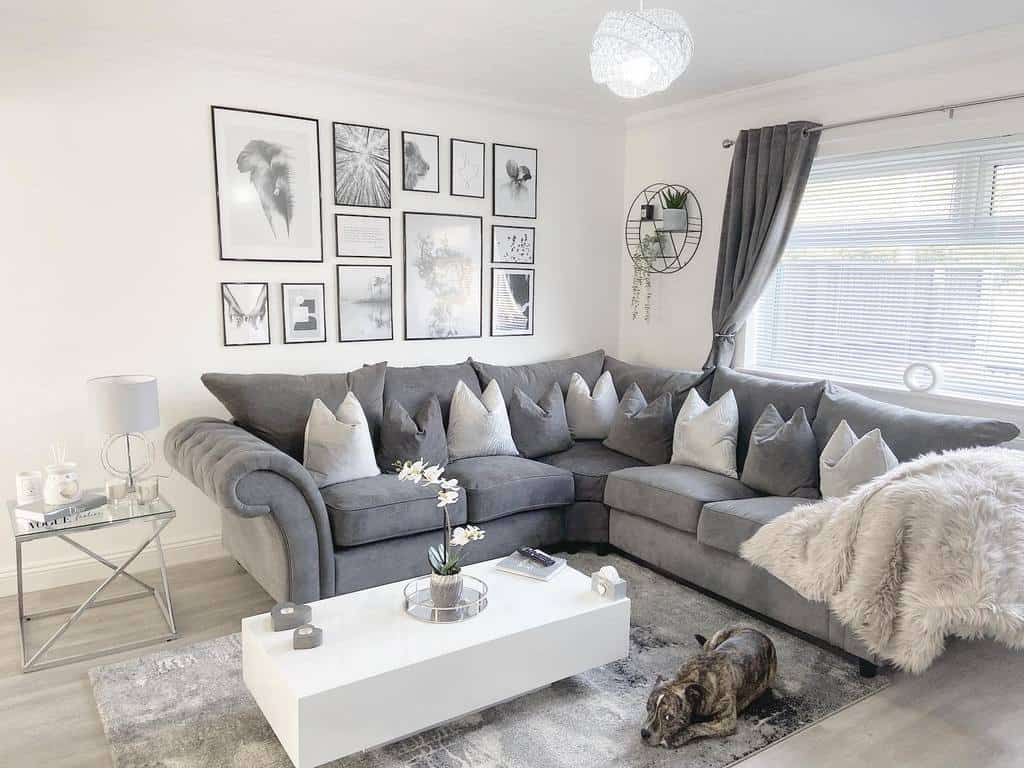
“I think a coffee table is one of the most important things. It’s where everything happens.” – Georgia Toffolo
What’s sitting in the center of your living room? Chances are, it’s a coffee table.
This short table sits proudly in the center of the room and gives you the perfect place for displaying decor, arranging books or magazines, or placing your glass. It could even give you more storage space.
If your living room doesn’t have a coffee table, then your living room is clearly missing something.
Thankfully, these coffee table ideas will help you get inspired. That way, you can find the perfect gorgeous coffee table that will complete your living room furniture design.
[view_toc]
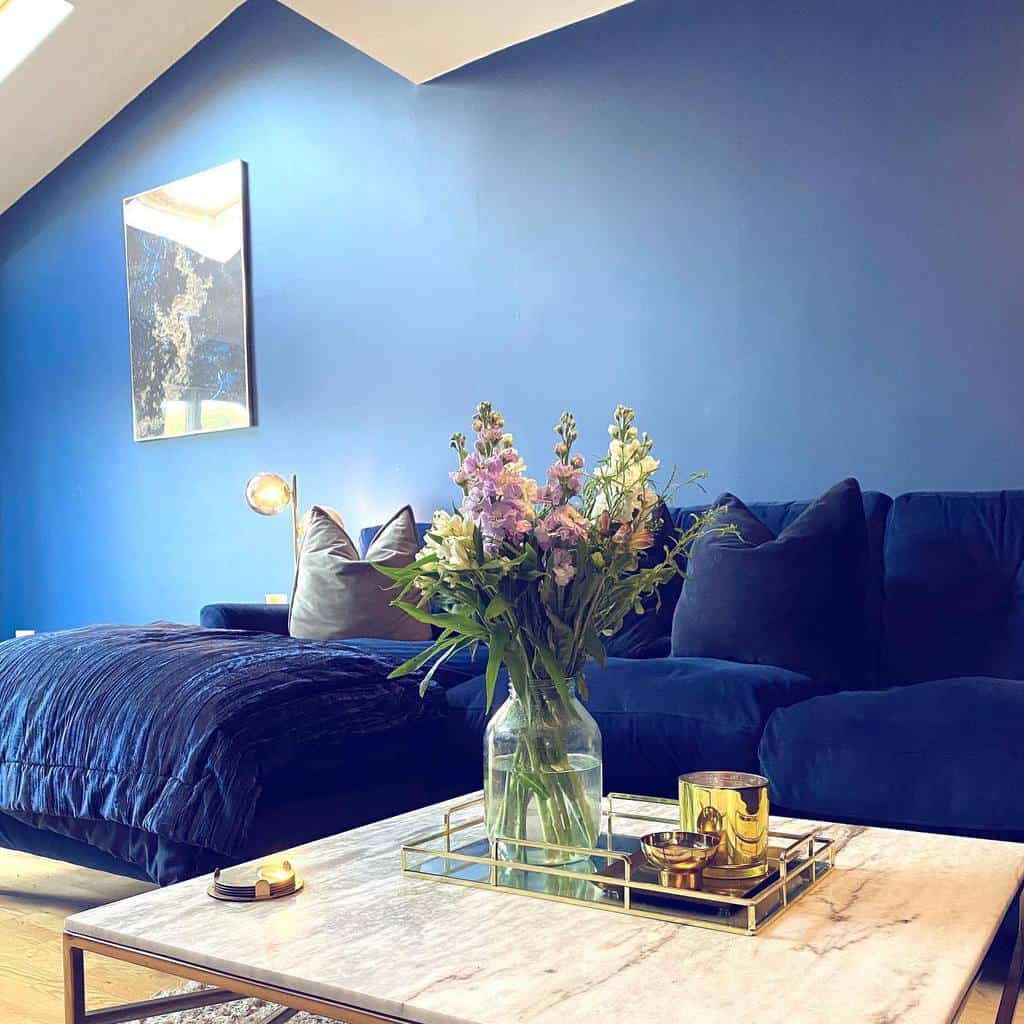
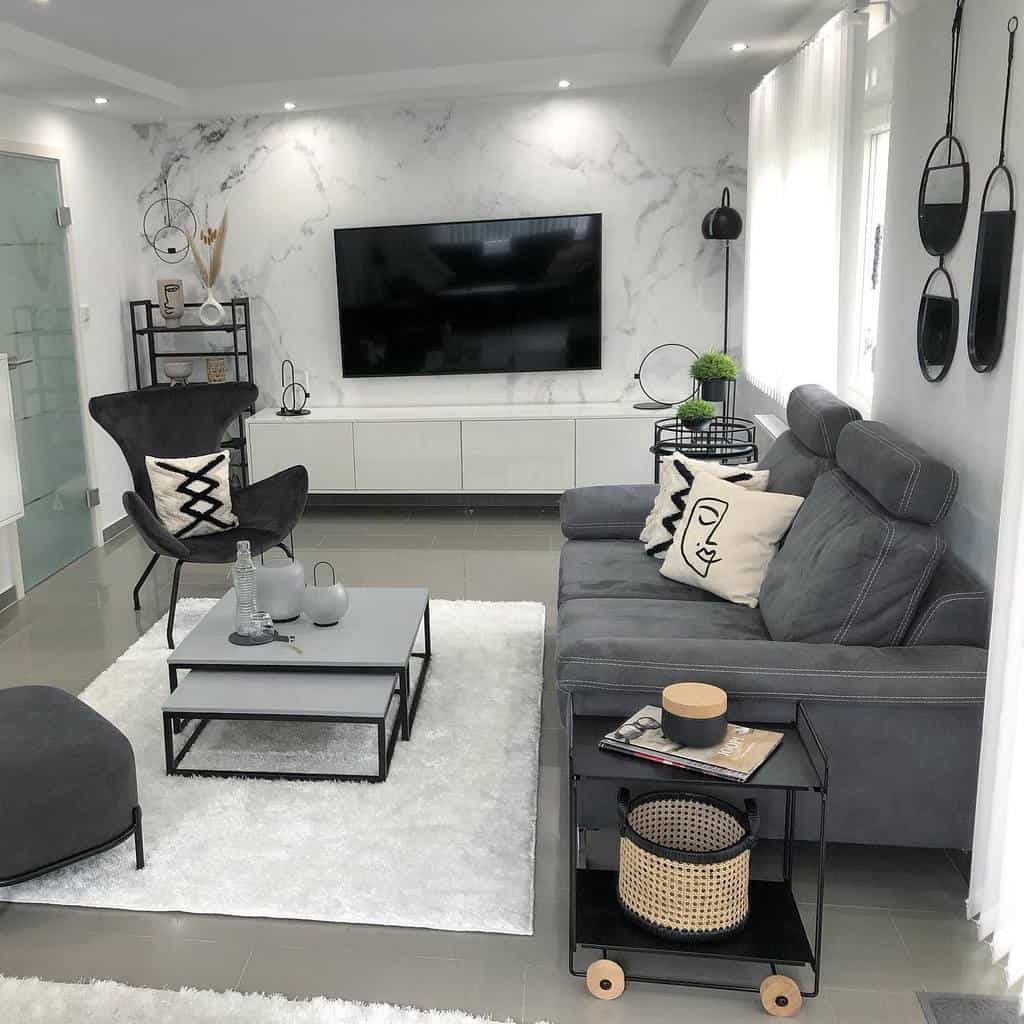
1. Elevate Your Space with a Marble Table
A marble table brings an air of sophistication to any room. Its sleek, polished surface is perfect for showcasing your favorite decor, while being remarkably durable and easy to clean.
Source: @danesburyhouse via InstagramSource: @homedecor_by_smith via InstagramSource: @avanthomestyle via Instagram
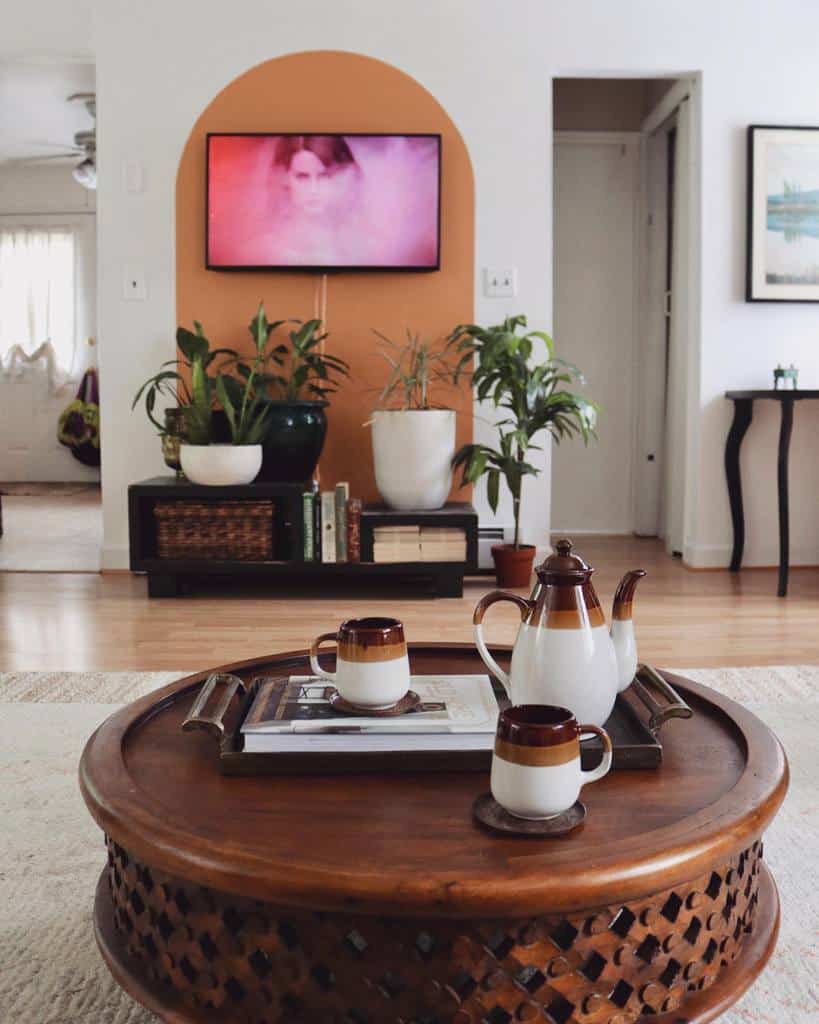
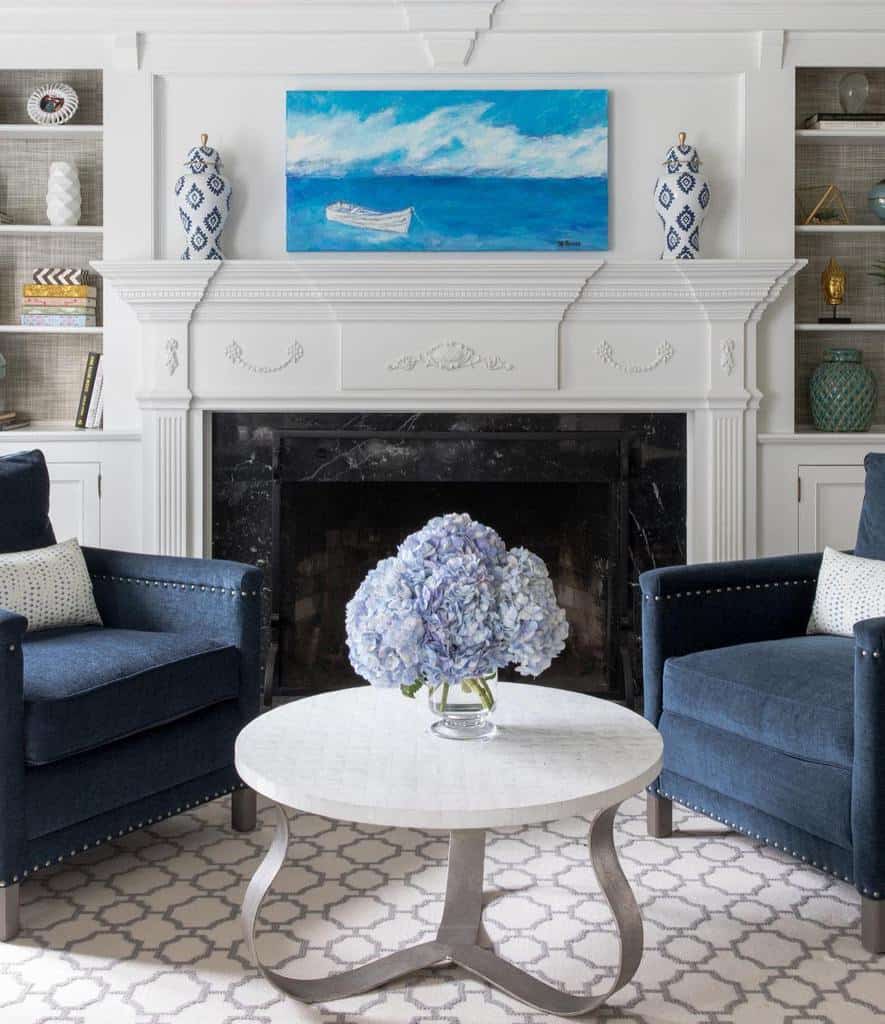
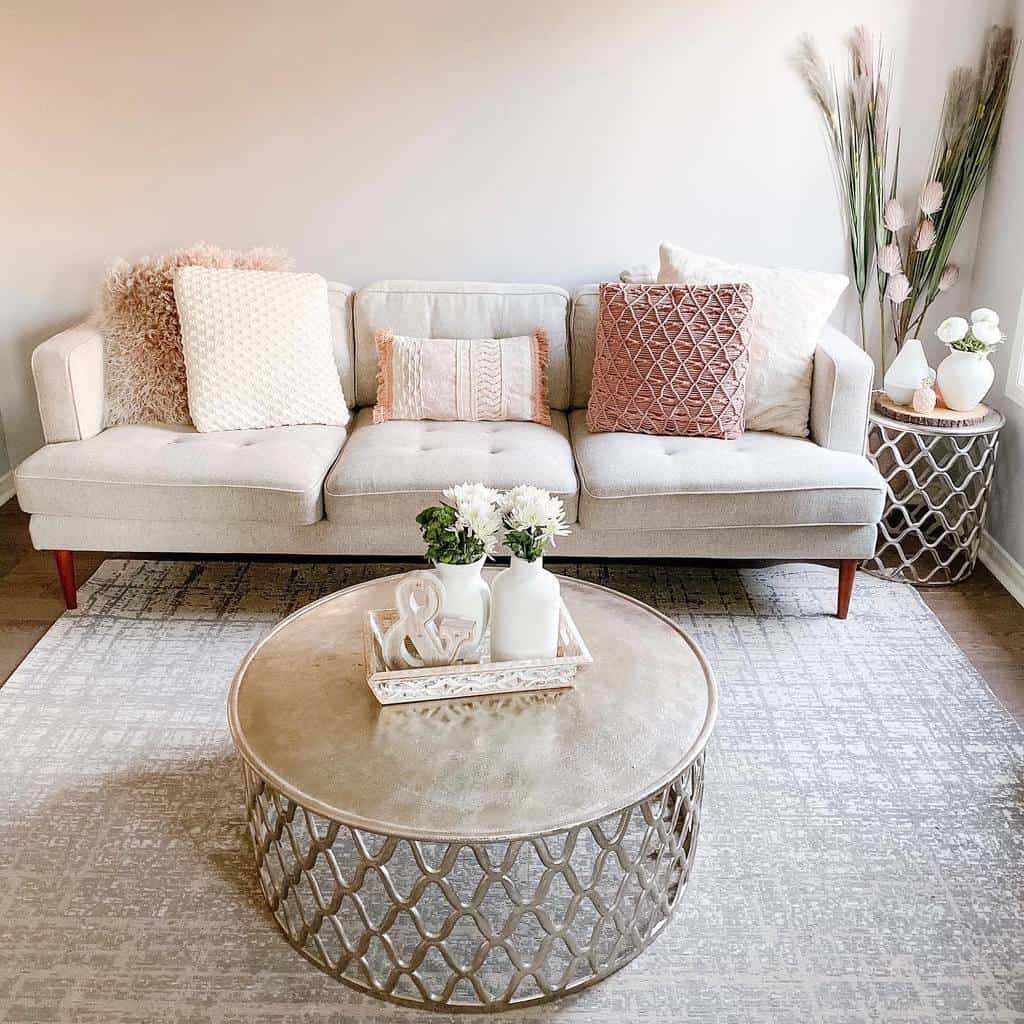
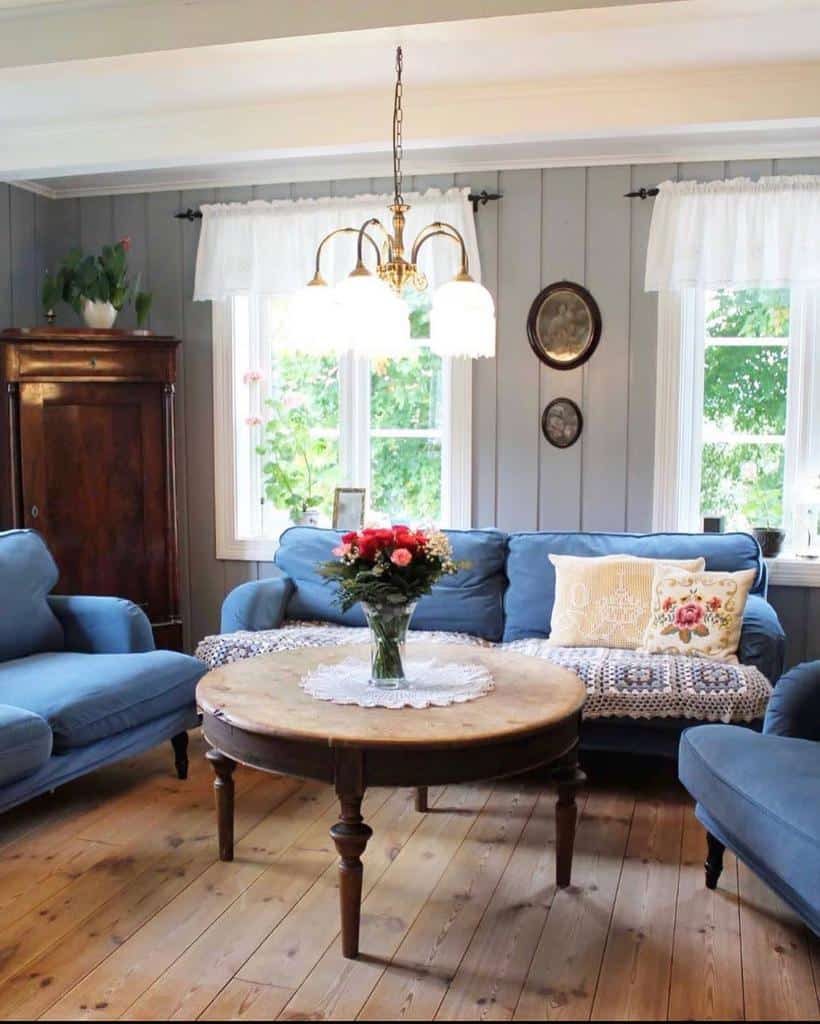
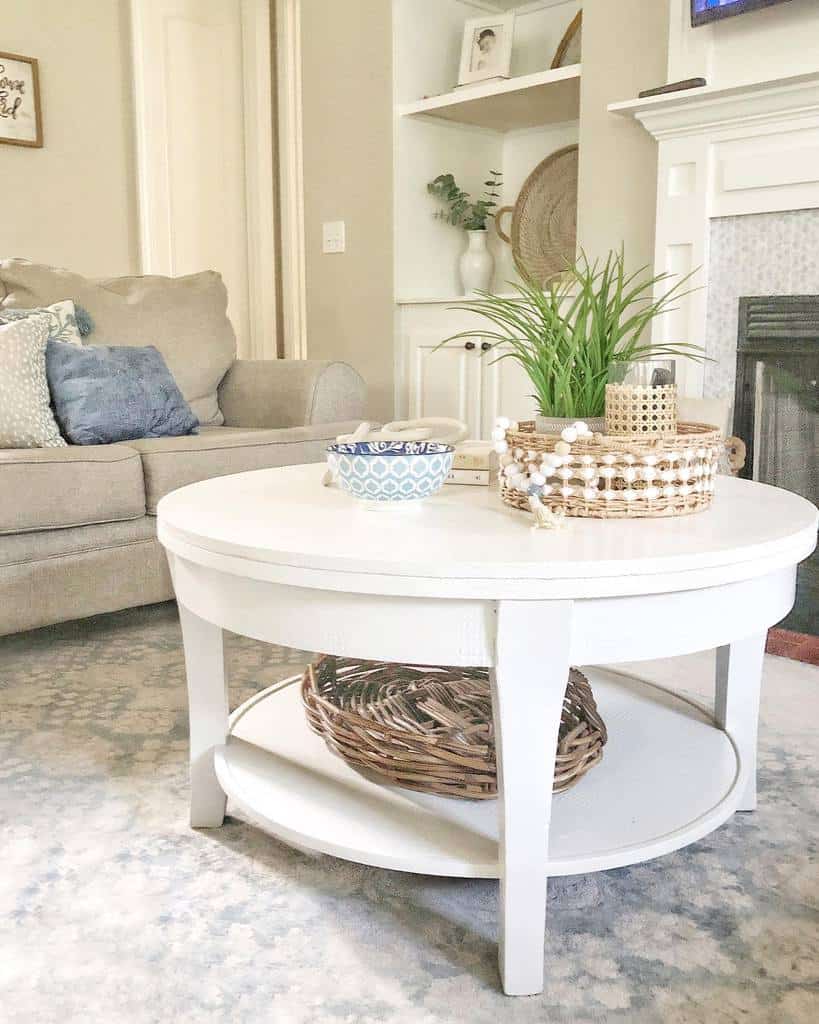
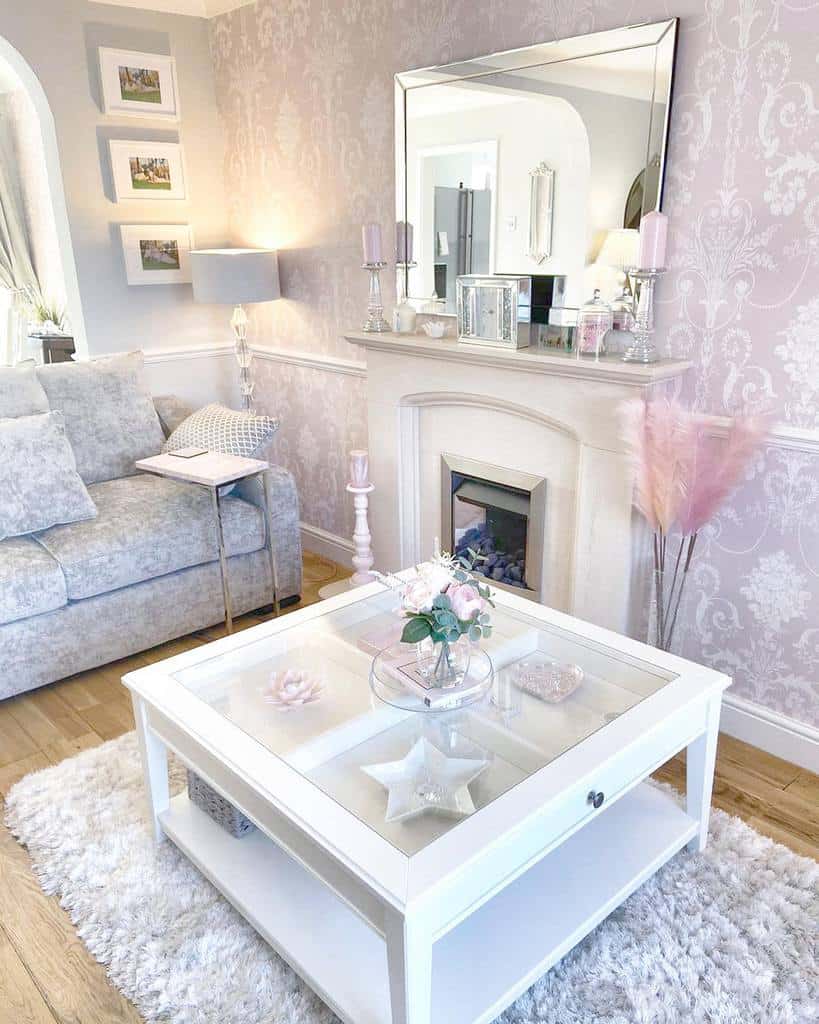
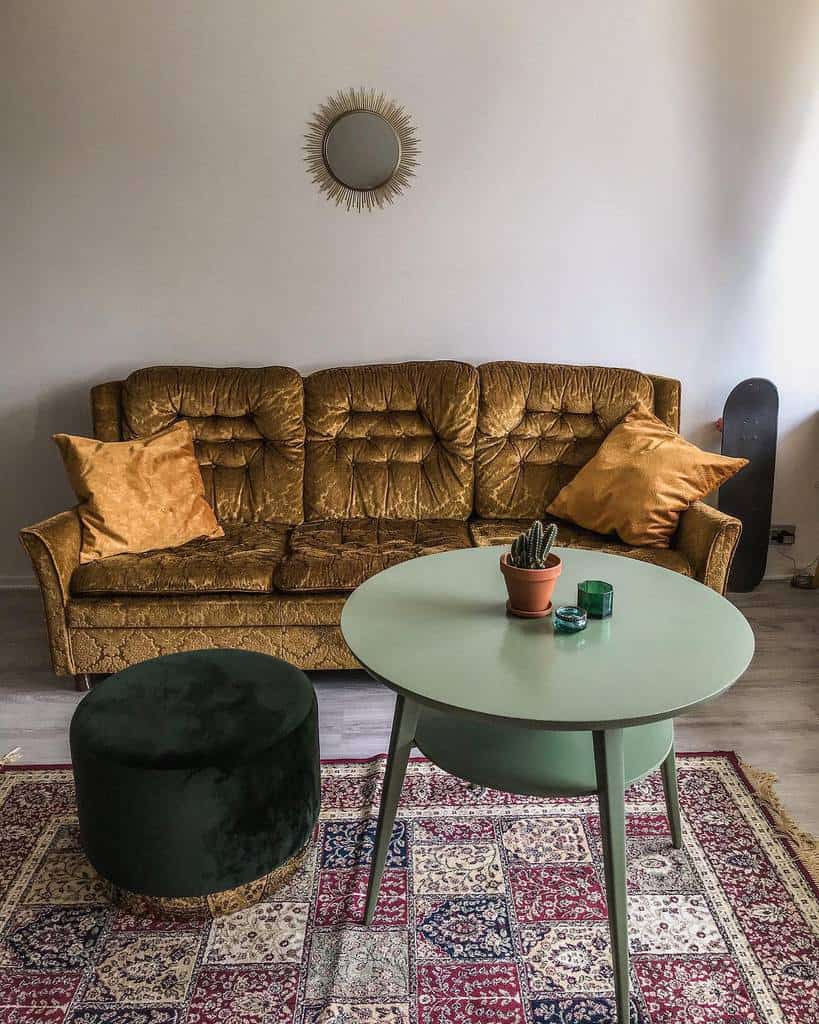
2. Embrace Elegance with a Round Table
Round tables soften the room with their curves, making them ideal for cozy gatherings. Their circular shape promotes easy conversation and flow in smaller spaces.
Source: @may.kamsch.designs via InstagramSource: @tatsyanaz via InstagramSource: @georginashomedecor via InstagramSource: @lisaflemingdesign via InstagramSource: @sarchetrit via InstagramSource: @suttonhomeandco via InstagramSource: @casamiasage via Instagram
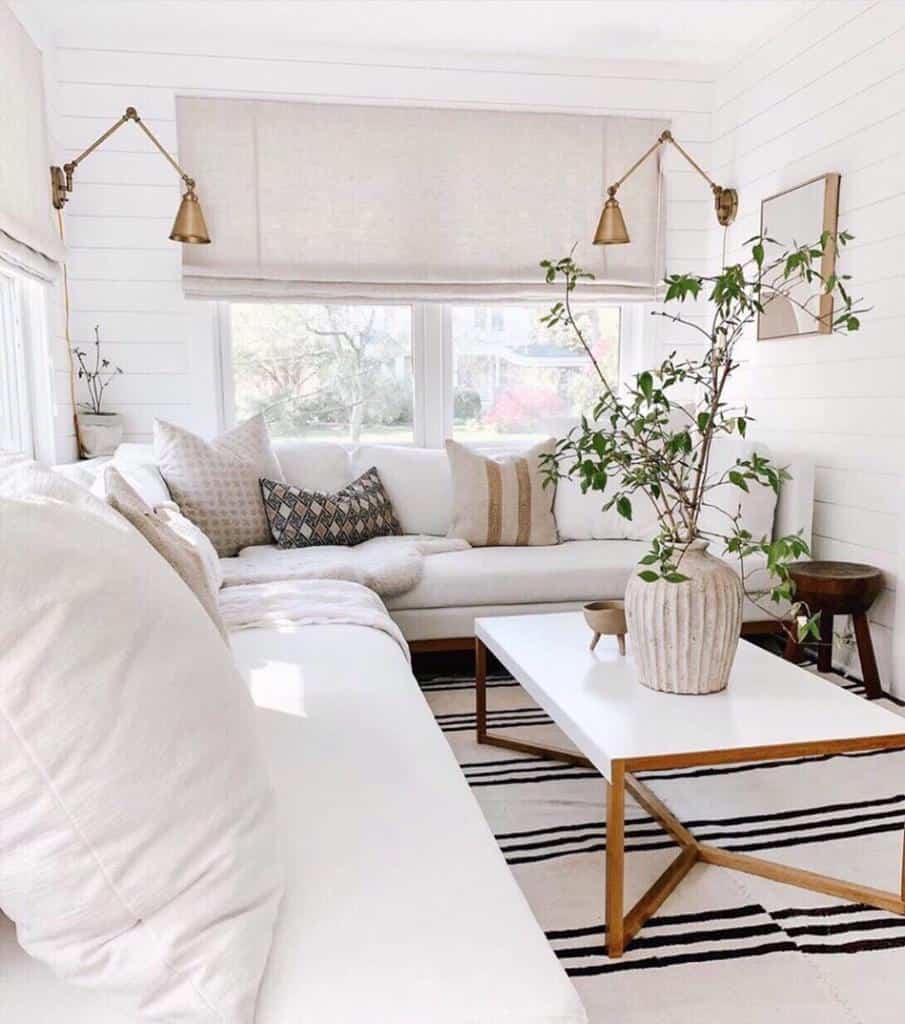
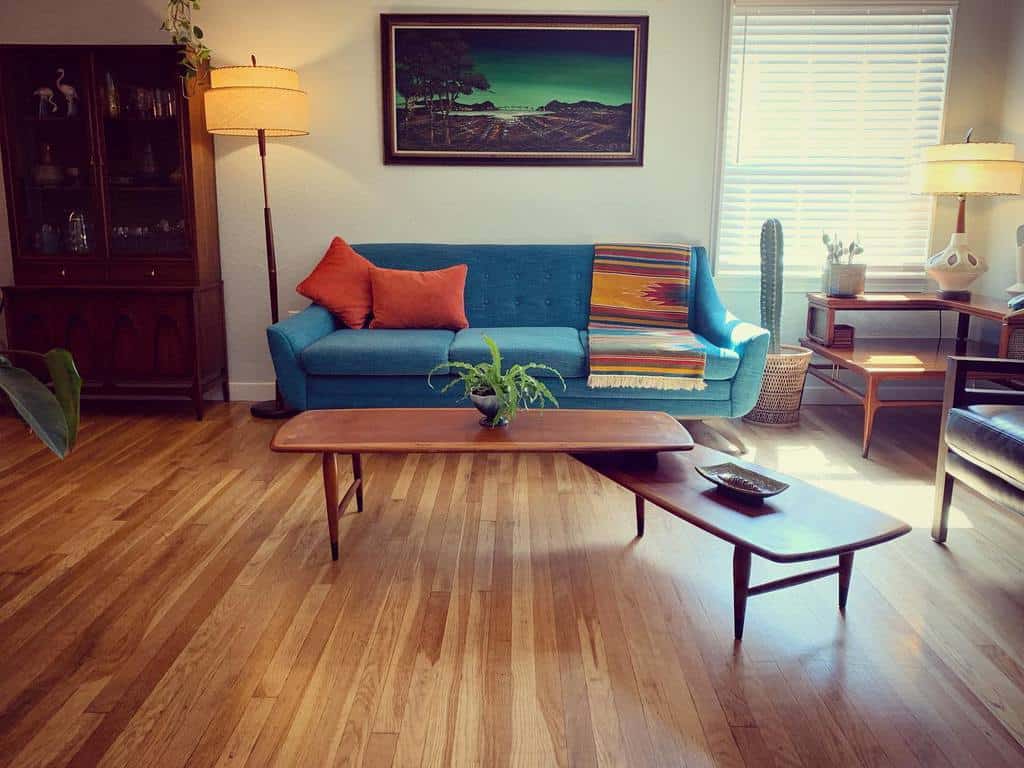
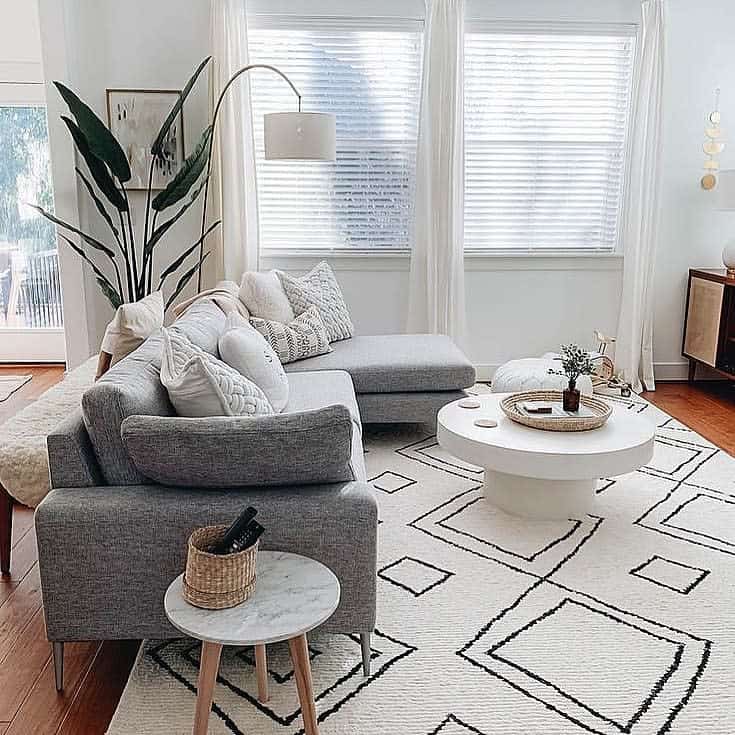
3. Scandinavian Style: A Minimalist’s Dream
Scandinavian tables blend functionality with simple beauty, featuring clean lines and natural wood finishes. They’re perfect for creating a serene, uncluttered environment in your living area.
Source: @seacoast_abode via InstagramSource: @baker.blooms via Instagram
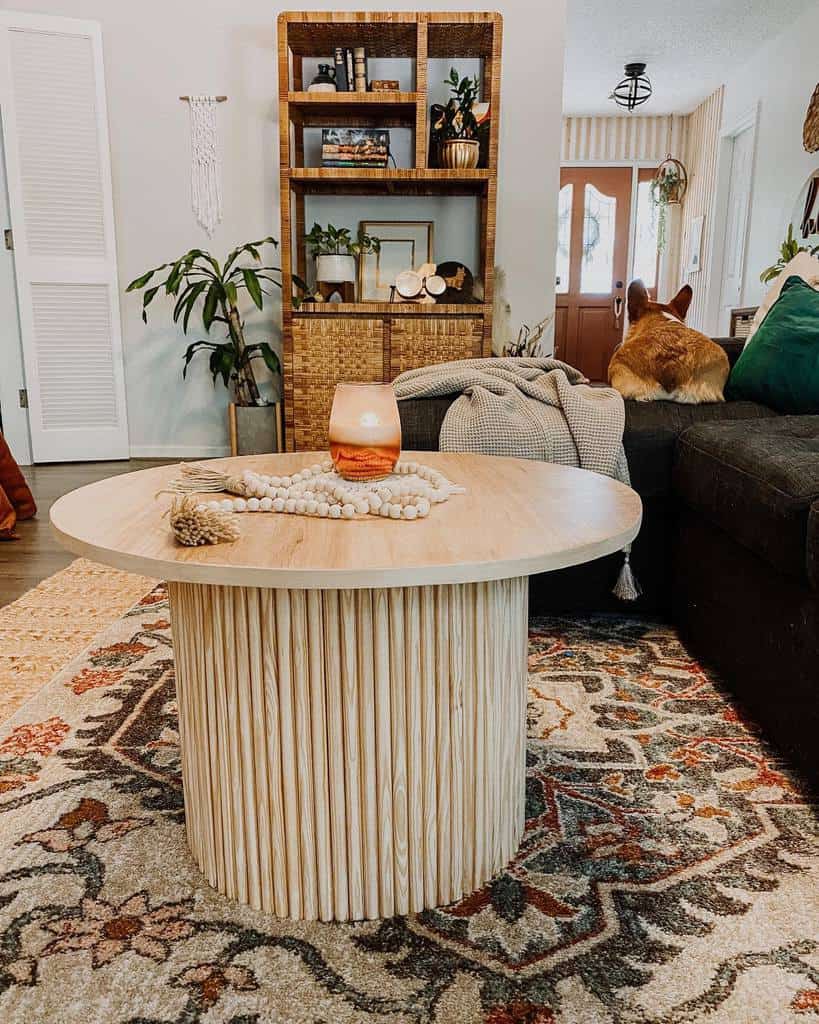
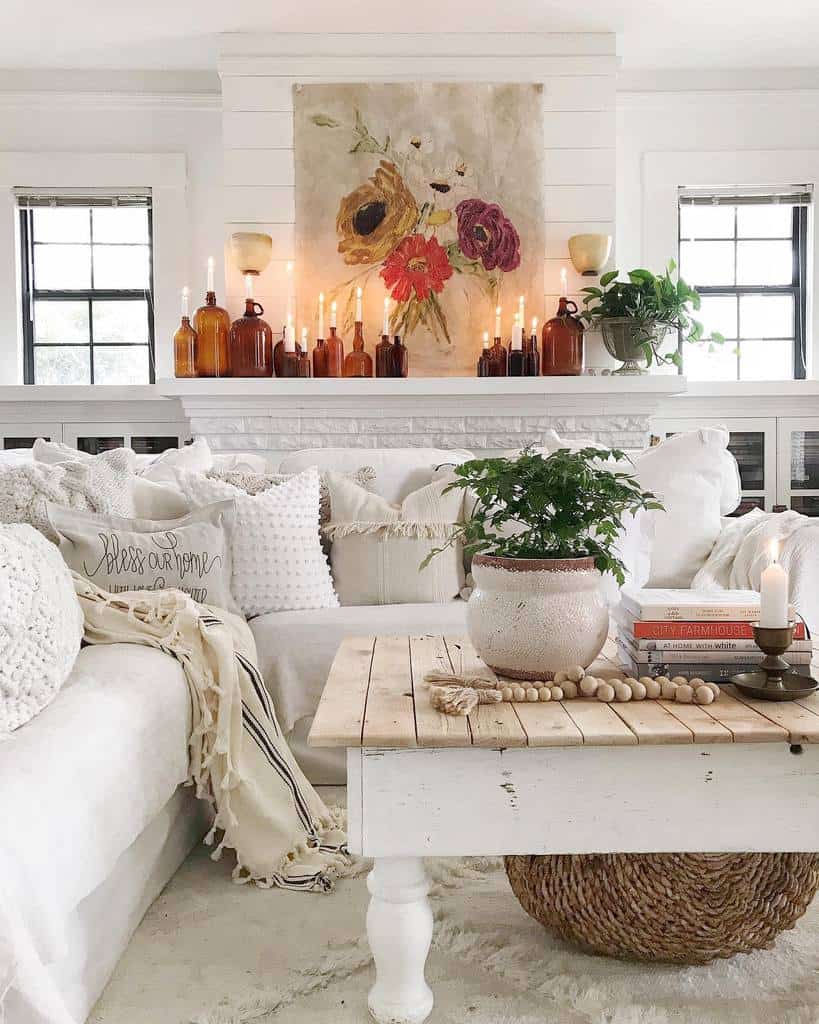
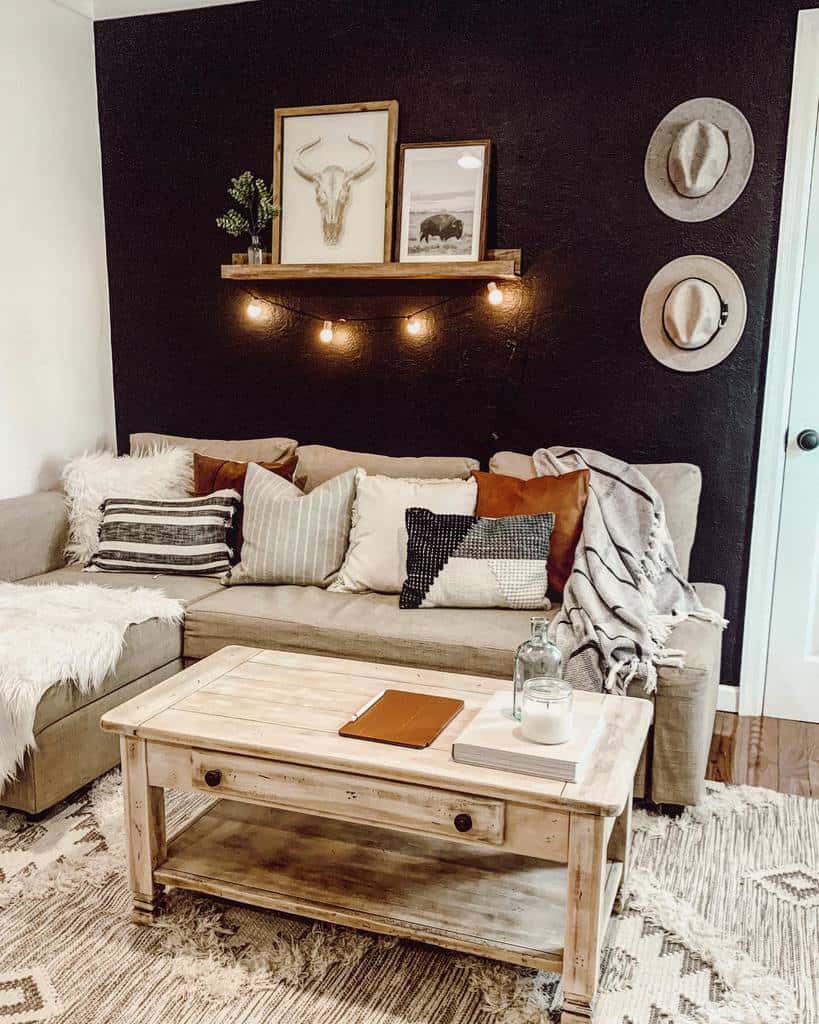
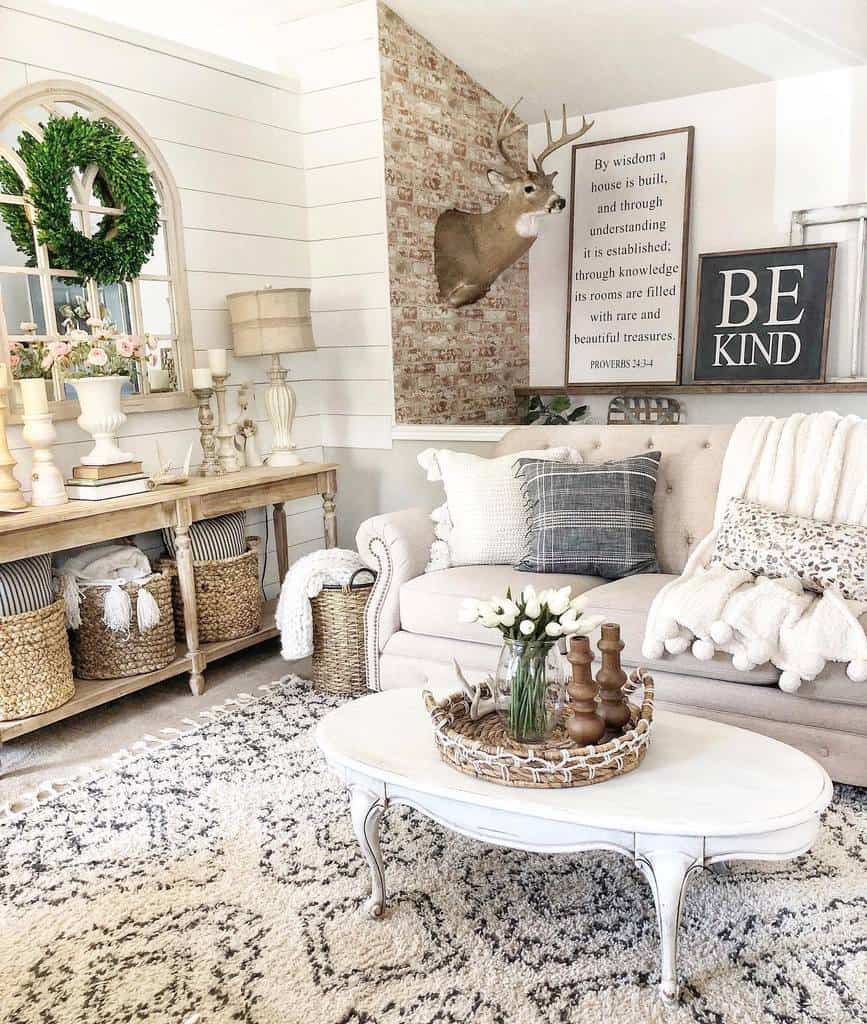
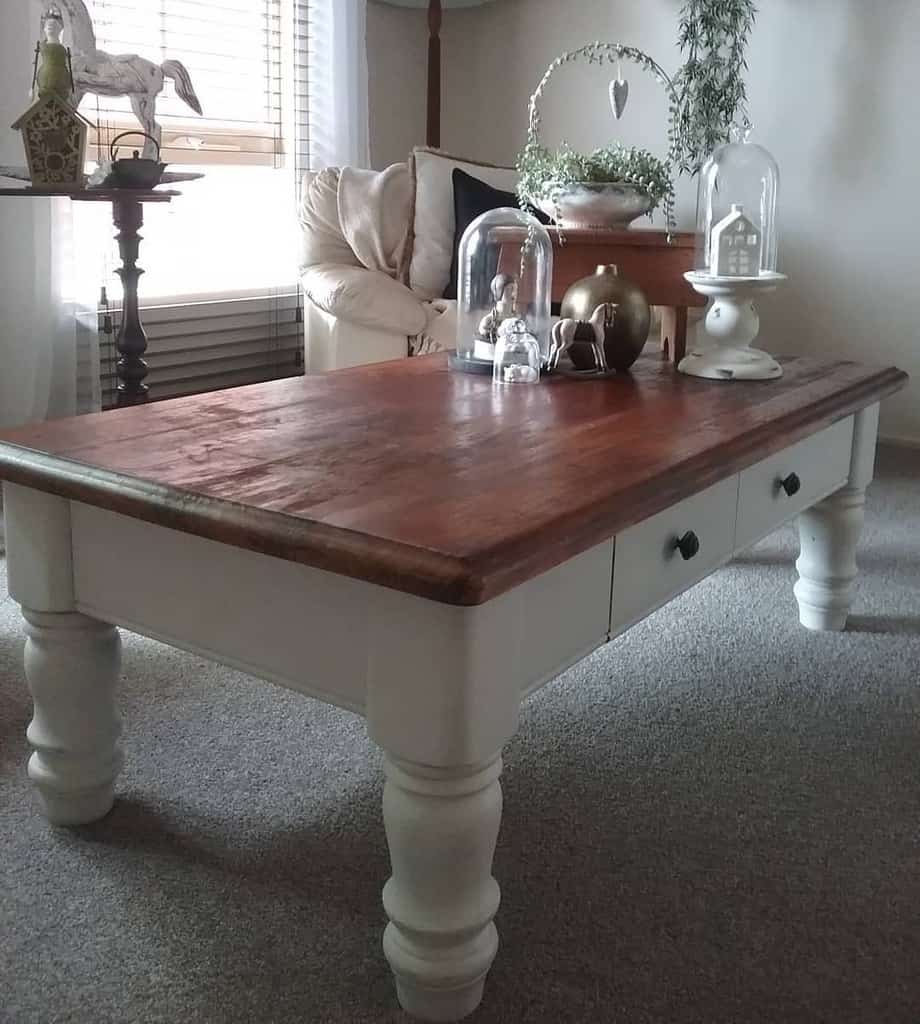
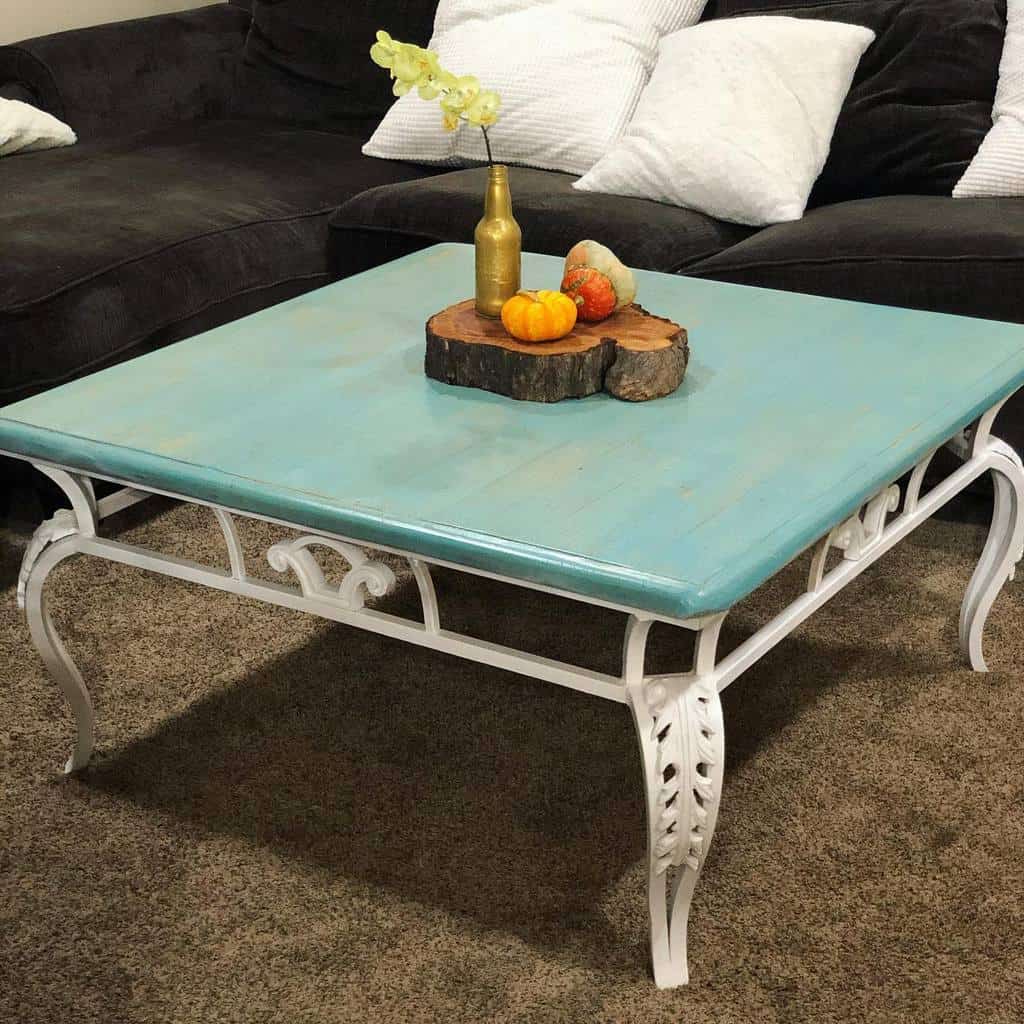
4. Refresh Your Room with a White-Washed Table
White-washed tables add a rustic yet fresh vibe to any setting. Their lightly distressed finish pairs well with both bright and neutral palettes, making them versatile for various decor styles.
Source: @toni_marianna via InstagramSource: @designsbyashleyknie via InstagramSource: @mrsdiy_ via InstagramSource: @sprucingitup via InstagramSource: @thehousetombuilt via Instagram
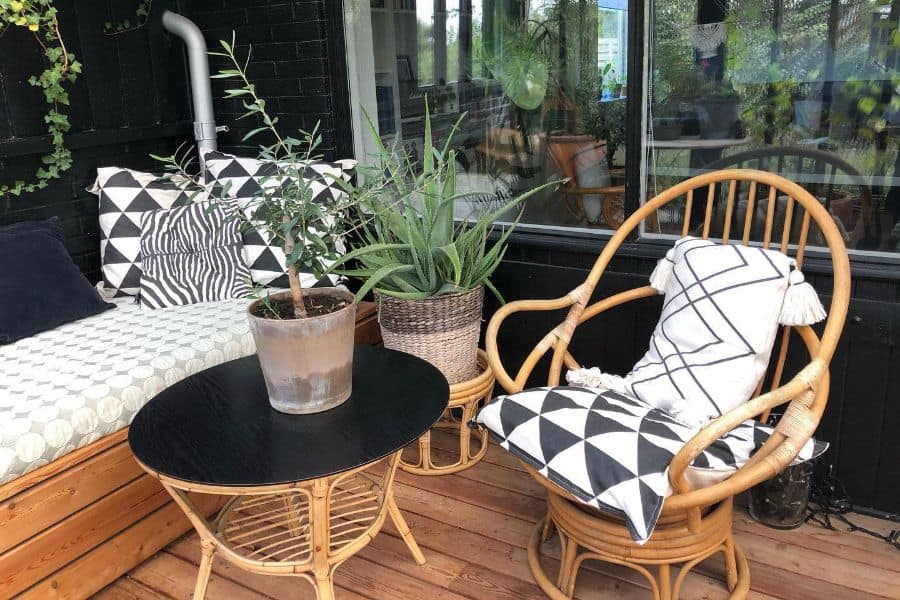
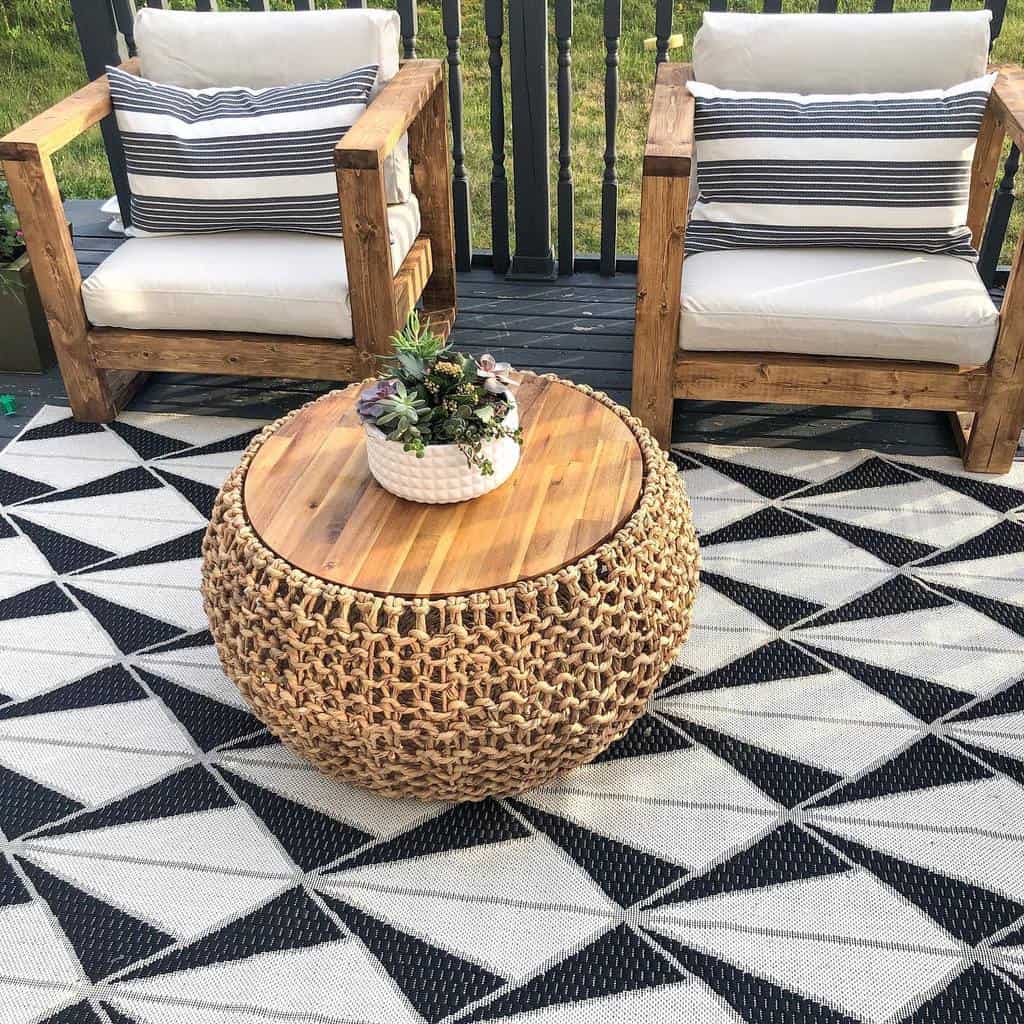
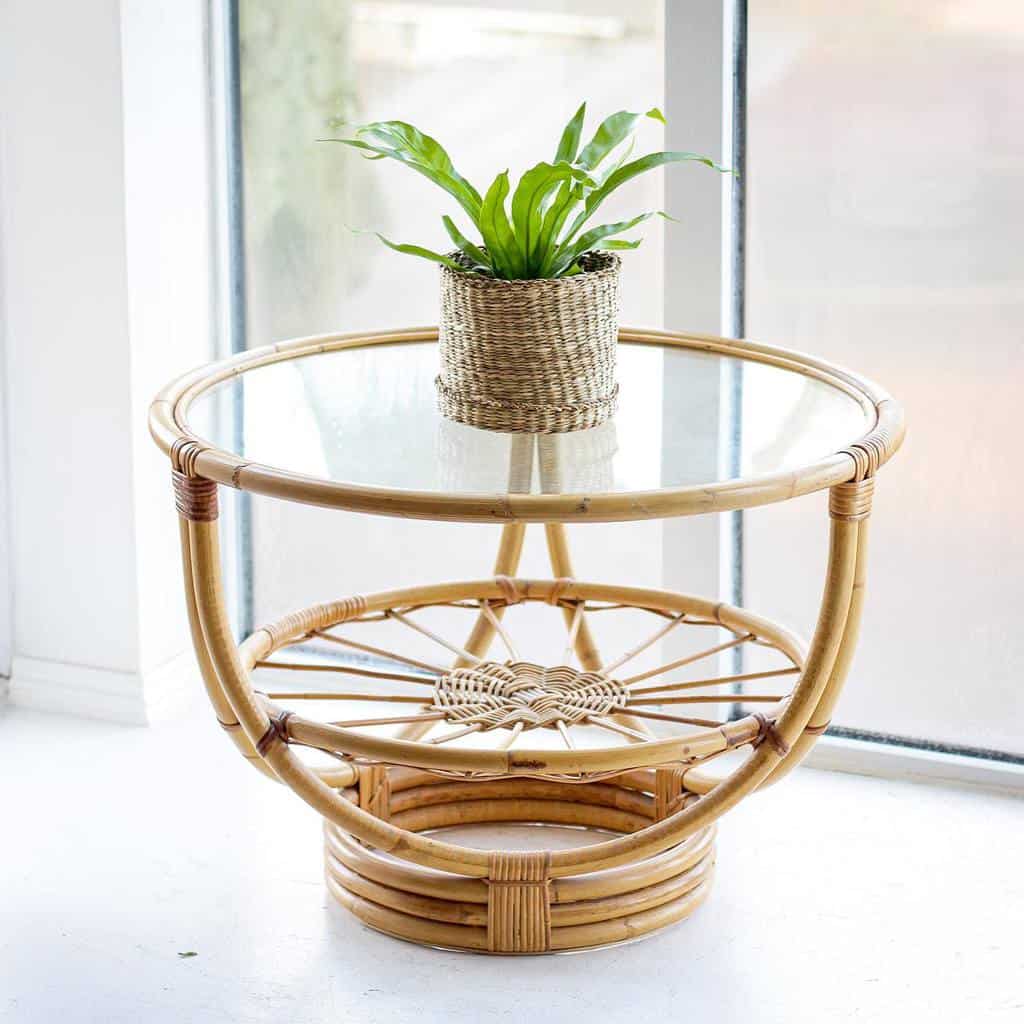
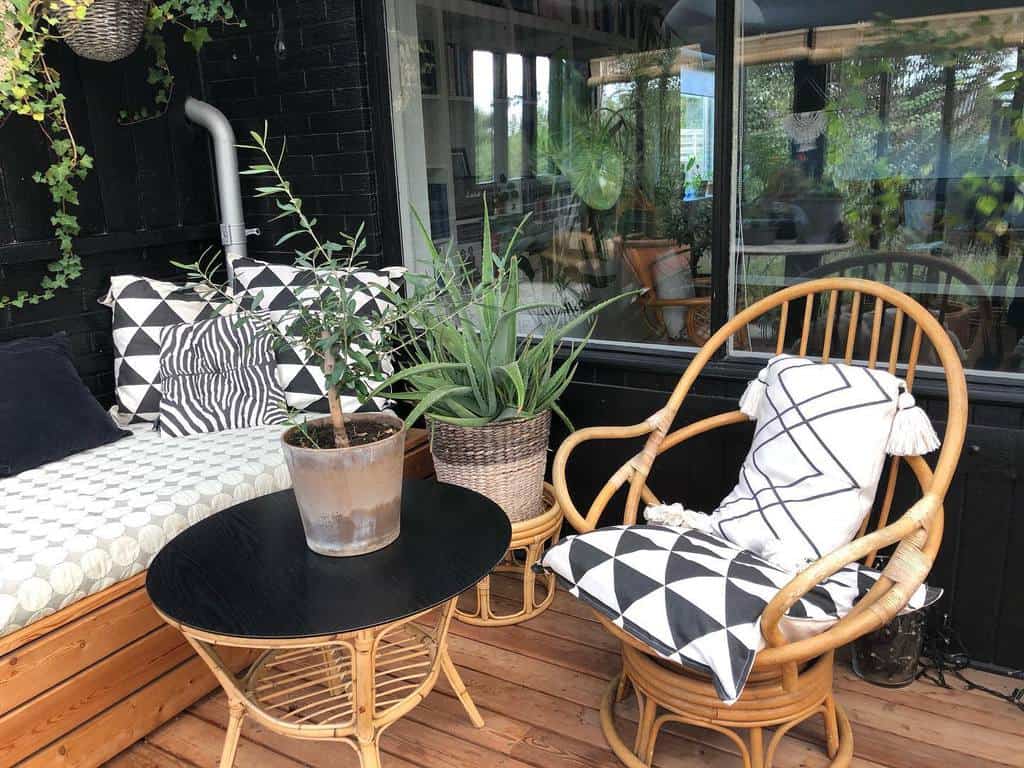
5. Add Texture with a Woven Table
Woven tables introduce a tactile element to your living space. Their intricate patterns and natural materials, like rattan or bamboo, infuse a cozy, handmade charm into your home.
Source: @home_on_the_bluff via InstagramSource: @cutertudor via Instagram
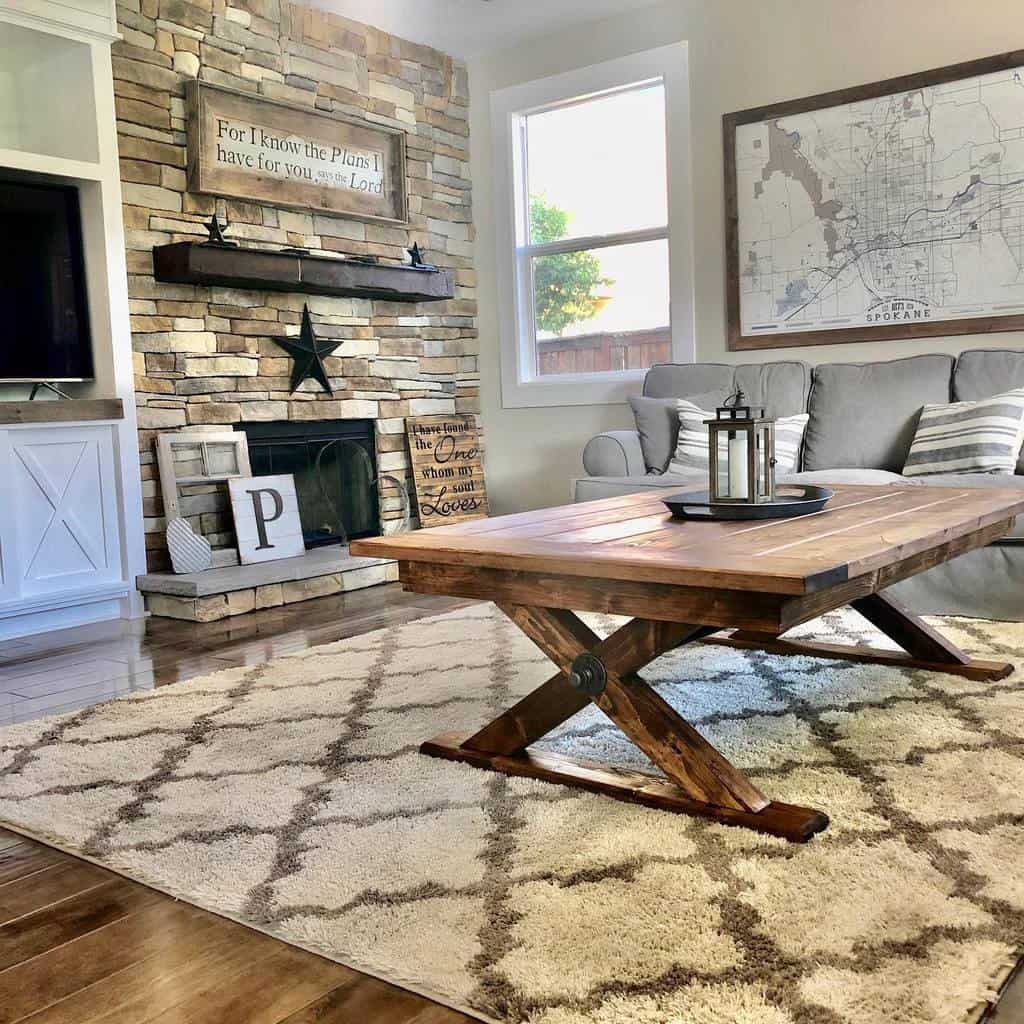
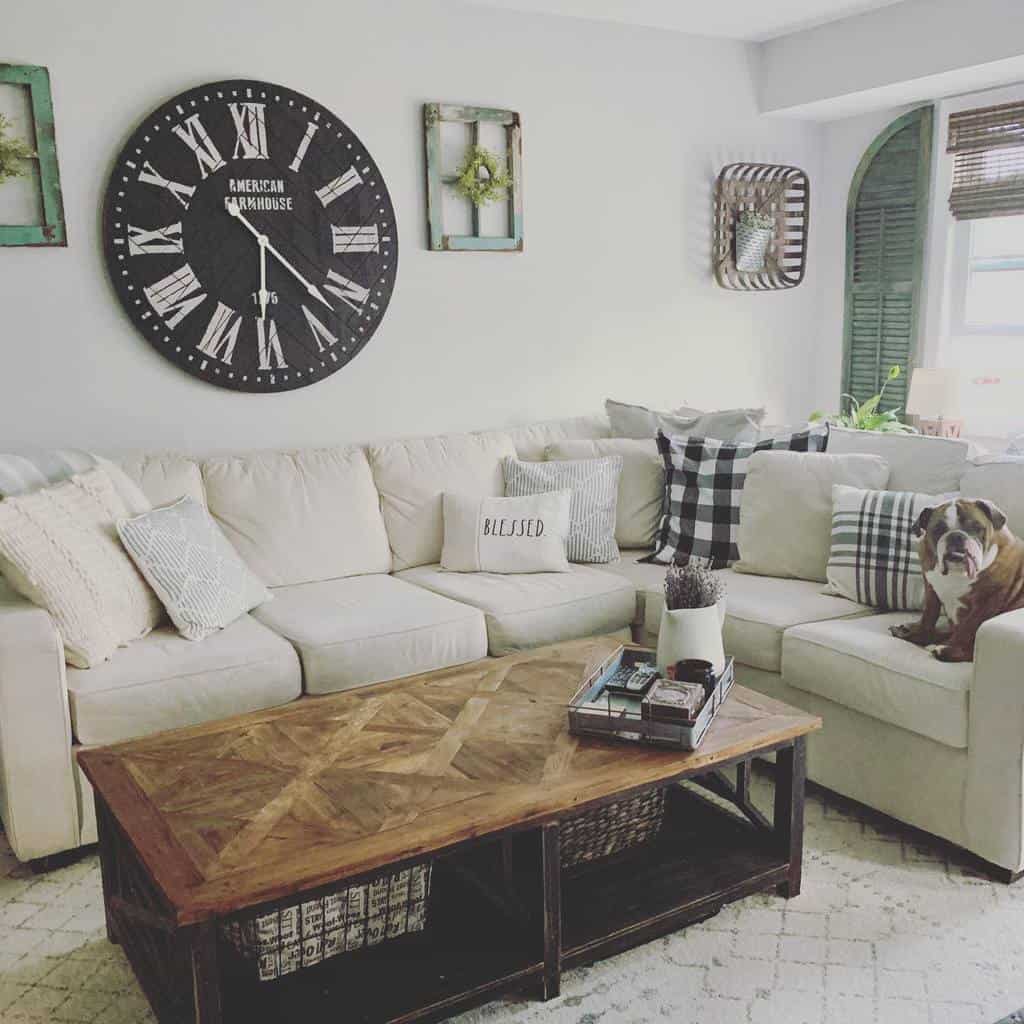
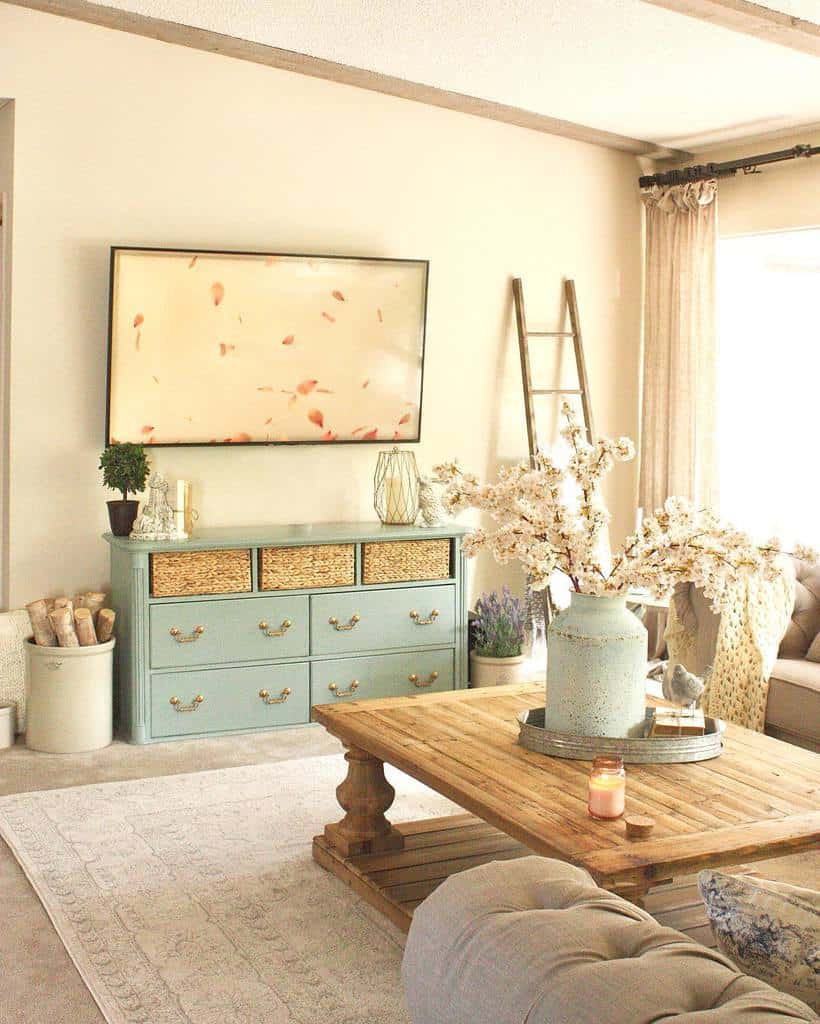
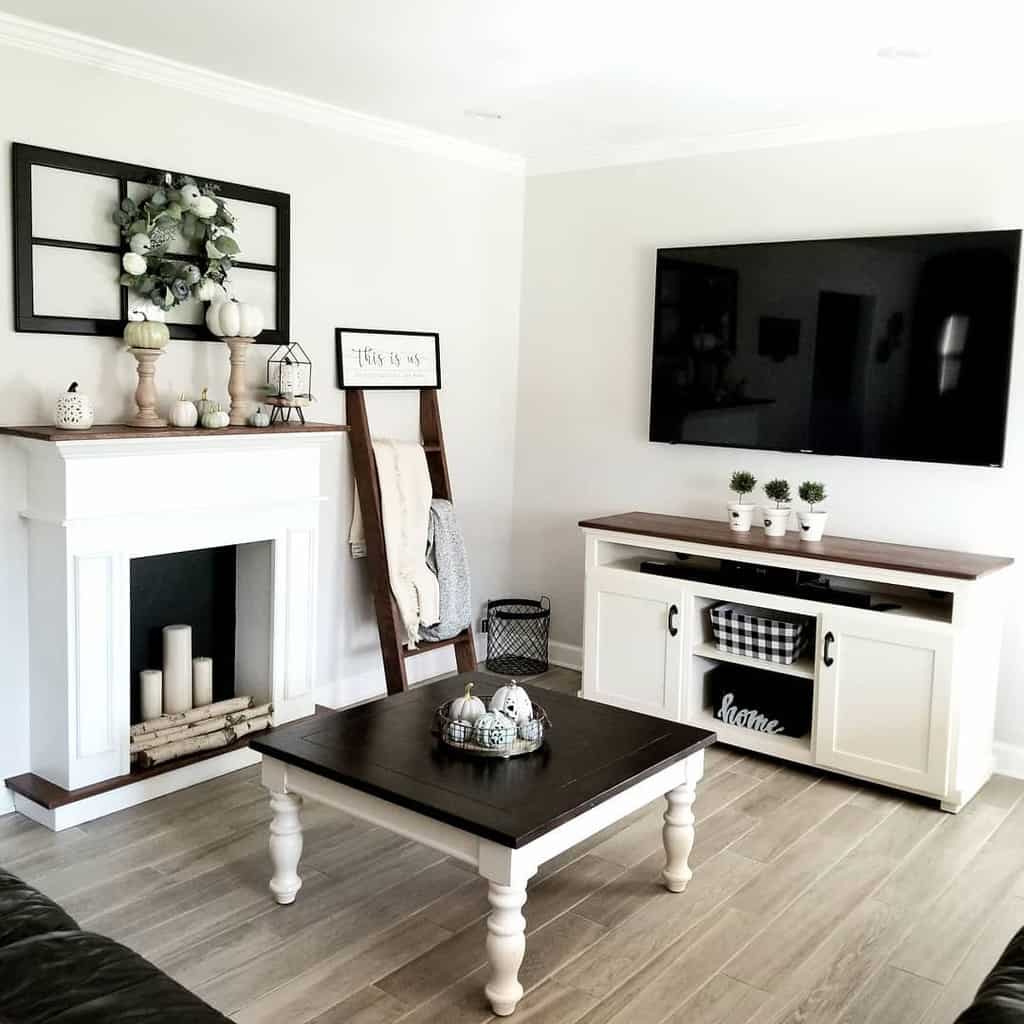
6. Farmhouse Charm: A Rustic Touch
Embrace the warmth of a farmhouse-style table, often characterized by distressed wood and a sturdy build. These tables create a welcoming, homey feel, perfect for a family-centric living space.
Source: @yssinteriordesign via InstagramSource: @oaktreedesignco via InstagramSource: @heatherjoandjojoproject via Instagram
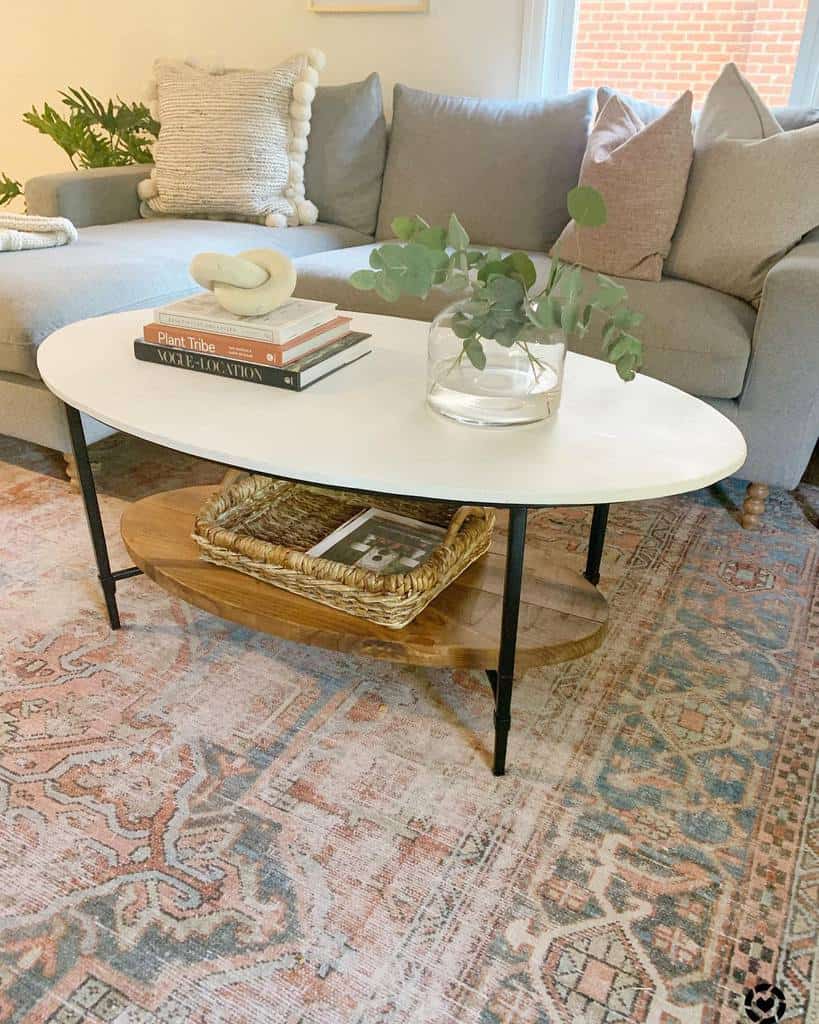
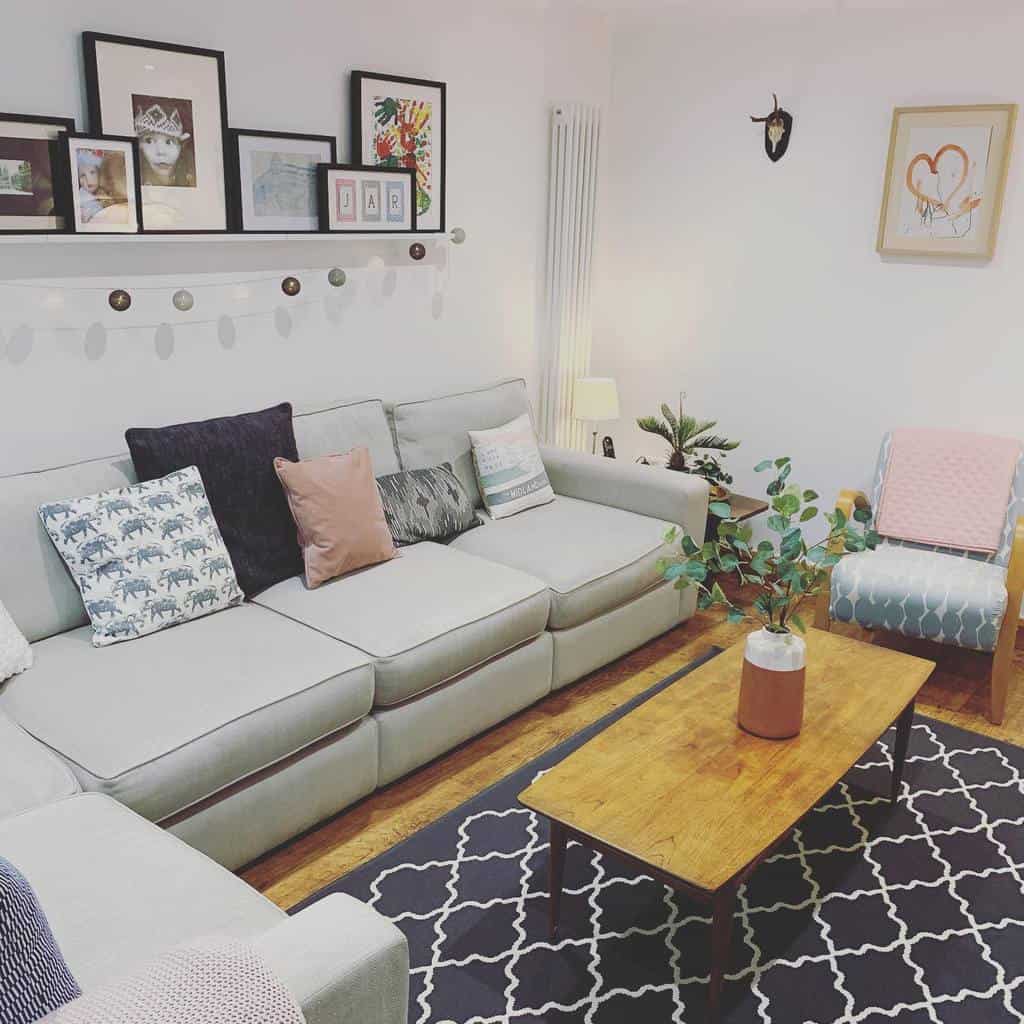
7. Go Unique with an Oblong-Shaped Table
Oblong-shaped coffee tables offer a refreshing departure from traditional forms. They provide ample surface space and an artistic touch, making them a focal point in any room.
Source: @areaimpressions via Instagram
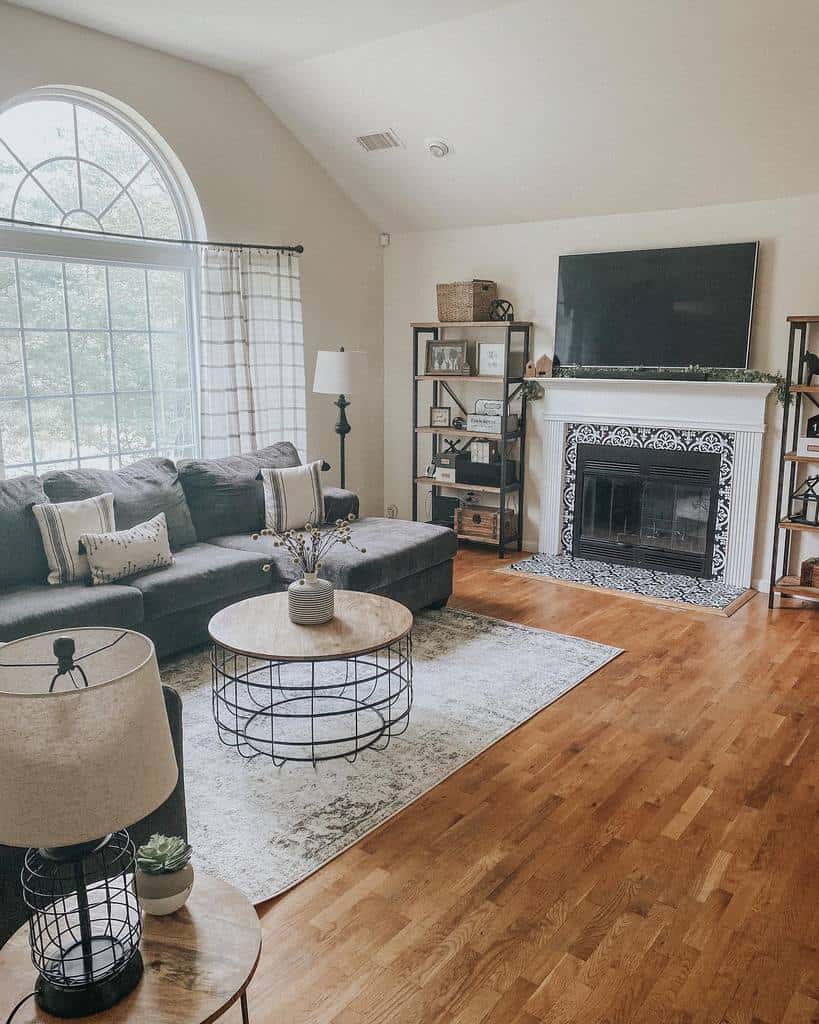
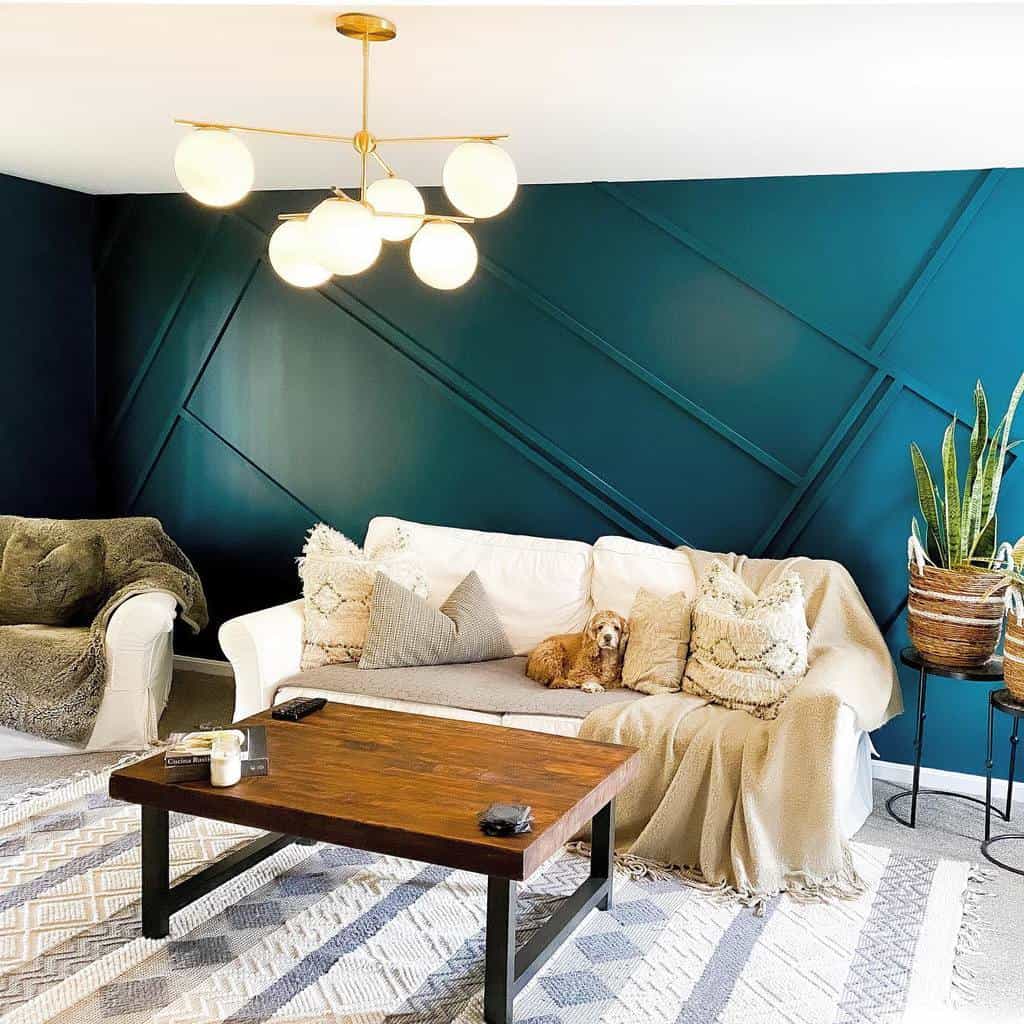
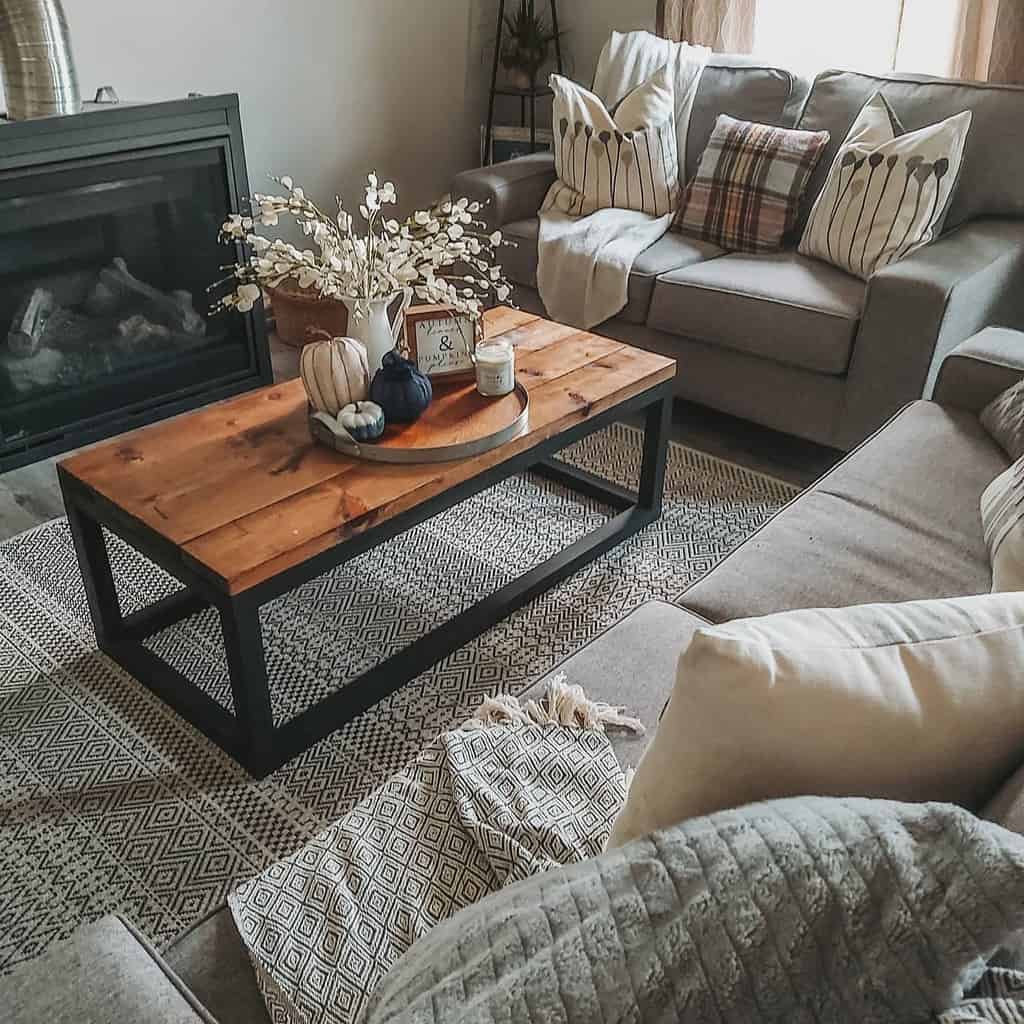
8. Industrial-Style Wooden Coffee Table
Industrial-style wooden tables mix raw materials like metal and wood, bringing an edgy yet warm vibe to your space. Their robust construction and unique design add character to a modern home.
Source: @hazelandhen via InstagramSource: @kate_davis_design via InstagramSource: @cowhollowdesign via InstagramSource: @mariaetralashop via InstagramSource: @kristinc13 via InstagramSource: @kayyland via Instagram
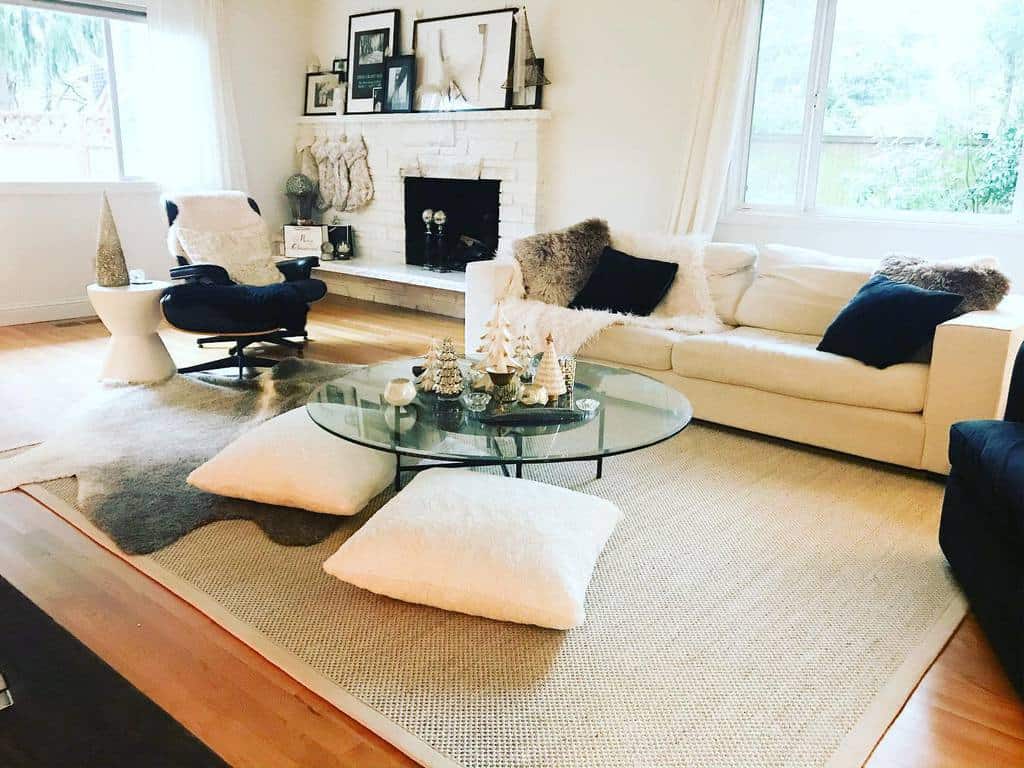
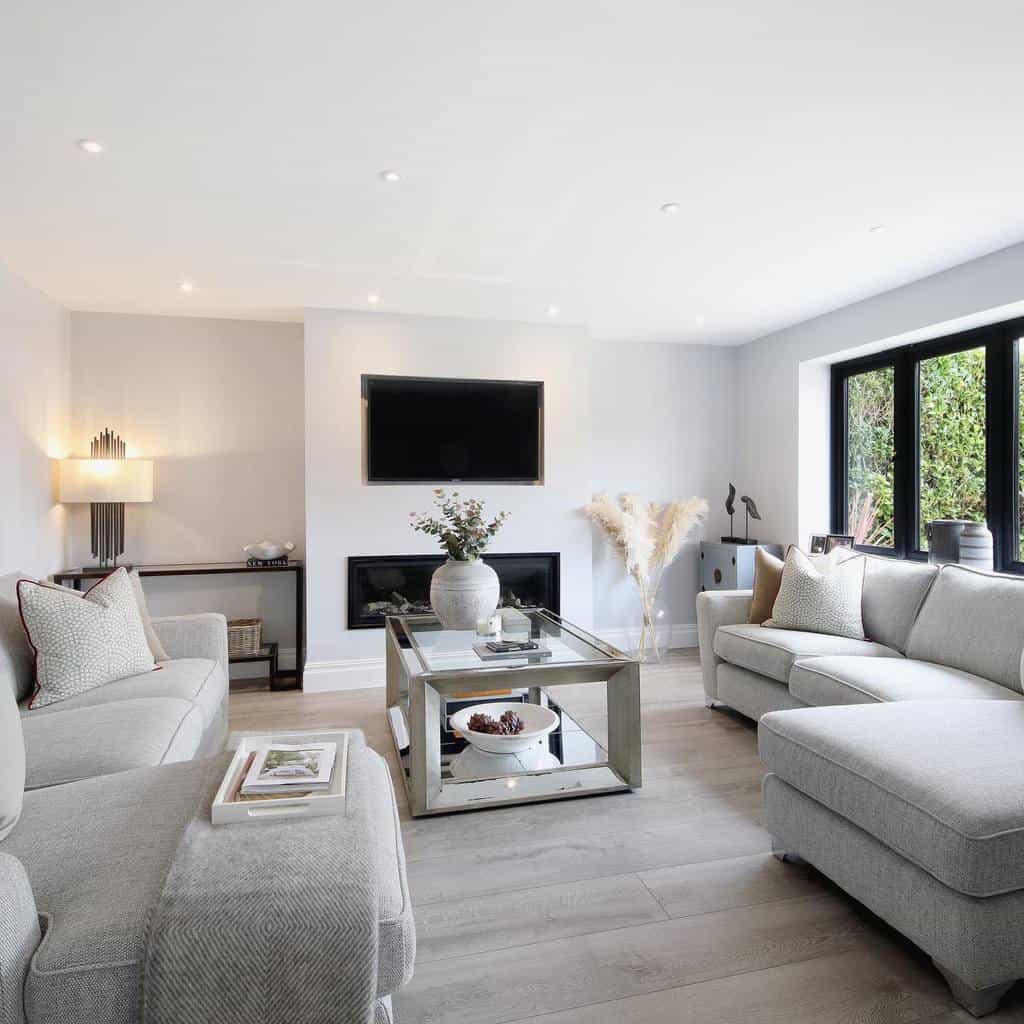
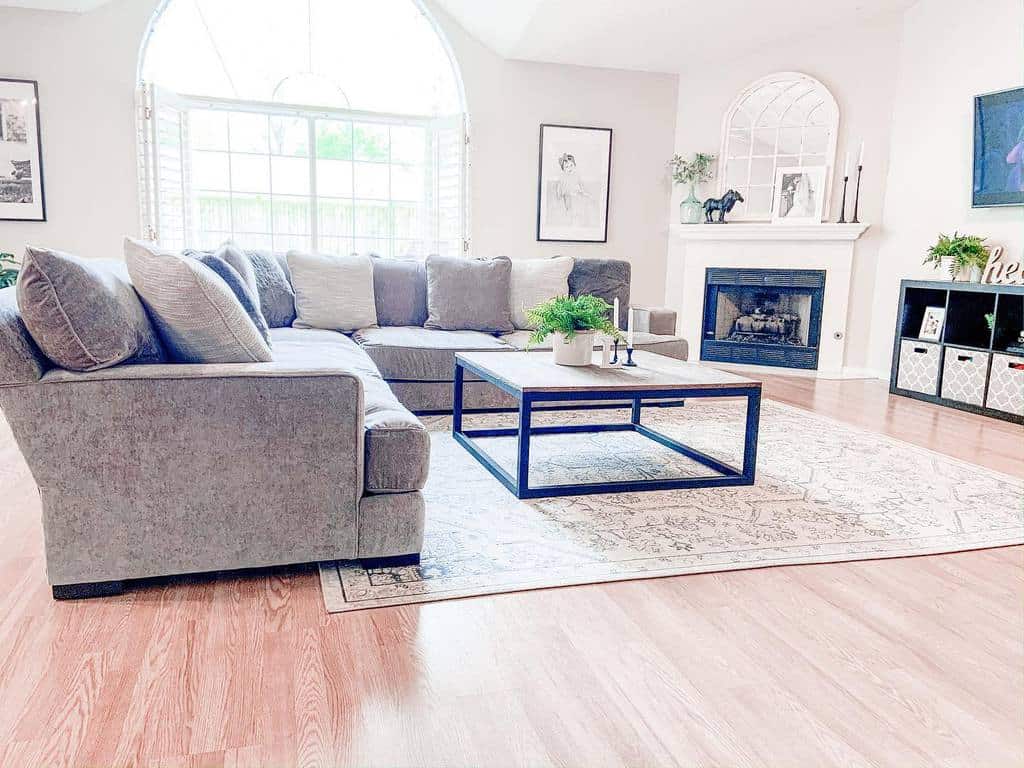
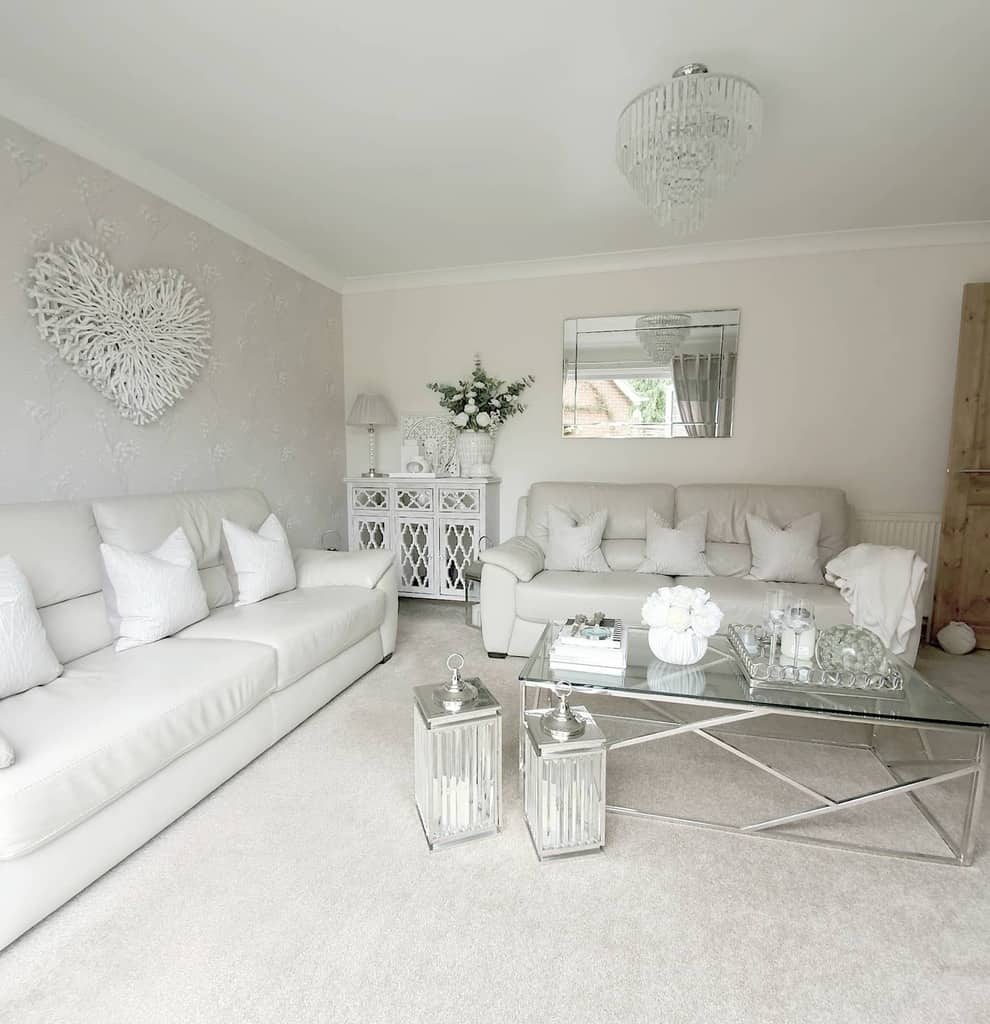
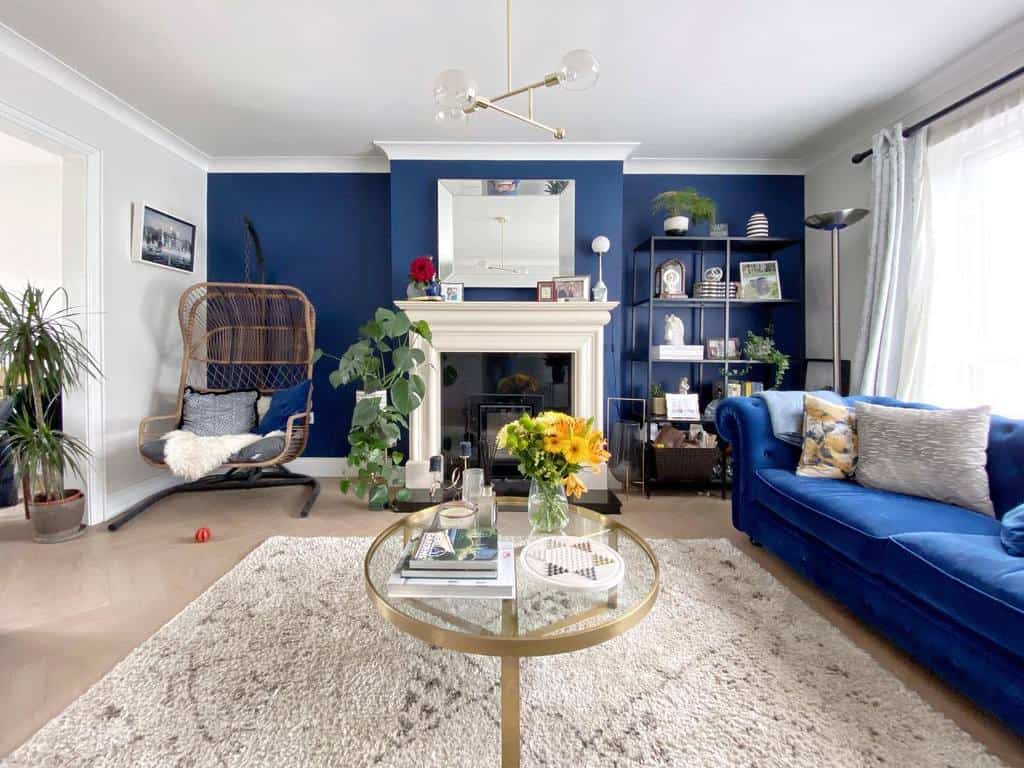
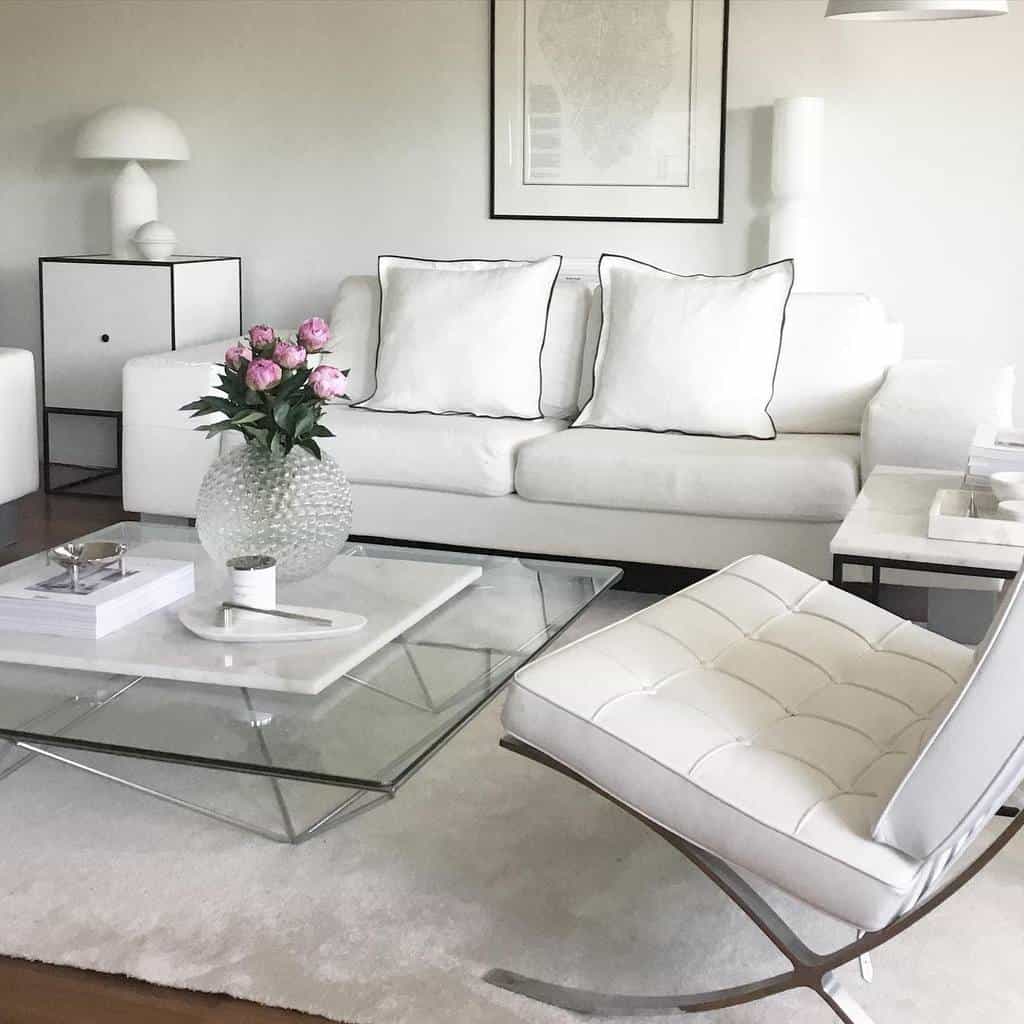
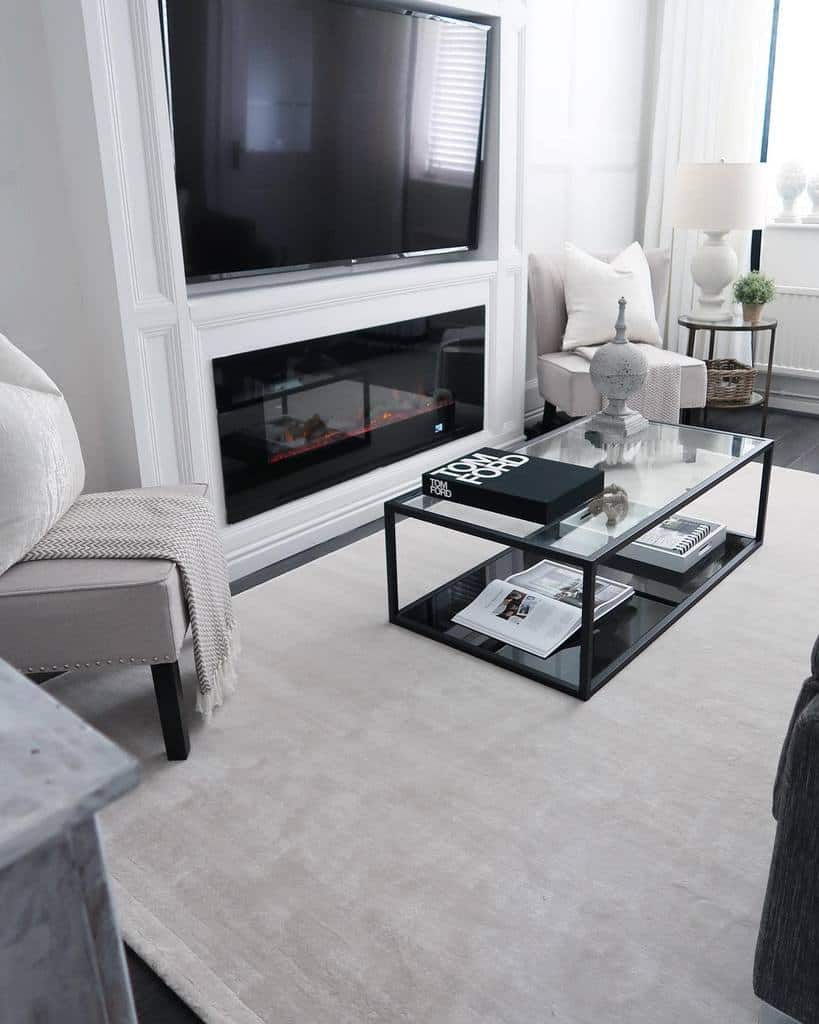
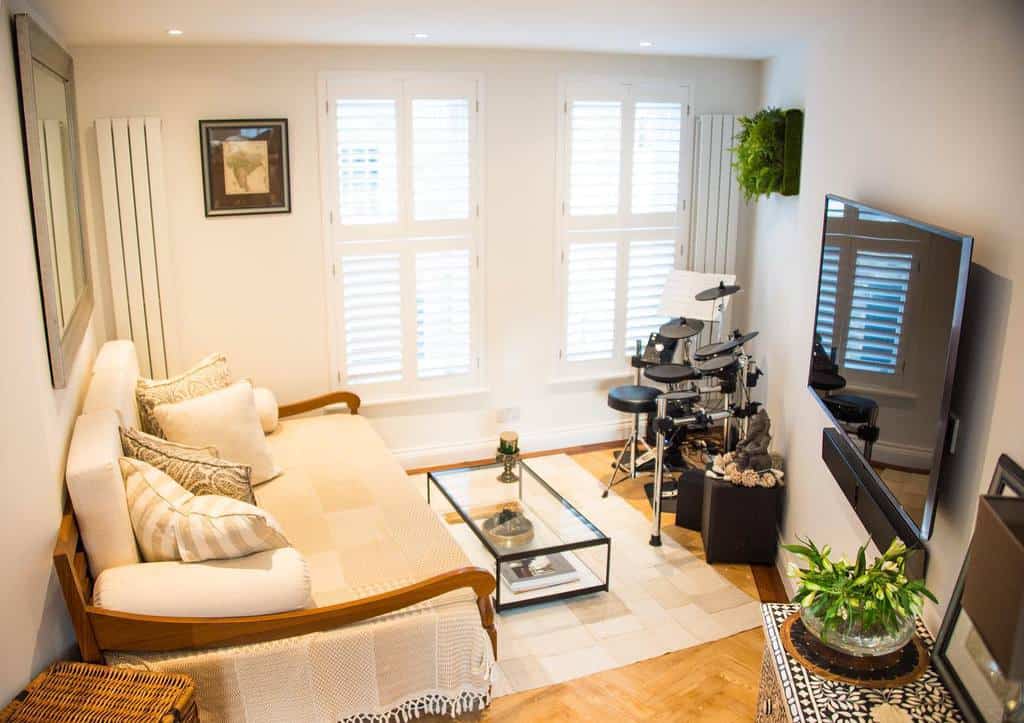
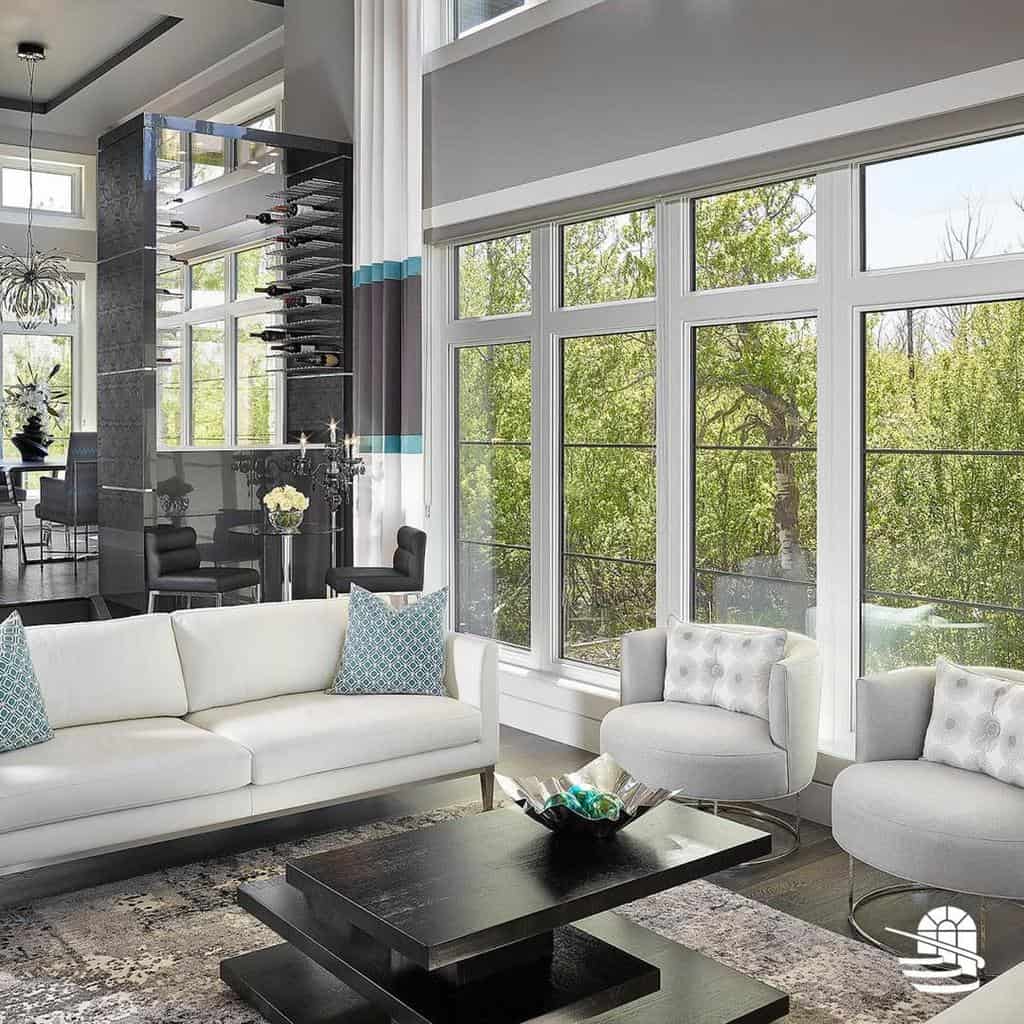
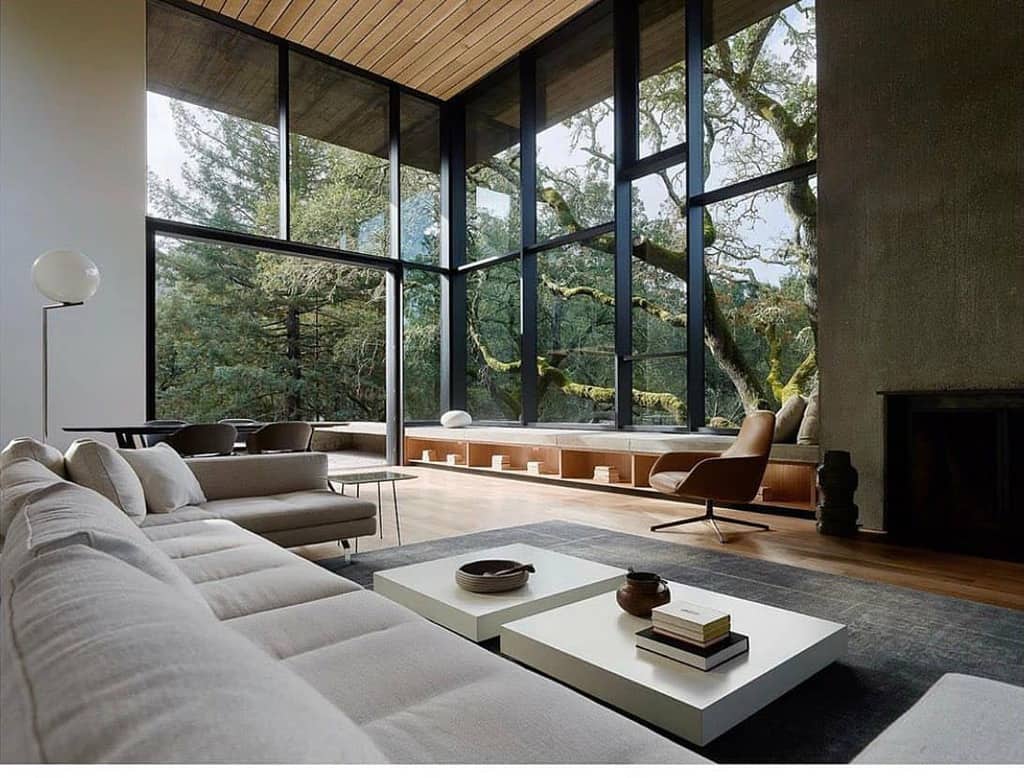
9. Modernize with a Sleek Glass Table
Glass coffee tables give an illusion of more space while offering a modern touch. Their transparent tops are ideal for showcasing statement rugs or flooring underneath.
Source: @jayne_winter_country_life via InstagramSource: @anndeckerdesign via InstagramSource: @caradiseblog via InstagramSource: @calahome41 via InstagramSource: @melbeaninteriors via InstagramSource: @chez.mckendry via InstagramSource: @minna.kreutzman via InstagramSource: @themccraehome via InstagramSource: @kaedyp via InstagramSource: @interiors_by_isha via Instagram
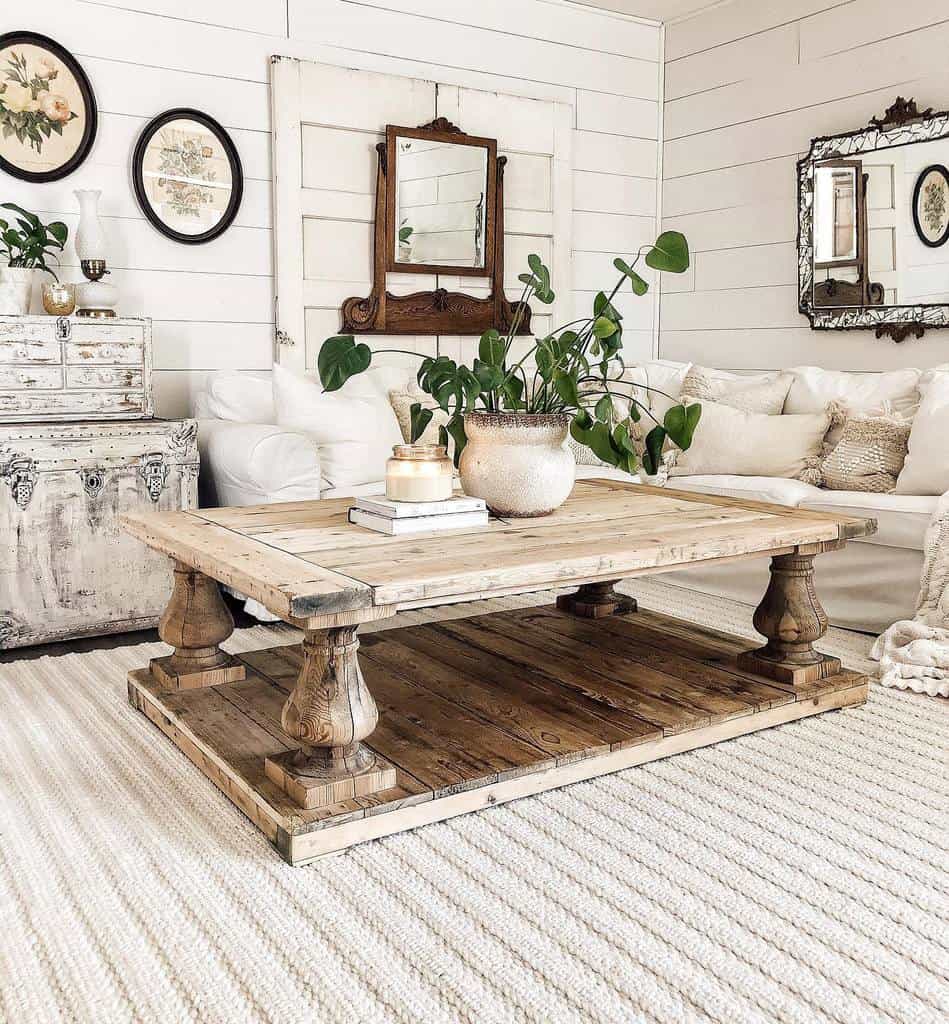
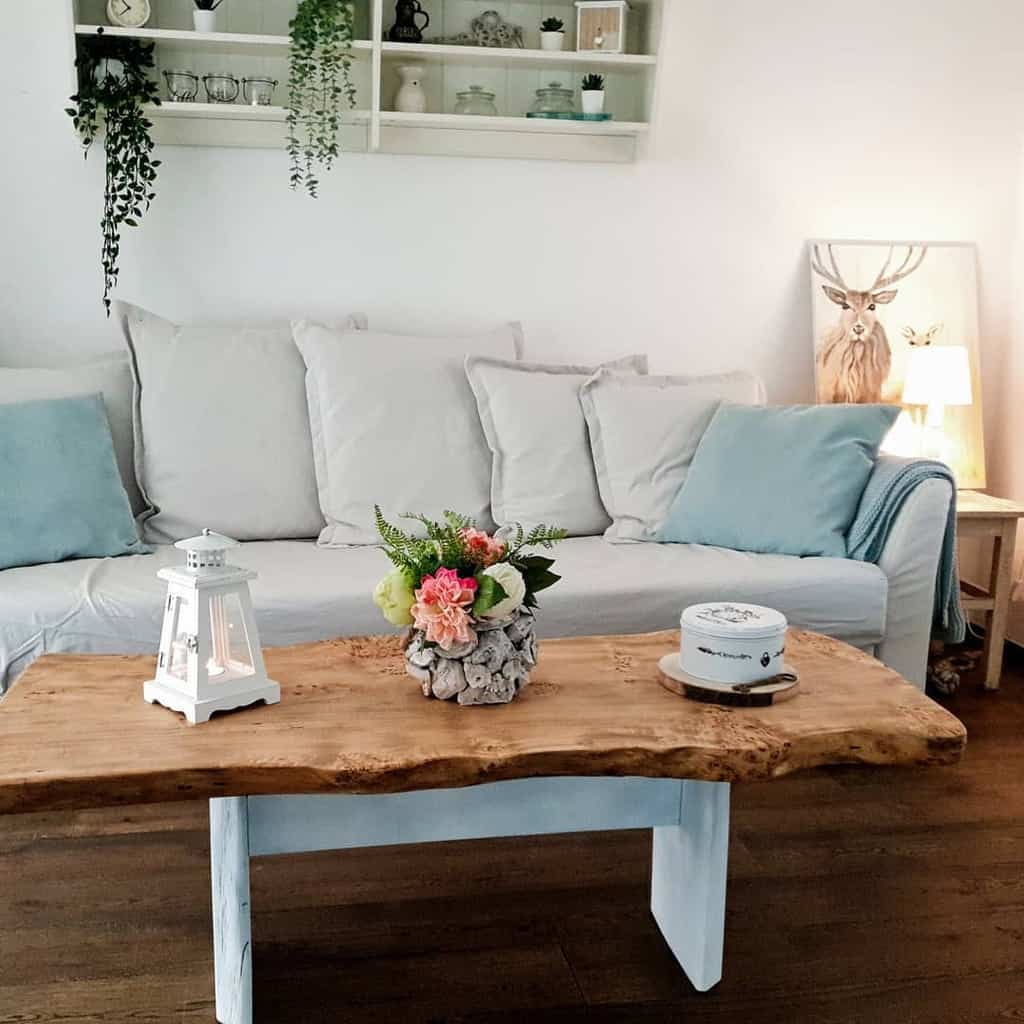
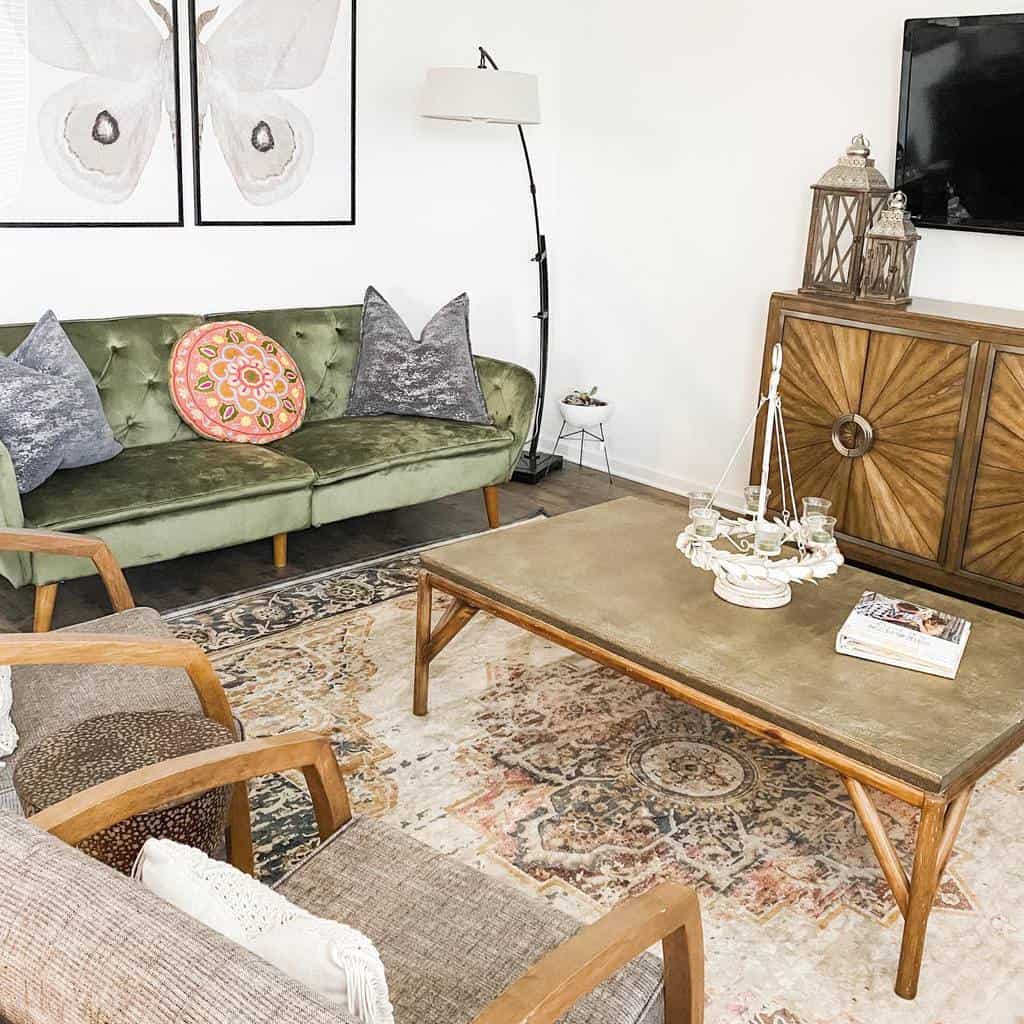
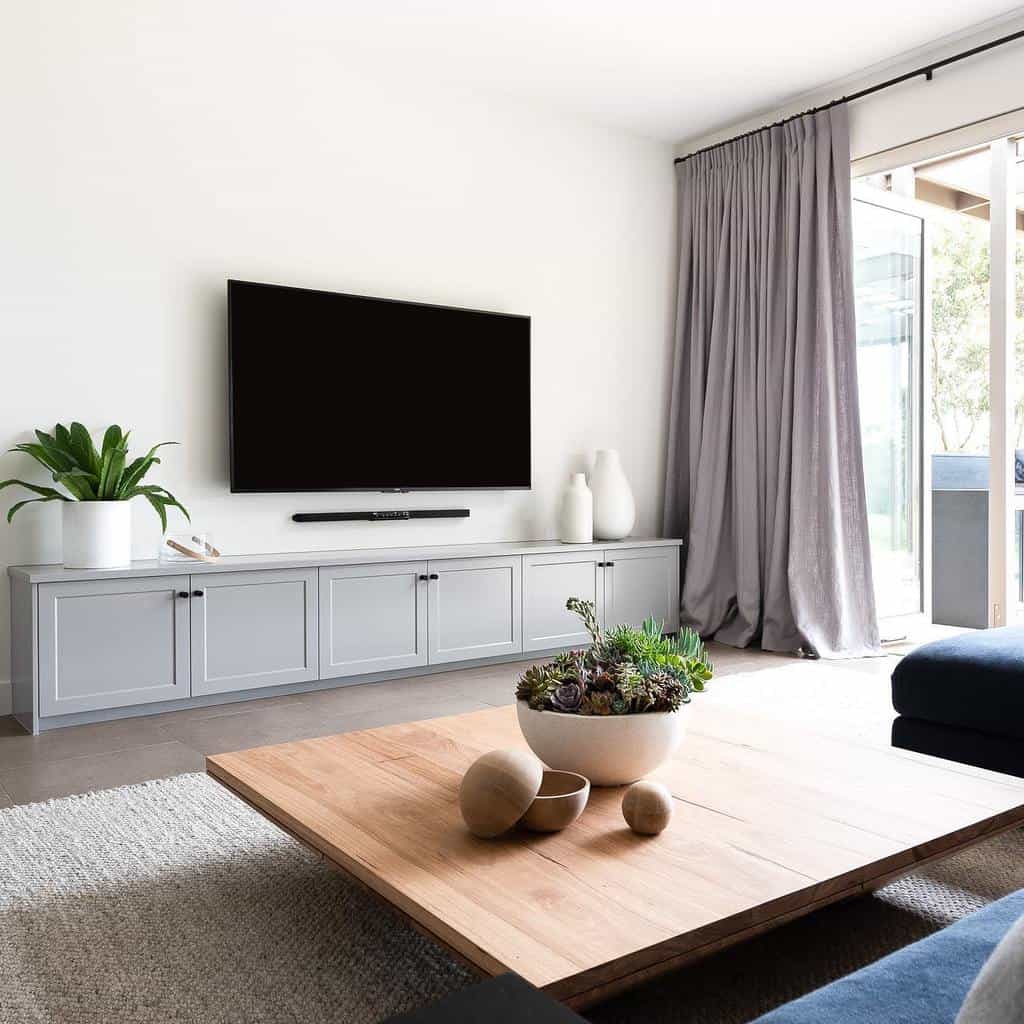
10. Natural Elegance: A Wooden Slab Table
A wooden slab table is a nod to nature’s beauty. Its unique grain patterns and organic edges make each piece a one-of-a-kind addition to your living space.
Source: @malakucanasavi via InstagramSource: @heartfailuregroup via Instagram
11. Upcycled Chic: Pallet Coffee Table
Pallet tables are a sustainable and creative way to add a rustic touch. Customize them with paint, casters, or glass tops for a personalized piece that tells a story.
Source: @missiefit via Instagram
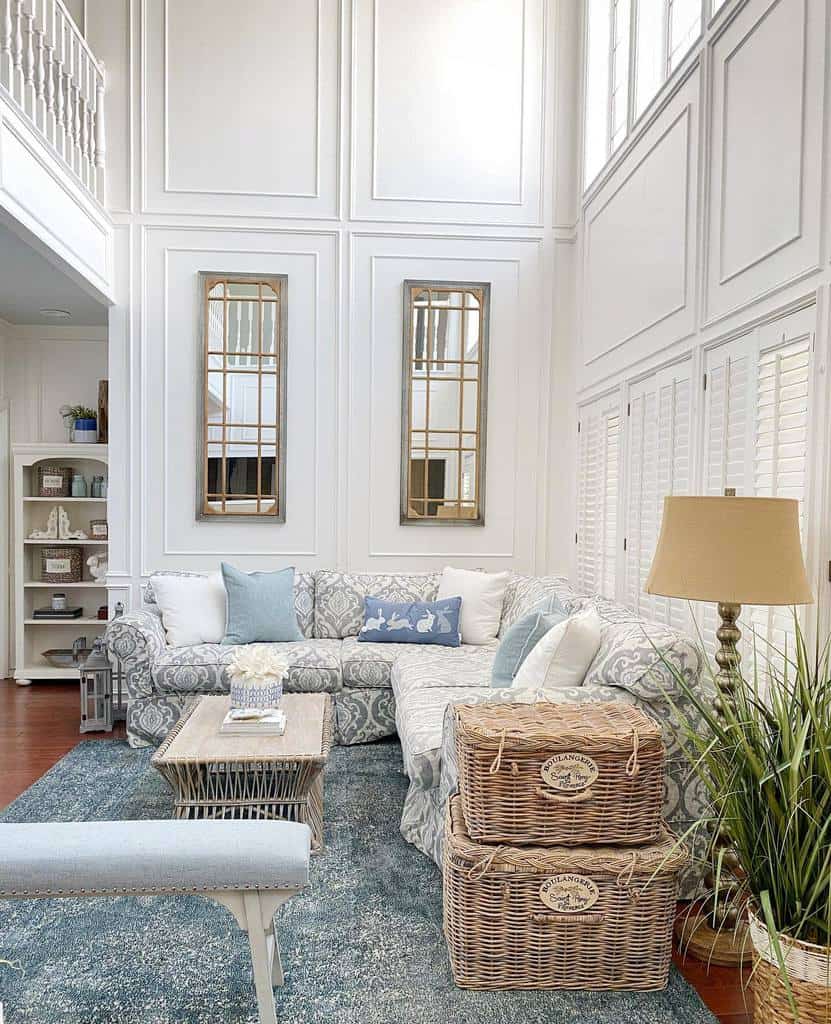
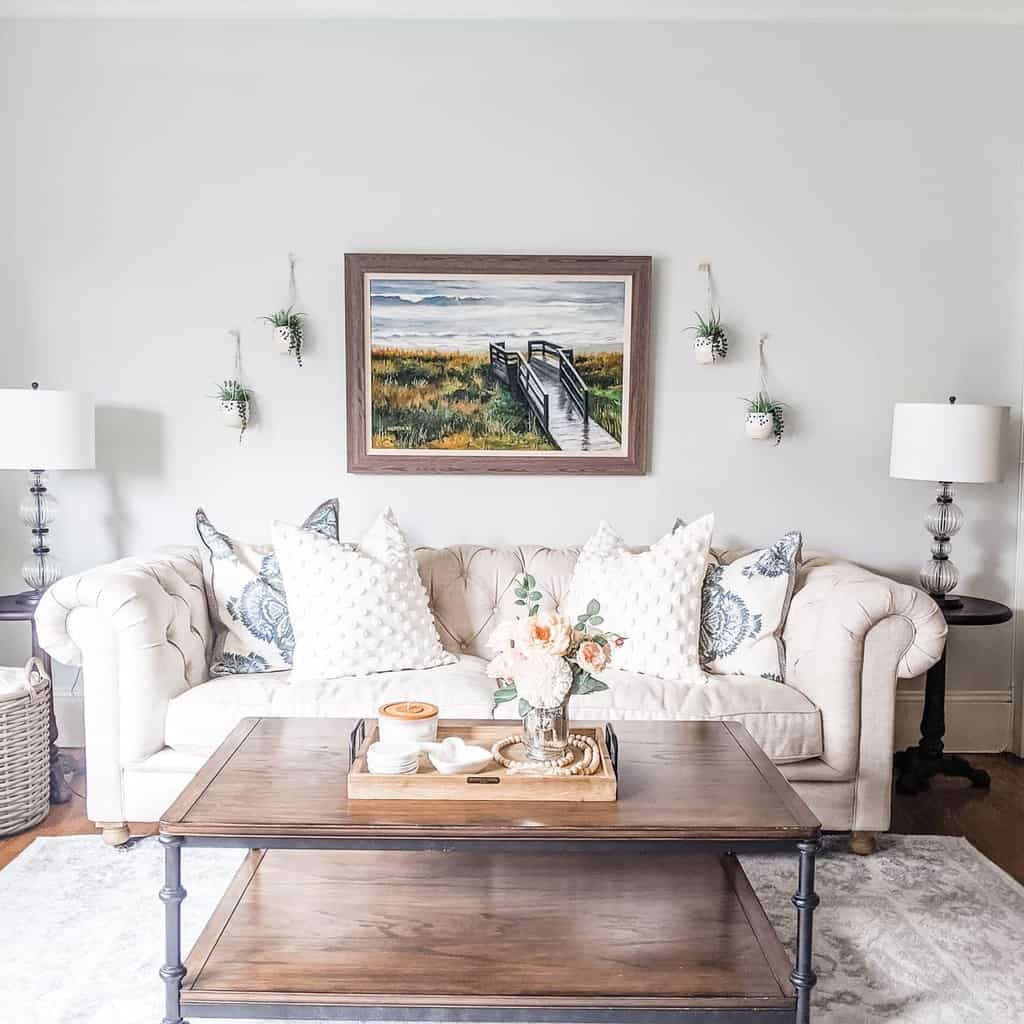
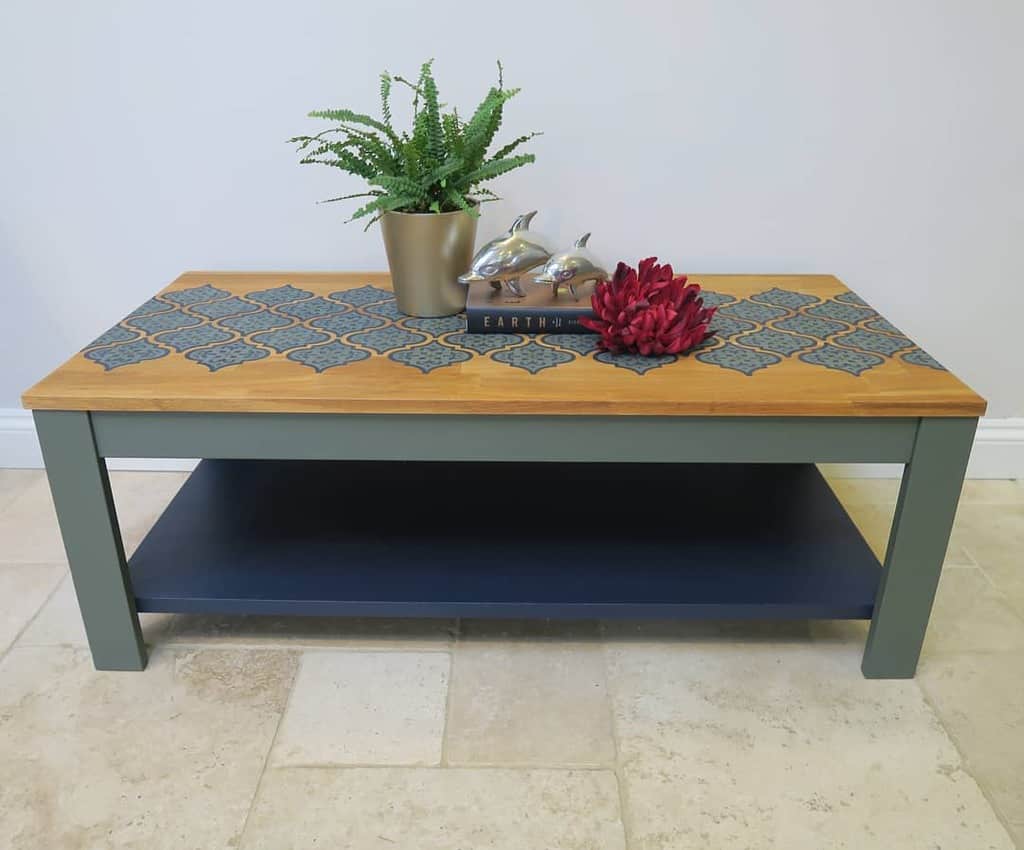
12. Create Depth with a Layered Table
Layered tables offer dynamic styling options and extra space for your books, plants, or decorative items. Their multi-level design adds an architectural element to your room.
Source: @sljiki via InstagramSource: @yasmins_sweethome via InstagramSource: @bestdesignerofall via InstagramSource: @bettyblueroses via InstagramSource: @kimberleyhomes via Instagram
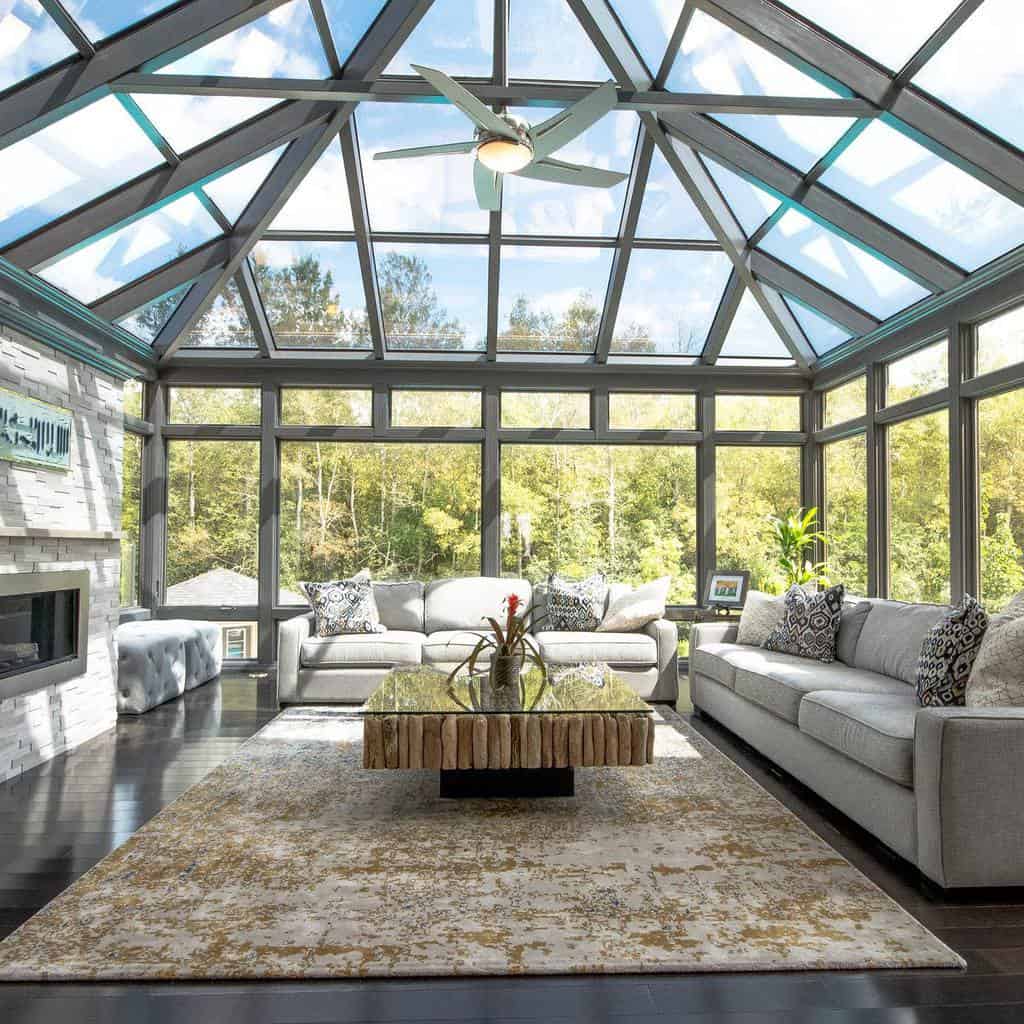
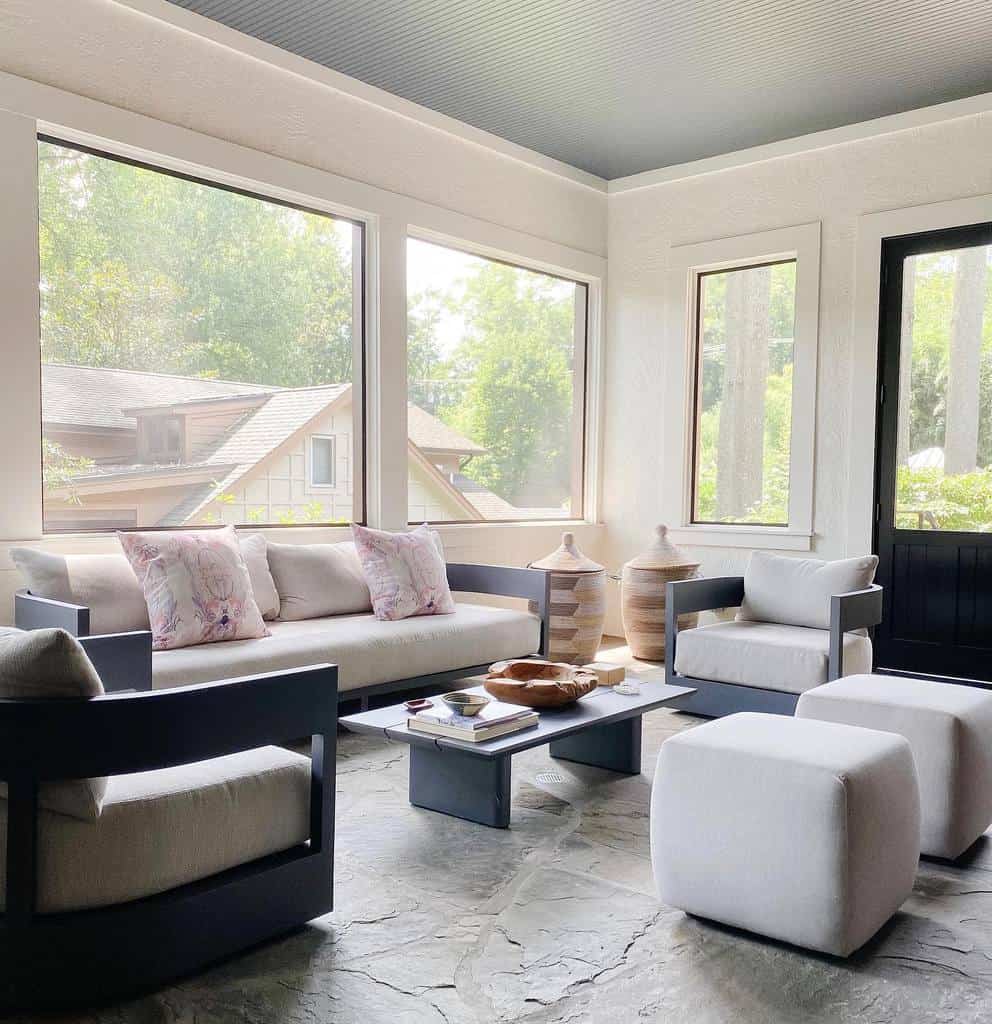
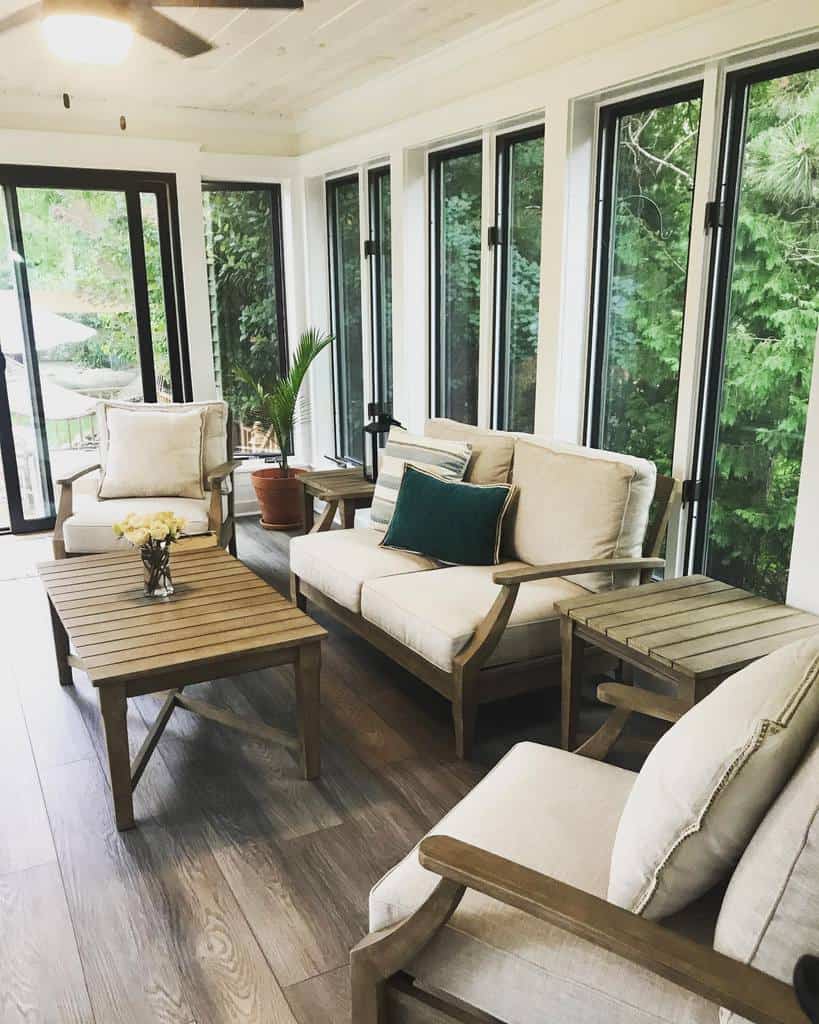
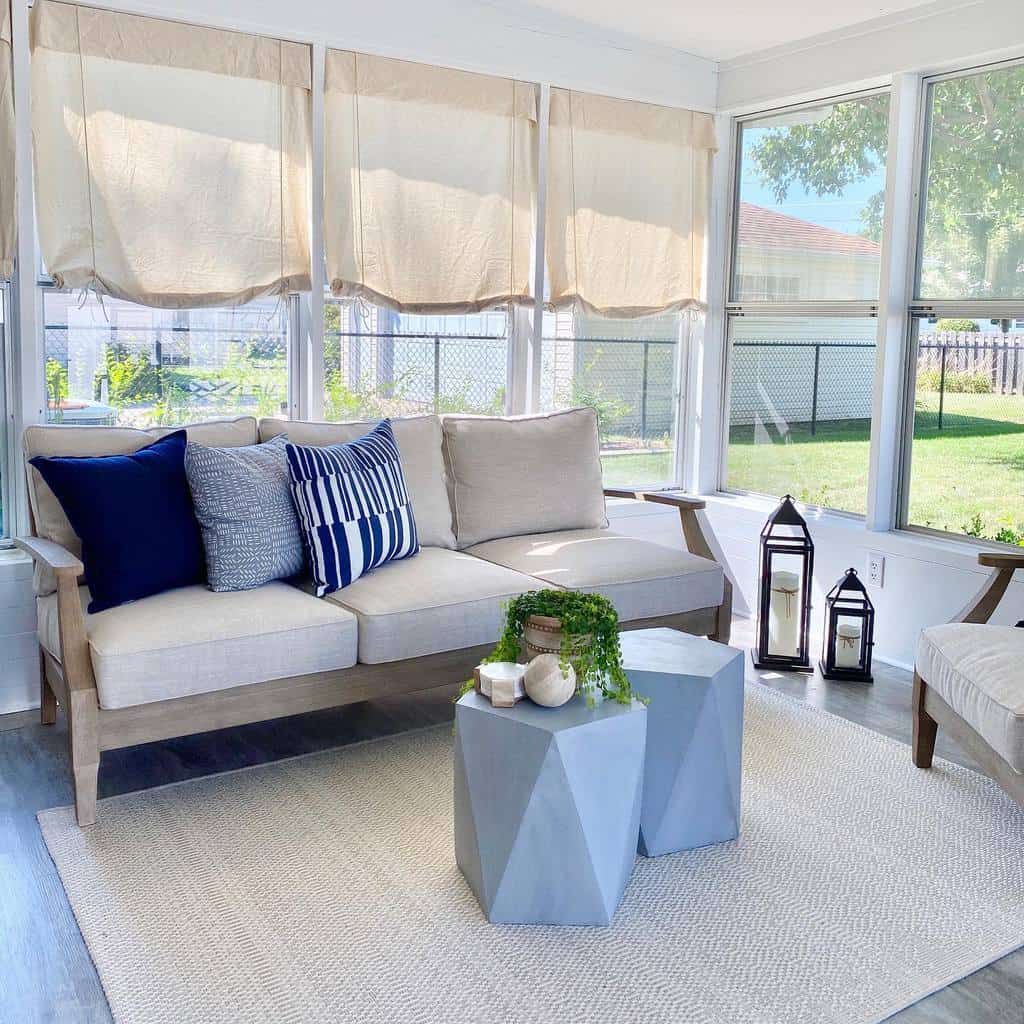
13. Driftwood and Glass: A Coastal Vibe
Combining driftwood with glass creates a serene, beachy feel in your home. The natural, weathered wood under a smooth glass surface evokes a sense of calmness and connection to the outdoors.
Source: @fourseasonssunroomstoronto via Instagram
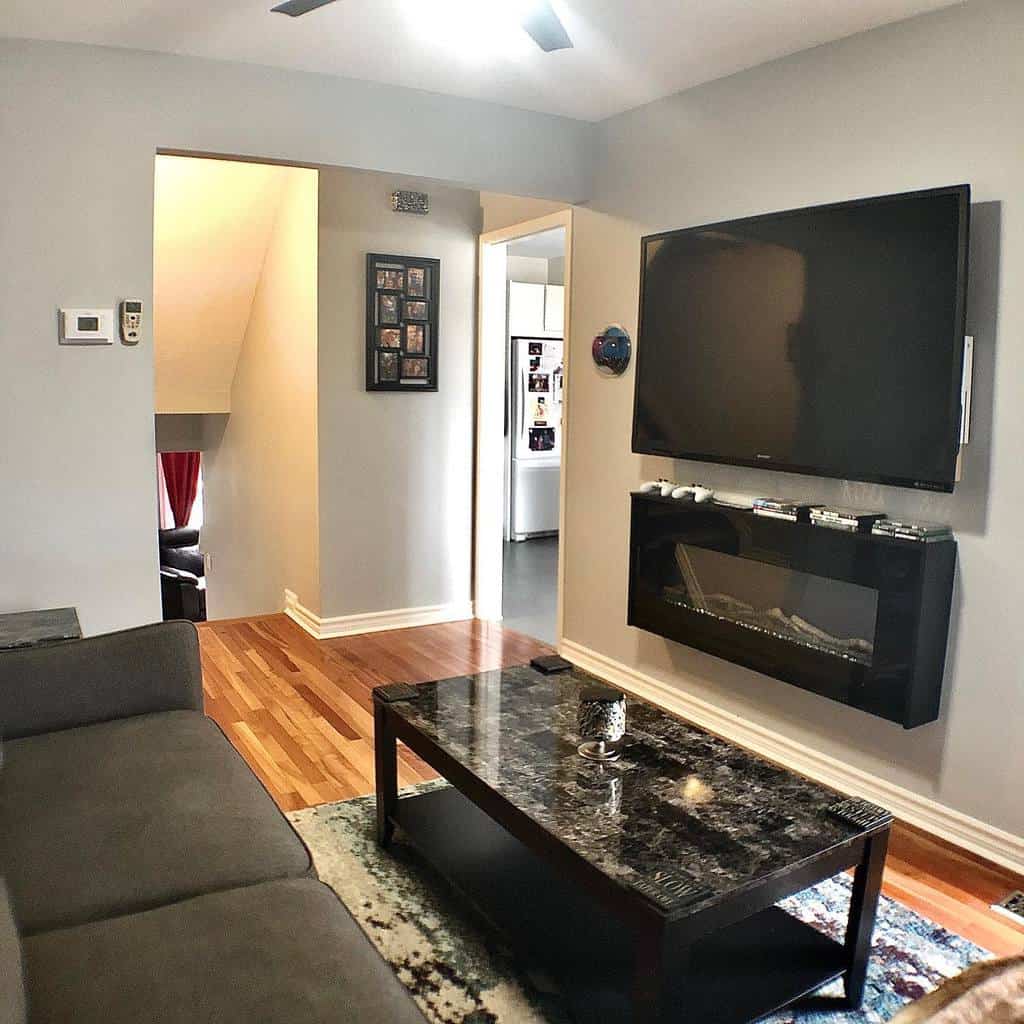
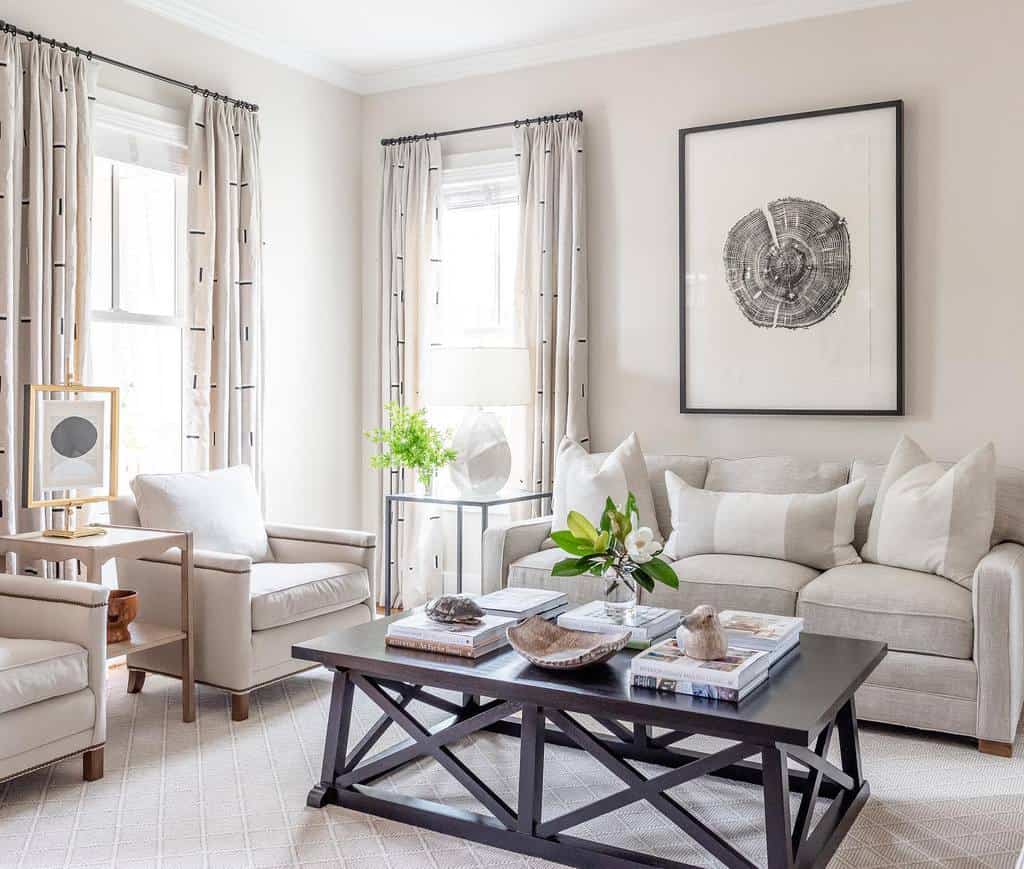
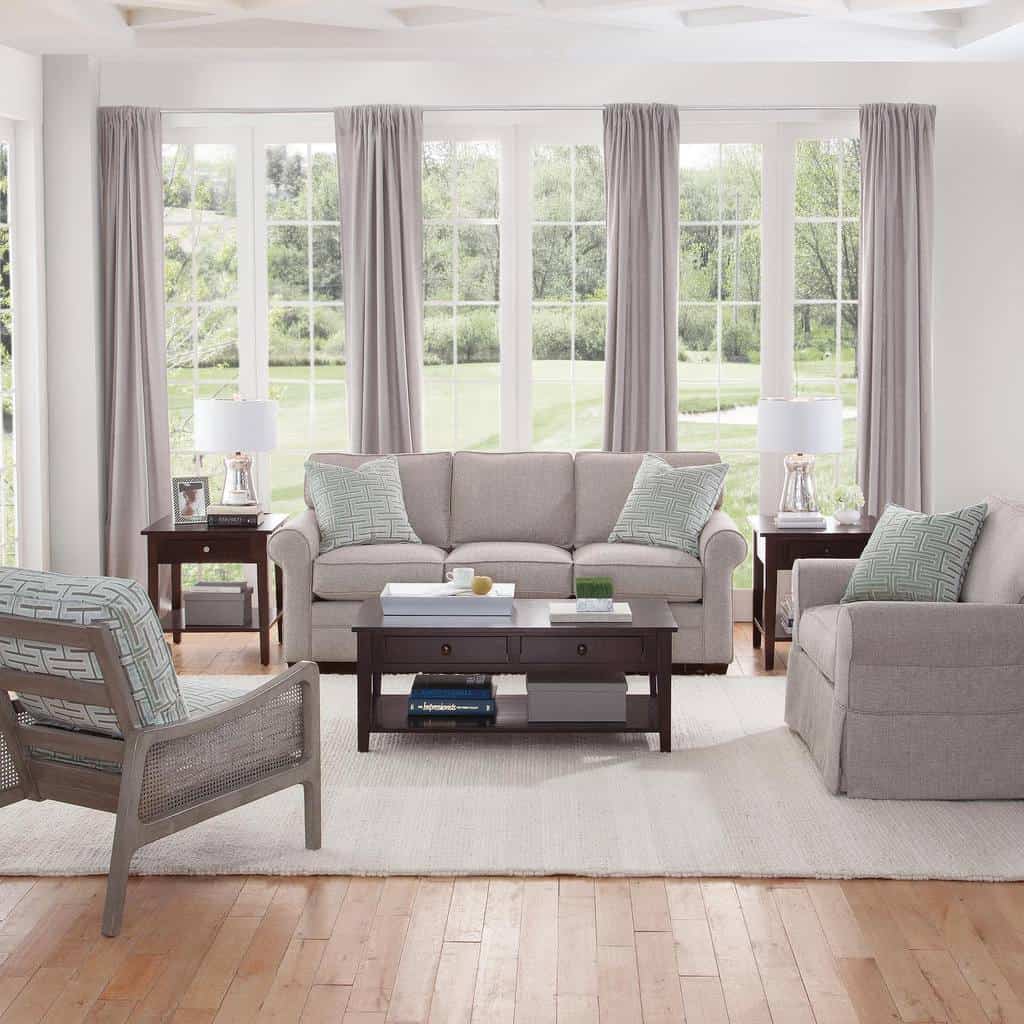
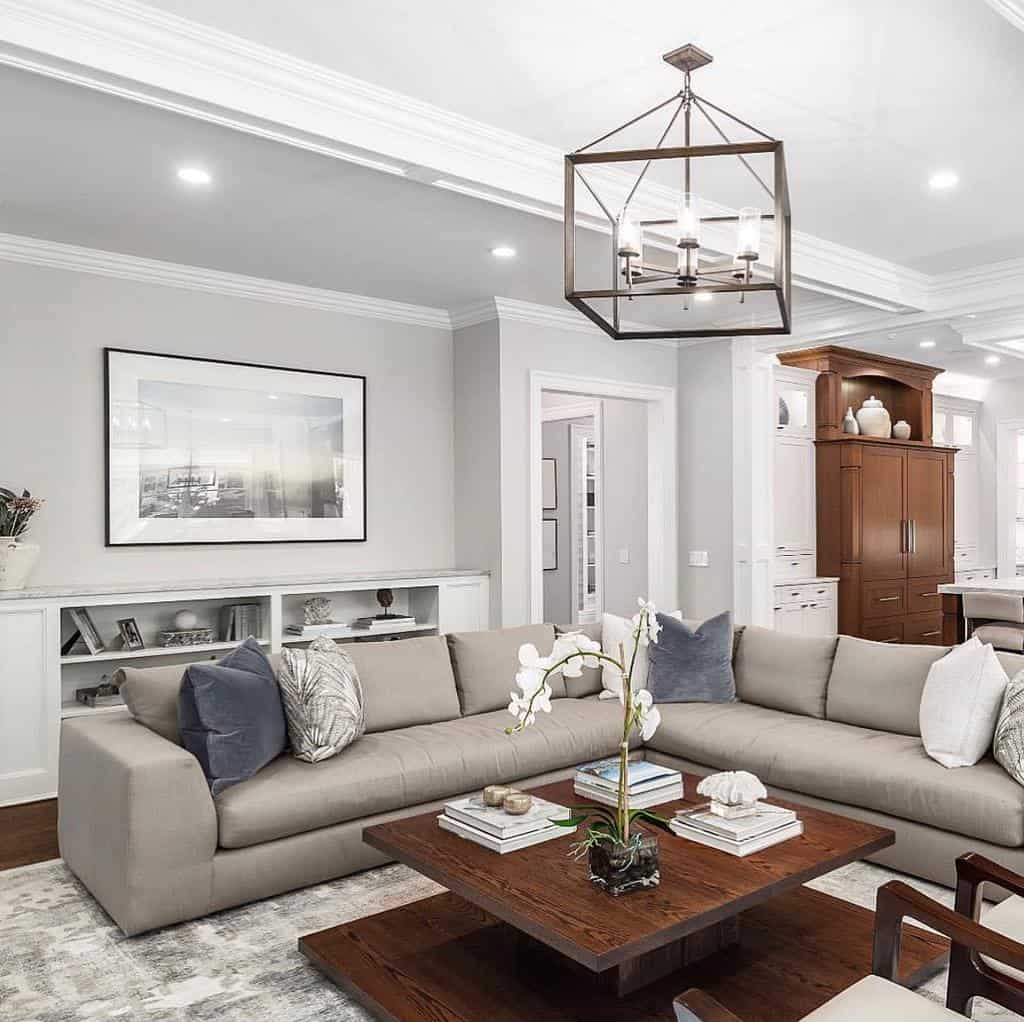
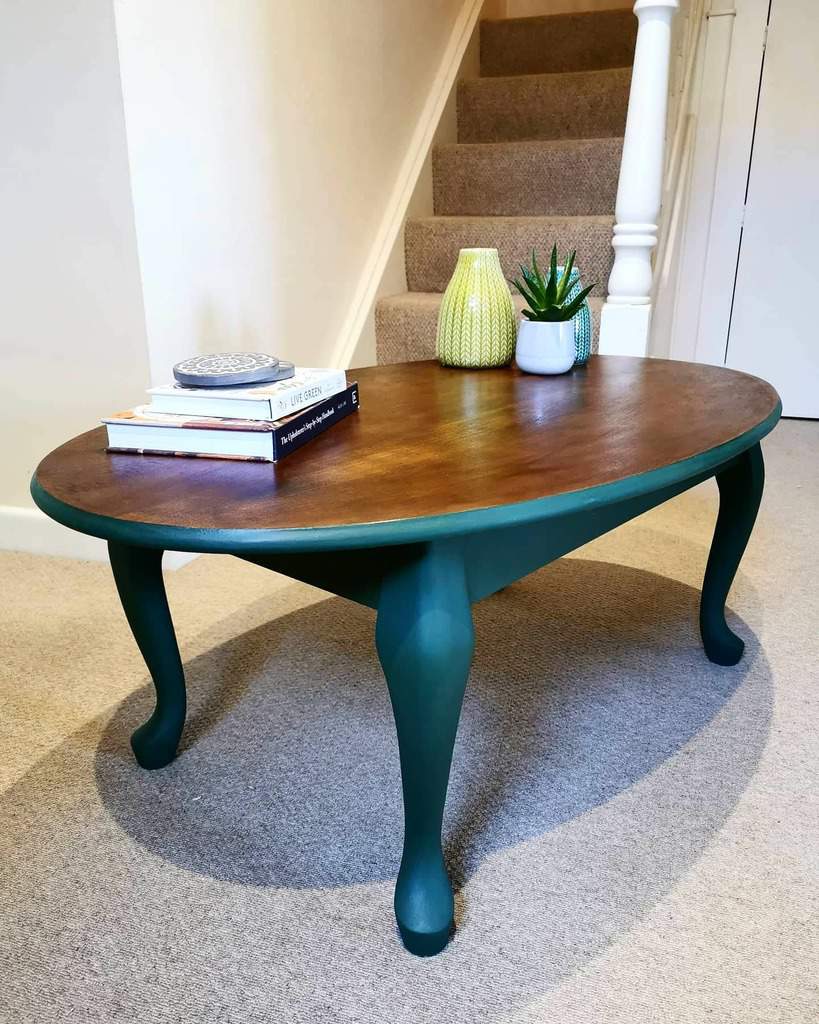
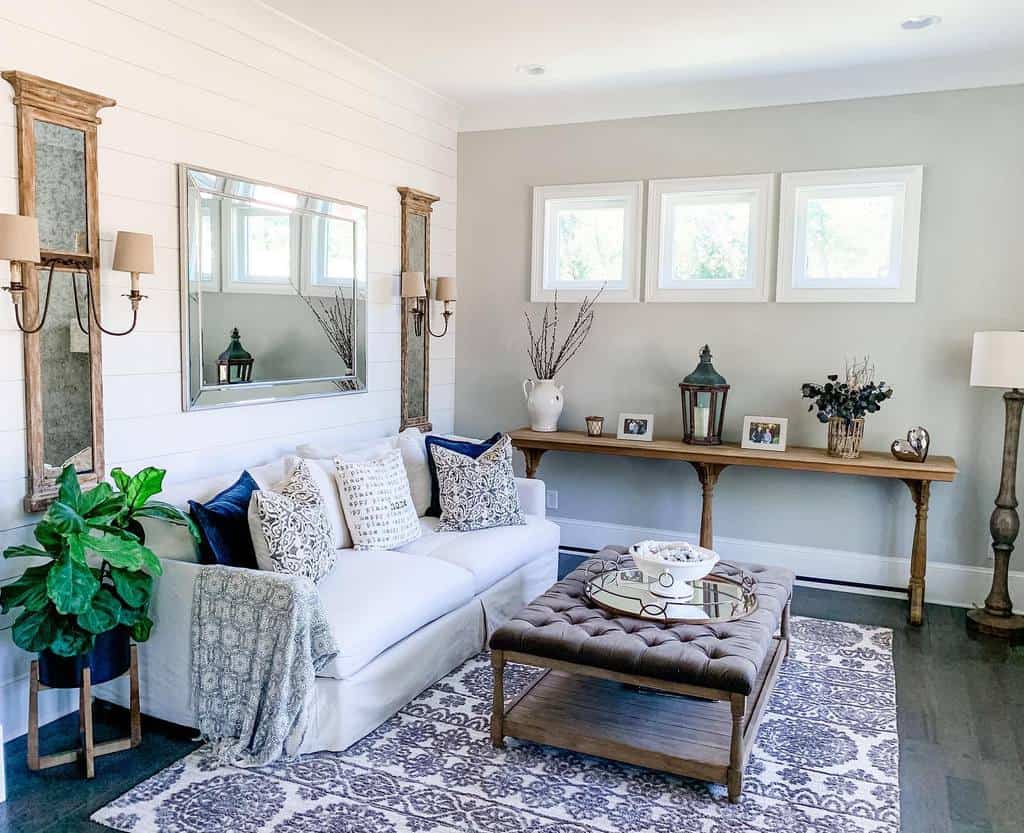
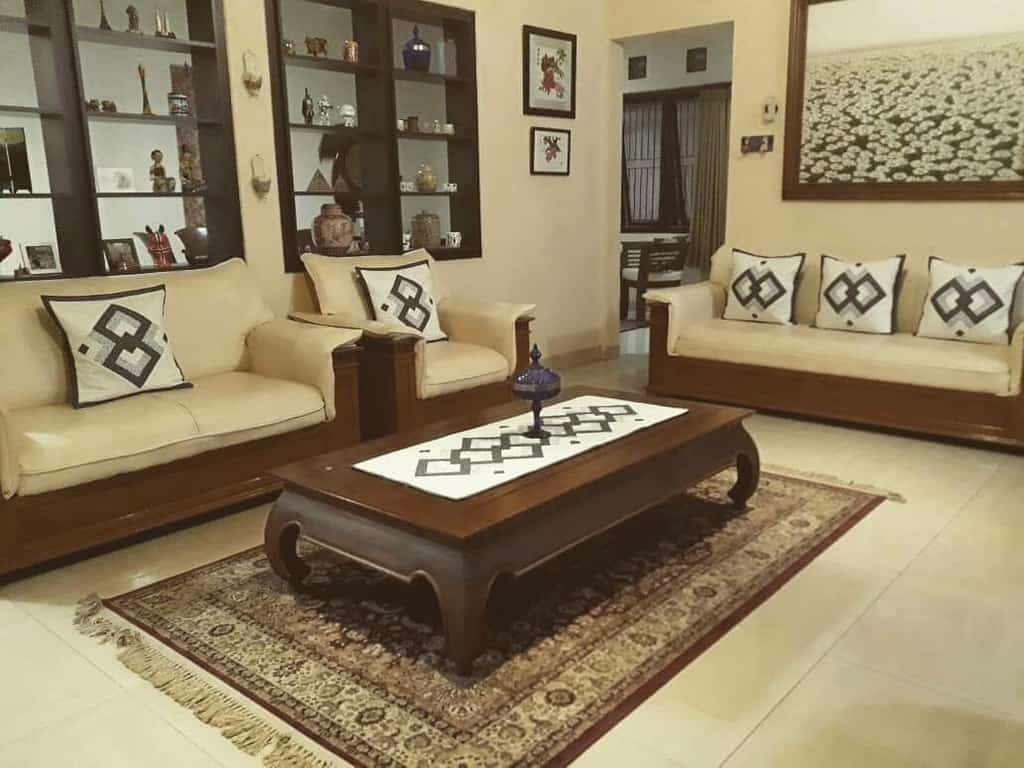
14. Darkwood Tables for a Sophisticated Look
Darkwood tables are all about elegance and drama. They anchor the room and make a statement, especially when paired with lighter colored furnishings and accents.
Source: @braxtonculler via InstagramSource: @cocoongreenwich via InstagramSource: @katiejenkinsinteriors via InstagramSource: @designersfurniture via Instagram
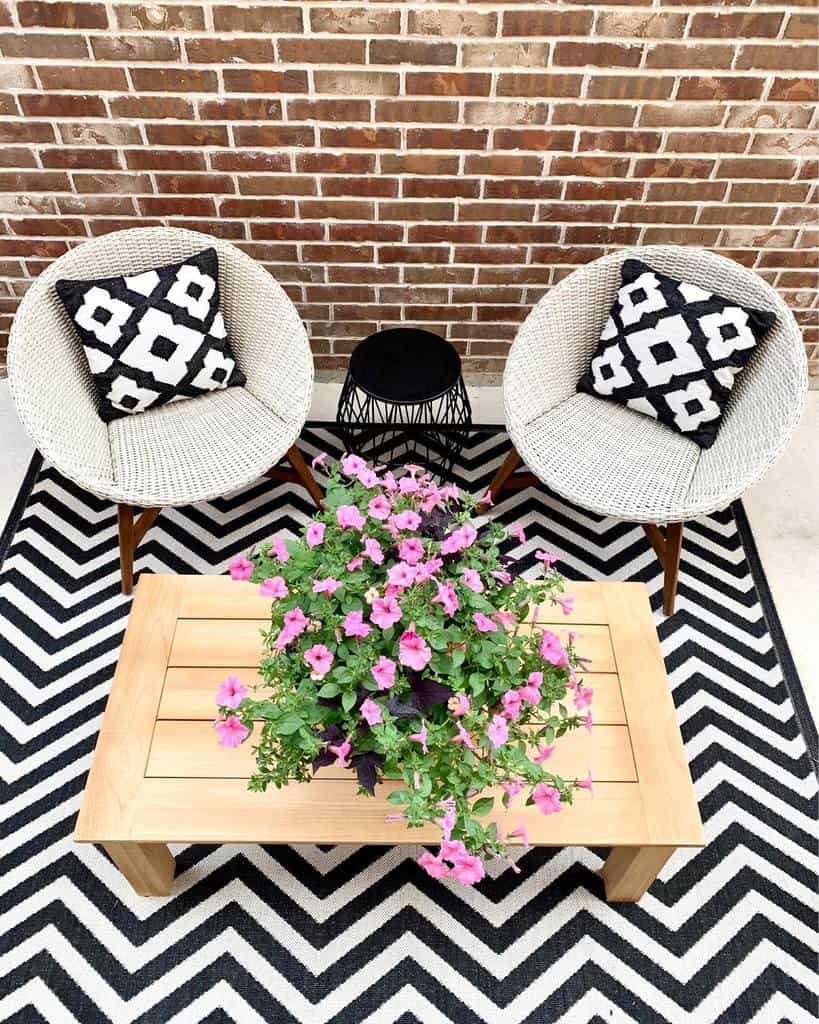
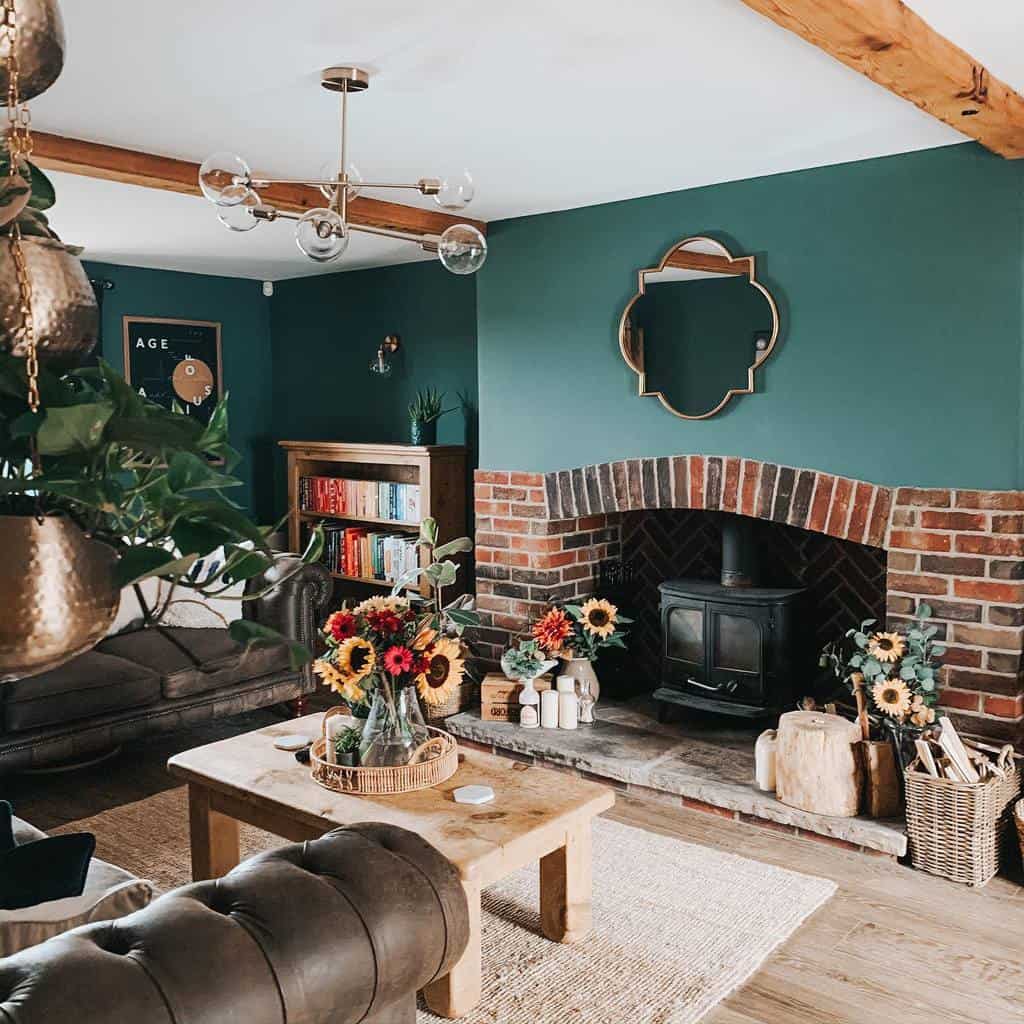
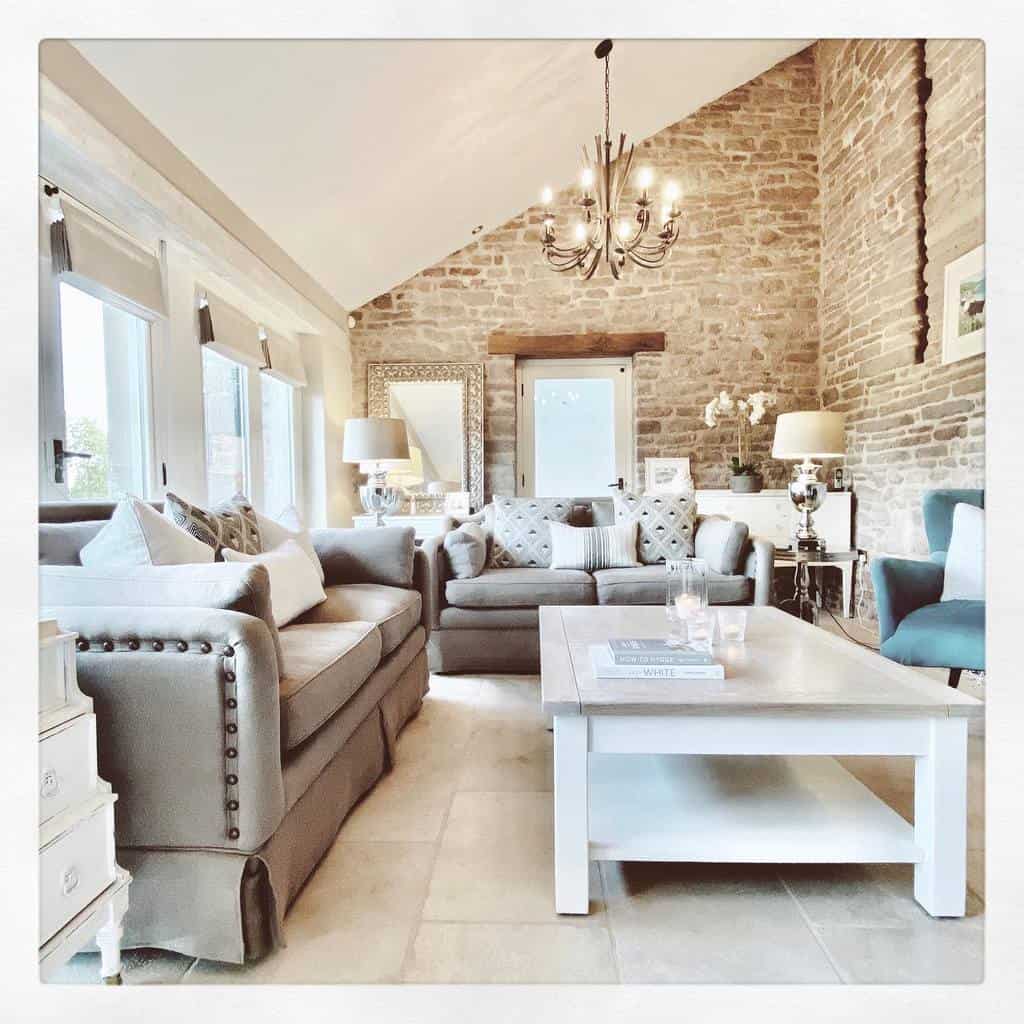
15. Classic Comfort: Wooden Coffee Tables
Wooden tables offer timeless appeal and durability. Their natural warmth and versatility make them a staple in any interior design, from rustic to contemporary.
Source: @thehousenextdoor87 via InstagramSource: @inside_110_timney via InstagramSource: @jillian844 via InstagramSource: @negardeppeland via InstagramSource: @sandpiperbarn via InstagramSource: @inside_110_timney via InstagramSource: @copperpointhome via Instagram
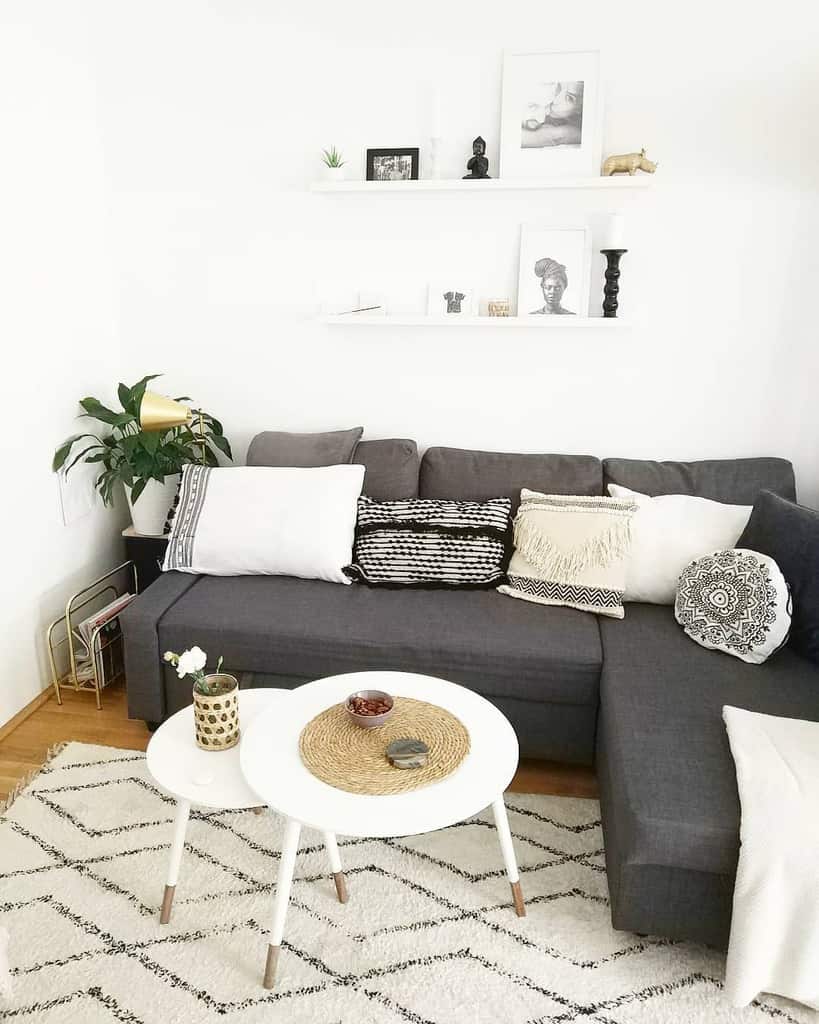
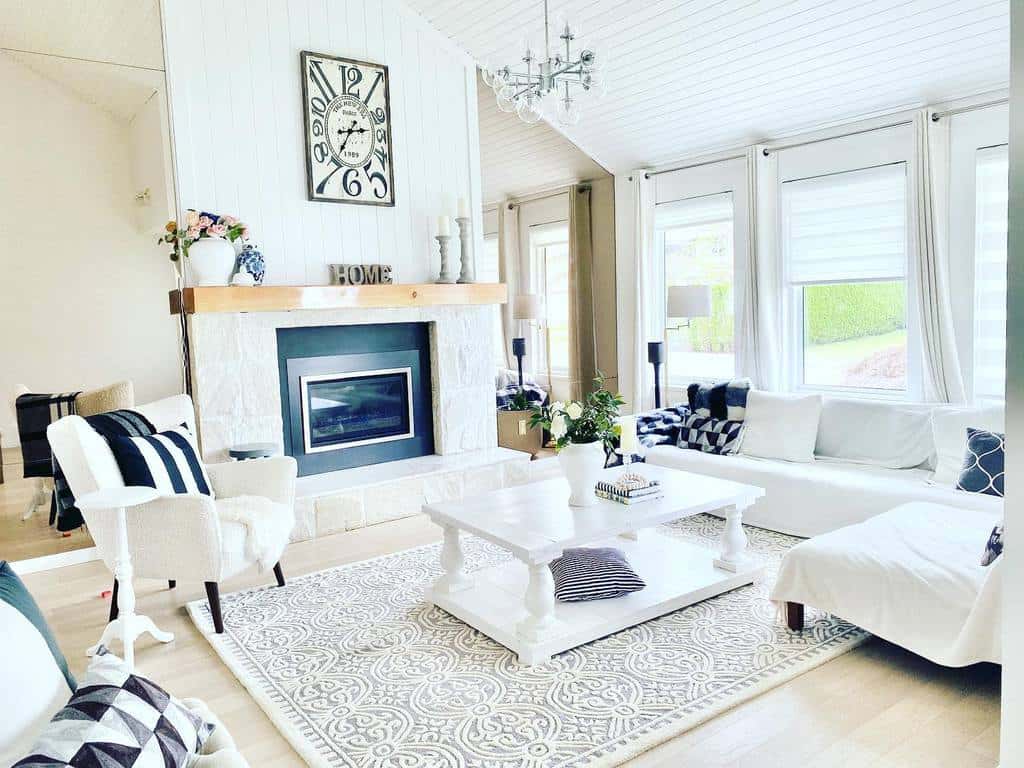
16. Brighten Up with a White Table
A white table instantly brightens and opens up a space. It’s a blank canvas for any decorative style, from minimalistic to eclectic, and pairs beautifully with bold colors.
Source: @meandmrhughes via InstagramSource: @the.white_.art_.group_ via InstagramSource: @boylewaybillet via InstagramSource: @rustic.sparkle via InstagramSource: @astorywaitingtohappen via InstagramSource: @mygranarybarn via InstagramSource: @our_sweet_domicile via InstagramSource: @home.at_.33 via InstagramSource: @my_home_pics_x_ via InstagramSource: @arthouse_visionboard via InstagramSource: @acorn_house via Instagram
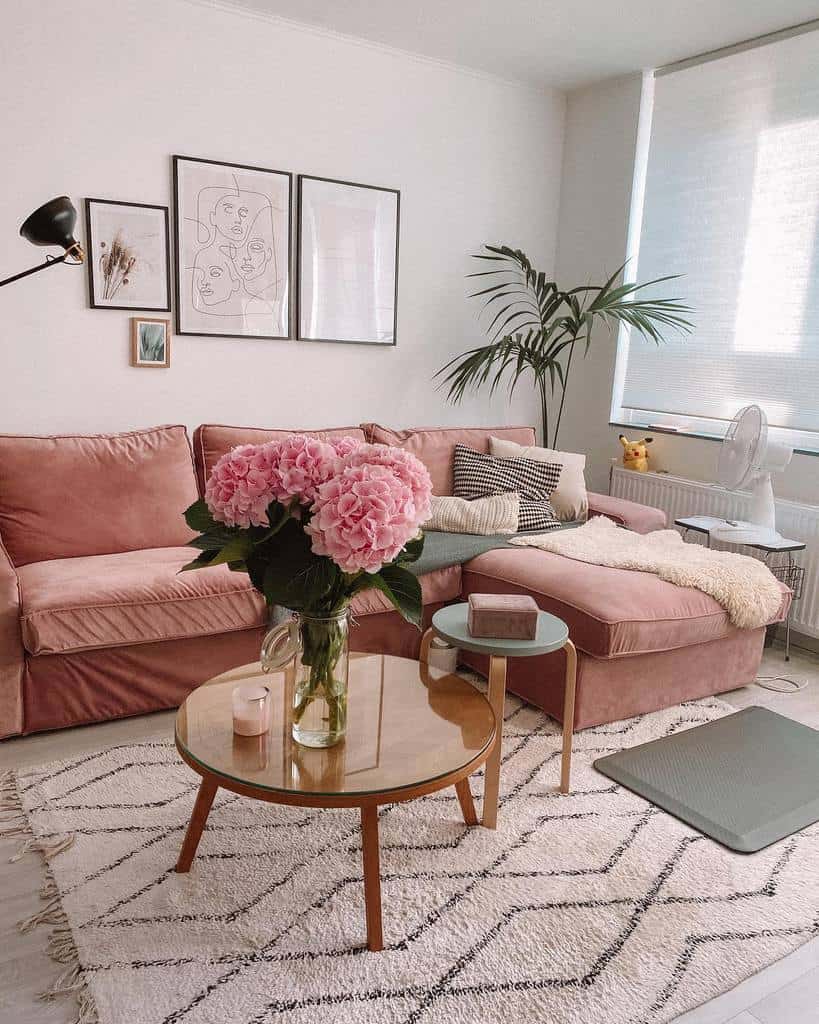
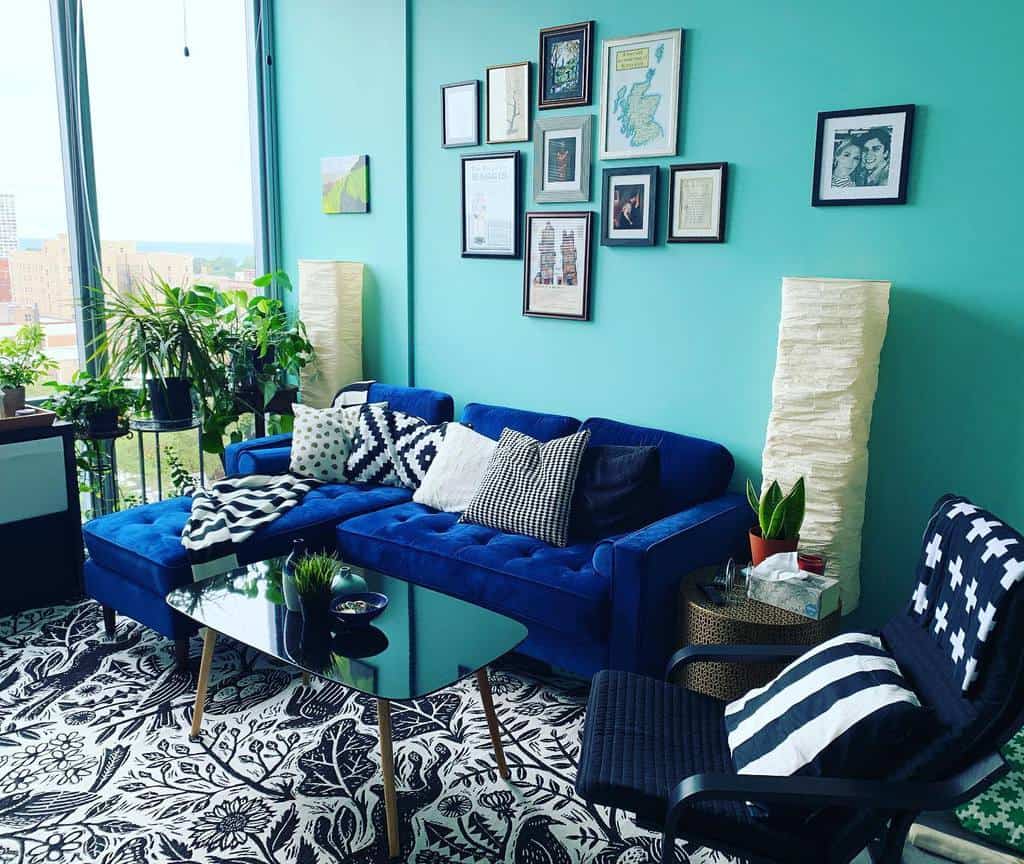
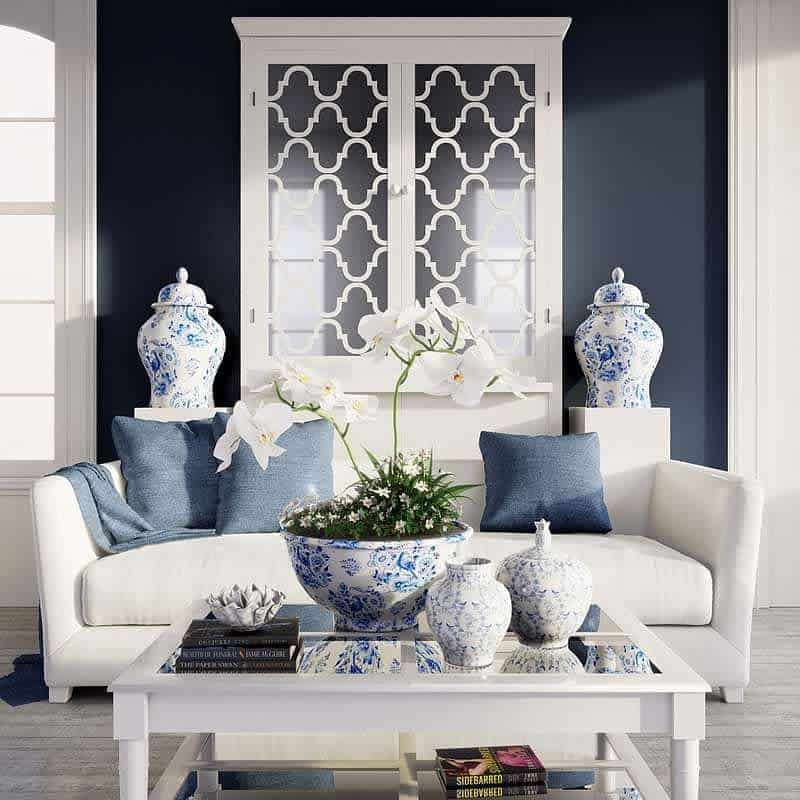
17. Add a Pop of Color with Dainty Blue
A dainty blue table brings a gentle splash of color to your living area. It’s perfect for creating a focal point and pairs wonderfully with neutral tones for a balanced look.
Source: @meg.benton via InstagramSource: @saikuhoo via InstagramSource: @jhbyhand_ via InstagramSource: @vintucy via InstagramSource: @misjamebel via Instagram
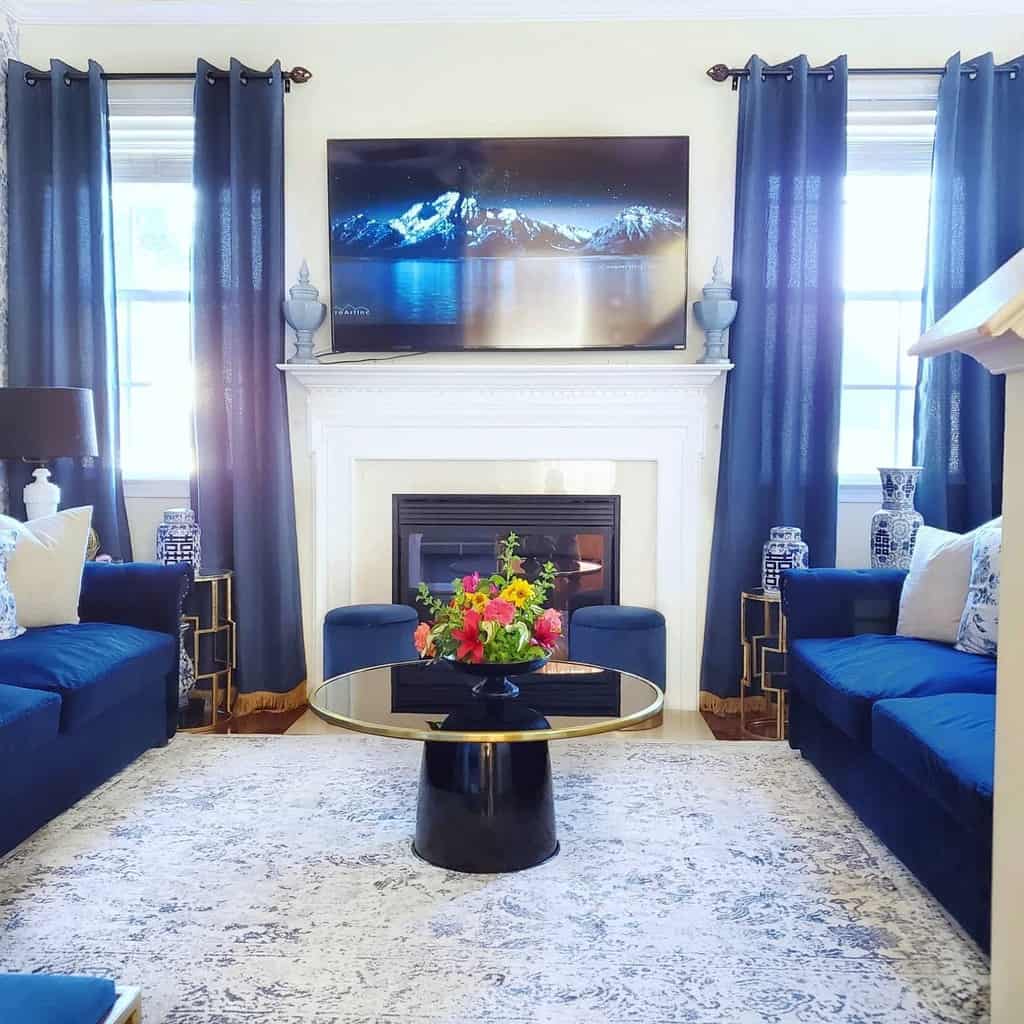
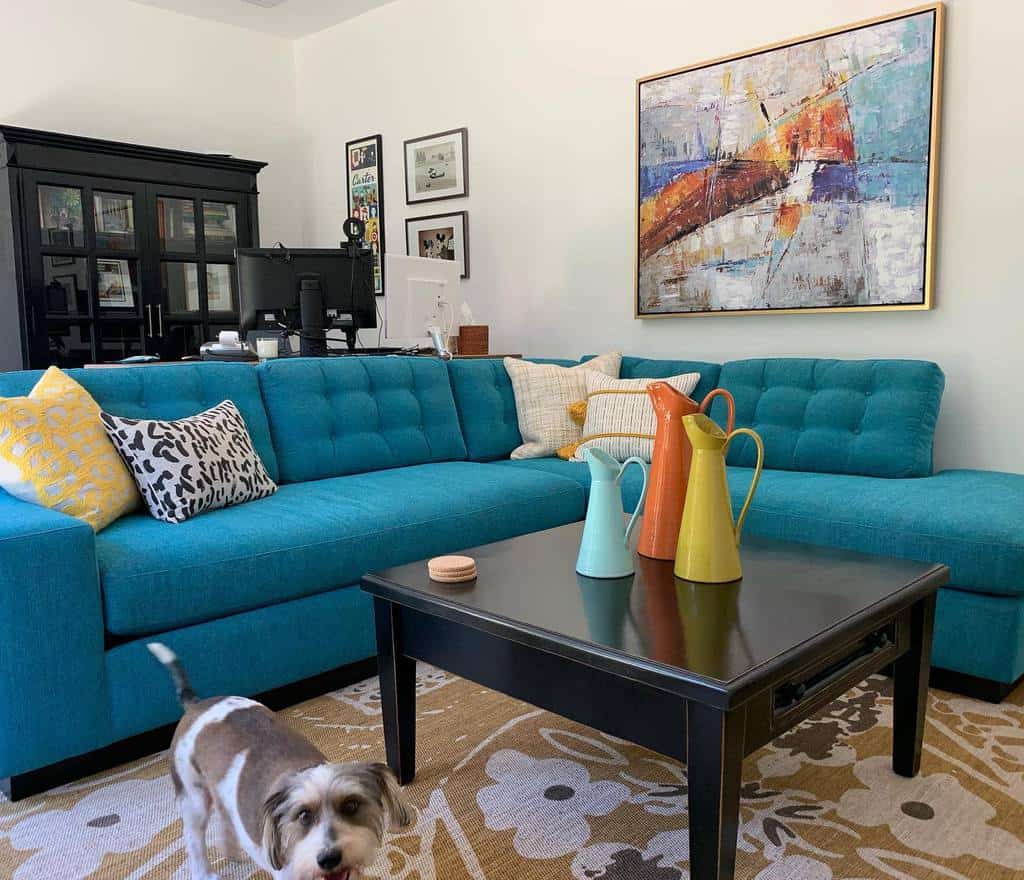
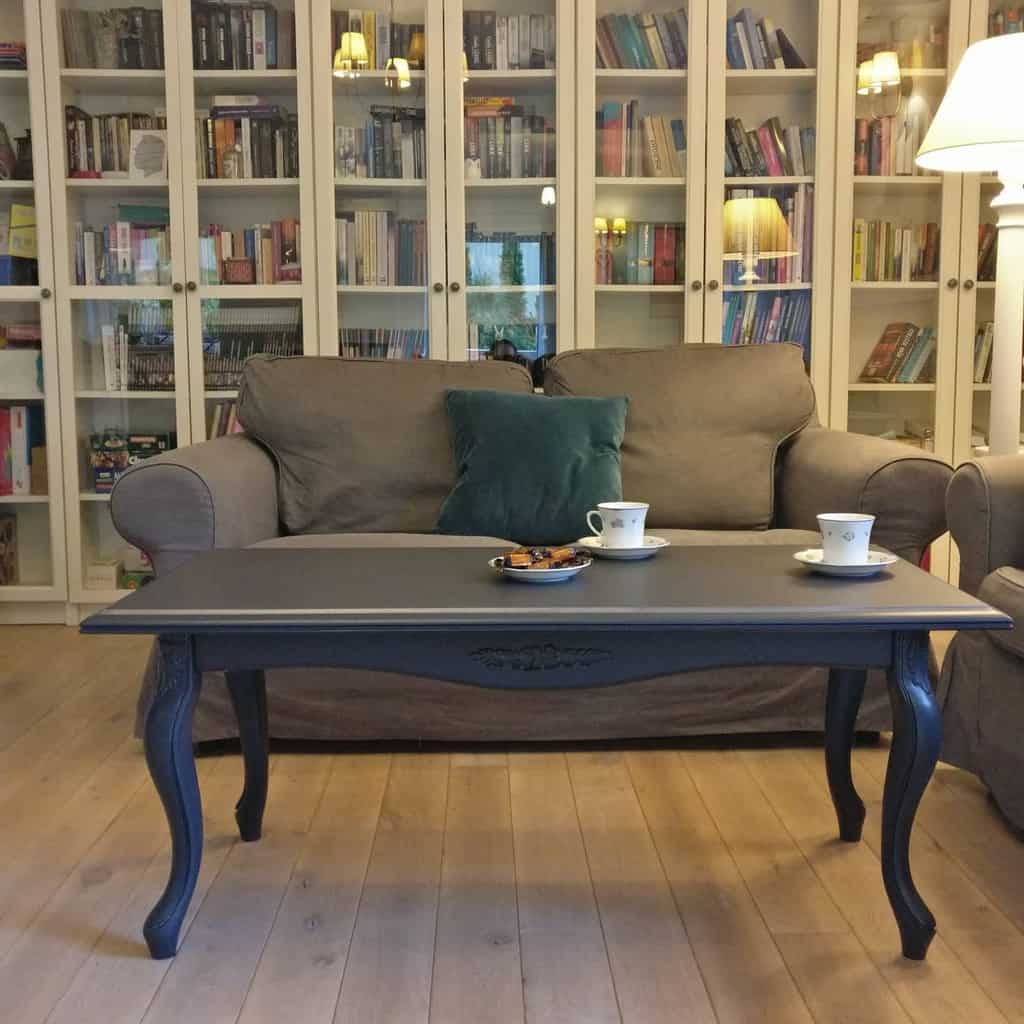
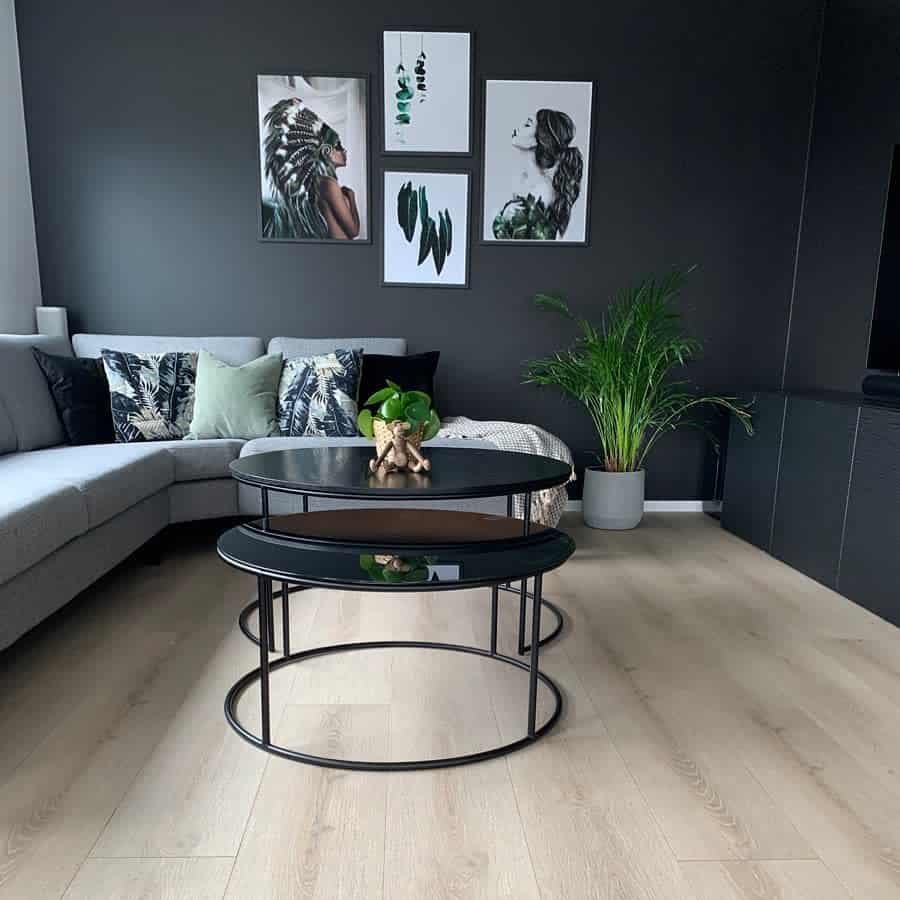
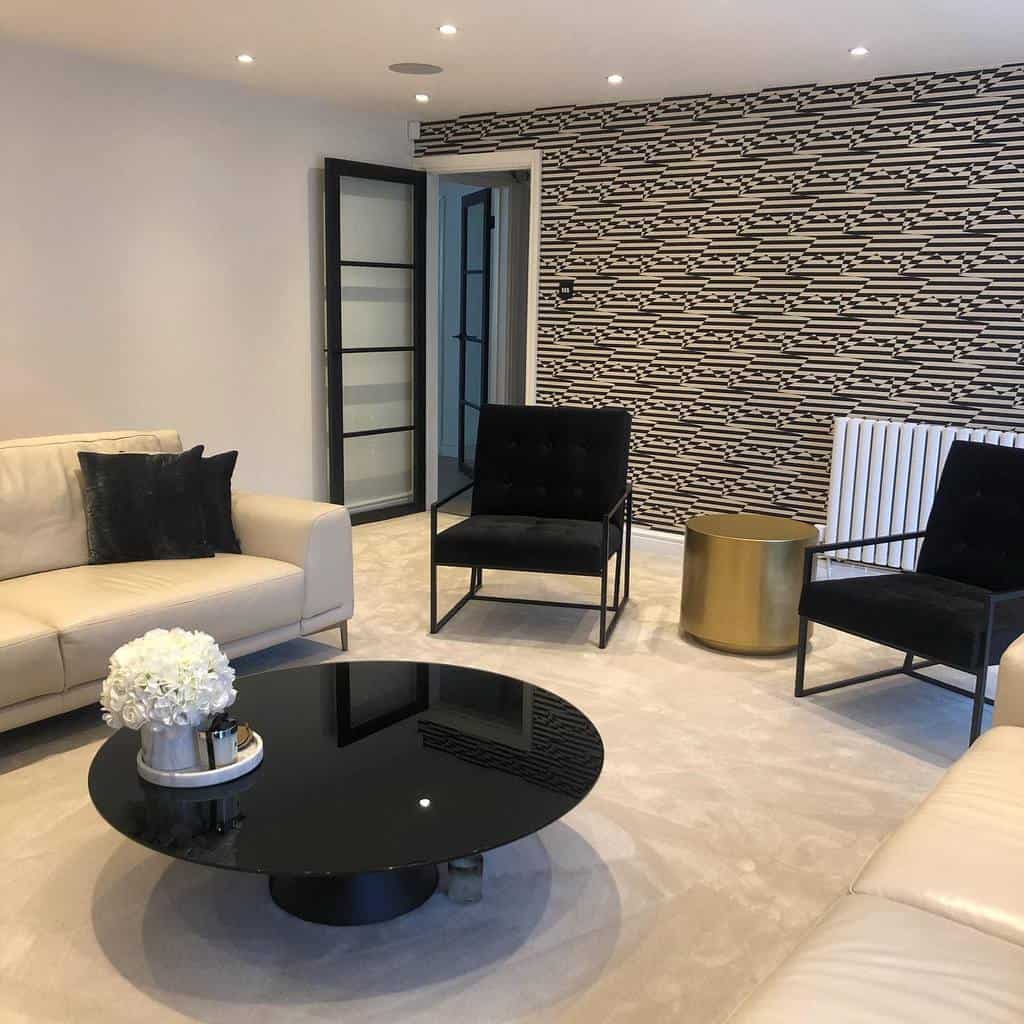
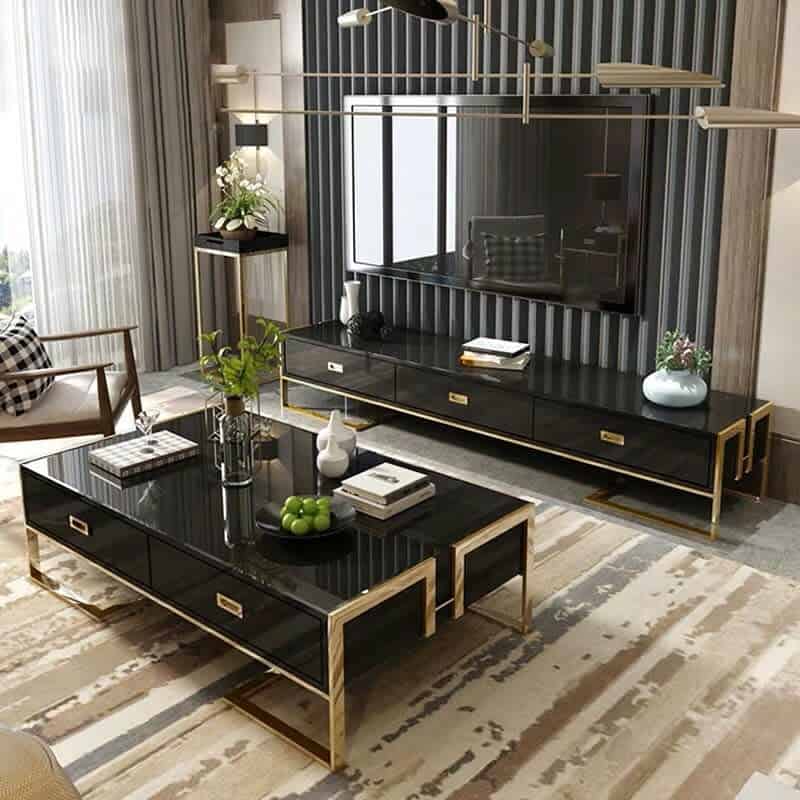
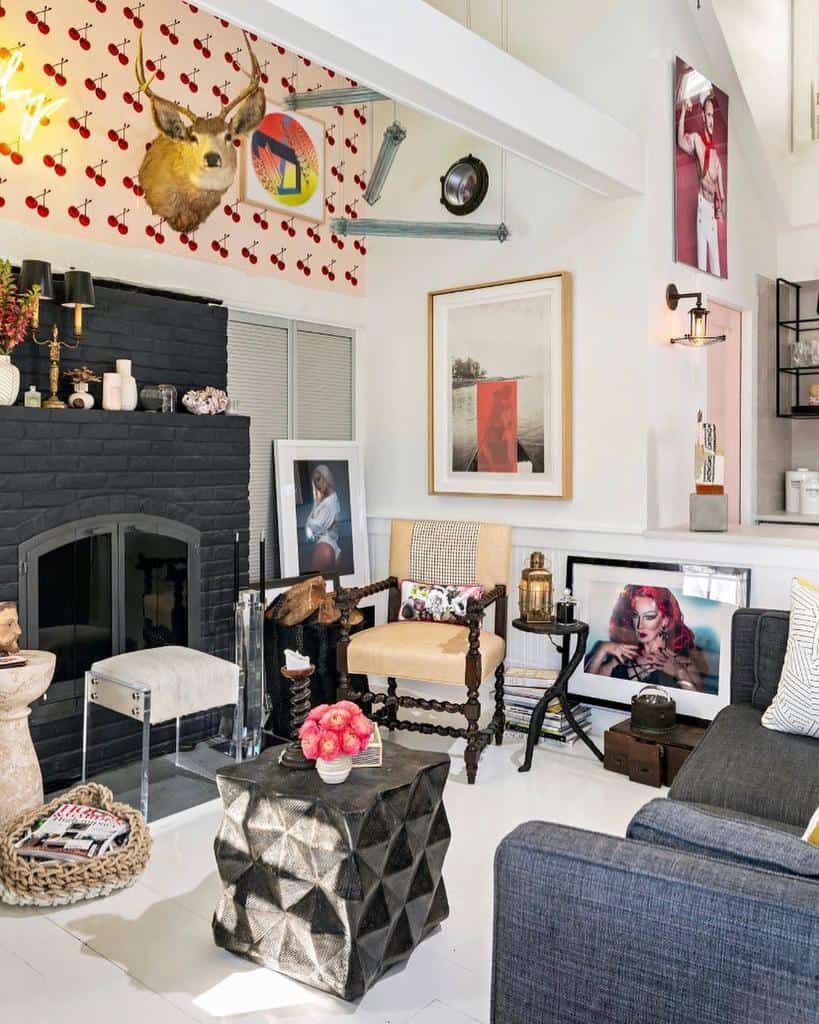
18. Bold and Beautiful: A Black Table
Black tables exude sophistication and modernity. They work as a striking centerpiece in your room, especially when contrasted with lighter hues and metallic accents.
Source: @klemstua via InstagramSource: @projectedg via InstagramSource: @modernoliving via InstagramSource: @the.dcruz_.casa_ via Instagram
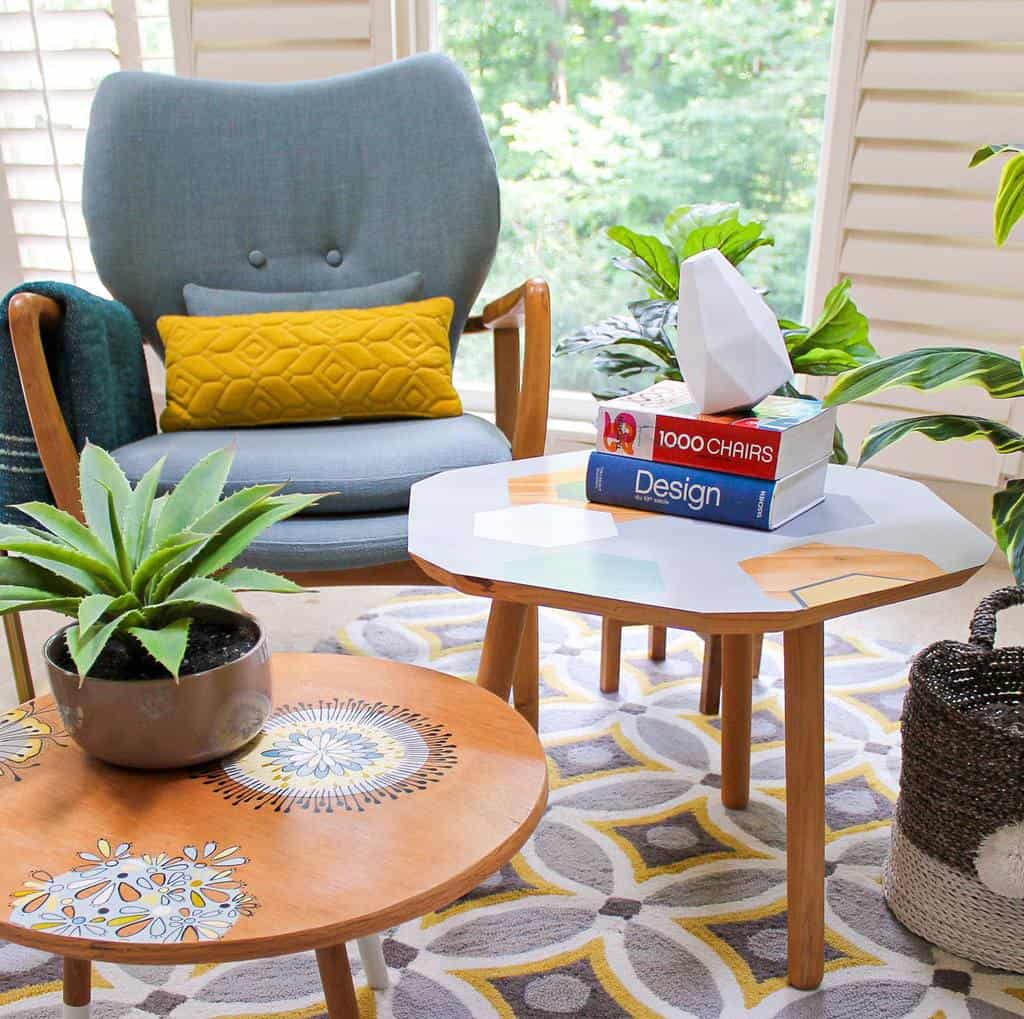
19. Embrace the Unconventional with Freeform Tables
Freeform tables break all the rules with their irregular shapes and lines. They are perfect for adding an artistic, playful touch to any space.
Source: @mauricionavadesign via Instagram
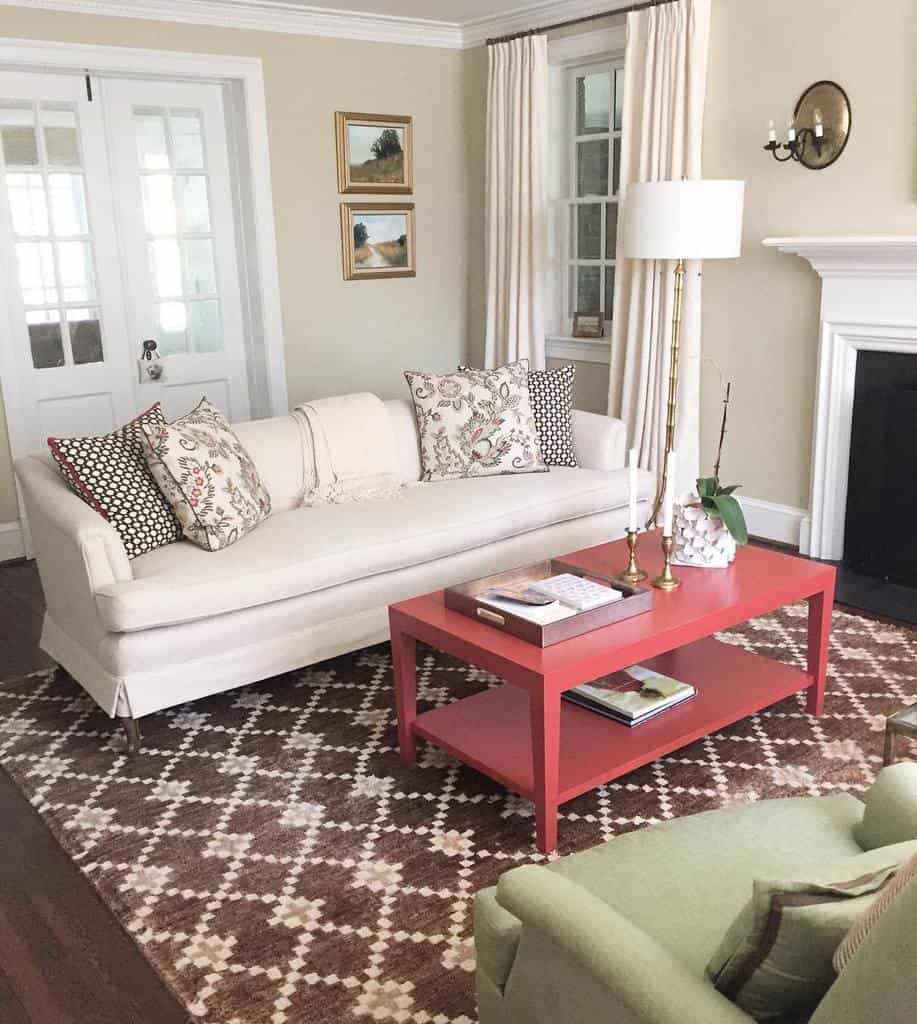
20. Bring Warmth with a Barn Red Table
A barn red table adds a cozy, vibrant energy to your living area. This bold color choice can act as a stunning focal point, especially in neutral or earth-toned settings.
Source: @madiganschuler via Instagram
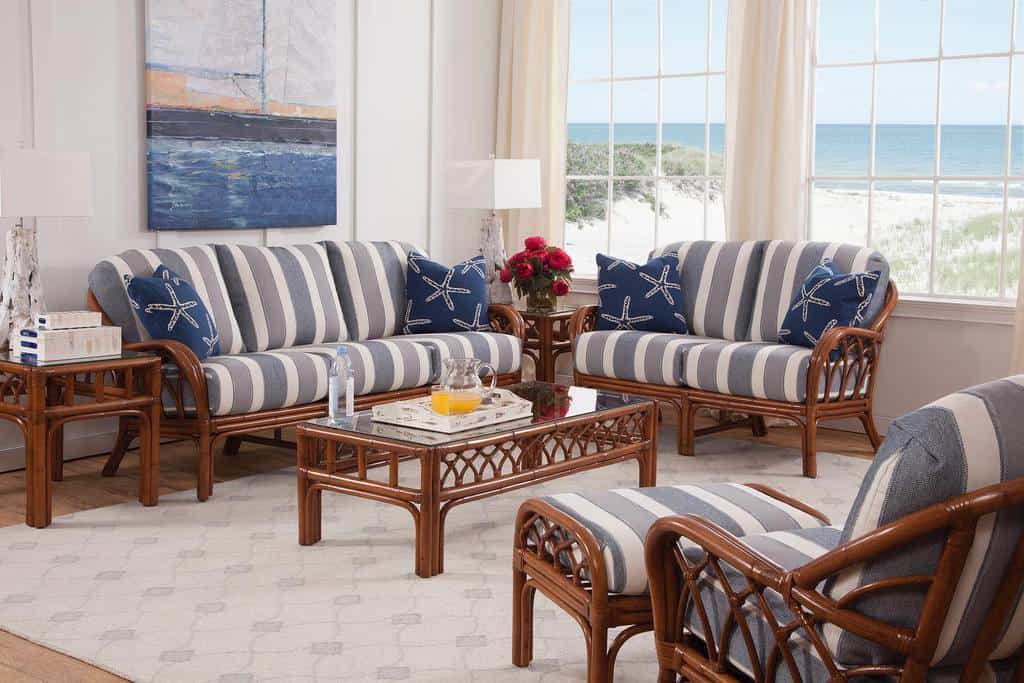
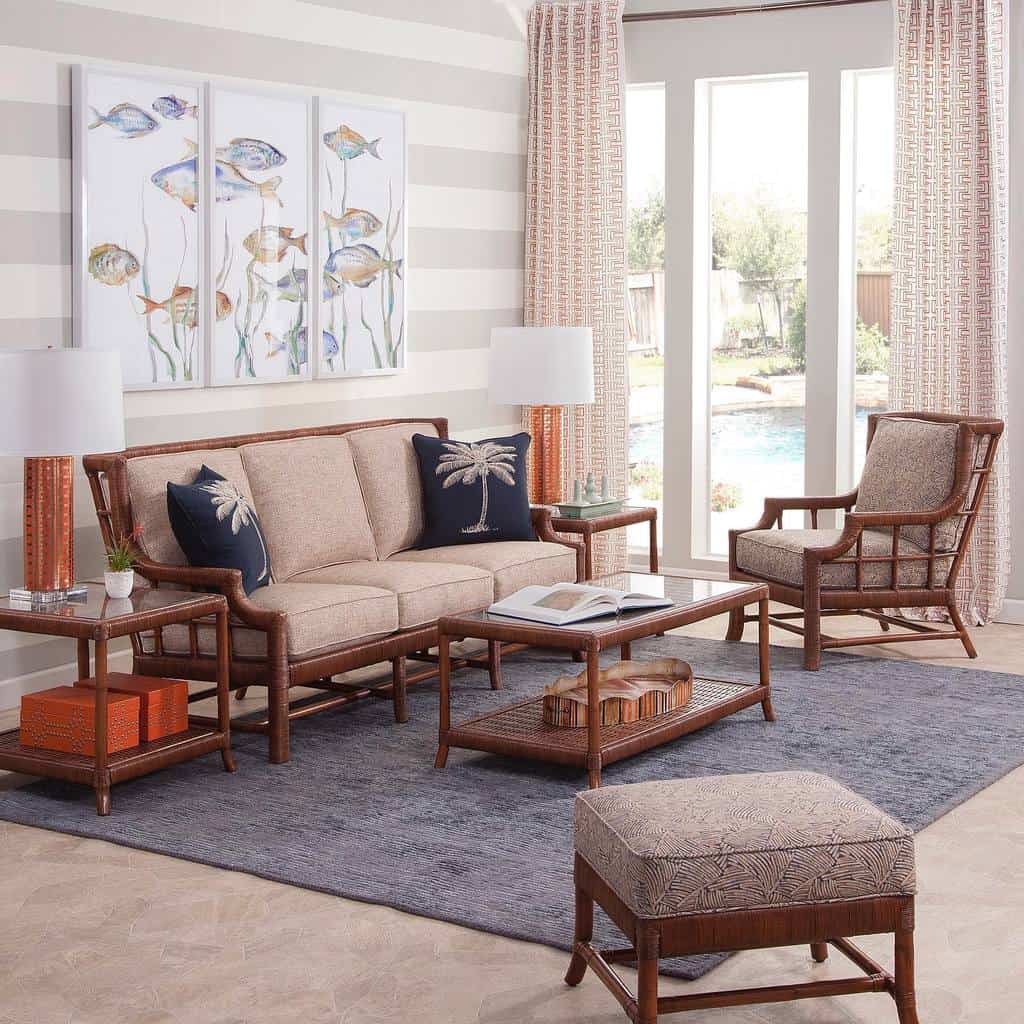
21. Rattan Tables: Boho Meets Elegant
Rattan tables blend bohemian charm with refined elegance. Their lightweight yet sturdy construction makes them both practical and stylish for both indoor and outdoor decor.
Source: @braxtonculler via InstagramSource: @alexelliselvispelvis via InstagramSource: @braxtonculler via InstagramSource: @sleekandbulky via InstagramSource: @paulcorrieinteriors via InstagramSource: @lavenders_on_my_mind via Instagram
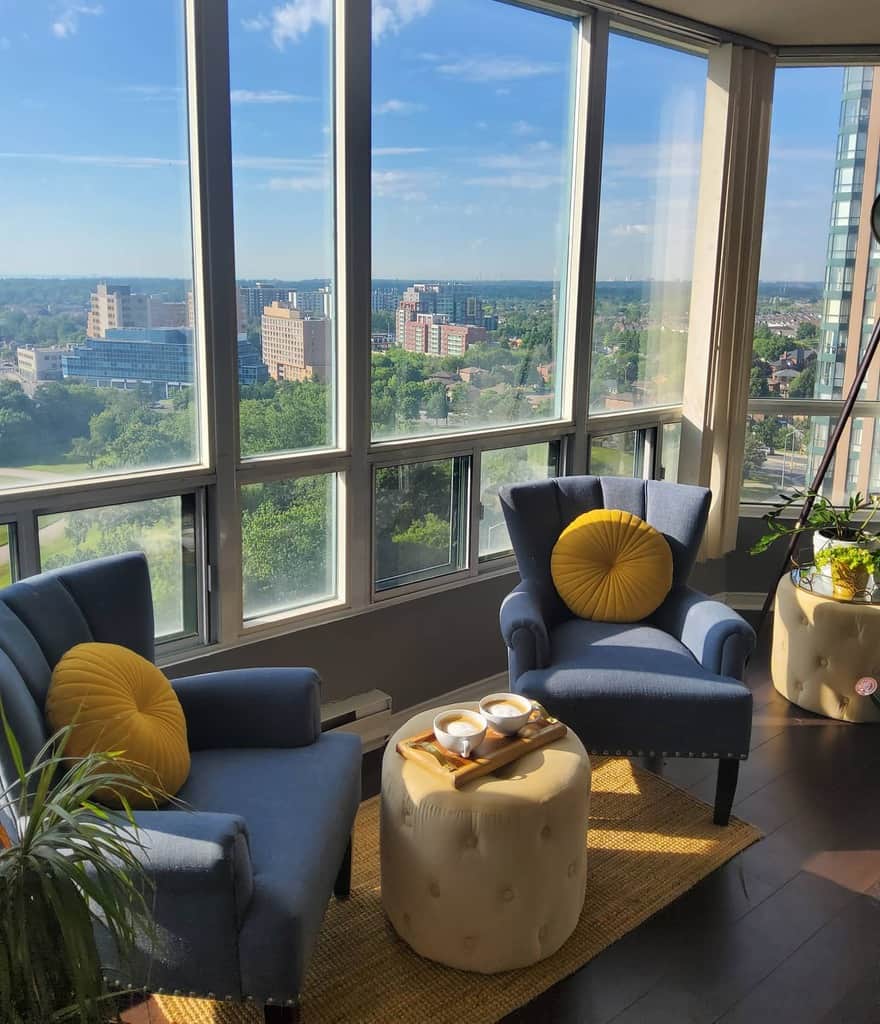
22. Dual-Purpose Design: Stool Tables
Stool tables offer a clever, space-saving solution. Use them as extra seating when guests are over, or as a unique, multifunctional coffee table in your daily life.
Source: @sunnysideupillustrations via InstagramSource: @stacysellsga via InstagramSource: @paulcorrieinteriors via InstagramSource: @stevensdesignstudios via Instagram
23. Express Yourself with a Printed Table
Printed tables are a fun way to express your personal style. Choose from intricate patterns or bold graphics to make a statement in your living space.
Source: @fa_interior_design_ via Instagram
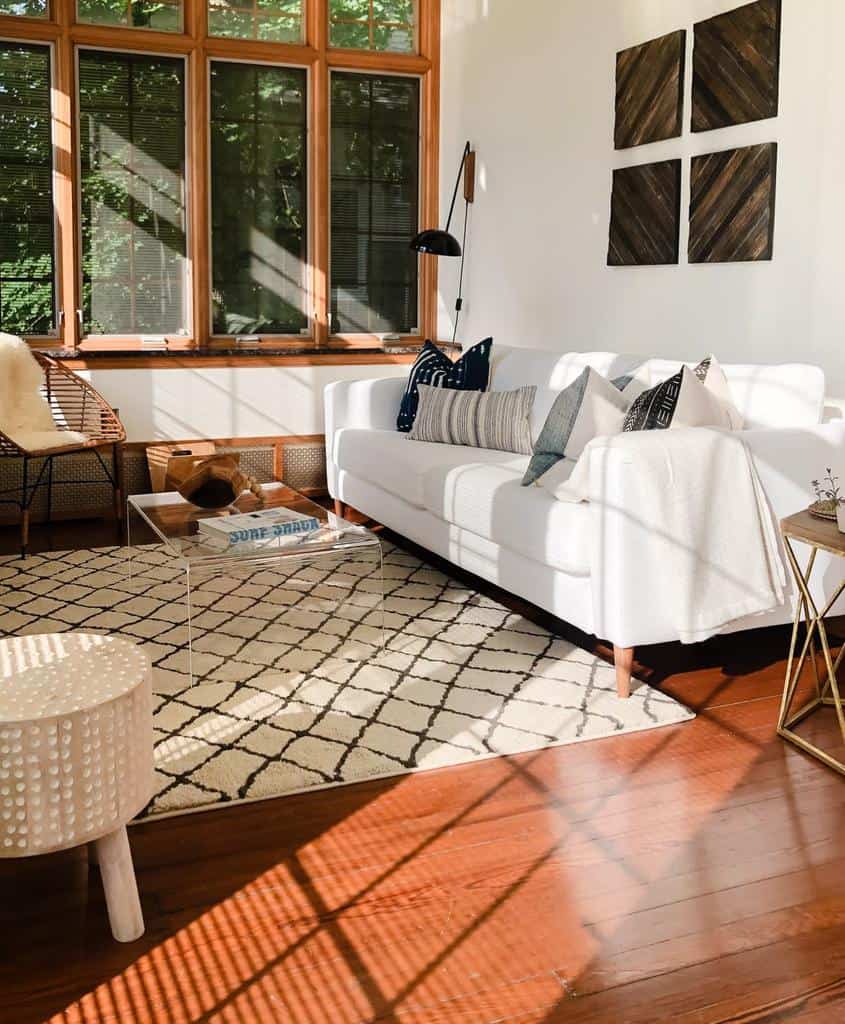
24. Transparent Acrylic Coffee Table
Acrylic tables add a futuristic touch with their sleek, transparent design. They’re perfect for minimalist interiors, giving the illusion of more space while offering functionality.
Source: @sharpandgrey via Instagram
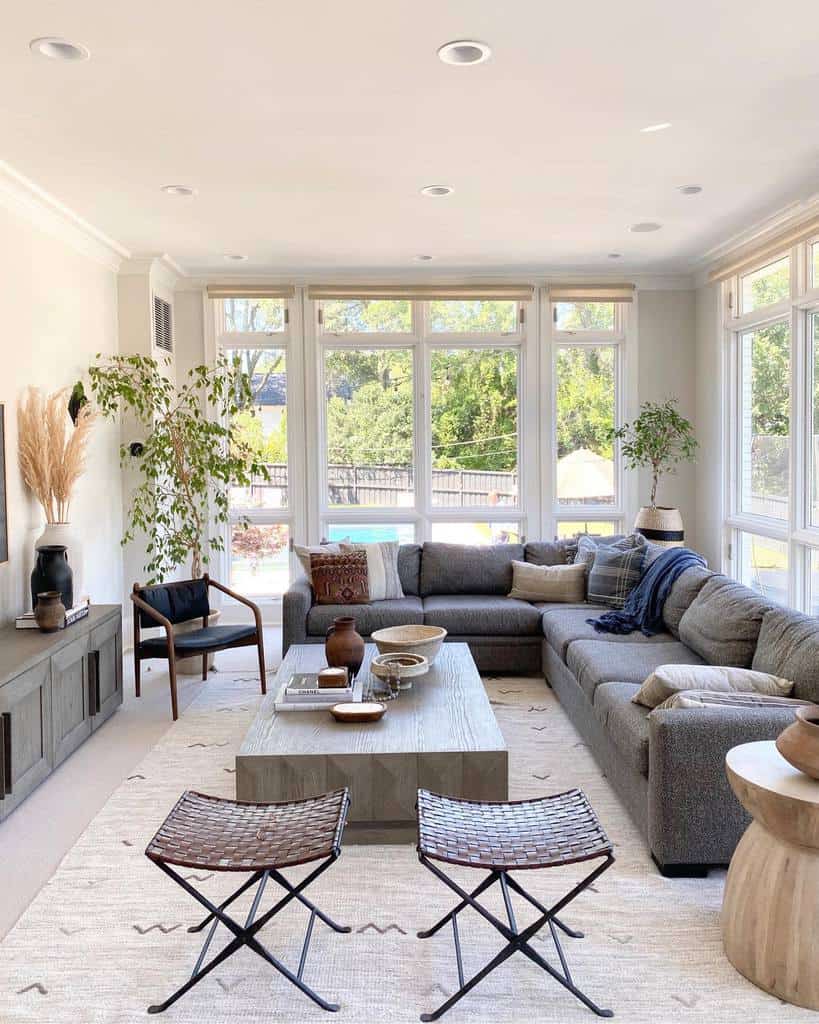
25. Keep it Low: Stylish Low Tables
Low tables create a laid-back, Zen-like atmosphere in your living area. They’re great for low-seating arrangements and add a modern, casual feel to your space.
Source: @liberty.interiors via InstagramSource: @reems_design via InstagramSource: @kuia_sewingcraft via Instagram
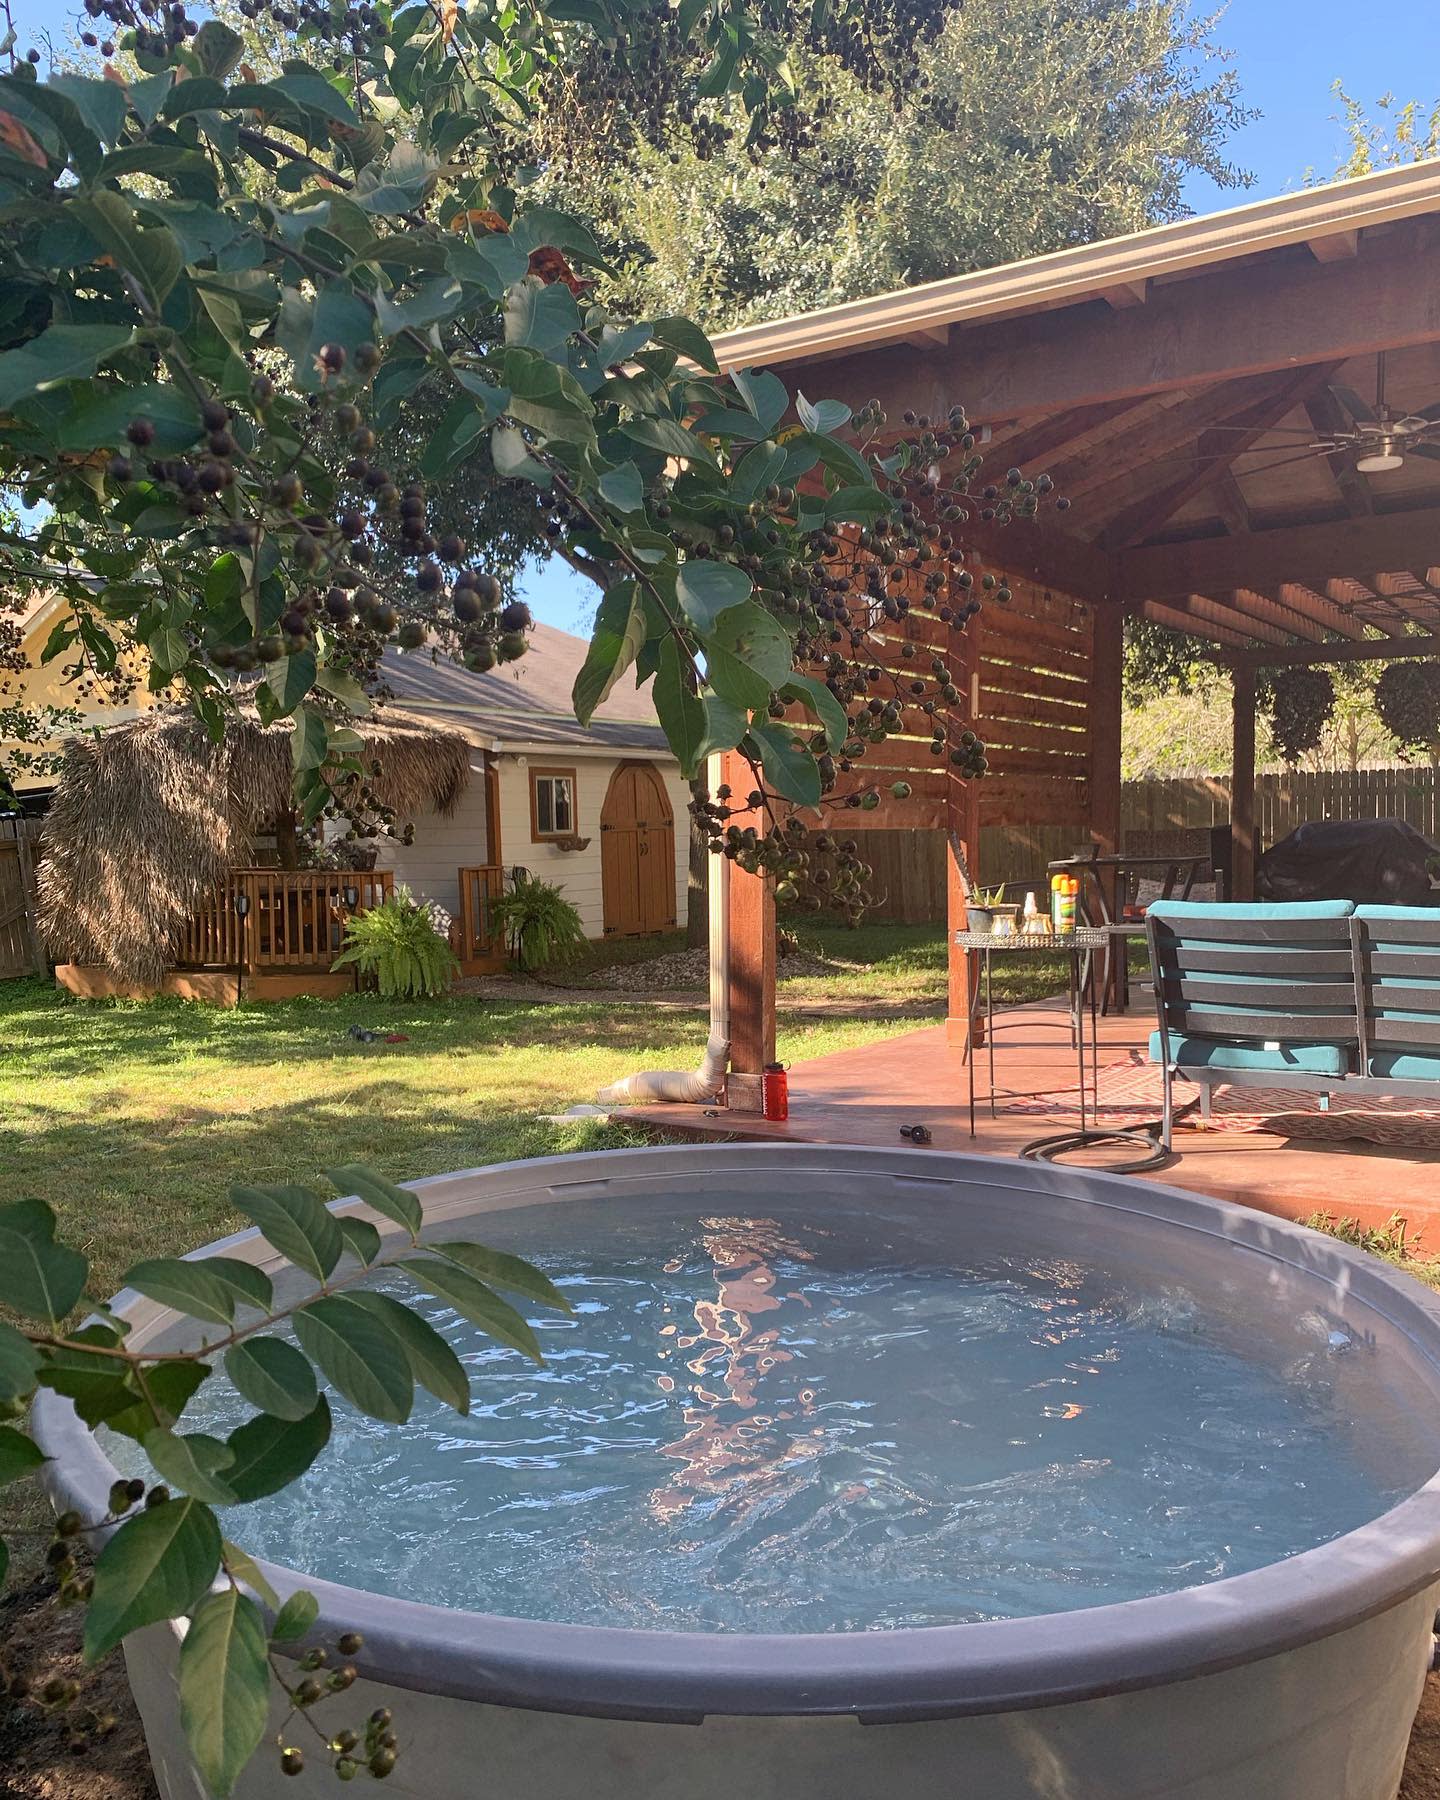
If you long for a backyard swimming pool, but lack the space or the budget, a stock tank pool might be for you.
Stock tanks have long served a functional purpose on farms, holding animal feed and water. Made from galvanized metal or plastic, they have become an affordable small pool alternative.
Although a DIY stock tank pool is only about two feet deep, it’s sufficient to cool you down on hot summer days.
Look through our favorite stock tank pool ideas then decide which corner of your yard is perfect for creating this little backyard oasis.
[view_toc]
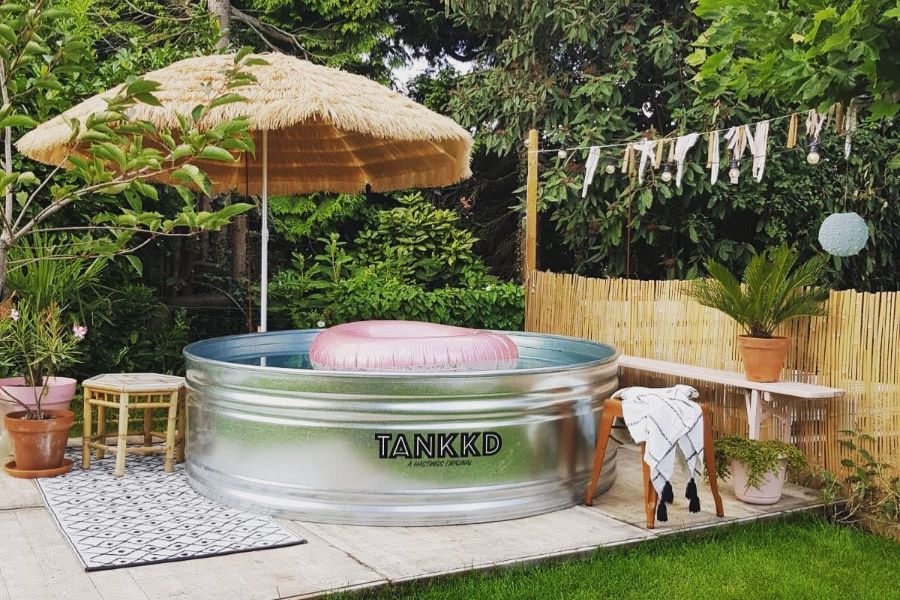
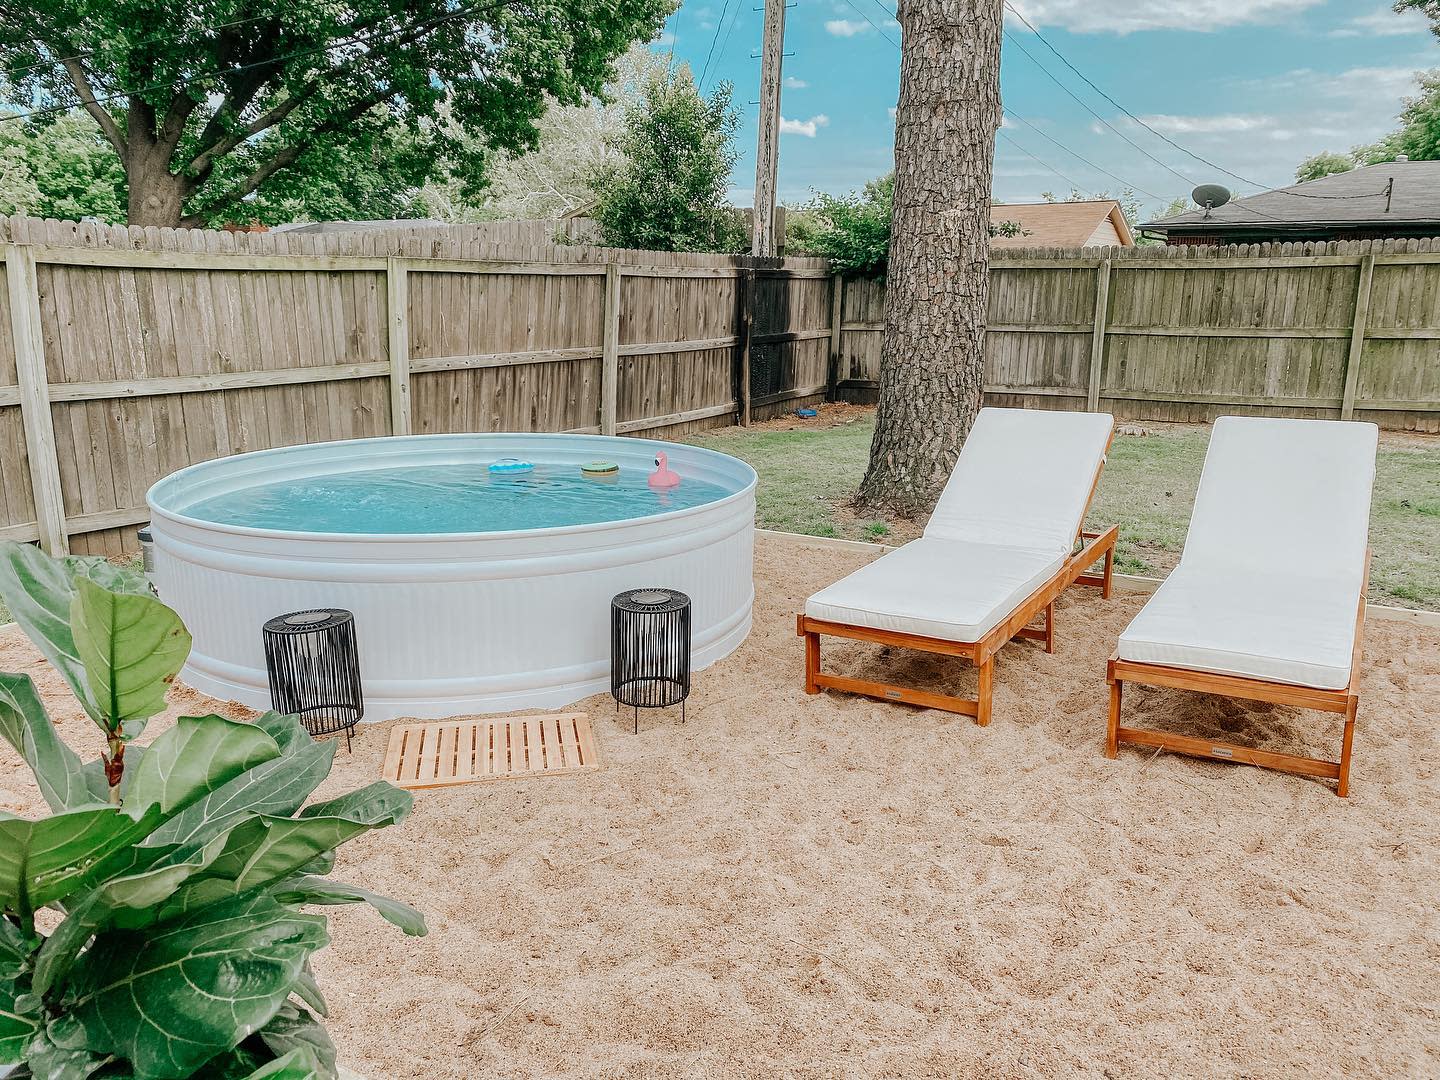
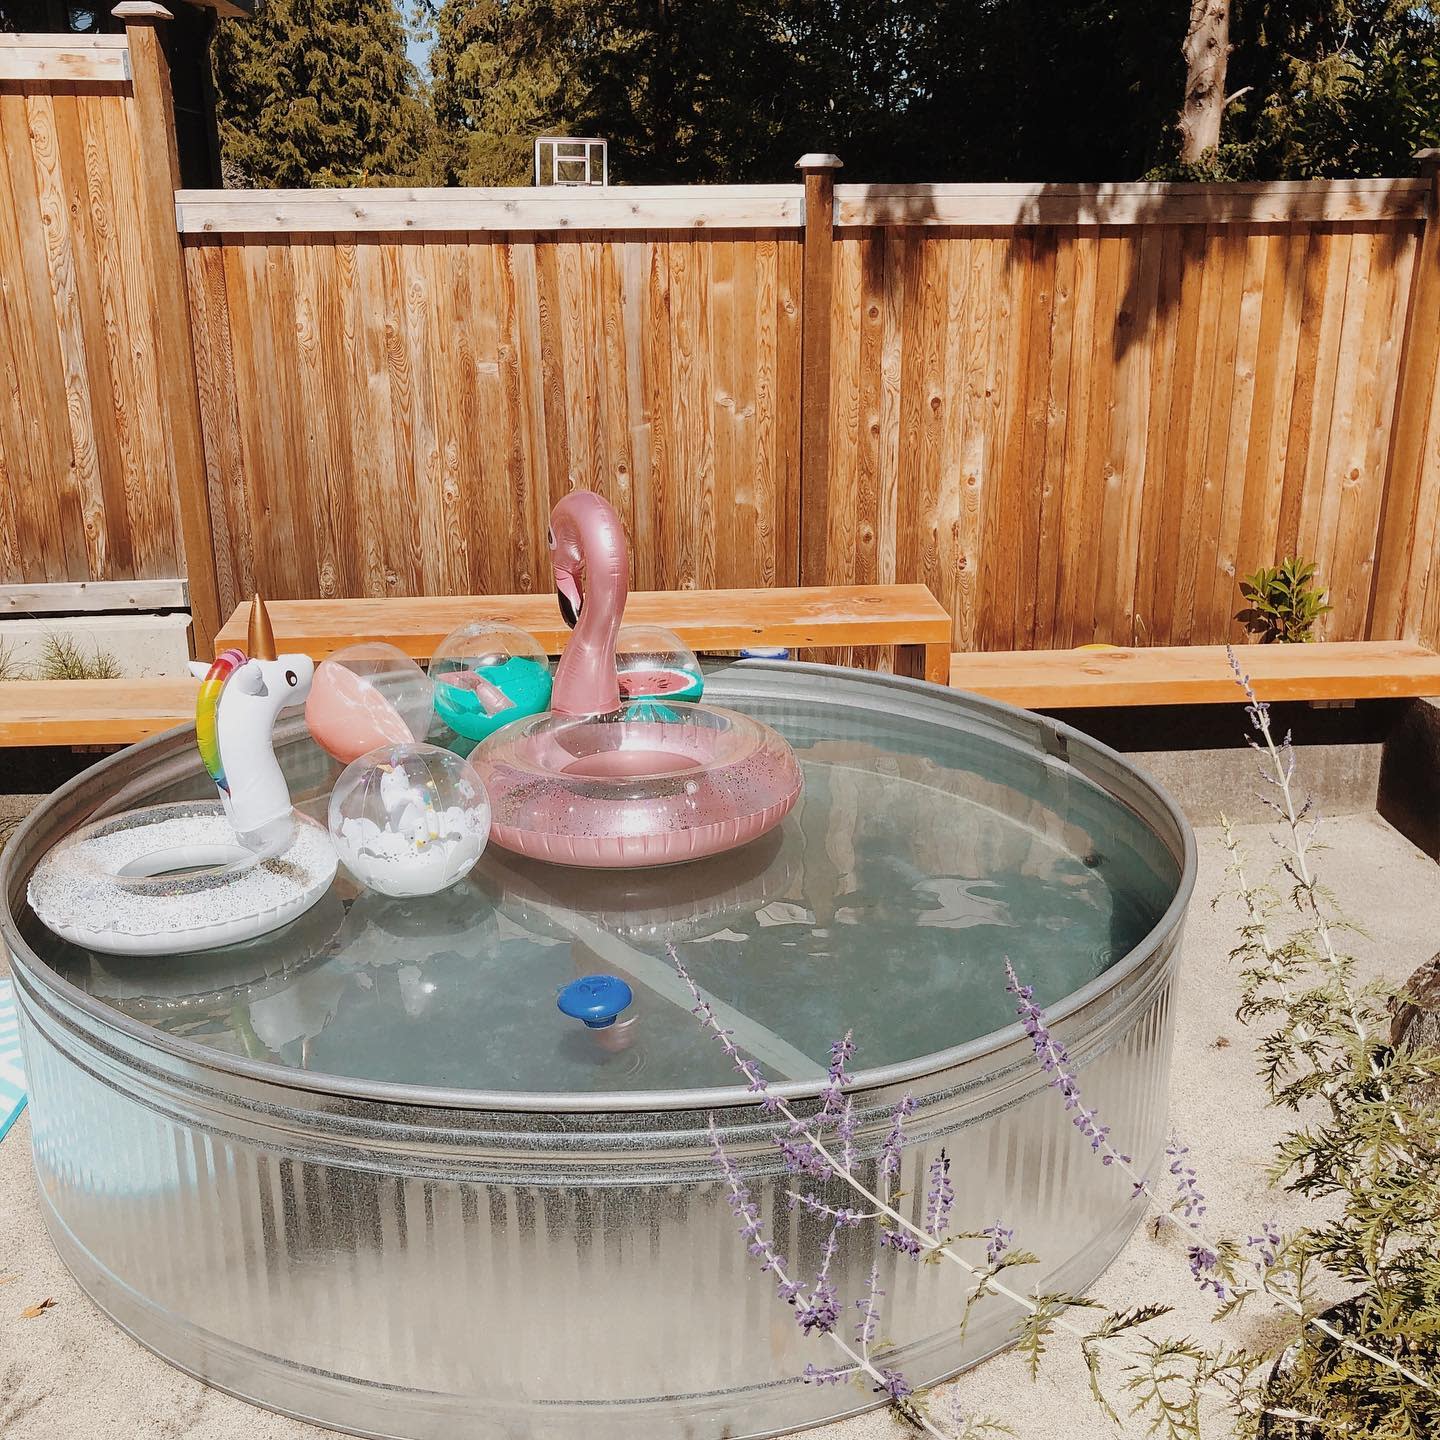
1. Set Up a Sand Landscape Around the Stock Tank
Creating a sand landscape around your stock tank pool can enhance its aesthetic appeal and give it a beach-like feel. Spread a layer of fine, clean sand evenly around the pool’s perimeter, ensuring it’s level and compacted for stability and ease of movement. This setup not only adds a visual charm but also provides a soft, comfortable surface for bare feet, mimicking a natural beachfront right in your backyard.
Source: @casadegitano via Instagram
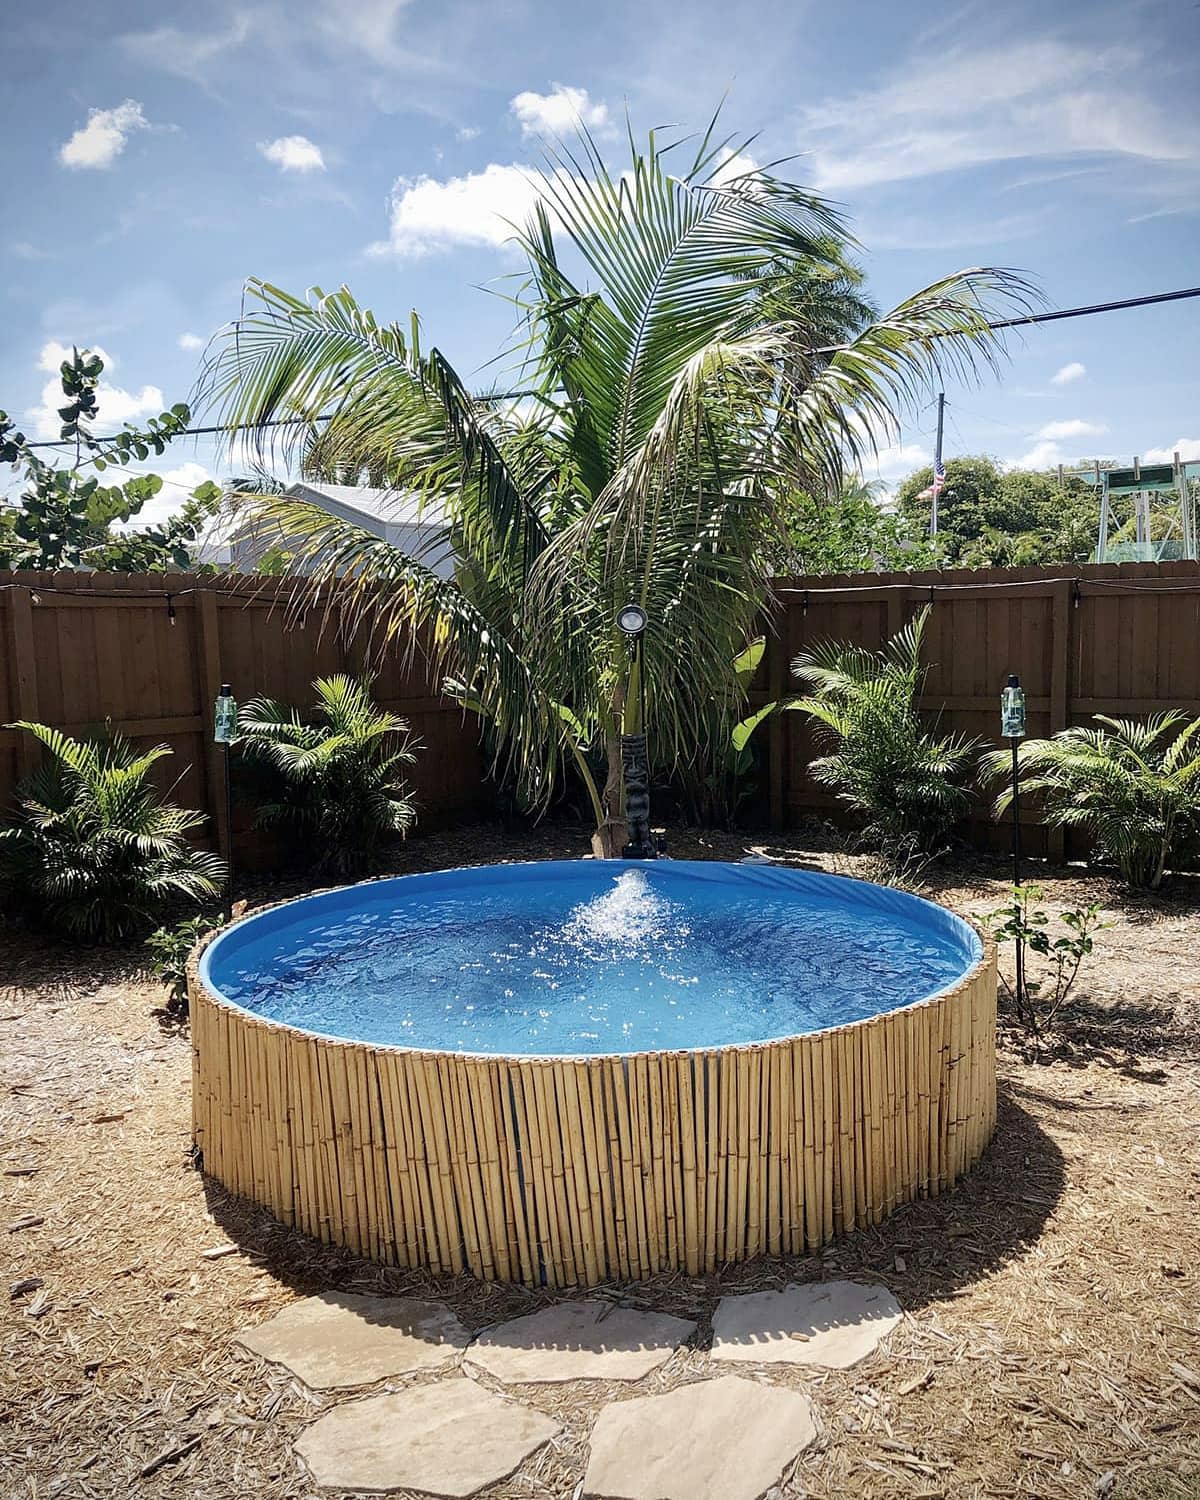
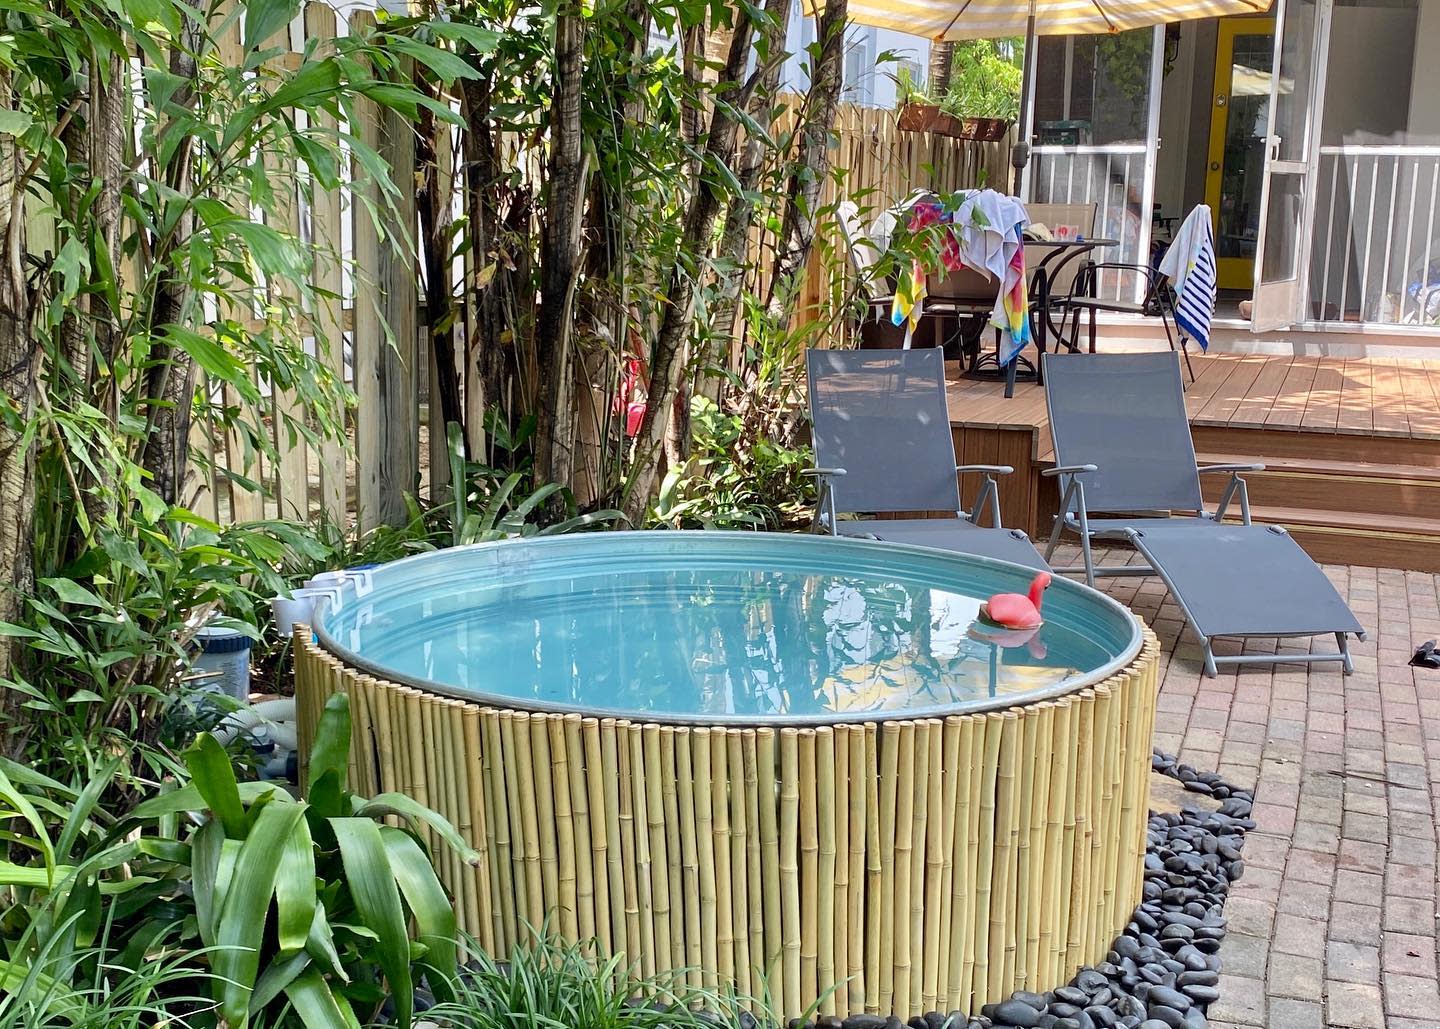
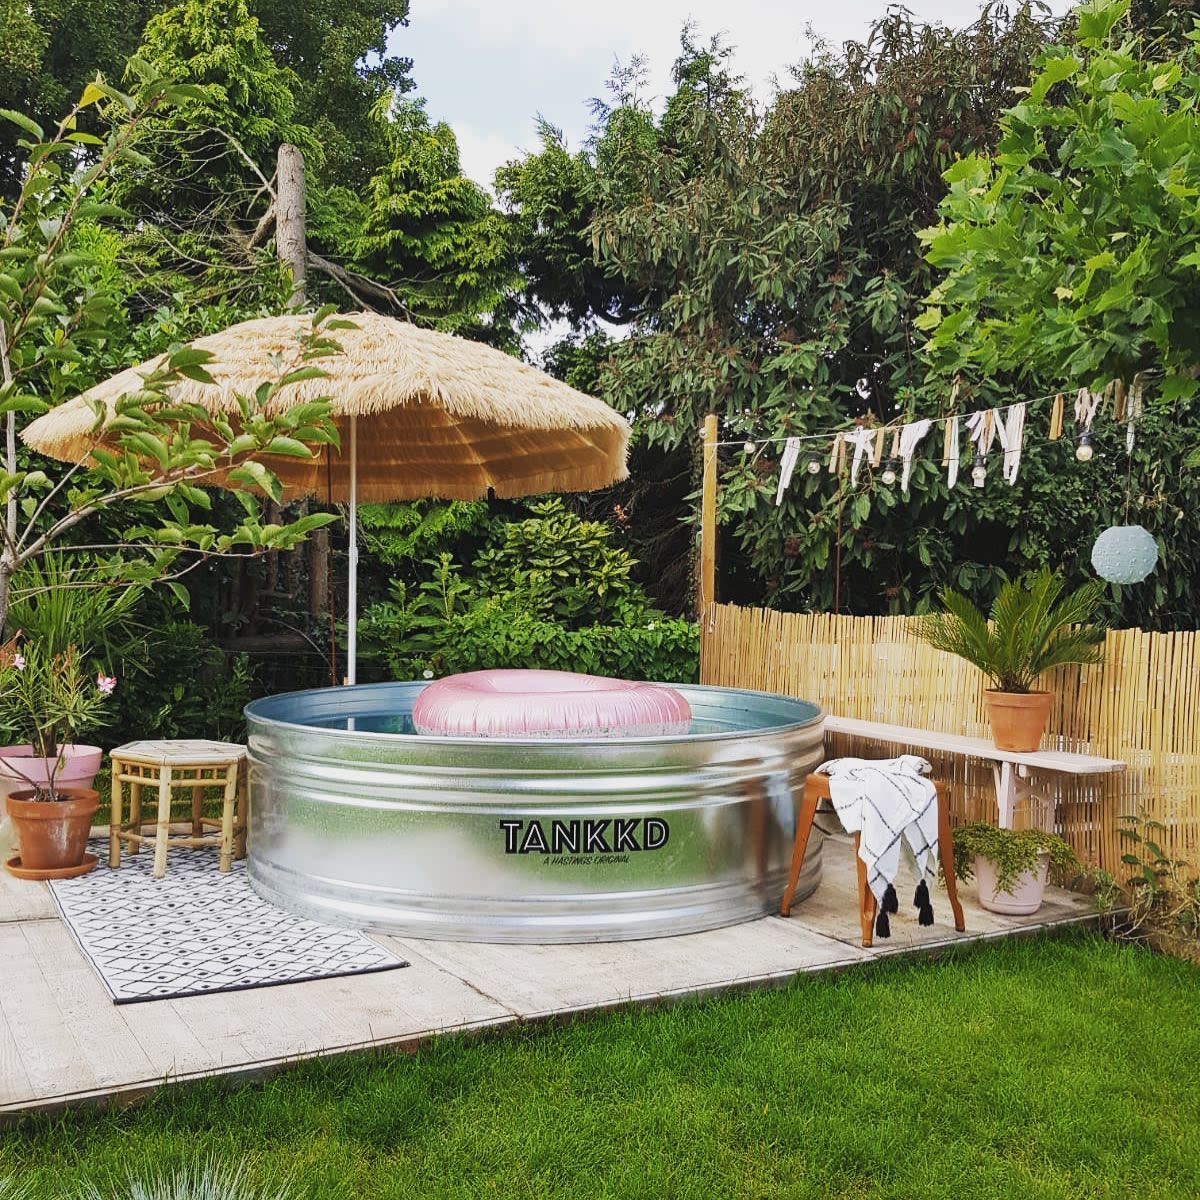
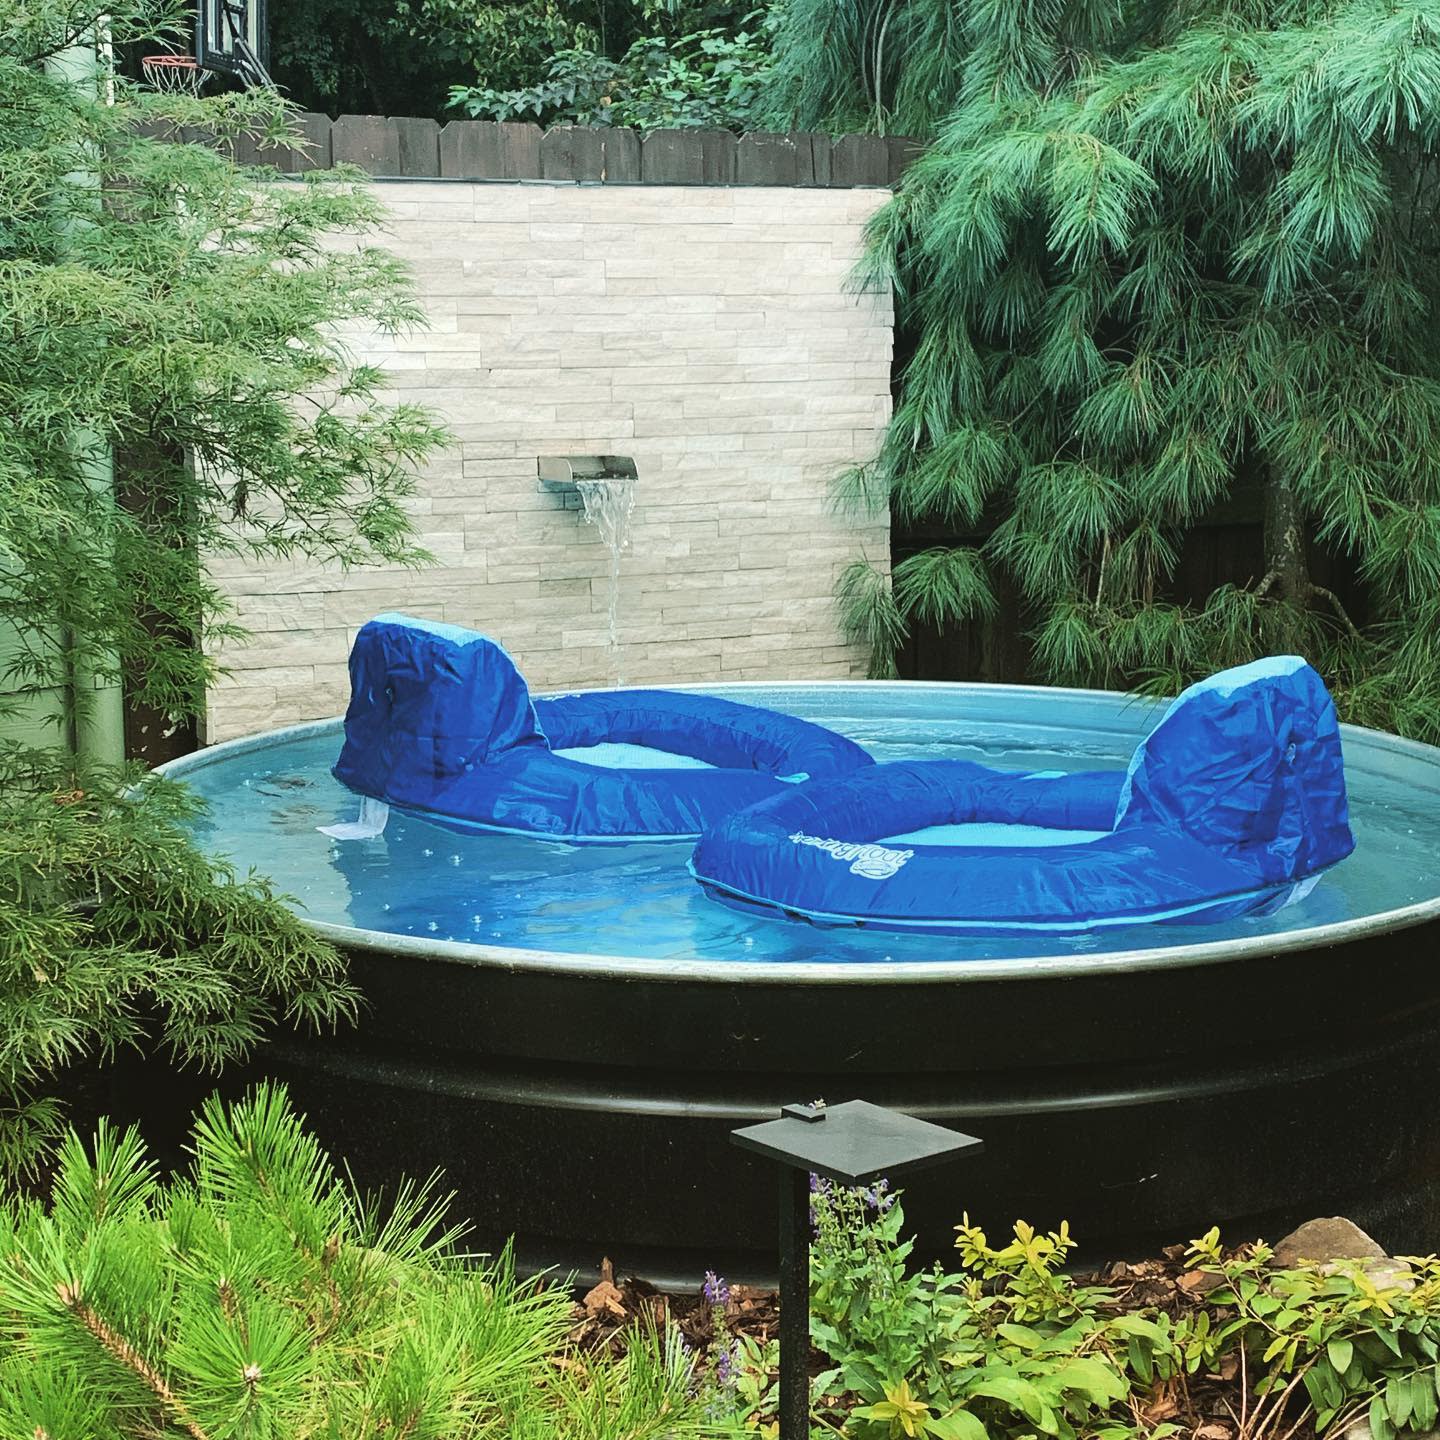
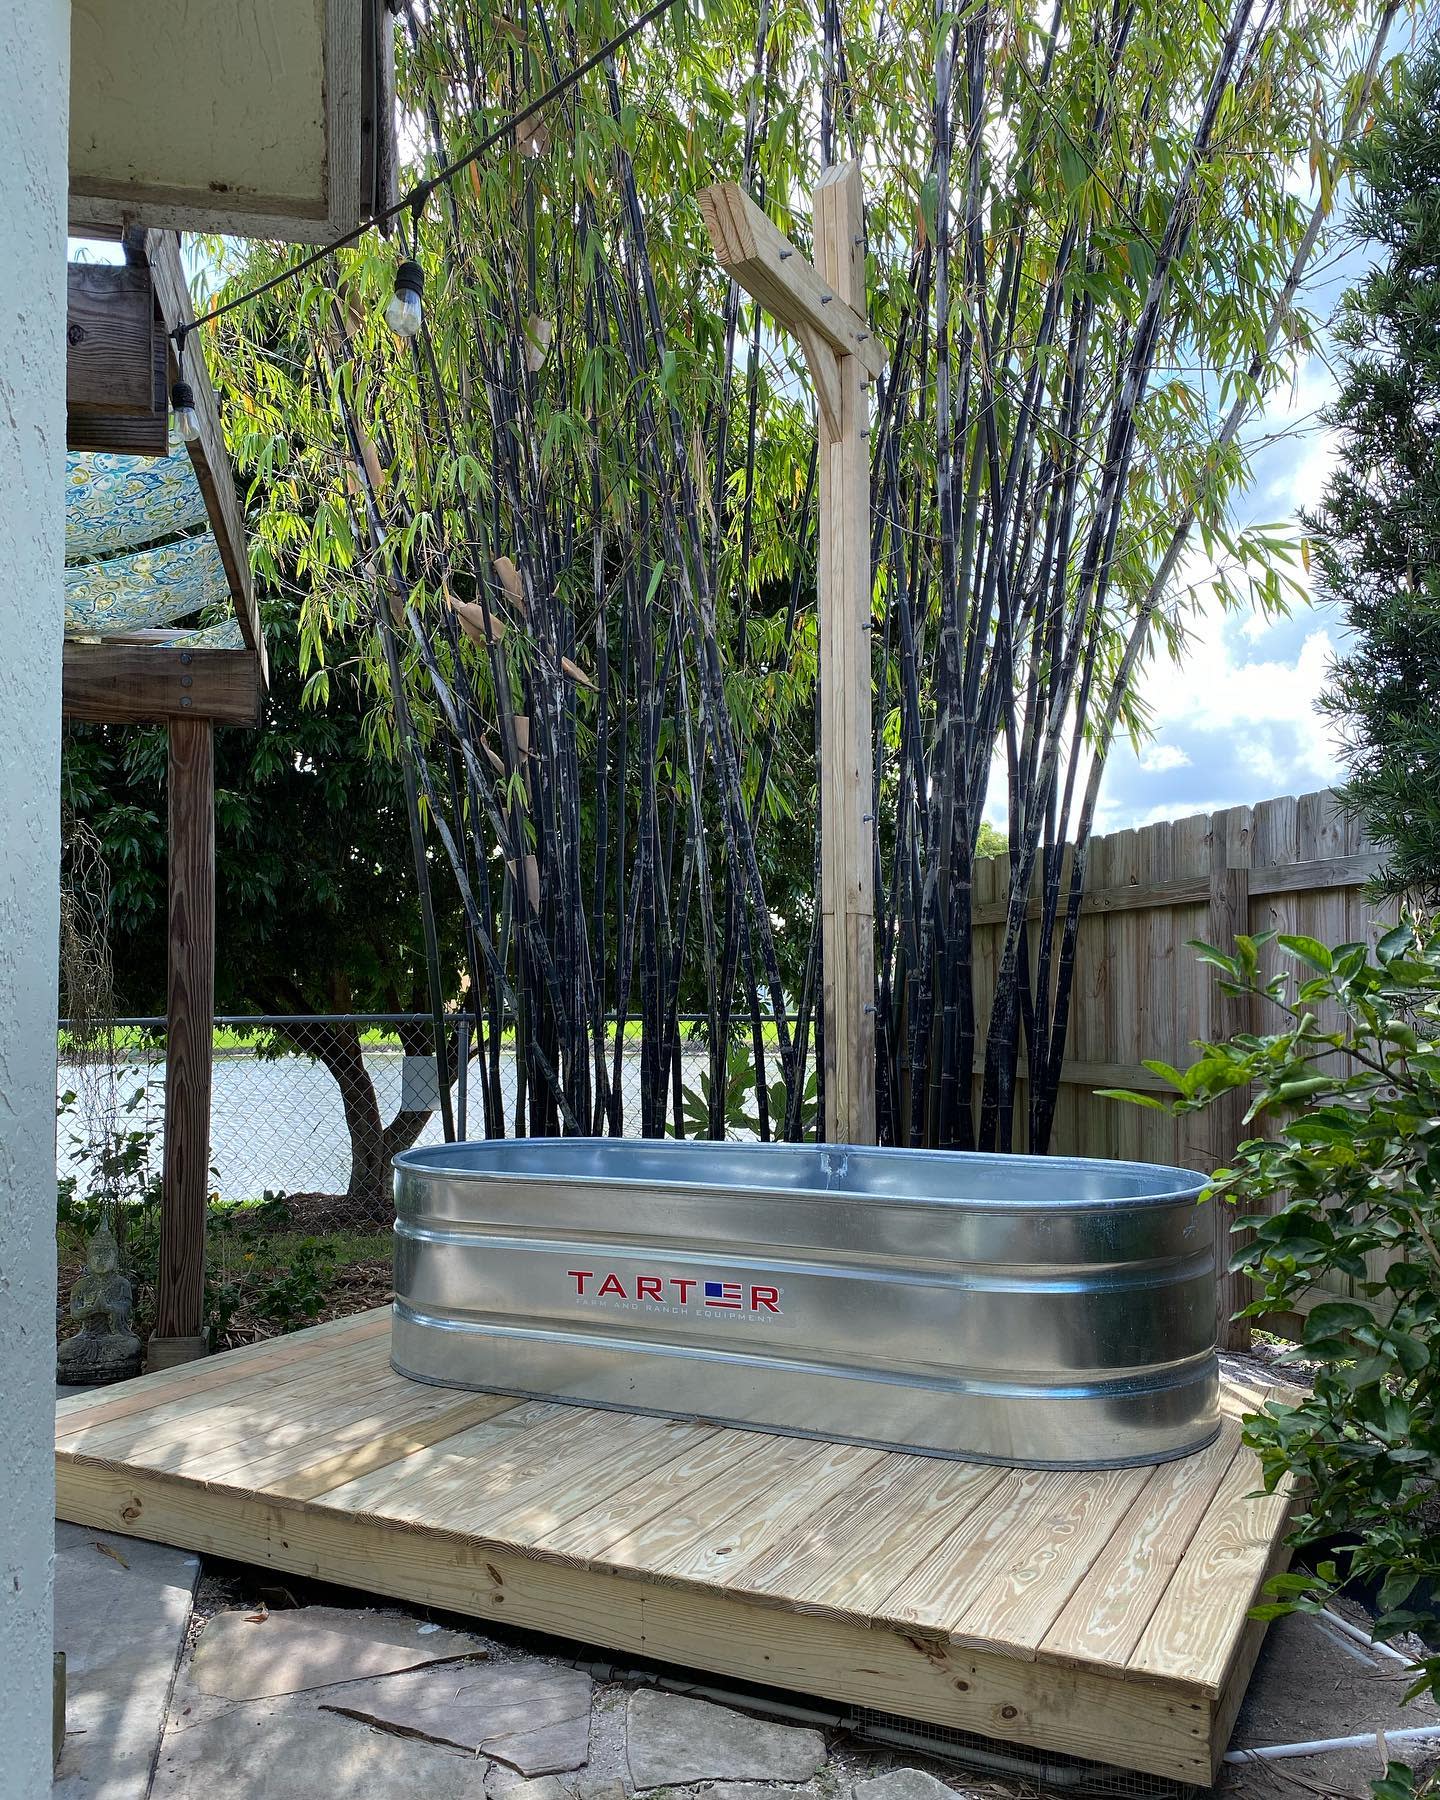
2. Cover With Bamboo Poles
Covering your stock tank pool with bamboo poles is an excellent way to add a tropical flair and provide shade. Arrange the bamboo poles in a crisscross pattern over the pool, securing them firmly in place. This not only protects from direct sunlight, making the pool area cooler and more enjoyable, but also adds an exotic touch to your outdoor space, creating a serene and inviting oasis for relaxation and entertainment.
Source: @jgannlandscapes via InstagramSource: @willyvolk via Instagram
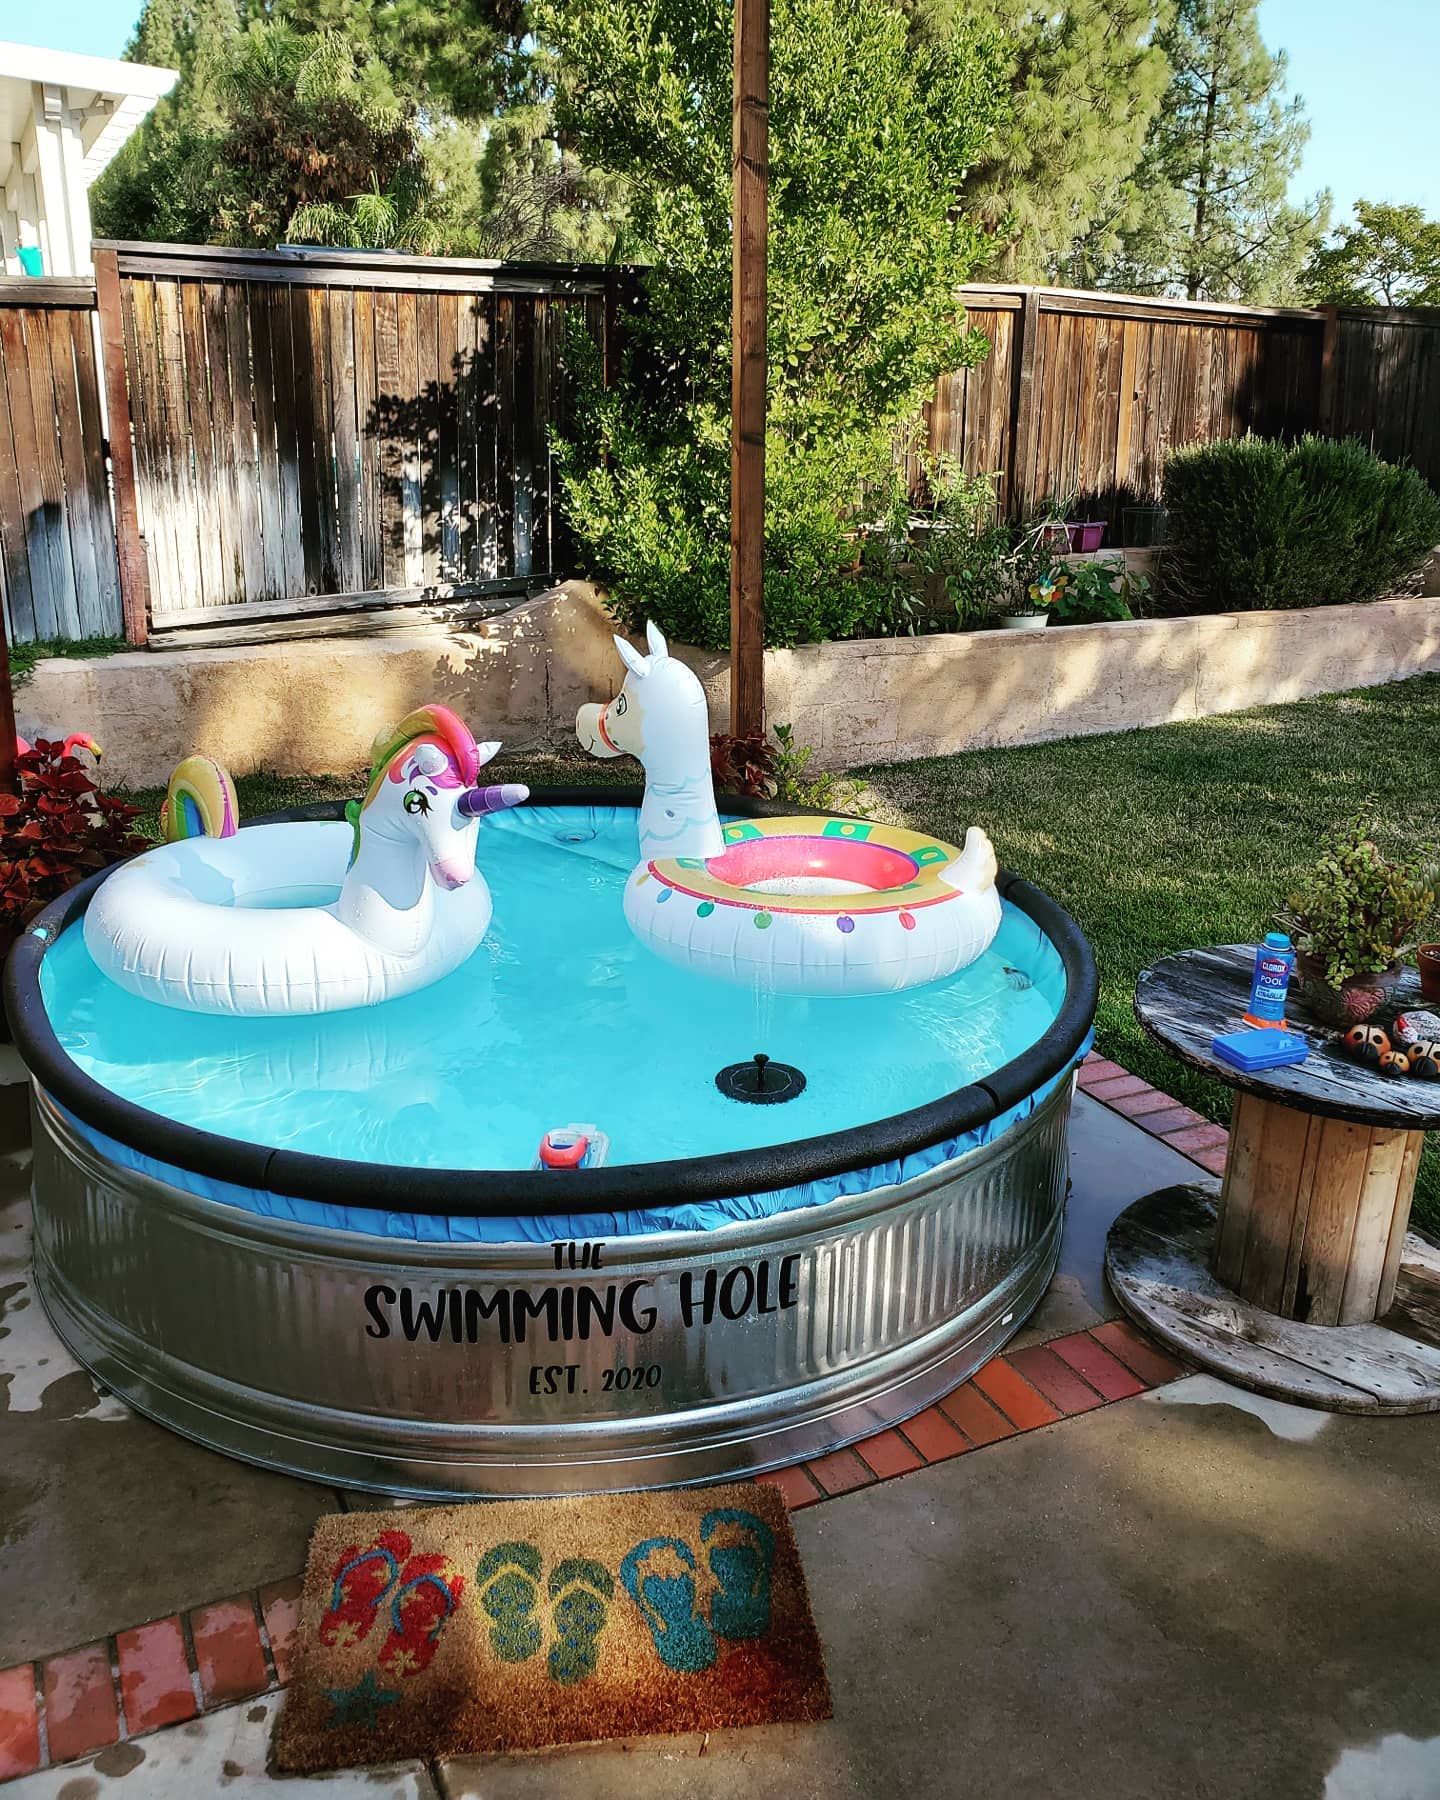
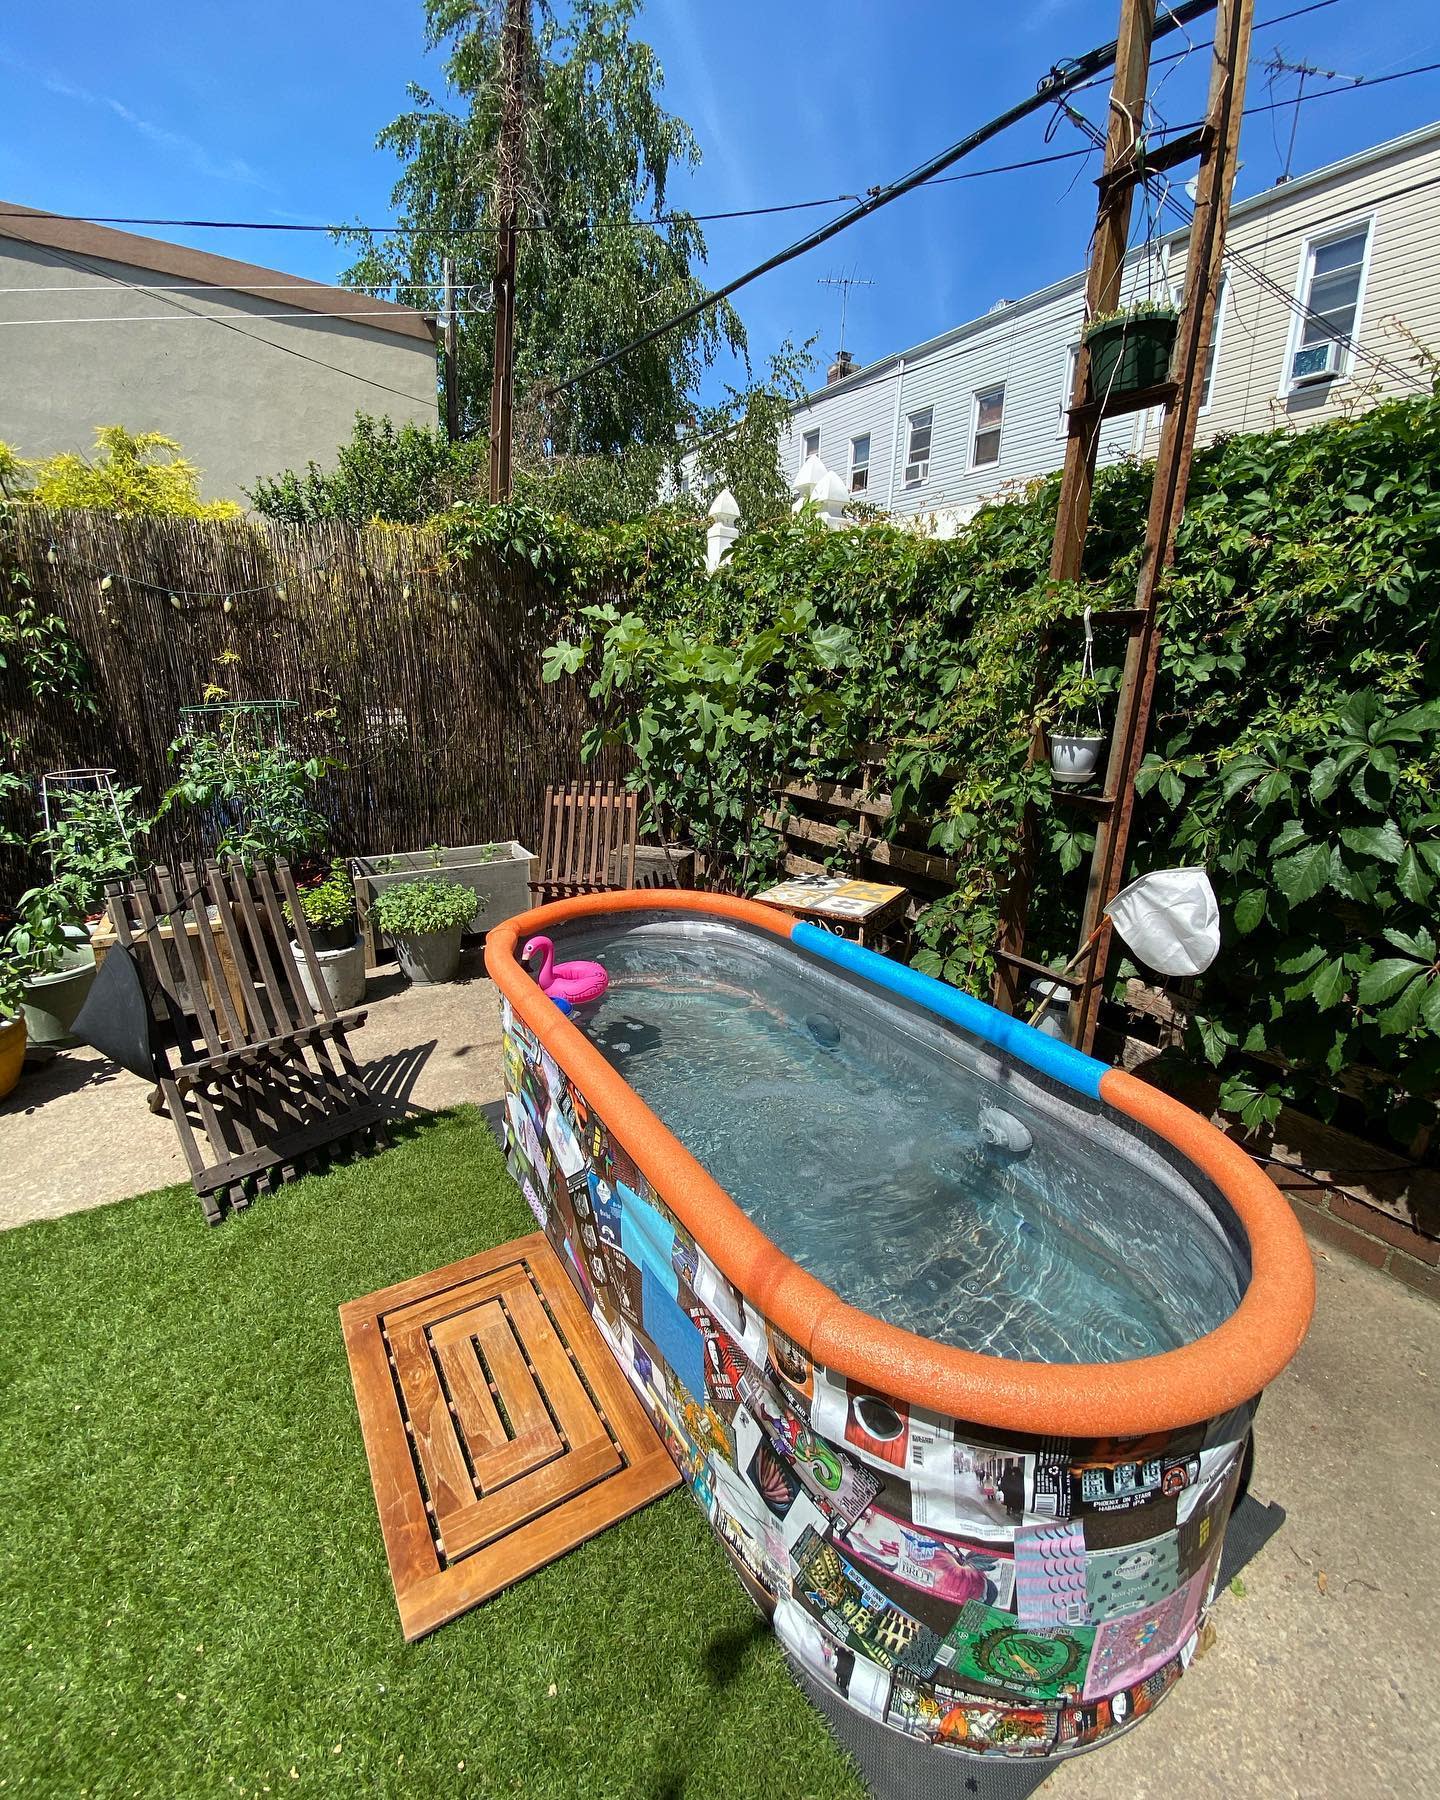
3. Kid-ify With Pool Noodles
Transforming your stock tank pool into a kid-friendly zone with pool noodles is both simple and effective. Cut colorful pool noodles in half and attach them around the edges of the tank to serve as soft bumpers, preventing injuries and making it safer for children. Additionally, you can float a few noodles in the water for extra fun and buoyancy, turning the pool into a delightful play area that is both safe and engaging for younger swimmers.
Source: @sarahjan73 via InstagramSource: @modern.thrifter via InstagramSource: @scentgalmeag via InstagramSource: @stephaniewithajd via Instagram
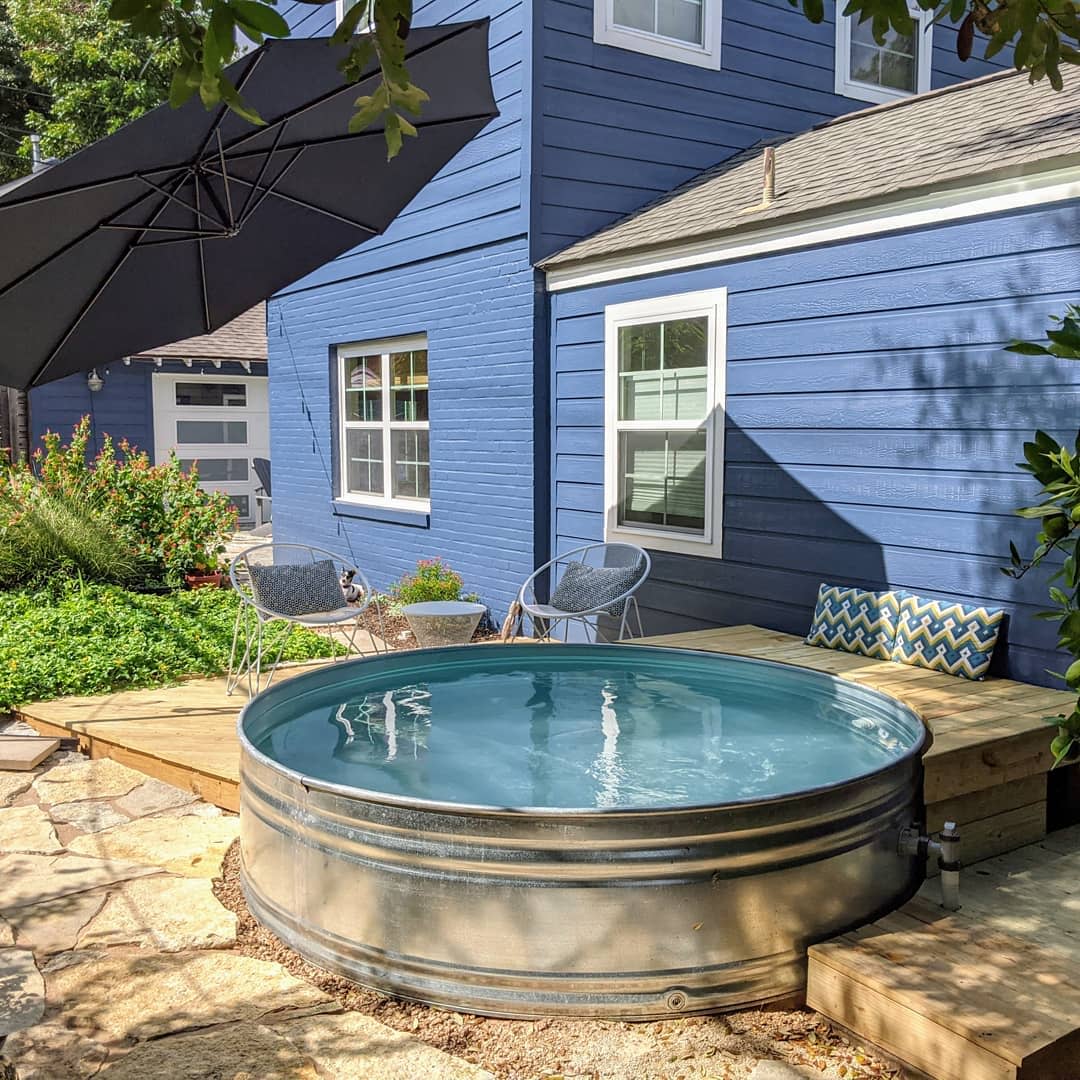
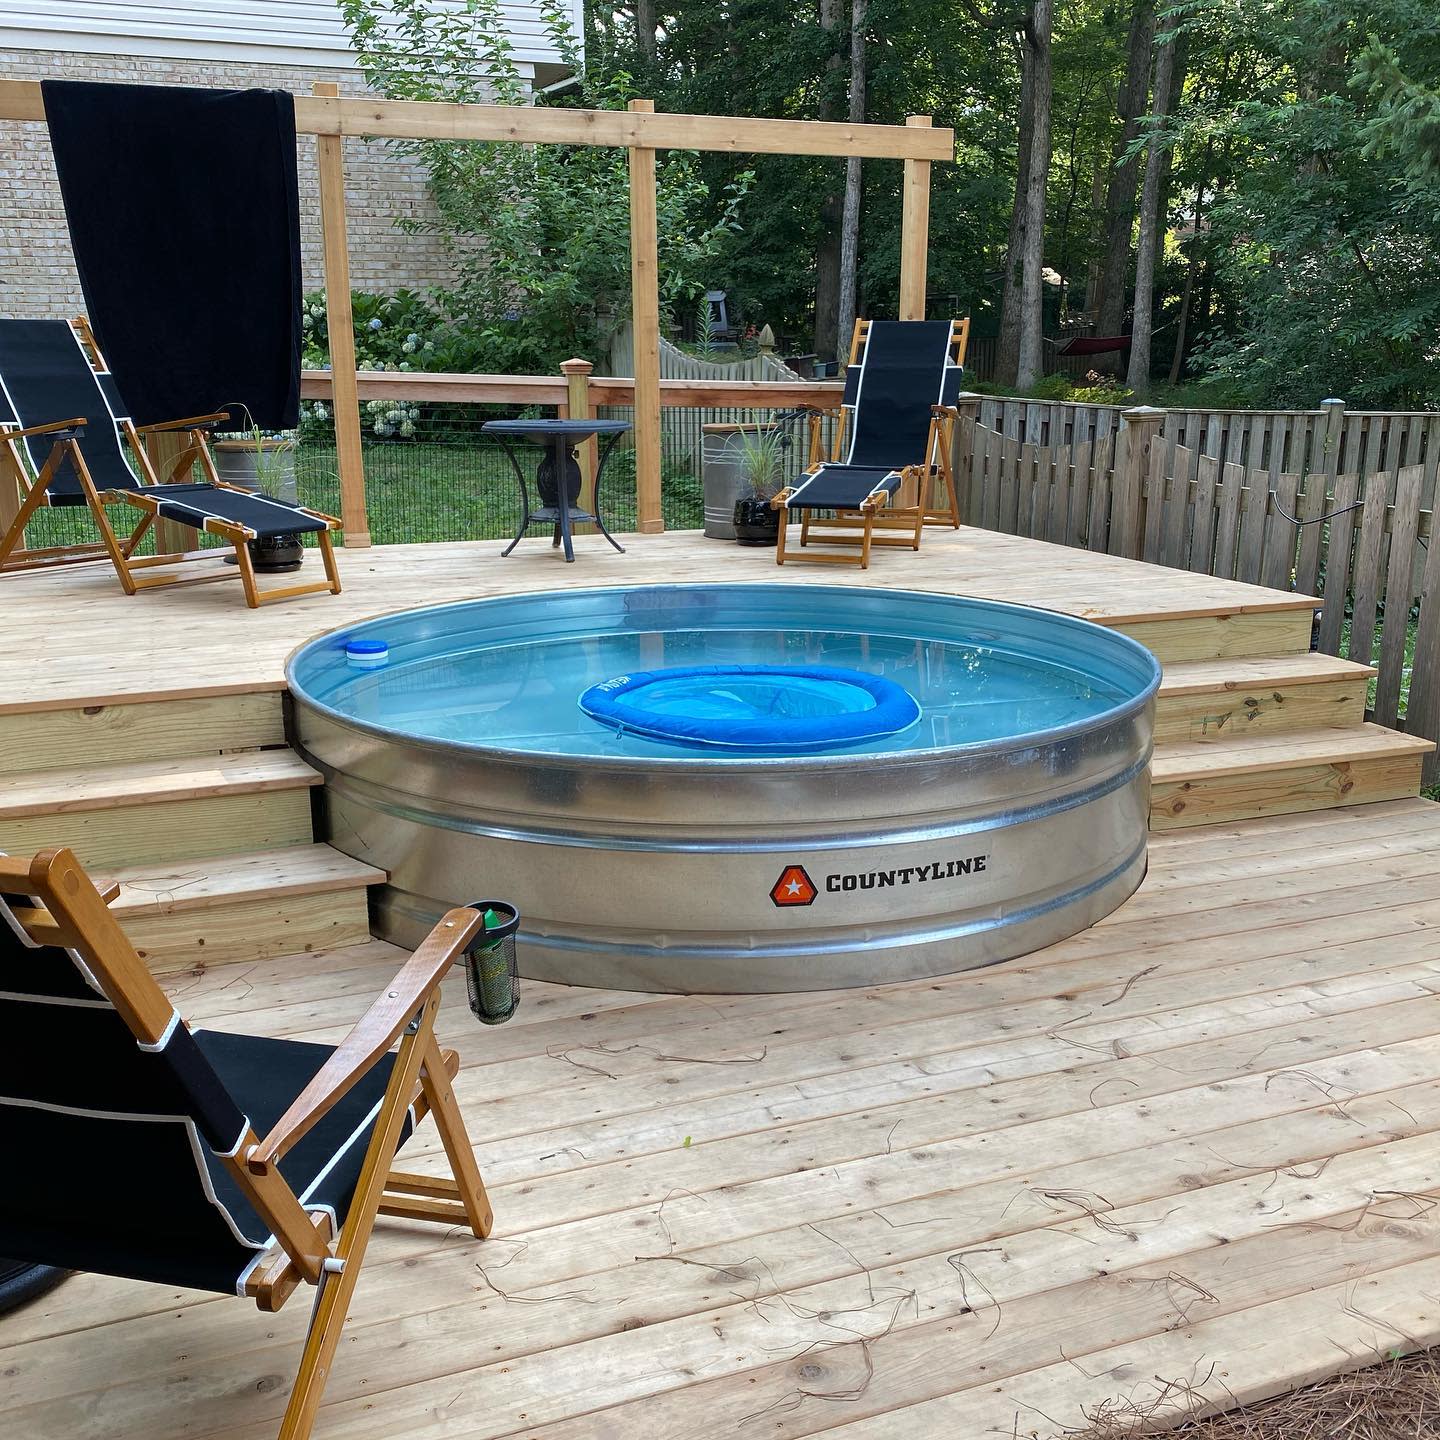
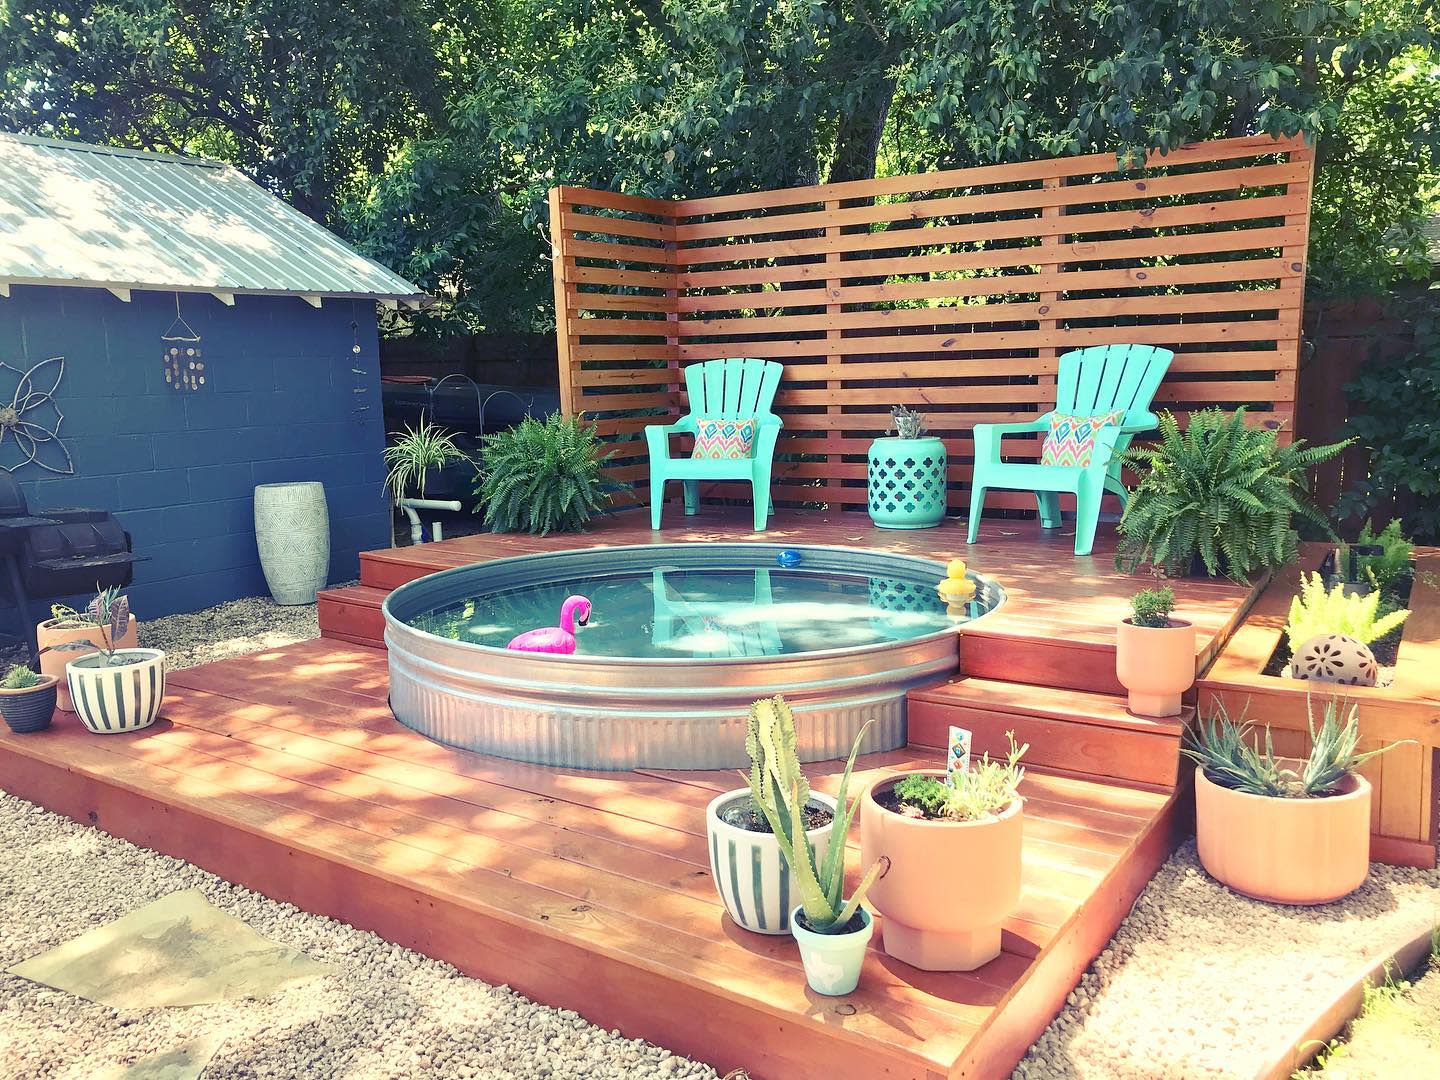
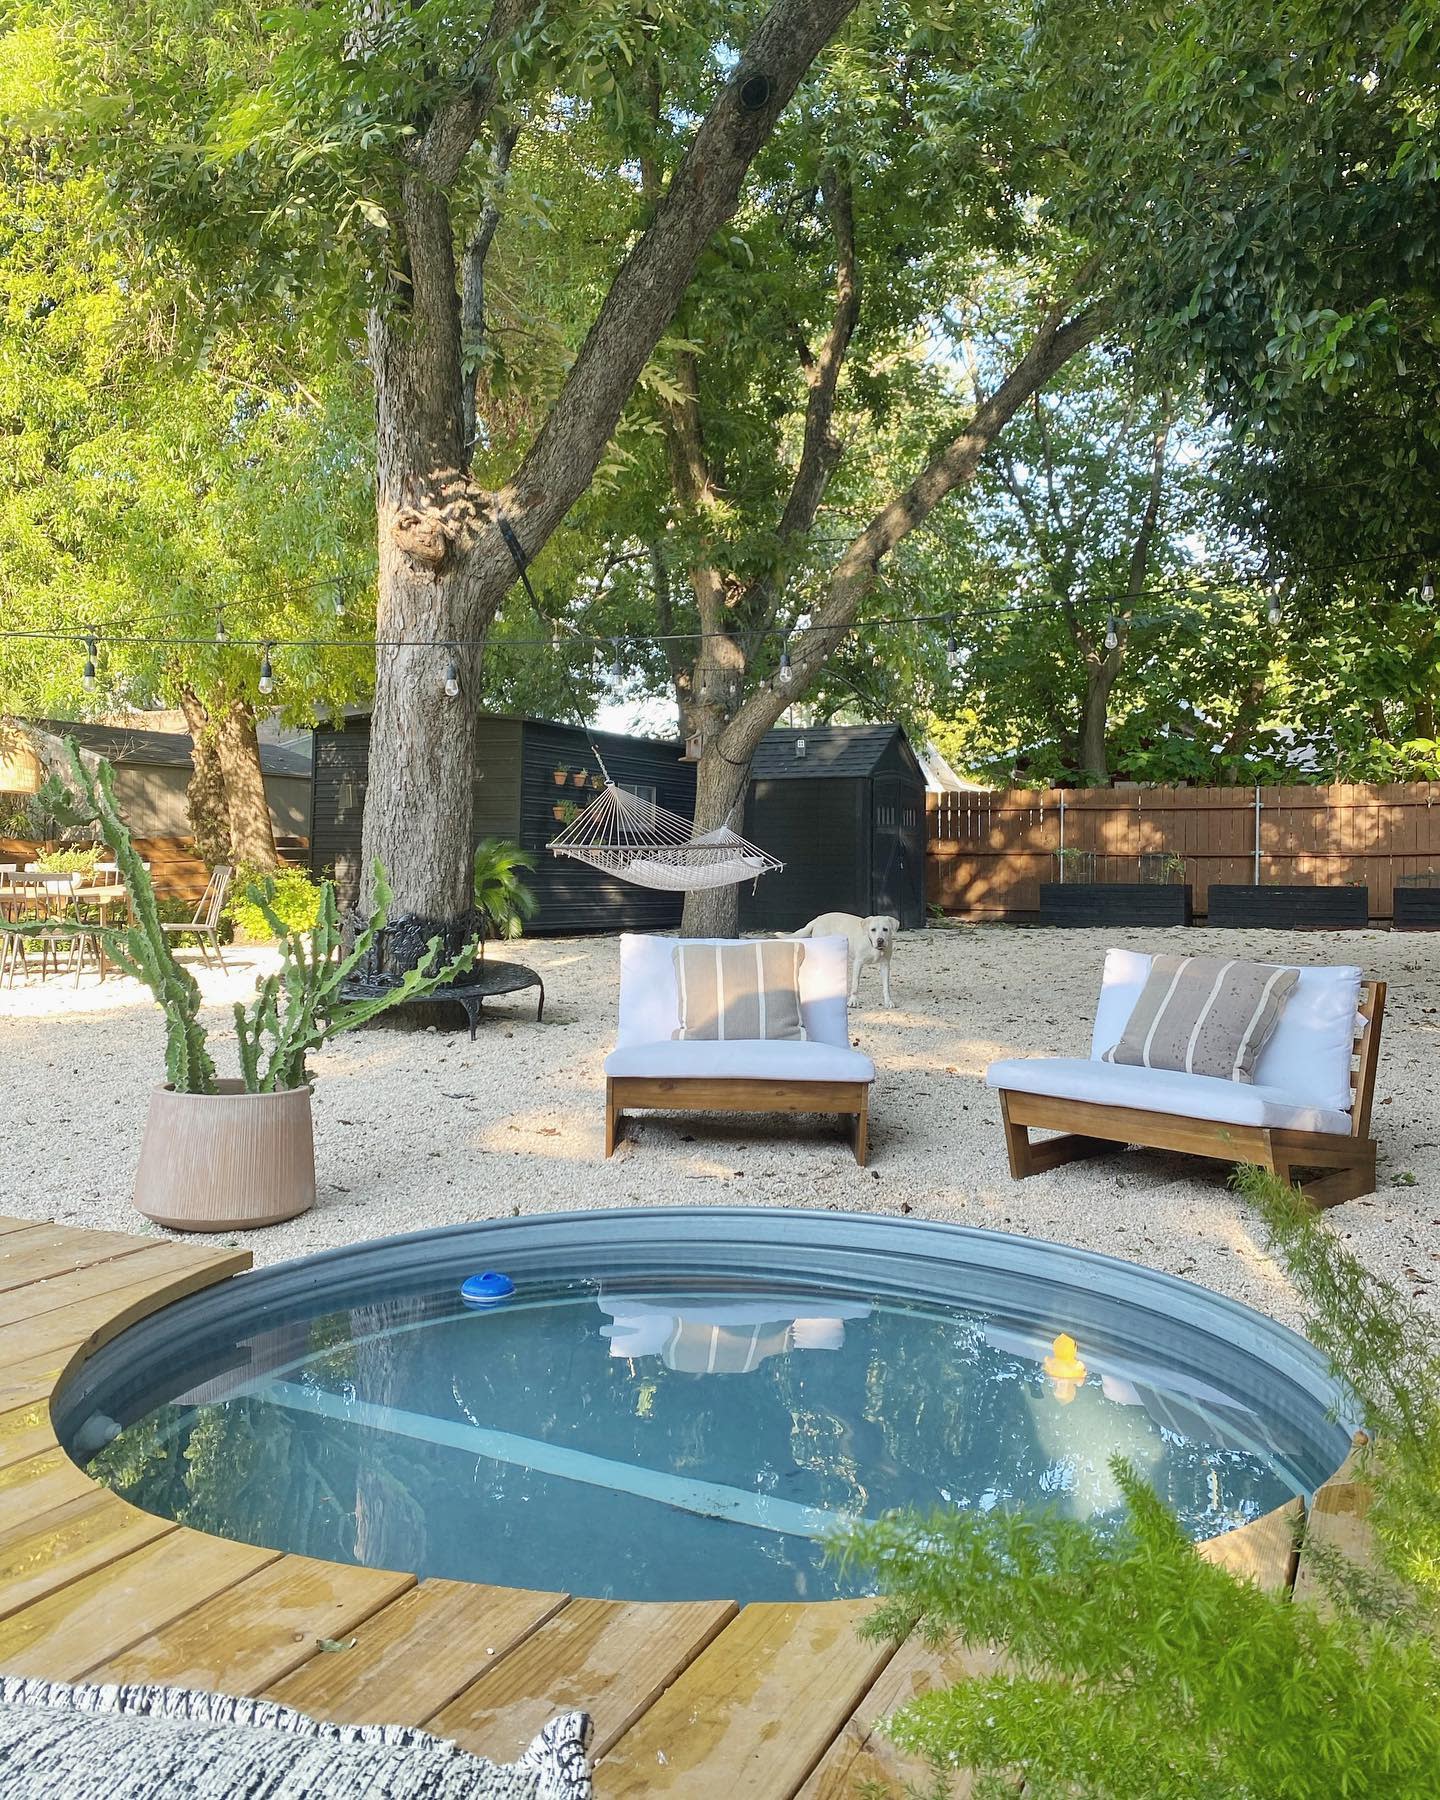
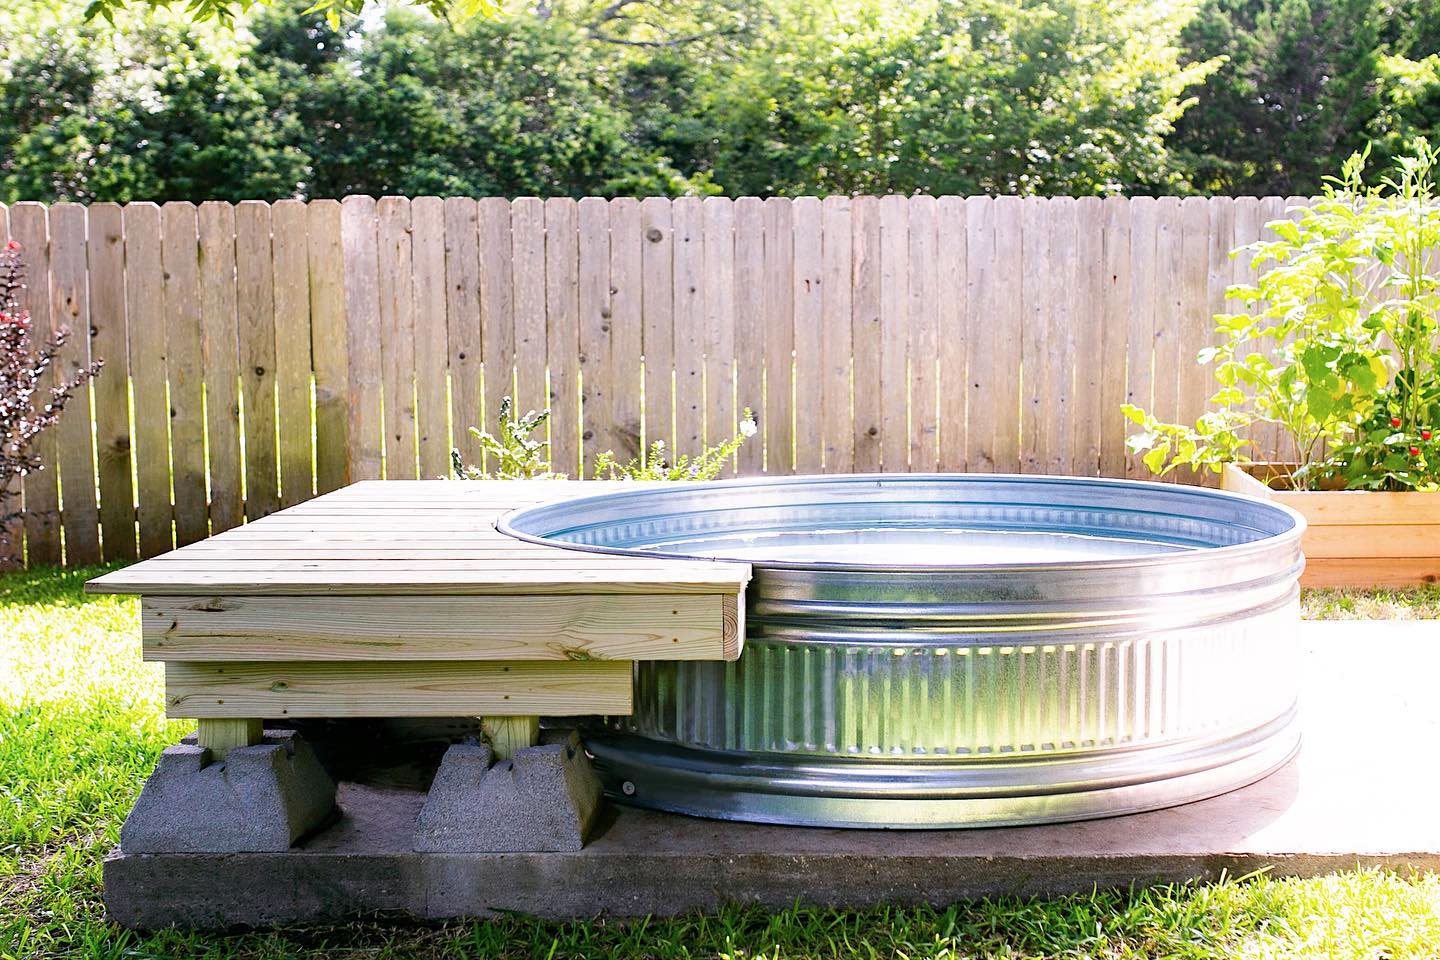
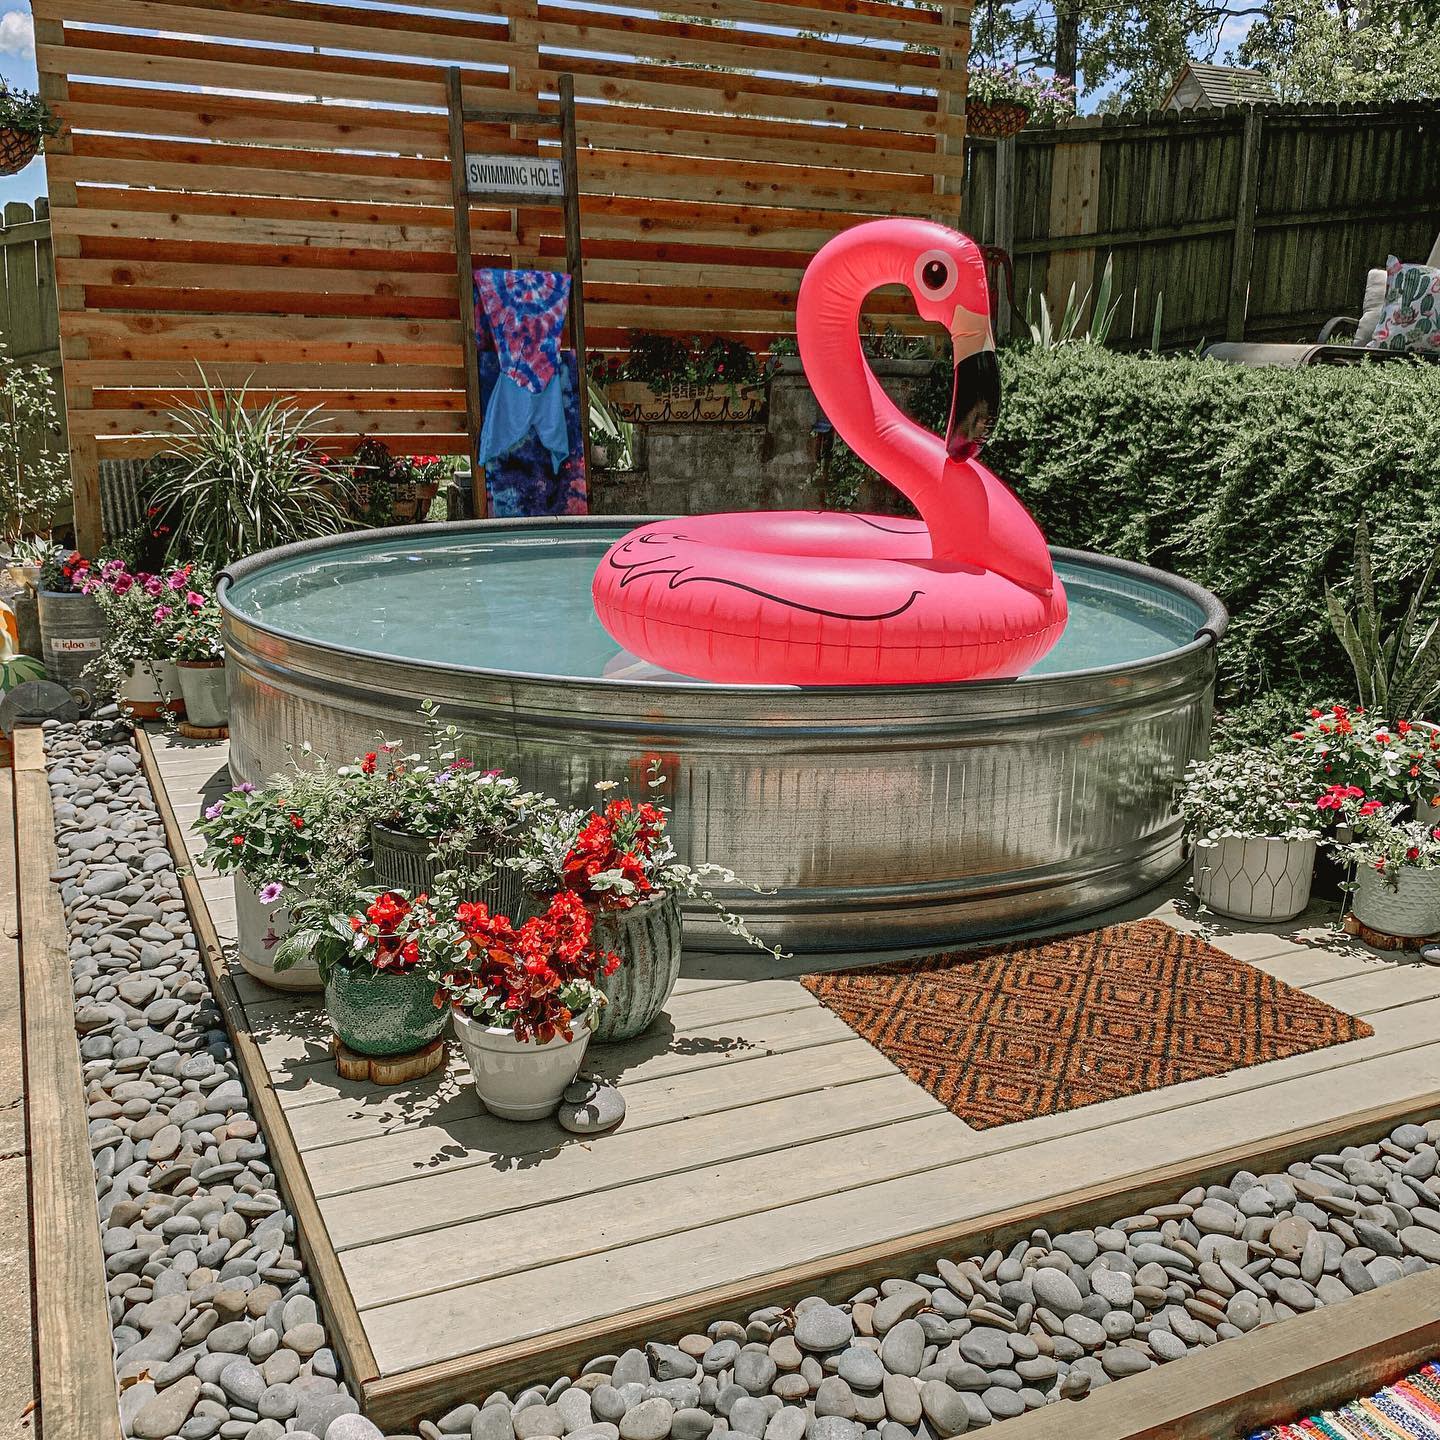
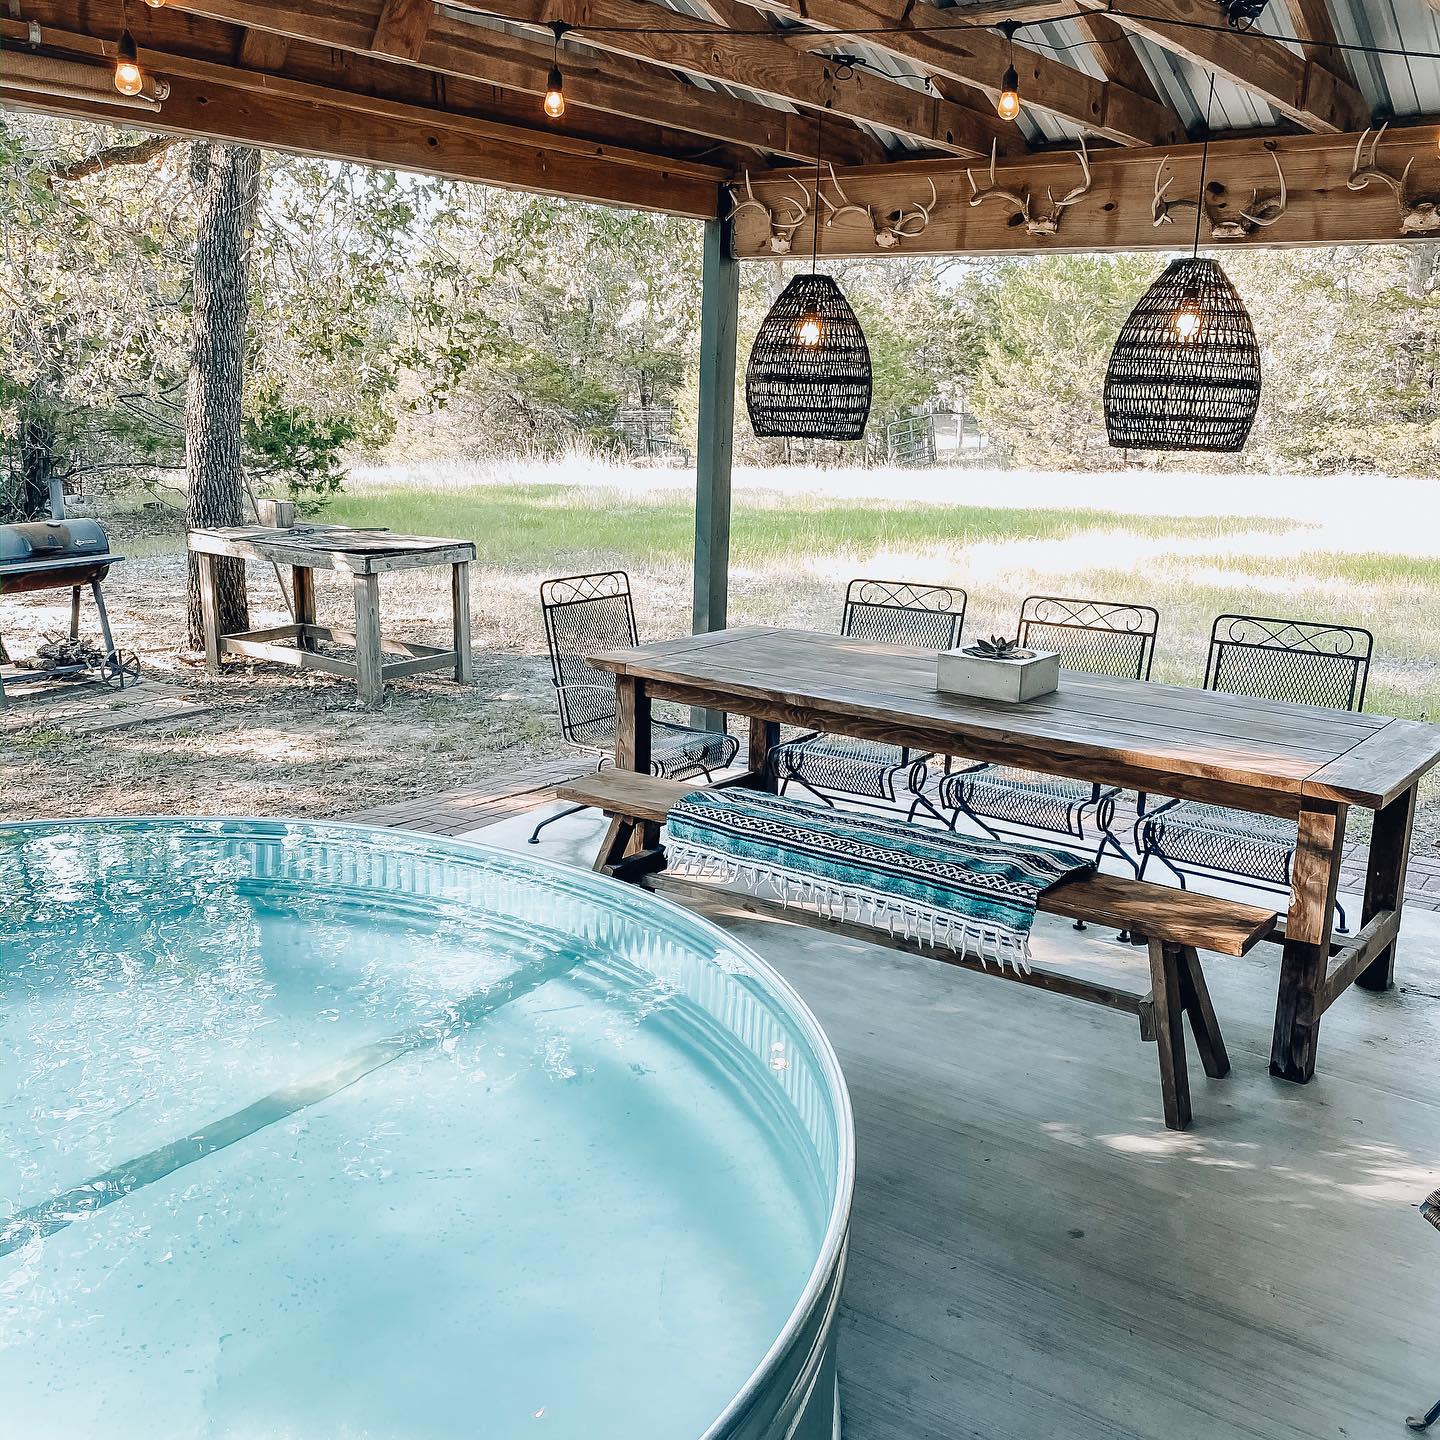
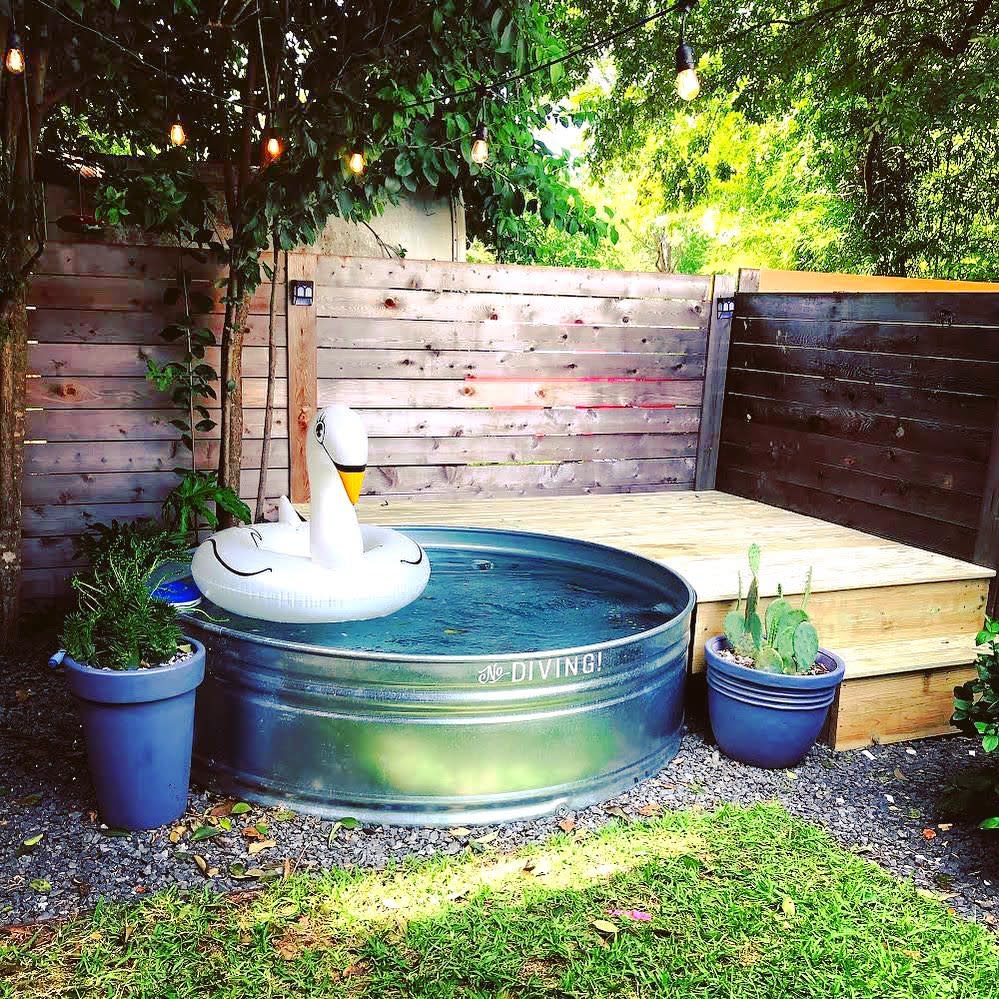
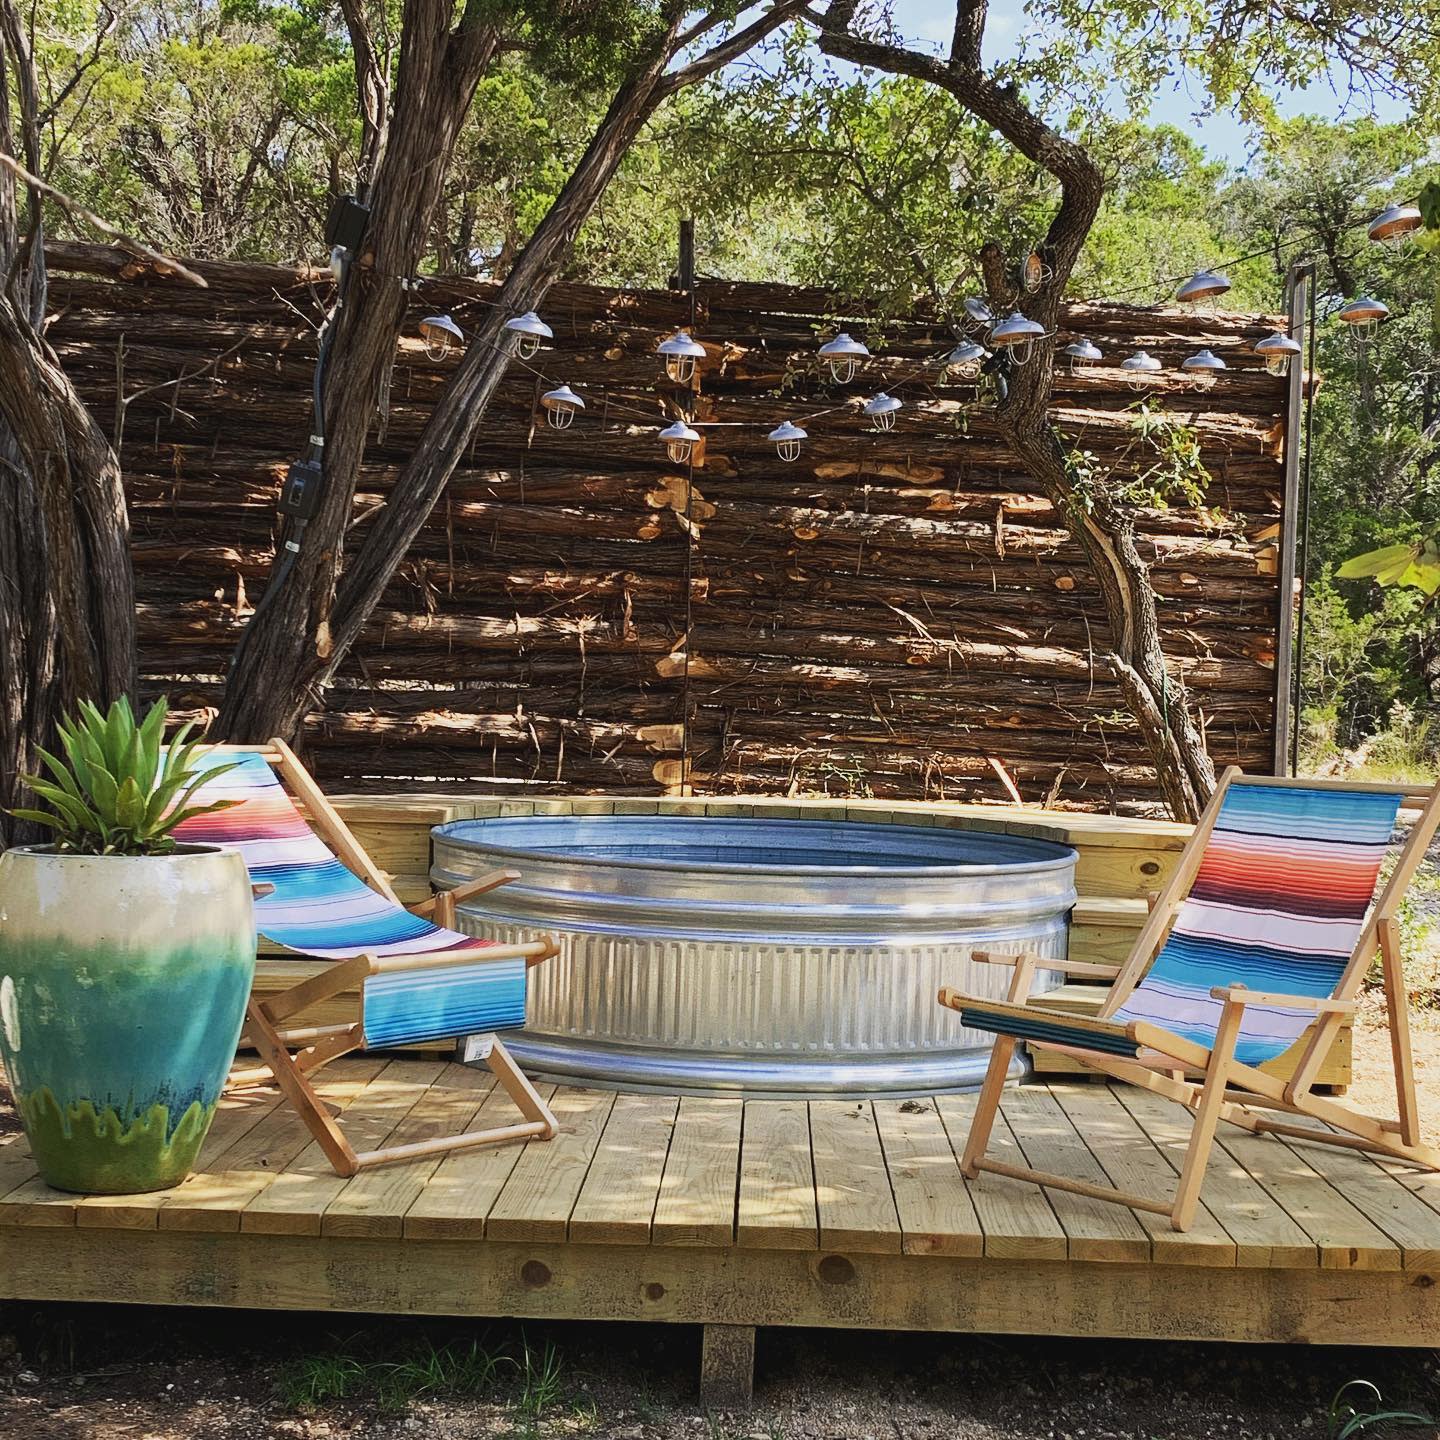
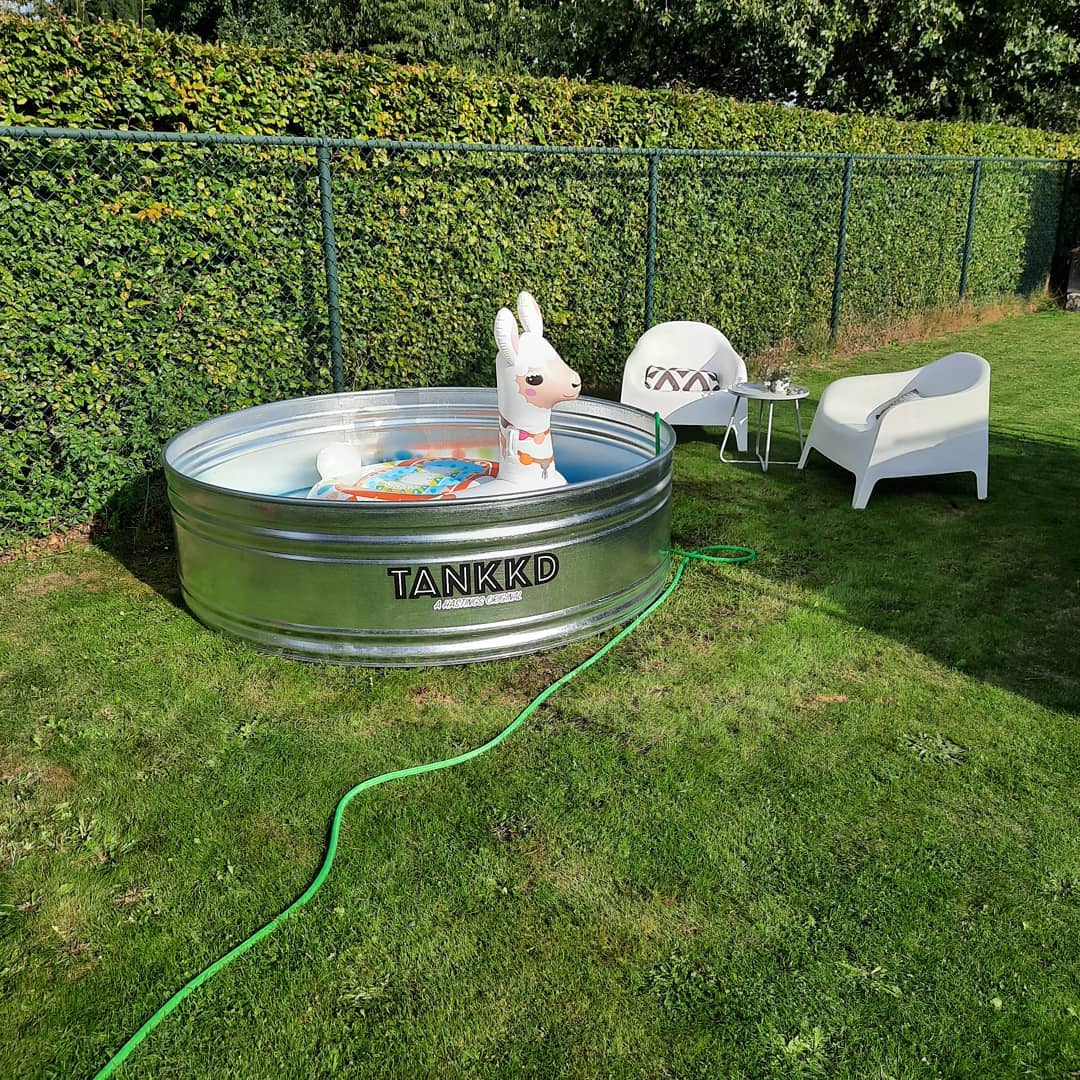
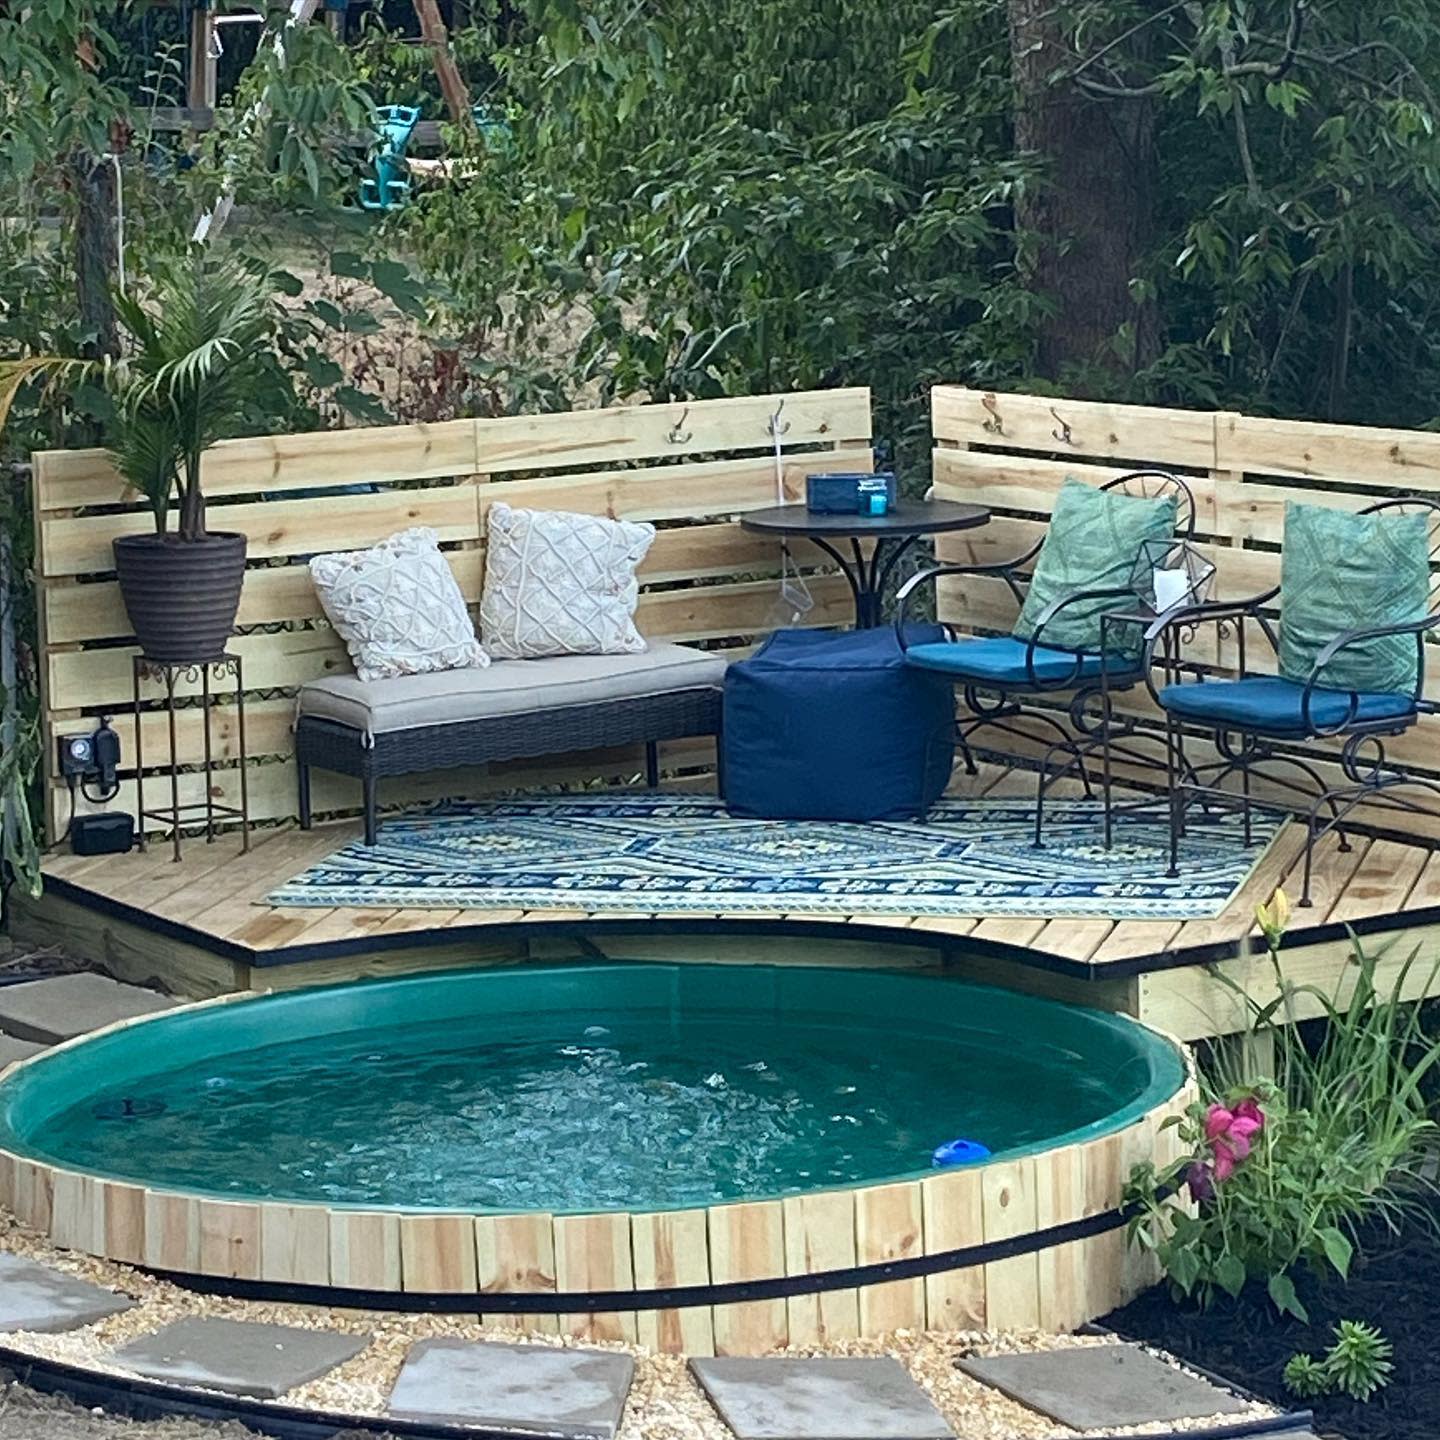
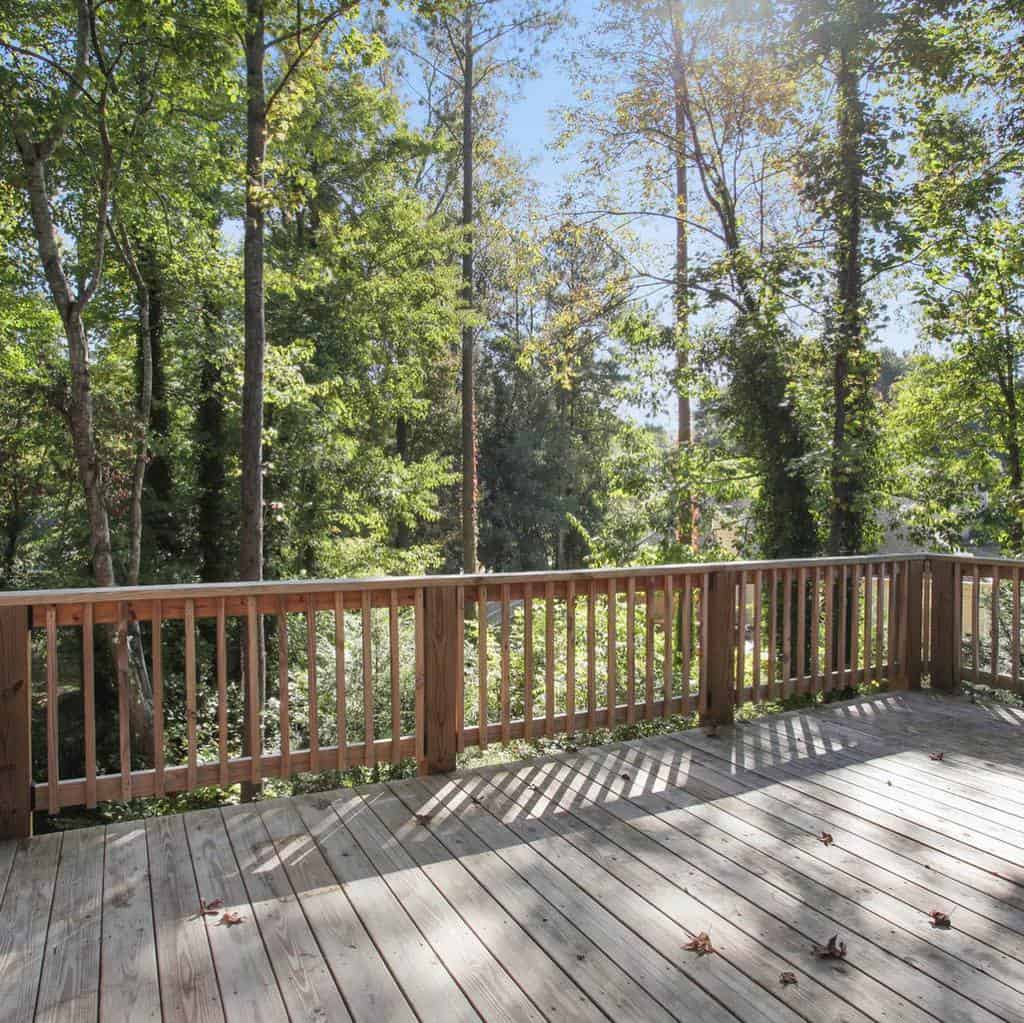
4. Stock Tank Pool With Seating Deck
Incorporating a seating deck around your stock tank pool elevates its functionality and style. Design a wooden deck that extends from the edge of the pool, providing ample space for lounge chairs, umbrellas, or a small table. This not only enhances the pool’s accessibility but also creates a comfortable, multi-purpose area for sunbathing, socializing, or simply relaxing by the water. The addition of a deck transforms your stock tank pool into a central feature of your outdoor living space, blending practicality with aesthetic appeal.
Source: @shelly.hemingson via Instagram
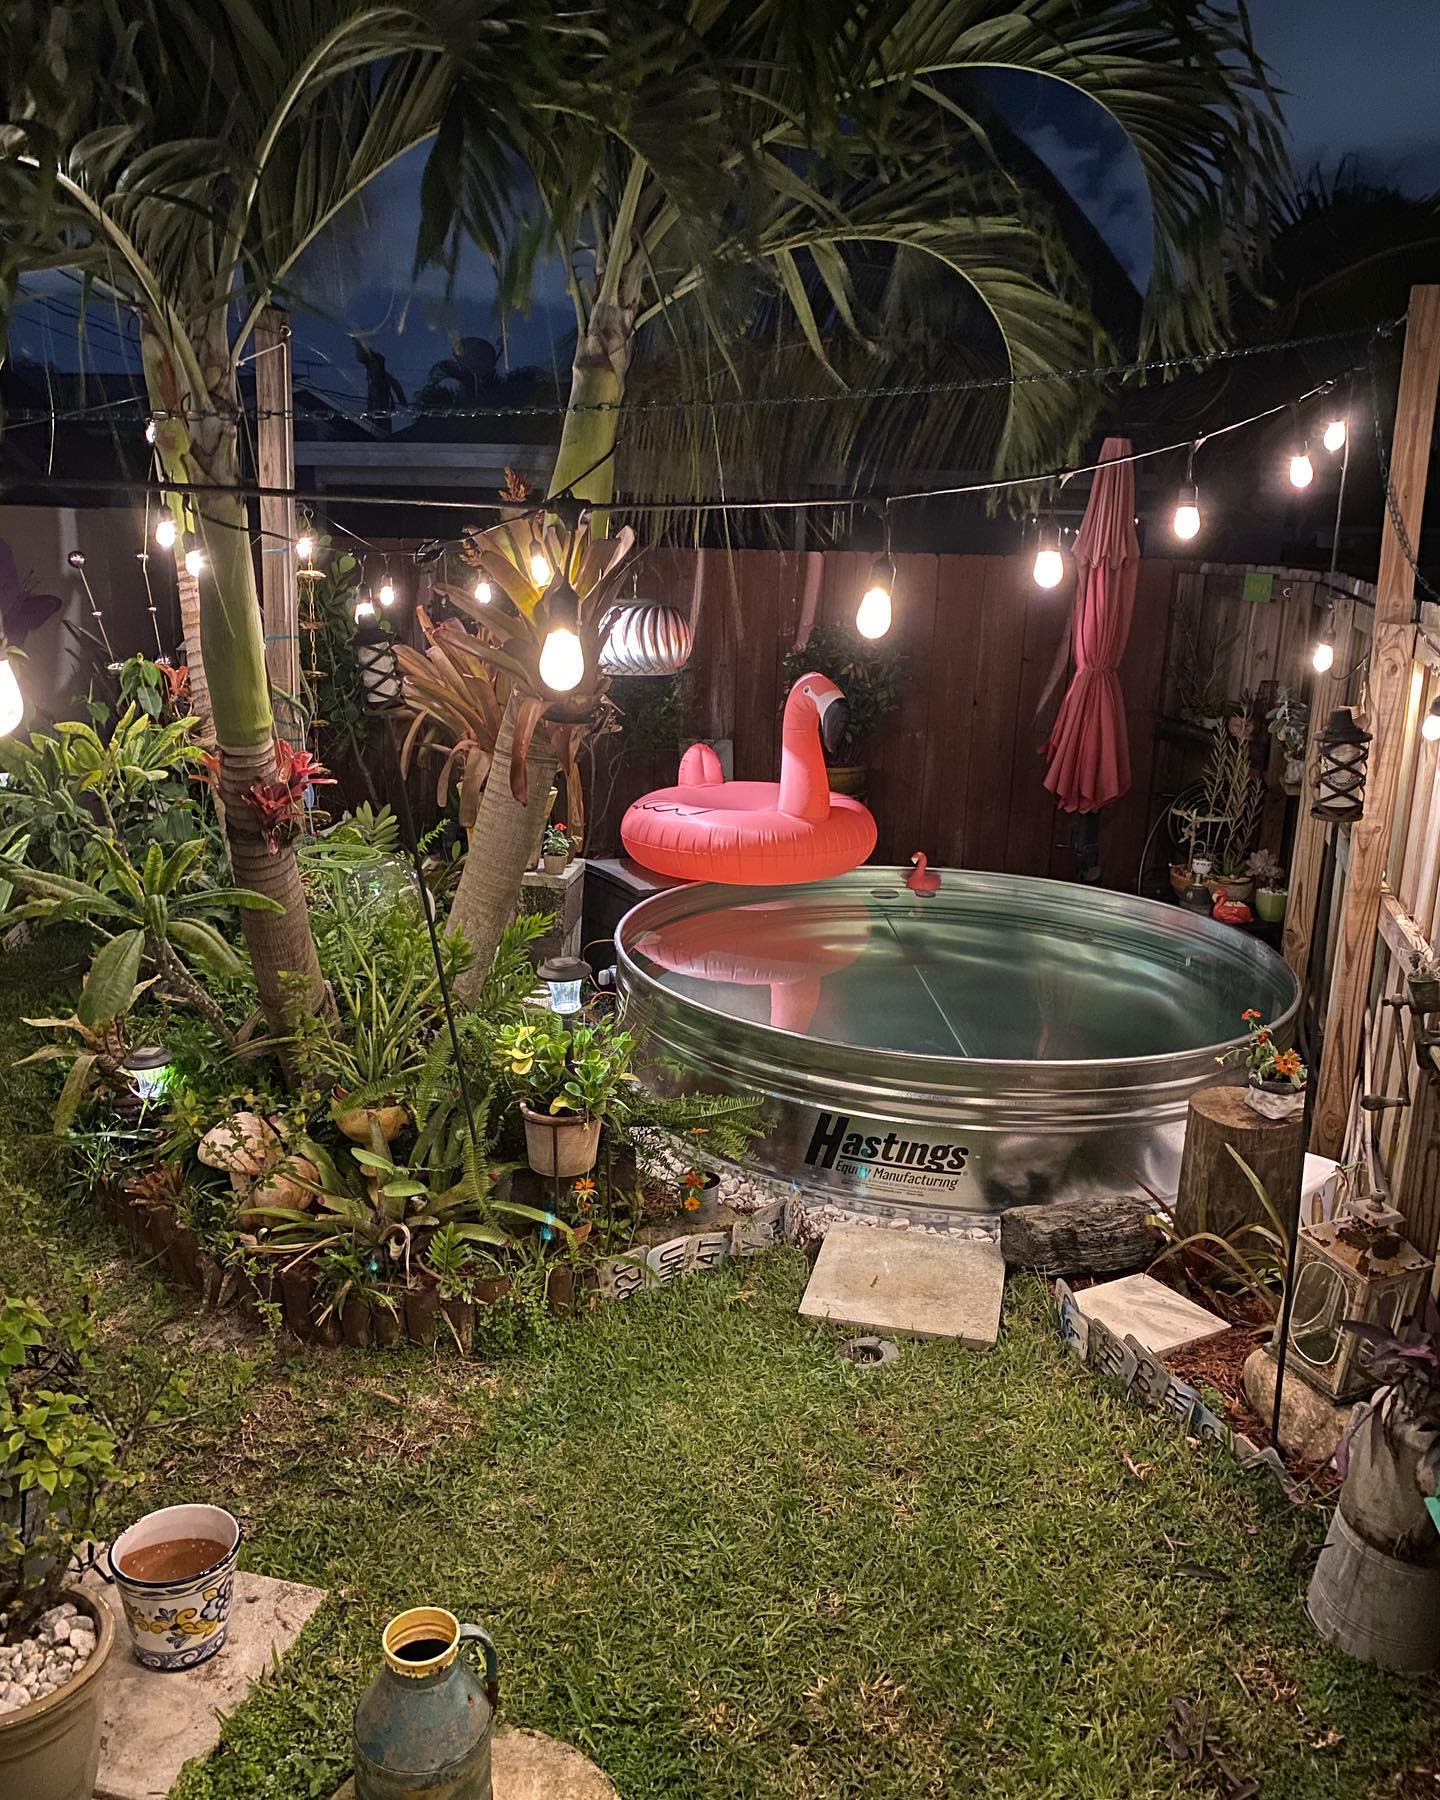
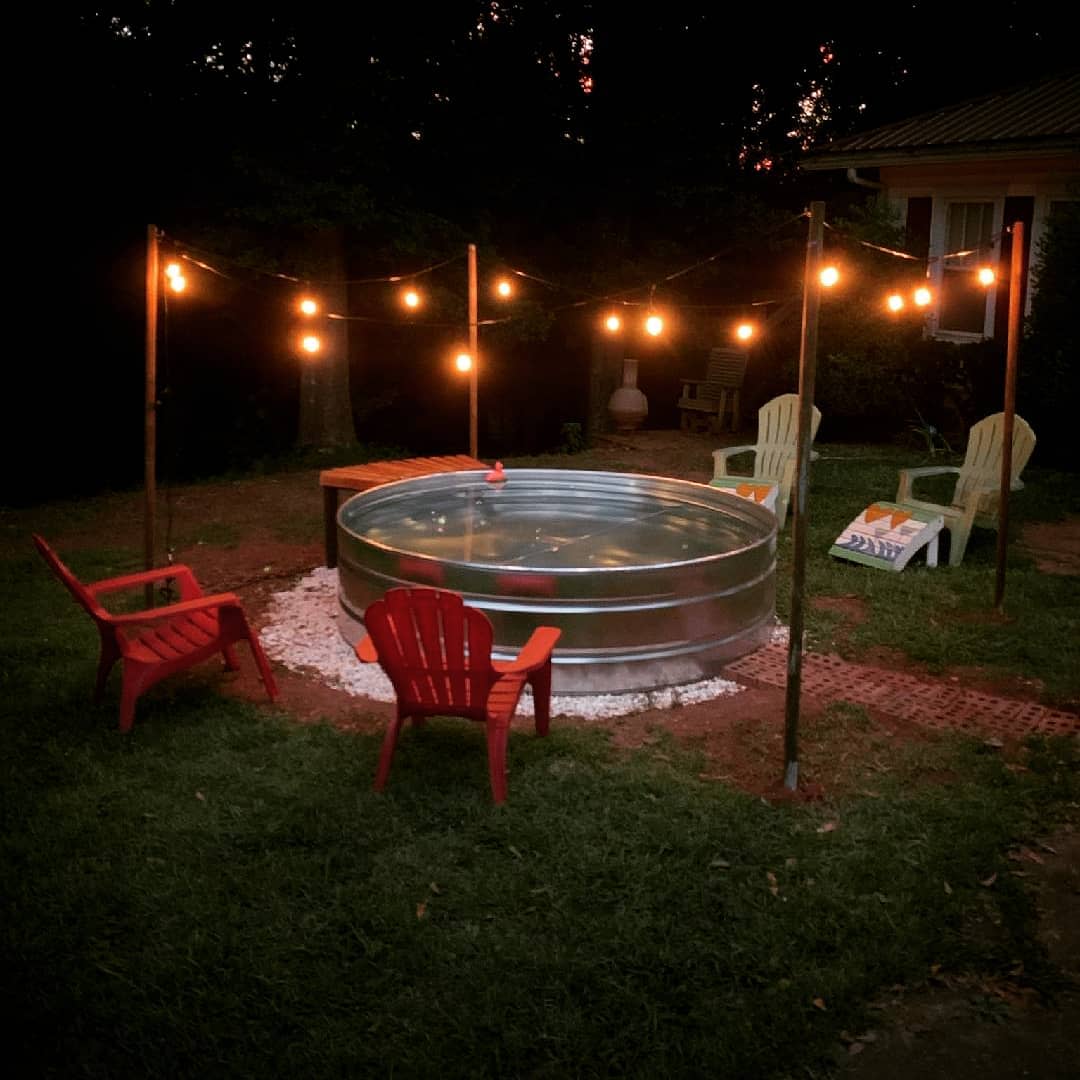
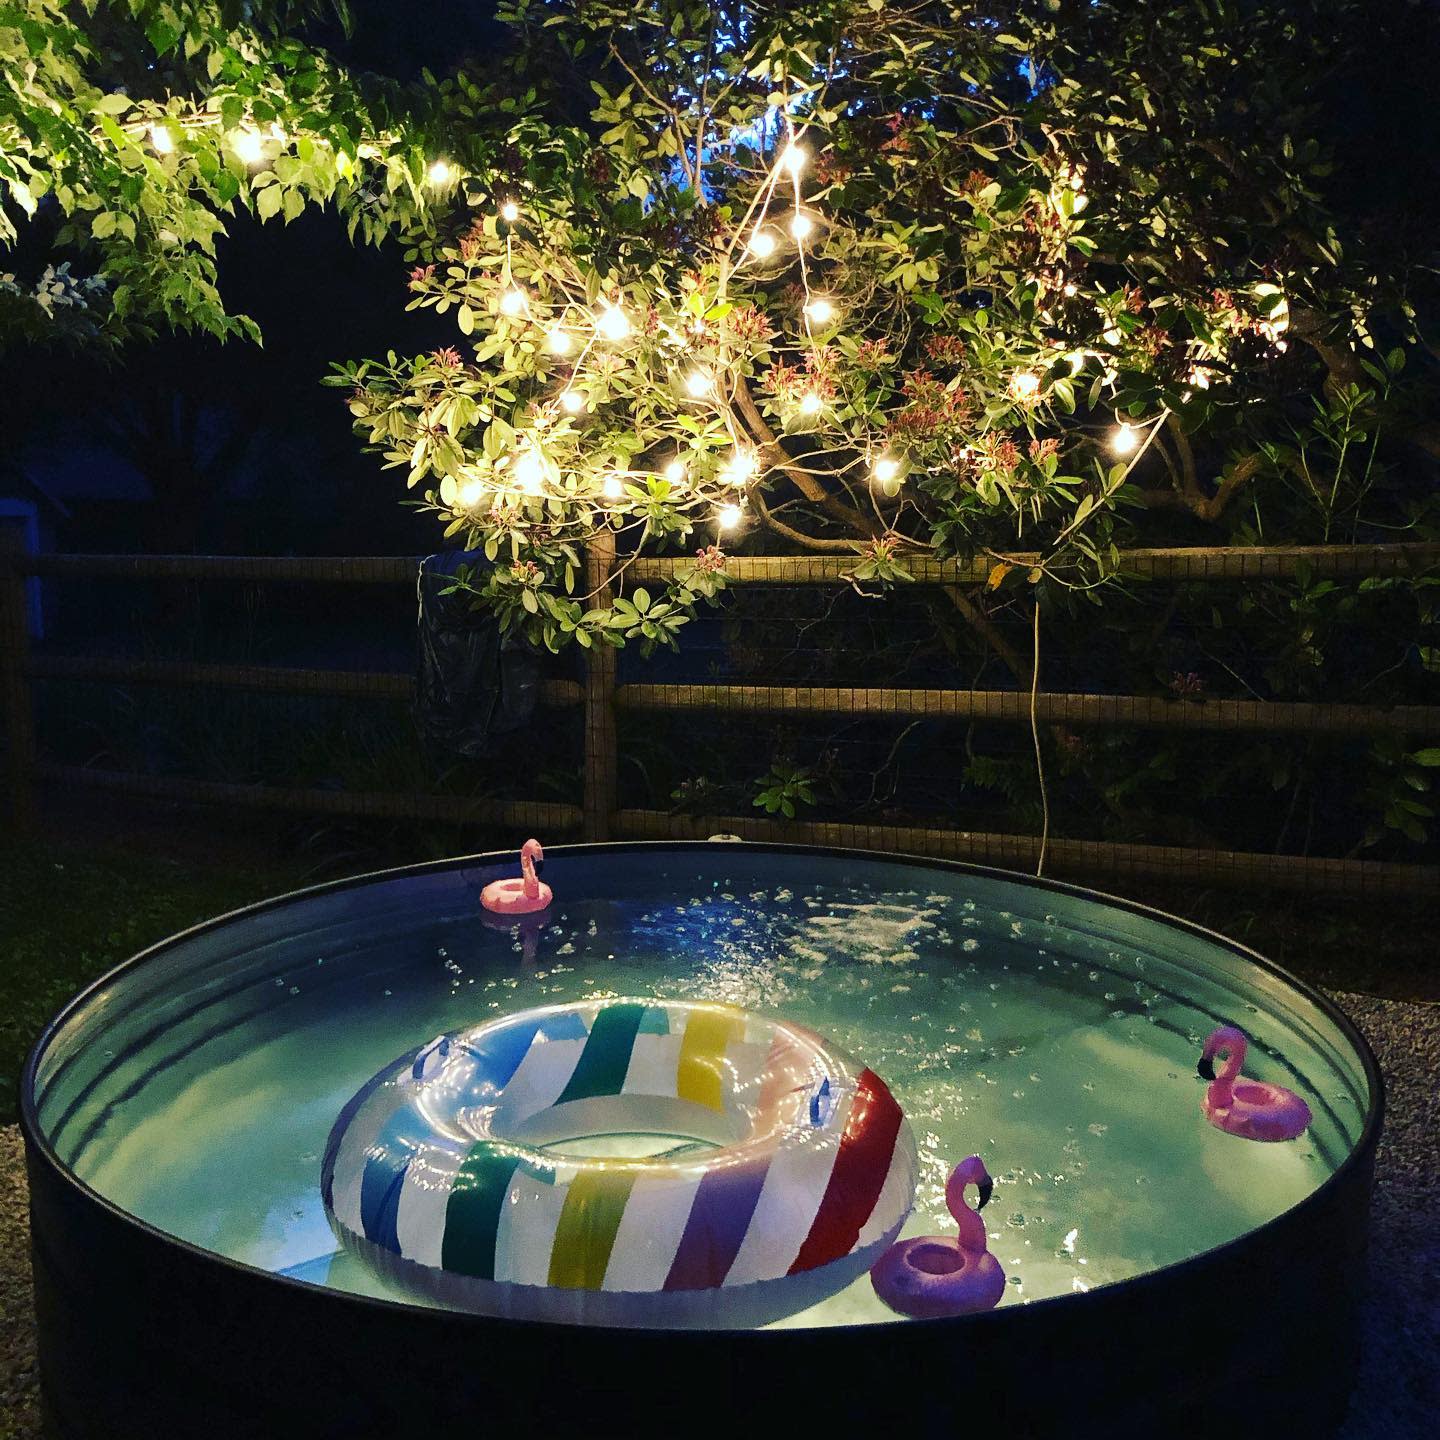
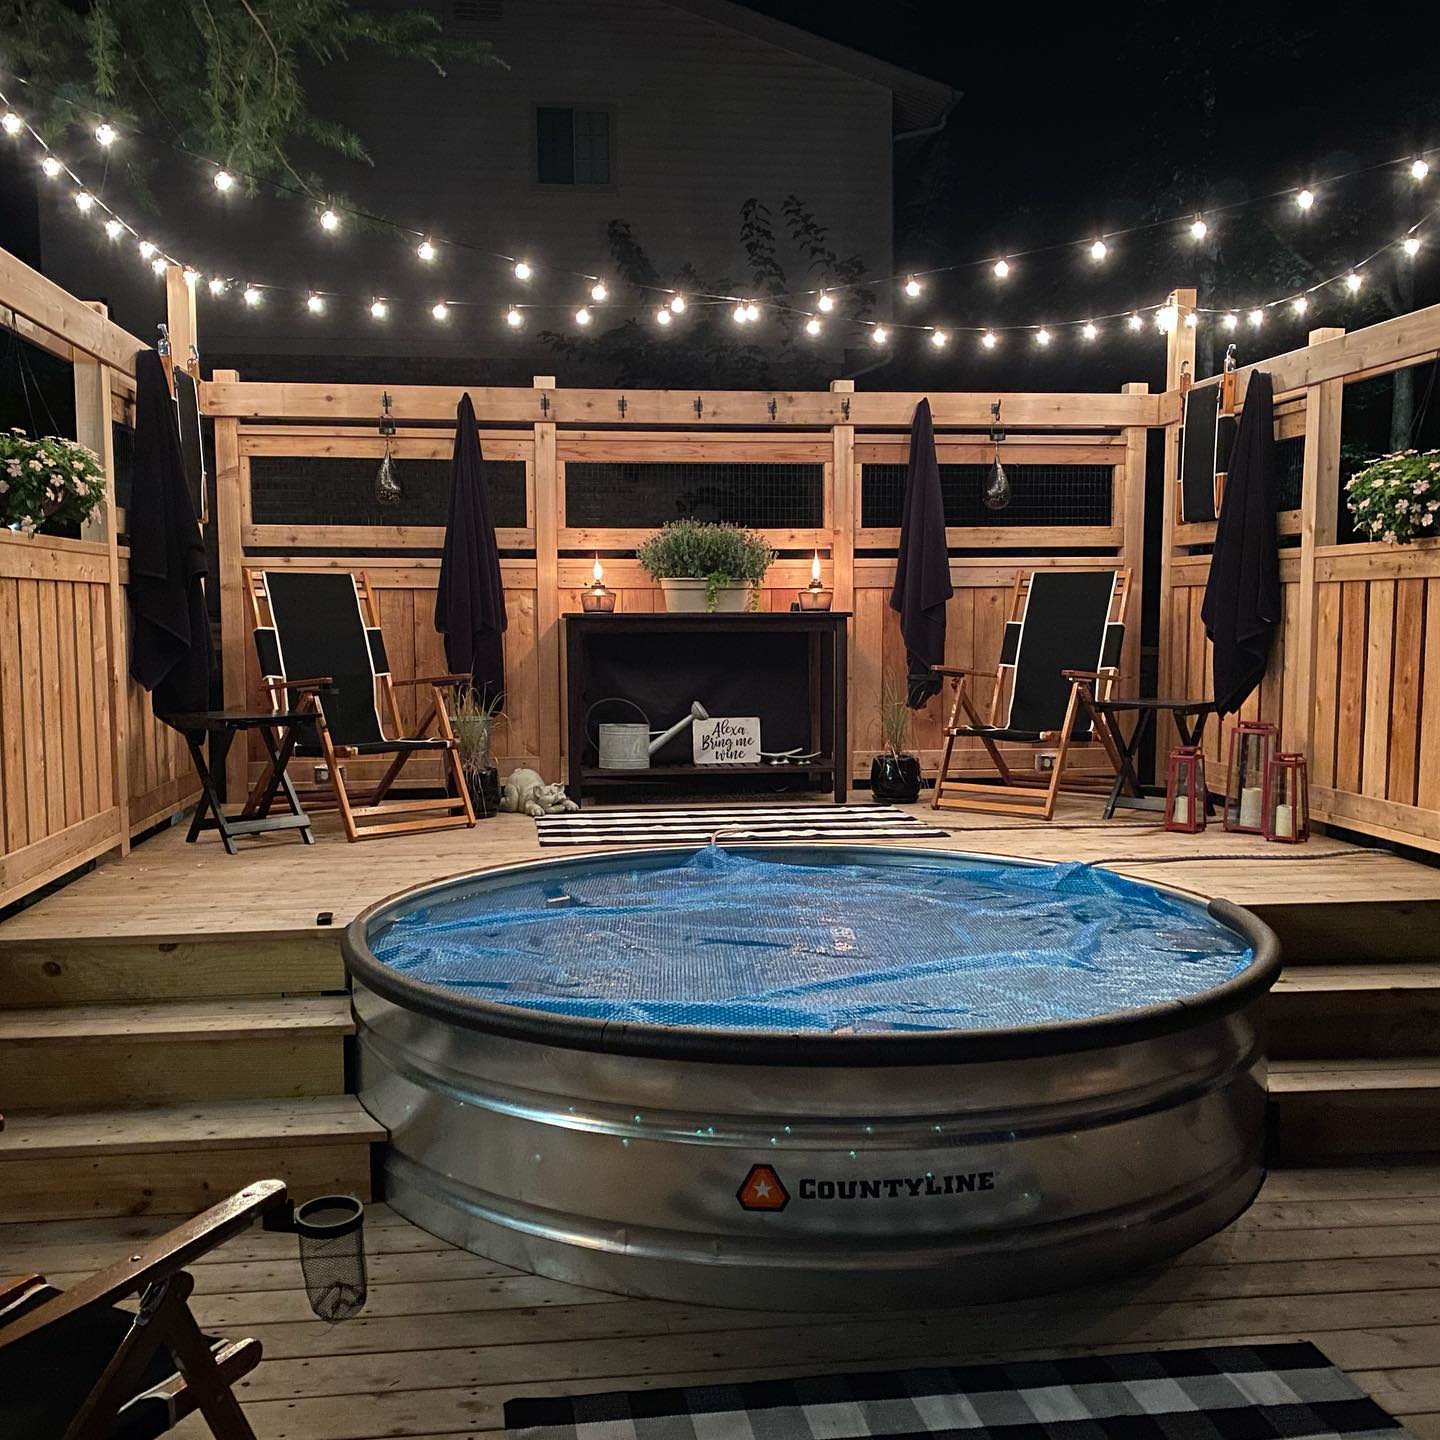
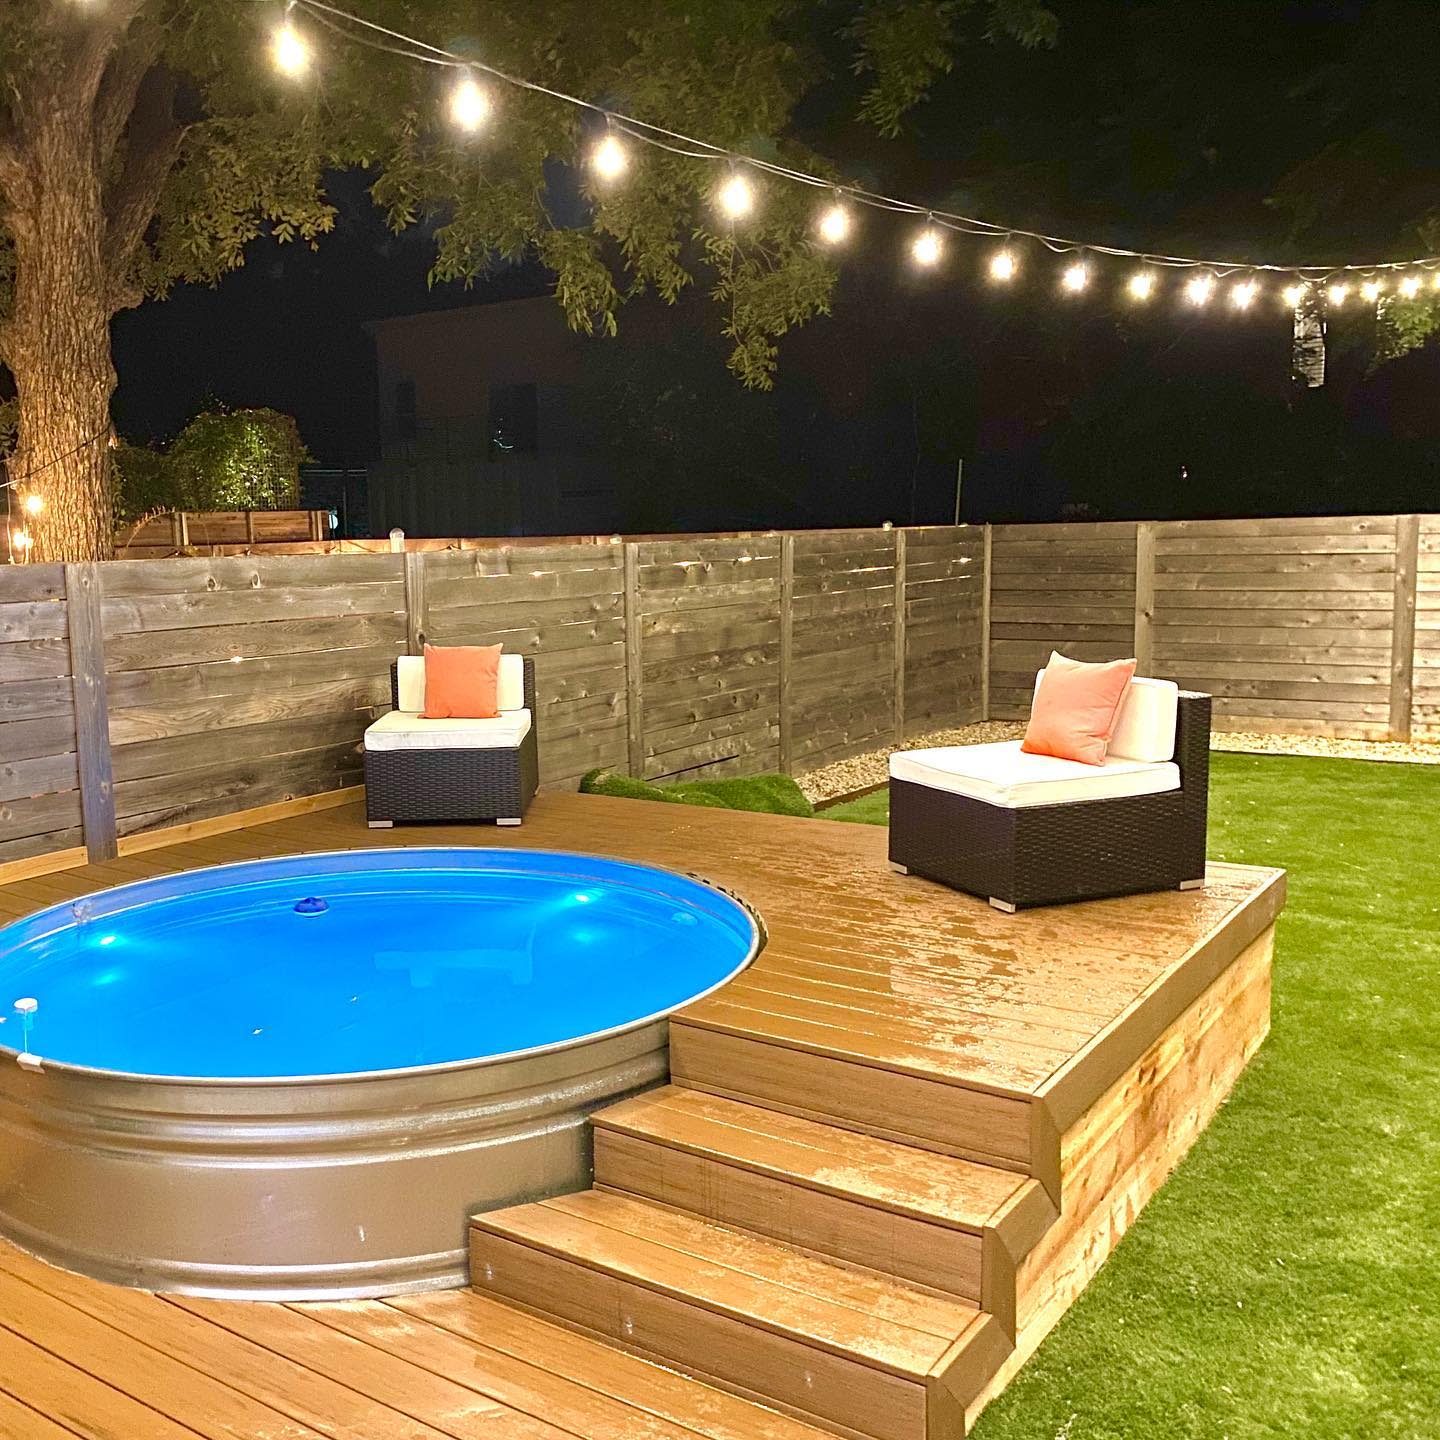
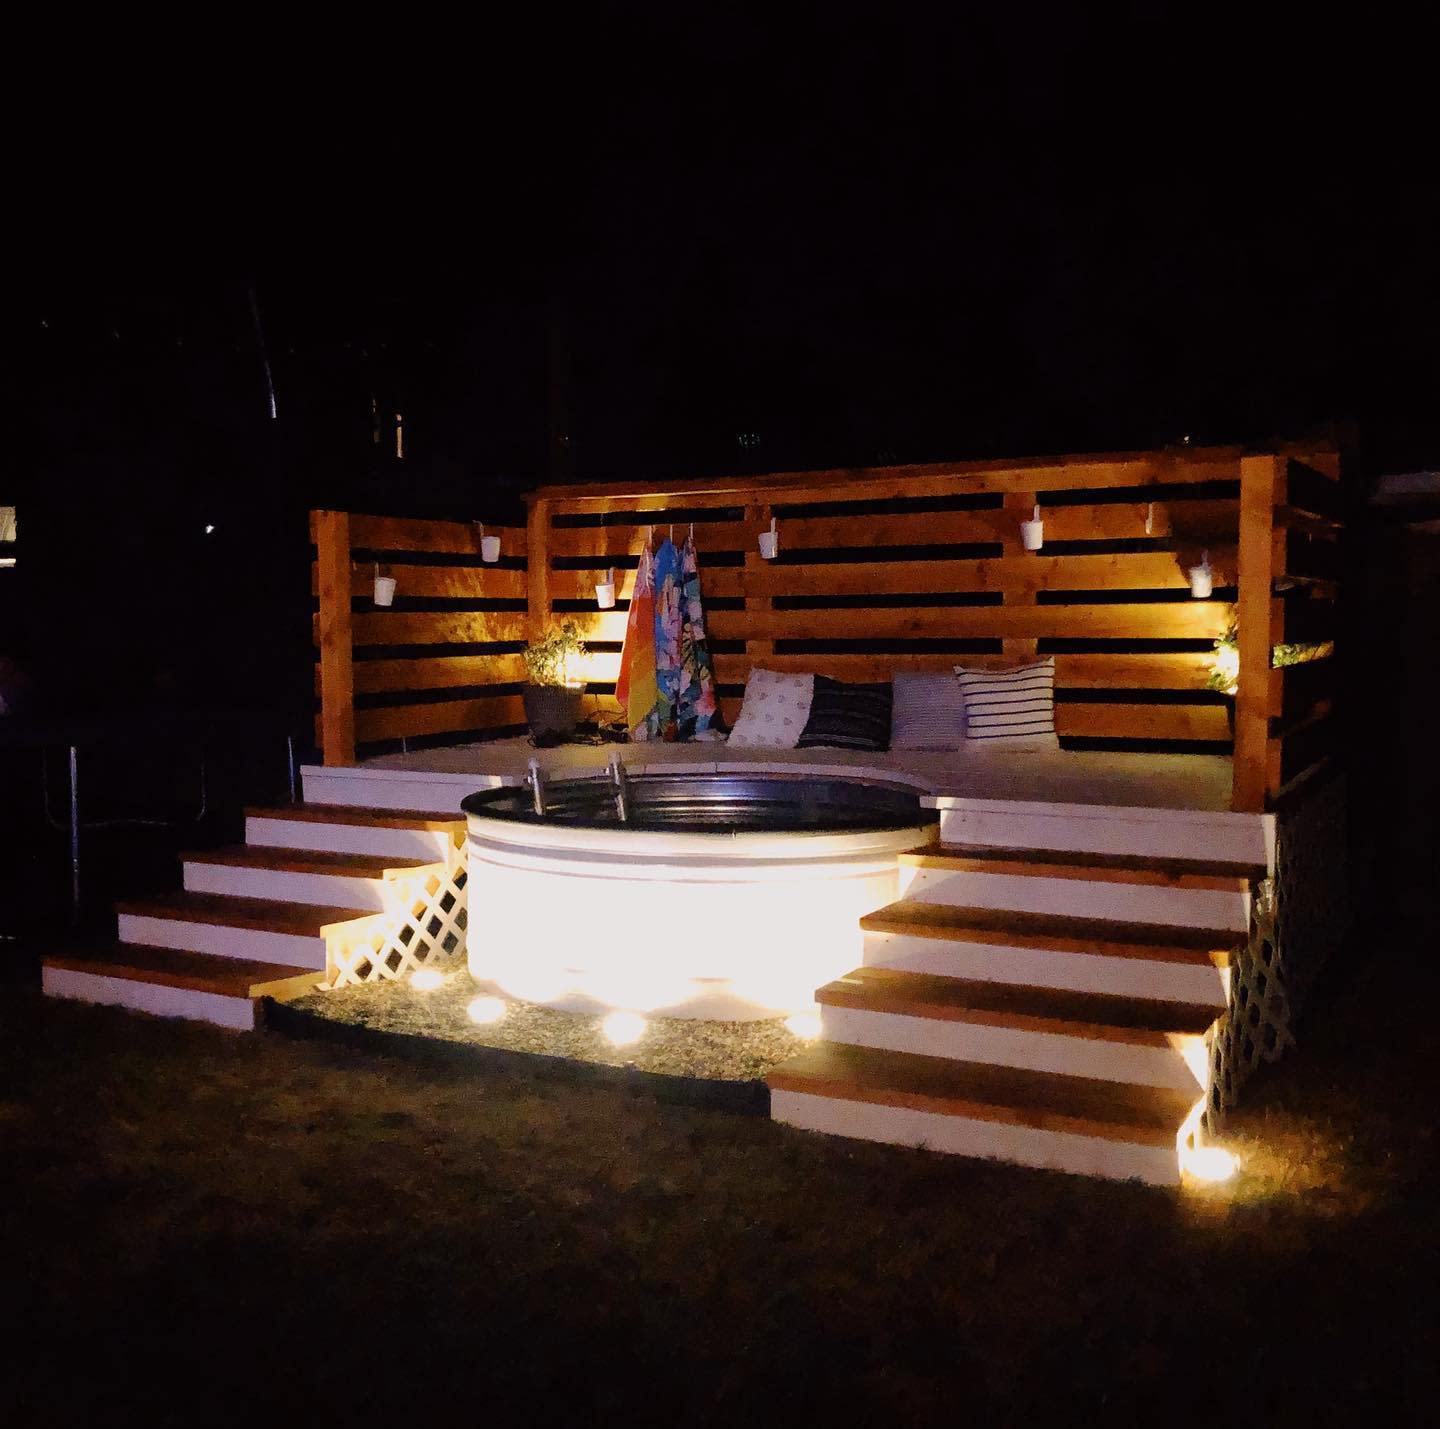
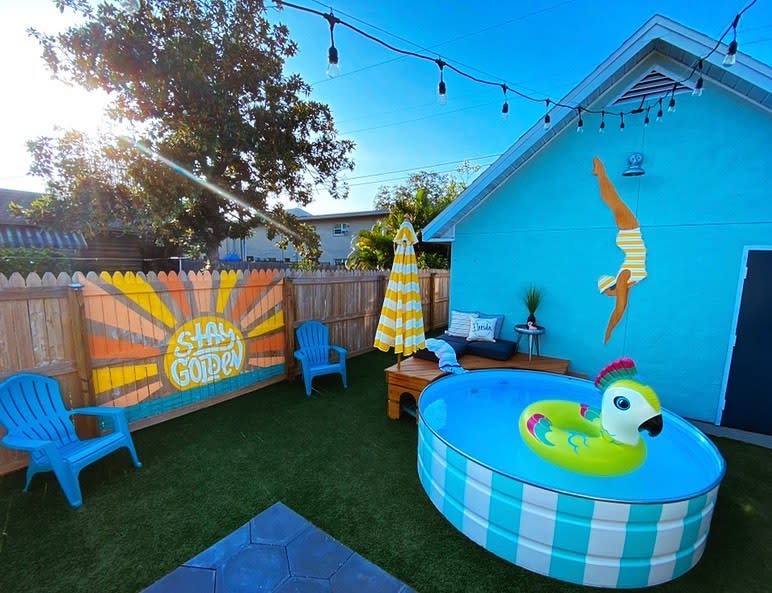
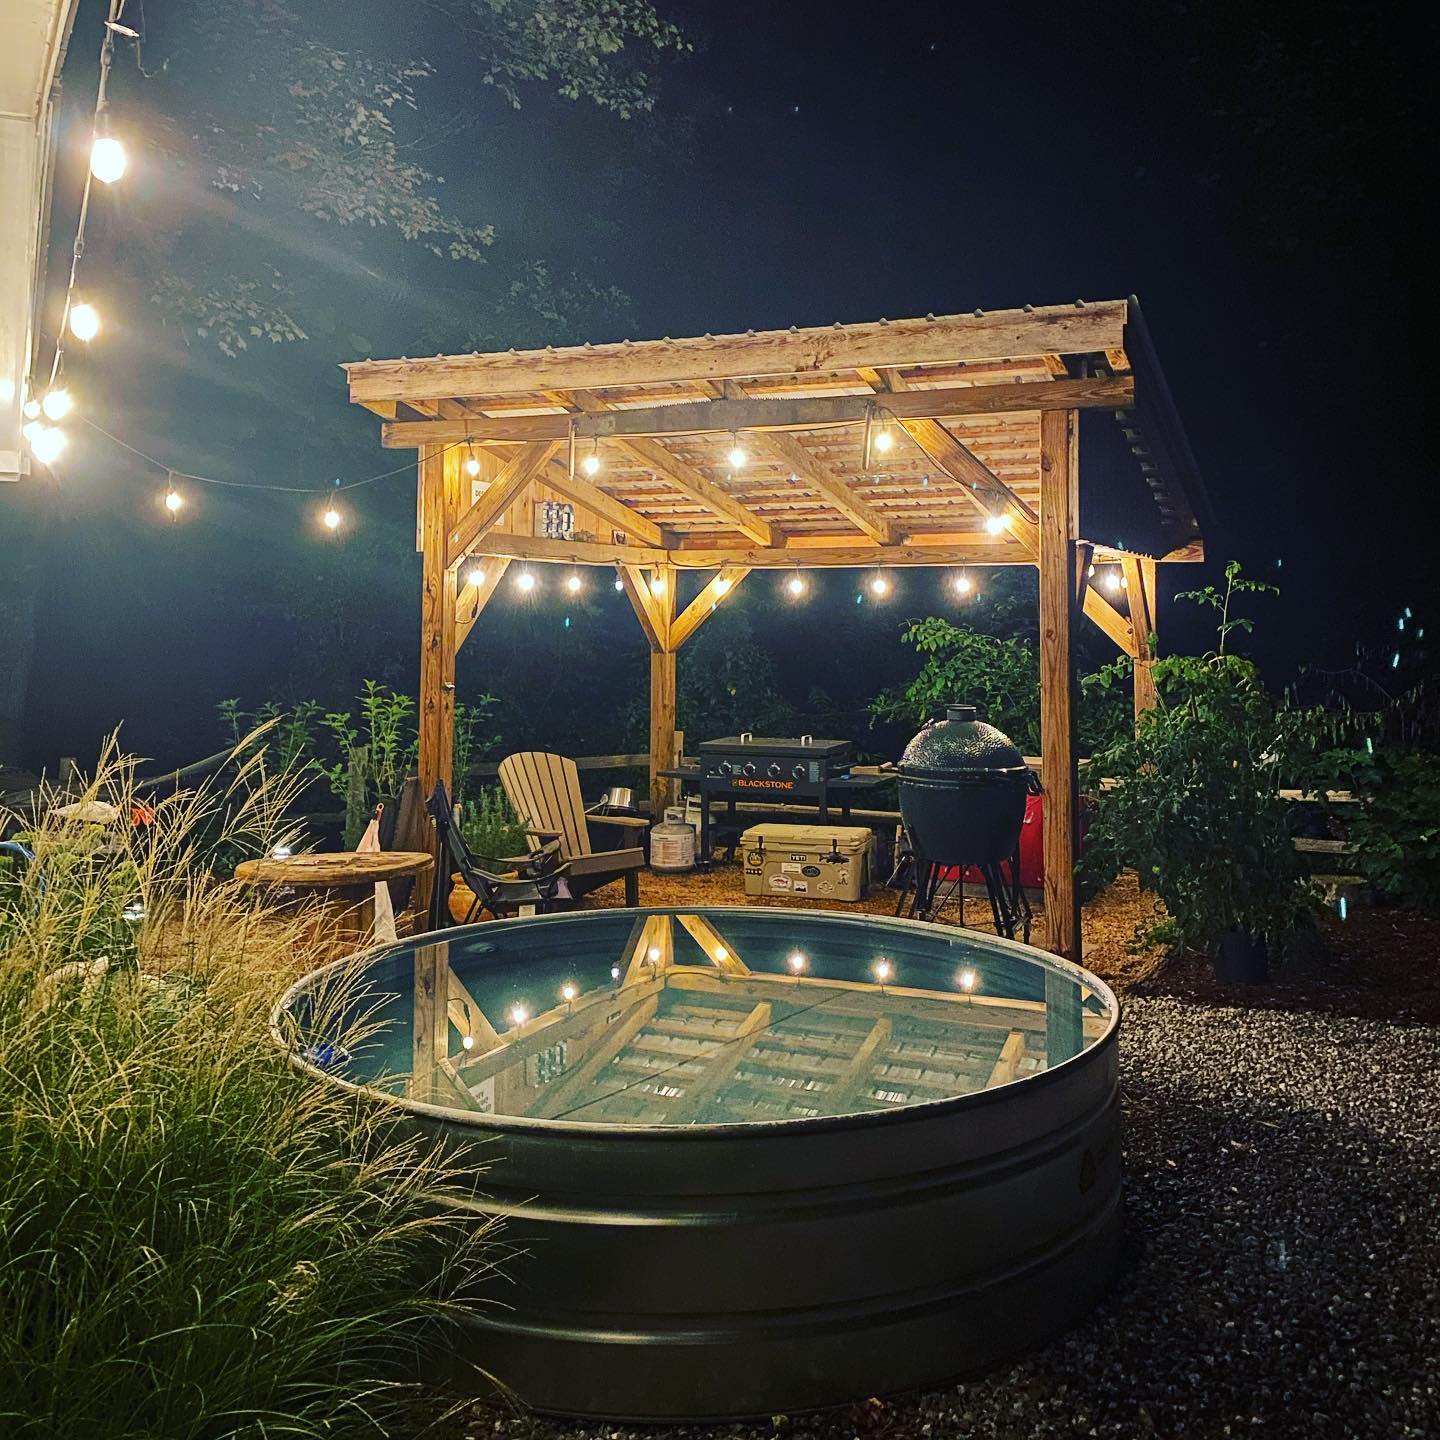
5. Hang String Lights Above The Pool
Hanging string lights above your stock tank pool can create a magical and inviting ambiance, especially during the evenings. Choose waterproof, outdoor-safe LED string lights and drape them overhead in a pattern that complements your pool area. This not only provides a soft, warm glow for nighttime swimming but also turns your pool into a picturesque spot, perfect for evening gatherings or a tranquil retreat after sunset. The twinkling lights add a cozy, enchanting atmosphere, enhancing the overall charm of your outdoor oasis.
Source: @southfloridagardenguy via InstagramSource: @stp4atl via InstagramSource: @dipsypools via InstagramSource: @cathydeloach via Instagram
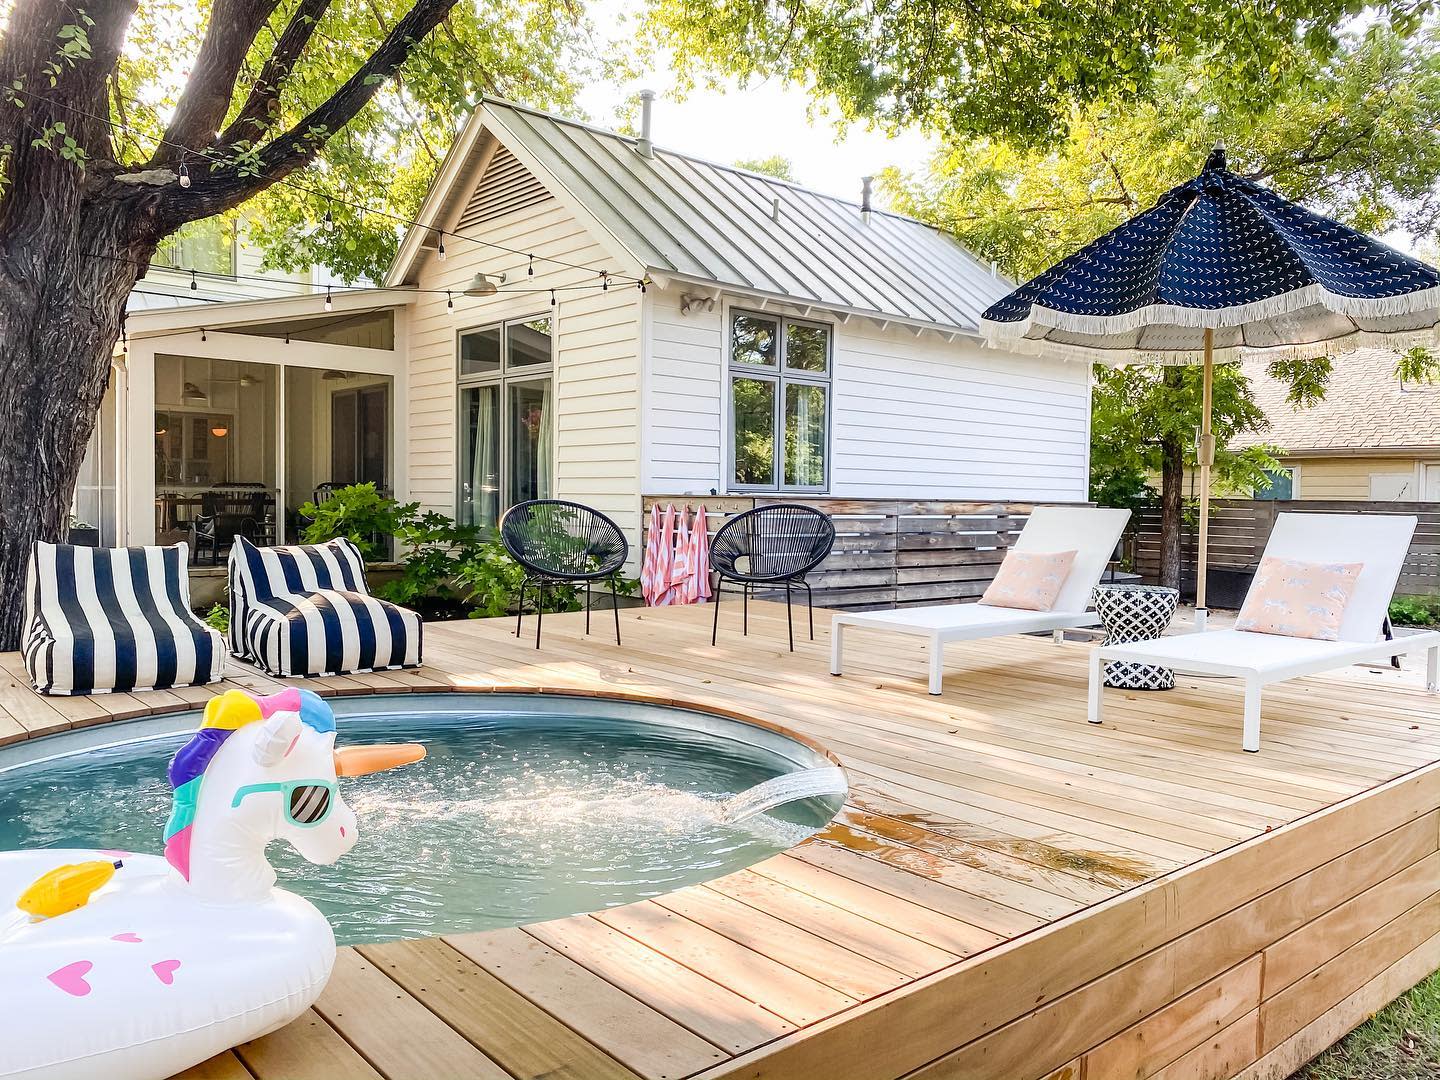
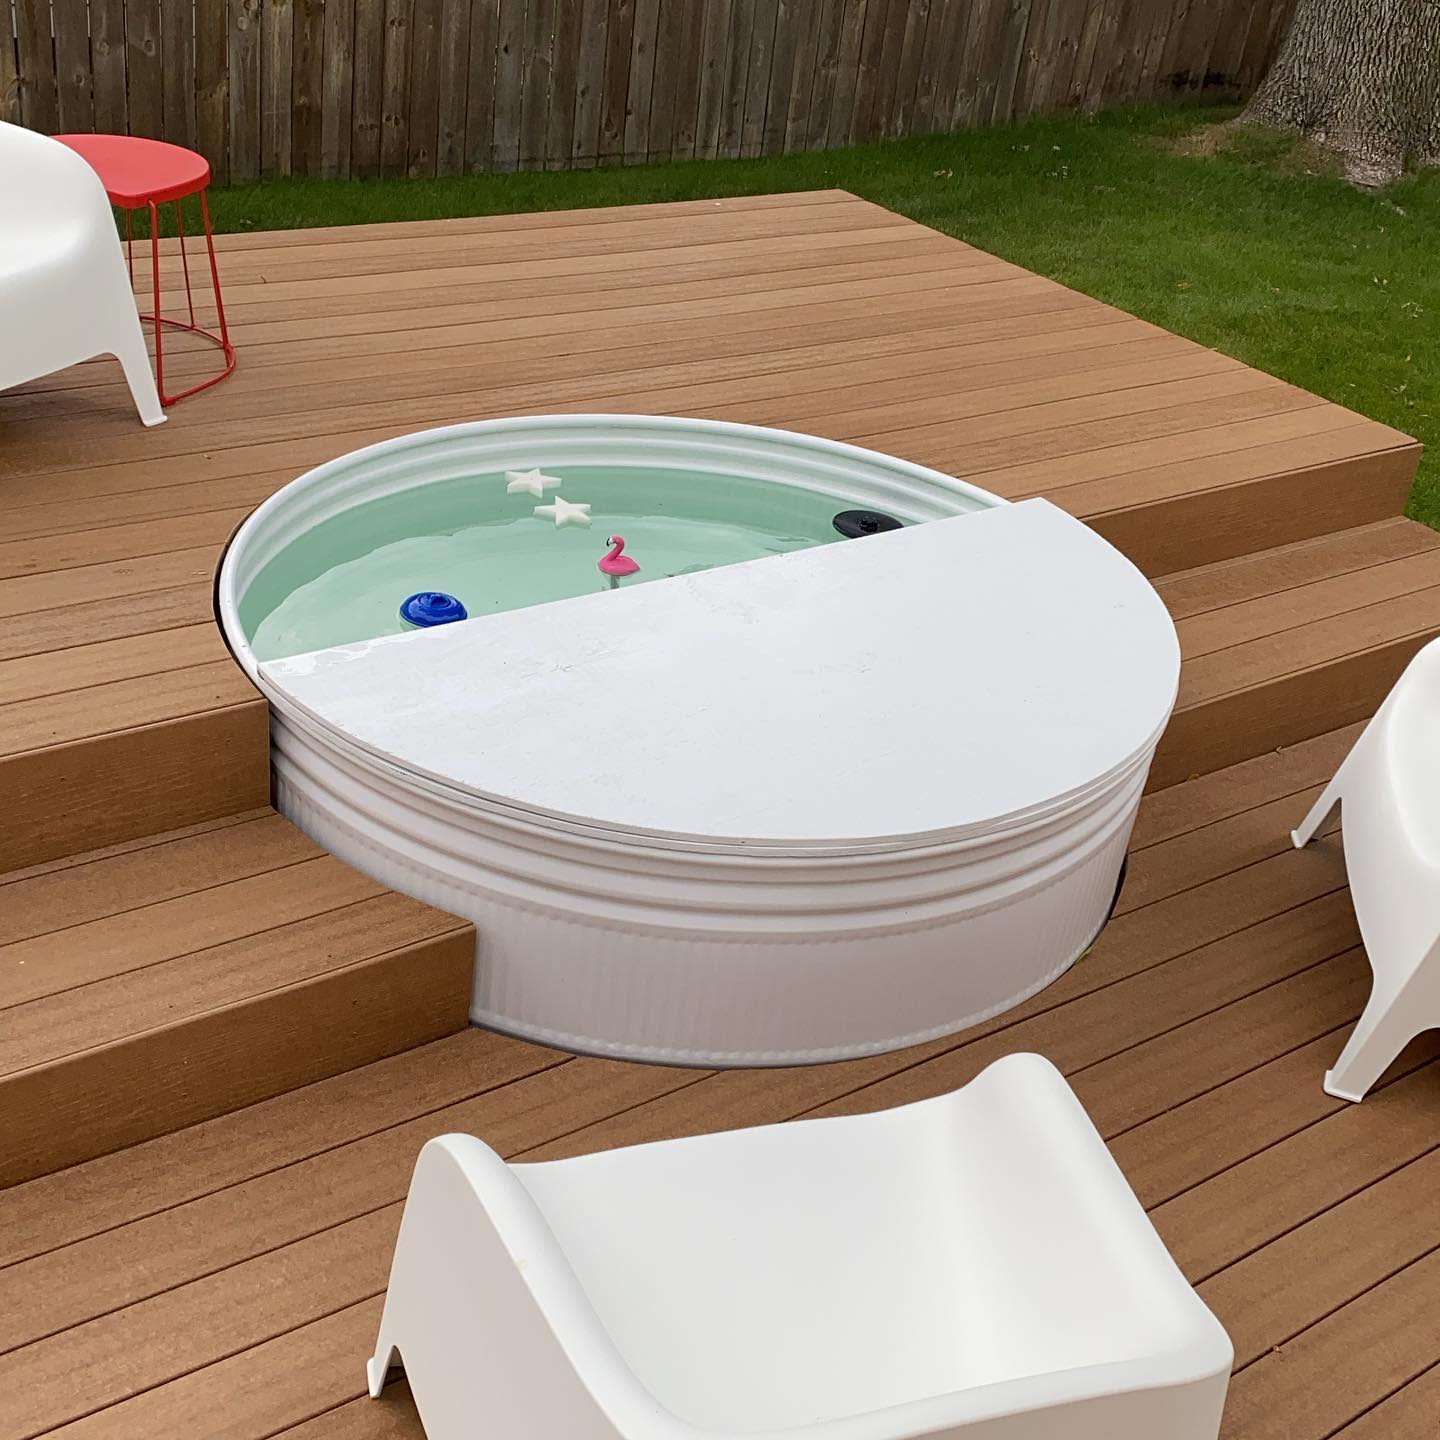
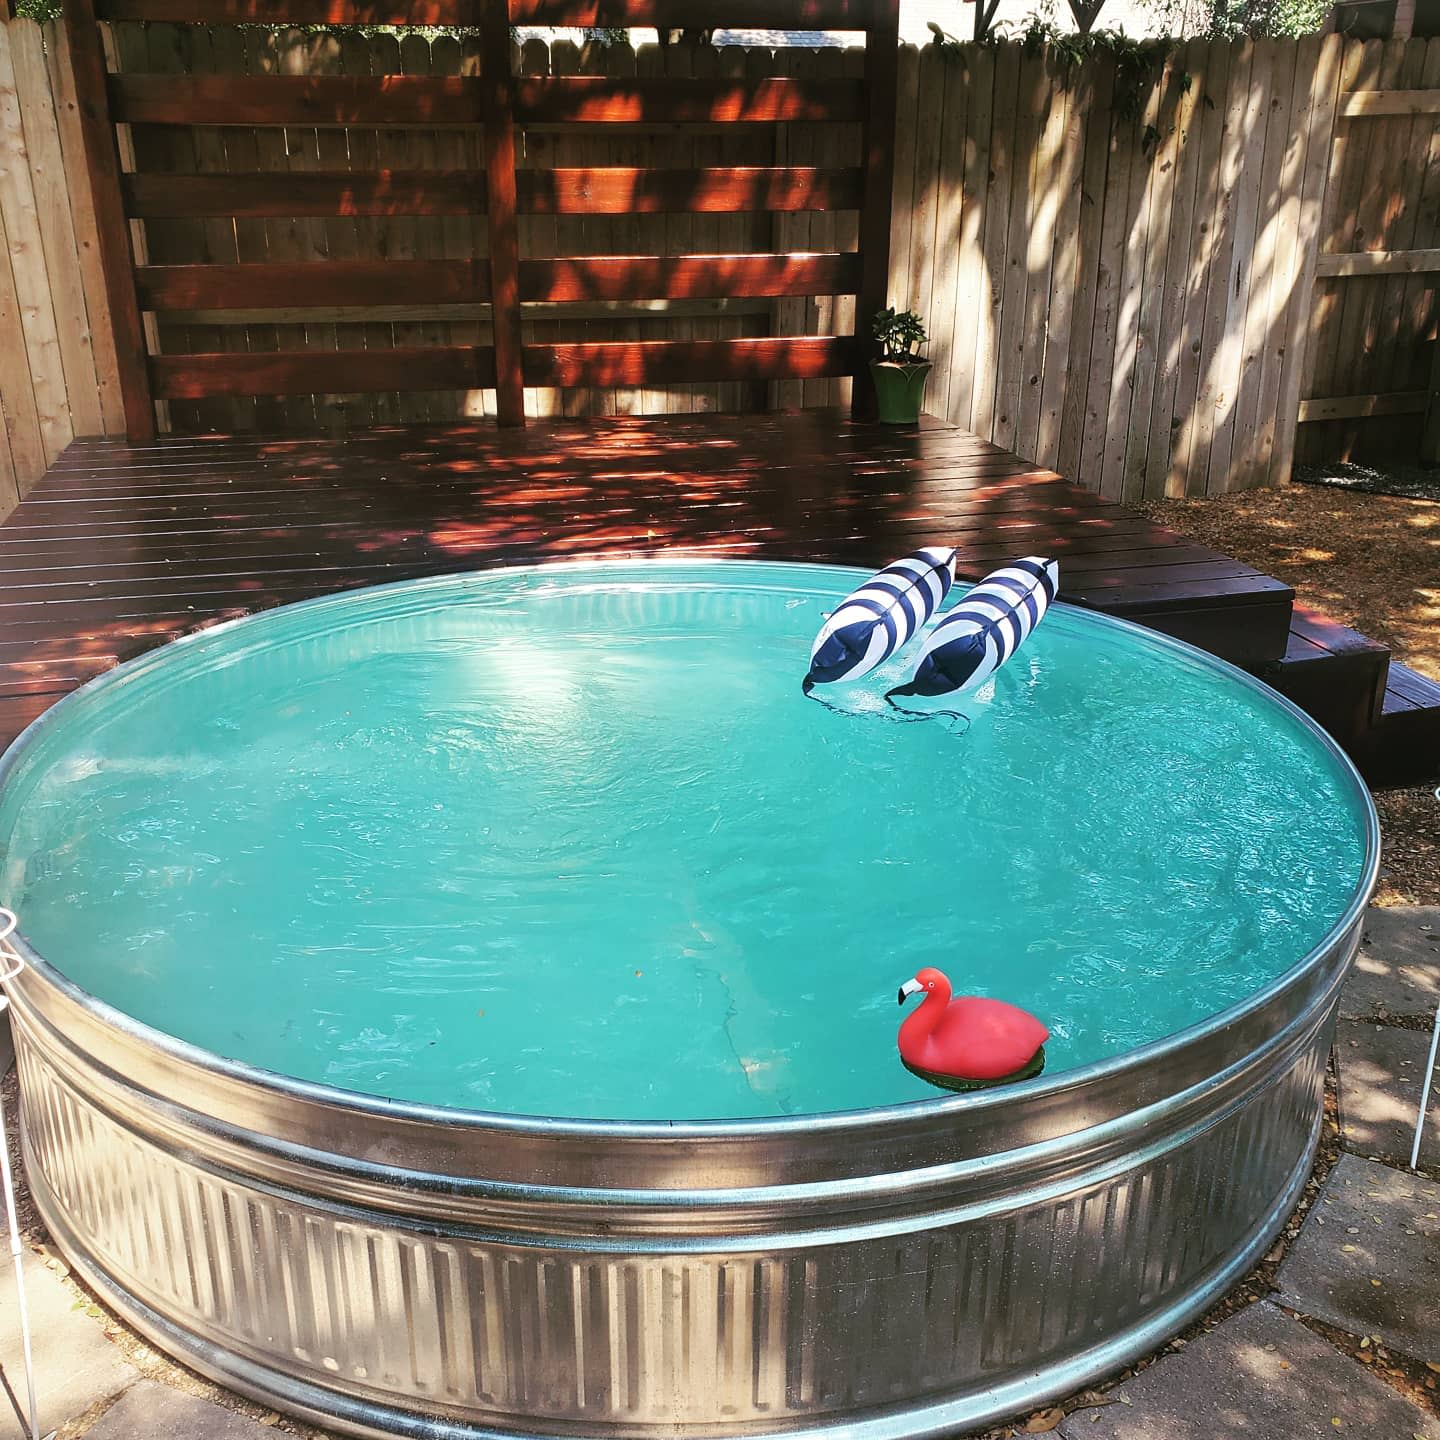
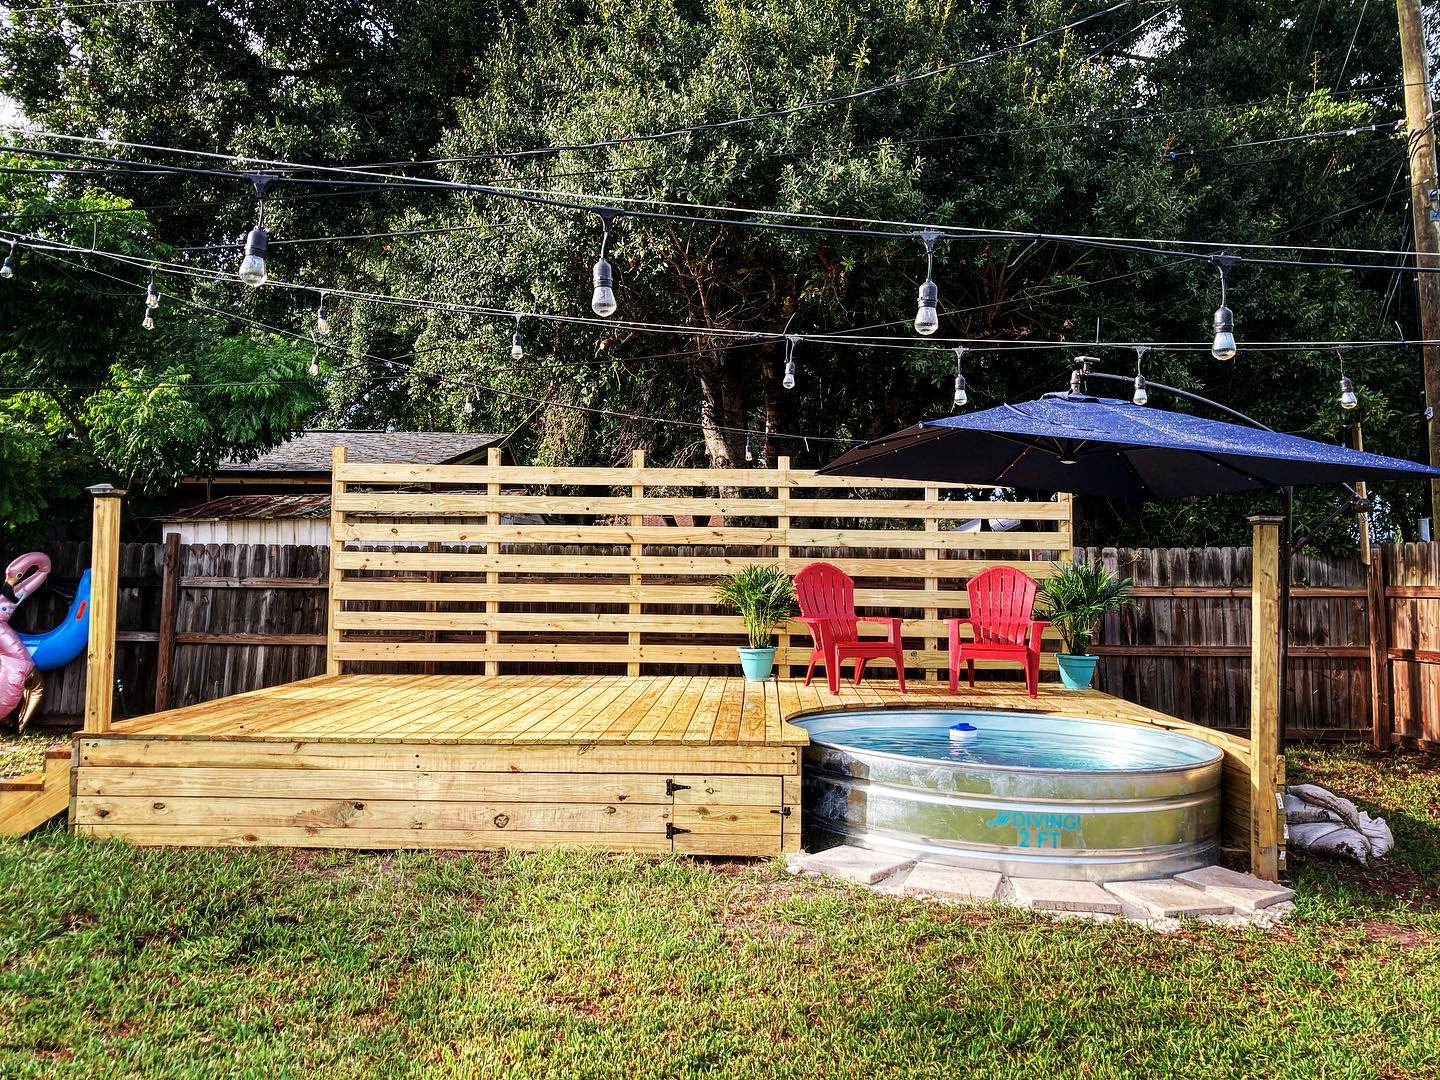
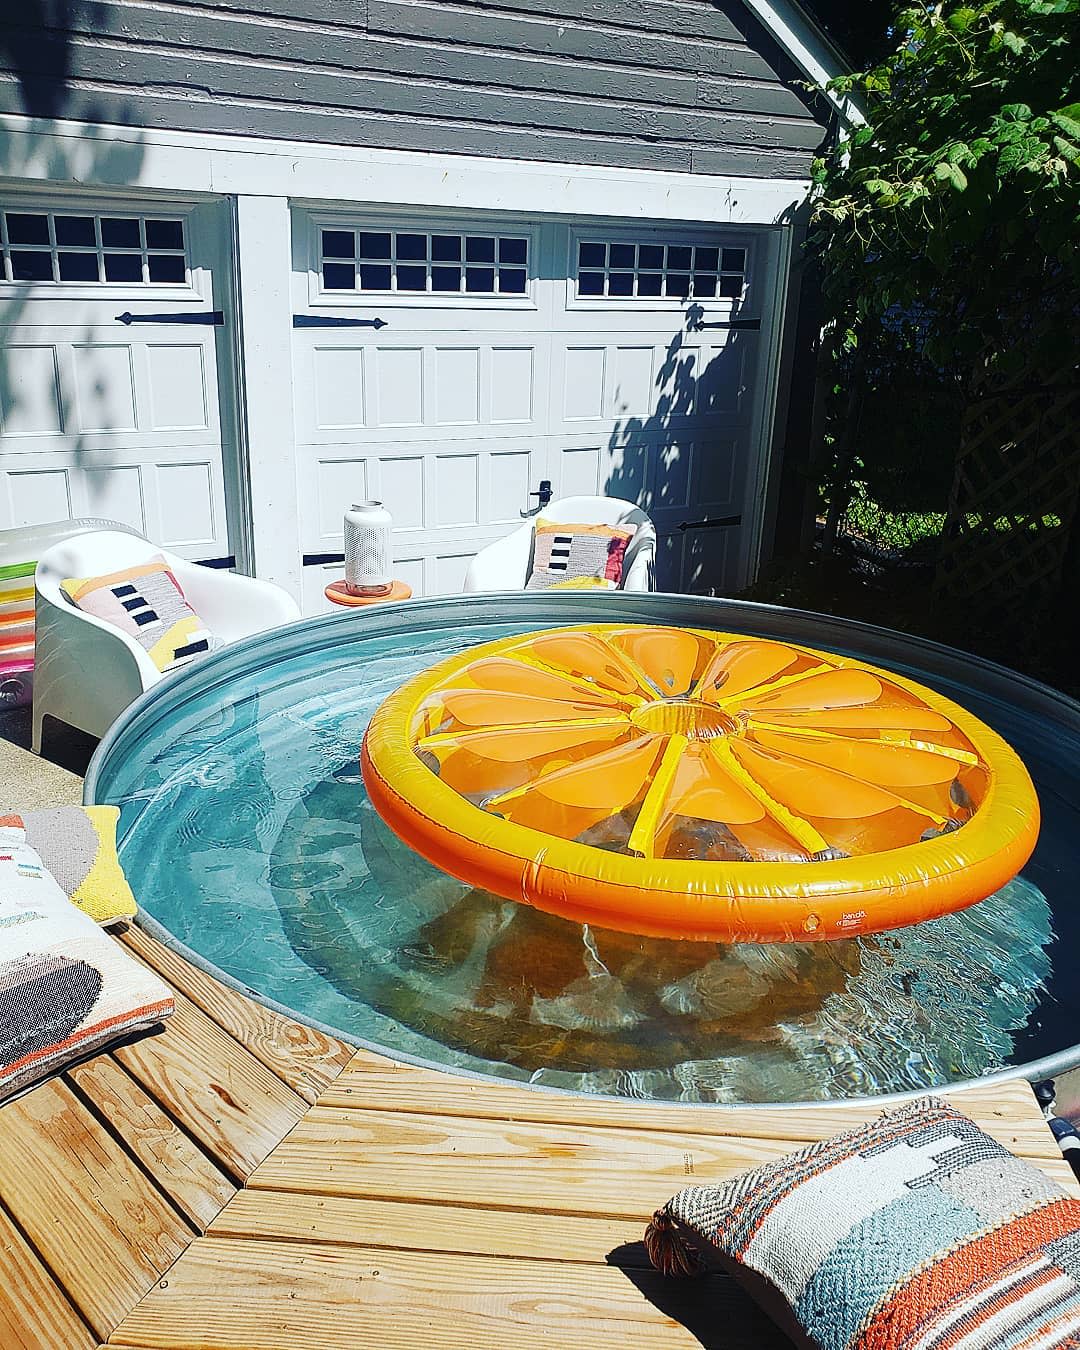
6. Build A Deck Around The Pool
Building a deck around your stock tank pool can significantly enhance its accessibility and aesthetic appeal. Construct the deck with durable, weather-resistant materials like treated lumber or composite decking. Ensure it’s level with the pool’s edge for seamless entry and exit, and include a non-slip surface for safety. This deck not only provides a stable platform for lounging and poolside activities but also integrates the pool into your backyard design, creating a cohesive and stylish outdoor living space.
Source: @aliweat113 via InstagramSource: @kaimke via InstagramSource: @bearded_ginger14 via InstagramSource: @cathydeloach via InstagramSource: @discoveringgtx via InstagramSource: @harley_the_bostonterrible via InstagramSource: @harvey_house_austin via InstagramSource: @jgehri via InstagramSource: @bruce_michael via InstagramSource: @joe.kral via InstagramSource: @kayday1989 via InstagramSource: @makergray via InstagramSource: @re.fab.ology via InstagramSource: @sneilson26 via Instagram
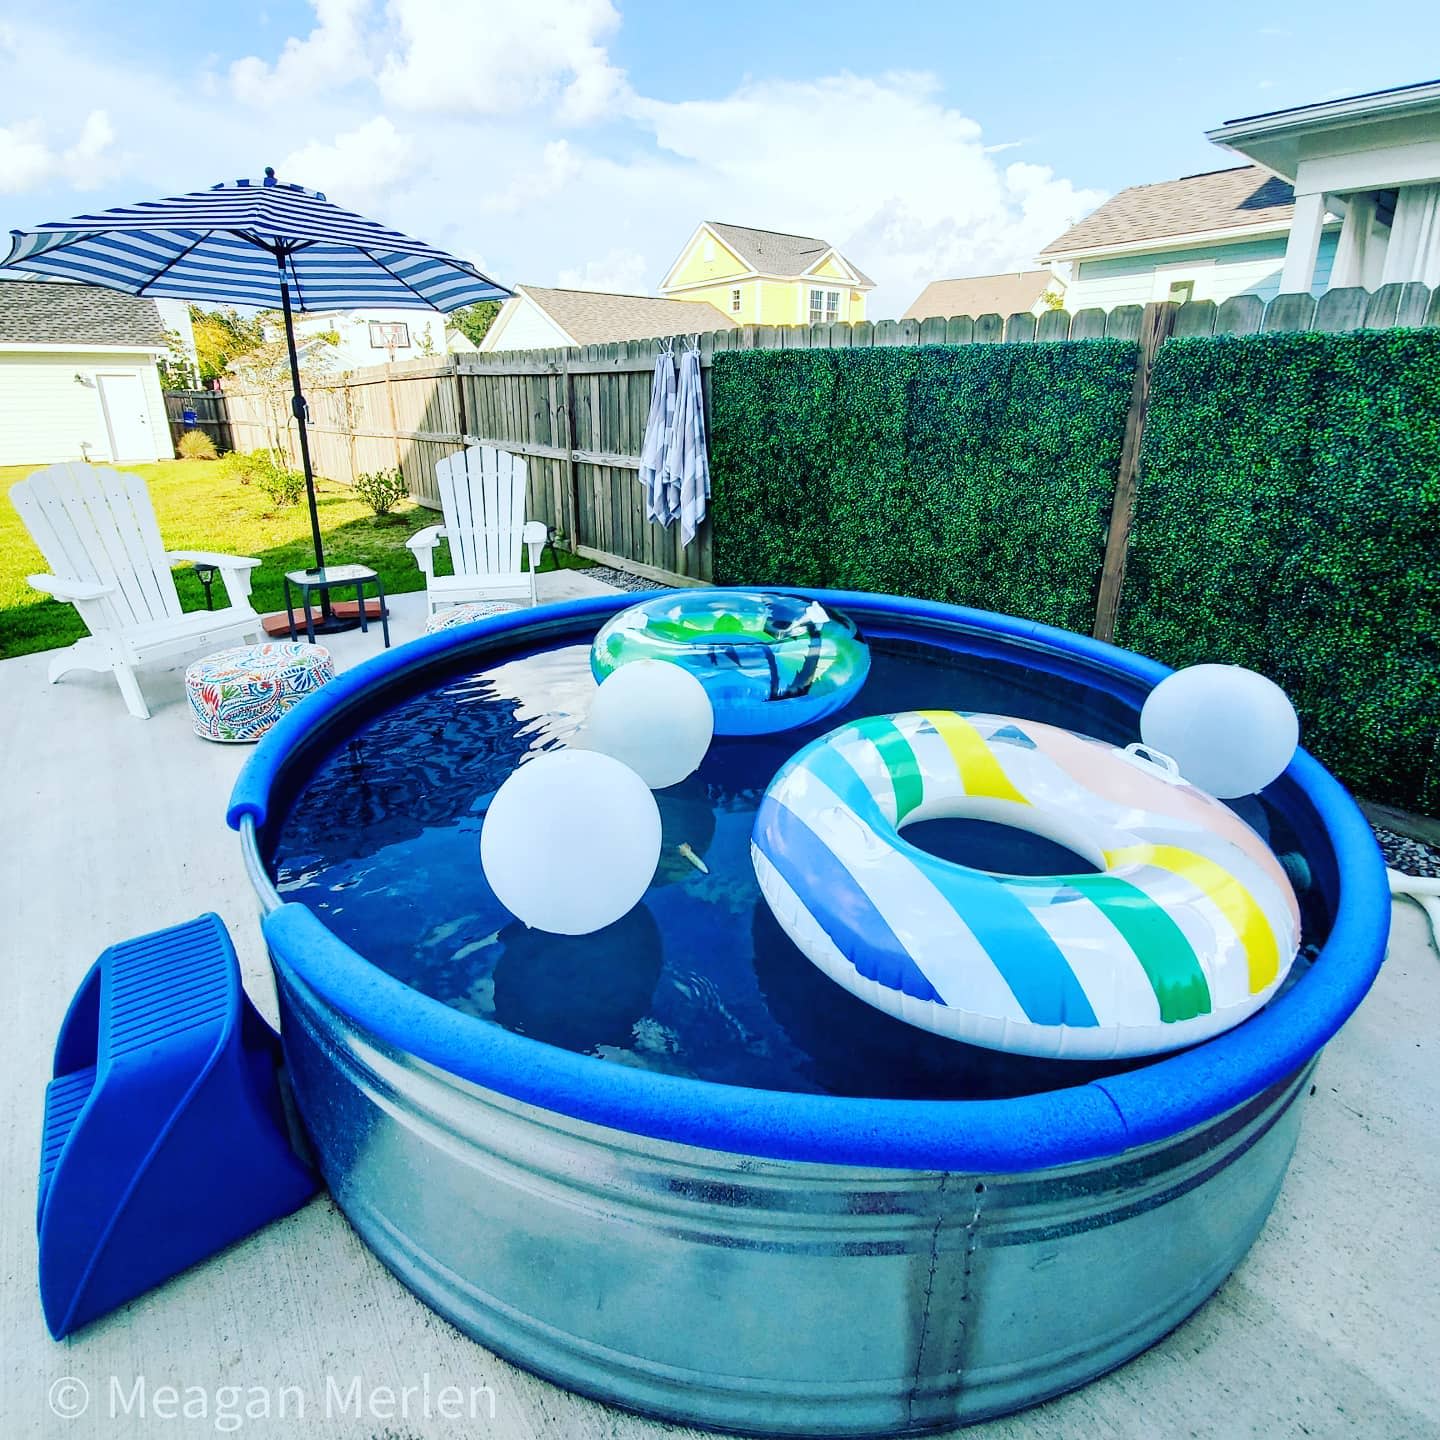
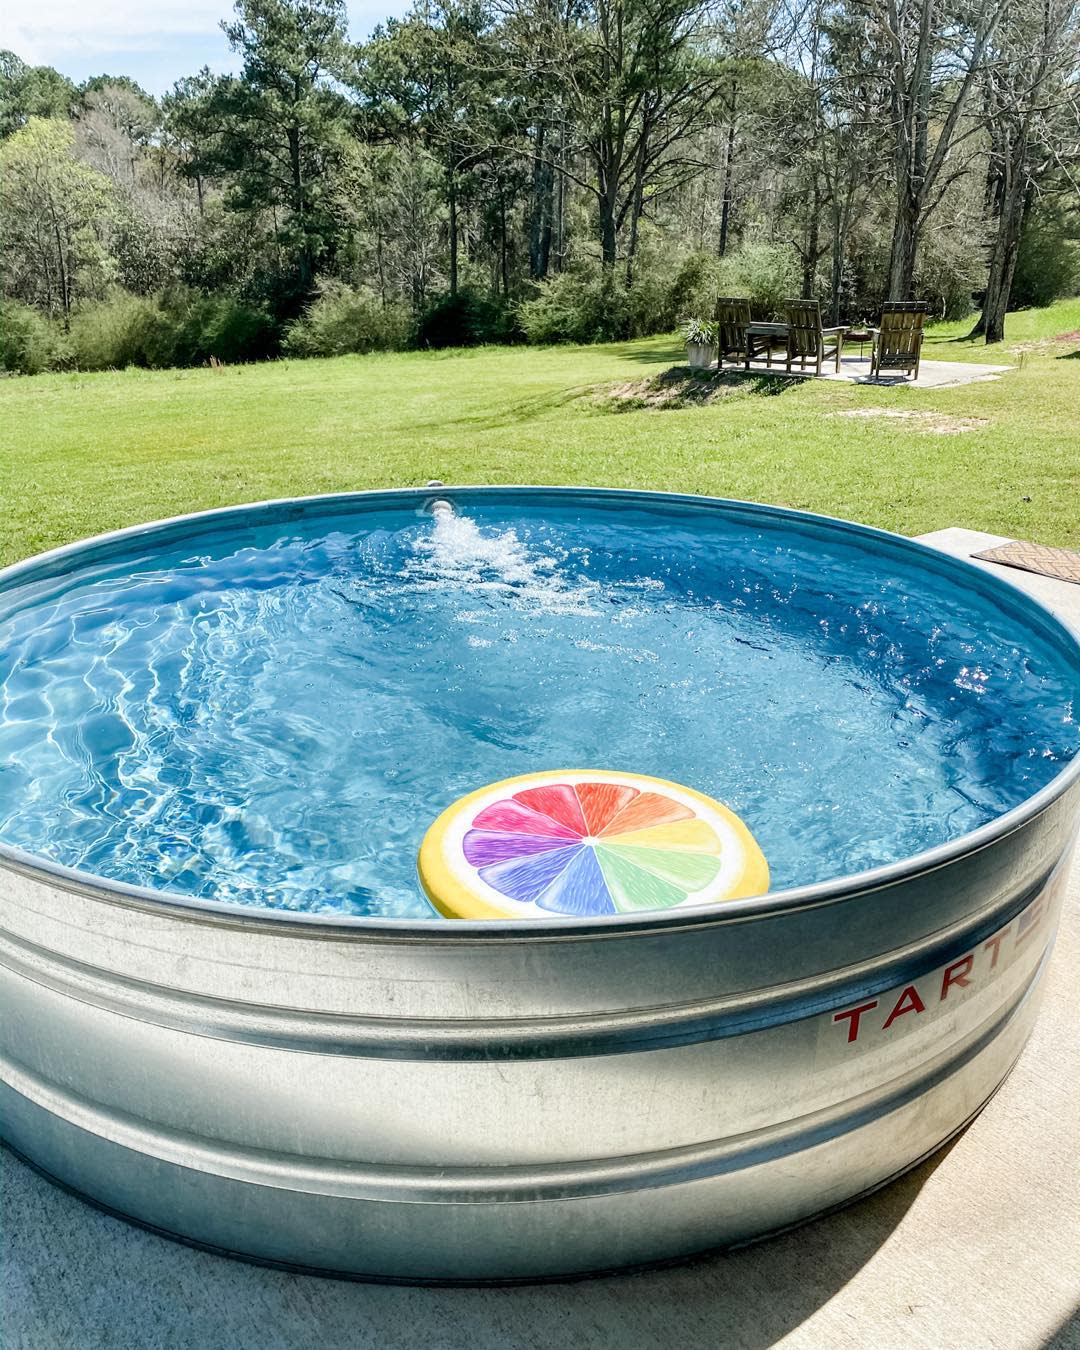
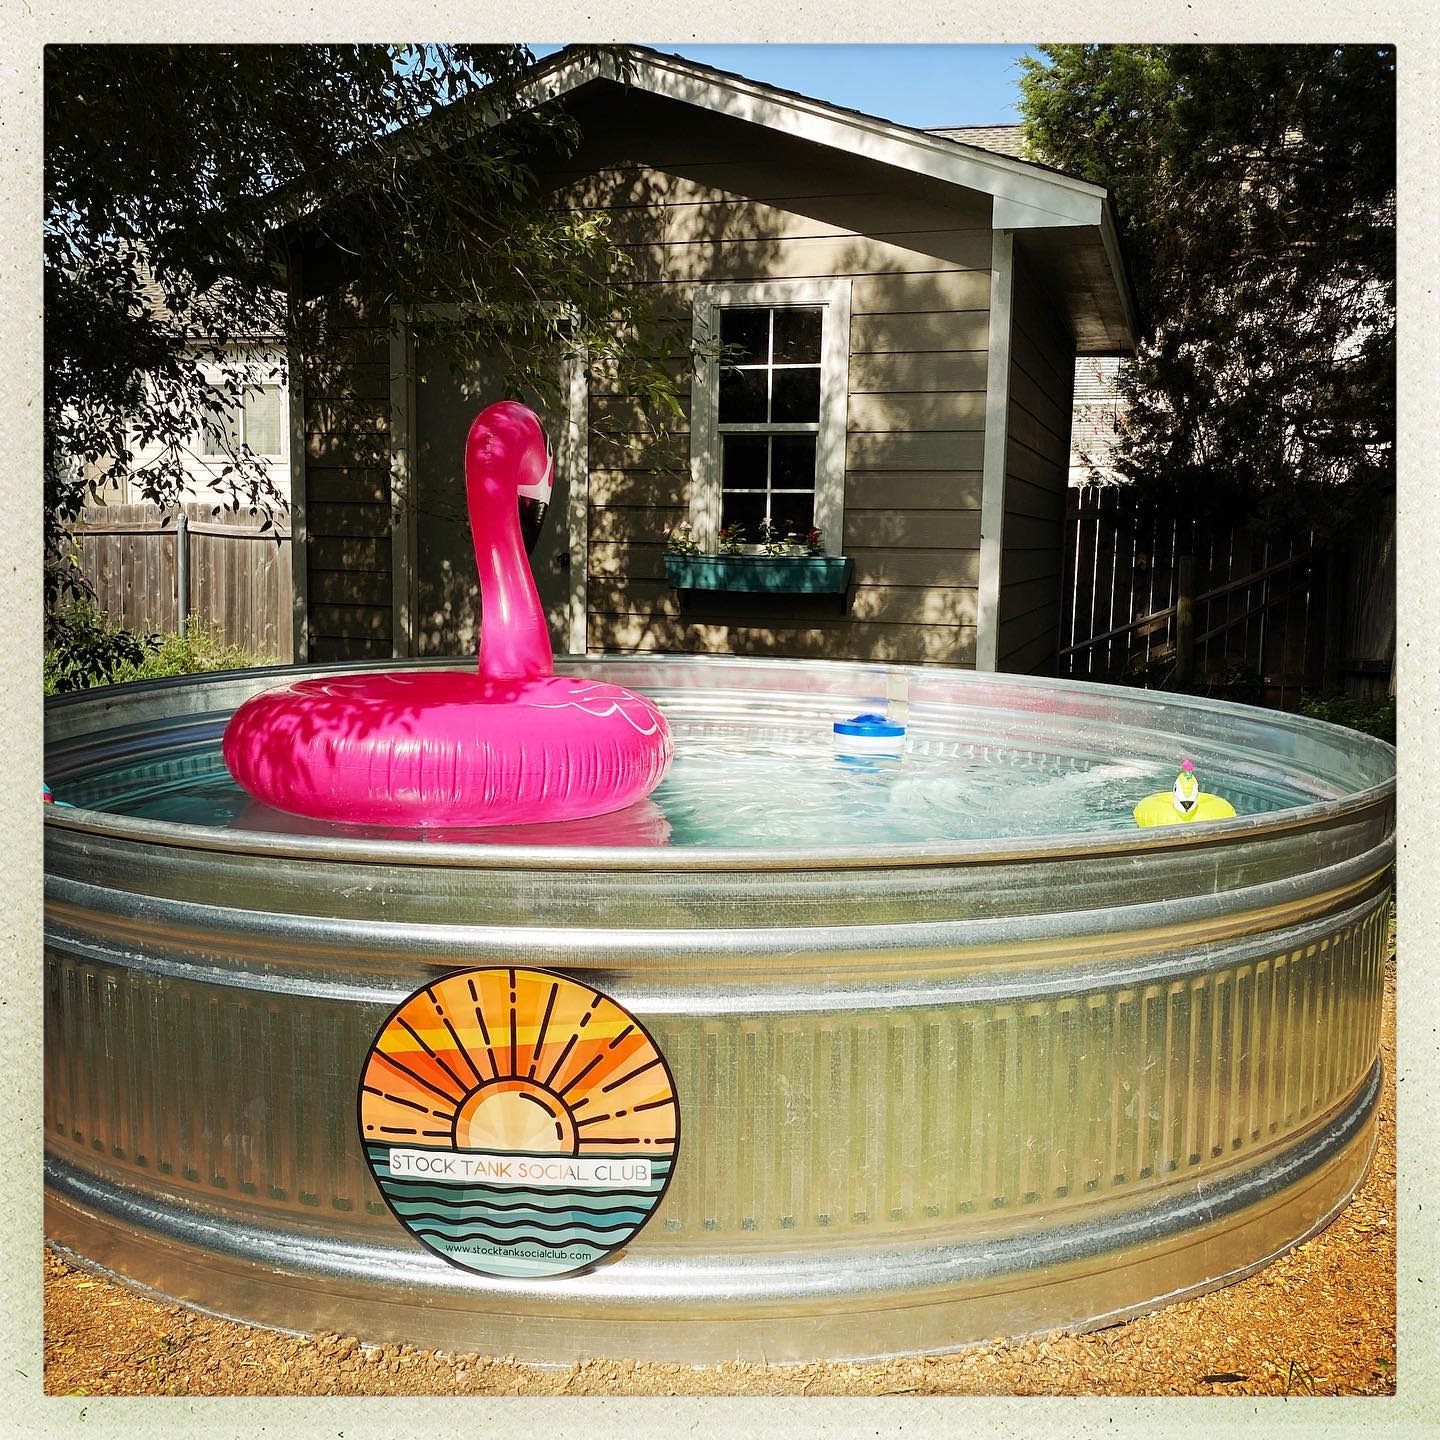
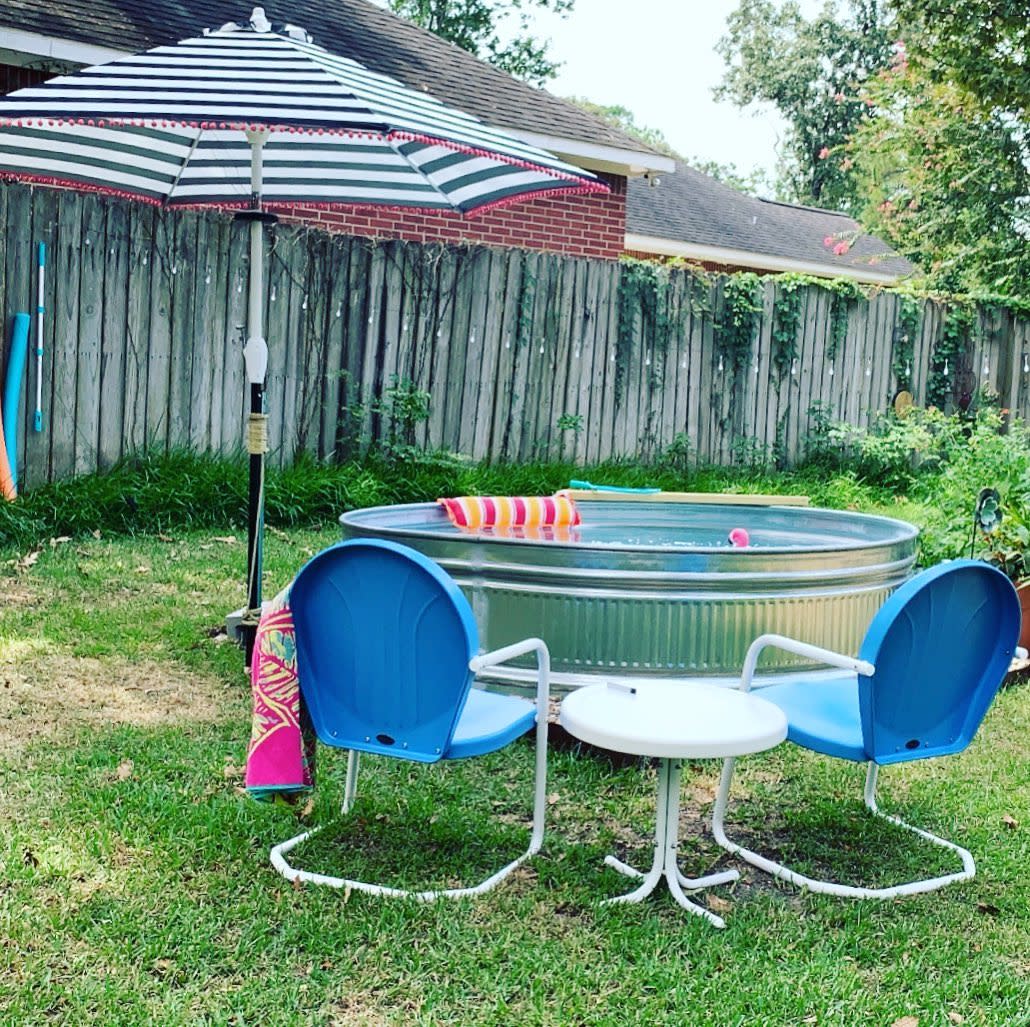
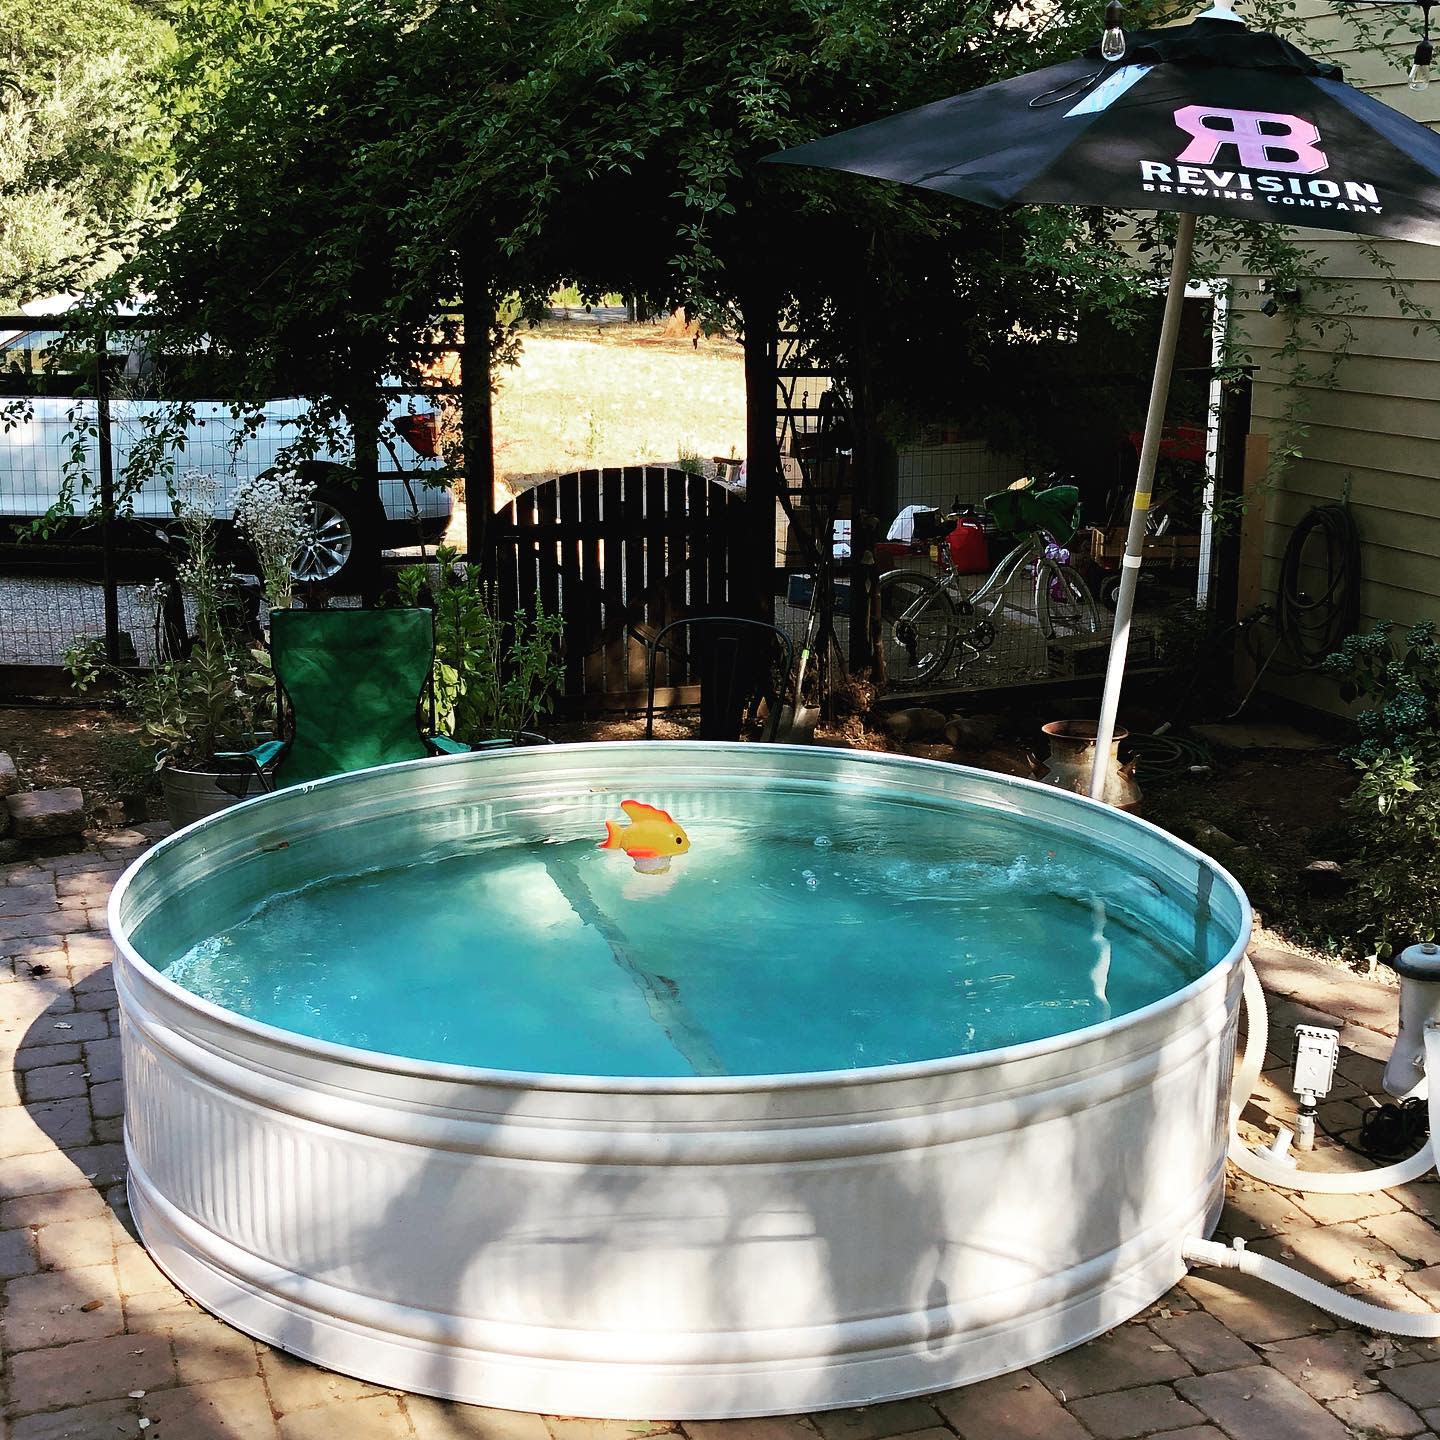
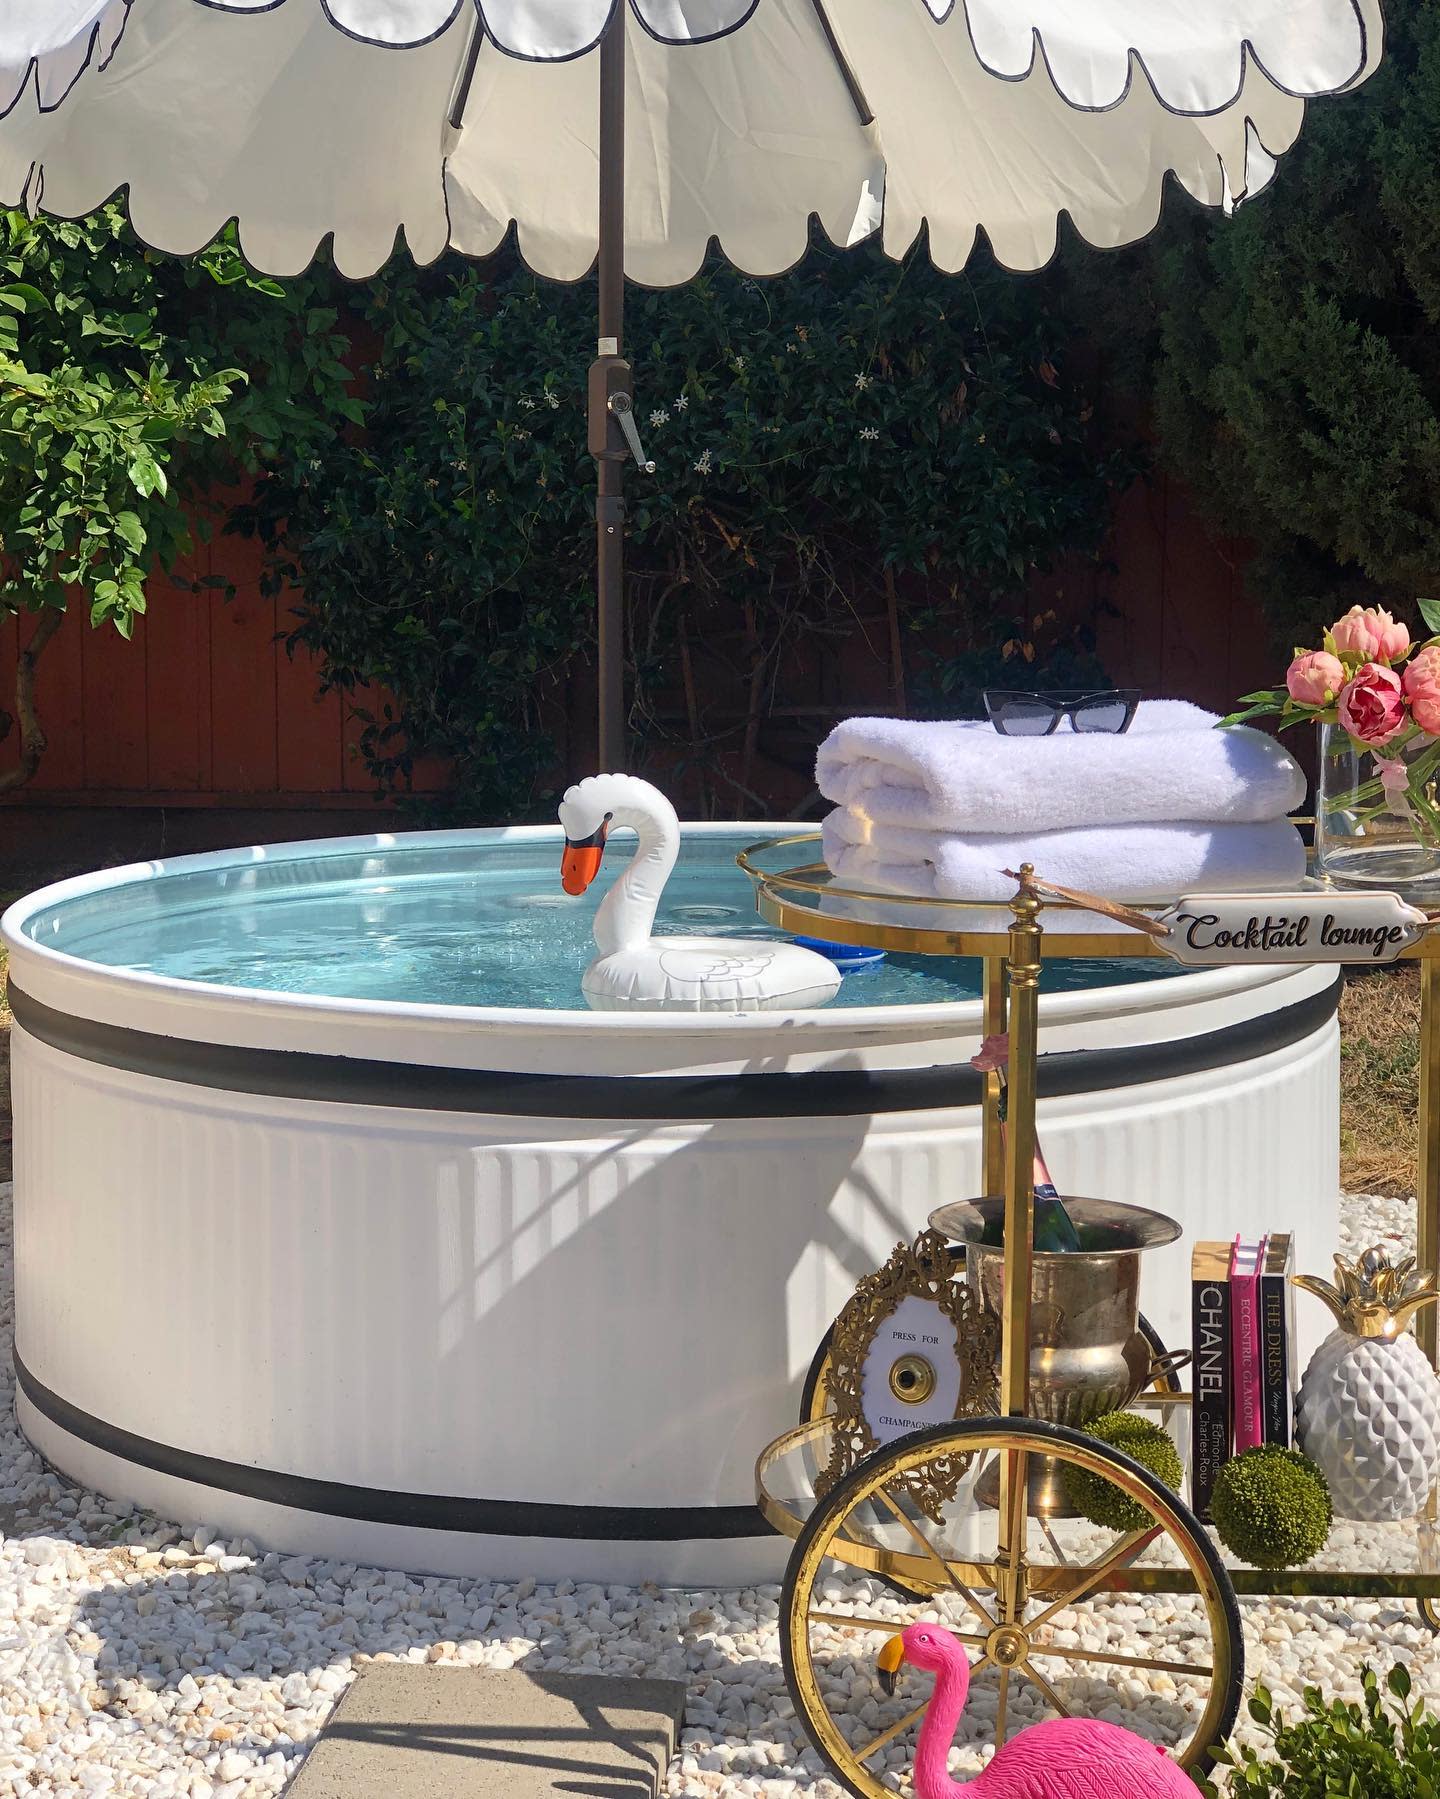
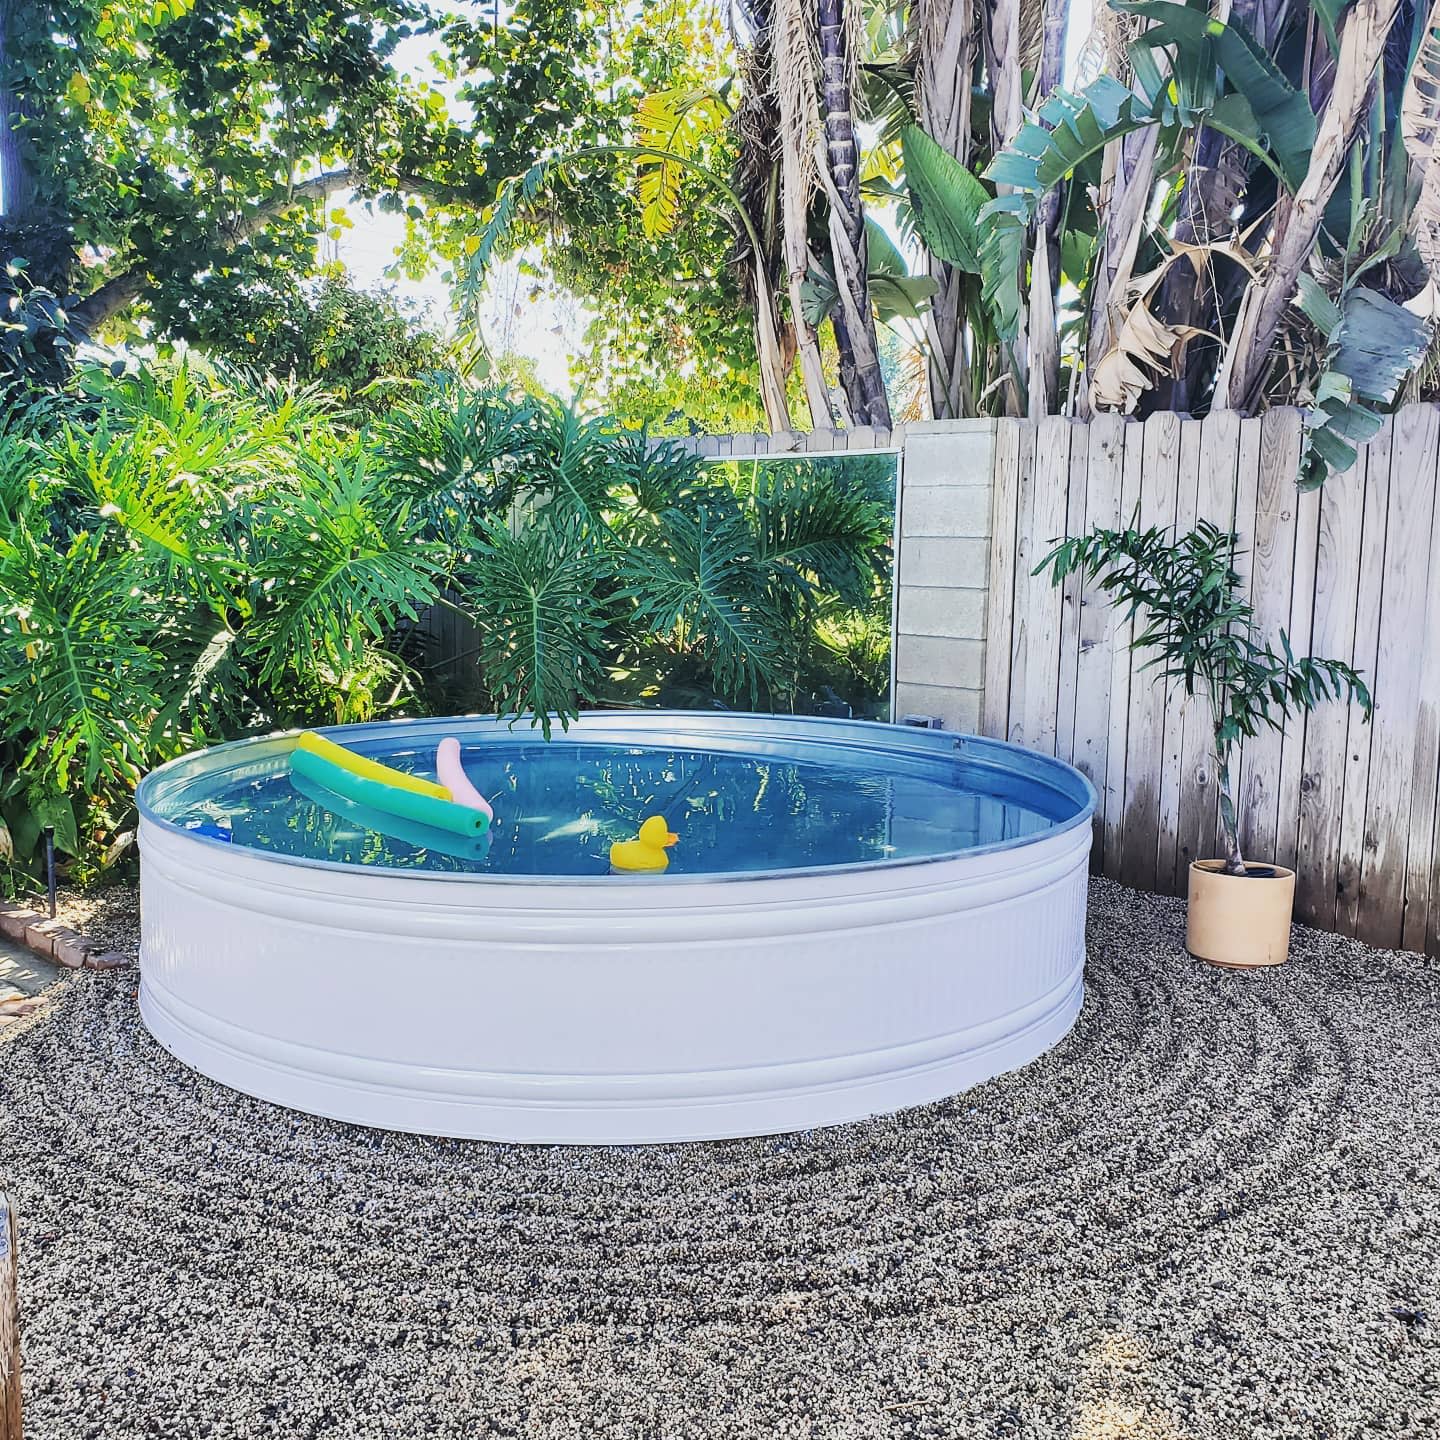
7. Keep It Simple
Maintaining simplicity in your stock tank pool design can often lead to a more elegant and timeless look. Opt for minimal decorations and straightforward, functional accessories. Stick to a neutral color palette for any surrounding elements like deck chairs or umbrellas, and avoid over-cluttering the area.
Source: @harvey_house_austin via InstagramSource: @jennyonthespot via InstagramSource: @living_a_well_life via InstagramSource: @adailydoseofchristianna via InstagramSource: @stocktanksocialclub via InstagramSource: @bethcampbellcreative via Instagram
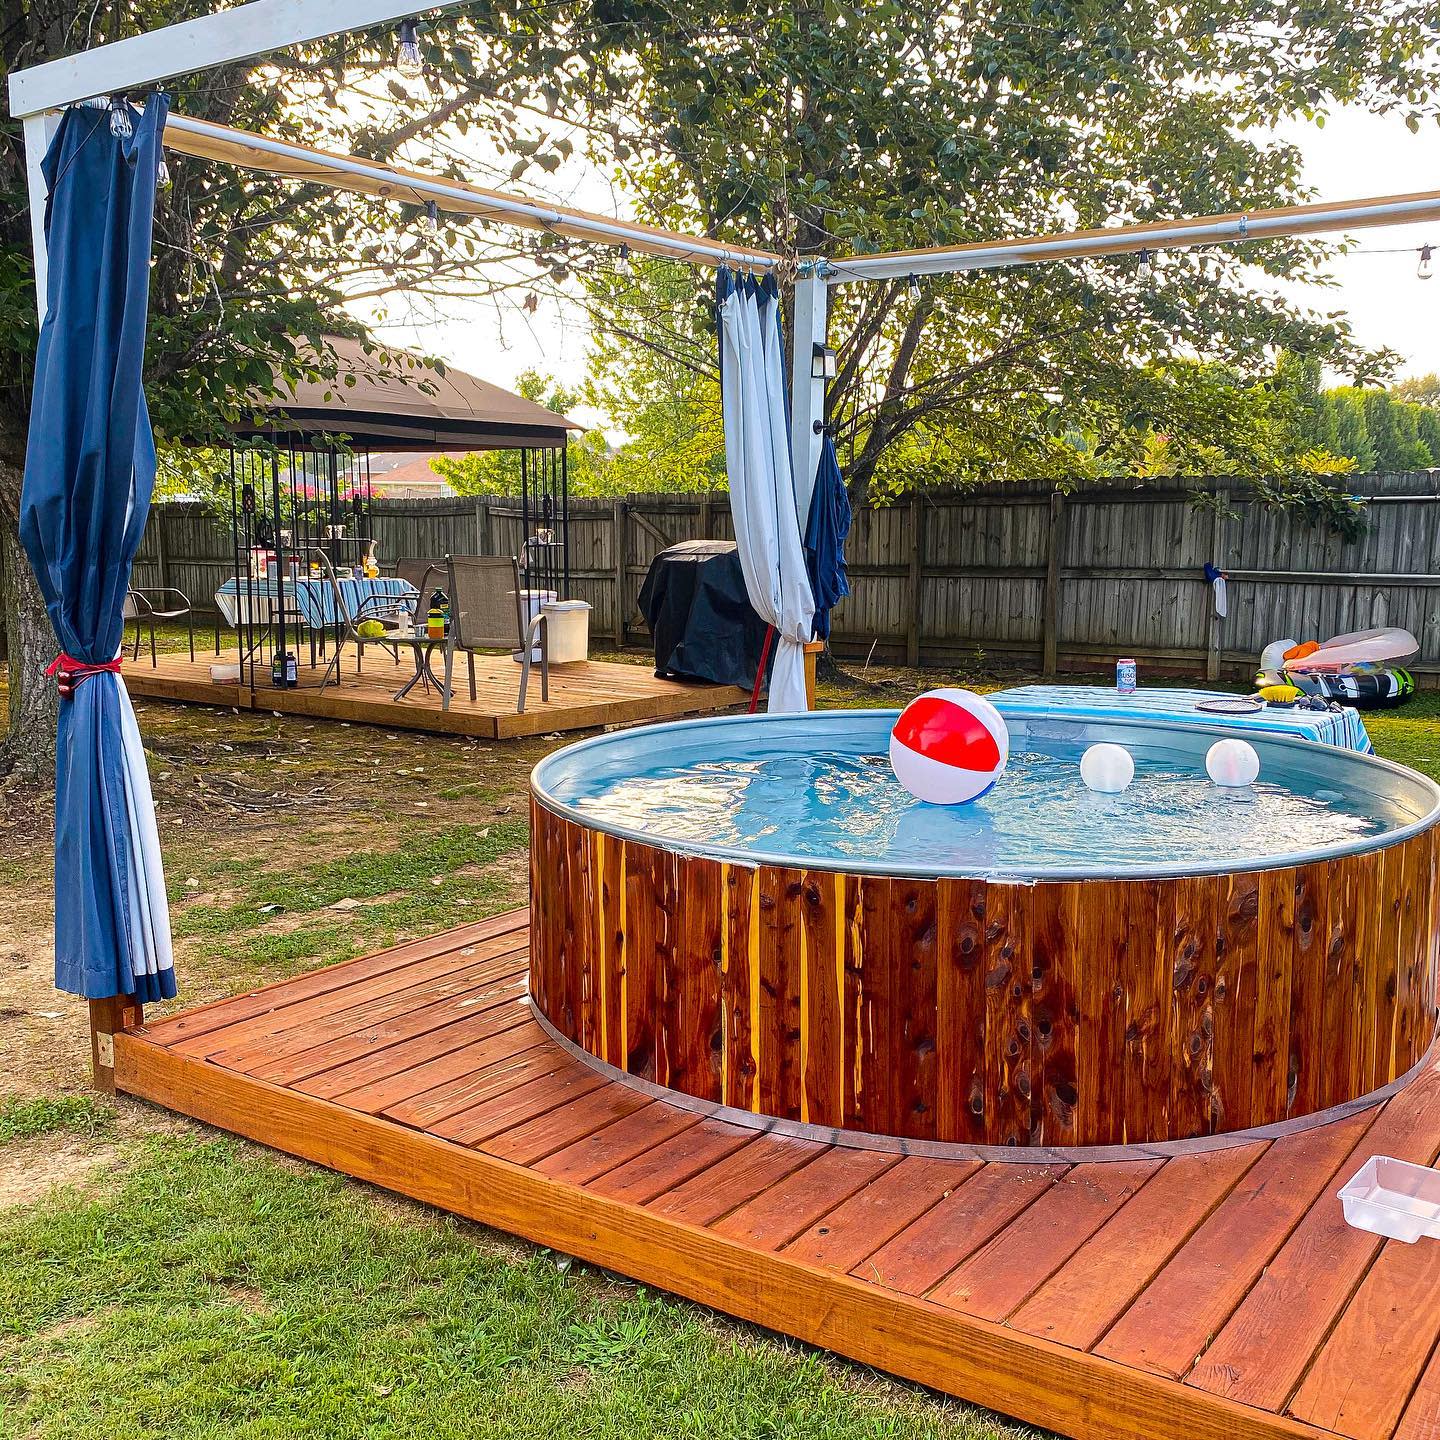
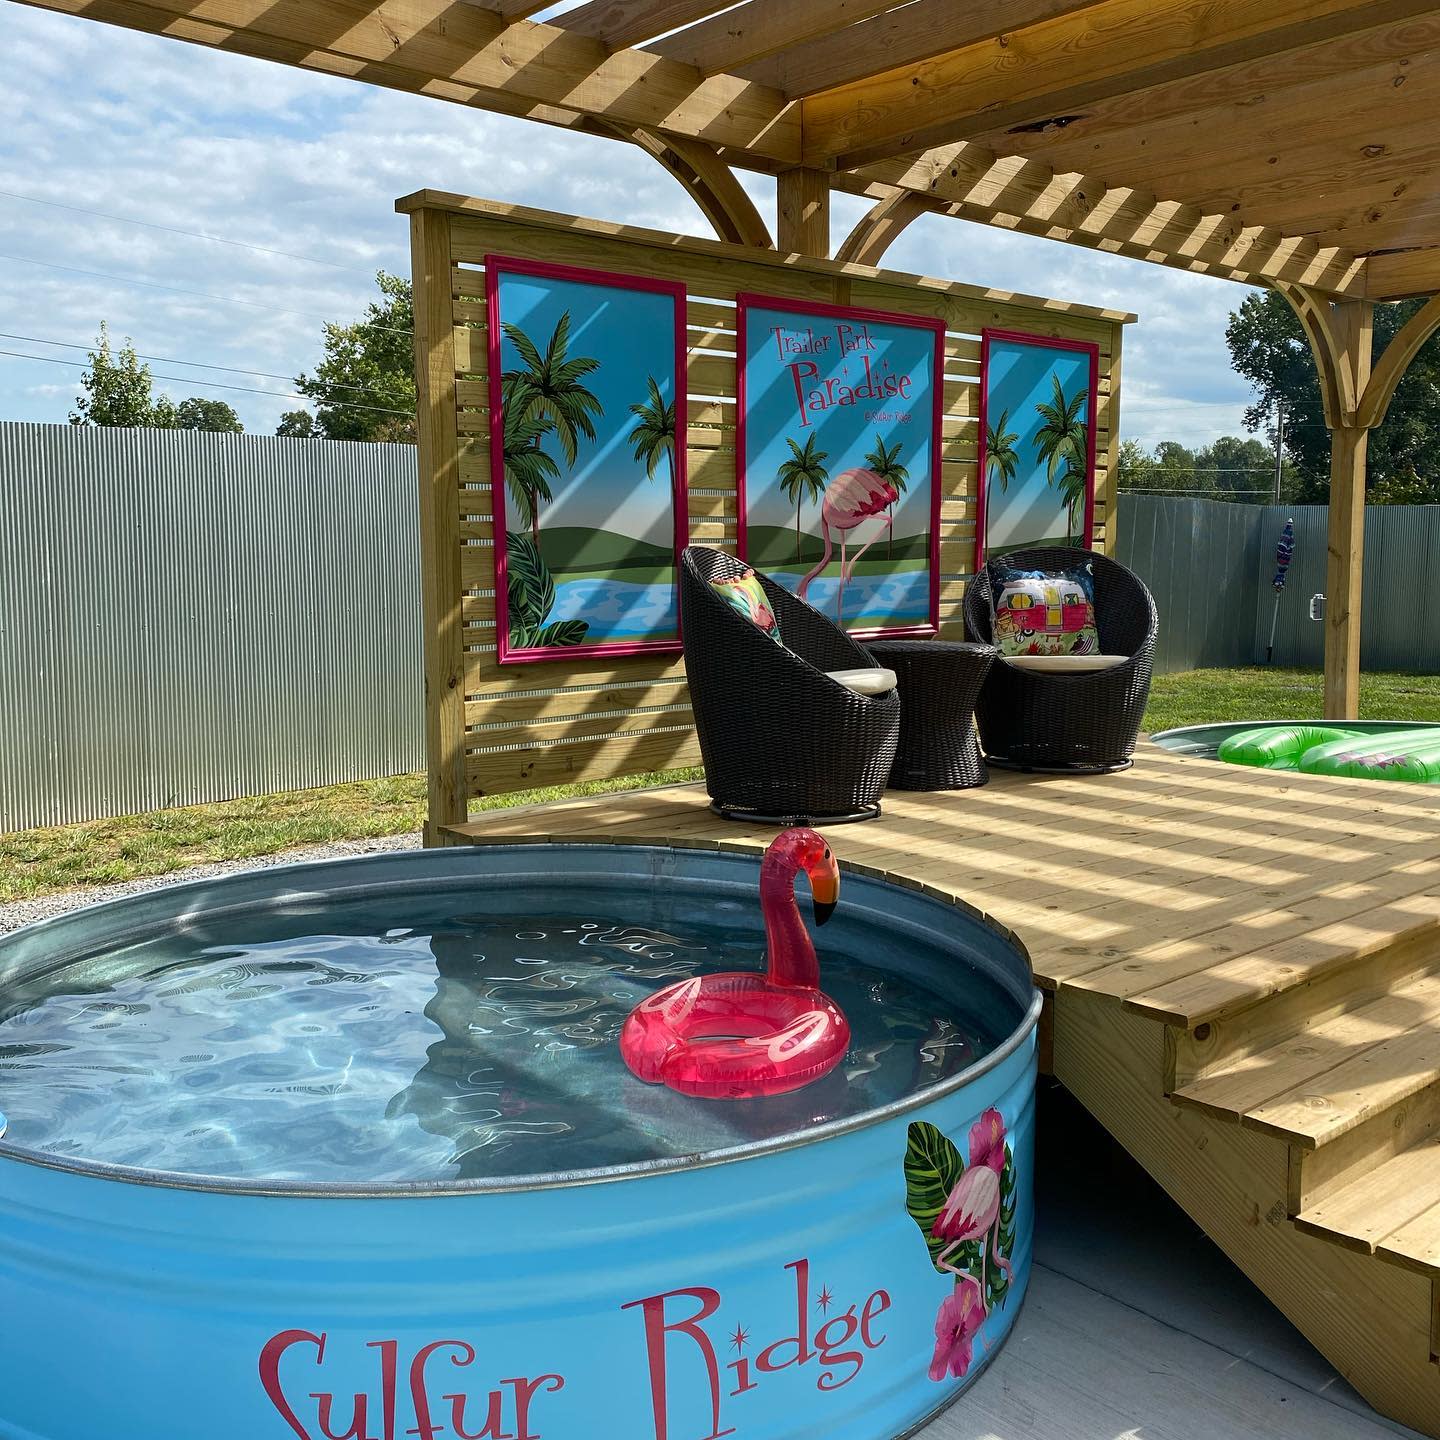
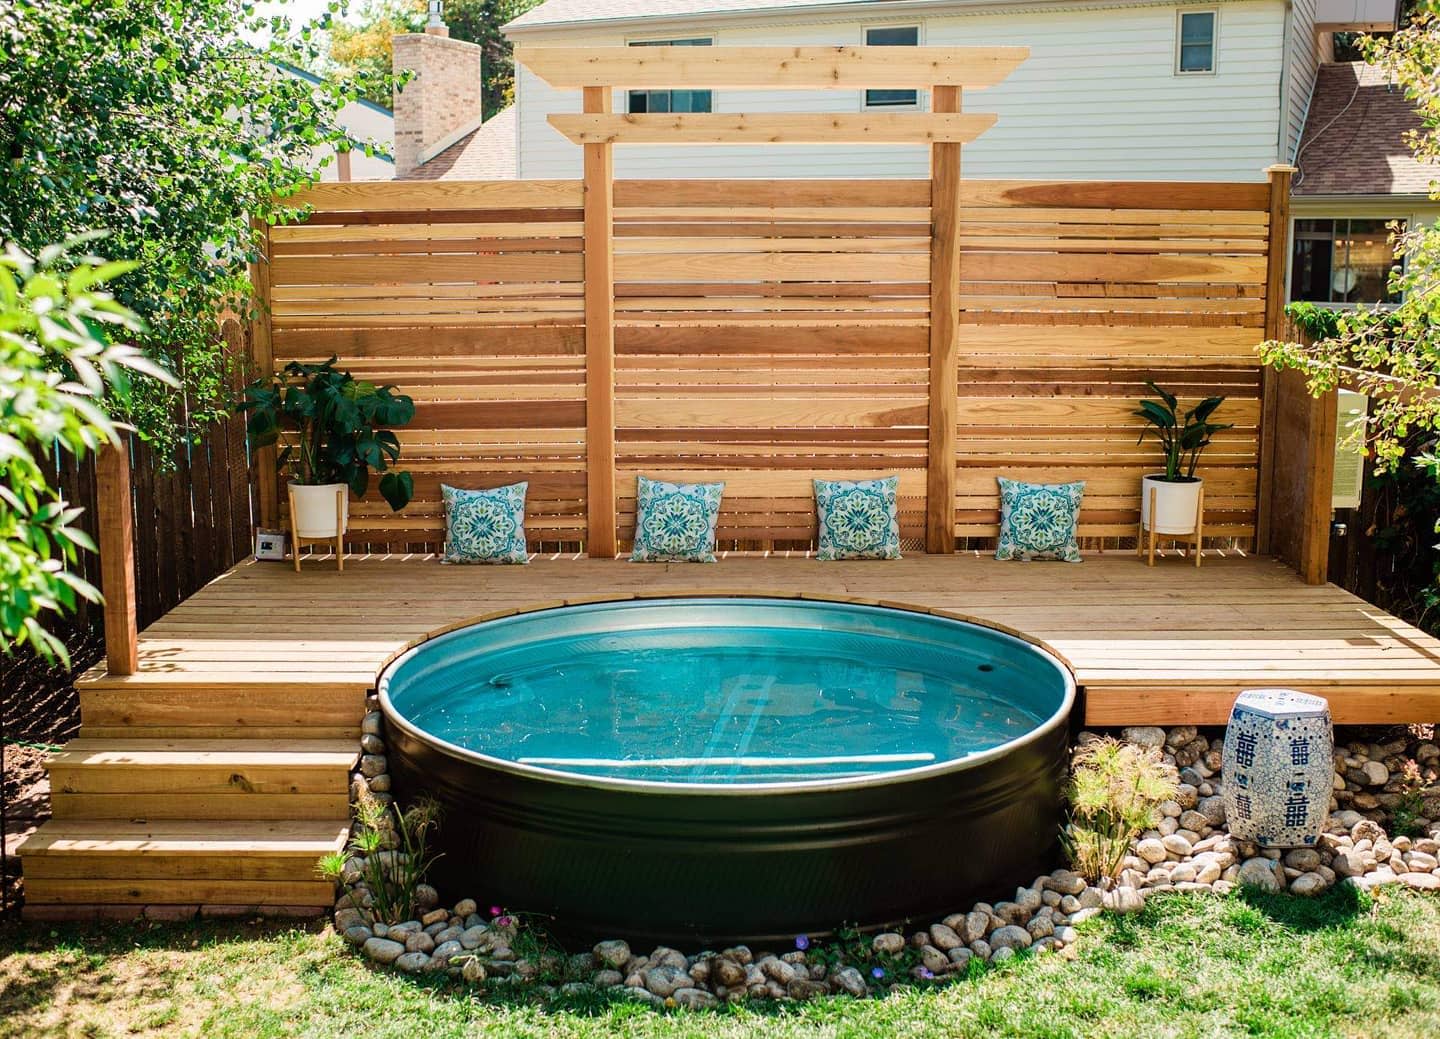
8. Install A Privacy Wall
Installing a privacy wall around your stock tank pool is a great way to create a secluded and intimate swimming area. Choose materials that complement your outdoor decor, such as wooden slats, bamboo screens, or even lush greenery for a natural barrier. Ensure the wall is high enough to provide adequate privacy while still allowing for ventilation and natural light.
Source: @mrsmamabritt via InstagramSource: @stocktanksocialclub via InstagramSource: @happy_camper_wimberley via InstagramSource: @zbuckingham via InstagramSource: @steven_laser via InstagramSource: @tubs_and_tanks via InstagramSource: @thatspeechgal via Instagram
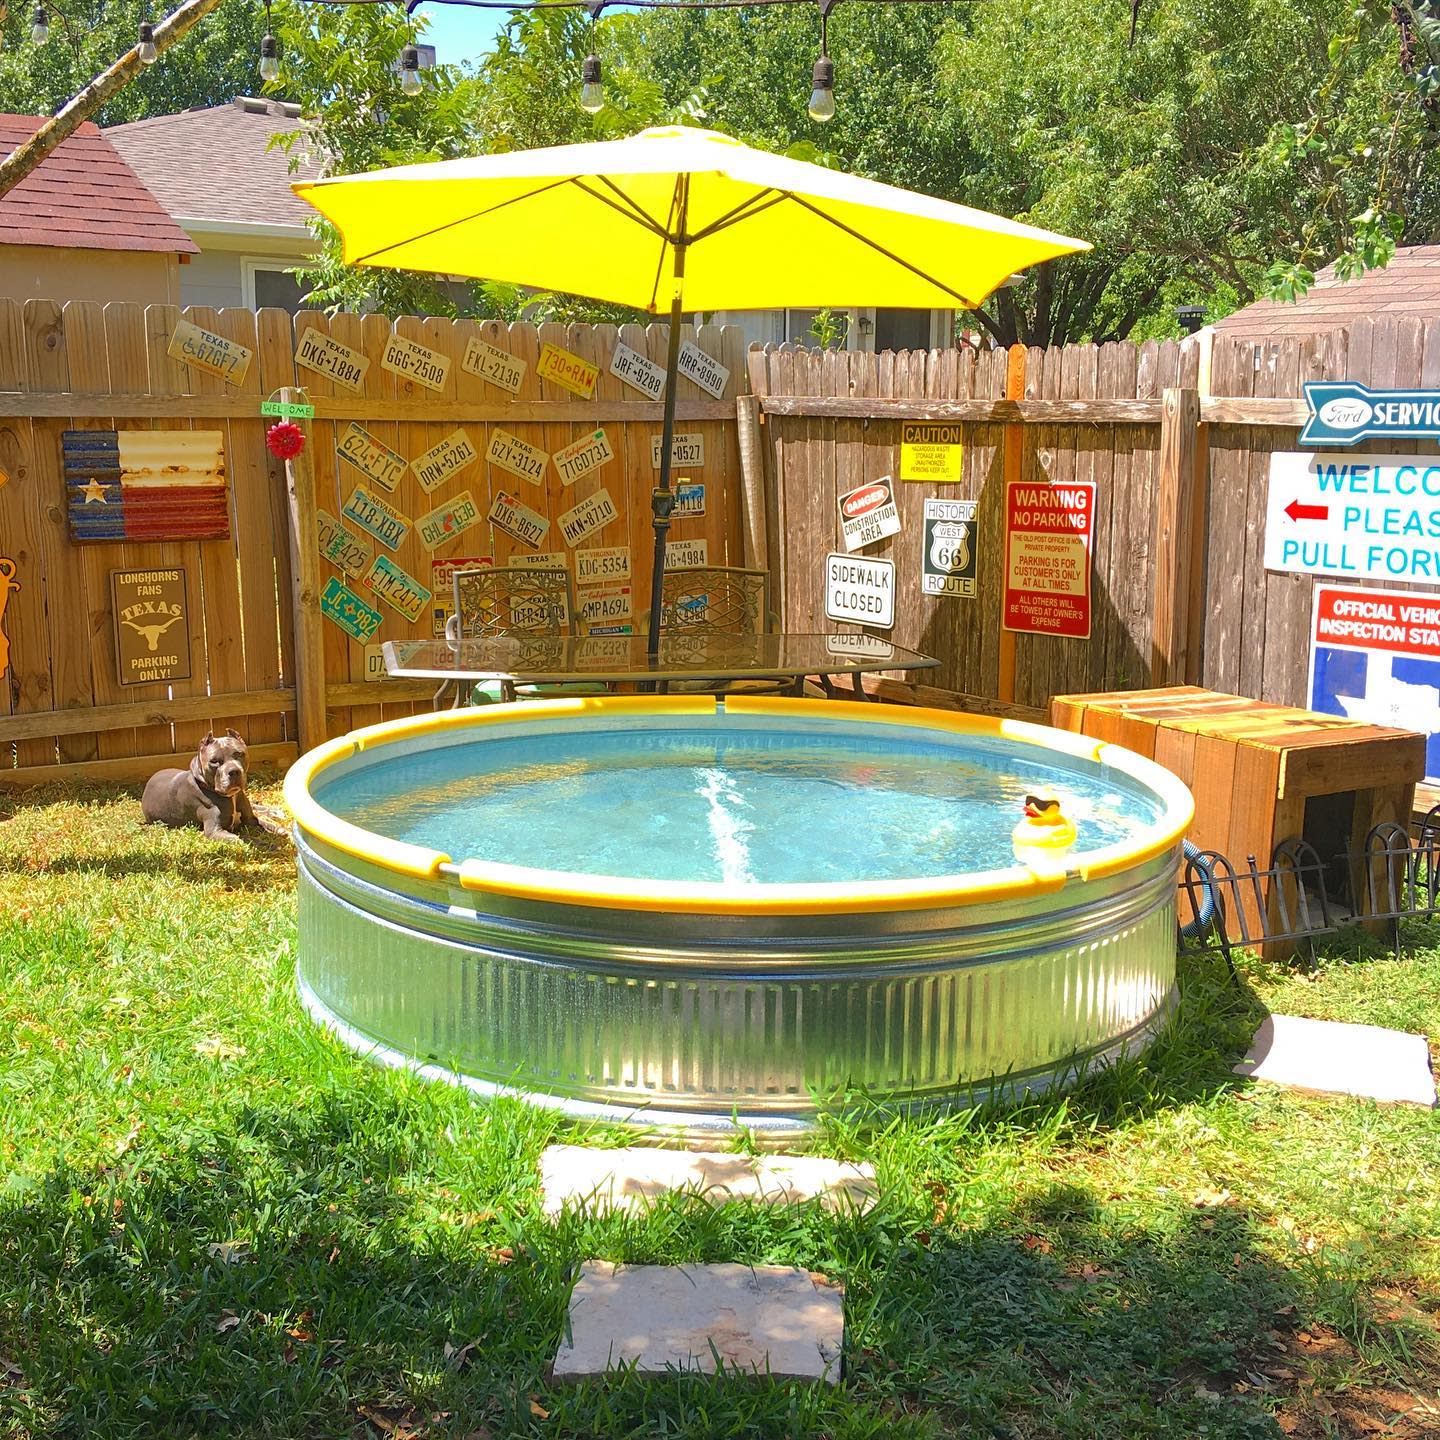
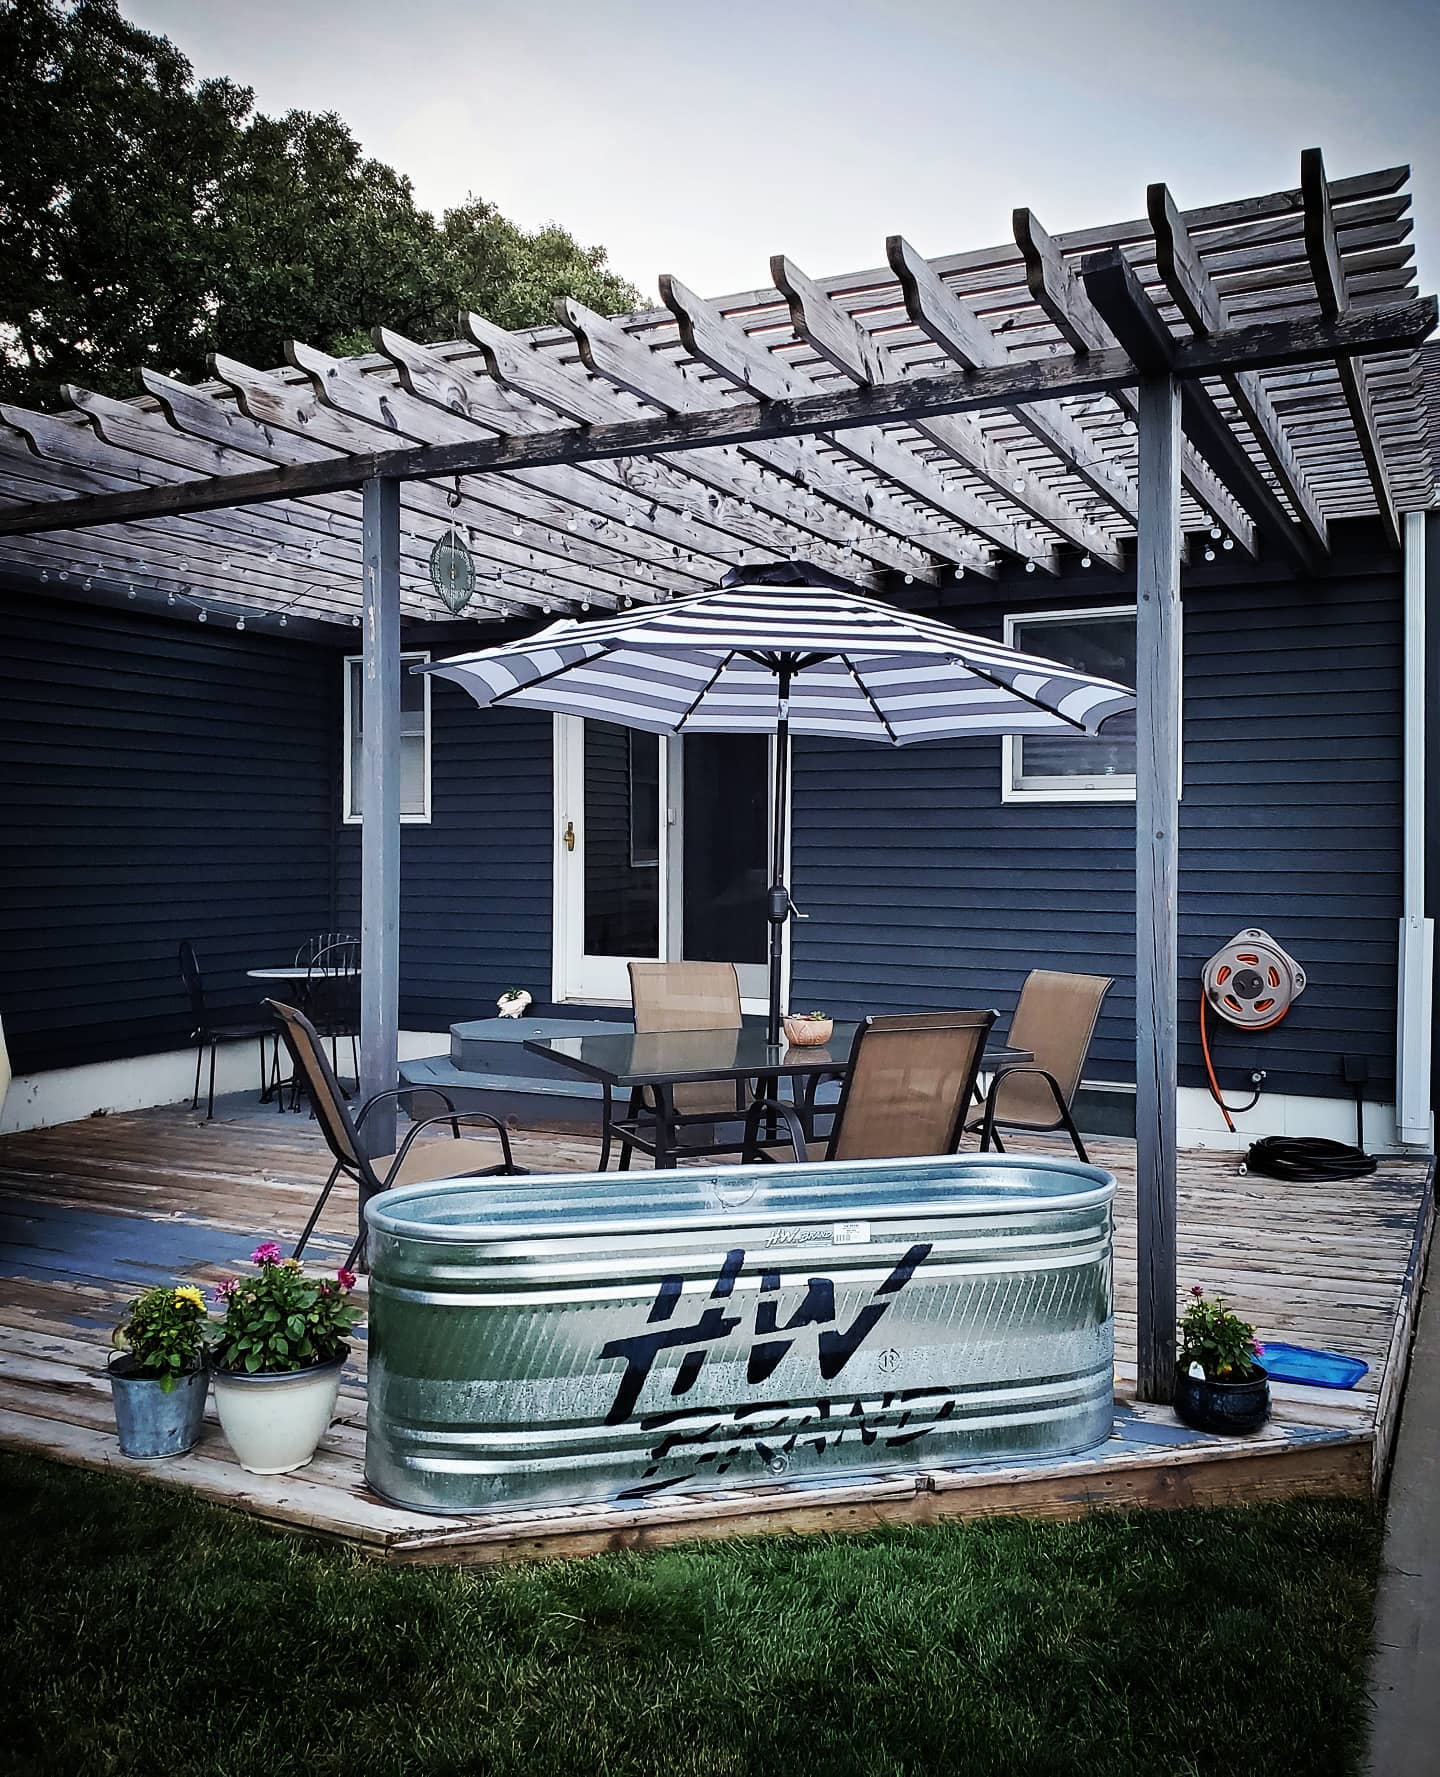
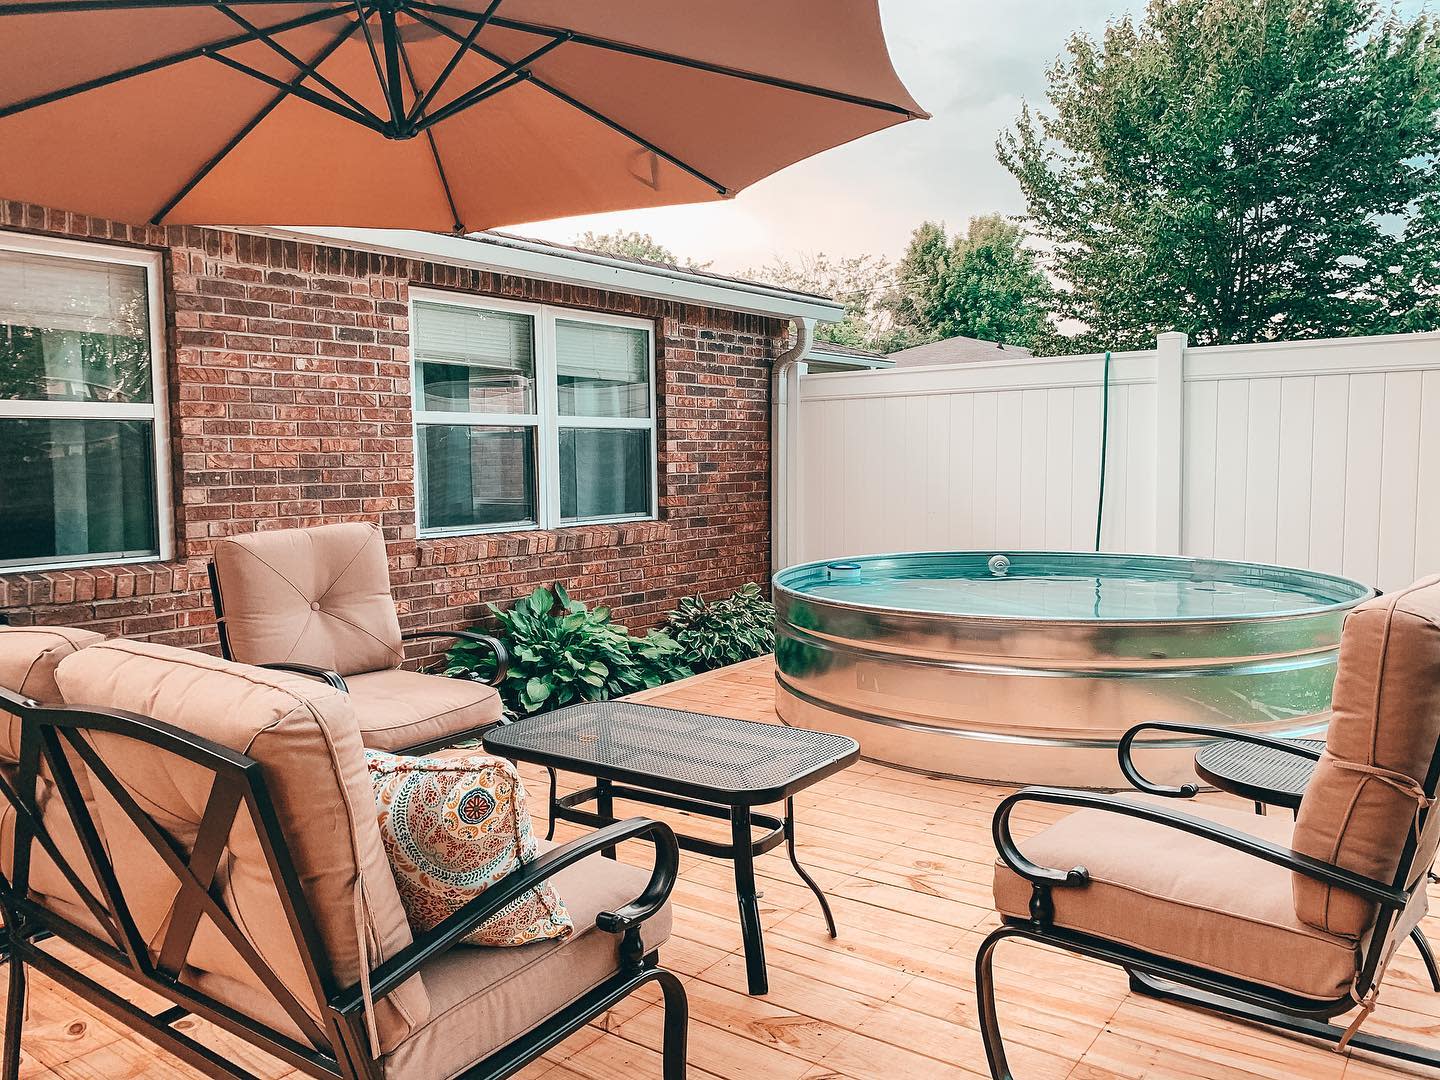
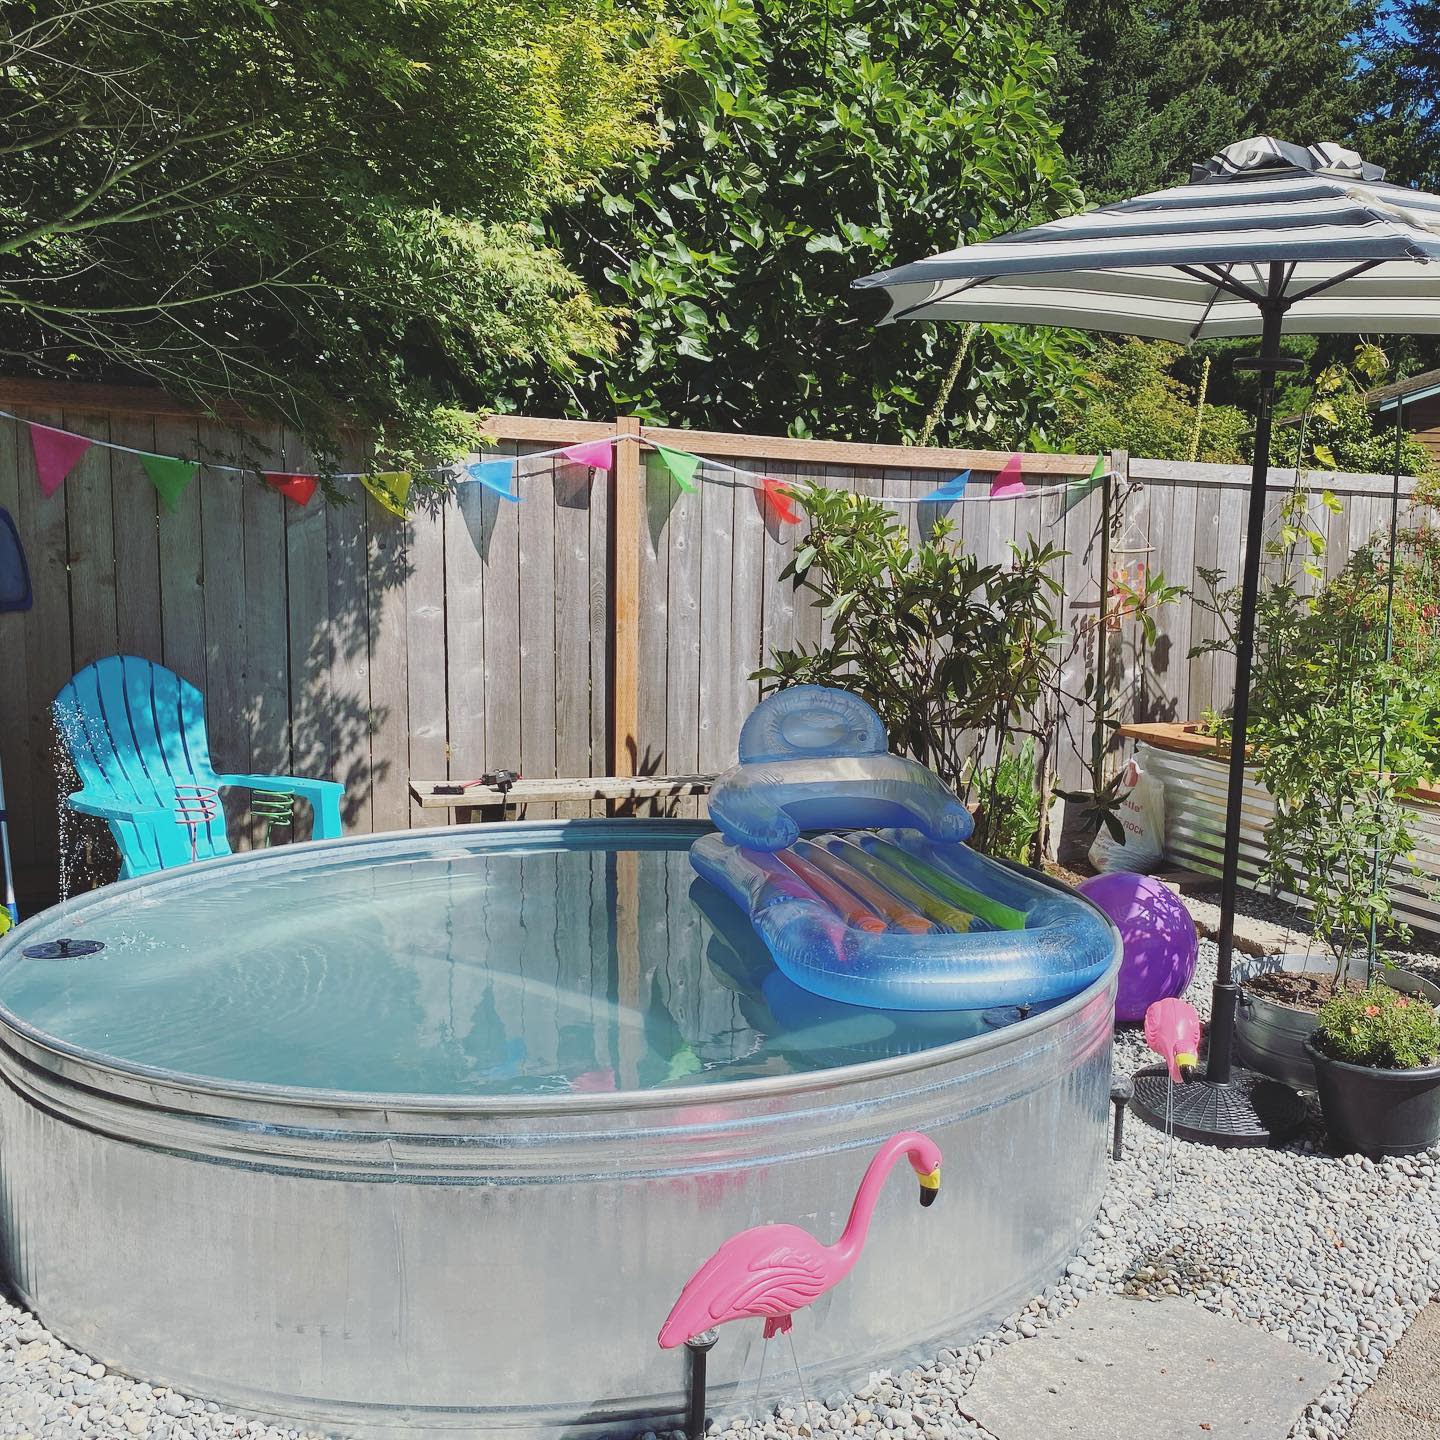
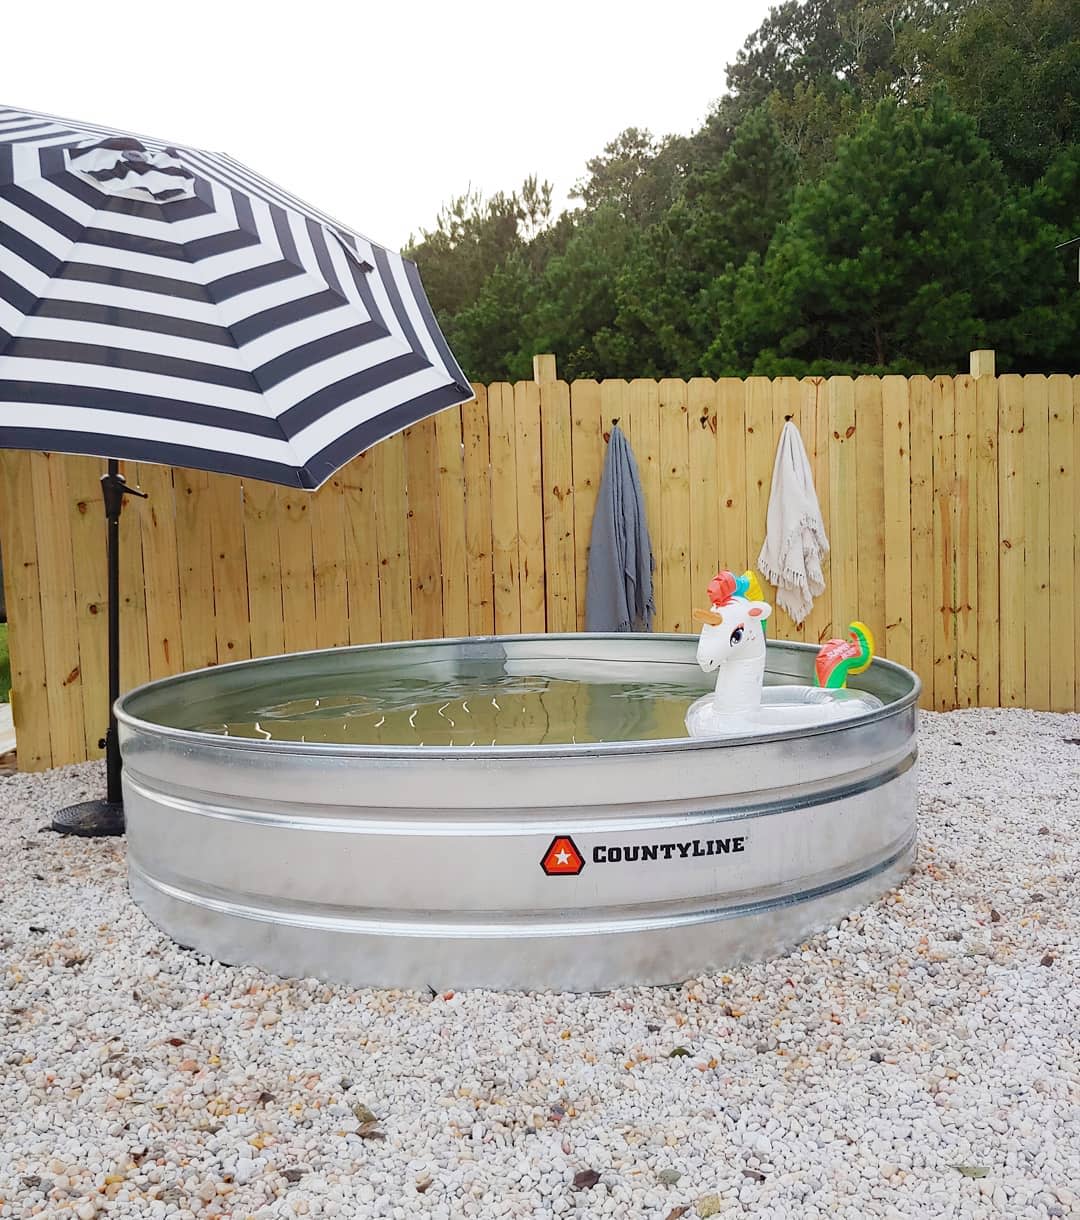
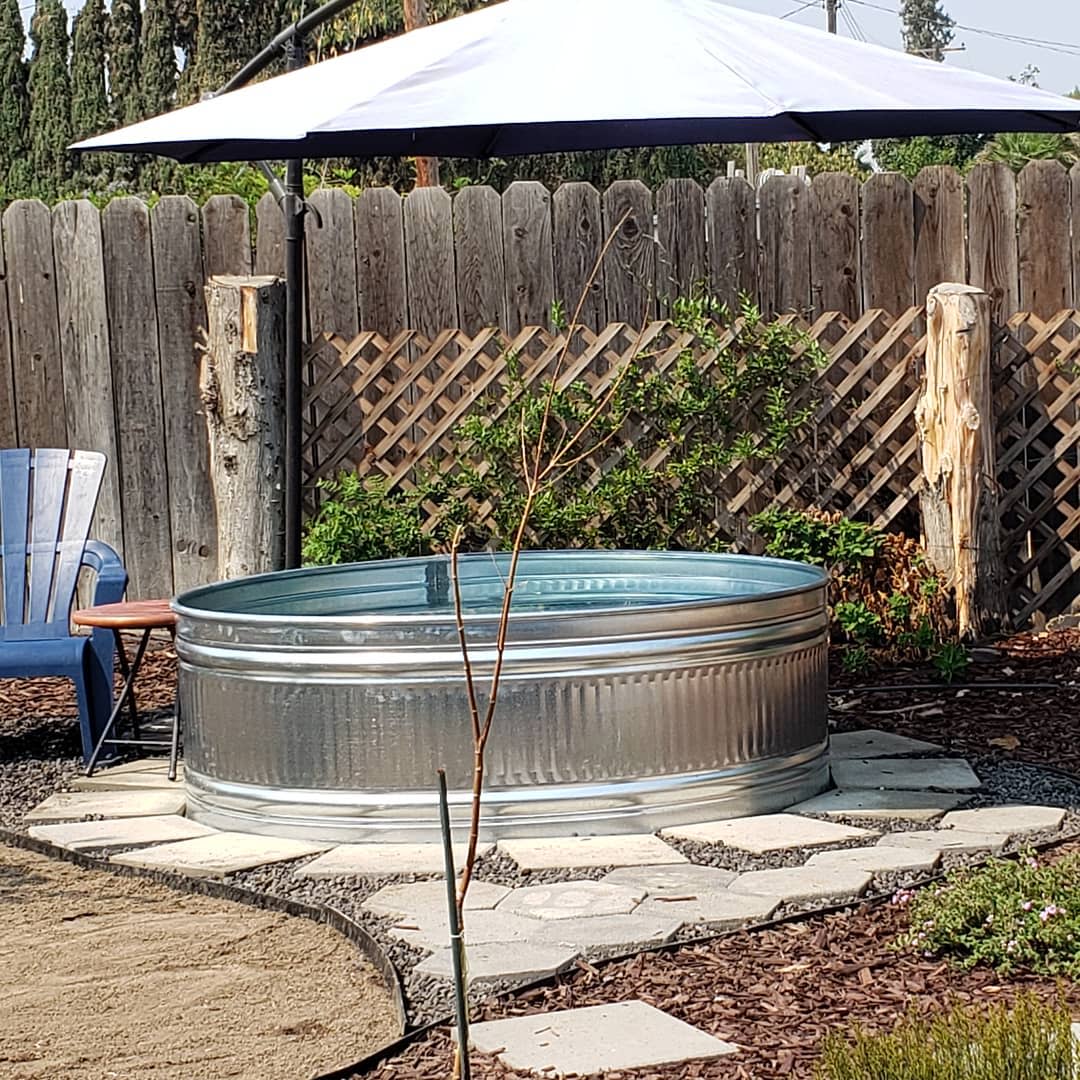
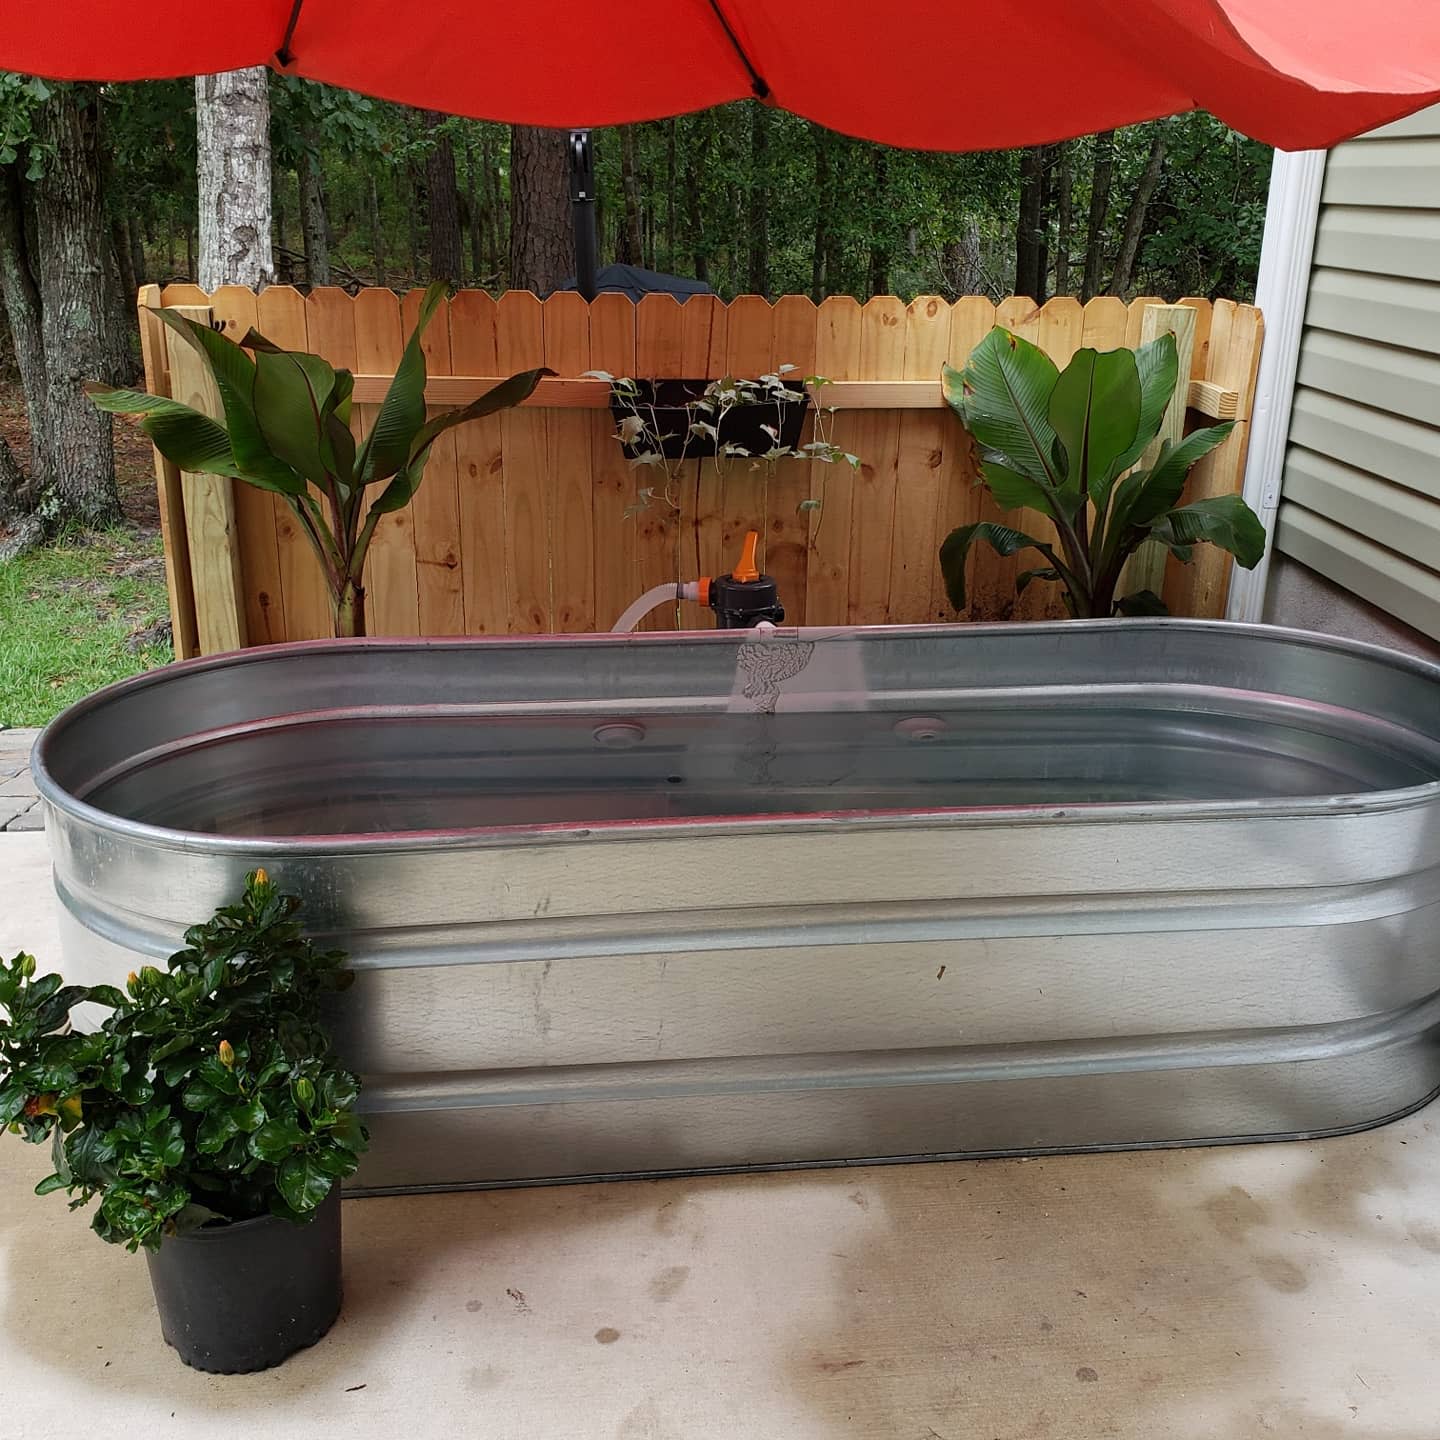
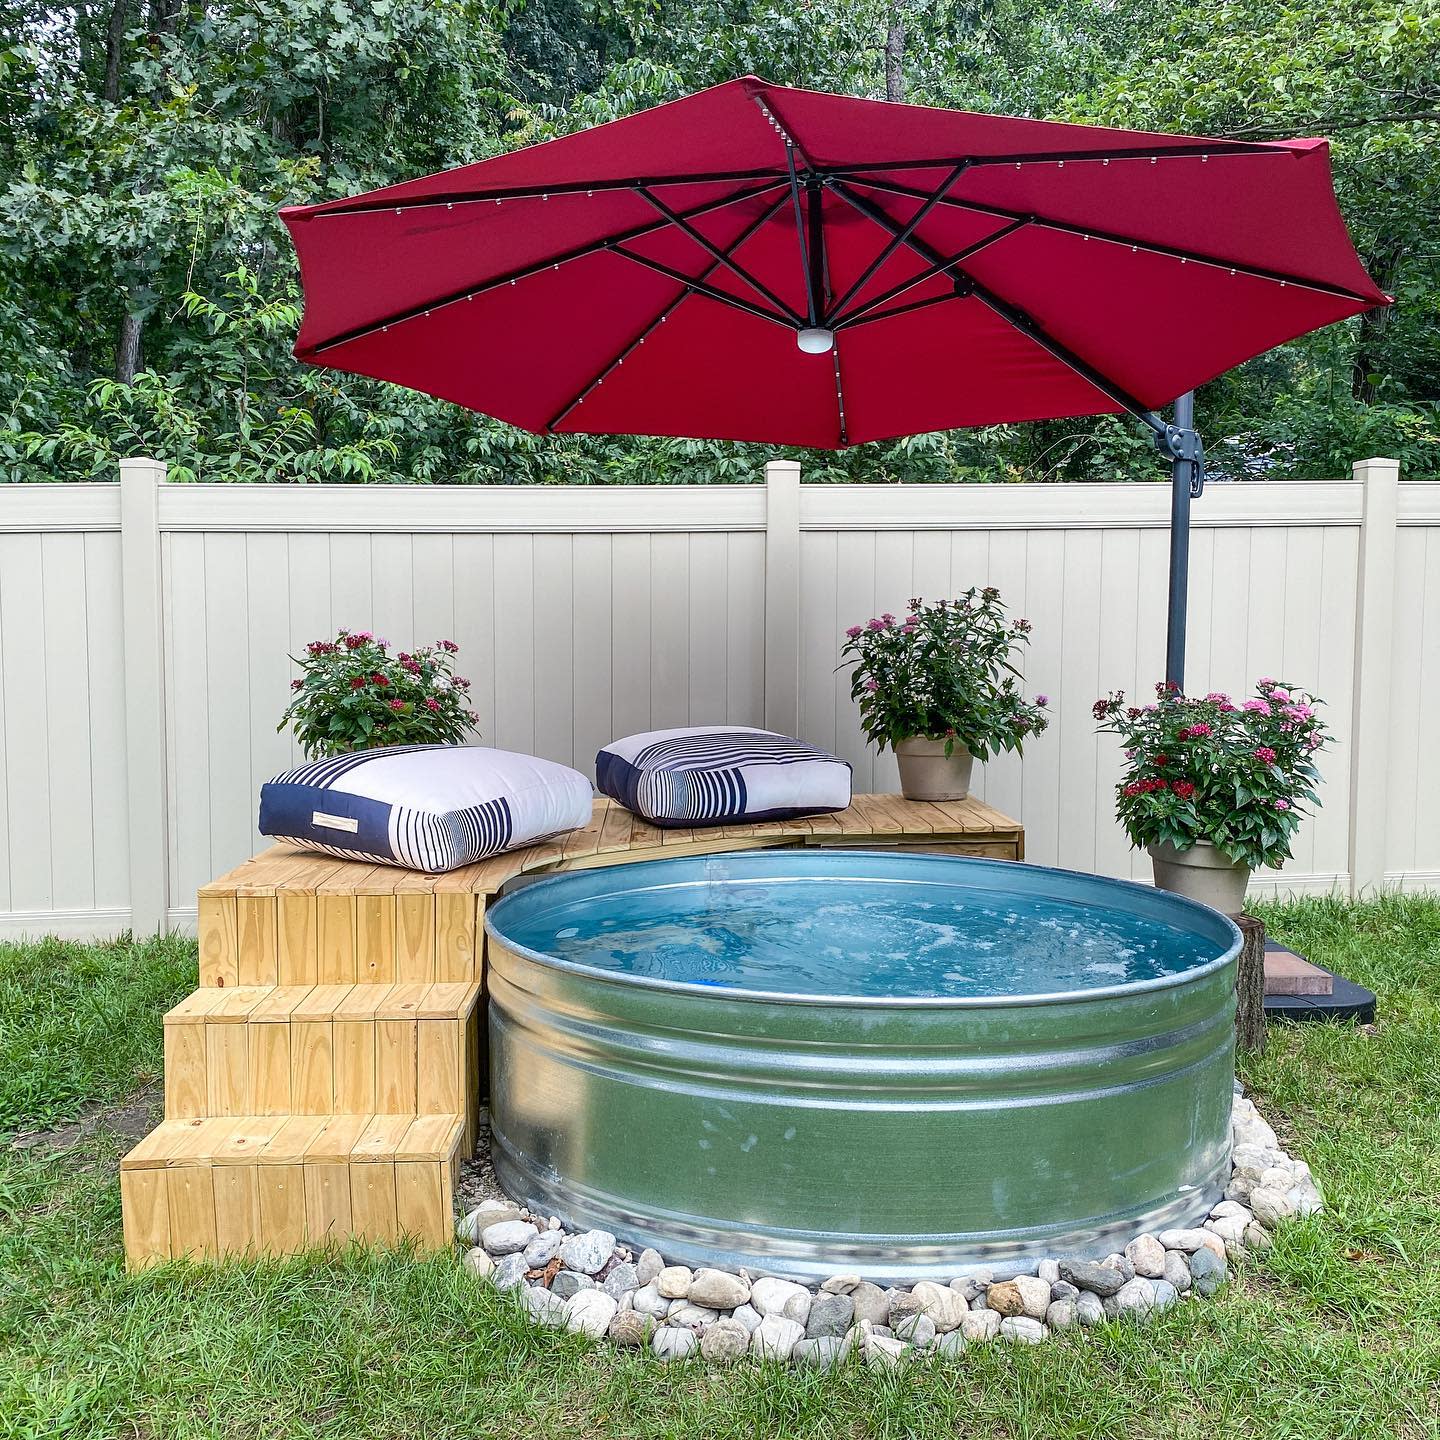
9. Add An Umbrella
Adding an umbrella to your stock tank pool area is a practical and stylish way to provide shade and comfort on sunny days. Select a large, durable umbrella that matches the overall aesthetic of your outdoor space. Consider a model with a tilt feature for adjustable shade and a heavy base for stability. Positioning the umbrella strategically not only protects swimmers from direct sunlight, but it also creates a cozy, sheltered spot for lounging and relaxation, enhancing the overall enjoyment and functionality of your pool area.
Source: @hetsasexterieur via InstagramSource: @fallons.homestead via InstagramSource: @garretfontes via InstagramSource: @mamagoodnight via Instagram
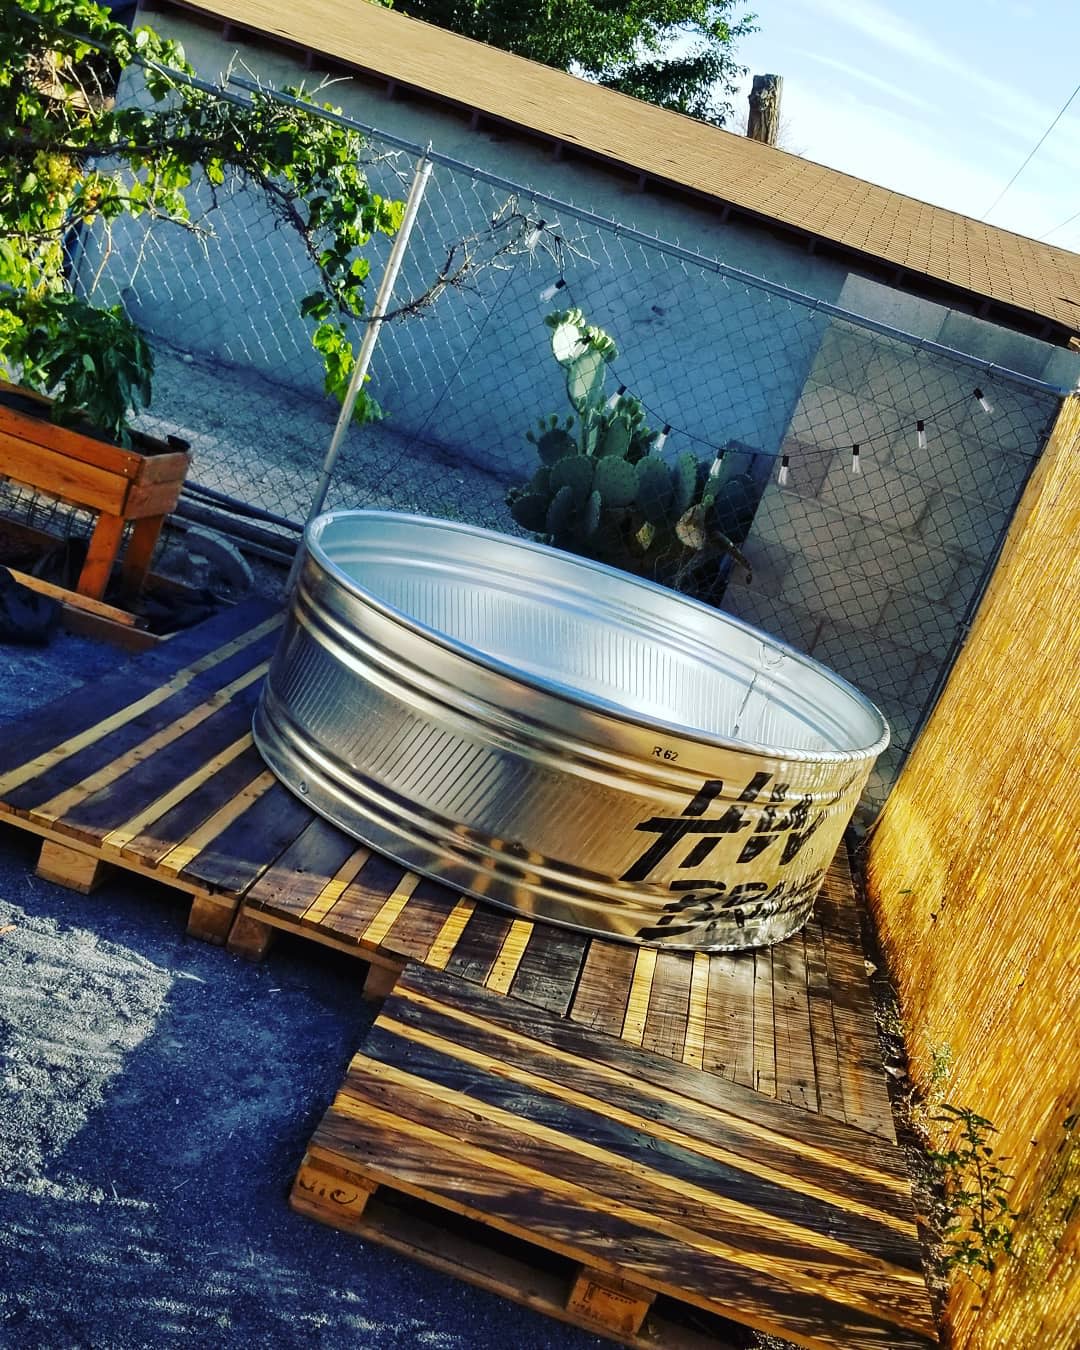
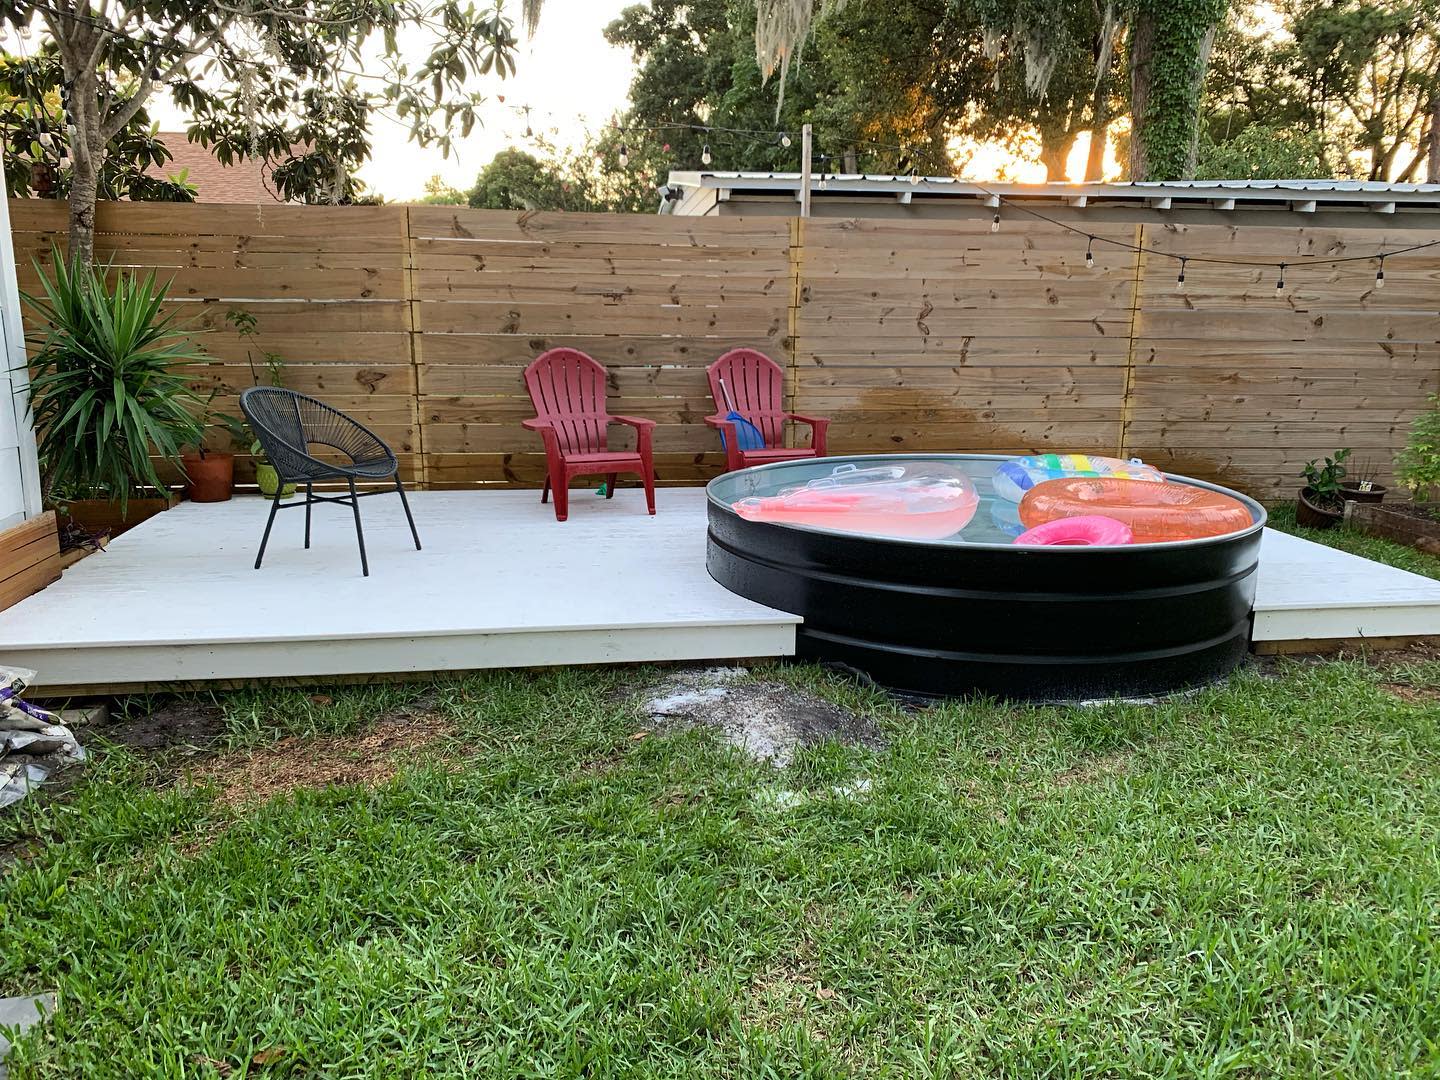
10. Stock Tank Pool on a Pre-Fabricated Patio
Placing your stock tank pool on a pre-fabricated patio offers a quick and efficient way to set up a durable and attractive pool area. Choose a patio material that is flat, stable, and capable of supporting the weight of a full pool, such as concrete pavers or composite decking. This method eliminates the need for extensive ground preparation, ensuring a level base for the pool.
Source: @blossomsbyjilliann via InstagramSource: @cosmicgirlgoes via Instagram
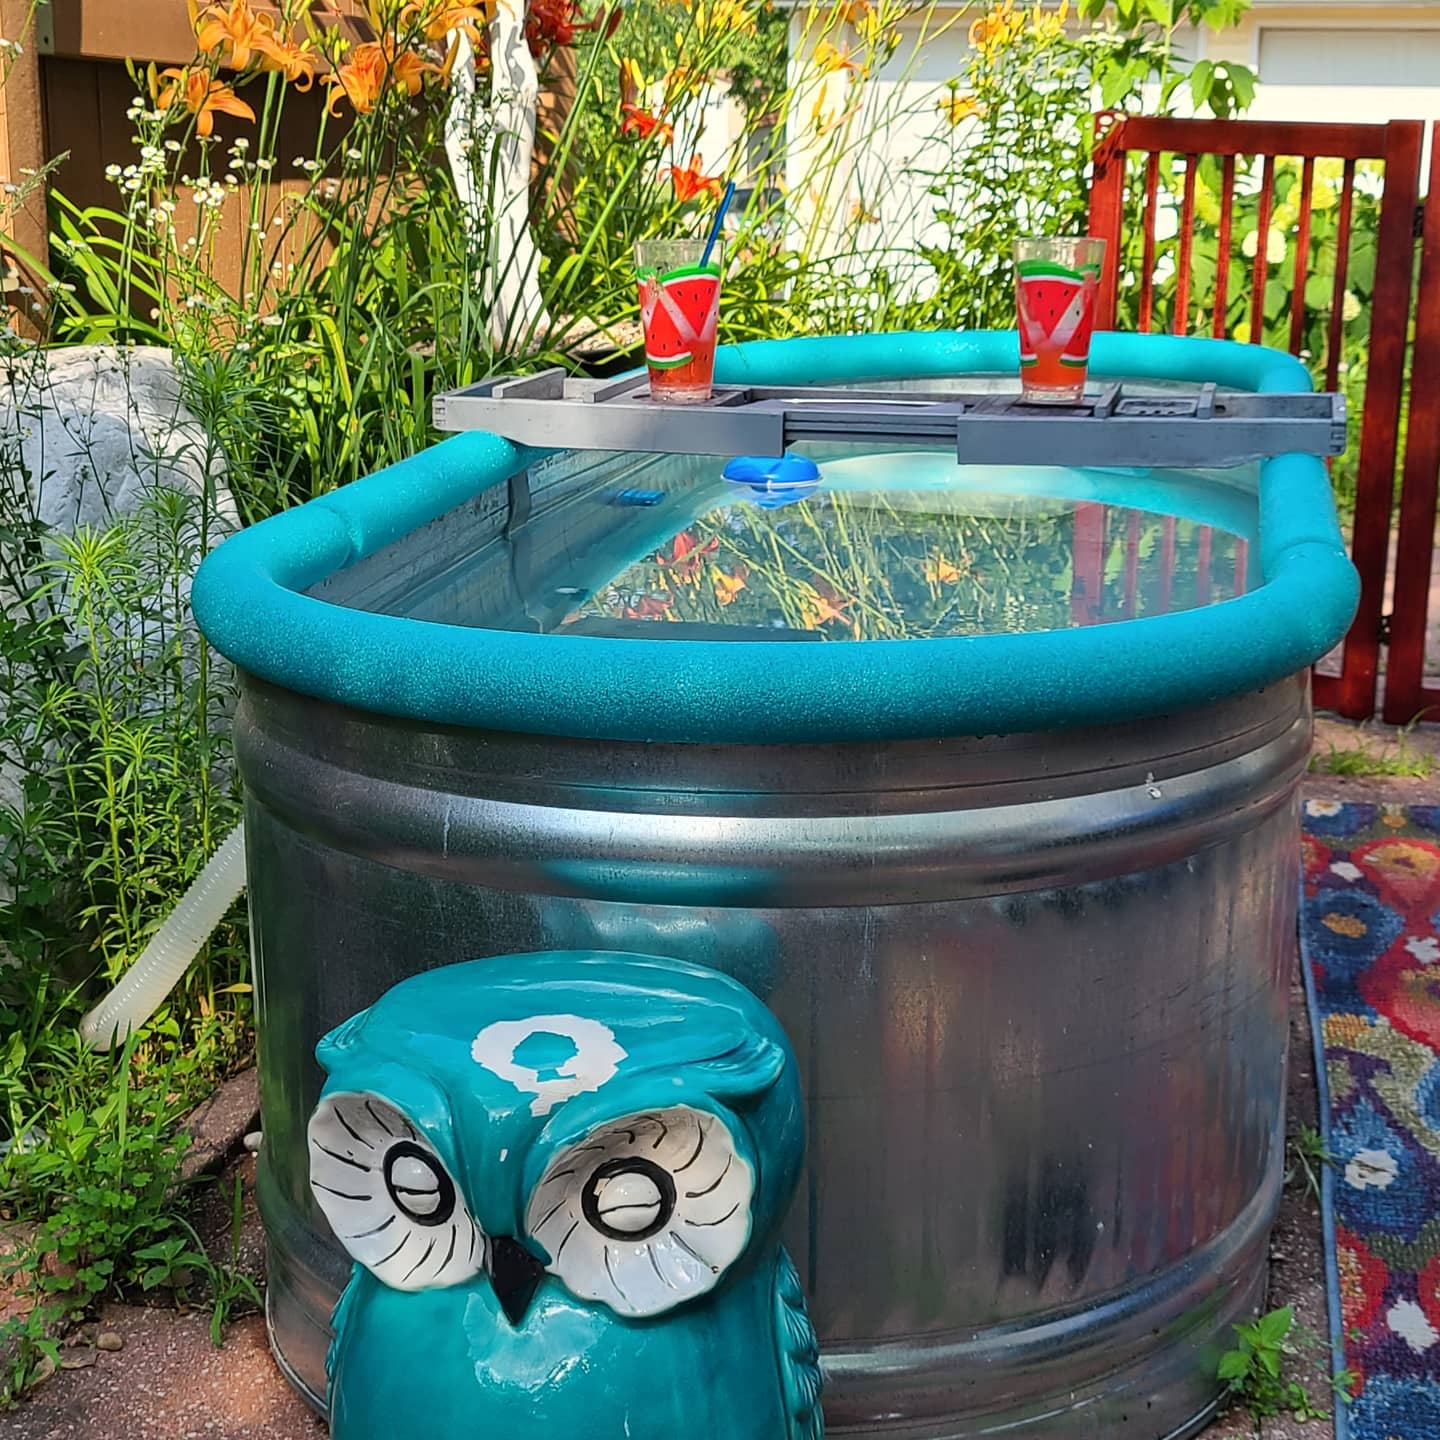
11. Surround With Plants
Surrounding your stock tank pool with plants can transform it into a lush, garden-like oasis. Opt for a mix of potted plants and shrubs that thrive in your climate, arranging them in varying heights and textures around the pool. Consider adding fragrant plants or flowers to enhance the sensory experience.
Source: @stocktanklove via InstagramSource: @oaklandgardencub via Instagram
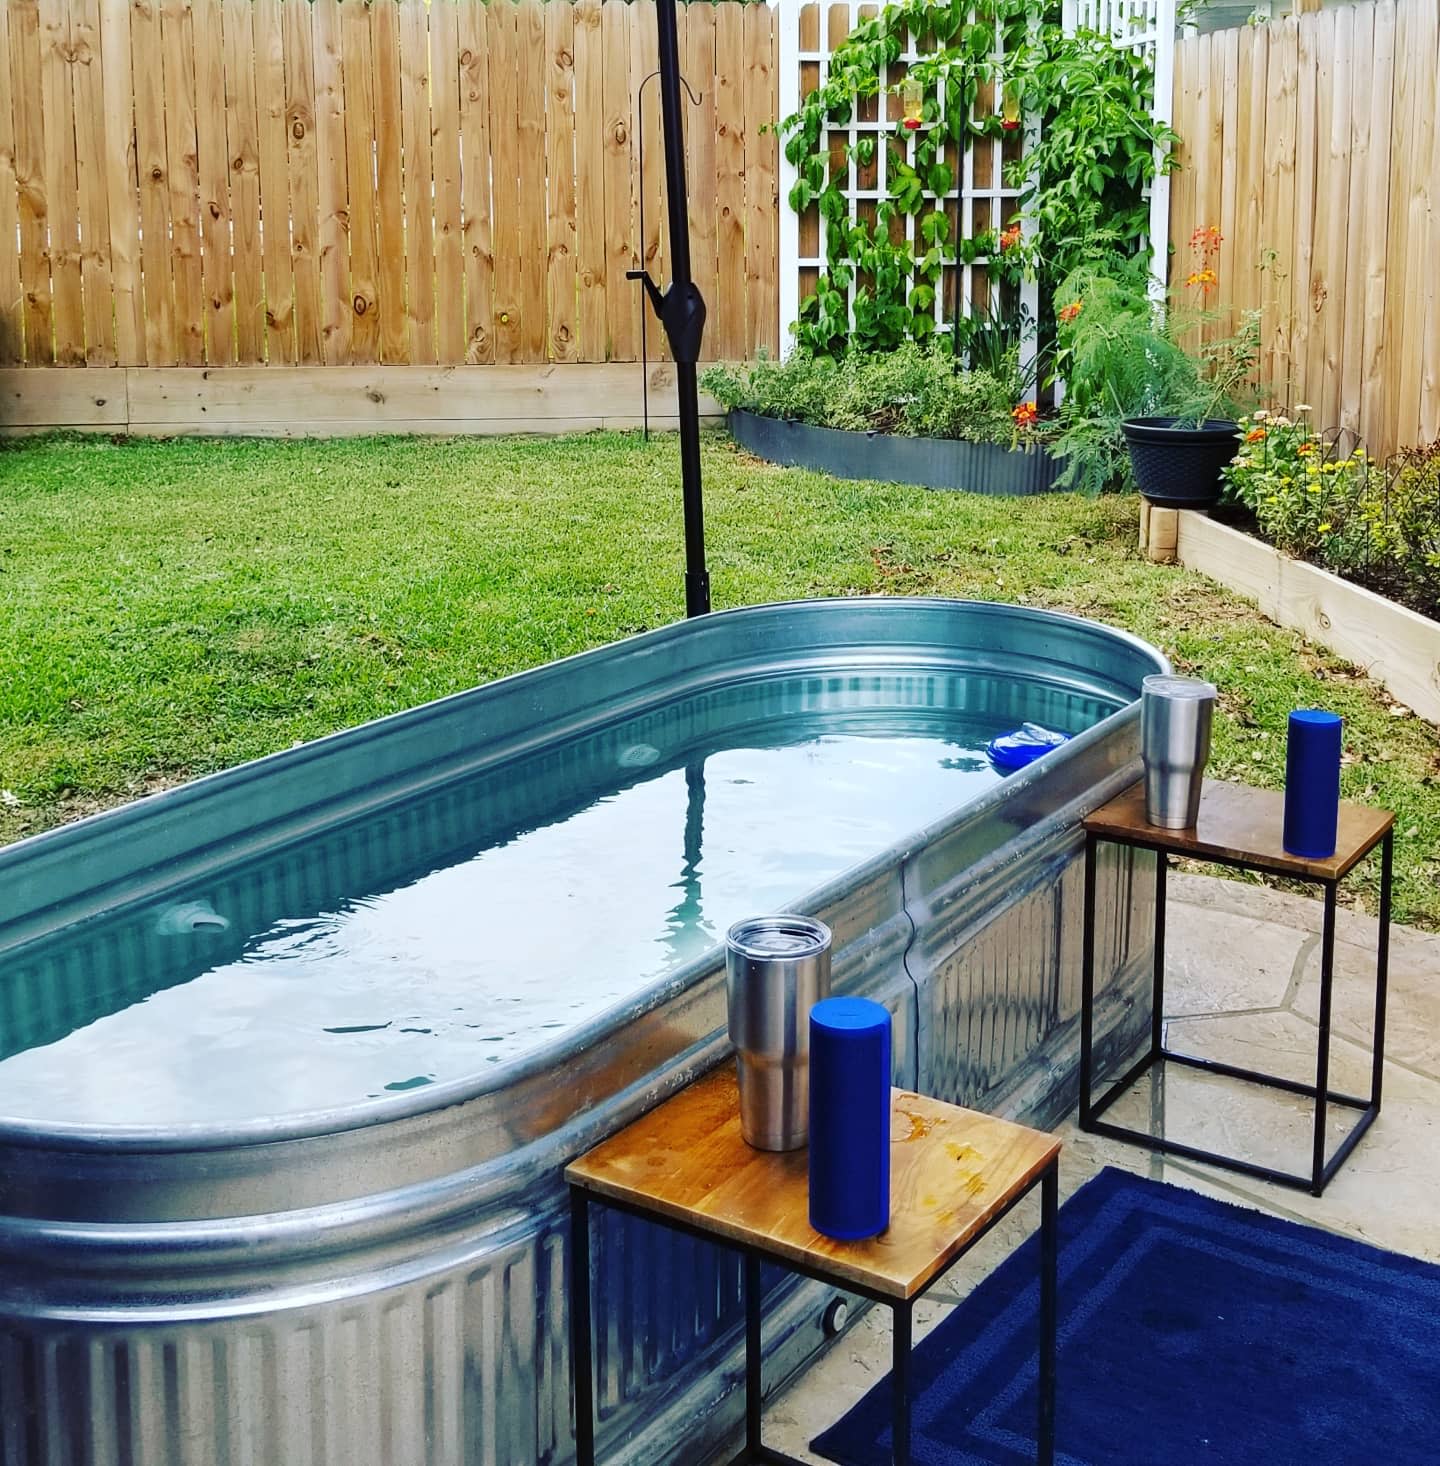
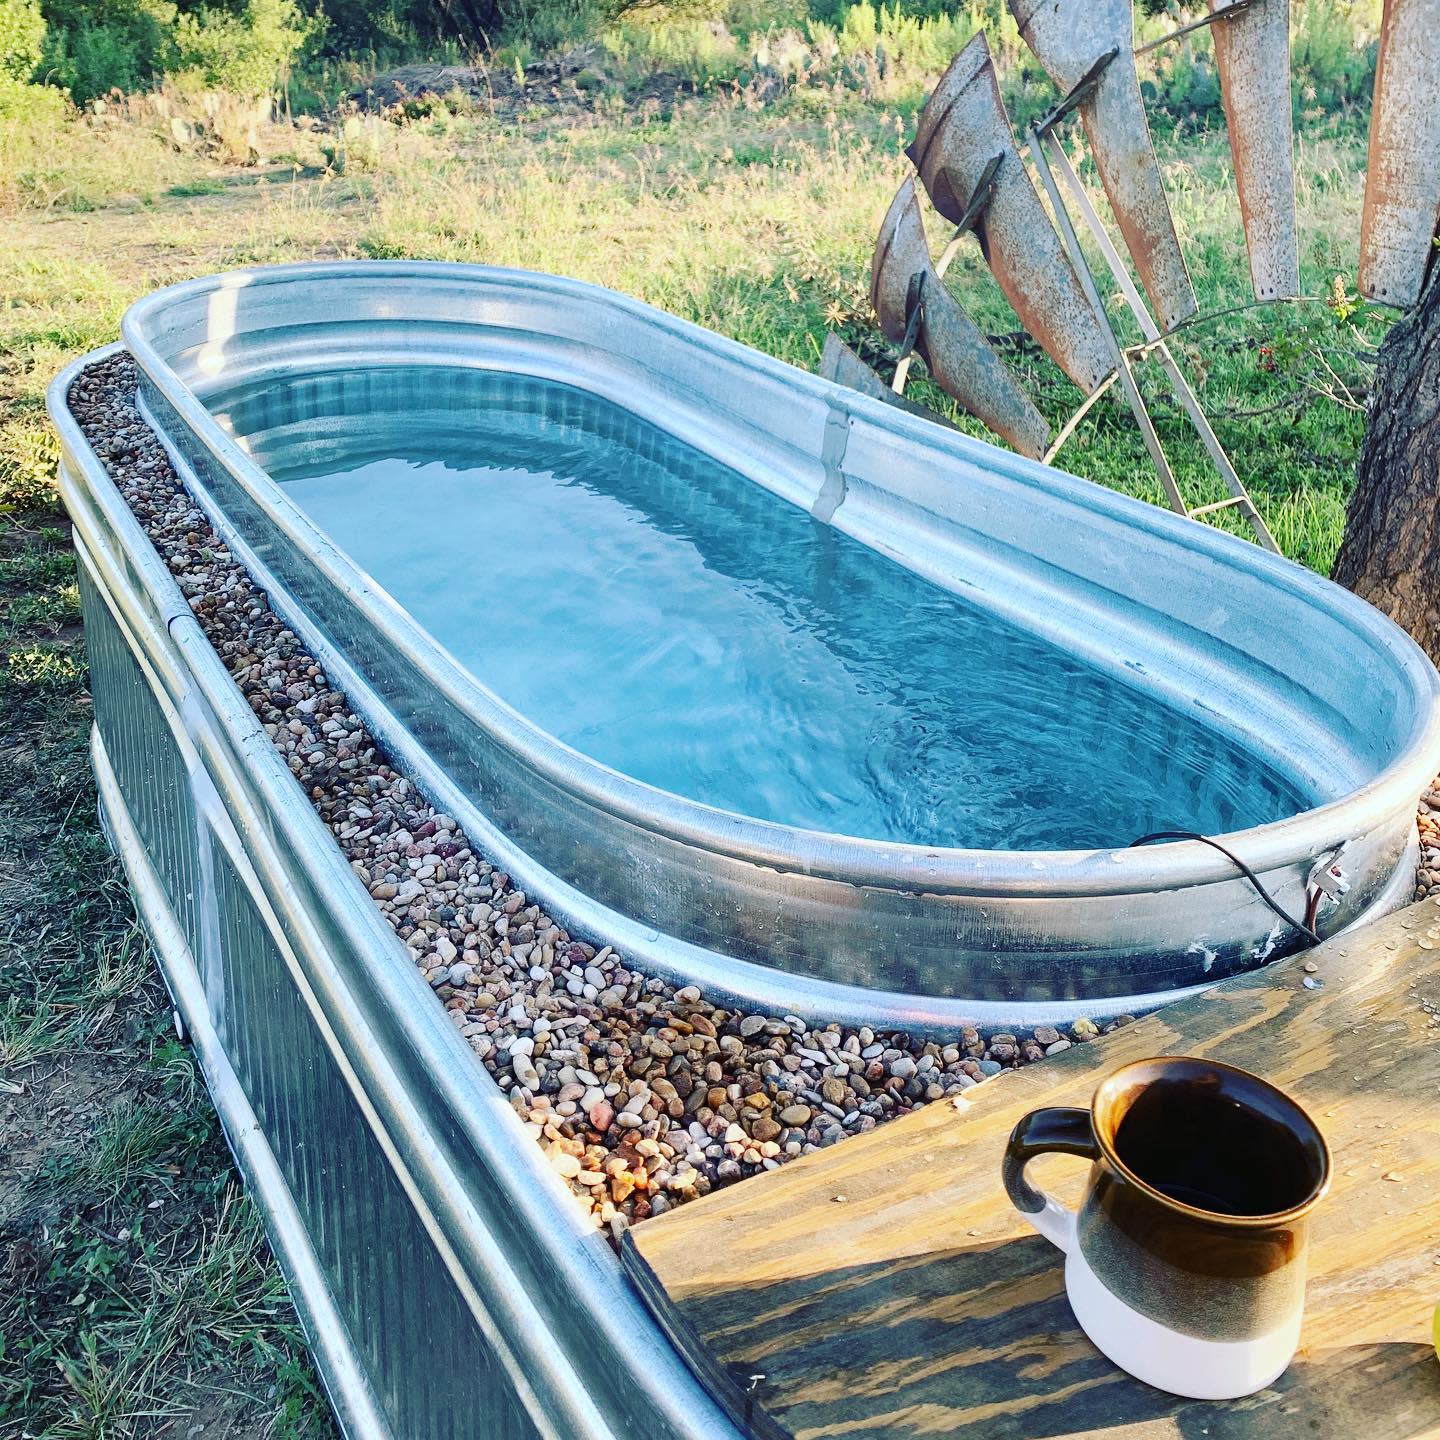
12. Choose An Oval Stock Tank
The elongated shape is ideal for accommodating more swimmers or for those who enjoy light swimming or floating in a specific direction. Its curved edges are visually appealing and can soften the overall look of your outdoor space. Additionally, the oval shape often allows for more efficient use of space, fitting well into various backyard layouts. When selecting your tank, consider its size in relation to your available space and intended use, ensuring it blends functionality with your personal style.
Source: @amandajroy via InstagramSource: @anitamich via InstagramSource: @h2o_tankavenue via InstagramSource: @gizellefer via InstagramSource: @hollymichelleclark via InstagramSource: @jengraphdesigns via Instagram
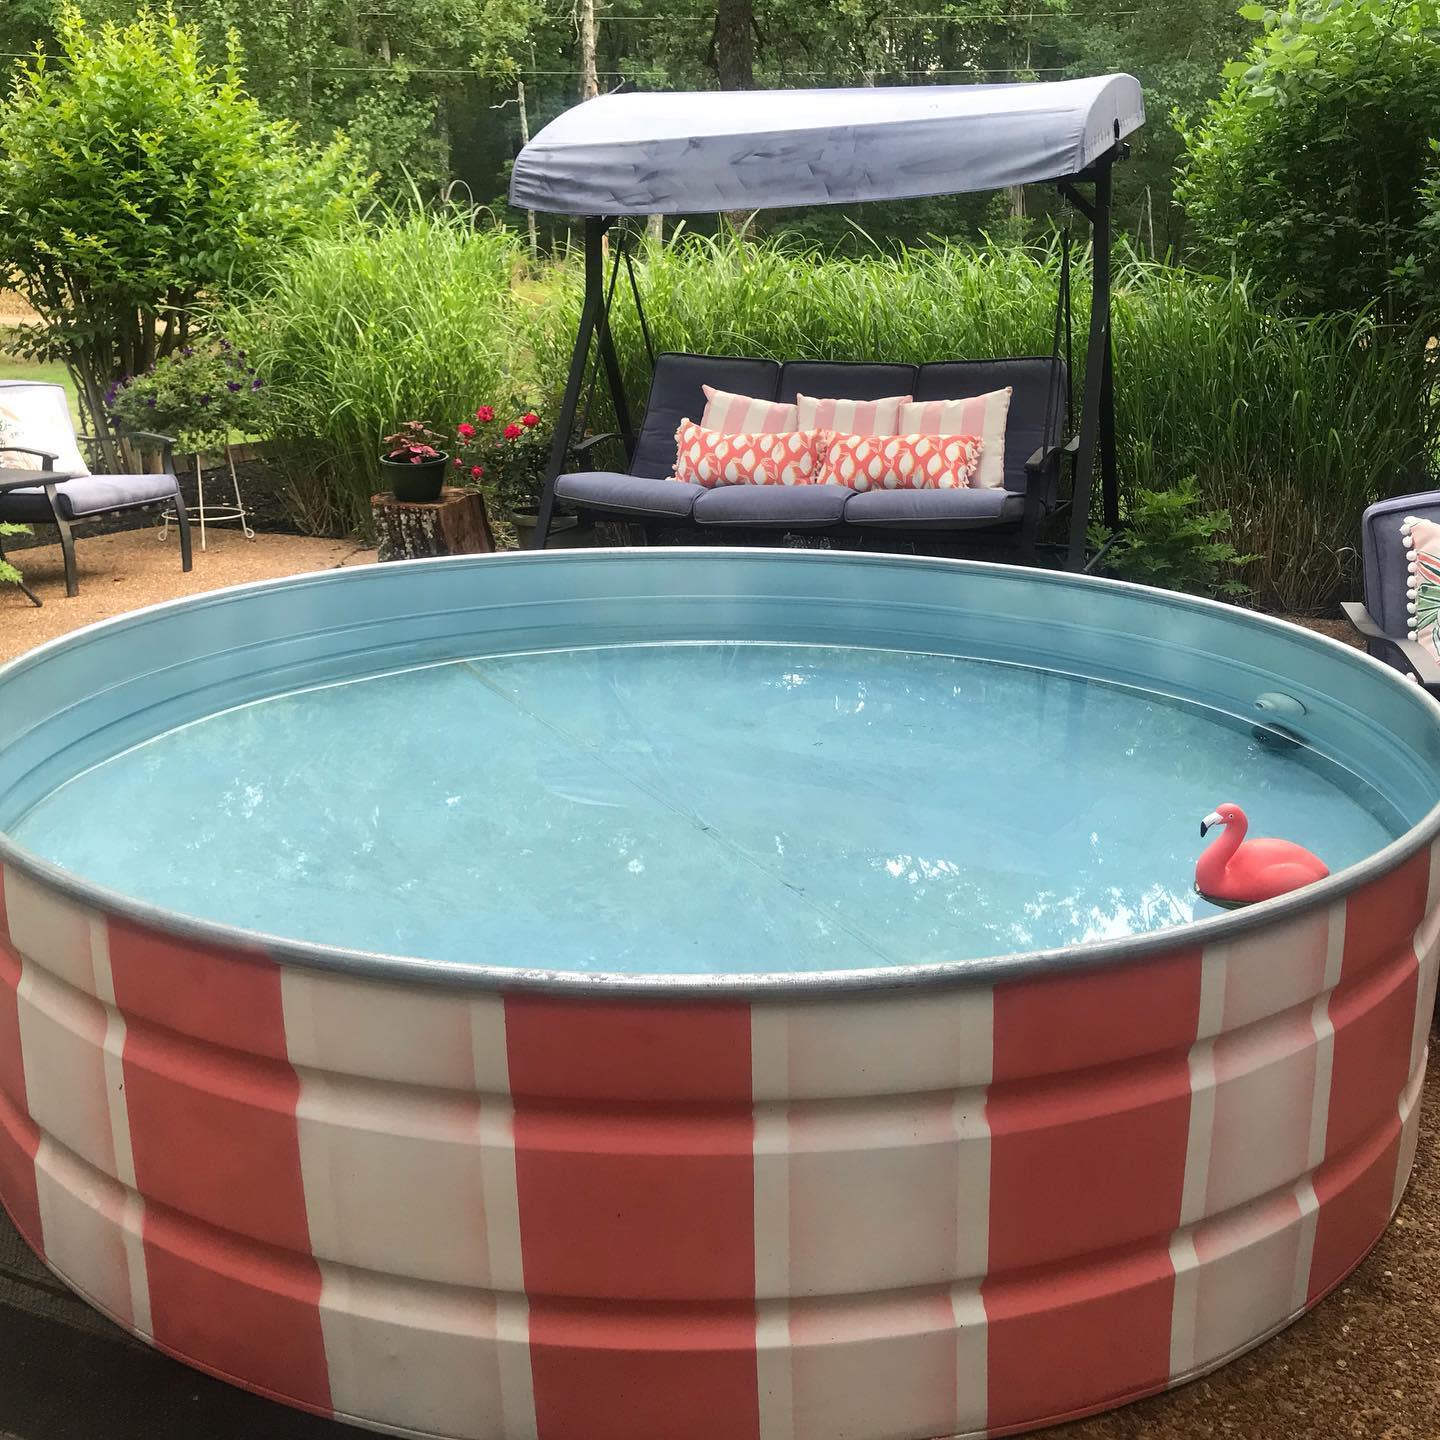
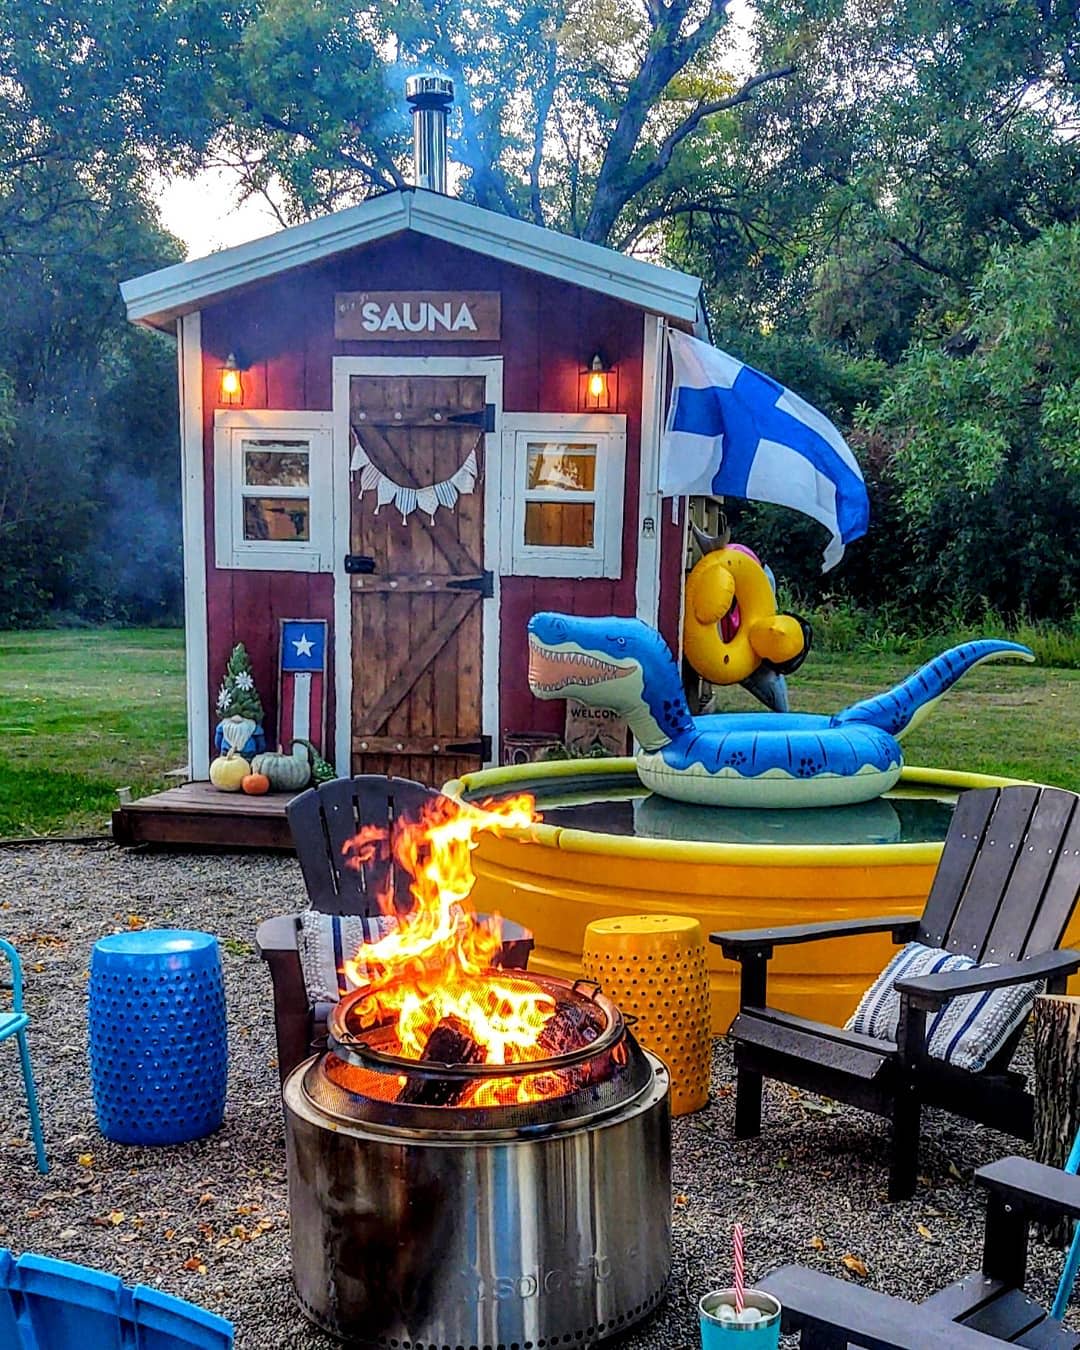
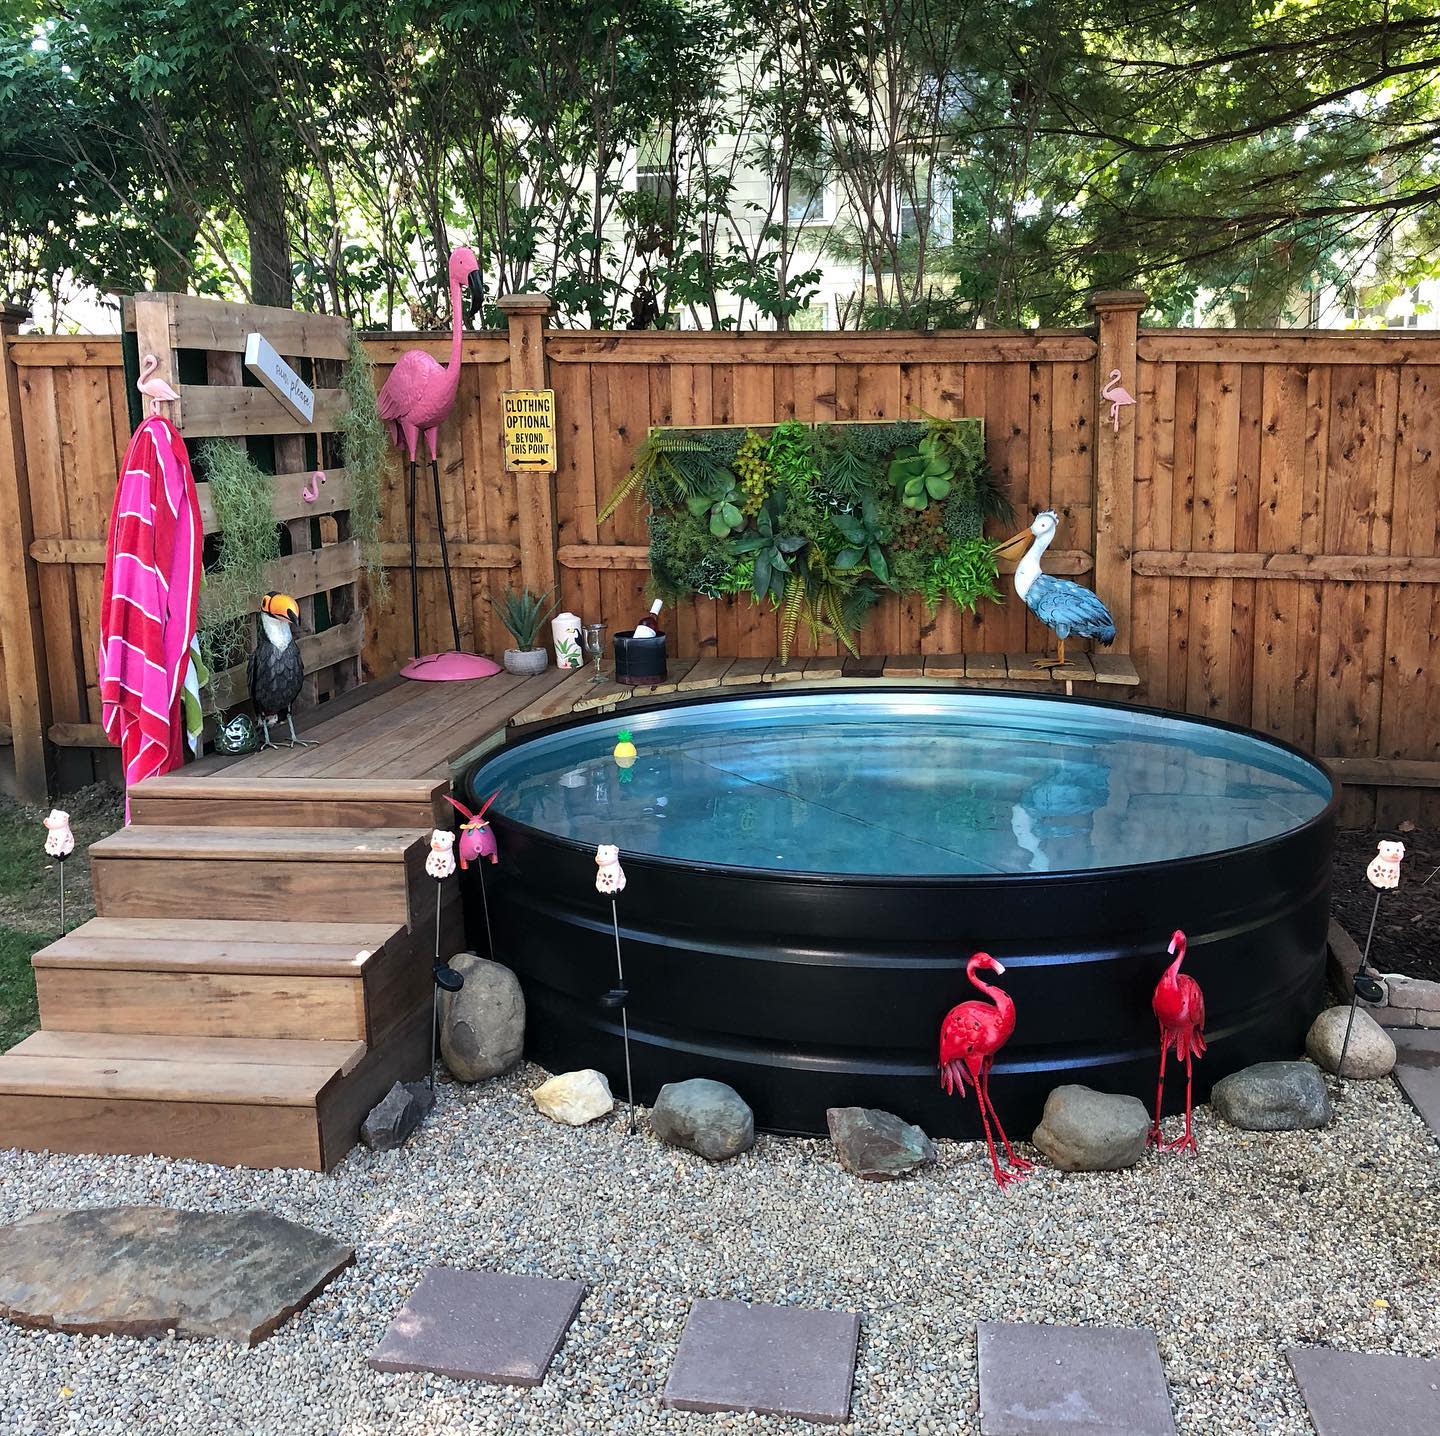
12. Be Creative With Paint
Being creative with paint can dramatically transform the look of your stock tank pool. Choose a high-quality, weather-resistant outdoor paint suitable for the material of your tank. You can opt for a single bold color to make a statement, or use multiple shades to create patterns or artistic designs. Painting the exterior in a color that complements your outdoor decor can seamlessly integrate the pool into your landscape.
Source: @faulkfarmstead via InstagramSource: @handsome_huckleberry via InstagramSource: @home.love.glam via InstagramSource: @lilseagull via InstagramSource: @mistychess via InstagramSource: @sulfurridge via InstagramSource: @amyericjohnson via Instagram
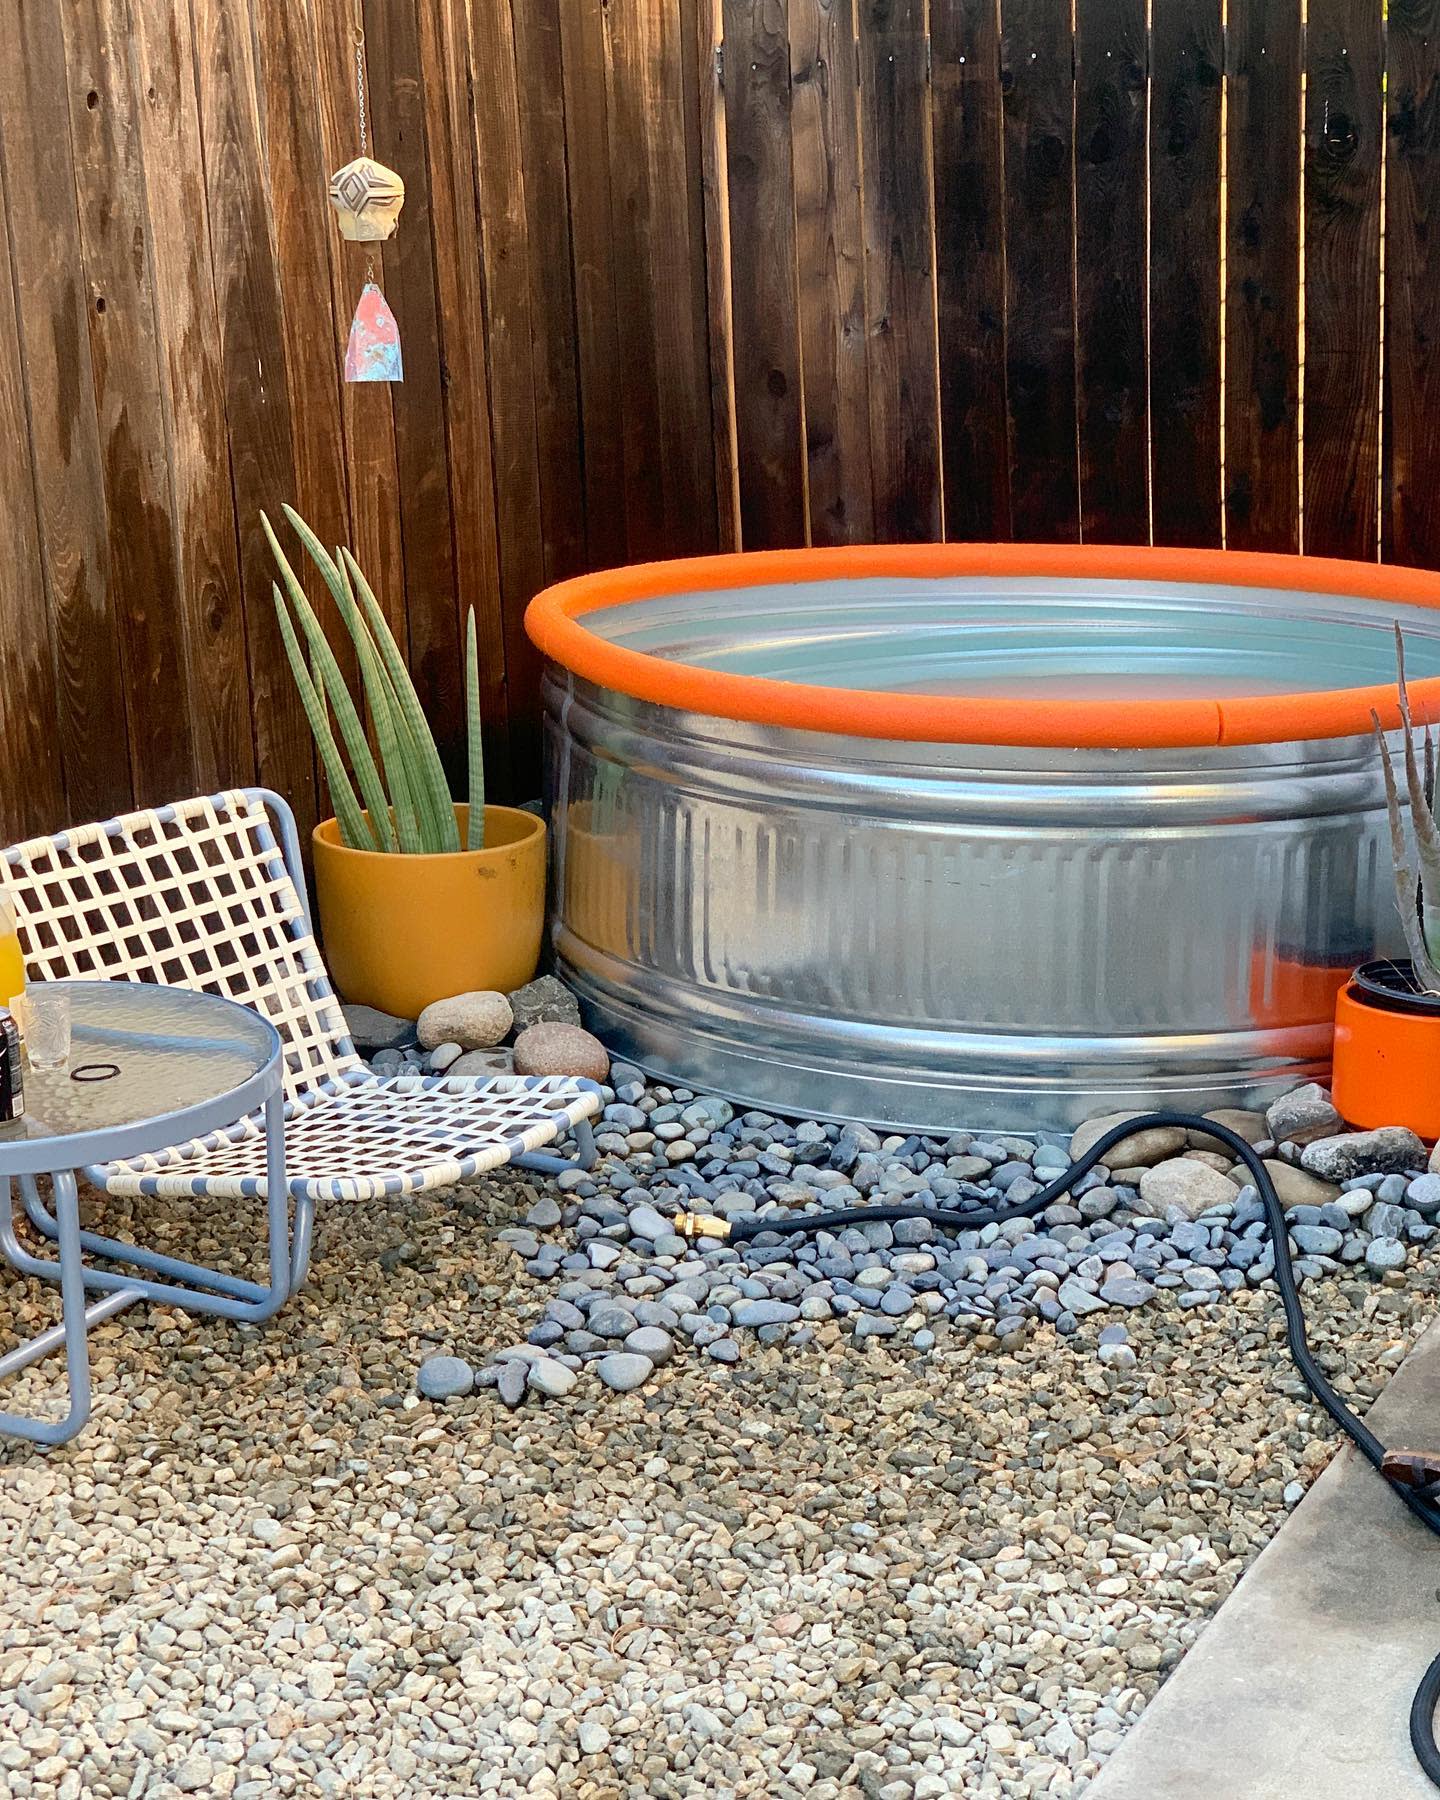
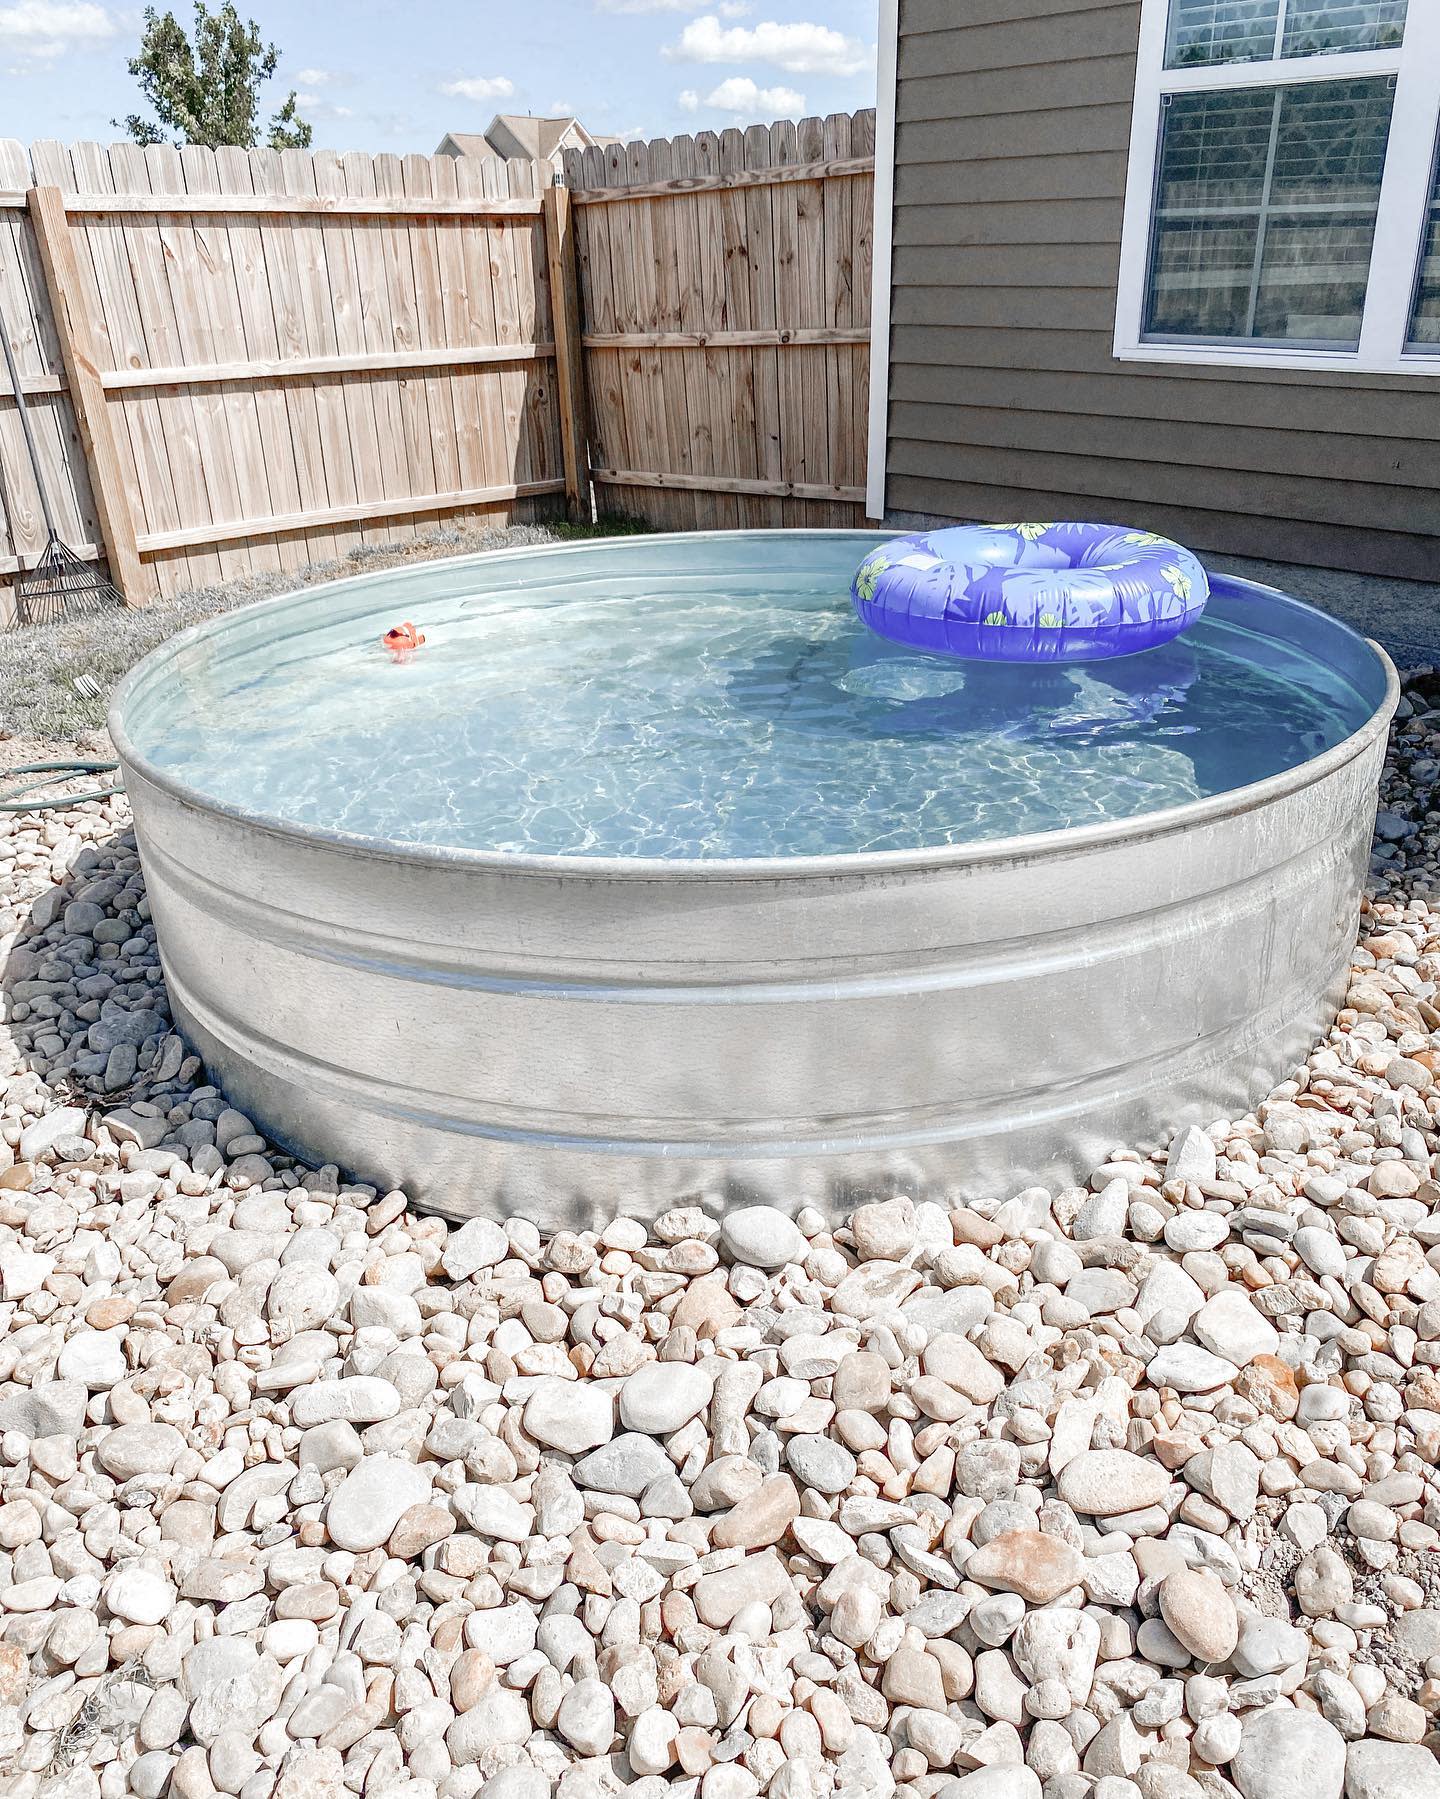
13. Surround With Rocks
Surrounding your stock tank pool with rocks is a natural and stylish way to enhance its appearance and blend it into the outdoor setting. Choose rocks of various sizes and colors to create a textured, organic look. Larger rocks can be used to create a border around the pool, while smaller pebbles can fill in gaps, providing a neat and cohesive appearance. The rock surround can also act as a transitional element, connecting the pool with the rest of your garden or outdoor space.
Source: @coloradokate_adventures via InstagramSource: @houseonthellano via InstagramSource: @fitforasuitcase via InstagramSource: @heart.makes.home via InstagramSource: @jdubb35 via InstagramSource: @notaskinnyveganswife via Instagram
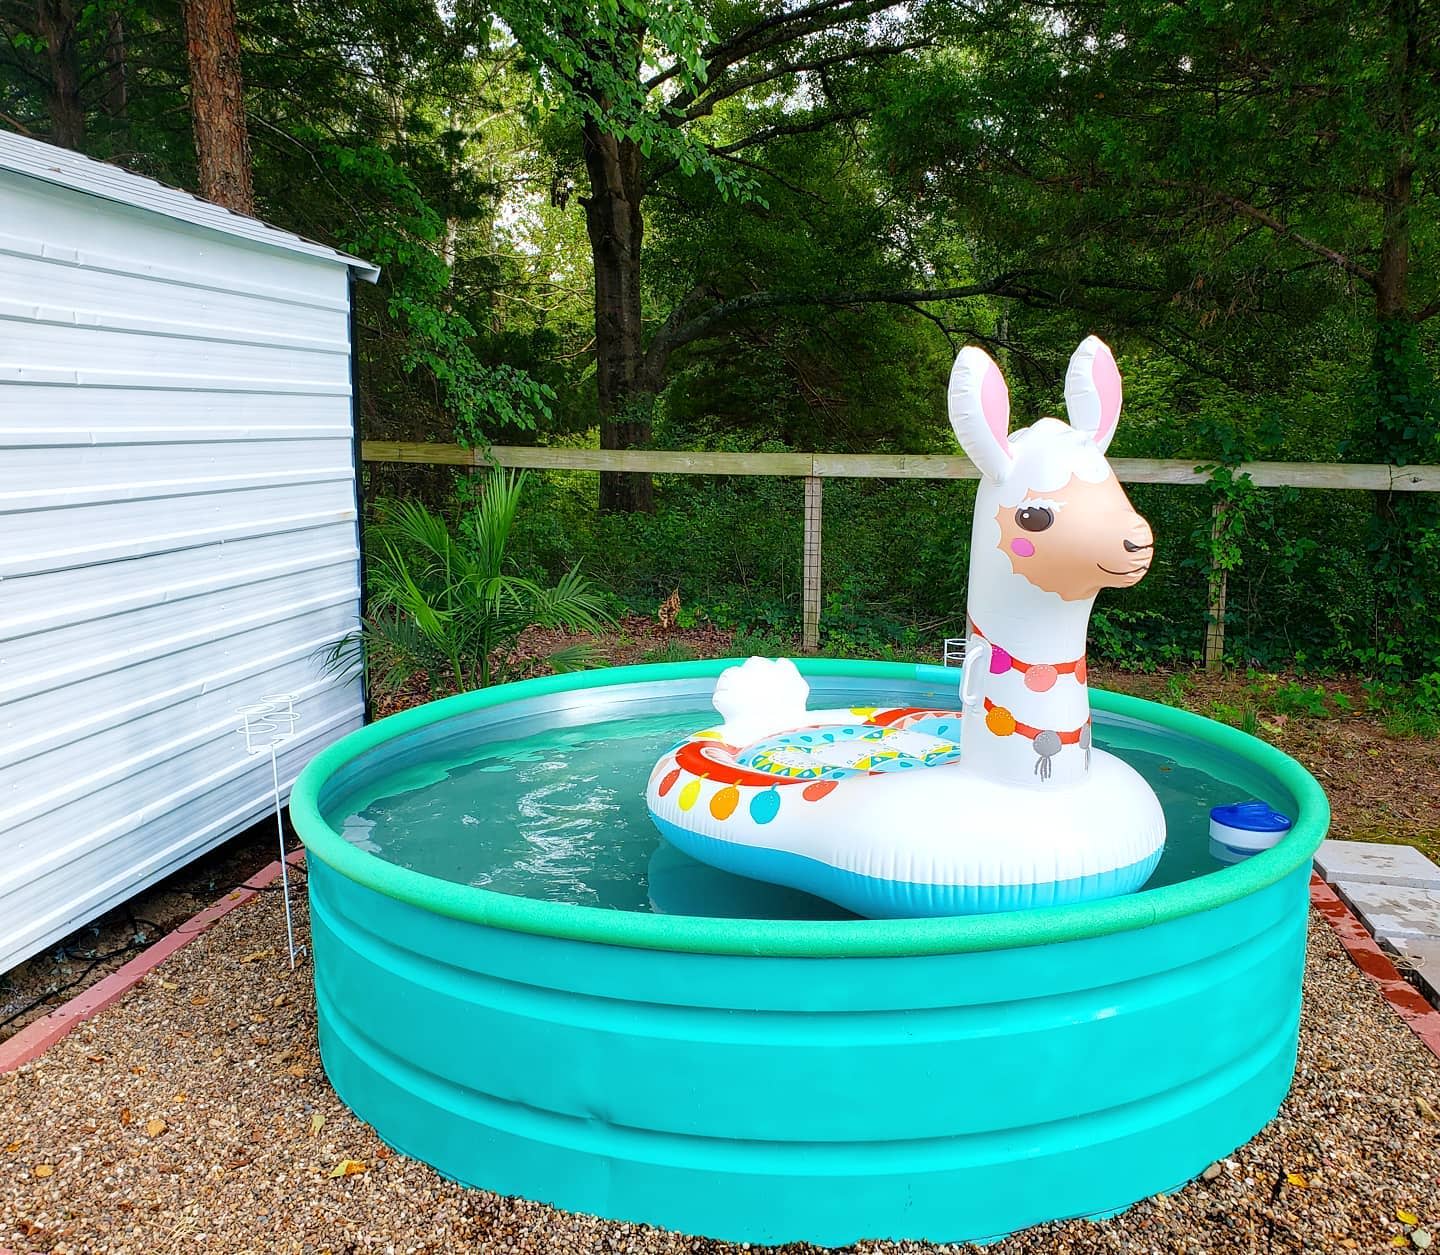
14. Plastic Stock Tank Pool
Opting for a plastic stock tank pool can be a cost-effective and low-maintenance choice for your backyard oasis. Plastic tanks are lightweight, making them easier to transport and install compared to their metal counterparts. They also tend to retain heat better, which can be an advantage for maintaining comfortable water temperatures. When selecting a plastic stock tank, consider UV-resistant options to ensure longevity and durability against sun exposure.
Source: @cowboypools via InstagramSource: @theturquoisedtexan via Instagram
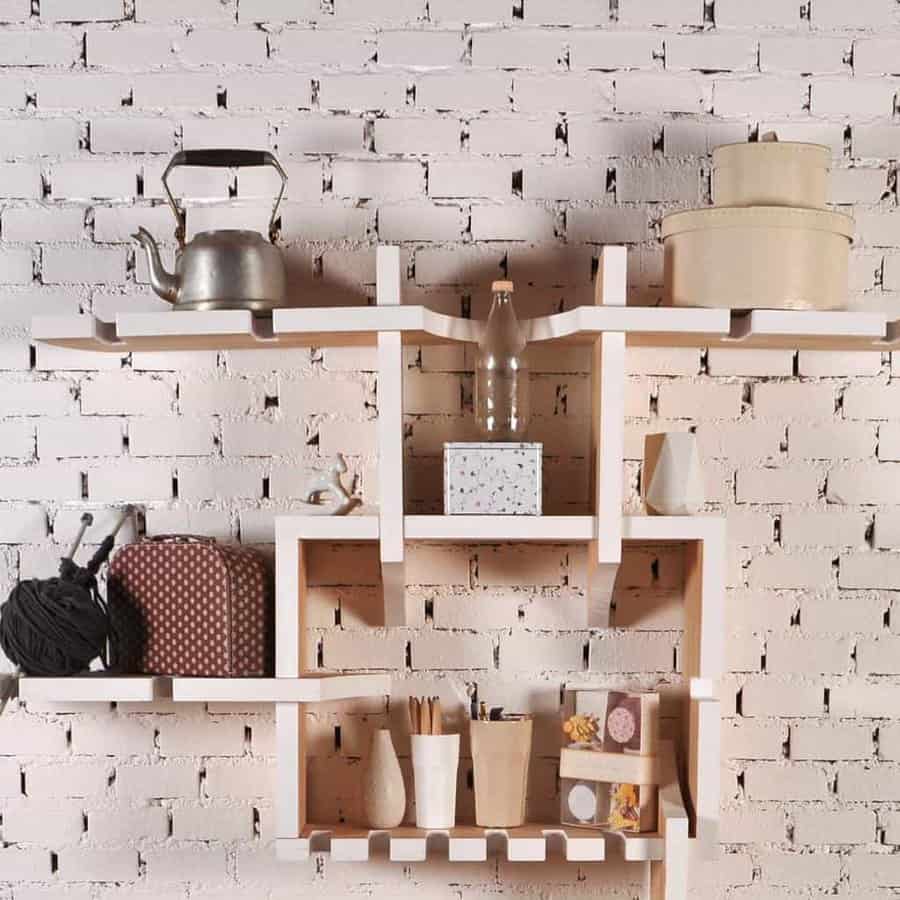
Do you have a blank wall that you wish you could do something with? Large, bare walls that have nothing on them. What you need is a floating shelf.
This gives you the freedom to do anything with it. You could use it as a display space for decor or use it to create additional storage.
What’s nice about floating shelves is that you can install them in any room of your home. You can use them in any style of interior decor. You can also use them in any sized room.
These floating shelves ideas will help you choose and install the perfect floating shelf in your home.
[view_toc]
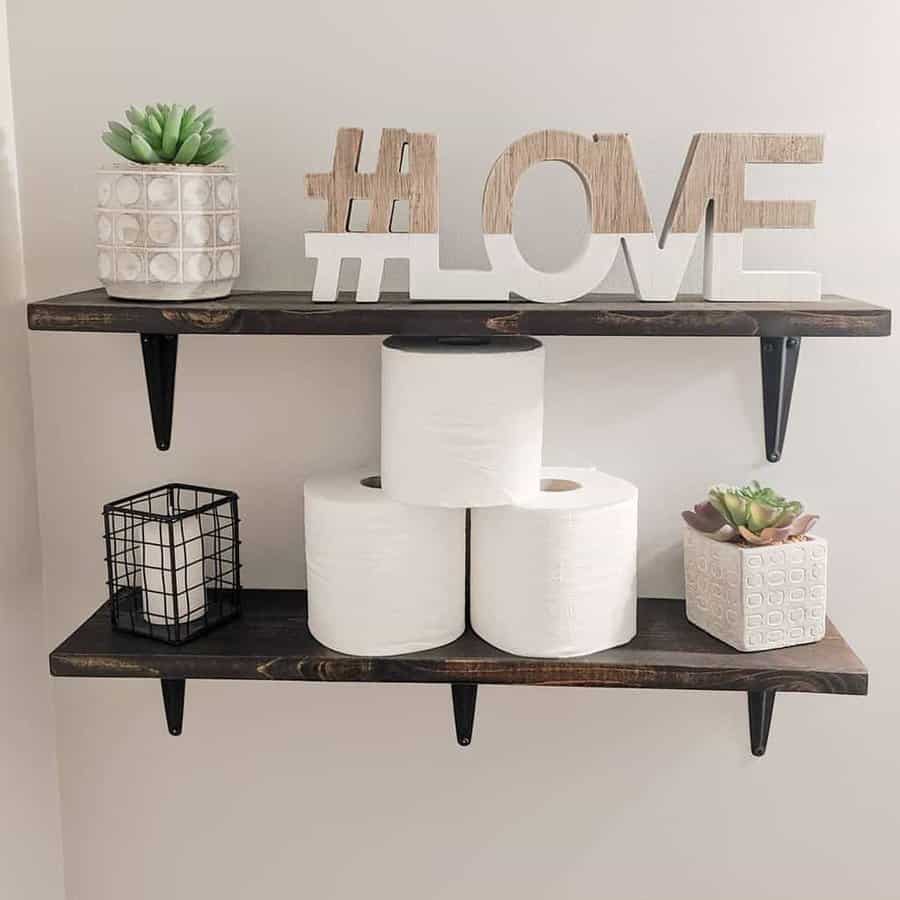
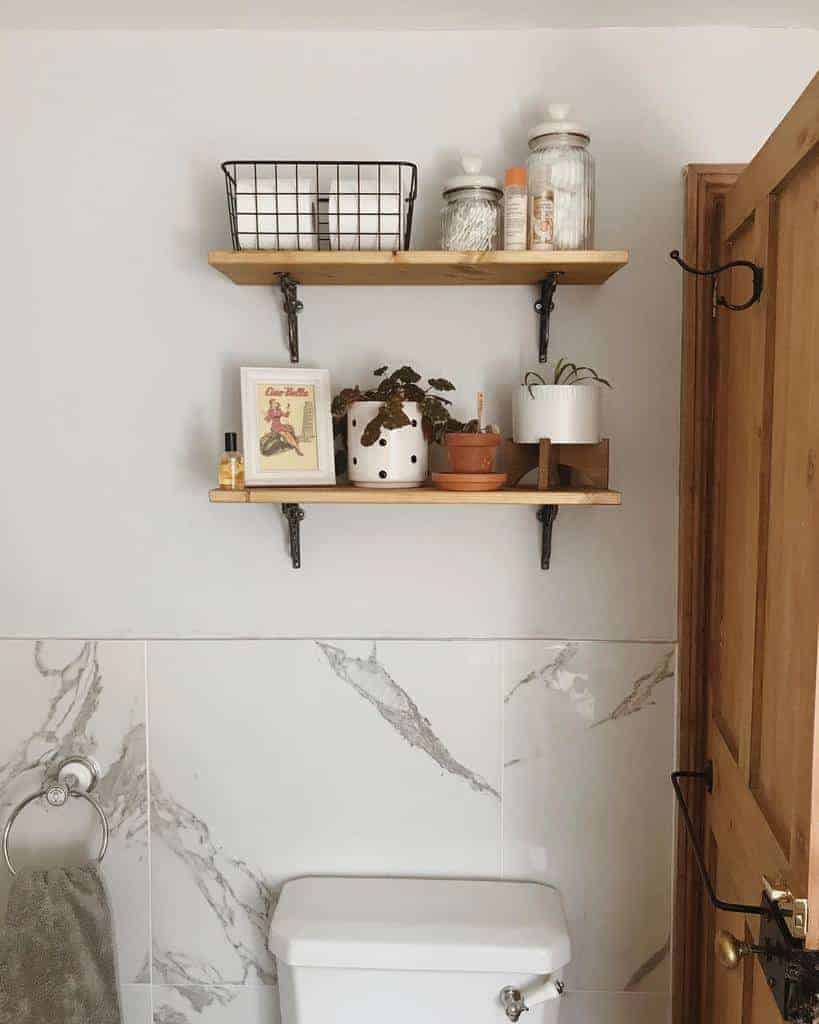
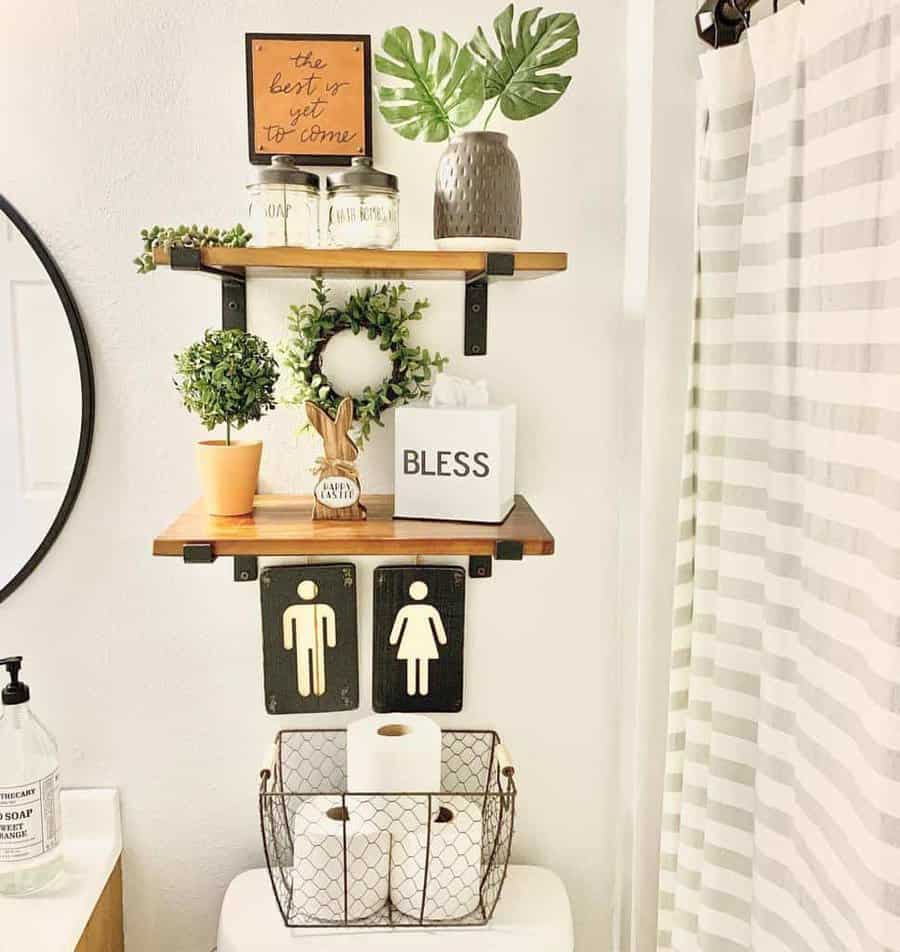
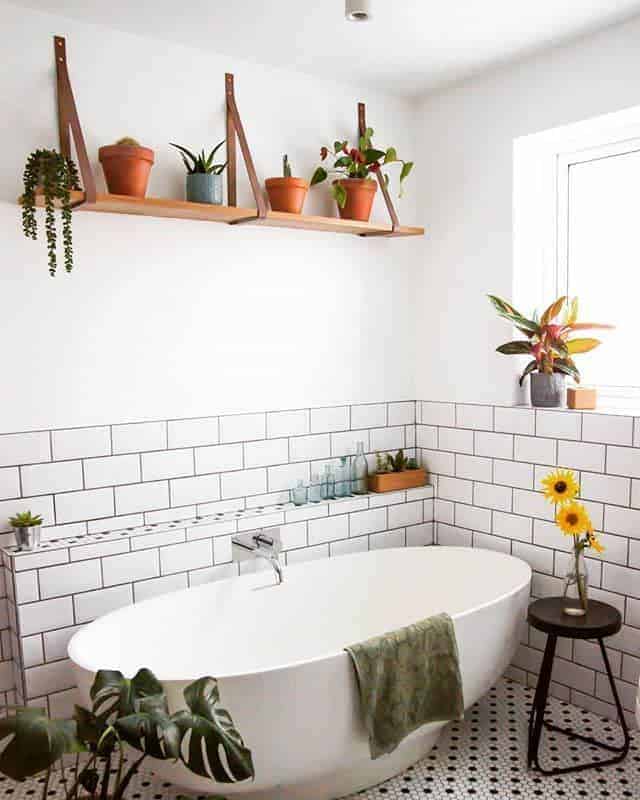
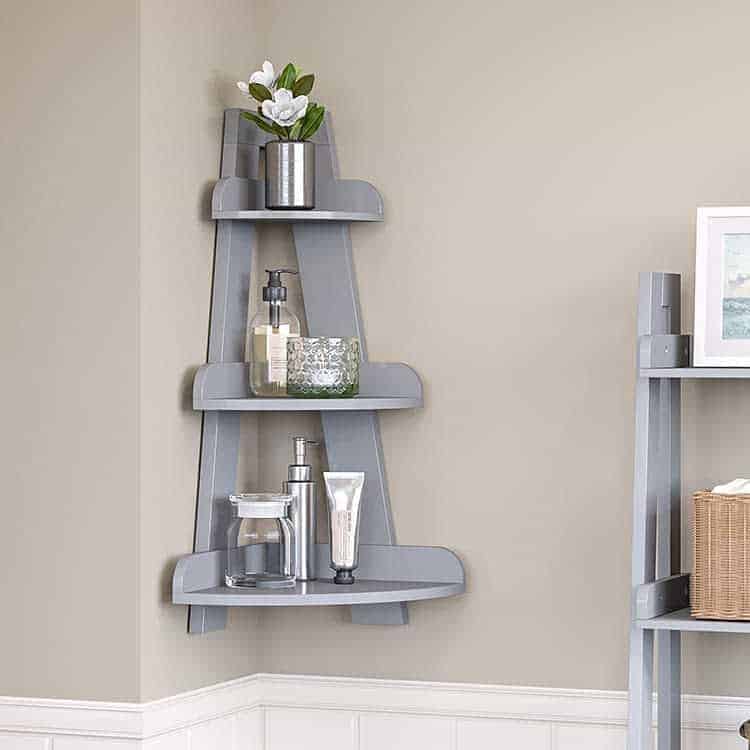
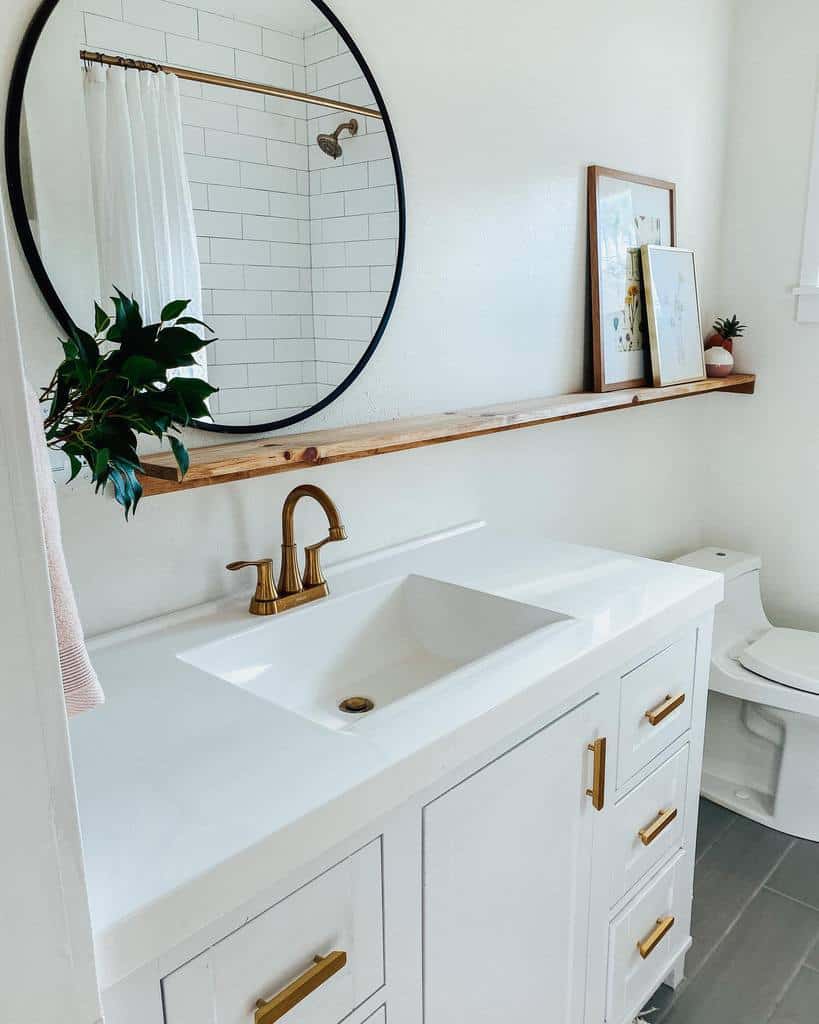
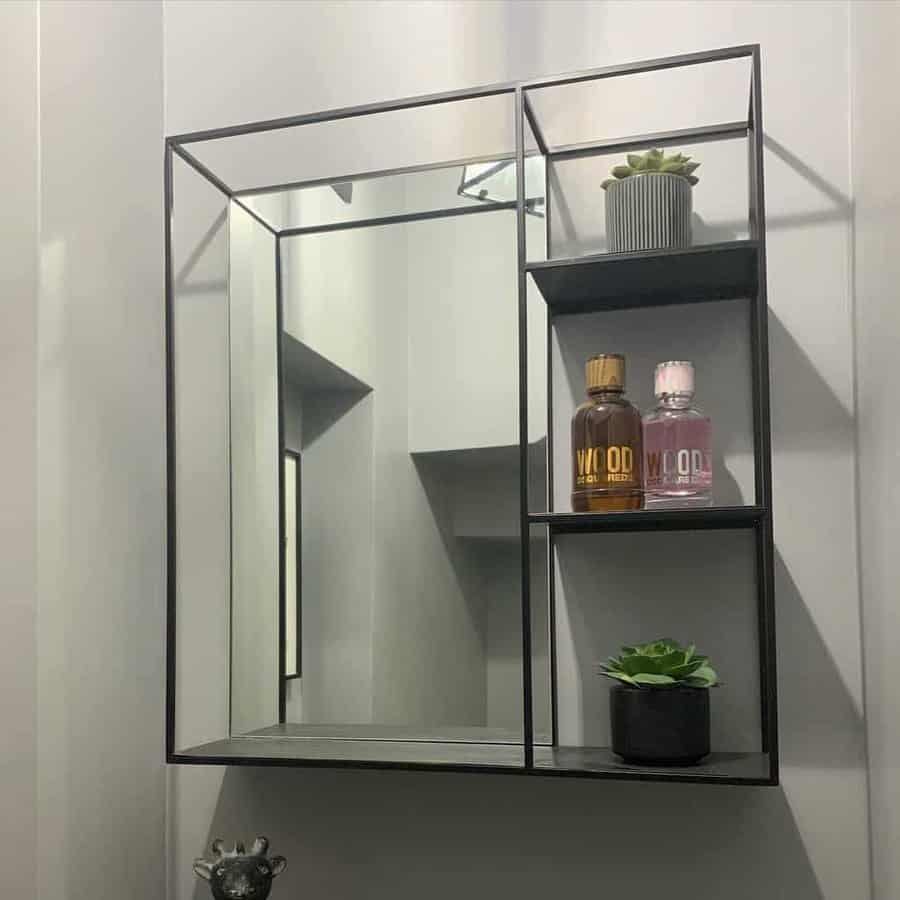
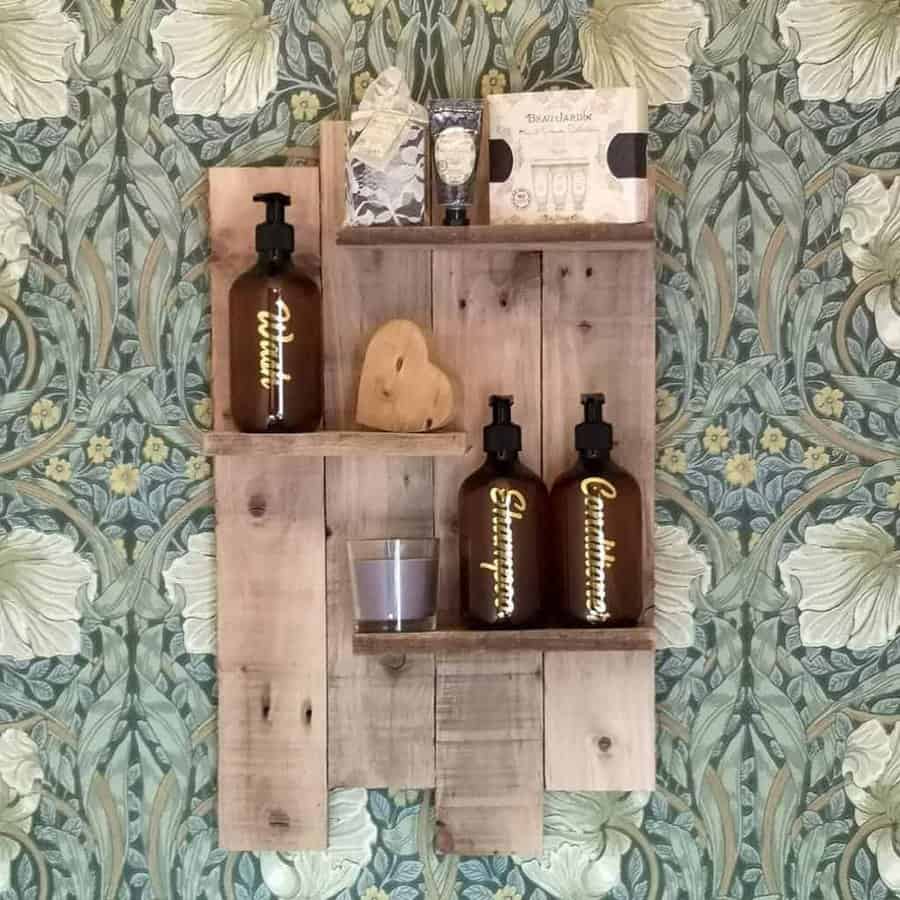
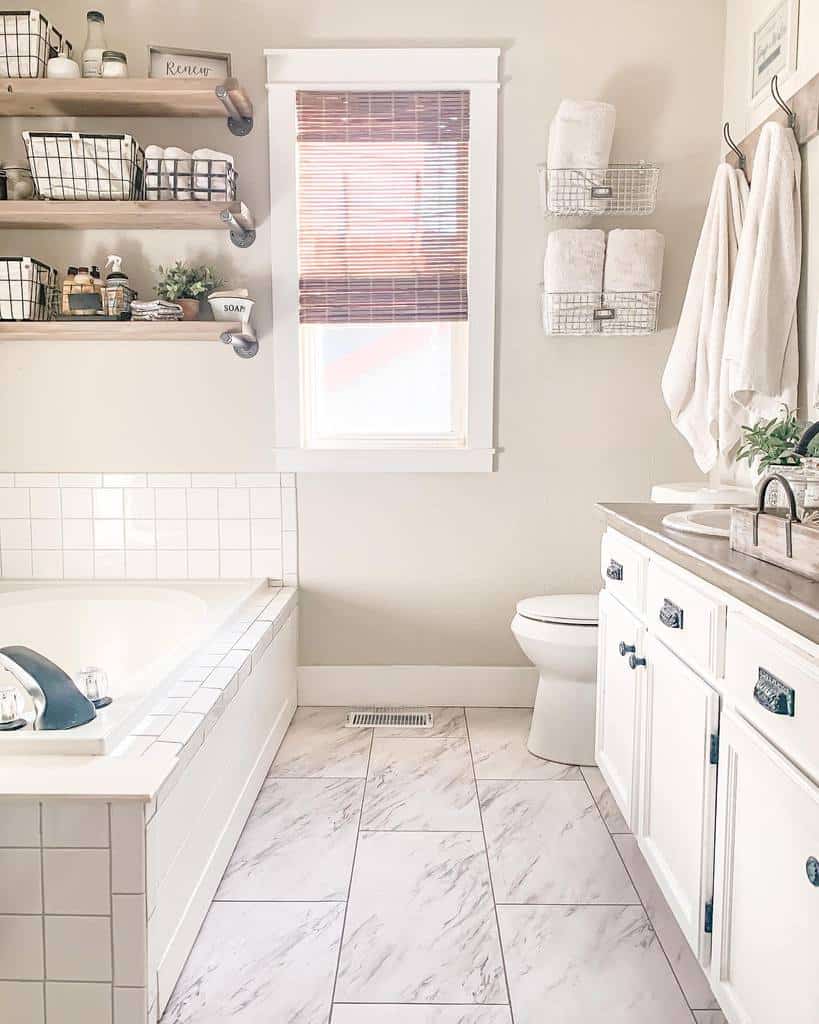
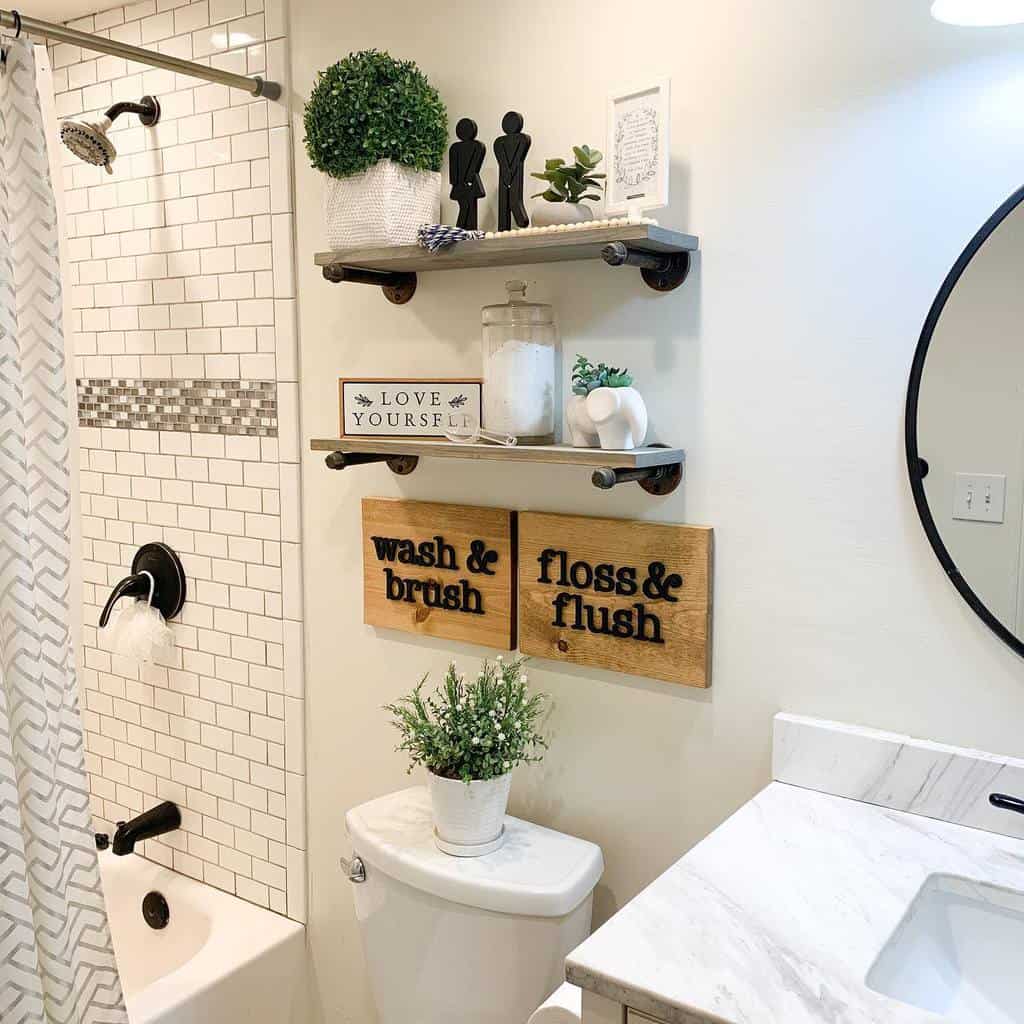
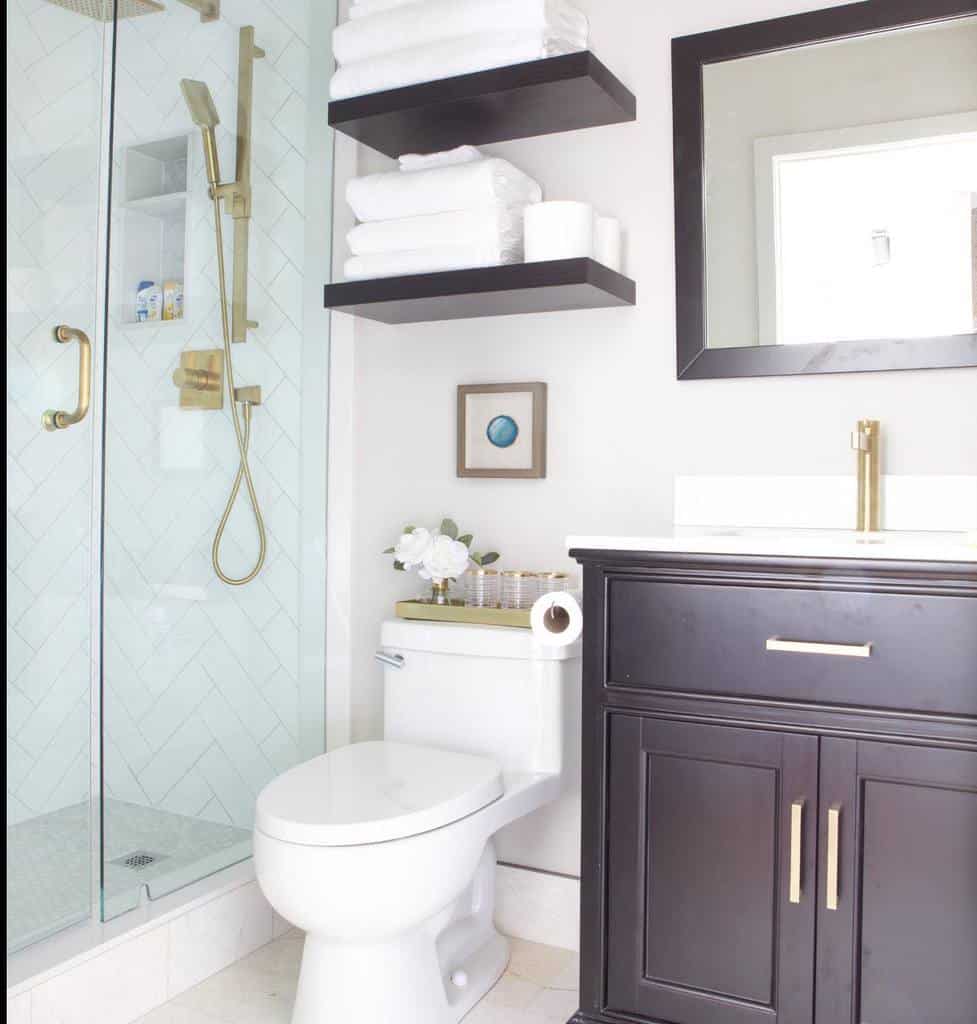
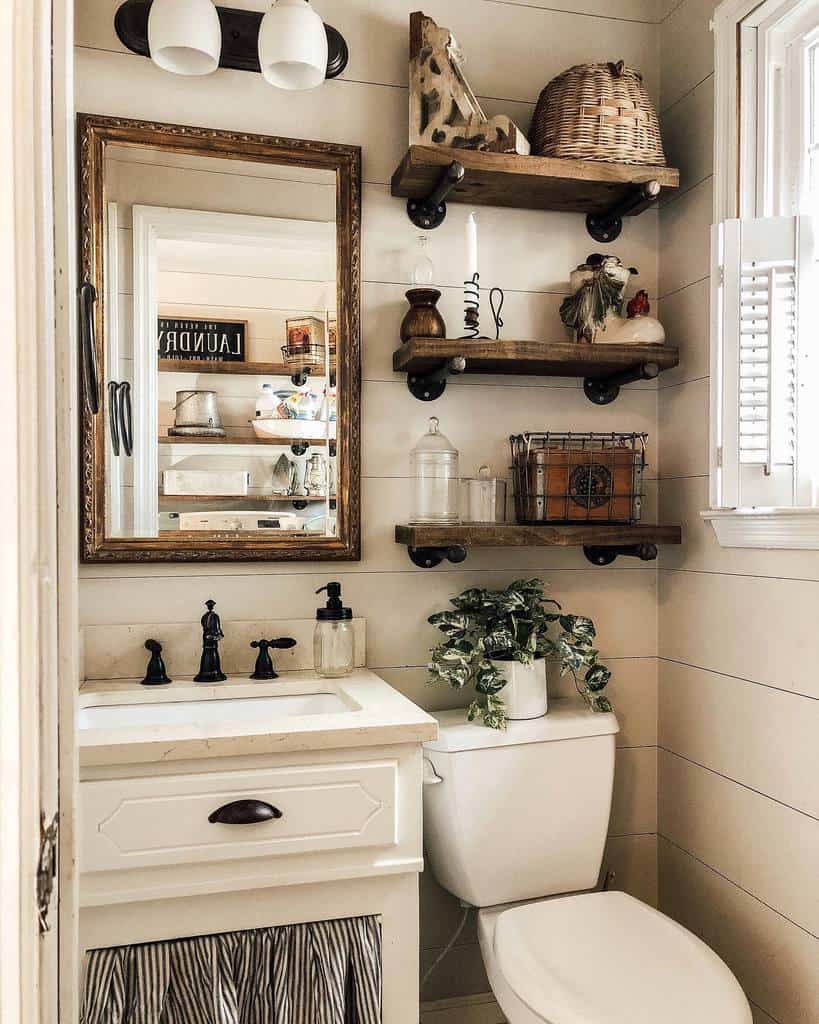
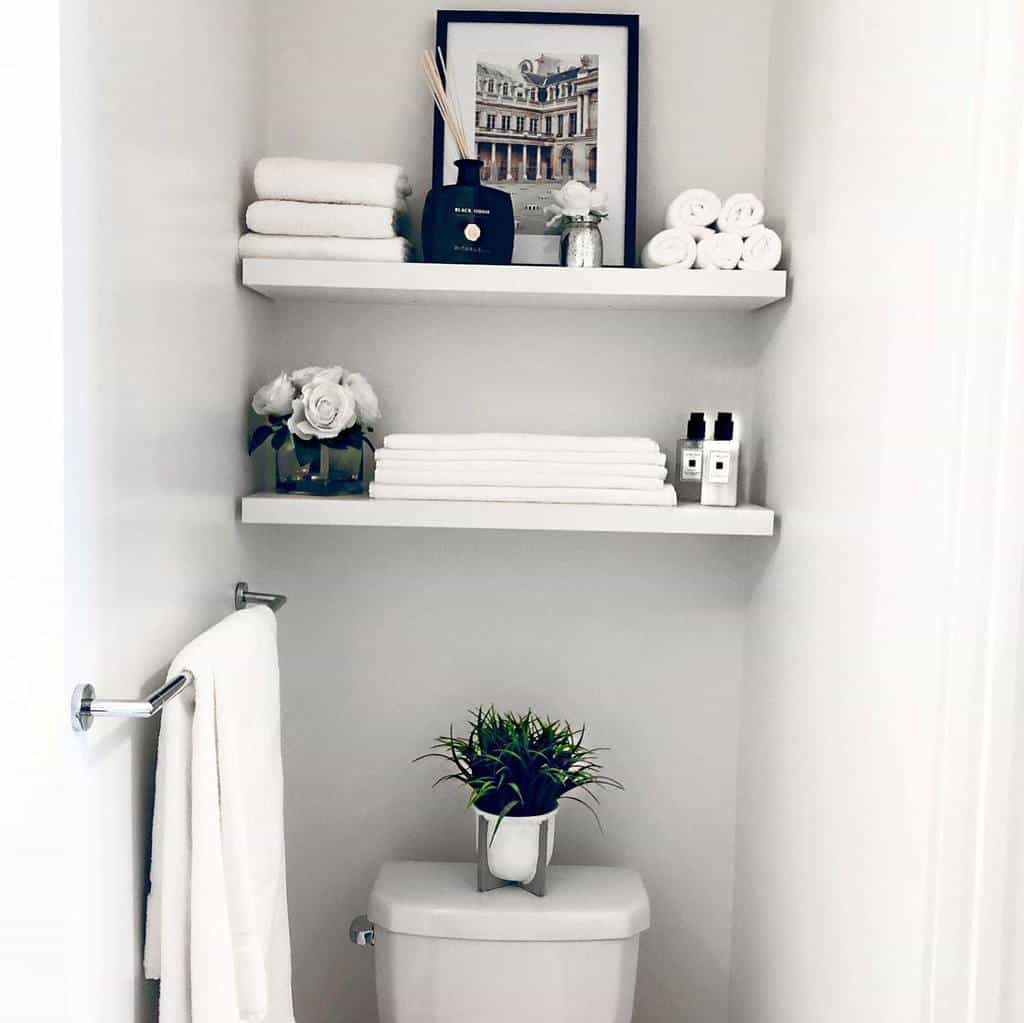
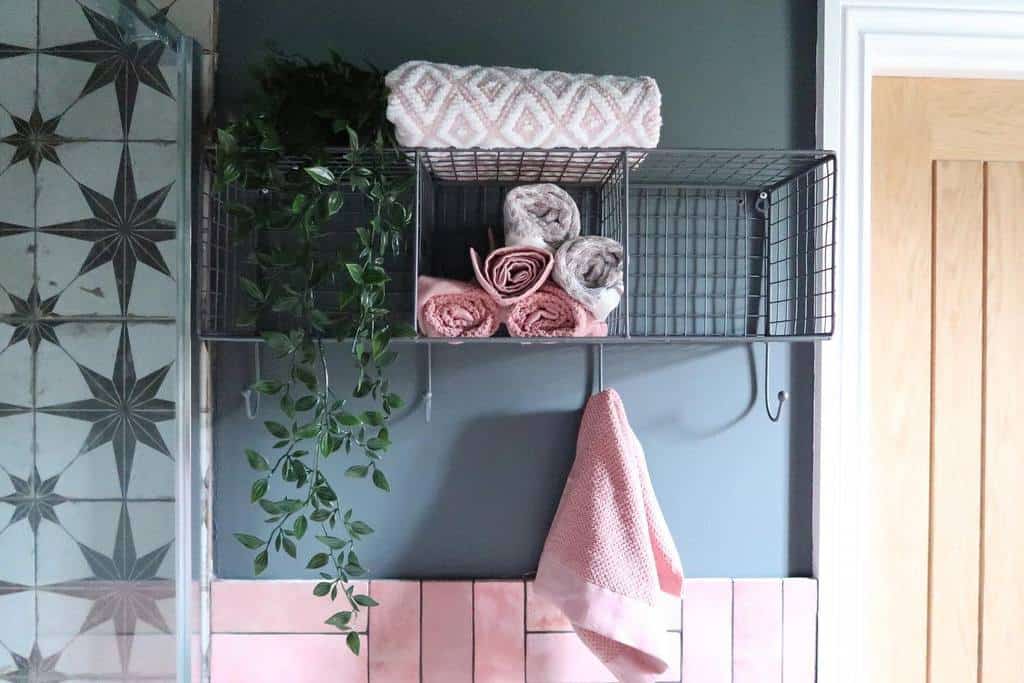
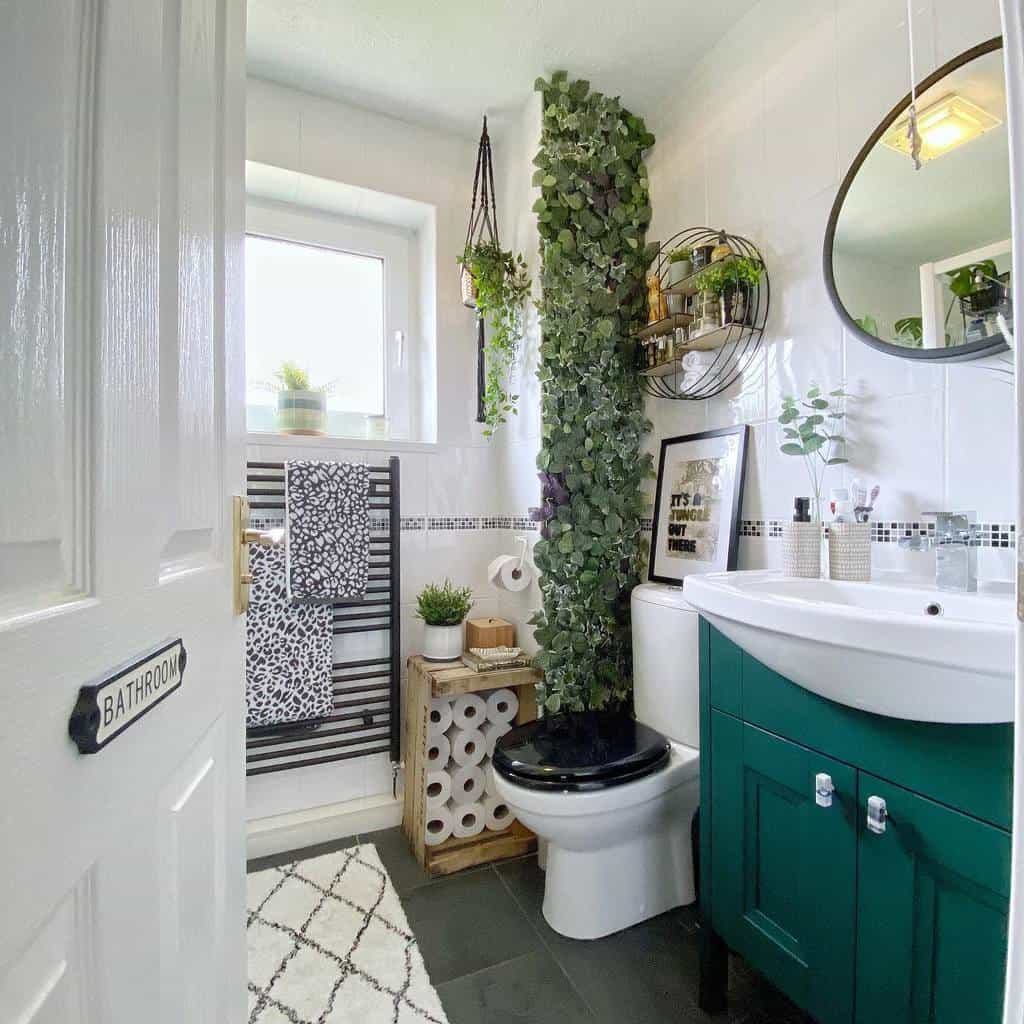
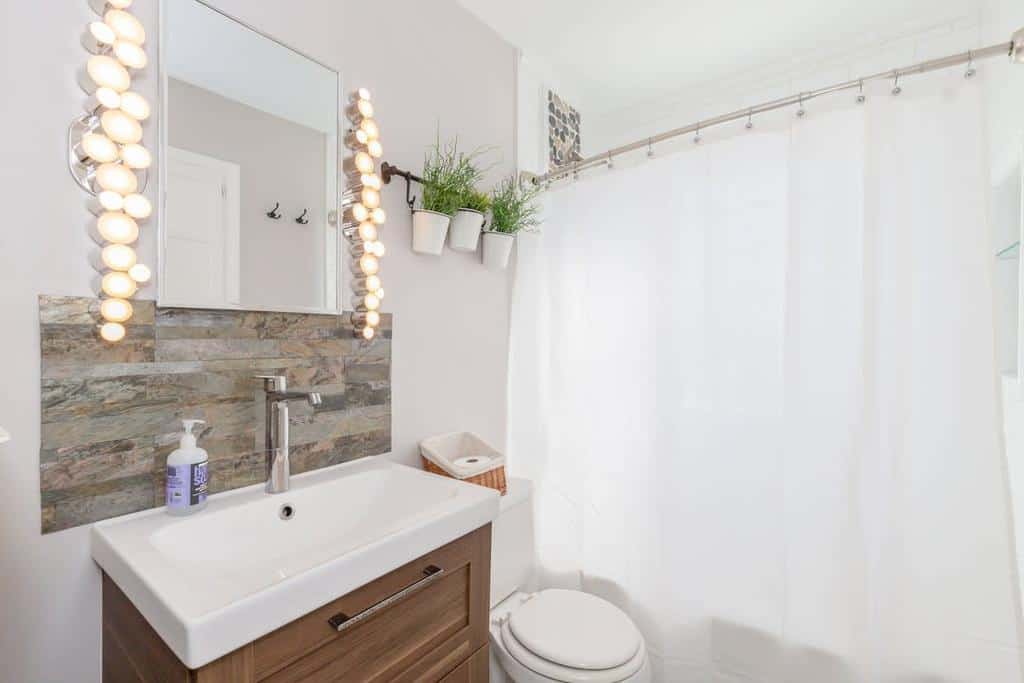
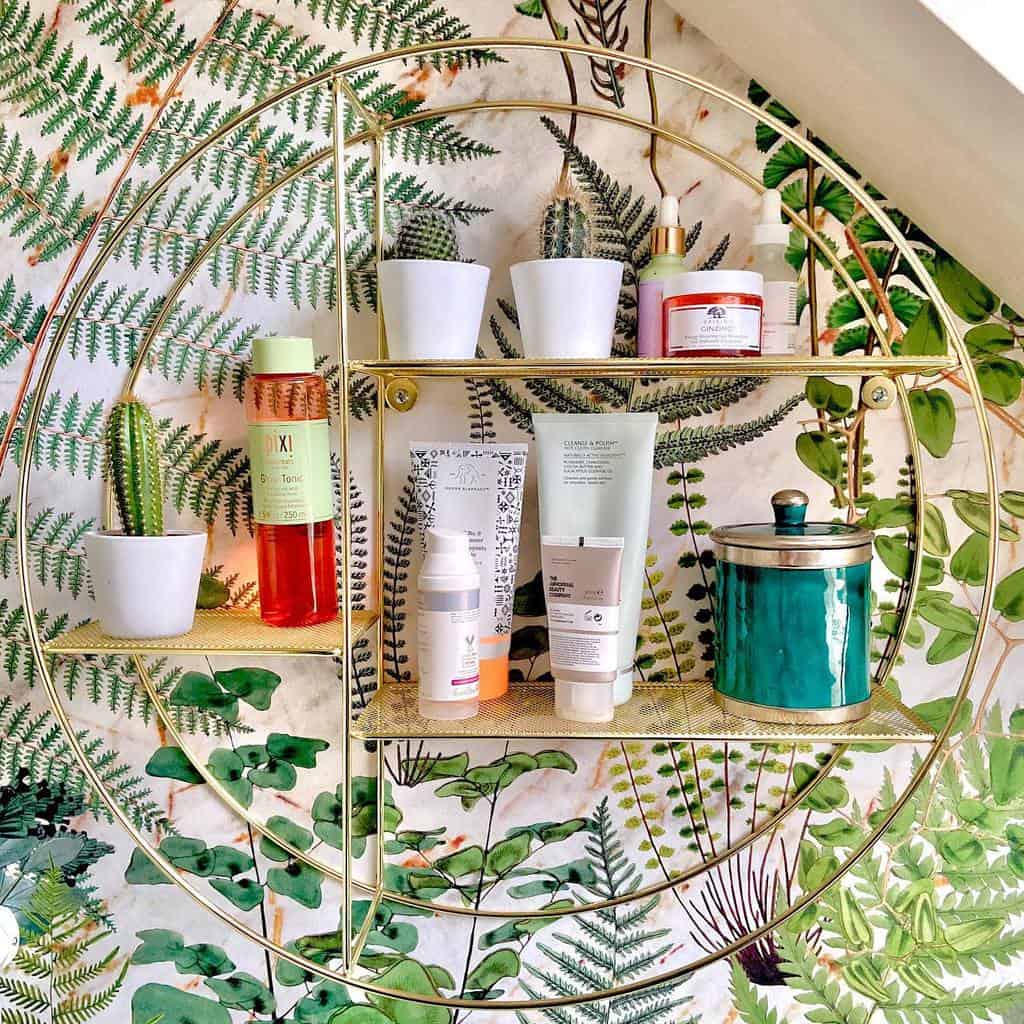
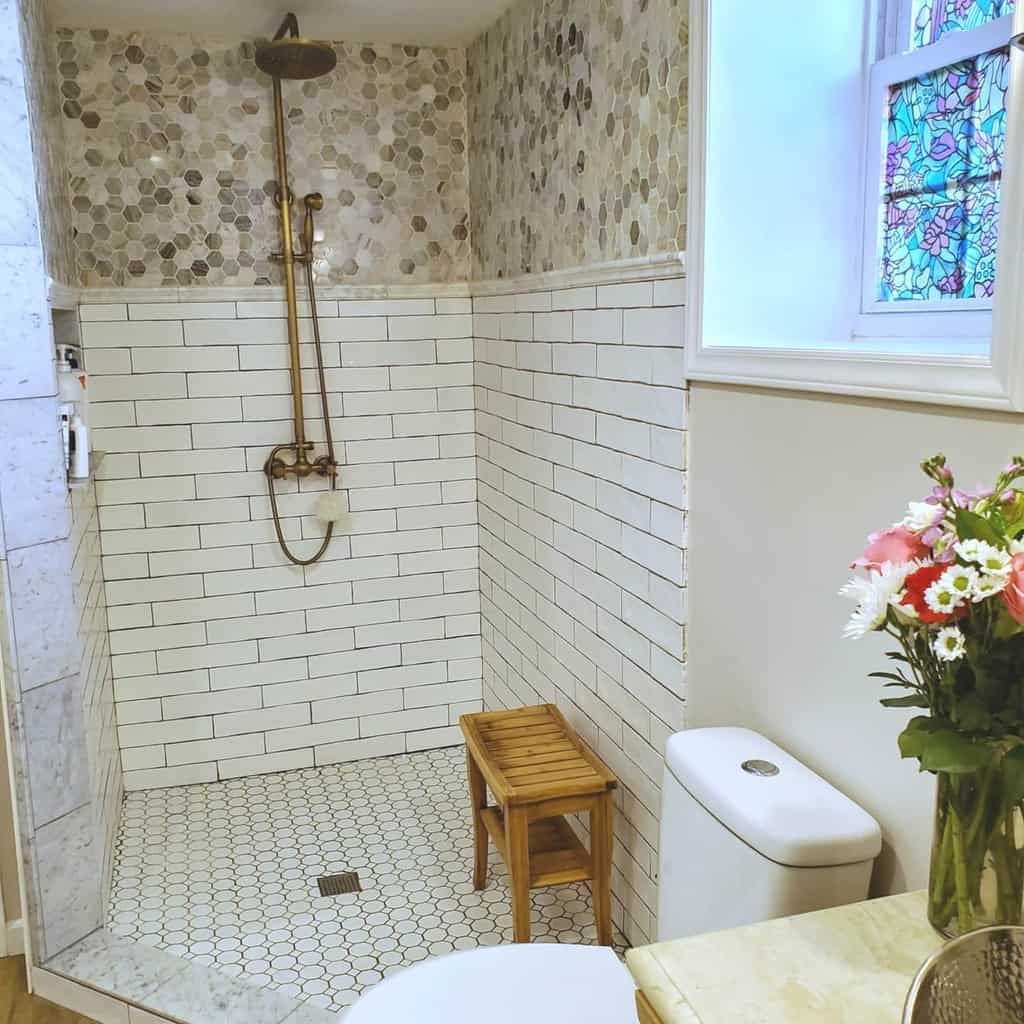
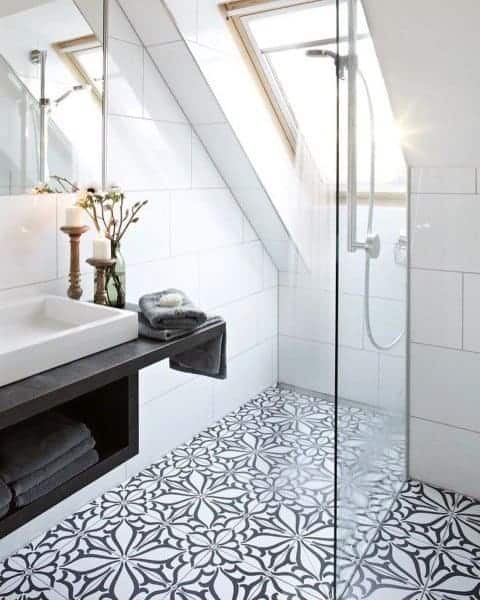
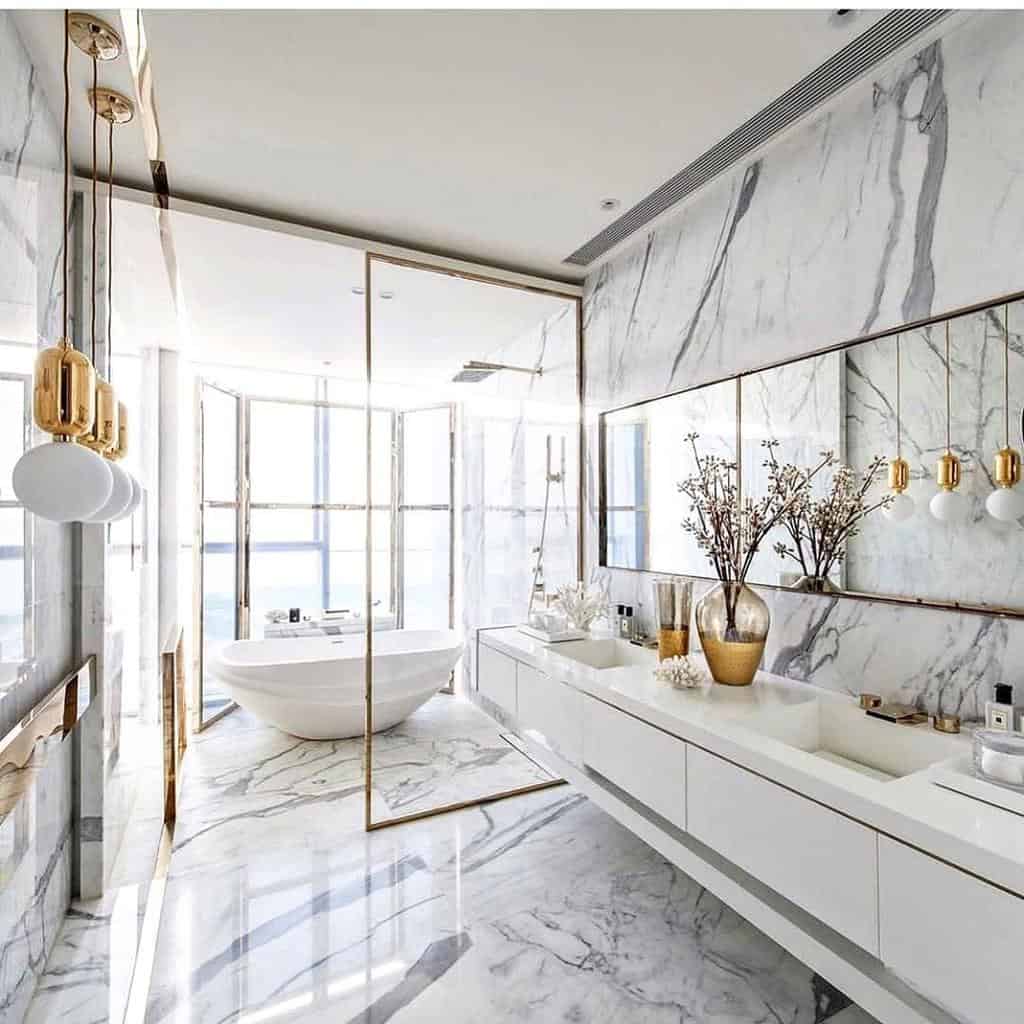
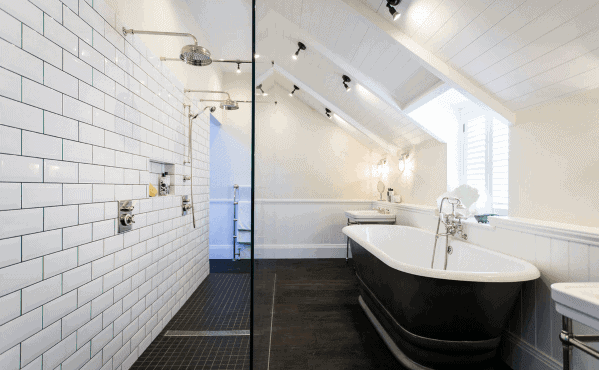
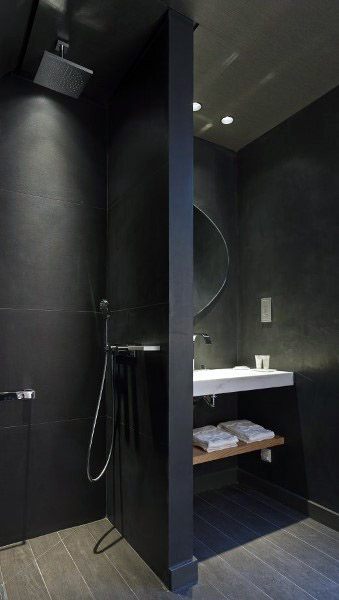
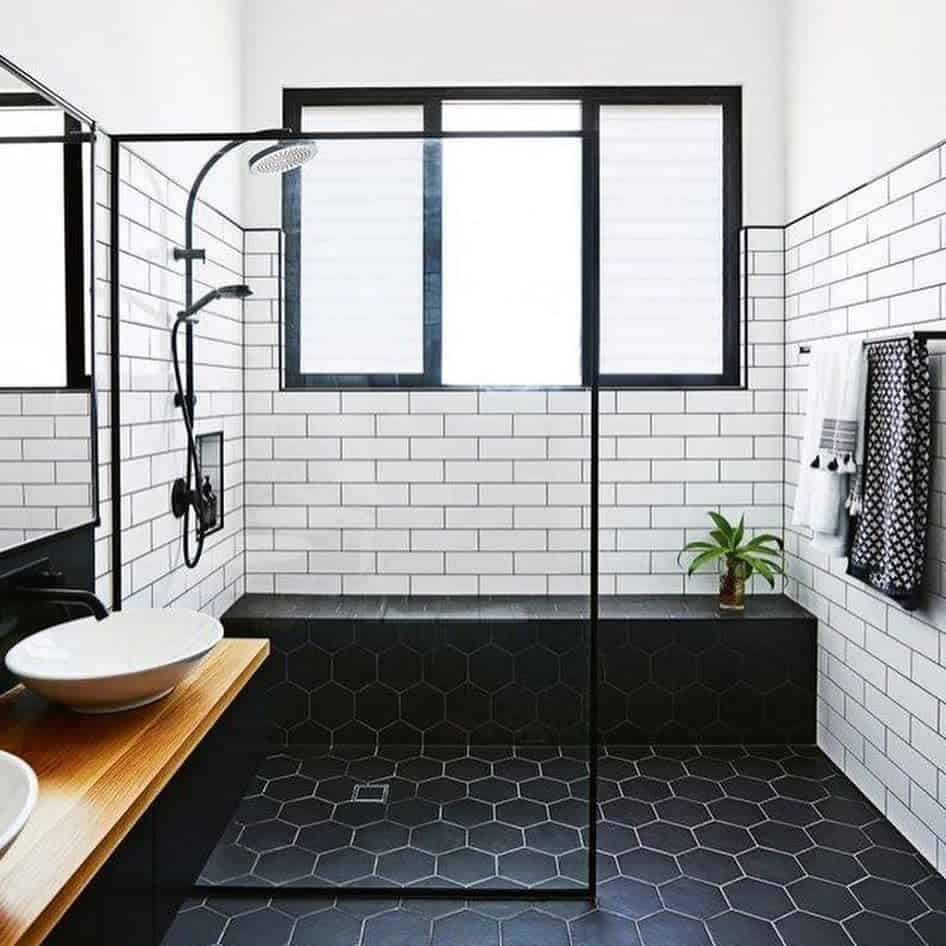
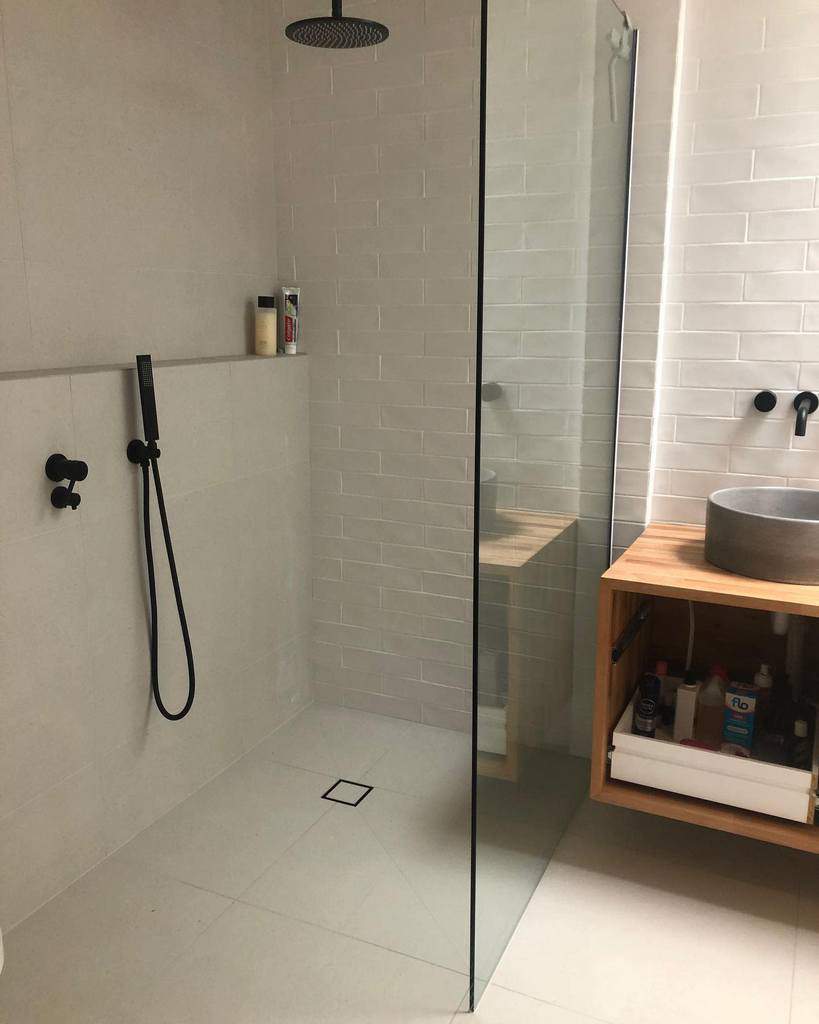
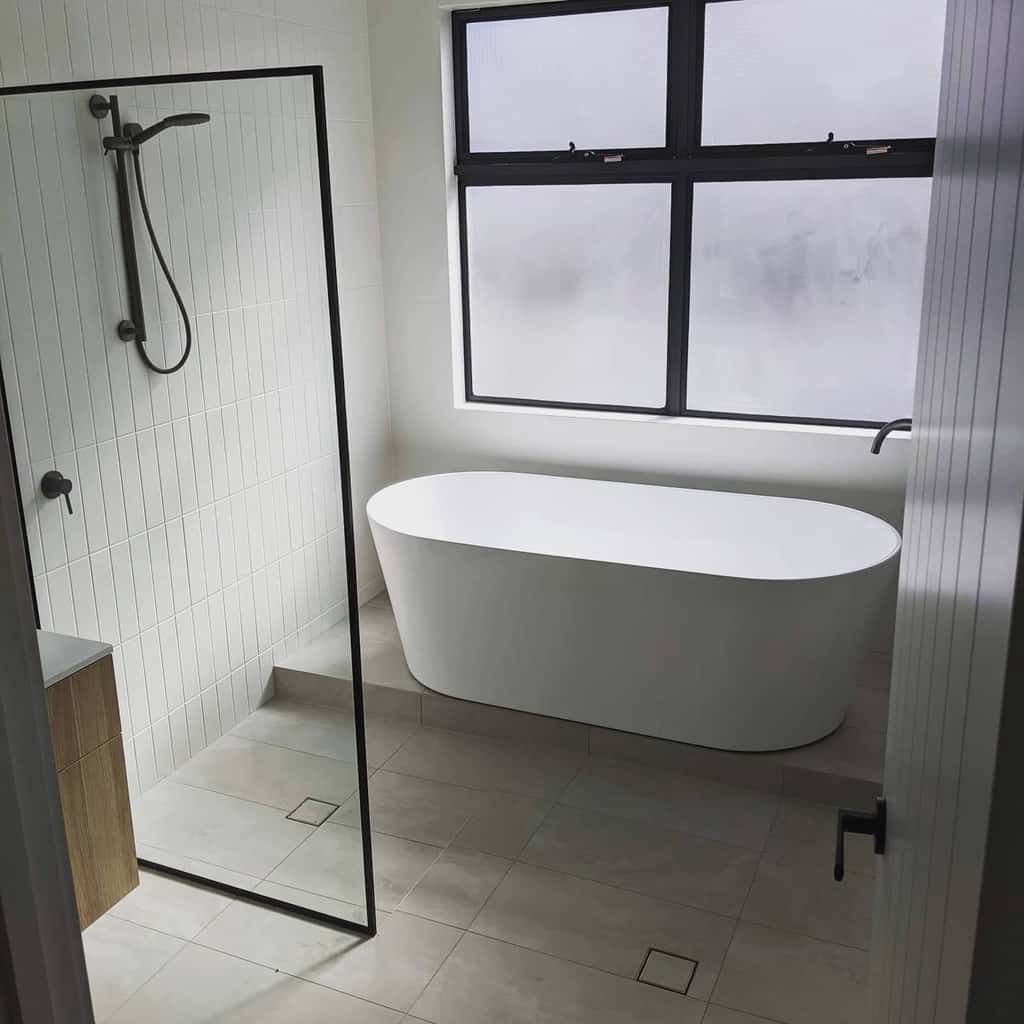
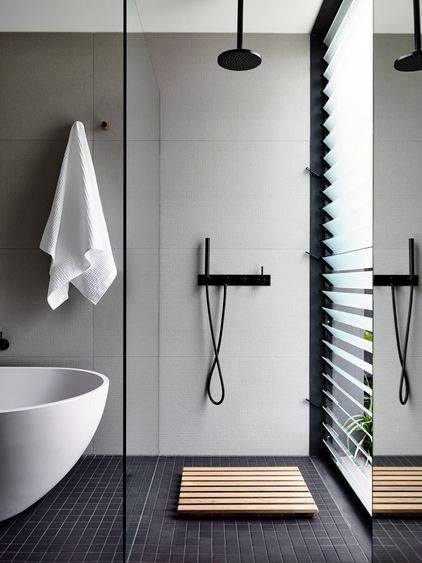
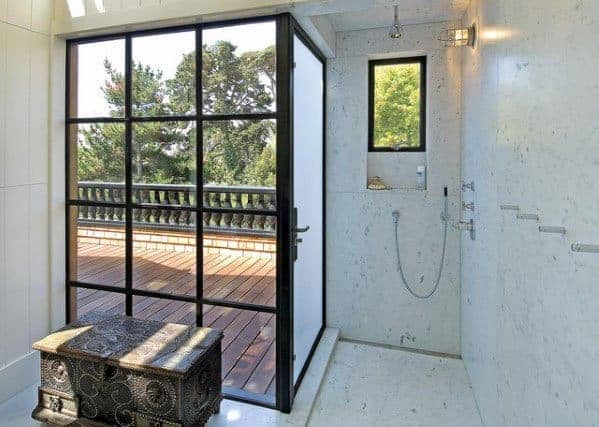
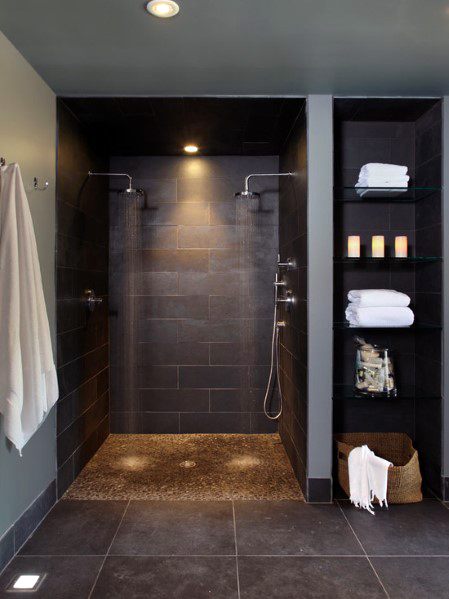
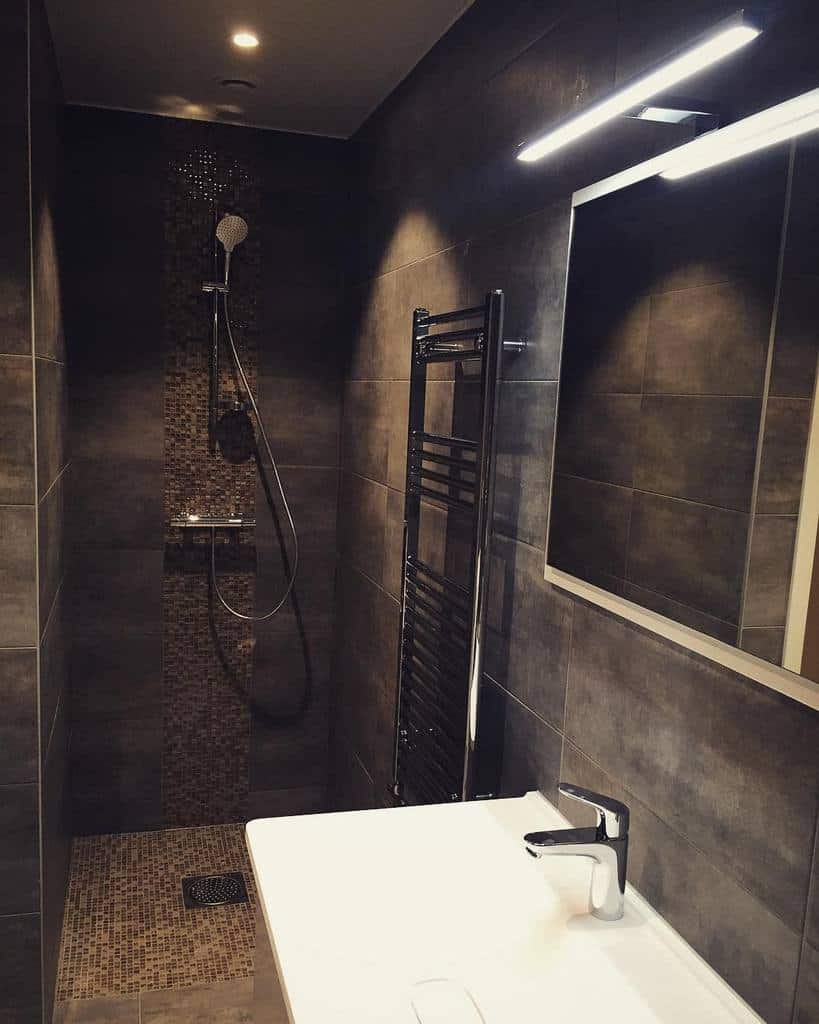
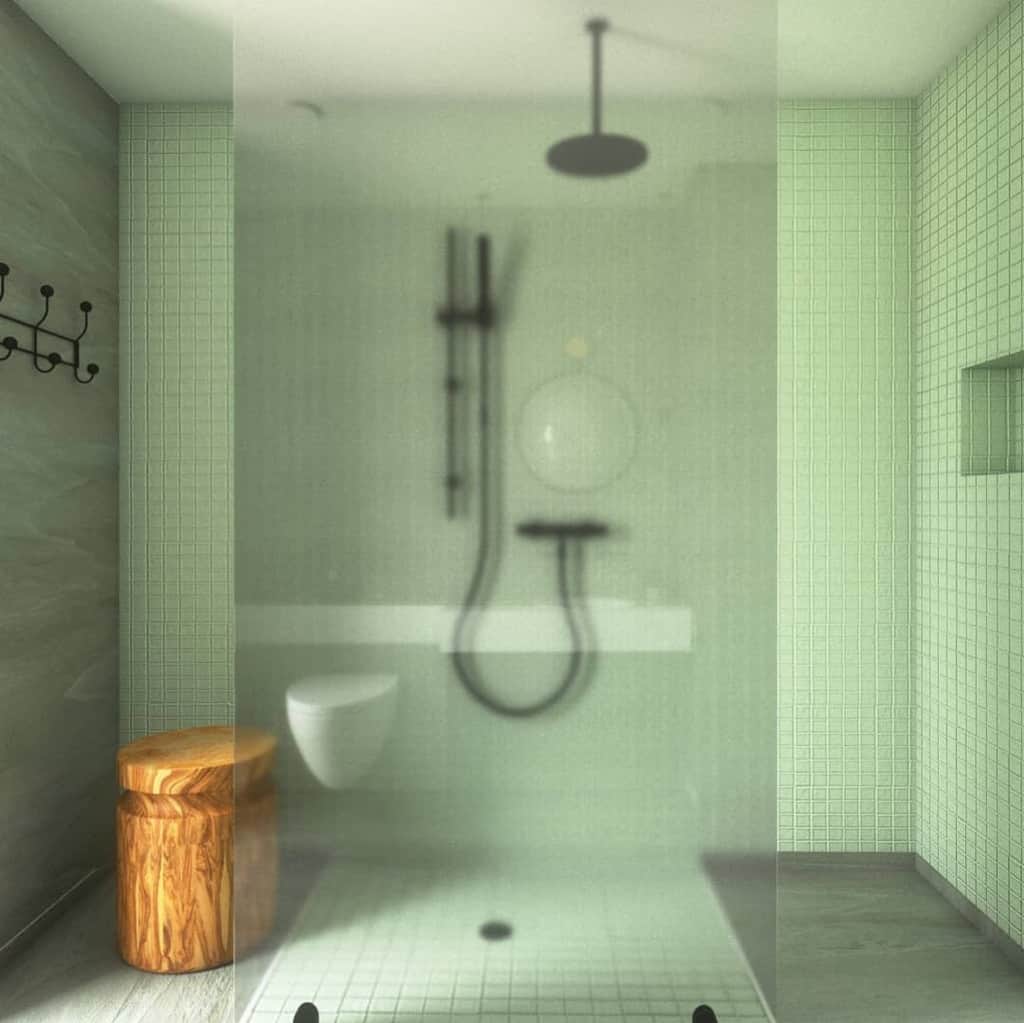
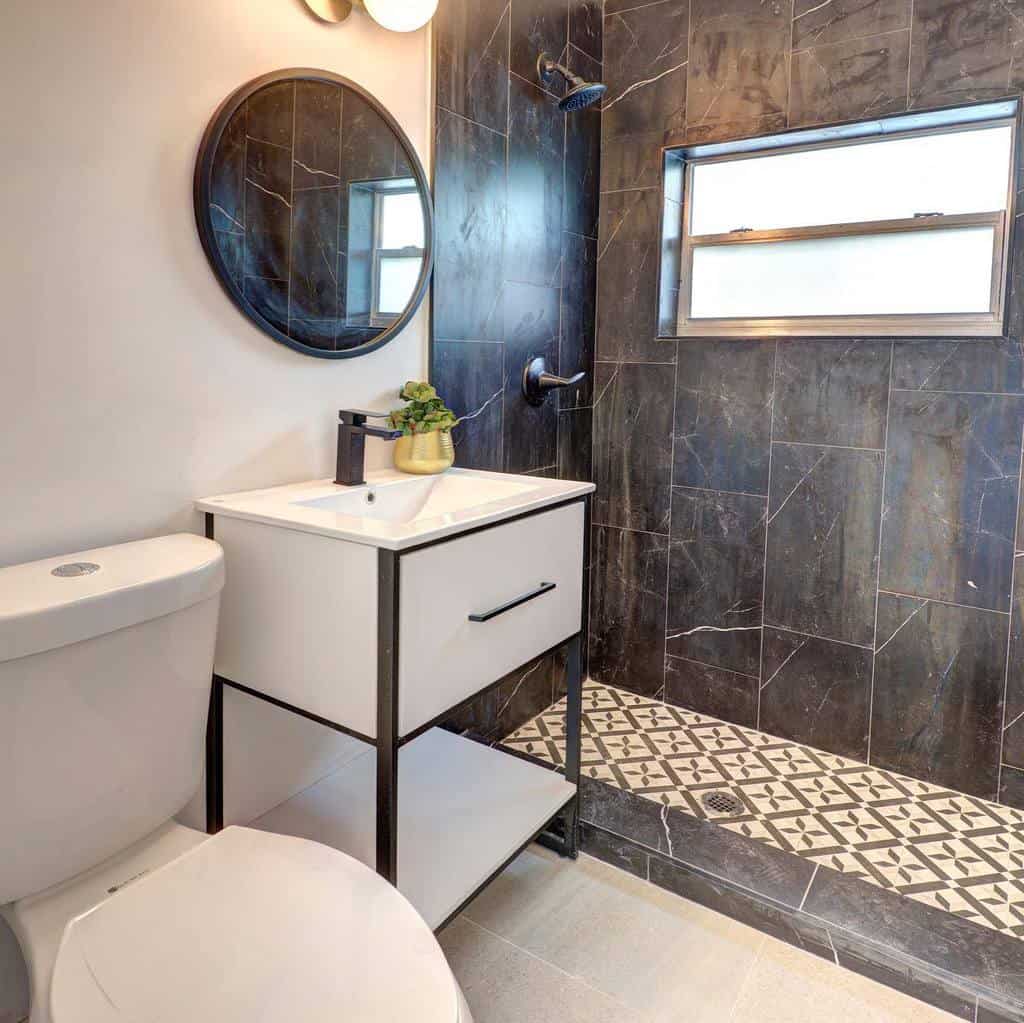
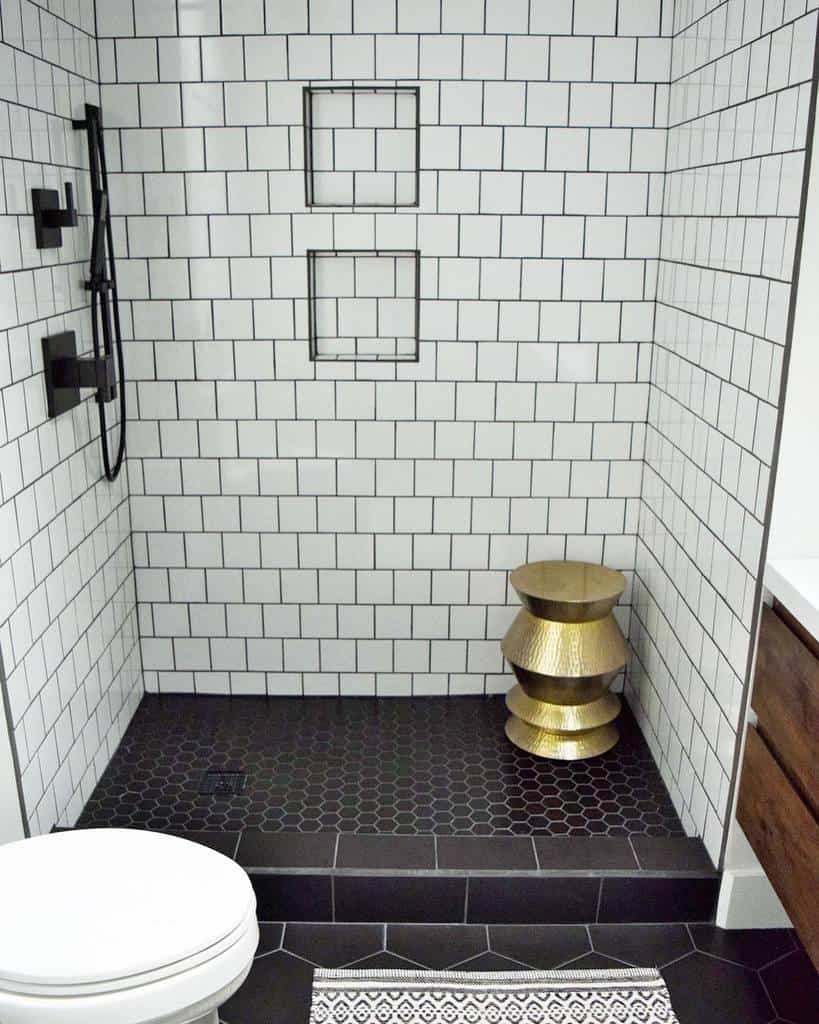
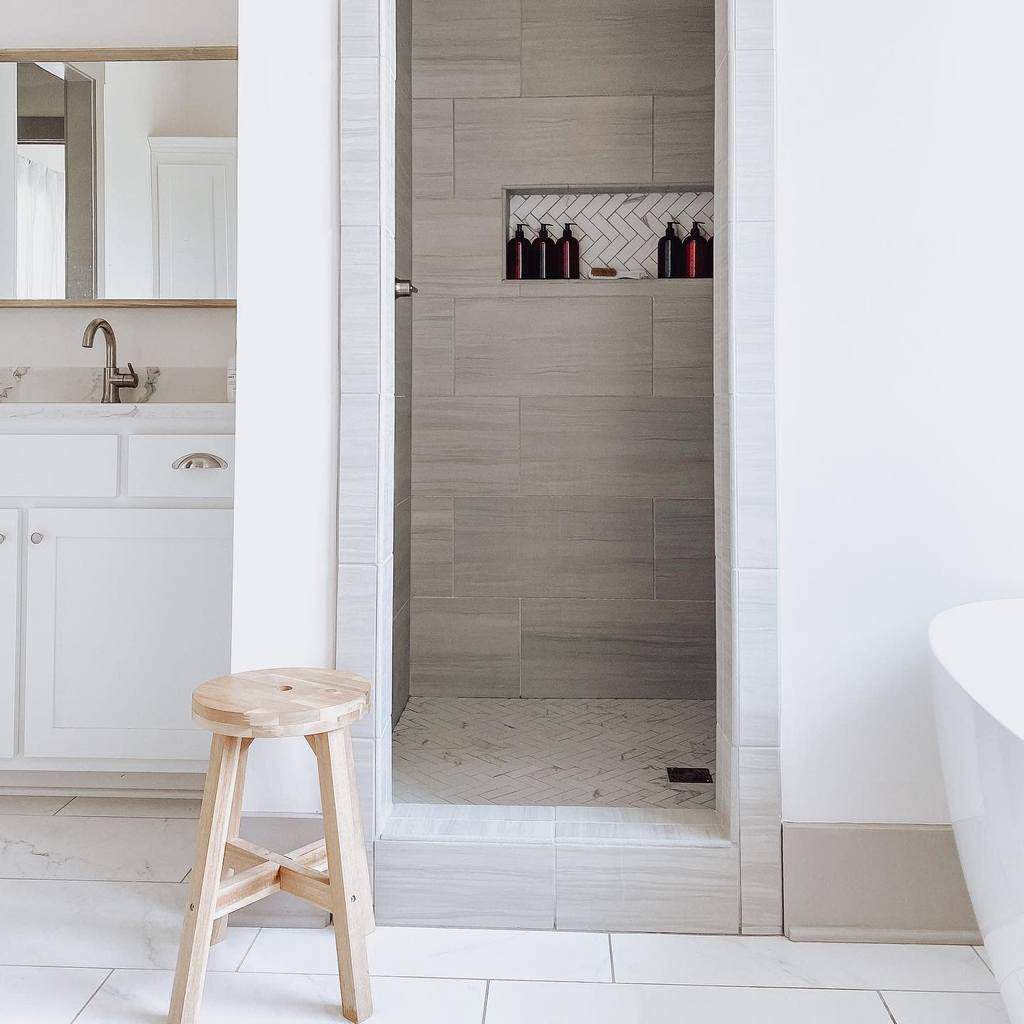
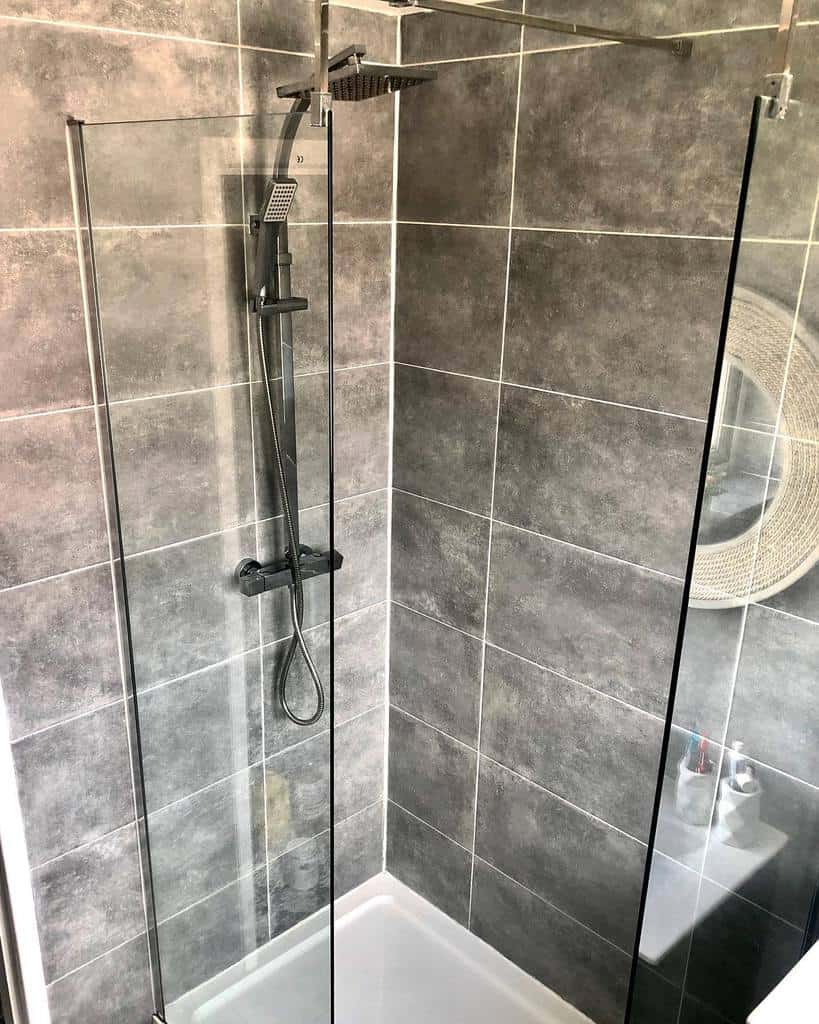
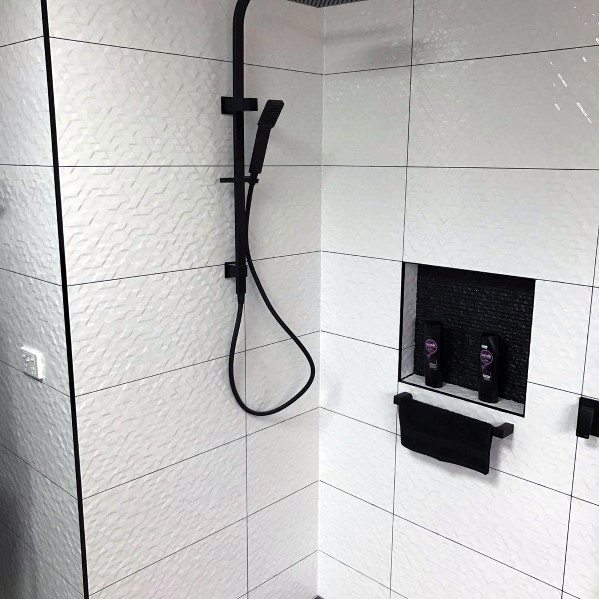
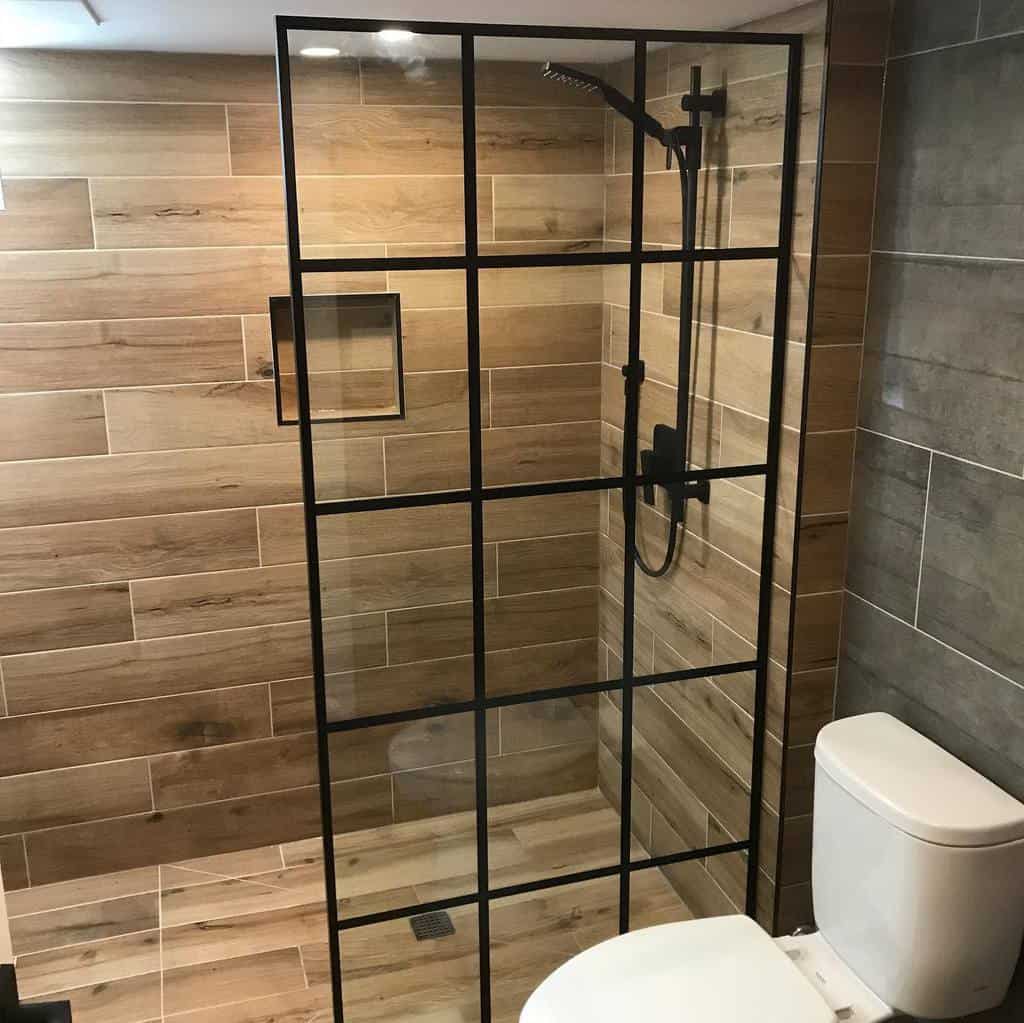
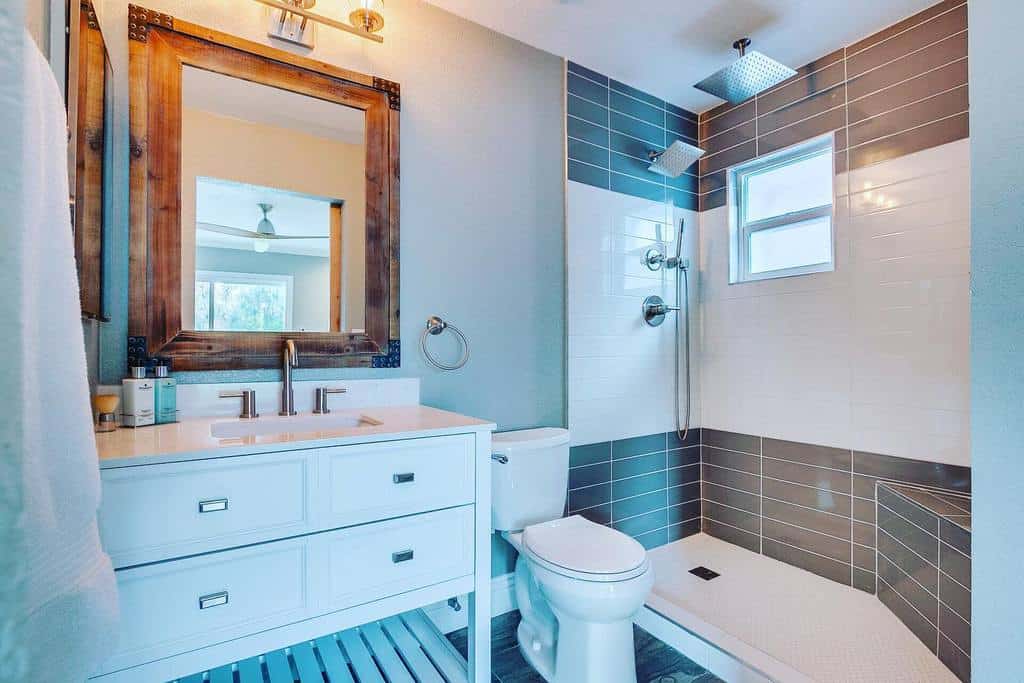
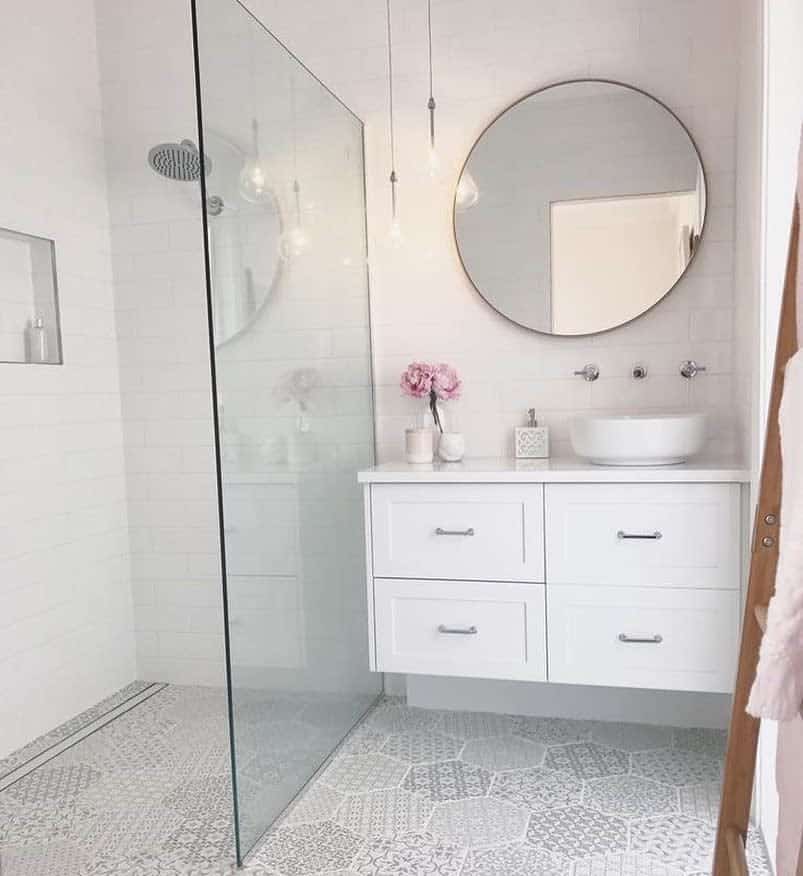
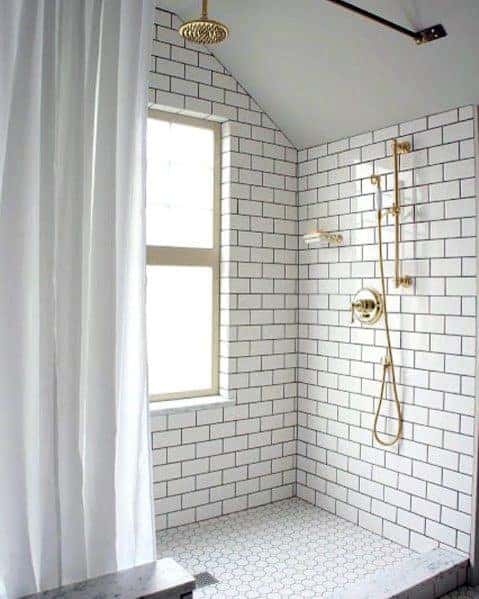
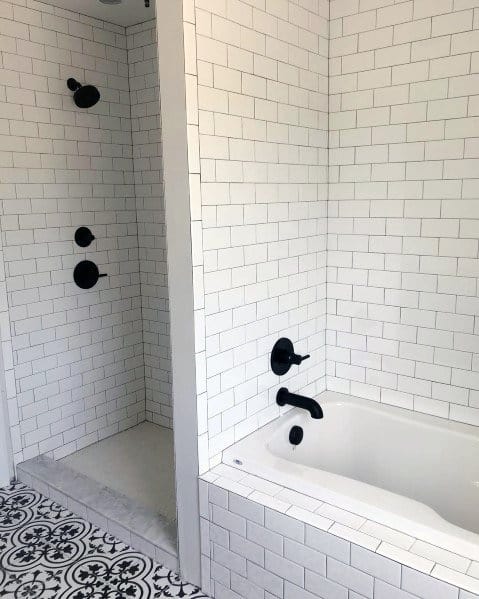
1. Optimize Bathroom Space with Floating Shelves
Adding a floating shelf or several shelves to your bathroom is a great way to create a decor display space or extra storage in your small bathroom.
Your bathroom floating shelves are the ideal extra storage space that you need for arranging spare towels and toiletries.
Source: @making.my_.happy_.place_ via InstagramSource: @numbertwentytwosomerset via InstagramSource: @rockycanyonrustic via InstagramSource: @sharystudio via InstagramSource: @theplacewherewecallhome via InstagramSource: @wovenandwicker via InstagramSource: @candyspradg via InstagramSource: @erin_vt via InstagramSource: @homewithsimone via InstagramSource: @lime_lace via Instagram
Your bathroom is in a high moisture environment. So choose a shelf material that will be impervious to the extra moisture.
You also don’t want to install your shelves in a place that will experience constant moisture, such as splashing from the shower. A good place to mount a floating shelf is above the toilet or vanity.
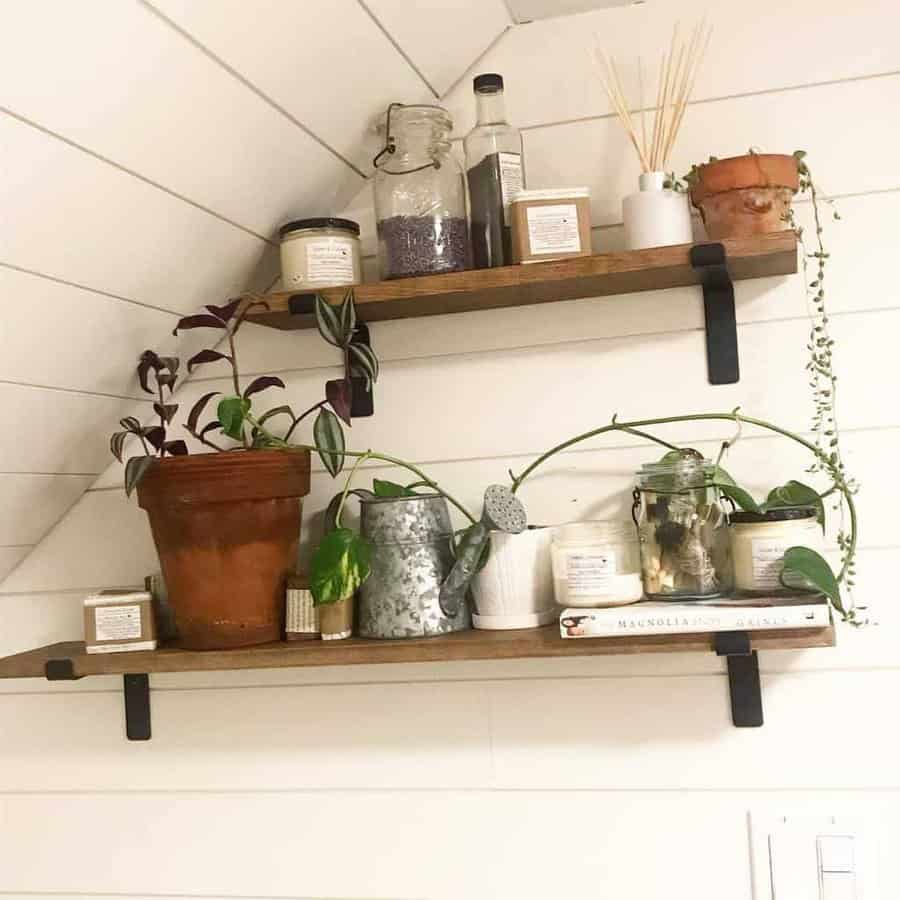
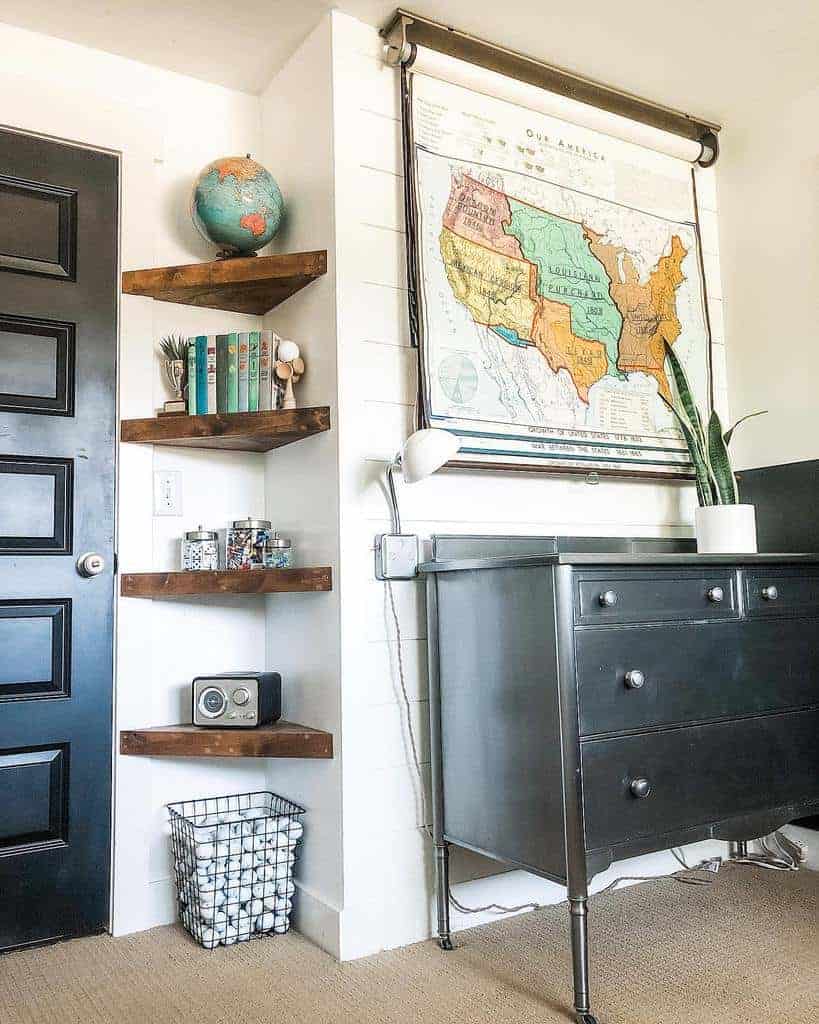
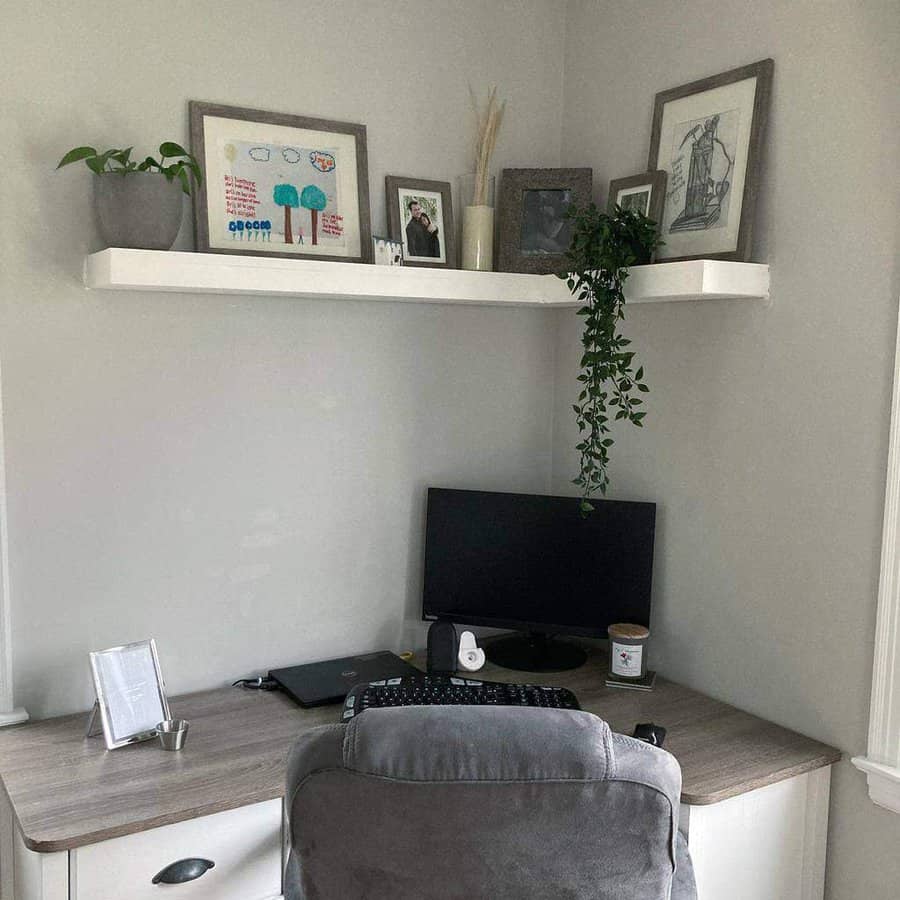
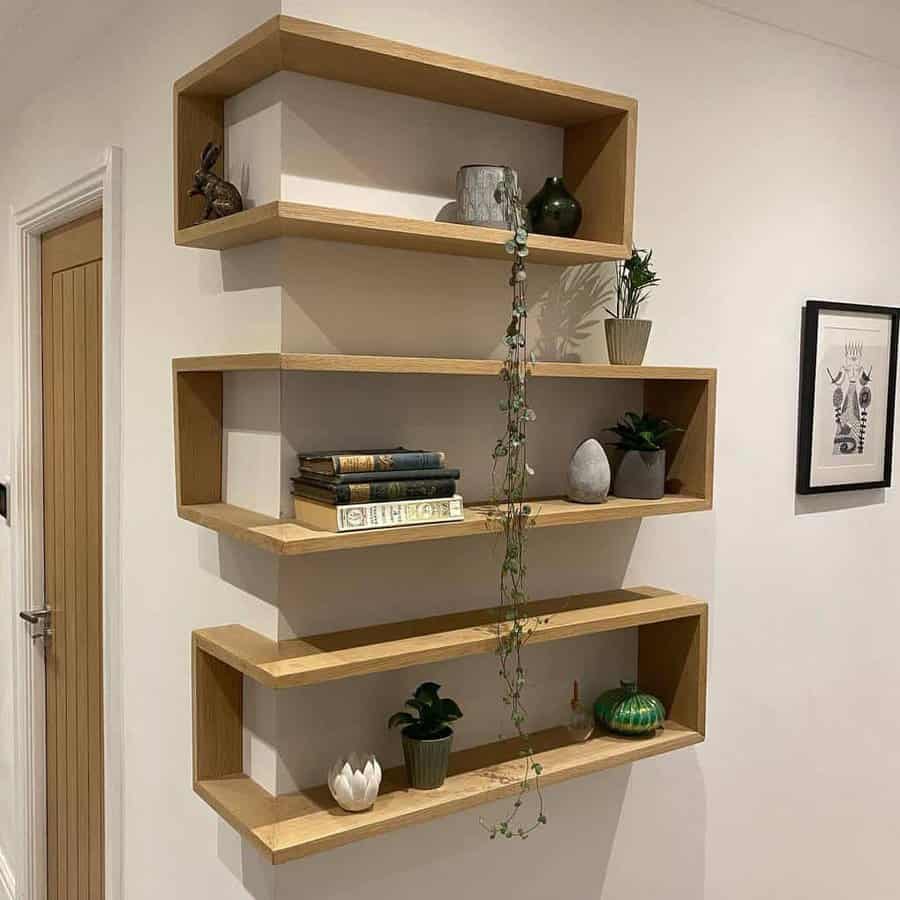
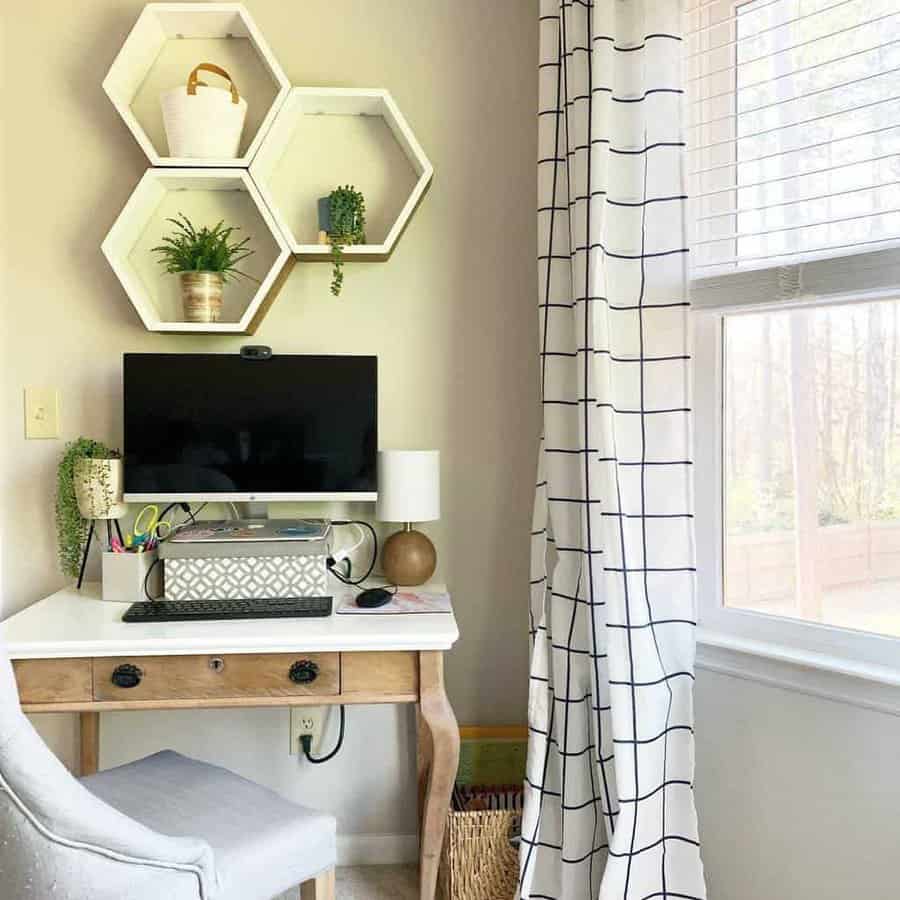
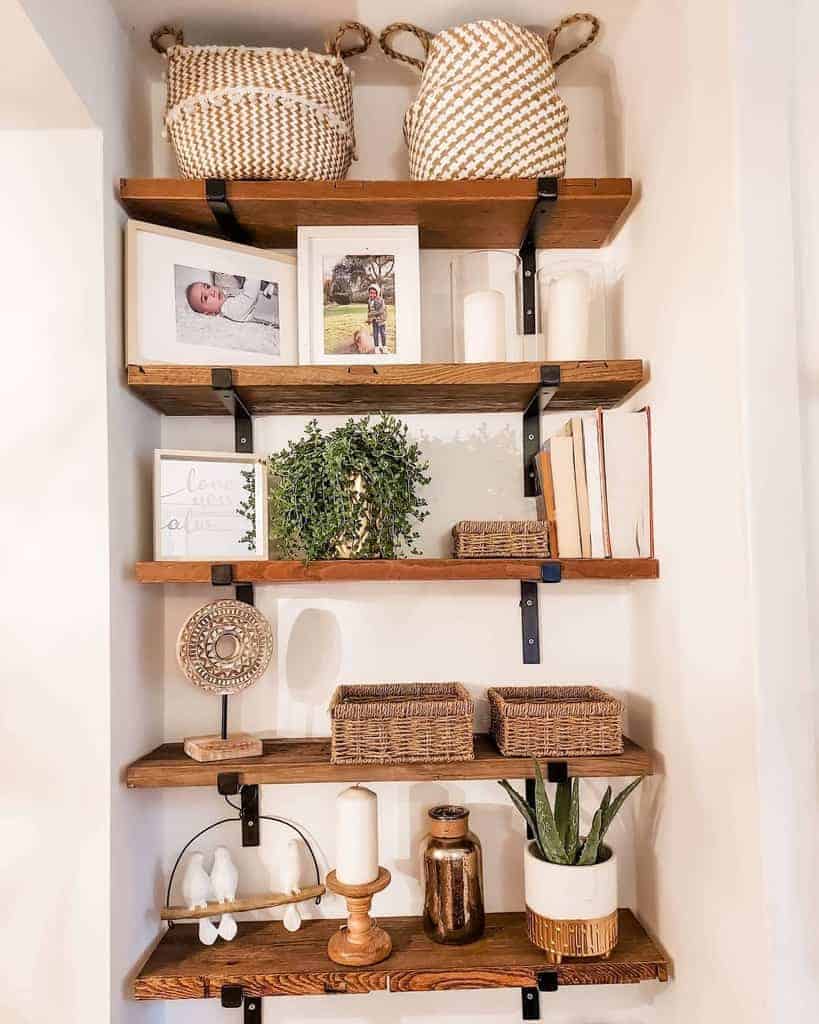
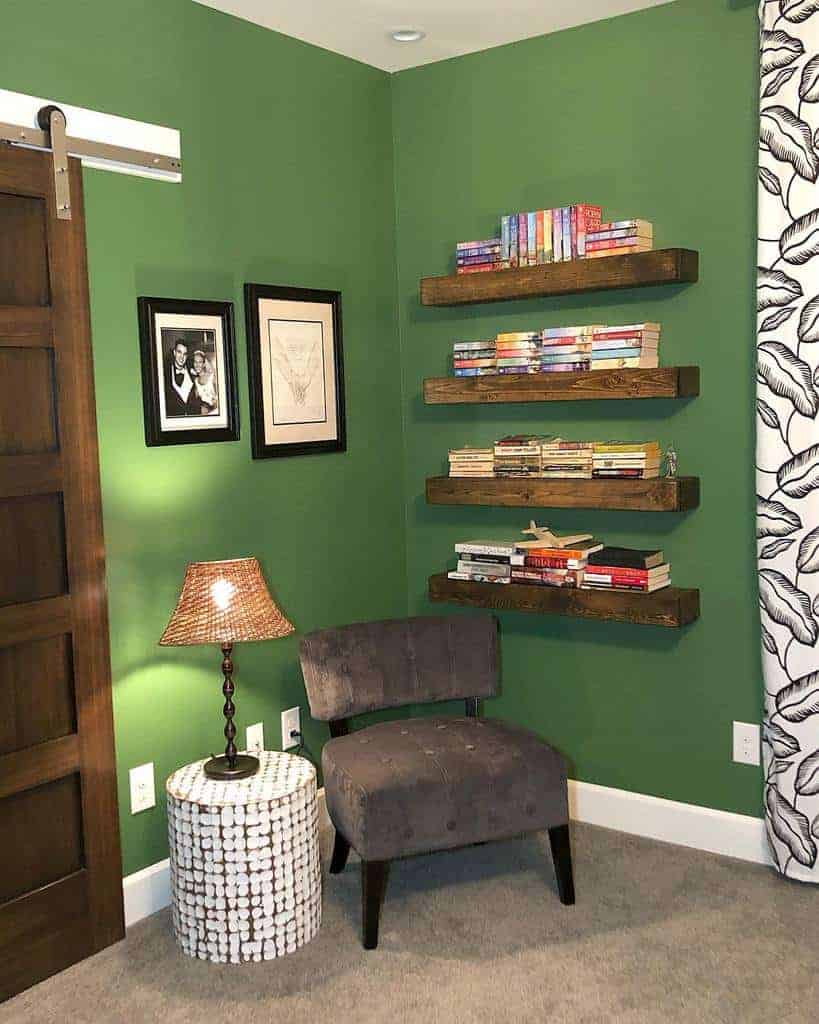
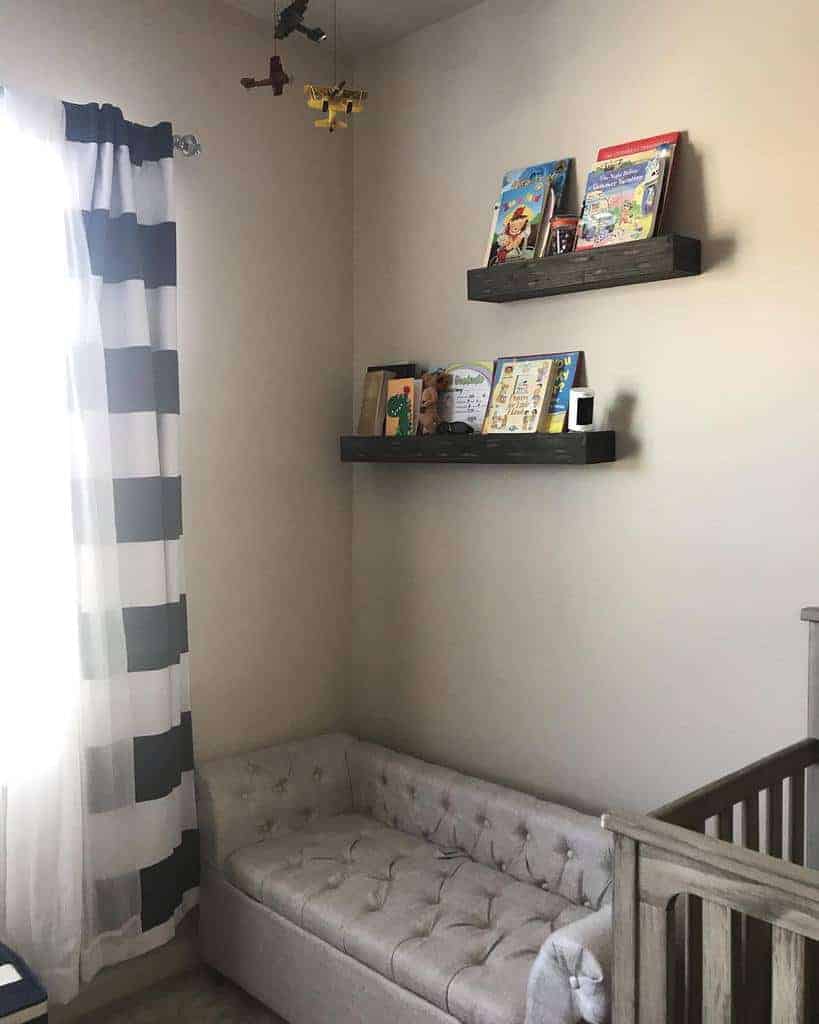
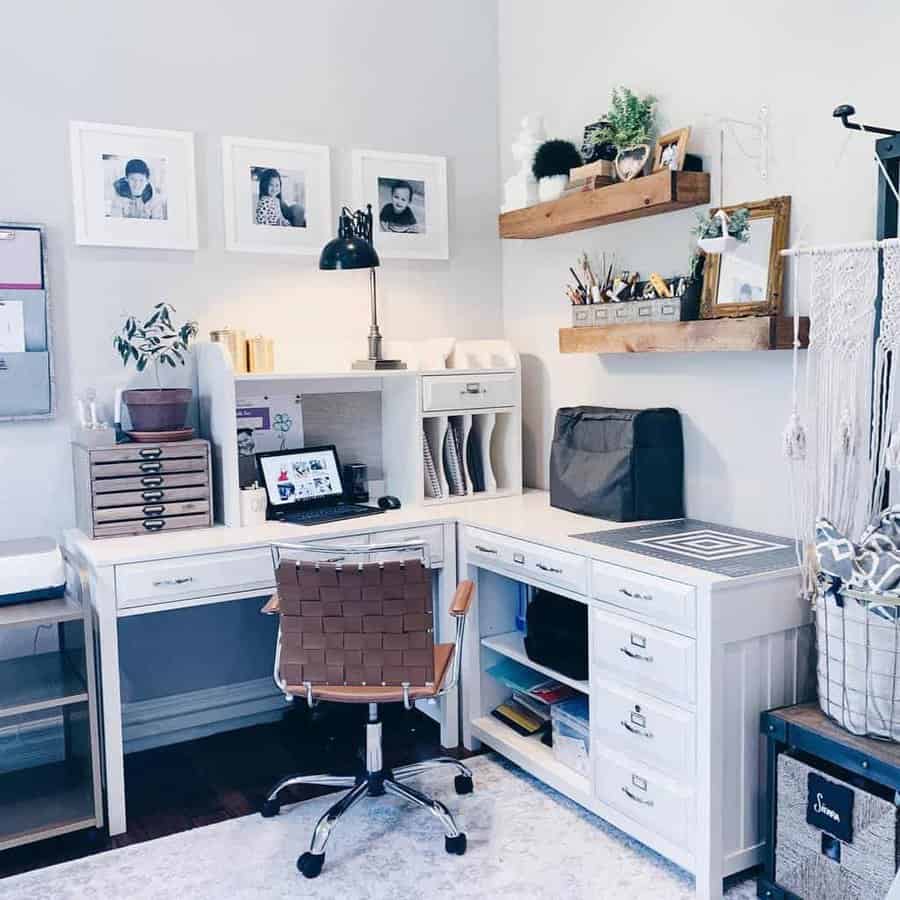
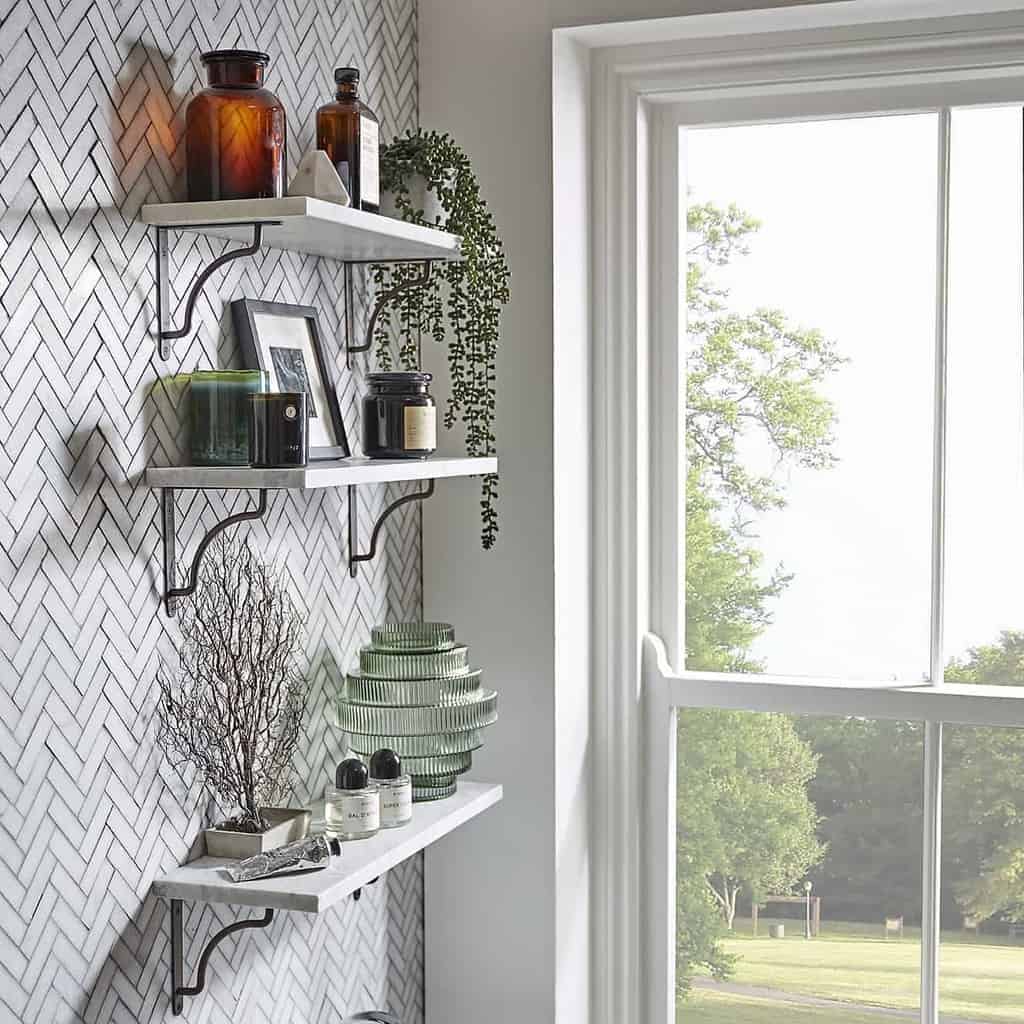
2. Utilize Corners Effectively with Creative Shelf Ideas
Take a look around your home and count how many empty corners you have. It’s probably a lot more than you think you have. These are corners that are essentially dead space. Why not put them to work with a corner shelf?
Source: @4men1ladyblog via InstagramSource: @homengineer_design via InstagramSource: @inside_no_8 via InstagramSource: @riverridgehome via InstagramSource: @second.hand_.home_ via InstagramSource: @shoptoshelf via Instagram
Install a single floating shelf over a countertop. Or you could install multiple floating shelves in an empty corner. You can size the shelf to fit the amount of wall space that you have.
You can put these corner shelves in any room you want, from the bathroom to the kitchen. You also don’t have to put them in a corner that’s created by two walls.
If you have a cabinet mounted on the wall, you could have mini corner shelves mounted on the side of the cabinet.
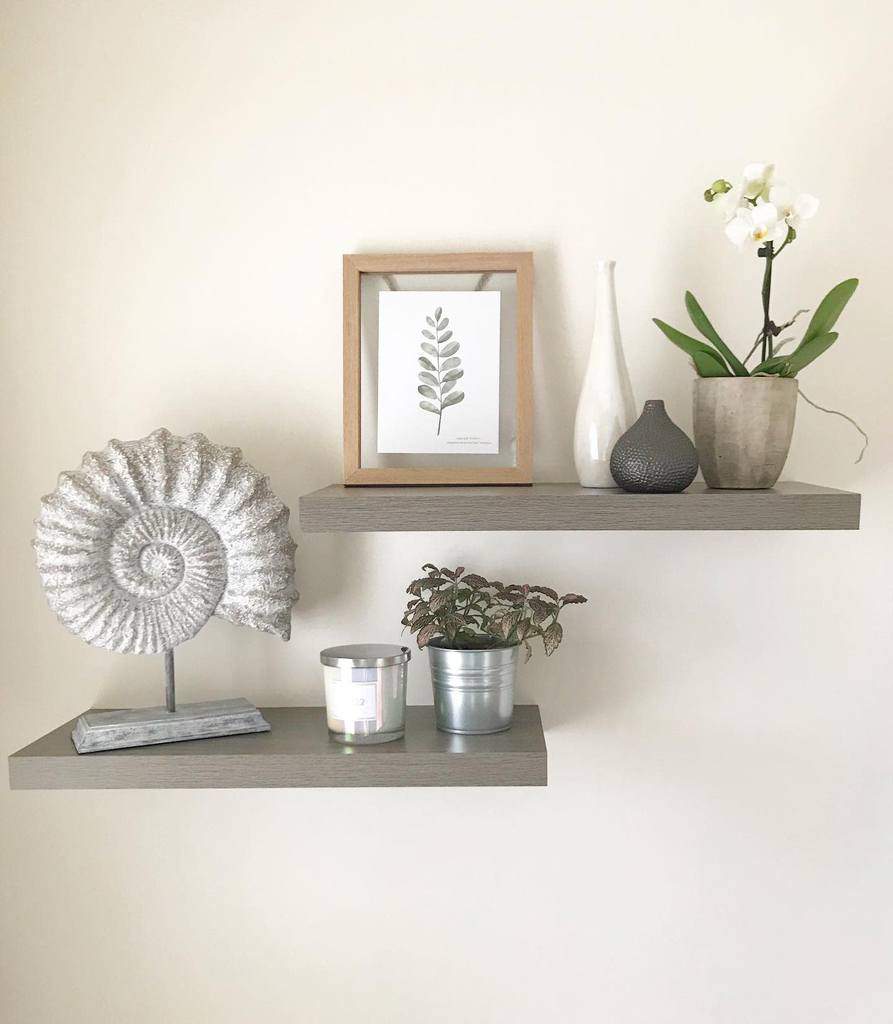
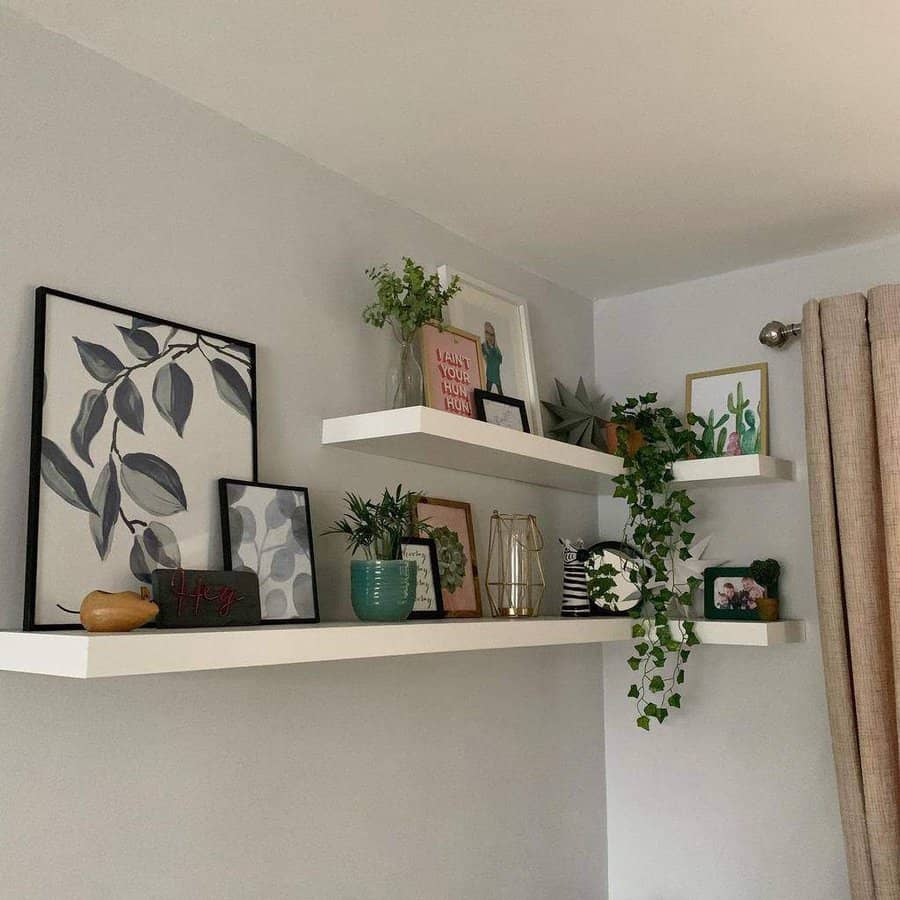
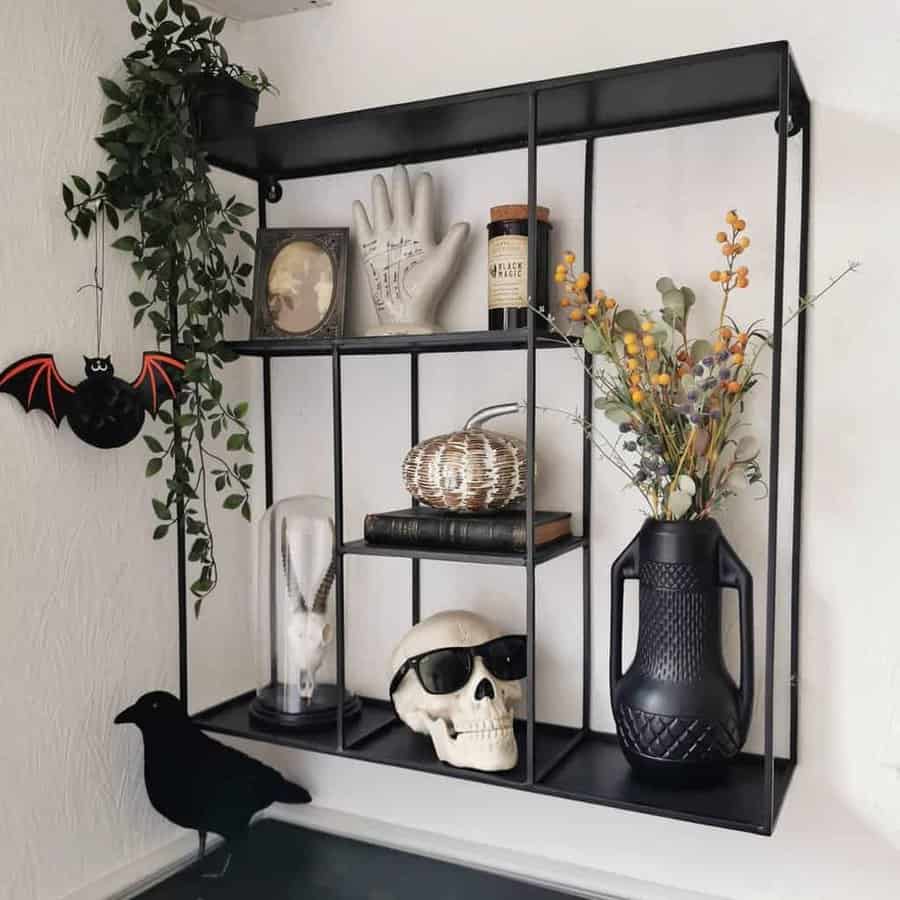
3. Enhance Decor with Stylish Shelf Arrangements
Mounting your shelf on the wall is the easy part. The hard part is arranging your floating shelf decor.
There are several decorating ideas out there, but not all of them are good. The easiest thing to do is to pick decorative items that you like and then worry about arranging them later.
Source: @home_down_south via InstagramSource: @jilldunnfit via InstagramSource: @katriina_sch via InstagramSource: @livs.home_ via InstagramSource: @lottieshousebuild via InstagramSource: @novakagiftshop via InstagramSource: @rainbows_on_the_hill via InstagramSource: @sunshine.and_.lily_ via Instagram
Visually balance the display you create. Have a single central high point or two high points on either end.
Layer the decor with taller items in the back and shorter items towards the front. Use pieces of varying widths and layer items left to right across the shelf. Balance the color across the shelf.
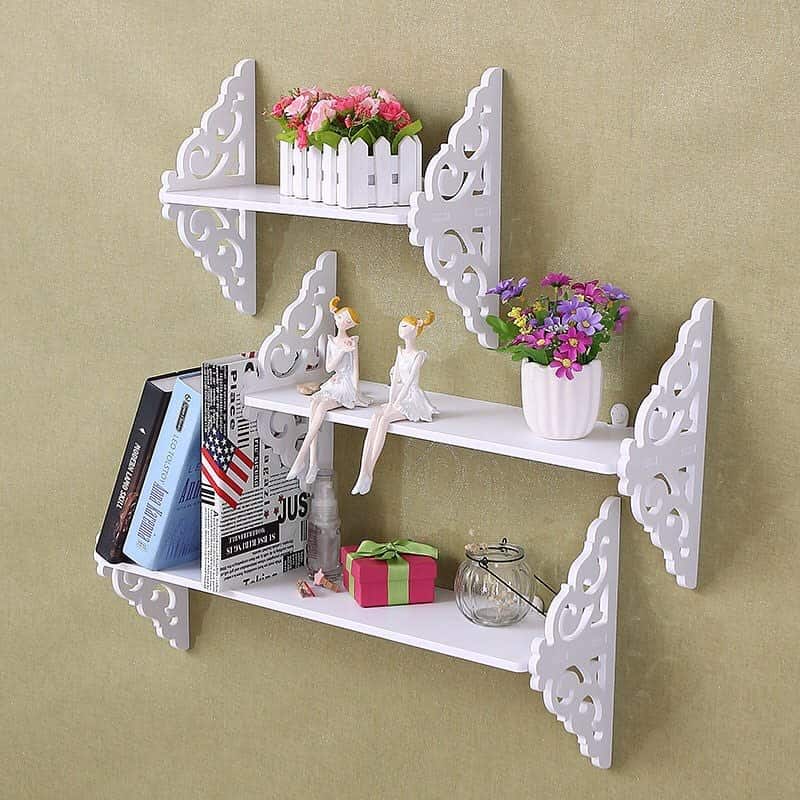
4. Personalize Your Space with DIY Shelf Projects
Build your own floating shelf and have a custom piece to display your decor. Your DIY floating shelf could be made of wood, metal, glass, stone, or any other material you choose. What’s nice about a DIY shelf is that you’re only limited by your shelving ideas.
Source: @eighty_onthebay_ via InstagramSource: @goldenhomediy via InstagramSource: @goodgollymrsholley via InstagramSource: @iansfurniture via InstagramSource: @inspiredlivingwithshanna via InstagramSource: @rancholaflor via InstagramSource: @shelfbarfloatingshelves via InstagramSource: @uniquelytaylormade via Instagram
Just like any other shelf you hang on your wall, you need to do it the right way. This means mounting it to the wall studs behind the drywall.
You’ll also want to use drywall anchors. You can use a stud finder to easily find the studs in the wall.
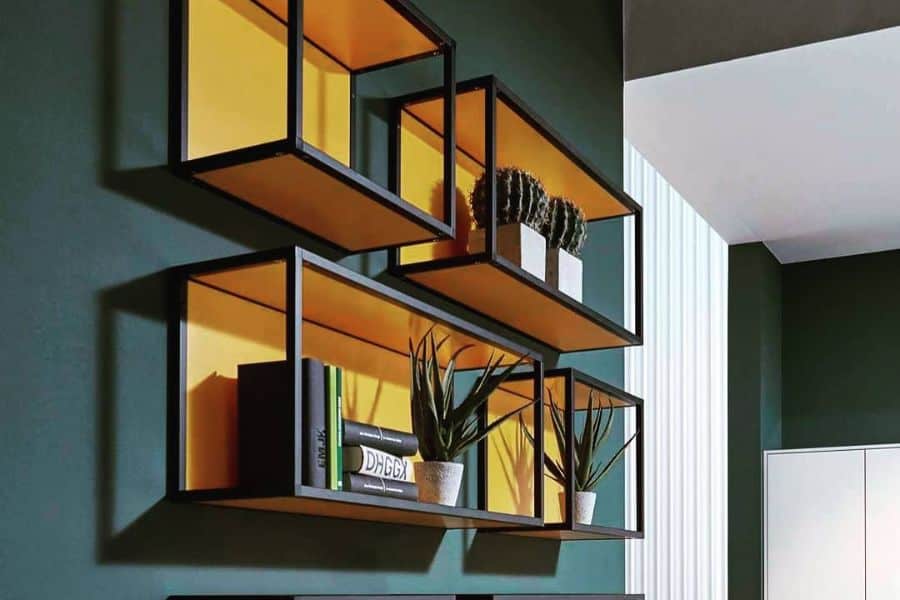
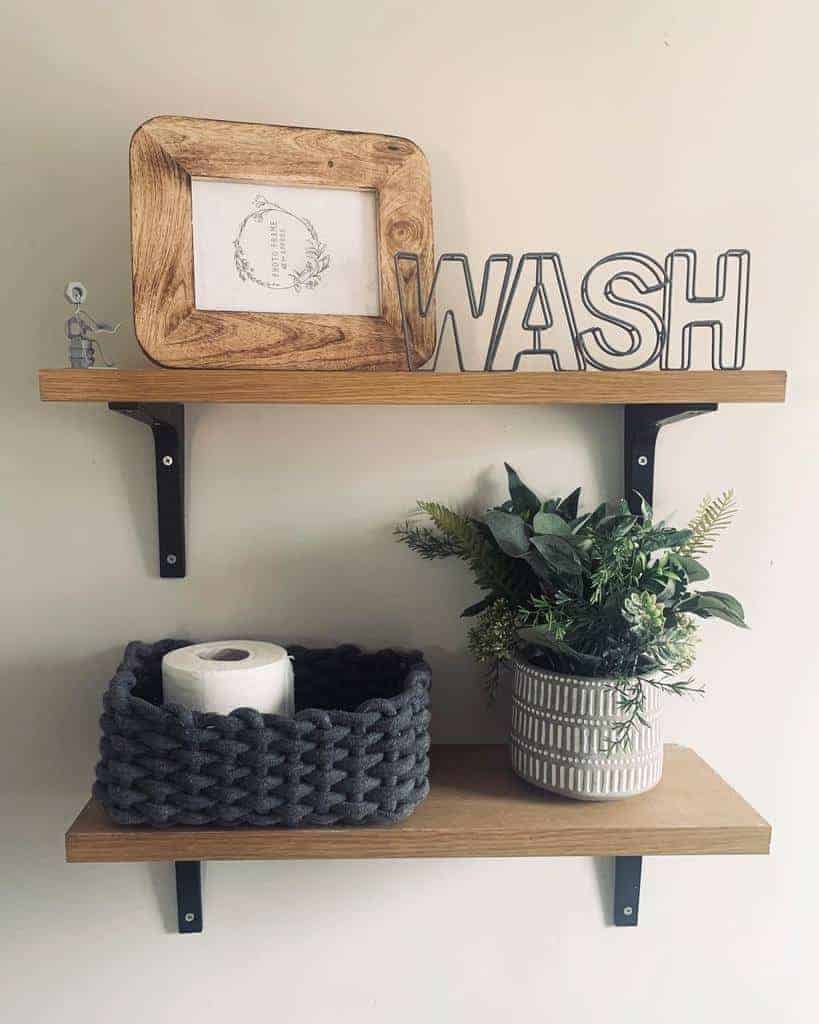
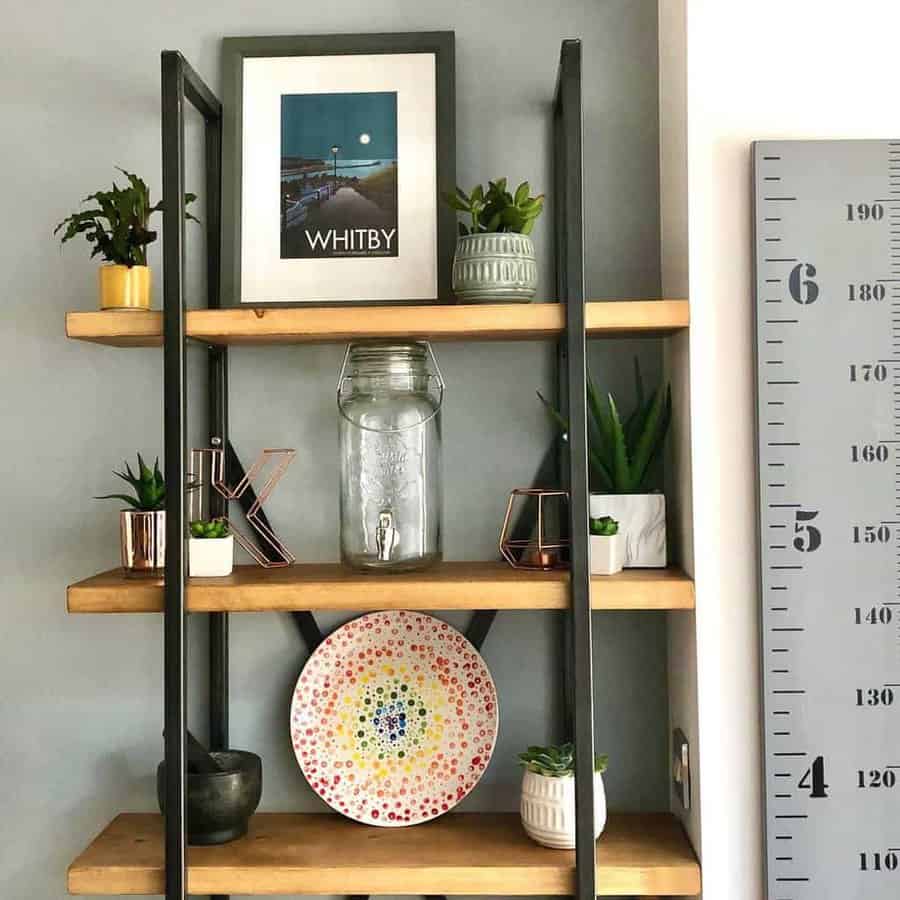
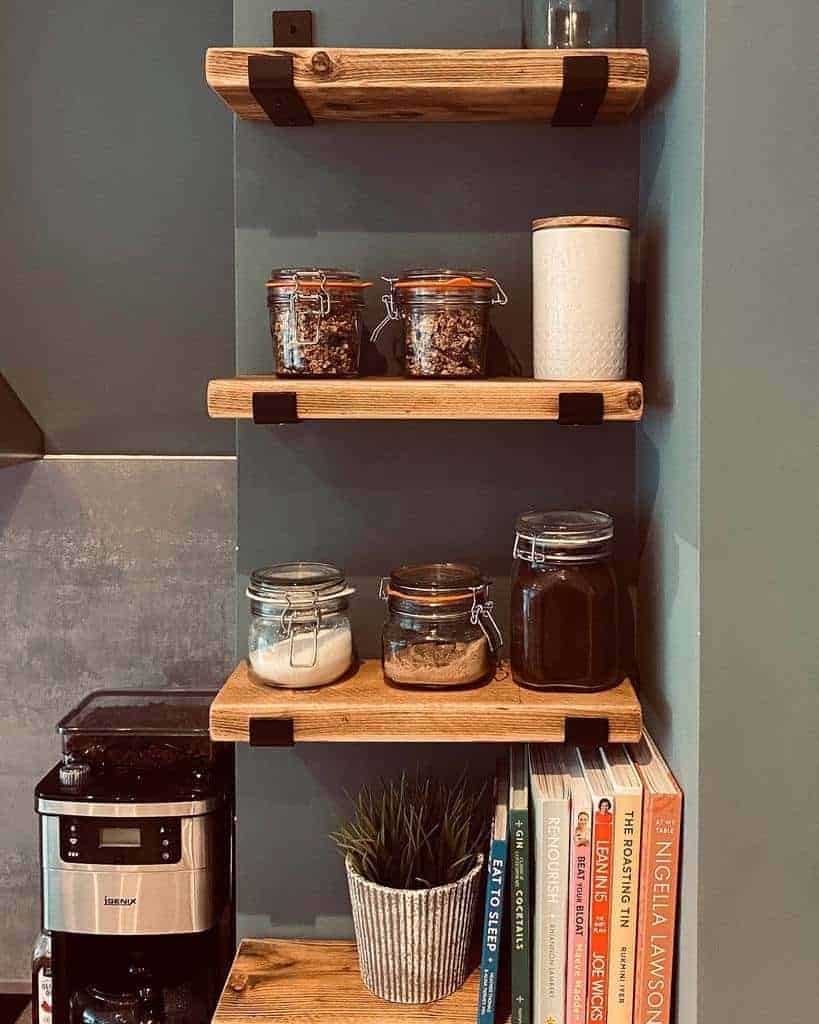
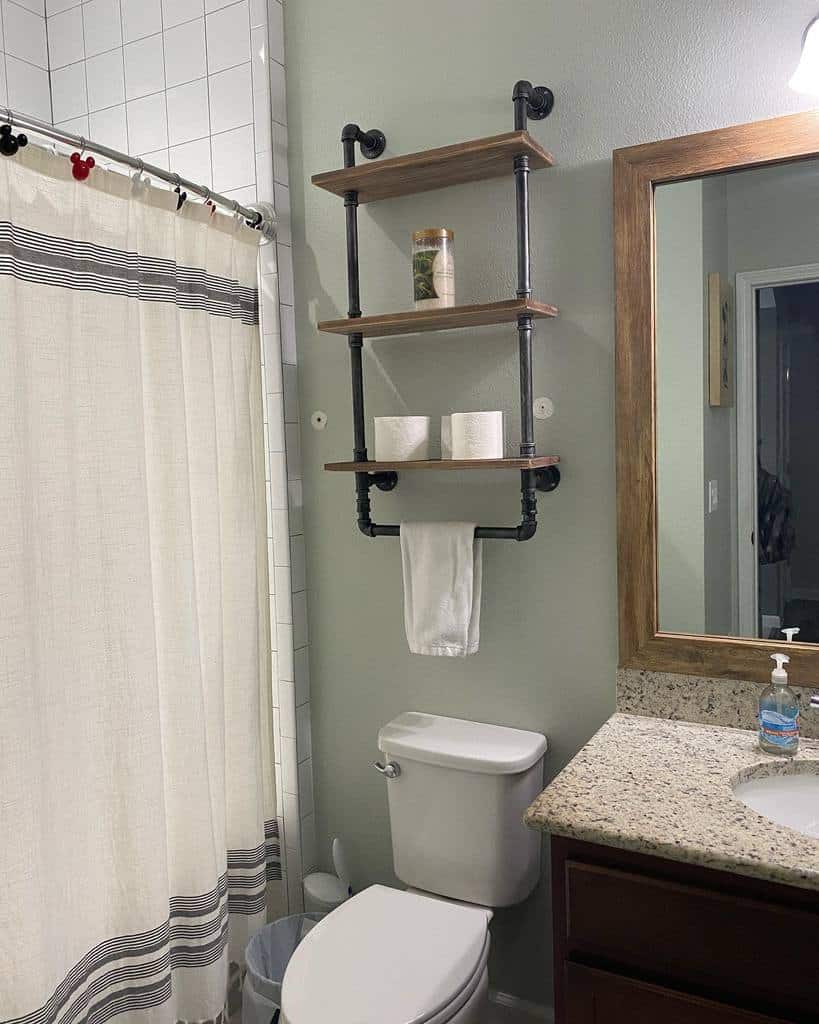
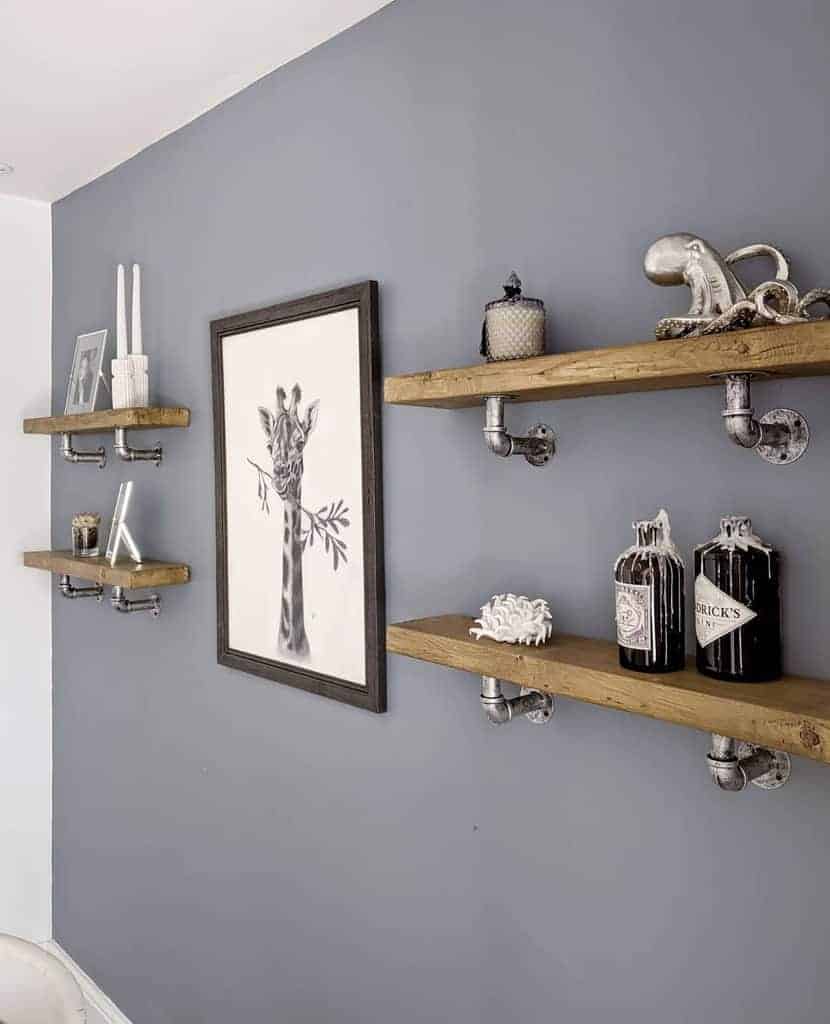
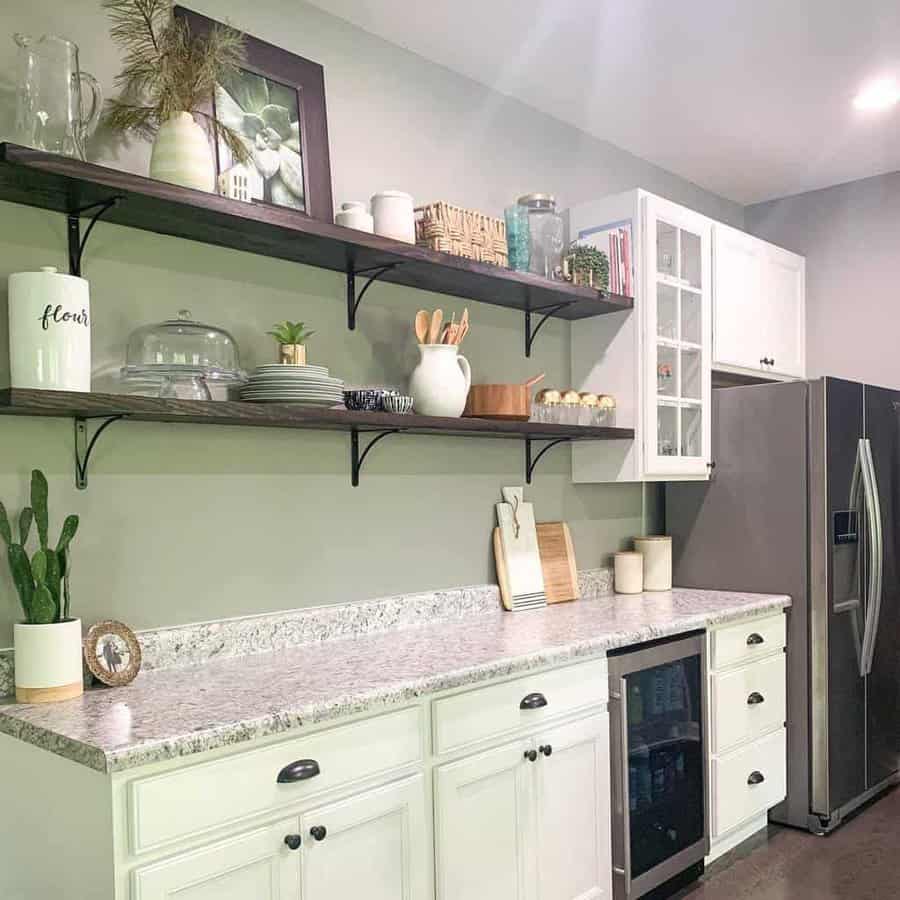
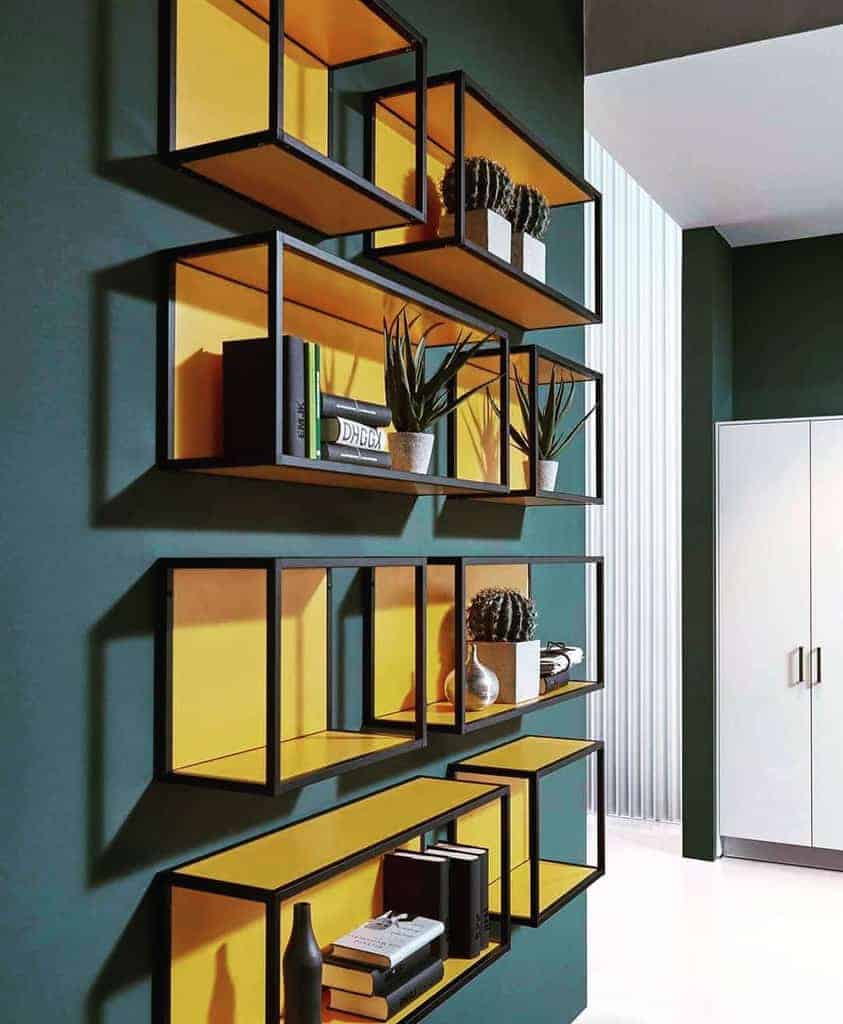
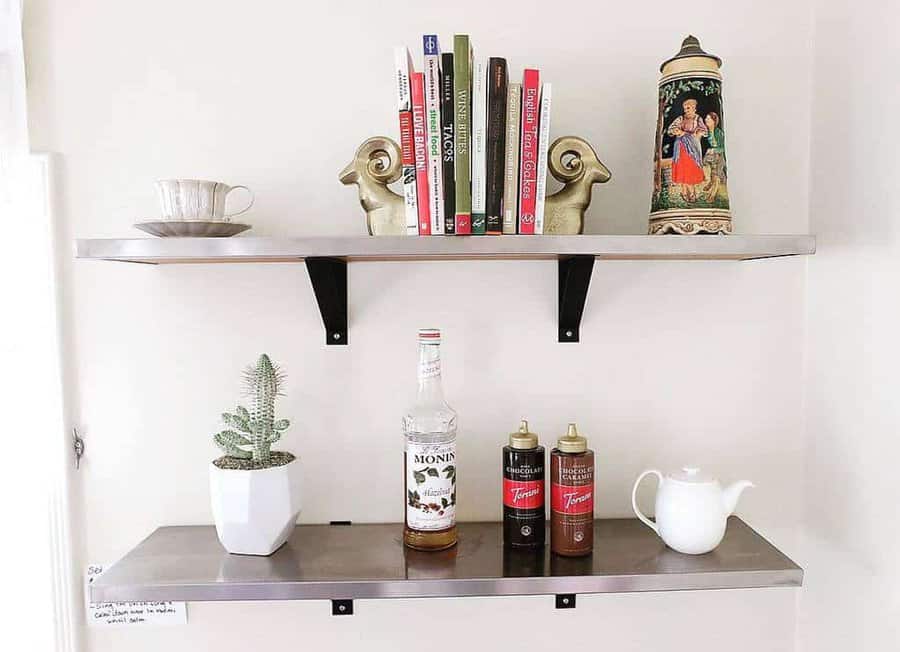
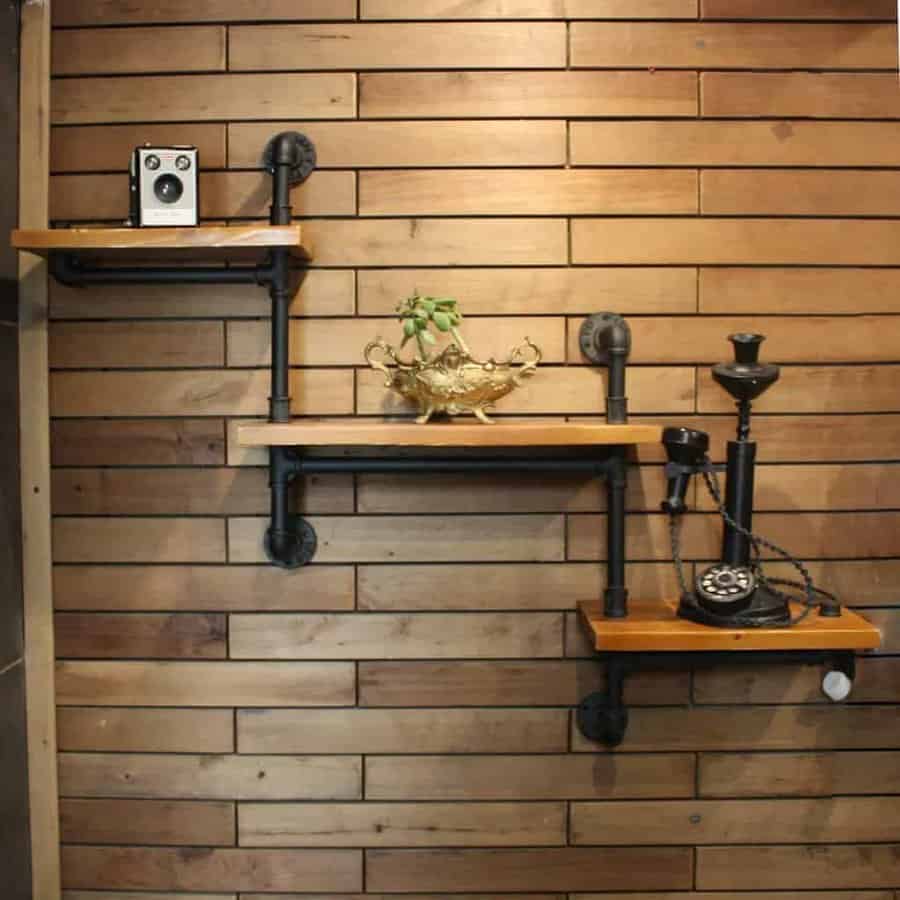
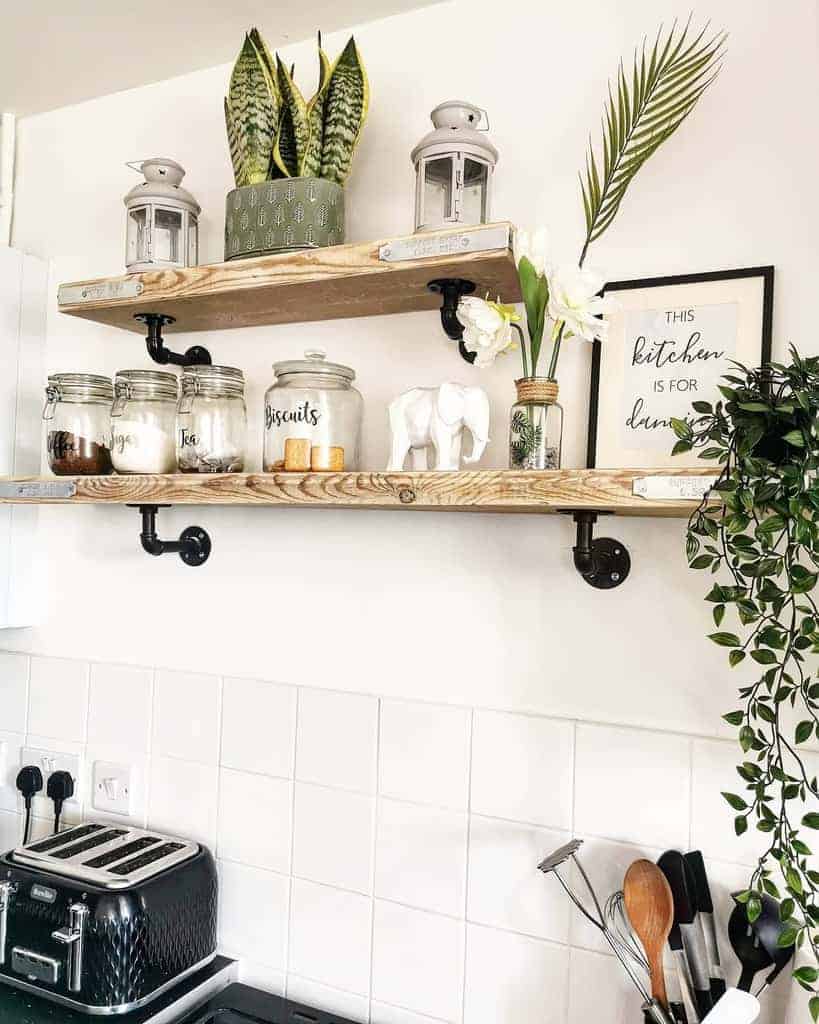
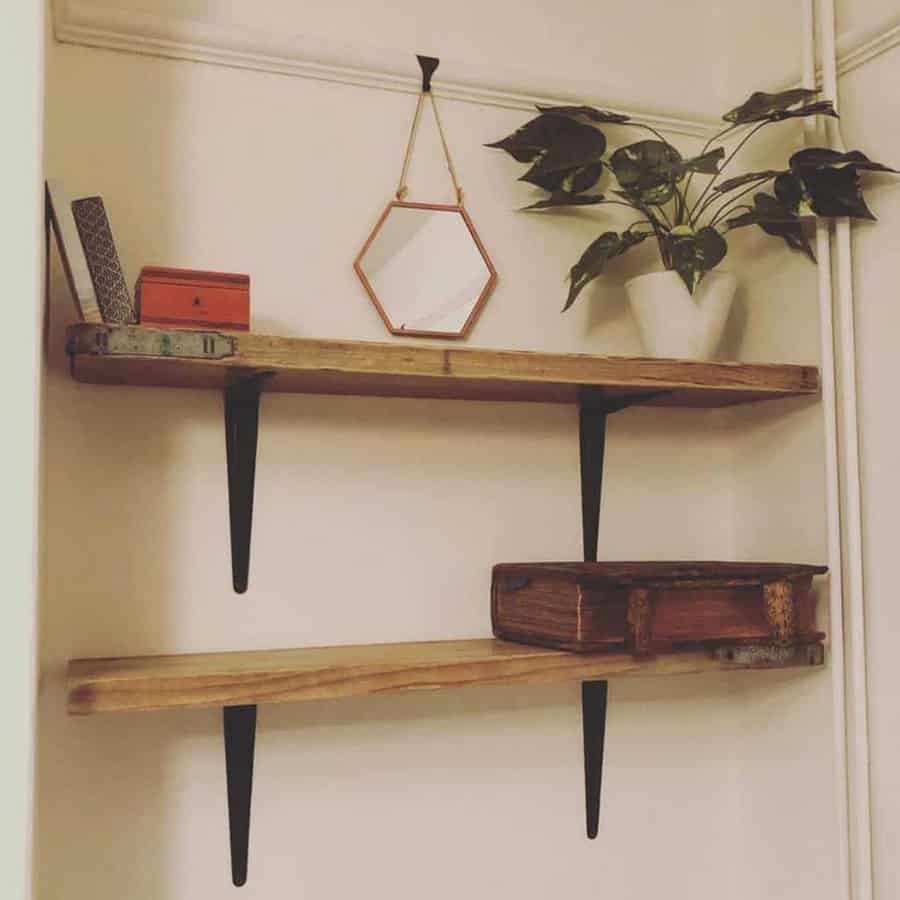
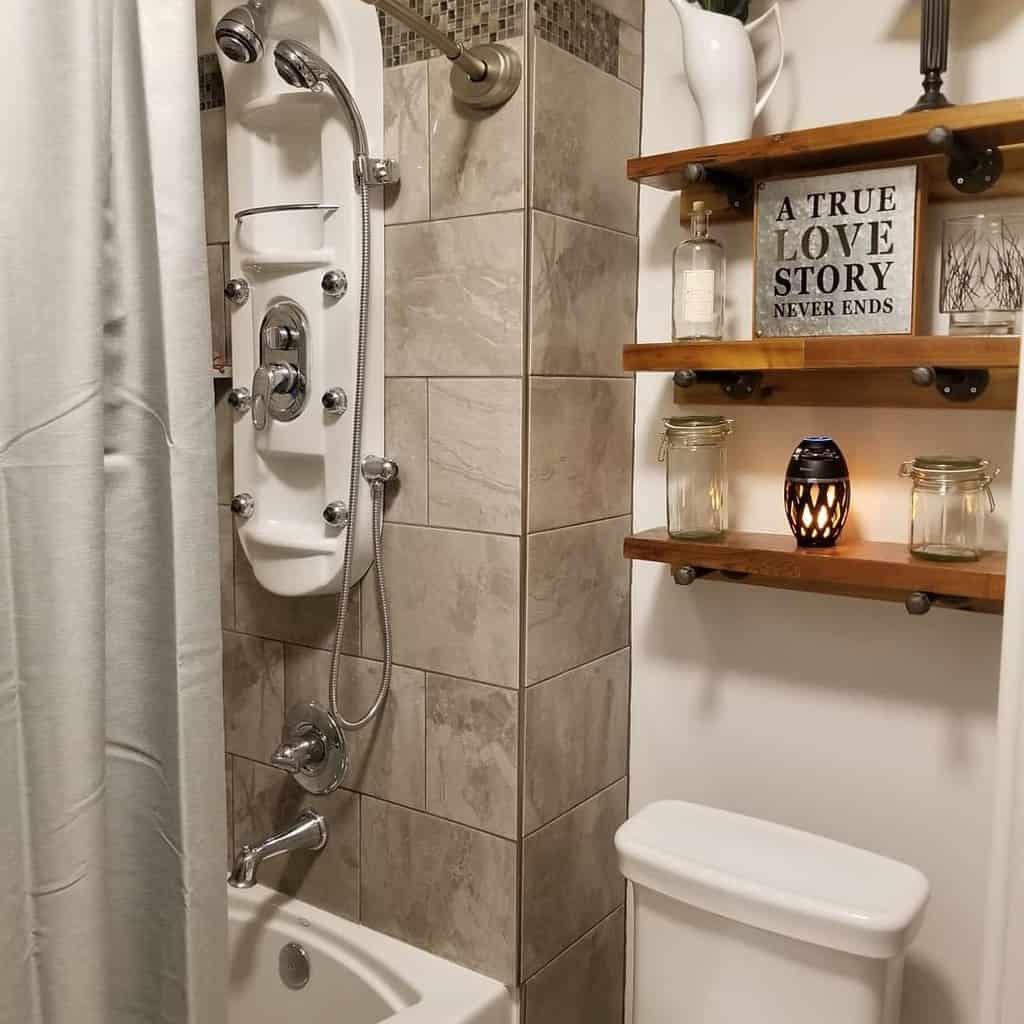
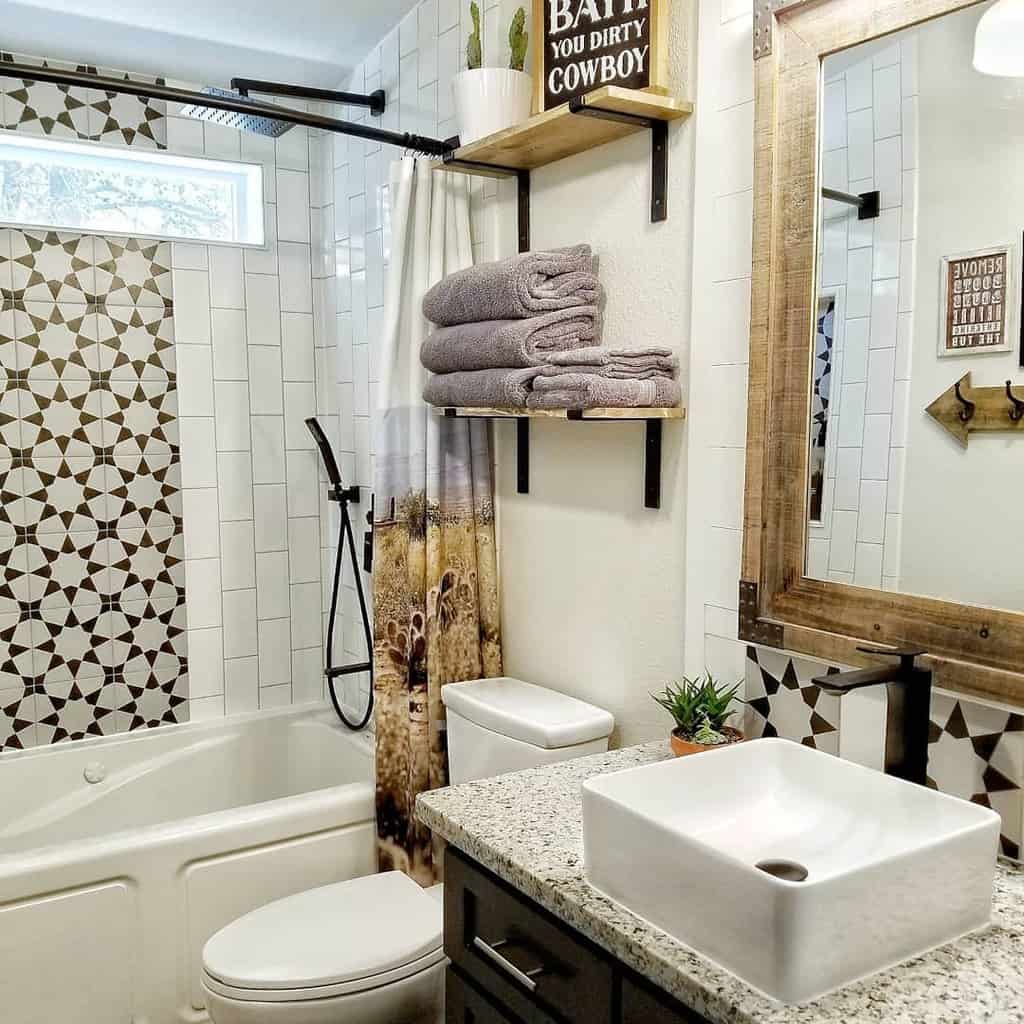
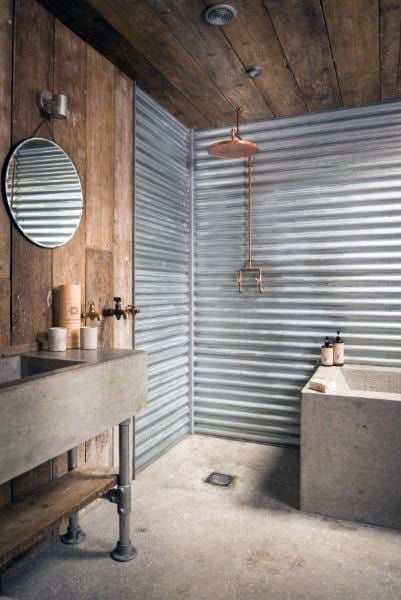
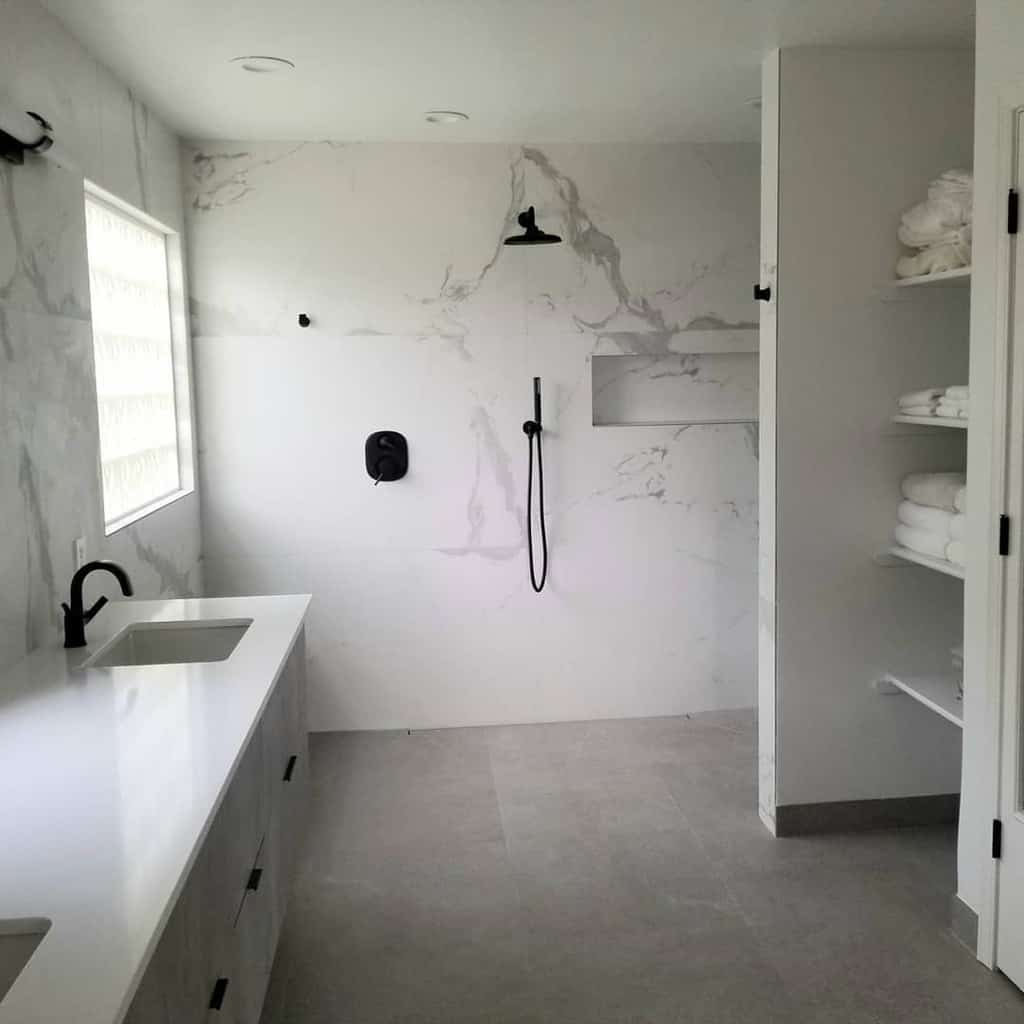
5. Bring Strength and Style with Industrial Shelves
Certain rooms of your home don’t need fancy decorative shelves. Instead, they need industrial shelves that are sturdy and strong.
Your laundry room is a perfect example of this. Floating shelves can give you the extra storage space that you need.
Source: @fauxcitrusfarmhouse via InstagramSource: @home.bylarissa via InstagramSource: @number22darlington via InstagramSource: @nvkitchens_interiors via InstagramSource: @our.renovation.diary_ via InstagramSource: @ourhomeonwatitune via InstagramSource: @pipeworkpieces via InstagramSource: @rahuffs via InstagramSource: @steelwood_craft via Instagram
These shelves are typically made from metal that’s been coated. They aren’t the most attractive, but they’ll get the job done. You’ll also see them in closets. Here though, they’ll have a track that they hook into. This lets you customize the height of each shelf to fit your storage needs.
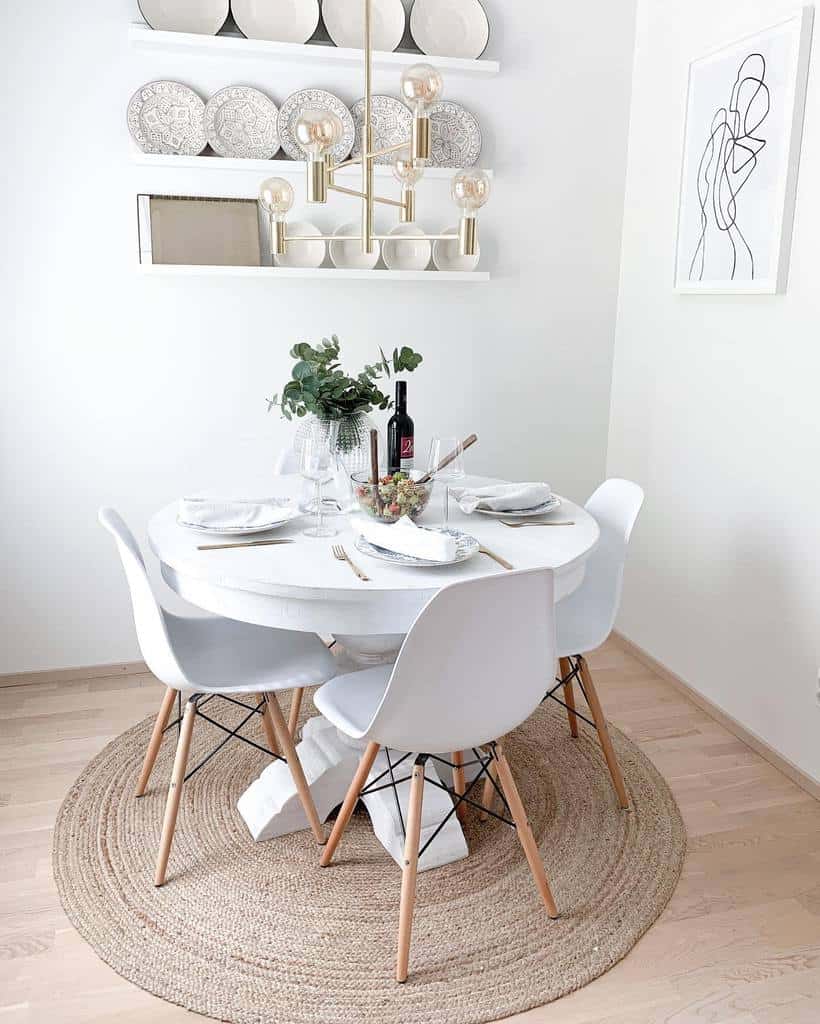
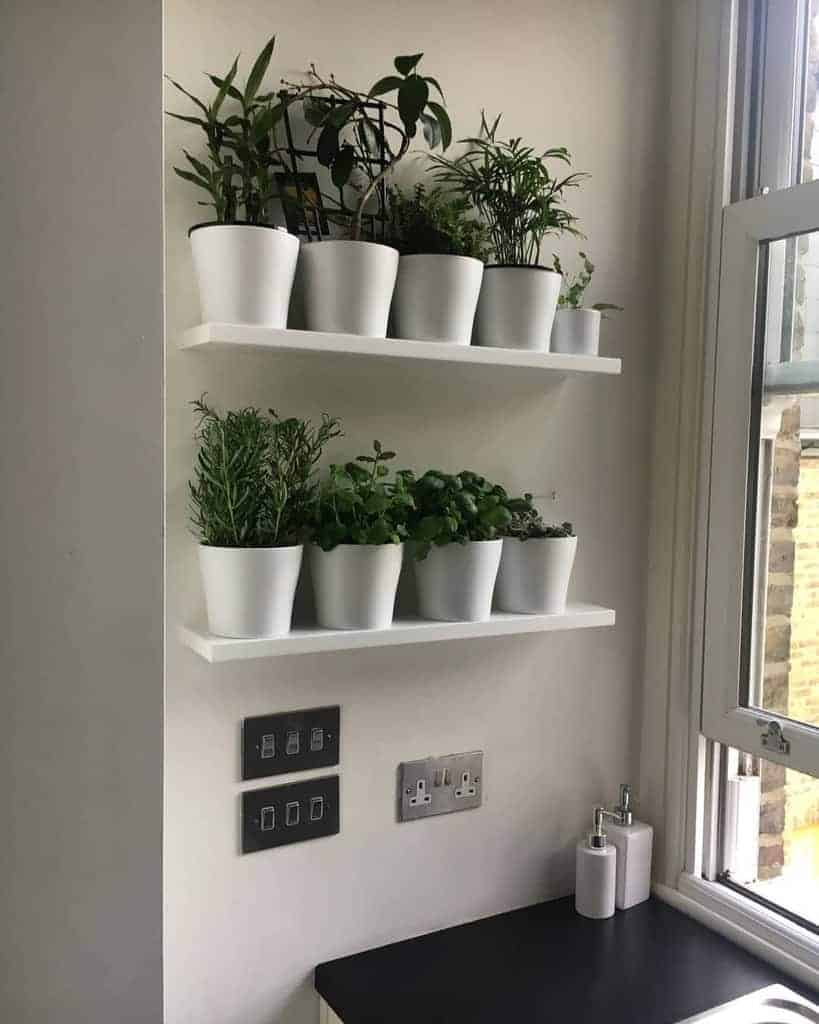
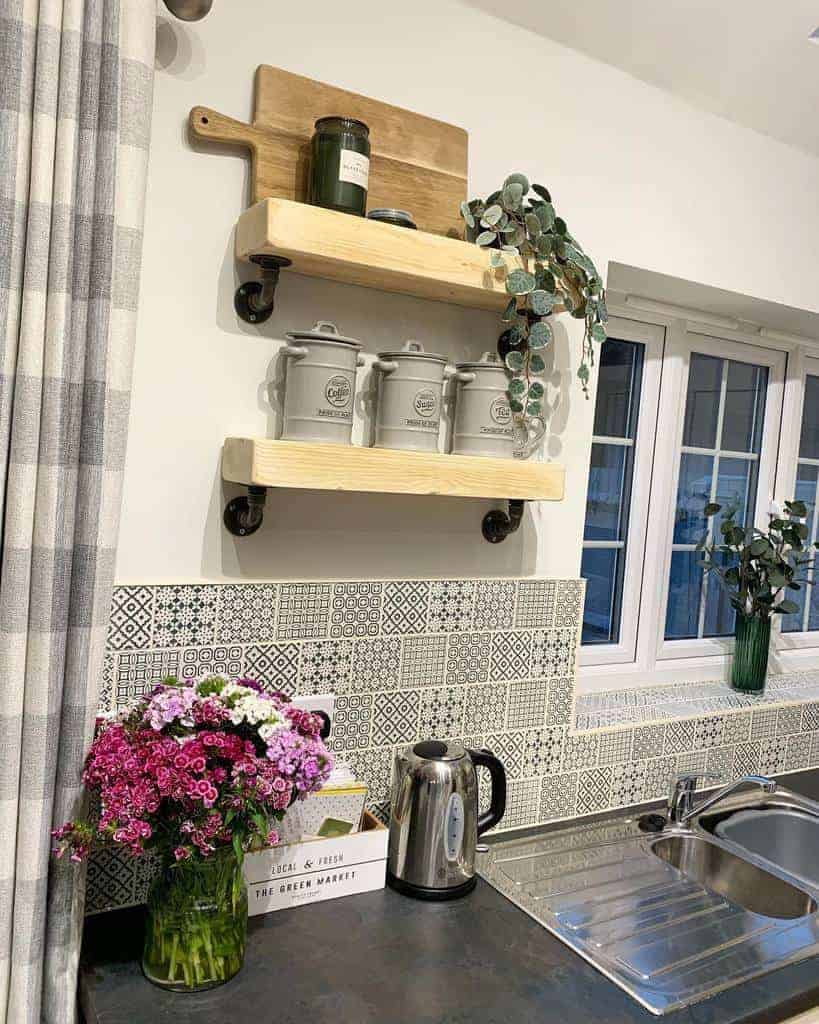
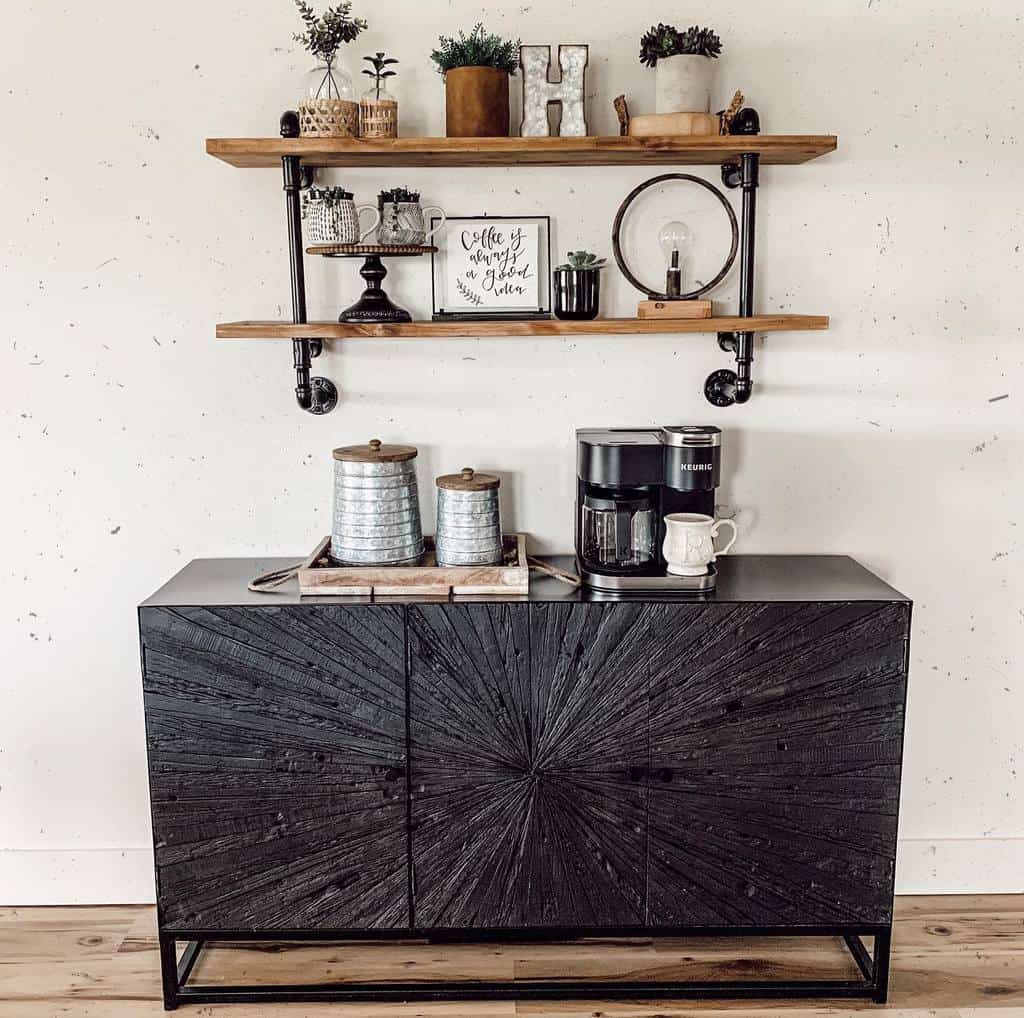
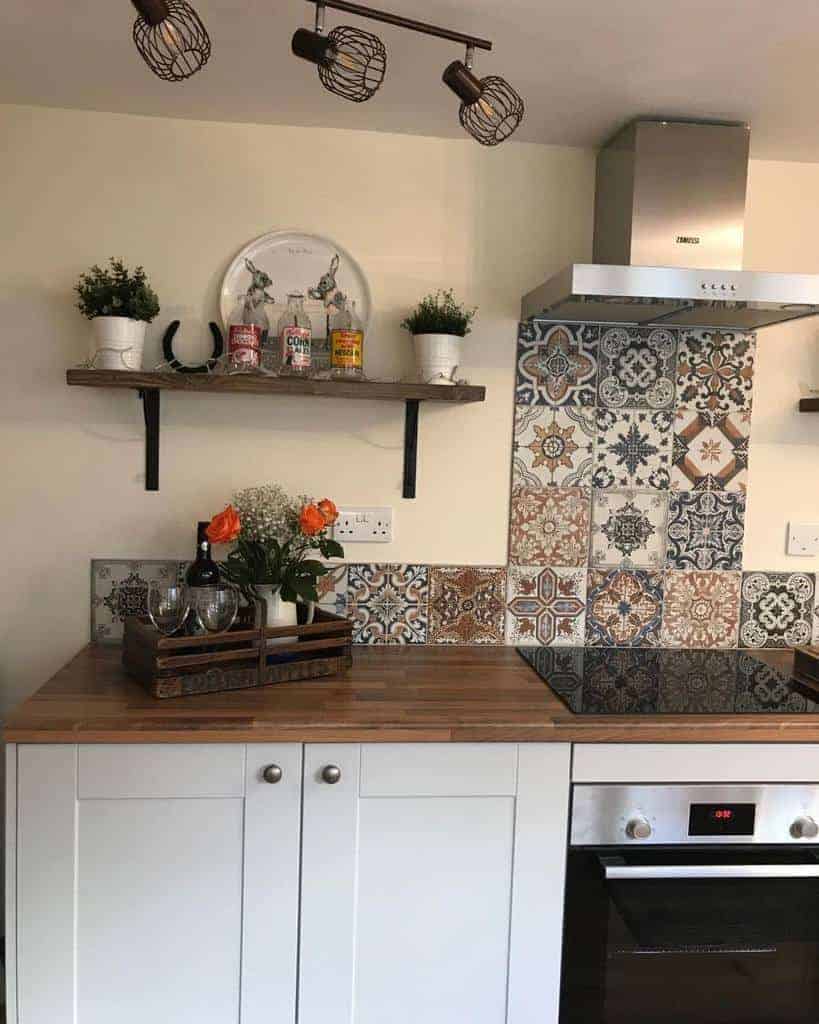
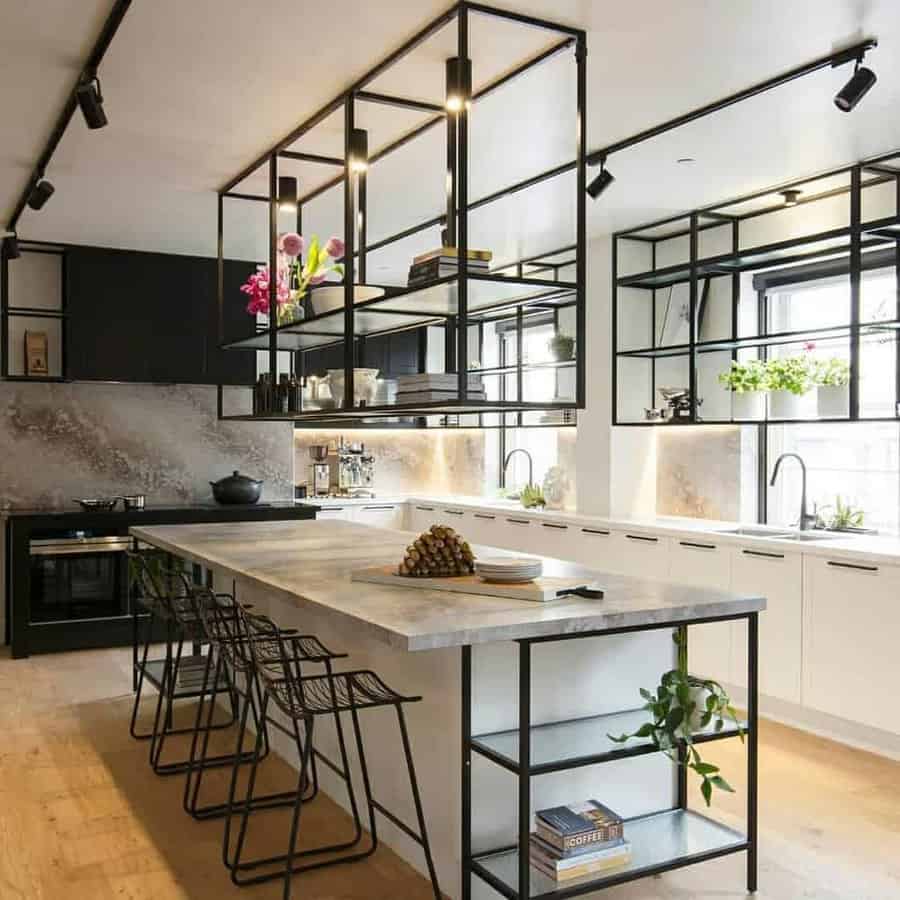
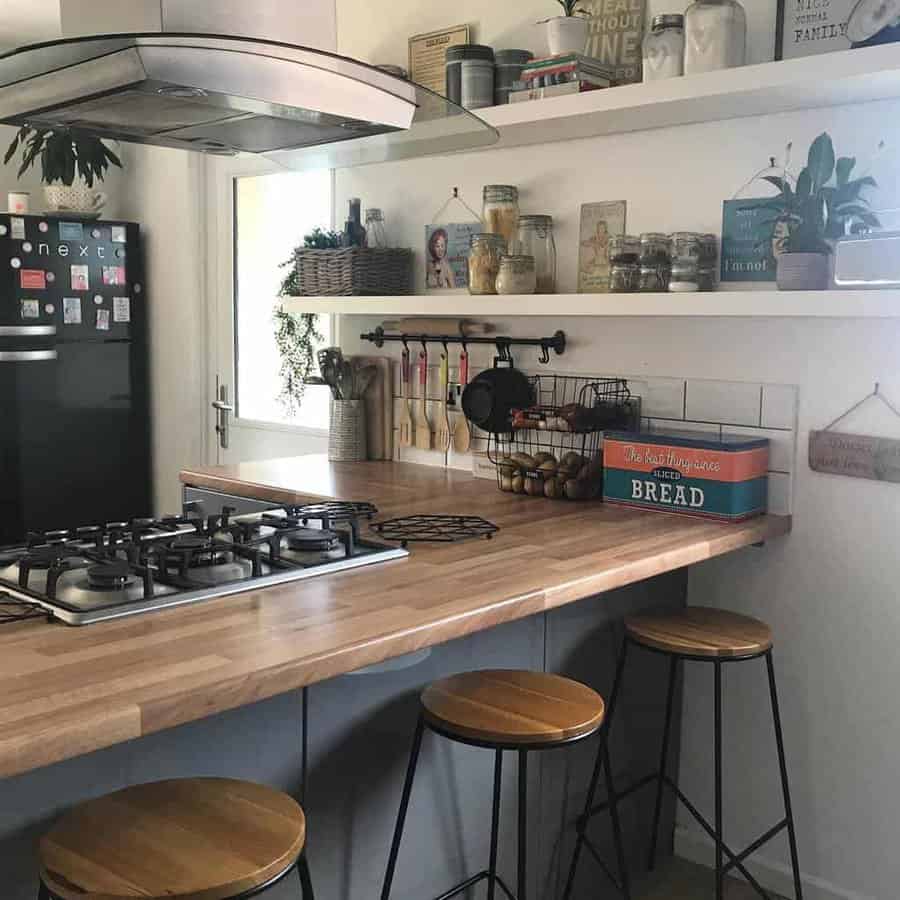
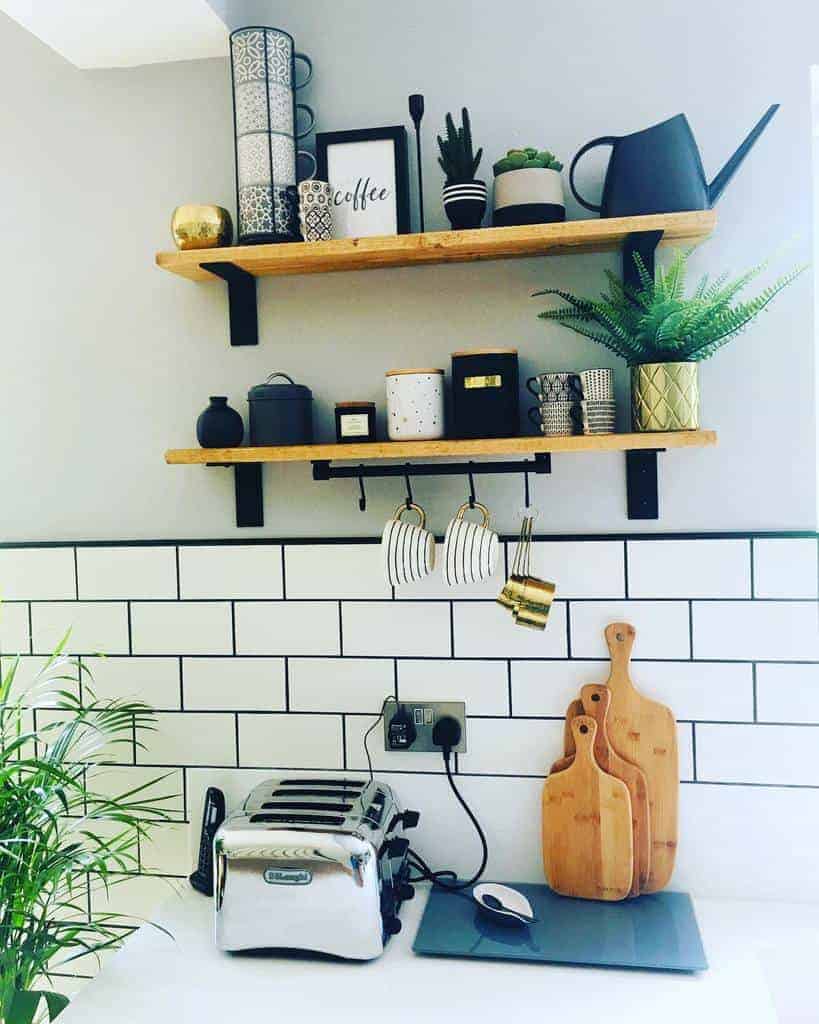
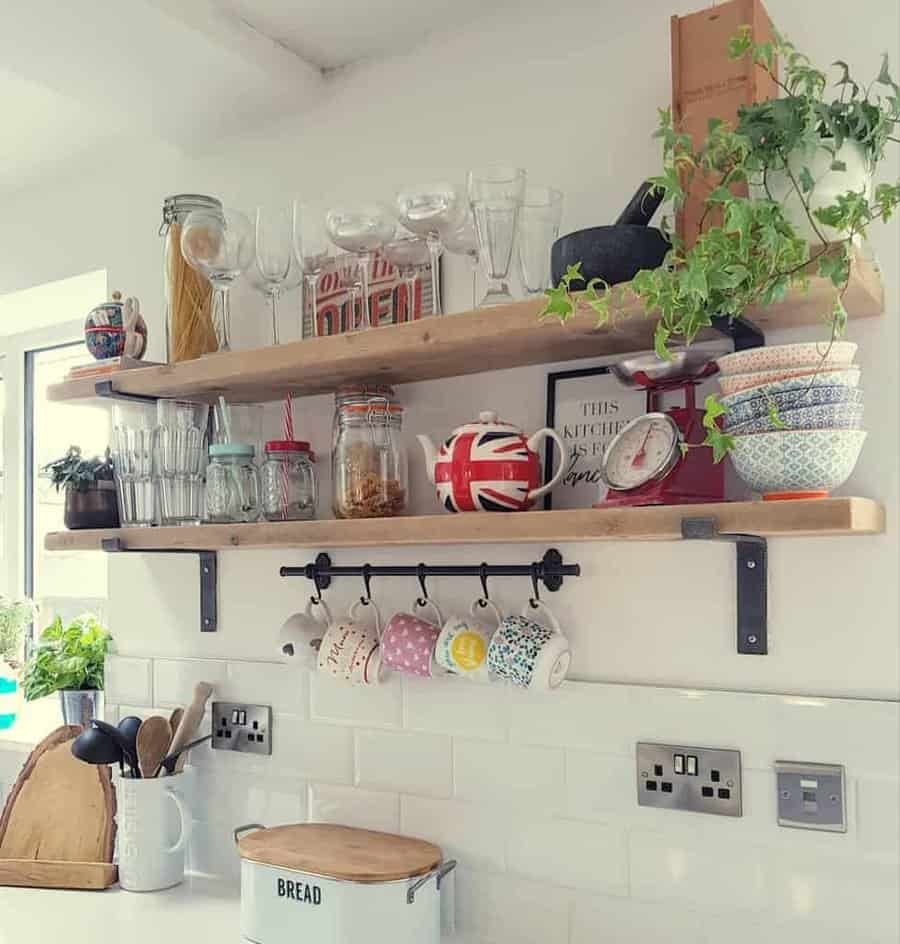
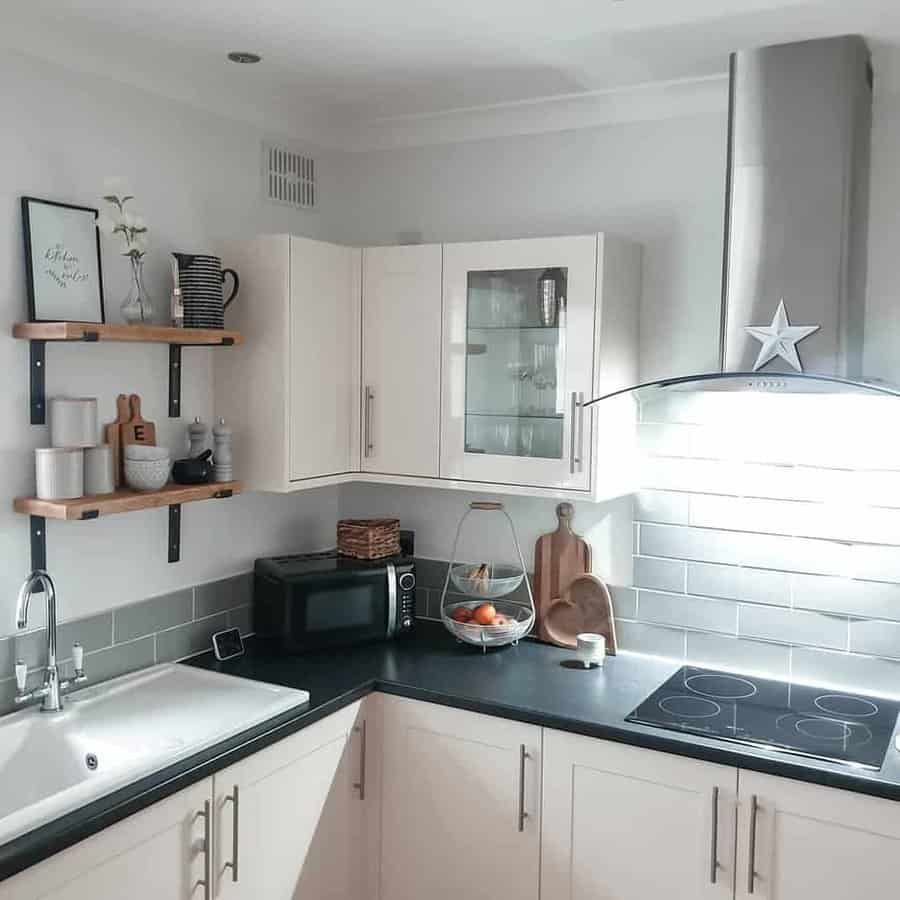
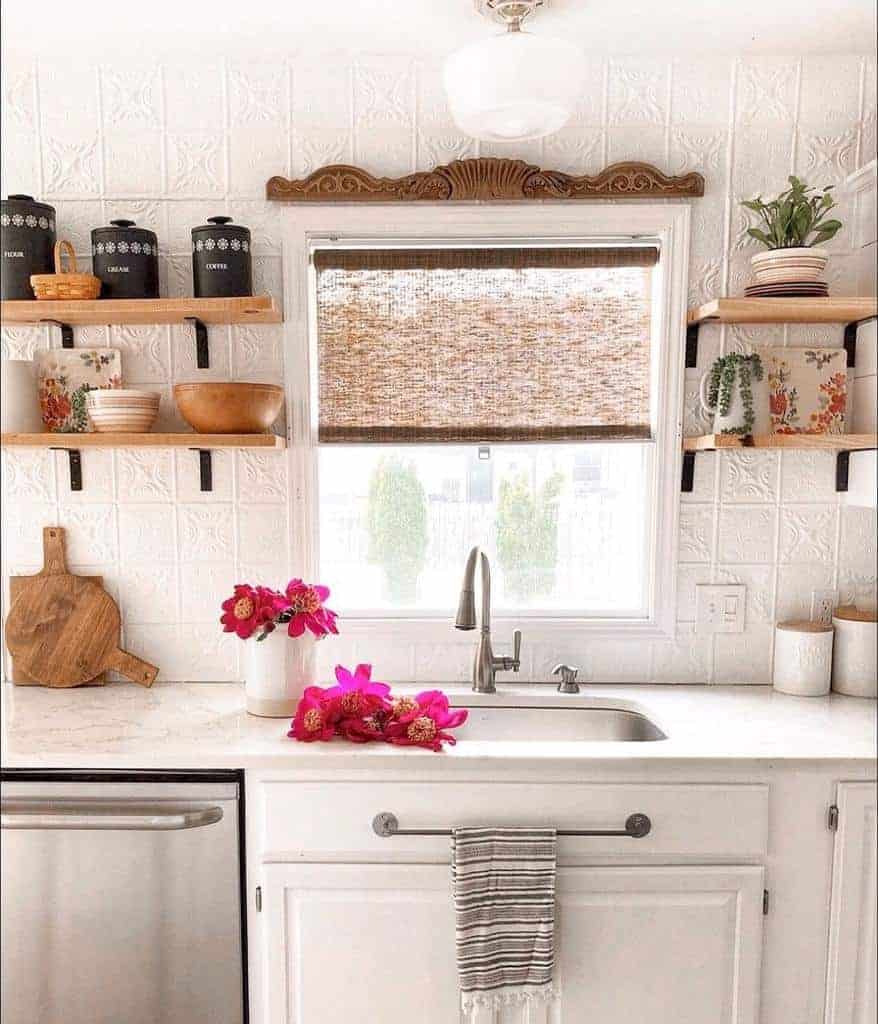
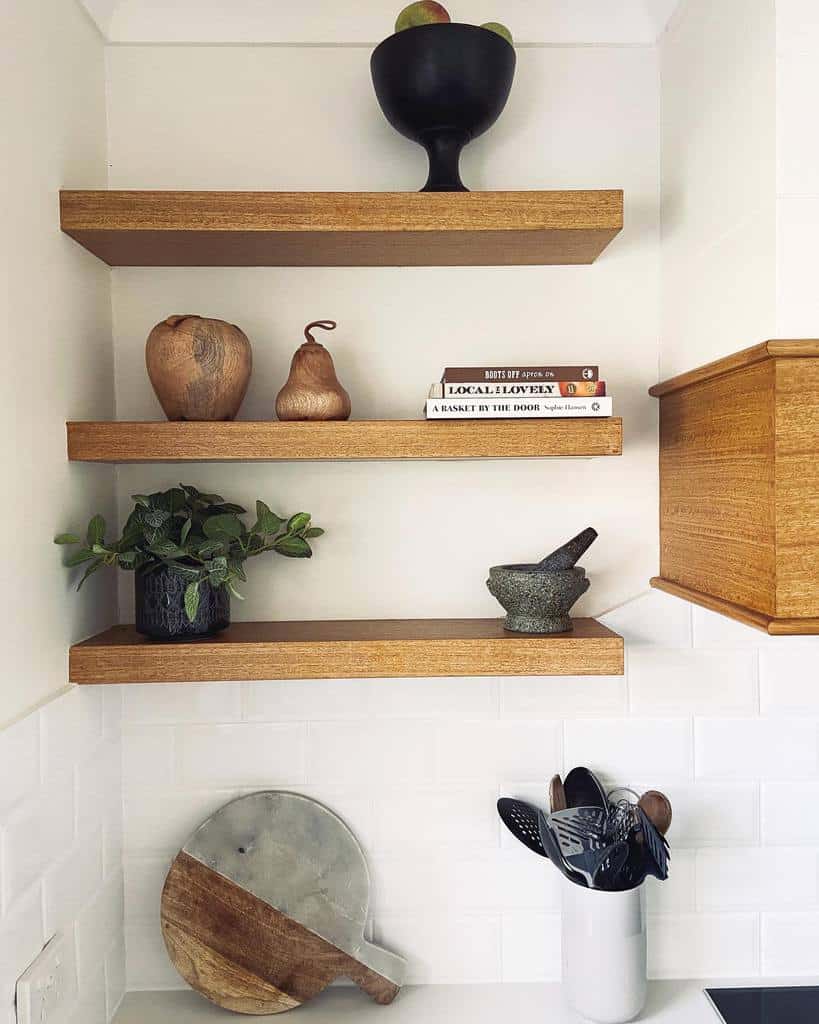
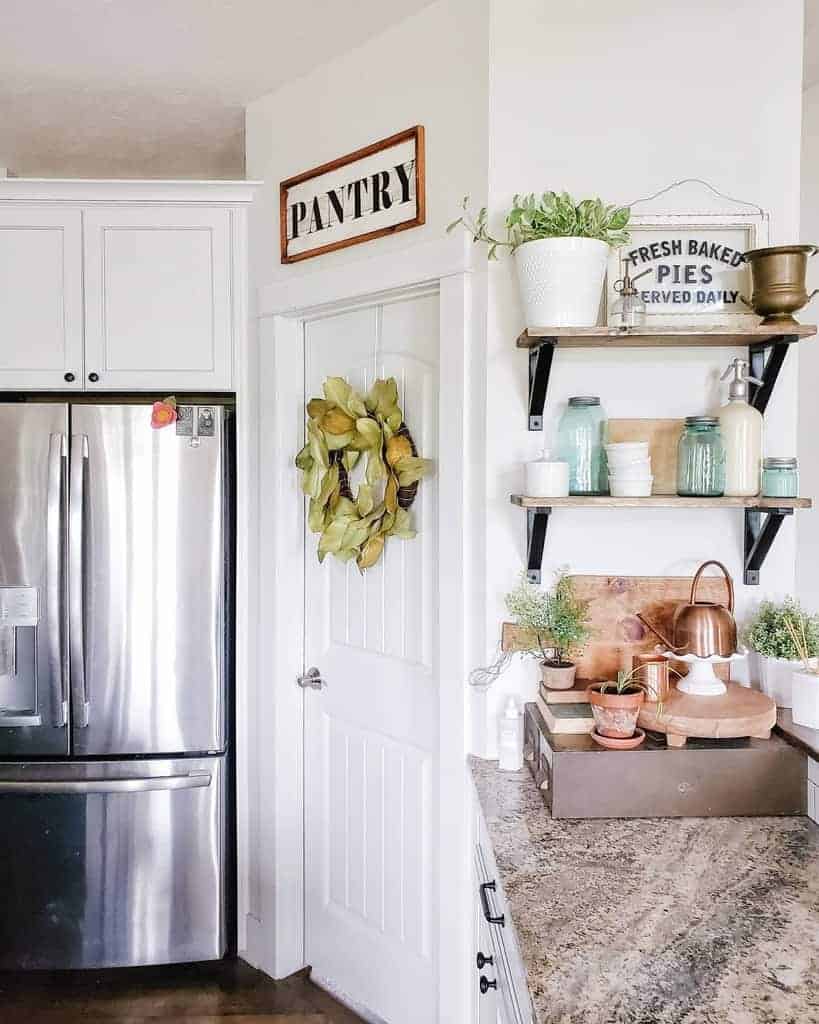
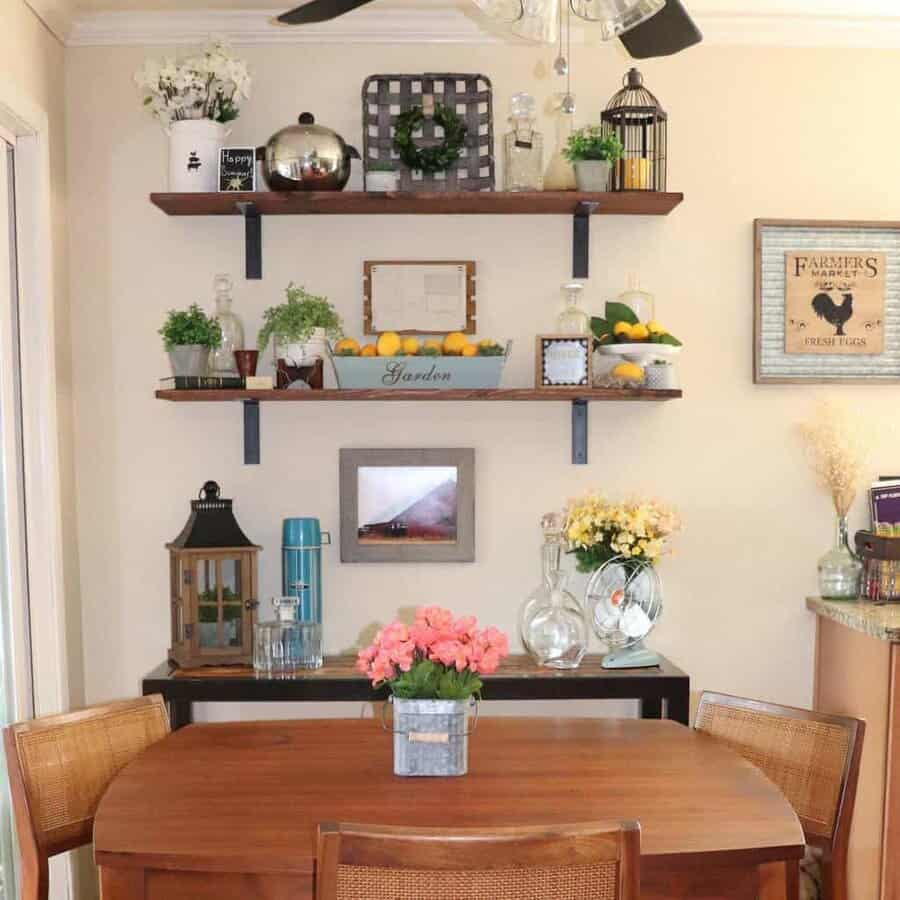
6. Transform Your Kitchen with Chic Open Shelving
The open shelving look has been popular in recent years for the kitchen. The problem with this is that it lacks functionality. Who wants to have all of the items on display in their kitchen?
Take a modern approach to the trend by installing a few floating shelves on an empty wall. Then you can keep the functionality of your cabinets while also enjoying the open wall shelf trend.
Source: @4.4home via InstagramSource: @be_kind_and_design via InstagramSource: @bunnipunch via InstagramSource: @carolynjayneinteriors via InstagramSource: @freedom_kitchens via InstagramSource: @notjustagreyandwhitehome via InstagramSource: @perfecthomeland9 via InstagramSource: @renovating_no_36 via InstagramSource: @tati_creates via Instagram
If you have an open layout for your floorplan, you can tie your kitchen and dining room spaces together.
Use the same wooden floating shelves in both rooms. Or have one long shelf that extends from one room to the other. This visual continuity creates a cohesive design throughout your home.
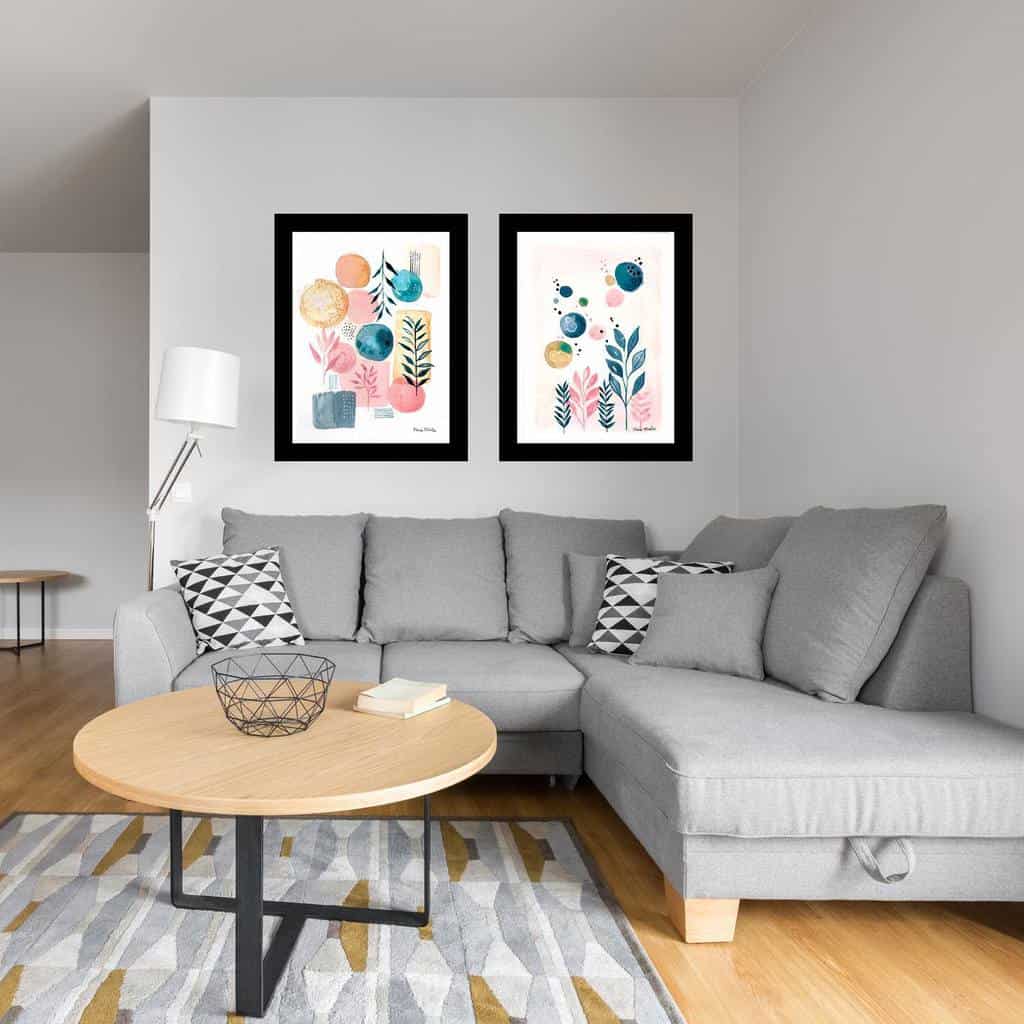
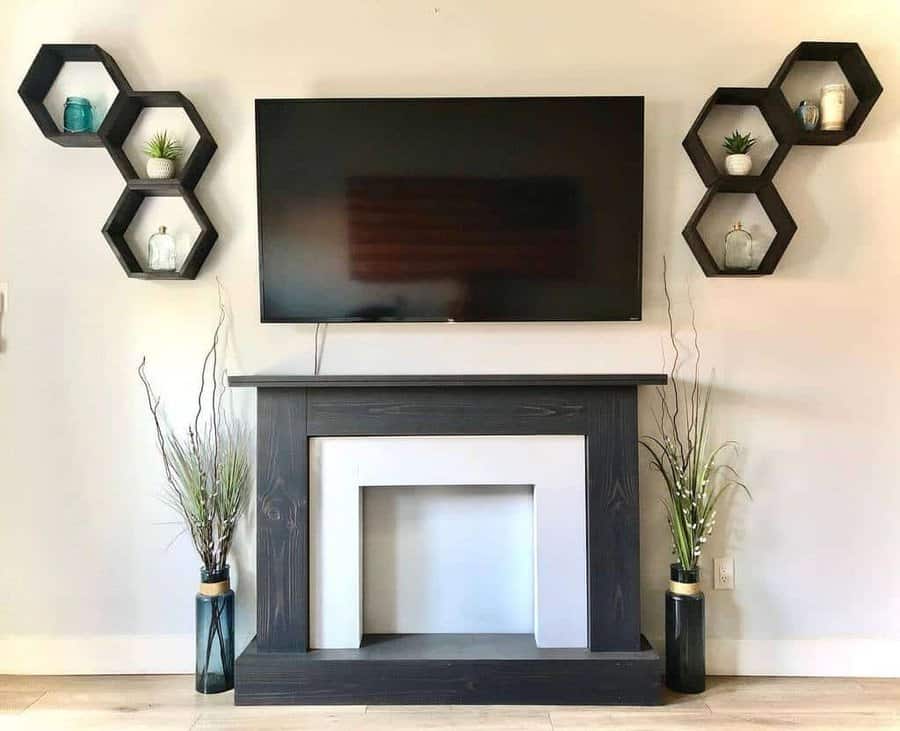
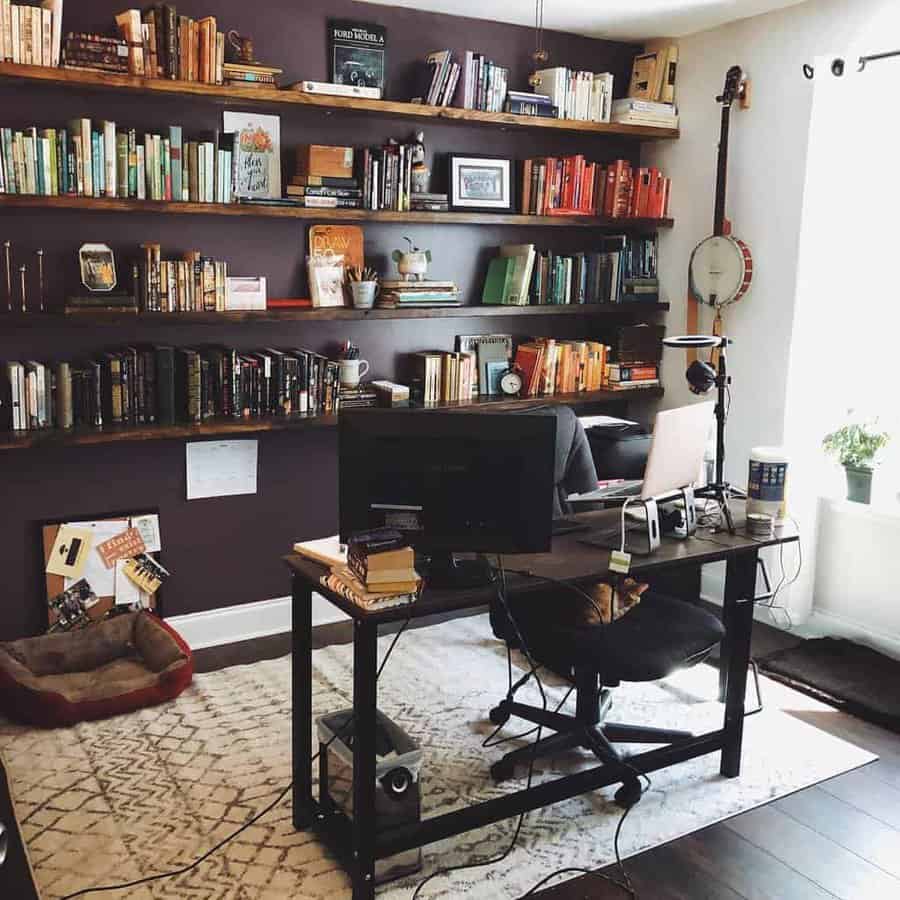
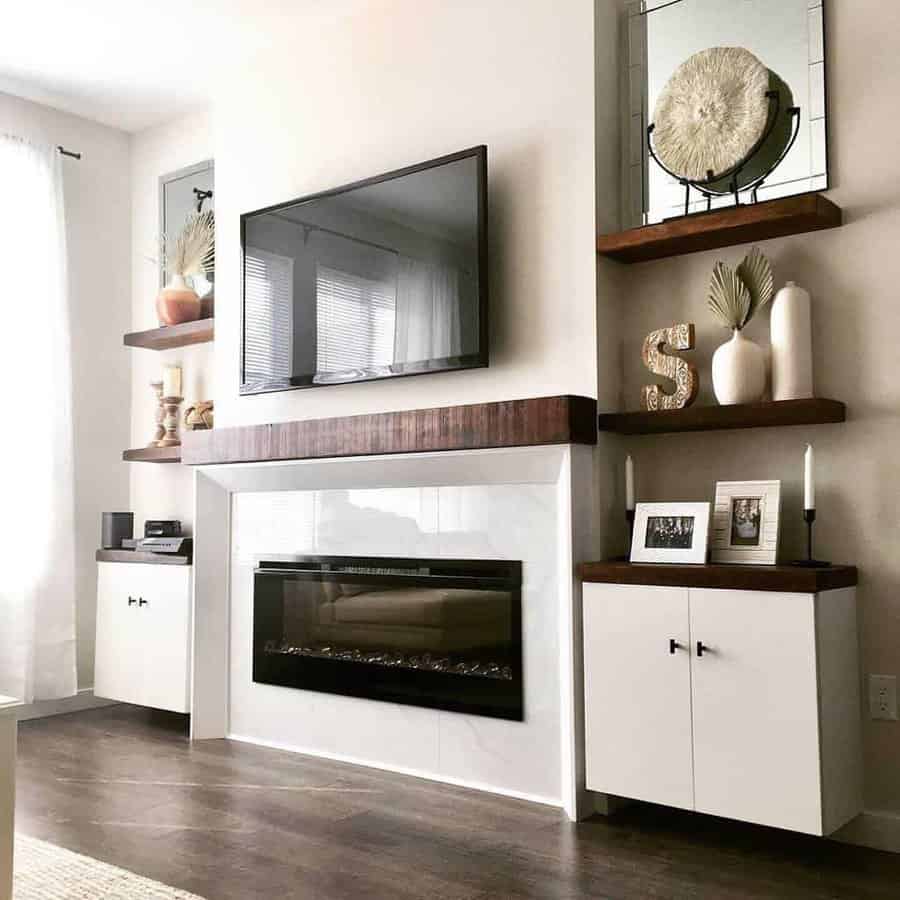
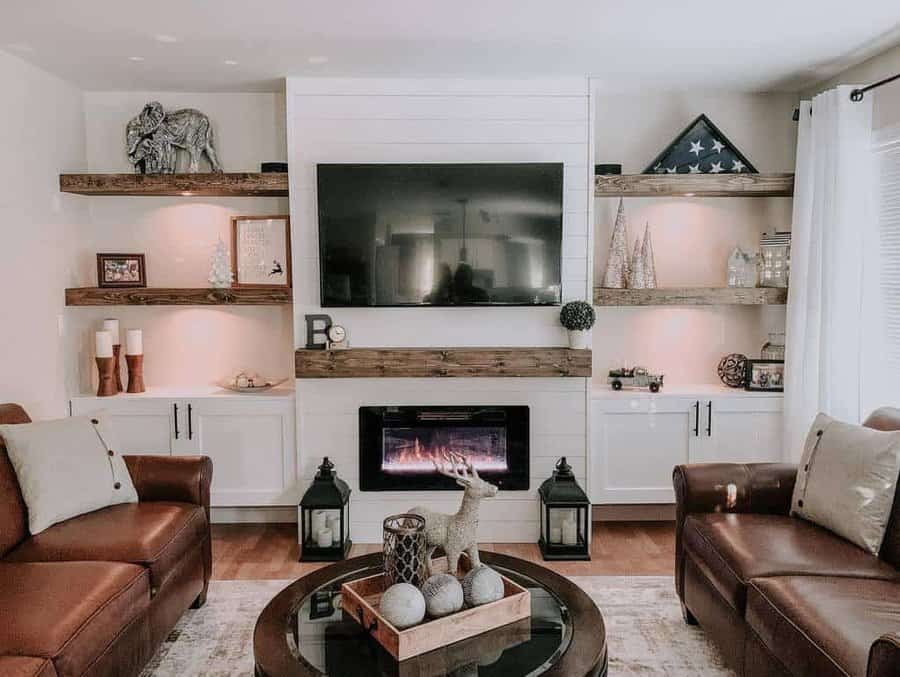
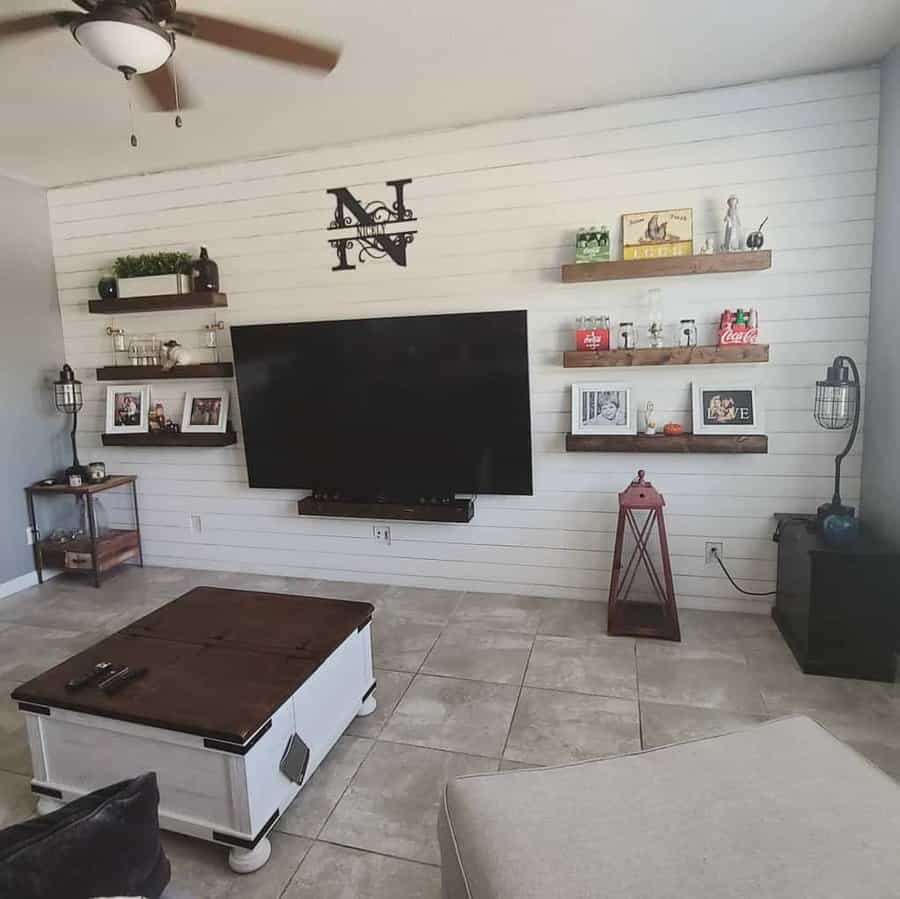
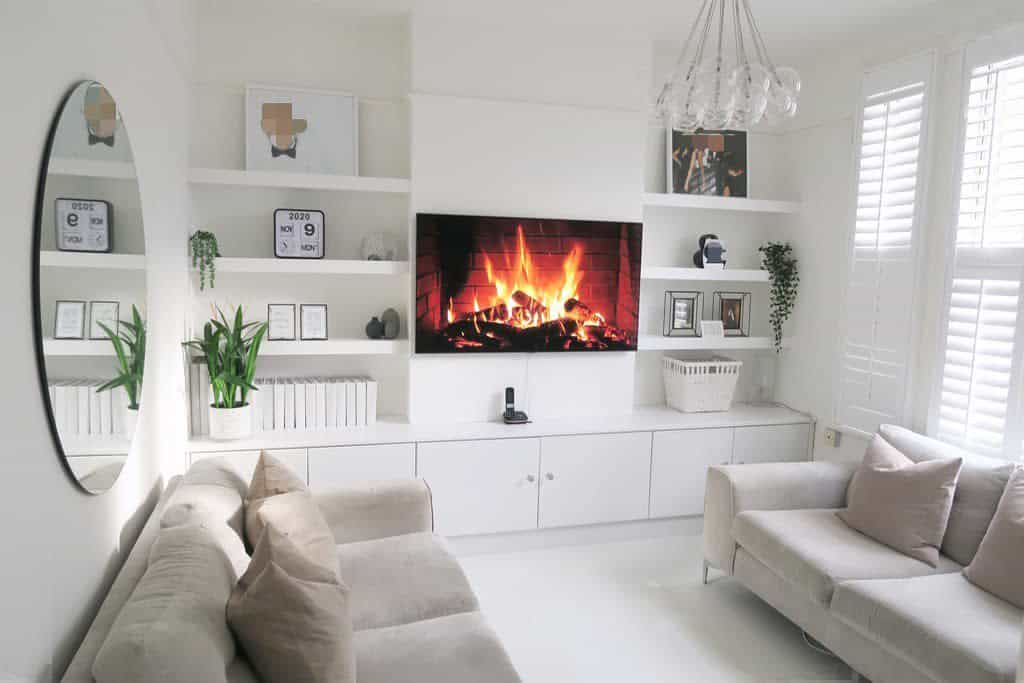
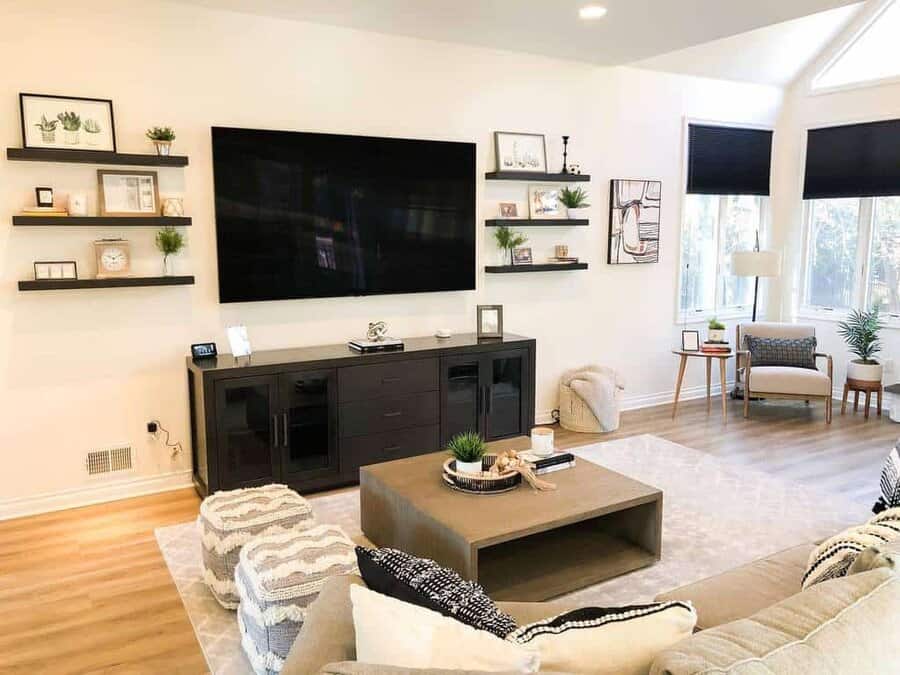
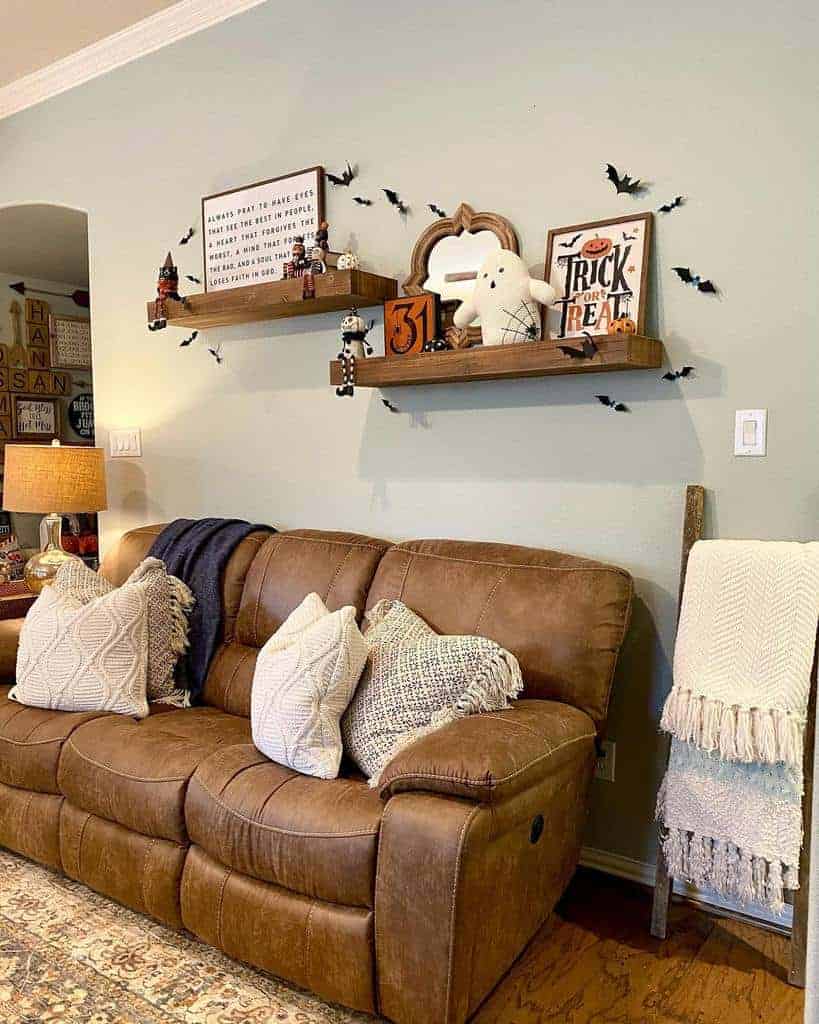
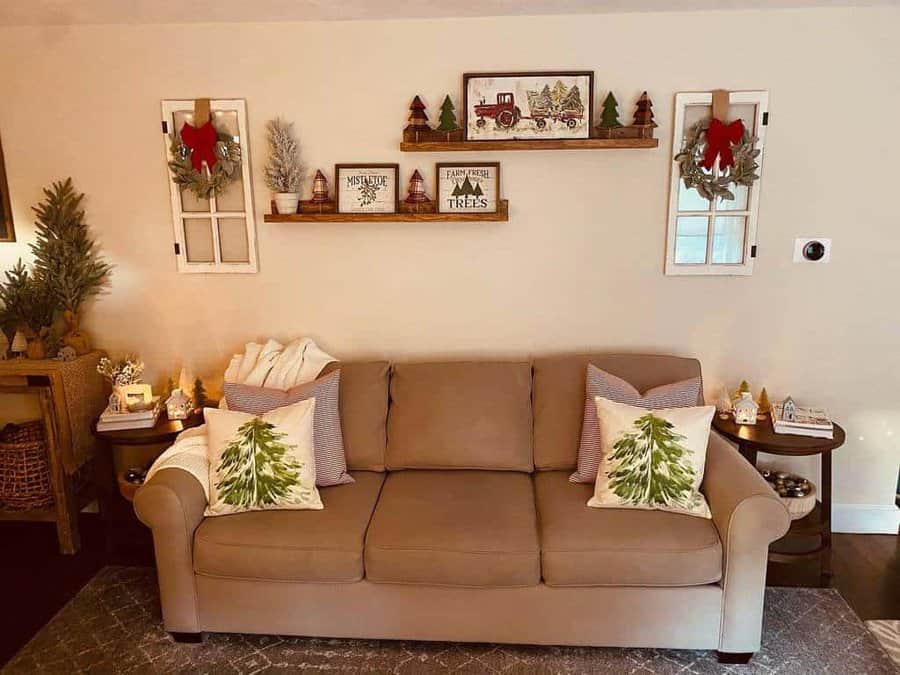
7. Elevate Your Living Room with Elegant Wall Shelves
Create a stunning display on your living room wall with a large floating shelf that extends the length of your living room.
Mount it above your sofa and create a focal point in the room. You can also use a rustic floating shelf to create a faux fireplace.
Source: @barnhousecompany via InstagramSource: @creativityinct via InstagramSource: @custom_made_by_steven via InstagramSource: @hellohouse_uk via InstagramSource: @jverainteriors via InstagramSource: @littlecajunhouse via InstagramSource: @nickithedecormama via InstagramSource: @thefrazierguy via InstagramSource: @woodzlover2020 via Instagram
You don’t have to commit to a single large floating shelf. Instead, try using several white floating shelves that are small and mounted among other decor.
You could have small wooden crates, photographs, and art. This creates a custom gallery wall with various textures and colors.
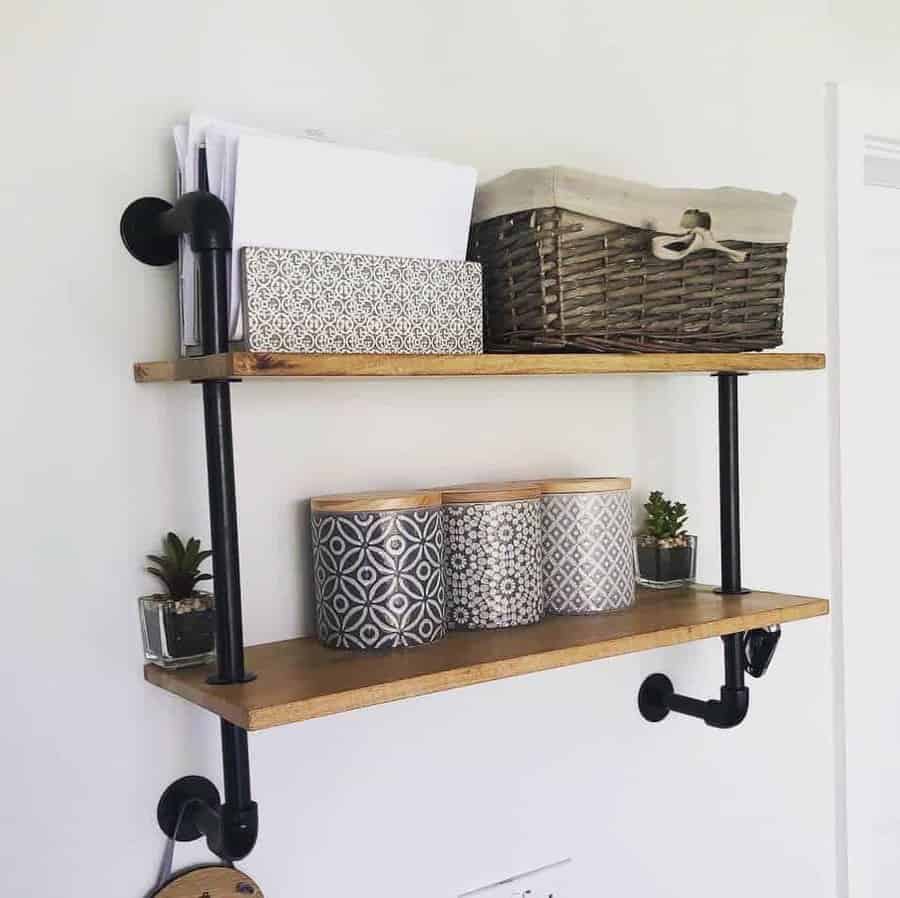
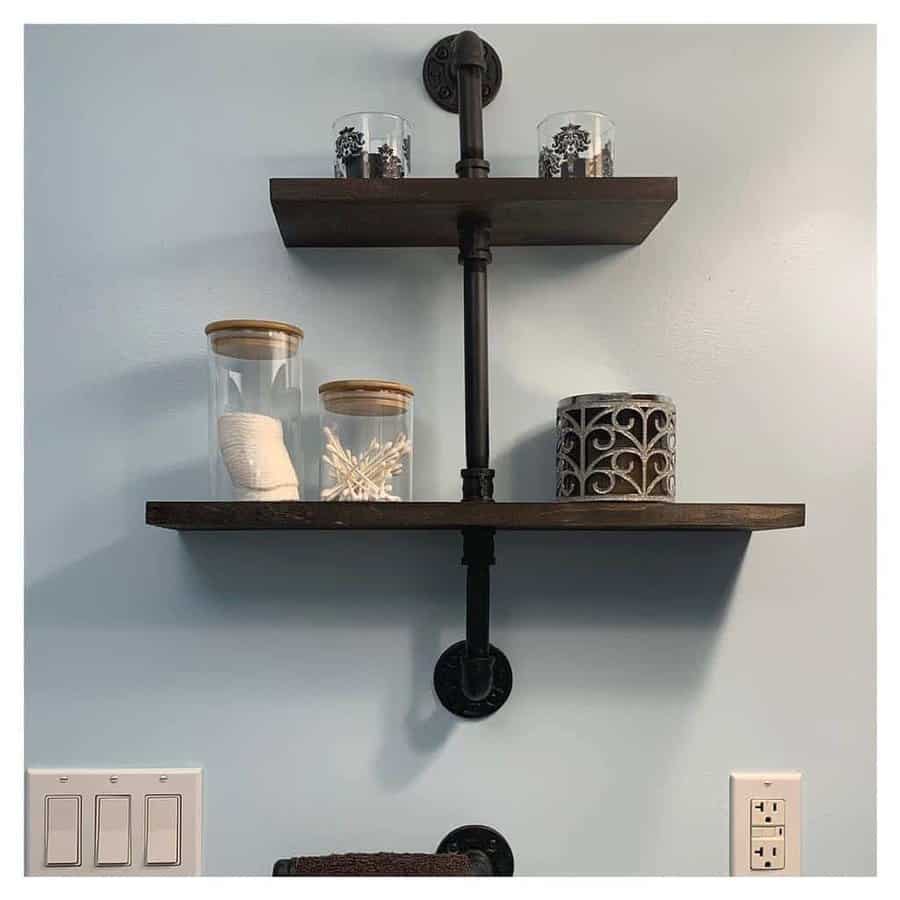
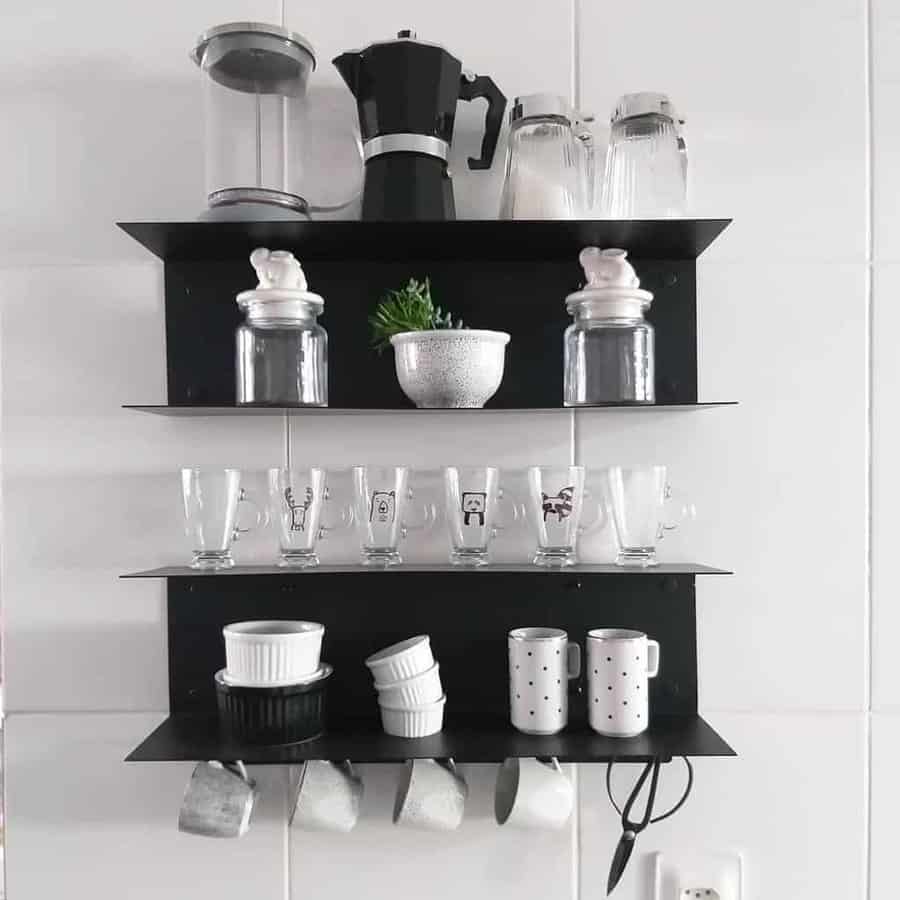
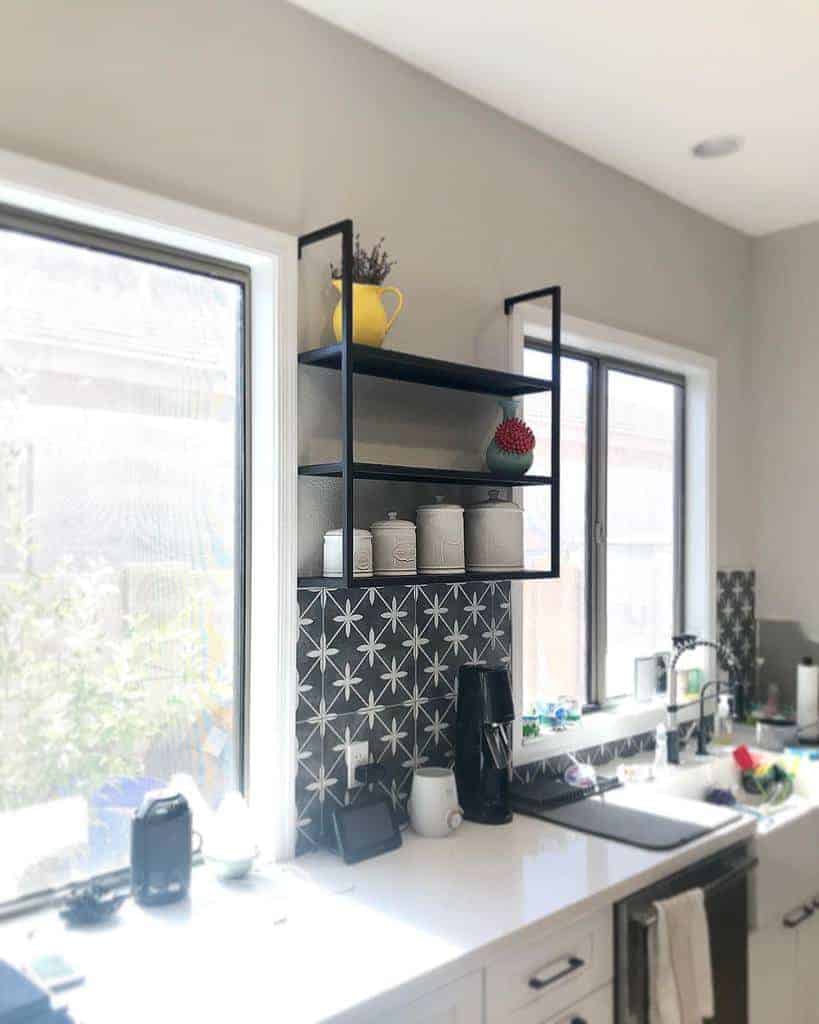
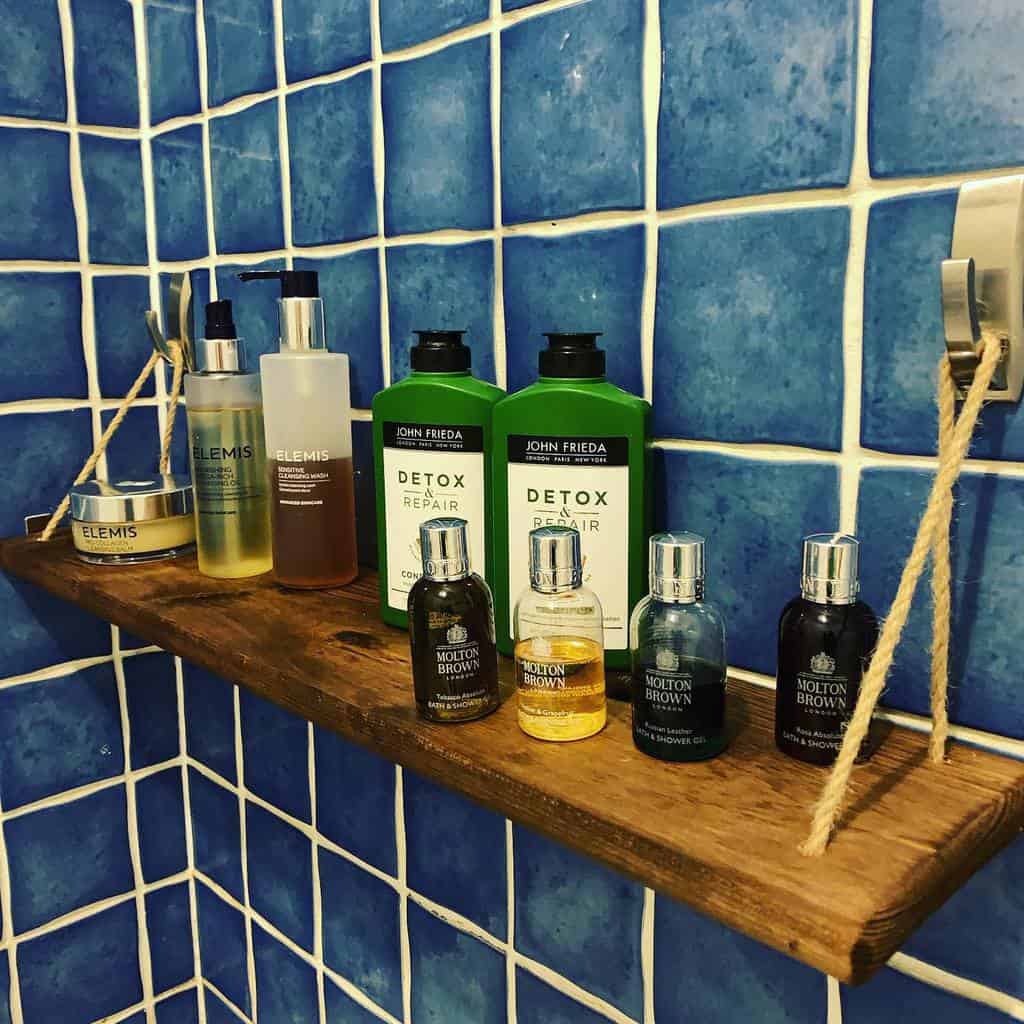
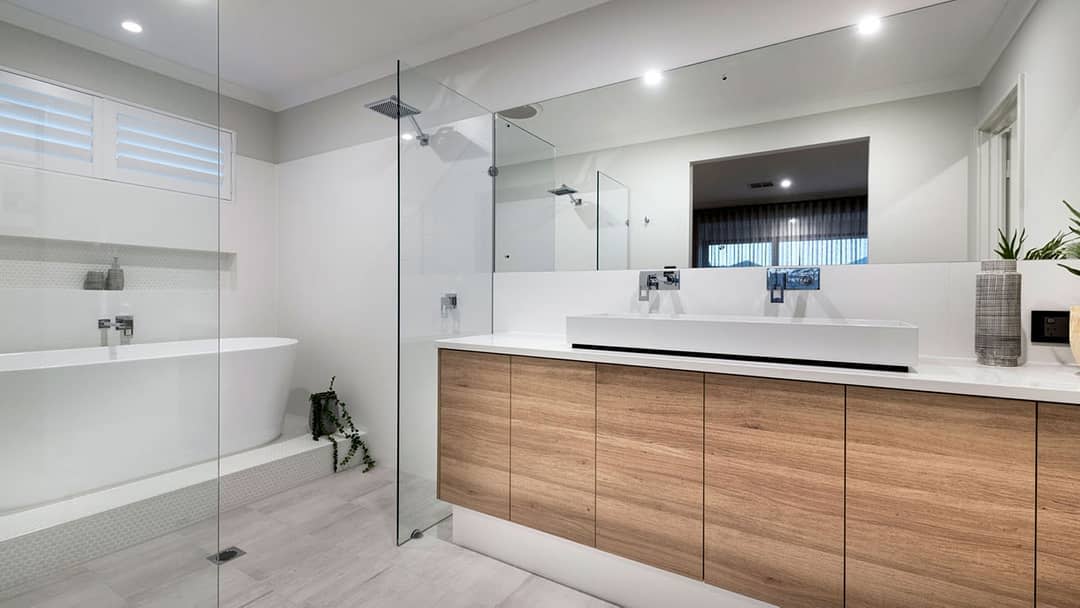
8. Incorporate Sleek Metal Shelves for a Modern Touch
Give your home an industrial feel by choosing metal for your floating shelves.
This style of floating shelving unit also works well in your kitchen or bathroom. Metal is a smooth material that doesn’t have crevices for bacteria to get in. You can clean and sanitize the metal.
Source: @carolealiazarinteriors via InstagramSource: @daniafurniture via InstagramSource: @house_of_beaks via InstagramSource: @mamaschaefers via InstagramSource: @no.8our_1930s_home via Instagram
Try mixing metal with your wood floating shelves for an industrial look. You can build a hanging shelf by using a metal pipe for the framework and then using wood planks for the shelves.
Another beautiful option is to use bold metal straps to mount the wood shelf on the wall.
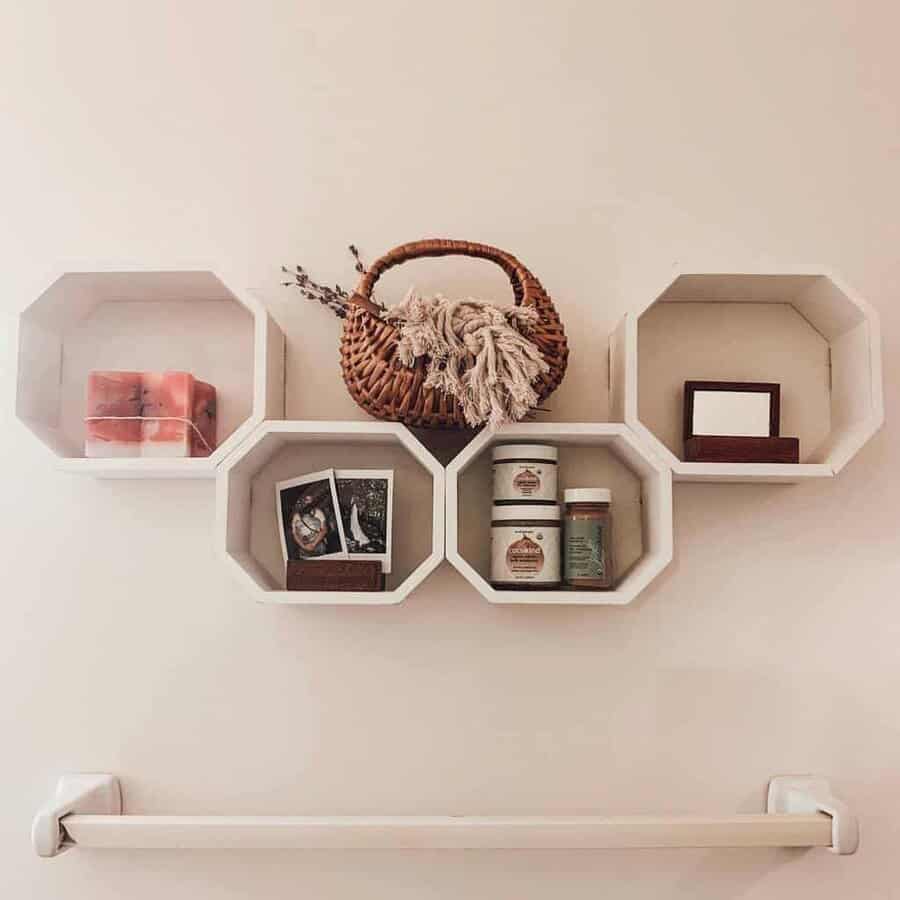
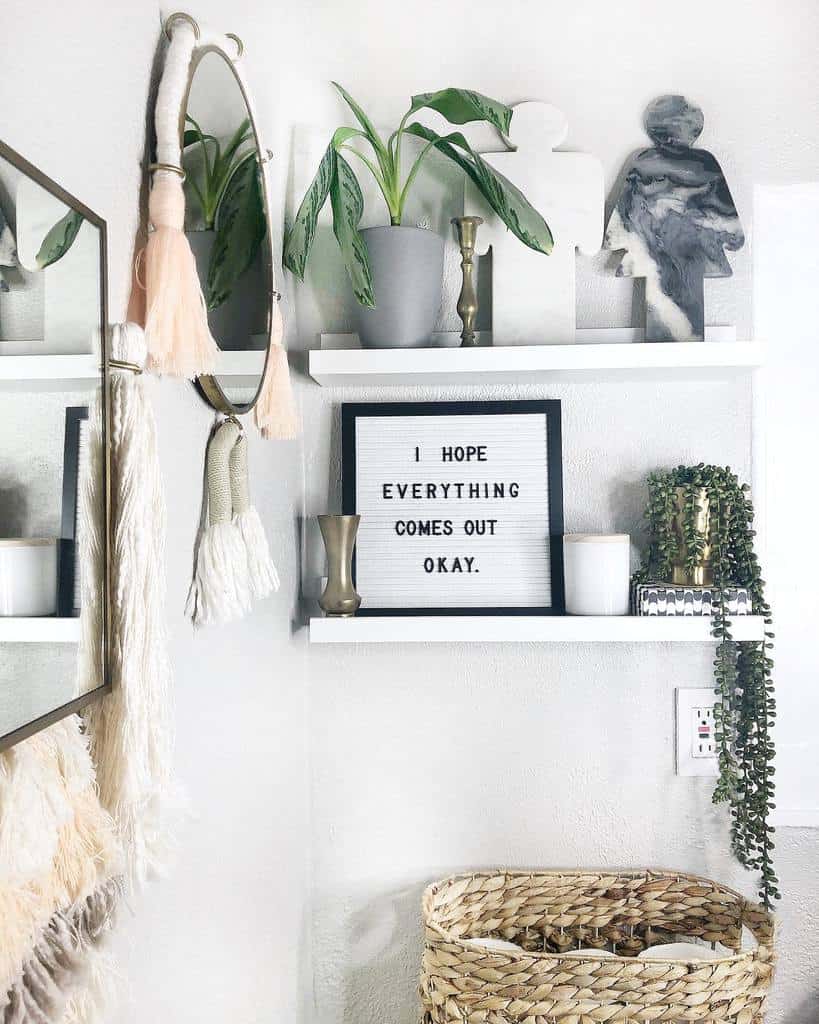
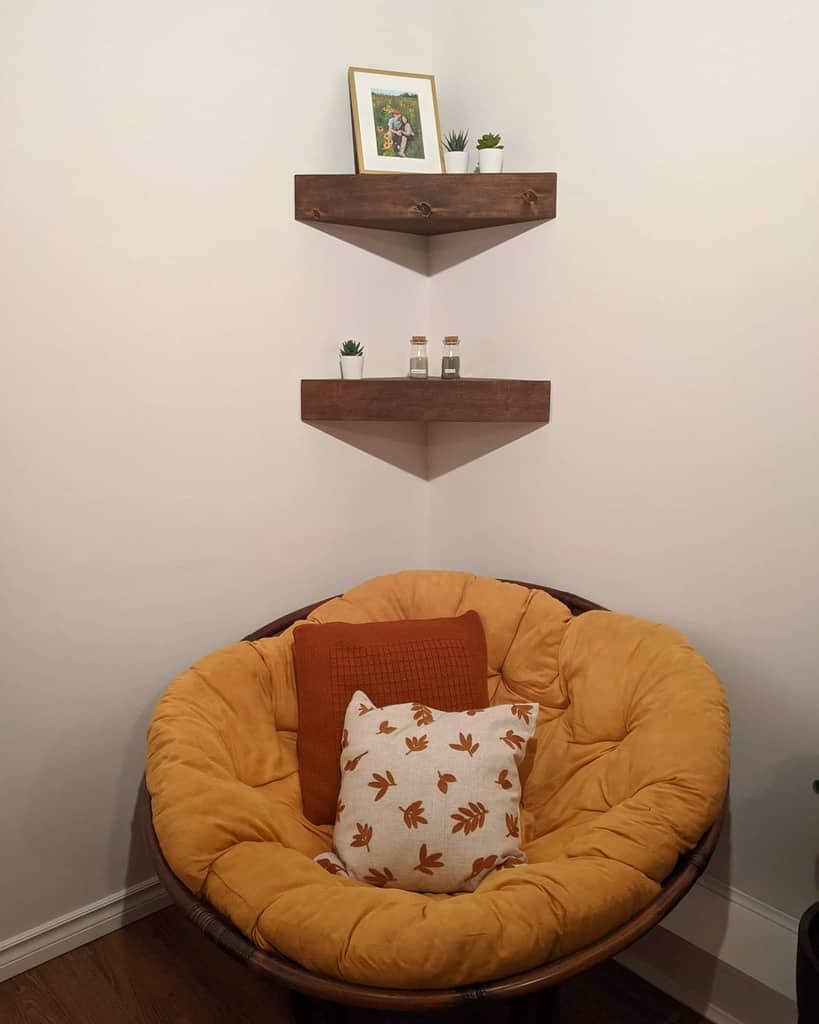
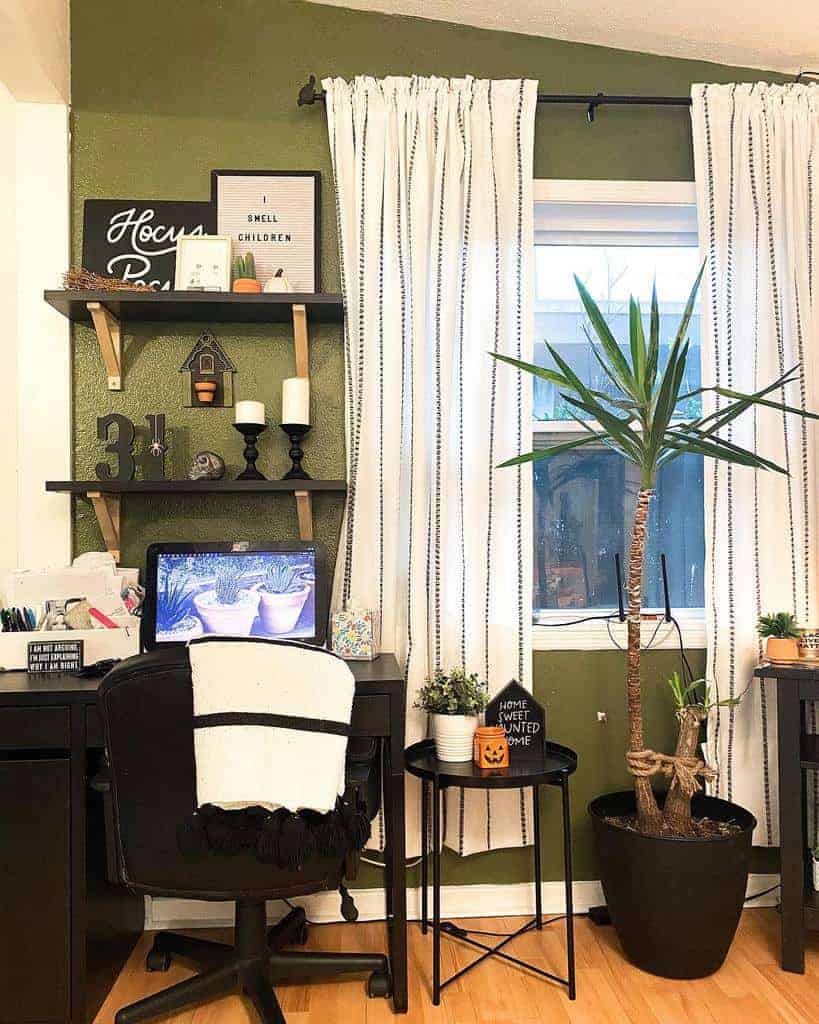
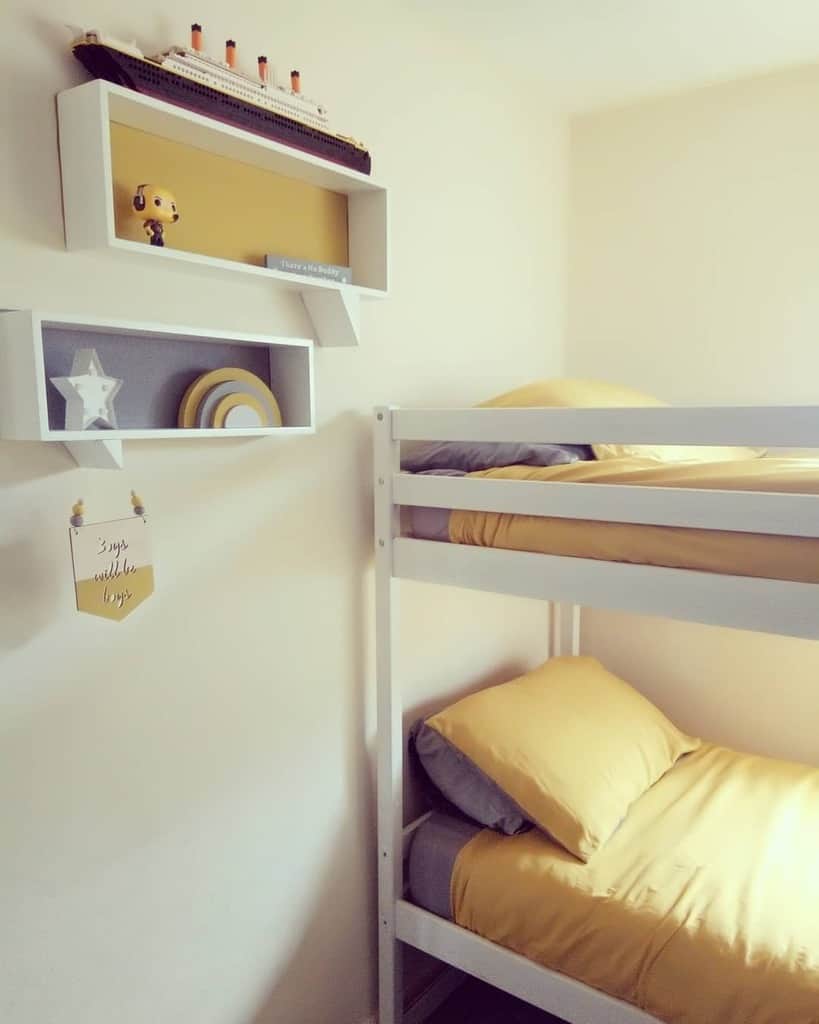
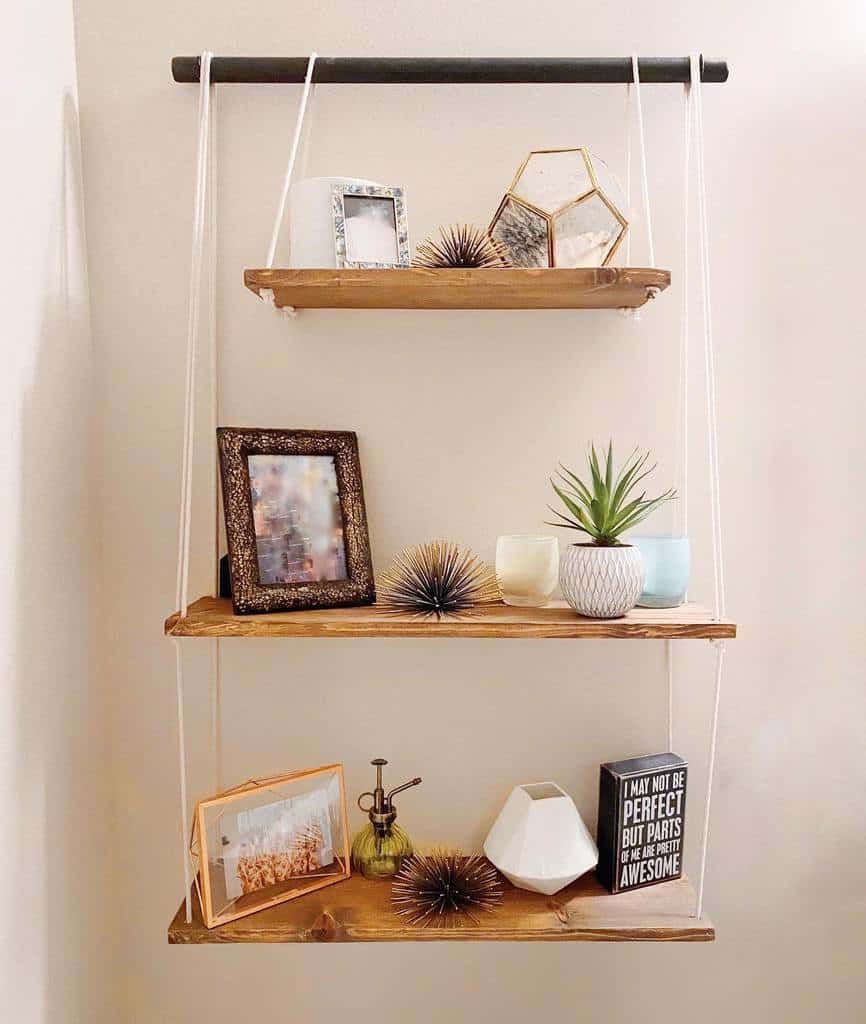
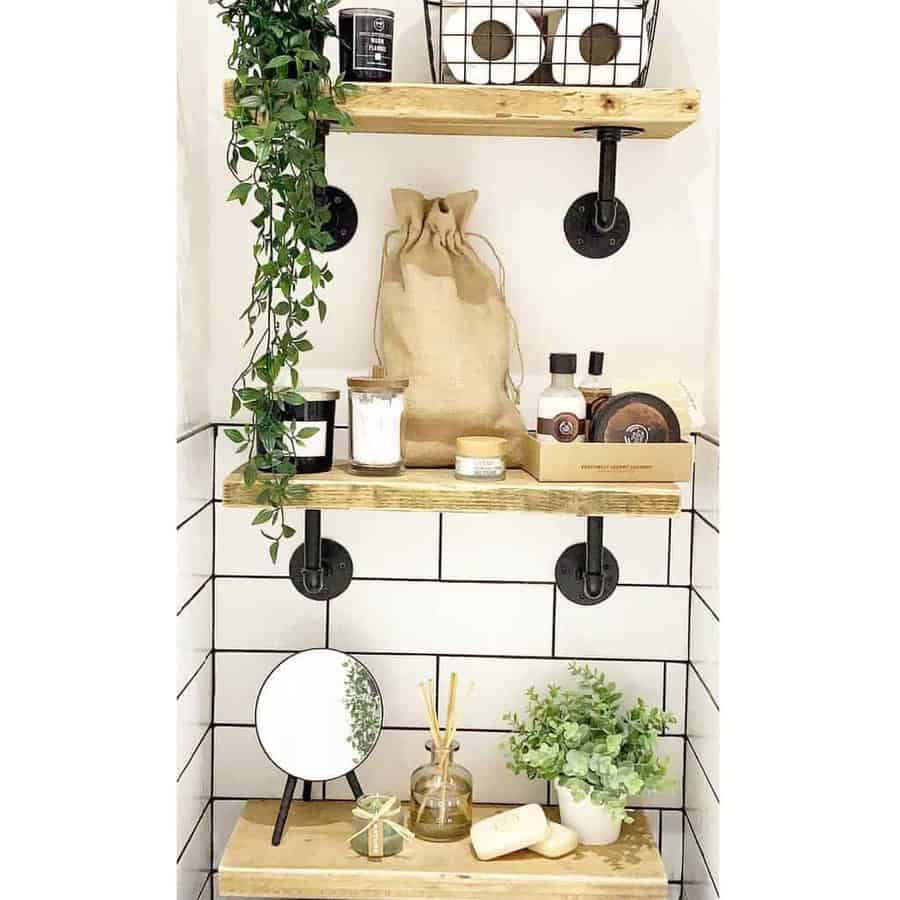
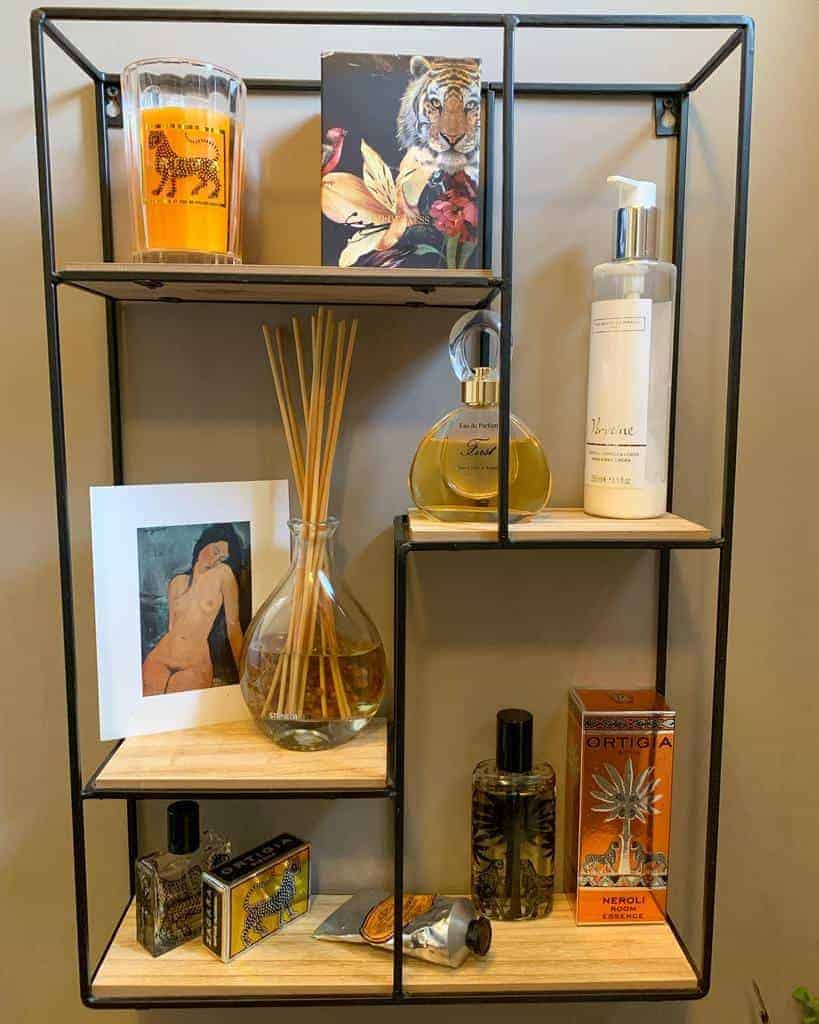
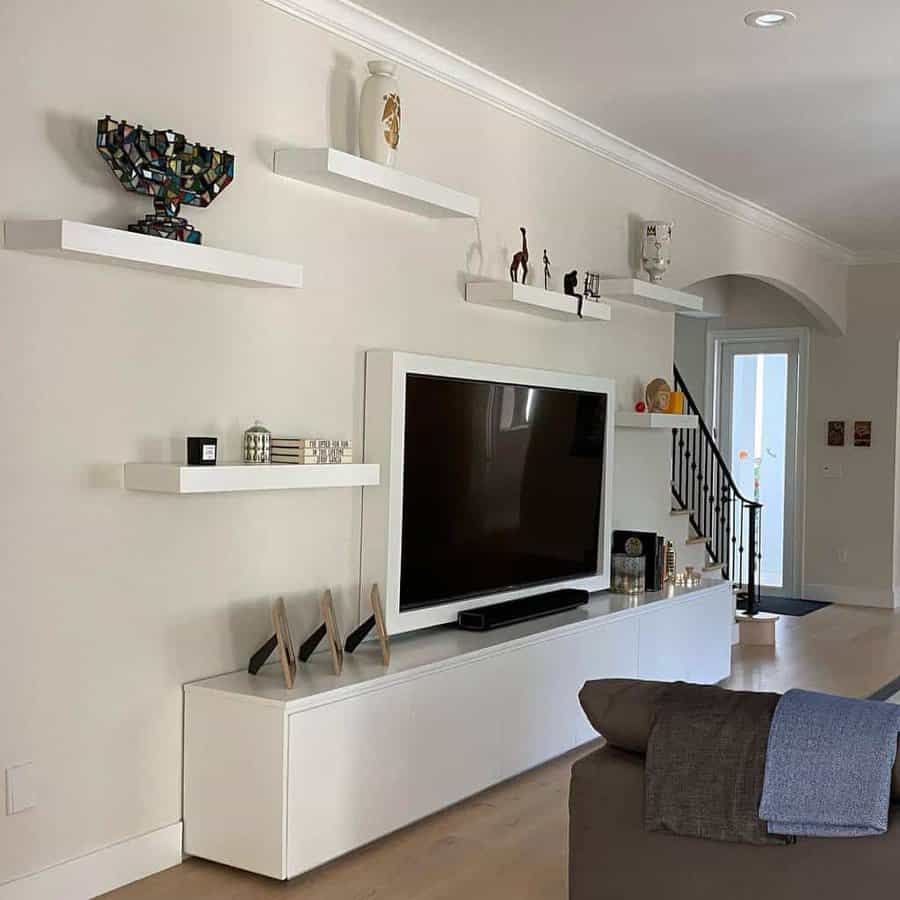
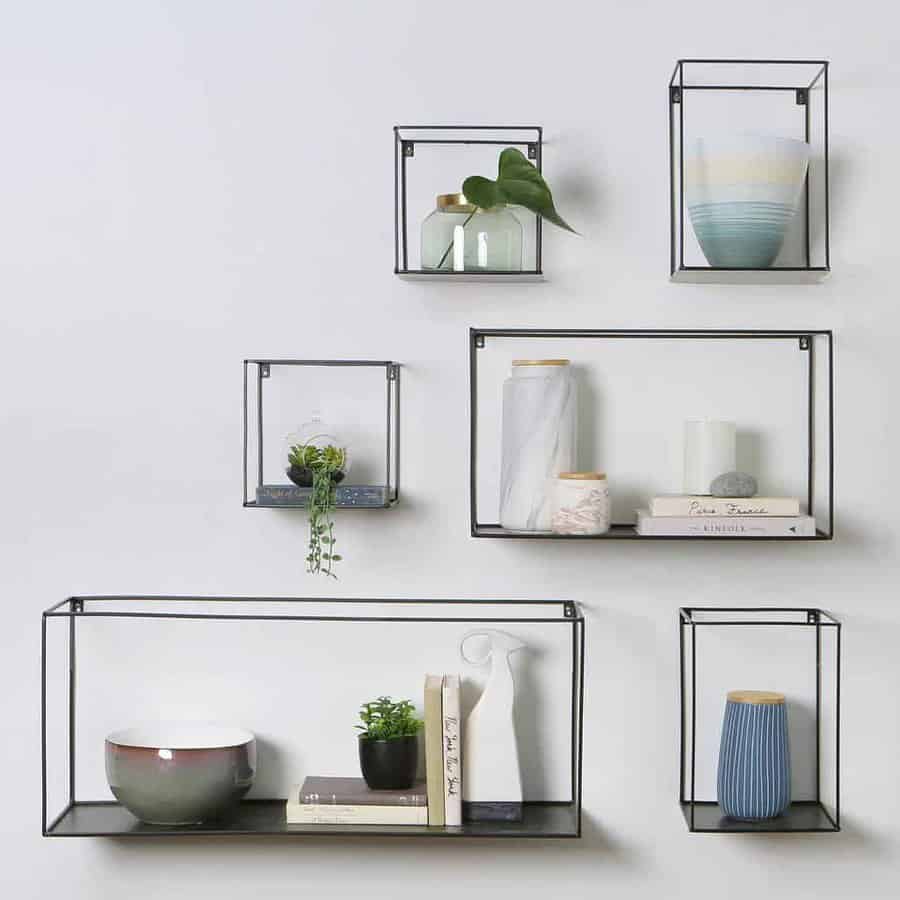
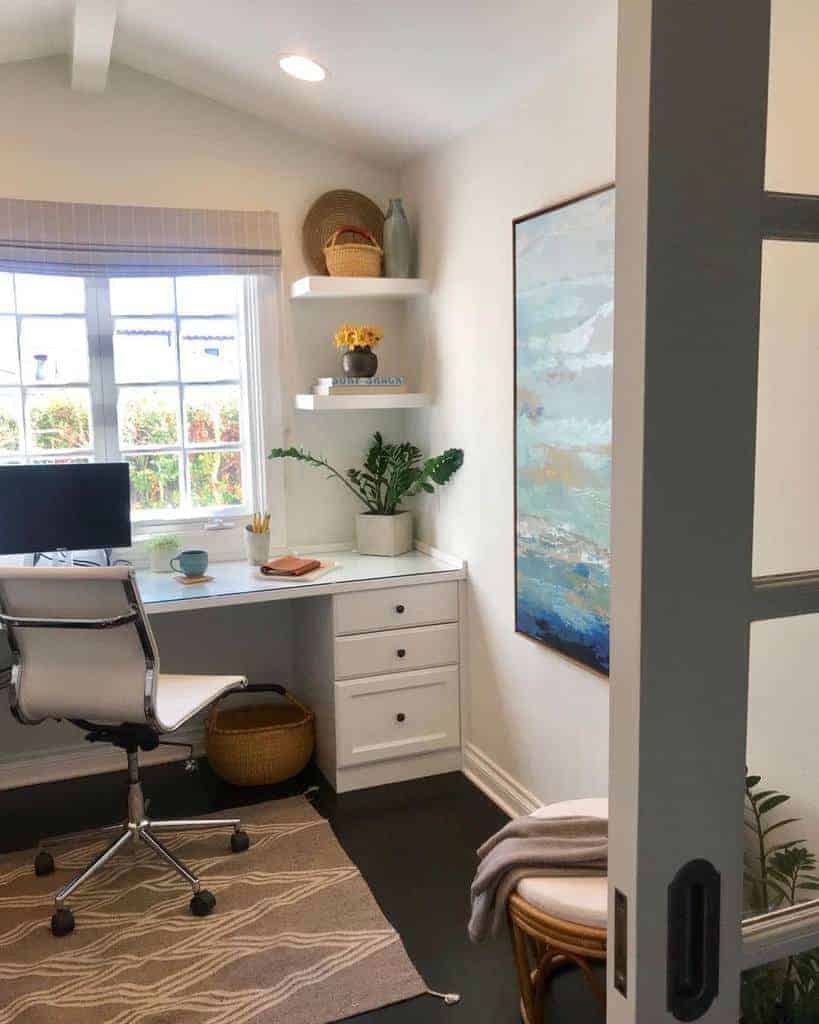
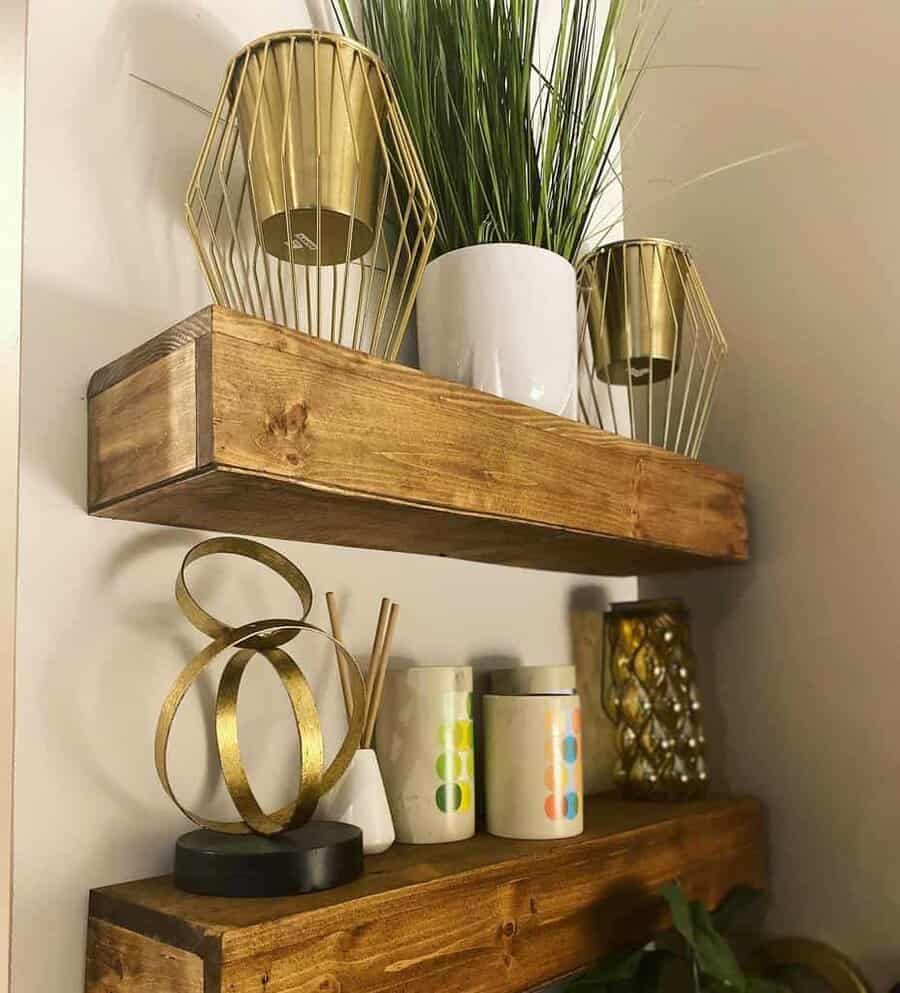
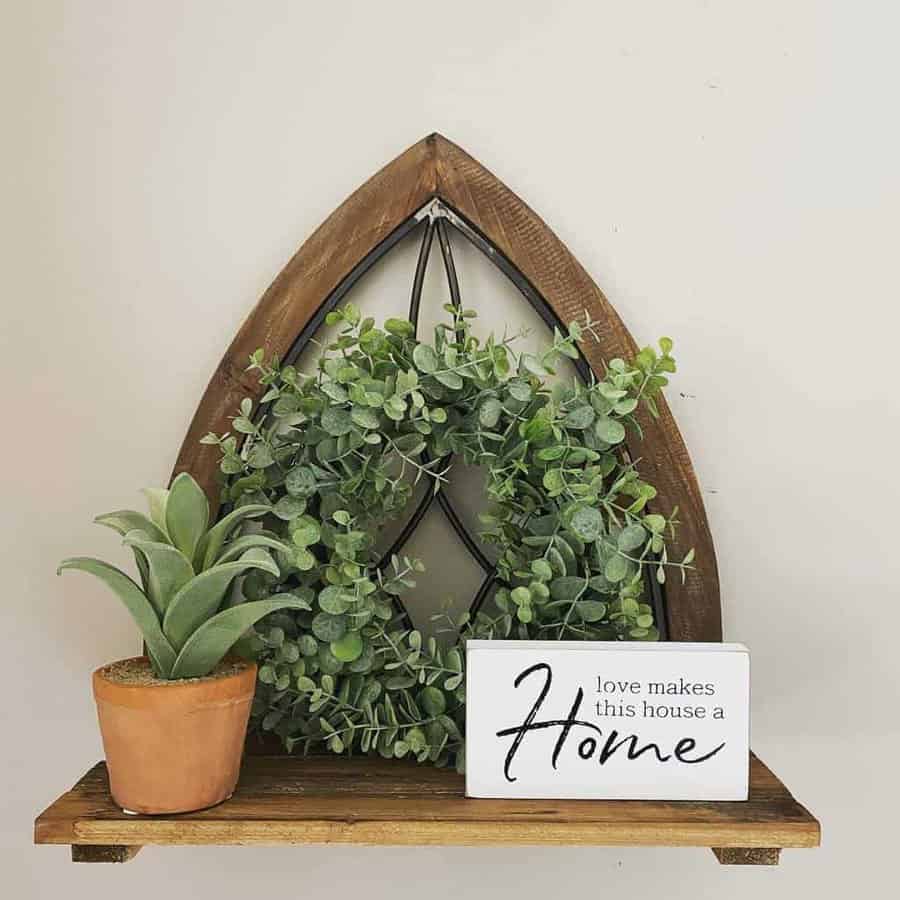
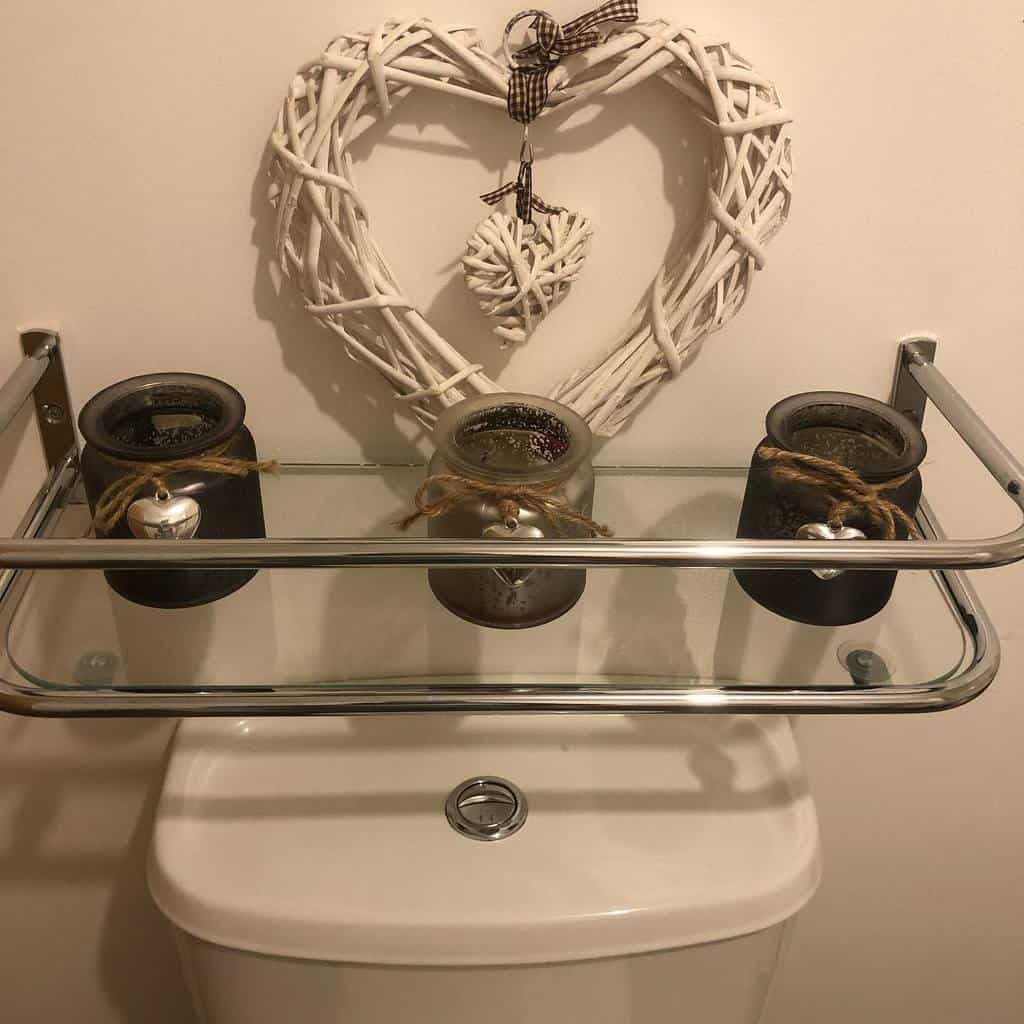
9. Maximize Minimal Spaces with Compact Shelving Solutions
Adding a small and simple floating shelf can create a beautiful accent in unexpected places.
Your floating wall shelf needs to only be big enough to hold a candle or small figurine. Install several of them in a single corner to create a complete display.
Source: @acton.life_.and_.home_ via InstagramSource: @chyracarmelle via InstagramSource: @essentiallyrawdesigns via InstagramSource: @llcustomcreationsuk via InstagramSource: @makingourhaven via InstagramSource: @pipe_decoration via InstagramSource: @thedomesticatedgoddesss via InstagramSource: @theflagfall via InstagramSource: @truemanstreasures via Instagram
These smaller shelves work well in places that are limited, such as your bathroom. Or they could be on the outside edge of your kitchen cabinets.
Try using them in your bedroom in the corner behind your bedroom door. The small size and angled edge of the open shelf won’t interfere with your door opening.
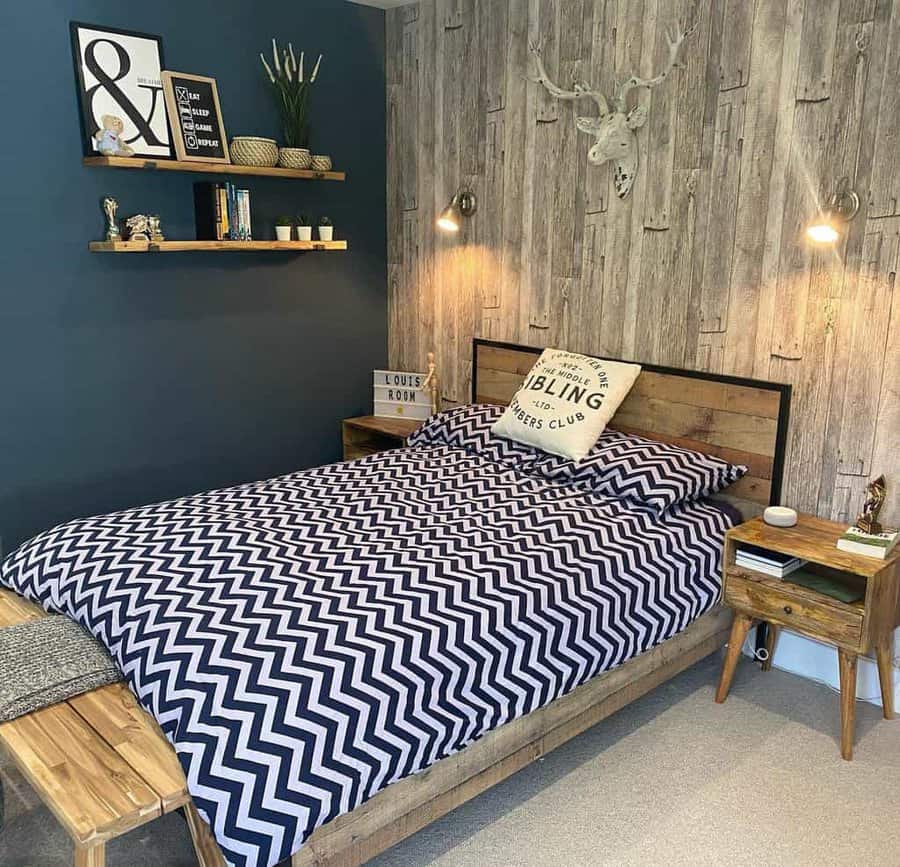
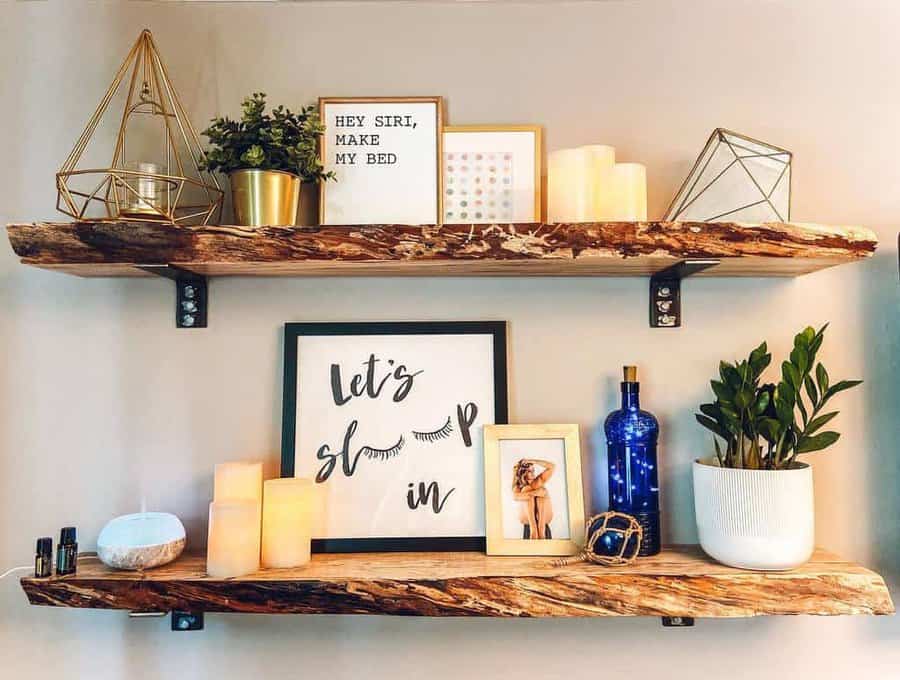
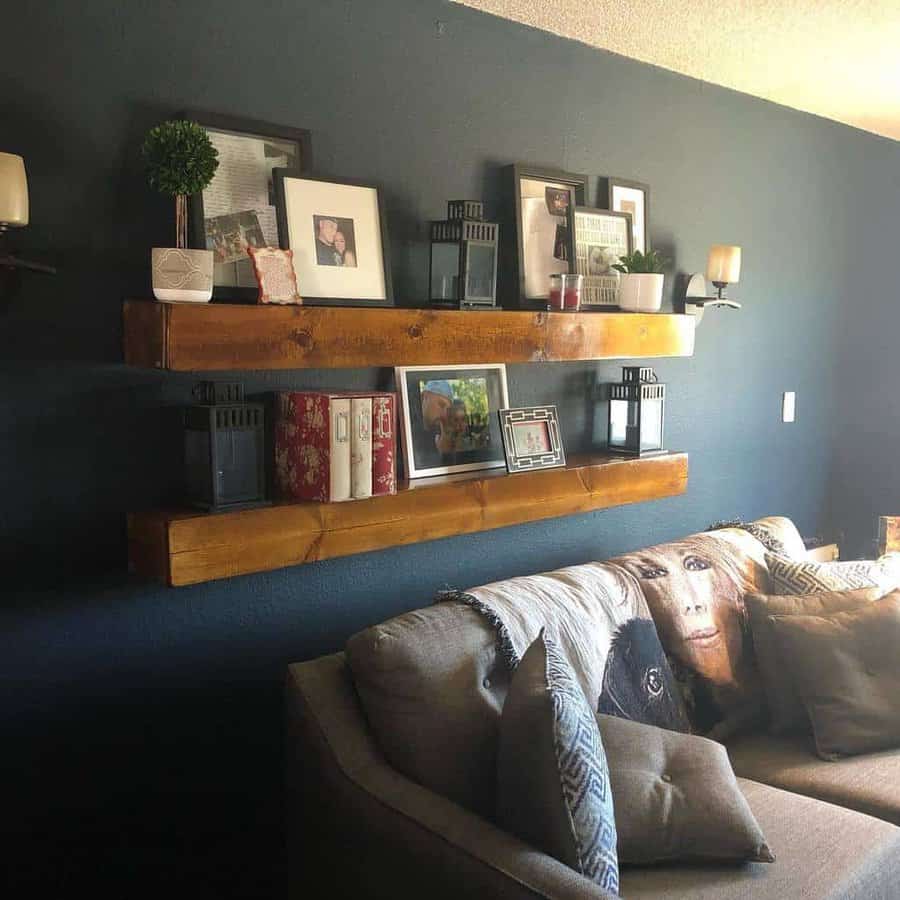
10. Infuse Natural Warmth with Wooden Shelf Designs
Adding a wooden shelf to your interior design is an easy way to bring nature indoors. Wood is warm and has texture.
Reclaimed wood is perfect for creating an authentic look to your rustic or farmhouse decor. Elegantly stained wood is perfect for a luxurious or elegant feel.
Source: @alittlesprucing via InstagramSource: @demjohnsonshome via InstagramSource: @dustylumberco via InstagramSource: @florellaclean via InstagramSource: @life.stylewithjess via InstagramSource: @littlegreenrambler via InstagramSource: @millysgiftshop01 via InstagramSource: @phantastication via InstagramSource: @the.mid.terrace via InstagramSource: @the_swanky_home via InstagramSource: @theseriousgentleman via Instagram
When picking your wood shelf, look at the length and thickness of the wood.
Thicker planks look more substantial and visually balanced on the wall. You may even want to build boxes to create a custom look for your shelves.
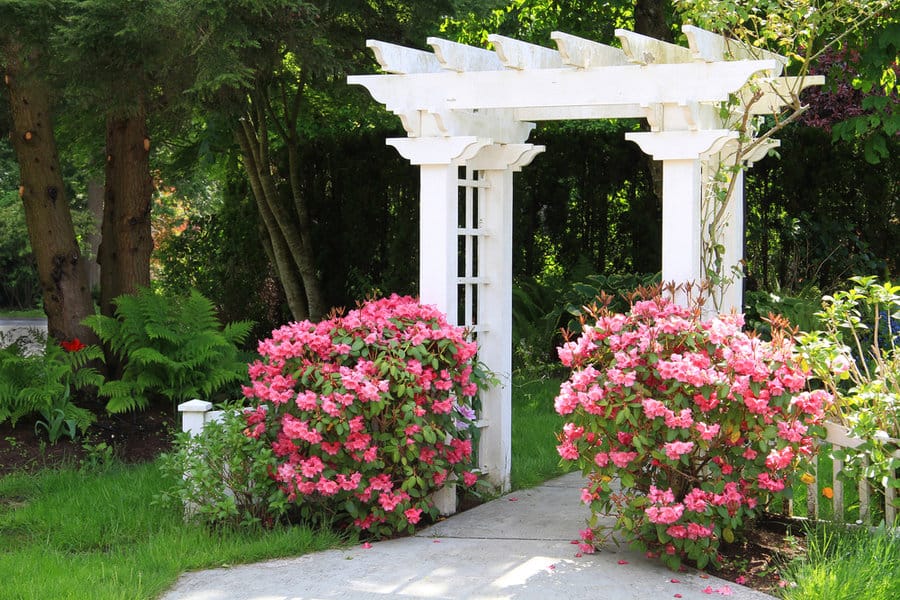
They say that good fences make good neighbors. A fence gives you the right amount of privacy that’s required for enjoying your property in peace.
However, you don’t want to put up just any fence. A chain-link fence won’t give you any peace as anyone can look right through it.
What you need is a solid wood privacy fence. You can build your own wood fence from pallets. The pieces of wood are all the same size and cut.
You’ll be reusing wood for a new purpose, making it environmentally friendly. So check out these wooden pallet fence ideas and get inspired to build your own fence.
[view_toc]
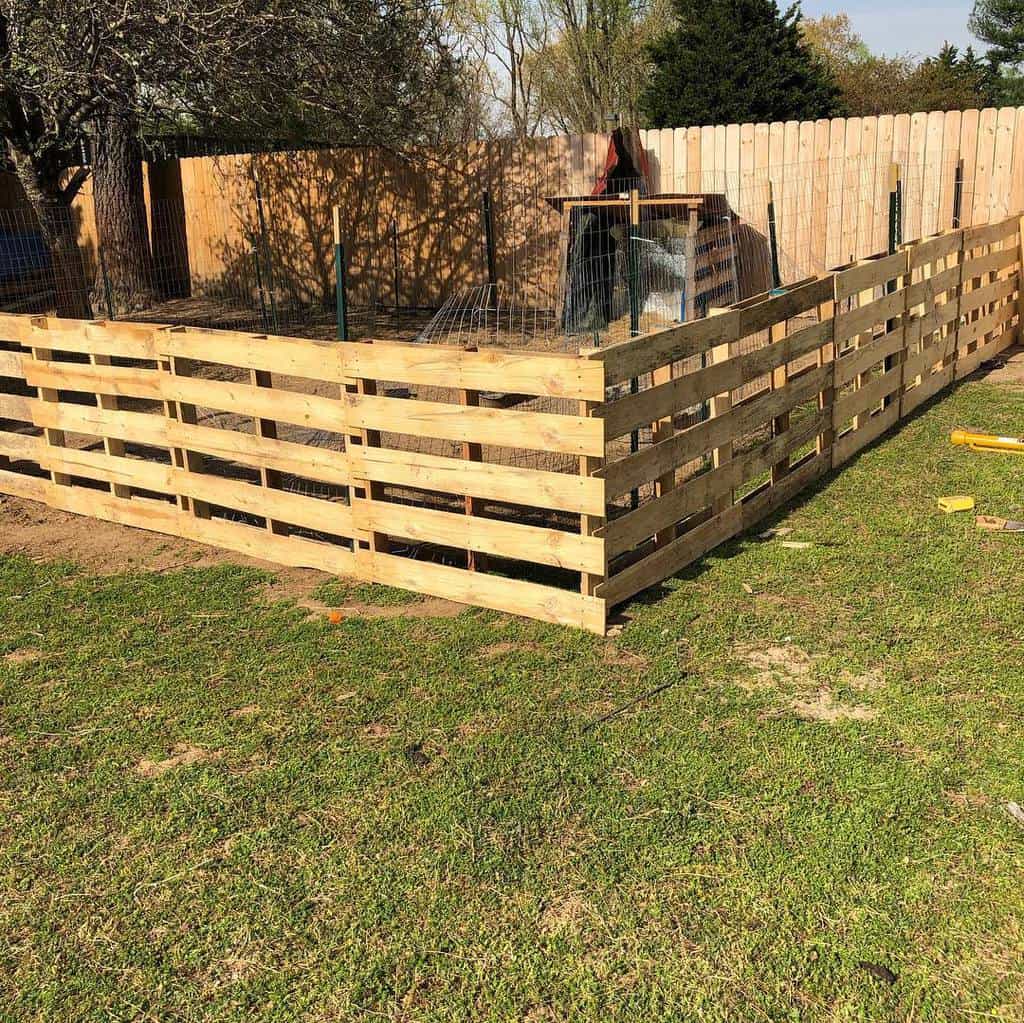
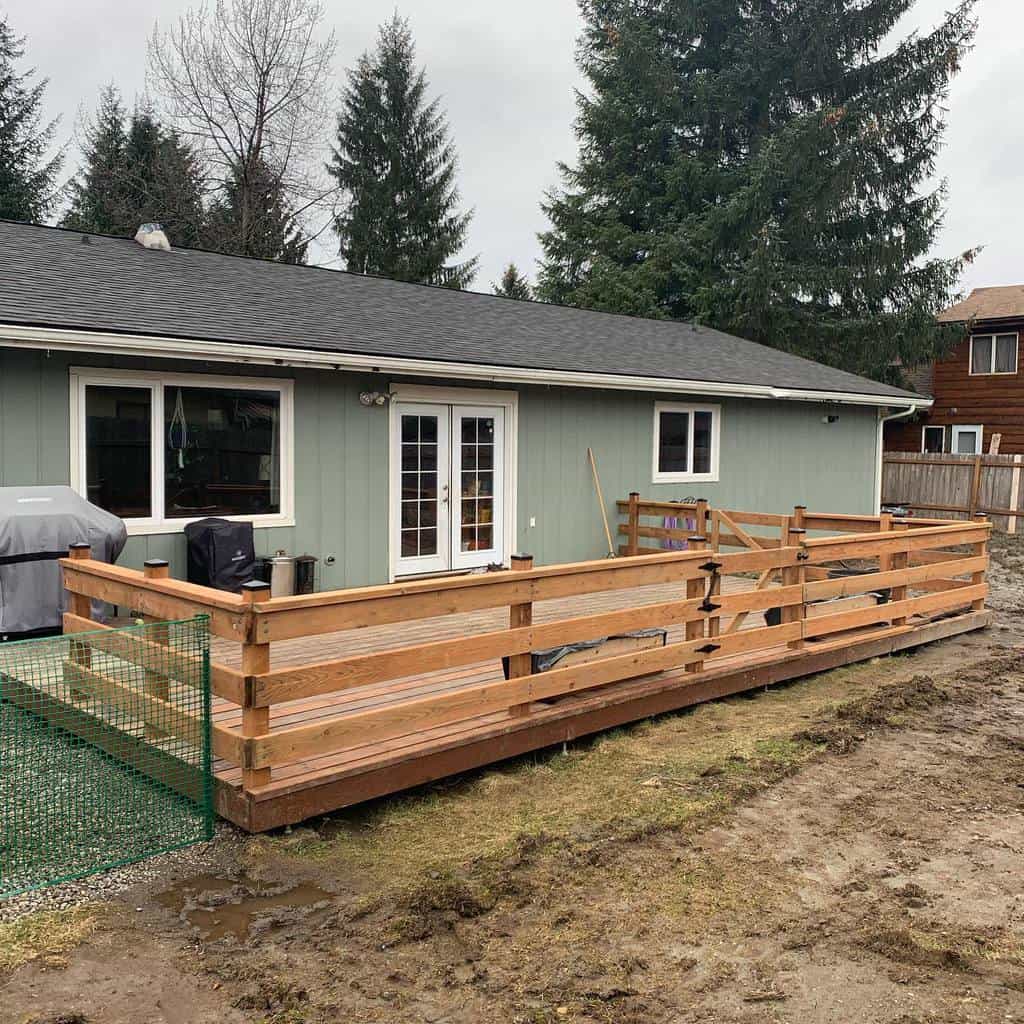
1. Build a Backyard Pallet Fence
Build a DIY pallet fence around your backyard and create a barrier around your property. A backyard fence is perfect for keeping people off of your property. It’ll also keep your pets or other animals on your property.
You can build a simple fence with posts and pallets. Space the posts out and bury them in the ground.
They should be just far enough apart that you can slide a pallet down between them and get held in place with the pallet planks overlapping the posts. Then you can secure everything together by nailing or bolting the pallet into place.
Source: @scott_s_gar via InstagramSource: @thebroodybantam via InstagramSource: @yard.ventures via InstagramSource: @ebscockers via Instagram
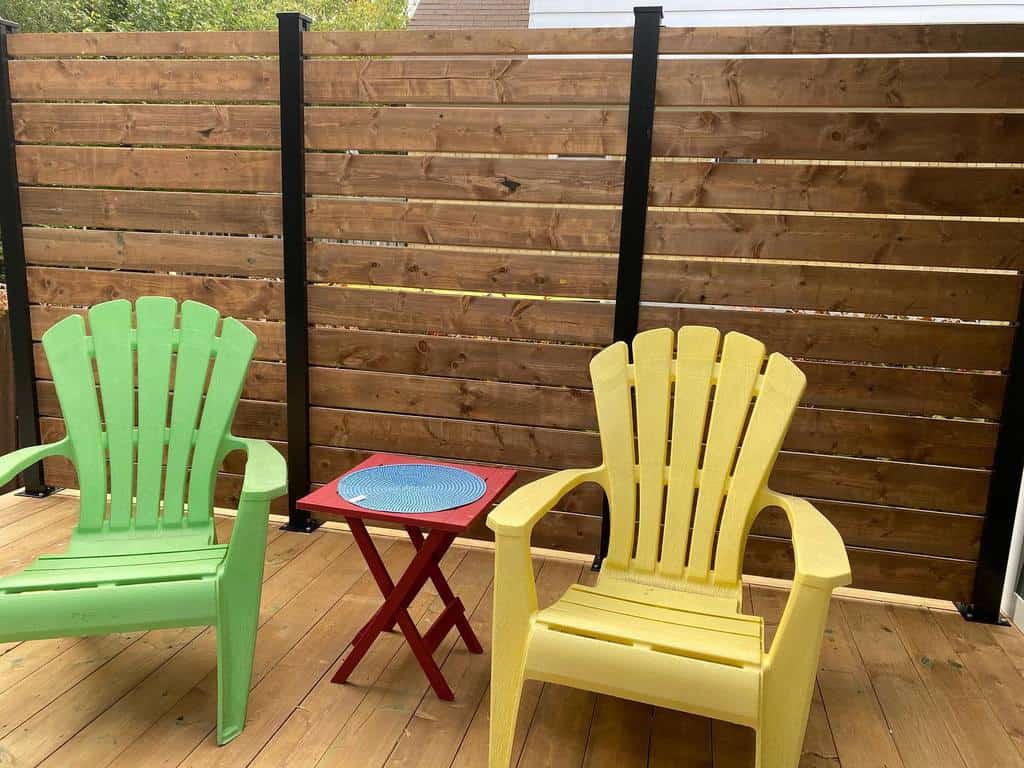
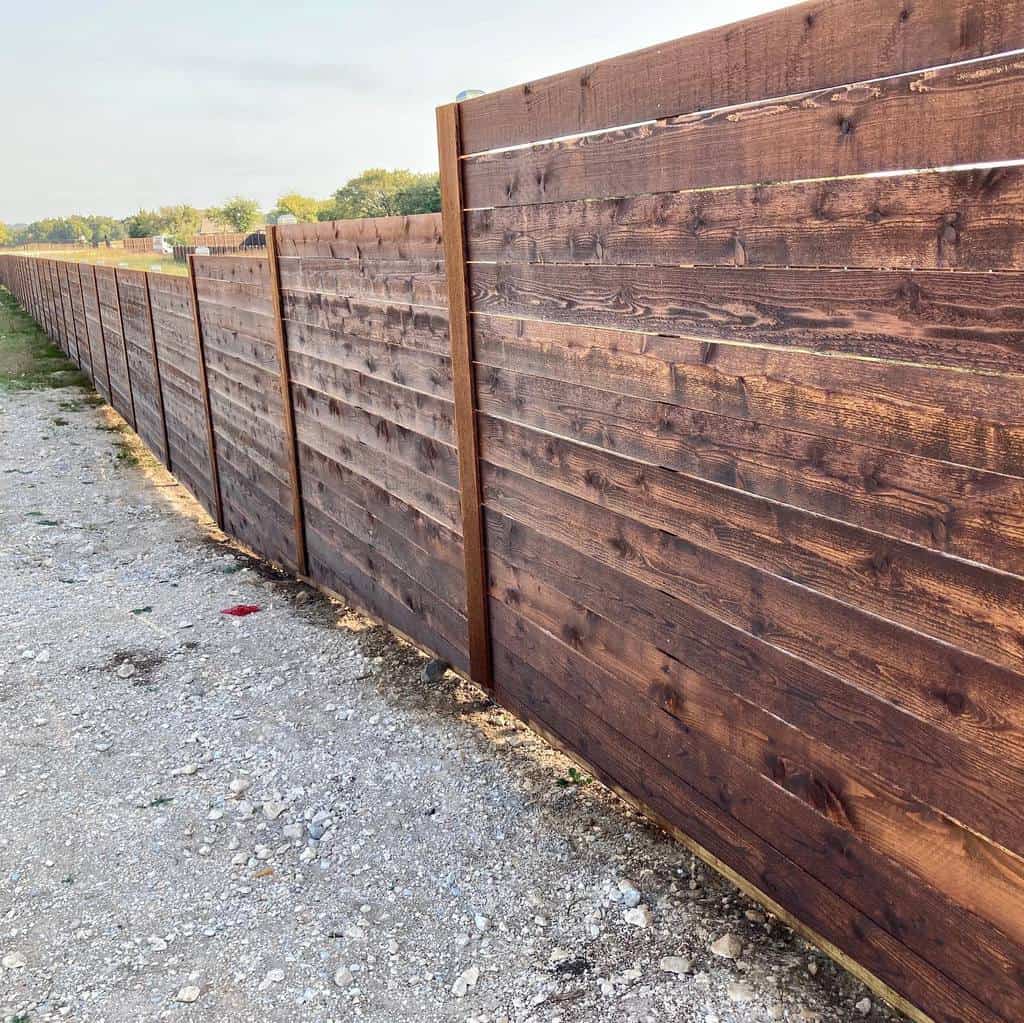
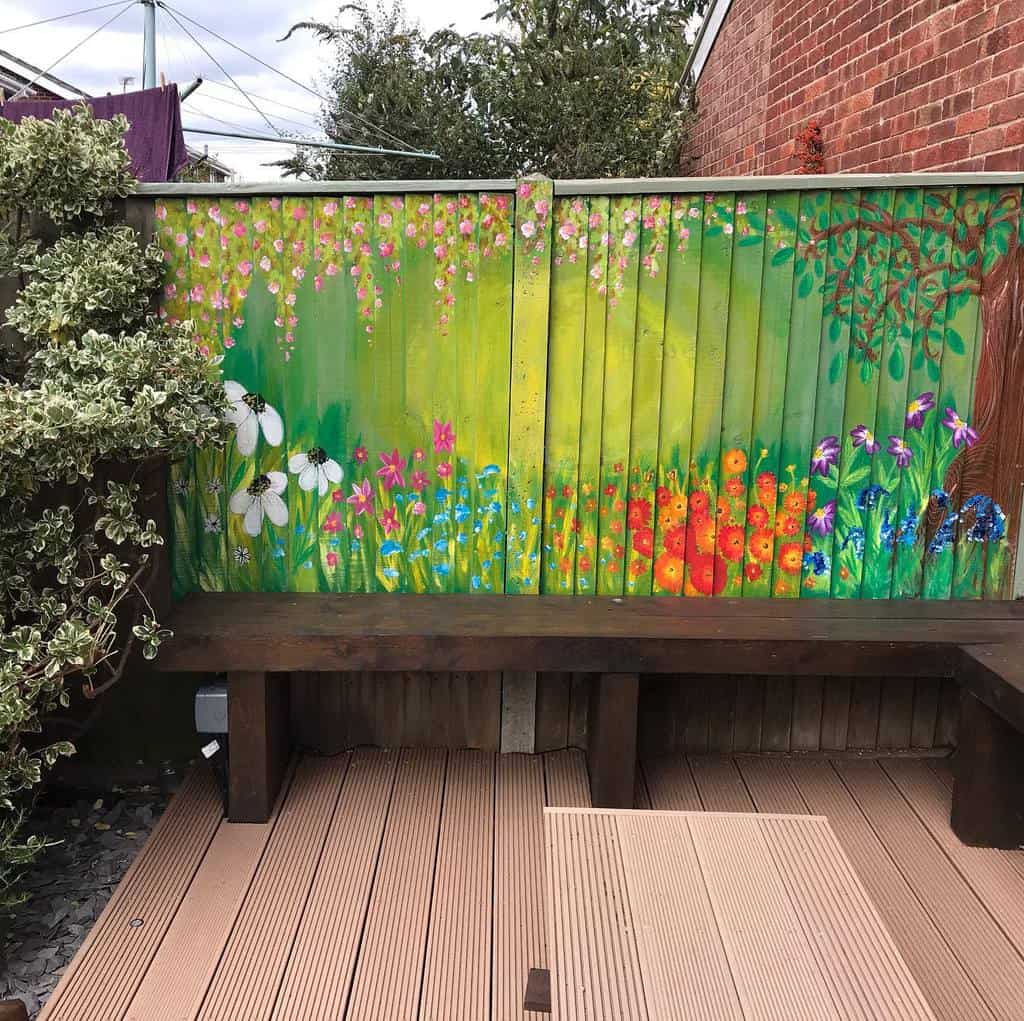
2. Create a Patio Privacy Pallet Fence
Creating a pallet fence around your patio can provide both privacy and a rustic aesthetic.
Use uniformly sized pallets for a cohesive look and ensure they’re securely fastened together for stability.
Consider staining the wood to match your patio’s theme and add weatherproofing for durability.
Source: @whitflip via Instagram
3. Combine Pallet and Living Fence
Blend the organic feel of a living fence with the structured appearance of pallets.
Intersperse pallet sections with areas of dense, climbing plants like ivy or jasmine. This creates a dynamic, eco-friendly barrier that combines solid wood sections with lush greenery.
Ensure the plants receive ample sunlight and train them to intertwine with the pallets for a natural, integrated look.
4. Hang String Lights
Transform your pallet fence into a whimsical nighttime feature by draping string lights along its top.
Choose warm, soft lights for a cozy ambiance or brighter LEDs for a festive touch. Secure the lights with small hooks or ties, ensuring they’re evenly spaced for a balanced look.
This simple addition brings life to your fence, especially during evening gatherings.
Source: @thecraftycatsman via Instagram
5. Design a Deck-Enclosing Pallet Fence
Surround your deck with a pallet fence to create a defined, private outdoor space.
Align the pallets closely for privacy or space them out for a breezier feel. Paint the pallets in a color that complements your deck, and consider adding a horizontal top board for a finished look.
Source: @jeshmaster via InstagramSource: @acorianna11 via Instagram
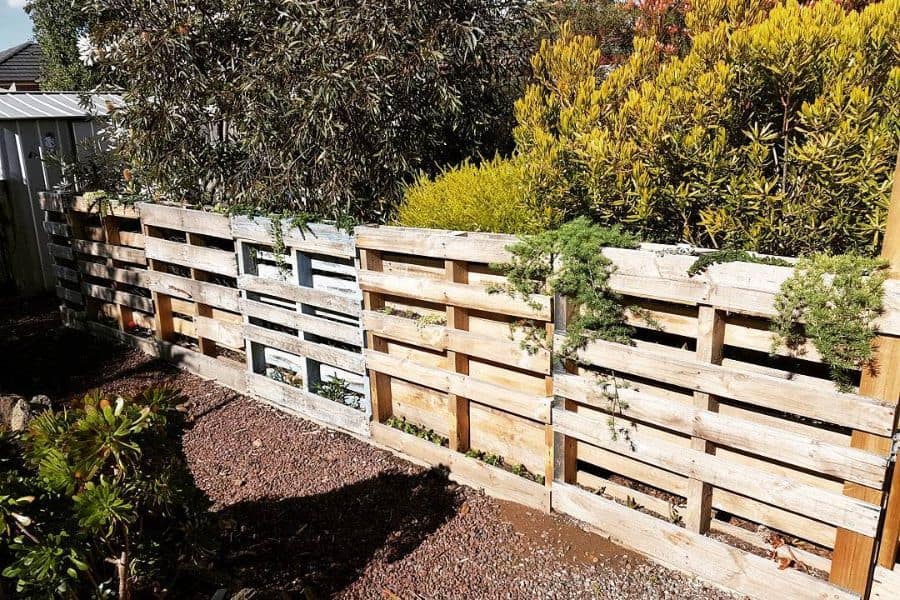
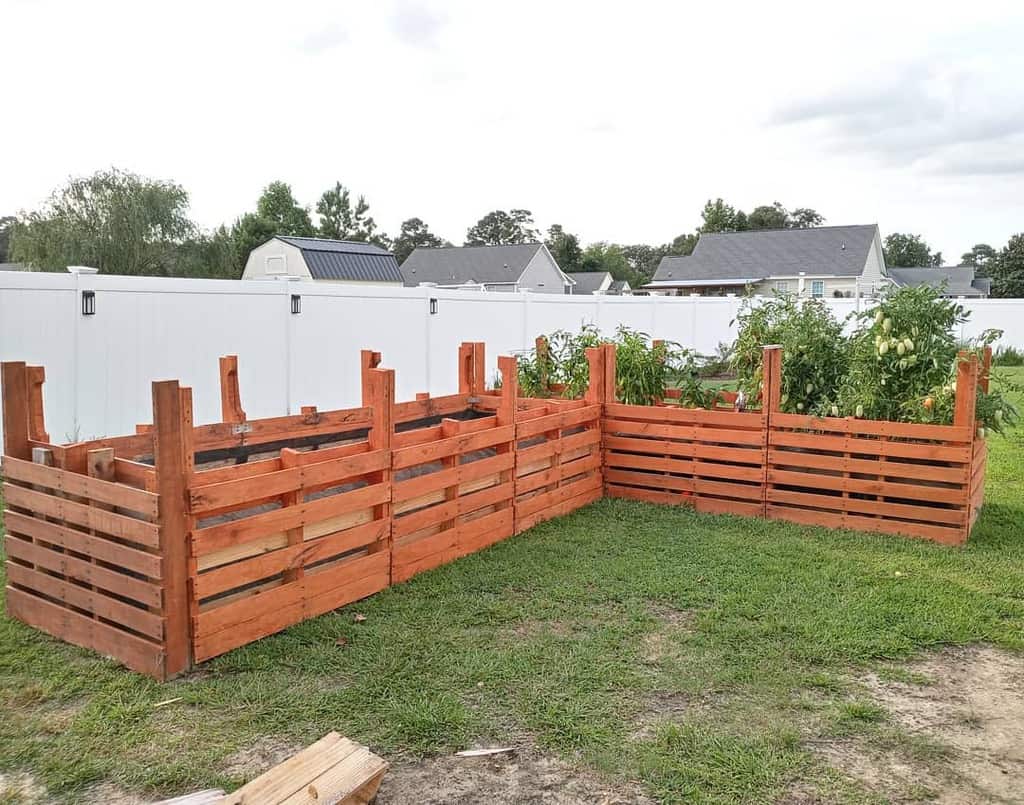
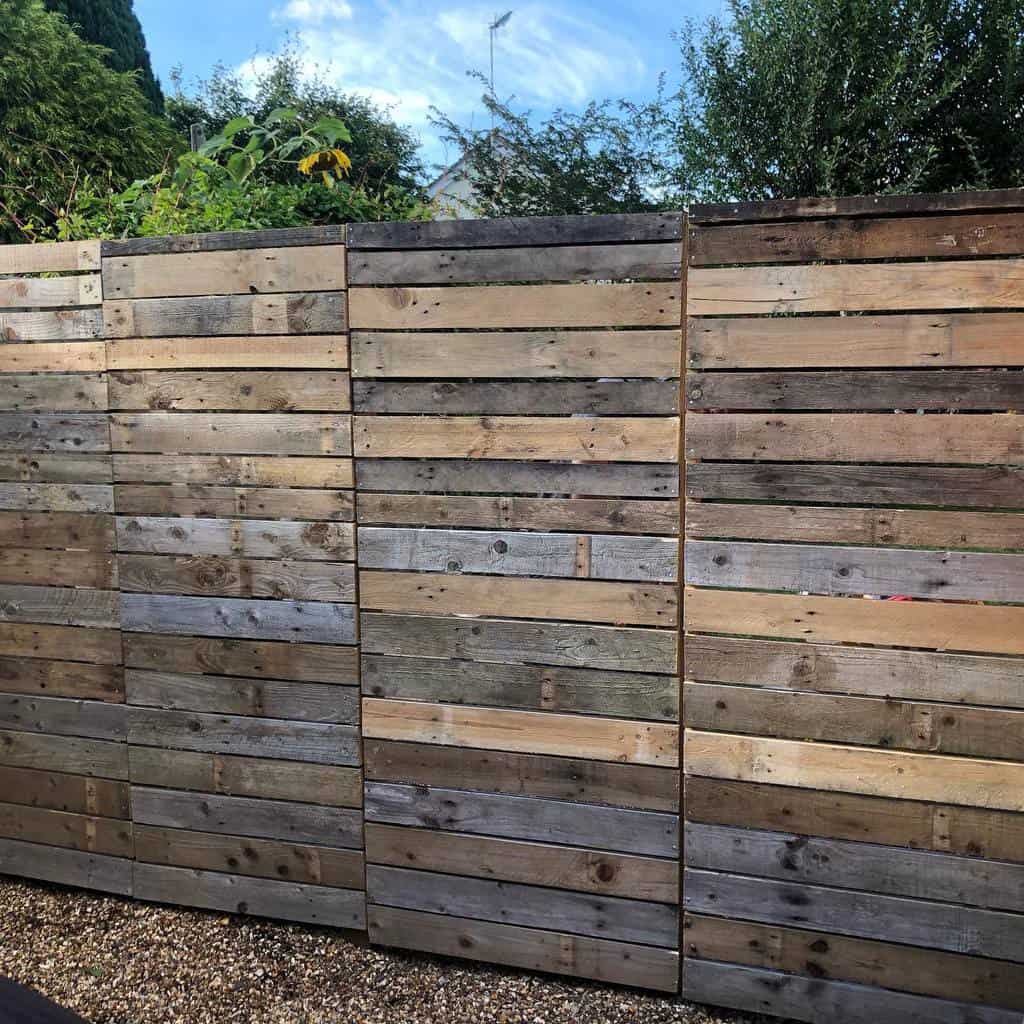
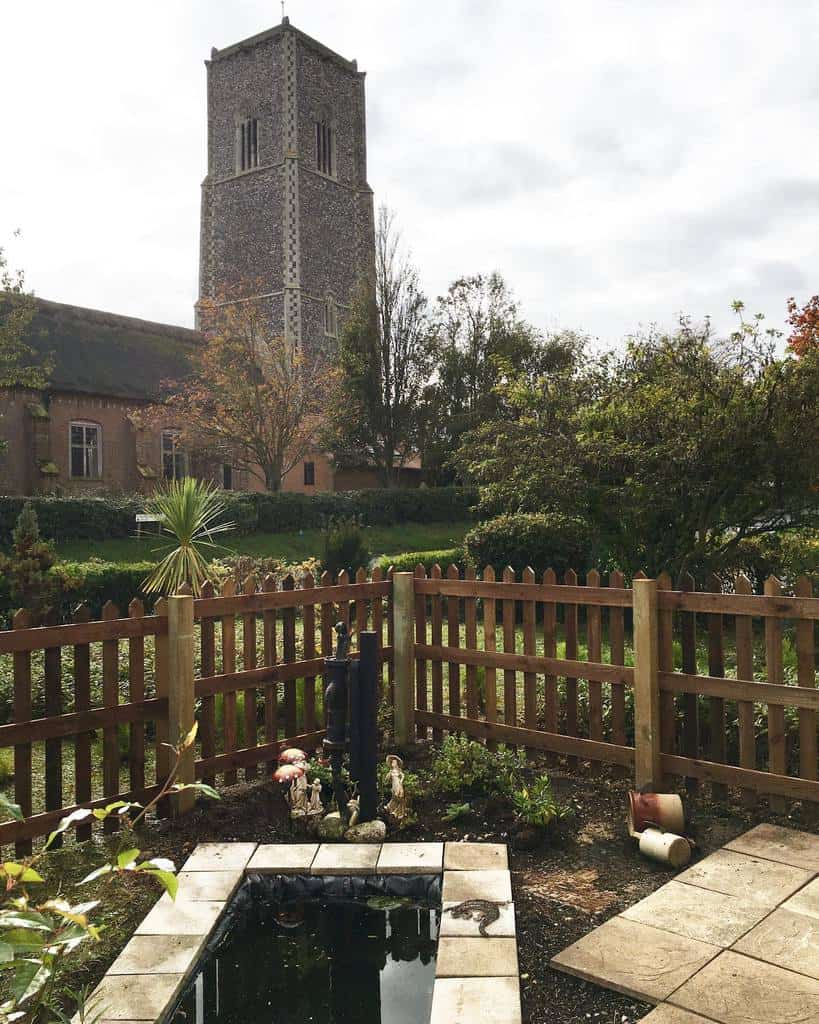
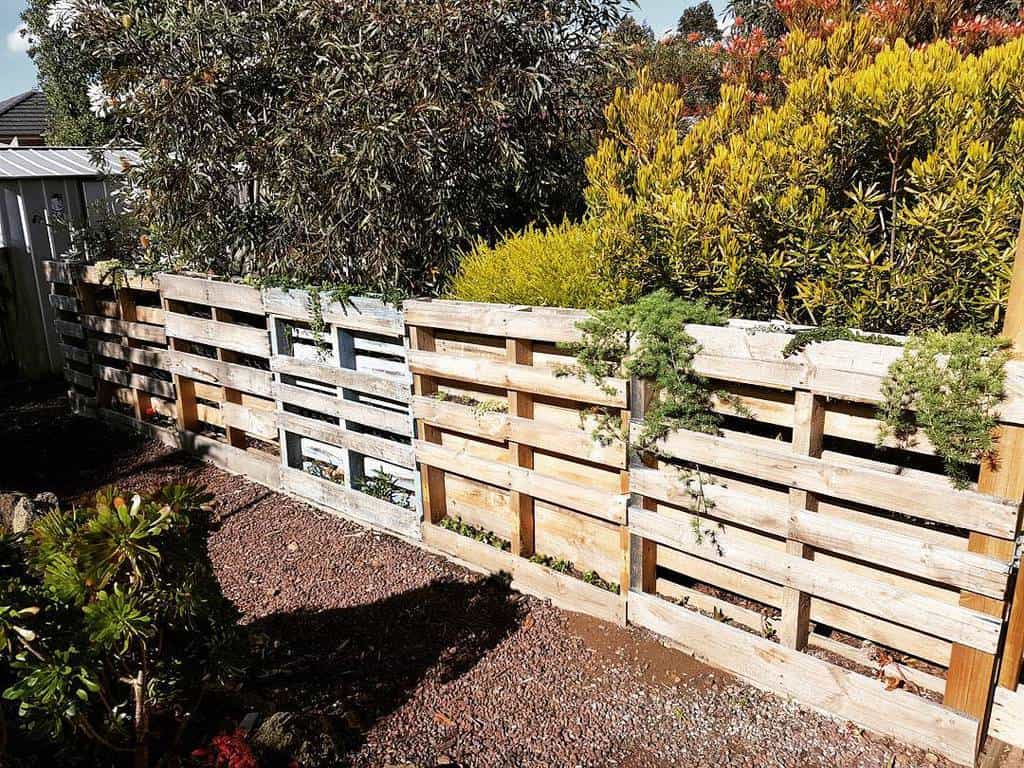
6. Encircle Your Garden with a Pallet Fence
A pallet fence around your garden can protect it while adding a rustic charm.
Arrange the pallets vertically for a traditional fence look, or horizontally for a more modern approach. Leave gaps between the slats for a semi-transparent effect, or close them for full privacy.
This fence keeps animals out and can be adorned with hanging planters for extra greenery.
Source: @jamie.owens1_ via InstagramSource: @thegardeningentomologist via Instagram
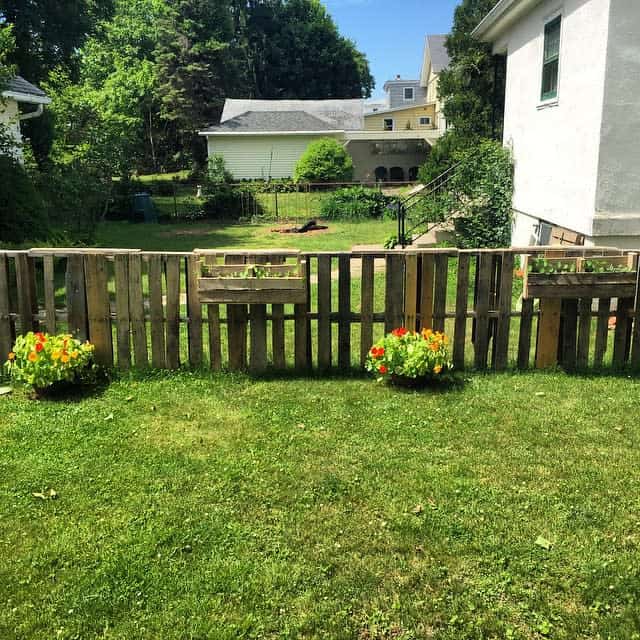
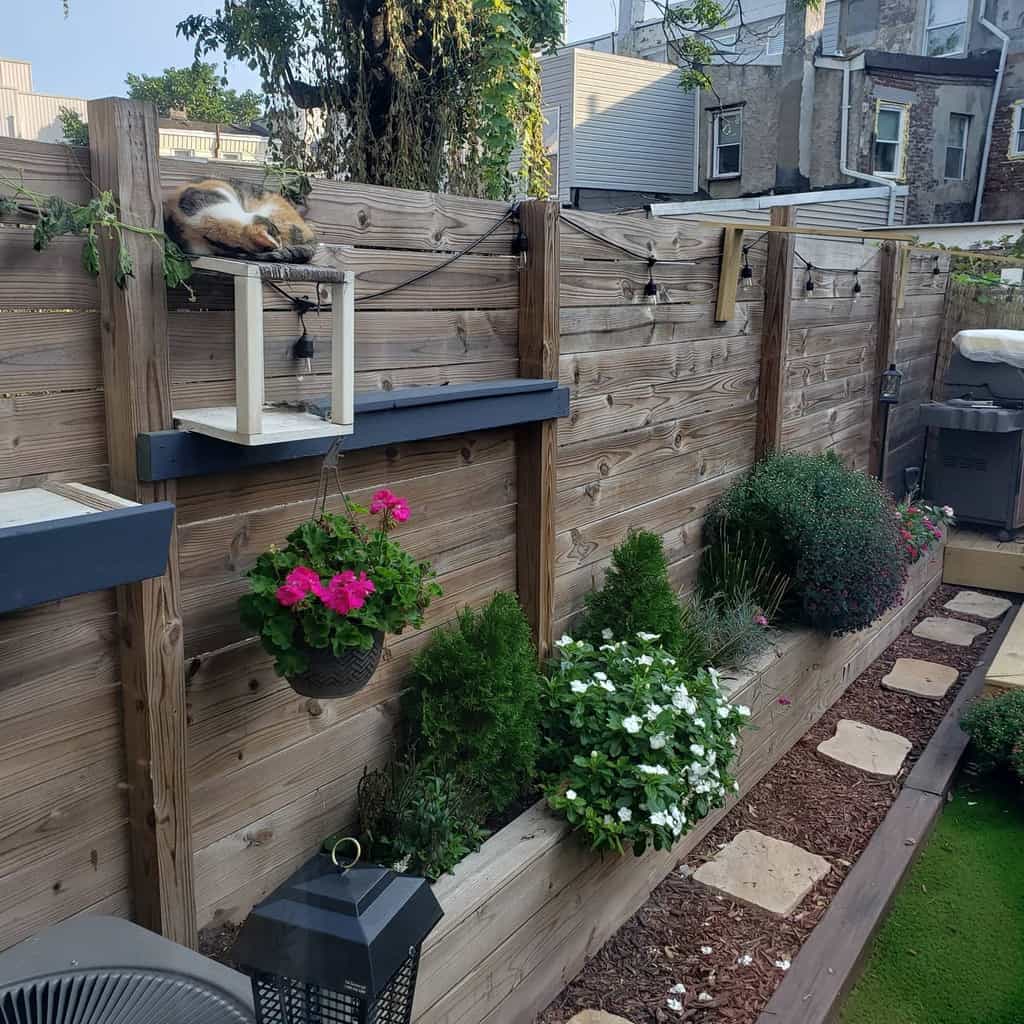
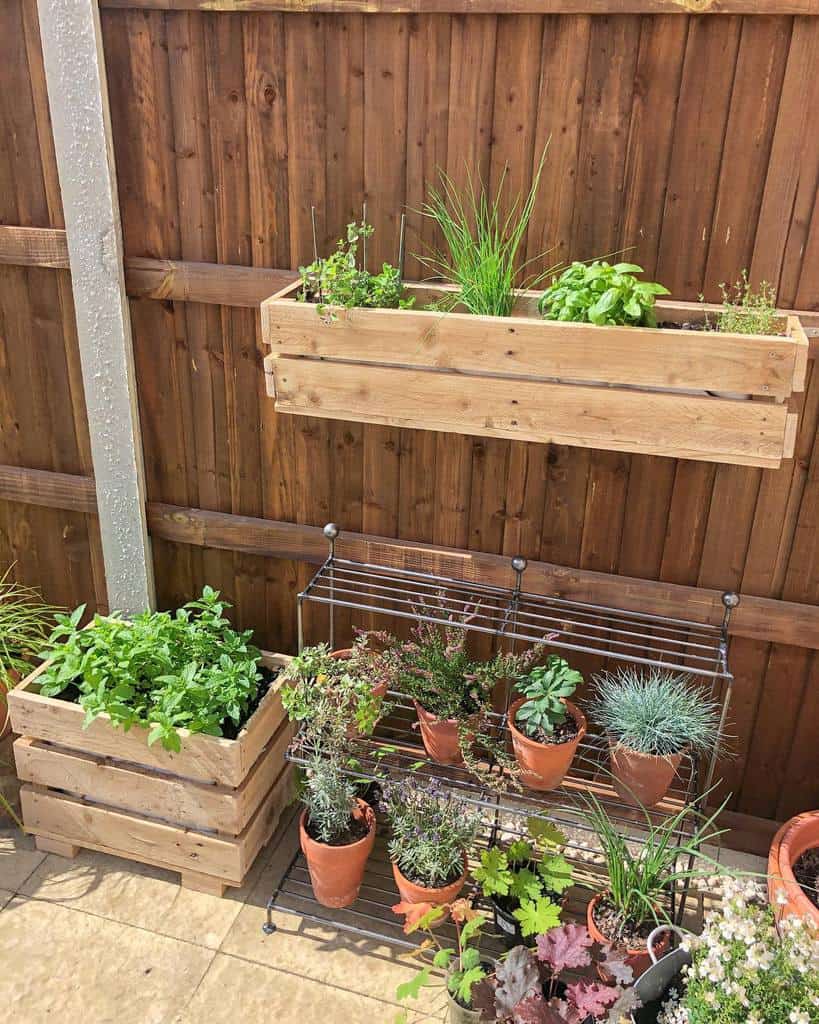
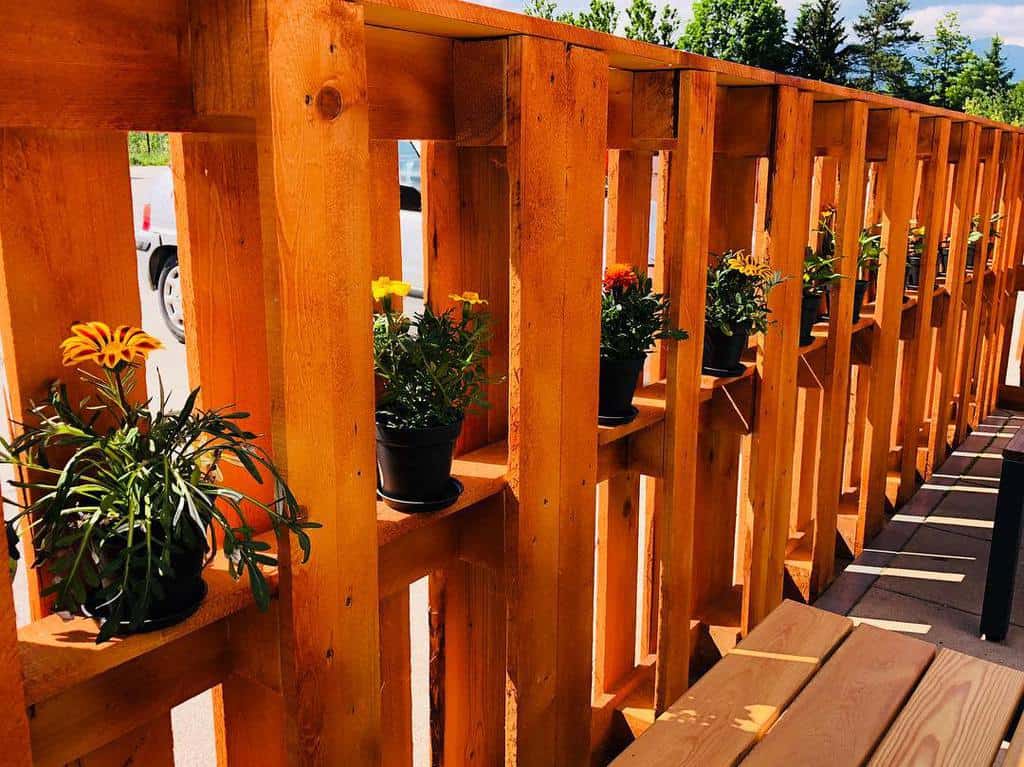
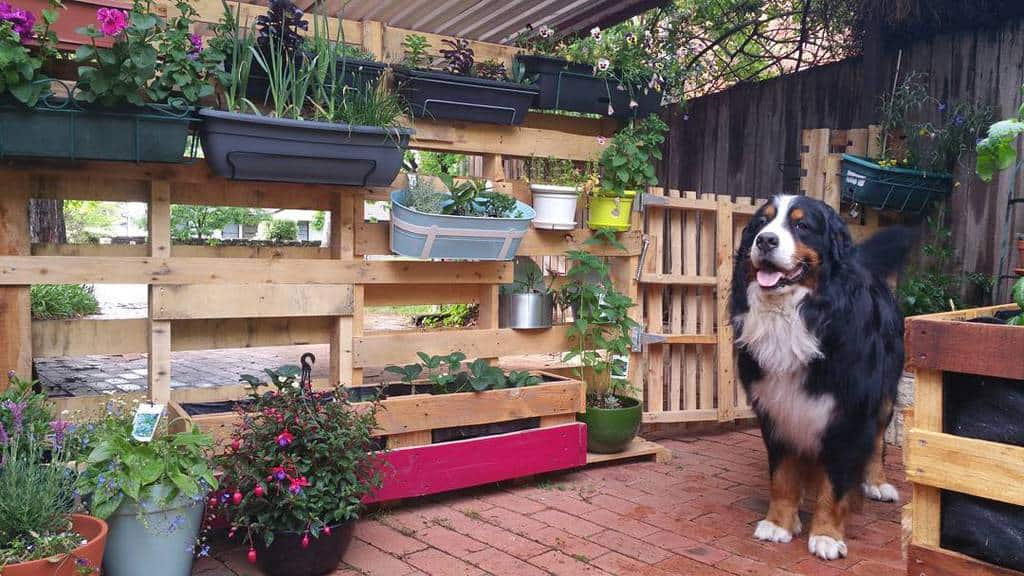
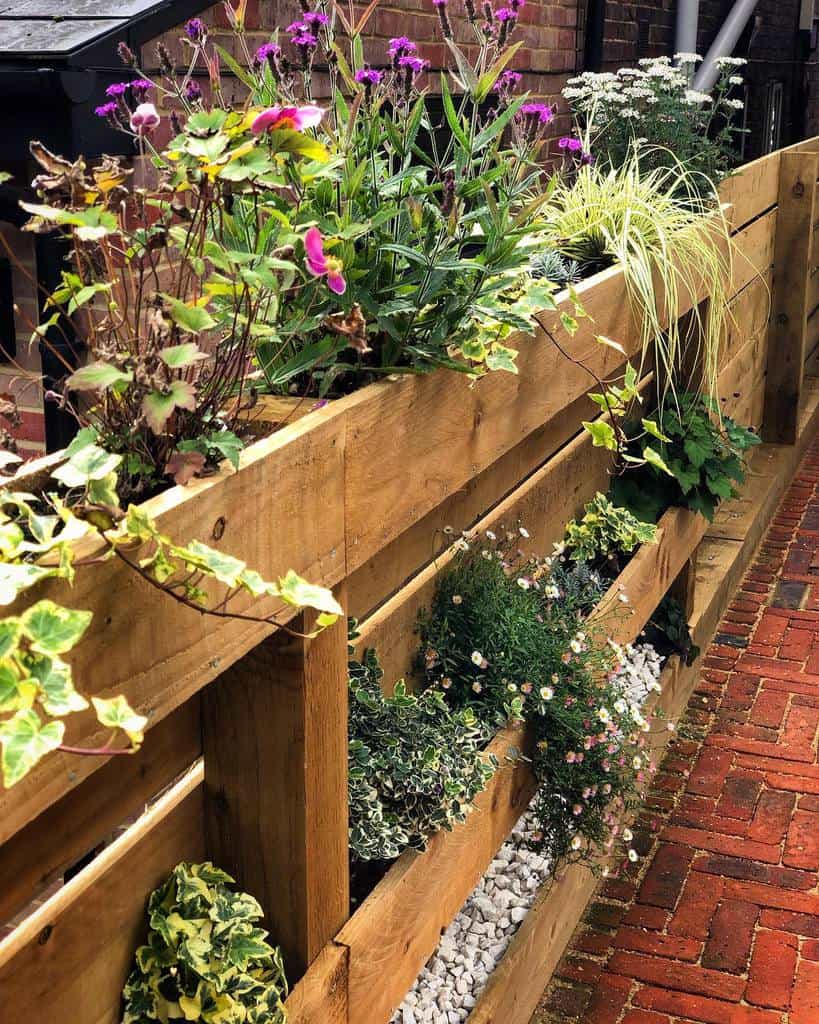
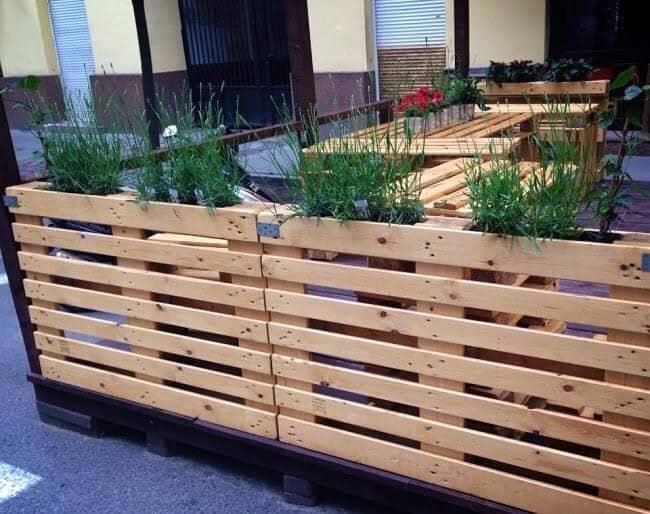
7. Enhance with Pallet Fence Planters
Create a multi-functional fence by attaching planters to your pallets.
Use the slats to hold boxed planters, or attach pots directly to the pallets. This approach allows for additional planting space and brings a burst of color to your fence line.
Choose a variety of plants to create a lively, ever-changing border.
Source: @new.house_.home_ via InstagramSource: @pivovarnamaligrad via InstagramSource: @crix_the_wonder_bear via InstagramSource: @doing_up_dewi via InstagramSource: @vitalonga via InstagramSource: @________palletcreation________ via Instagram
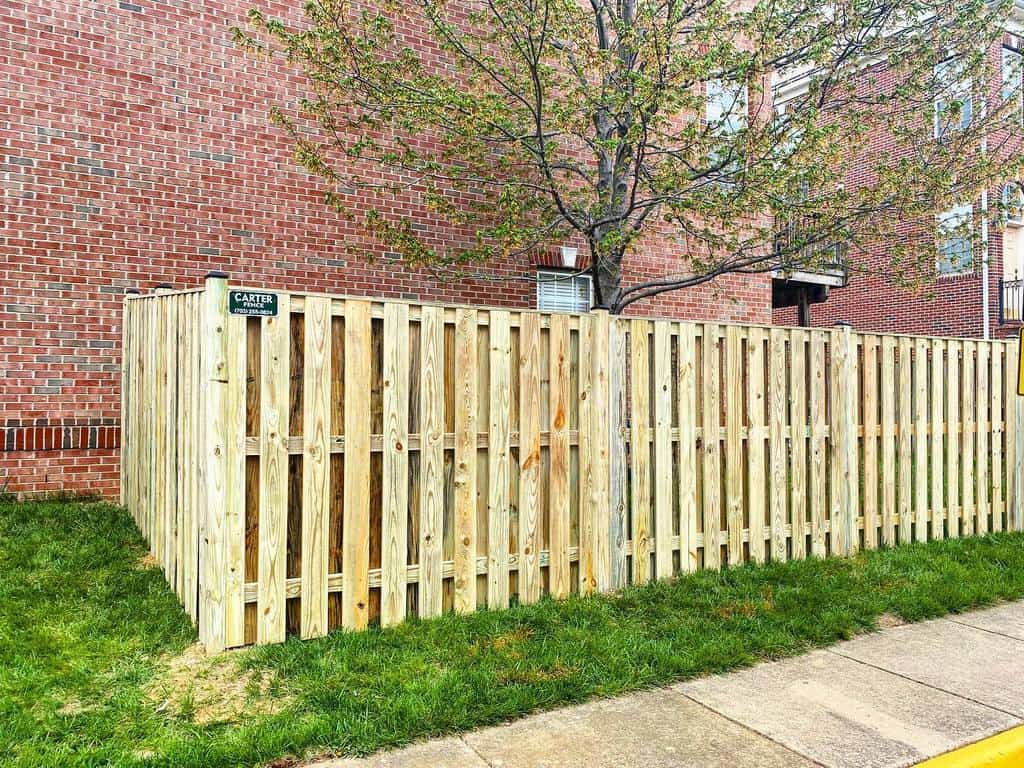
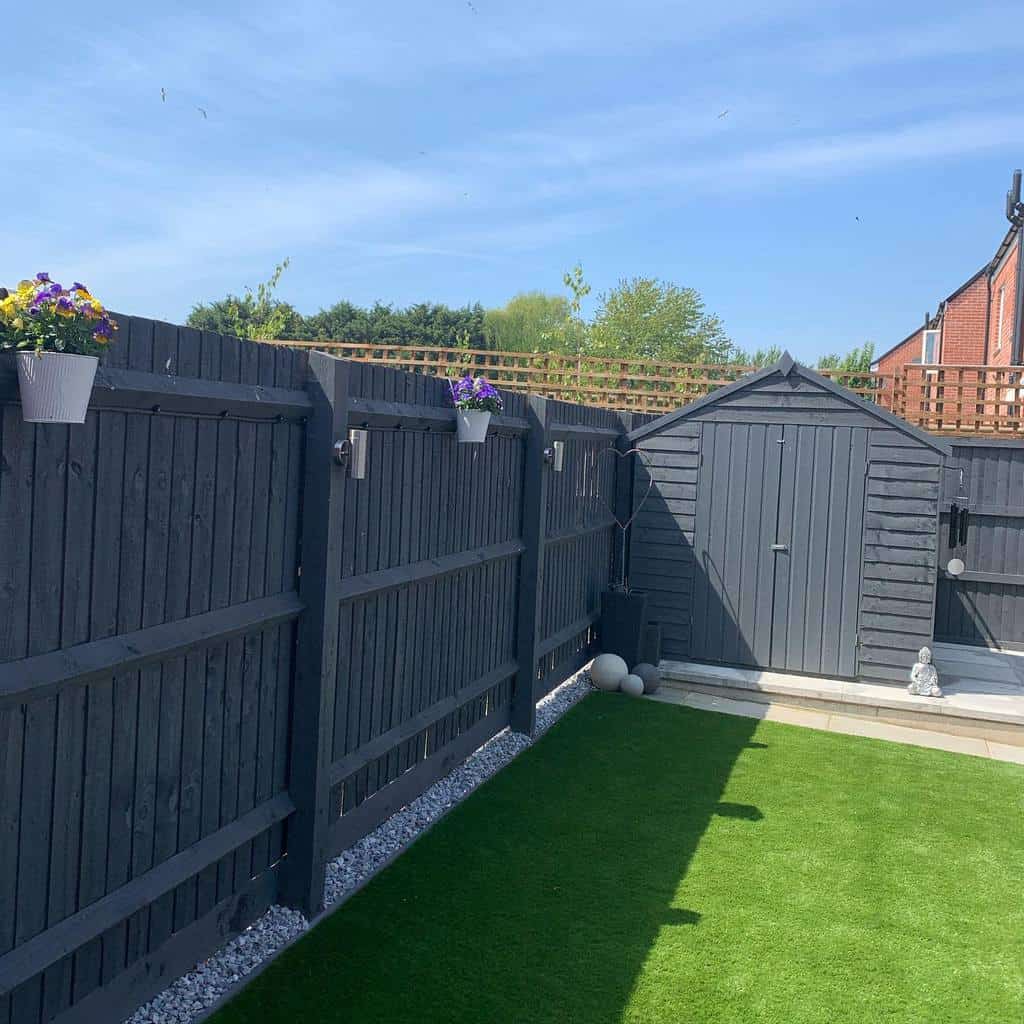
8. Erect a High Pallet Fence for Privacy
For heightened privacy and security, consider building a tall pallet fence. Stack pallets to reach the desired height, ensuring they’re well-supported and stable.
A taller fence provides more seclusion and can be softened with climbing plants or decorative elements.
Make sure to check local height regulations before constructing.
Source: @jessnosneb via InstagramSource: @carterfencecompany via InstagramSource: @custom_fence_and_pergola_llc via Instagram
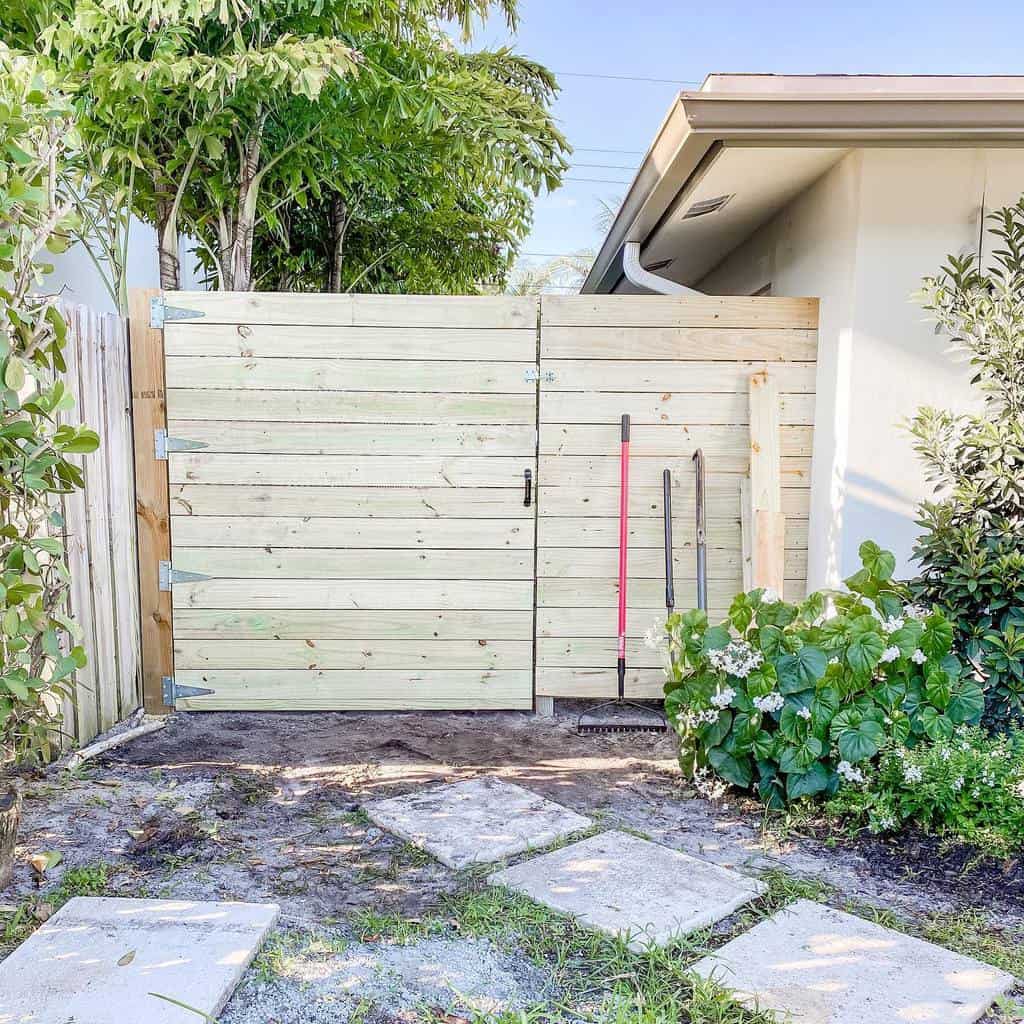
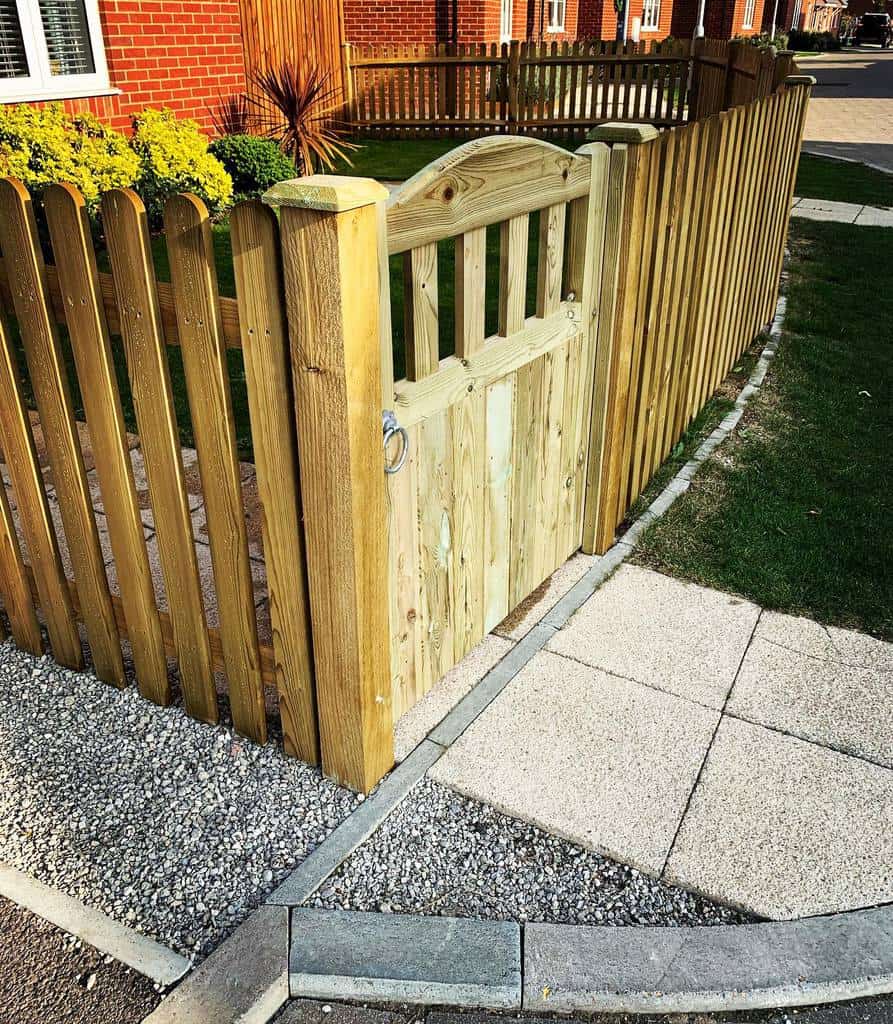
9. Install a Pallet Fence Gate
Integrate a gate into your pallet fence for easy access and functionality.
Use hinges to attach a pallet section that matches the rest of the fence. Add a latch or lock for security.
A well-designed gate can be both a practical entry point and an aesthetically pleasing addition to your fence.
Source: @dunnswood via InstagramSource: @modernday_farmhouse via Instagram
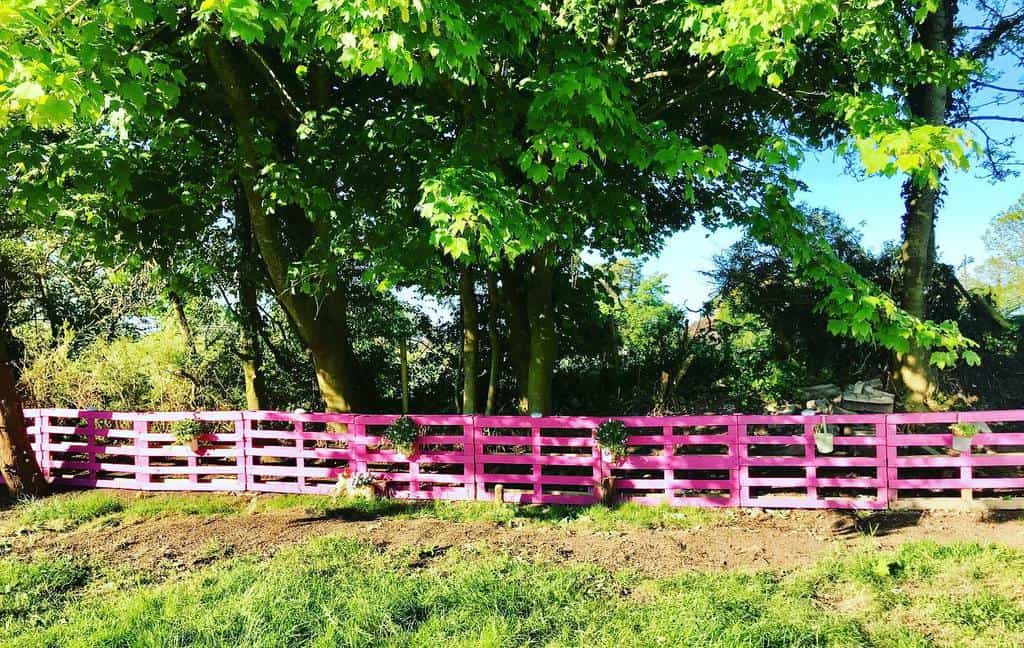
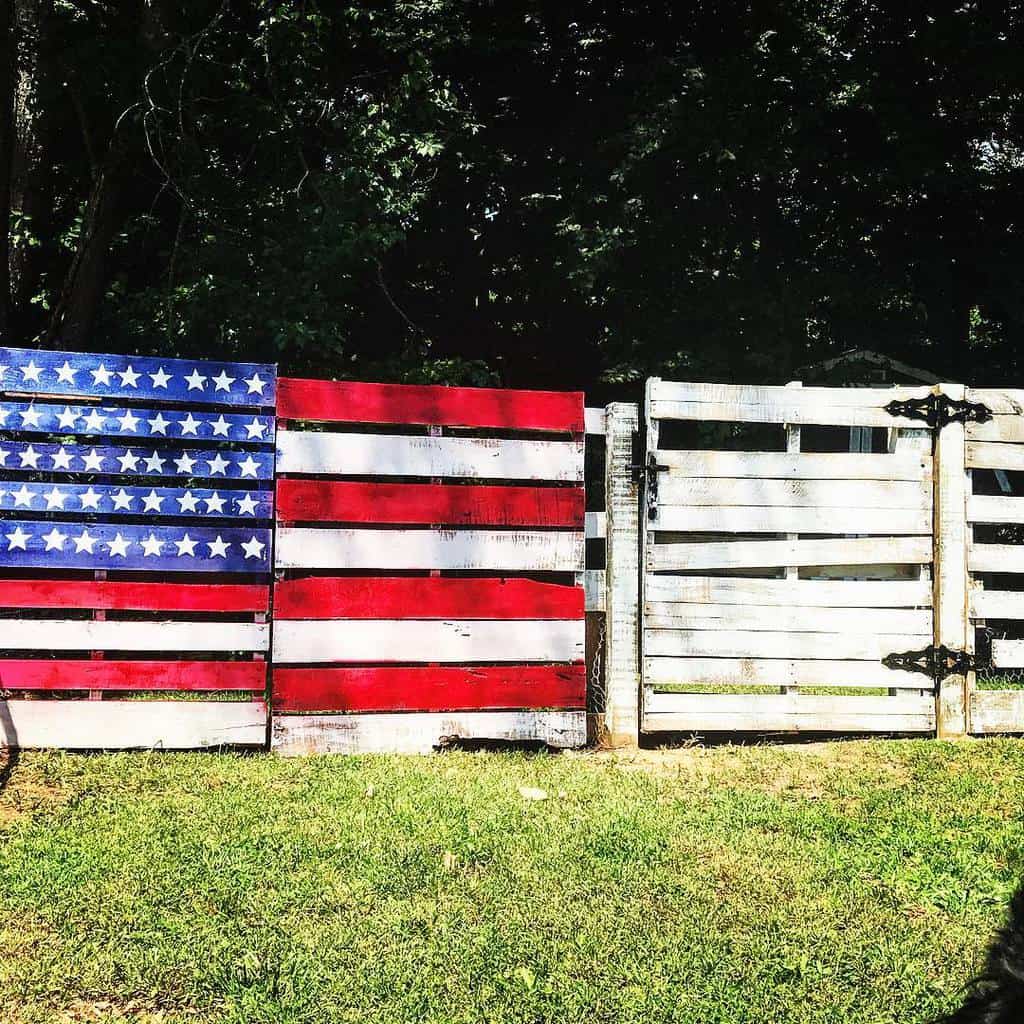
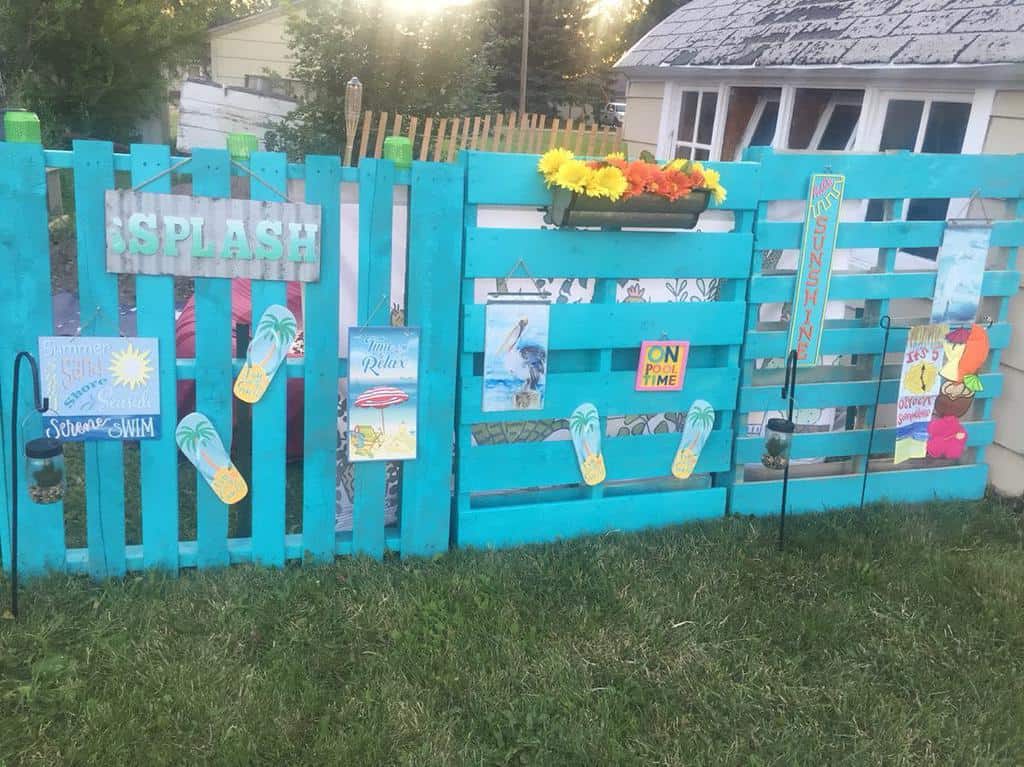
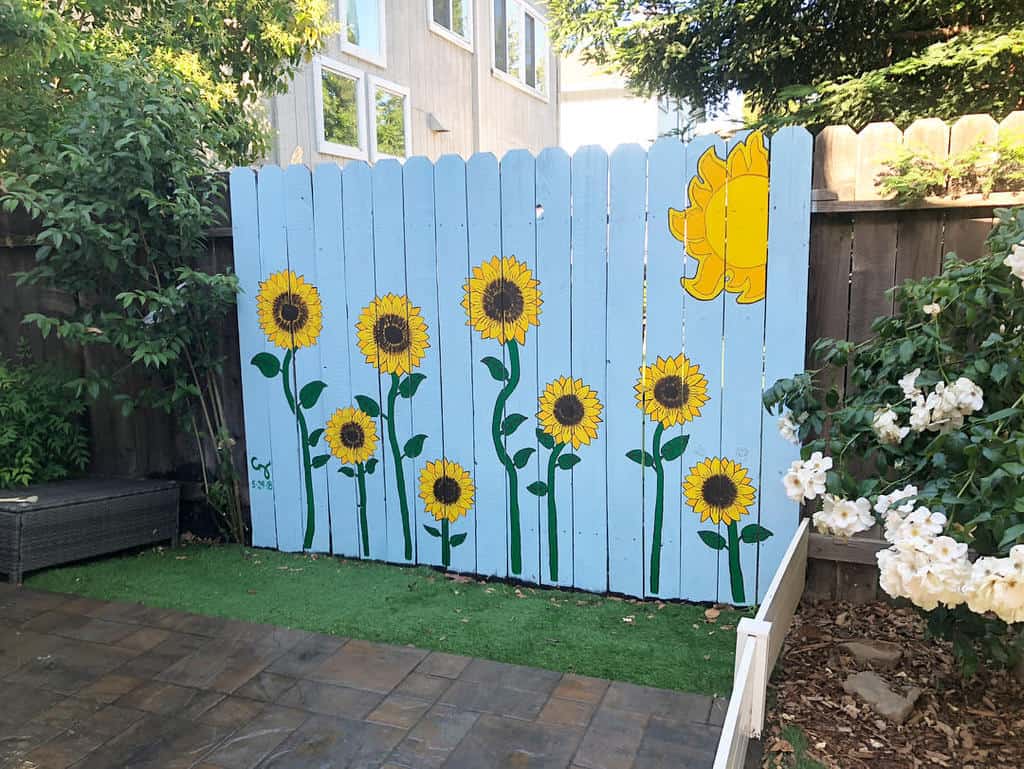
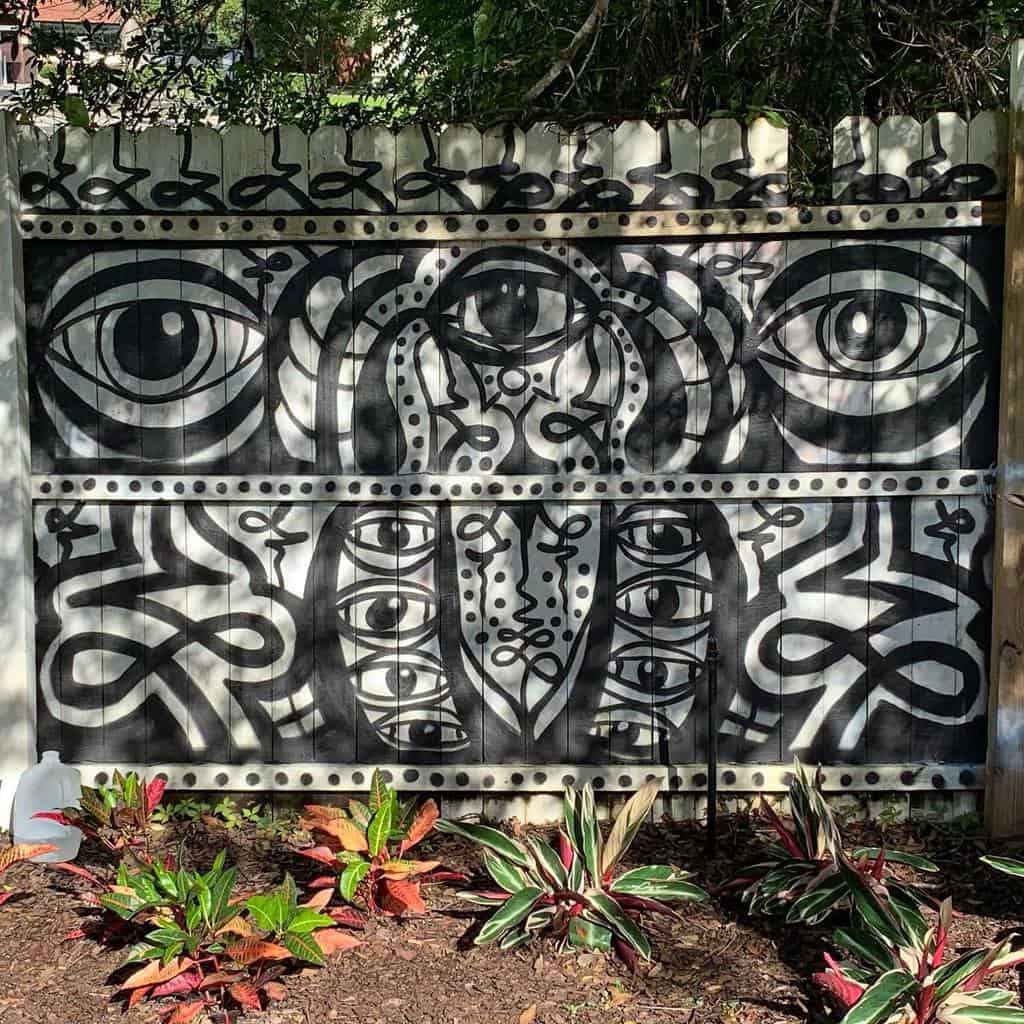
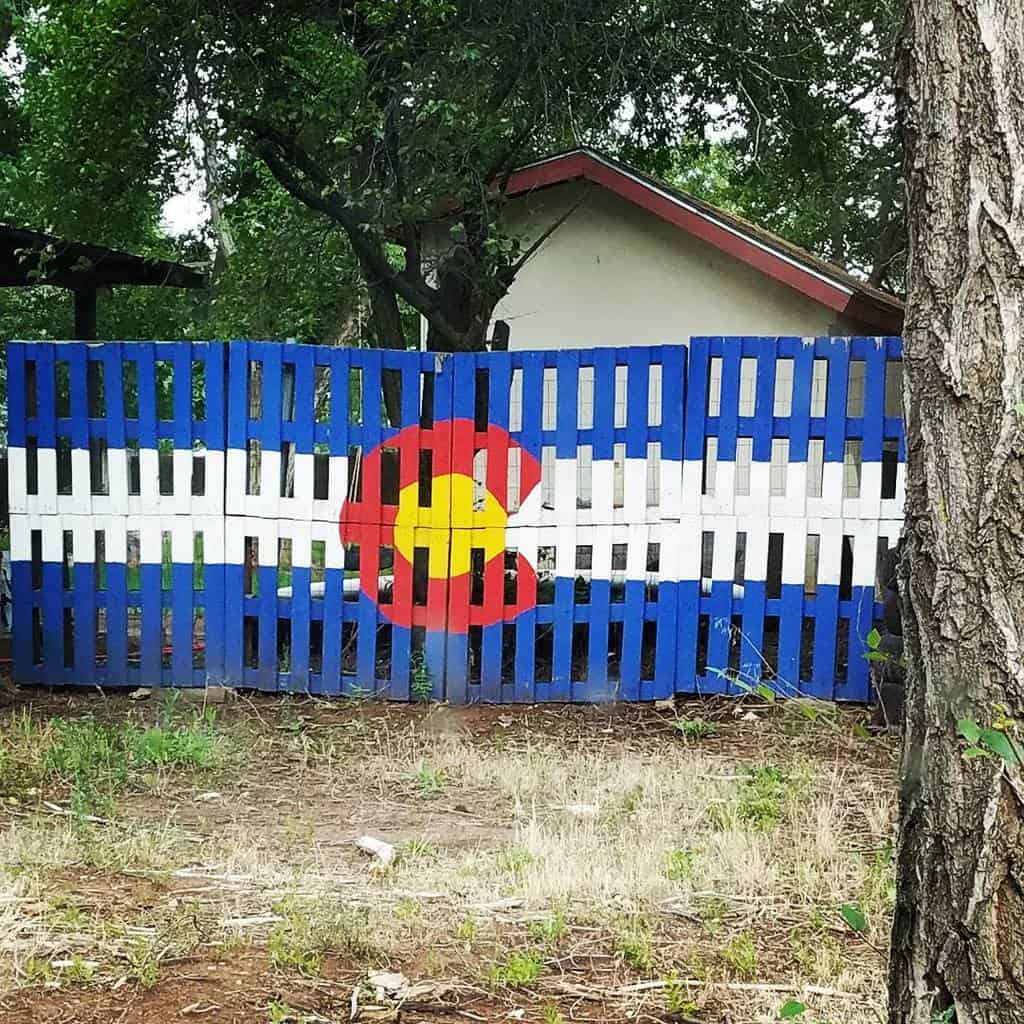
10. Customize with Colorful Painted Pallets
While you could leave your pallet fence as raw wood, this isn’t the best idea. Pallets are designed to be durable, but that doesn’t mean the wood is durable enough to be a fence. If you want to have a wooden fence, you should seal or treat the wood to preserve it.
Another option is to paint the fence. The right kind of outdoor paint will seal the wood and protect it. You don’t have to worry about bugs making their home in the wood or moisture causing the wood to rot. Both of these will deteriorate the integrity of your fence.
Source: @brigadoonsmart via InstagramSource: @ourvantasticfamily via InstagramSource: @alisonhornecker via InstagramSource: @ckburgod via InstagramSource: @cherrichiodo via InstagramSource: @insidenumber33 via InstagramSource: @pzlawfirm via InstagramSource: @scott.rice_ via InstagramSource: @thepeculiarpear via Instagram
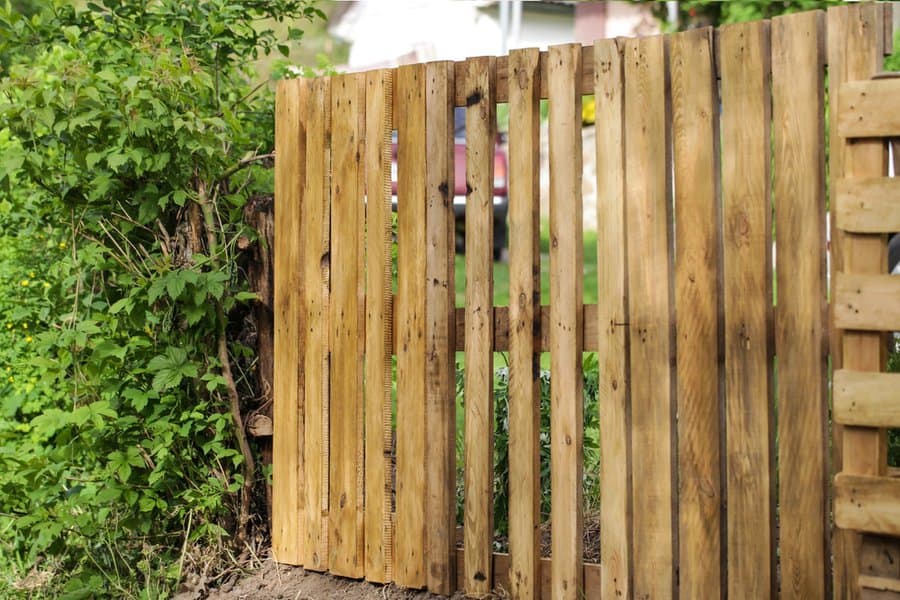
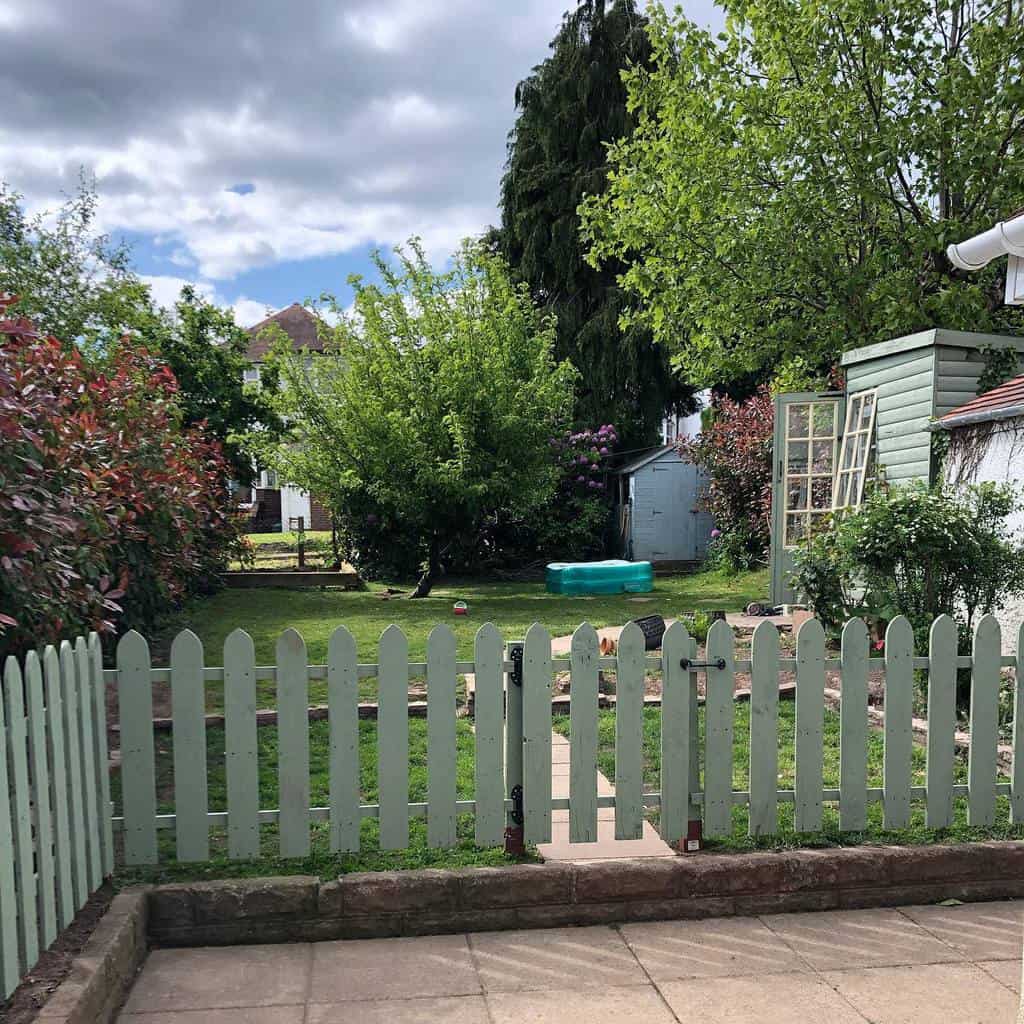
11. Create a Pallet Wood Picket Fence
You can build a decorative picket fence with your pallet wood. Create a decorative look with your fence design by cutting the top of the planks.
You could create a scallop shape on the top or give each plank a point. This DIY pallet fence idea is perfect for giving your yard a decorative border.
You can also build a simple fence gate for your walkways. This gives the fence a finished look and makes it easy to walk in and out of your yard.
Add a gate at your walkway at the front of your home. Then add another gate somewhere else in the fence. You should always have two entry points for safety purposes.
Source: @adrian.nichols.5 via InstagramSource: @hawkescreativebuilds via InstagramSource: @jessicasweetpea via InstagramSource: @training_allama via Instagram
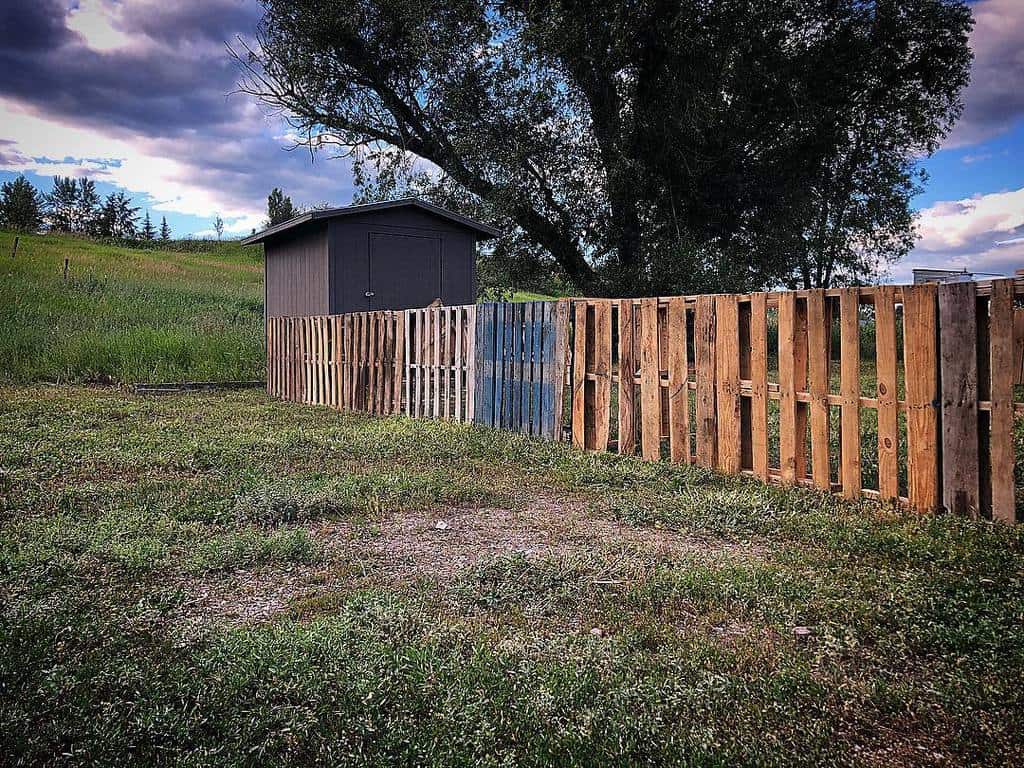
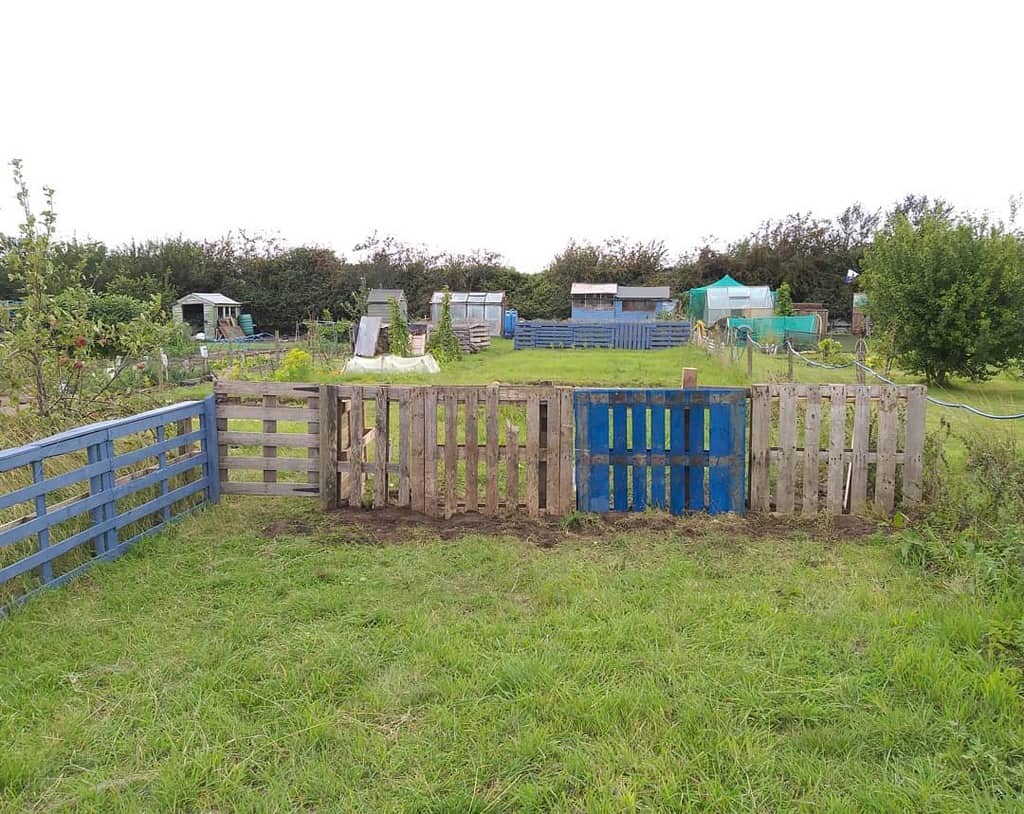
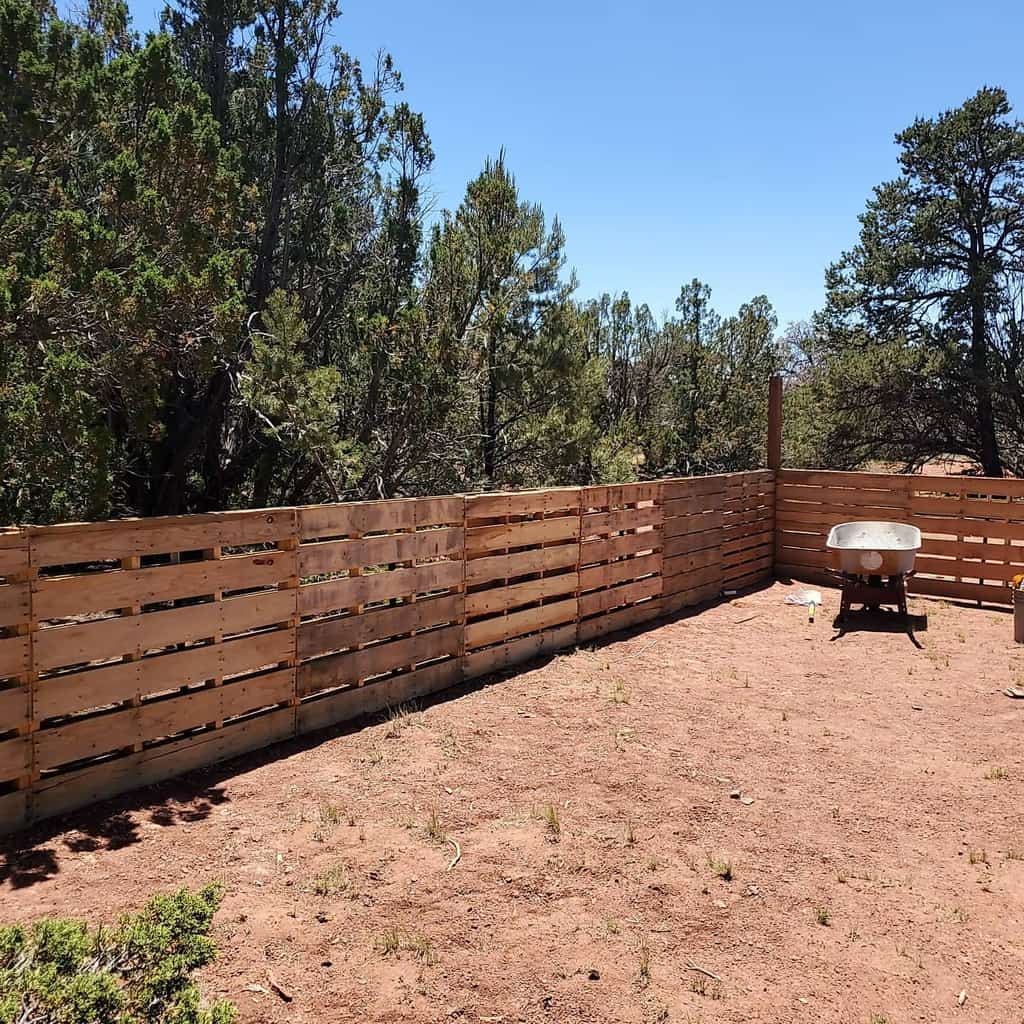
12. Secure Backyard Borders Against Shrubs
Use pallets to create a sturdy border around your backyard, safeguarding against encroaching shrubs and trees.
Place the pallets deep enough in the ground to ensure stability and align them to follow the natural contours of your yard.
This fence serves as a clear boundary and can be decorated to blend with the natural landscape.
Source: @awwburke via InstagramSource: @grandcanyongetaway via Instagram
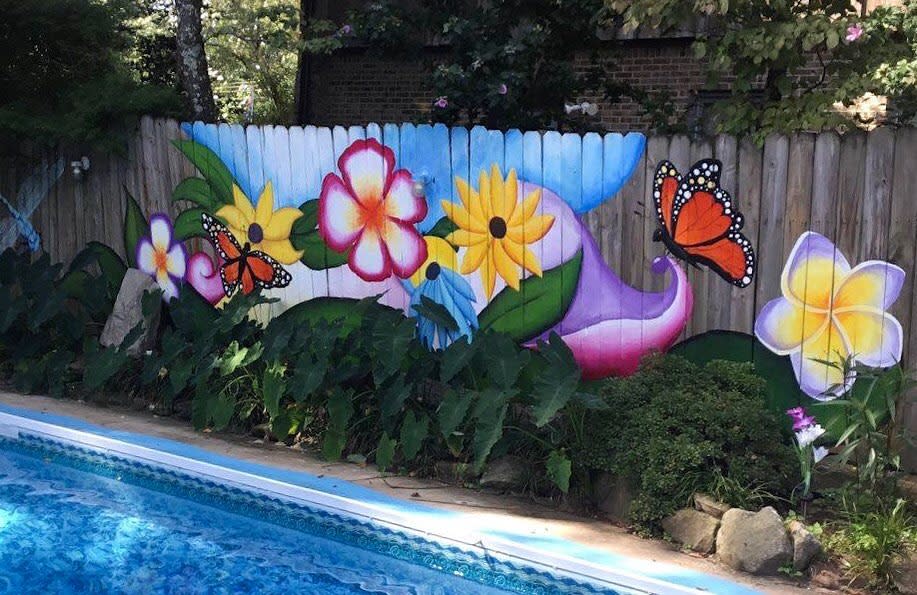
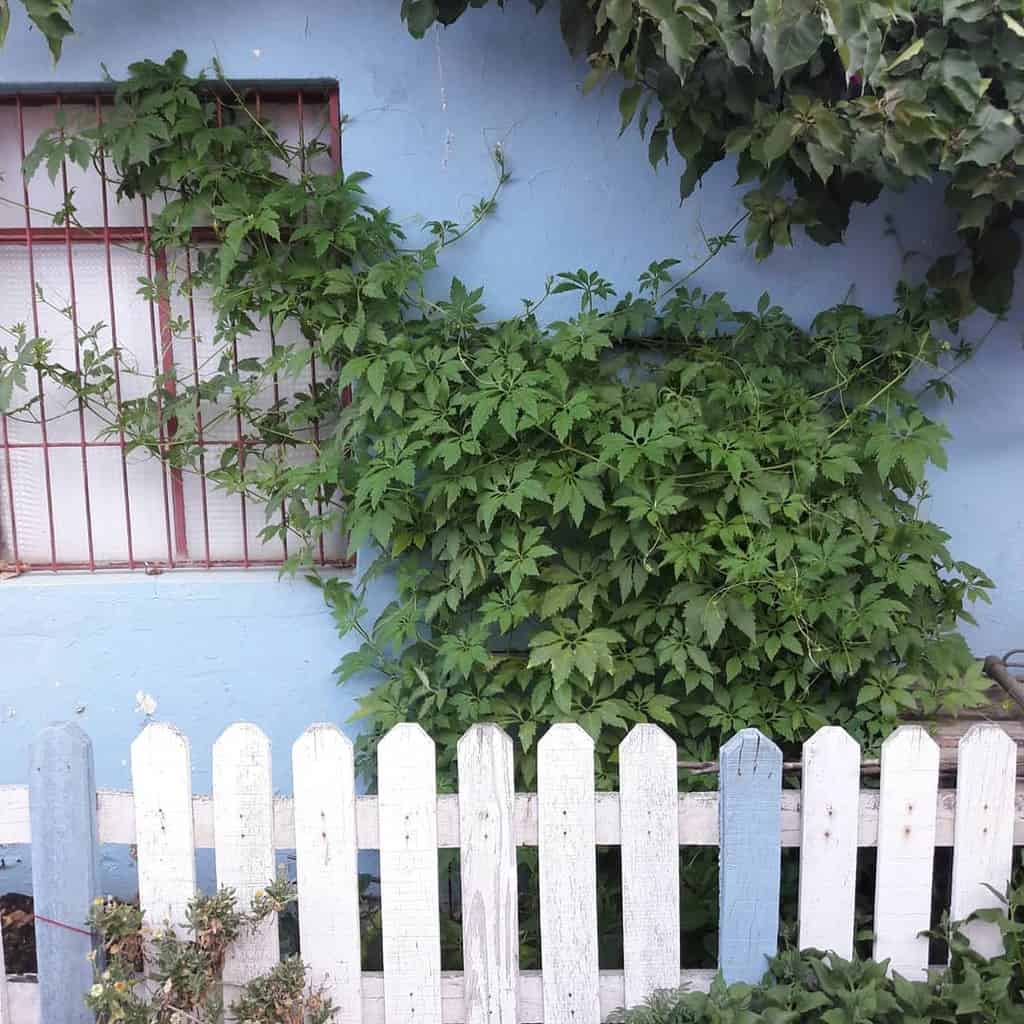
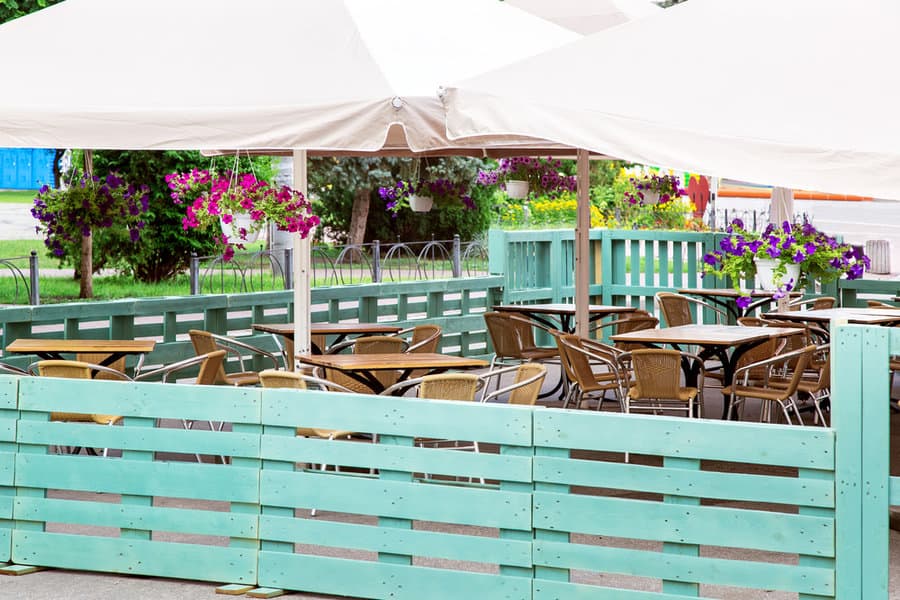
13. Style a Café with a Blue Pallet Fence
Give a unique touch to an outdoor café by painting a pallet fence in a vibrant blue.
This adds a pop of color and creates a distinct, inviting boundary for the café. Ensure the paint is outdoor-friendly and complements the café’s overall theme.
A brightly colored fence can serve as a visual landmark and enhance the café’s ambiance.
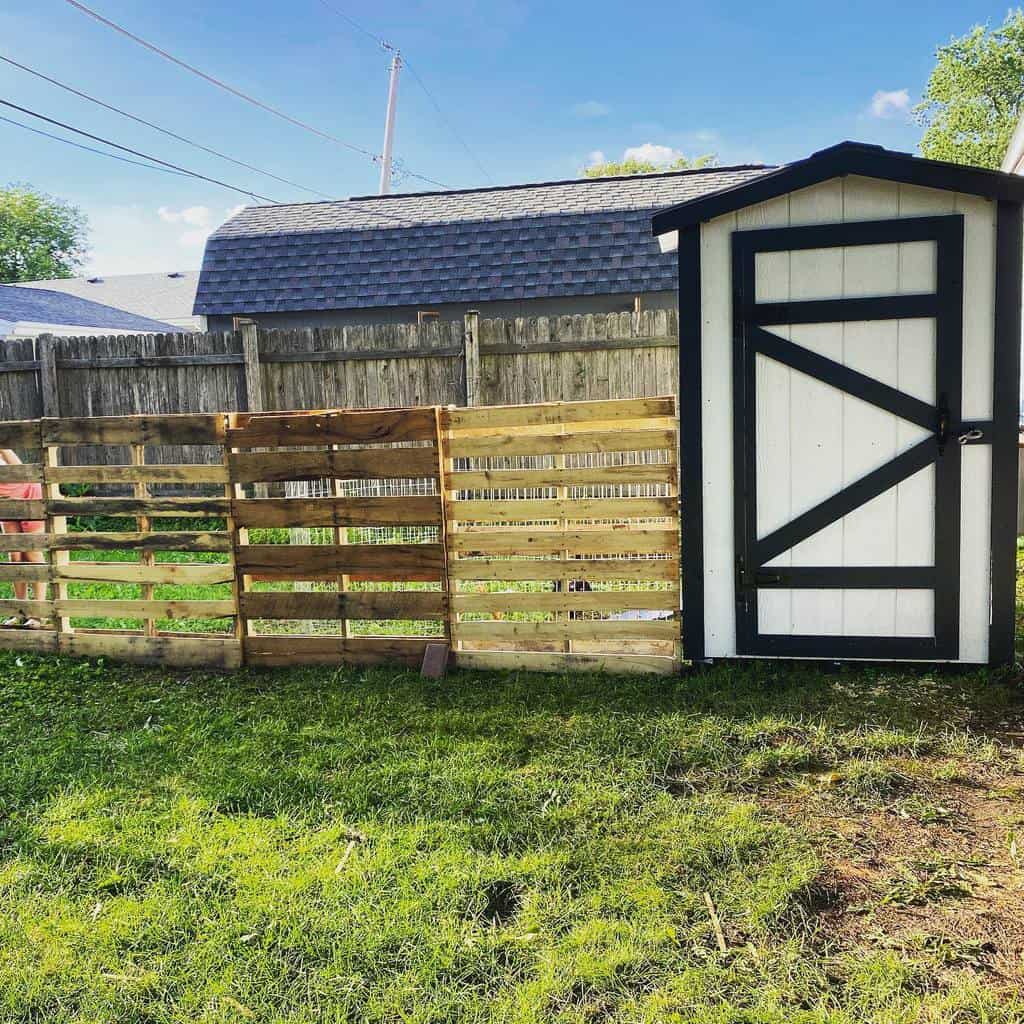
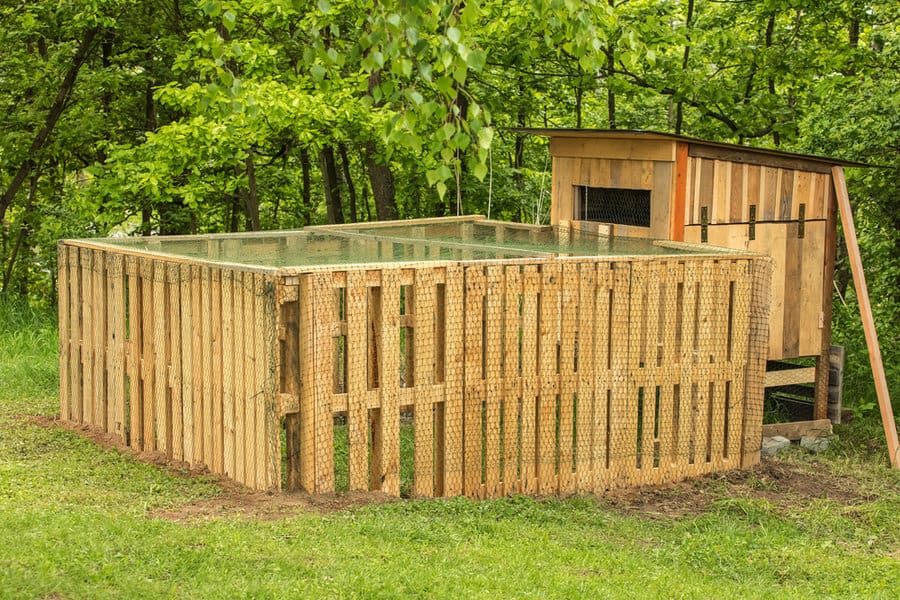
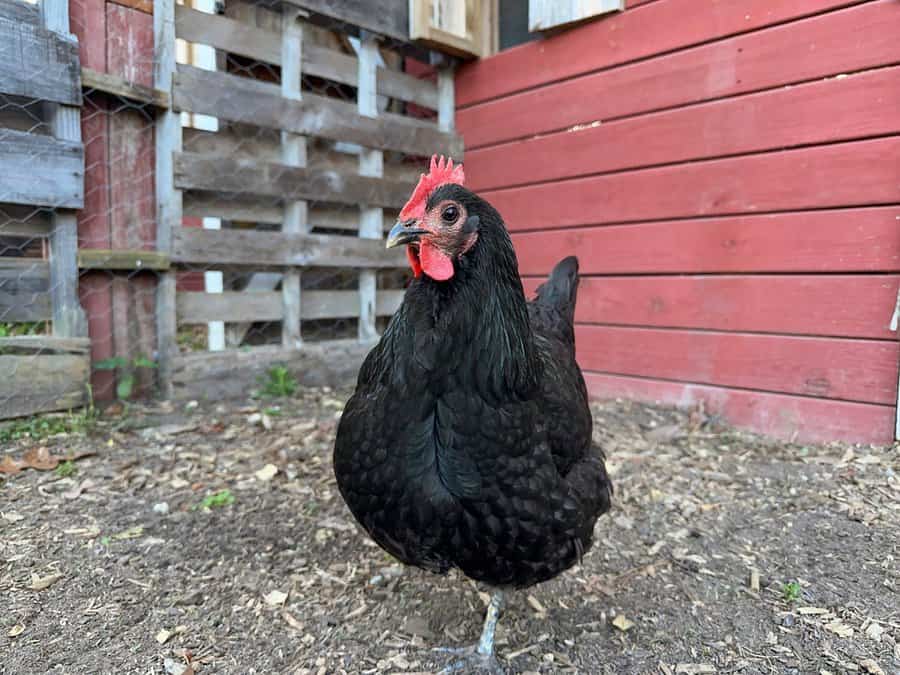
14. Protect a Chicken Coop with a Pallet Fence
Construct a sturdy and functional fence around your chicken coop using pallets. The natural wood look fits well in a farm setting, and the pallets provide sufficient protection from predators.
Space the pallets close enough to prevent chickens from escaping and predators from entering. This cost-effective solution keeps your poultry safe while maintaining a rustic aesthetic.
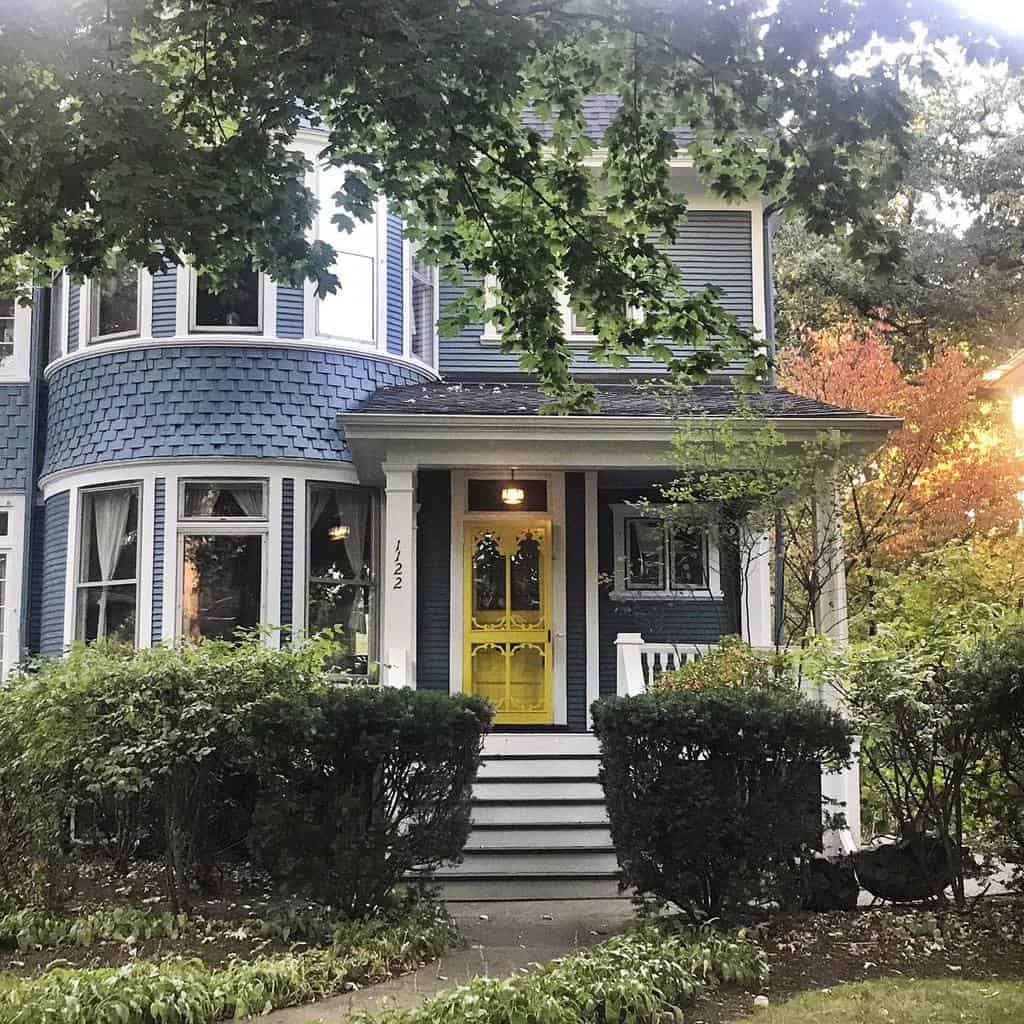
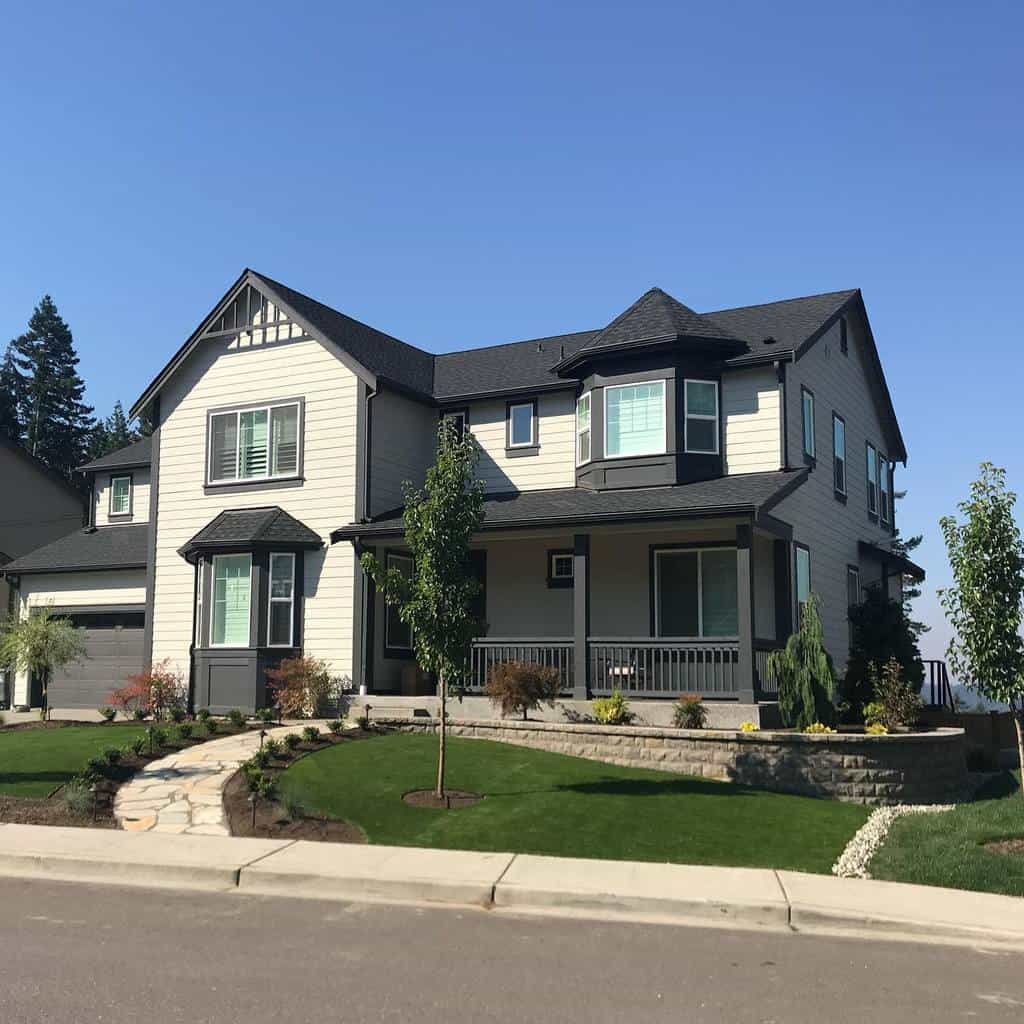
If you own an older house, especially one built in the Victorian era, there’s a good chance you have at least one bay window in your home. There’s also a good chance that you have no idea how to decorate it.
Bay windows might not be as popular as they once were. But that doesn’t make them any less stylish. You just need to know how to get the most out of this design element’s unique function and aesthetic.
These bay window ideas will help you decide on the perfect furniture, decor, and window treatments to pair with your home’s classic architecture.
[view_toc]
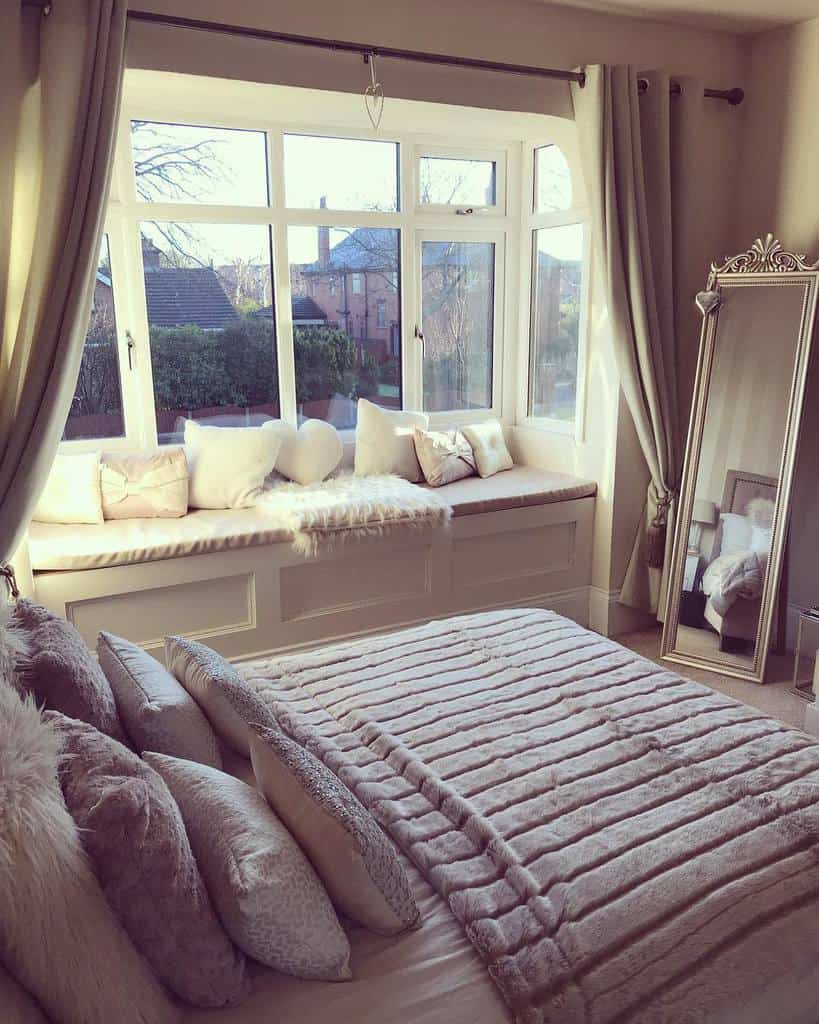
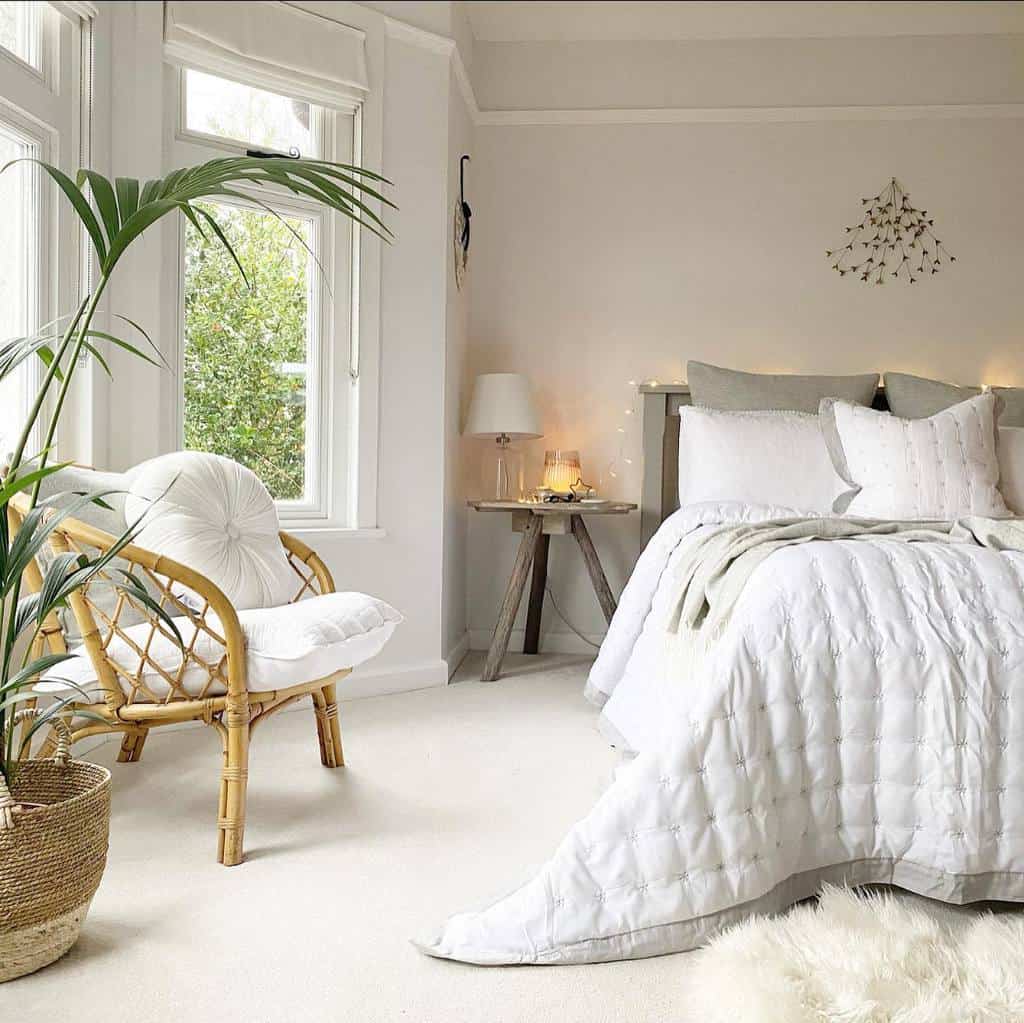
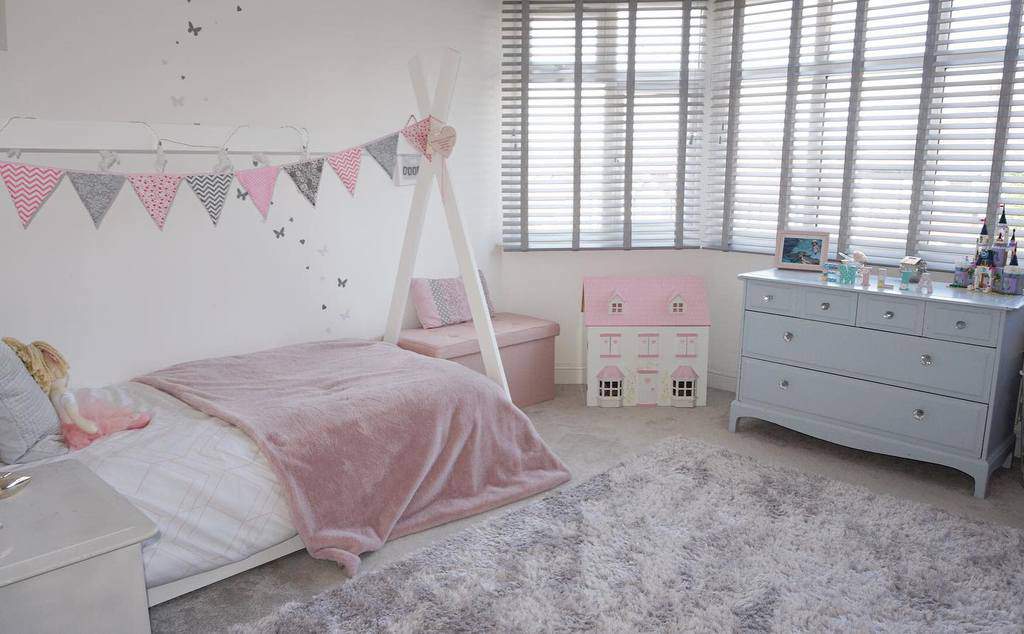
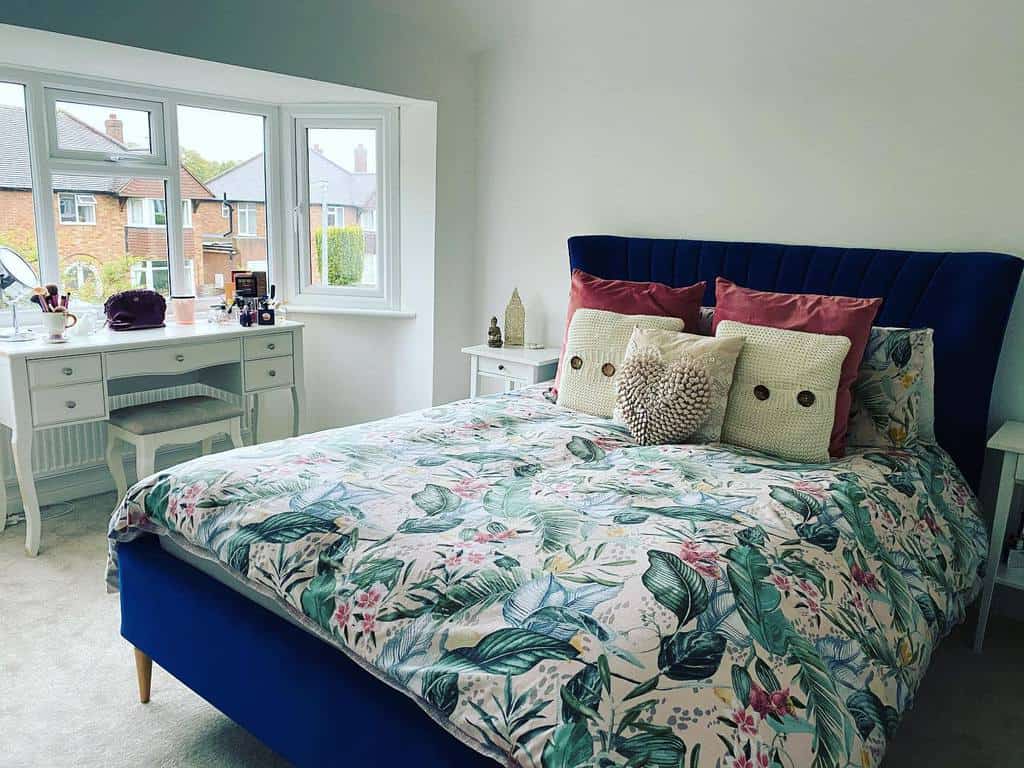
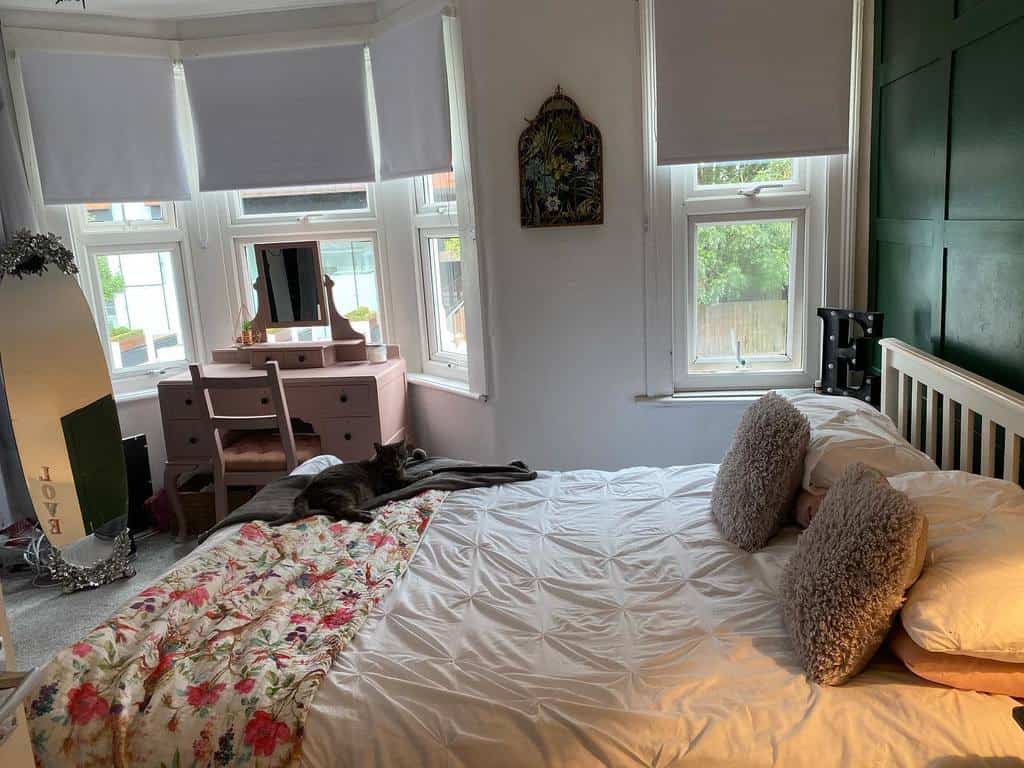
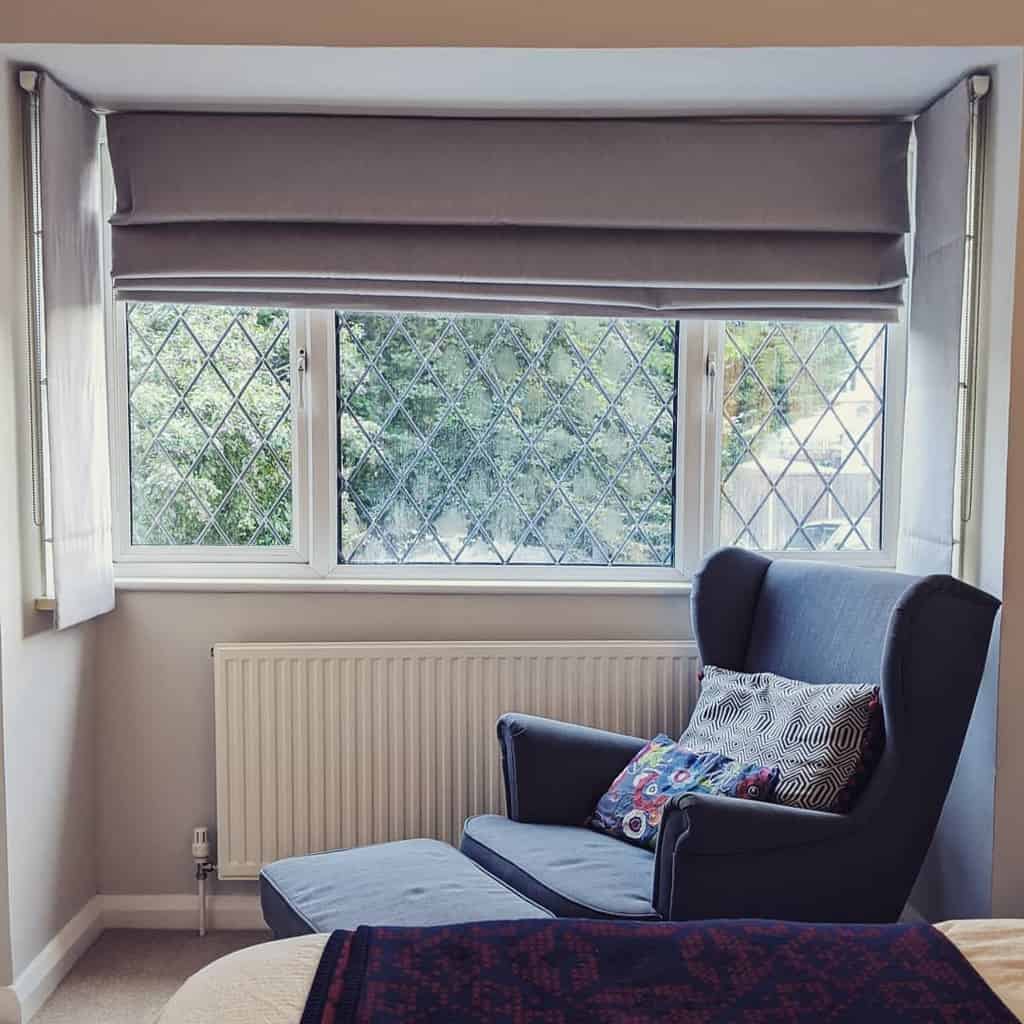
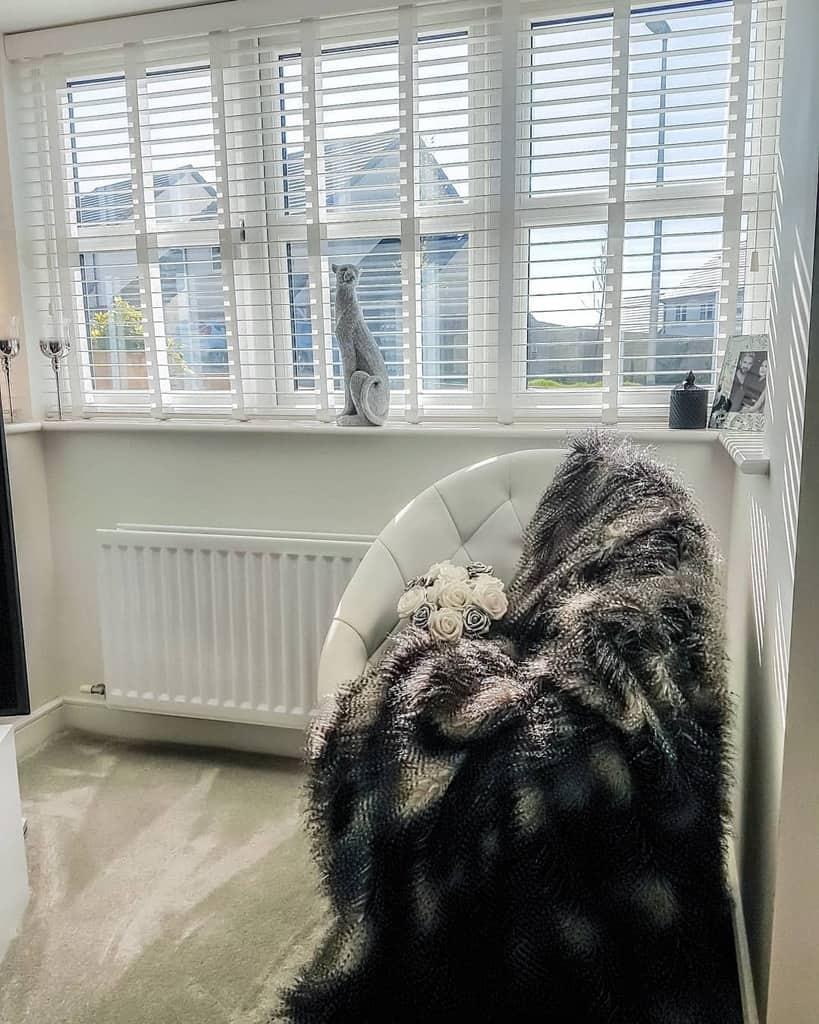
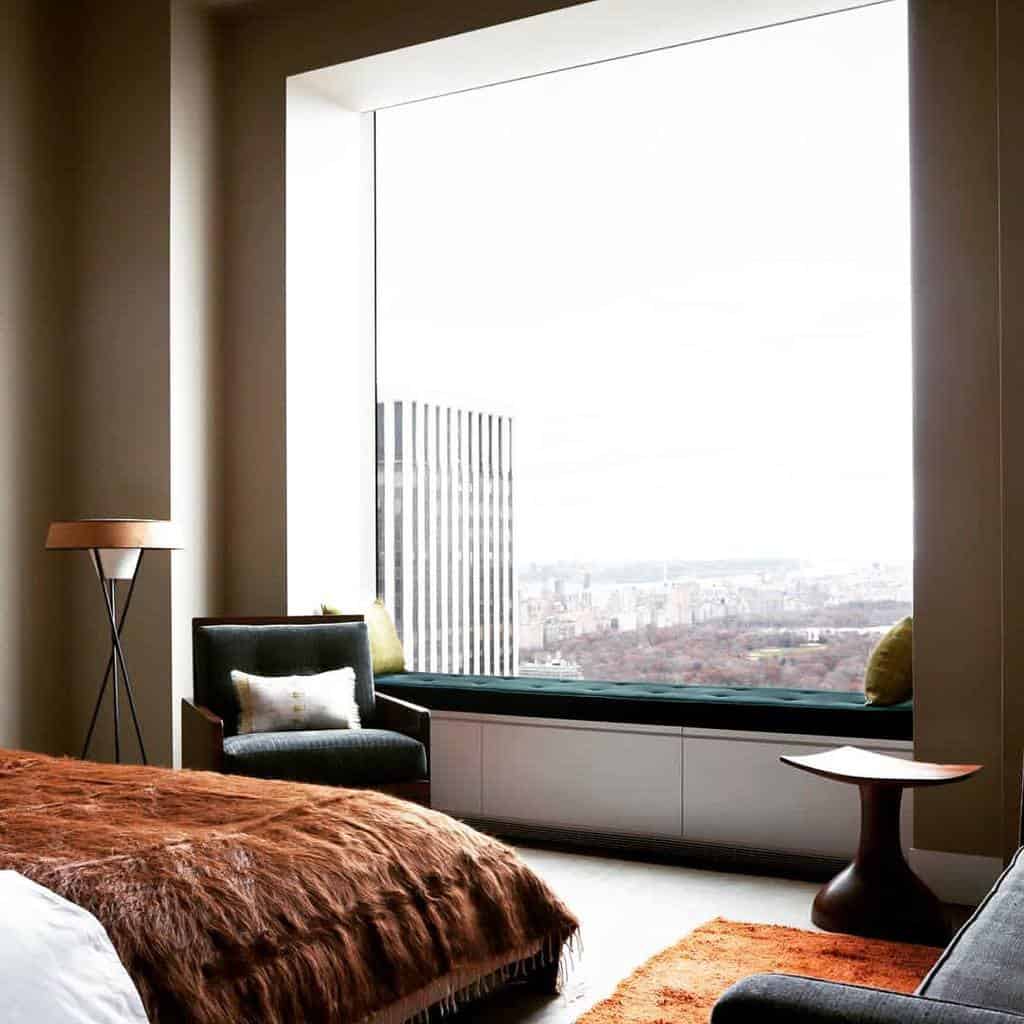
1. Transform Your Bedroom with a Bay Window
The master bedroom (or any bedroom, really) is a prime candidate for a bay window. Bay windows let in plenty of natural light, which can make your bedroom feel larger and brighter.
Source: @angiehappyhome via InstagramSource: @becshomestyle via InstagramSource: @budgethomedesign via InstagramSource: @lulus.home_ via InstagramSource: @mid_terrace_victorian via InstagramSource: @my_country_townhouse via Instagram
The space in front of your bay window is ideal for a reading nook, vanity, or dressing area. Take advantage of the extra floor space to store furniture or decor that would otherwise crowd the room.
While it’s great that these windows let in tons of sunlight, this isn’t always desirable in a bedroom. More windows also mean more concerns about privacy. Be sure to include a reliable set of curtains or blinds in your bay window design.
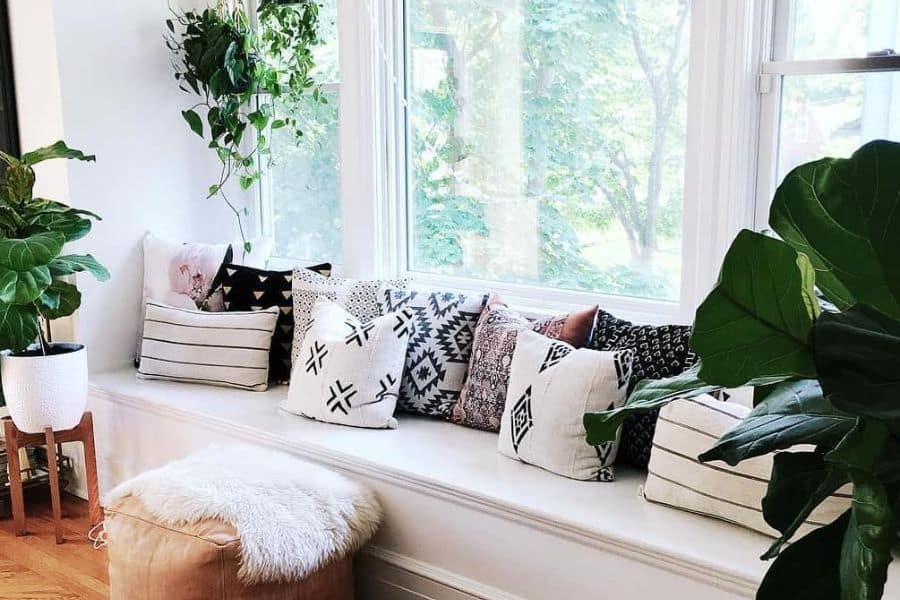
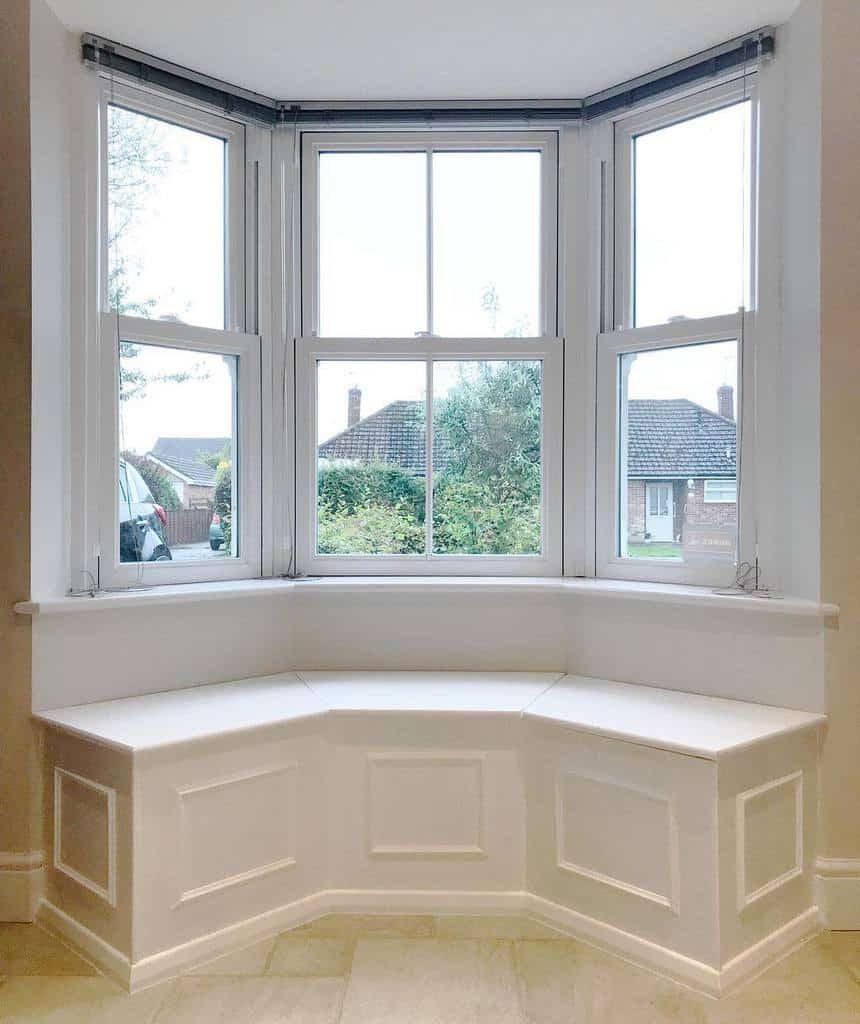
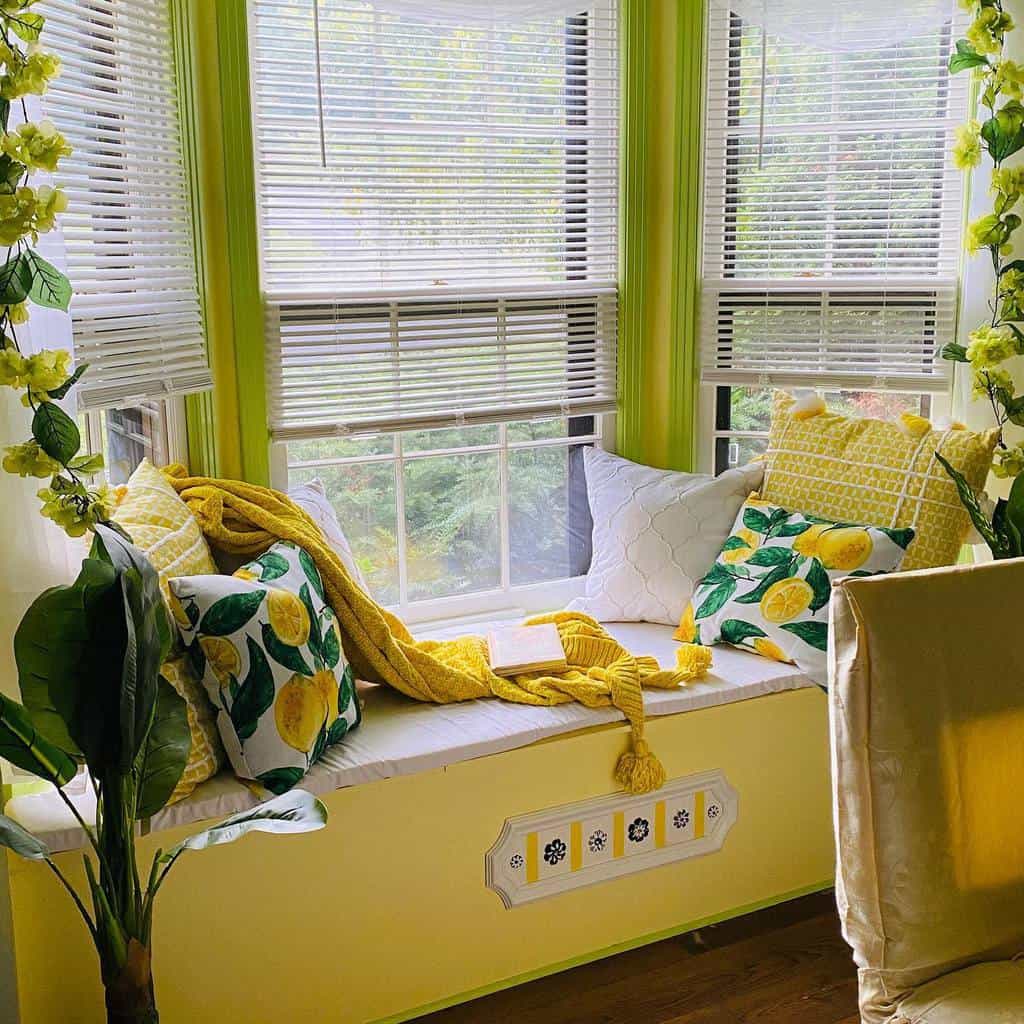
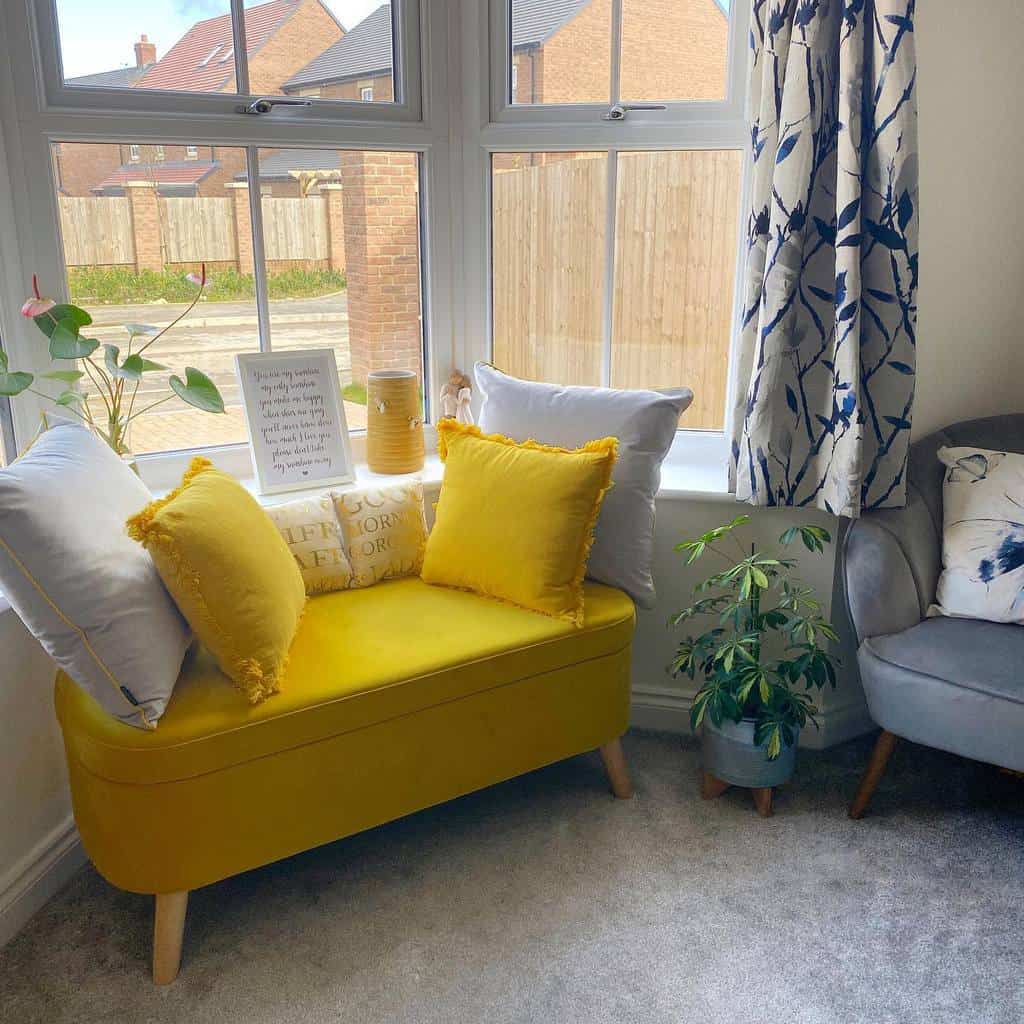
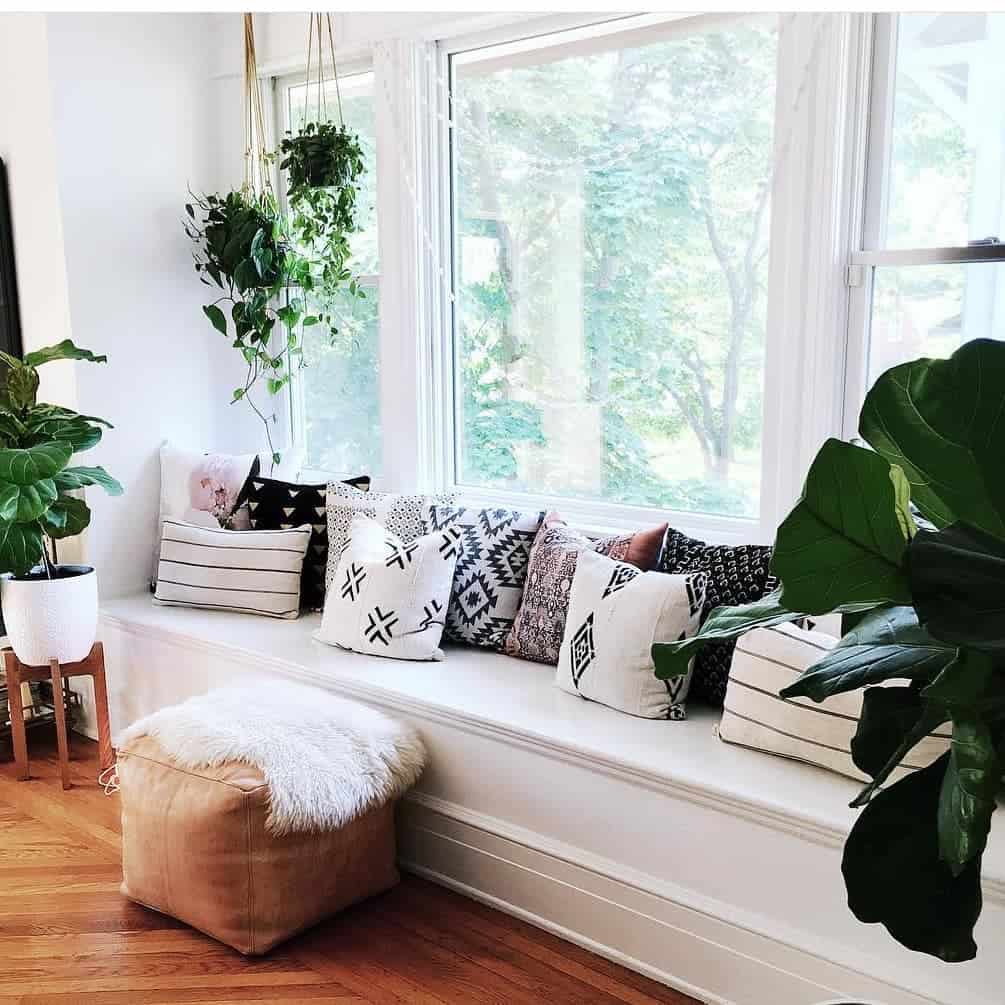
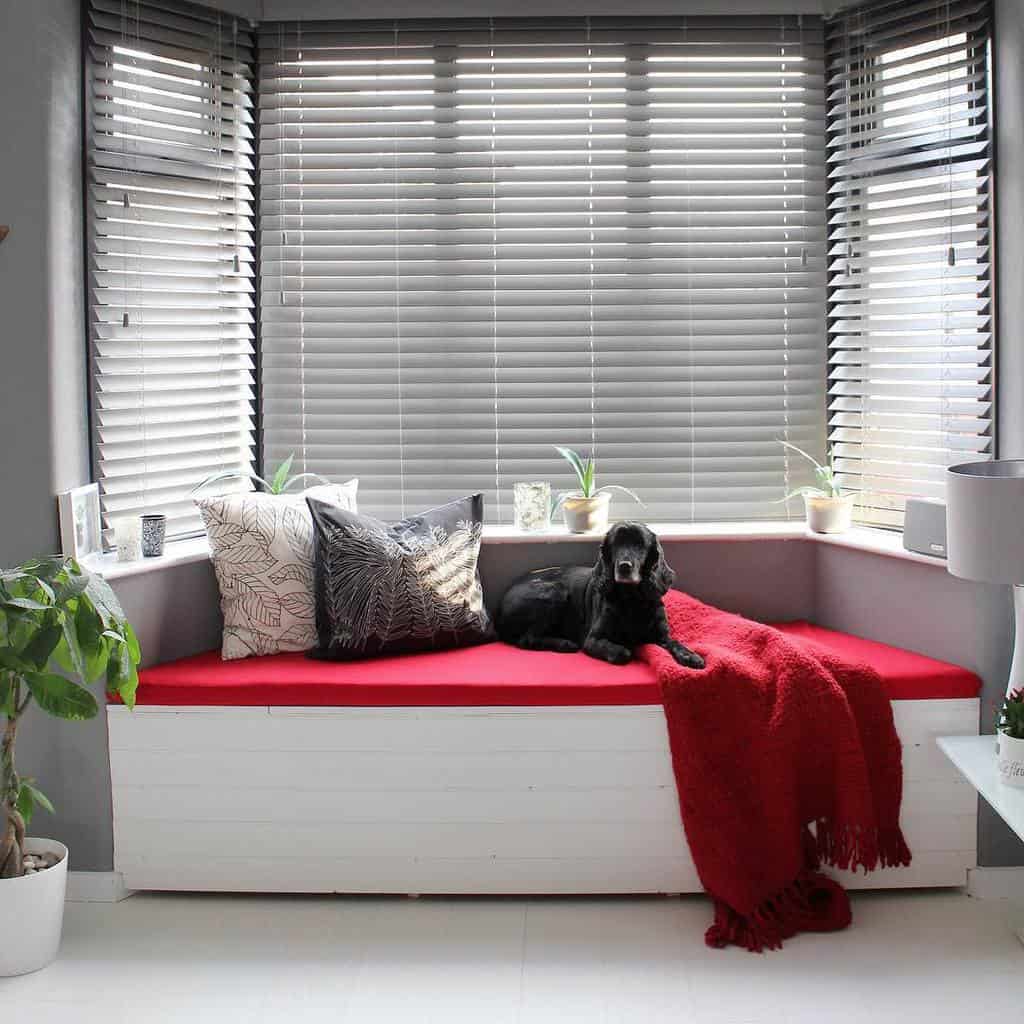
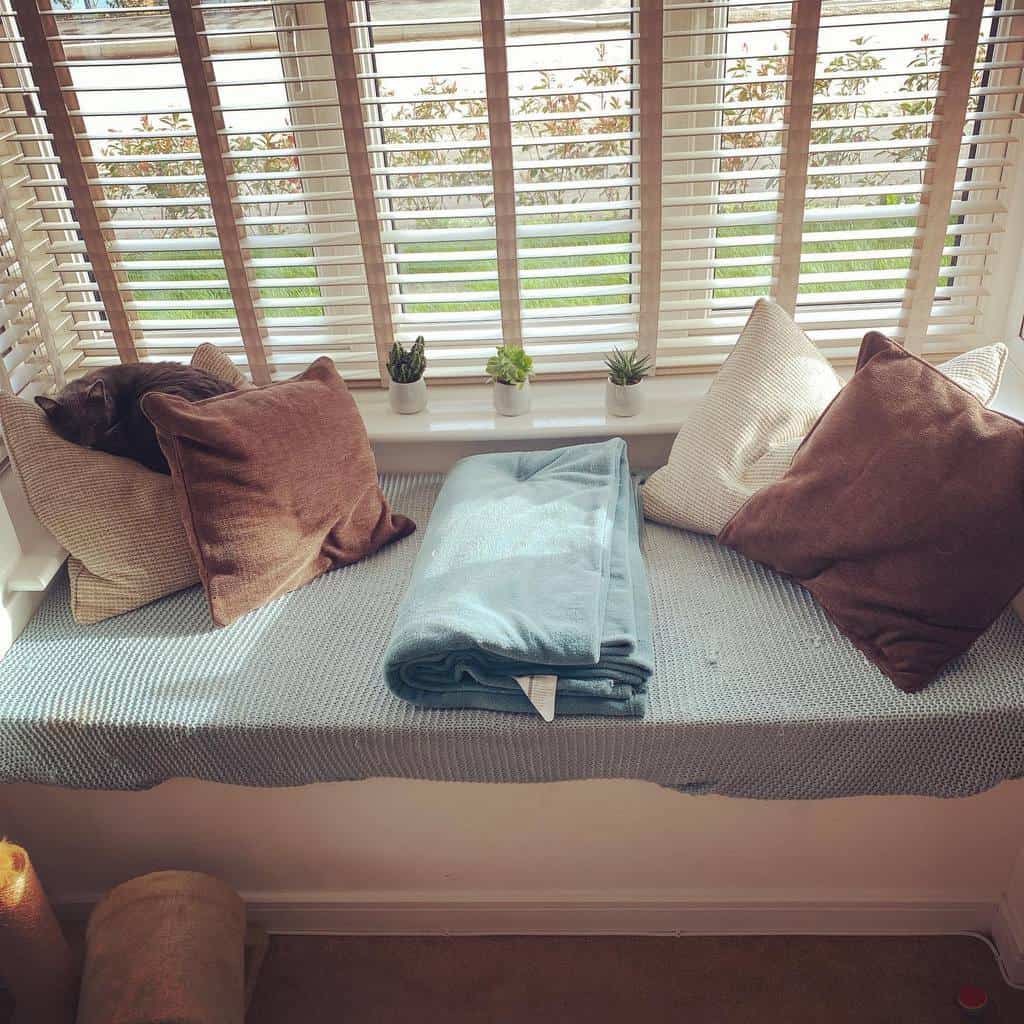
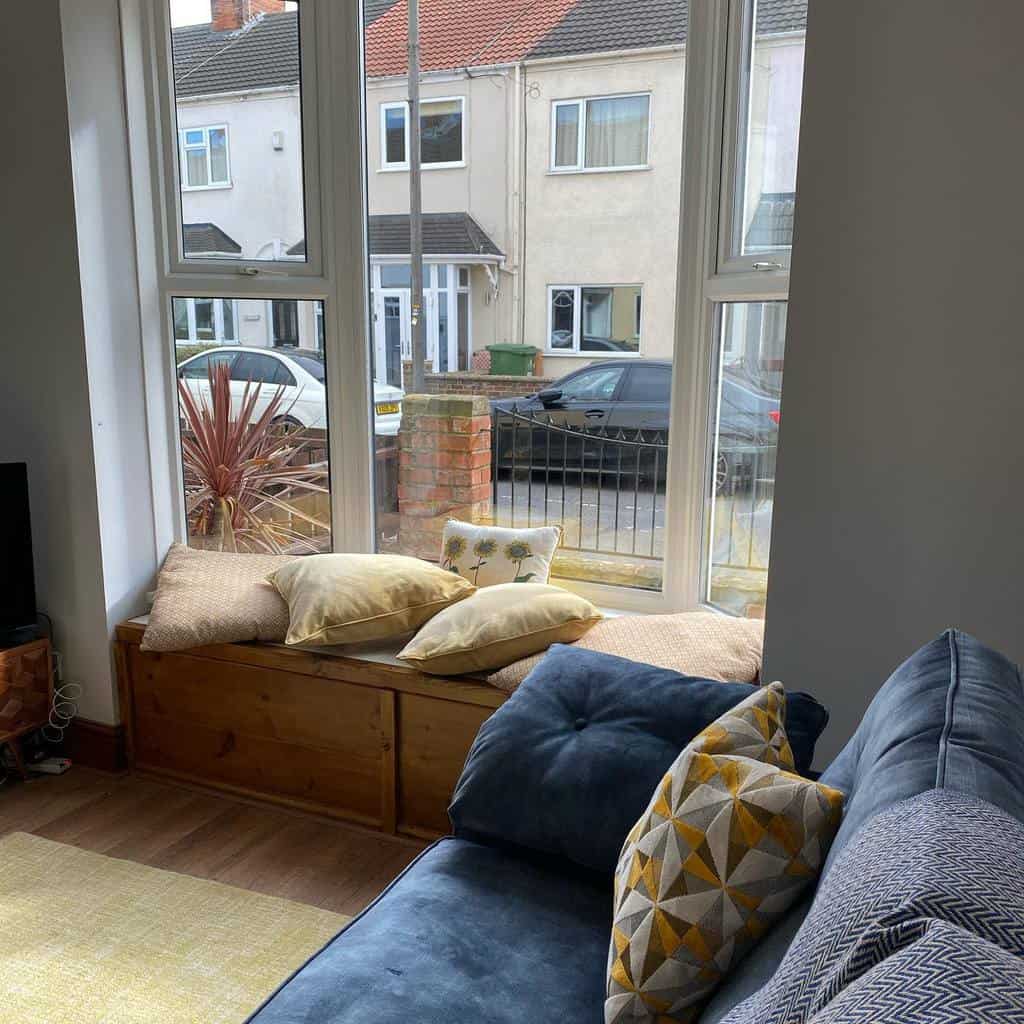
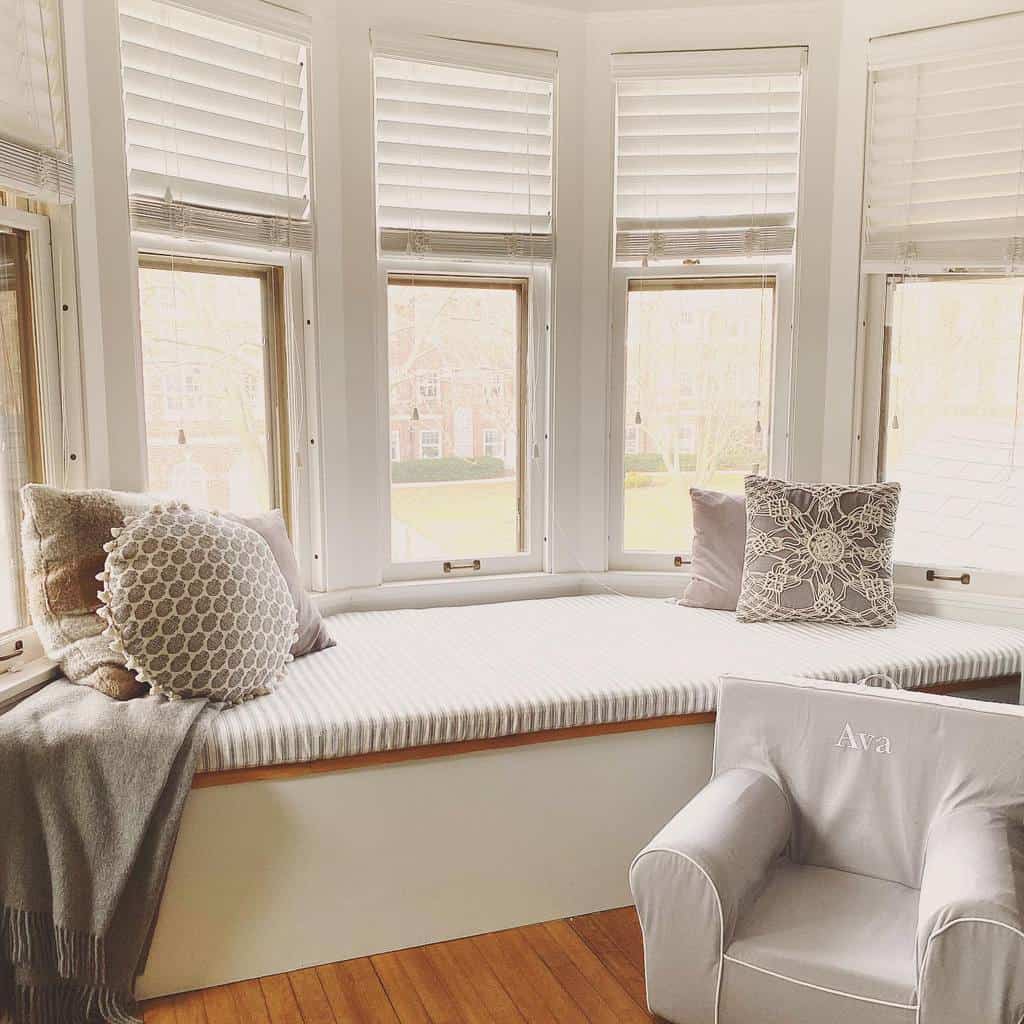
2. Create a Cozy Bay Window Bench
Bay windows and benches tend to go hand-in-hand. Seating is a great way to take full advantage of the natural light and view from your bay window.
Source: @craftyglamwithmandy via InstagramSource: @home_in_silly_country via InstagramSource: @myloyallens via InstagramSource: @sinnamon_studios via Instagram
If permanent seating isn’t an option, place an ottoman or bench in front of your bay window. Add a seat cushion or throw pillows to your window bench for a personalized style and added comfort.
Whether you’re upgrading an existing bench or installing a brand new one, don’t overlook the potential for extra storage. Include compartments in your bay window seat for more functional storage and organization.
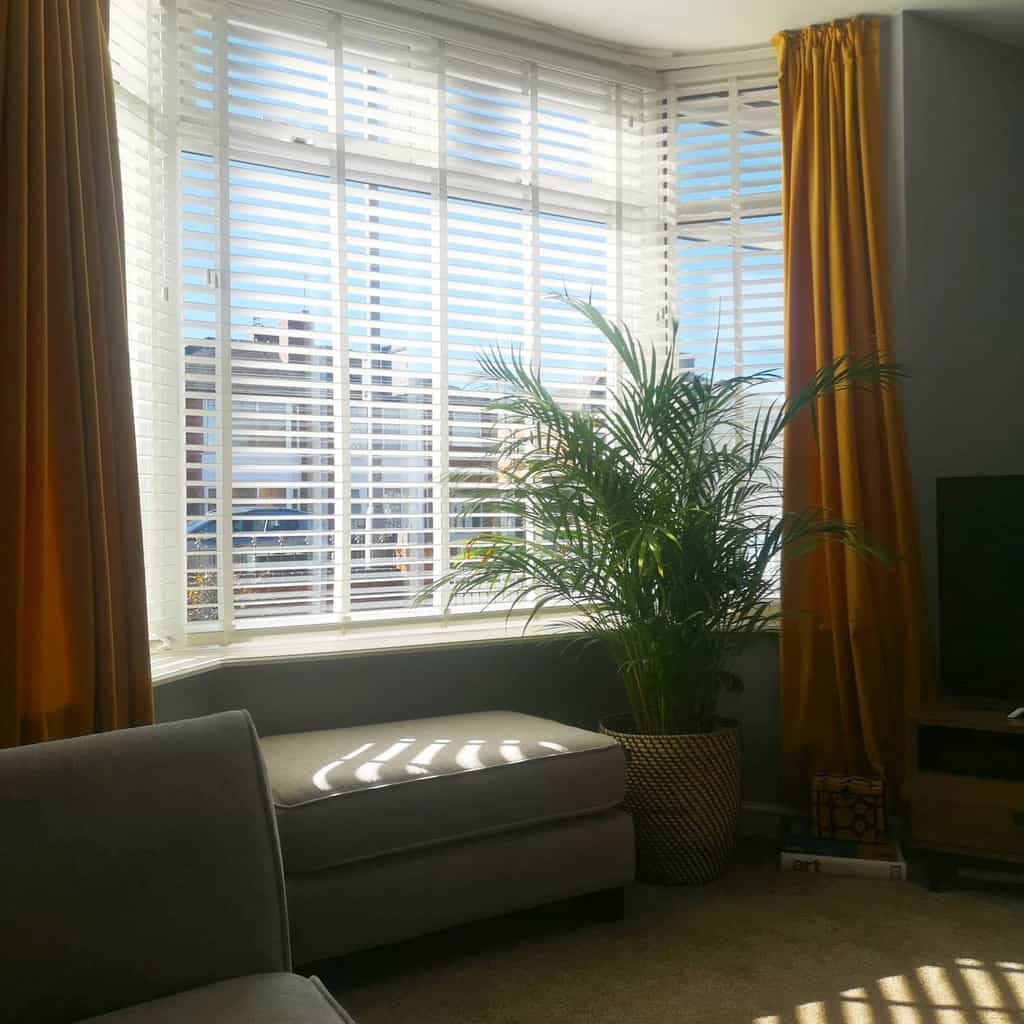
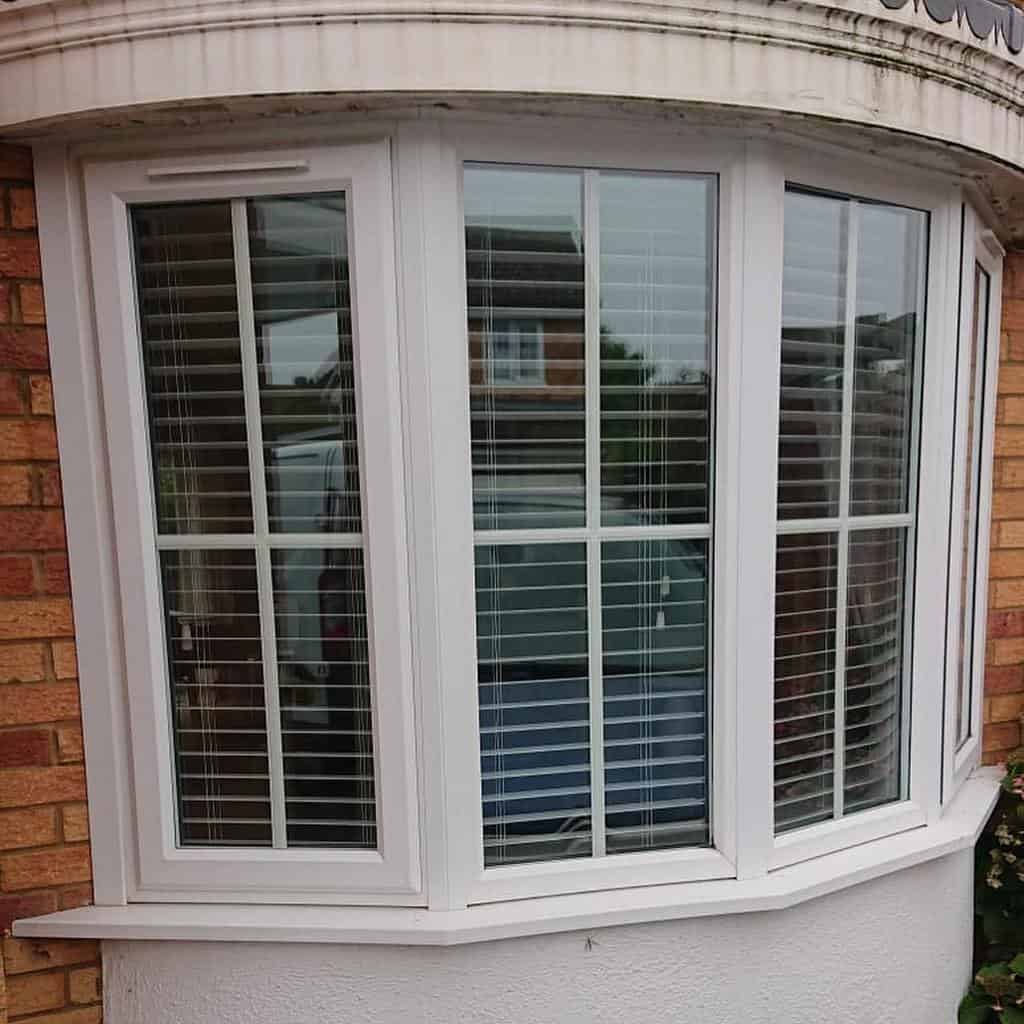
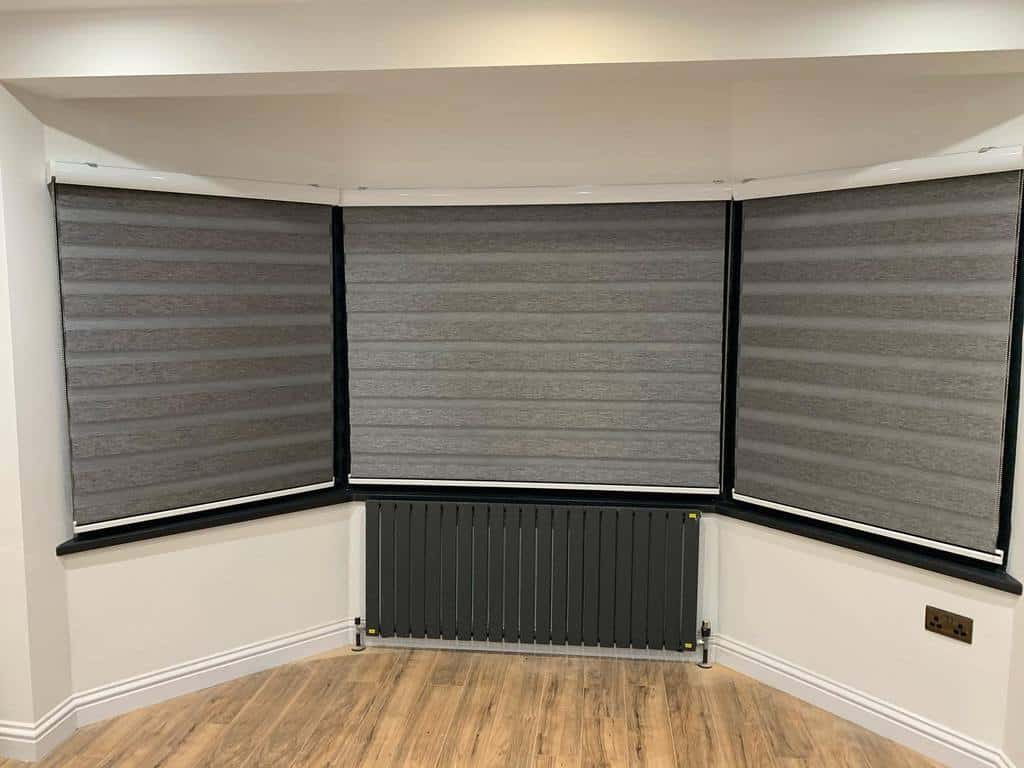
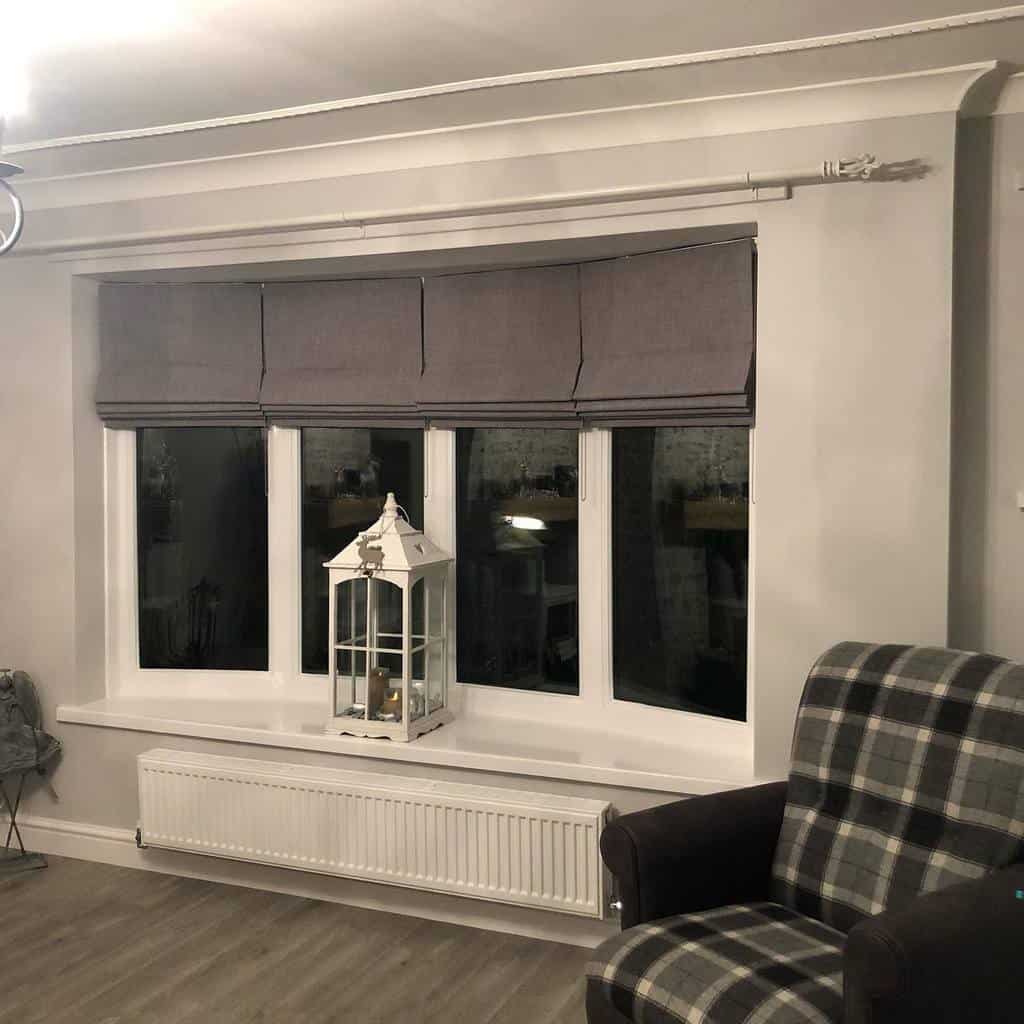
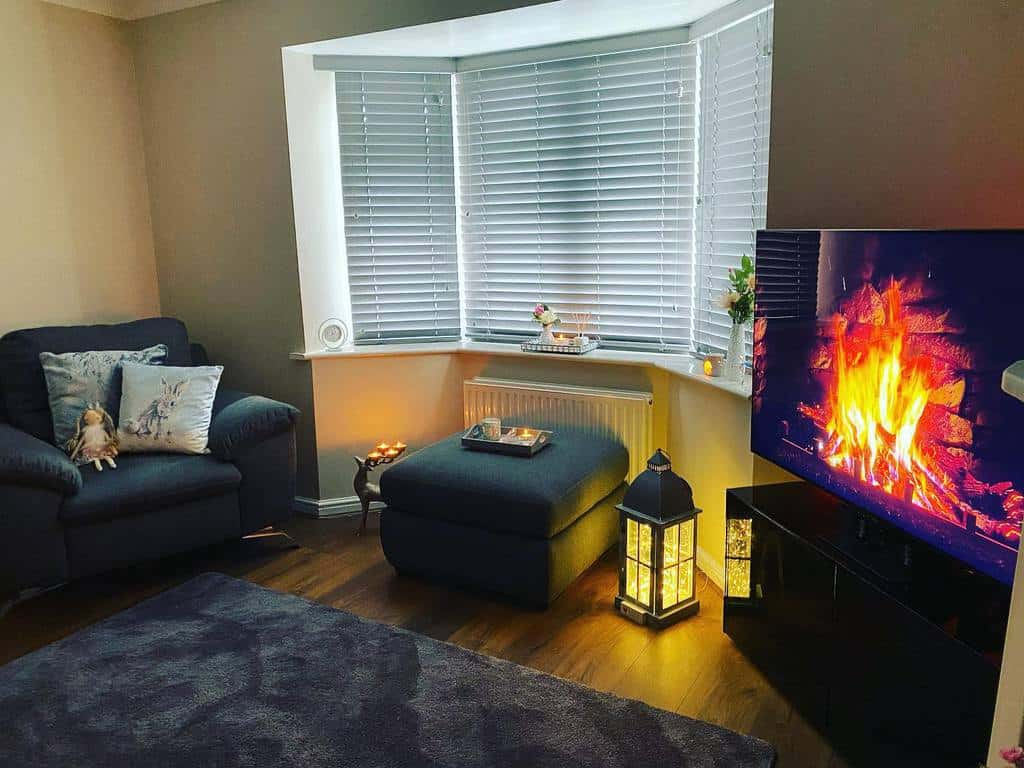
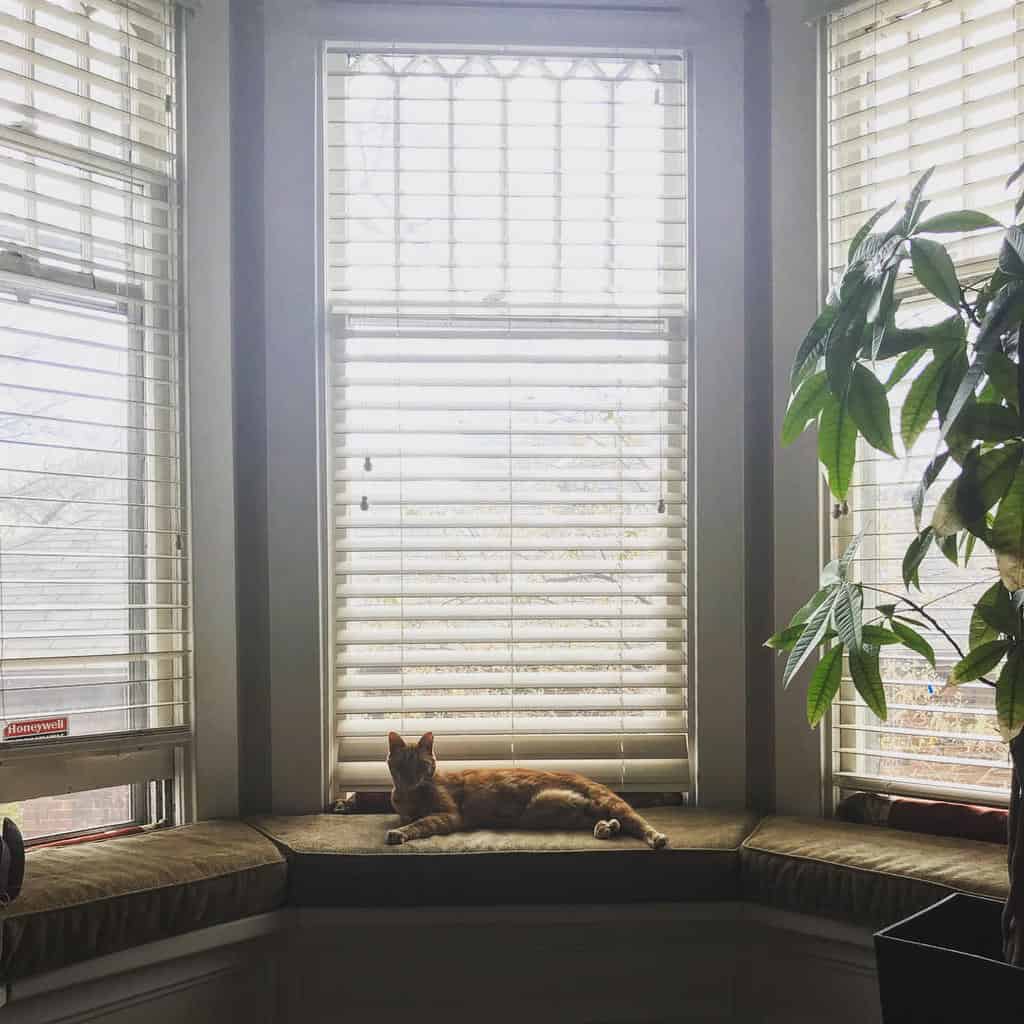
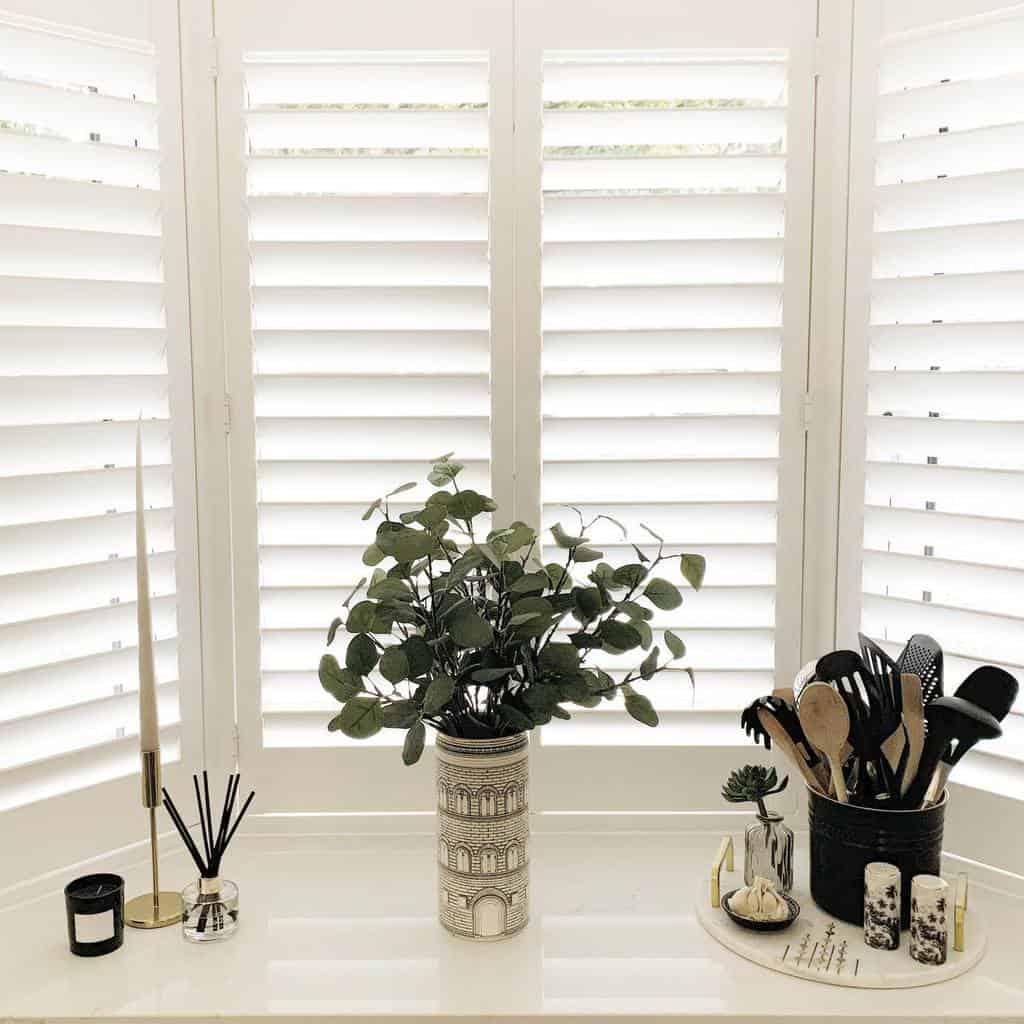
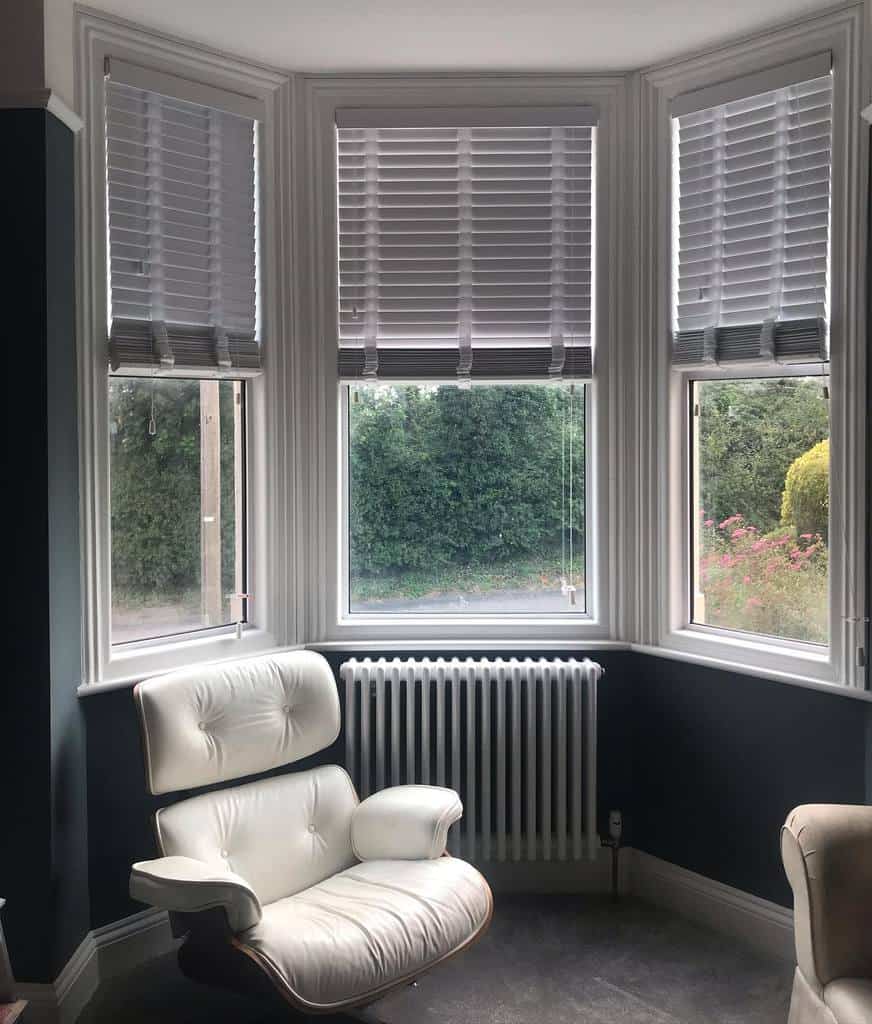
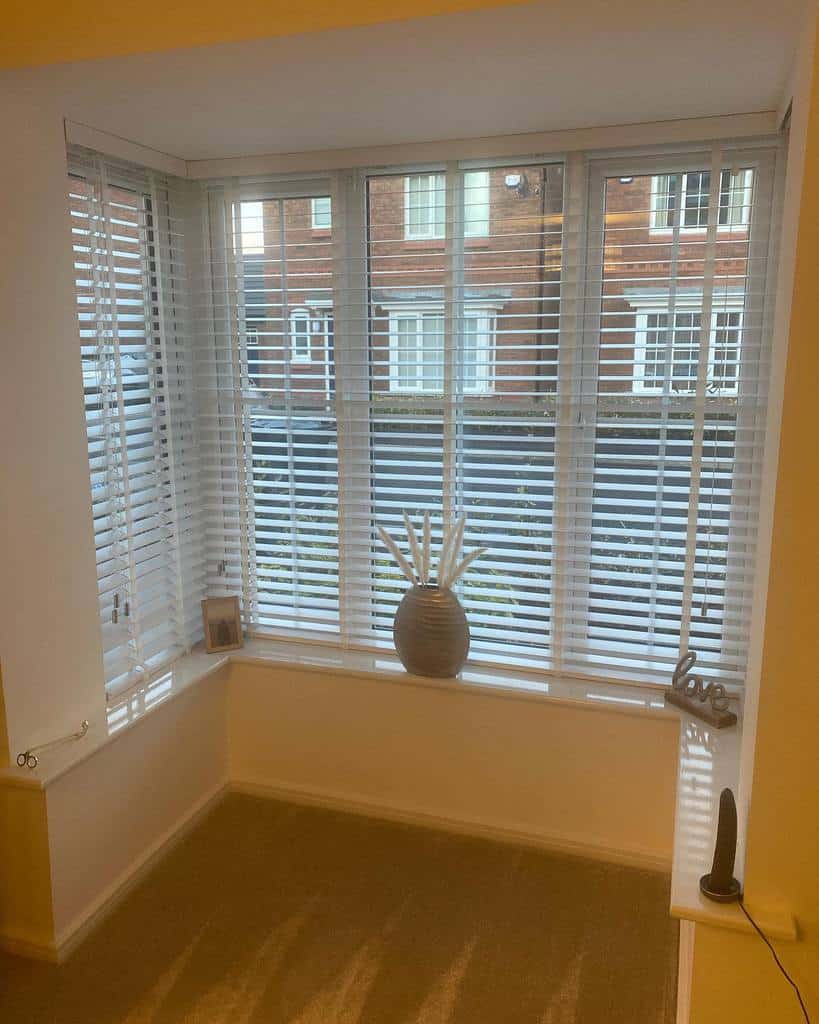
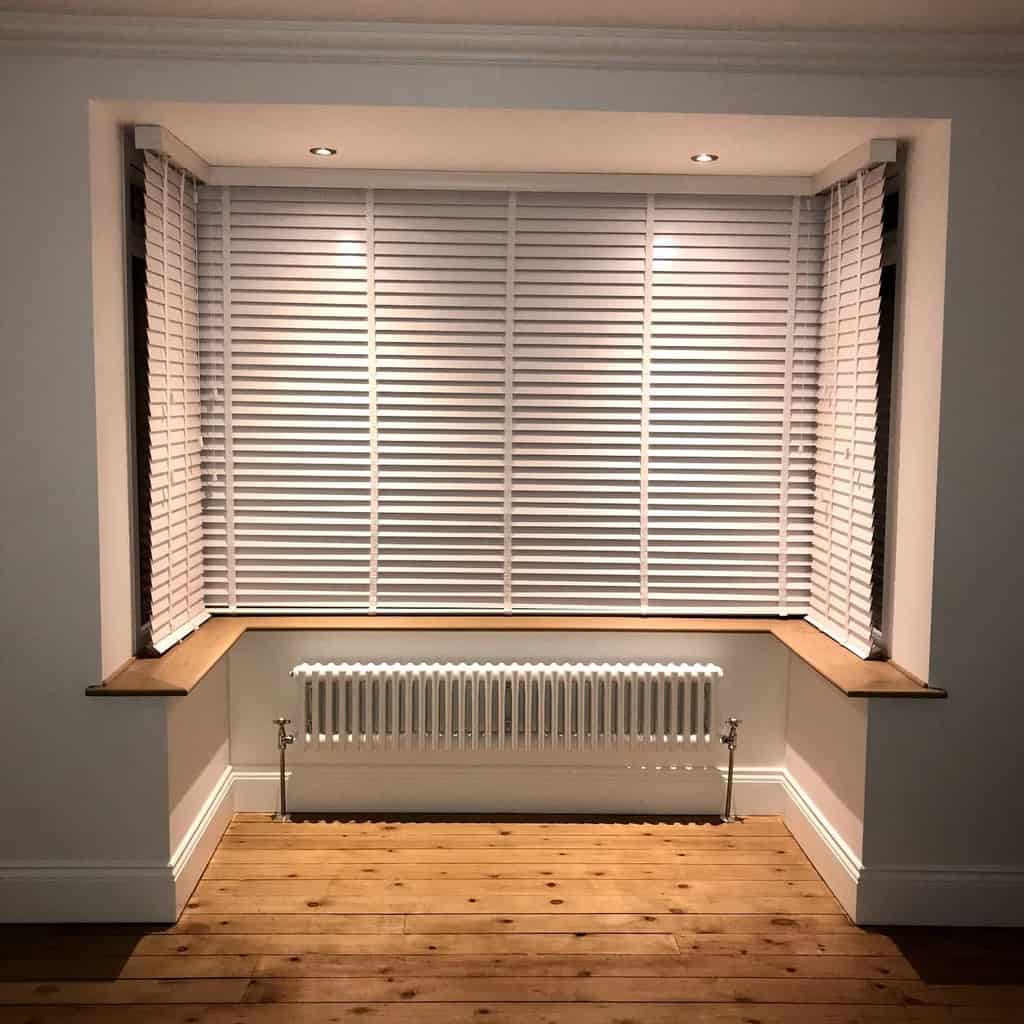
3. Select the Perfect Blinds for Bay Windows
Many homeowners struggle to choose the right window treatment for their bay windows. With the sheer number of window panes to be covered, it’s important to opt for sleek, low-profile blinds for your bay window.
Source: @bakersblinds via InstagramSource: @donebychristmas via InstagramSource: @house_in_the_heath via InstagramSource: @lara_blinds_interiors via InstagramSource: @our_1930s_green_renovation via InstagramSource: @tresco_trio via InstagramSource: @wilcox_homely_house via Instagram
A Roman shade is a great option that looks nice pulled up or down. Wood blinds mimic the look of shutters without the permanence or expense.
You want your bay window to look bright and open, not weighed down by blinds or curtains. Choose a window treatment that matches the surrounding wall or window frame for a uniform appearance. Or draw attention to your bay window with contrasting blinds in black or white.
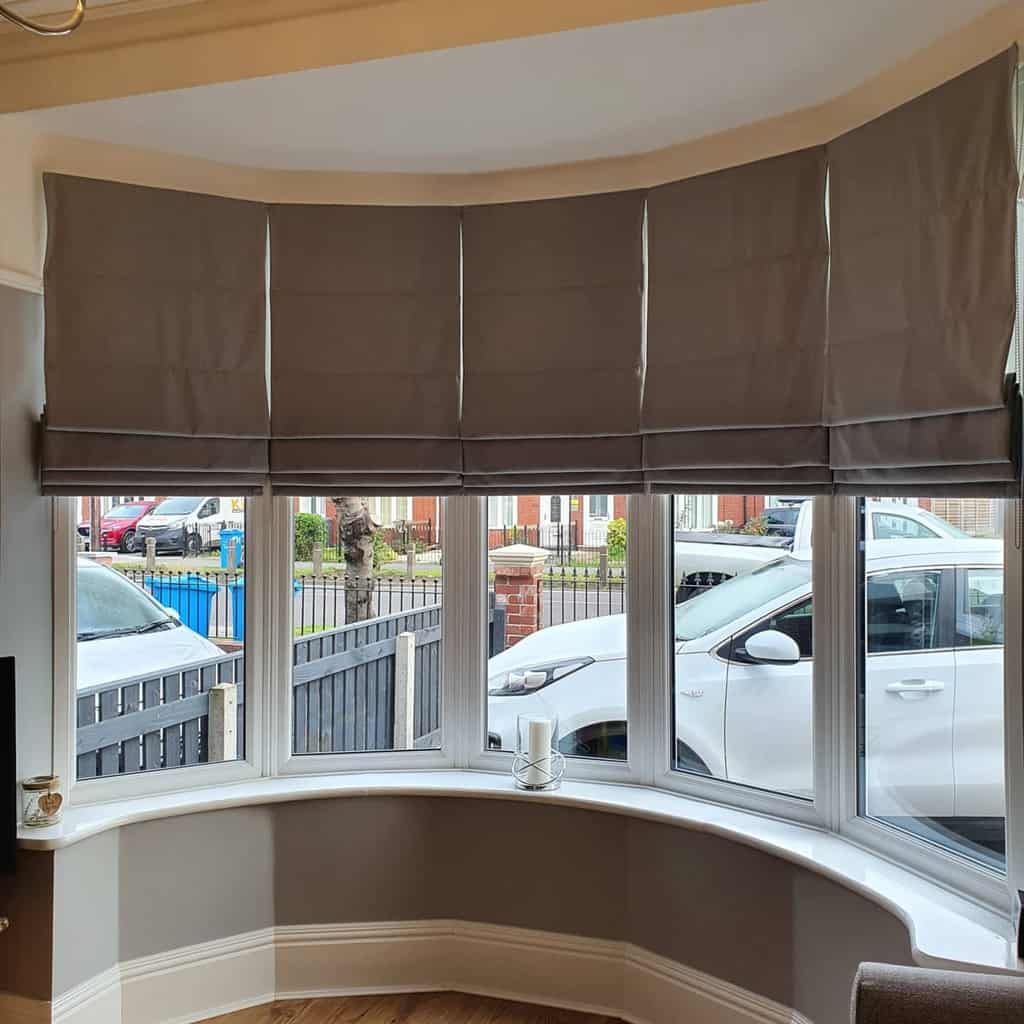
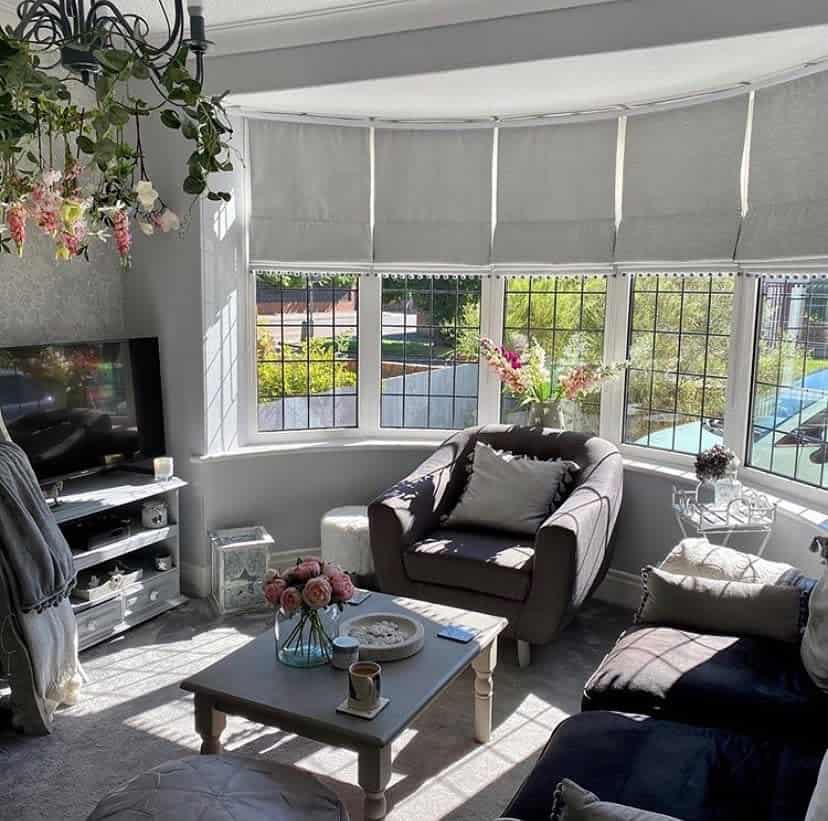
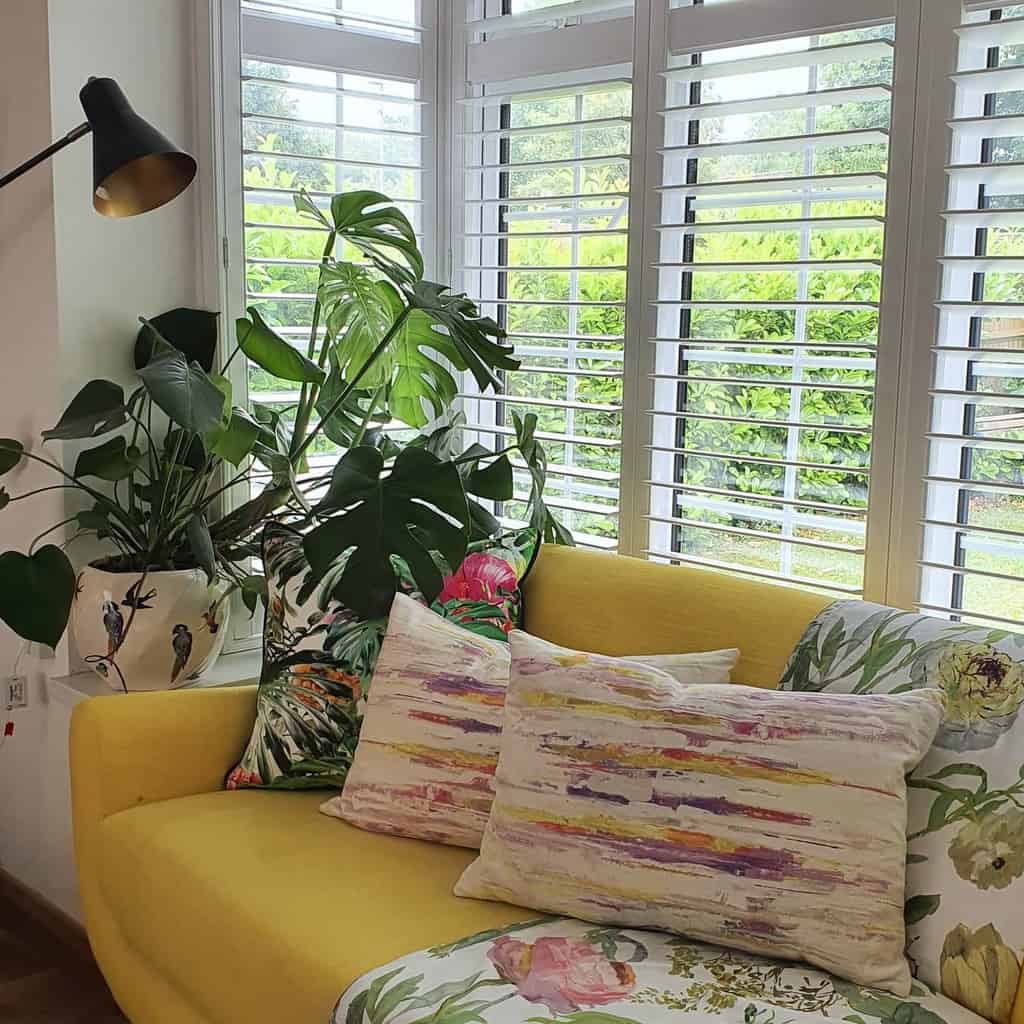
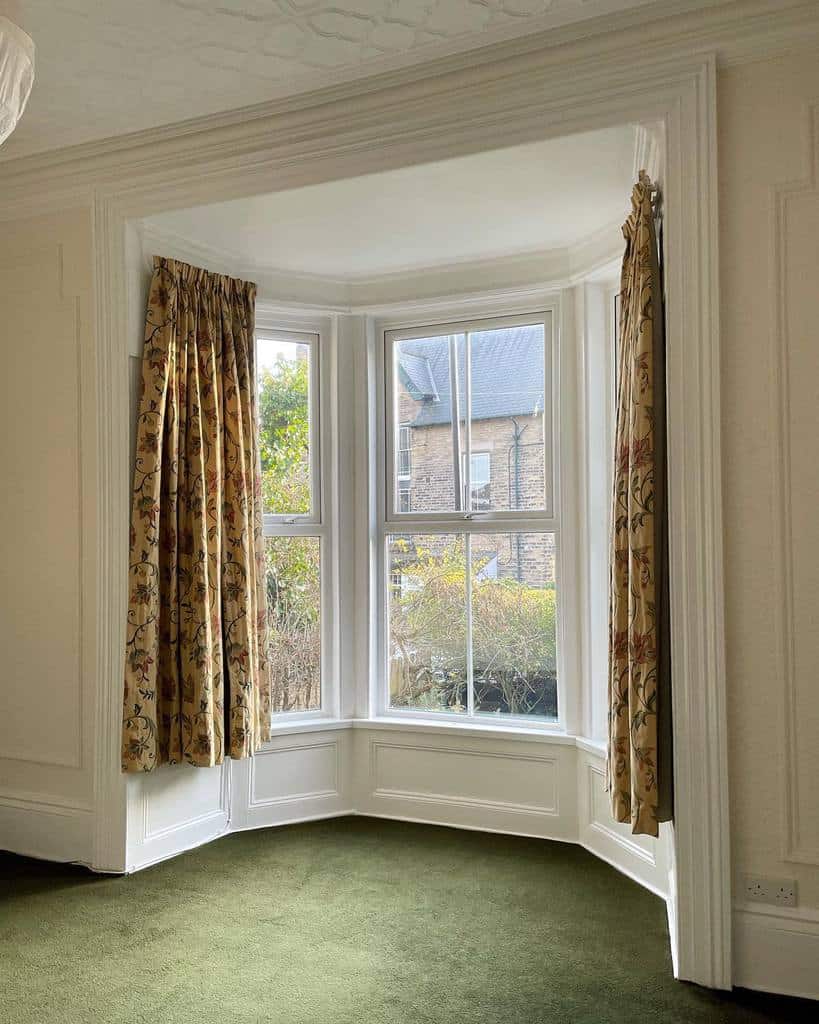
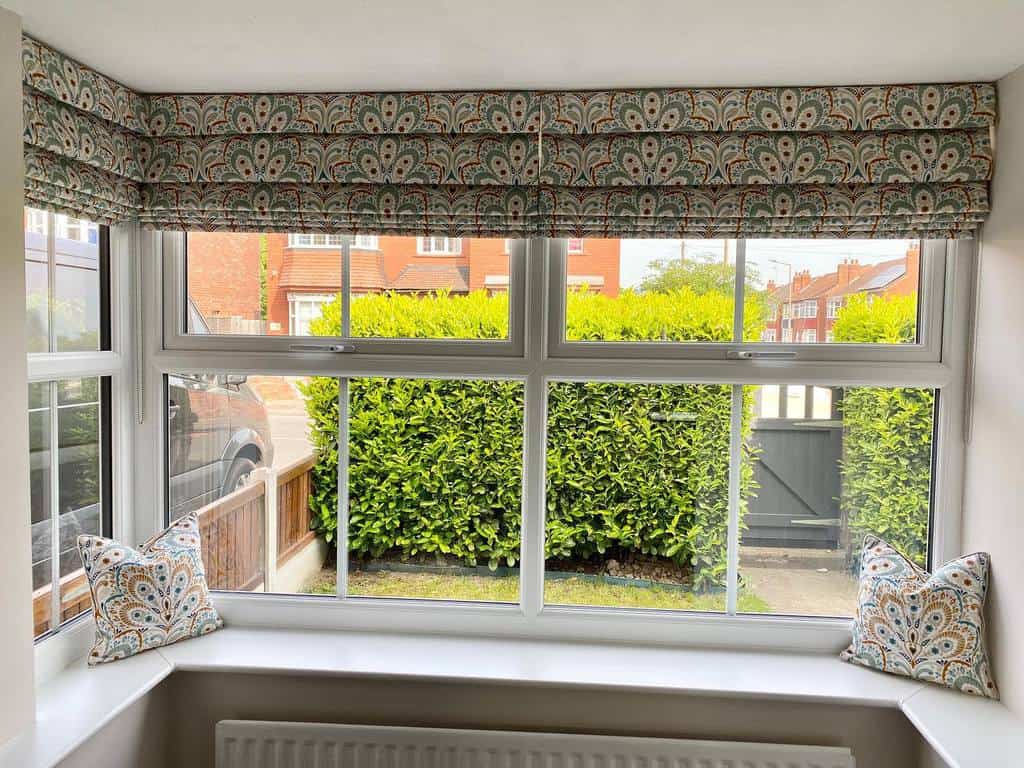
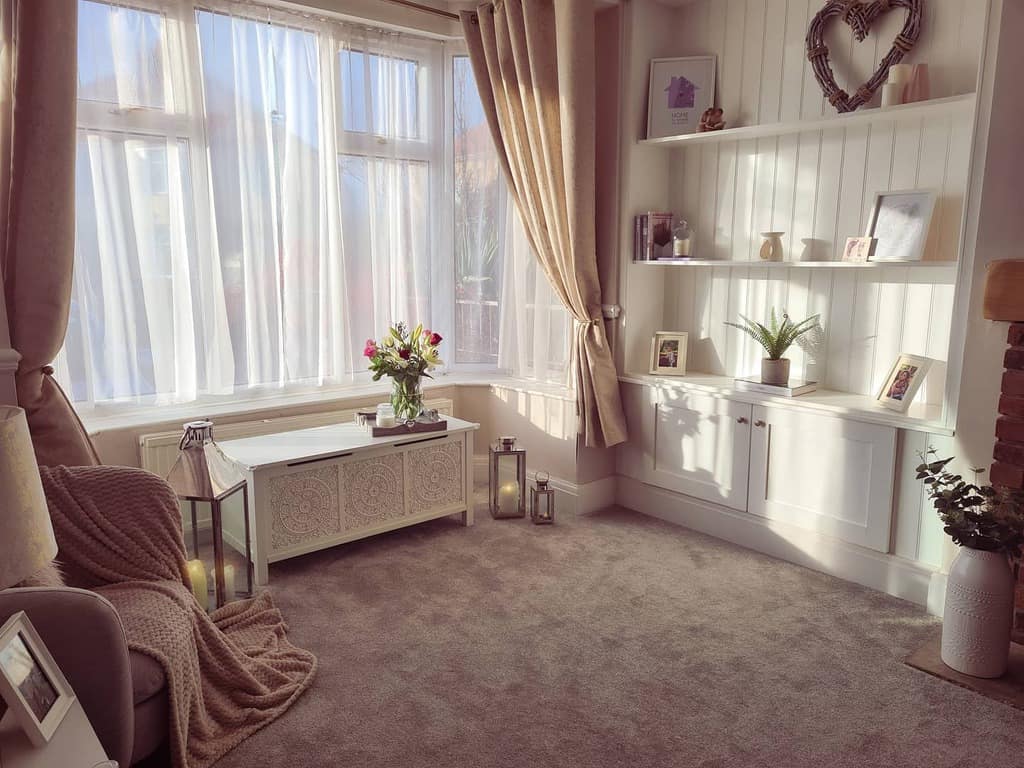
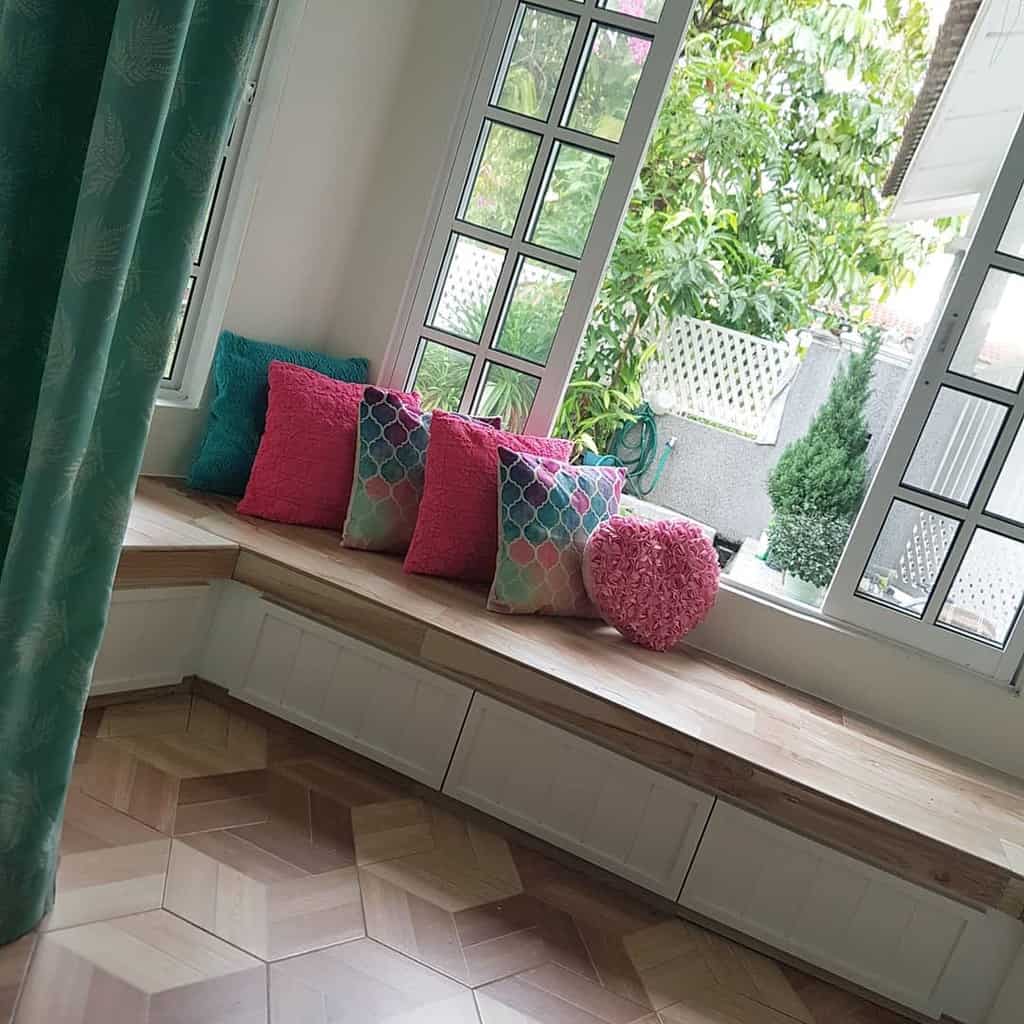
4. Design Bay Windows with Curtains and Shades
Bay windows can make the perfect backdrop for your favorite furniture and decor. Leave the window panes bare for tons of natural light and a great view. You can also use curtains, shades, or blinds to add a dose of color to your bay window design.
Source: @curtainspelmets via InstagramSource: @harburyhouse via InstagramSource: @our_greenhouse_reno via InstagramSource: @skylaspencerofficial via InstagramSource: @the.home_.of_.grey_ via Instagram
Use windowsills to display decor but be sure not to block too much of the window itself. Potted plants are a great option, and most will thank you for being left in a bright window.
Add comfortable seating or a desk in front of your bay window — unless, of course, it’s already outfitted with a built-in bench seat. This is also the spot to tuck your favorite holiday decorations depending on the season.
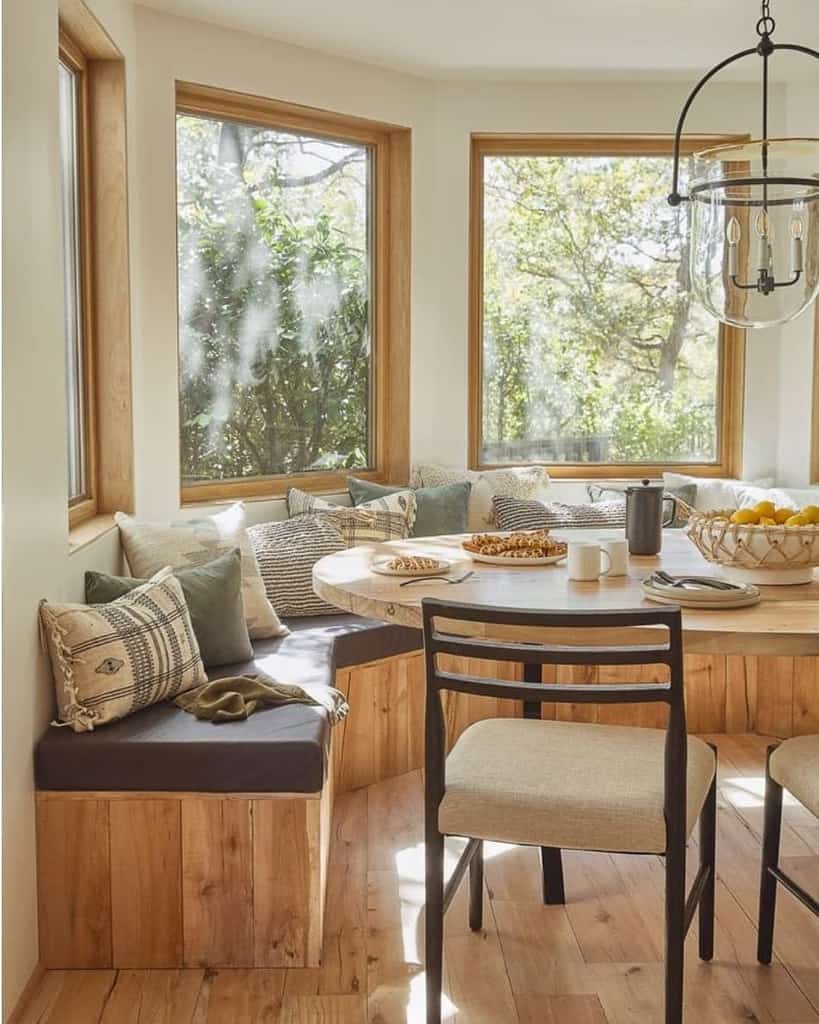
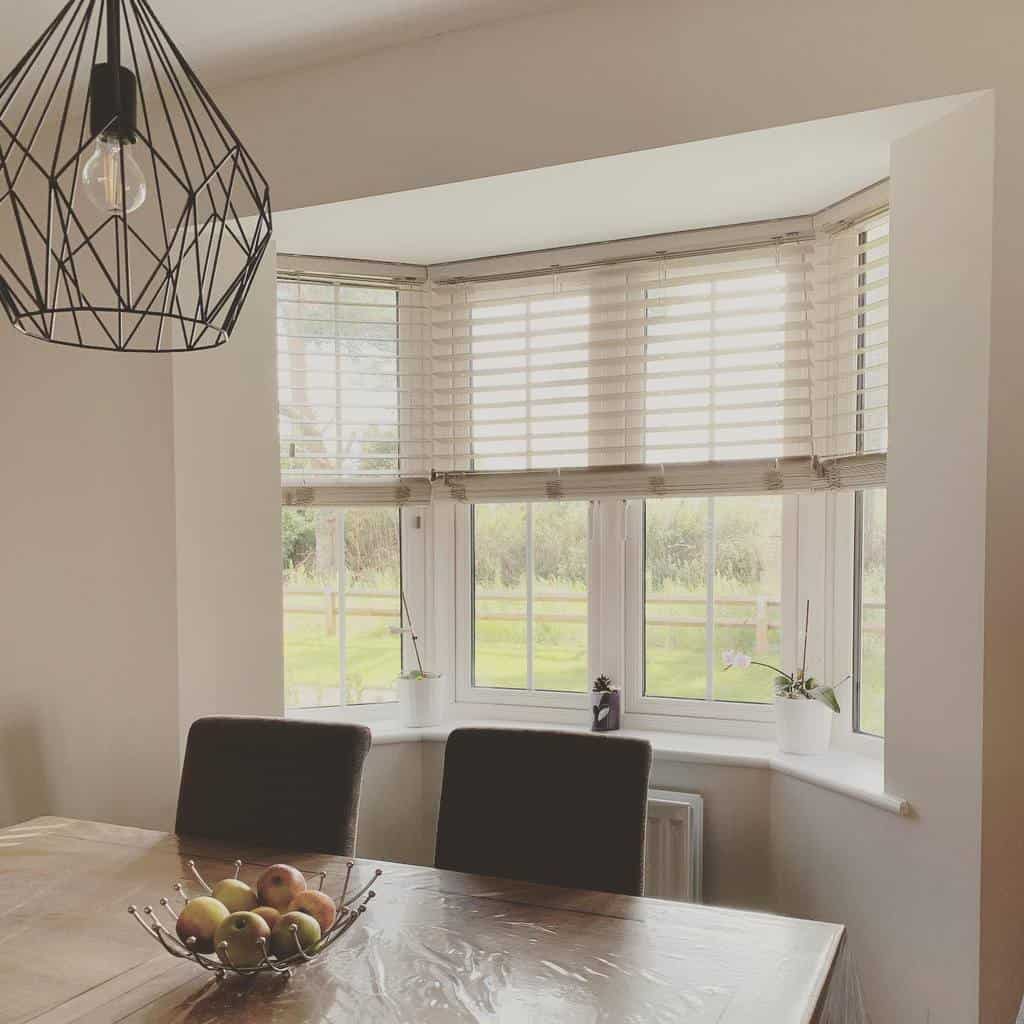
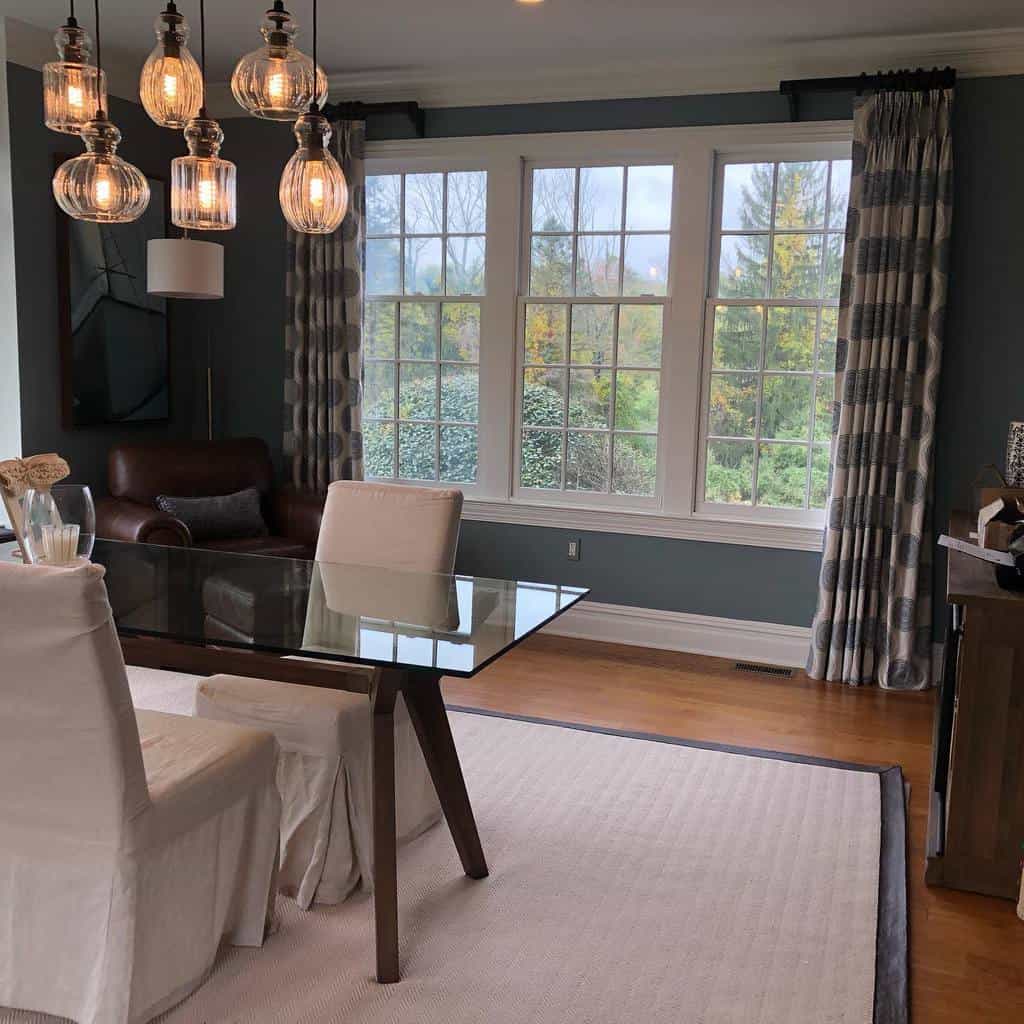
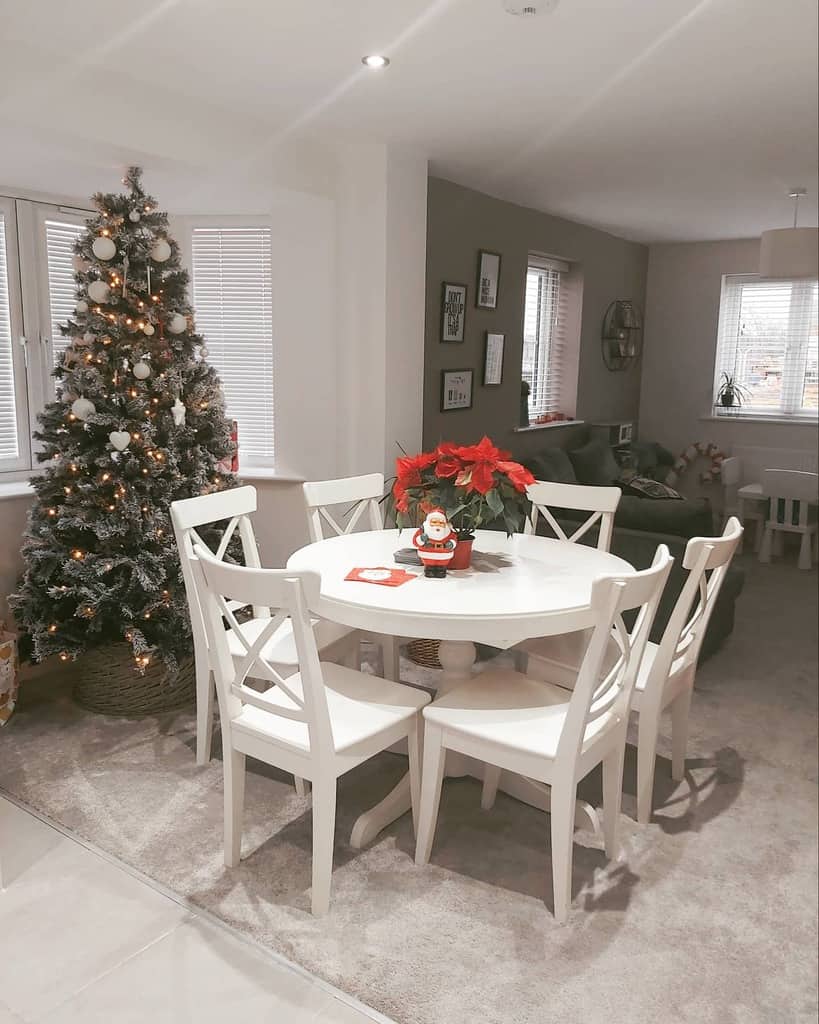
5. Enhance Your Dining Room with a Bay Window
In many contemporary homes, the dining room feels like an afterthought. This room often offers limited floor space and suffers from a lack of natural light. Installing a bay window can fix these common problems.
Source: @curtaincathy via InstagramSource: @our_castleford_casa via Instagram
A large bay window makes the perfect accessory to a formal dining room table. If you prefer a more casual dining experience, transform a corner of your kitchen into a breakfast nook with a bench seat and a small table.
Finish your dining room or kitchen bay window with roller shades or a drapery panel. Also, don’t neglect the light fixtures. Your bay window won’t do you much good after the sun sets, at least in terms of light.
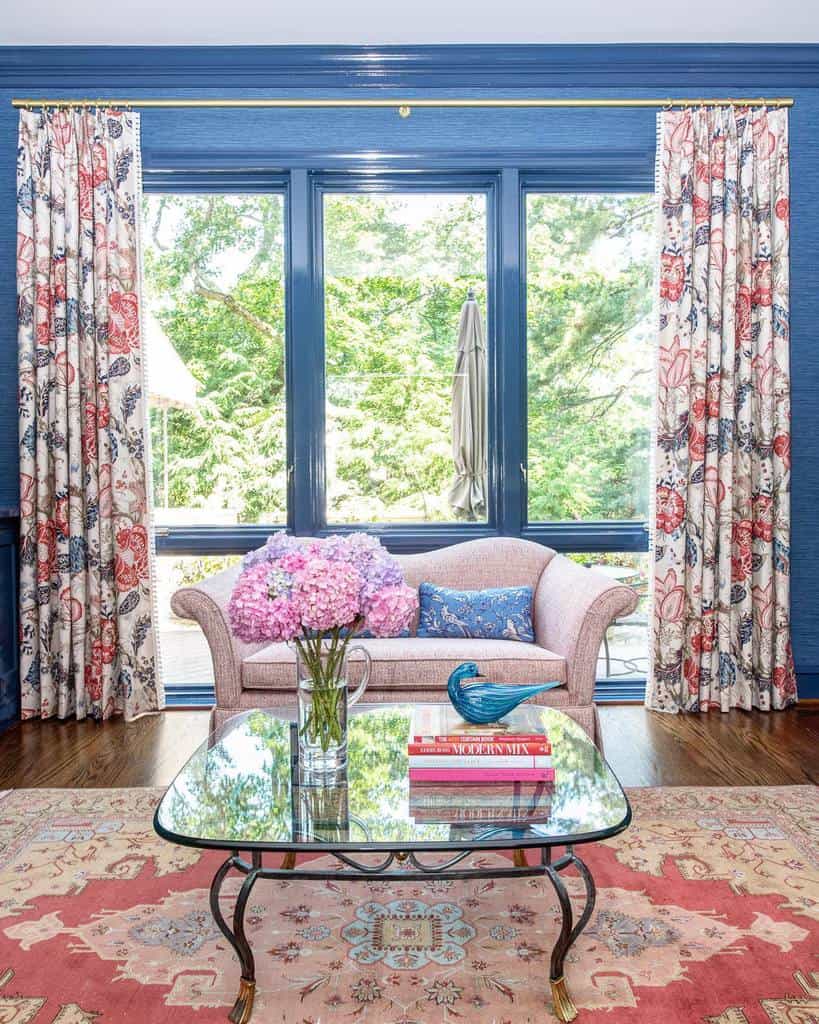
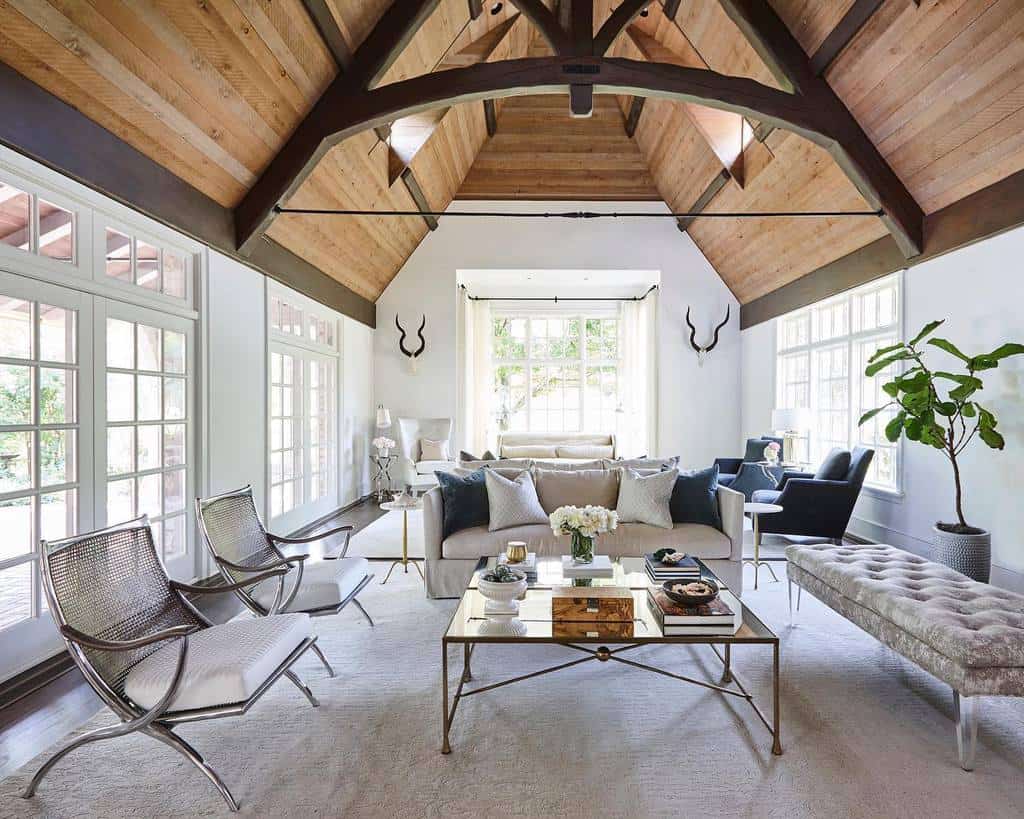
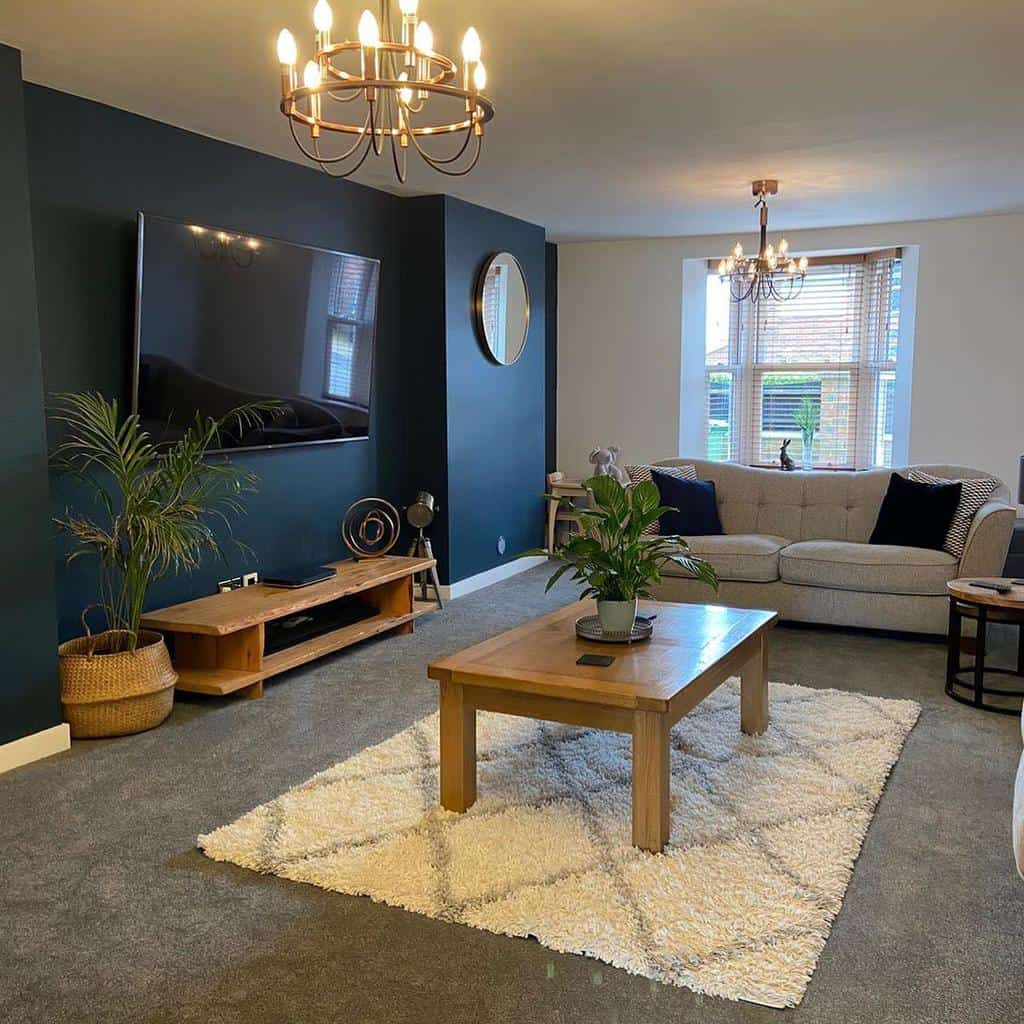
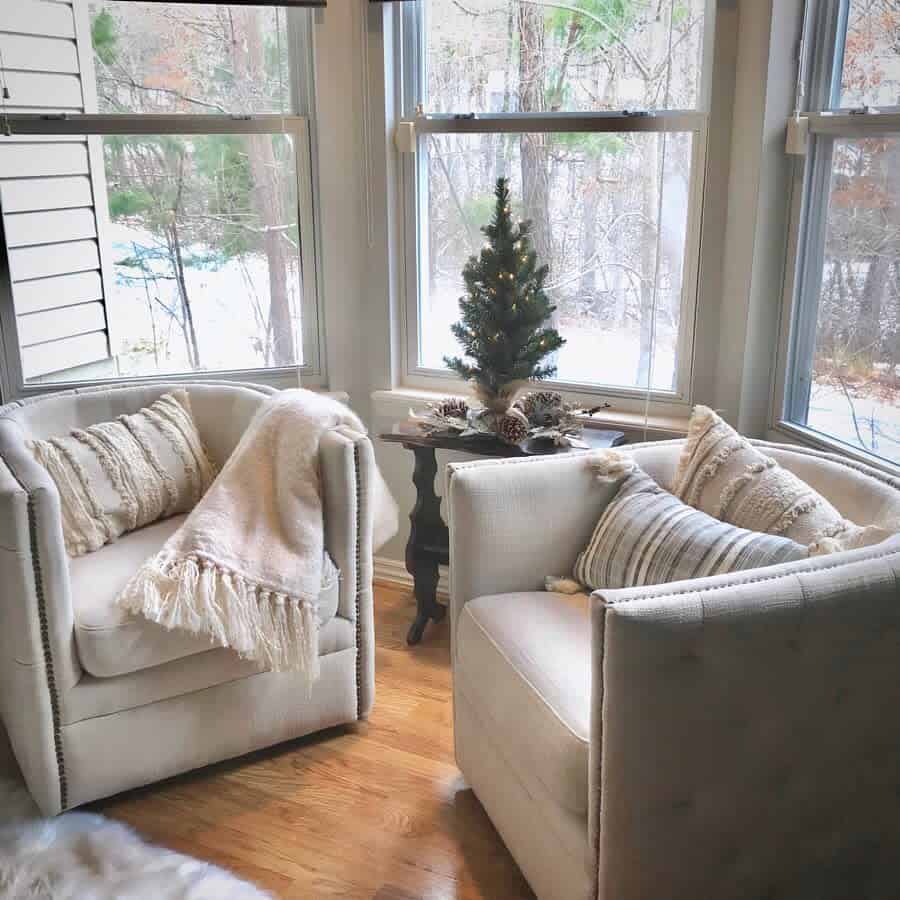
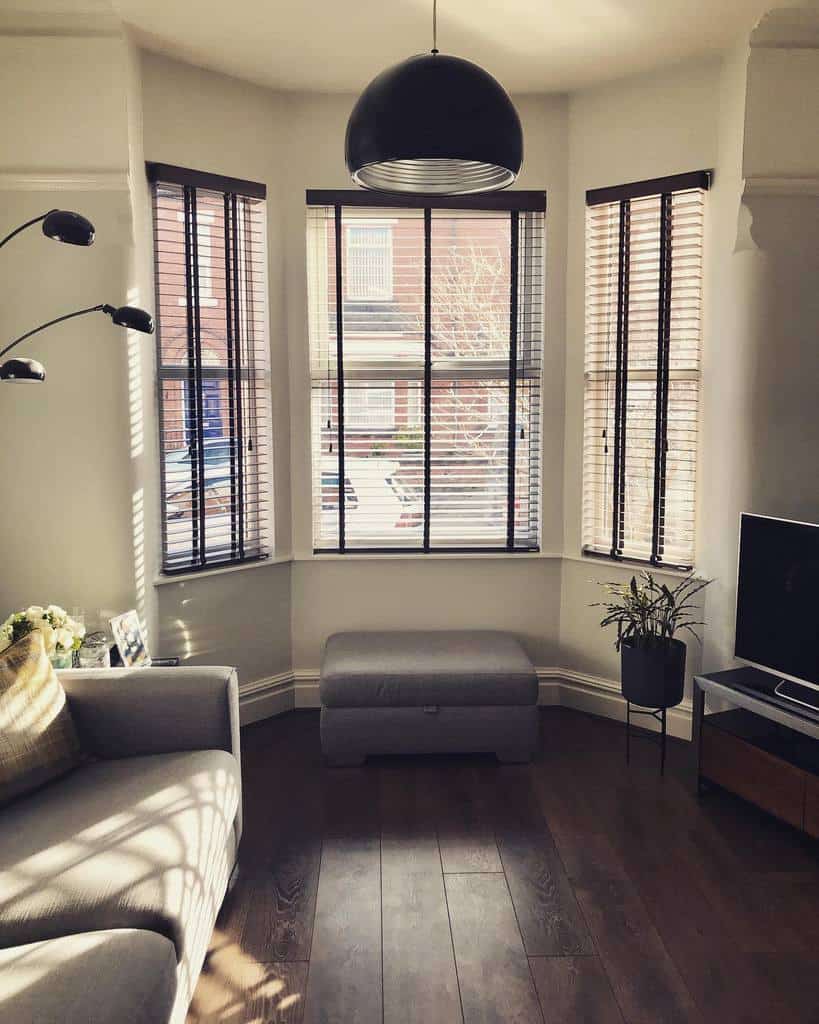
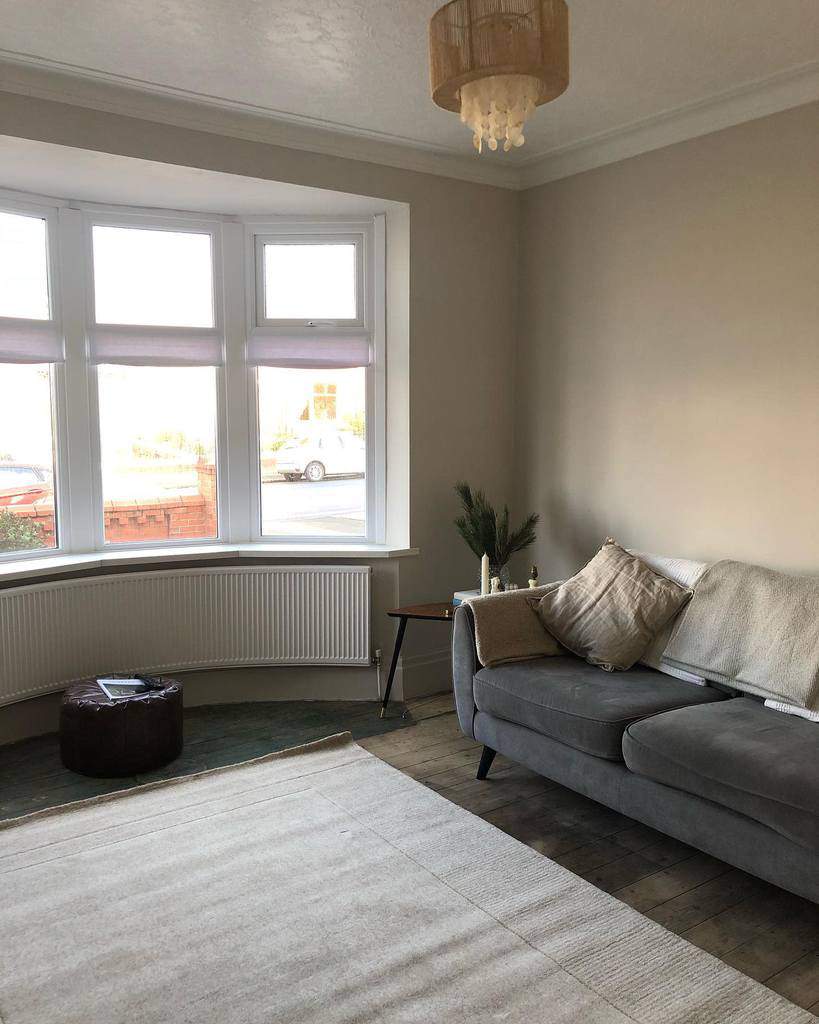
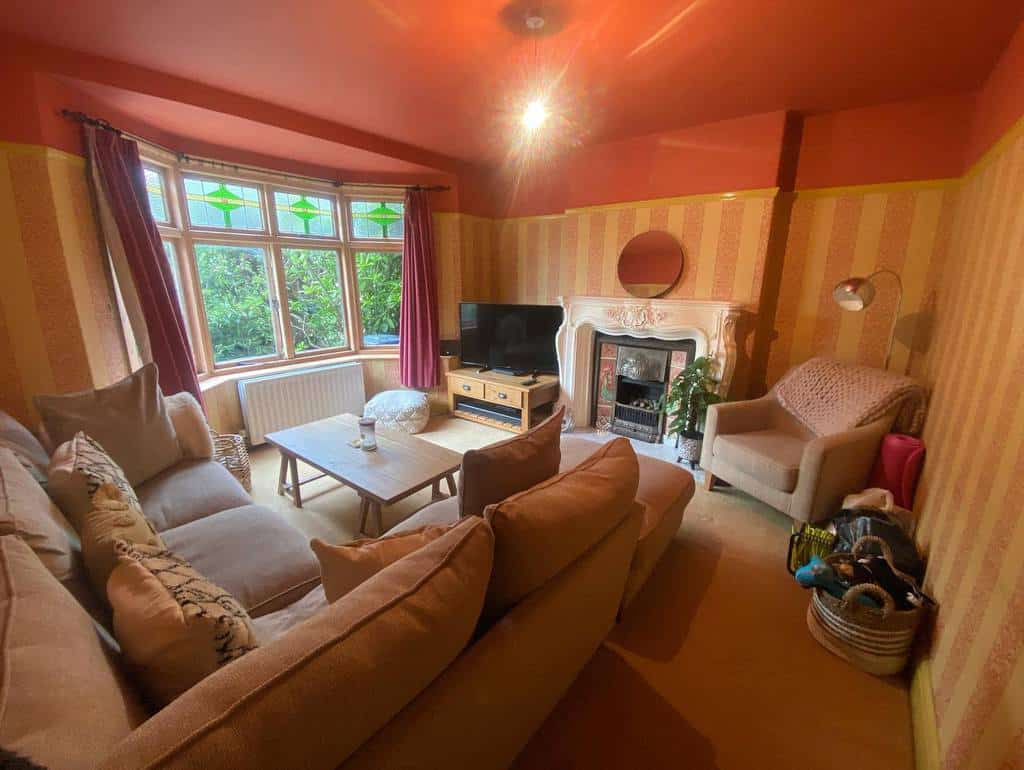
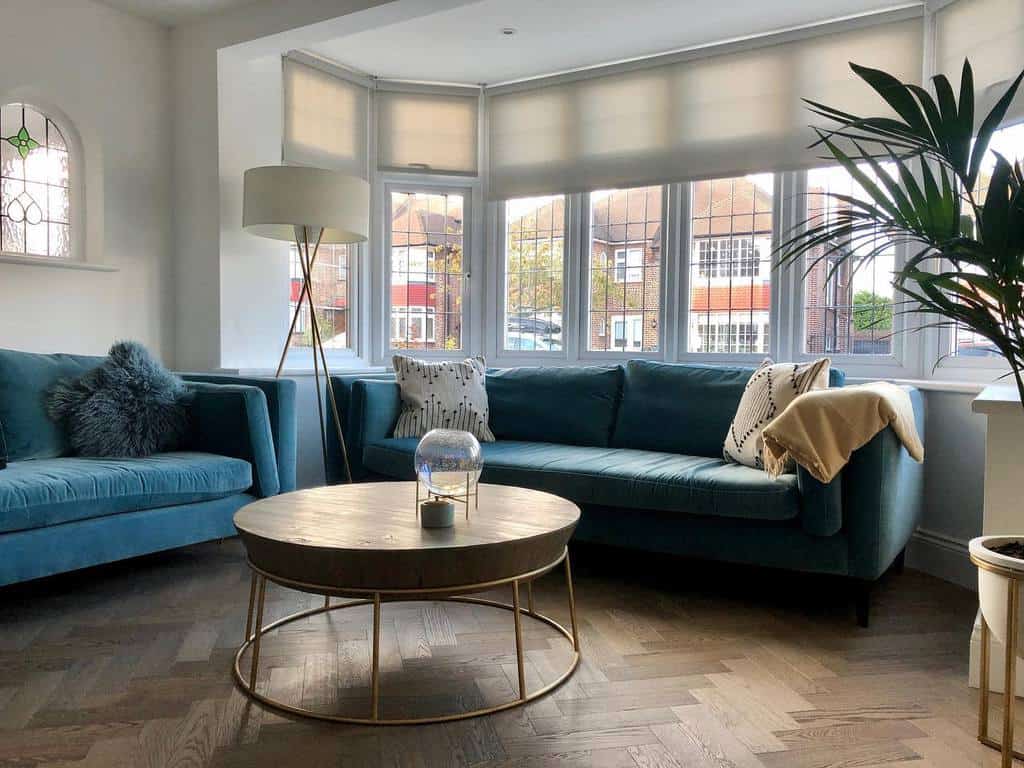
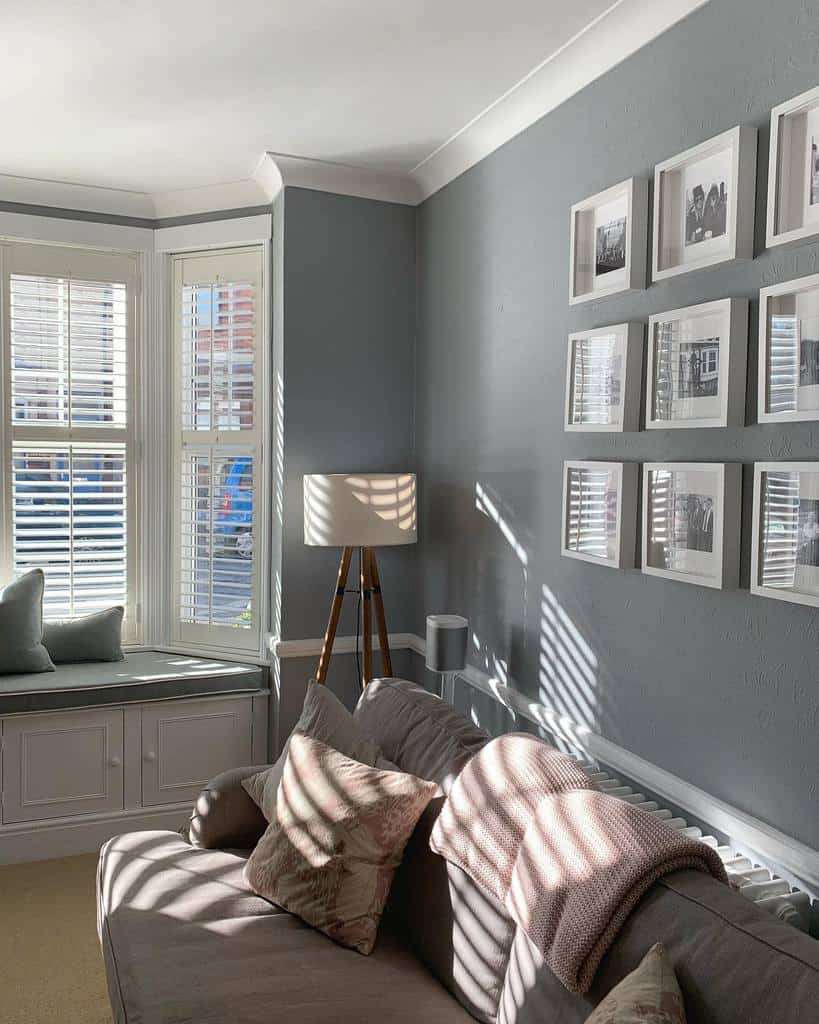
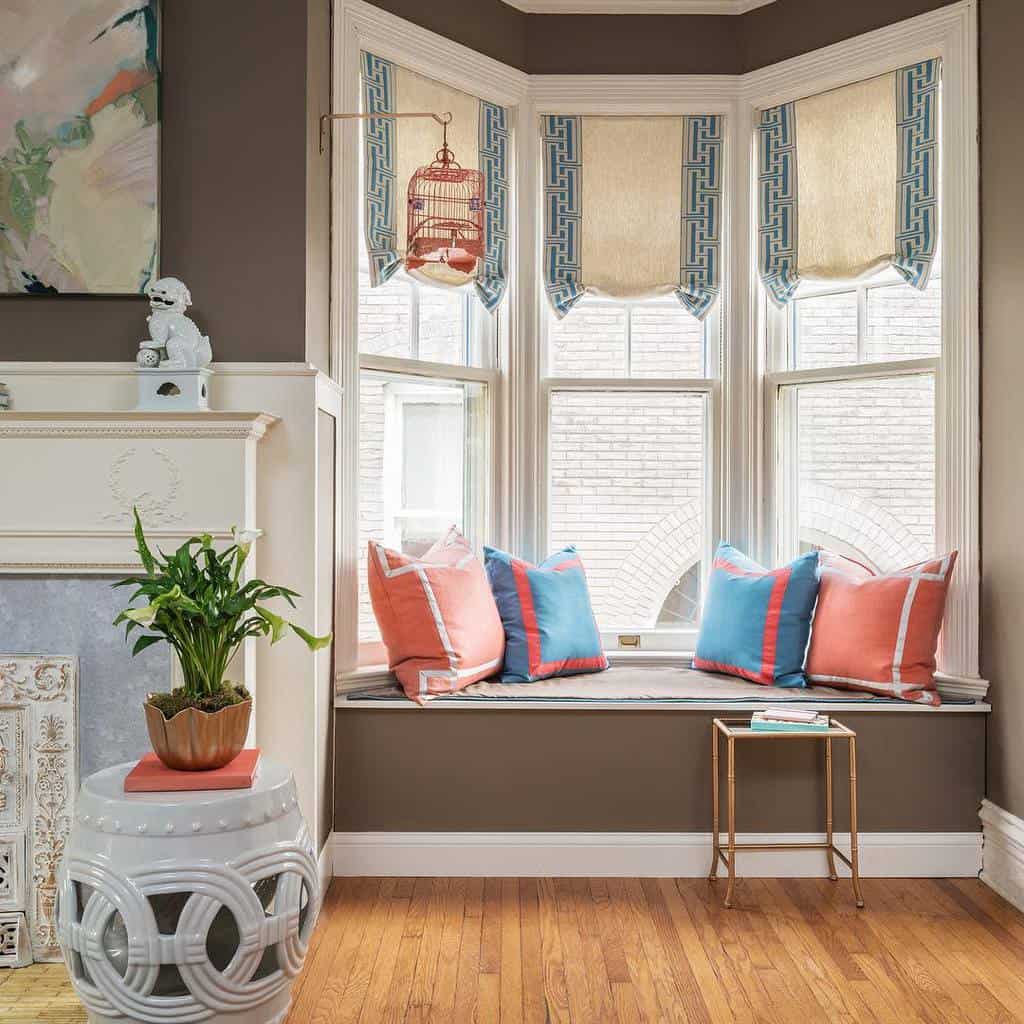
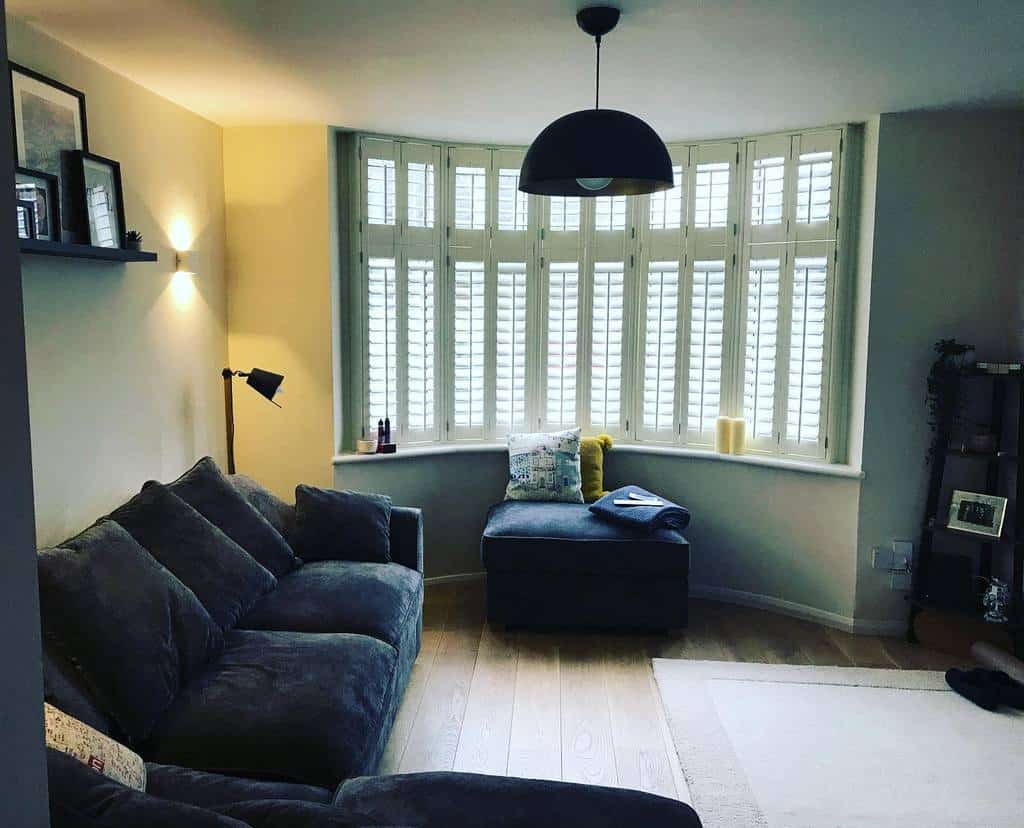
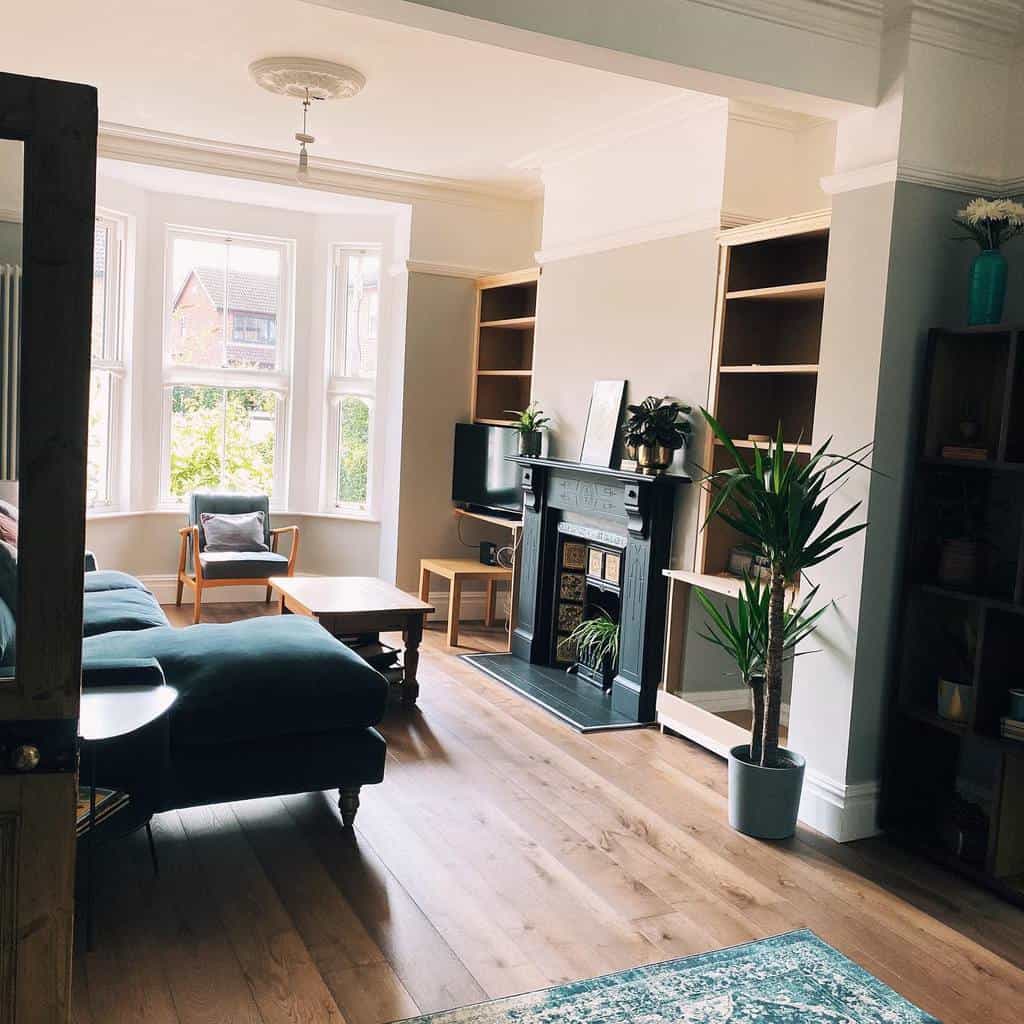
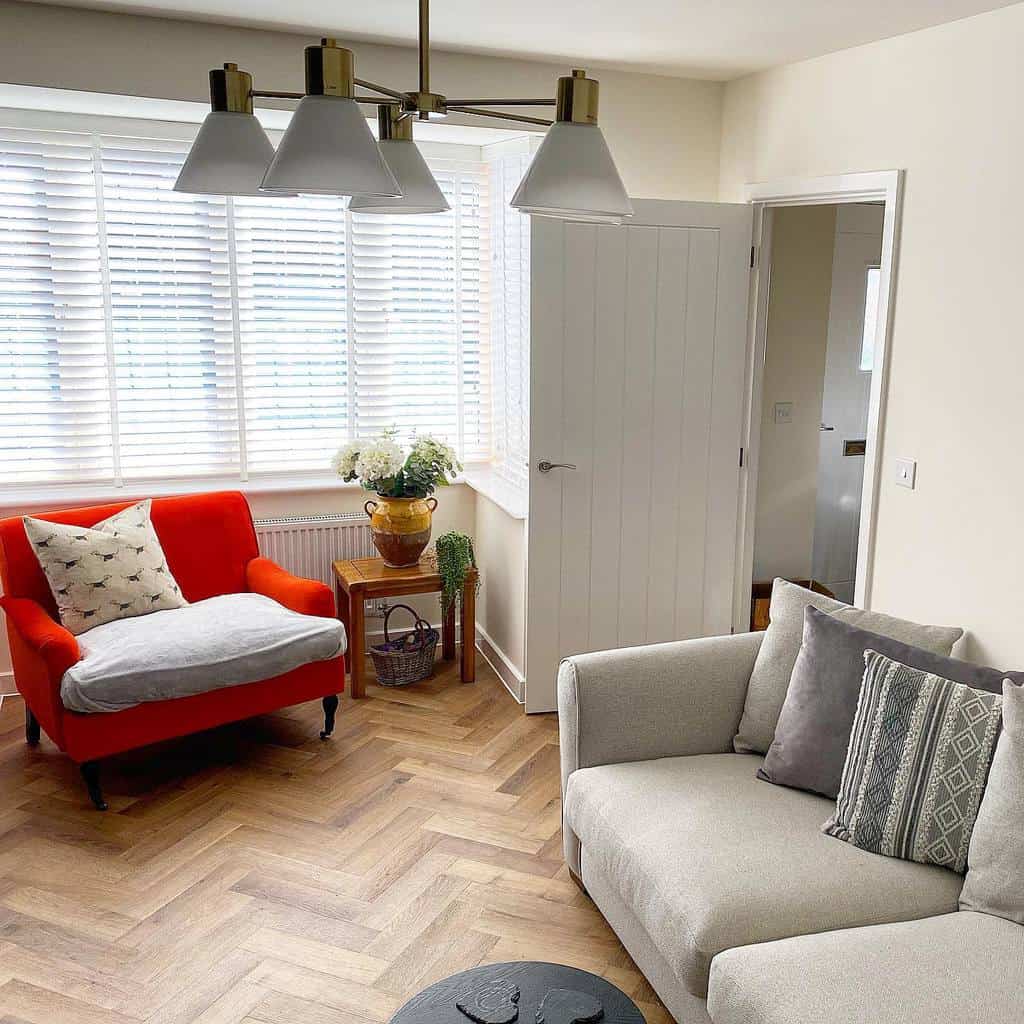
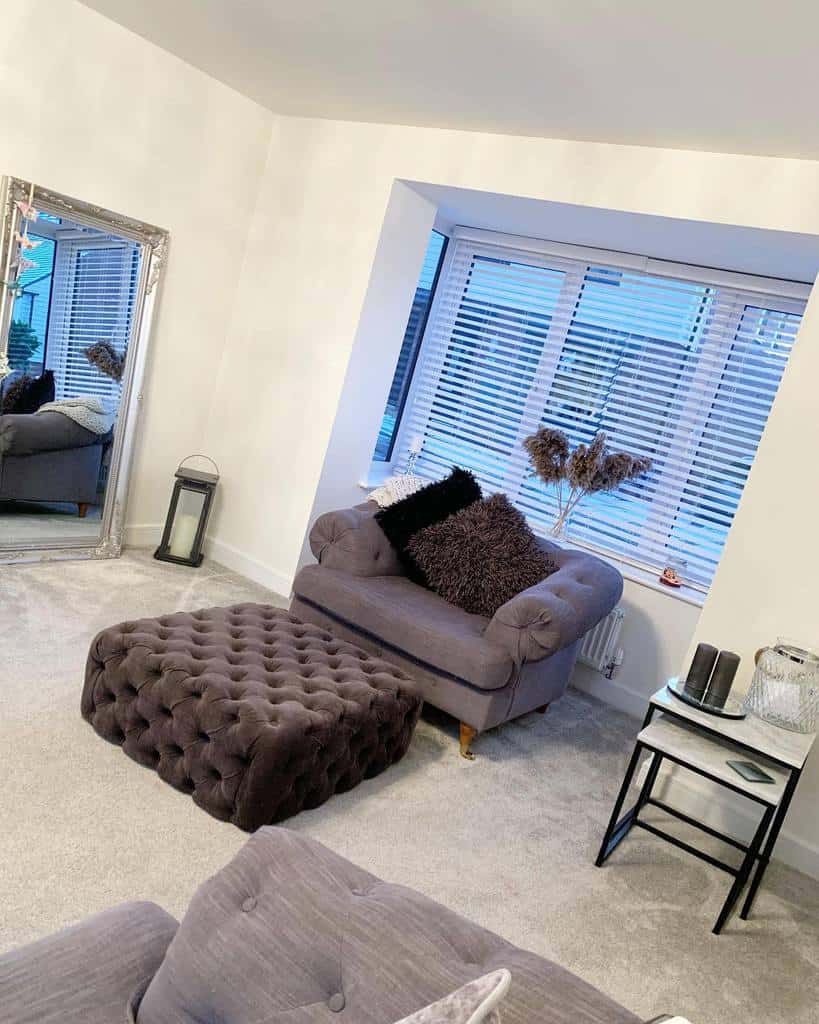
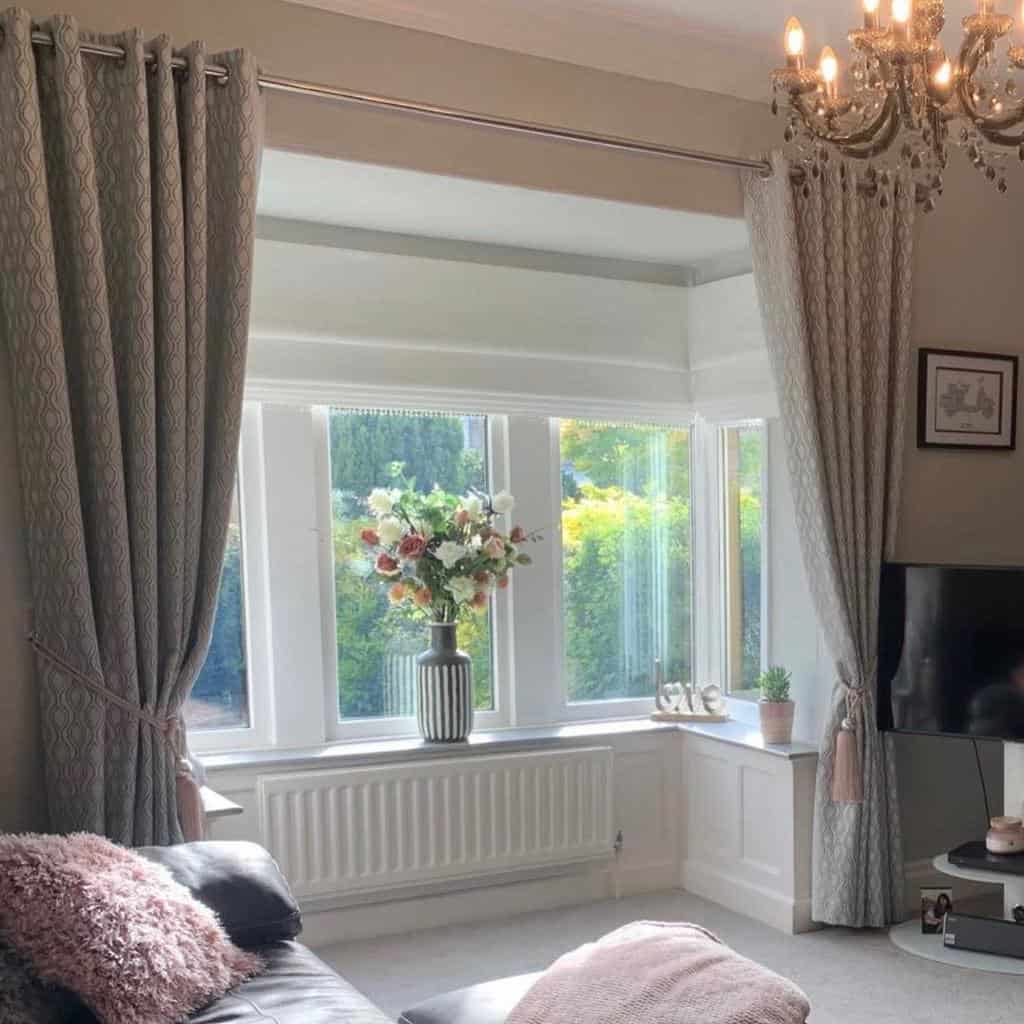
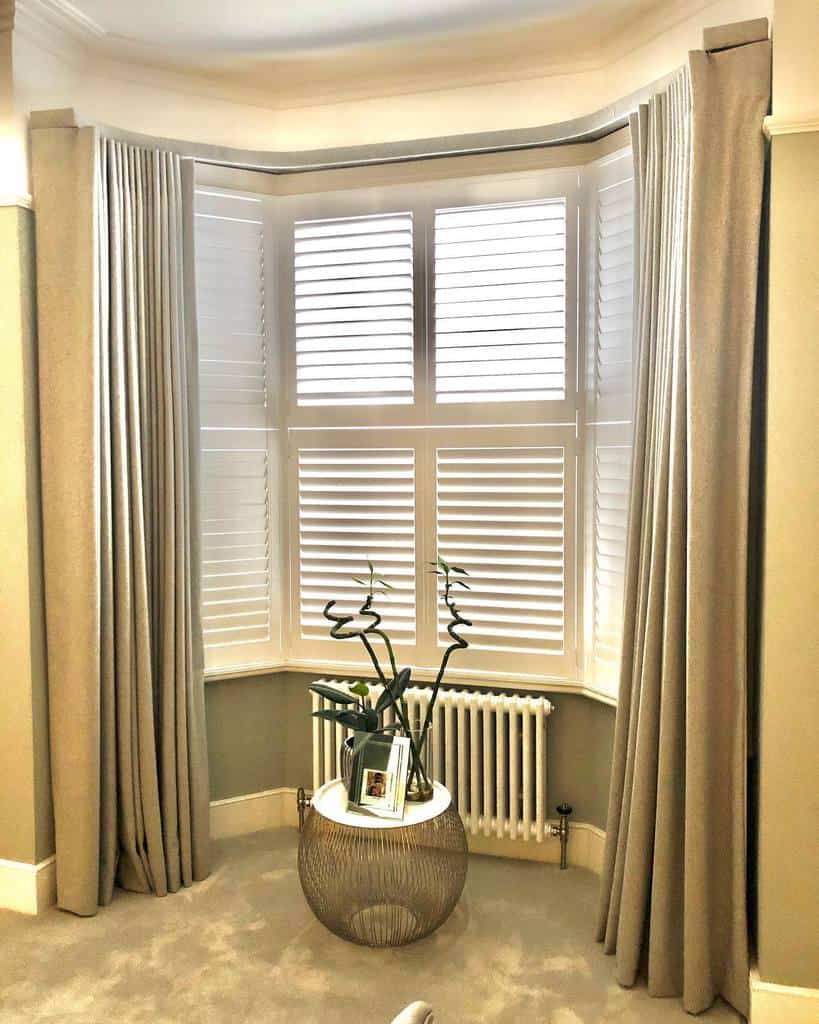
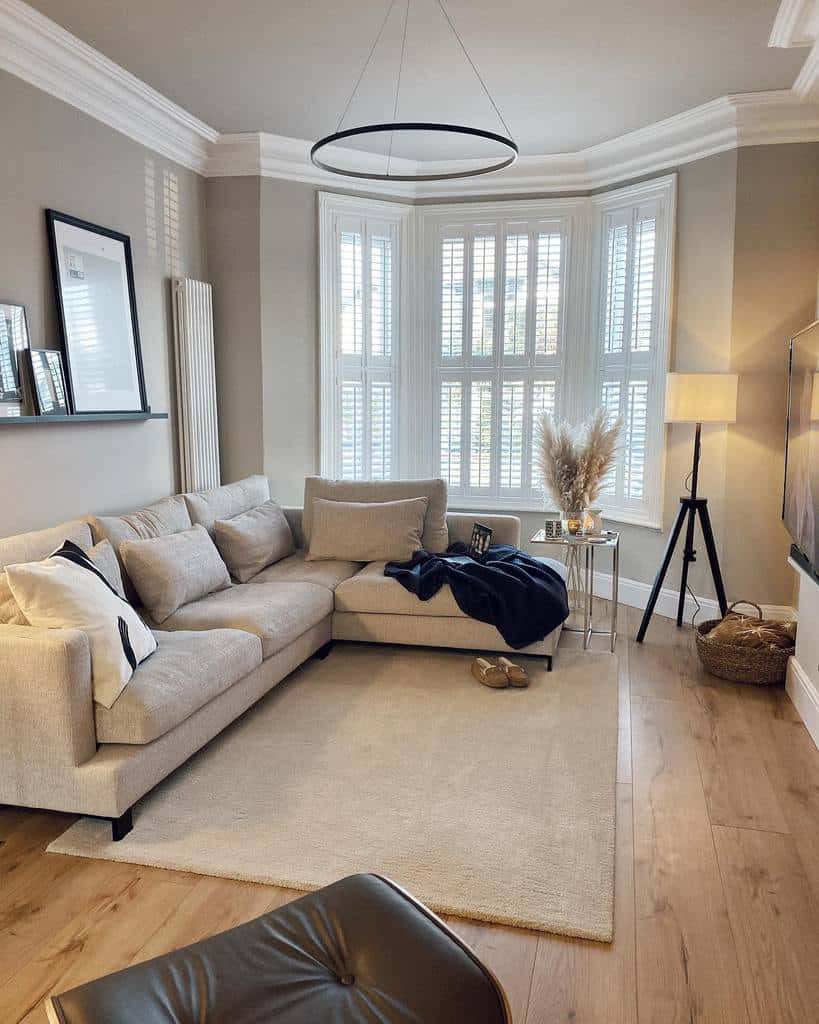
6. Create a Focal Point in Your Living Room
Use your bay window as a reverse accent wall for your living room. Keep the wall around your bay window neutral while painting the adjoining walls a more dramatic hue. This will also open up your living room space, making it feel larger.
Source: @ahome_bythesea via InstagramSource: @at_the_armstrongs via InstagramSource: @home_dreams_and_wishes via InstagramSource: @daly_delights_ via InstagramSource: @overatno15 via InstagramSource: @somethingsohome via InstagramSource: @that_overton_house via InstagramSource: @urbanworkroom via Instagram
If you want to strike a balance between natural light and privacy, cover the bottom of your bay window with a valance or half-shutters.
For a more formal living room, you can use drapery as a bay window treatment. You can hang a tension curtain rod across your entire bay window area for a simple solution. Or install a custom valance and curtains over each window for a more polished appearance.
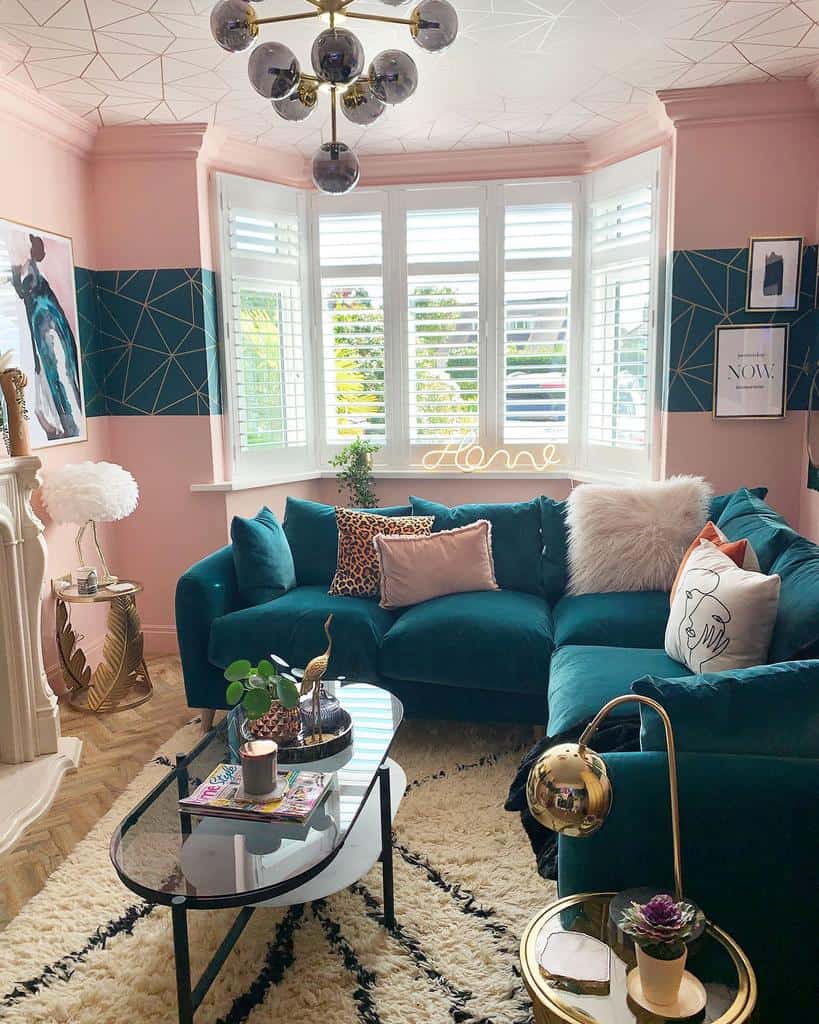
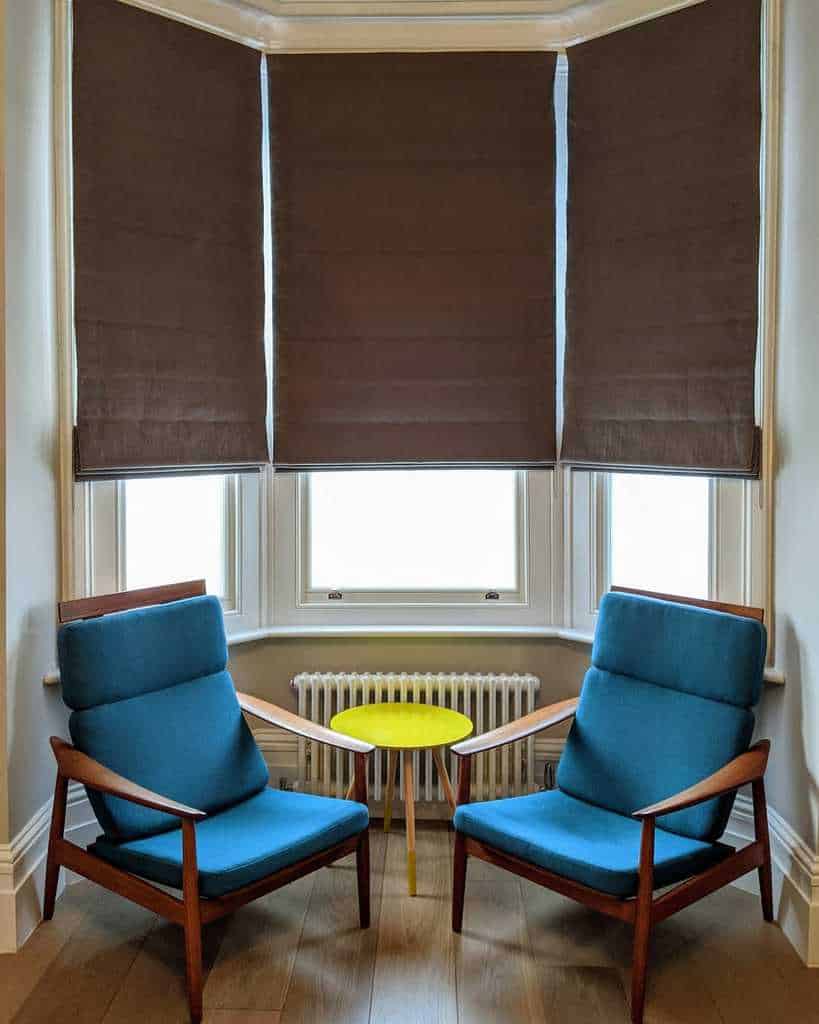
7. Modernize Your Space with a Bay Window
For a modern take on bay window design, keep things clean and straightforward. A sleek bench seat is your best option, but you can also go with something like a desk or mid-century chaise lounge.
Source: @_benflower via InstagramSource: @home.and_.boho_ via InstagramSource: @homeat22_ via InstagramSource: @marie_antoinette57 via InstagramSource: @restoring_ingleside via InstagramSource: @suzannetullockinteriors via InstagramSource: @tamannahbysonakshi via Instagram
Don’t overload your extra seating with pillows and blankets. Instead, keep the space clutter-free. You can add texture to the area with velvet upholstery, potted houseplants, or unique window treatment ideas.
The bigger your bay window the more dramatic and stylish the finished design will look. While you can’t change the size of an existing bay window, you can create the illusion of a larger window frame with strategic curtain placement.
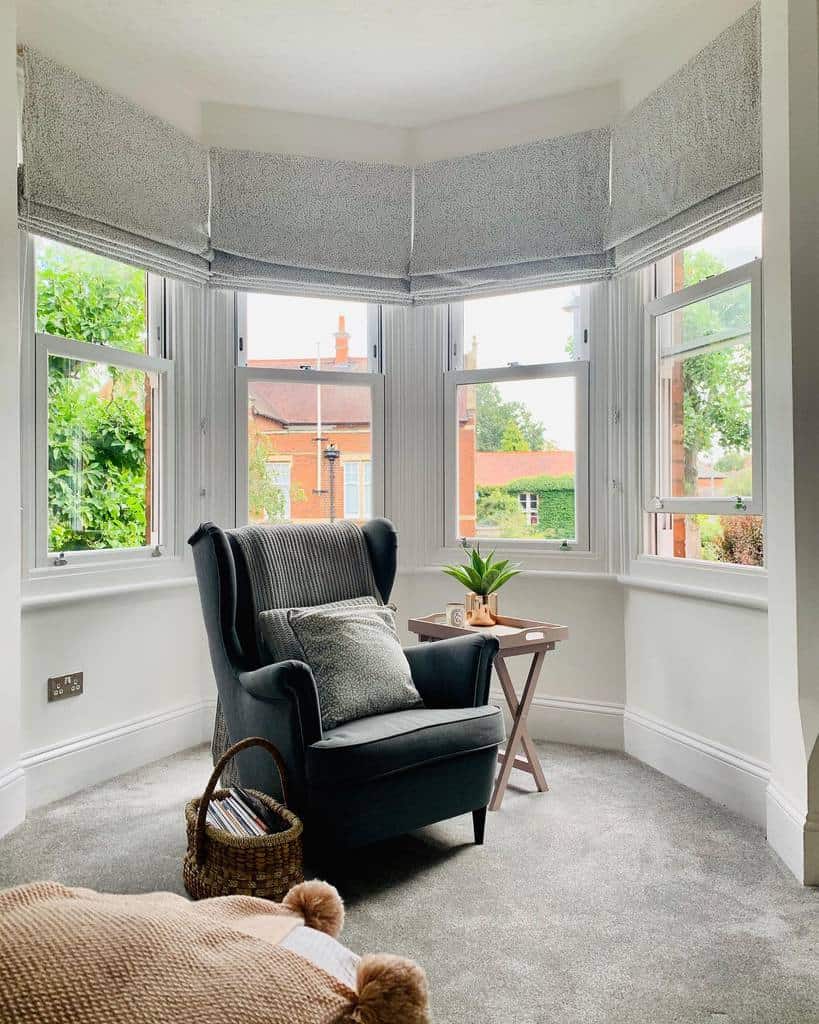
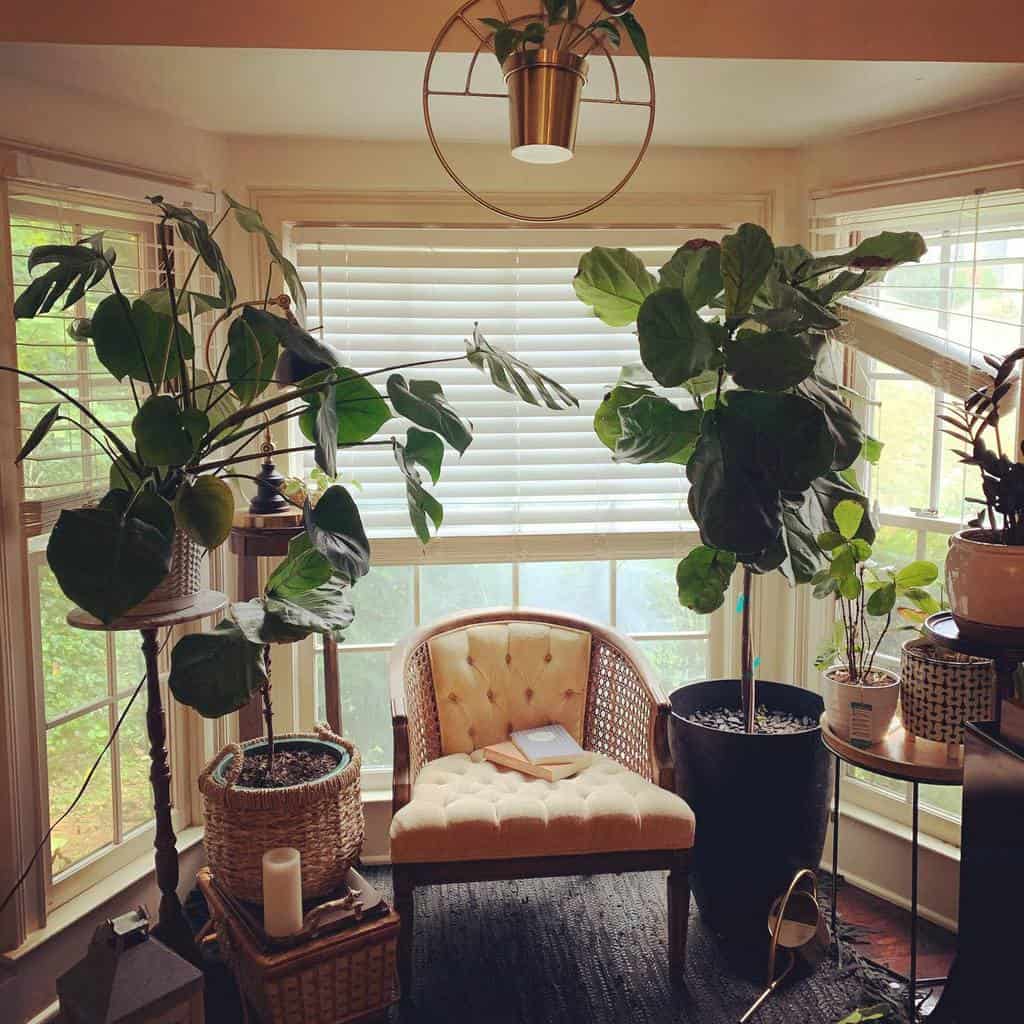
If you have a bay window sitting empty — no matter the room — few design ideas are as quintessential as a reading nook. Your top priorities for this project should be comfortable seating and adequate lighting.
Source: @hatty_ridout via InstagramSource: @homewithharri via InstagramSource: @meammeammeam via InstagramSource: @the.new_.ashbourne via InstagramSource: @villageblindslondon via Instagram
Finding the right window seat can be tricky — go with your gut. Choose something that looks great and stays comfy throughout hours of reading. Set up window blinds and a lamp so you have full control of the area’s lighting.
Many readers refuse to let go of their hardcovers and paperbacks. But if you enjoy using a Kindle or tablet on occasion, you can bring your quaint reading nook into the modern era by making sure you have access to an outlet.
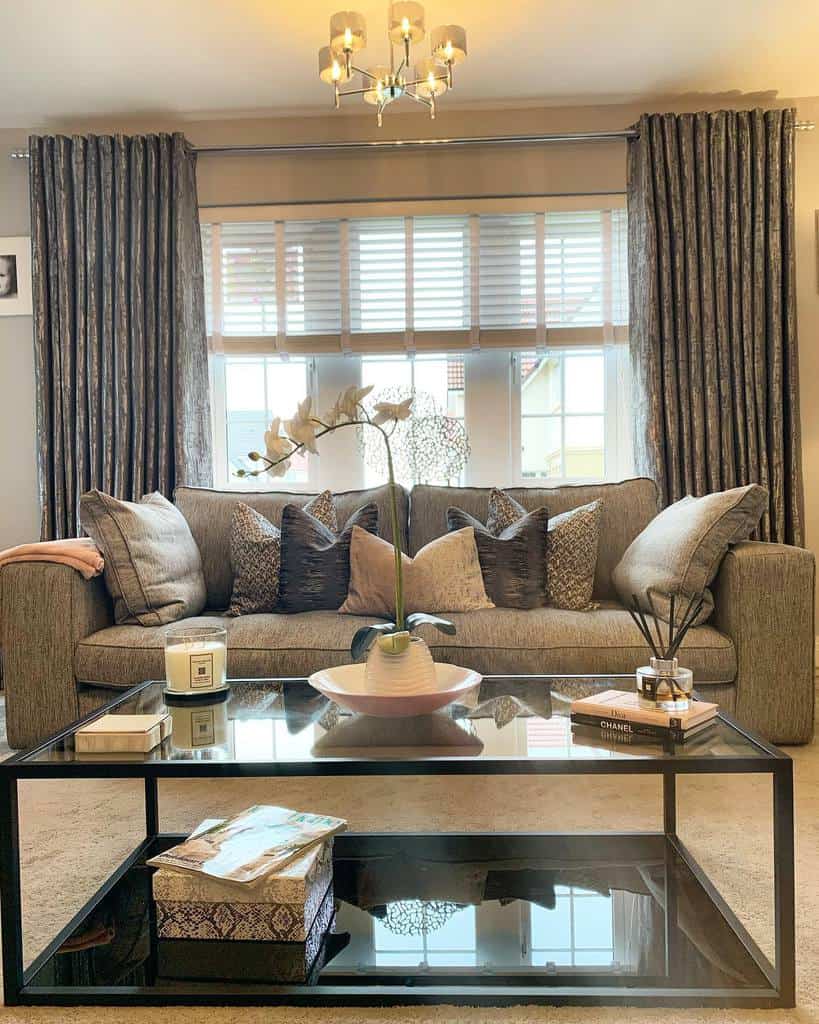
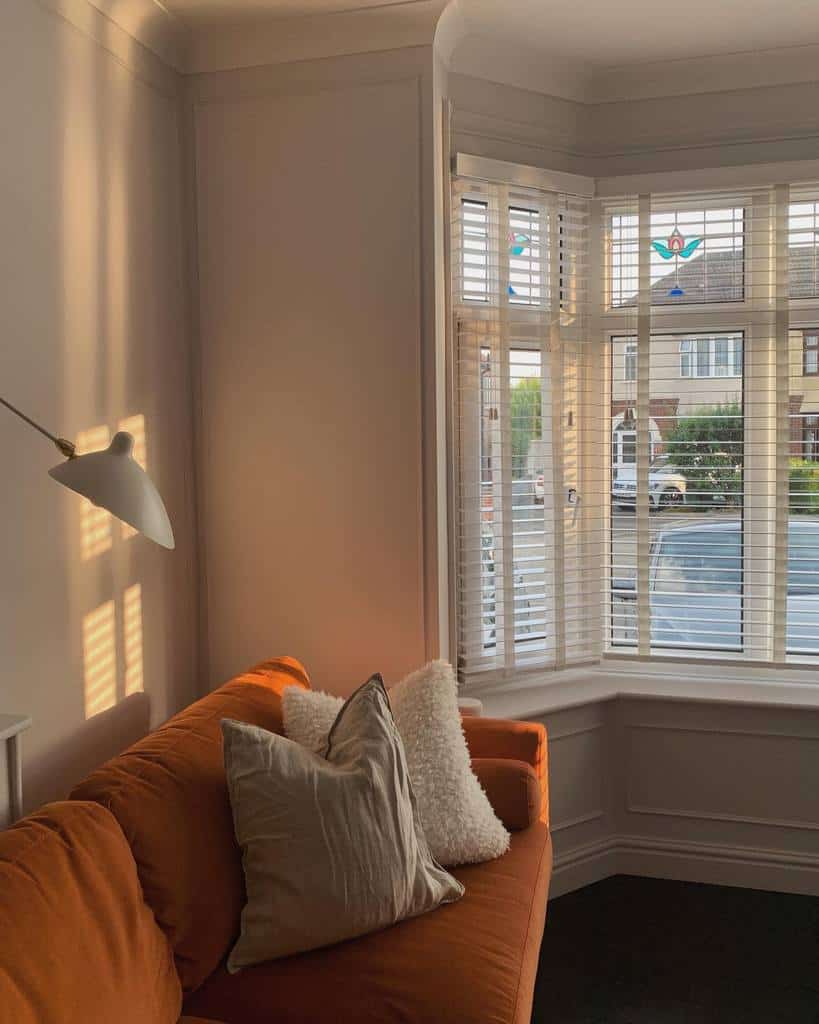
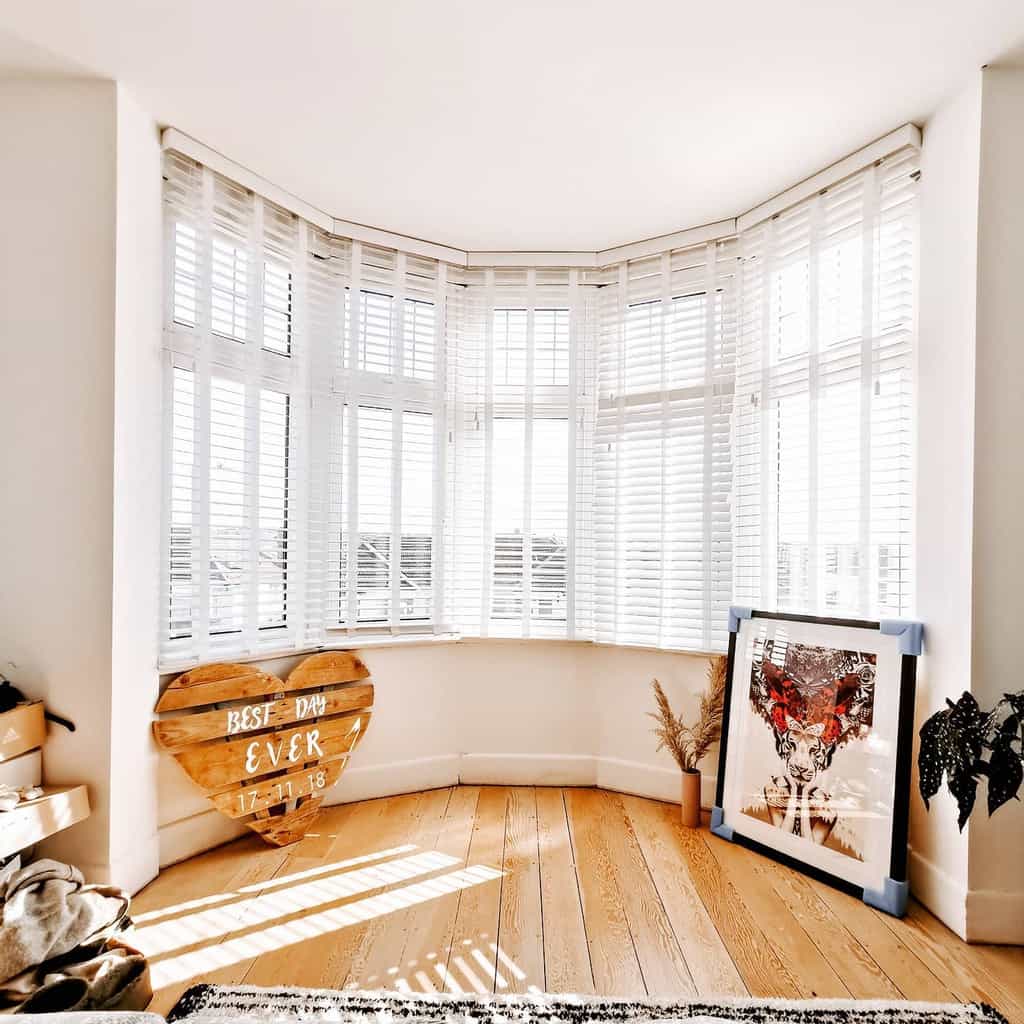
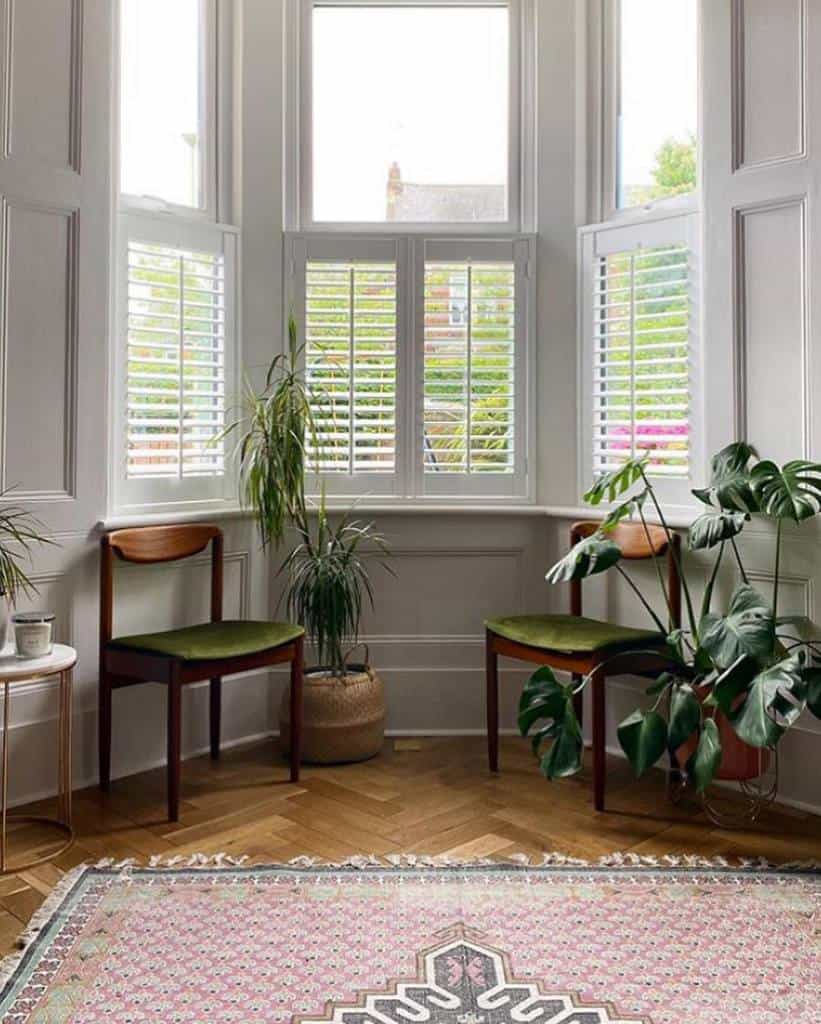
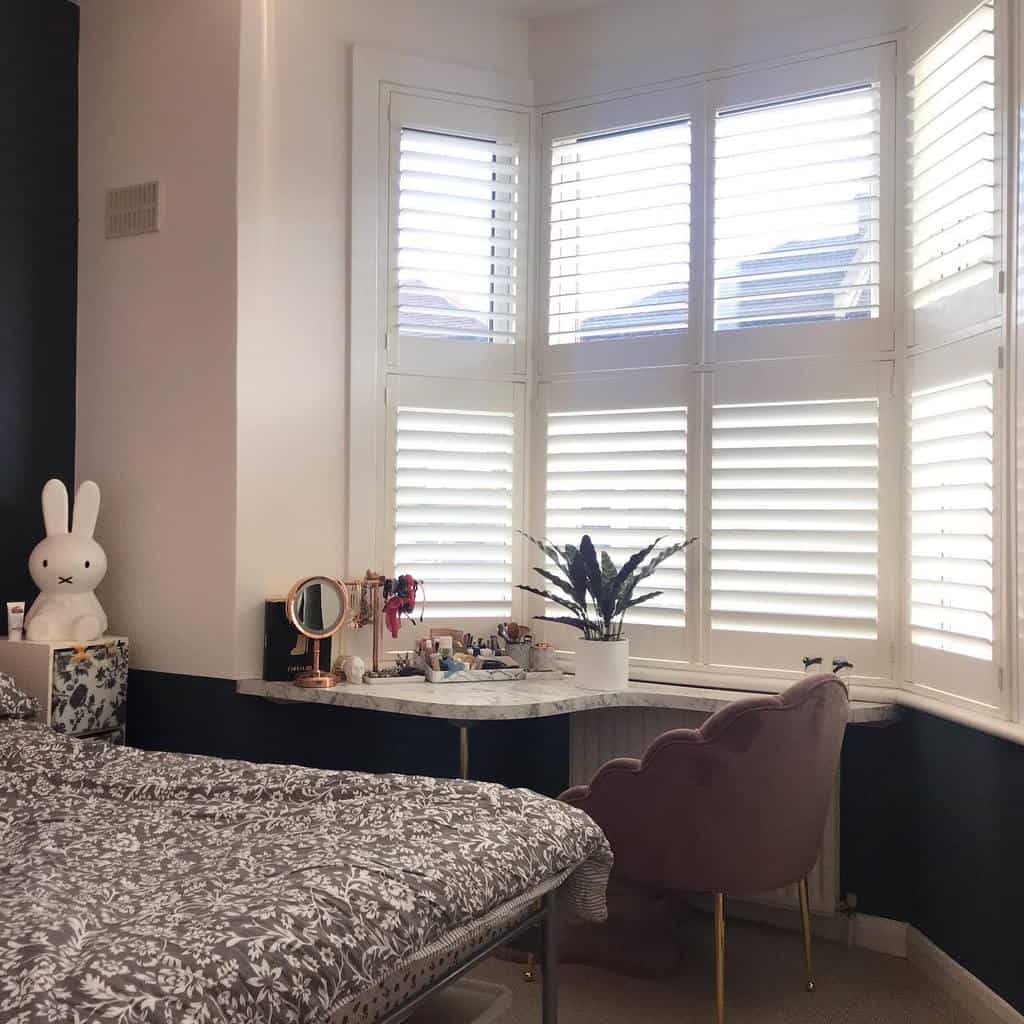
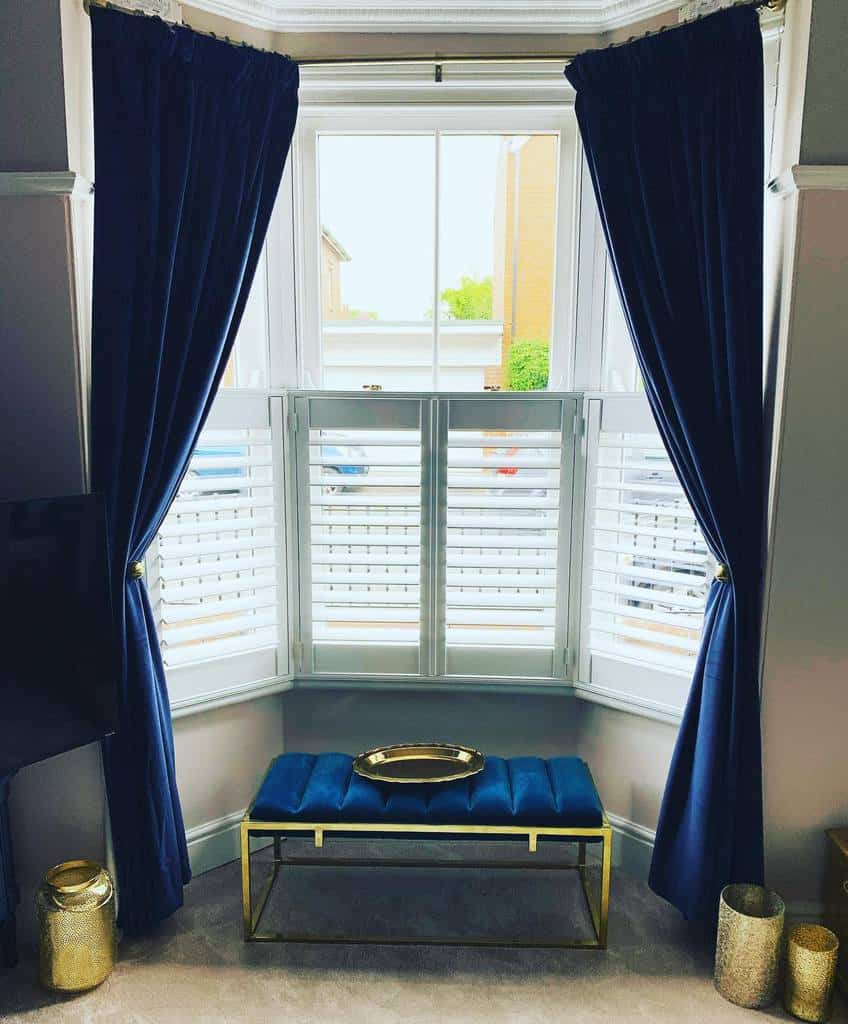
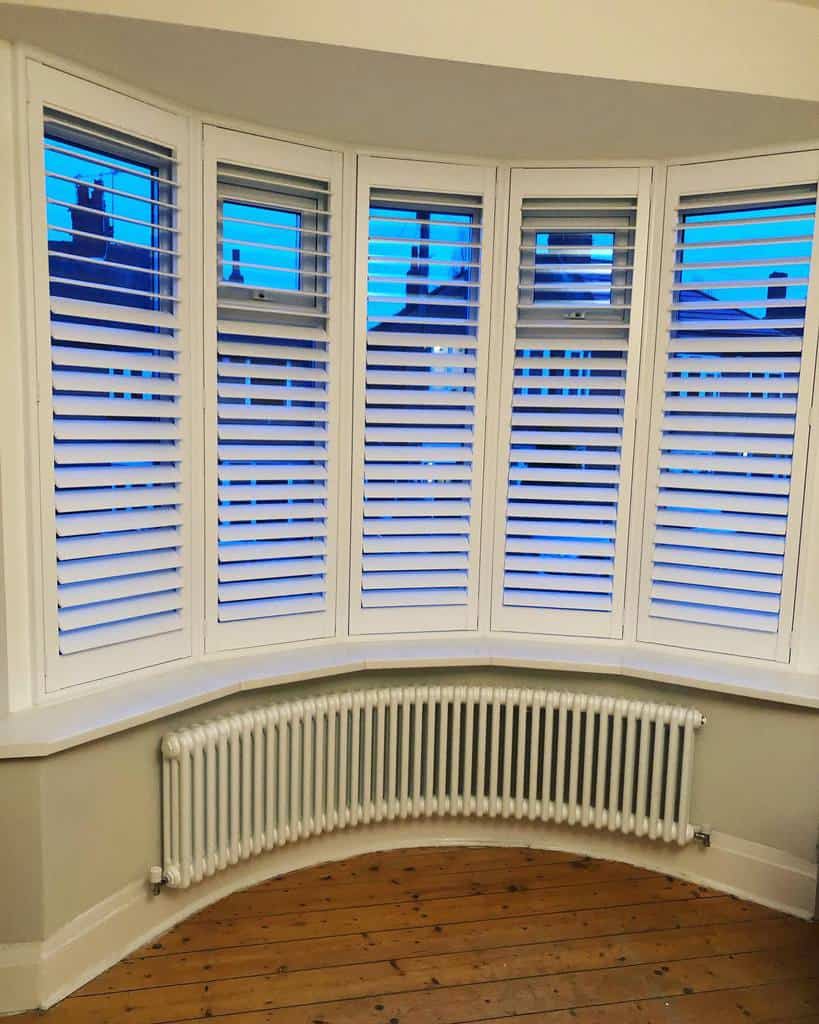
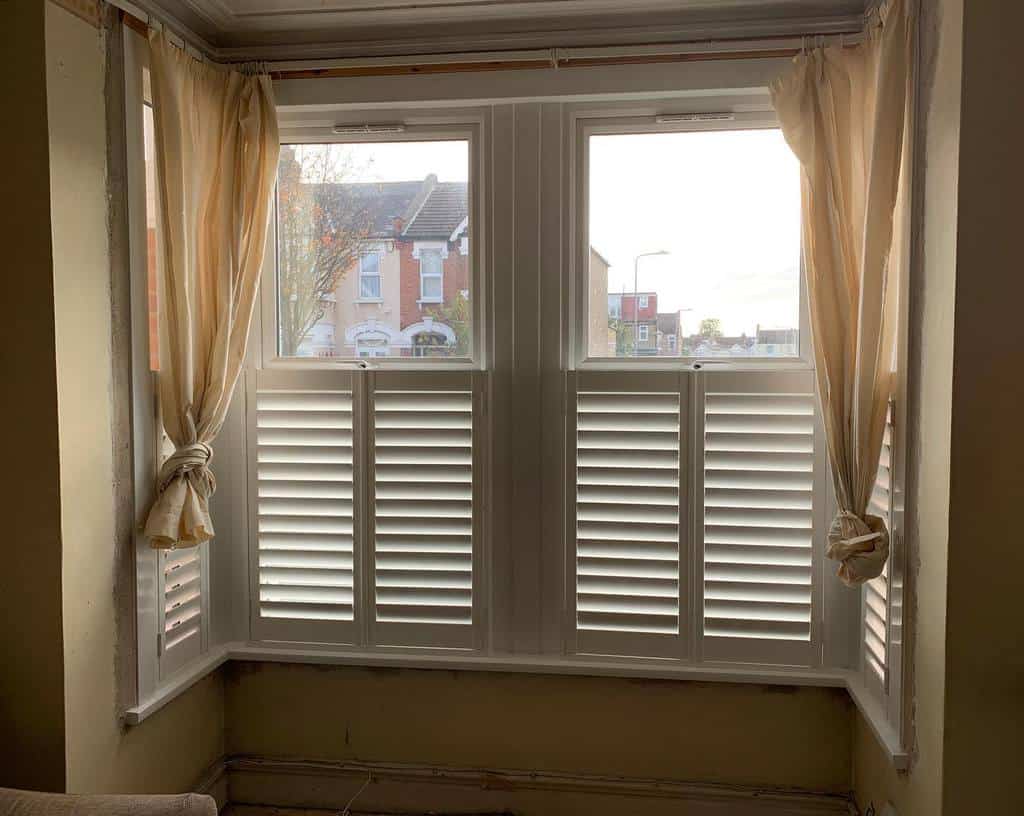
9. Install Custom Shutters for Privacy
Indoor shutters are sturdy and easy to adjust if you need a change in lighting or privacy. Shutters are great for areas like the bedroom, where blackout window treatments are necessary. They’re also less bulky than many other window coverings.
Source: @cc_designs79 via InstagramSource: @juliusinteriors via InstagramSource: @keyes.home_ via InstagramSource: @nightanddaydecor via InstagramSource: @our_bellway_adventure via InstagramSource: @t.l_homes via Instagram
You can still finish your bay window with a set of traditional curtains. Drape a decorative curtain on each side of your window or hang sheer panels over the shutters themselves.
If your bay window is surrounded by a white wall, white shutters will make the space feel nice and put together. Natural wood shutters go with everything. On the other hand, contrasting shutters can be a great complement to your room’s color scheme.
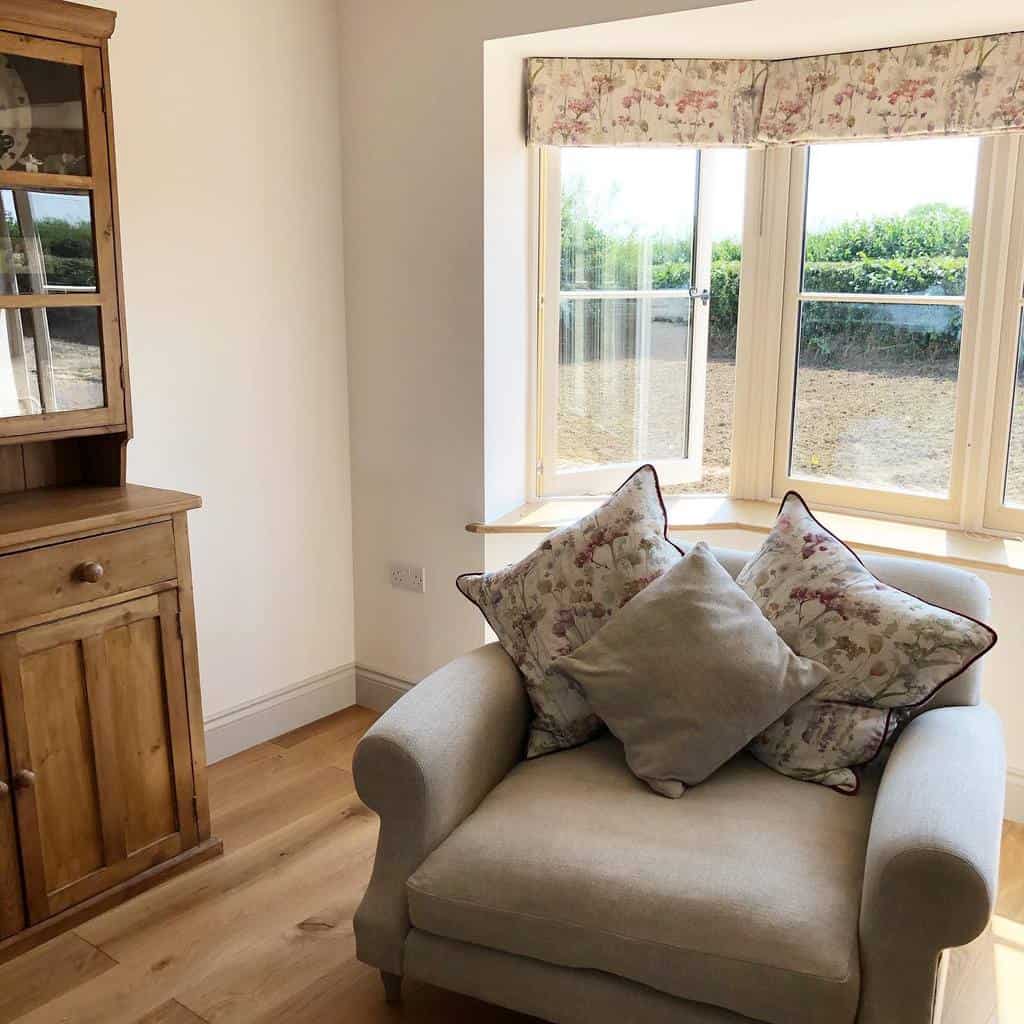
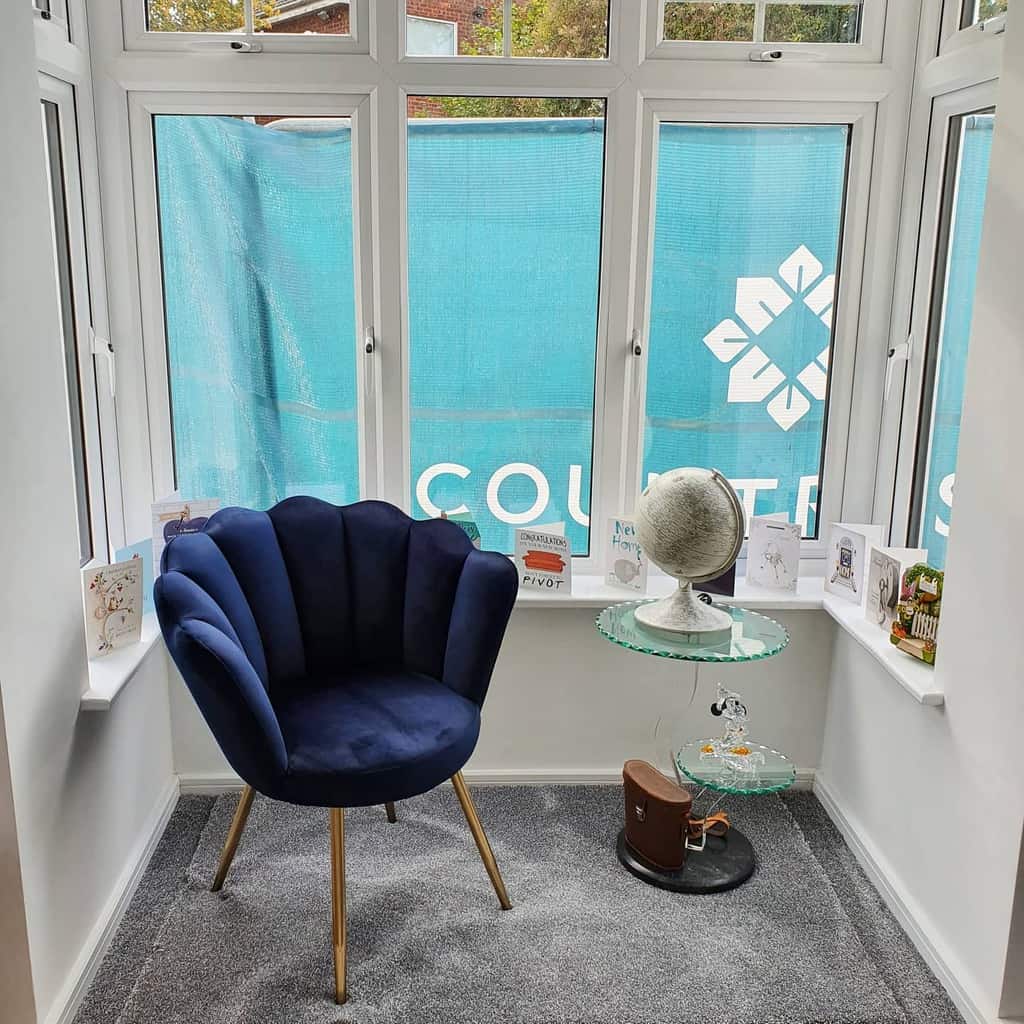
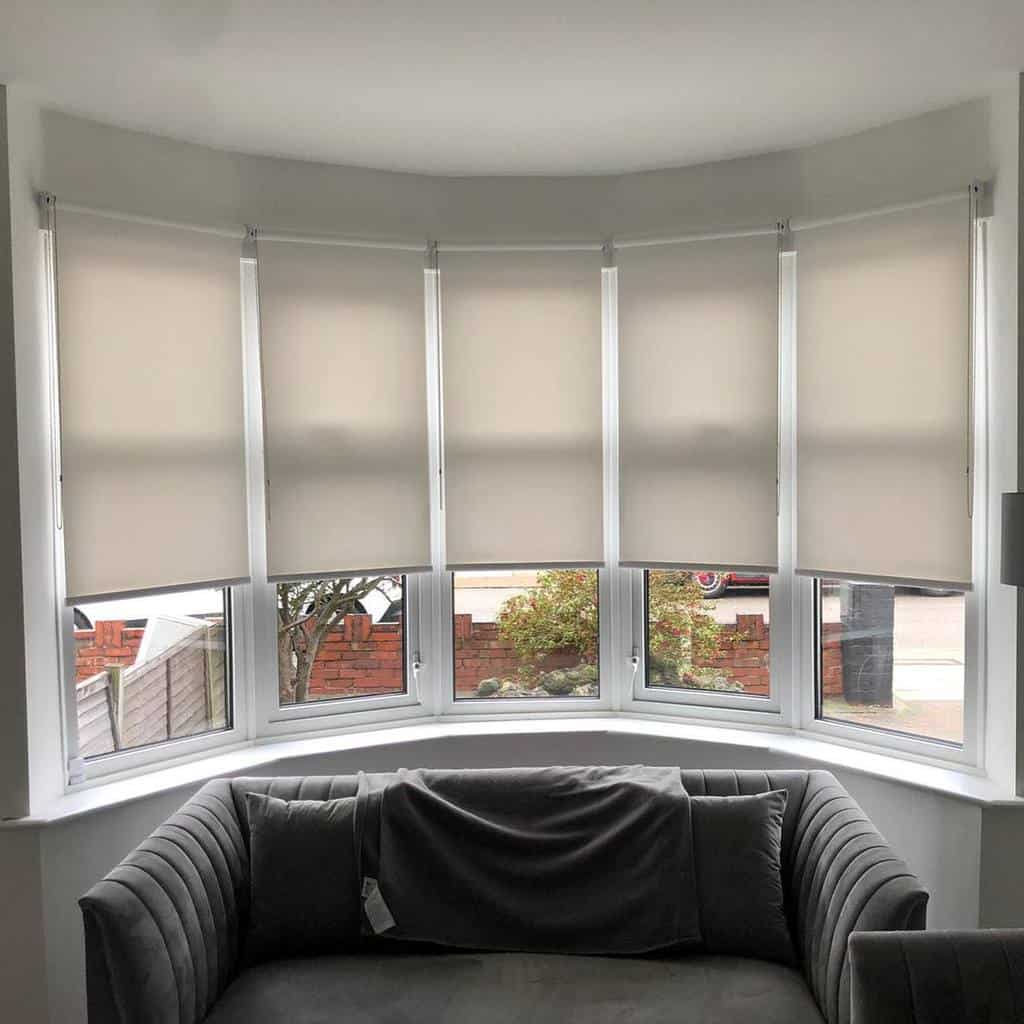
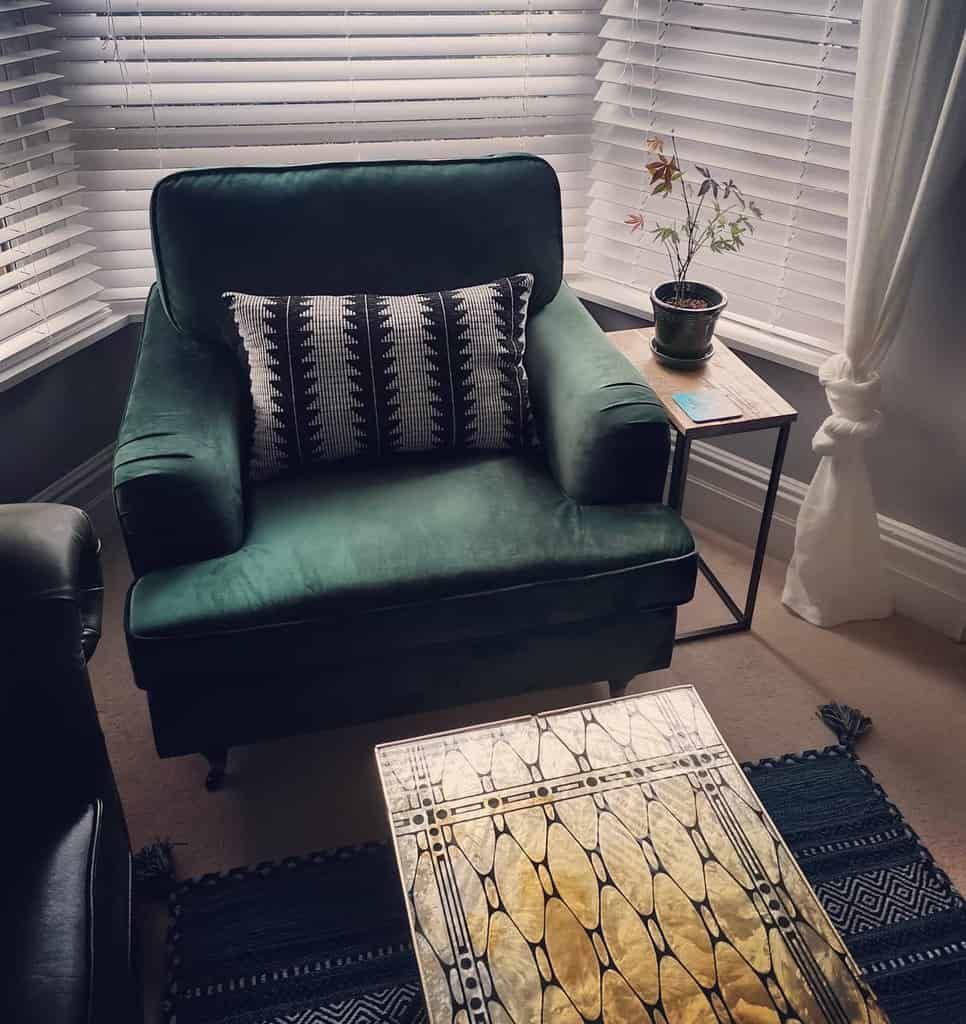
10. Decor Solutions for Small Bay Windows
Most bay window designs assume that your window is large enough for a full-length bench or sofa. If you’re looking for ways to decorate a small bay window, though, finding inspiration can be hard.
Source: @117the_village_reno via InstagramSource: @at_home_onthevale via InstagramSource: @restoringsouthbourne via InstagramSource: @the_seaview_2020 via InstagramSource: @victorian_renovation_3bh via InstagramSource: @wakeupinworthing via Instagram
Instead of a long bench, try placing an accent chair or ottoman in front of your windows. A sturdy chest can double as seating while also offering hidden storage — throw a cushion on top for comfort.
Keep the space directly in front of your windows clear to maximize the amount of sunlight that comes through. Curtains will weigh down small bay windows. Opt for Roman shades or Venetian blinds for privacy.
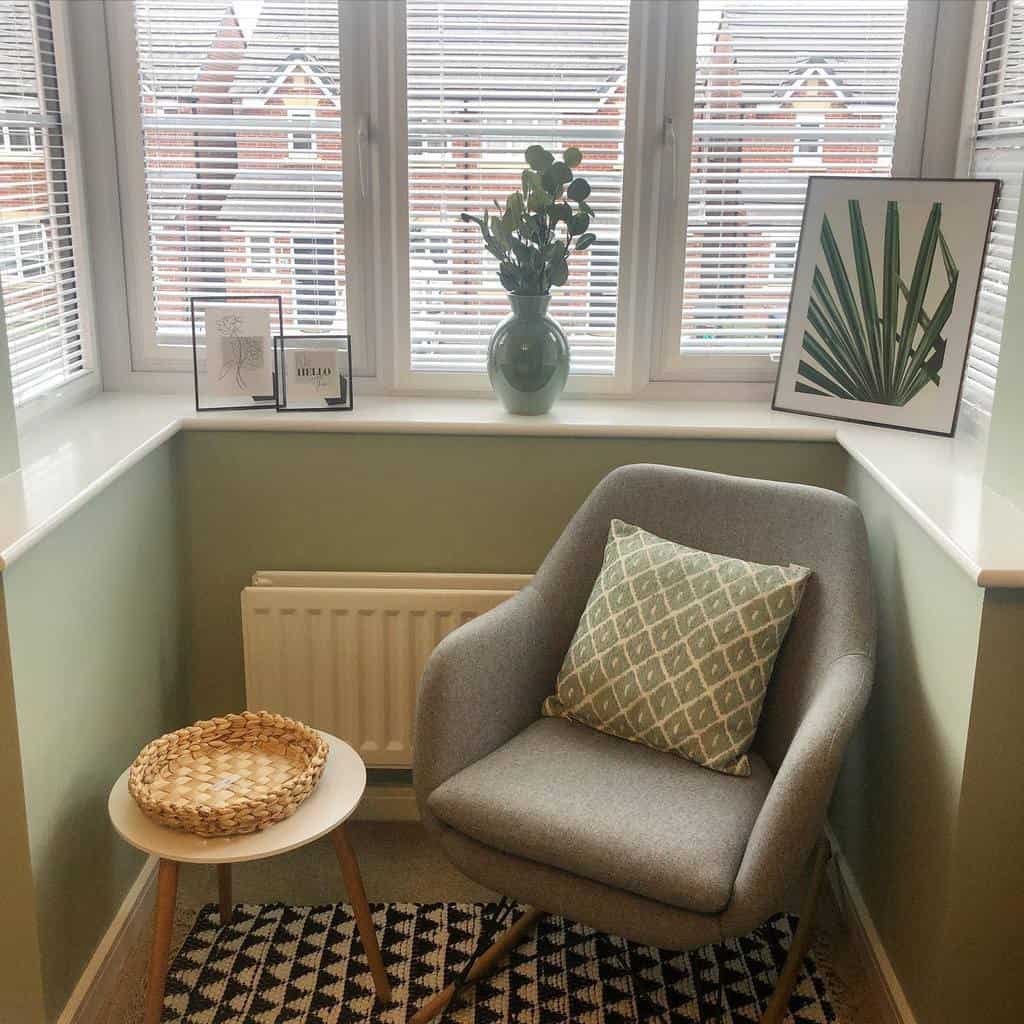
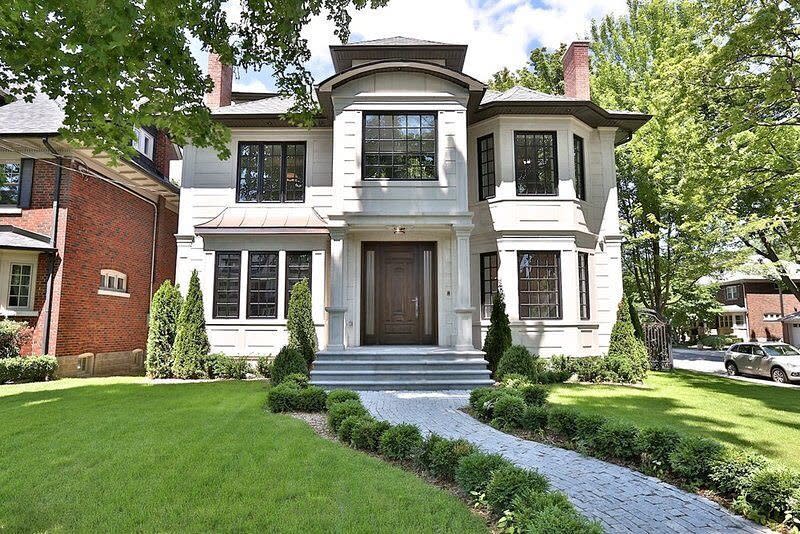
11. Style a Square Bay Window with the Right Decor
Box bay windows — bay windows with a squared-off design — can add beauty and intrigue to the exterior of your home. They can also be an interesting addition to your interior floor plan.
Source: @candsinteriors via InstagramSource: @doornumbereleven via InstagramSource: @foundations_2_finishes via InstagramSource: @movingintono.11 via InstagramSource: @my.white_.house_.by_.the_.seaside via InstagramSource: @oakhousedesign via InstagramSource: @projectfourwinds via InstagramSource: @shutterfitter via Instagram
Depending on the size, a box bay window can be turned into a private alcove with a bench seat, armchair, or writing desk. Use a screen divider or tall houseplants to separate this space from the rest of the room.
When it comes to choosing blinds or shutters for a box bay window, there’s little room for error. Make sure your measurements are accurate, or else you’ll end up with window treatments that gap or overlap.
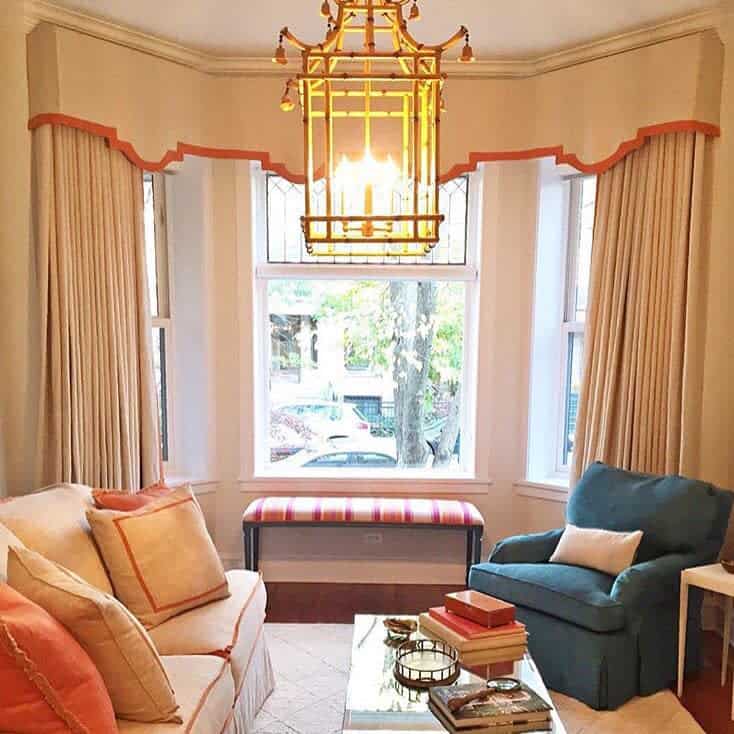
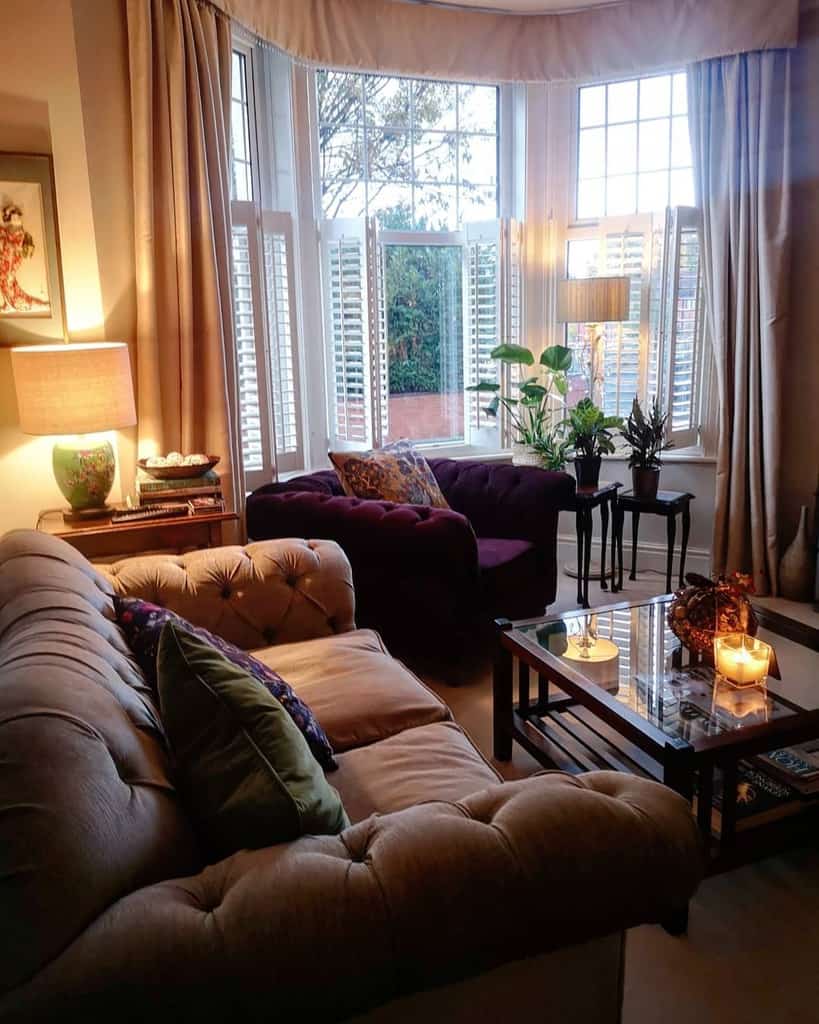
12. Add Victorian Elegance to Your Bay Window
Many homeowners strive to make their houses look as contemporary as possible. But if you relish in the vintage details of your home’s architecture, decorating a set of bay windows can be a real treat.
Source: @amyclarkinteriordesign via InstagramSource: @kellysblindsuk via InstagramSource: @oldmoneyarchitecture via InstagramSource: @projectno55 via InstagramSource: @westcliffe.reno_ via Instagram
The best way to dress Victorian bay windows is to mostly let them stand on their own. Stick with basic window coverings, like sleek blinds, shutters, or a custom curtain set.
Keep your decor and window treatments as simple as possible. Instead of placing decorative items on your windowsills, adorn a small cocktail table or bench set in front of the window.
13. Build a Bay Window Seat with Storage
Whether you’re dreaming of a private reading nook or some extra seating for your kitchen or living room, a bay window is the perfect spot to bring this idea to life.
Source: @113.greenvictoria via InstagramSource: @lynncgriffith via InstagramSource: @rumah_ayin via Instagram
Many bay windows are accompanied by built-in seating. You can also use a freestanding banquette bench, armchair, or loveseat. Make wooden bench seating more comfortable with an upholstered cushion and throw pillow arrangement.
Get creative with your window seat ideas — the only rule is that the furniture must fit the space. Place a small table or desk in front of your window seat for a casual dining or work area with plenty of natural lighting.
“Age is just a number. It’s totally irrelevant unless, of course, you happen to be a bottle of wine.” – Joan Collins
Do you love a good glass of wine with your dinner? Perhaps you love a robust cab with your chicken or steak. Maybe you’re more of a pinot grigio drinker with some fish.
It doesn’t matter what variety of wine you drink or where in the world it comes from. All fine wine enthusiasts have one thing in common. They have a collection of bottles and enjoy having them displayed in an arrangement.
Your wine collection deserves to be stored in a manner that will preserve it. These wine rack ideas will help you figure out the best way to store your fine collection while also making it easy to grab your favorite bottle for a glass with dinner.
[view_toc]
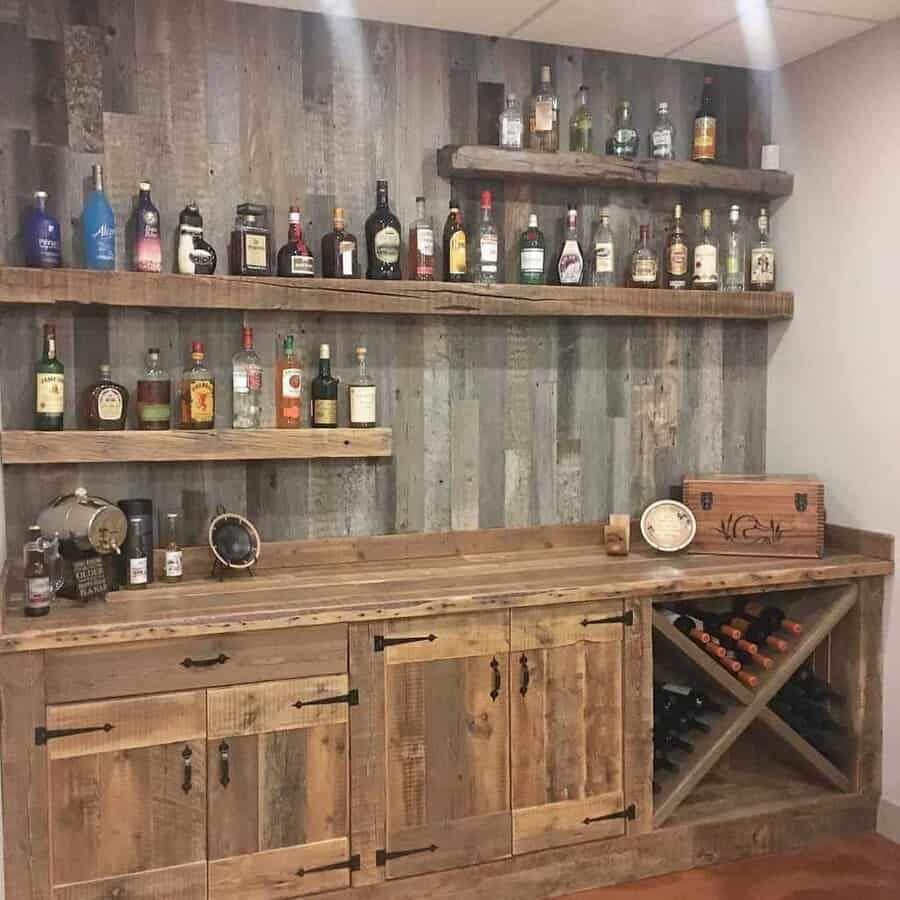
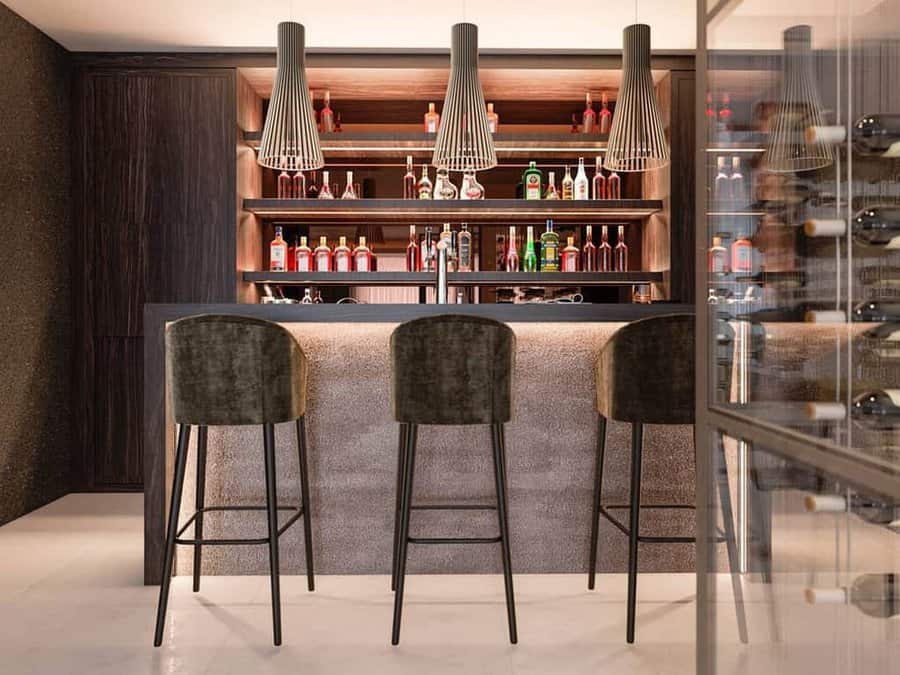
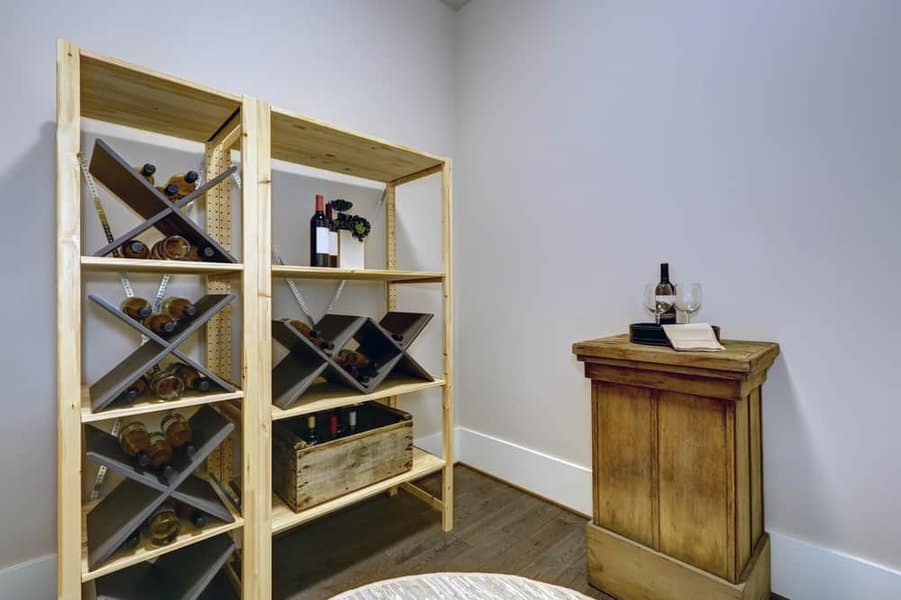
1. Store Your Wine In The Basement
If you have an unused corner in your basement, why not put it to wine-filled good use by installing a wine rack? Not only is this an attractive and creative home design feature, but it also helps to keep all your wine bottles in a centralized area.
If you really want to take wine storage to the next level, consider building a wet bar with glass shelves and integrated wine coolers – that way you can store not only wine but also beer, mixer drinks, and other beverages conveniently.
Whether it’s just for yourself or for entertaining guests, a wine rack or wet bar is sure to elevate any wine enthusiast’s experience.
Source: @originalsinteriorsmarbella via InstagramSource: @sigiscustomsolutions via InstagramSource: @scaled via Instagram
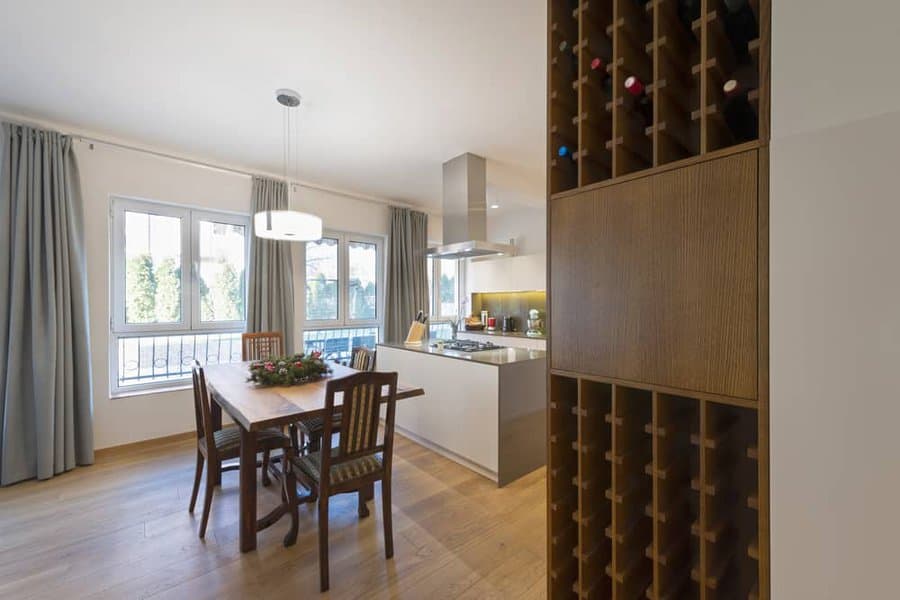
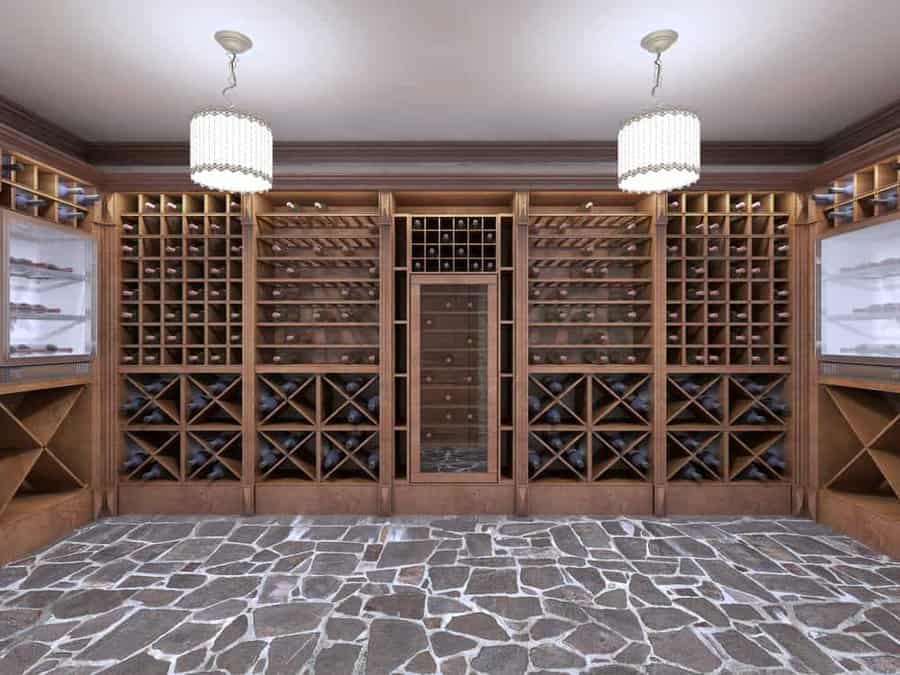
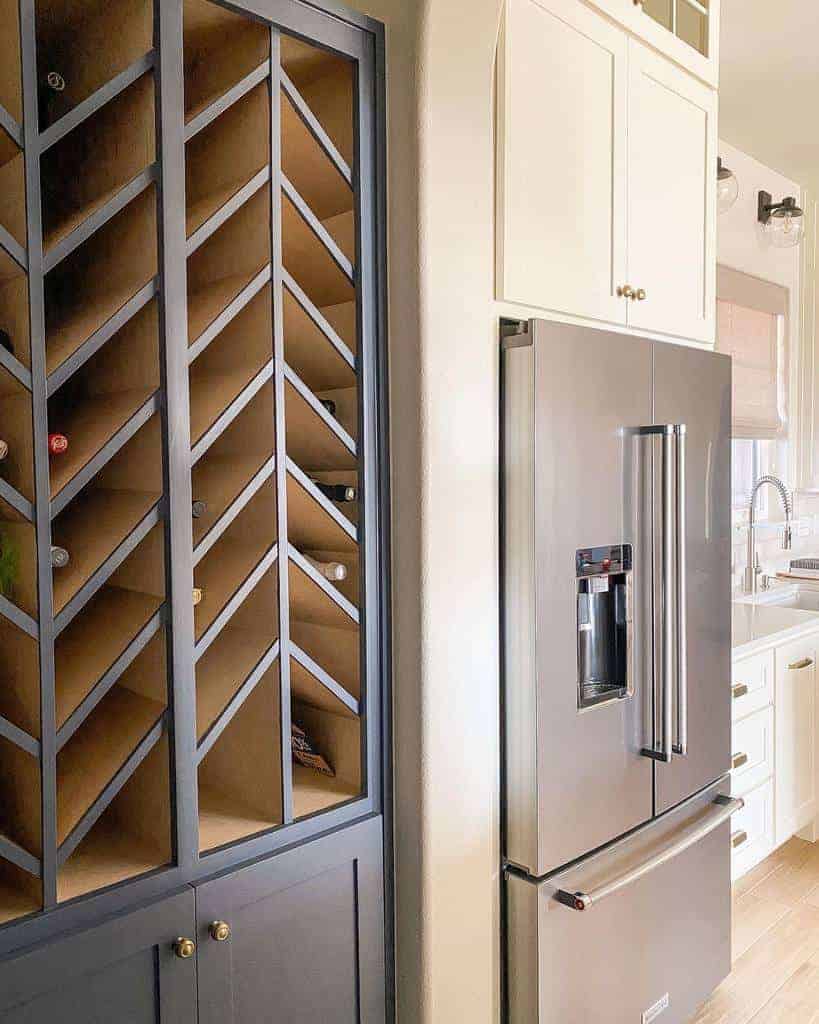
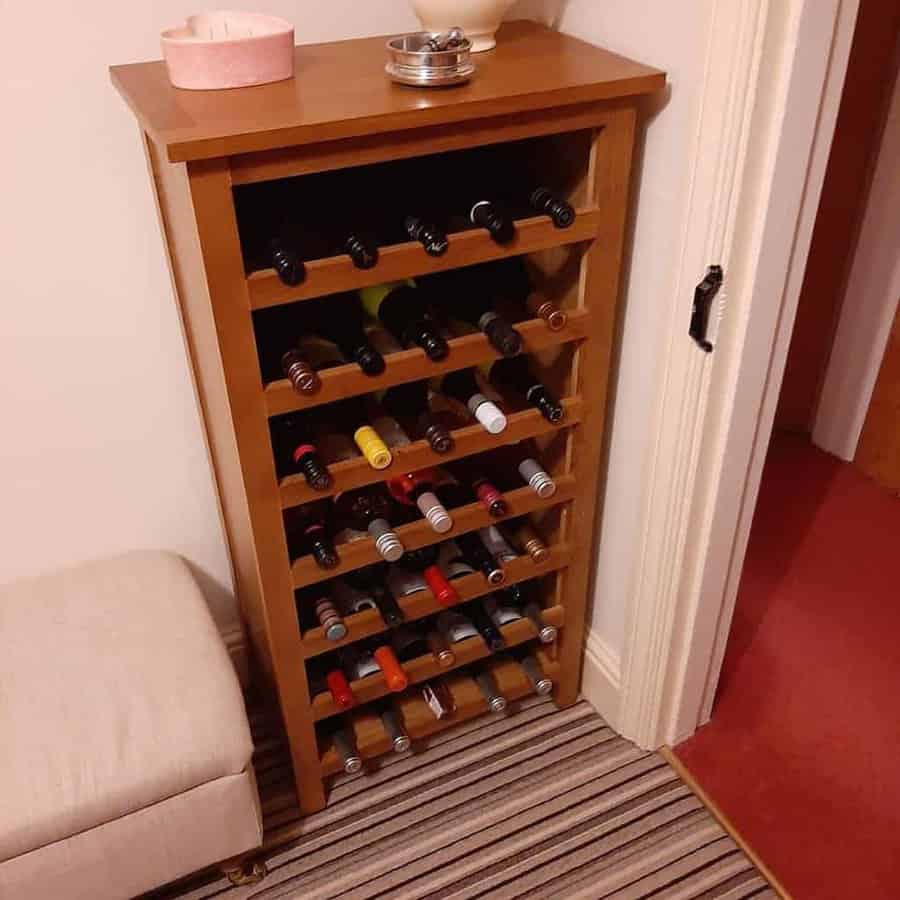
2. Install Pre-Built Shelves
When it comes to storing your favorite wines, built-in wine shelves are always a great choice! Not only do they look stylish and modern, but they also save you the hassle of having to find space for separate pieces of furniture. You can incorporate built-in shelves into a kitchen cabinet, pantry, or even a hallway nook; design them with built-in slots or cubbies that fit different wine bottle sizes and styles. Built-in wine shelving allows you to store more than just bottles – you can incorporate stemware storage, too.
Some built-in wine shelf designs include racks for hanging glasses upside down like art on a wall – this feature is both decorative and practical! And if you really want to emphasize the artistic aspect of built-in shelves, consider using reclaimed wood or metal frames. Ultimately, built-in wine shelves are both cost-effective and practical when it comes to finding creative ideas for wine rack designs.
Source: @margo.hampel via InstagramSource: @my_home_pics_x_ via InstagramSource: @designfirmllc via InstagramSource: @emery_design_build via Instagram
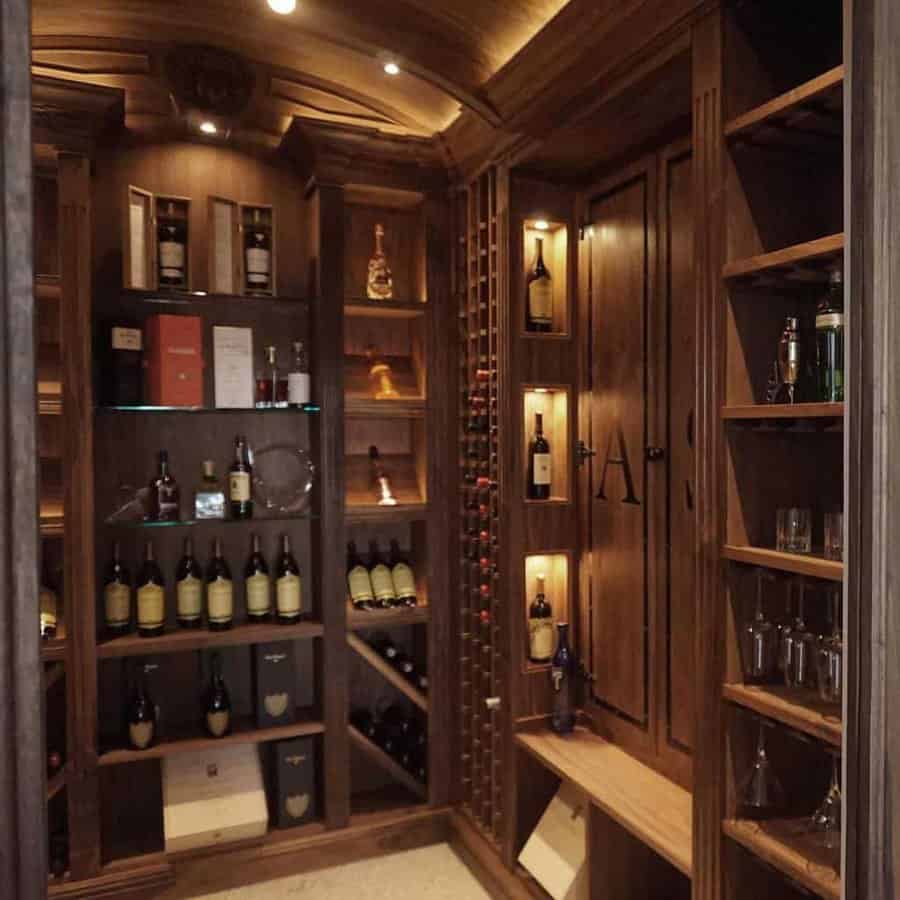
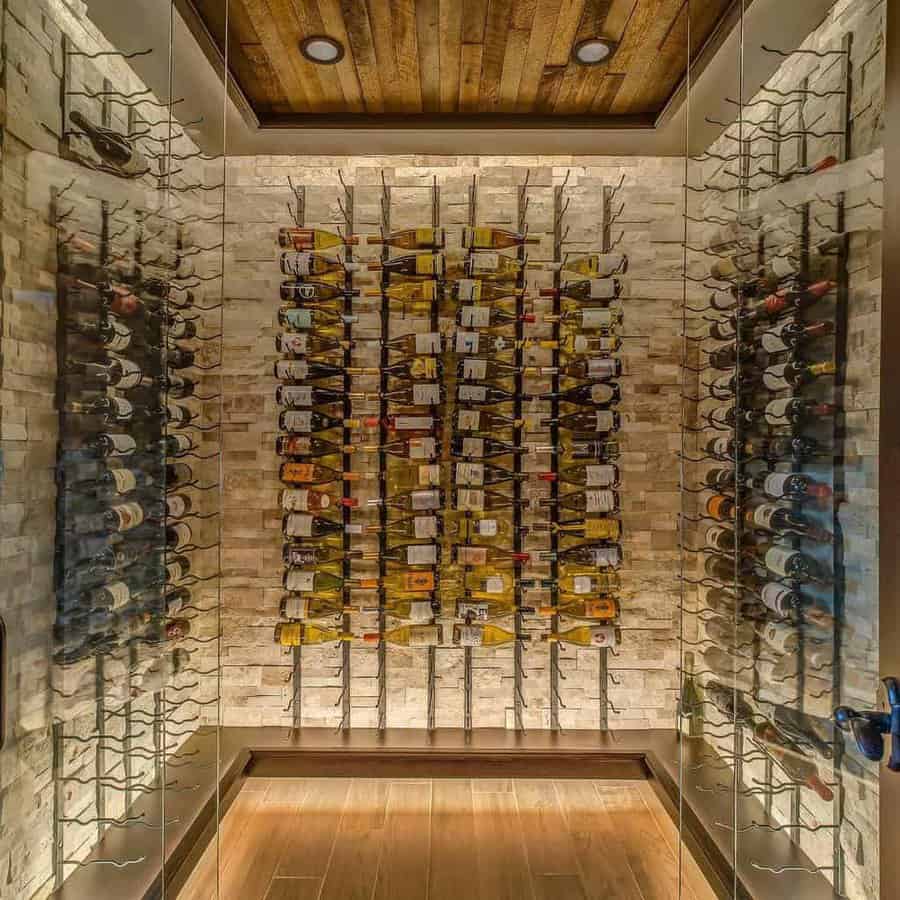
3. Create A Wine Room
A wine rack is an excellent way to upgrade your wine storage. From wine rooms to racks that fit in small spaces, there are lots of creative wine rack ideas to spruce up your next wine tasting.
For a luxurious yet practical wine rack setup, consider a wine room or an area with immaculately arranged wine racks and a mini bar – this would make the perfect entertaining spot!
As an added bonus, if you install climate control features such as insulation and cooling units you can ensure that wine is stored at the optimum temperature for consistent aging and quality.
Source: @m_brigs via Instagram
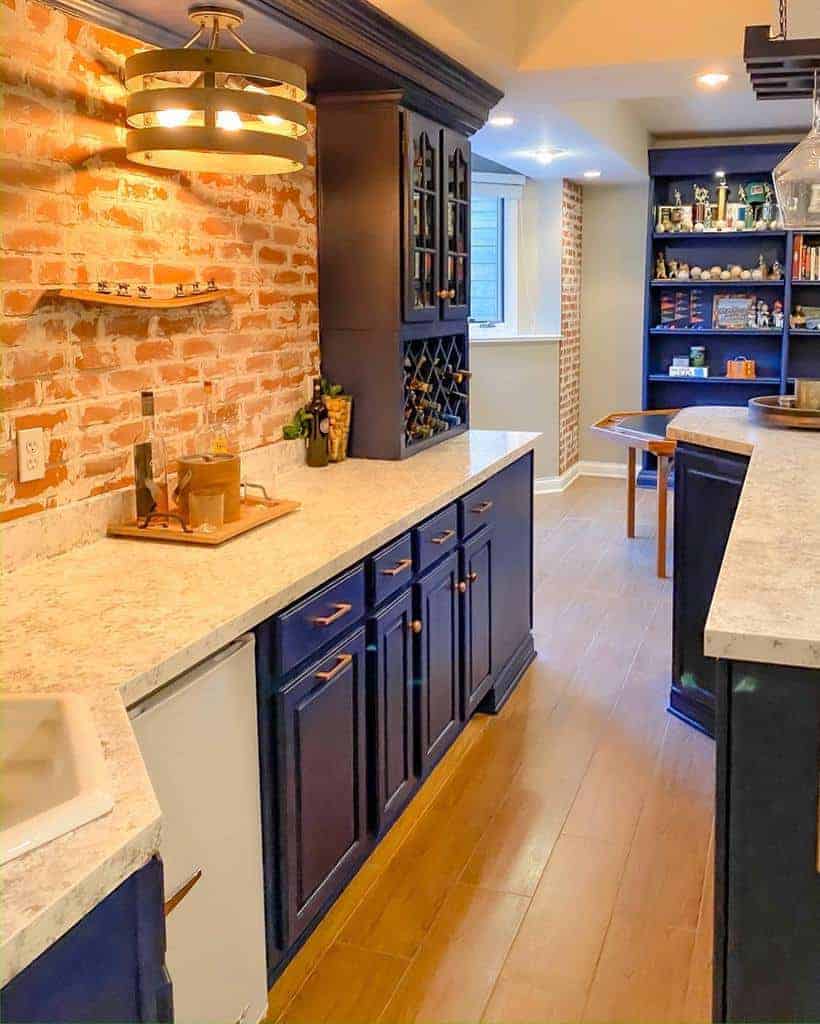
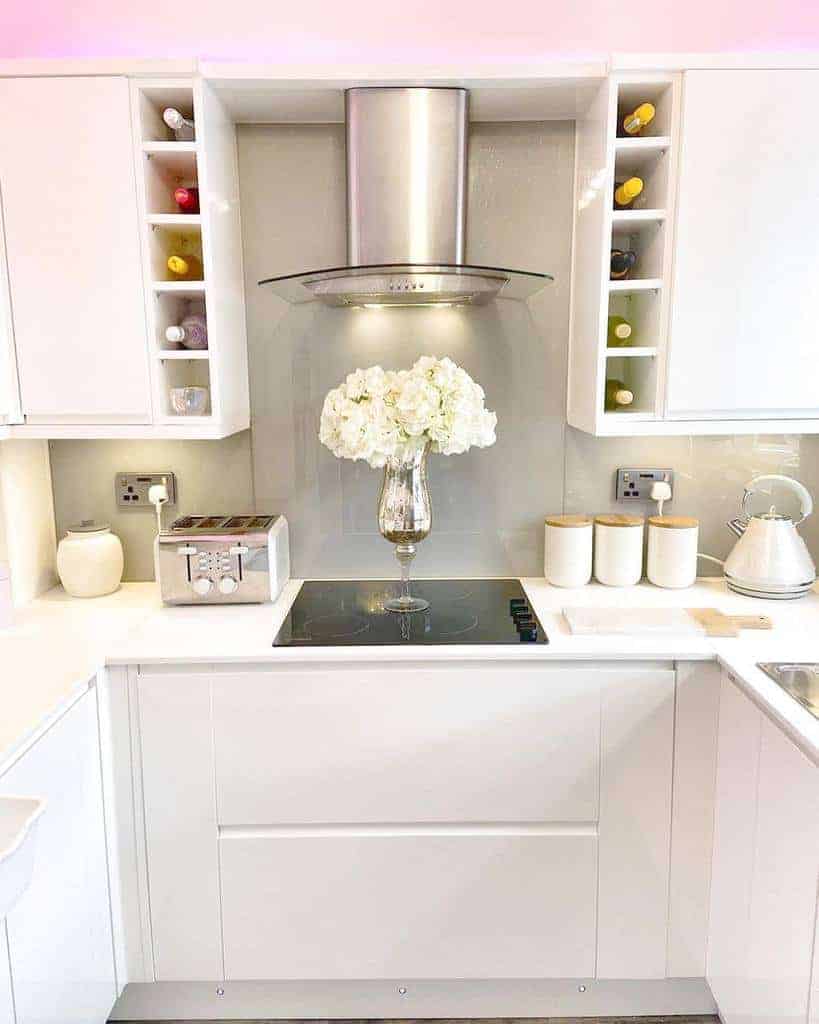
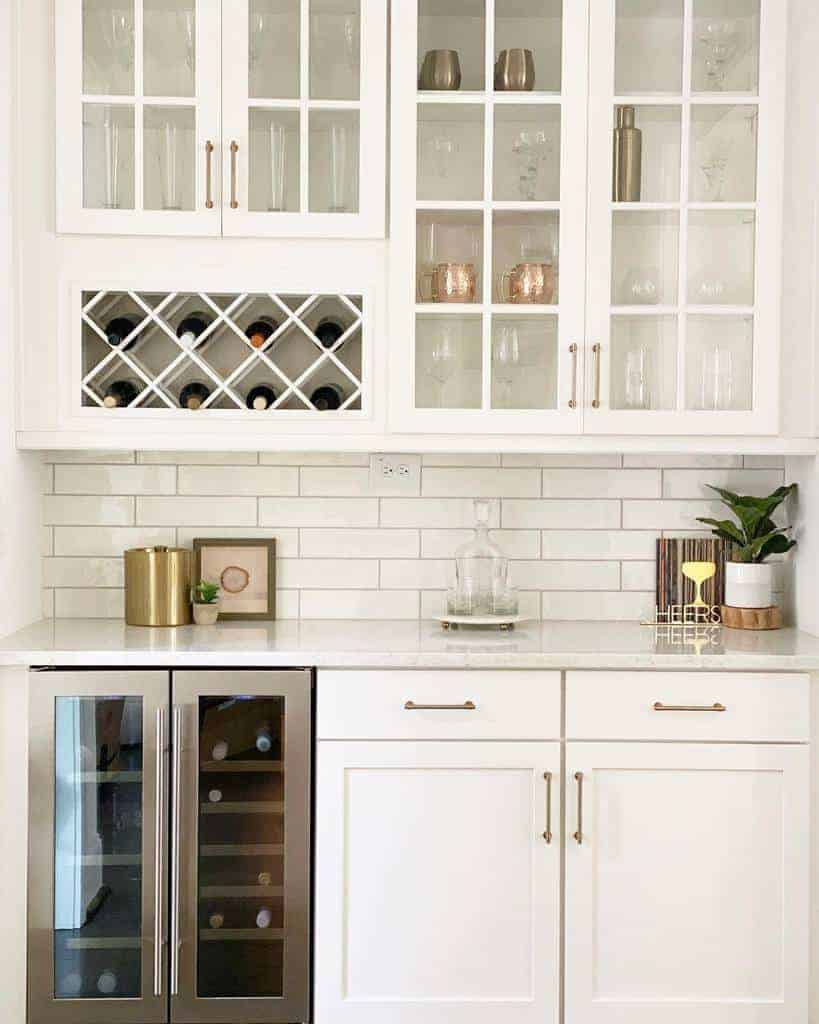
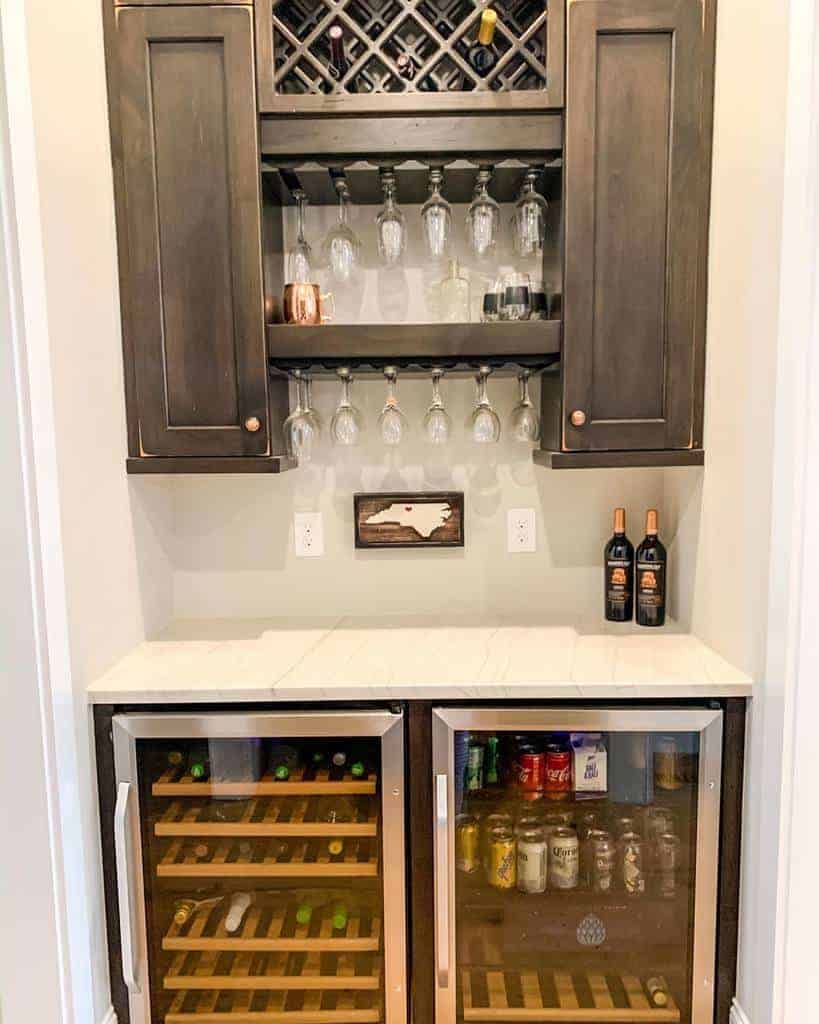
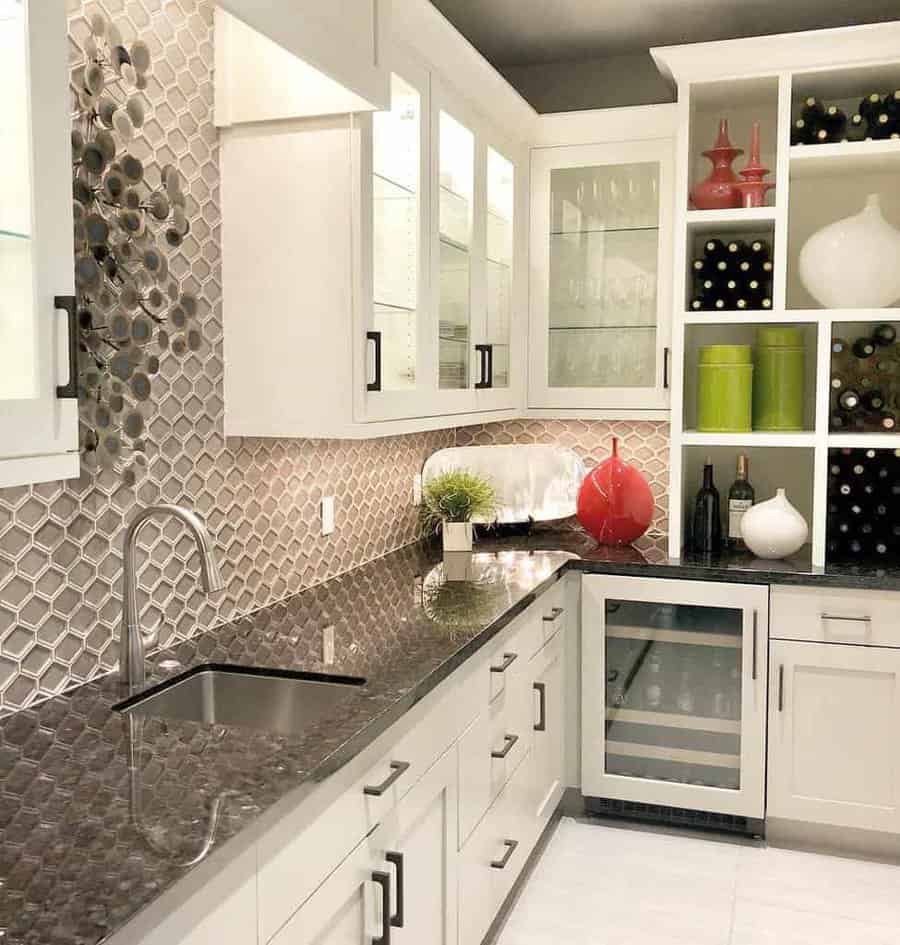
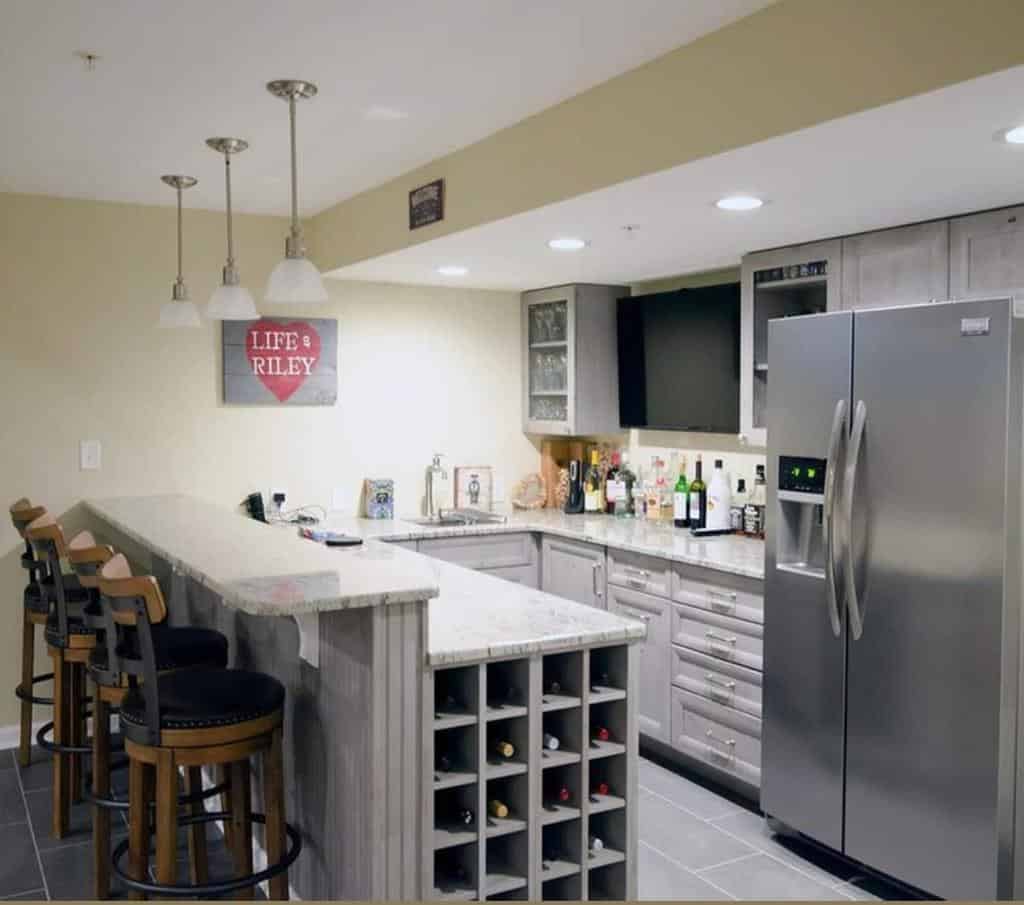
4. Craft A Wine Corner In The Kitchen
For a kitchen with a wine corner, why not transform an existing kitchen unit into something new and creative? A minibar can be easily installed at counter level for convenience, or you can opt for an all-in-one kitchen feature, like a kitchen island with custom-made wine racks built in.
Wine racks come in many sizes with interesting shapes and designs to choose from- industrial pallets, wall-mounted wooden cubbies, classic horizontal displays, and much more. So expand your cabinet storage ideas and get creative with practical and beautiful wine rack solutions that suit your kitchen style!
Source: @daisyanddaydreams via InstagramSource: @home_on_providence_hill via InstagramSource: @haciendamoderna via InstagramSource: @scottsdaleneat via InstagramSource: @wineemotion.ca_ via Instagram
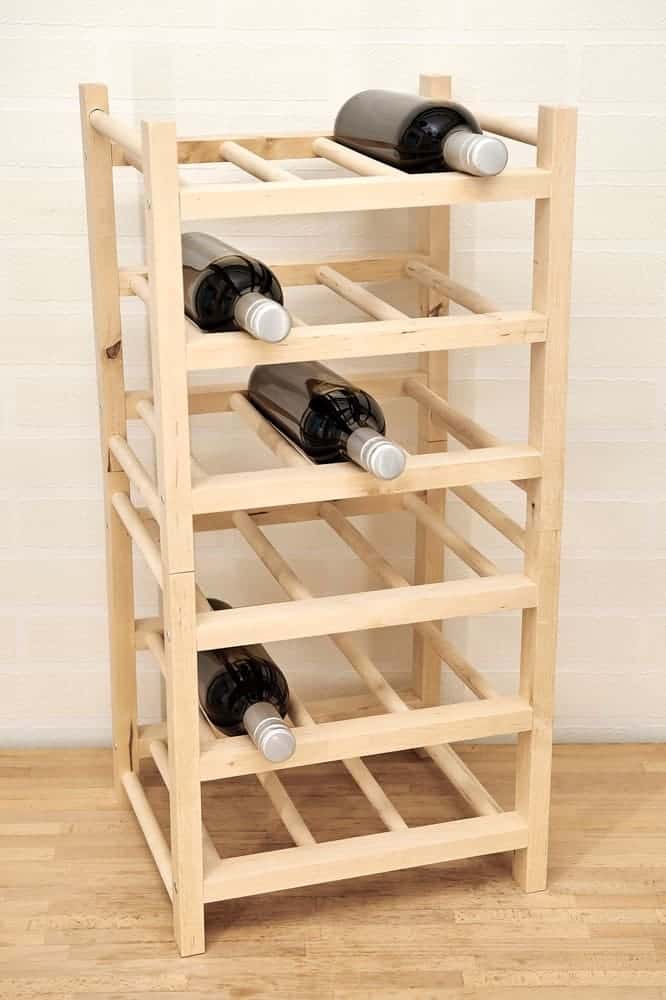
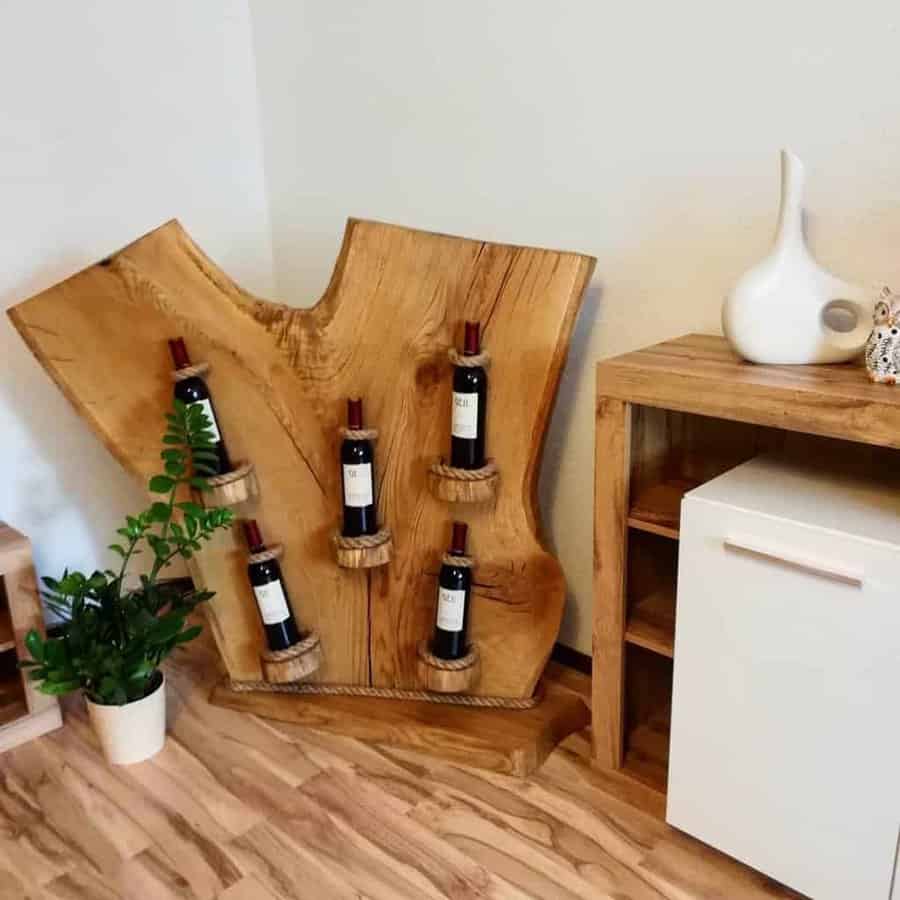
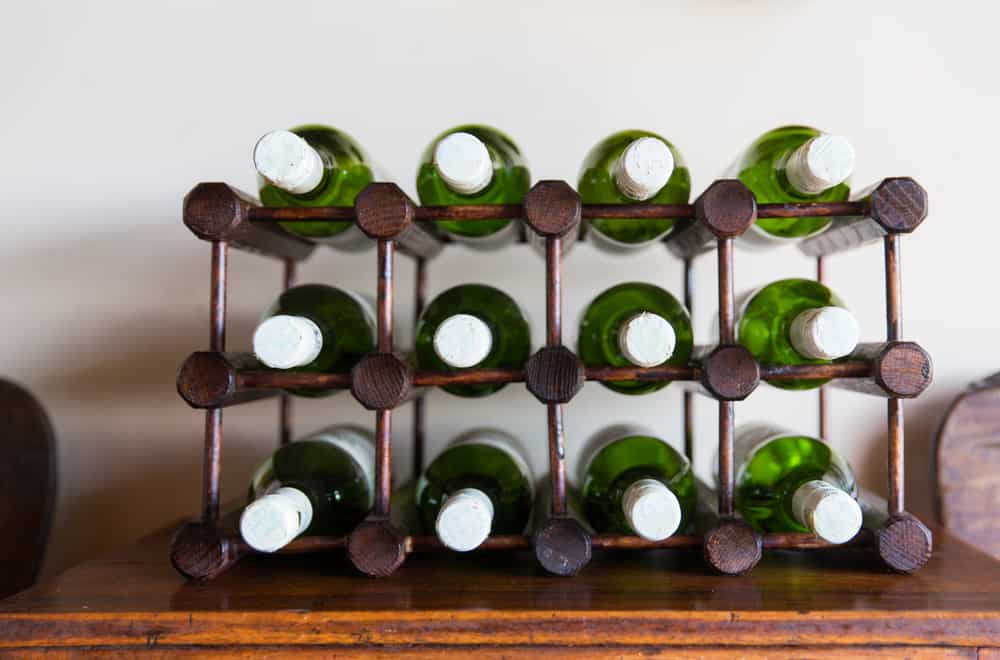
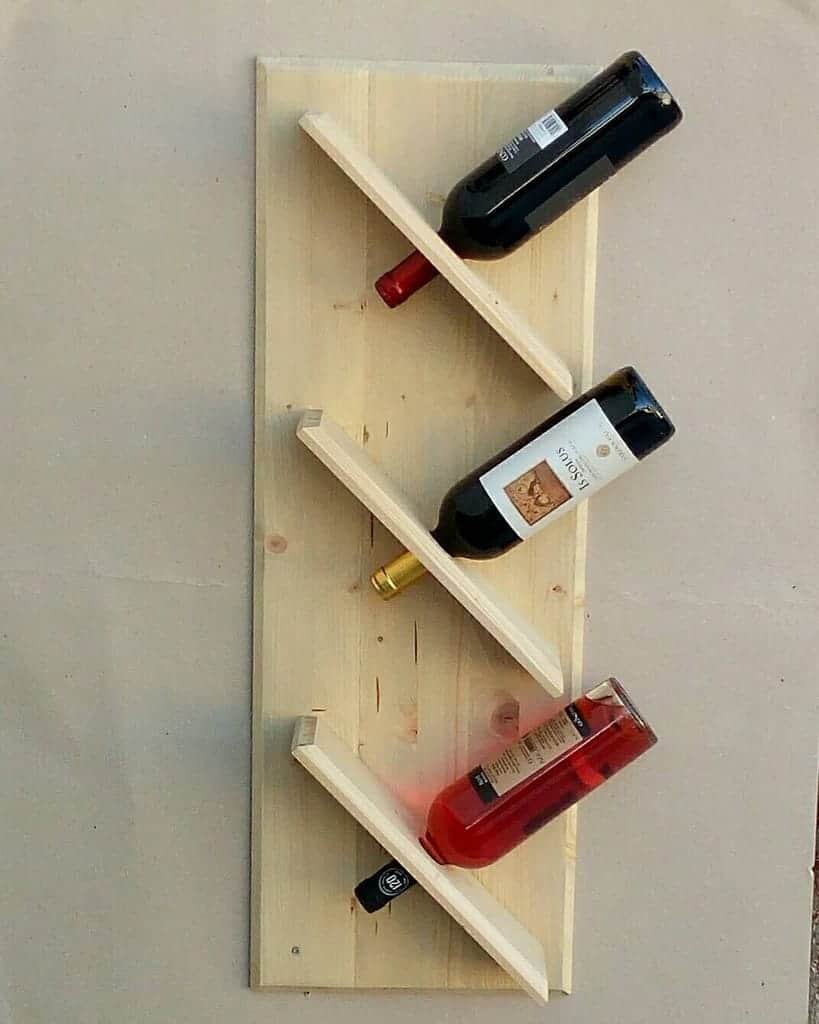
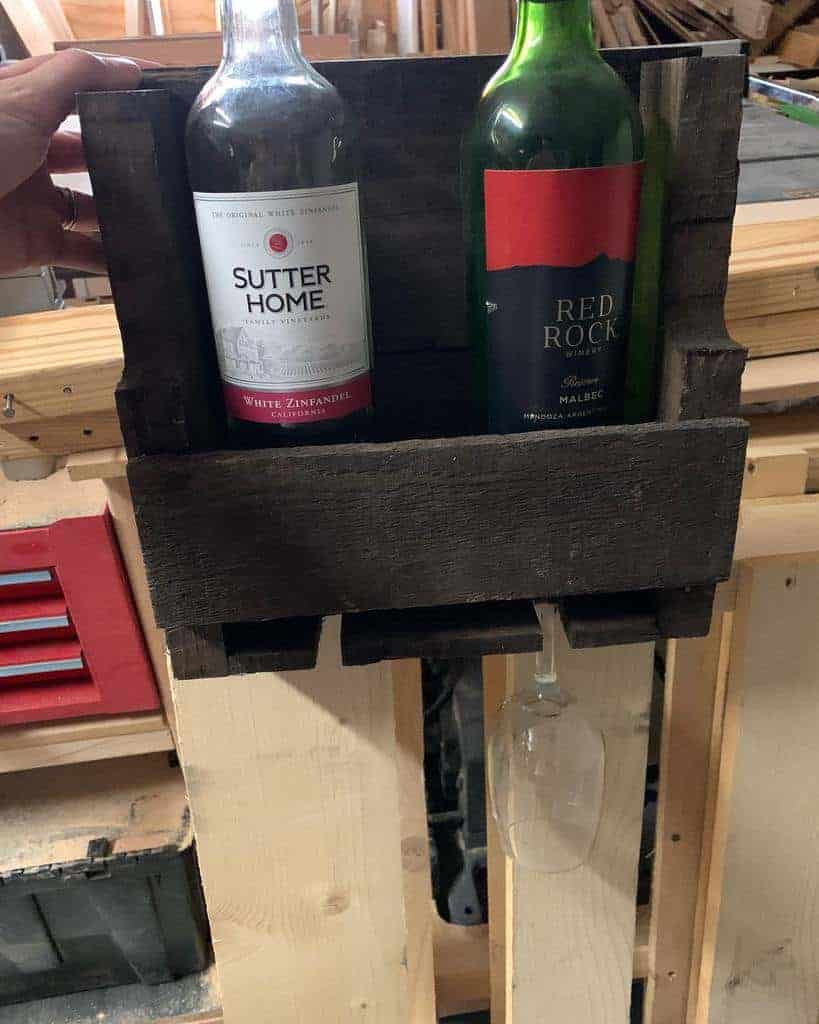
5. DIY A Wooden Rack
Using your favorite DIY materials and tools, you can put that DIY magic to good use with a DIY wooden floor rack. Use a sturdy treated branch or cut of wood from a pallet and start mounting it on the wall vertically.
With some creativity, you should be able to find ways to add more bottles by creating shelves with other pieces of wood or cutting slots into each plank above and below the bottle holder. The possibilities are endless! Plus, the DIY wooden floor rack adds an aesthetic touch of character to any room!
Source: @bladewoodworks via InstagramSource: @holzinderhuette via InstagramSource: @markolrog via Instagram
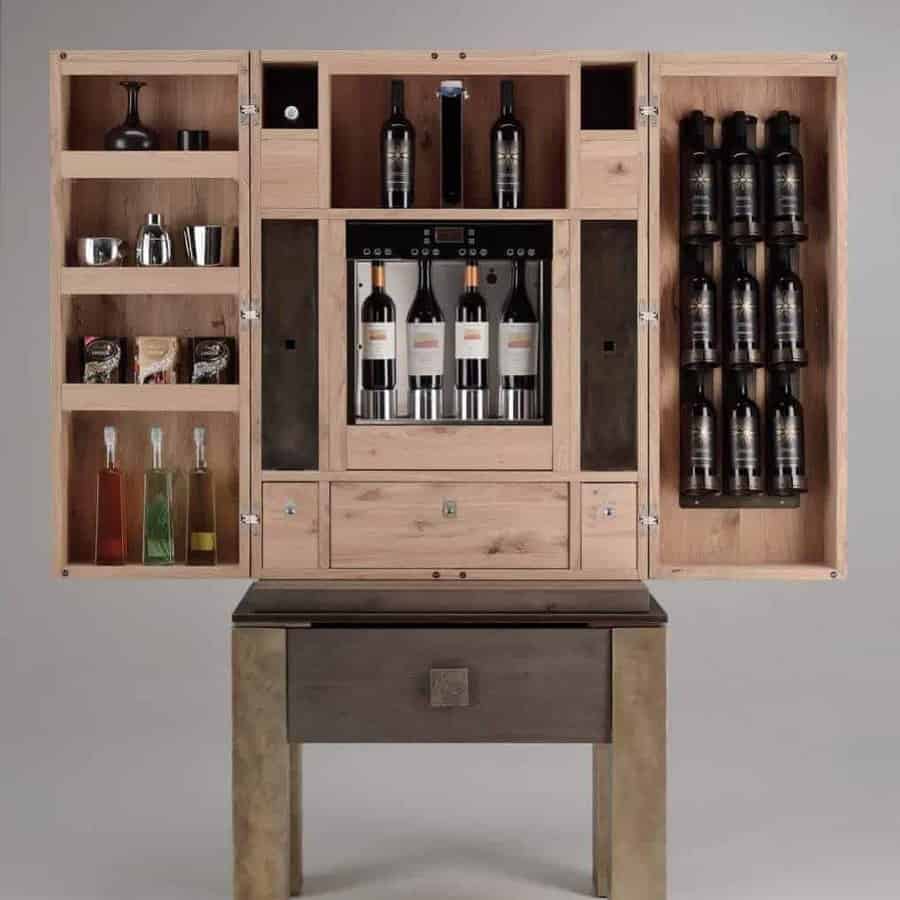
6. Get A Wine Desk Rack
If you’re looking for wine rack ideas to liven up your kitchen or bar, why not try a wine desk rack? Not only does this creative design allow you to conserve space and keep your wine bottles organized, it also adds an intriguing aesthetic to the room.
A wine desk rack says you care about class without sacrificing style and can enhance any space you choose to put it in. By simply adding a few of these clever elements, you can take your wine storage from functional to fabulous.
Source: @justjenni07 via Instagram
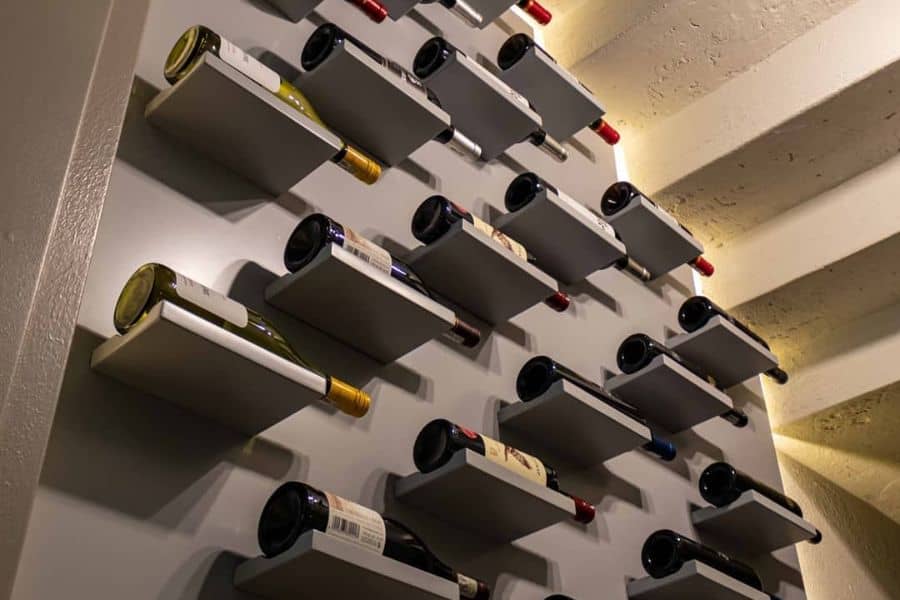
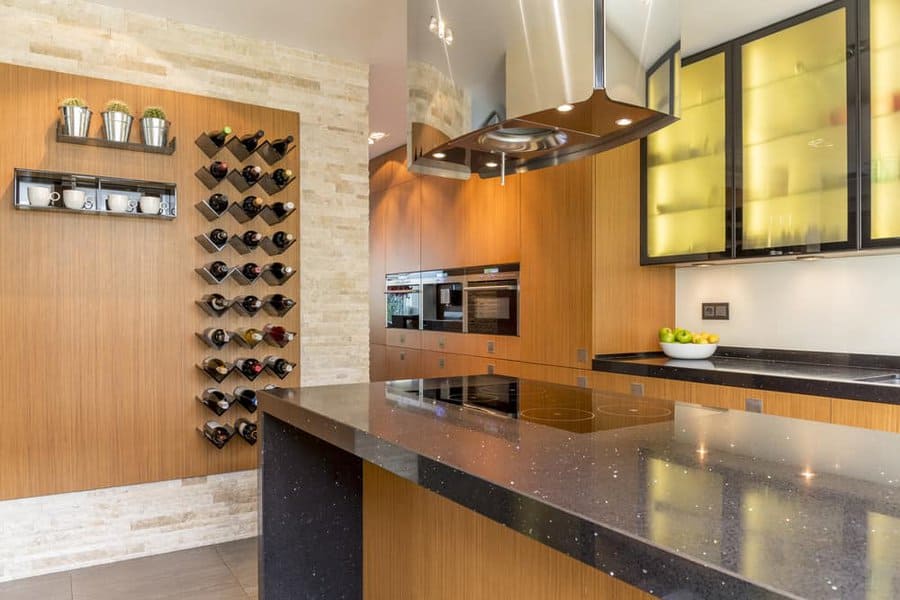
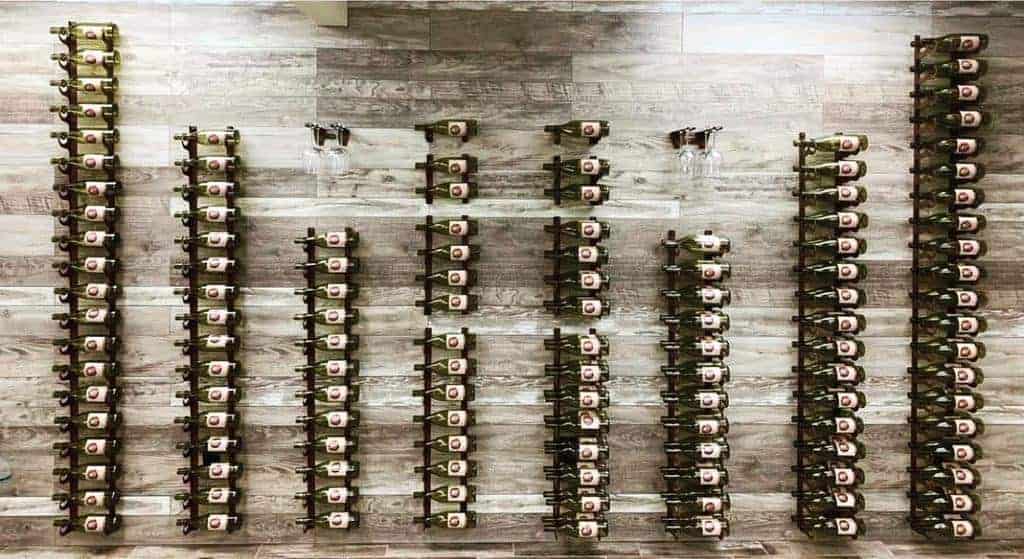
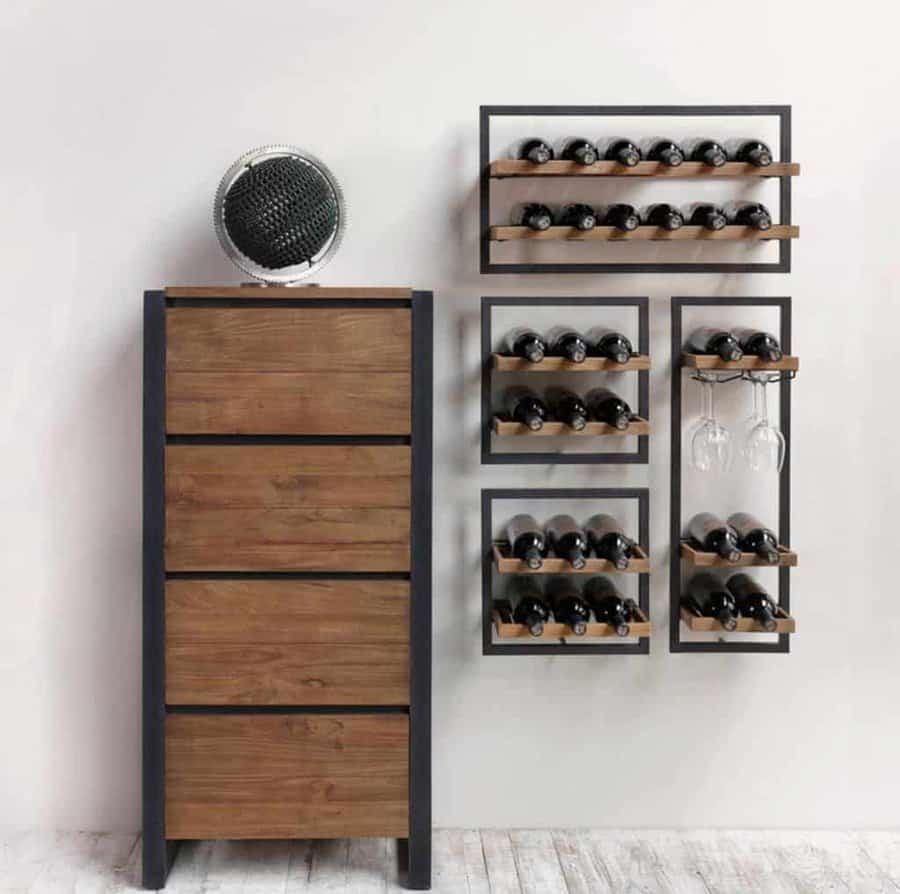
7. Mount It On The Wall
A wall-mounted rack will allow you to maximize space and keep your bottles organized for easy access. Invest in individual racks so that you can customize the configuration and utilize vertical wall space effectively.
Not only is it a great way to store your wines, but it also doubles as wall art. Dress up an empty wall with an elegant wall-mounted wine rack and show off your prized wines!
Source: @wijnpaal via InstagramSource: @bluegrousewinecellars via InstagramSource: @alessandro.branchina via InstagramSource: @niro_developments via InstagramSource: @diprimapaolo via Instagram
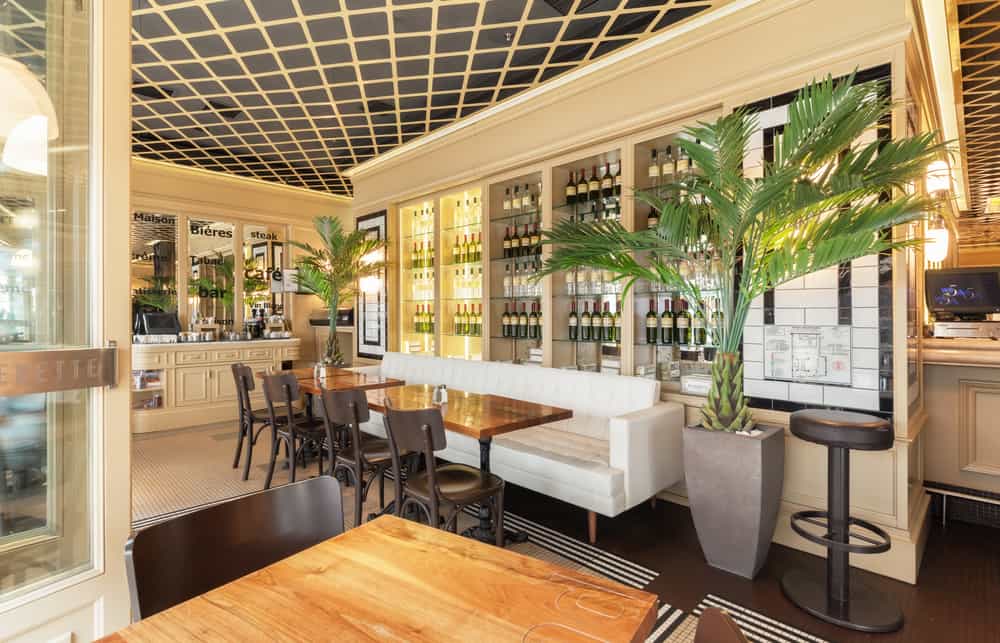
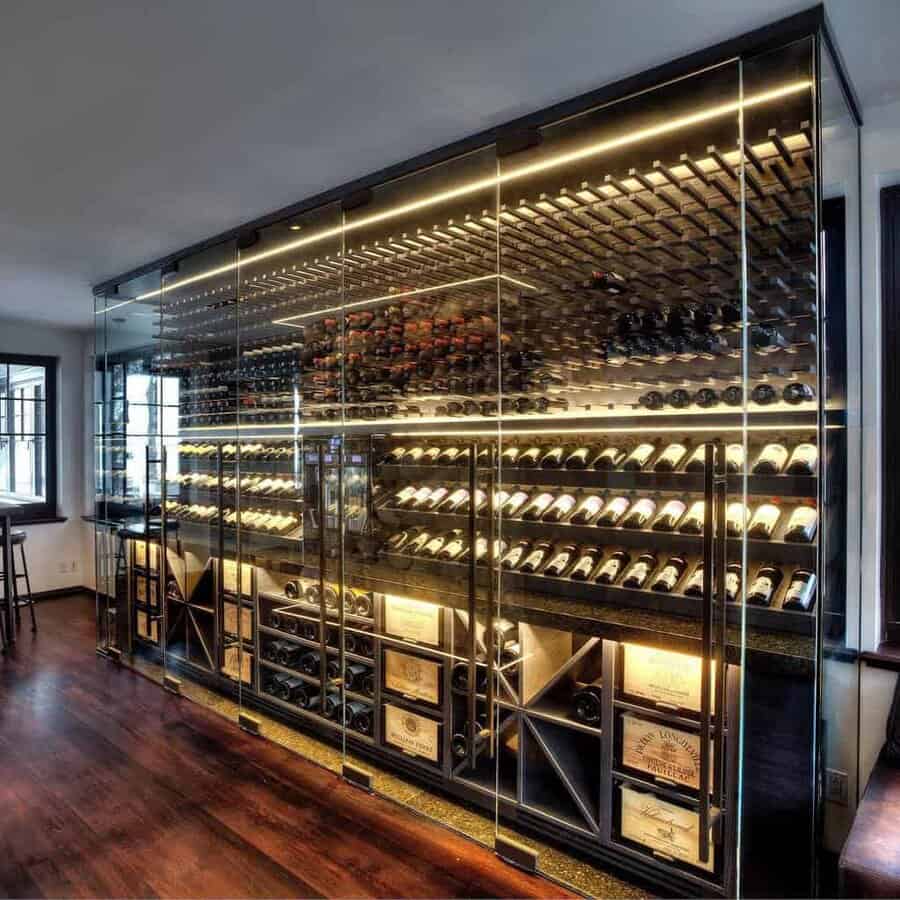
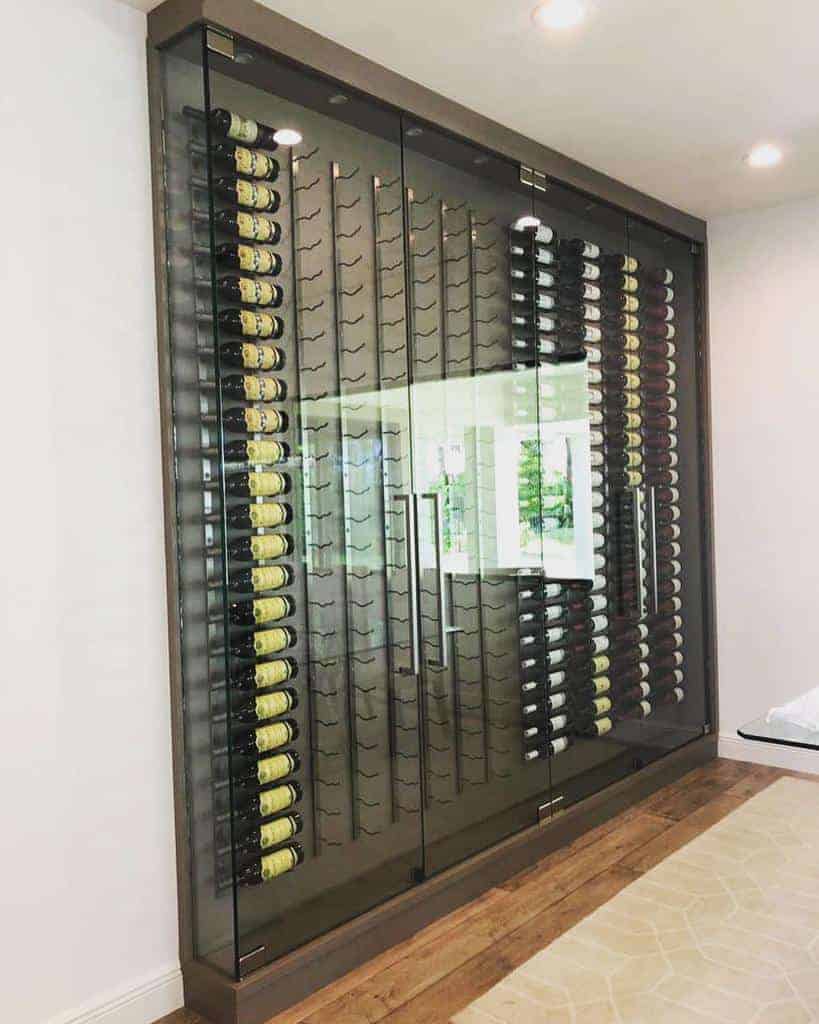
8. Showcase Your Collection With A Glass Display
A glass wine rack is a perfect way to add an elegant touch to any area of your home. Not only does it make for a unique glass display, but also provides an easy way to access and showcase your favorite wines.
Whether on a counter or in a wall-mounted glass cabinet, glass wine racks offer ultimate convenience while adding a delicately refined sense of style. An ideal choice for all levels of wine enthusiasts!
Source: @cellart.wine_ via InstagramSource: @glasswinecellars via InstagramSource: @maidensteel via InstagramSource: @mirrorsandclosets via Instagram
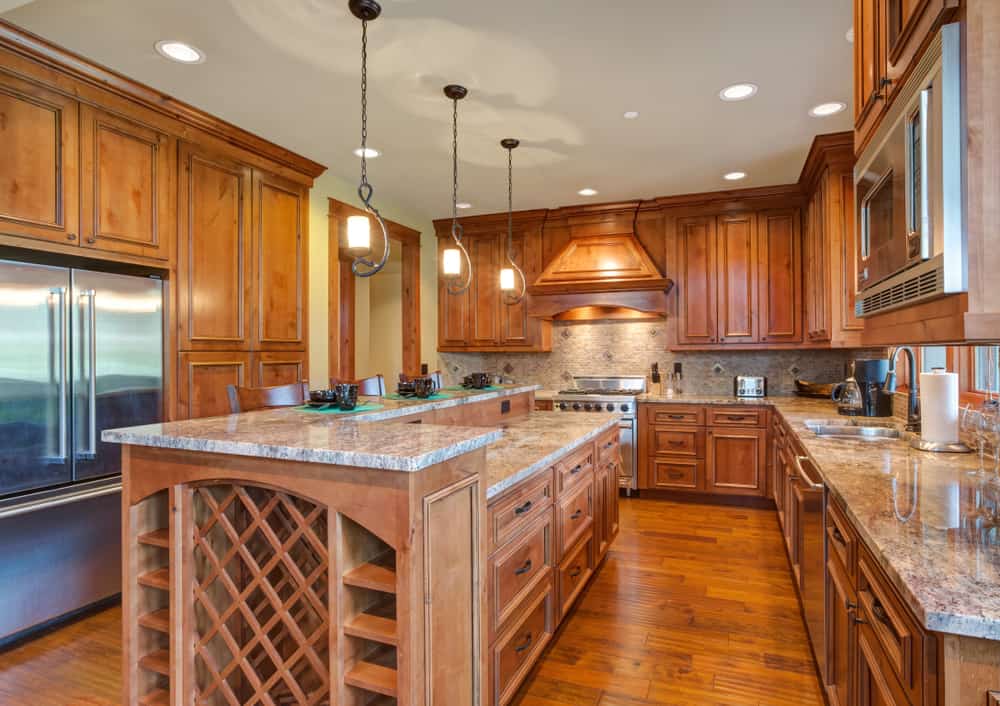
9. Utilize The Kitchen Island For Easy Access
A kitchen island with a wine rack is the perfect way to easily access your favorite bottles of vino during meal prep and entertaining. Not only does it allow for easy access to refreshments, it can also be used for additional kitchen storage and multitasking activities during food and beverage preparation.
Plus, having the kitchen island with a wine rack in full view offers guests a first-class experience! Utilize this kitchen solution to combine practicality and style in one attractive package.
Source: @byrddesignandbuild via Instagram
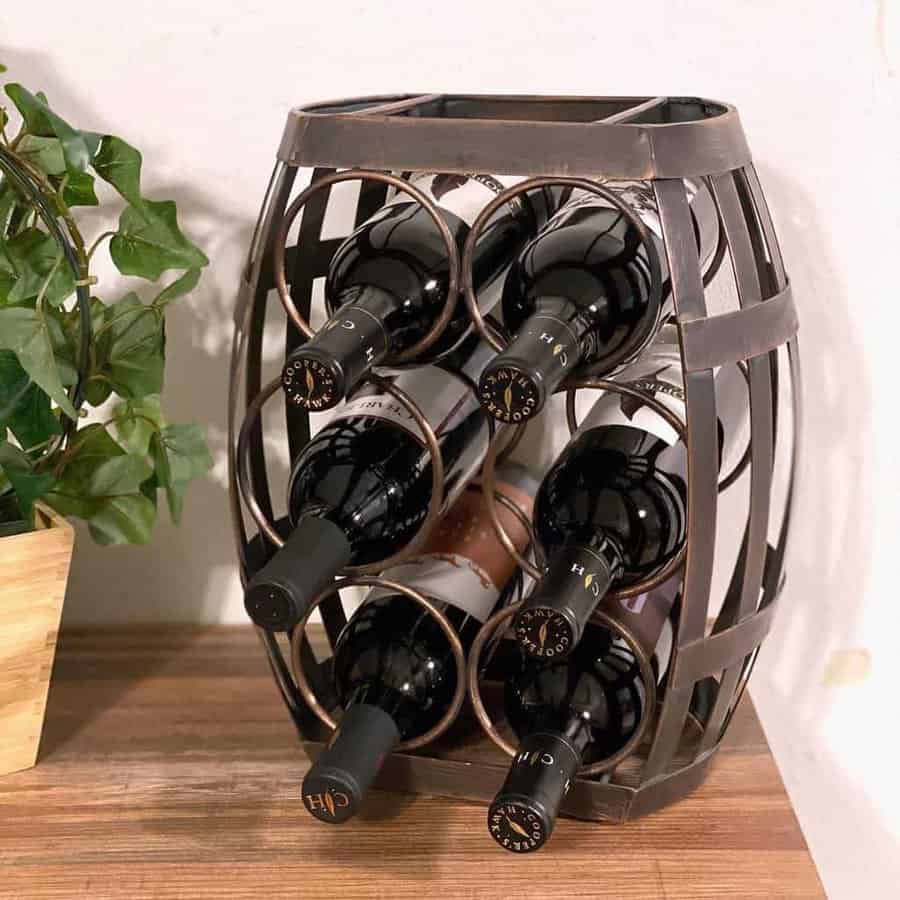
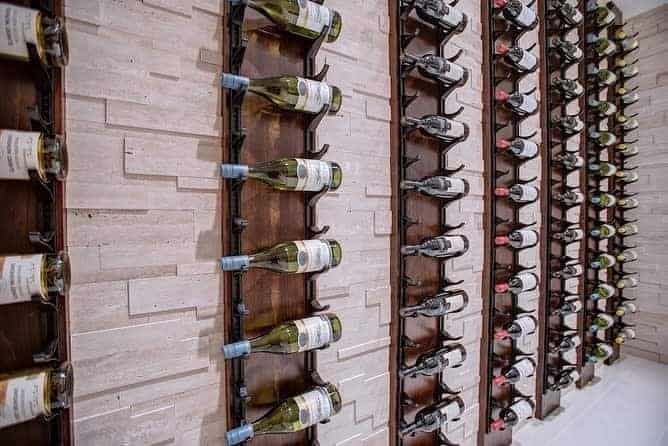
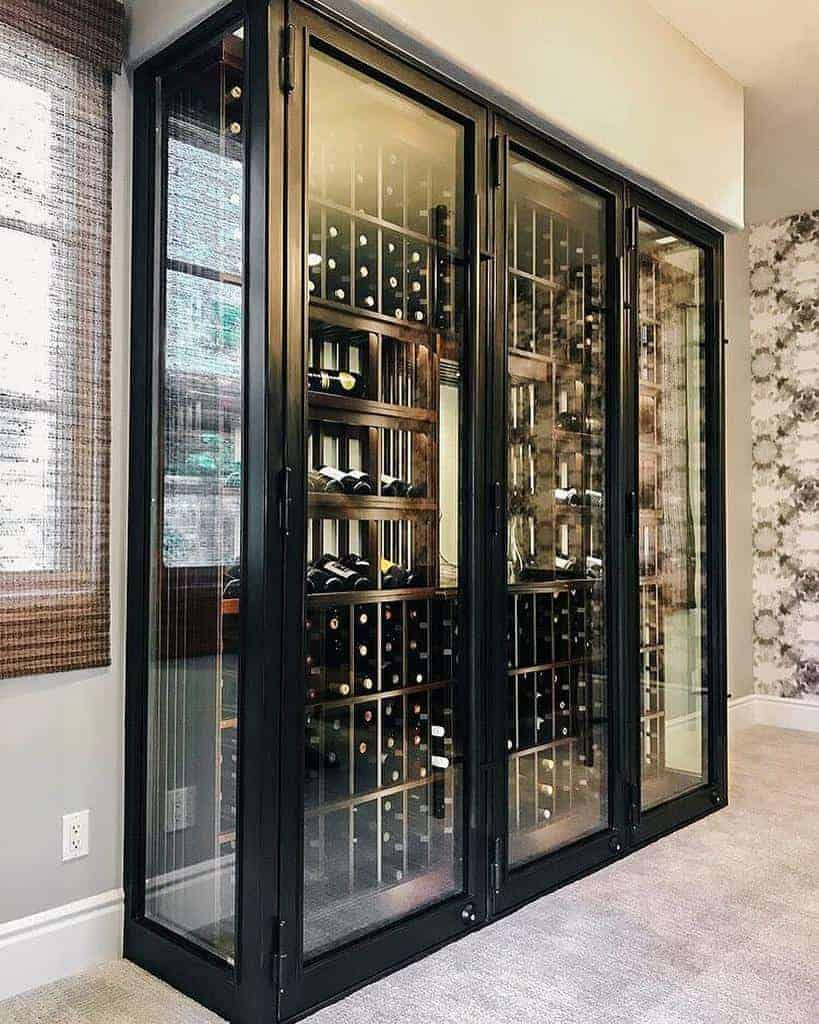
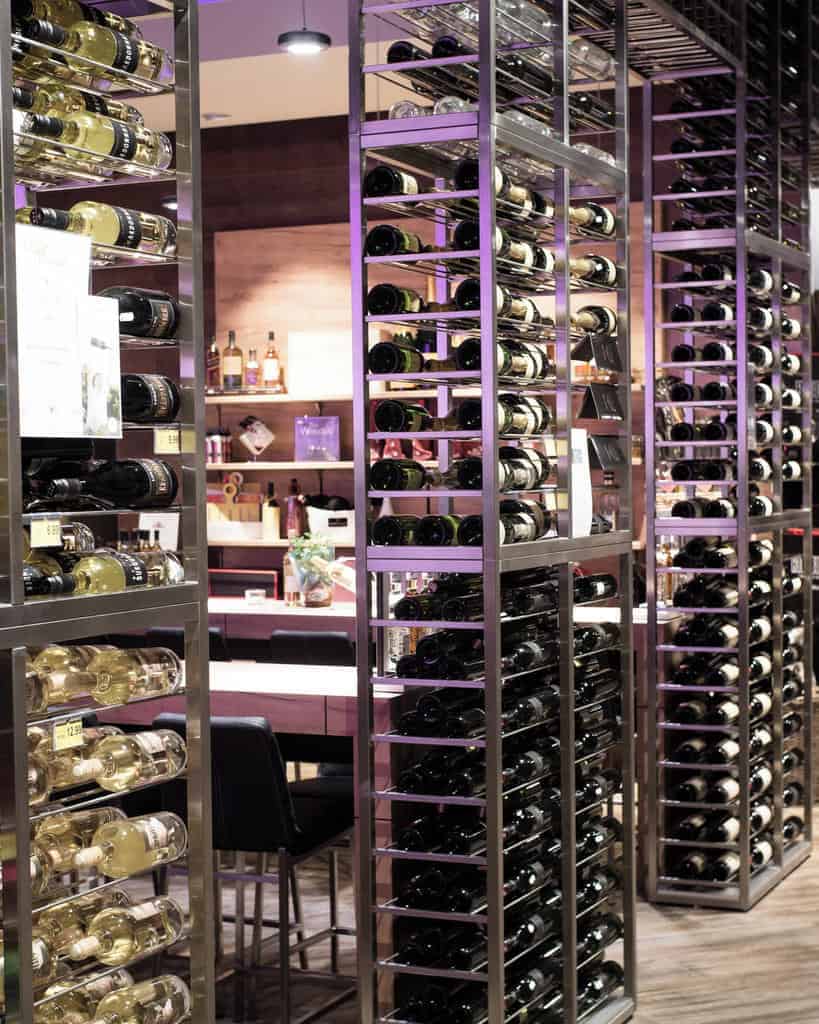
10. Organize Your Wine With A Modular Metal Rack
If you’re an avid wine collector, or just like to show off your favorite bottles, then modular metal wine racks are a great way to impress with style. Mounting it from floor to ceiling gives an elegant look for when guests come over that can be arranged and organized in any way you’d like.
Also, the modular design allows for additional layers if more storage is needed. Not only will this modular metal wine rack store your finest wines safely and securely, but it looks absolutely stunning!
Source: @koelling_projekt via Instagram
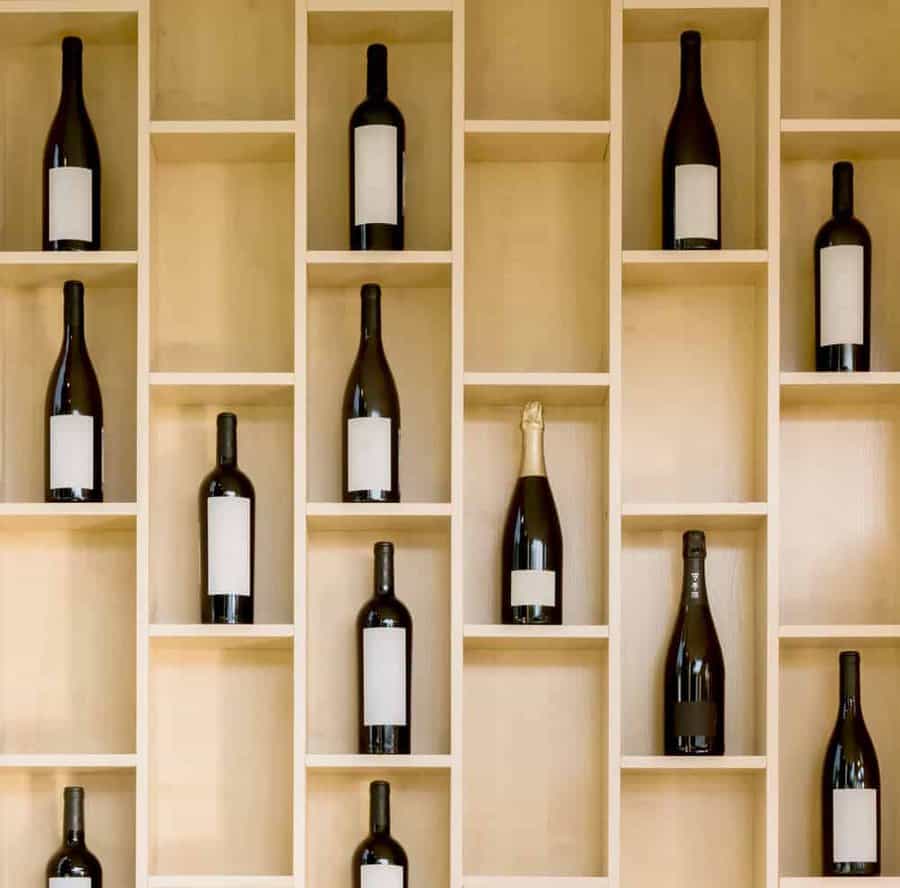
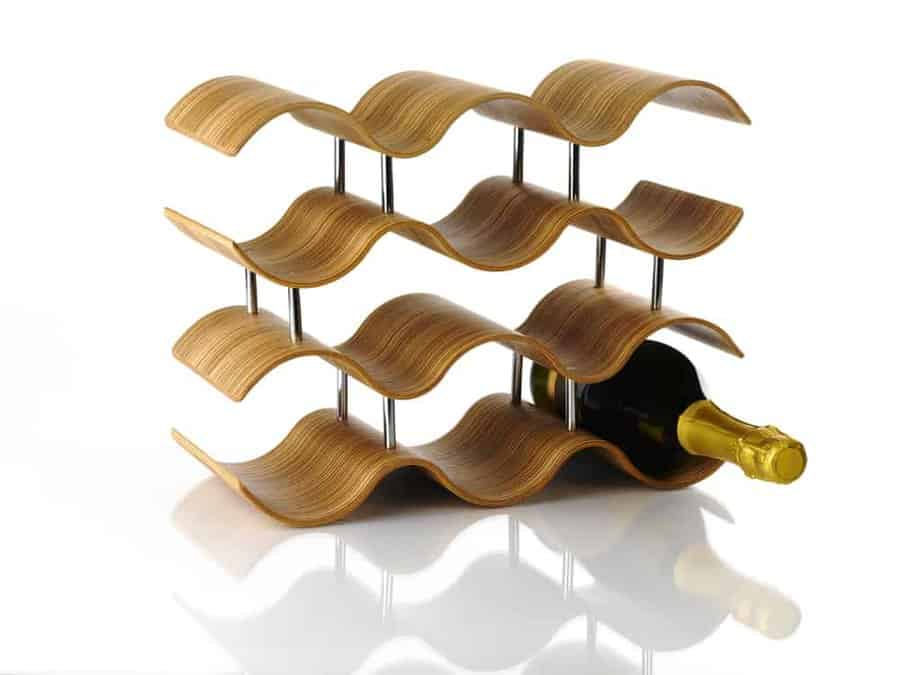
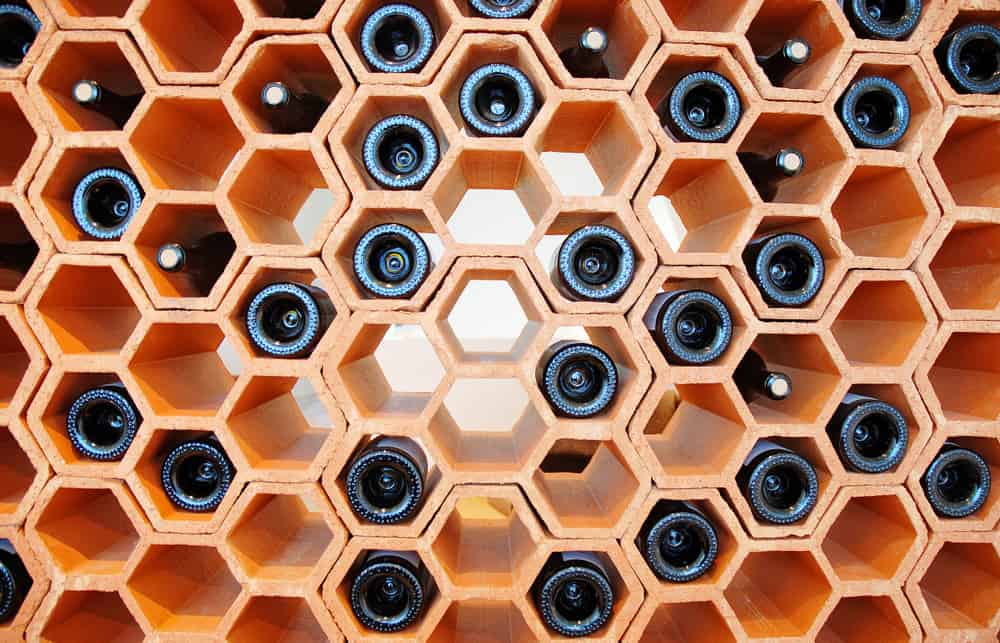
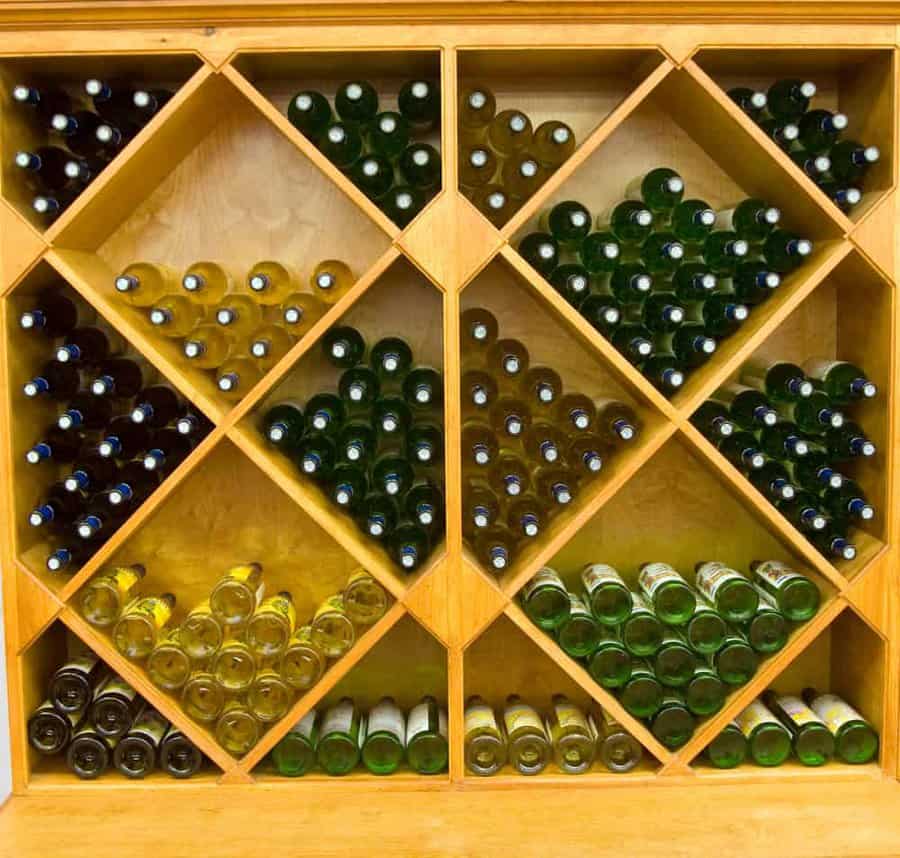
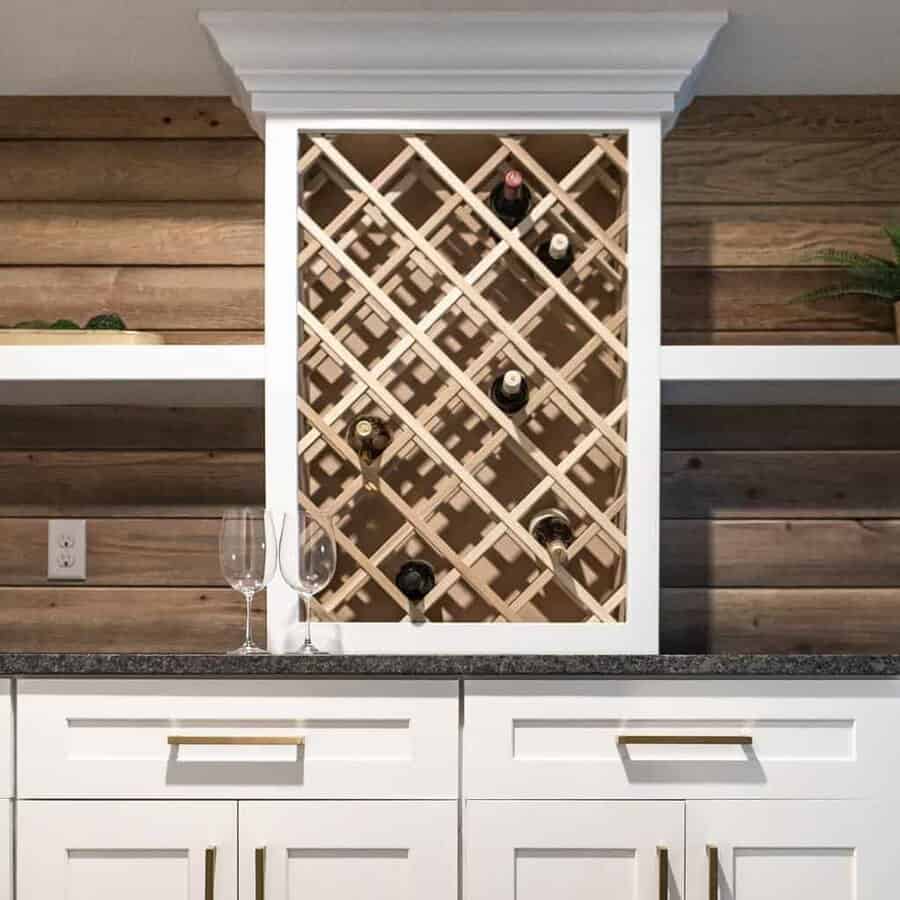
11. Be Creative With A Honeycomb-Patterned Rack
A honeycomb wine rack is a brilliant way to store bottles of wine individually and add some extra style to any cabinet or dining room.
With this unique honeycomb design, you can proudly display your favorite collections and find the perfect bottle quickly and easily whenever it’s time to cheer with friends.
And if you’re ever in need of extra storage, honeycomb racks are known for their space-saving capabilities – making storing fancy bottles even easier.
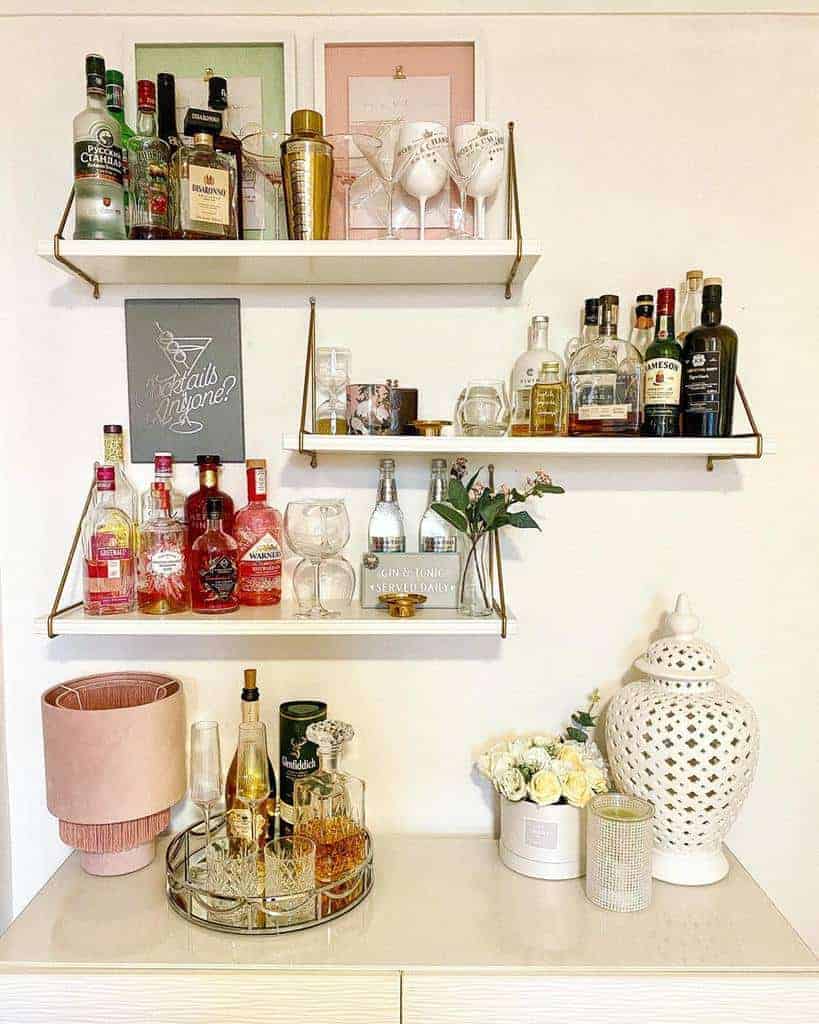
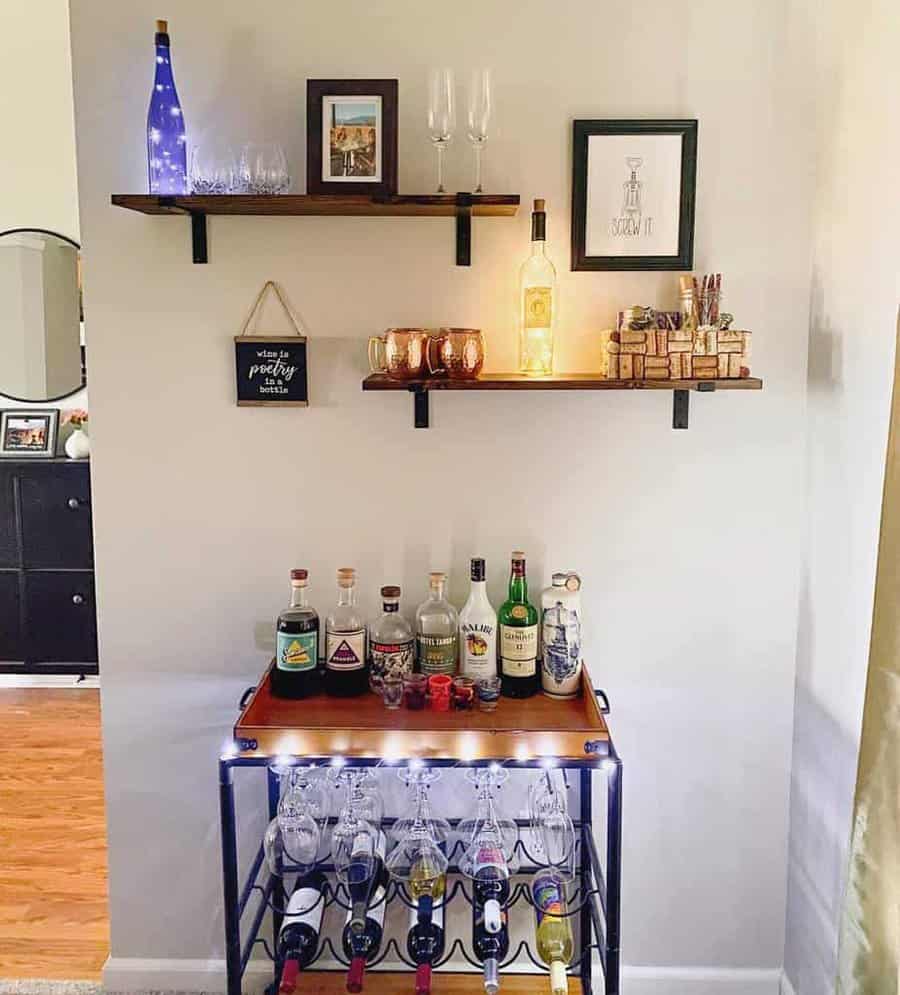
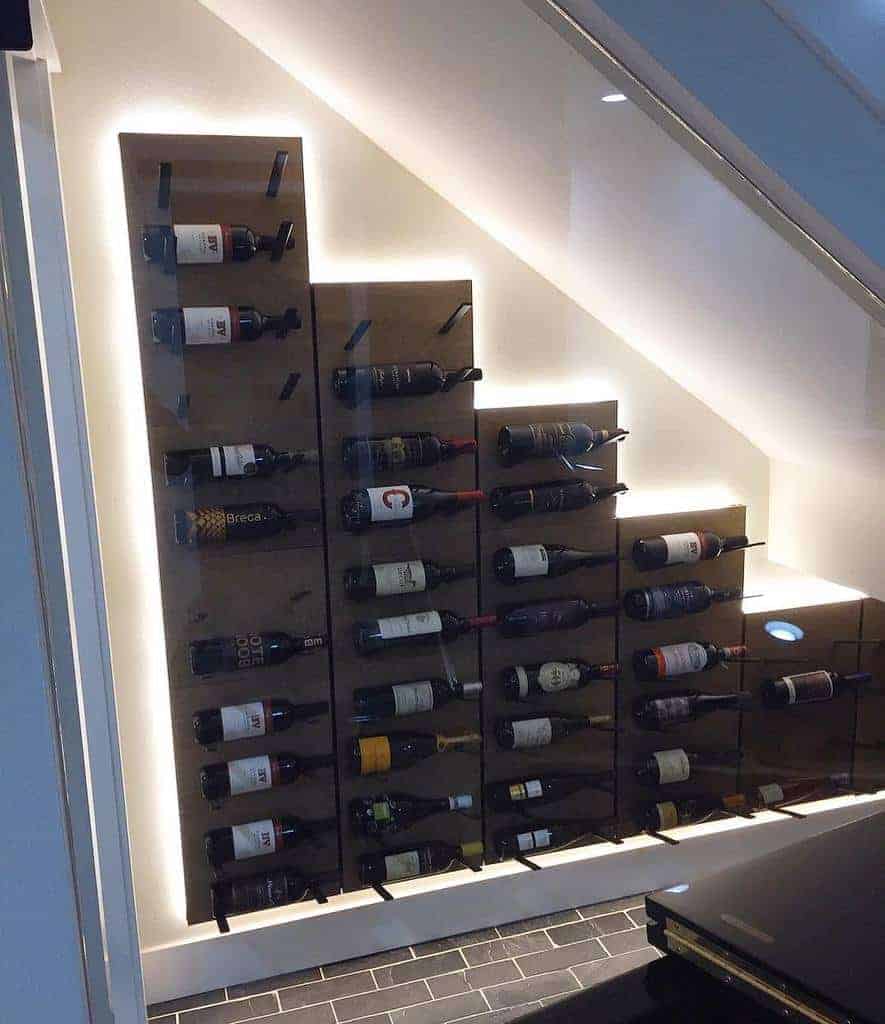
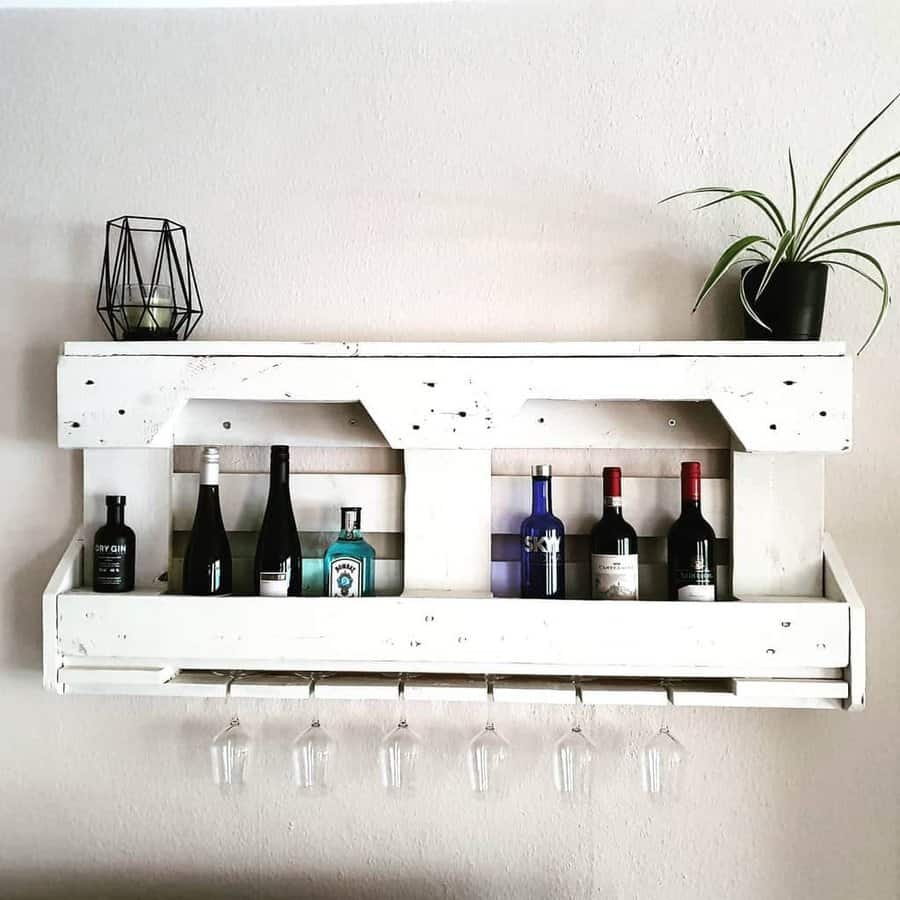
12. Install A Floating Wine Shelf
Looking to spice up your home bar? Why not consider installing a floating wine shelf? Perfect for showcasing your best liquors and spirits, it will make the perfect designated shelf for them. Not only is this shelving style practical – it’s also incredibly chic and unique.
Plus, it’s suitable for any home decor style and space you can think of. From urban-industrial to traditional farmhouses, a floating wine shelf fits perfectly in its surroundings!
Source: @designrepublicto via InstagramSource: @dinspirations_dg via InstagramSource: @drecoprojects via InstagramSource: @el_micha169 via InstagramSource: @glasswinecellars via Instagram
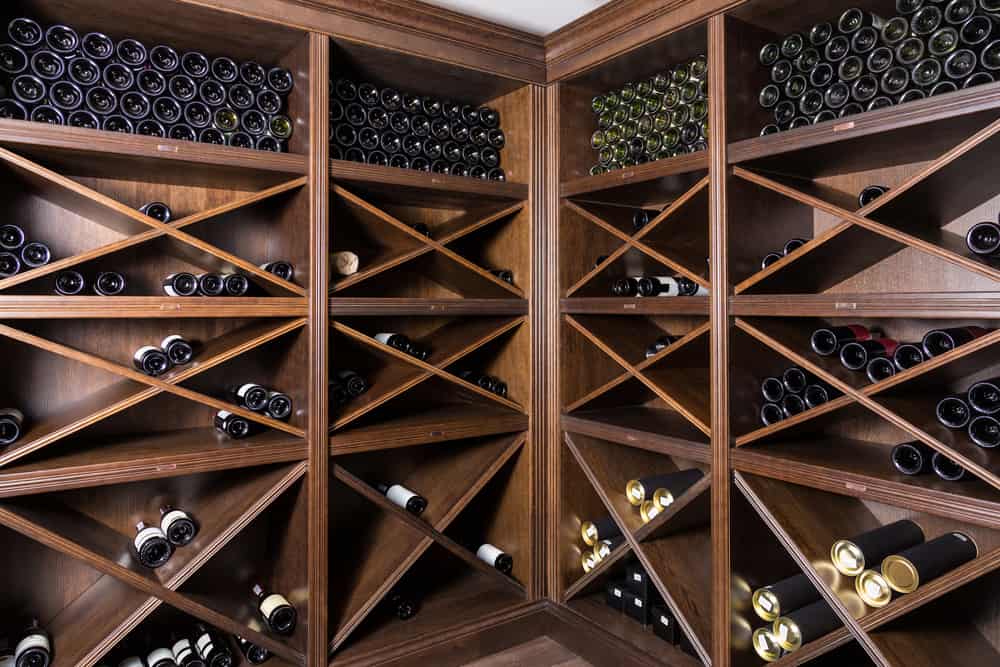
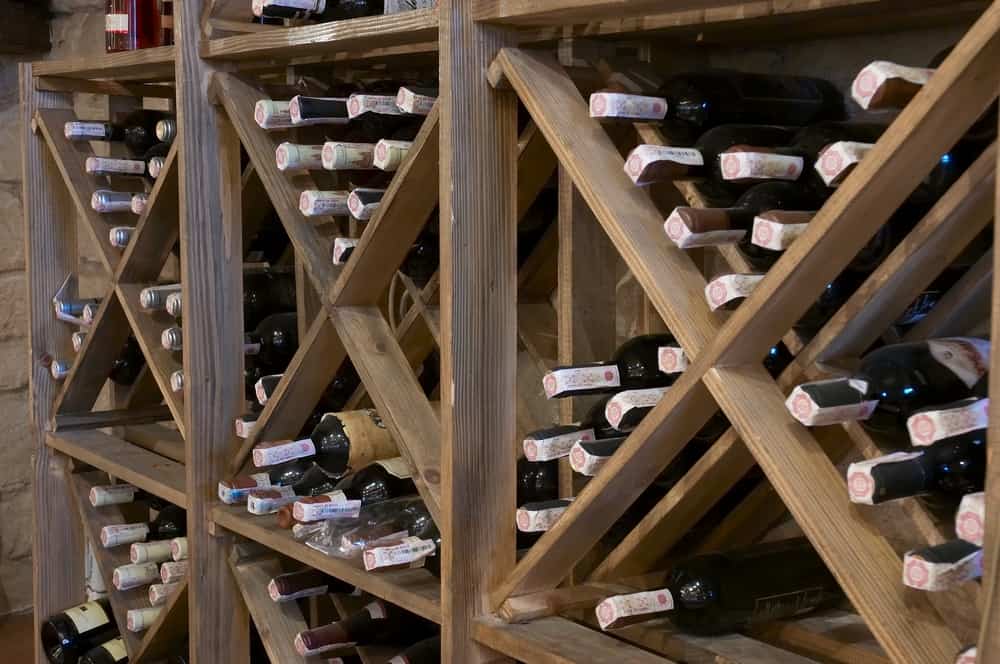
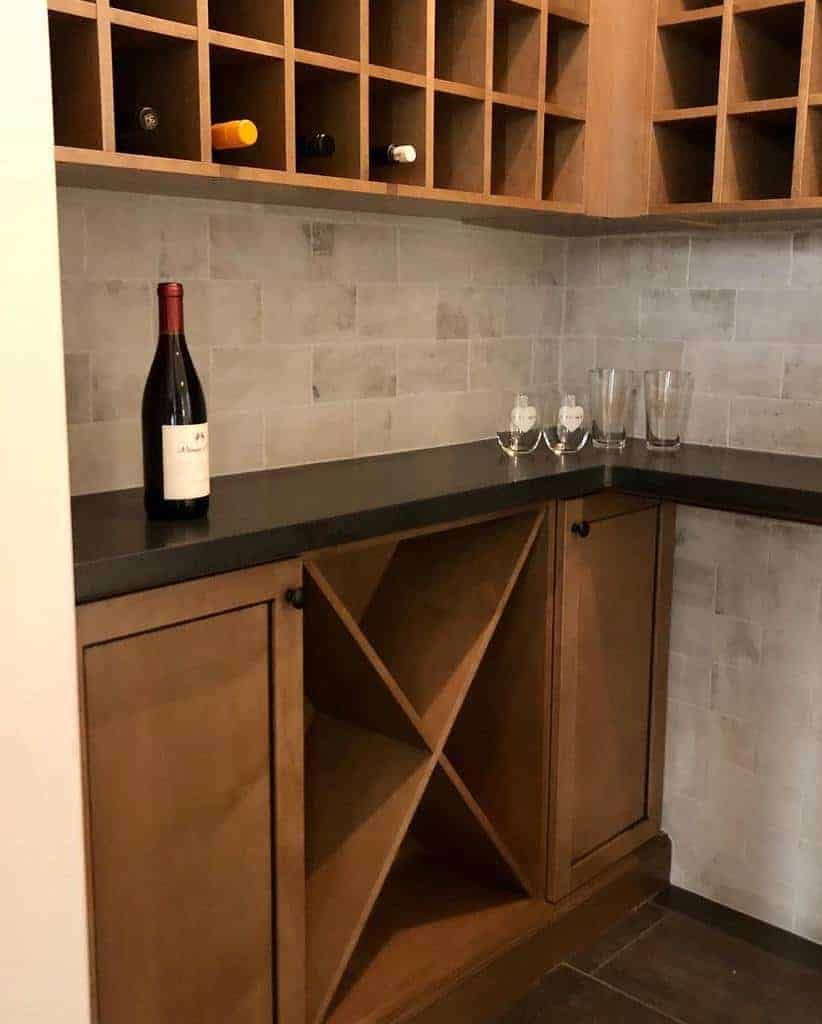
13. Design ‘X’ Shelves
X-shelves are an ideal and easy shape for storing wine bottles, and they can be easily incorporated into any home. These styles of shelves not only look incredibly stylish but can add to the aesthetic of your room as well.
Their sturdy construction ensures that your wines will always be protected and safe from any potential harm, and X-shaped shelves also make it very easy to see what type of wines you have on hand.
Source: @cabinetconnection_clovis via InstagramSource: @restorhomes via Instagram
Do you fancy yourself an amateur (or not-so-amateur) birdwatcher? Have you suddenly found yourself spending more time in your home’s outdoor spaces? These are just some of the great reasons to add a birdhouse to your property.
You can set up a birdhouse for specific species, like bluebirds, purple martins, or chickadees. Or you can sit back and let nature determine who fills the vacancy.
The world is full of beautiful creatures. We just need to take the time to stop and notice them. If you’re not sure what types of birds visit your garden, this is an excellent way to find out!
Keep reading for some awesome birdhouse ideas that will turn your backyard into an avian paradise.
[view_toc]
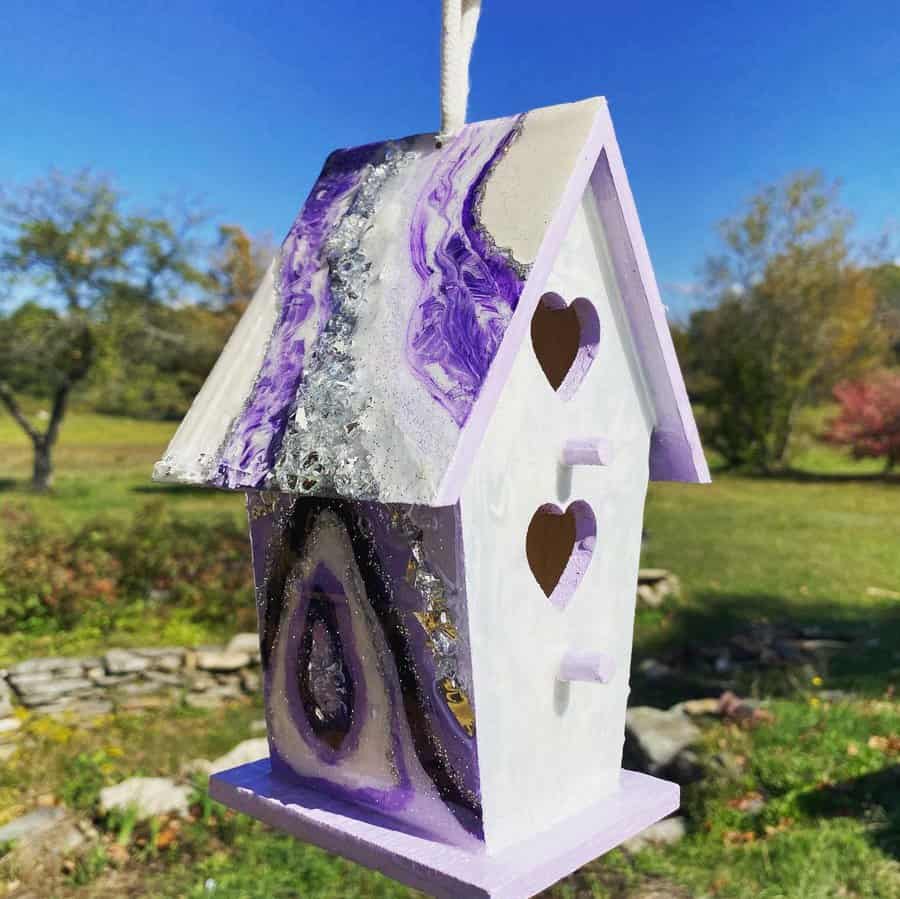
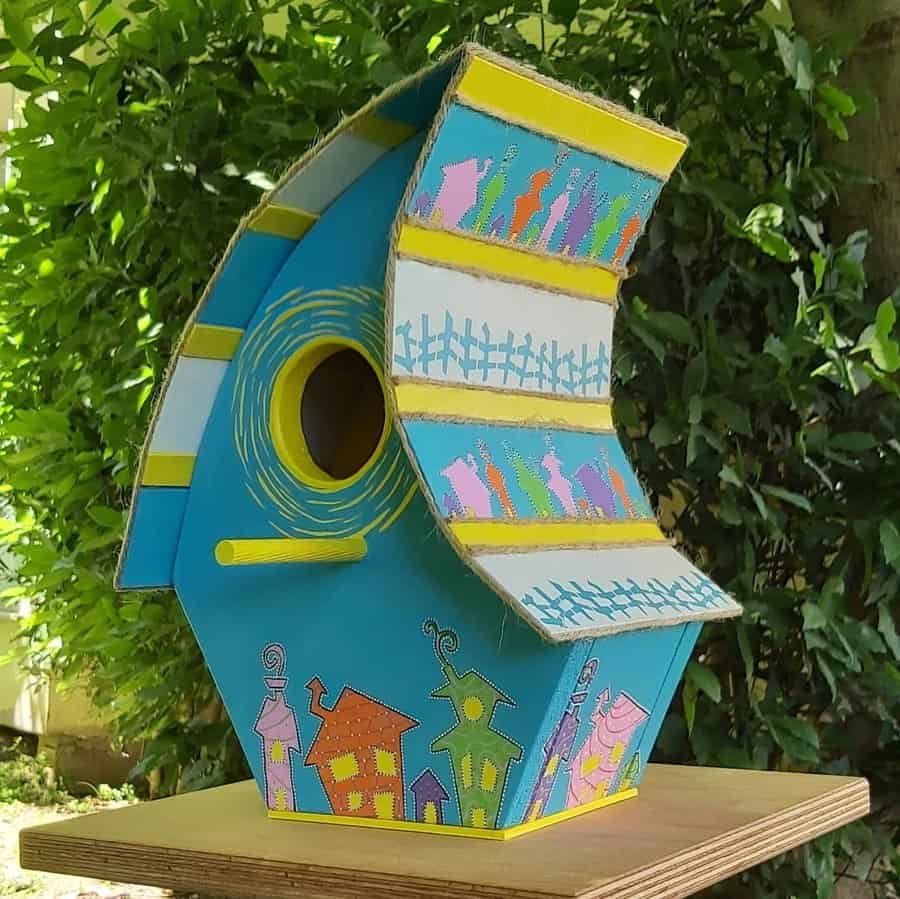
1. Geode Birdhouse with Heart Windows
Create a captivating DIY birdhouse by incorporating a geode-inspired design with swirling purple and white patterns, which you can achieve with paint or resin art techniques.
Accent the birdhouse with heart-shaped cutouts to serve as inviting windows, and choose a contrasting color like white to make the design pop. To replicate the shimmering effect of a geode, use glitter or metallic elements that catch the light.
Source: @luxybirdhouses via Instagram
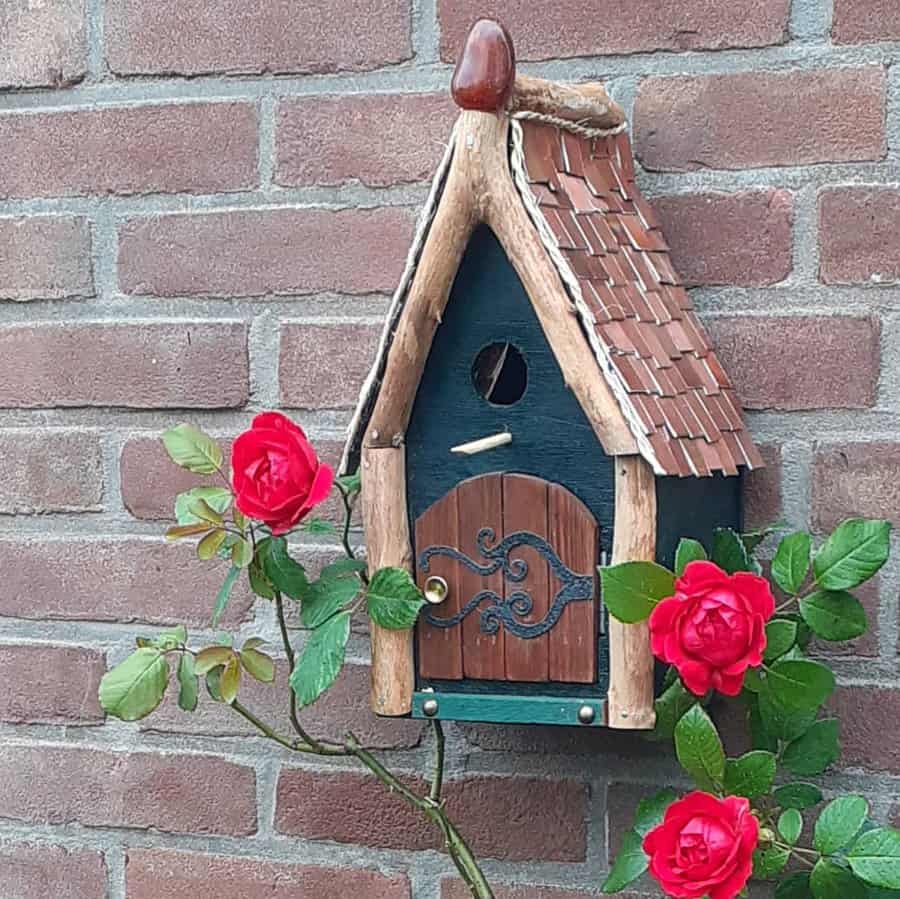
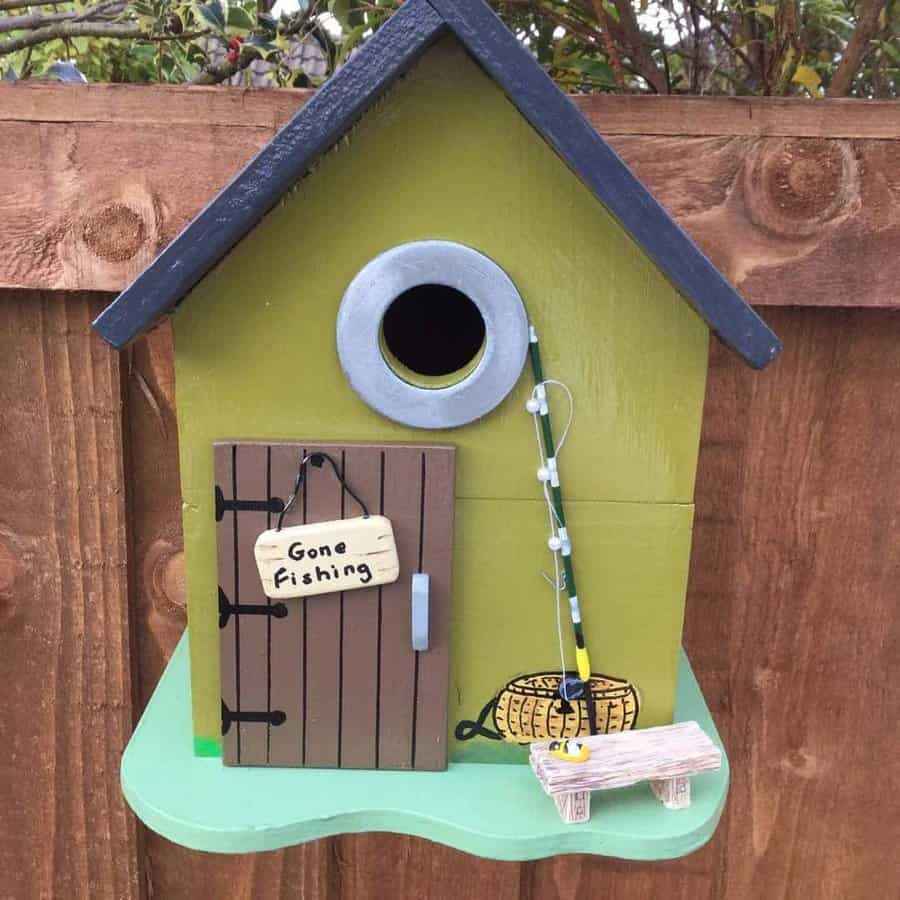
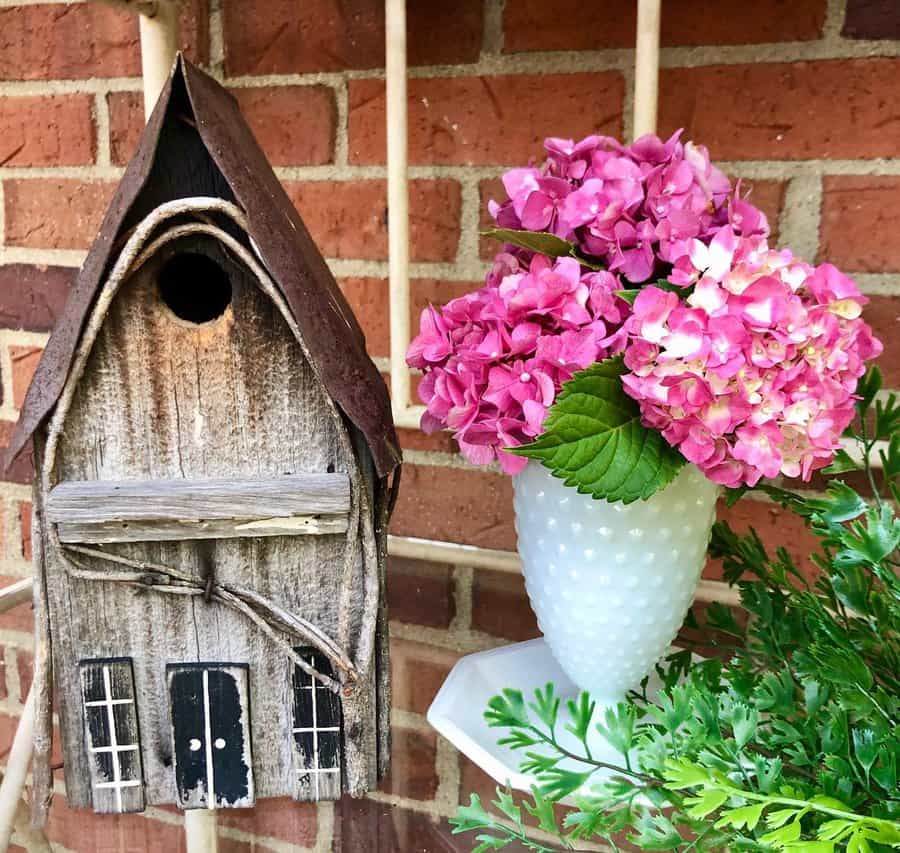
2. Rustic Cottage Birdhouse with Decorative Accents
If you’re looking for a fun, creative way to give your feathered friends a place to stay, why not build them their own cottage-inspired birdhouse? Construct a cozy cottage home for your feathered friends using recycled wooden items.
For a creative twist, add an inches-tall troll door so that fairies can come by too. This DIY project can offer hours of fun, help reduce waste in your home, and show off your unique style all at the same time. Building a birdhouse has never been more exciting and thoughtful!
Source: @nix.xies via Instagram
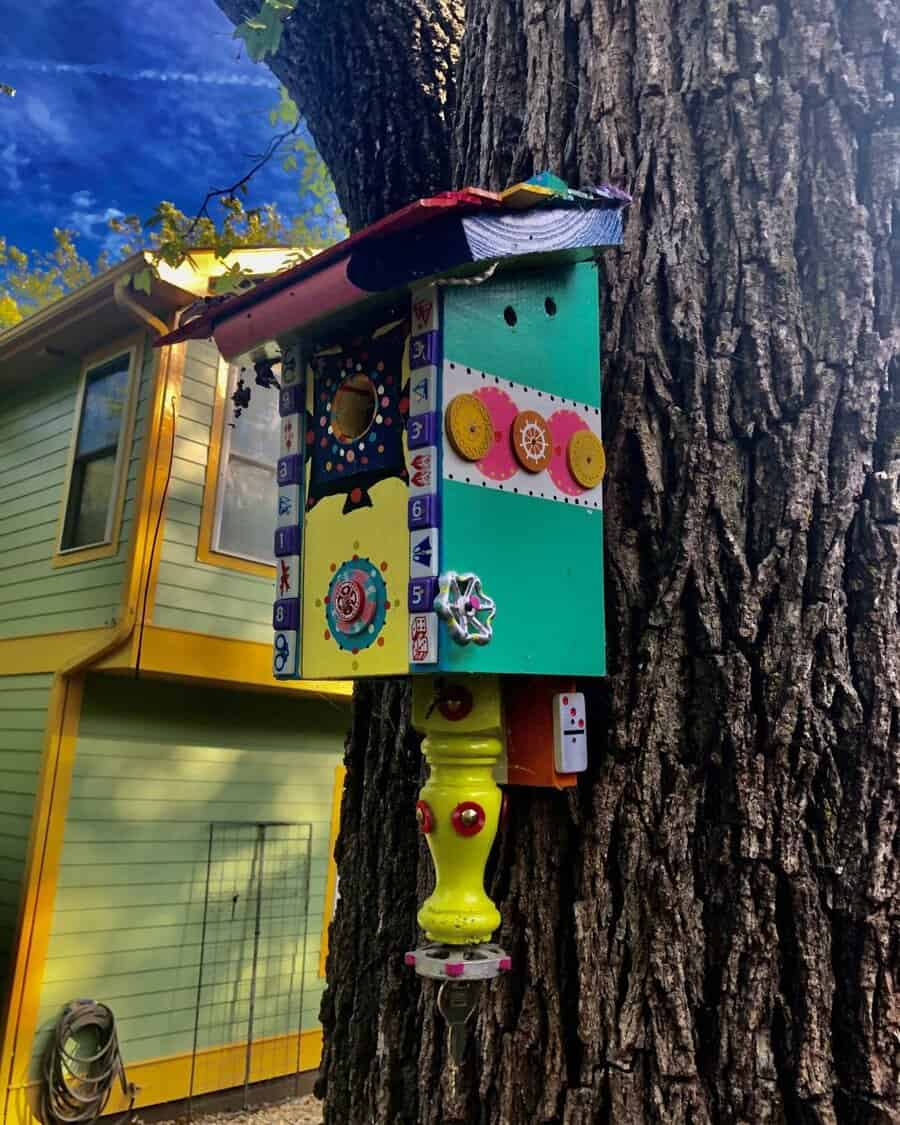
3. Bird’s Entertainment House
Decorating your birdhouse has never been easier! With the use of mahjong blocks and abstract stencils, you can paint a beautiful mosaic that will have any birds fluttering over to take a closer inspection. Create massive colorful murals out of eight-sided pieces of wood or decorate each side to show the diversity and beauty of the species.
If you ever feel stuck in the process, remember: the more creativity you put in, the better your birdhouse will look!
Source: @robertduvallsmith via Instagram
4. Repurposed Teapot
Every bird deserves a home, and with repurposed teapot birdhouses, you can get creative in providing new birds with some shelter. A repurposed teapot not only gives you plenty of freedom to craft the perfect birdhouse for your backyard feathered friends but also repurposes an older item so it can be used once again.
Source: @cozy_garden_features via Instagram
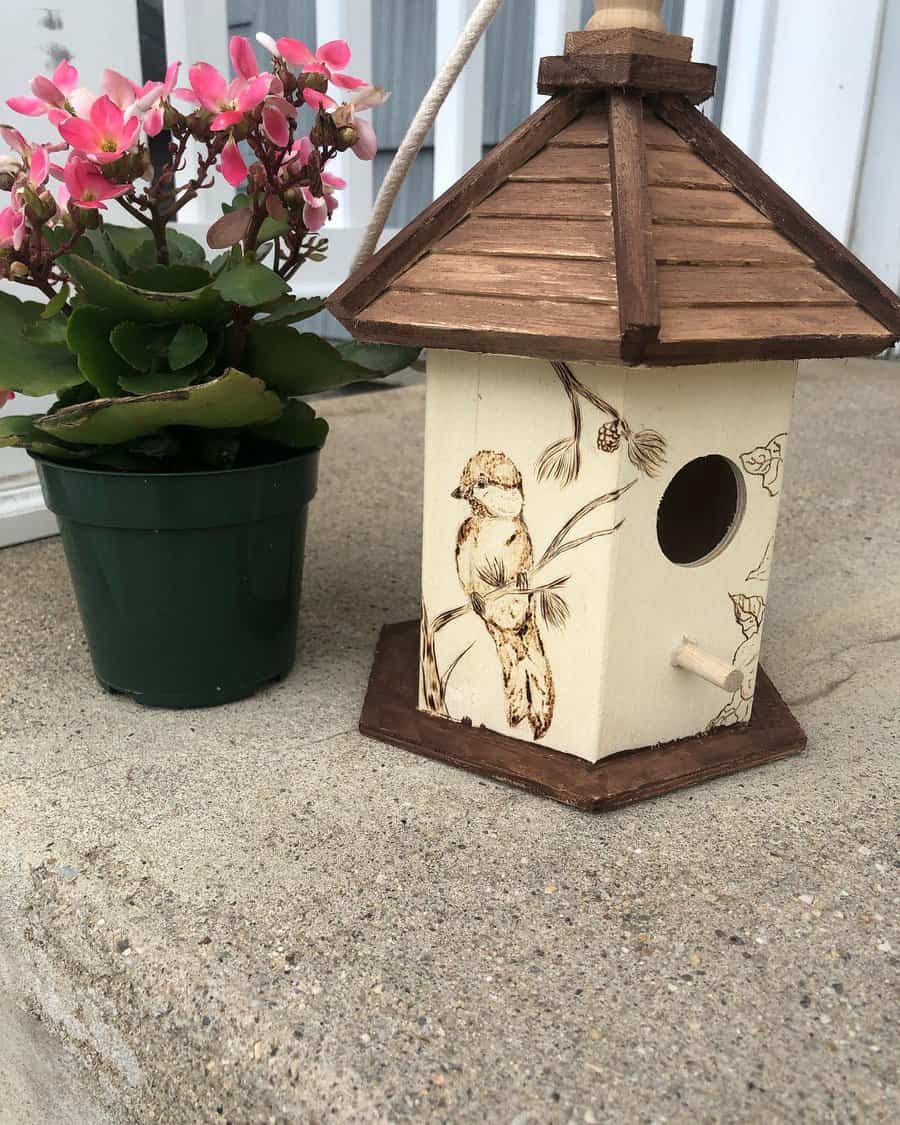
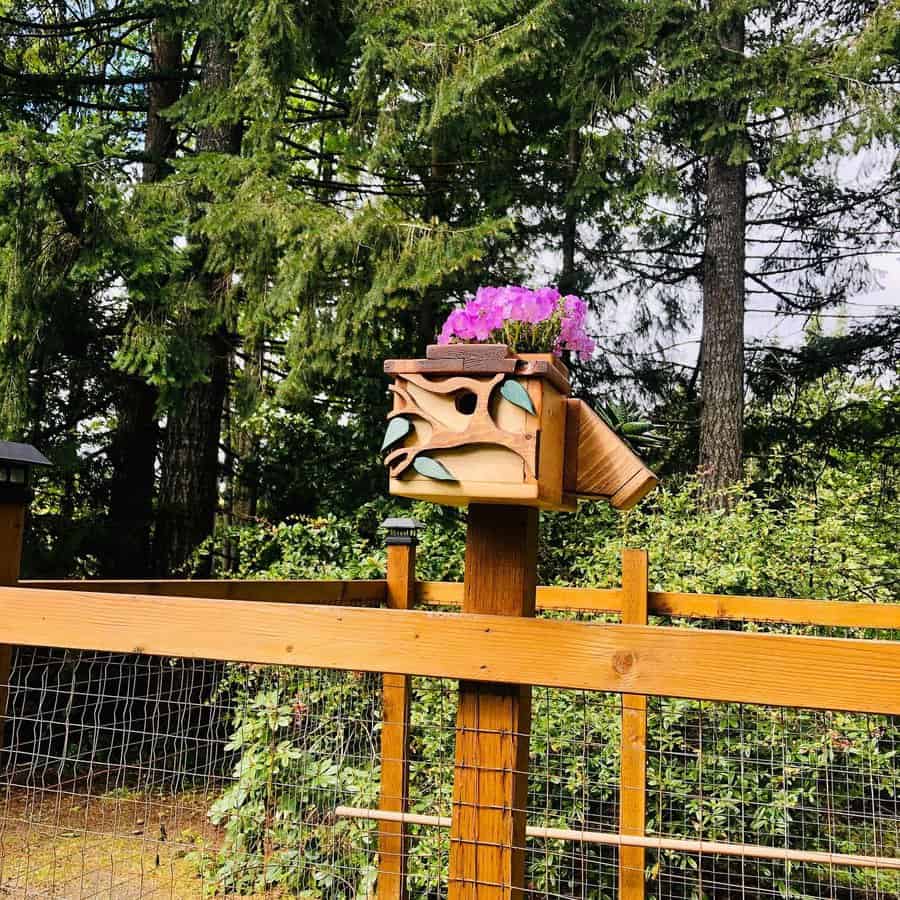
5. Bird’s Gazebo
Add a personalized touch to your garden with a DIY birdhouse featuring delicate pyrography illustrations of birds and flora.
This simple, cube-shaped birdhouse is a beginner-friendly project, starting with a plain wooden structure that you can easily assemble. Using a wood-burning tool, you can etch your favorite bird species or nature scenes onto the sides, creating a bespoke and artistic abode for your feathered friends.
Source: @emberfairy_ via Instagram
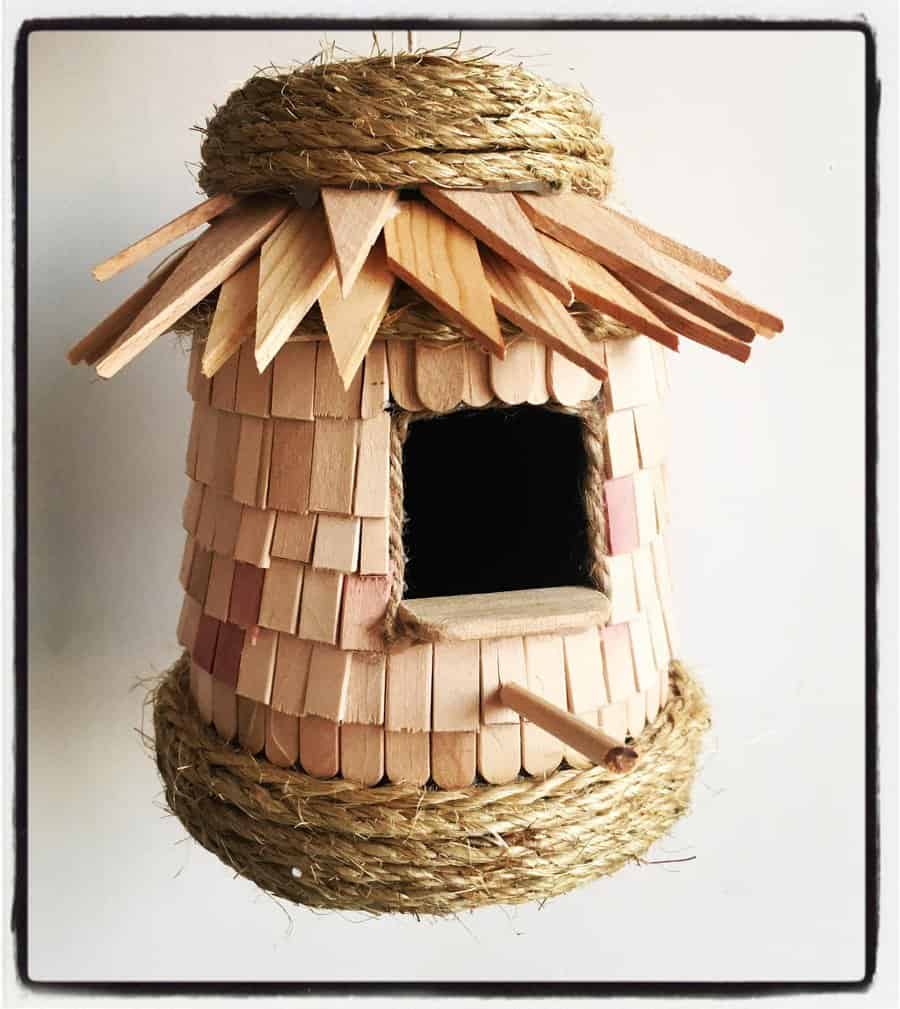
6. DIY Birdhouse with Thatched Roof and Wooden Shingles
For a DIY birdhouse like the one in the image below, you can use a sturdy cylindrical base such as a PVC pipe or cardboard tube, cover it with wooden shingles or popsicle sticks for rustic walls, and top it with a thatched roof made of straw or dried grass.
Cut out an entrance hole and attach a small dowel below it as a perch. All components can be assembled with non-toxic glue, and it’s important to sand down any rough edges to make it safe for birds.
Source: @jmp.creativity via Instagram
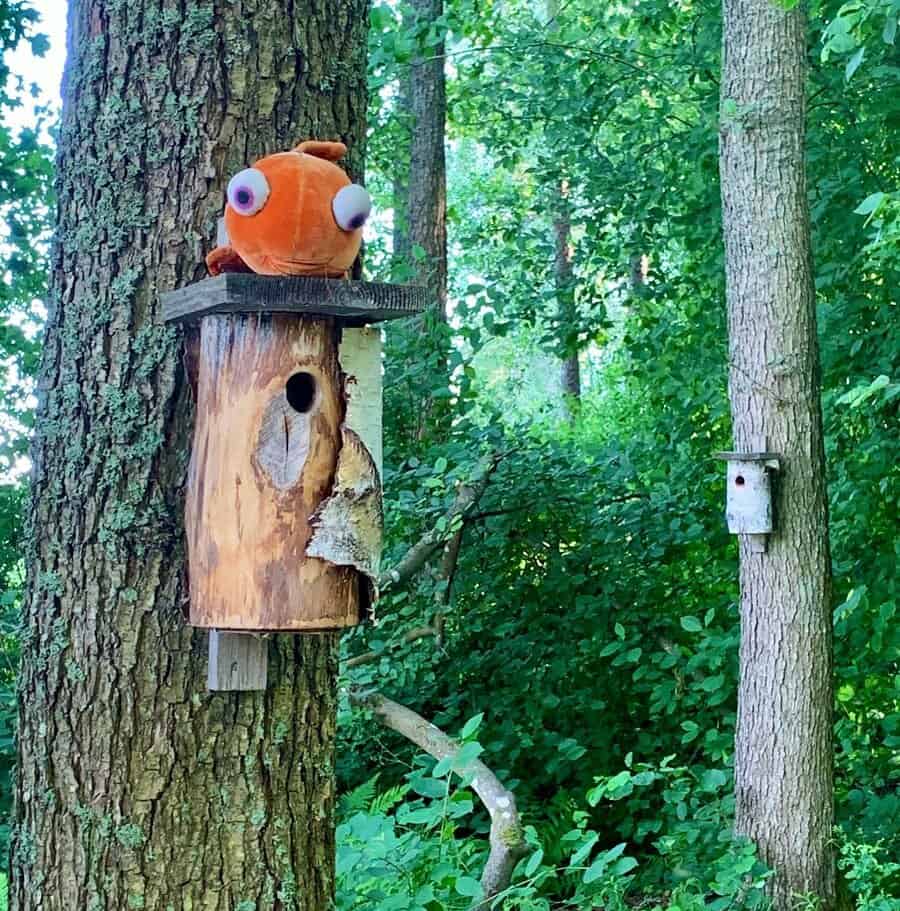
7. Natural Log Birdhouse with Whimsical Toy Topper
Dive into a fun DIY project by creating a birdhouse from a hollow log, maintaining the natural aesthetic that blends seamlessly with the woodland environment. The rough, rustic texture of the log brings an organic charm, while a simple, flat wooden platform serves as a landing area for birds.
For a playful twist, top the birdhouse with a bright, eye-catching toy that adds a pop of color and whimsy to your garden.
Source: @myfishhavingfun via Instagram
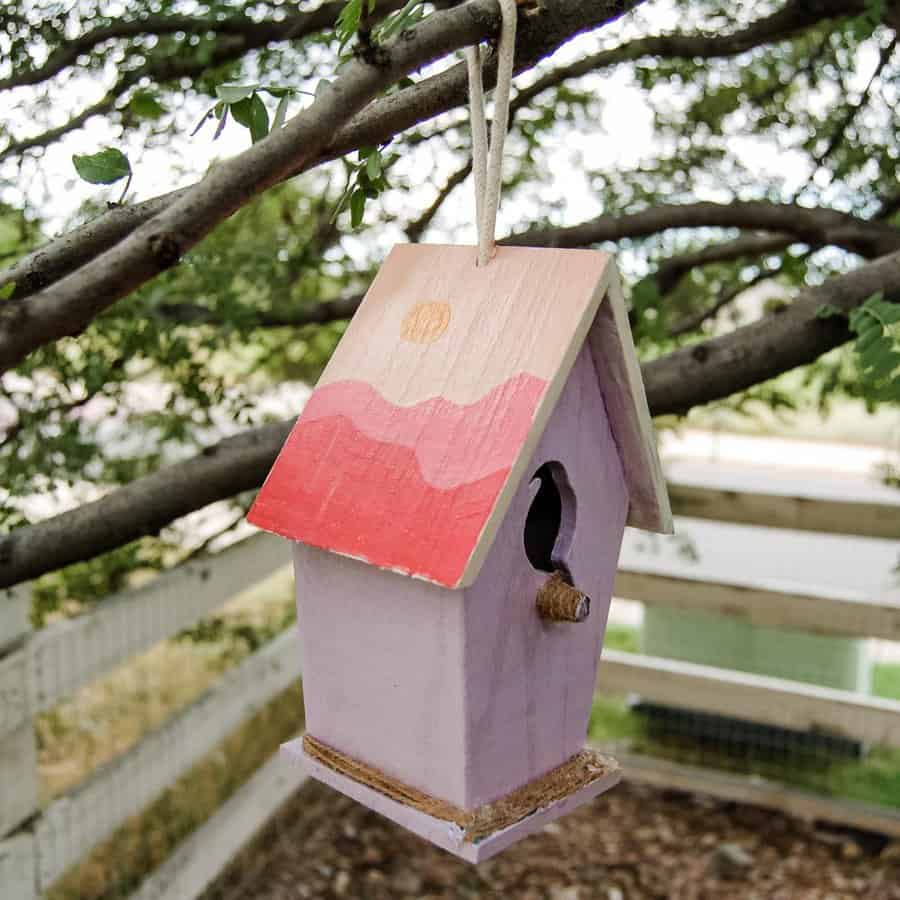
8. Sunset-Inspired Birdhouse
To create this serene sunset-inspired birdhouse, begin with a basic wooden house and paint it in soft purple shades, reflecting the calm of dusk. Sketch a scene of rolling hills on the front, using wavy lines and sunset colors for a tranquil effect. Add a sturdy perch and a round entrance for birds, then hang the birdhouse from a tree branch to provide a secure nesting place.
Source: @artbyschulze via Instagram
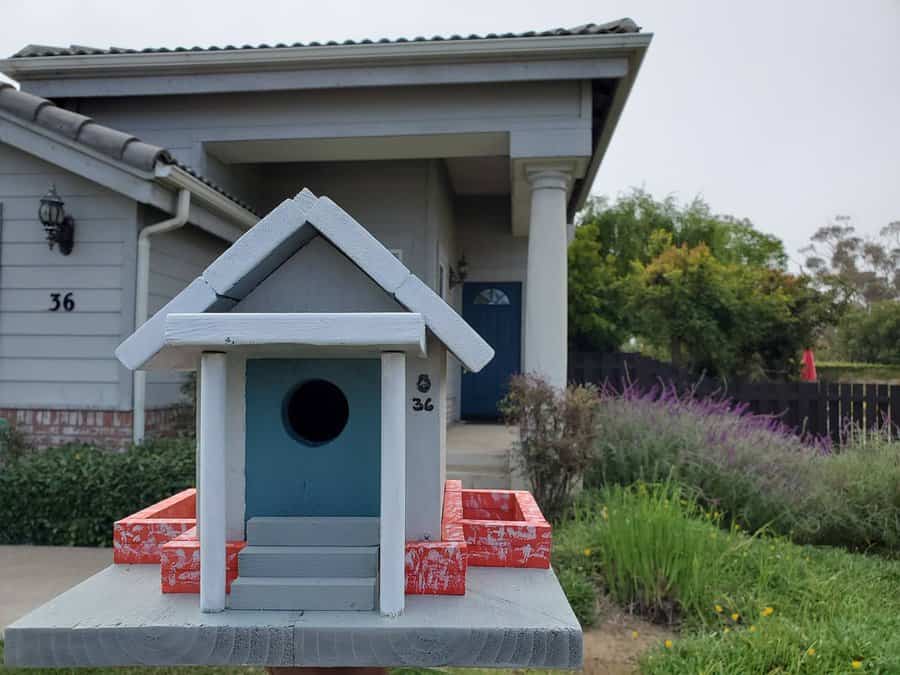
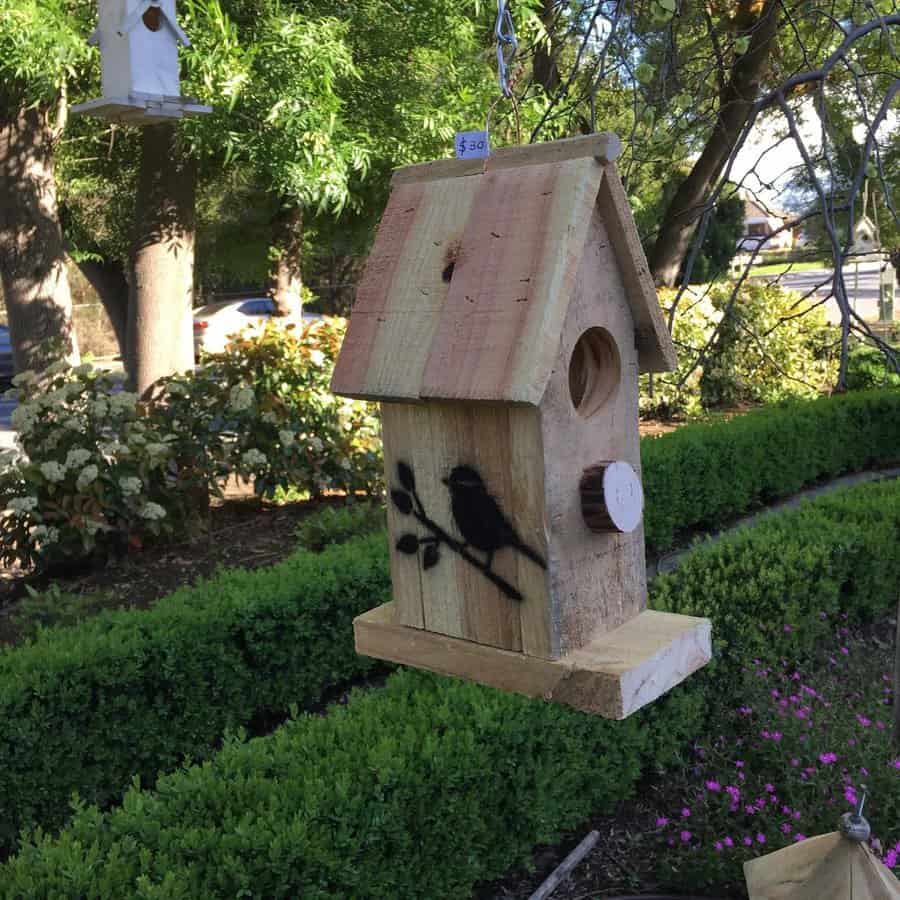
9. Tiny House Replica
A birdhouse that is a replica of your main house can make for a fun and creative conversation starter. Not only will the birdhouse be an eye-catching piece to have around your garden, it will also offer a chance to show off your style and creativity, as you can customize it according to the materials that you have on hand. Plus, you’ll be providing shelter and a home for friendly feathered friends when they come over to take a break from the world outside.
Source: @backyard_birdlife via InstagramSource: @lite.gront.som.hanger.ner via Instagram
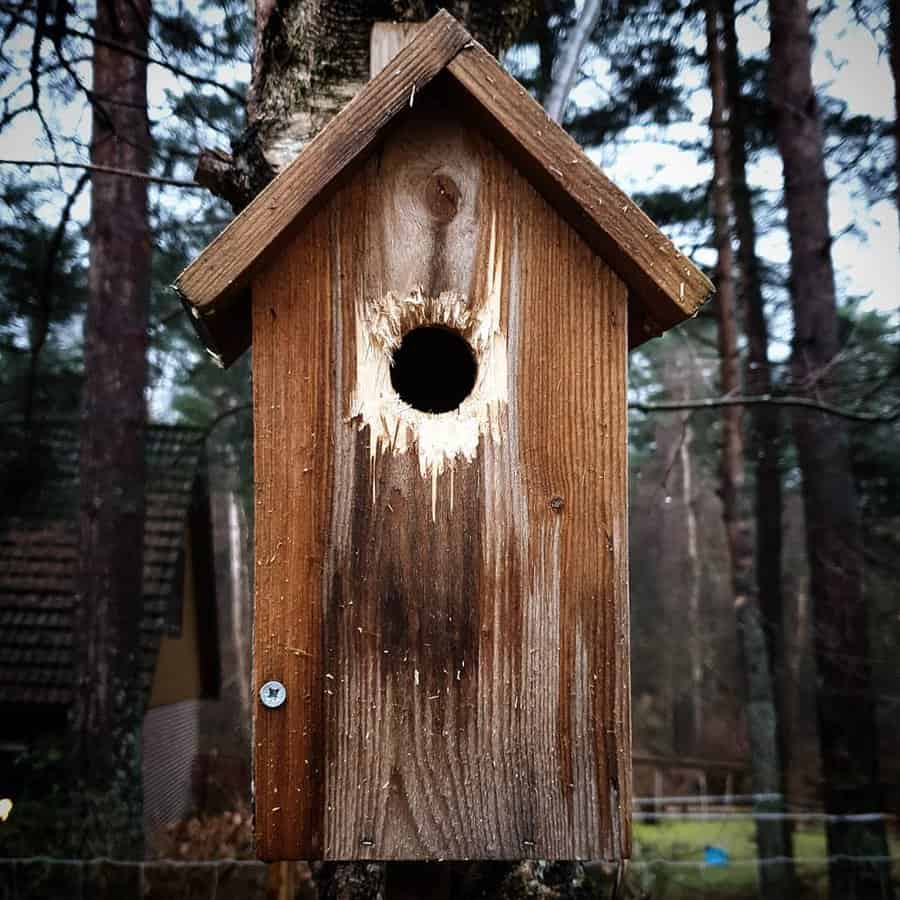
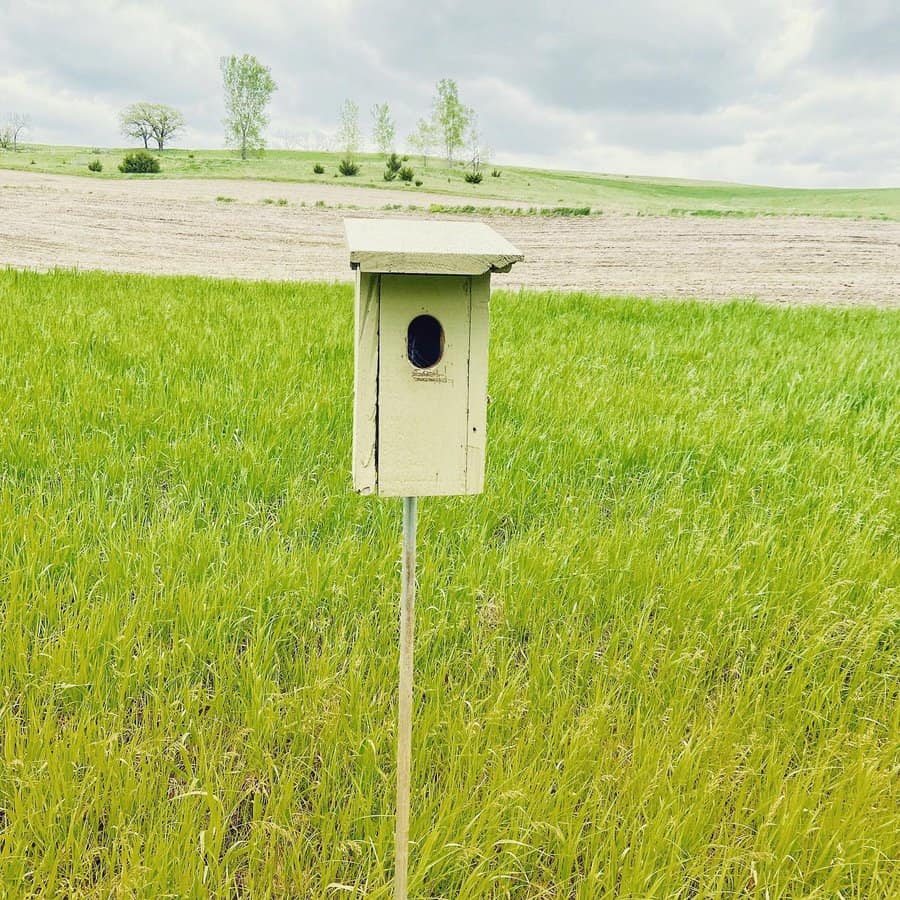
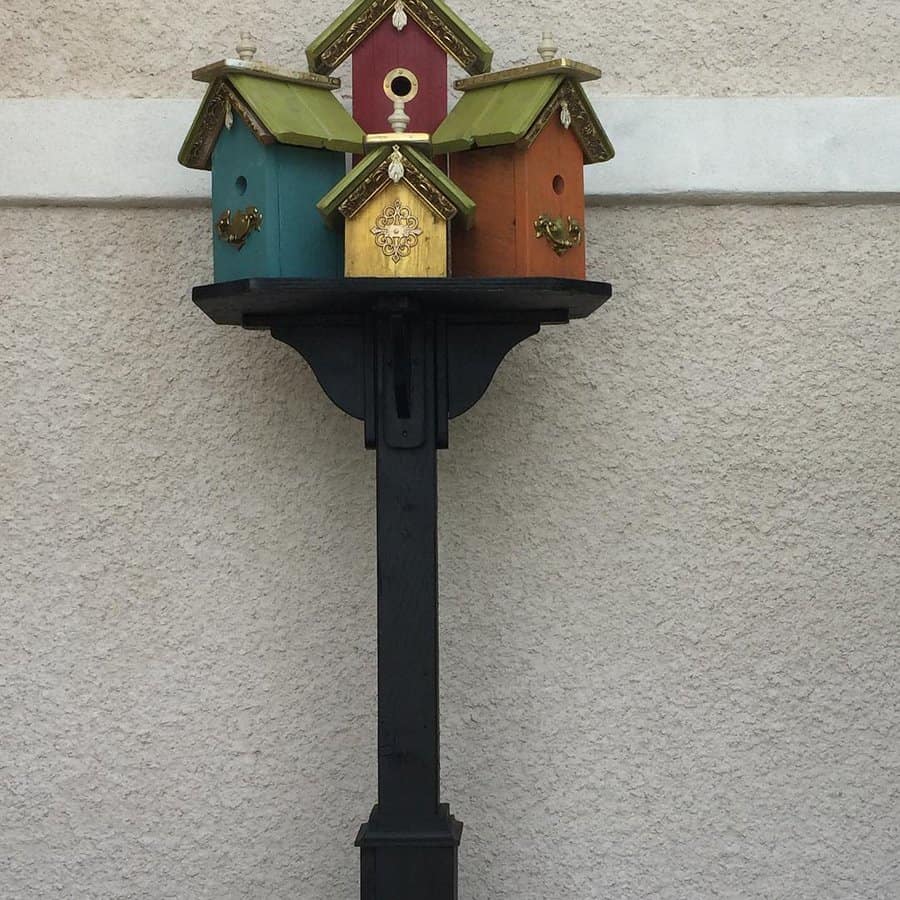
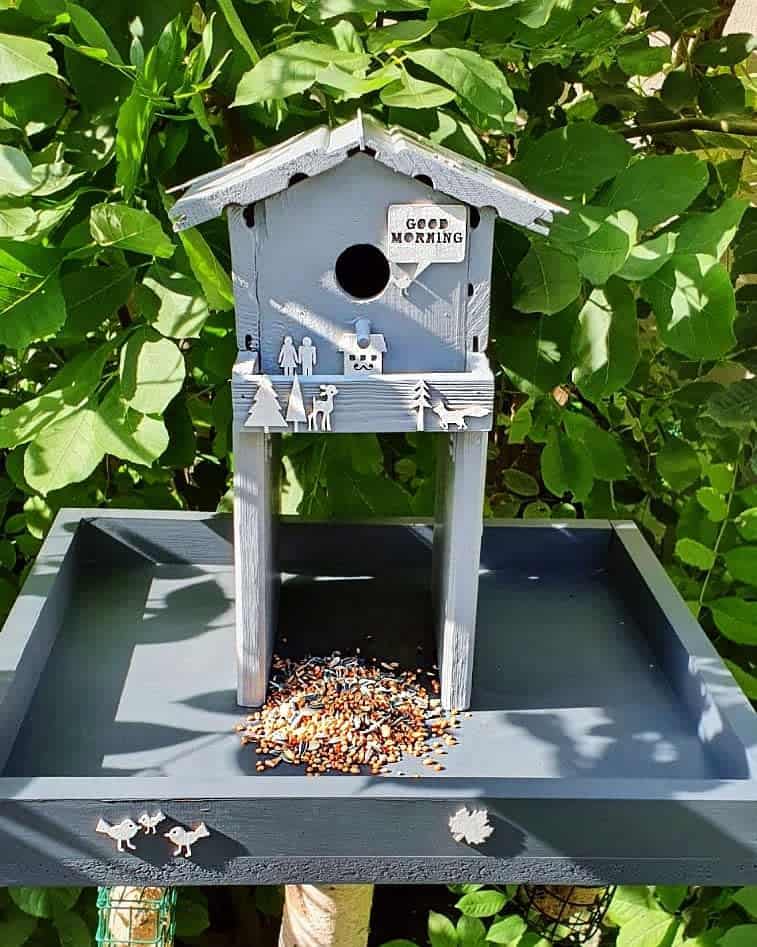
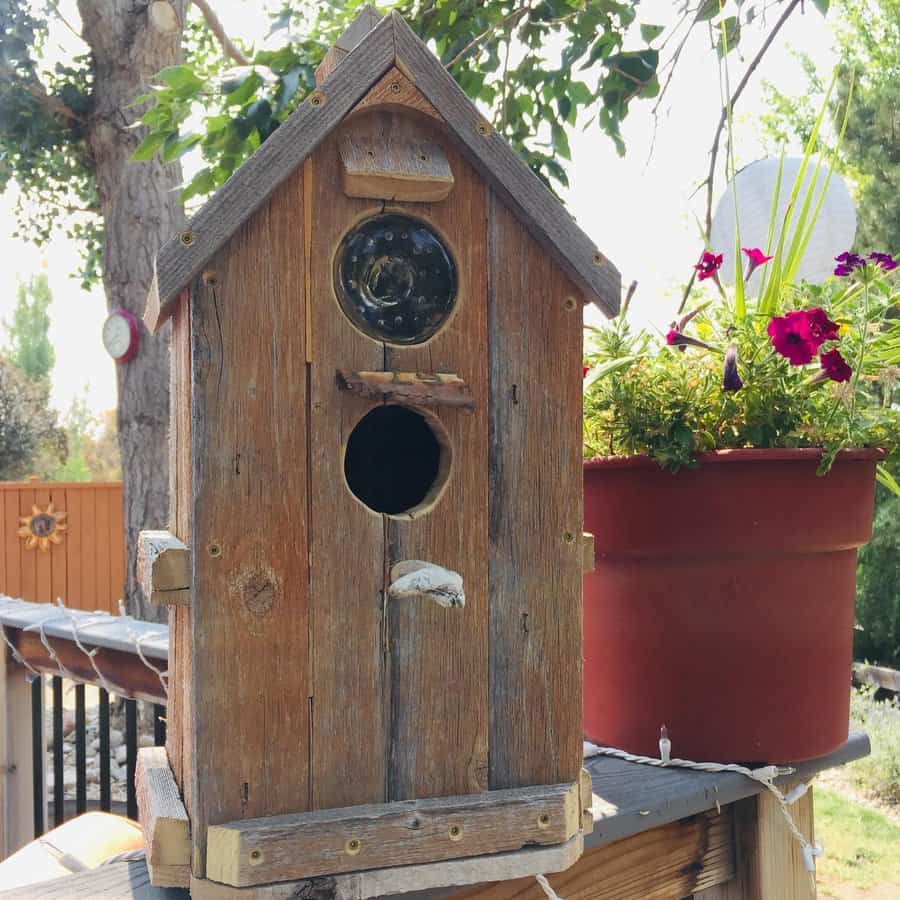
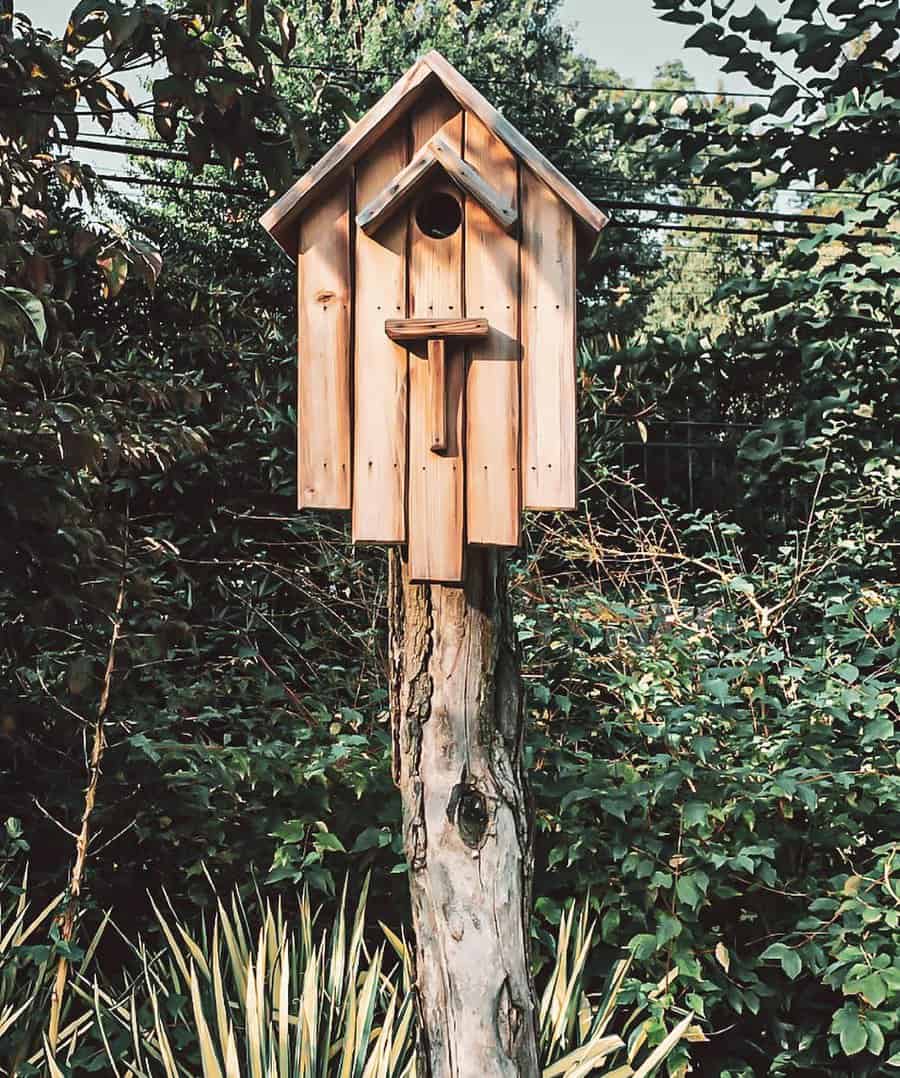
10. On Post Birdhouse
Making a simple on-post birdhouse out of planks is an easy and creative way to give nature a home. Our feathered friends would be happy nestling in the cozy, rustic wooden structure while you sit on the porch and enjoy their company from afar.
Source: @suzeloveslife via InstagramSource: @brendaklinehikes via InstagramSource: @capturekismet via InstagramSource: @birdhousesunday via Instagram
11. Hanging Birdhouse
Nothing quite compares to the sight of a hanging birdhouse suspended by a metal pole, hook, and all. It carries with it a sense of whimsy, of something special that feels almost magical. It’s as if we’ve conjured a home for our feathered friends in the air itself, hanging them up like dainty Christmas tree ornaments.
Source: @wildflowervintageandrustic via Instagram
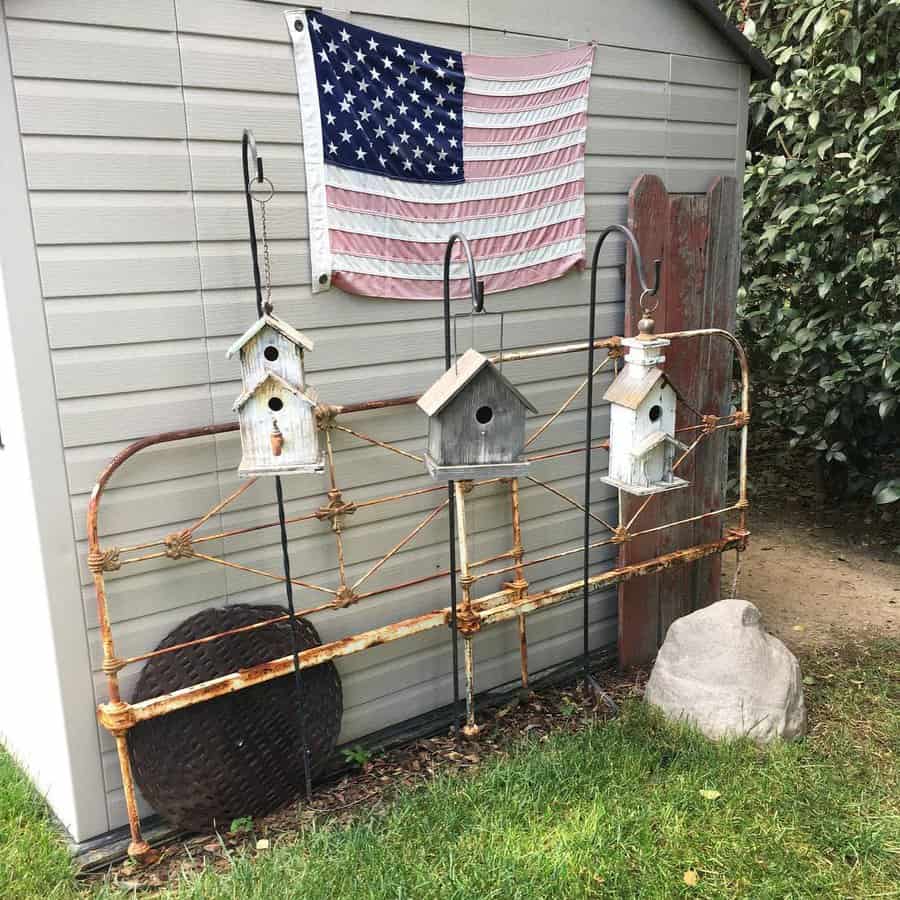
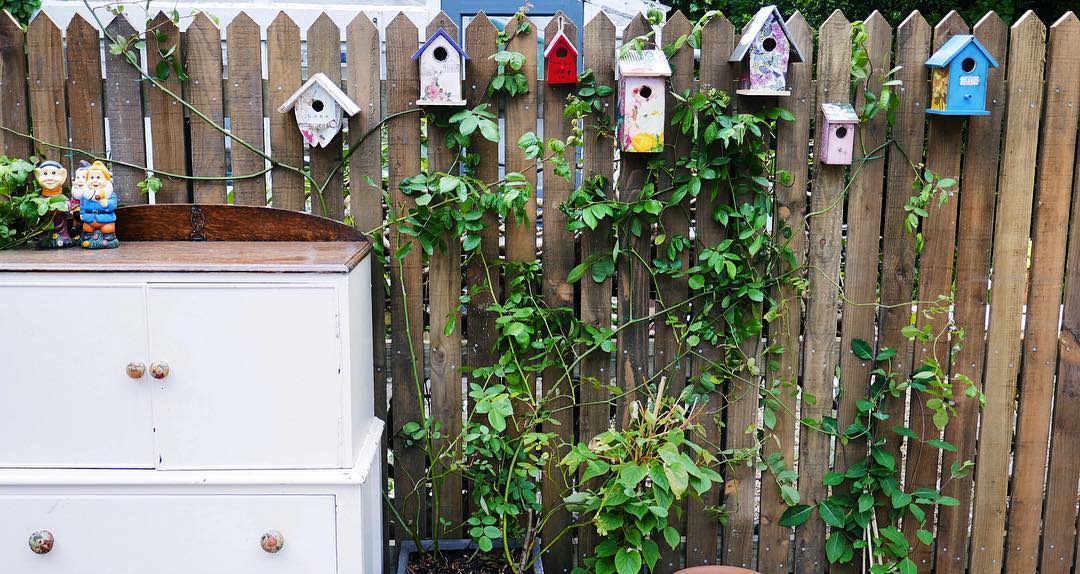
12. ‘The Compound’ Birdhouse
Instead of just having one birdhouse in your garden, why not multiple tiny ones layered and beside each other? This tiers effect will have the birds flocking to multiple homes in no time, cheerily chirping away as they hop together along their multiple-roofed paradises.
Source: @__annirose__ via InstagramSource: @altstaterecycling via InstagramSource: @chippernelly via InstagramSource: @doodinne via InstagramSource: @martian_rose via InstagramSource: @tuesdaybirdsong via Instagram
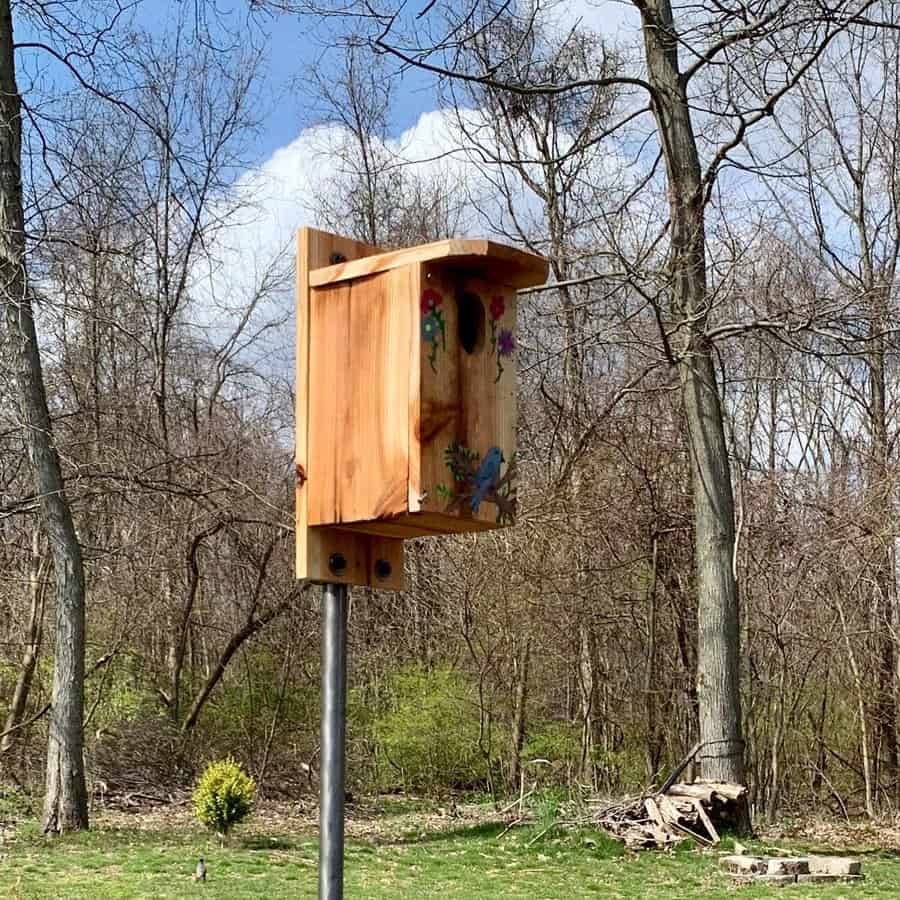
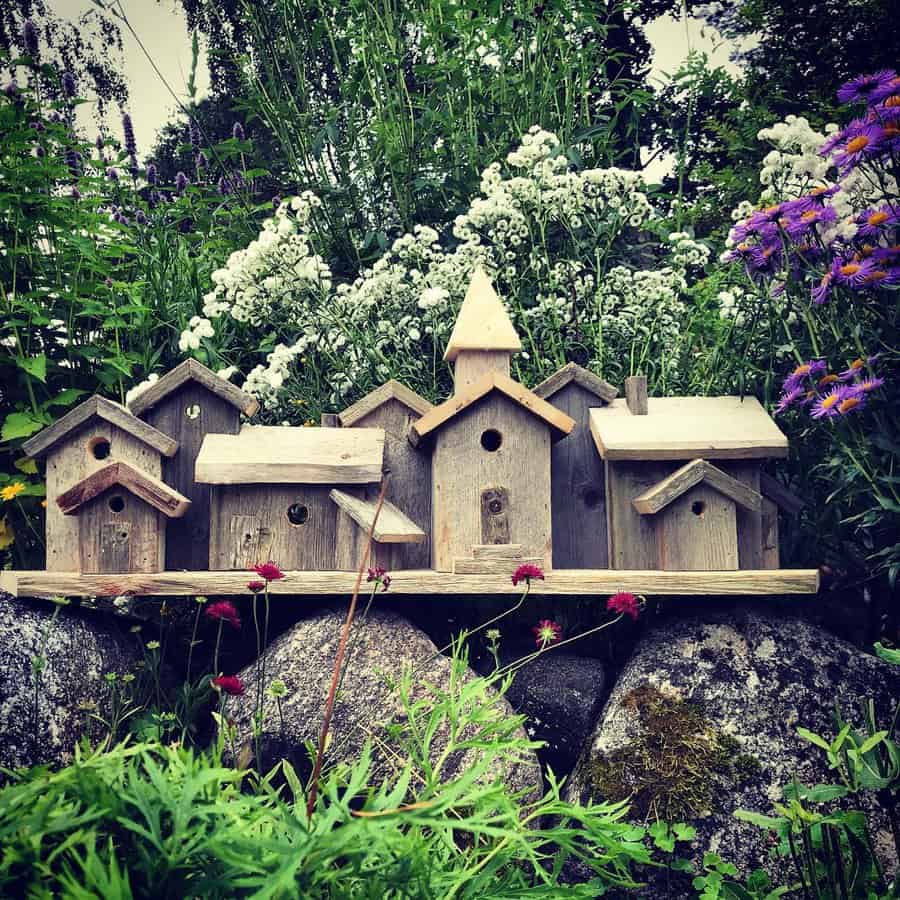
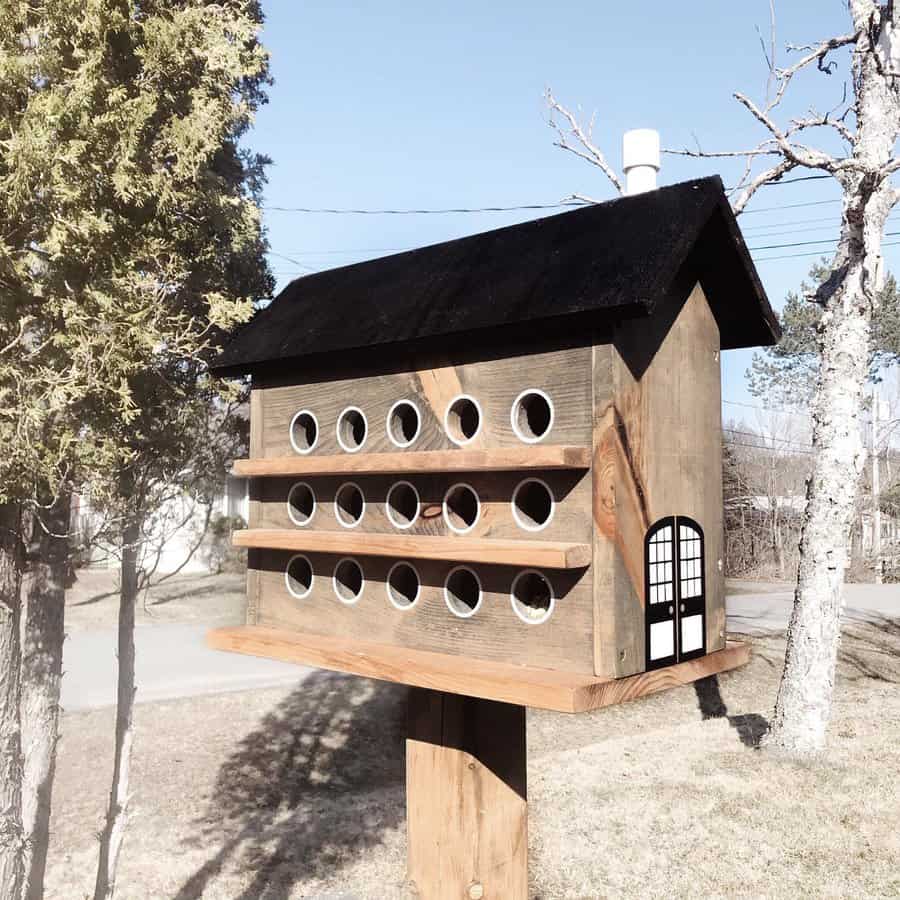
13. Multi-Unit Birdhouse Condo
To achieve the multi-unit birdhouse condo design, select durable lumber and cut it to size for the back, sides, base, and a slanted roof. Drill evenly spaced circular entrances using a hole saw to create individual compartments for the birds. Stain or paint the wood for a sleek finish, and consider contrasting colors for visual impact. Add a singular faux window for charm and ensure proper ventilation and drainage for the bird’s comfort. Attach the structure to a post or tree, creating not just a bird-friendly habitat but also a striking garden feature.
Source: @mrssaredonovan via InstagramSource: @sommerhusliv_hele_aaret via Instagram
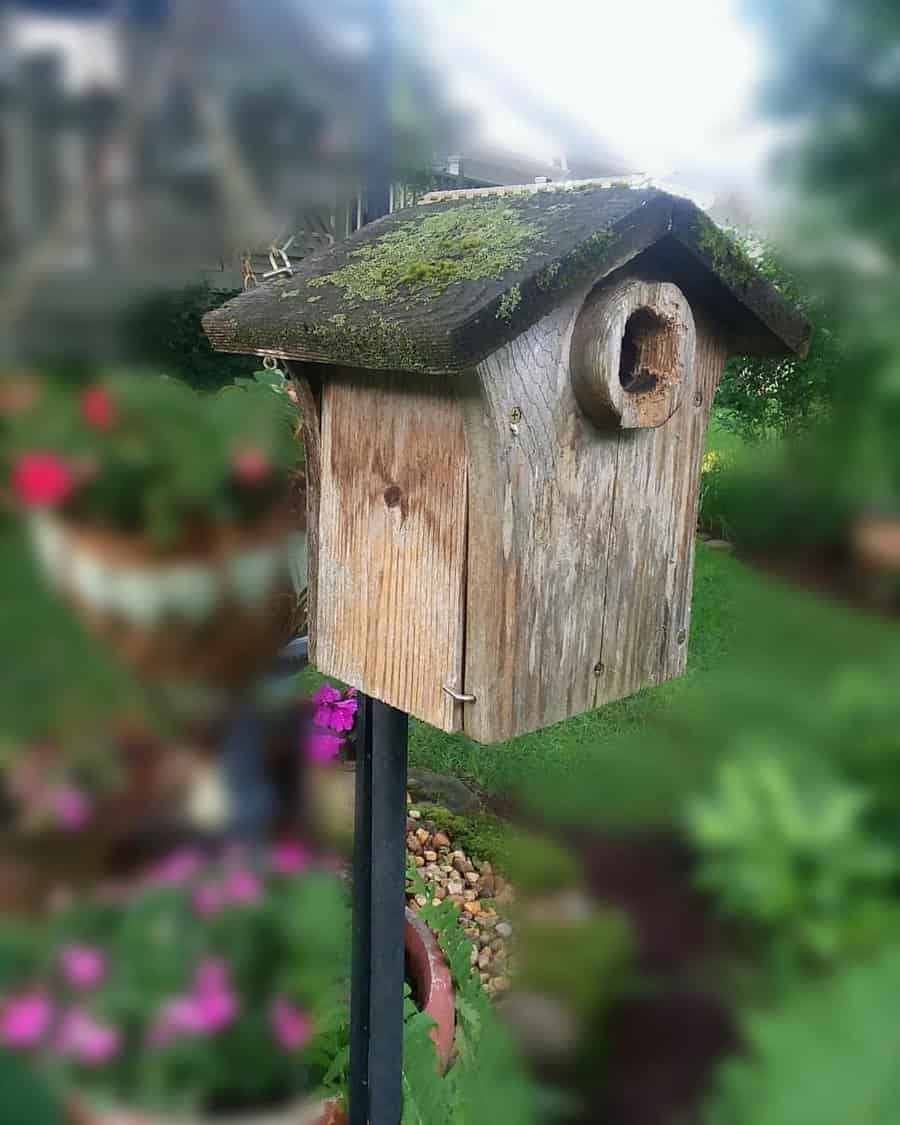
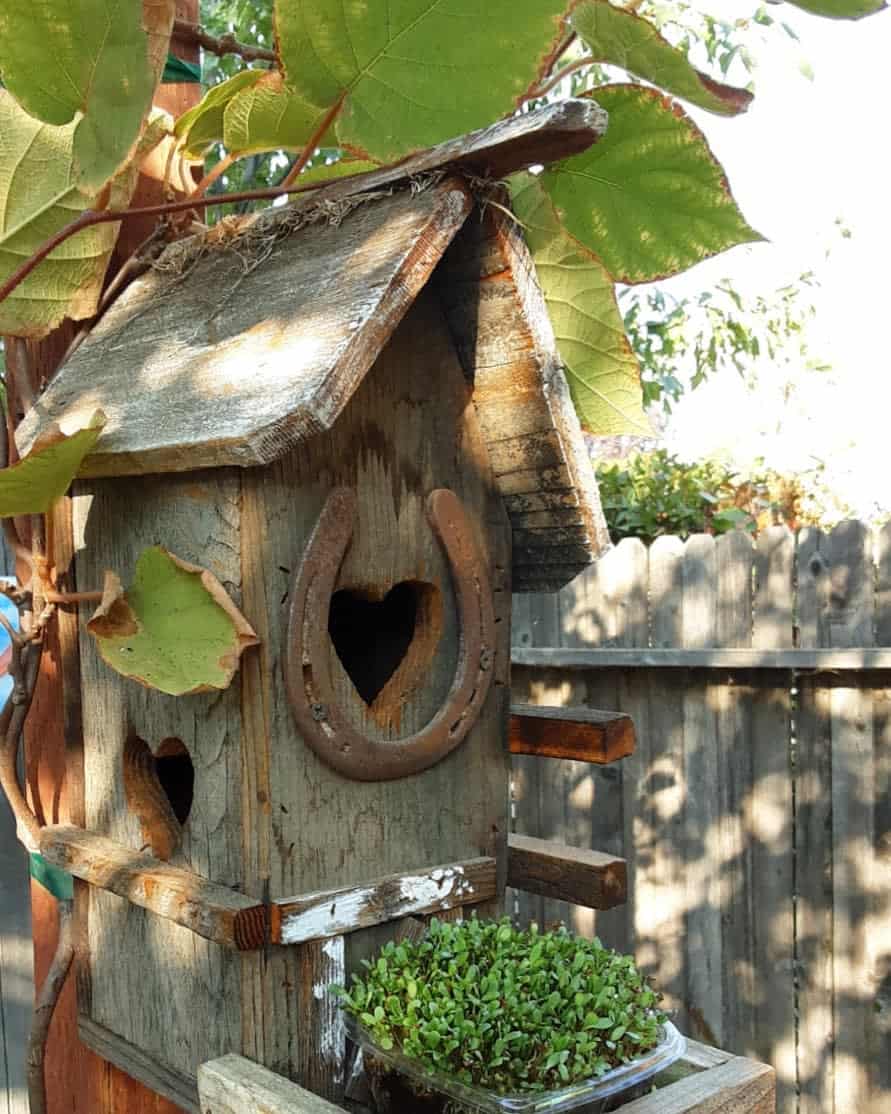
14. Mossy Cottage House
What could be more mystical and rustic than a mossy cottage house for the birds? A birdhouse made with natural, weather-worn materials like moss and twigs gives backyard birds an inviting place to call home.
Best of all, these unique nests can be enjoyed by you too—just think of the charming addition that this mossy cottage house will make to your garden!
Source: @staceysiegelglass via InstagramSource: @susiecouch via Instagram
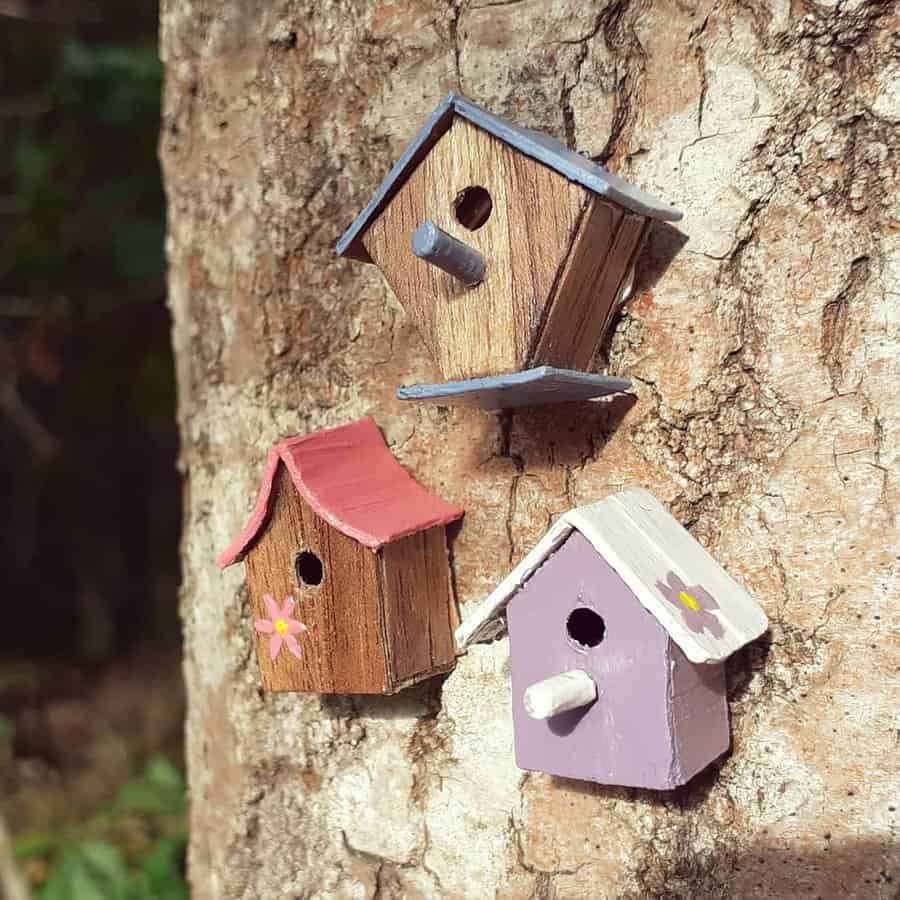
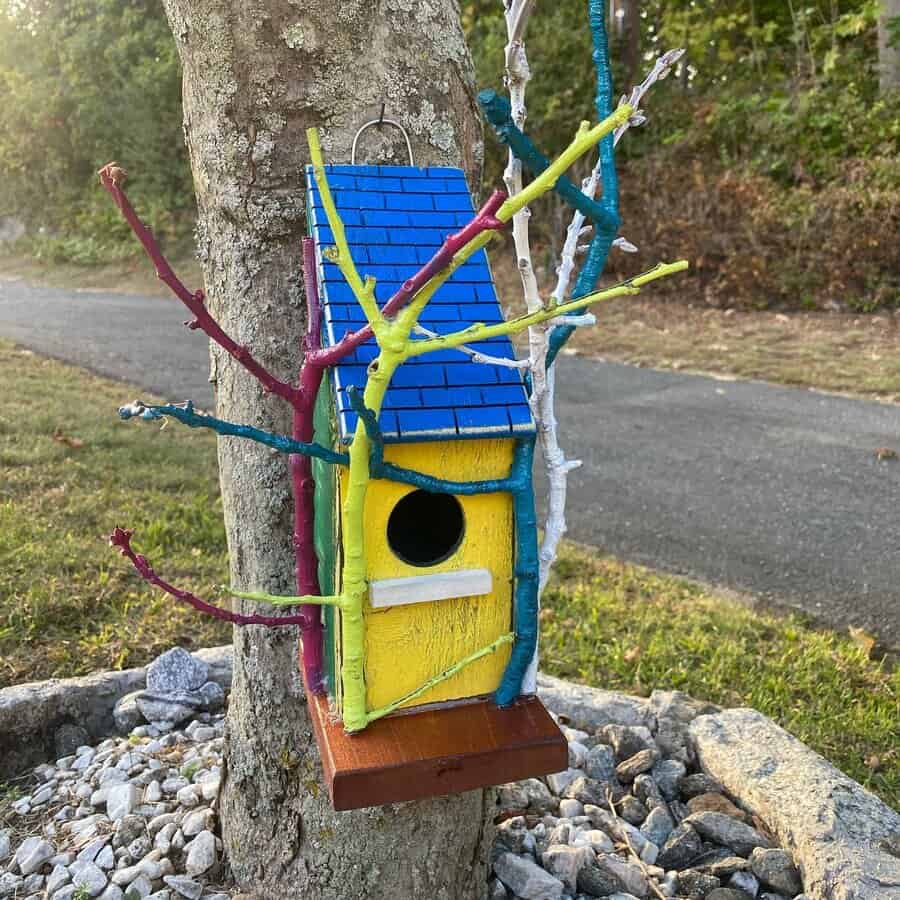
15. Cartoon-like Birdhouse
A cartoon-like birdhouse can be a really cute addition to your garden. With markers and some creativity, you can draw cartoon faces on it and give it its own unique personality.
Hang the birdhouse high up on a tree, or in a cozy corner of your patio; then watch as birds flutter around it and come to take refuge in it during stormy days.
Source: @cnnkusevi via InstagramSource: @fly.awayhomes via InstagramSource: @muckelkim via InstagramSource: @garyd14_ via Instagram
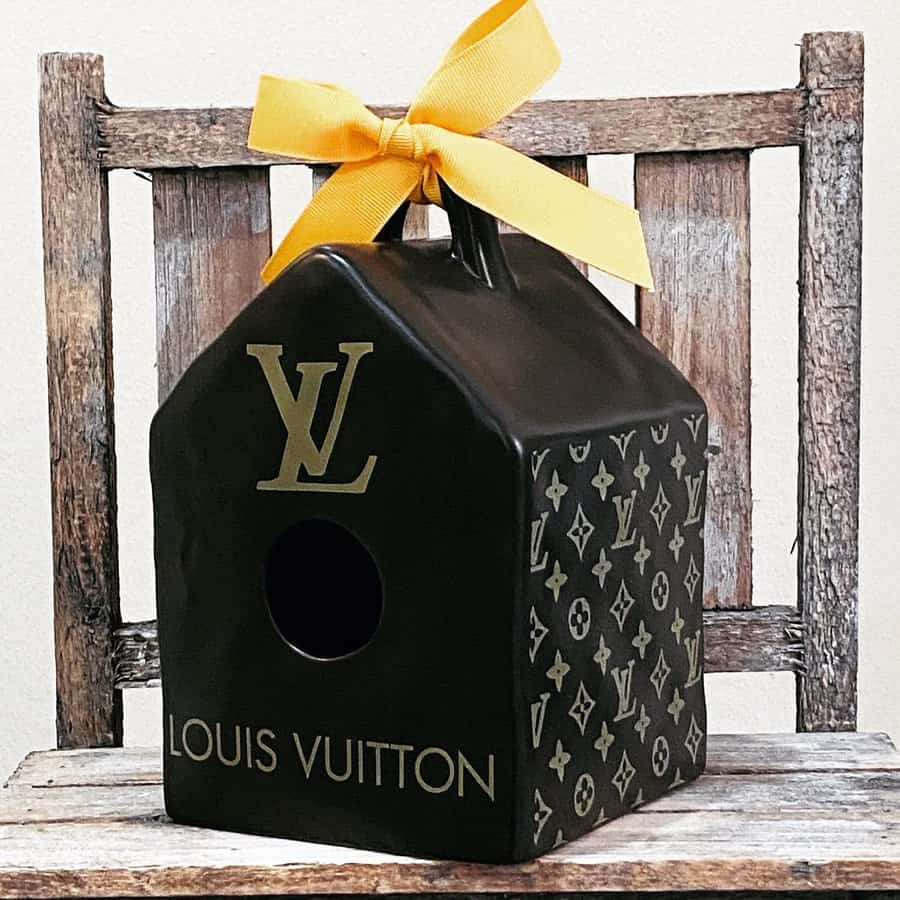
16. Luxury Birdhouse
Take luxury to the skies with a luxury-inspired birdhouse! Perfect for pampered, discerning birds, this luxury birdhouse features custom paint jobs, each adorned with famous luxury brands. Choose from LVMH’s iconic Louis Vuitton pattern or his-and-hers Chanel prints.
Source: @jzdesigns_ via Instagram
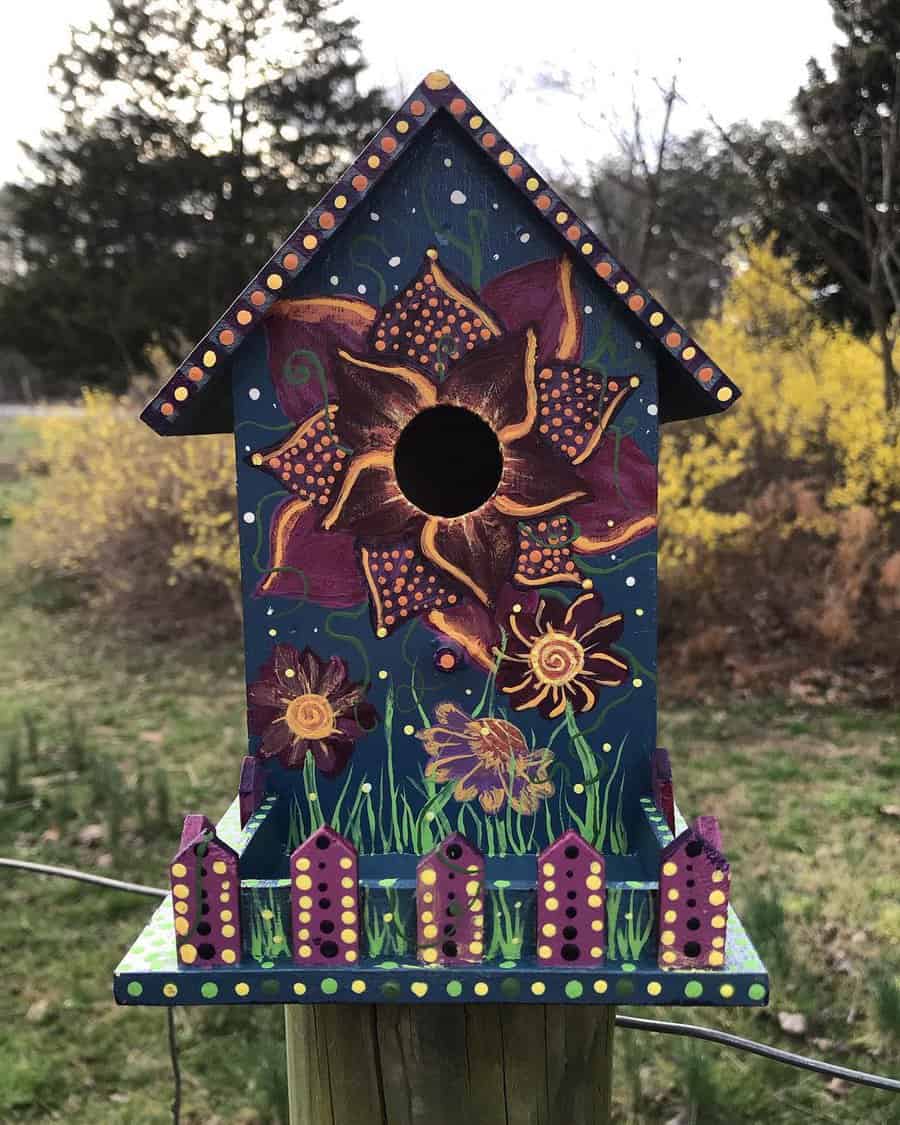
17. Hand-Painted Floral Birdhouse
To craft this vibrant birdhouse, start with a pre-made or handcrafted wooden structure. Choose a deep blue as the background, reminiscent of a night sky, and paint elaborate, colorful flowers that command attention and add a sense of whimsy. Accentuate the edges with polka dots and complementary patterns for an extra layer of detail. The lively picket fence motif around the base injects a playful, storybook charm.
Source: @rstcraven via Instagram
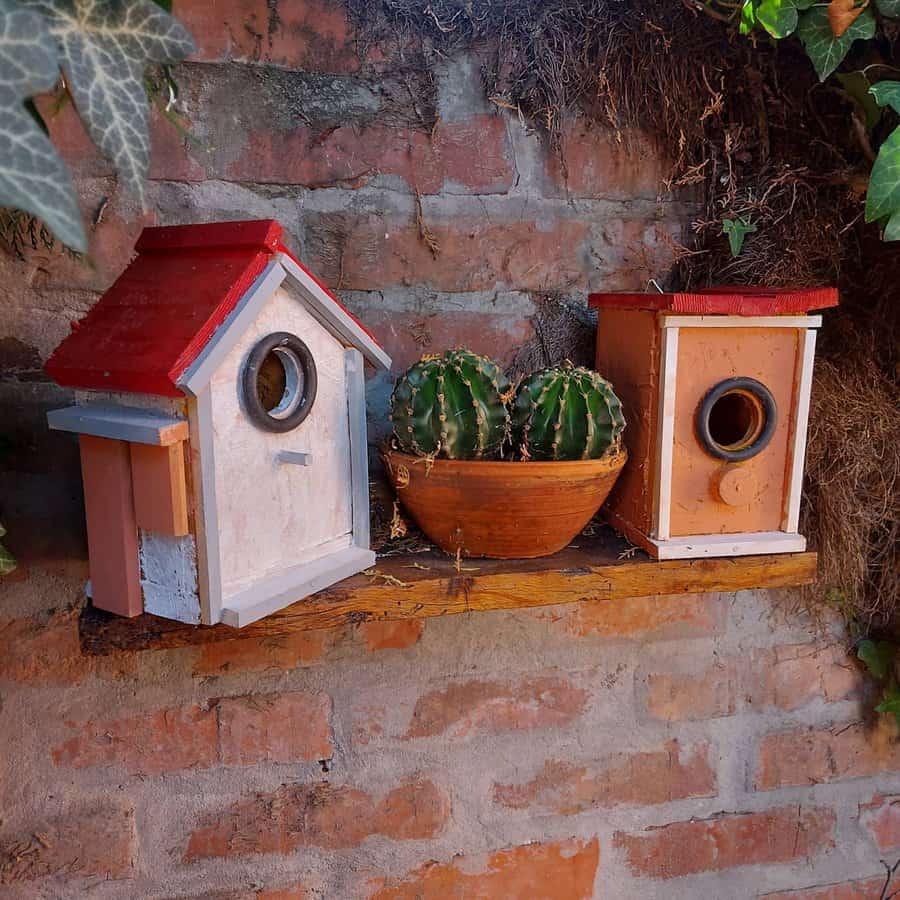
18. Repurposed Birdhouse
You can use repurposed materials like wood, metal, and stones to construct your unique house. The possibilities are endless when it comes to adding color and detailing!
Transform it with repurposed paint or repurposed glass gems for an added touch of sparkle. With a little creativity and repurposing, you can make your backyard scenery one-of-a-kind!
Source: @moja_hobyradionica via Instagram
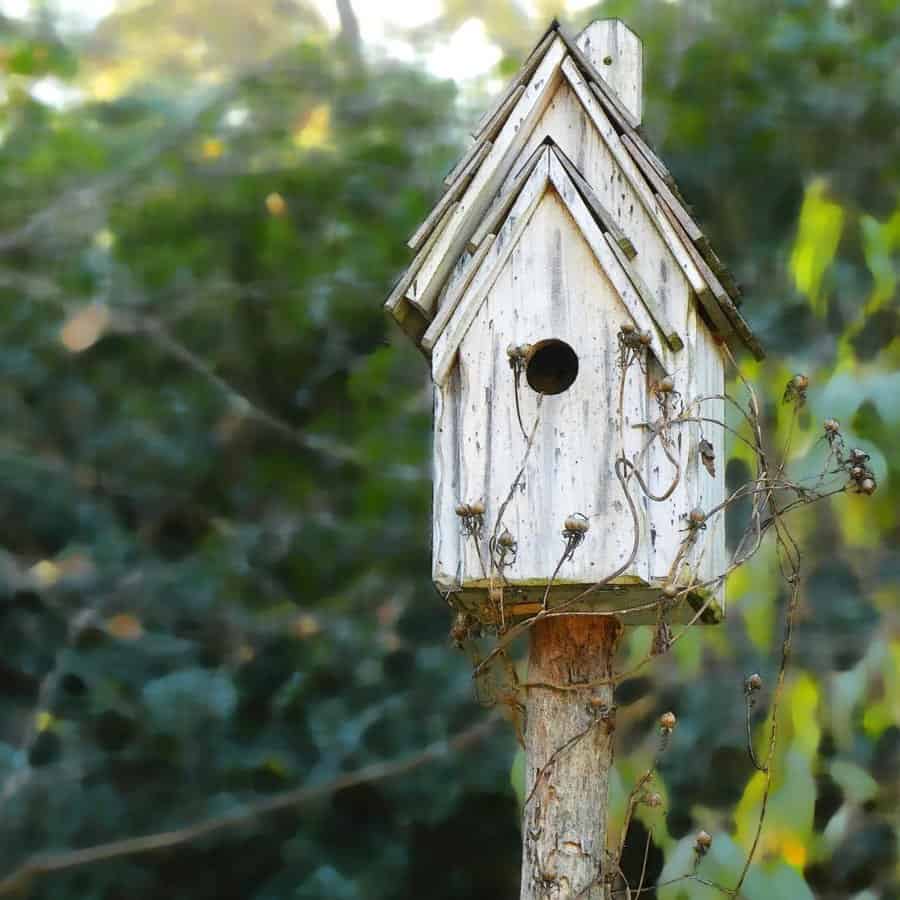
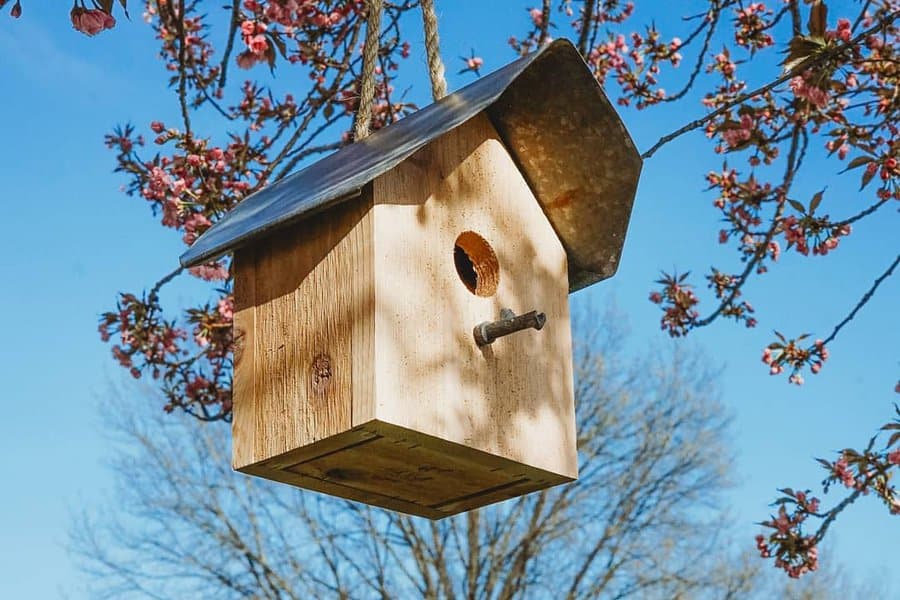
19. Simple Rustic Birdhouse
Transform your garden with a DIY rustic birdhouse that embodies the charm of upcycling. Begin with salvaged wood and repurposed tin to construct a durable shelter, ensuring each creation is unique with its own set of characterful imperfections. For a personalized touch, add hand-carved decorations—think nature-inspired motifs like flowers or birds.
Source: @oakknollcreations via InstagramSource: @tuesdaybirdsong via InstagramSource: @__awalktoremember__ via InstagramSource: @avintageglow via InstagramSource: @california.microgreens via InstagramSource: @cutiepinwheel via InstagramSource: @magnolia_birdhouses via InstagramSource: @sird1 via Instagram
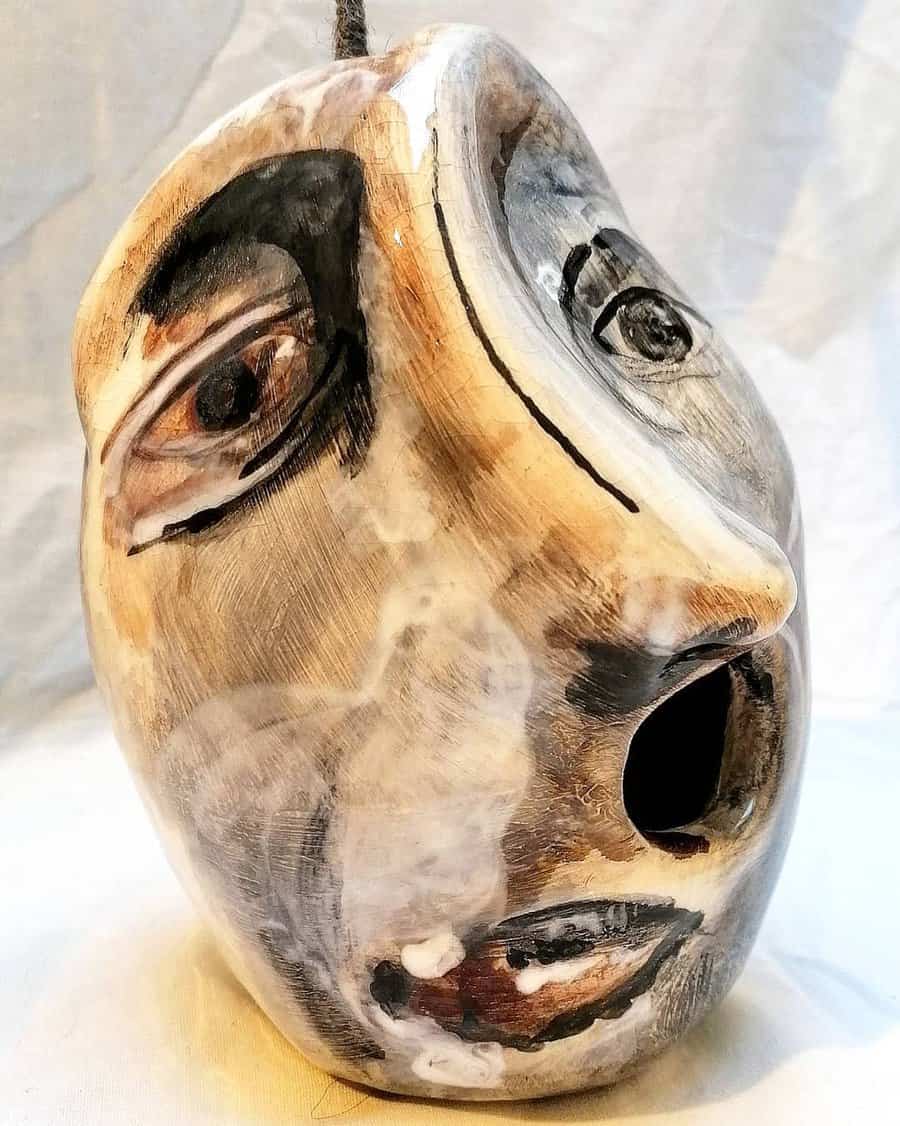
20. Sculptural Birdhouse
A sculptural abstract birdhouse is so much more than just a home for your feathered friends. It can also be a work of art, made with beautiful ceramic and set to stand proudly in your garden.
In the same way that traditional sculptures are often considered masterpieces, this modern twist on avian architecture should also be recognized as a creative piece of artwork. Providing birds with a safe space to nest has never looked better!
Source: @lisagowdyceramics via InstagramSource: @lisagowdyceramics via InstagramSource: @lisagowdyceramics via Instagram
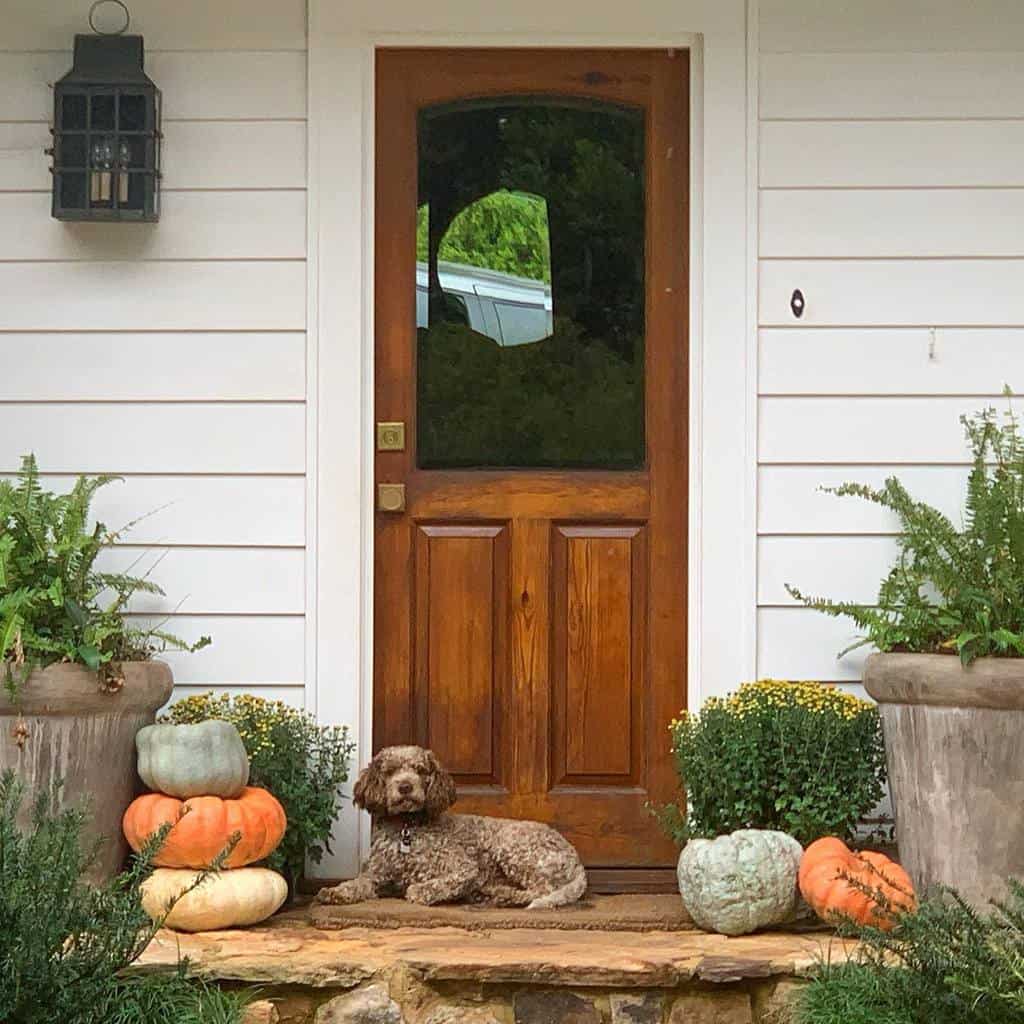
You’re using the bathroom and realize it’s out of toilet paper. You look around in panic for a replacement roll. Except, there isn’t one.
Your small bathroom lacks storage space, and you have to keep the extra toilet paper in the linen closet down the hall. What you need is more storage in the bathroom.
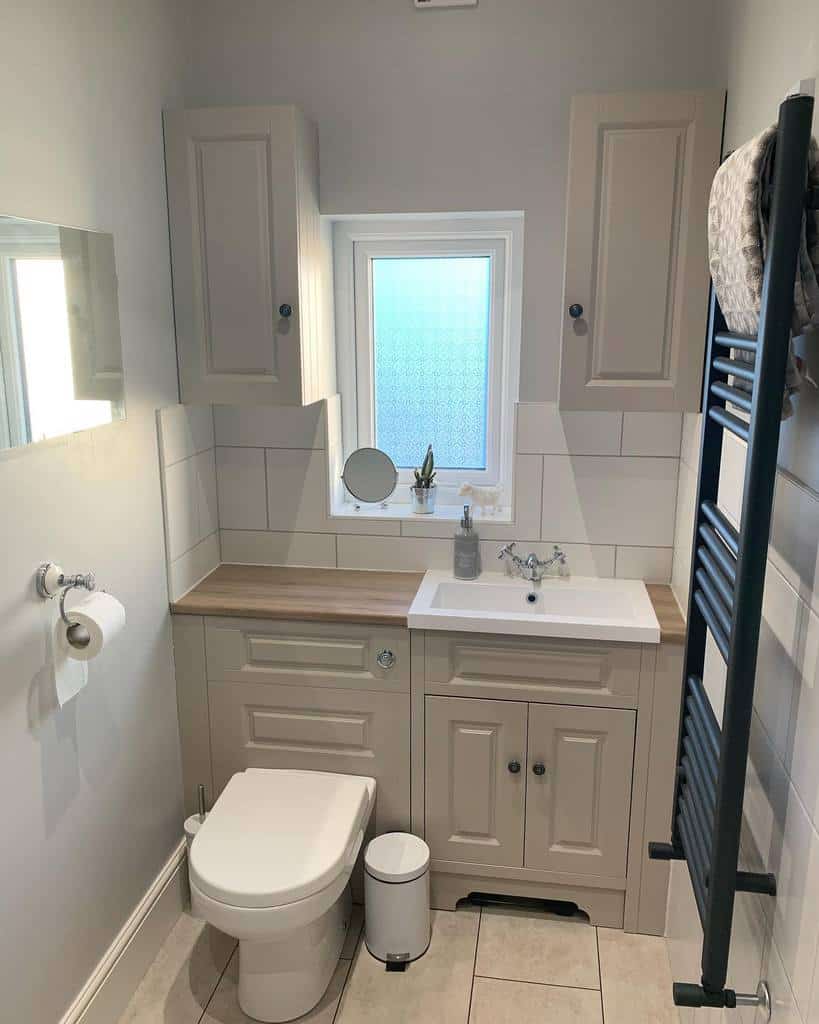
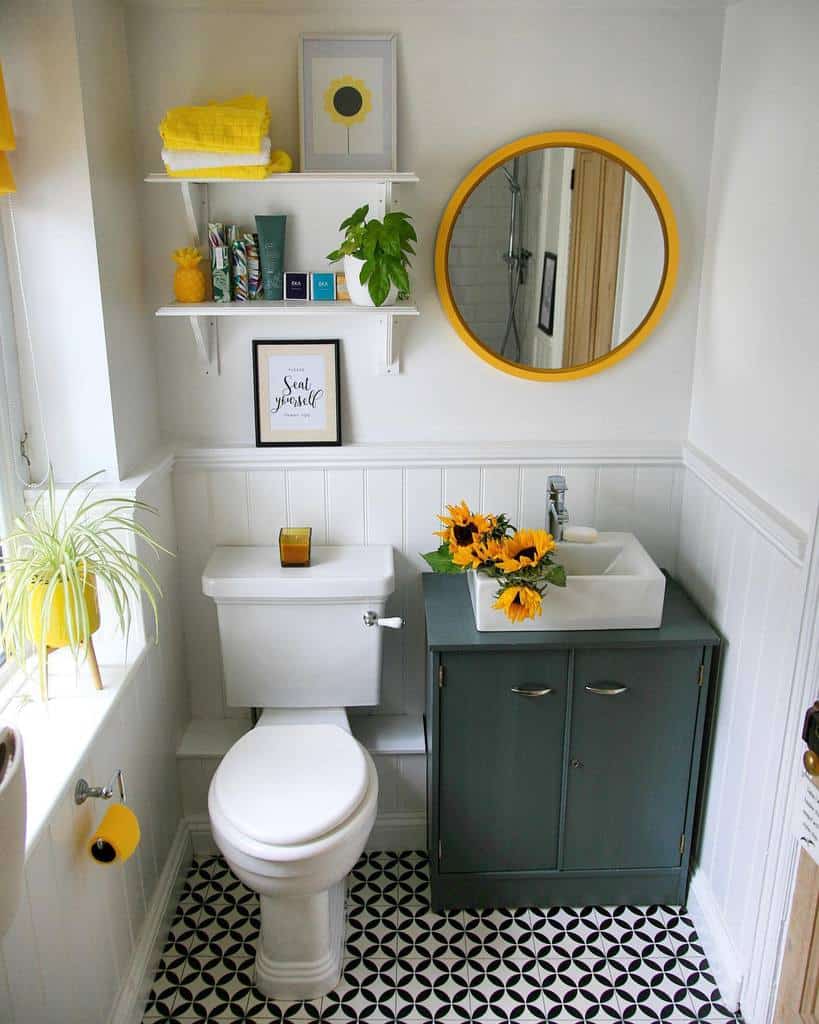
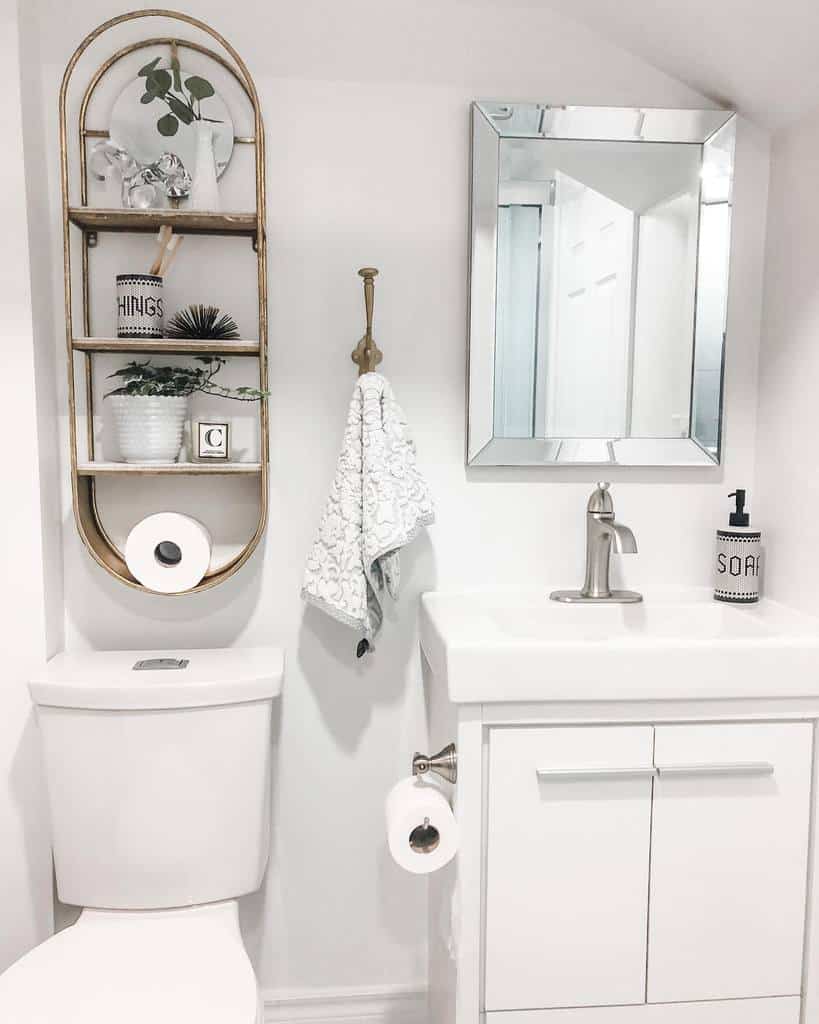
It’s time for a bathroom makeover. Consider bathroom storage ideas to create more storage for your toiletries and bathroom essentials. The most often neglected space is the area above your toilet.
This open space is the perfect place to create additional storage and decor. Check out these over the toilet storage ideas and get inspired.
[view_toc]
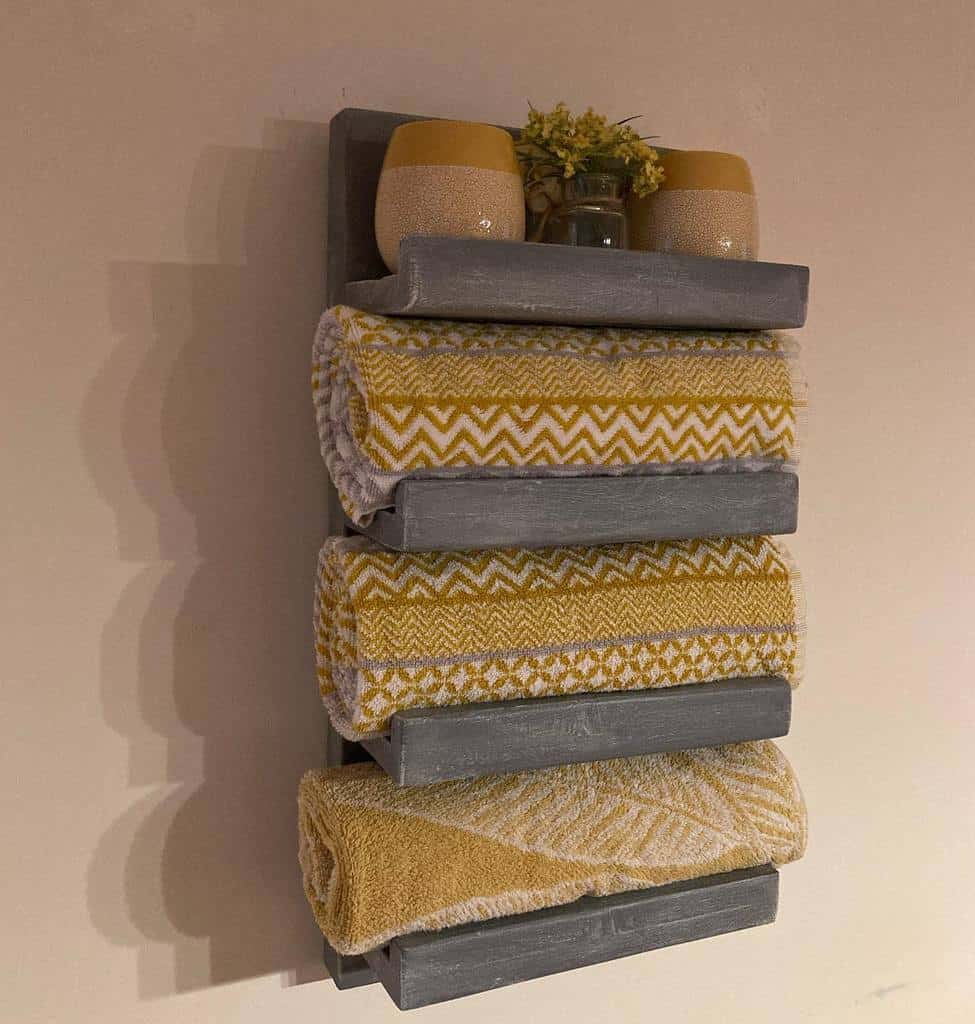
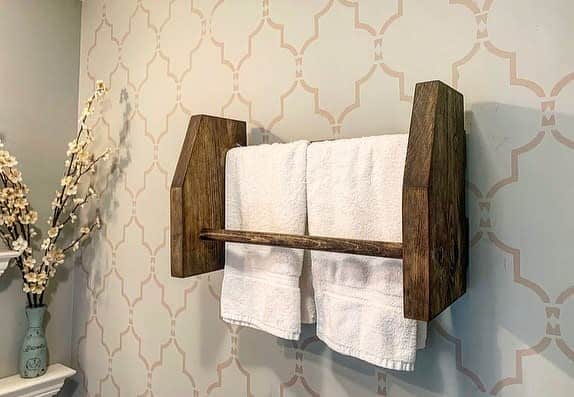
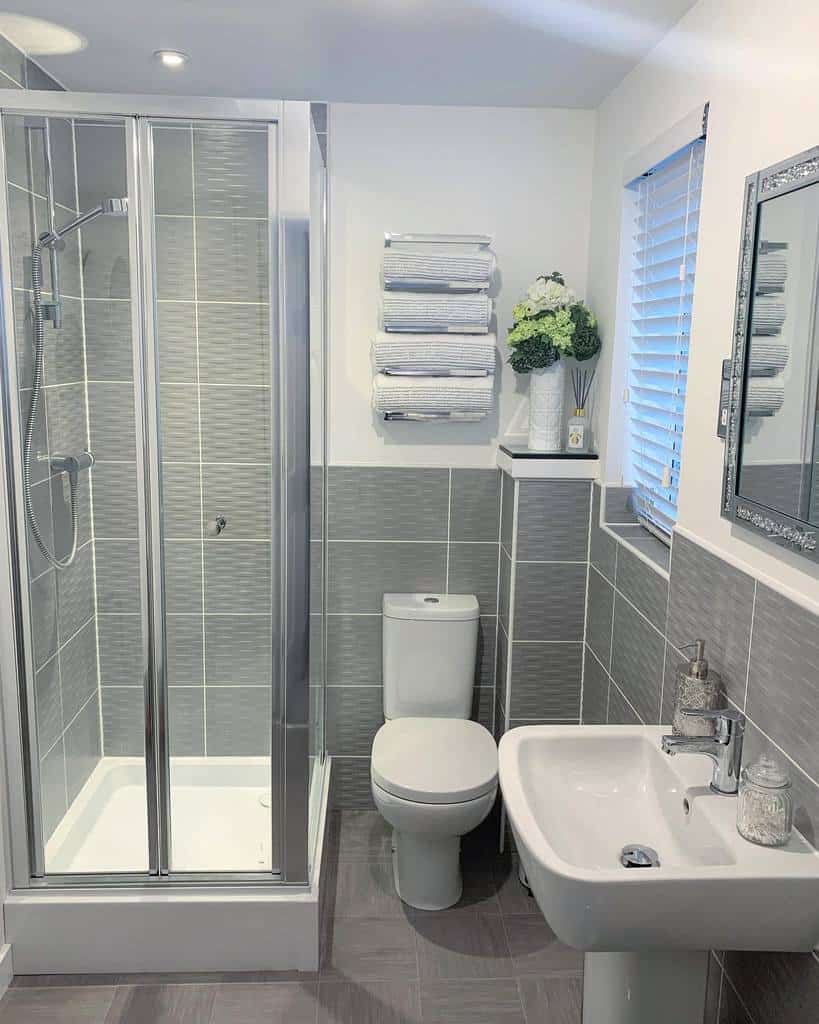
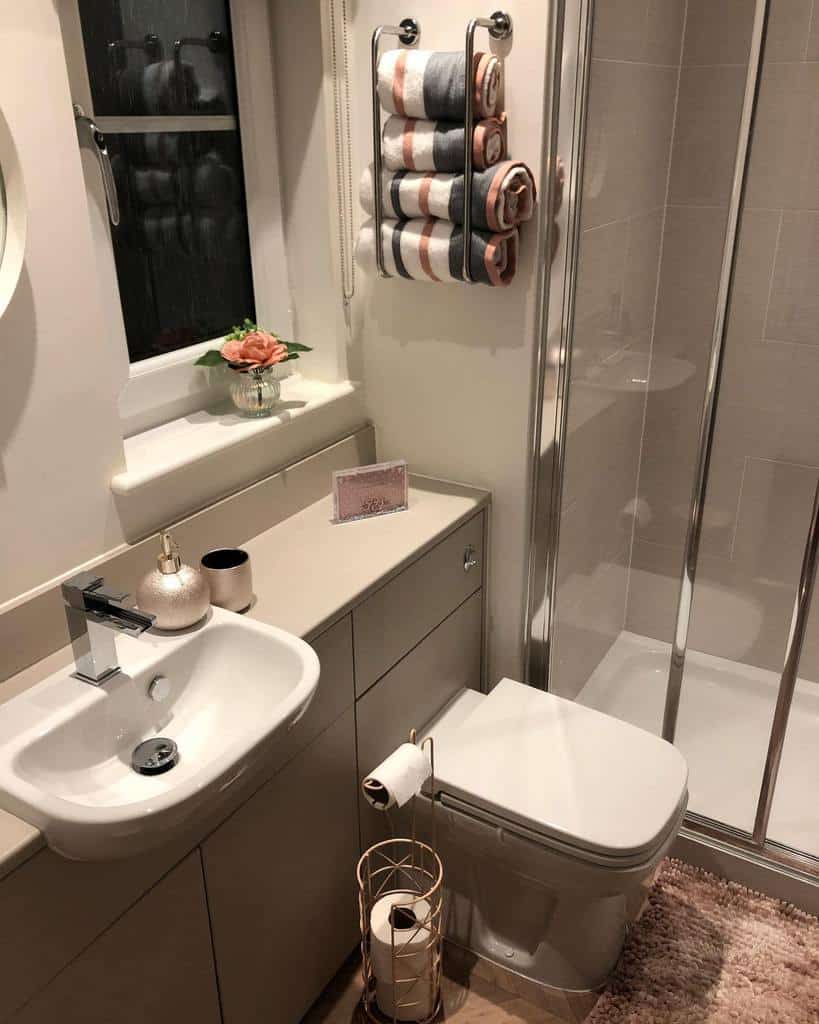
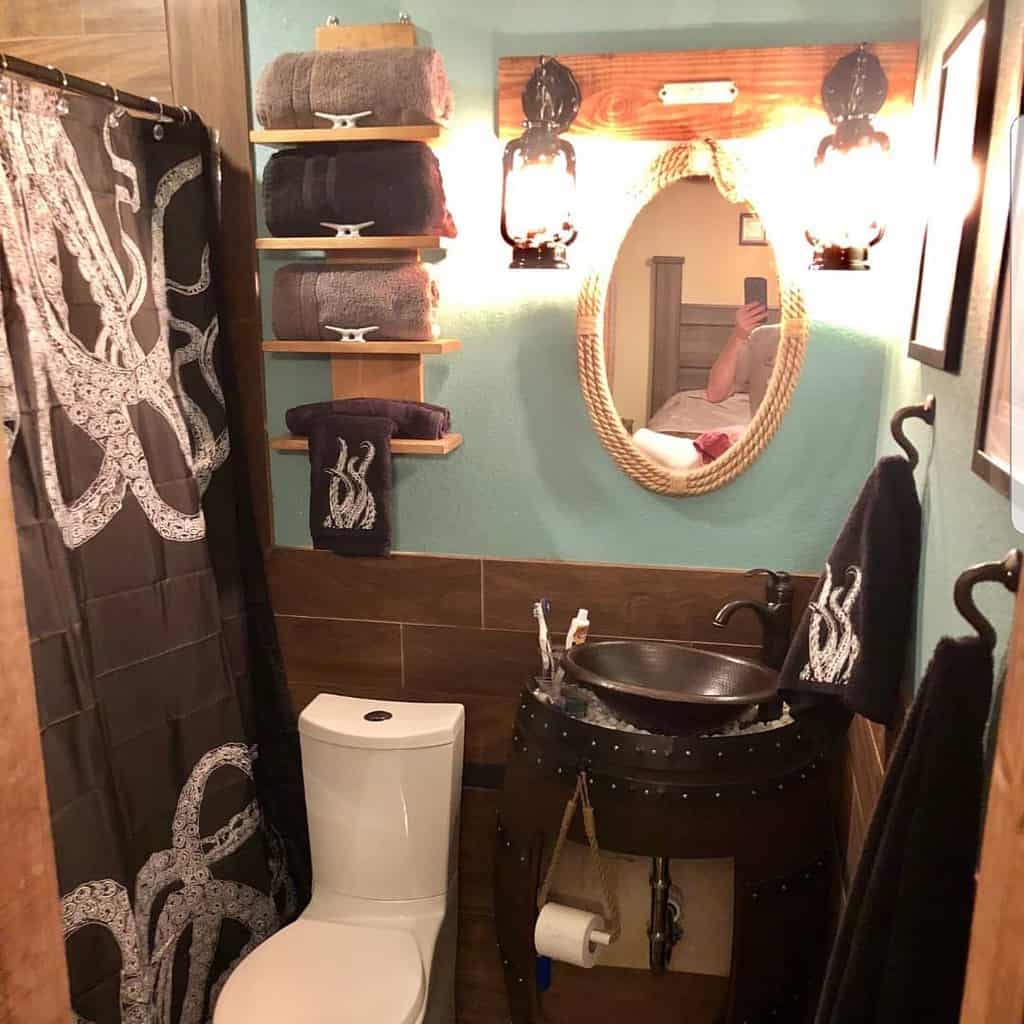
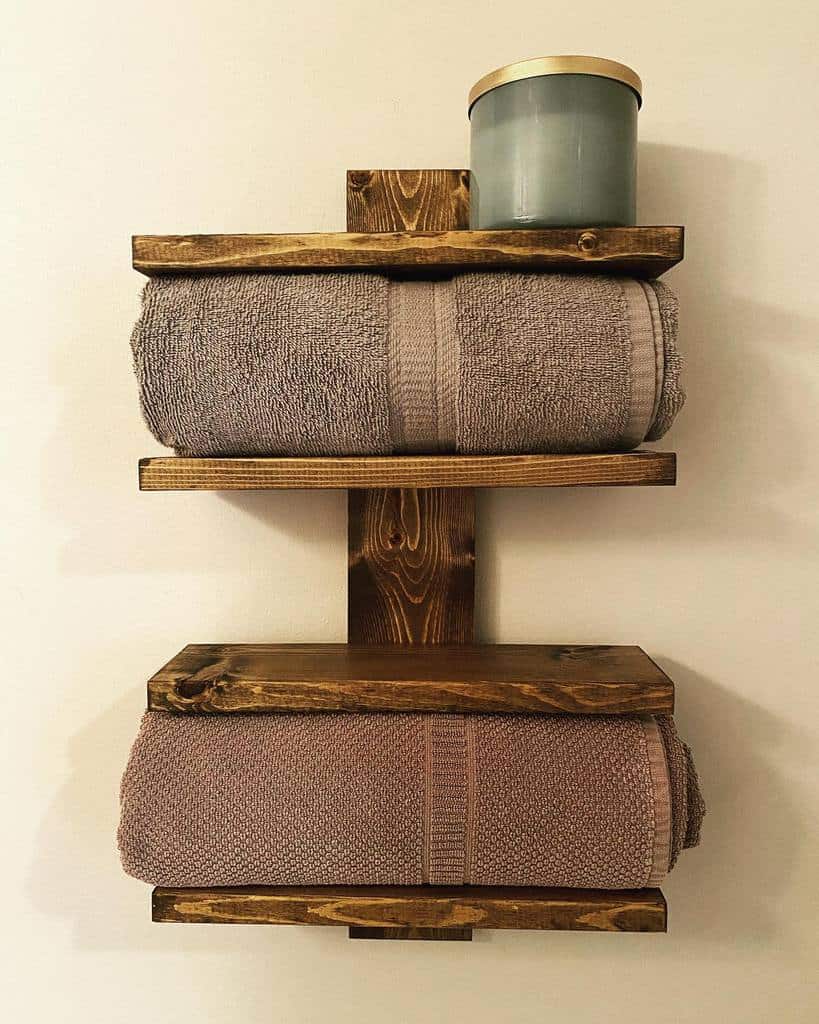
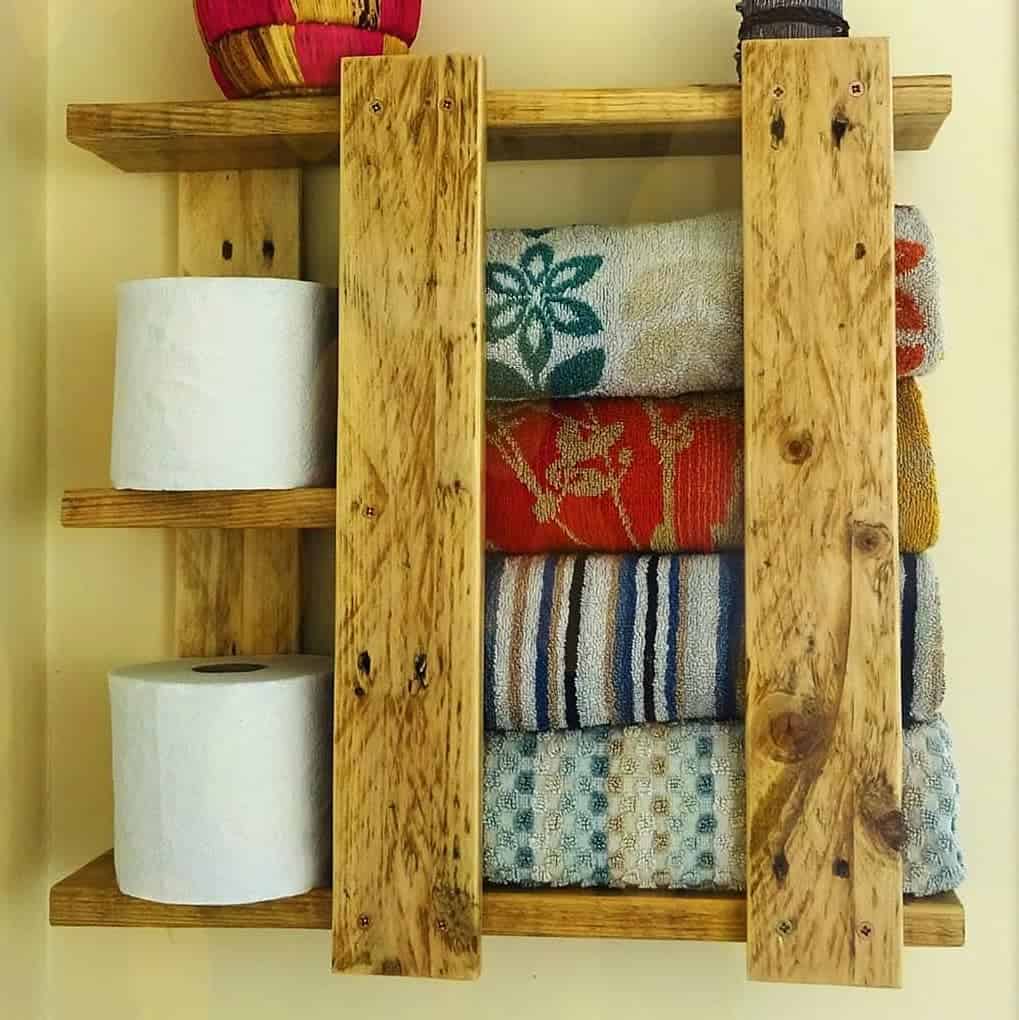
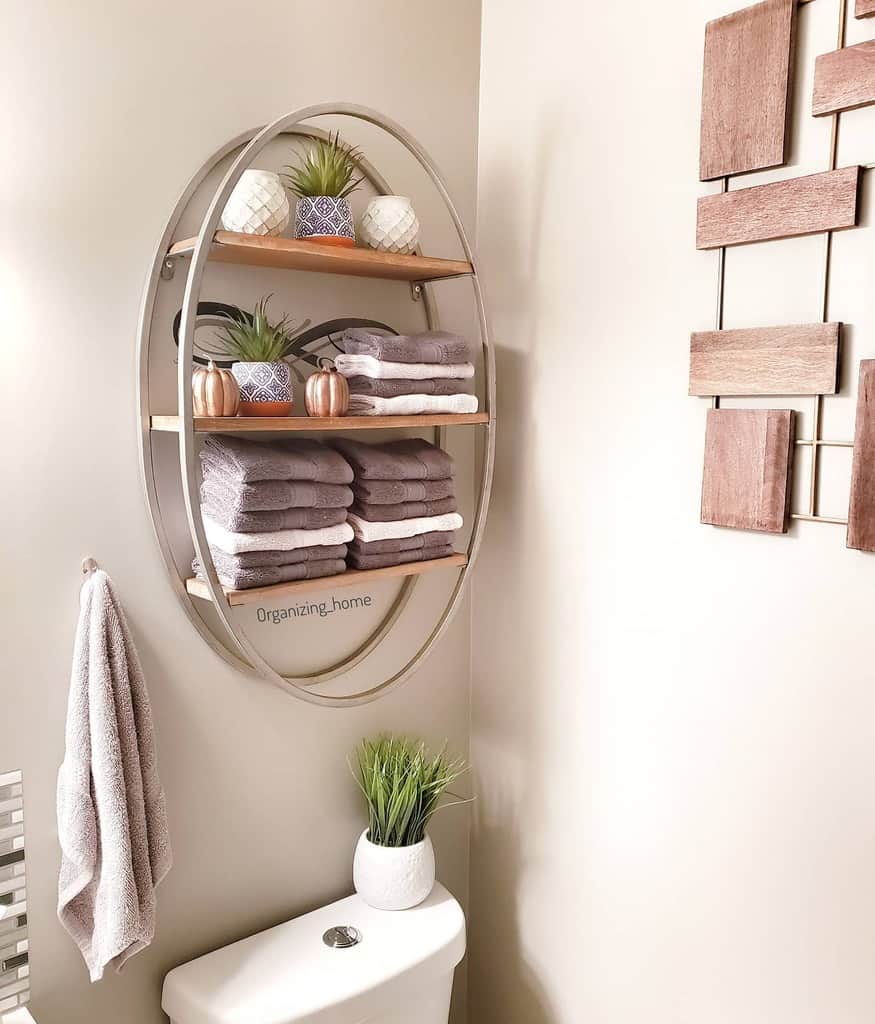
1. Bathroom Towel Holder
Where do you keep your bath towels? Are they in the bathroom hanging on a towel bar? What about the ones that aren’t currently in use?
Many bathrooms lack the storage space needed to store your towels in the bathroom. So you end up keeping them in a linen closet down the hall. This isn’t convenient.
Source: @dw_pallet_wood_designs via InstagramSource: @kellysdiyprojects via InstagramSource: @life_at_29 via InstagramSource: @ourhome.atnum19 via InstagramSource: @simplybeautifulbyangela via InstagramSource: @upfinishedfurniture via InstagramSource: @wamwoodworks via Instagram
Install a towel rack over your toilet to use as towel storage and display. It can have several shelves that are perfect for organizing and displaying your towels.
Roll them up and give your bathroom a spa feel. Or fold and stack them to look like a display you’d see at a store. Choose one that has a towel bar on the bottom and use it to hang decorative hand towels.
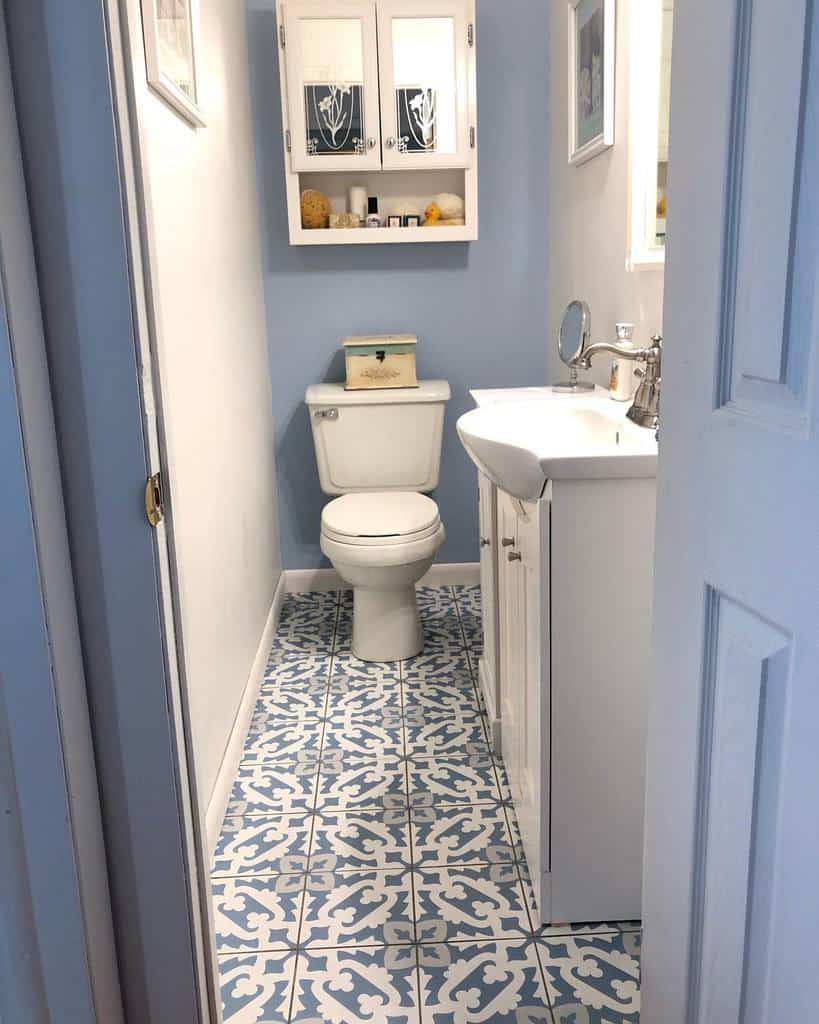
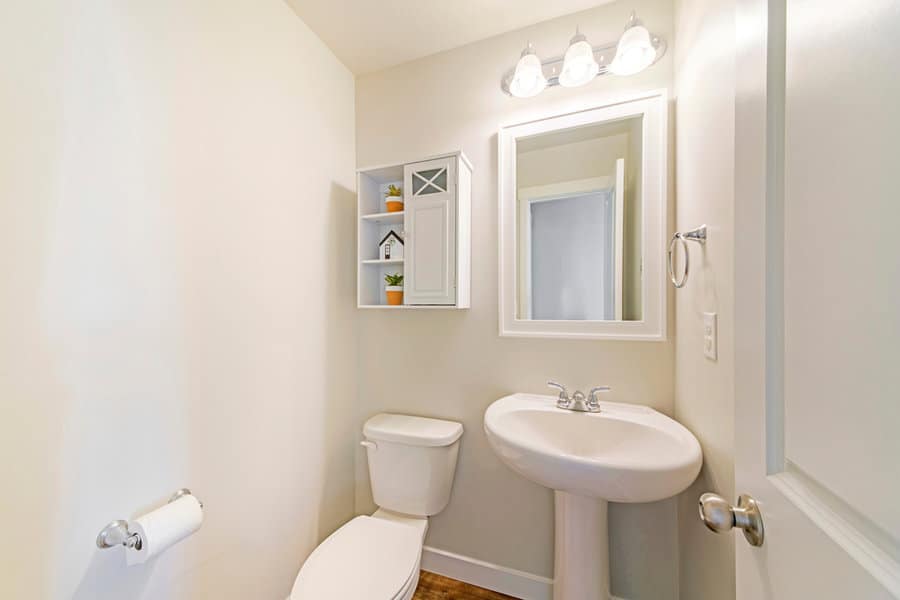
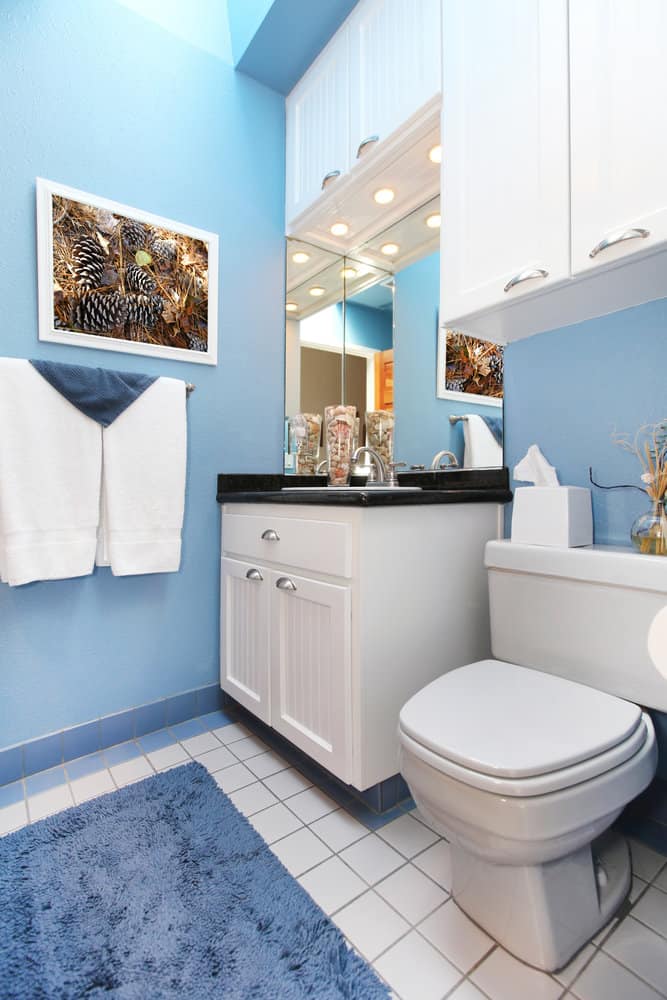
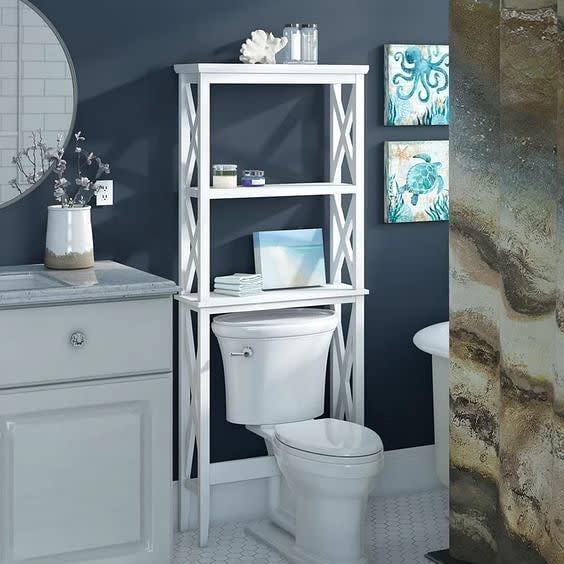
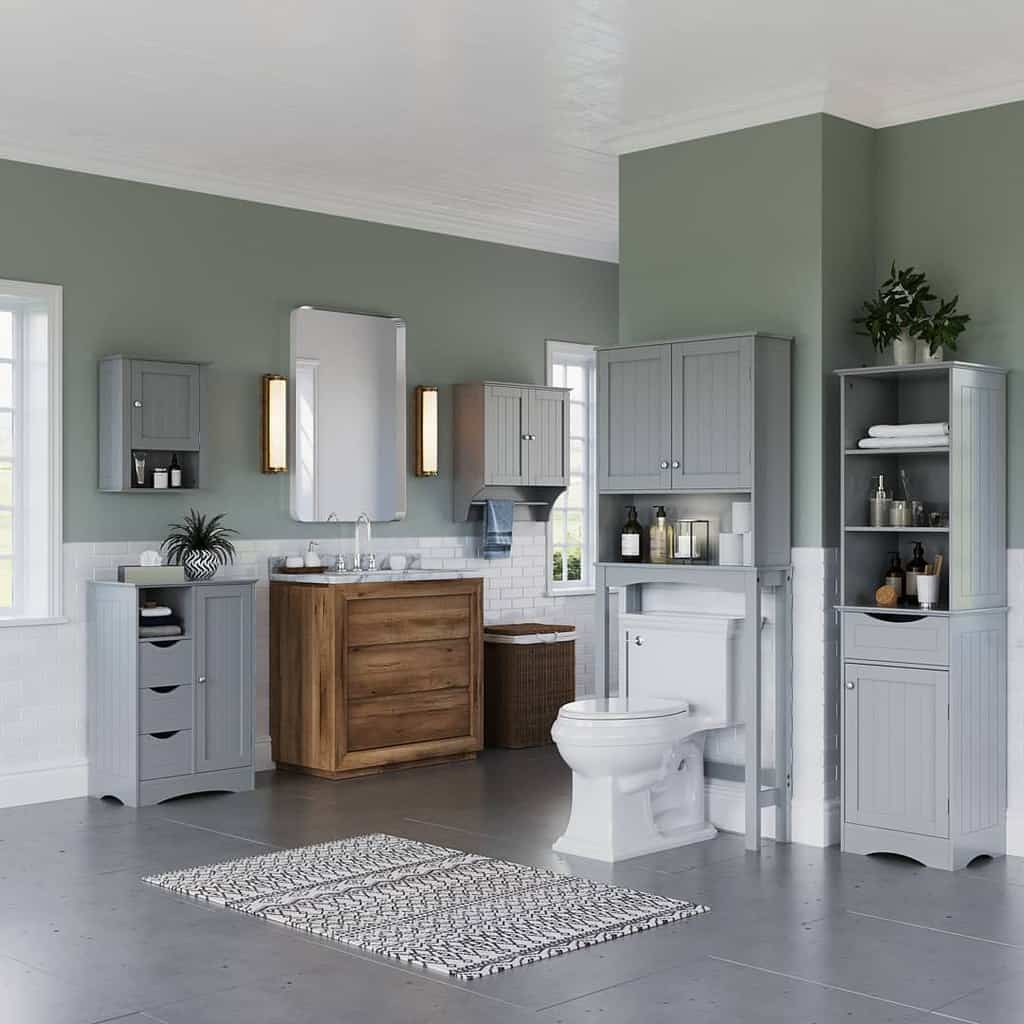
2. Cabinet Above the Toilet
Installing a bathroom cabinet above the toilet can give you a hidden storage solution. These cabinets are larger and deeper than a medicine cabinet, so they can hold larger or bulkier items.
You could use it as a linen cabinet to store extra towels. Or you could use it as a storage unit for hiding away extra toiletries or cleaning supplies.
Source: @bayhouse.northernhome via InstagramSource: @the_ramblr_rv via InstagramSource: @the_trembling_terrace via InstagramSource: @betterhomesupplies_uk via Instagram
Pay attention to the cabinet doors. You want the doors to secure closed and not randomly swing open. They should also allow air to flow so that moisture doesn’t build up inside the cabinet. They could have slats, a lattice weave, or a cutout design.
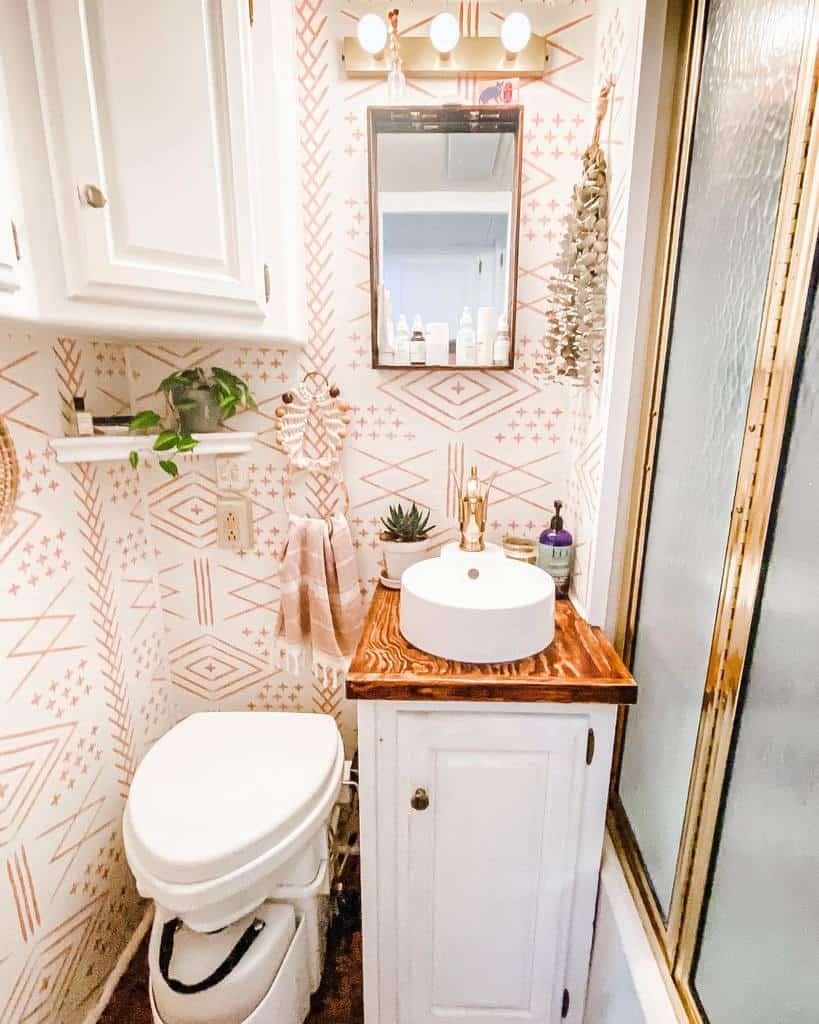
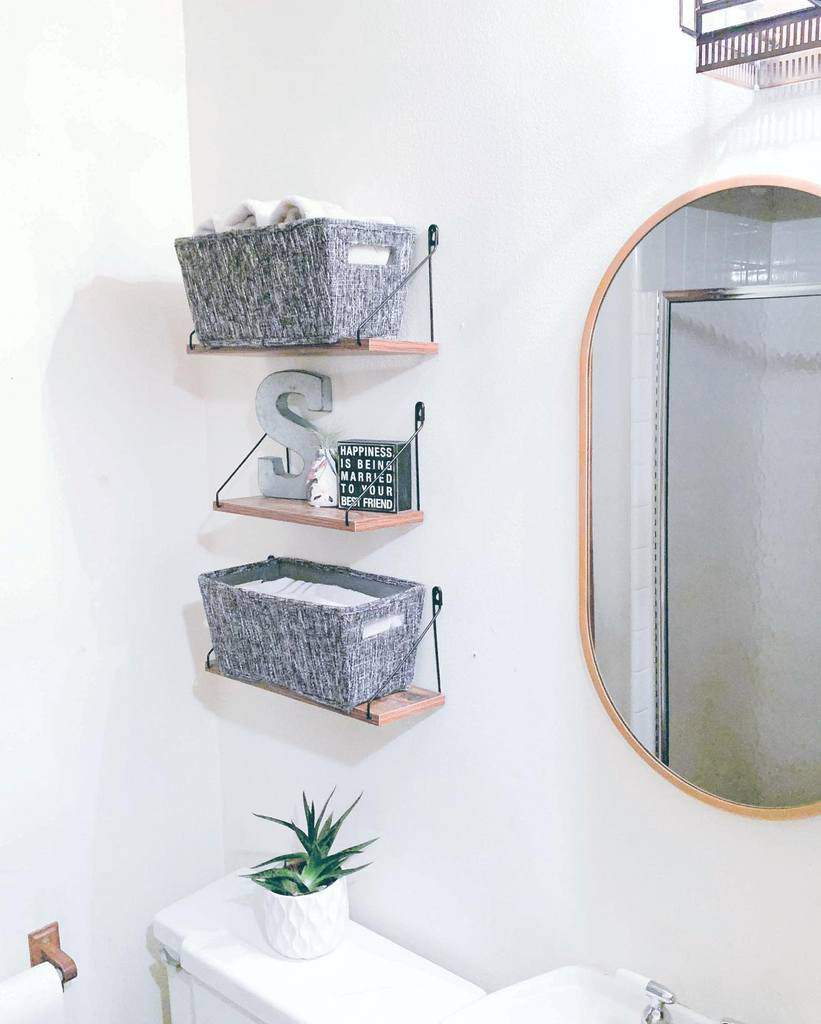
3. DIY
If you’re struggling to find the right shelf, cabinet, or rack for your toilet cabinet, then try building your own bathroom storage. This lets you build a wall cabinet or shelving that’s the perfect size for your small bathroom.
Source: @homewithalia via InstagramSource: @luccichio.woodworks.vt_ via InstagramSource: @making.my_.happy_.place_ via InstagramSource: @martinezz_carpentry via InstagramSource: @oldcityfarmhouse via InstagramSource: @ourlittlewhitecottage via InstagramSource: @rockycanyonrustic via InstagramSource: @simplicitypallets via InstagramSource: @surfshackdesigns via InstagramSource: @thecoreyhomestead via InstagramSource: @updatemycape via InstagramSource: @302woodworks via InstagramSource: @dark.horse_.designs via InstagramSource: @zarajaneinteriors via InstagramSource: @gosh.c via Instagram
This is a smart approach when looking at small bathroom storage ideas. Even if you amount a simple plank or reclaimed wood, you appreciate the extra storage space. You don’t even have to build anything. Use repurposed or recycled materials, such as wood crates, baskets, or metal tins.
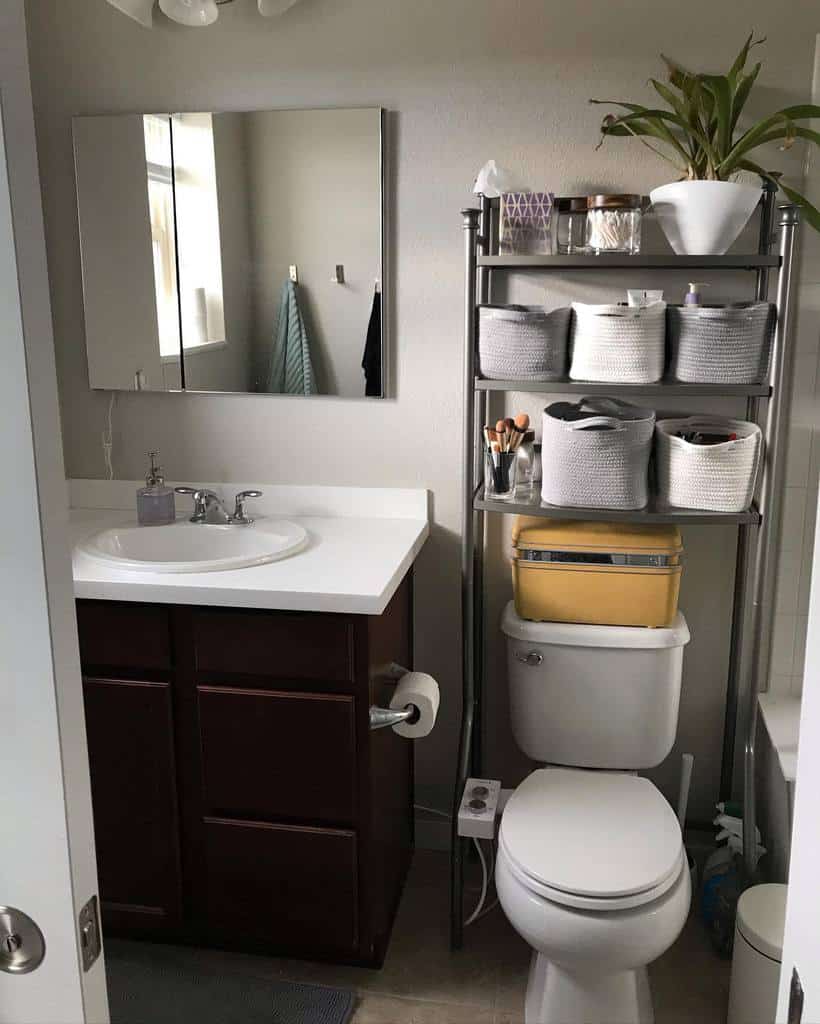
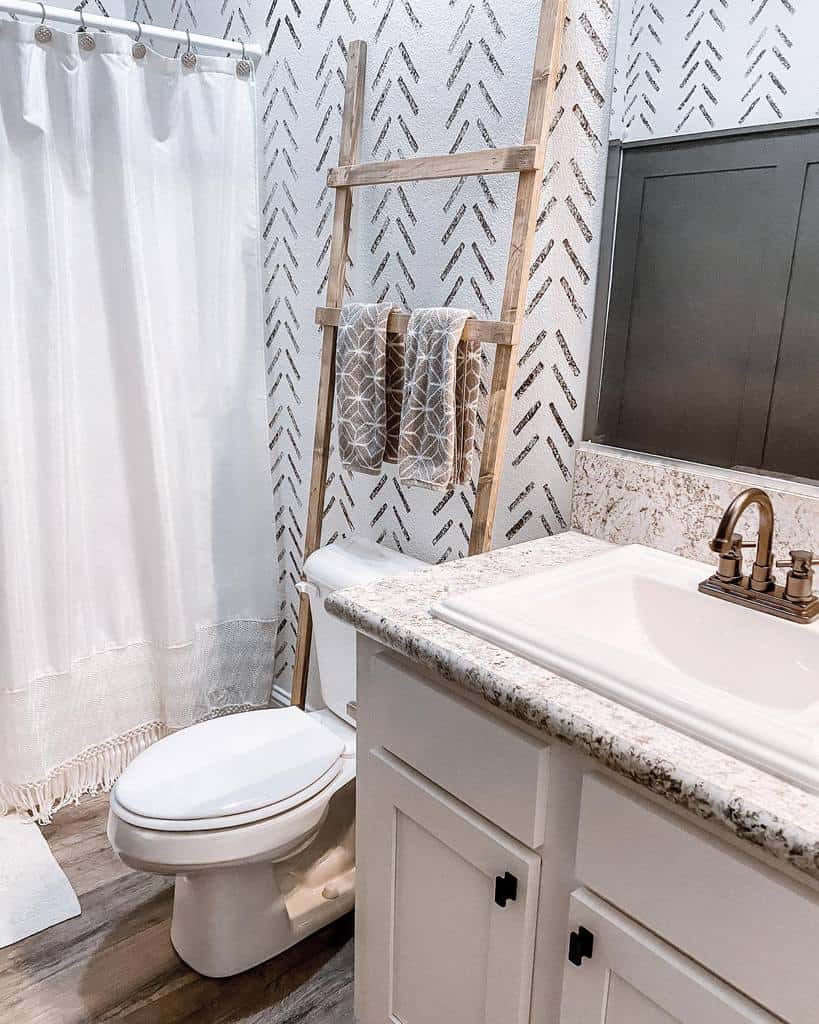
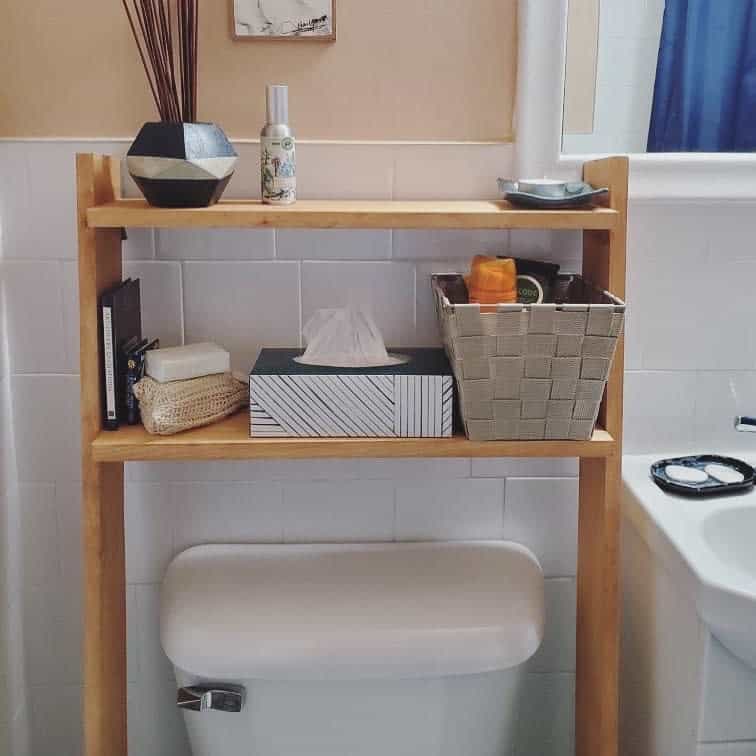
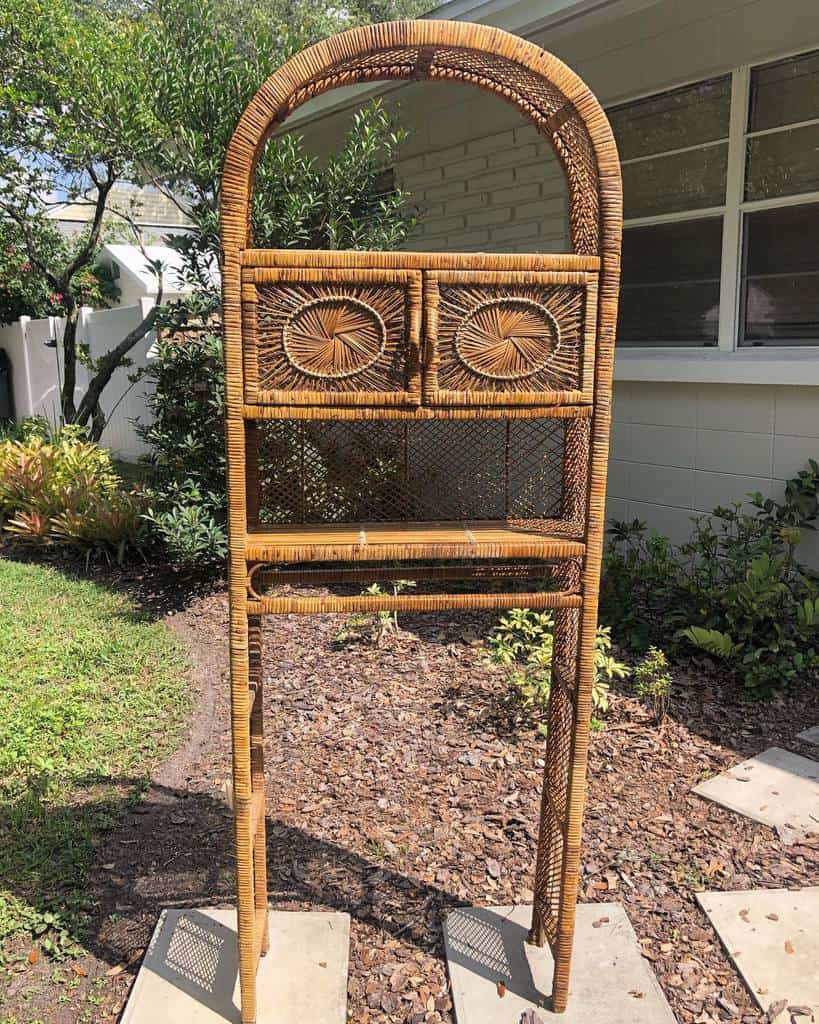
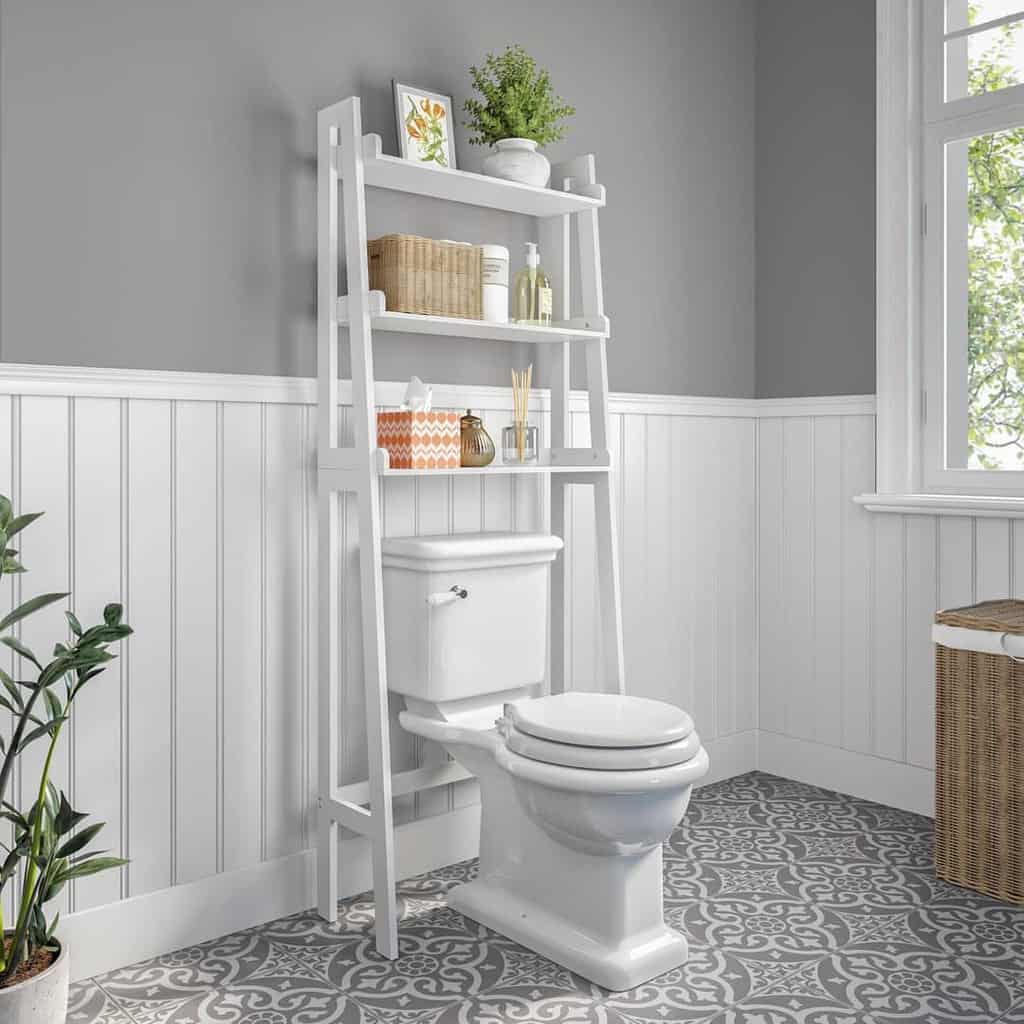
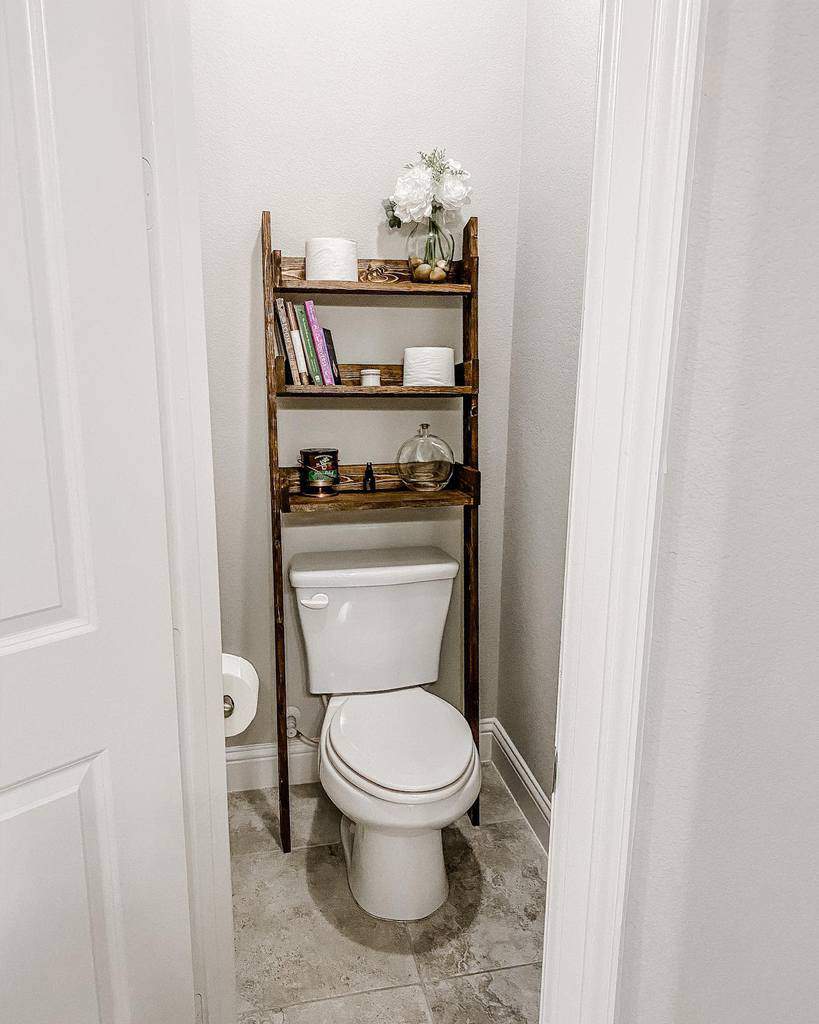
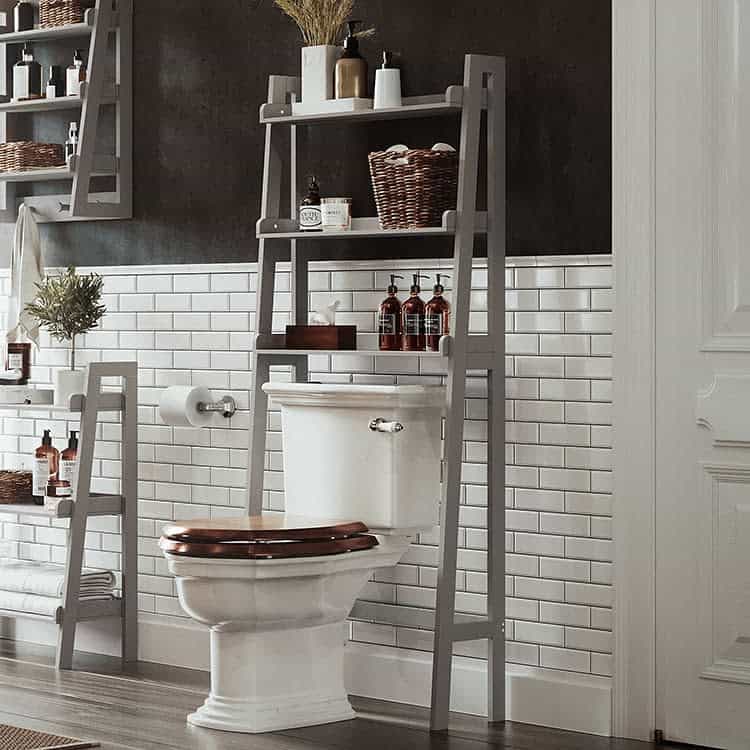
4. Freestanding Unit (Ladder)
Sometimes it doesn’t make sense to drill holes in your walls to hang a cabinet or shelf. In this situation, you should look for a freestanding unit that sits above the toilet tank. Some look like a ladder. You can use it as a linen tower with several towels rolled up and set on each shelf.
Source: @shannahclaws via InstagramSource: @mymodularfarmhouse via InstagramSource: @theknotspecialists via InstagramSource: @wildbird_vintage via InstagramSource: @riverridgehome via InstagramSource: @riverridgehome via InstagramSource: @riverridgehome via InstagramSource: @craftsbyabuela via InstagramSource: @riverridgehome via Instagram
You’ll need to have enough floor space around your toilet to fit a freestanding unit. Some make this easy by having four slim legs.
Others are more substantial with solid sides. A ladder shelving unit will look more open but will have legs that extend out more forward and could be in the way.
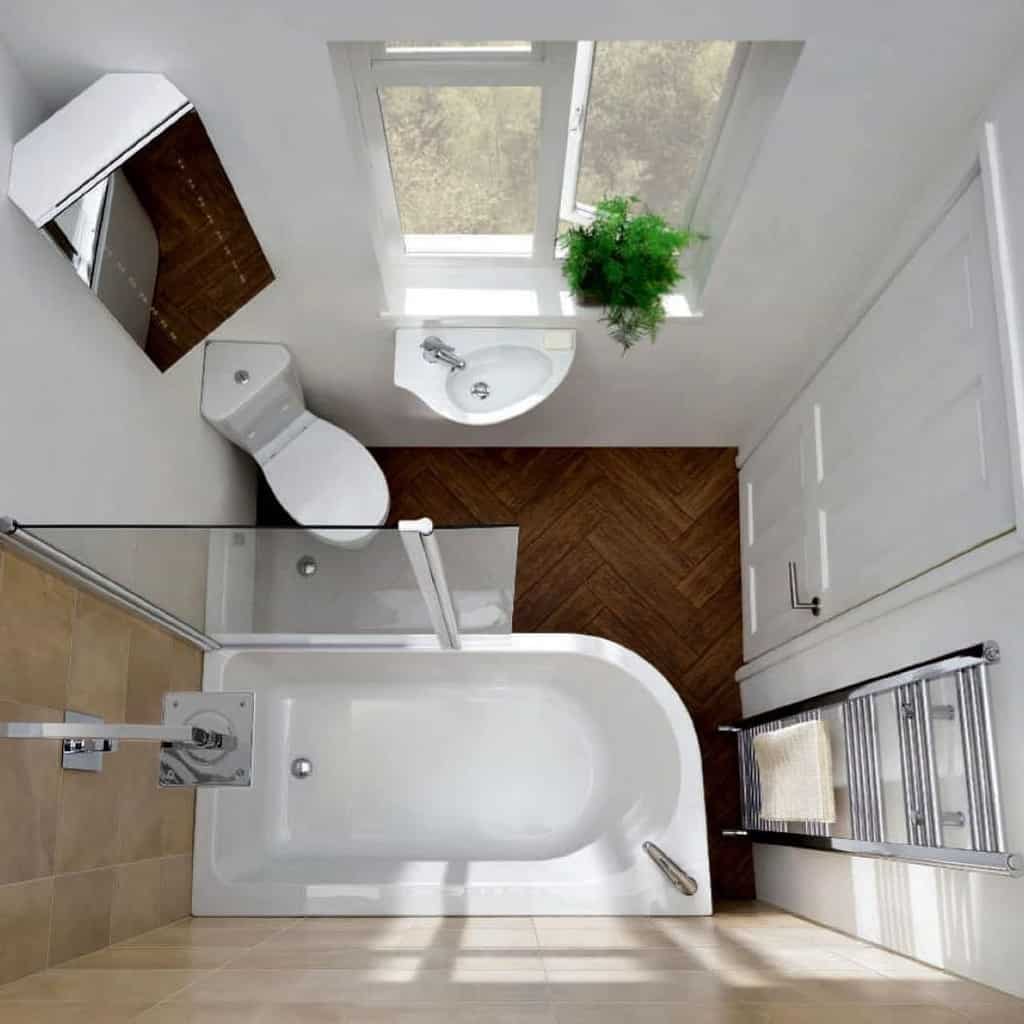
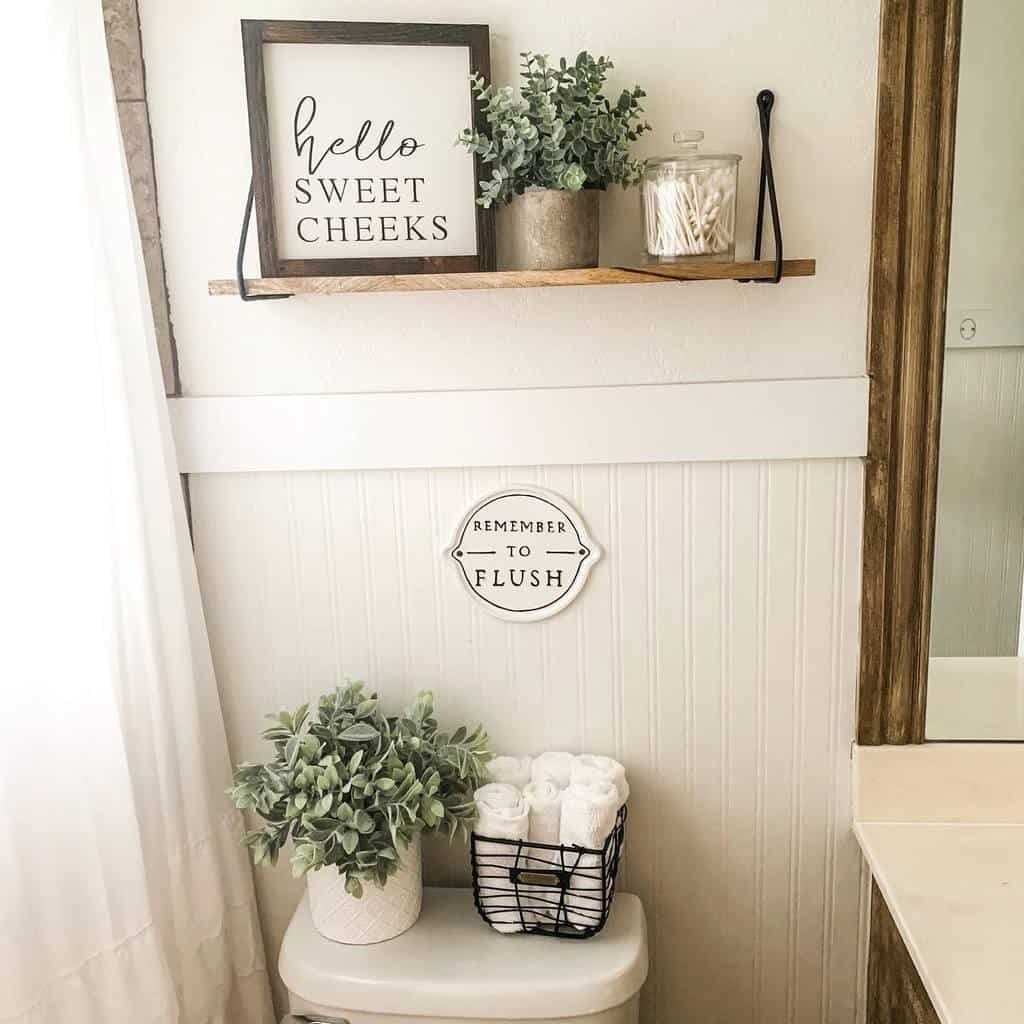
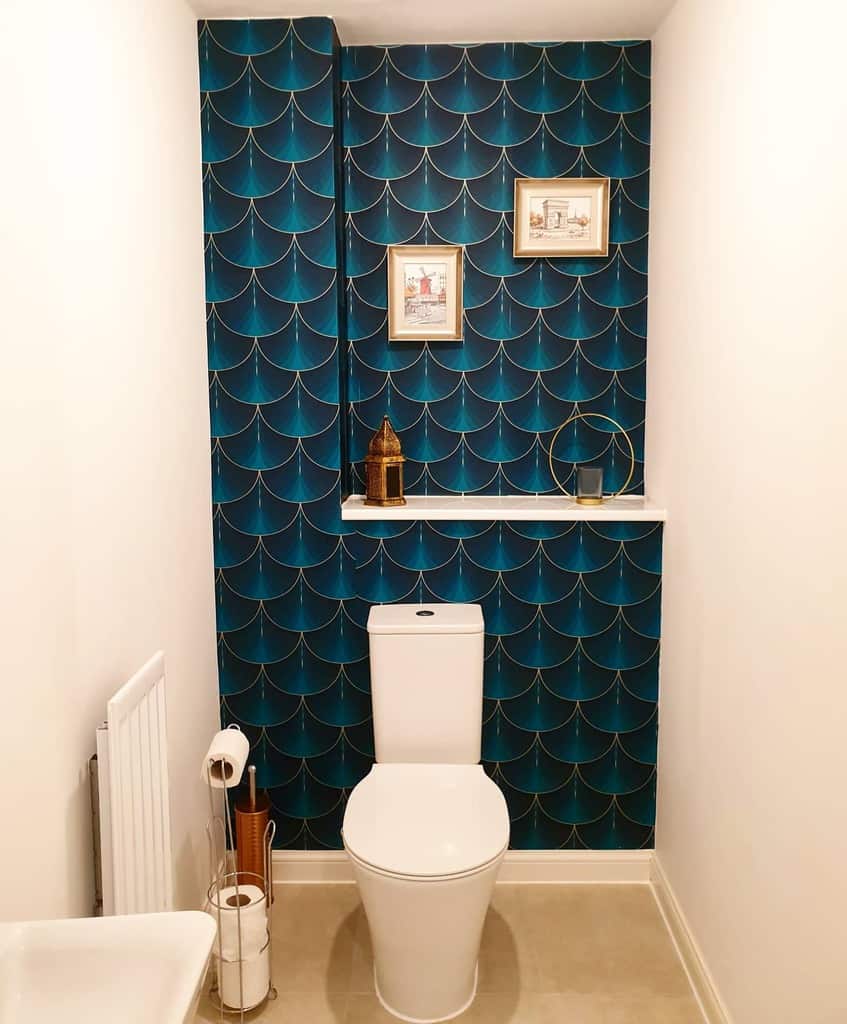
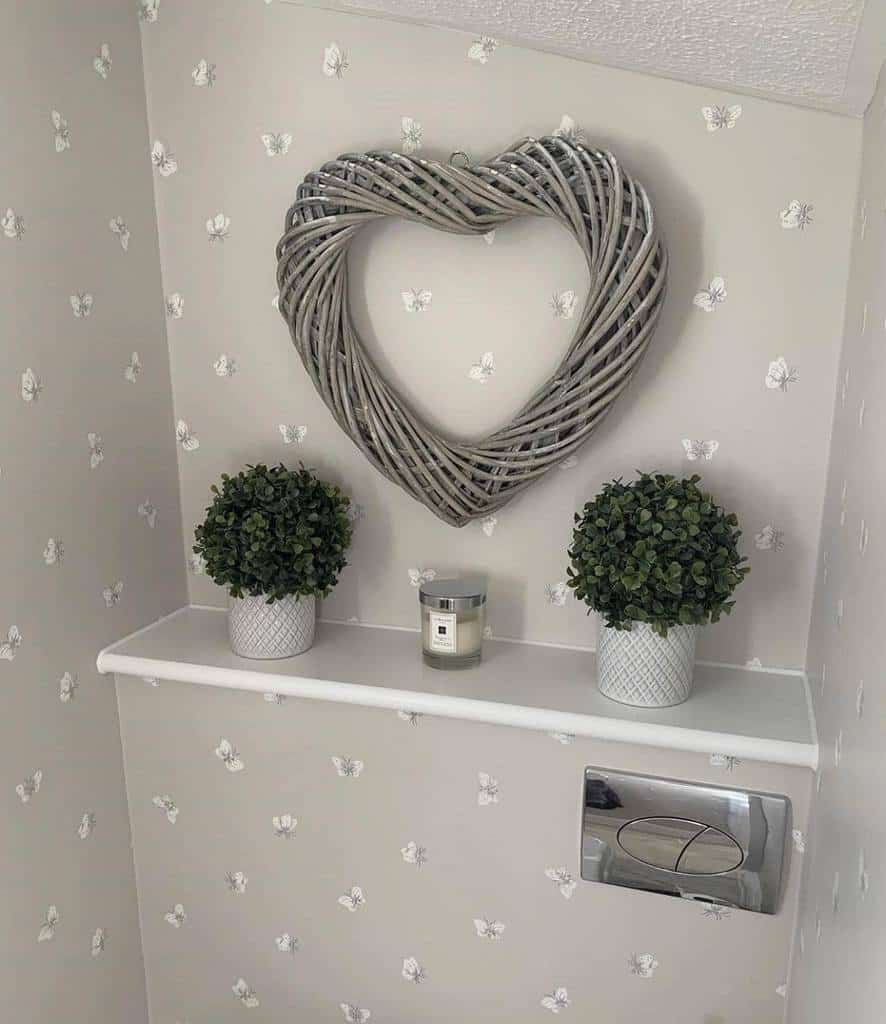
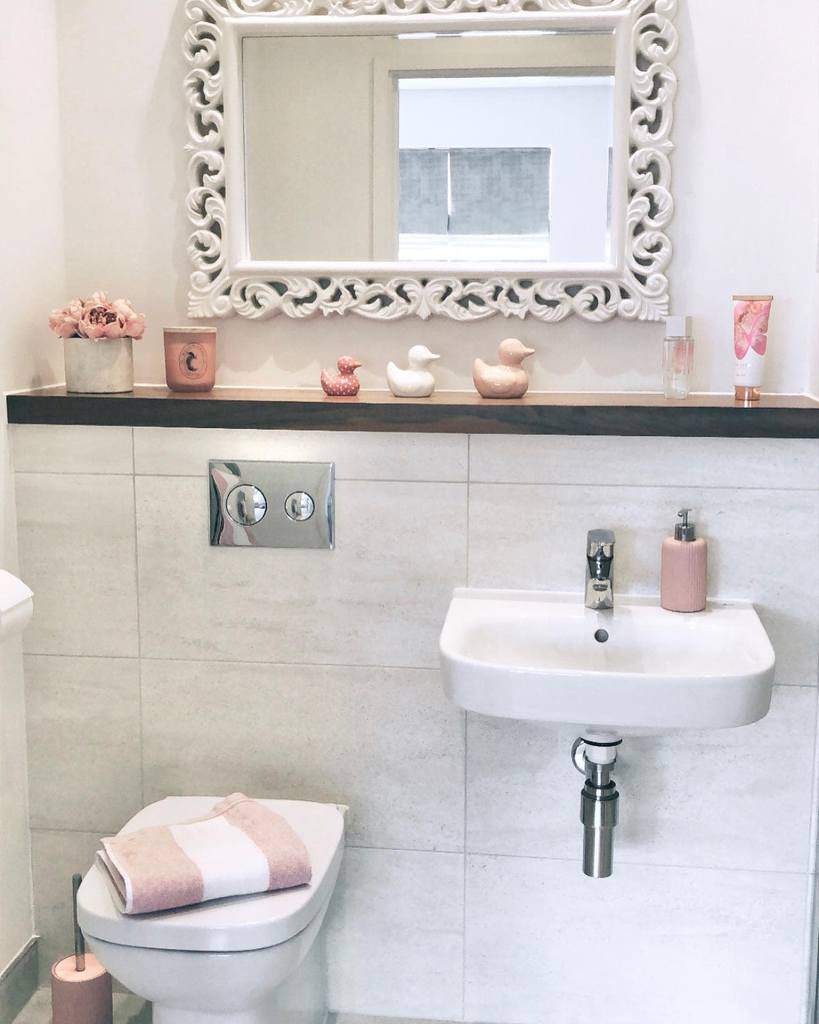
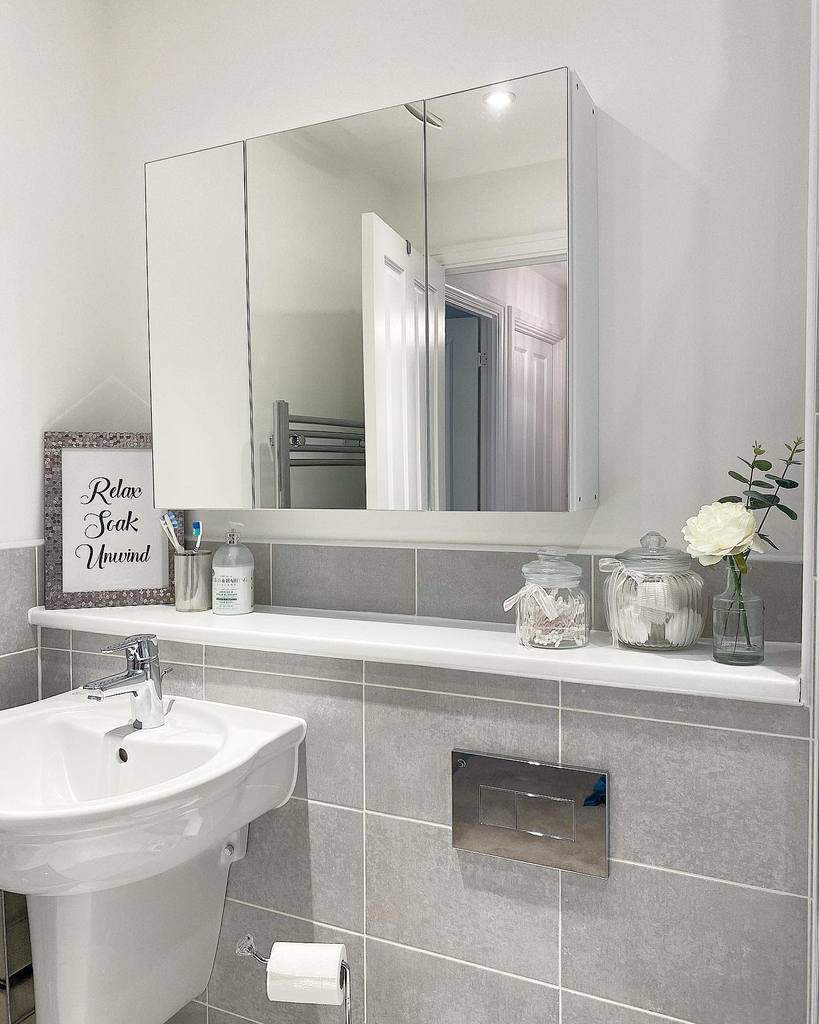
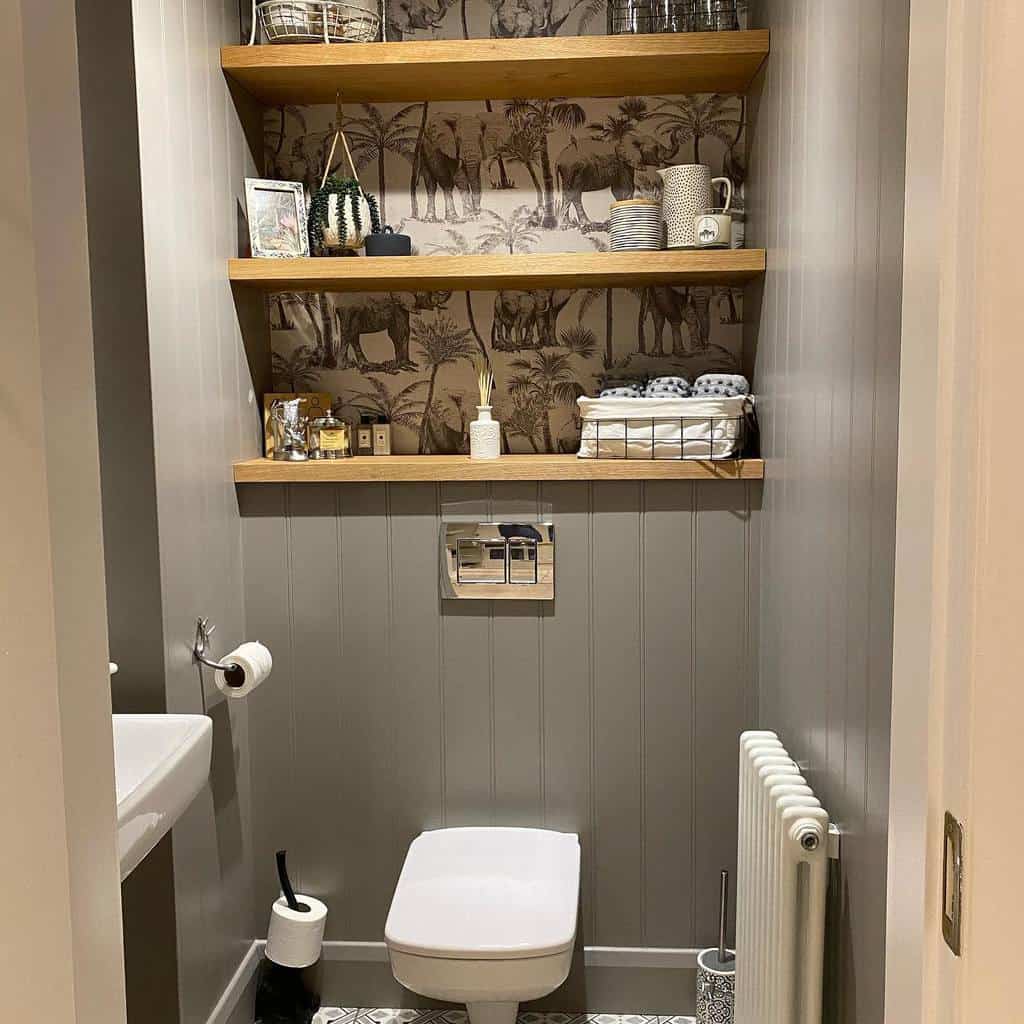
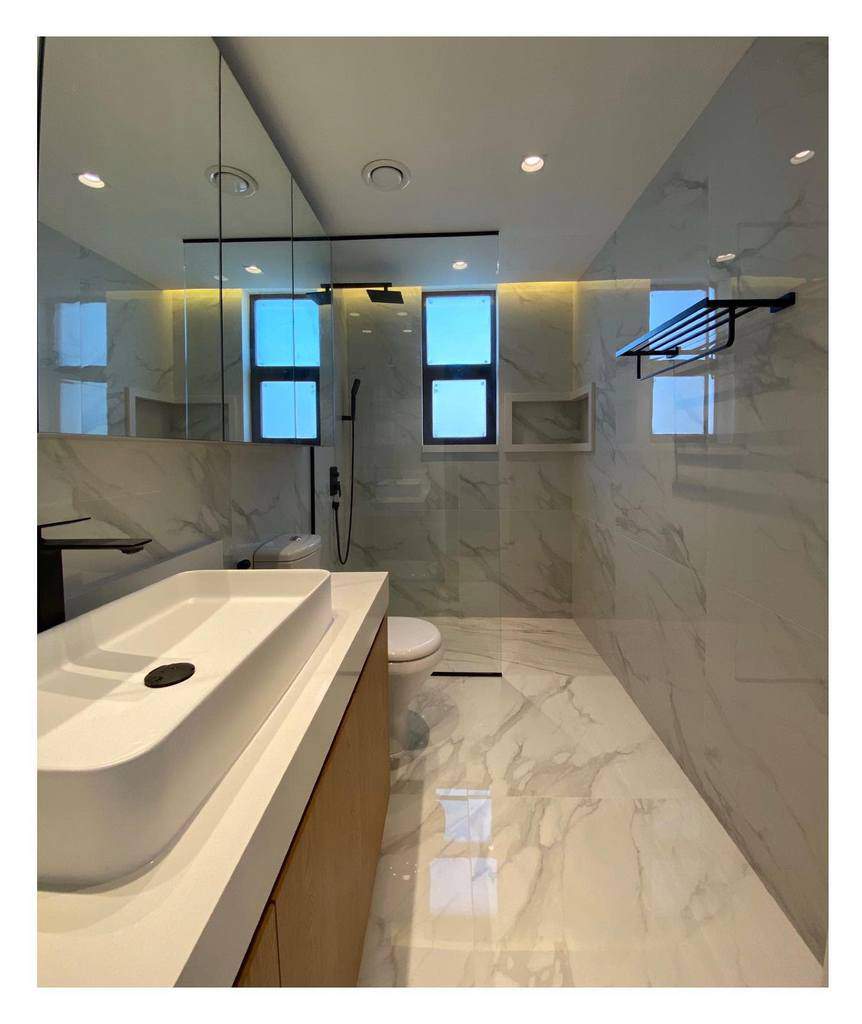
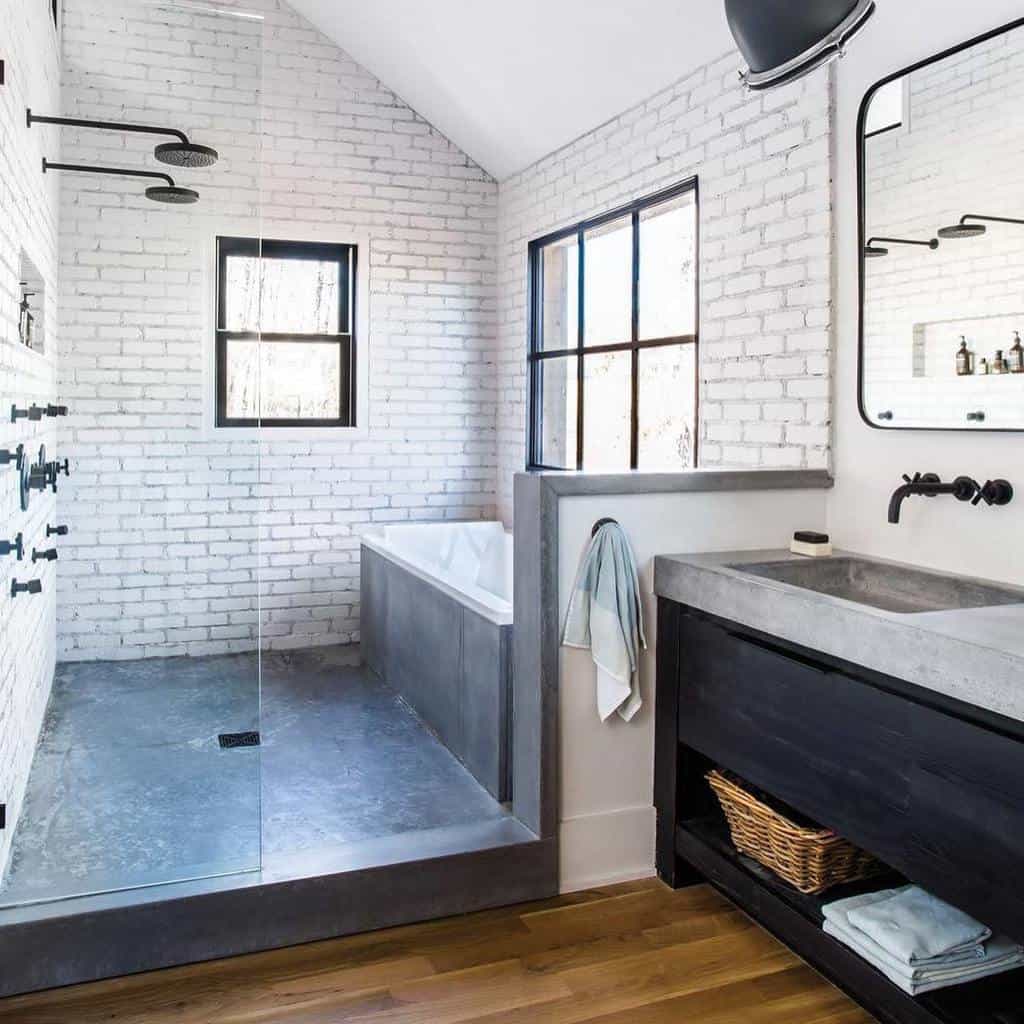
5. Toilet Ledge
Have more than just a toilet shelf above your toilet. Instead, take an idea from your shower and build a ledge. Instead of having a small shelf with limited space, you can have a ledge that extends the entire length of your bathroom space.
Source: @at_home_with_the_mackies via InstagramSource: @bungalow_and_bargains via InstagramSource: @life.at_.no_.76 via InstagramSource: @noa_kravitz_interior_design via InstagramSource: @paigejamesphotography via InstagramSource: @snyggehygge via InstagramSource: @the_stokes_house via InstagramSource: @_myhomeinspo_ via InstagramSource: @asteririsinteriors via InstagramSource: @myvalerianhome via InstagramSource: @the_artisans_burrow via Instagram
Think outside of the box when choosing the location of your ledge. It could start over your toilet and wrap around the bathroom and over your tub. Or you could extend through the vanity over the sink.
Choose a substantial material for your ledge. While wood will work, you should pick a piece that’s thicker than a standard 2 x 4. Consider using a stone like marble or granite.
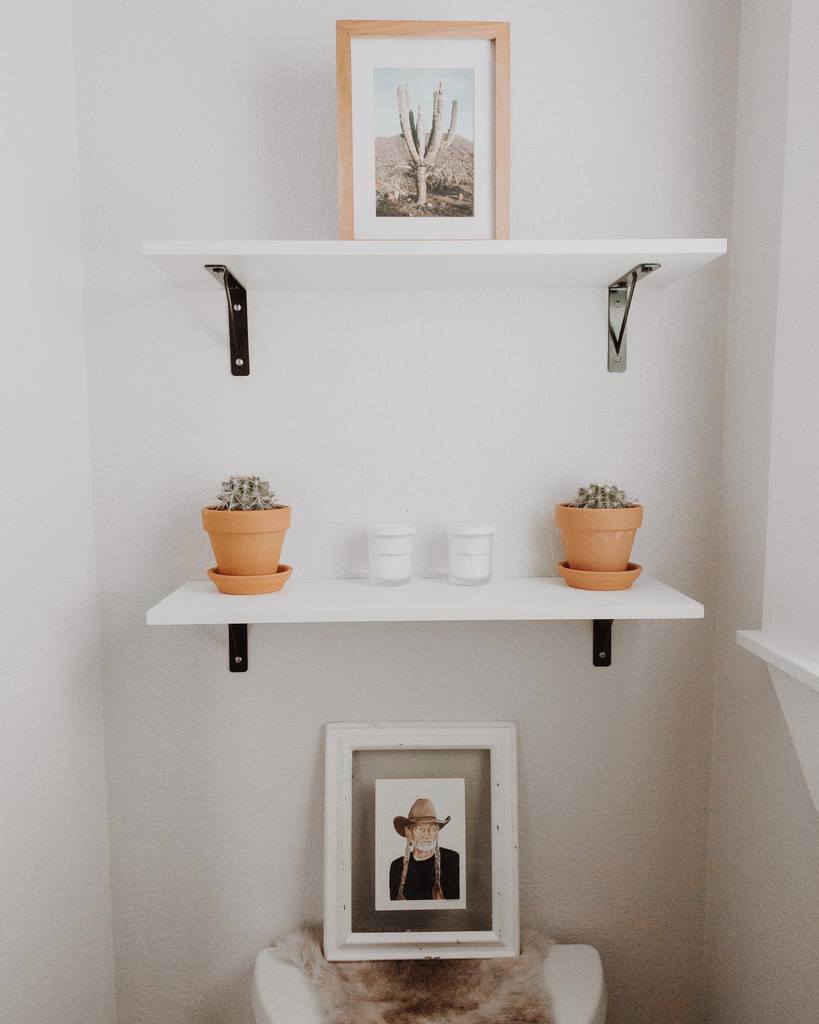
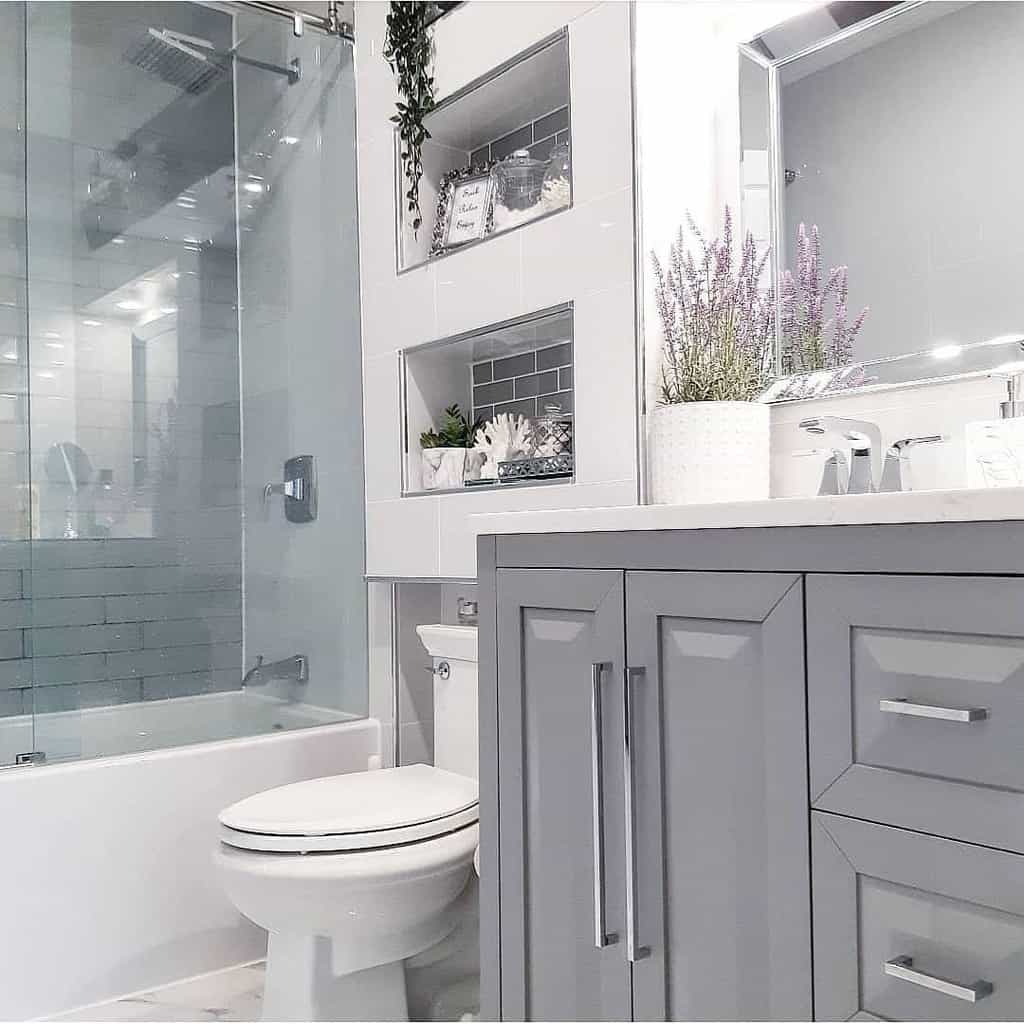
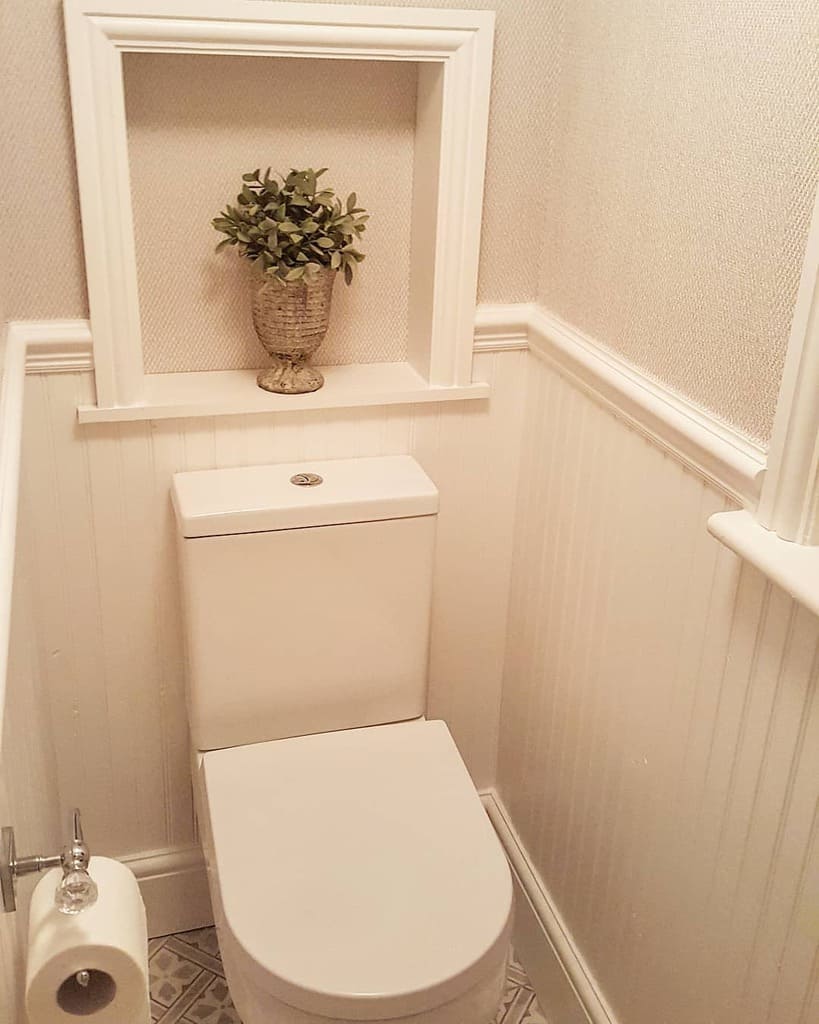
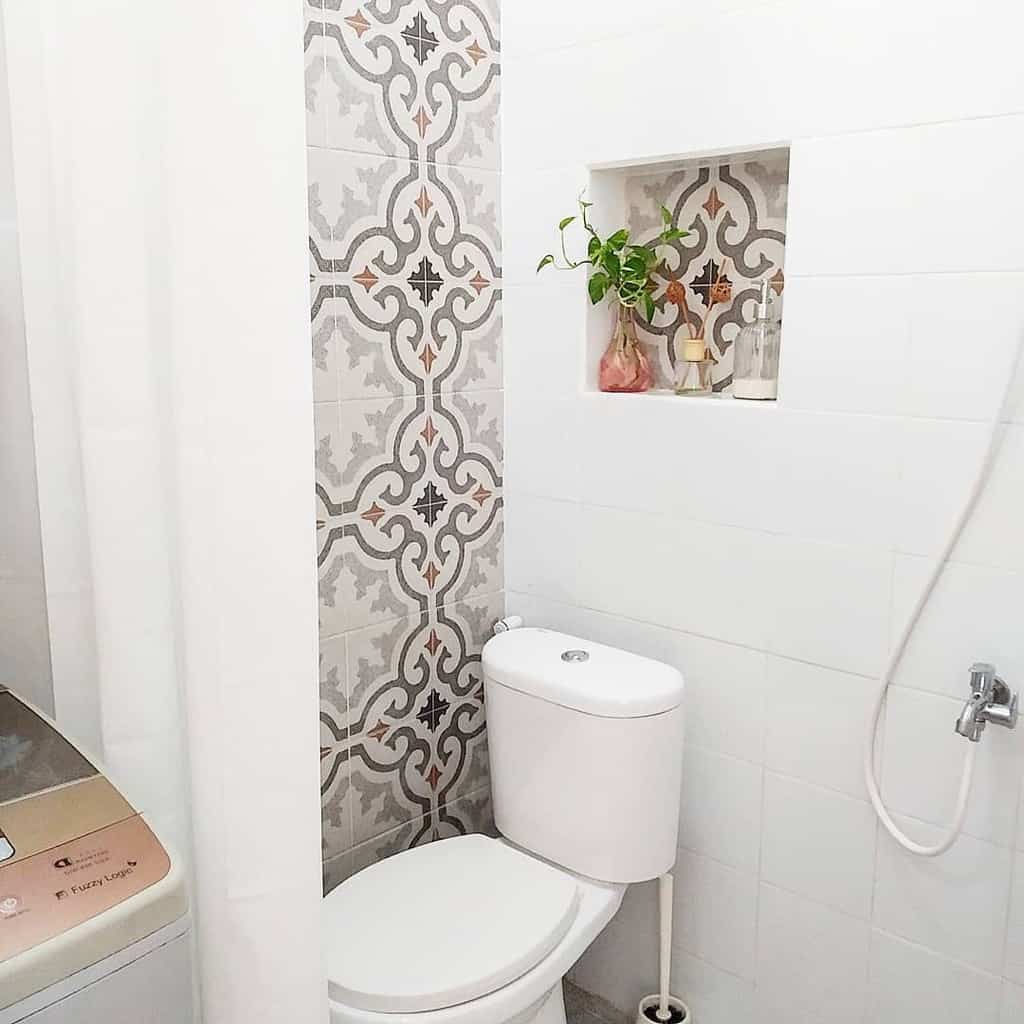
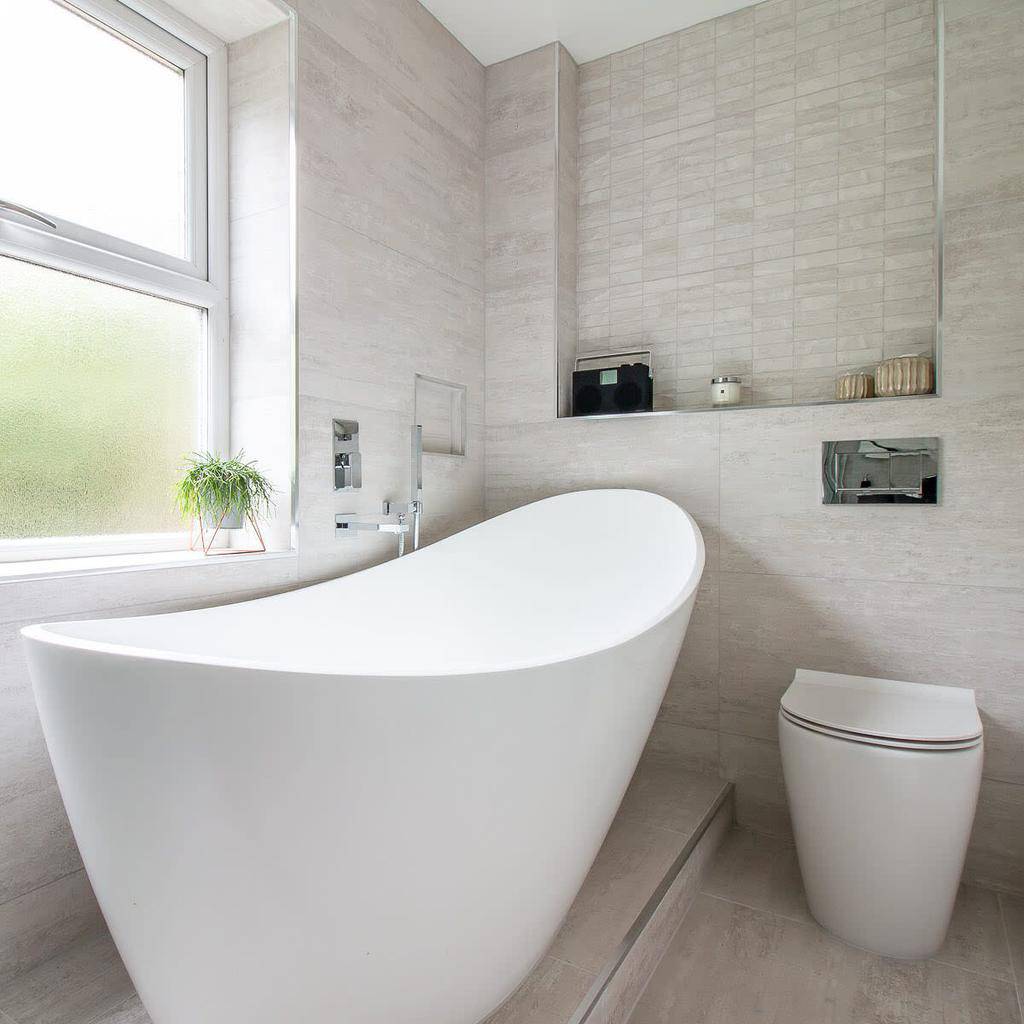
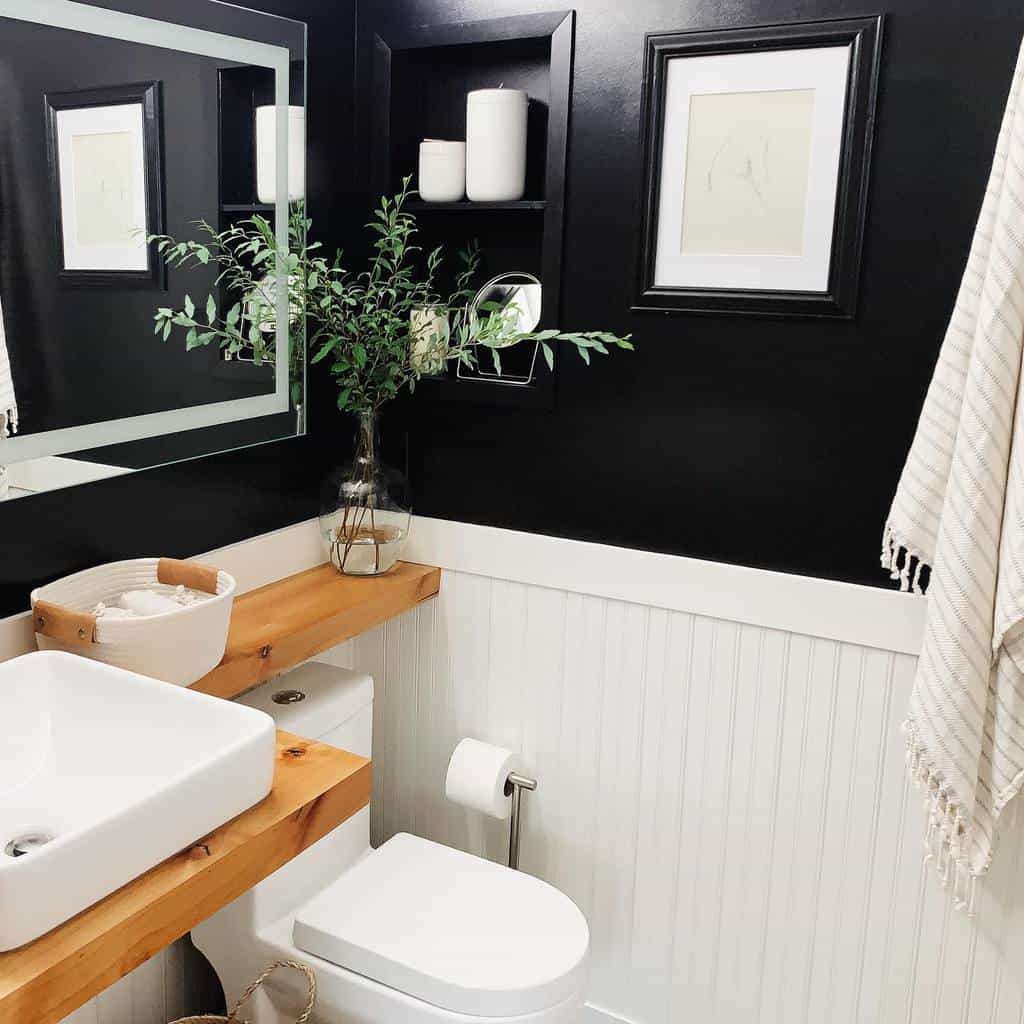
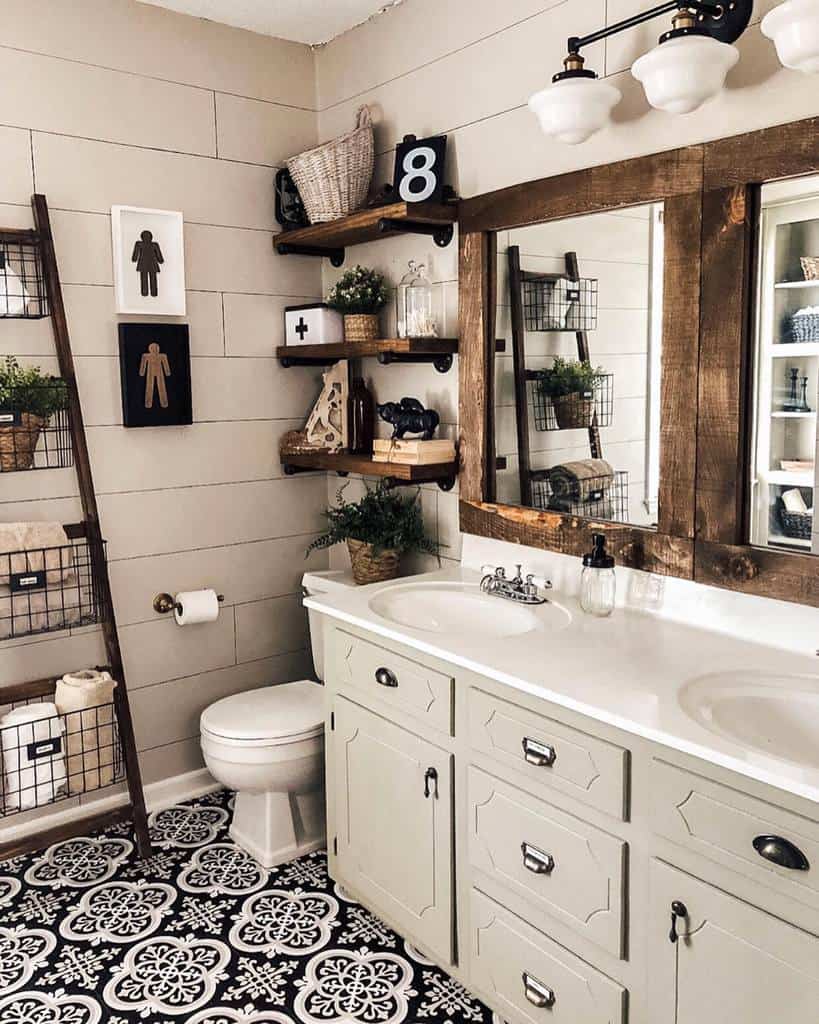
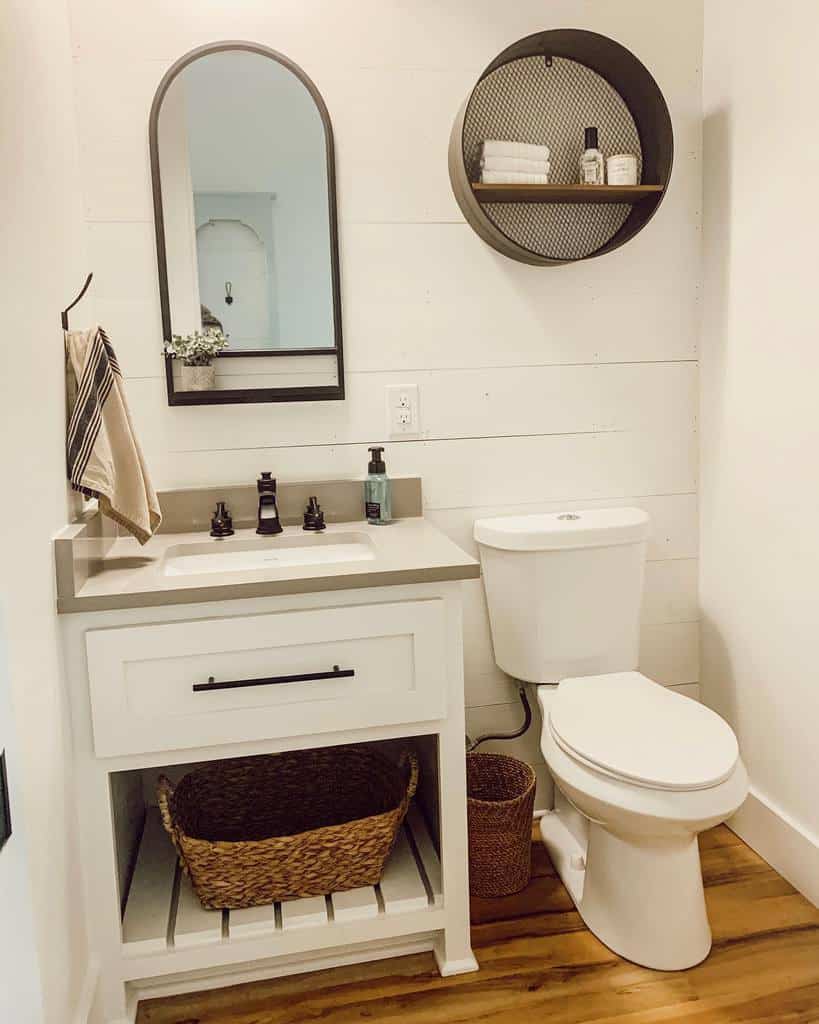
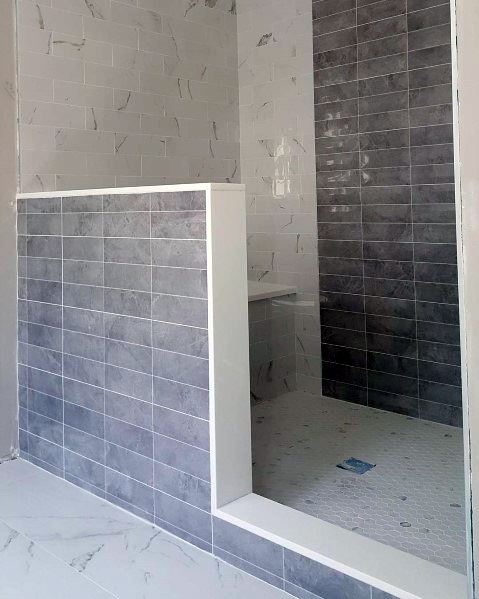
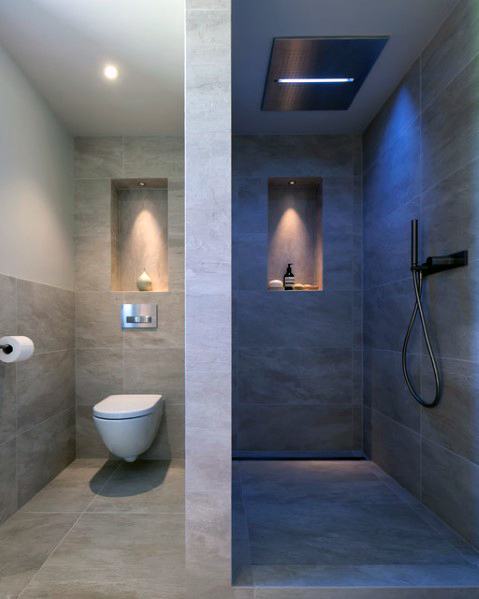
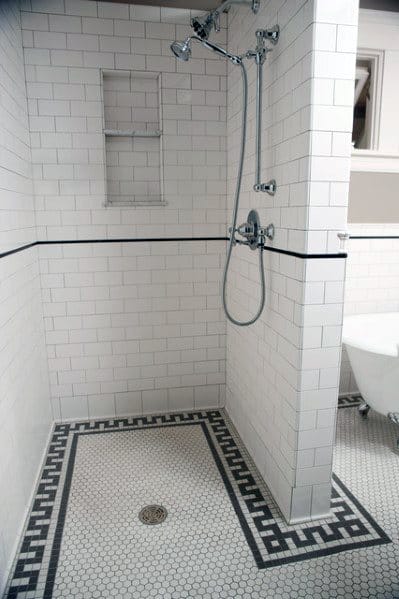
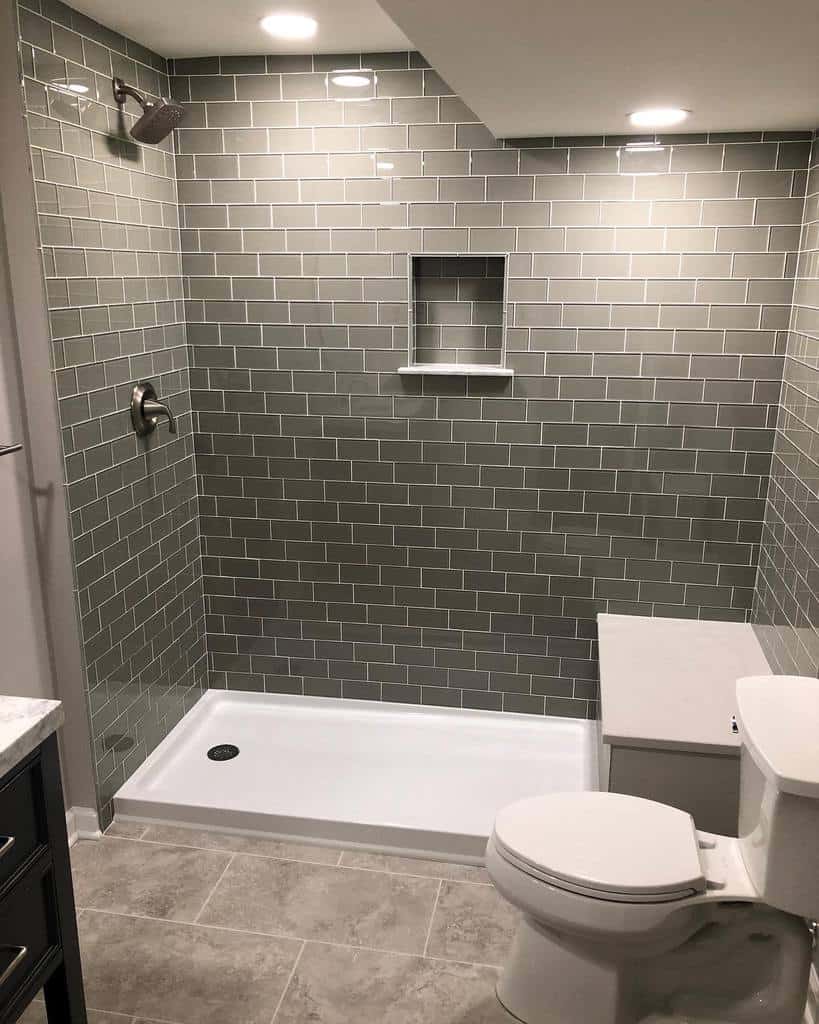
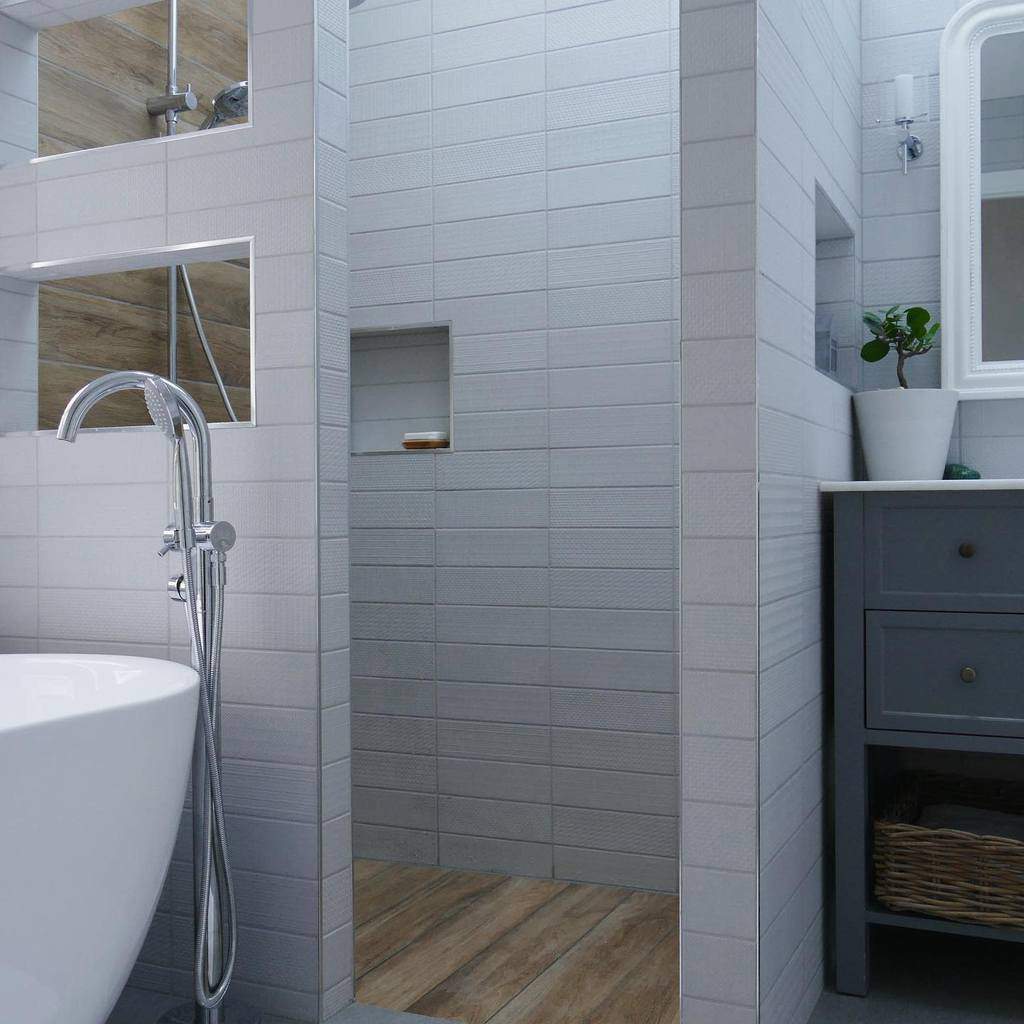
6. Recessed Wall Niche
Instead of mounting a cabinet or shelves on the wall, try creating a cutout niche. If you’re doing a bathroom remodel, you can work with your contractor to create a custom niche.
However, you can also create your own in a finished bathroom. You can then have an adjustable shelf that lets you move it up and down as you need it.
Source: @allthatisgrey via InstagramSource: @homedoover via InstagramSource: @ratih_rachmayanti via InstagramSource: @roselynninteriors via InstagramSource: @svershinina_design via InstagramSource: @swiss_lake_love via InstagramSource: @thebromleybathroomcompany via InstagramSource: @70sranchreno via Instagram
When building your niche, you’ll want to be careful to avoid cutting into a wall that has electrical and plumbing behind it. You’ll also want to build your niche between a set of studs. This ensures the wall retains its strength and integrity.
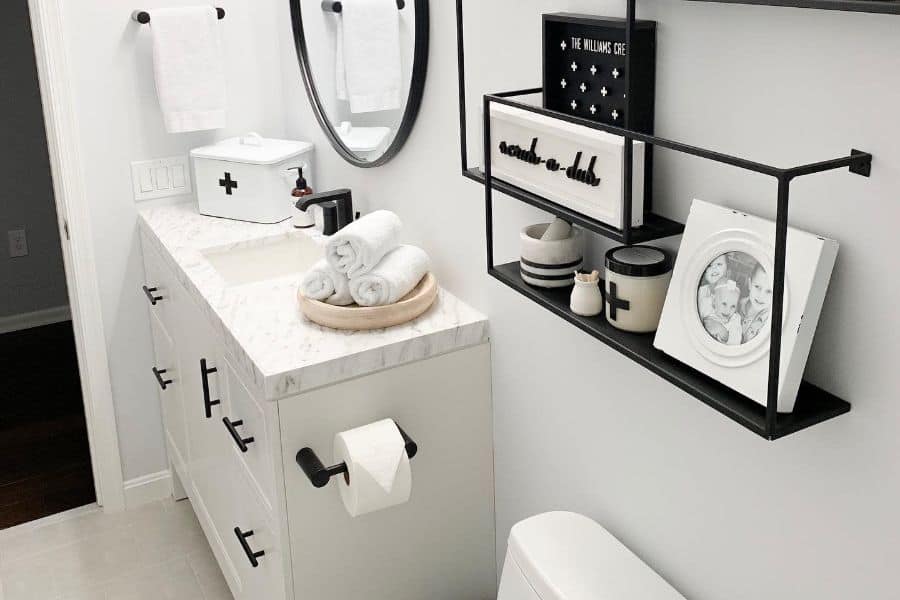
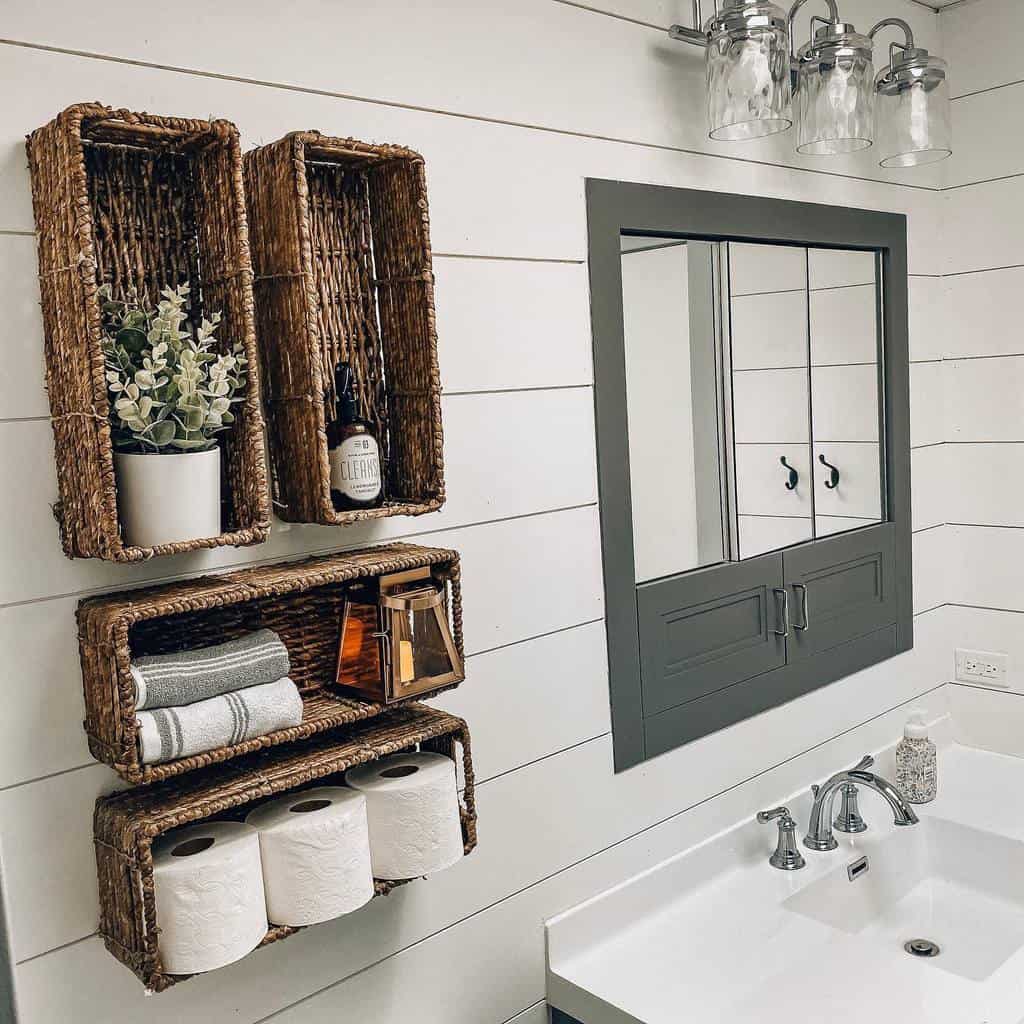
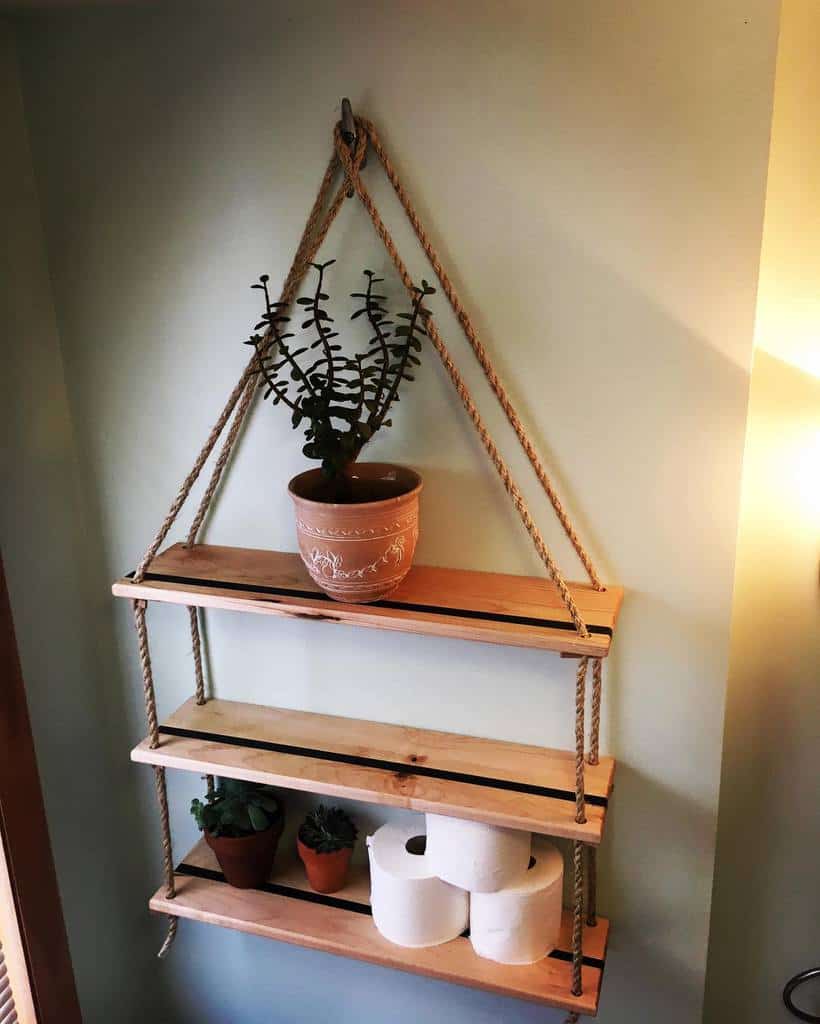
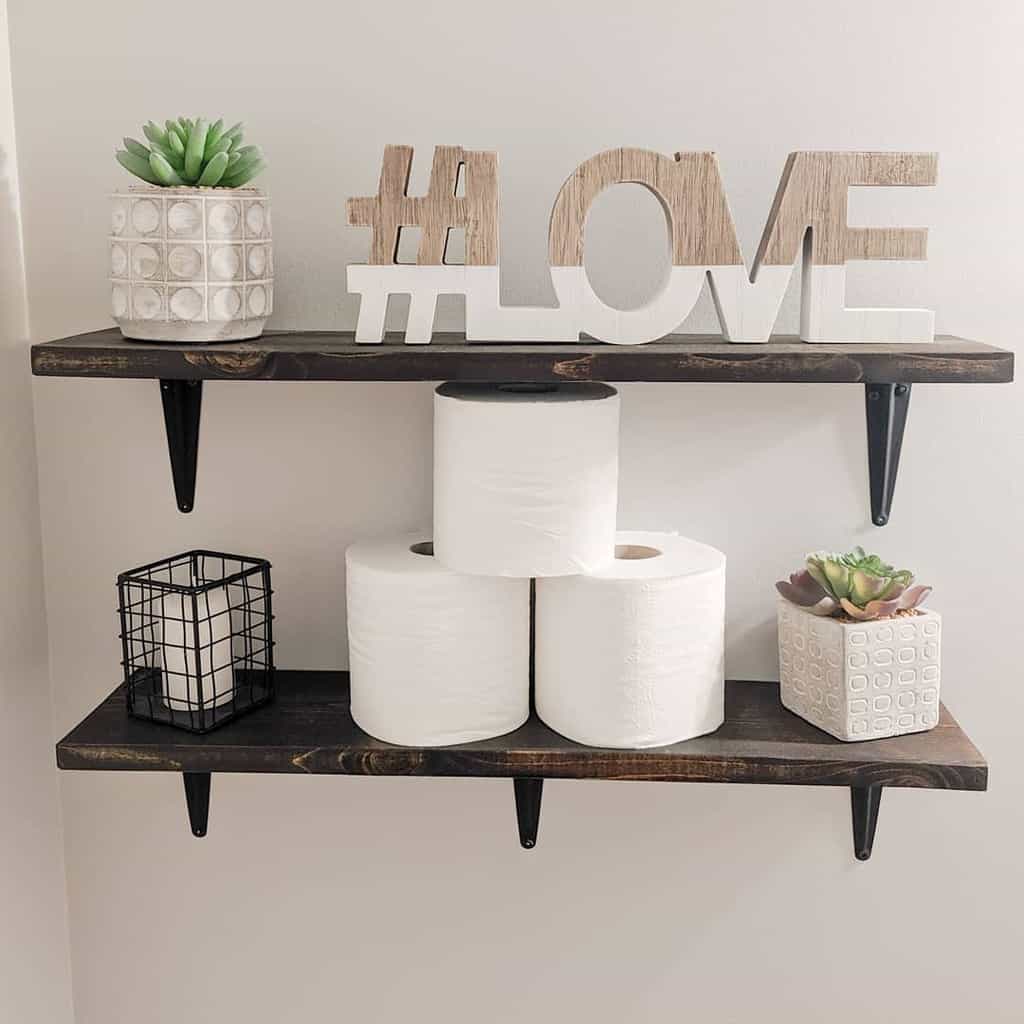
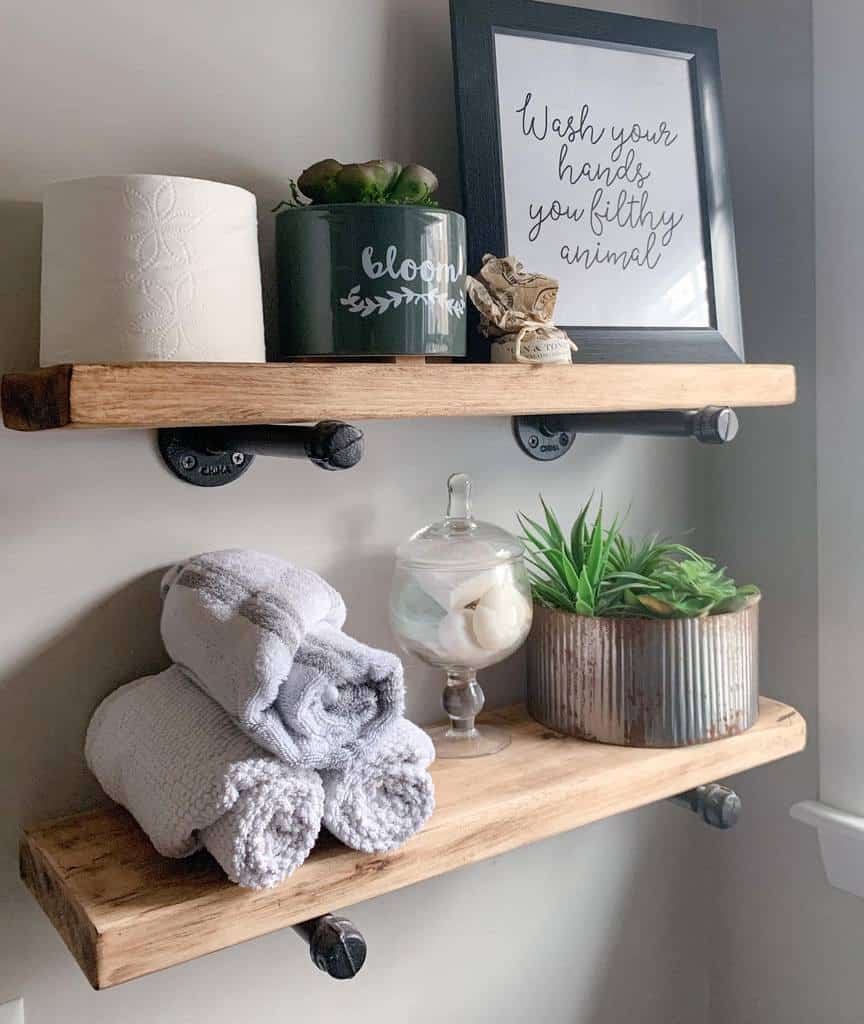
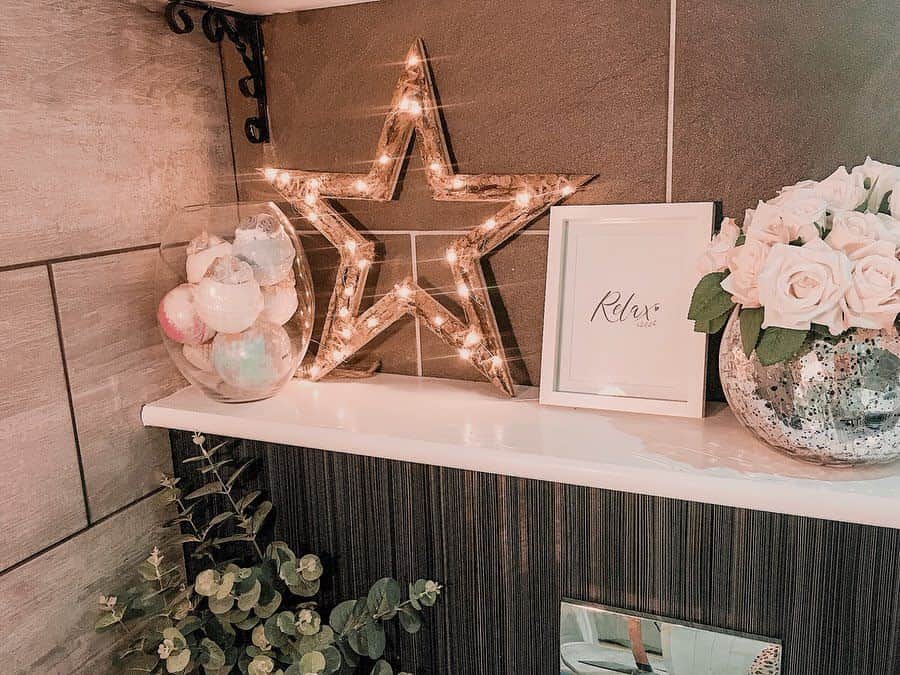
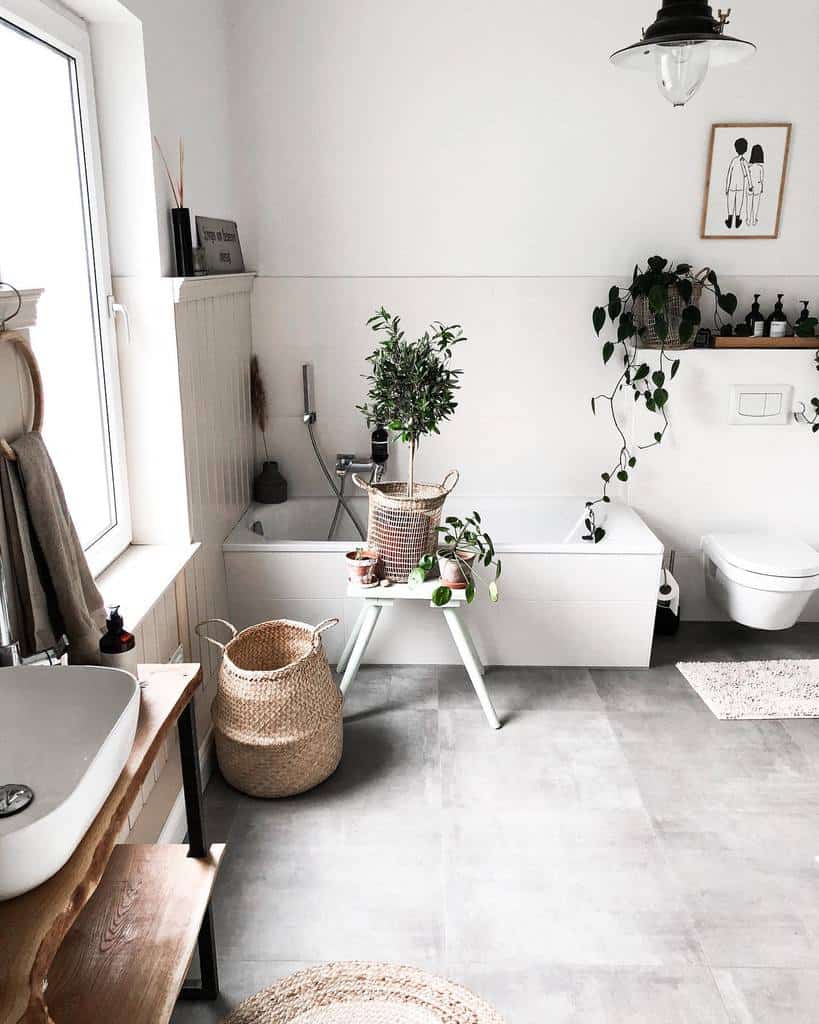
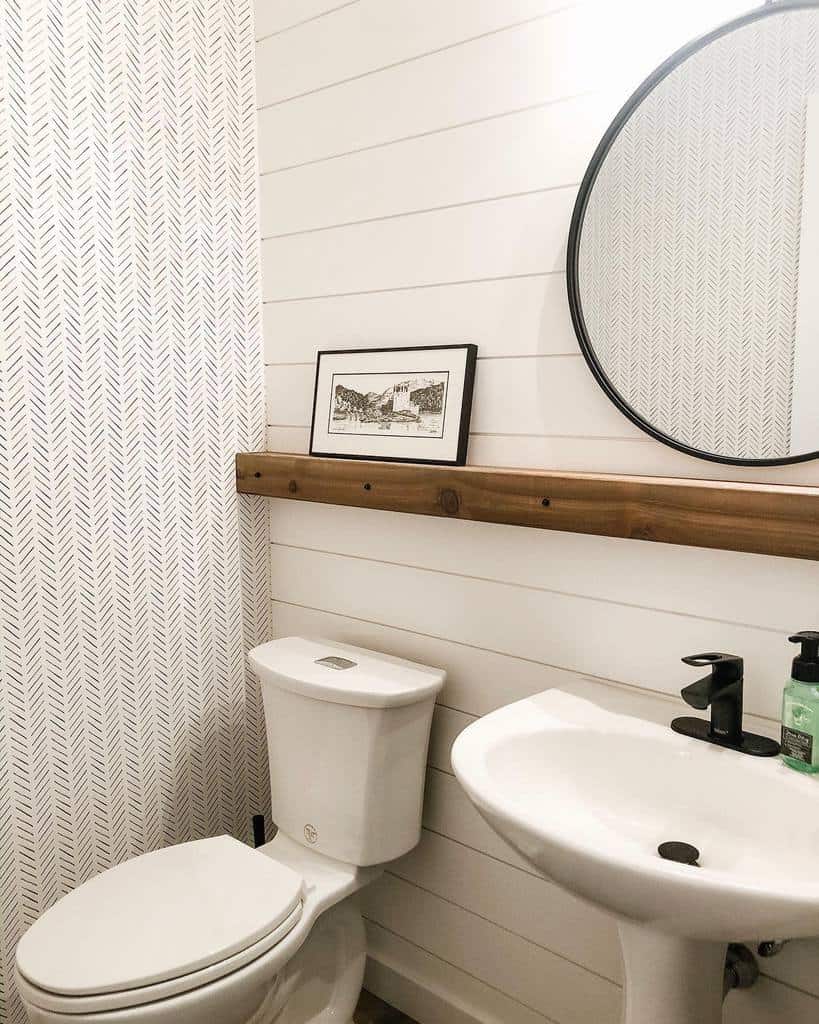
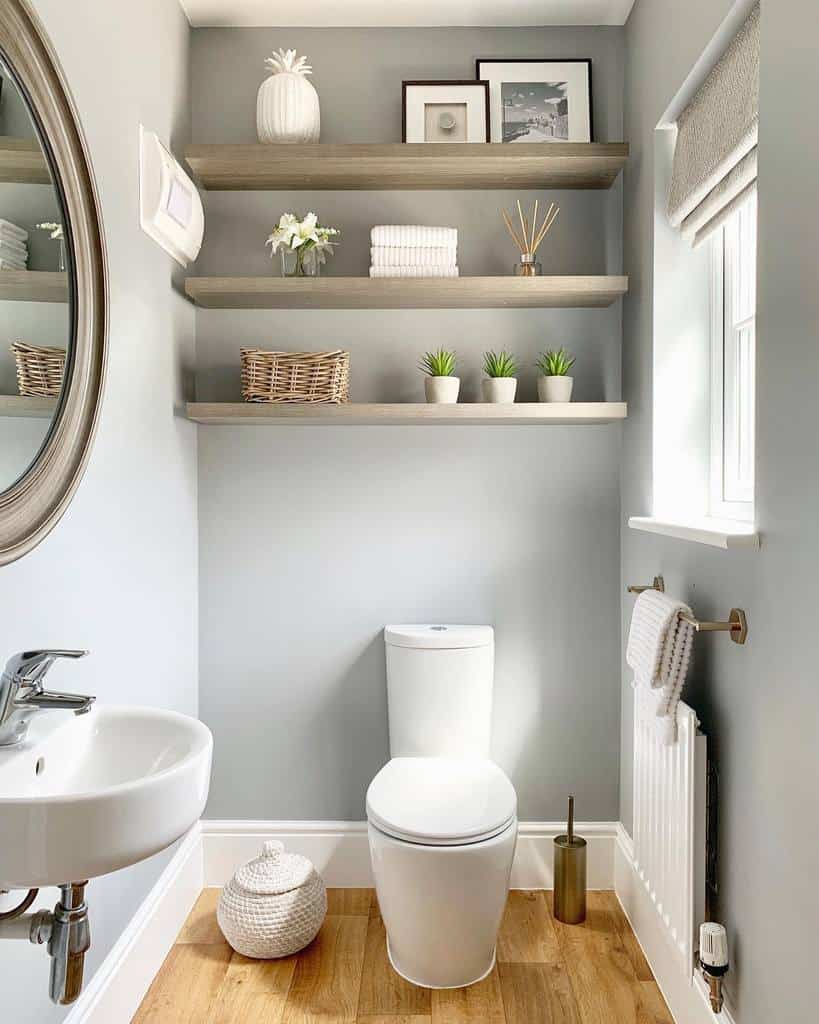
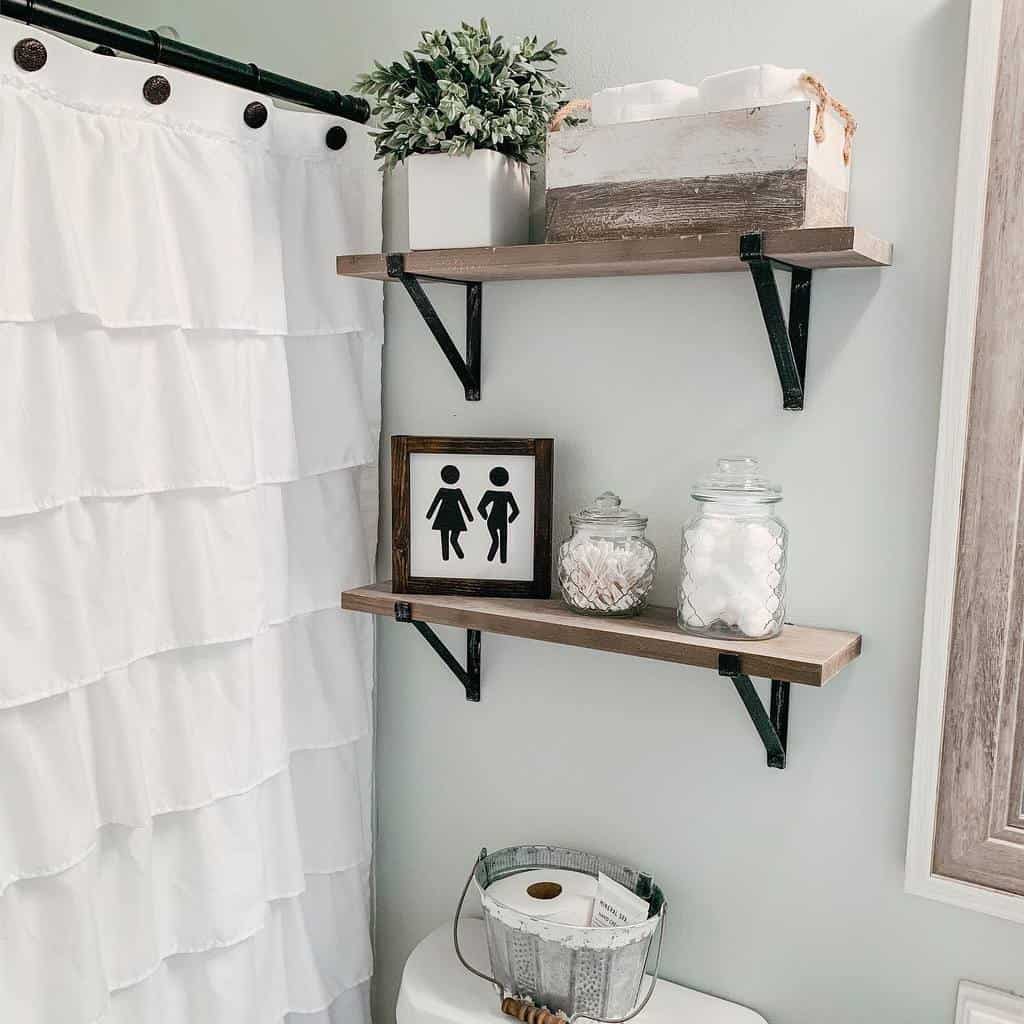
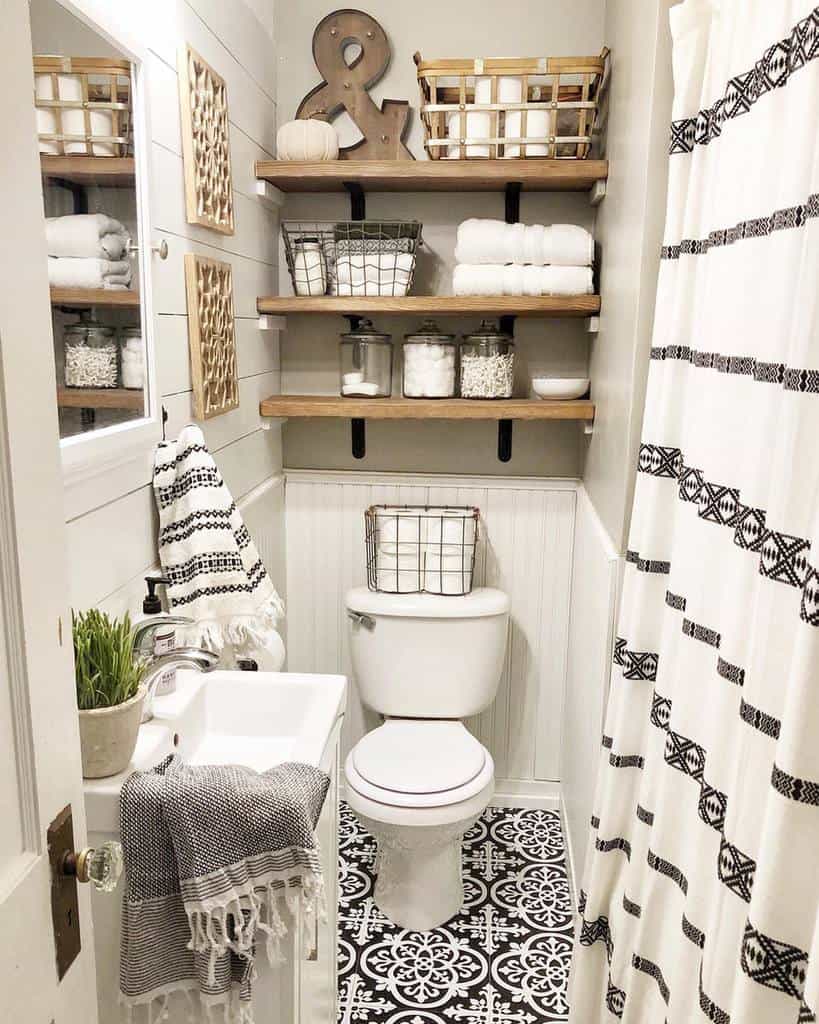
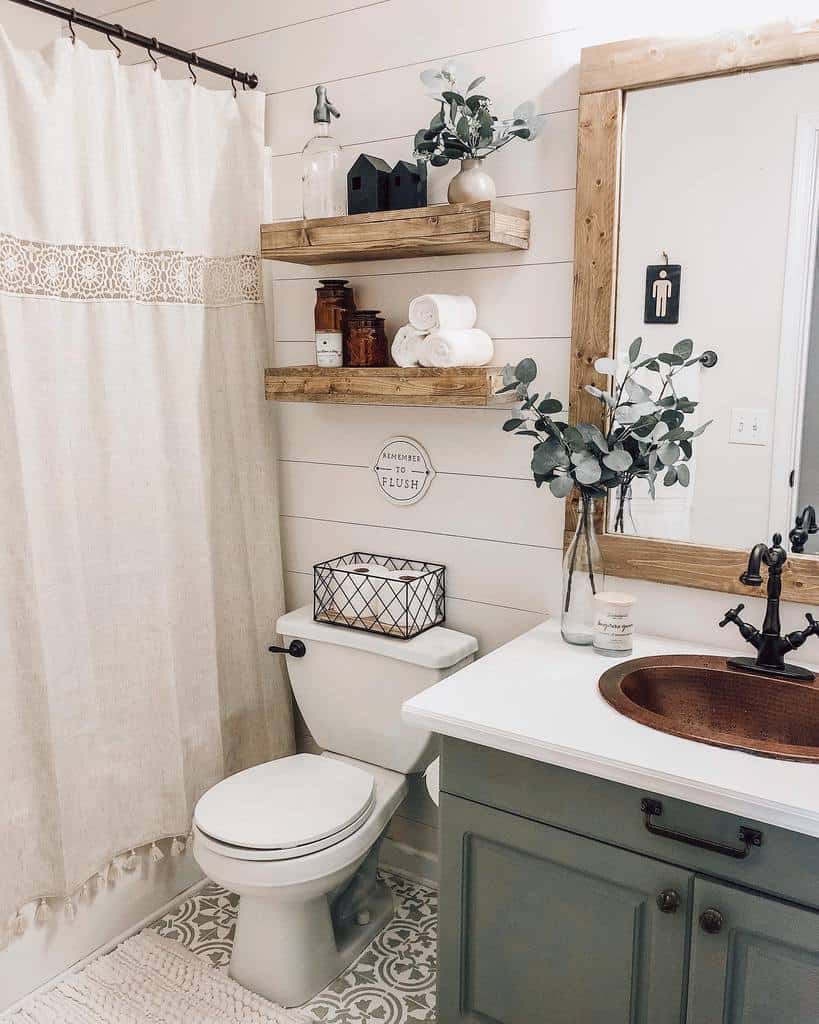
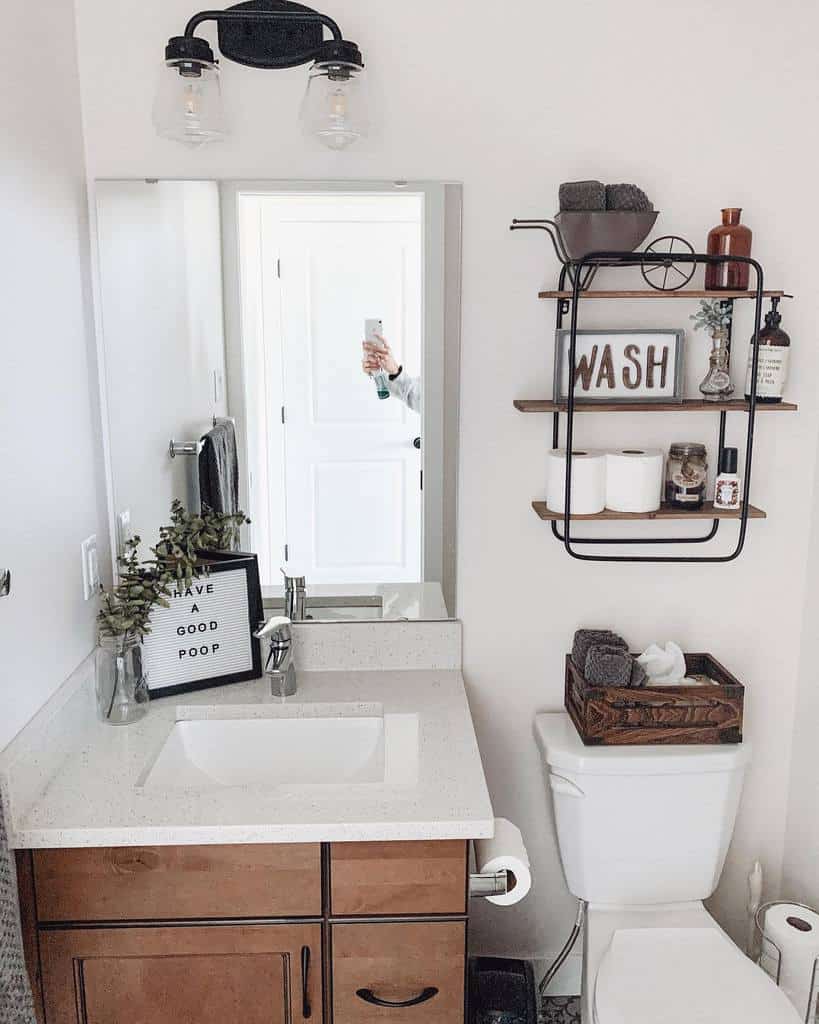
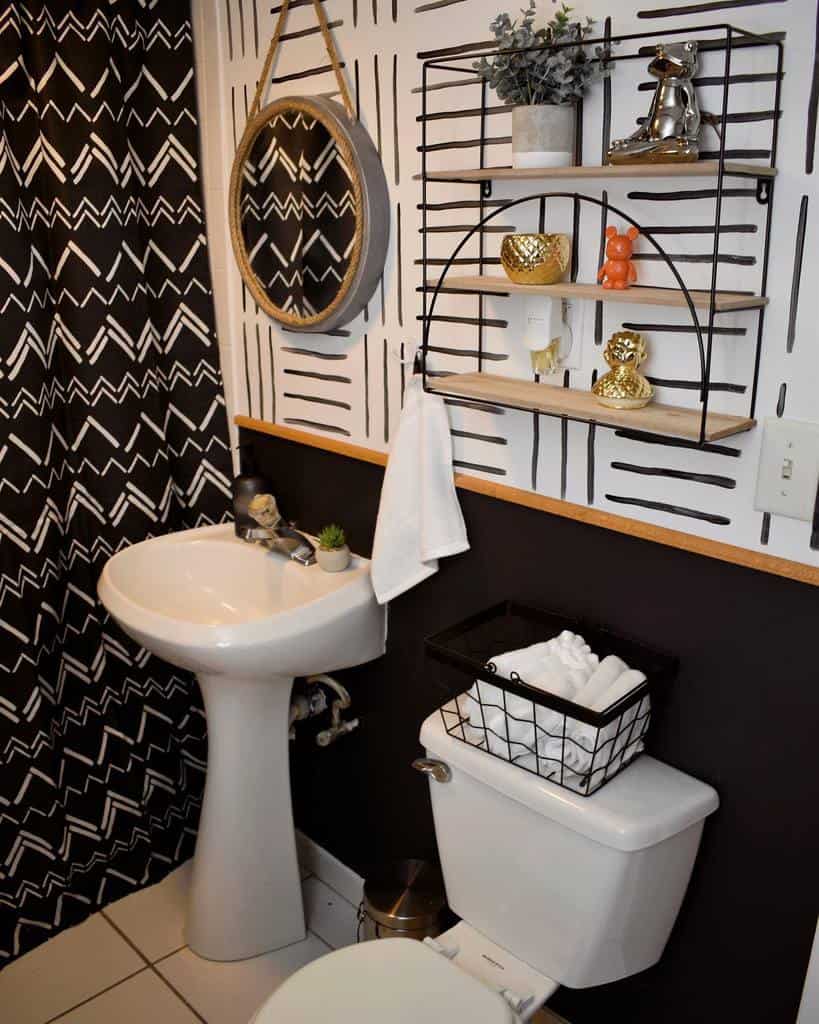
7. Floating Shelves
Give your bathroom a modern look by mounting a floating shelf over your toilet. Consider the type of wall shelf you use to help create a cohesive interior design look in your bathroom. A reclaimed wood plank will look rustic and perfect in a farmhouse bathroom.
Source: @interiorbylindseyvictoria via InstagramSource: @letsstayhome_blog via InstagramSource: @megan.allen_.home_ via InstagramSource: @miriammanzo_interiors via InstagramSource: @nanny_loves_cleaning via InstagramSource: @ourrusticlife via InstagramSource: @roperrhodes via InstagramSource: @rustic.sparkle via InstagramSource: @sharystudio via InstagramSource: @withlovesierra via InstagramSource: @apriljoy_ful via InstagramSource: @athomewith_aisha via InstagramSource: @bellwheeldesigns via InstagramSource: @candysprad via InstagramSource: @feel.at_.home_.inspo_ via InstagramSource: @functionalfarmhouse via InstagramSource: @hibaqmurad via InstagramSource: @home_made_by_mia via InstagramSource: @houseofspolland via InstagramSource: @functionalfarmhouse via Instagram
A metal shelf can look industrial or sleek and modern, depending on the styling. A glass bathroom shelf with metal accenting can blend perfectly in a luxurious bathroom. Glass is also smart in a small bathroom because its transparency helps the bathroom to feel large and not closed in.
8. Wall Hang
Express your personal style by hanging a shelving unit. These are perfect because they have shelves of different heights and sizes, making them perfect as toilet shelving. It can also double as a bathroom vanity when you lack counter space above your bathroom sink.
Source: @organizing_home via InstagramSource: @pineapple.pepper.organization via InstagramSource: @rural_haven via InstagramSource: @simoneoaks via InstagramSource: @the_handymama via InstagramSource: @theperfectspotforyoullc via InstagramSource: @thesteadingonthehill via InstagramSource: @violets_and_lilacs via InstagramSource: @apartment_b_annex via InstagramSource: @champagne.chaos_ via InstagramSource: @diyginnychi via InstagramSource: @forever.six_.acres_ via InstagramSource: @kellysdiyprojects via Instagram
You’ll wonder how you ever lived without this type of wall hanging, and it will quickly become a bathroom necessity. A modern one will have a refined black frame that features straight lines and crisp square corners. You could choose one with a curved gold frame for a more organic feel.
It’s time to say goodbye to your busted and worn-out shower curtain. Your master bathroom deserves better. Modern design trends embrace the idea of having a separate shower and tub area in your bathroom. Consider taking this approach with your bathroom remodel.
These doorless walk-in shower ideas will show you that walk-in showers are the future of bathroom design. Even if you already have a walk-in shower, these ideas will show you that it’s time for an update. Consider replacing your shoer’s tired design and replacing it with one that uses frameless glass or an open concept.
[view_toc]
1. Maximize Space with Corner Showers
A corner shower design can give you plenty of shower stall space and make it easy to not have a door. Work with your shower to have the showerhead point in a direction that avoids water from flowing directly out of the shower.
Source: @maddimaysmiles via InstagramSource: @Ideas via Instagram
For a stylish look, try having the entrance to your shower be on the corner. Then you’ll have two dividers on either side to enclose the shower in. This is nice because it cuts down on the drafts that you could experience with other styles.
2. Elegant Glass Partitions for Openness
The simplest way to build a shower without a door is with glass. Skip the glass block wall though. This type of shower glass is outdated and will immediately age your bathroom.
Instead, use a single large pane of glass to create a shower wall. You could use more than one glass sheet to build a multi-sided glass shower enclosure.
Source: @insidepropertyinvesting via InstagramSource: @mif_design via InstagramSource: @mikolmarmi via InstagramSource: @plum_construction via InstagramSource: @Ideas via InstagramSource: @cyana.ae_ via InstagramSource: @ditteblog via InstagramSource: @enslisanitaryware via Instagram
You want to leave enough open space to walk in and out of the shower comfortably. However, you don’t want the space to be so large that it allows water to splash out into the bathroom. Consider the direction the showerhead points when installing the glass divider.
3. Half Wall Partitions for Stylish Privacy
Instead of having a floor to ceiling sheet of glass, you can have a roman shower. The shower area will be large with one or more showerheads. This is more like a shower room than a shower stall.
Source: @nhdconstructiondesign via InstagramSource: @Ideas via InstagramSource: @doubledeuce2121 via InstagramSource: @kathrynmireland via Instagram
There will be an opening that you walk through to get in and out of the shower enclosure. Then the walls will be solid and covered in tile, usually a mosaic tile. They will come up to about waist height, leaving the space above them open.
4. Embrace Spaciousness in Large Showers
A large open shower gives you plenty of space to spread out and stretch while you’re showering. However, this also means that you’ll have to spend more to finish your tile shower.
Source: @caronconstructioninc via InstagramSource: @caronconstructioninc via InstagramSource: @caronconstructioninc via Instagram
Skip the small penny and mosaic tile for this job. It’ll cost a fortune to lay, and the small pattern will look overwhelming. Try using extra-large tiles. They could be large squares or rectangles. Opt for thin grout lines to avoid breaking up the visual lines.
Remember that large showers that lack a door have a greater risk of feeling cold and drafty. You can prevent this by putting heating elements under the tile. This will warm the tile under your feet and warm the space. You can also install a fan that will keep the warm air circulating in the shower.
5. Infuse Luxury in Your Shower Design
Doorless showers are traditionally a feature of luxury bathrooms. While they have become more popular, you can make your master bath stand out by incorporating elegant features you only find in luxury homes. The first thing you should do is add a seat. It could be a bench built into the shower.
You should also change out the showerhead to one that will give you a luxurious experience while showering. This could be a rain shower, one with multiple showerheads, one that has a light integrated into it, or one that can add aromatherapy to your shower.
6. Sleek Minimalism in Shower Spaces
Minimalism is all about keeping the design clean and simple. A doorless bathroom shower blends perfectly with this. While a frameless shower door looks modern, it isn’t the best option for a minimalist bathroom.
Instead, install one that has a thick black frame around it. This creates the straight lines and crisp corners that you see in minimalist designs.
Source: @tile.whisperer via InstagramSource: @apextilingco via Instagram
Use a white tile with white grout to create a uniform look. A dark tile and grout on the floor will balance it. You can then finish the look with black plumbing hardware and light fixtures.
7. Modern Touches for a Fresh Look
Update your shower to look like a modern bathroom. Do more than just have a glass-enclosed curbless shower. Sink the floor and install a bamboo slat shower floor over it. This gives your bathroom a spa-like feel.
Source: @capturedbysherene via InstagramSource: @ditteblog via InstagramSource: @grohekz via InstagramSource: @heatherjaneinteriors via InstagramSource: @kachi.interiordesign via Instagram
Add decorative accent lighting to your shower. You can install LED strip lights in the ceiling to glow downward. Or you can combine the glass with colored lights for a mood-influencing effect. Lights along the floor can make your shower safer to use at night when you’re tired and want to keep the lighting dim.
8. Explore Open Concept Shower Designs
Instead of having a separate shower space, you could embrace the open concept. The entire bathroom will have protective tiling. Then there’s a shower head in the corner with a slight slope in the floor towards a drain underneath.
Source: @thinkcurated via InstagramSource: @advaitarchitects via InstagramSource: @grough.luxurysuites via Instagram
There are no doors, no walls, no dividers, or separators. This doorless shower design can look stunning and ultra-modern. However, keep in mind that now your whole bathroom becomes the shower, and water will get everywhere.
It also can feel cold and drafty while showering. It’s best to have a showerhead that’s angled to be directly overhead to rain down on you instead of coming out of the wall.
9. Simplicity in Shower Design
You don’t have to get overly creative or complicated with your doorless shower design. You can turn your traditional shower into a doorless one while keeping the same amount of shower space.
Start by taking out the tub and replacing it with a single shower pan to cover the floor. Then mount a single pane of glass that covers half of the opening.
Source: @theglamfarmlife via InstagramSource: @Ideas via InstagramSource: @kc_bathroomremodeling via InstagramSource: @lords_creek_homestead via InstagramSource: @millymouset via InstagramSource: @mybestfriendcraig via InstagramSource: @smithsquaredplus3 via Instagram
Keep the frameless glass clean and simple. This helps to keep your bathroom design feeling open. When you can see through the glass without anything blocking it, the whole bathroom will feel bigger.
10. Smart Solutions for Small Showers
You can have a doorless shower in your small bathroom. The trick is to arrange the bathroom in such a way that the partition blocks splashing.
You can keep the small shower pan with a ledge on the outer side of the shower. This prevents water from flowing out of the shower and into the rest of the bathroom.
Source: @littlerivertinyhouse via InstagramSource: @our_journey_at_81 via InstagramSource: @thehighamhome via InstagramSource: @andenbath via InstagramSource: @champagnebronzepapi via InstagramSource: @emiliakonaszewska via InstagramSource: @houseinthemiddle via Instagram
Don’t try to simply take off the glass shower door. Your shower was designed to work with the shower door in place. Instead, you can remove the door and walls and adjust them to have a partial partition to replace them.
11. Classic Elegance with White Showers
White bathrooms will always be popular. The white tile gives the bathroom a clean feel, while the white tile keeps the bathroom feeling bright. You have several options when it comes to the type of tile you use.
For a luxurious aesthetic, you can use marble tile. For something affordable and universally appealing, you can use subway tile. Although, any kind of ceramic tile will be durable and is a smart choice for your bathroom.
Source: @made_by_color via InstagramSource: @plunketthomes via InstagramSource: @wellnessbyjen via Instagram
To keep your bathroom from looking like a hospital, try to mix the white tile with other colors and textures. This is why marble works so well. The marble’s main color is white, but it also has graining of other colors, such as grey, black, tan, or brown. This adds depth and texture to the room.
Curb appeal might be one of the most integral steps to putting your home’s best foot forward. It’s also one of the easiest to overlook.
As a homeowner, you spend more time looking at the inside of your house than the outside. But for your neighbors, passersby, and potential homebuyers, this definitely isn’t the case. Putting yourself in their shoes can be a great way to spot what areas of your home’s curb appeal are on point, and which need some serious work.
Keep reading for the best curb appeal ideas that will beautify your outdoor space, get your house market-ready, and help you keep up with the rest of the neighborhood.
[view_toc]
1. Jazz up Your Front Door
Make a striking statement with your home’s entrance by choosing a bold color for your front door, ensuring it both stands out and harmonizes with the exterior of your home. To add a personal flair, consider adorning the door with a seasonal wreath, a welcoming sign, or a tasteful metal decor element. These accessories can be easily changed throughout the year to reflect the seasons or holidays.
Source: @karlacloses via InstagramSource: @newgenconcrete.ca_ via InstagramSource: @parketeam via InstagramSource: @jtaylor.decor_ via InstagramSource: @homestylesllc via InstagramSource: @our.surburban.home_ via InstagramSource: @ourpnw_home via InstagramSource: @allproinstallationllc via InstagramSource: @nolaacres via Instagram
2. Set up and Maintain a Lawn
A lush, green lawn is a cornerstone of curb appeal. Invest in quality grass seed or sod for a robust start. Regular mowing, watering, and fertilizing are key to maintaining its vibrancy. Address any brown spots or weeds promptly to keep your lawn looking its best.
Source: @leighadams77 via InstagramSource: @designbydama via InstagramSource: @thompsonkofflerrealestate via InstagramSource: @alinapitchenko via InstagramSource: @wilshereinterior via Instagram
3. Paint the Front Door
A fresh coat of paint on the front door can be a game-changer. Choose a shade that makes your entryway pop, while aligning with the overall color scheme of your home. Quality exterior paint will ensure longevity and resistance to weathering.
Source: @defrancis_ via InstagramSource: @placeswecallhome via Instagram
4. Install a Front Porch
Adding a front porch can significantly boost your home’s charm. Design it to blend seamlessly with the architectural style of your house. Comfortable seating and soft lighting will create an inviting ambiance. This addition not only improves aesthetics but also adds functional outdoor living space.
Source: @cheryl.m.hart_ via InstagramSource: @happenings_of_our_farmhome via InstagramSource: @thedahlfarmhouse via InstagramSource: @mojica.family.farm_ via Instagram
5. Front Door With Awning
An awning over your front door adds both style and functionality. It provides shelter from rain or sun, creating a more welcoming entryway. Choose materials and colors that complement your home’s exterior for a cohesive look.
Source: @happenings_of_our_farmhome via InstagramSource: @our_hemsley_home via InstagramSource: @our.dunnock.home_ via Instagram
6. Build a Retaining Wall
A well-constructed retaining wall can be both practical and attractive. It prevents soil erosion and helps manage landscape slopes. Select materials that harmonize with your home’s exterior and consider adding landscape lighting for an extra touch of elegance.
Source: @lineandform_design via Instagram
7. Garden Arbor
A garden arbor creates an enchanting entry to your yard. Opt for materials that match your home’s style, whether it be wood for a rustic look or metal for a more modern feel. Climbing plants such as roses or ivy will add a natural charm over time.
8. Install a Fence
A fence can define your property while adding style. Whether you choose a classic white picket fence or a more modern design, it should complement the architectural style of your home. Remember to check local regulations before installation.
Source: @transformationsstaging via InstagramSource: @mdlab via Instagram
9. Potted Plants Along the Entryway
Strategically placed potted plants can bring life to your entrance. Mix and match sizes and textures for depth. Choose seasonal plants for year-round appeal. This simple addition can make a significant impact on your home’s first impression.
Source: @gknoxrealestate via InstagramSource: @lushcontainerdesigns via InstagramSource: @decor8thehill via InstagramSource: @natureworkslandscape via InstagramSource: @uniquelytaylormade via Instagram
10. Add Well-Maintained Hedges
Neatly trimmed hedges provide a polished look. They offer a natural way to frame your property and can also add privacy. Regular trimming and shaping are crucial for maintaining their appearance and health.
Source: @robjensenco via InstagramSource: @archi_capture5 via InstagramSource: @charmingaustintexas via Instagram
11. Install a Trellis Fence
A trellis fence adds both privacy and a vertical garden space. Ideal for climbing plants, it can transform an ordinary fence into a living wall. It’s a practical solution that brings a touch of nature to your curb appeal.
Source: @thepurpletangerine via Instagram
12. Plant Trees
Trees not only enhance the beauty of your landscape but also provide shade and privacy. Choose species that are appropriate for your climate and soil type. Proper placement is key to avoid future issues with roots and branches.
Source: @liannemariephoto_home via InstagramSource: @troyolsonteam via InstagramSource: @thompsonkofflerrealestate via InstagramSource: @charmingaustintexas via Instagram
13. Front Yard Landscaping
Thoughtful landscaping can completely transform your front yard. Balance soft plantings with hard elements like stones or pathways. Consider seasonal color changes and maintenance requirements to keep your yard looking pristine year-round.
Source: @willowhomesbham via InstagramSource: @exeterbuildingcompany via InstagramSource: @artechlandscaping via InstagramSource: @mapleridgelandscapes via Instagram
14. Build a Balcony
If your home’s design allows, adding a balcony can dramatically improve its exterior appeal. It offers additional outdoor space and a vantage point to enjoy your surroundings. Ensure it’s designed in harmony with your home’s architecture for a seamless look.
Source: @justathoughtsas via InstagramSource: @andiface via Instagram
15. Elevate Your Front Porch With Stairs
Adding or improving front porch stairs can make a significant difference. Choose materials and designs that align with your home’s style. Proper lighting and railings are essential for safety and aesthetic appeal.
Source: @talking_tree_hollow via InstagramSource: @addressabby_chicago via InstagramSource: @mapleridgelandscapes via InstagramSource: @earthandsole via InstagramSource: @mapleridgelandscapes via Instagram
16. Reseal the Driveway
A well-maintained driveway is a crucial aspect of curb appeal. Resealing it not only protects the surface but also gives it a fresh, clean look. Choose a high-quality sealant and consider professional application for the best results.
Source: @gibsoncontracting via InstagramSource: @farmhousemoderndecor via Instagram