In this interview, we’re joined by Sarah Bronstein, a skilled realtor and interior designer from Asheville, North Carolina, who has carved a niche in optimizing tiny living spaces. Living in a vintage traveler trailer herself and hosting the “Nomadic Spaces Podcast,” Sarah brings a wealth of practical experience to tiny home design.
Sarah discusses the ingenious balance of functionality and aesthetics in small spaces, emphasizing the use of multifunctional furniture, sustainable materials, and clever storage solutions. Her approach not only maximizes space but also ensures that these compact homes reflect the personal style and emotional well-being of their occupants.
Join us as Sarah shares her expert tips and strategies for transforming tiny spaces into comfortable, stylish, and efficient homes.
[view_toc]
Maximizing Storage in Tiny Homes
Trendey – How do you optimize storage solutions in tiny homes without compromising design aesthetics?
Sarah – It’s all about balance and creativity. I look for opportunities to utilize vertical space, such as installing shelves or utilizing wall-mounted storage units. I’ll also try to utilize creative storage options like hanging organizers, over-the-door hooks, and storage baskets.
I also seek out multifunctional furniture — sometimes that means designing it myself. For example, a dining table can double as a workspace, a sofa can have built-in storage, and a Murphy bed can transform a bedroom into a living area during the day. Flexibility is key in a tiny house, so choose versatile pieces that adapt to changing needs.
Organization is also important to keep a clean aesthetic and prevent the small space from feeling cluttered or overrun.
Designing for Dual-Purpose Spaces
Trendey – What strategies do you use to make small spaces serve multiple functions effectively?
Sarah – Multifunctional furniture is a great option. It’s important to understand which functions are most important and most frequent and incorporate them into the design plan.
Sustainable Practices
Trendey – Can you elaborate on your choice of sustainable materials and practices in your designs?
Sarah – I am LEED-certified, so I incorporate a lot of those standards into my designs — sourcing responsibly sourced wood, recycled materials, organic textiles, and low-VOC paints are some of the most common ways. Additionally, sourcing second-hand furniture and decor can be more challenging and time-consuming but I love the character and richness it brings to spaces.
Enhancing Natural Light
Trendey – What are your tips for maximizing natural light in compact living spaces?
Sarah – Natural light is incredibly important in interior design. Some of my go-to tips are:
Use light colors that will reflect light and make the space appear brighter
Arrange your furniture and décor to maximize the amount of sunlight that enters your home
Don’t block windows if possible
Consider using light and airy window treatments that allow sunlight to filter in while maintaining privacy
Incorporating mirrors can also help bounce light around the room, creating a brighter and more cheerful ambiance.
Incorporating Color Psychology
Trendey – How does color psychology play a role in your tiny house interior designs?
Sarah – Color psychology plays a significant role in interior design. It’s not just about aesthetics; color can affect how we perceive and feel in a space. Generally, light colors tend to make rooms feel larger and more open, while dark colors create a sense of coziness and intimacy. Understanding the space and the owner’s aesthetic preferences and functional goals for that particular space is key.
Personal Style vs. Space Limitations
Trendey – How do you help clients balance their personal style with the limitations of a small space?
Sarah – I love to help folks incorporate a sense of themselves into the space. This may involve incorporating mementos, photographs, art, and collections into the decor or finding ways to integrate meaningful materials into the design. For example, a client had a beautiful embroidered tablecloth that had been passed down in her family for generations and was living mostly in a drawer waiting for the occasional event she may take it out. We were able to have it turned into curtains for her bedroom window which not only made it more functional but she also gets to see and touch it everyday.
Design Principles for a Spacious Feel
Trendey – What are your key design principles for creating a cozy yet spacious feel in tiny homes?
Sarah – Intentional space planning, color selections, and lighting (natural and fixtures) are key. It’s important for a space of any size to have a proper flow and feel cohesive yet comfortable.
Integrating Greenery and Outdoor Elements
Trendey – How do you incorporate greenery and outdoor elements in tiny house living?
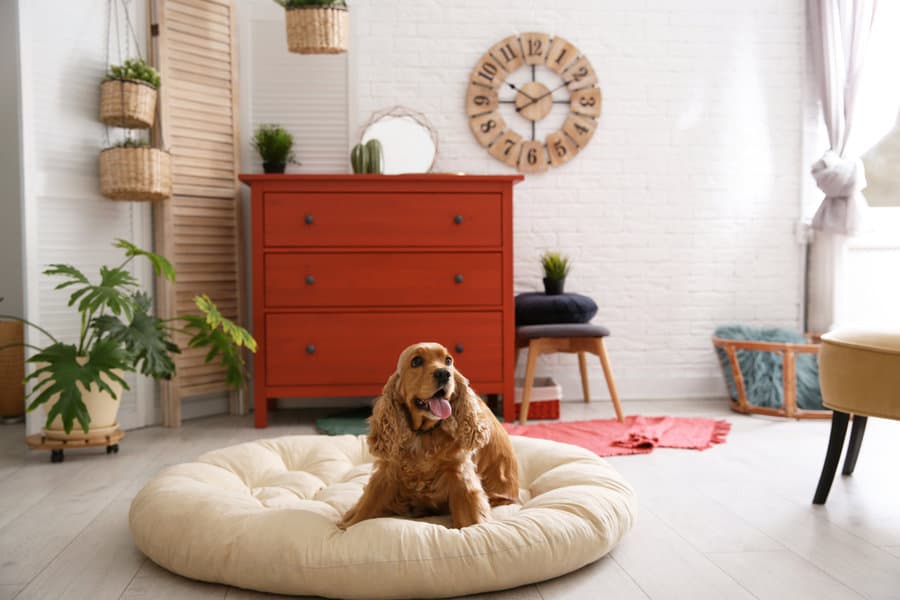
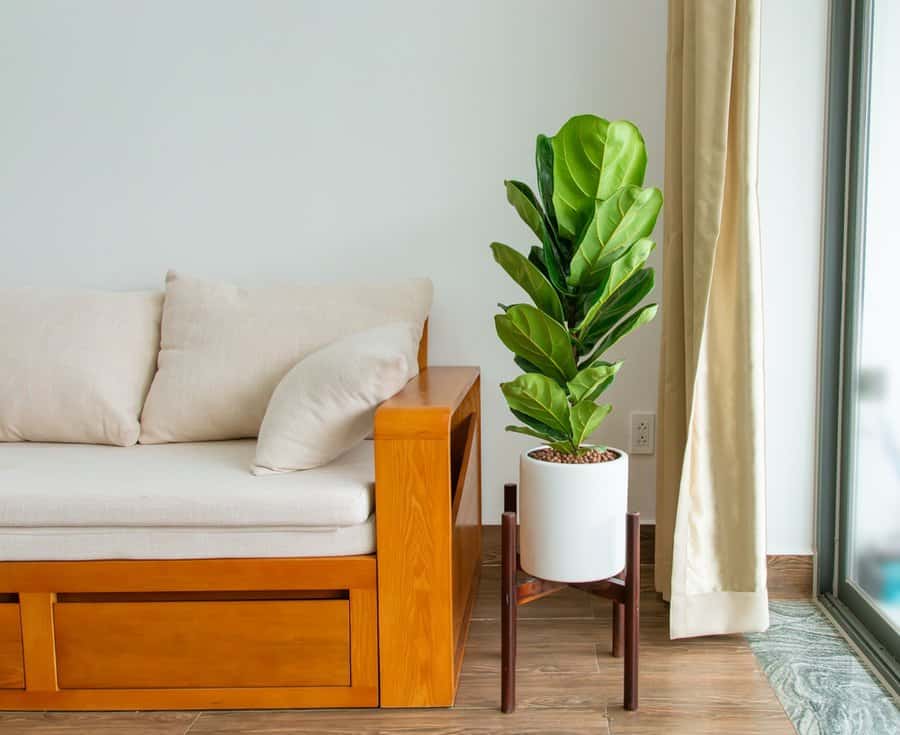
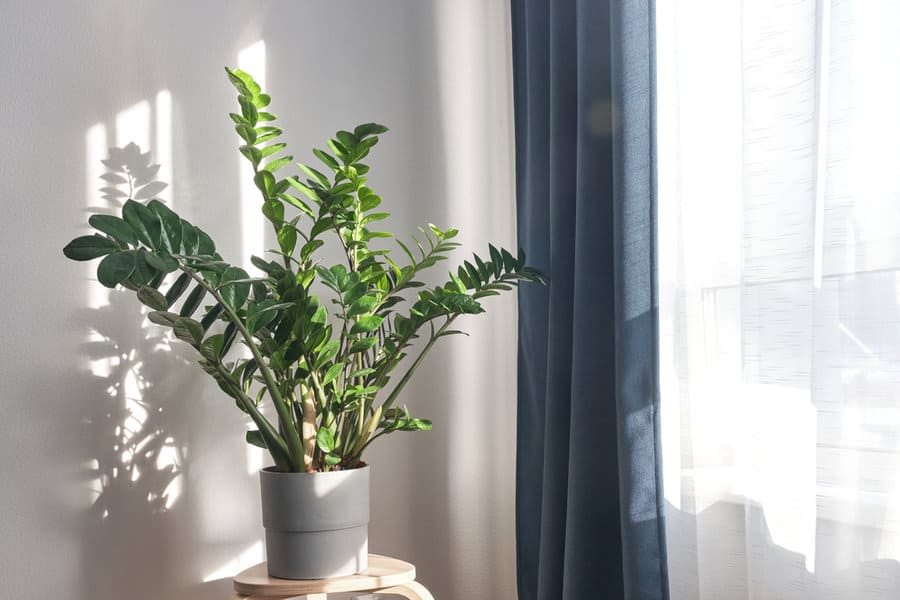
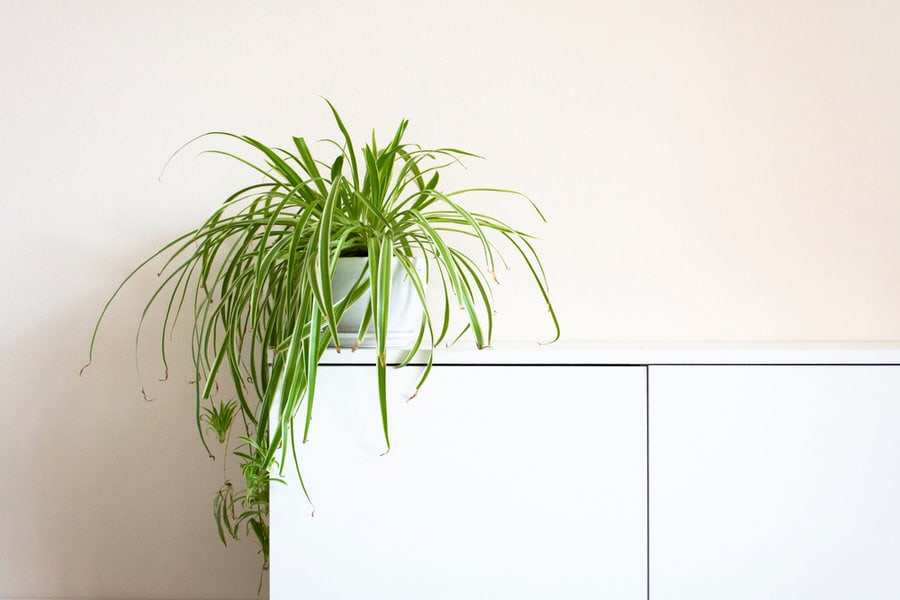
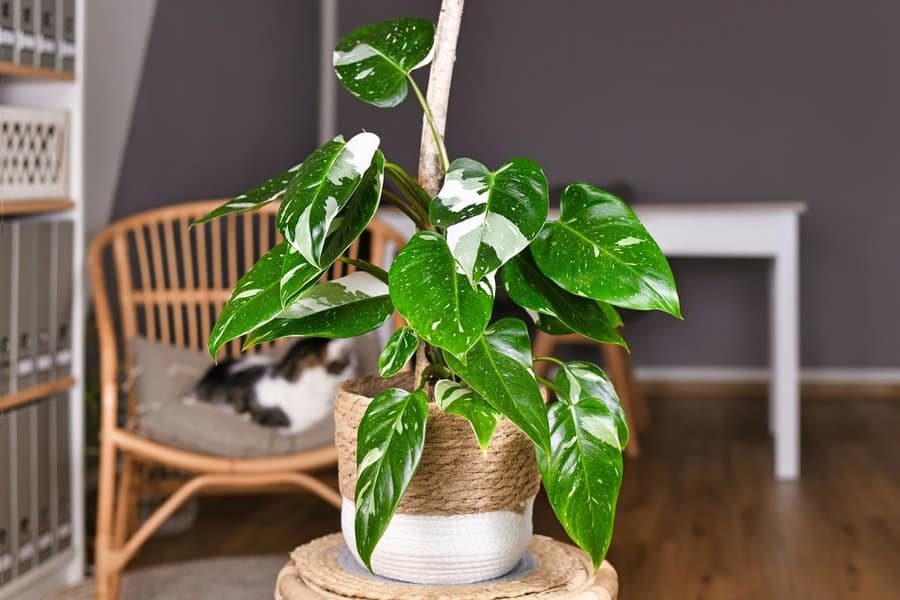
Sarah – Houseplants are a classic way to introduce greenery and outdoor elements into a tiny home. They bring a touch of nature right into your living room, bedroom, or even your office space. Research on these biophilic design principles has shown that this approach can support physical and mental well-being. Being surrounded by nature, or elements that remind us of nature, can reduce stress, improve mood, and even boost productivity. In small spaces, I like to look at adding plants to shelving or hanging pots. Even if you aren’t able to manage real plants in your space, science shows faux plants have the same impact on our brain as real ones.
Budget-Friendly Design Strategies
Trendey – How do you approach designing a tiny home on a tight budget?
Sarah – This is a really common challenge for spaces of any size and the answer really comes down to a deep understanding of available options and priority. If someone can identify alternative options to cut costs in some areas, they can prioritize spending in the spaces that are most meaningful. Understanding priority can allow you to take on projects as budget allows. What needs to be done, and what could be done in time? There are still updates I’d like to make in my own tiny home trailer that I am saving for and will implement down the line. I prioritized the things I’d need to make my space livable and tackled other projects as I’ve been able.
Transforming Small Outdoor Spaces
Trendey– What are some creative ways to transform small outdoor areas into functional spaces?
Sarah – Seating around a firepit or small dining sets. Benches can be a great alternative to chairs, allowing you to fit more seats with less furniture. If there is room I love to incorporate hanging egg chairs or hammocks. Adding outdoor rugs and lighting goes a long way, too! I am personally a sucker for string lights outside — it just creates such a vibe!
Emotional Well-being and Interior Design
Trendey – In your design process, how do you consider the emotional well-being of the occupants in tiny homes?
Sarah – This is by far the most important consideration that goes into my design process. Understanding my client’s goals, personal aesthetic, and functional needs for each space is key. This is completely unique to each space and client so I spend a lot of time early on asking questions to get a really clear grasp on how we need the space to feel. I believe interior design should support and enhance the mood and well-being of the occupants. I wrote a thorough blog post about this very topic if you’re interested in learning more.
Today, we’re excited to chat with Chas Greener, the creative mind behind “Chas’ Crazy Creations.” Renowned for her innovative DIY projects and practical home improvement solutions, Chas has garnered a large following through her website and YouTube channel.
In this interview, she’ll share essential DIY skills for homeowners, tips for beginners, and insights into repurposing and upcycling for home decor. We’ll also explore her approach to budget-friendly projects, common DIY pitfalls, and balancing creativity with practicality. Join us for an inspiring session filled with valuable advice for anyone interested in DIY and home improvement.
[view_toc]
Basic DIY Skills for Homeowners
Trendey – What are the basic DIY skills that every homeowner should learn?
Chas – You should have some basic tools. You don’t need all the heavy-duty equipment in your home, but get some essential tools, screwdrivers, hot glue guns, and things like that so you have them on hand when you need to create or repair something.
Access to the internet is huge when you’re a DIYer, too. It helps you build inspiration for designing your space or creating something for your home. AI can also help you design your space. For example, I’m a visual person, so being able to take a tool that can create an image for me might help me build a room before I go out and buy a bunch of stuff, bring it home, and set it up, only not to be sure if it looks good. This way, I can put pieces into a room, shape the room, or create a look and then know what I like and what I don’t. Embracing AI is a scary thing, but it’s very helpful for a DIYer, especially if you’re a visual learner.
Top Tips for First-Time DIYers
Trendey – What are your top tips for homeowners who are looking to undertake their first DIY project?
Chas – Having a clean slate is nice to start with. Sometimes, if you already have items in that space, it can cause you to stumble over them, and you may not know exactly how to move things because the space has looked like that for so long. I don’t care if you’re going through your clothes in your closet. If you gut the space and then start with a clean slate, it gives you endless possibilities so you can begin to feel the space and envision the look you’re going for.
Again, you might need to look online to see if you like modern or traditional stuff. Sometimes, I suggest opening ChatGPT and telling it something like, “I have a room. It’s a living room space. I want a contemporary look. What are some key things I might want to consider putting in this space?” It brainstorms for you about what you could put in that room.
Let’s say you have a very old home, and back in the day, a lot of houses had a family room and a living room. Now, I hear a lot of people asking what to do with that living room. The living room used to be a very neat and tidy room that, when somebody came over to visit, sat in. This wasn’t your entertainment space. But there are so many possibilities. Think of it. Instead of just being confined to a living room, that could be your home office, a playroom for the kids, a music room, a craft room, or a dining room if you didn’t have one in your home. It can be anything you want it to be. Sometimes, that living room is the first room that pops in when you walk into a home. You may want that to be the family room, and then the other family room space becomes the additional space that you can create into something else, too. Just think outside the box.
Again, a clean slate is one of the biggest things. Sometimes, we get stuck in our heads, but if you could start with a clean slate, that opens your eyes to all the possibilities. We’ve gotten a little better at that because we were confined to our homes for some time, so it’s helped open our eyes in terms of other possibilities that our home space can be.
Repurposing and Upcycling in Home Decor
Trendey – How do you approach the challenge of repurposing or upcycling items for home decor?
Chas – That’s one of my favorite things. Let’s say you inherited something. You’ve got your grandma’s coffee table, and it doesn’t fit into your house because it’s the wrong color, wood, not your style, or something like that. But you can fix a lot of things with just some paint. There are so many paints out there, like chalk and acrylic paint. You can also use resin to create a design on the top of the table to make it fit in your space better. Or you can add photos to it and then place a top coat of Mod Podge over it. There are a lot of possibilities; just understand what it is you’re trying to fit it into. Look at the space, the color choices, etc.
If you have furniture, you can take all the fabric off and reupholster it. I did that with my grandma’s dining room set. It had a color that didn’t fit into my space, so I pulled off the upholstery and reupholstered it on a budget, and now it fits into my home nicely. One of my grandmas had given me a bunch of utensils and stuff that may not be great for use in the kitchen anymore because they’re made of a material that we shouldn’t be using. I turned that into a wind chime, and now it’s hanging on my front porch. I think of my grandma every time it’s clanging around out there. Sometimes, a piece was inside, but it’s okay to put it outside like that wind chime. Or you take your grandma’s dishes, glue them together, and make a dish flower that goes in your garden so you can again repurpose or upcycle those items to make them fit your home, yet honor the memory.
If you’re on a budget, it’s your first home, your first apartment, and you’re trying to figure out how to furnish it. There are so many great ways to do it. You can go to thrift stores or garage sales to pick up items. We are in a unique stage of design right now where there’s a lot of mix and matching going on. Back in the day, your couches and your end tables had to match. Now, they can be different shapes and sizes, but you can tie them together through color or concept. You can also use contact paper to change a wall or a bookshelf in your house, and if you don’t like it or you need to move, you peel it off, and it doesn’t do any damage.
Memorable DIY Projects on a Minimal Budget
Trendey – Can you share some memorable DIY projects that transformed the space or item at a minimal or no cost?
Chas – Pottery Barn sells this Eagan mirror for more than $600. It’s one of their bestsellers, and it’s like a window with a bunch of panels in it. I went to the dollar store and bought nine mirrors, glued them all together, and reinforced them with some poster board on the back. I spent a total of $13 to get that same look and hung it up on my wall. To hang it on the wall, I used velcro command strips so I wouldn’t have to put holes in the wall. I could use the command strips to hang it because it’s probably lighter than Pottery Barn’s, too. After all, it was made of these lighter mirrors. I loved the look, and I didn’t have to spend a ton of money on it, so that was one of my favorite pieces that I ever did.
We sometimes feel like we’re supposed to make our entire house flow with one type of design, and that might be true for some, but not for me. There was a living room in my house that wasn’t as useful, so I wondered what to do with it. I had a vintage rocking chair that was my family’s. There was also my piano and an old vintage suitcase in the room. We created this music room. I paid tribute to the oldness and the vintage in that room. Even though the rest of my house might be more modern and contemporary, I envisioned this particular room as a place where everybody is sitting around singing songs and playing music together, and my husband could leave his saxophone out.
I took that rocking chair and redid the cushions so that they fit a little more into our color style. It also made it way more comfortable. I took the suitcase and turned it upright and sideways (so the handle is on the side, and one of the ends is on top), and I made it the coffee table for that rocking chair. So, I embraced the suitcase and turned it into a piece of furniture. Then, I went to a thrift store and found this unique heart-shaped table. I painted its legs white and kept the top of the wood so it tied in with the piano. There are a bunch of little eclectic pieces in this room, but you don’t walk in the room and say it’s old. It’s got some old pieces in it, but it’s a quirky music room, and it’s creative. Most of that stuff in that room was free except for one chair or one table, and I think I flipped that table for under $10.
Common DIY Mistakes and How to Avoid Them
Trendey – What are the most common mistakes that most DIY enthusiasts make? Do you know some ways how they can be avoided?
Chas – The biggest thing I see people do (and I’ve made this mistake myself) is making mistakes with paint. You start painting a piece of furniture to fit into your house, and then something goes wrong. The paint drips, or it has lines from your paintbrush. One of my big painting mistakes was when I did my first chalk painting project. The paint went on, and I enjoyed the look of it, but I misunderstood the waxing end of it. It said to paint the wax on, let it set, and then buff the excess wax off. What they meant was to let it soak in and then buff it off, but I left it for 24 hours and was left with a hot mess.
When something like that happens, the first thing you think is, “I did all that work for nothing,” and you look at the negative side and decide to get rid of the piece. The best thing about paint is it can be done again and again and again and again. All I did was take a sanding block, and I lightly sanded off all that wax, and I started again.
If you don’t like the color, you can repaint it, too. Paint is one of the most forgiving things that we can use and work with. So if you make a mistake, there’s usually always a way to fix it. Sometimes, it doesn’t turn out the way you hope, and that’s okay. Take a breath, take a moment, put a pause on it, whether it’s 24 hours a week, and then try again. I encourage everybody to give it another try because not everything turns out right away, and sometimes it is a hot mess. The great thing about DIY is that it can usually be fixed in some way, shape, or form.
Environmentally Friendly DIY Projects
Trendey – How do you keep your DIY projects environmentally friendly?
Chas – It only goes in the trash if it’s beyond fixable. But even then, when something falls apart, if I can find a use for it, whether it’s inside or outside, I will try. I’m a big garage sale thrifter because I have been to the dump, and I’ve seen people throw away perfectly good pieces of furniture or items that my brain can creatively think of different ways to use. Before you throw something away, I encourage you to consider donating it if it’s not useful for you. Consider putting it on one of those platforms or Facebook groups. Somebody’s going to come for it. You’ll be surprised at the crazy things people can make or do out of an item.
Here’s another example. I went to an outdoor flea market, and I saw a hanging candle holder that was supposed to have about six little glass pieces that the candles went in on, but the glass pieces were all gone. Most people would think you should throw that away because it doesn’t have all the parts anymore, but I saw the vision, so I brought it home. I spent only a dollar or two on it because they thought it was broken. To me, it was a framework. I added solar lights to all of those holes where the glass pieces were and hung the piece outside. Now I have this beautiful chandelier that’s hanging outside and makes this awesome ambiance for our porch or patio in the evenings when we’re hanging out there. We just need to remember that one person’s junk is another person’s treasure.
Balancing Creativity and Practicality
Trendey – What advice do you have on balancing creativity and practicality in home improvement projects?
Chas – Over the years, you collect things, and I developed a “use it or lose it” mentality. Losing it doesn’t mean throwing it away. It means finding a new home for it. I believe in finding a use for anything. Still, I am a practical girl, so when I look at something like that piece, I get the idea to spend more time with my family, so I decide to turn that into a chandelier, and I’m going to use it outside, so we are encouraged to sit outside. That maybe isn’t necessarily a necessity, but I did save it from going to the dump, and I did make something that I love.
When it comes to furniture, it is useful. Some things are decorative, too. If it sparks joy for you, that’s an important piece of it. Let’s say it’s summertime, and you have these dishes that you’ve found. You can make these thrift store flowers out of them. You glue them together, set them on something, and stick them in the ground. It’s practical to me because now I don’t necessarily have to waste a bunch of water on real flowers. I can create a different, unique look out there. To me, they brought as much joy as real flowers.
There are some other ways you can think outside the box. You can use things in a different way. If something got shipped to you, and it had a nice container or a box, you can add contact paper, Mod-Podge napkins to it, or spray paint it. You can turn those into beautiful closet or pantry organizers. You can take things like that and use them in other ways in your home just by changing the appearance of it. Yeah, each container is a little different looking, but if you decorate it, you can create a similar look across all of them to give you that kind of designer look on a budget while making it very useful in your home again.
Simple Outdoor DIY Projects
Trendey – Can you suggest some simple but effective DIY projects for outdoor spaces?
Chas – I love decorating my outside space. Again, you can take any candle holder or a chandelier and add solar lights to it and create a beautiful indoor living space outside.
If you have furniture, it gets weathered over time, and simple light sanding of that chipping paint or giving it a fresh coat of paint (maybe brightly colored) can fix things and help create a beautiful space.
Here’s one crazy idea that can work if you have a power washer. You can create different images or writing on your patio or concrete. Because cement is porous, dirt gets into it over time, and if you lay stencils down and spray over the top of the stencil with a power washer, it will wash the dirt off. When you lift that stencil, you’ll have this fun design on your patio. You can create beautiful tile floors or fun things (I’ve used it for a Happy Birthday on the tile). The design stays for a long time because it takes a while for it to get dirty again. It can create that look of a rug or a stamped space on a budget, and all you used was a power washer and some stencils.
Adding some pillows is another simple thing. I’ve made outdoor pillows out of dollar-store tablecloths, the kind that you’d use for picnicking. You just hot glue that together and insert a pillow. Now you’ve got outdoor pillows that give it that extra touch and make it look fancy. It was all on a budget, too.
The dish flowers are also great. I’ve taken old vintage dishes that grandma gave me, or I found at a thrift store and made bird feeders out of them. They look prettier than your typical non-pretty birdfeeder that you could pick up at the store. I’ve taken something and created a beautiful space by just gluing some things together.
Generating Ideas for Seasonal DIY Projects and Decor
Trendey – How do you come up with new ideas for seasonal DIY projects and decor?
Chas – Thrift stores are amazing for this because, over the course of the year, people get tired of certain seasonal decor, so you can get seasonal decor on a budget there sometimes. Just think outside the box. Spring is coming, for example, and maybe you find this super ugly ceramic bunny, but a coat of white spray paint will make it look like something you grabbed from Pottery Barn.
I’m also a big fan of the dollar store. I tend to decorate seasonally more than for a specific holiday. Instead of Halloween, I might decorate for fall because I can put something up in my home, and it’s going to stay up for three months, so I get more enjoyment out of it. One of the best things about fall, honestly, is pumpkins. You can also use pine cones, acorns, branches, and things you find outside for free and create a garland by gluing them to some twine. You can add some cinnamon essential oil to create that cinnamon smell with the pine cones in your home. Just make little bowls or vases and put those things in them to create this fall decor on a budget.
The same can be said for almost every holiday. You can go in your backyard or a park and look for leaves and things to create some great decor for free. I love taking leaves in the fall. If you Mod-Podge them, they hold the color, and you can hang them with a fish line, and they look like they’re falling. You can do that in different places in your home. If you have a dining room, you hang the leaves from the light, and then it looks like they’re falling over your table. Those are all almost practically free pieces of decor.
Organizing and Storing DIY Tools and Materials
Trendey – What are some effective ways to organize and store DIY tools and materials?
Chas – I’ll give you another example because everybody’s got space-saving issues. If you don’t think it’s something you’re going to use again, post it on Facebook groups or donate it to schools. I love to donate to schools or day camps and things like that because they often are on a budget and don’t have a lot of room for supplies.
I also take advantage of vertical space. I have a space that’s underneath my stairs. A lot of people who have stairways in their homes end up with this weird pocket closet. I bought a couple of rolling drawer crates, and I organized my tools into the drawer crates. When I need them, I wheel them out, and when I don’t need them anymore, I wheel them back in and store them inside that closet.
In the bottom half, I have a couple of those drawers for the tools. Above that, I’ve built vertical shelves to store my paints. Above those, I’ve used tension rods to hang different things, like paintbrushes. A lot of times, we think about putting furniture pieces in, but there are so many ways to create vertical space. I’ve used magnetic strips you can get at Ikea or Amazon, and your paintbrushes can stick to those, too, if you start running out of drawer space. I’ve even taken magnet hooks and stuck them to the magnet strip and hung stencils, stickers, or different things from that.
Think vertical, and you can hook baskets on with command hooks. I have a whole space that’s not necessarily for my craft supplies. We don’t have an entryway closet, so I put the command hooks above coat racks, and I grabbed four small bathroom-size dollar-store trash cans and hung them on the command hooks above everybody’s coats. Now we throw the hats and the gloves inside that. Before that, that wall was just an empty space.
Another great tip, especially if you’re crammed for space, is a shoe organizer. You can hang it on the back of the door. You don’t have to put shoes on it. You can put paintbrushes, markers, pens, and glue guns in it. Those pockets can be used to hold anything. I’ve used shoe organizers as a pantry. I’ve used shoe organizers in a bathroom. I’ve used them for my craft supplies. I’ve used them for so many things. They’re underutilized, for sure.
If you’re inspired by Chas Greener’s innovative approach to DIY and home improvement, be sure to connect with her on social media for more creative ideas and tips. Follow her journey and engage with her community through these platforms:
Picture this: You’re settling in for a movie night, only to find your neck craning awkwardly, or the sun’s glare wreaking havoc on your screen. The living room is the heart of your home, and the placement of your furniture – especially the TV – can make or break your relaxation haven.
This article will guide you on how to masterfully arrange your living room furniture to optimize your TV viewing experience. Dive in to discover practical steps, aesthetic considerations, and ergonomic principles that will transform your living room into a cinematic paradise.
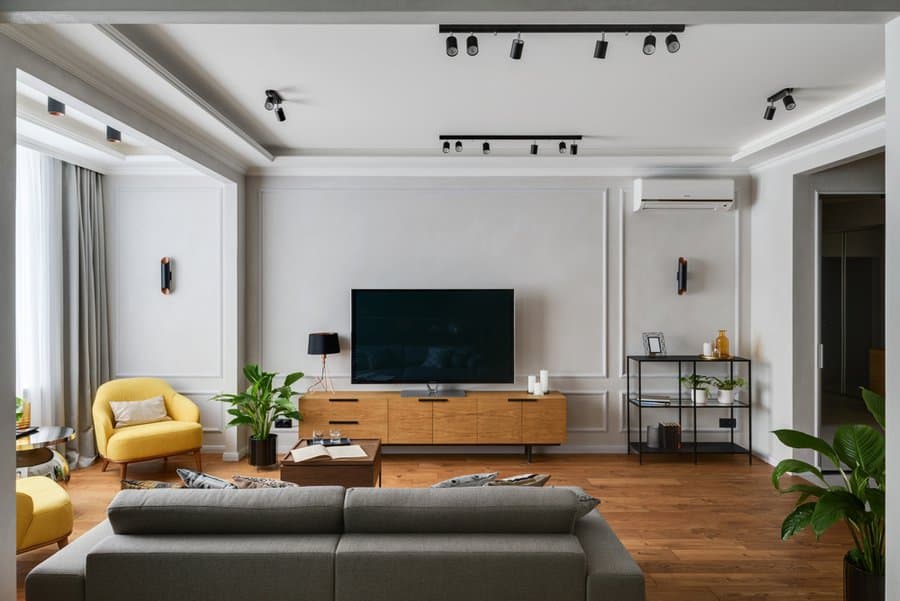
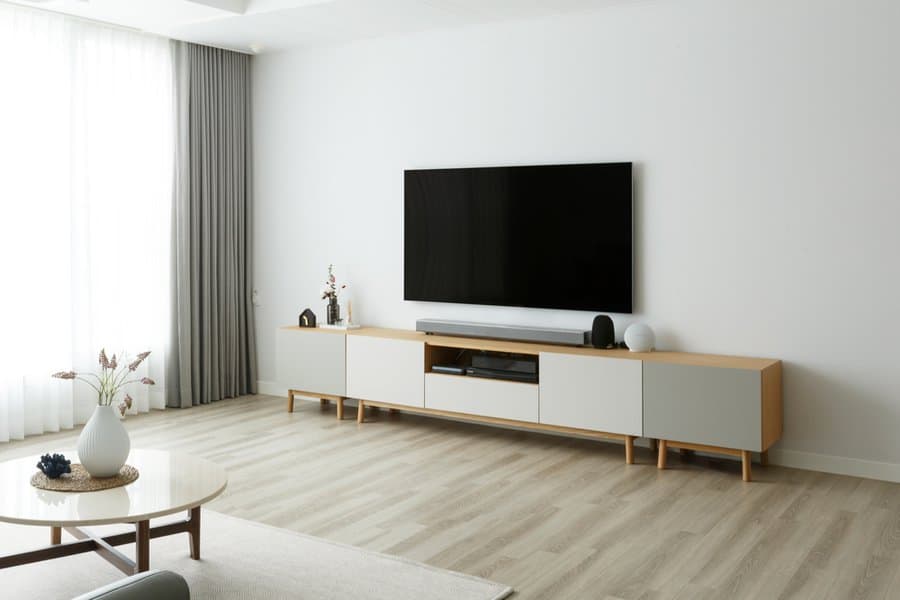
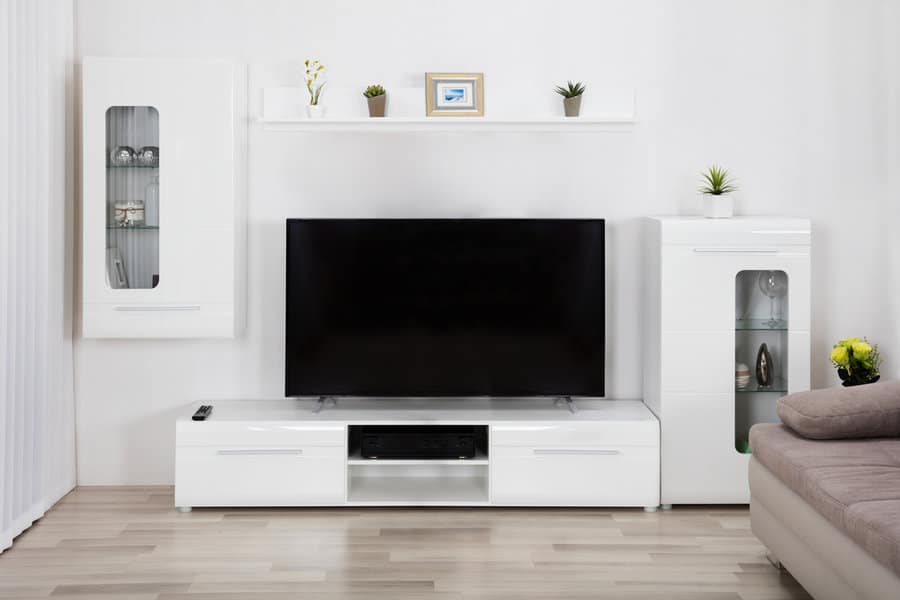
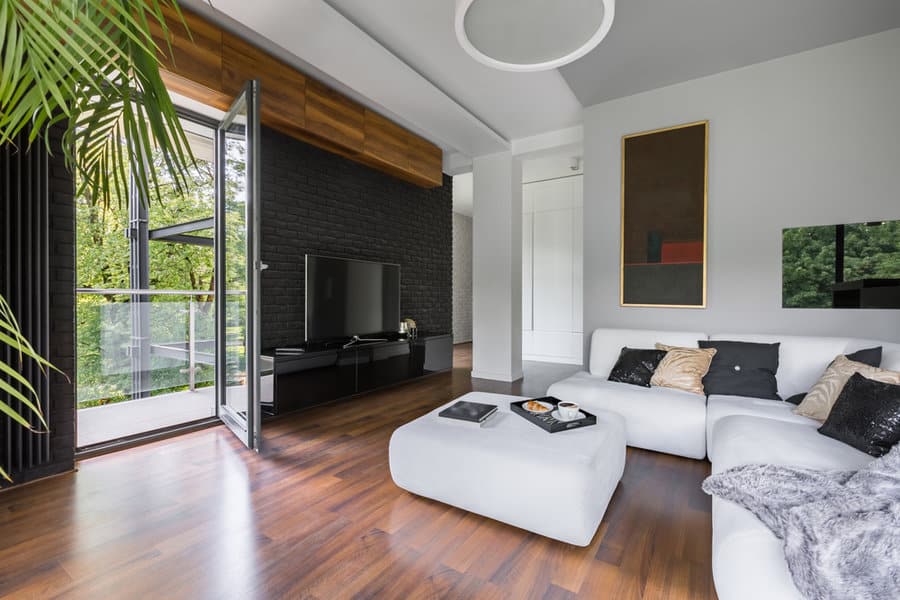
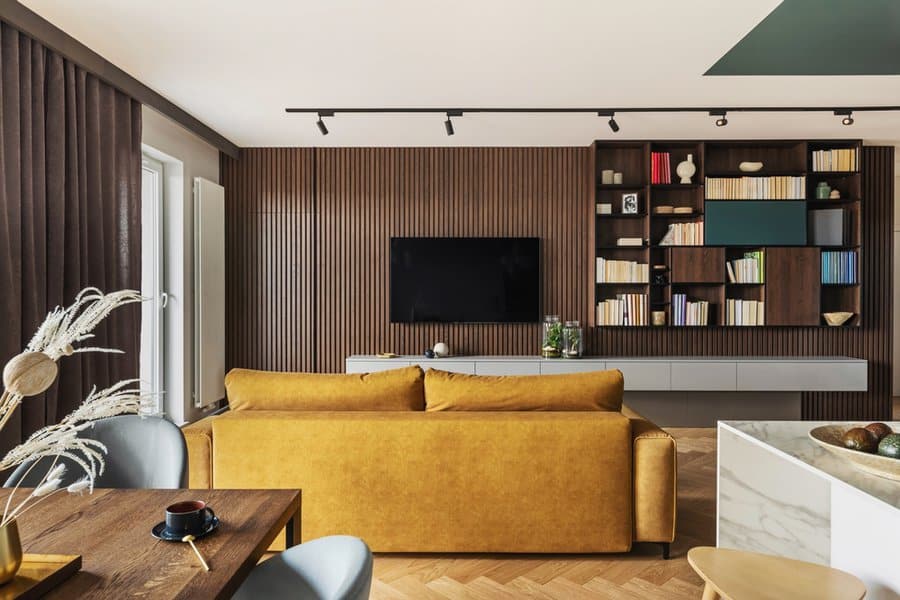
1. Establish the TV as the Focal Point
Ensure your TV is the central point of attention in your living room layout. This helps guide the rest of your furniture arrangement for optimal viewing and aesthetics.
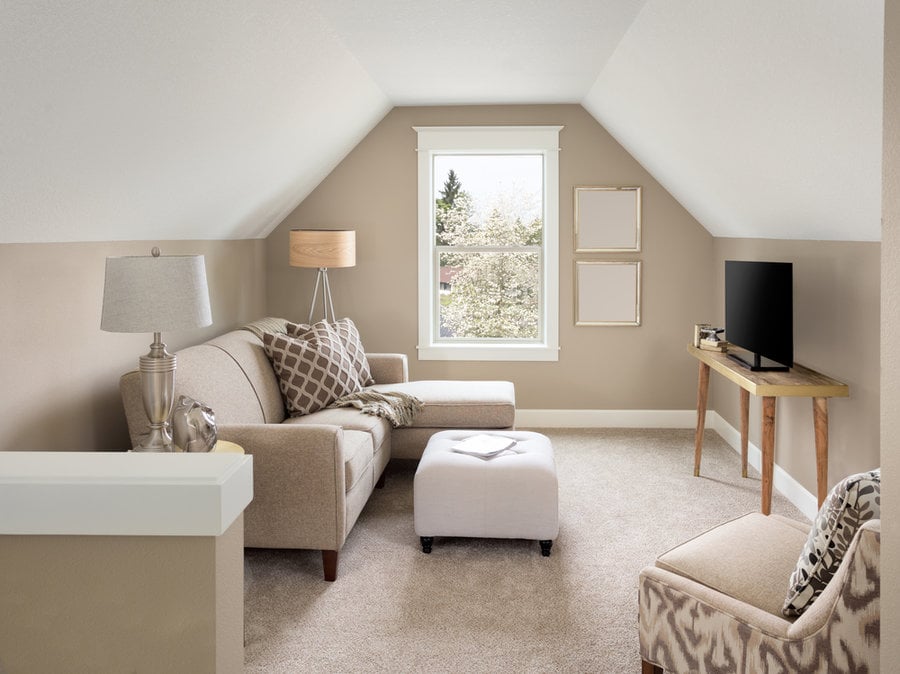
2. Seating Arrangement
Your primary sofa or couch should be directly opposite the TV for the best straight-on view. Side chairs or smaller seating should angle slightly towards the TV to keep everyone comfortably engaged.
3. Mind the Distance
Ensure there’s a proper gap between your seating and the TV. A too-close sofa can distort the viewing experience, while a too-far one can make details hard to catch.
4. Coffee Table Placement
Position your coffee table centrally between your sofa and TV. This not only supports snacks and drinks but also bridges the gap between the main seating and the screen.
5. Side Tables for Convenience
Place side tables next to armchairs or the ends of your sofa. They’re perfect for holding remotes, drinks, and decorative items without having to reach far.
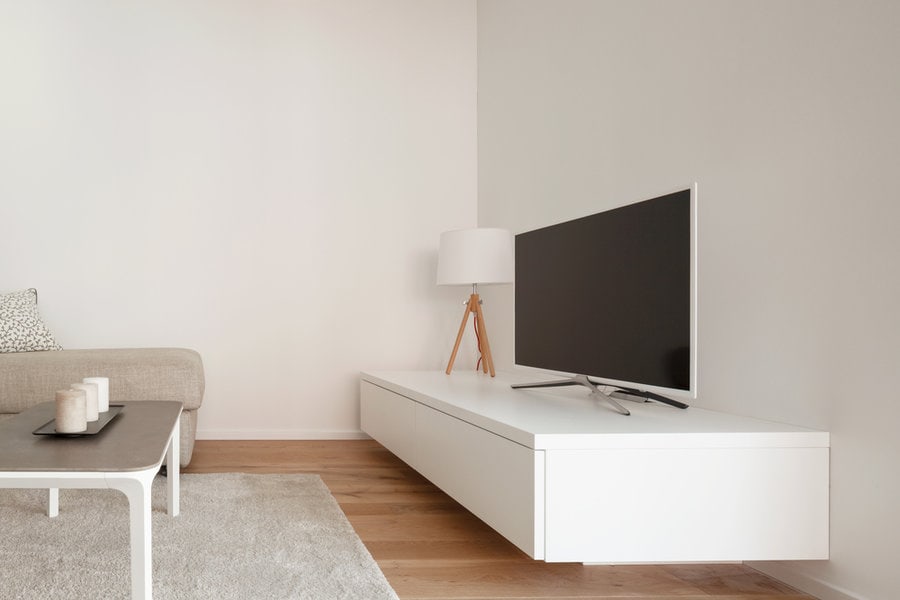
6. Shelving and Storage Units
If you have bookshelves or cabinets, place them perpendicular to the TV wall to avoid distractions. This can also provide a place to store media or display decorative items.
7. Use Rugs to Define the Area
A well-placed rug can delineate the TV watching area from the rest of the room, creating a cozy enclave for entertainment.
8. Opt for Slimline Furniture
If space is tight, choose slender furniture pieces that don’t overpower the room or obstruct viewing angles.
9. Multi-functional Pieces
Invest in furniture like ottomans or benches that provide storage. This keeps the room tidy, storing items like remotes, magazines, or blankets.
10. Leave Space Behind Sofas
Ensure there’s a bit of space behind your sofa, especially if it’s against a wall. This prevents the room from feeling cramped and allows for better air circulation.
11. Allow for Walking Paths
Arrange your furniture in a way that leaves clear paths for walking. This ensures the room remains functional and accessible.
12. Create Zones
If you have a particularly large living room, create zones. For instance, have a TV watching zone, a reading corner, and perhaps a gaming area. Use furniture to subtly demarcate these spaces.
High ceilings, while breathtaking and luxurious, can present unique challenges in interior design. Most homeowners grapple with striking the right balance between warmth and grandeur in such spacious rooms.
If you’ve ever wondered how to transform your cavernous space into a cozy haven without losing its architectural charm, you’re not alone.
This article unveils insightful tips for designing a living room with high ceilings, ensuring that every inch, from floor to ceiling, resonates with style and purpose. Dive in to explore ways to maximize aesthetics, maintain functionality, and create an ambiance that harmonizes with your personal taste.
[view_toc]
1. Scaling Furniture to Match Ceiling Height
In a living room with towering ceilings, dainty furniture can look out of place. Opt for larger, bulkier pieces that hold their own in such voluminous settings.
Consider sofas with taller backrests, chunky armchairs, or even grand bookshelves that stretch upwards.
However, while scaling up, ensure there’s a balance. Your aim should be furniture that complements the ceiling height without making the room feel congested.
Lastly, remember that visual balance is key. If you have an oversized coffee table, for instance, pair it with substantial sofas or chairs to ensure harmony in the design landscape.
2. Strategic Lighting: Layers and Vertical Dynamics
High ceilings offer a splendid canvas for lighting experiments. Begin by layering light sources to cater to the room’s verticality.
Downlights, pendants, chandeliers, and uplights can all play a role. A cascading chandelier can bridge the gap between the ceiling and the primary living space, drawing the eye and filling the vertical expanse.
Wall sconces or vertical light installations can accentuate the height while providing ambient light. Multiple light sources, controlled individually, also allow you to set the mood — bright and airy for the day, cozy and intimate for the night.
In spaces graced with high ceilings, walls can seem expansive and intimidating. However, they’re also a golden opportunity to make a visual statement.
Start by considering tall pieces of art or tapestries that can anchor the space. These pieces shouldn’t just be broad but elongated, guiding the viewer’s eyes upward.
If one significant piece feels overpowering, consider a vertical gallery wall, stacking artworks or photographs from floor to ceiling. This arrangement can lend a dynamic, curated feel to the room.
Moreover, when selecting frames, colors, and themes, ensure they align with the room’s overall design language. You want the art to feel integrated, not isolated. Mixing textures, such as metal wall sculptures with painted canvases, can also add depth and intrigue to your vertical space.
4. Incorporating Tall Plants and Trees
High-ceilinged rooms provide an ideal setting for showcasing impressive indoor trees and plants. Embracing these natural elements can transform your space into an urban oasis.
The Bird of Paradise stands tall with its sculptural leaves, making it a perfect choice for vertical appeal. The Dracaena, with its long, slender trunk and tufted top, is another option that can reach considerable heights.
Palm trees, like the majestic Kentia Palm or the fan-like Lady Palm, introduce a touch of the tropics and can grow tall, filling in those vertical gaps nicely.
Don’t forget about the Bamboo plant which can add a touch of Zen while embracing the room’s height. And, if you’re looking for something a tad unconventional, consider the Norfolk Island Pine, an indoor-friendly tree that brings a hint of the forest into your living room.
5. Utilizing Statement Ceiling Fixtures
The vast expanse of a high ceiling provides a unique opportunity to make a bold statement with ceiling fixtures. When chosen thoughtfully, these elements not only serve their functional purpose but become show-stopping centerpieces.
First, think grand chandeliers. These aren’t just for classic or traditional spaces. From intricate crystal designs to sleek, modern geometric forms, there’s a chandelier to match every style.
Next, consider pendant lights. Grouping them in clusters or arranging them at varying heights can create a visually captivating cascade effect. Opt for designs that complement the room’s aesthetics, whether that’s minimalist cone pendants or opulent, globe-shaped ones.
Also, explore architectural fixtures like coffered ceilings or wooden beams. These not only add texture and depth but can also help visually segment and define the vast ceiling space.
6. Balancing Negative Space: Tips on Upper Wall Design
The upper sections of walls in rooms with high ceilings can sometimes feel barren or disconnected. Addressing this negative space is crucial for creating a cohesive and inviting atmosphere.
Floating shelves are a fantastic tool. When mounted higher up, they can house decorative elements, sculptures, or books, drawing the eye and providing visual interest in often-neglected areas.
Consider architectural moldings or trim work. These can segment vast wall expanses, creating zones or frames for art or other decorative elements. They also add layers of texture and sophistication to the room.
Wallpaper or wall decals can be employed strategically. Using patterns or murals that play with verticality can elongate the space further while filling it with engaging visuals. Consider designs that have gradients or upward-reaching motifs.
7. Eye-Level Interest: Keeping Cohesiveness from Bottom to Top
With high ceilings, there’s a risk of the design feeling disjointed, where the lofty heights steal the show and the immediate eye-level area feels overlooked. To maintain cohesiveness, it’s vital to bridge the gap between the floor and the ceiling.
Start with strategically placed mid-height furniture like credenzas, sideboards, or console tables. These pieces can anchor the room and offer surfaces for decorative elements like vases, sculptures, or photo frames.
Mirrors are invaluable tools in these spaces. Vertical or horizontally-oriented mirrors at eye level can reflect light, add depth, and tie together the room’s upper and lower regions.
Consider creating a focal wall, maybe with a fireplace, textured panels, or a large painting. This not only draws the eye but offers a grounding element in the midst of towering walls.
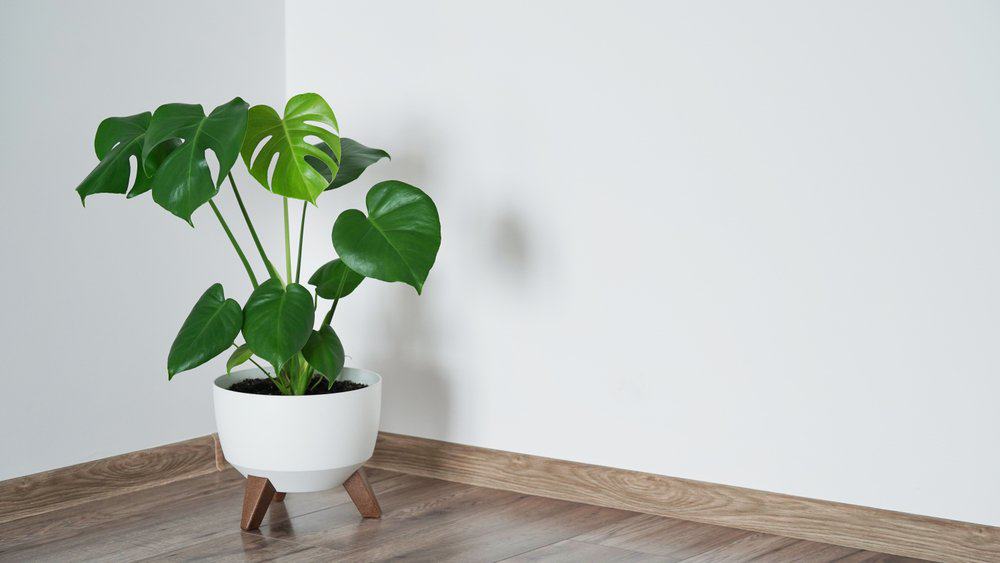
Utilize plants of varying heights. While we’ve discussed taller trees, don’t neglect medium-height plants like monstera, pothos, or snake plants. Positioned on stands or tables, they can seamlessly bridge the vertical design gap.
8. Multi-Level Shelving and Display
When dealing with high ceilings, multi-level shelving becomes a powerful design asset, effectively using vertical space while offering functionality and aesthetic appeal.
Start by considering floor-to-ceiling bookshelves. Not only can they house your literature collection, but they also provide niches for decorative items, framed photos, and potted plants. Varying the shelf heights or including cabinets can break the monotony and introduce rhythm.
Modular shelving systems are adaptable and can be customized to fit the room’s dimensions and design ethos. Whether you prefer a minimalist metal frame or a rustic wooden look, these systems can be tailored to your needs.
Display platforms or staggered shelving can create visual intrigue. By having some shelves protrude more than others or vary in width, you introduce depth and a dynamic quality to the space.
9. Drapery Solutions for Tall Windows
Tall windows are a hallmark of rooms with high ceilings, offering abundant light and a sense of grandeur. However, they demand special attention when it comes to drapery, ensuring both aesthetics and functionality are in harmony.
Selecting extended curtain rods that stretch wider than the window frame can create an illusion of even larger windows, further emphasizing the room’s verticality.
Floor-to-ceiling drapes are a must. Not only do they underscore the room’s height, but they also provide an elegant and continuous visual flow. Materials like velvet or heavy linen can offer a luxurious feel, while sheer, breezy fabrics can maintain an airy ambiance.
Layering is key. Using a combination of sheer drapes for daytime privacy and heavier, opaque curtains for night can ensure versatility. This dual approach also adds depth and texture to the window space.
10. Cozying Up: Textures and Materials for High Spaces
High ceilings, while majestic, can sometimes impart a feeling of coldness or detachment. Introducing varied textures and materials is key to warming up the space, making it feel intimate and welcoming
Rustic wooden beams or paneled ceilings can instantly add warmth. The raw, earthy texture of wood contrasts beautifully with the openness of a high ceiling, offering both visual and tactile comfort.
Wall textures, like exposed brick or decorative plaster, can elevate the cozy quotient. These tactile surfaces can reduce the starkness often associated with towering walls.
Incorporate plush rugs or carpets. Soft underfoot, they not only delineate spaces within the room but also introduce a snug and comforting layer.
Soft furnishings like velvet cushions, chunky knit throws, or tufted ottomans can break the room’s vastness, making it feel more approachable and cozy.
Lastly, natural materials like stone, rattan, or jute can be integrated through decorative items, furniture, or wall accents. Their organic feel can counteract the room’s imposing size, bringing it down to a more human scale.
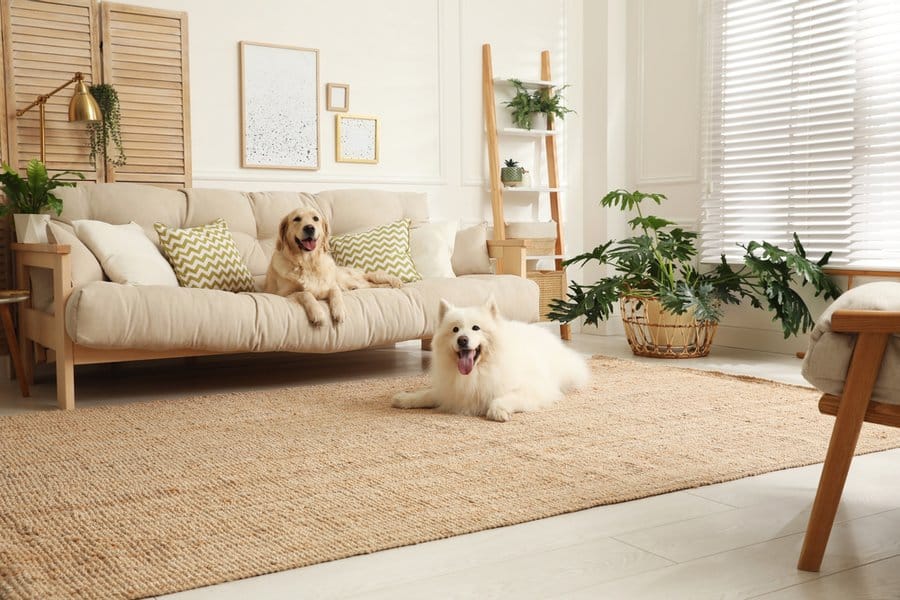
Ever walked into a room only to find your prized sofa chewed up or a beloved plant knocked over by your furry friend?
Designing a space that’s both chic and pet-friendly might seem like chasing a tail, but it’s more attainable than you think. Many homeowners struggle to strike a balance between a stylish living room and one that can withstand the playful antics of their pets.
This article serves as your guide to creating a living room that’s not only visually appealing but also a haven for your four-legged family members. Dive in to discover design tips, durable materials, and creative solutions that harmonize style with the spirited nature of pets.
[view_toc]
1. Understand Your Pet’s Behavior and Needs
Each animal has its quirks, habits, and preferences, whether it’s a favorite lounging spot or a tendency to scratch certain surfaces. By recognizing these patterns, you can make informed choices about furniture placement, material selection, and other design elements. This proactive approach ensures that the room not only looks appealing but also aligns with your pet’s natural instincts and behaviors.
2. Choose Pet-Friendly Materials for Your Furniture
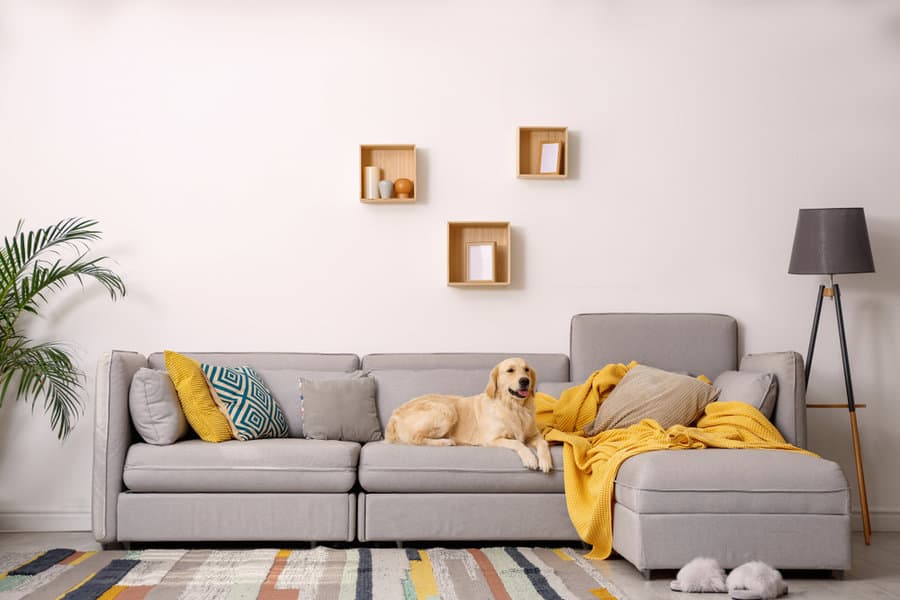
Choosing pet-friendly materials for your furniture is crucial in ensuring longevity and ease of maintenance. Opt for durable and easy-to-clean fabrics like microfiber or leather, which resist scratching and are simple to wipe down. Materials like tightly-woven fabric can prevent pet hair from sticking too easily. Additionally, selecting furniture with darker hues or patterns can help camouflage minor stains or pet hair.
3. Incorporate Easy-to-Clean Rugs and Flooring
Hardwood, laminate, and tiles are some of the best flooring options as they can be swiftly wiped down in case of spills or accidents. When it comes to rugs, consider those made from synthetic fibers like polypropylene or nylon; they are known for their durability and stain resistance. Additionally, low-pile rugs are easier to vacuum and less likely to trap pet hair compared to shaggy, high-pile rugs.
4. Opt for Functional and Stylish Storage Solutions
Multi-purpose furniture, like ottomans with hidden storage or built-in shelves, allows homeowners to store pet toys, leashes, and grooming tools without compromising on aesthetics. Wall-mounted cubbies or decorative baskets can serve as stylish storage spots, keeping essentials within reach yet out of sight. By integrating these smart storage solutions, you ensure that everything has its place, making the living space both orderly and pet-accommodating, while also adding an element of design sophistication.
5. Invest in Protective and Washable Throws
These throws act as a barrier, shielding sofas, chairs, and beds from potential stains, fur, and wear and tear caused by pets. Being washable, they can be easily cleaned, ensuring that any pet-related messes are dealt with swiftly. Moreover, throws come in various colors, patterns, and textures, allowing homeowners to choose options that complement their décor.
6. Select Non-Toxic Plants and Decor
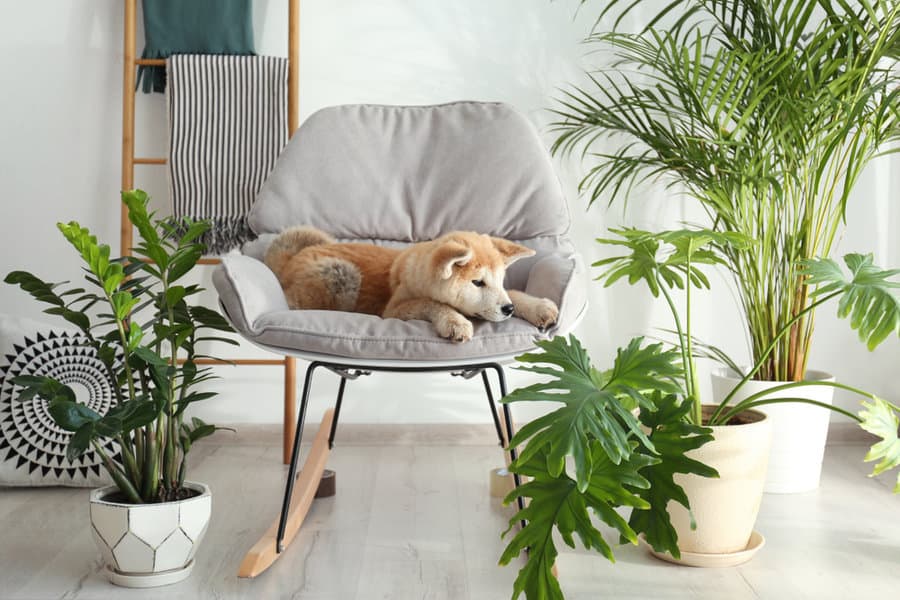
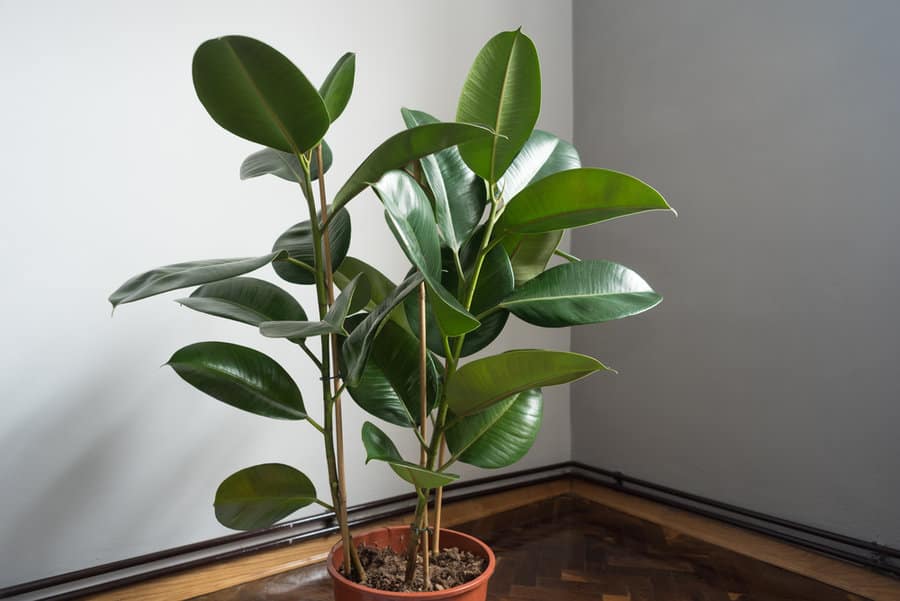
Many popular houseplants, although visually appealing, can be harmful or even fatal if ingested by curious pets. Harmful plants for pets include popular choices like poinsettias, lilies, and oleander, which can cause a range of symptoms from gastrointestinal upset to more severe reactions when ingested by pets, especially cats and dogs. On the other hand, pet-friendly plants that homeowners can safely incorporate into their living spaces include the rubber plant, haworthia, and the money tree.
It’s essential to cross-reference any plant additions with a trusted source or consult a veterinarian to ensure the well-being of pets in a plant-filled environment.
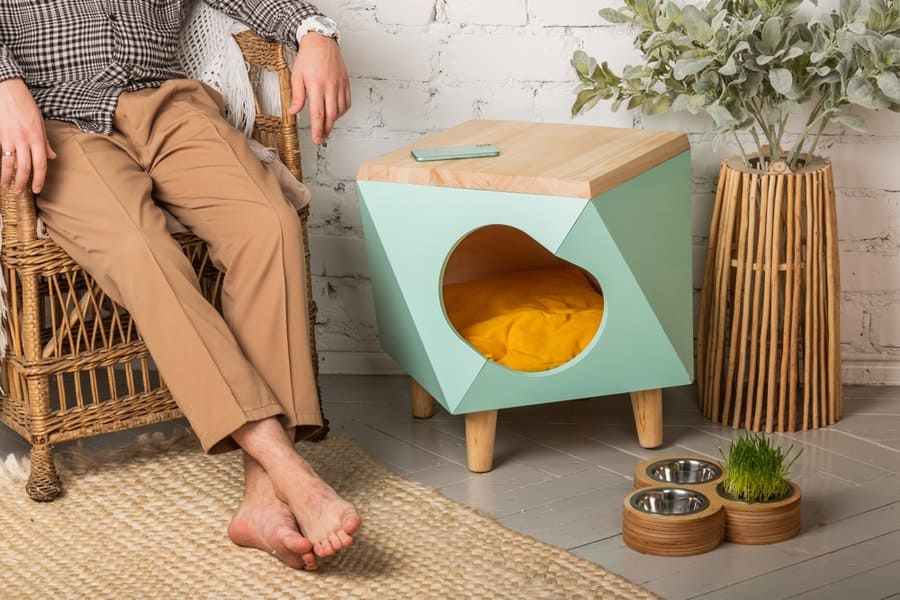
7. Prioritize Safe and Cozy Corners for Relaxation
Pets, much like us, need their own designated spaces to retreat, relax, and feel secure. By setting up a dedicated pet nook with soft bedding, cushions, and perhaps a few favorite toys, you not only provide them with a sense of belonging but also minimize their temptation to claim other furniture. These corners can be stylishly integrated into the room’s design, using complementary colors and textures.
8. Keep Cables and Wires Out of Paw’s Reach
Keeping cables and wires out of paw’s reach is crucial to ensure both the safety of your pets and the functionality of your electronic devices. Here’s how:
Cable Management Boxes: These are containers designed to house power strips and tangled wires. They not only keep the cables organized but also hidden from curious pets.
Cable Sleeves or Wraps: Made from durable materials, these wraps encase multiple cables, consolidating them into a single, less tempting bundle. They can be particularly helpful in deterring pets from chewing.
Cable Concealers: These are typically plastic channels that adhere to walls or baseboards. They hide and protect cables from being bitten or tripped over.
Use Furniture Strategically: Arrange furniture in a way that hides cables behind or underneath them.
Taste Deterrents: There are sprays available that taste bitter or unpleasant to pets. Spraying these on cables can deter most pets from wanting to chew on them.
9. Use Elevated Shelves for Delicate Items
Elevated shelves, positioned above the jump or reach of pets, are ideal for displaying fragile decor, collectibles, or plants that might be toxic if ingested. By placing these items high up, you minimize the risk of them being knocked over by an energetic tail wag or a playful pounce. Wall-mounted or floating shelves can serve this purpose beautifully, blending functionality with aesthetics.
10. Embrace Furniture with Sturdy and Stable Bases
Energetic pets, particularly larger breeds, can unintentionally bump into or attempt to climb on furniture, risking toppling lighter pieces or causing breakage. Furniture with a solid, broad base, such as sofas with thick legs or coffee tables with a weighty foundation, are less likely to be moved or tipped over by your pet’s antics. Furthermore, opting for such robust designs ensures a longer lifespan for your furnishings, reducing the wear and tear that can come from the hustle and bustle of an active pet.
11. Implement Durable Window Treatments
Pets, especially cats, may be inclined to play with, climb, or even chew on flimsy curtains or blinds. To counteract this, opting for heavy-duty materials like thick drapes, or durable blinds and shutters, can withstand such behaviors. Additionally, cordless window treatments are a safer option, as traditional cords can pose a strangulation risk or become a tempting toy for pets.
12. Add Pet Amenities that Complement Your Décor
Consider selecting pet beds, toys, and feeding stations that match the color palette and aesthetic of your living room. Modern design trends even offer chic pet furniture that seamlessly blends with contemporary home décor, such as sleek cat towers or minimalist dog beds. Elevated feeding stations can double as stylish side tables, and woven toy baskets can complement rustic or boho themes.
The ancient Chinese art of Feng Shui suggests that the arrangement of objects and spaces can deeply affect our well-being, mood, and even our prosperity. This age-old practice emphasizes harmony between humans and their environment, and the living room, where we spend a significant amount of our time, is no exception.
In this article, we’ll delve into practical steps and insightful tips to Feng Shui your living room, ensuring it not only looks aesthetically pleasing but also resonates with positive energy and balance.
[view_toc]
1. Clear the Clutter
In Feng Shui, stagnant energy is often associated with clutter. A cluttered living room can disrupt the flow of chi (energy), leading to feelings of stagnation, confusion, and stress. Maintaining a clear, organized space promotes positivity, clarity, and a refreshing ambiance, essential for harmonious living.
To effectively declutter, start by systematically going through each item in your living room. Separate items into categories: keep, donate, recycle, or throw away. Once you’ve streamlined your belongings, invest in storage solutions that keep essentials accessible but out of sight. This could include decorative baskets, cabinets, or shelves. Committing to regular decluttering sessions—say, once every few months—ensures your living room remains an oasis of calm and balanced energy.
2. Prioritize Natural Light
In the realm of Feng Shui, natural light is a powerhouse. Sunlight not only revitalizes living spaces but also infuses them with positive energy. A well-lit room exudes warmth, optimism, and encourages an upbeat mood. It’s essential, then, to make the most of the daylight pouring into your living room.
To harness the full potential of natural light, consider sheer curtains or blinds that filter rather than block the sunlight. They provide privacy without creating a barrier to the sun’s nurturing rays. Additionally, positioning mirrors directly across from windows can reflect and amplify light throughout the room, making spaces seem brighter and larger. Regularly clean windows and mirrors to ensure they’re letting in and reflecting as much light as possible.
3. Position Your Furniture Thoughtfully
The arrangement of furniture plays a pivotal role in Feng Shui. A well-thought-out layout ensures the seamless circulation of chi, promoting a feeling of balance and relaxation. Conversely, haphazardly placed furniture can create blockages, causing energy to stagnate, which can lead to feelings of unease or restlessness.
The “command position” is a fundamental Feng Shui principle. In your living room, the main seating, like sofas, should ideally face the door but not be directly in line with it. This position offers a sense of security and control, allowing one to easily see the entrance. It’s also crucial to avoid creating barriers with furniture. For instance, don’t place a large sofa in the middle of the room, blocking the flow from the entrance. Instead, ensure there are clear pathways and open spaces, allowing energy to circulate freely and invitingly.
4. Incorporate the Five Elements
Feng Shui emphasizes the balance of five elements: Wood, Fire, Earth, Metal, and Water. Each brings unique energy, shaping the ambiance of a space.
Wood: Symbolized by wooden furniture or plants, it radiates growth. A simple wooden shelf or potted plant infuses vitality.
Fire: Exemplified by candles or red decor, it denotes warmth. A few red throw pillows or candles can evoke its essence.
Earth: Reflecting stability, it’s captured in earth-toned decor or ceramics. A beige rug or clay pot adds grounding energy.
Metal: Representing clarity, it’s highlighted with metallic items or white shades. Consider metallic frames or white vases.
Water: Mirrors or blue tones embody its emotional depth. A tabletop fountain or blue decor encapsulates its spirit.
Incorporating these elements is about harmony, ensuring no element overshadows another, resulting in a unified, positive space.
5. Choose Colors Wisely
Colors in Feng Shui are more than mere aesthetic choices; they’re channels of energy that can influence mood, well-being, and the ambiance of a space. Each hue resonates with a particular vibration and energy, making it essential to select colors that align with your intentions for the room.
Earth Tones (Beige, Light Yellow, Sandy Browns): These shades instill a sense of grounding, stability, and nurturing. They’re ideal for creating a calming environment, making them great choices for main wall colors or large furniture items.
Wood Colors (Green, Teal): Representing growth and vitality, green hues rejuvenate and bring a sense of renewal. Incorporate them through plants, wall art, or cushions to promote healing energy.
Fire Colors (Red, Bright Orange, Purple): Energetic and dynamic, these colors stimulate activity and passion. Use them sparingly, like in accent pieces, to invigorate the space without overwhelming it.
Metal Colors (White, Metallics, Pastels): Signifying clarity and joy, metal-associated colors bring a sharp, clean energy. Think of white walls, metallic fixtures, or pastel decor.
Water Colors (Blue, Black): These colors offer a deep, introspective energy, fostering wisdom and relaxation. Incorporate them in artwork, rugs, or throw blankets.
Remember, balance is key. Your living room should reflect a harmonious blend of colors that not only appeal to your aesthetic sense but also promote the desired energy flow.
6. Balance Yin and Yang
Feng Shui’s essence lies in the balance of Yin and Yang—representing life’s dualities.
Yin, characterized by softness and coolness, can be enhanced in a living room through plush rugs, muted colors, and ambient lighting. A cozy chair corner encapsulates this calming energy.
On the other hand, Yang, signifying brightness and warmth, shines through in vibrant colors, sharp-edged decor, and materials like glass or polished wood. Bright wall art emphasizes its dynamic nature.
When designing, gauge your room’s natural tone. If it’s brightly lit with hard surfaces, it may need Yin touches, and vice versa. The goal is a living room that’s both rejuvenating and serene.
7. Use Mirrors Strategically
In Feng Shui, mirrors are powerful tools for reflection and amplification. Properly placed, they can magnify positive energy, expand confined spaces, and redirect chi. However, when mispositioned, they might scatter good vibes or even magnify negatives.
To harness their positive potential, mirrors should reflect scenic views or attractive decor, like an indoor plant, thereby enhancing the room’s energy. Yet, it’s vital they don’t capture sources of negativity, such as clutter or bathrooms. Mirrors placed directly opposite each other can cause energy whirlwinds, leading to unease. In compact living rooms, mirrors can open up the space, offering an airy feel.
However, avoid mirrors reflecting the main door; they might push out positive energy. If light is limited, a strategically placed mirror can brighten the ambiance. Lastly, opt for round or oval mirrors, their gentle curves promote a smooth chi flow.
8. Introduce Living Plants
Living plants breathe life into indoor spaces, aligning with Feng Shui principles to radiate vibrant chi, health, and vitality. Beyond beautifying a room, they purify the air, absorbing toxins, and releasing oxygen. This natural filtration fosters tranquility, reduced stress, and a deeper connection to nature.
Among the plants that resonate with Feng Shui, bamboo stands out, symbolizing luck and resilience. The elegant Peace Lily not only purifies the air but exudes serenity. Snake Plant acts as a guardian against negative vibes, while the Rubber Plant’s round leaves are associated with wealth. The sturdy Ficus represents growth and prosperity. While integrating these green companions, ensure they get proper light and aren’t cramped or obstructing pathways. A flourishing plant, when placed thoughtfully, becomes a beacon of positive energy and aesthetic charm.
9. Avoid Sharp Corners and Edges
In the realm of Feng Shui, sharp corners and edges, dubbed “poison arrows,” are seen as conduits of disruptive energy, or sha chi. They can inadvertently introduce unease or even discord in a space. Think of chi as water: when it encounters sharp objects, its flow becomes disturbed, much like a stream hitting jagged rocks.
Addressing these “poison arrows” is about smoothing energy flow. Placing tall plants like bamboo near aggressive corners disperses sharp energy. If a furniture edge is problematic, a decorative screen or room divider can buffer its effect. Flowing drapes can cloak sharp architectural features, and furniture with gentler curves, such as a round coffee table, is preferable to its edgier counterparts. For dangerous corners, especially at head level, decorative or functional covers can be a stylish remedy. The goal isn’t an edge-free room but a space where energy flows undisturbed.
10. Incorporate Feng Shui Symbols
Traditional Feng Shui is rich with symbols that carry profound meanings and are believed to attract specific energies into a space. Icons like the laughing Buddha, dragon, or koi fish are not only decorative but also potent reminders of the values, aspirations, and energies they represent.
Laughing Buddha: A symbol of happiness, contentment, and prosperity, the Laughing Buddha is often placed facing the entrance of a home to welcome positive energy. However, in the living room, he can be positioned on a prominent shelf or table, always off the floor, to invite joy and abundance. Rubbing his belly daily is believed to bring good luck!
Dragon: Representing power, strength, and good fortune, the dragon is a powerful Feng Shui enhancer. It’s best to place the dragon in the east section of your living room for health or the southeast for wealth. Ensure it’s not positioned too high, and it should never face outwards directly from a door or window.
Koi Fish: Symbolizing abundance, perseverance, and success, the koi fish is often depicted in paintings or sculptures. A painting of koi fish in the living room, especially near the entrance, is believed to bring in waves of good luck and prosperity.
When integrating these symbols, it’s essential to place them with respect and intention. While they enhance the Feng Shui of a space, their placement should also resonate personally, ensuring that they harmoniously blend with the room’s aesthetics and your personal beliefs.
Have you ever walked into a room and felt an immediate sense of warmth and vibrancy, but couldn’t quite put your finger on why? The secret might just be in the greenery! A lifeless living room can easily be transformed into a serene sanctuary with the right choice of plants.
In this article, we will delve into the world of houseplants that not only thrive in living room conditions but also elevate its aesthetic appeal. Expect a curated list of plants that promise to bring your living space to life, coupled with care tips to ensure they flourish. Dive in and discover the power of green to redefine your living space!
[view_toc]
1. Monstera Deliciosa
Position: Place it near a window where it can receive indirect sunlight. It can handle some shade but thrives best with dappled sunlight.
Growth: Monstera is a fast grower, especially in its prime growing seasons of spring and summer. Mature plants can reach several feet in height, depending on the available space.
Complementing with Furniture: With its distinctive split leaves, the Monstera becomes a focal point. Position it next to a neutral-colored sofa or against a white wall for a pop of greenery. Its tropical vibe goes well with wooden or rattan furniture.
Maintenance and Care: Water once the top 1-2 inches of soil feels dry, typically once a week. Reduce watering in the colder months. It appreciates a well-draining potting mix. As for light, bright to medium indirect light is ideal. Direct sunlight can scorch its leaves.
Other Aspects: Monstera’s leaves tend to grow towards the light, so rotate the pot regularly for even growth. If it grows too large, consider staking or using a support to help the plant maintain its shape. Pruning older leaves or aerial roots helps to manage its size. Remember, this plant can be toxic if ingested, so keep it away from pets and children.
2. Fiddle Leaf Fig
Position: Choose a bright spot in your living room, preferably close to a window that receives consistent light. Avoid places with drafts or rapid temperature fluctuations.
Growth: Fiddle Leaf Figs can grow tall, with mature indoor plants reaching up to 10 feet or more. However, their growth rate is moderate, and their height can be controlled with occasional pruning.
Complementing with Furniture: Given its statement-making large, glossy leaves, it pairs beautifully with minimalist, modern furniture. Place it against a muted color backdrop or next to sleek furnishings to let its grandeur shine.
Maintenance and Care: These plants thrive in bright, indirect light. Direct sunlight can burn the leaves. Water when the top inch of the soil feels dry. Ensure adequate drainage to prevent root rot. A well-draining soil mix is ideal.
Other Aspects: Fiddle Leaf Figs are known to be a bit finicky. They don’t like being moved often and can drop leaves if exposed to draft, low light, or inconsistent watering. Dust the leaves occasionally to ensure they can photosynthesize efficiently. Like the Monstera, the Fiddle Leaf Fig can be toxic if ingested, so it’s wise to keep it away from pets and children.
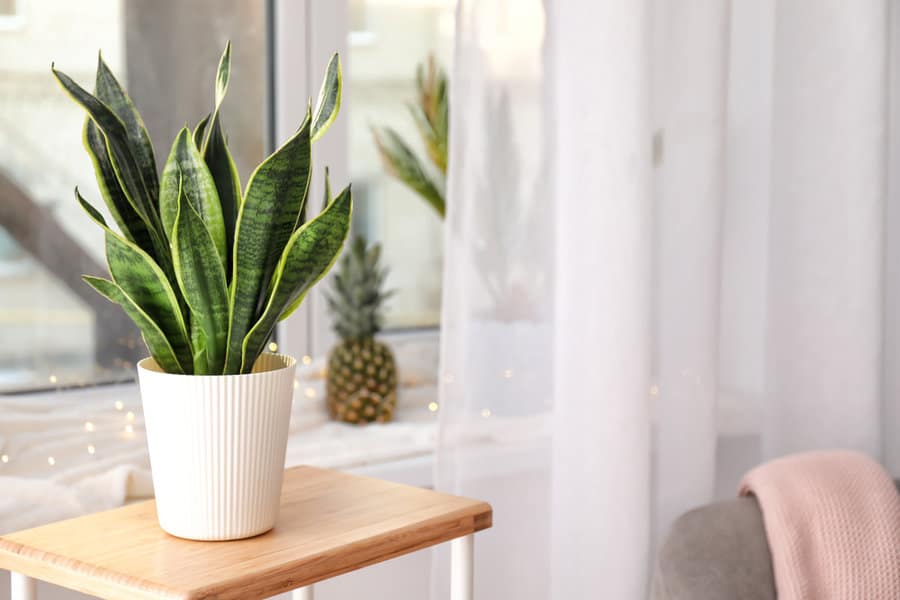
3. Snake Plant
Position: One of the most versatile plants in terms of placement. It can tolerate low light conditions, making it perfect for spaces away from windows or in dimmer corners. However, it also thrives in brighter spots.
Growth: Snake plants grow vertically, with some varieties reaching up to 4 feet. They have a moderate growth rate and can expand outward with new shoots at the base.
Complementing with Furniture: Its upright growth pattern and architectural leaves lend a modern touch. It complements both contemporary and traditional furnishings. Pair with metallic accents or geometric-patterned rugs for a sleek look.
Maintenance and Care: Water sparingly. The snake plant is drought-tolerant and prefers to dry out between waterings. Overwatering is its nemesis and can lead to root rot. Bright, indirect light is ideal, but as mentioned, it’s forgiving of lower light conditions.
Other Aspects: An added benefit of the snake plant is its ability to purify indoor air. It’s one of the few plants that convert CO2 into oxygen during the night, making it an excellent choice for bedrooms as well. Furthermore, its hardy nature makes it a favorite for beginners. However, it’s worth noting that snake plants can be toxic if ingested, so they should be positioned out of reach of pets and young children.
4. ZZ Plant
Position: ZZ Plants are adaptable and can be placed in a variety of locations, from low-light corners to spots with bright, indirect sunlight. Avoid direct sun, which can scorch its leaves.
Growth: The ZZ Plant has a moderate growth rate, usually reaching a height of 2-3 feet indoors. Its dense, dark green leaves grow on stems that can become thick and woody with age.
Complementing with Furniture: Its glossy leaves and upward growth add elegance to any space. The ZZ Plant pairs well with both contemporary and rustic furniture. Its shine contrasts beautifully with matte finishes or softer textiles.
Maintenance and Care: This plant is drought-tolerant, so it’s better to under-water than over-water. Let the soil dry out between waterings. As for light, it’s tolerant of a range but prefers bright, indirect light.
Other Aspects: The ZZ Plant is notorious for its resilience. It can thrive in challenging indoor conditions, making it perfect for those who might not have the greenest thumb. Its rhizomes store water, so occasional neglect won’t harm it. However, all parts of the ZZ Plant are toxic when ingested, so it’s important to keep it away from pets and children.
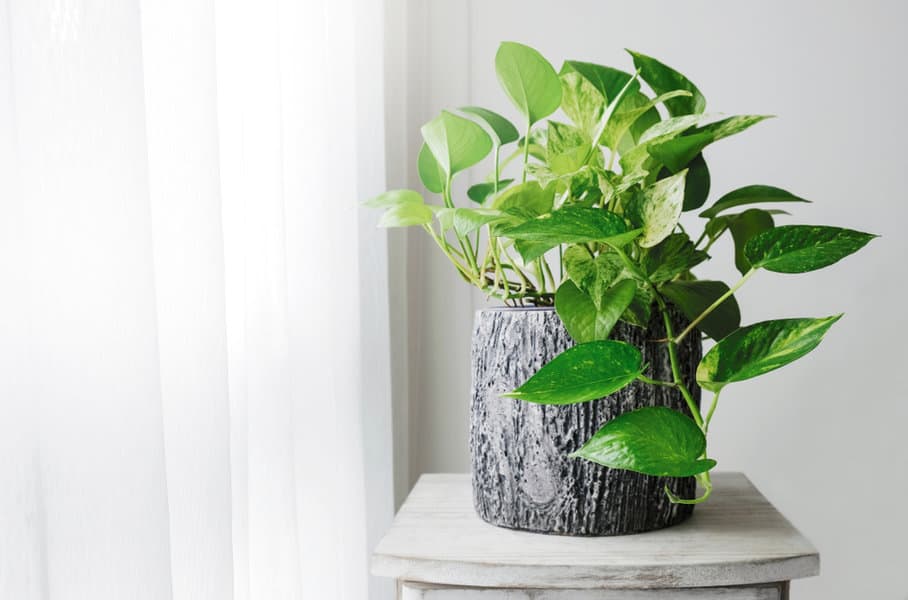
5. Pothos
Position: Pothos is flexible with its light needs. While it enjoys bright, indirect light, it’s also tolerant of low light conditions. Hang or position it near a window, or let it cascade from a bookshelf or high ledge.
Growth: Pothos is a trailing plant with vines that can stretch up to 10 feet or longer indoors. Its growth rate is quite vigorous, especially in favorable conditions.
Complementing with Furniture: Given its cascading nature, Pothos adds a soft touch to sharp-edged furniture. Drape its vines over shelves, or place it on top of a tall cabinet. Its green and yellow variegated leaves can break the monotony of monochrome spaces.
Maintenance and Care: Water when the top inch of soil is dry. Pothos isn’t too fussy about its watering schedule, but it doesn’t like sitting in water. Ensure the pot has proper drainage. As for light, it’s adaptable but thrives in medium to bright indirect light.
Other Aspects: One of the easiest houseplants to care for, Pothos is also known for its air-purifying qualities. It can help remove indoor pollutants like formaldehyde. However, it’s essential to note that Pothos is toxic when ingested, so keeping it out of reach from pets and children is advised. If you wish for a bushier look, pinch back the growing tips occasionally.
6. Spider Plant
Position: The Spider Plant prefers bright, indirect light, so placing it near a window but shielded from direct sunlight is ideal. It’s also well-suited for hanging baskets given its arching leaves and baby plantlets.
Growth: With slender, arching leaves, mature Spider Plants can span 2-3 feet. Their distinctive feature is the “baby” spiderettes that dangle from the mother plant, giving it a unique appearance.
Complementing with Furniture: Its playful, cascading growth makes it a lively addition to any room. Hang it above a reading nook, or place it atop a stand where its spiderettes can cascade freely. It pairs well with bohemian or casual decor styles.
Maintenance and Care: Water moderately, allowing the topsoil to dry out between waterings. Spider Plants prefer well-draining soil and pots. They can tolerate some degree of neglect, making them beginner-friendly. Bright, indirect light is ideal, but they can also survive in semi-shaded spots.
Other Aspects: Spider Plants are renowned for their air-purifying properties, especially in removing pollutants like formaldehyde and xylene. They’re non-toxic and safe around pets and children, making them a popular choice for family homes. If the tips of its leaves turn brown, it might be due to fluoride in tap water; using distilled or rainwater can help.
7. Rubber Plant
Position: The Rubber Plant prefers bright, indirect sunlight. A spot near a window with sheer curtains or a bit farther away from direct sunlight is optimal. They’re robust and can adapt to less light but may lose some of their vibrant colors.
Growth: This plant can become quite tall indoors, reaching heights of 6-10 feet. Its broad, shiny leaves can grow up to 12 inches long.
Complementing with Furniture: With its dark green, glossy leaves, the Rubber Plant offers a touch of sophistication. It works well in modern, minimalist settings or rooms with wooden furniture, providing a contrasting green backdrop.
Maintenance and Care: Water the Rubber Plant when the top inch of soil feels dry, usually once a week in the growing season and less often in winter. Ensure good drainage to avoid root rot. Bright, indirect light helps maintain its vibrant foliage.
Other Aspects: Rubber Plants can help improve indoor air quality by removing pollutants. To keep its leaves shiny and unobstructed from dust, it’s good to wipe them down occasionally with a damp cloth. It’s mildly toxic if ingested, so it’s recommended to place it away from pets and children. If the plant becomes too tall, you can prune the top to control its height and promote more branching.
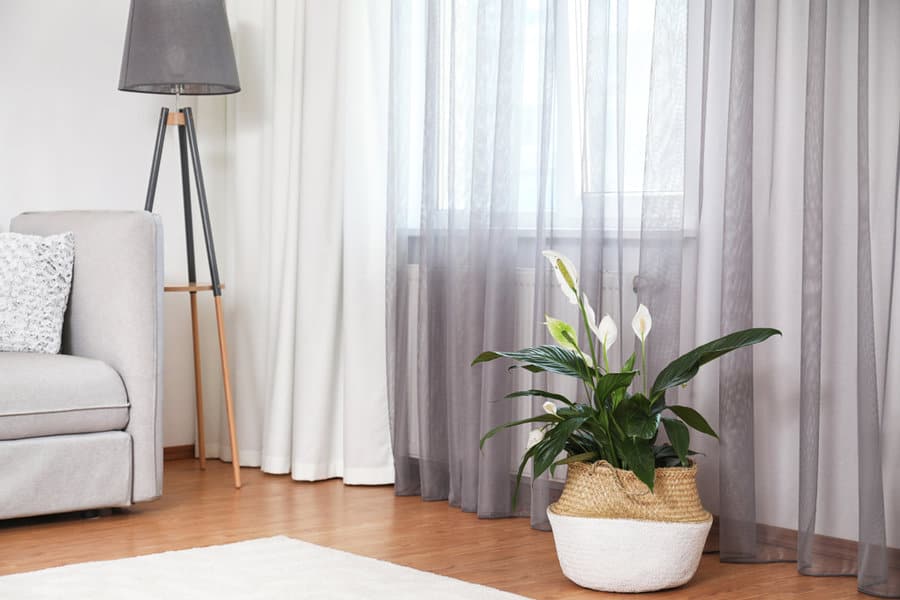
8. Peace Lily
Position: The Peace Lily appreciates bright, indirect light, but it’s also one of the few plants that can thrive in low-light conditions. Avoid direct sunlight, which can scorch its leaves. A spot away from windows or in a well-lit corner works well.
Growth: Generally, Peace Lilies stay compact, growing to a height of 1-4 feet, depending on the variety. They produce white, hood-like flowers which can appear at any time of the year, especially if they’re well-tended.
Complementing with Furniture: The elegant white blooms and lush green foliage make Peace Lilies a classic choice for any decor style. They’re particularly effective in softening spaces with metallic or glass furnishings. The plant’s graceful appearance complements both contemporary and traditional interiors.
Maintenance and Care: Water consistently, keeping the soil slightly moist but not soggy. It’s a good sign if the plant droops a bit when it’s thirsty. Bright, indirect light is preferred, though it’s forgiving of lower light. Ensure good drainage and consider a pot with a saucer to catch any excess water.
Other Aspects: Renowned for its air-purifying abilities, the Peace Lily can filter out several toxins from the air. While beautiful, it’s essential to note that all parts of the plant are toxic if ingested, making it vital to position away from curious pets and children. Brown leaf tips can indicate over-watering, while yellow leaves might suggest too much light.
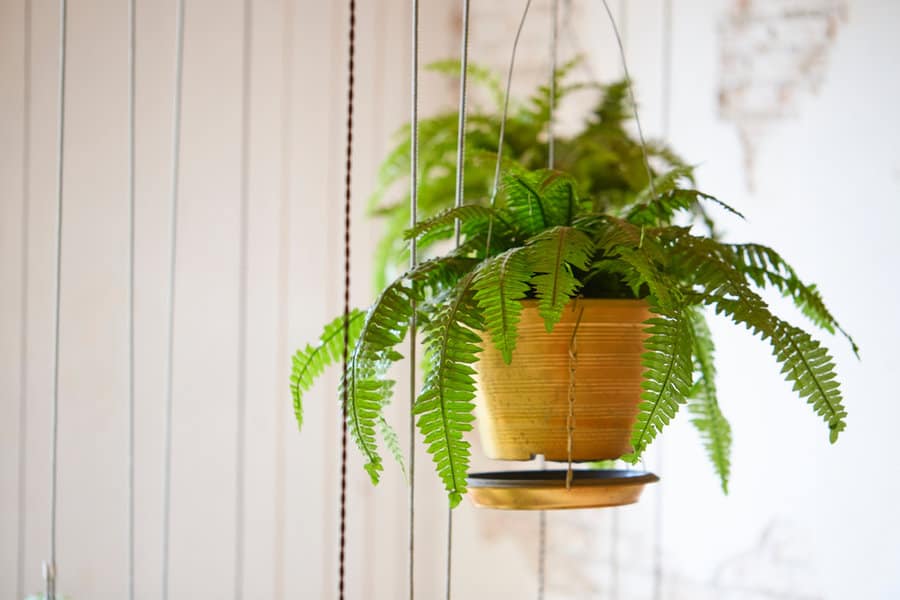
9. Boston Fern
Position: Boston Ferns thrive in indirect, filtered light. North-facing windows or spots with dappled light are ideal. They’re also popular choices for hanging baskets due to their cascading fronds.
Growth: A mature Boston Fern can reach a diameter of 2-3 feet, with delicate, arching fronds that can extend 2-3 feet long, creating a voluminous appearance.
Complementing with Furniture: Its feathery fronds add texture and a touch of wilderness to spaces. Boston Ferns look great against bare walls, or hanging in corners, where their fronds can drape gracefully. Their vintage charm pairs well with antique or rustic furniture.
Maintenance and Care: This fern loves consistent moisture but dislikes waterlogged soil. Water regularly, ensuring the pot provides good drainage. Bright, indirect light is best. They also appreciate higher humidity, so consider misting the plant or placing it on a tray with watered pebbles.
Other Aspects: Boston Ferns are known for their air-purifying qualities and can help to add humidity to dry indoor air. They’re non-toxic, making them safe for homes with pets and children. To maintain a lush appearance, regularly trim away any yellow or brown fronds.
10. Philodendron
Position: Philodendrons are versatile in terms of light requirements. They prefer bright, indirect light but can also tolerate medium to low light conditions. Avoid placing them in direct sunlight, as this can scorch their leaves. They can be placed on shelves, hung, or even trained to climb depending on the variety.
Growth: Their growth varies depending on the specific type. Some philodendrons, like the vining Heartleaf, can trail or climb several feet, while others, like the Split-Leaf or Hope, can grow more upright and bushy.
Complementing with Furniture: Their lush greenery can soften spaces and add a touch of the tropics. Vining types can be draped over shelves or used in hanging planters, while larger varieties serve as floor plants, complementing taller furniture pieces.
Maintenance and Care: Water when the top inch or so of the soil feels dry. They don’t like to be overly wet, so ensure their pots have proper drainage. While they’re adaptable to various light levels, brighter indirect light will encourage more robust growth.
Other Aspects: Philodendrons are excellent at purifying indoor air, helping to remove formaldehyde. They’re relatively easy to care for, making them suitable for both novice and experienced plant enthusiasts. However, it’s essential to know that philodendrons are toxic if ingested, so they should be kept out of reach of pets and children. Regular pruning can help maintain a desired shape and promote fuller growth.
11. Jade Plant
Position: Jade Plants prefer bright light, so a spot near a south or west-facing window where they can receive a good amount of indirect sunlight is ideal. They can tolerate direct sunlight but ensure it’s not too harsh, especially during peak hours.
Growth: Known as the “money plant” in some cultures, Jades can grow to become large, bushy plants reaching up to 3-4 feet indoors. With time, their stems become thick and woody, resembling miniature tree trunks.
Complementing with Furniture: With its succulent, glossy, green leaves and tree-like growth pattern, Jade Plants add a touch of nature’s grandeur to indoor spaces. They work well on desks, tabletops, or as standalone specimens in rooms with wooden or rustic themes.
Maintenance and Care: Being a succulent, Jade Plants store water in their leaves, so they don’t require frequent watering. Allow the soil to dry out between waterings to prevent root rot. They thrive in bright light and can handle some direct sun, but be wary of too much direct sunlight, which can cause leaf scorching.
Other Aspects: Jade Plants are believed to bring good luck and prosperity, making them popular gifts. They’re relatively low maintenance and can live for many years with proper care. They are mildly toxic if ingested, so keeping them away from pets and children is advisable. For a bushier appearance, you can pinch back the growing tips.
12. Calathea
Position: Calatheas thrive in bright, indirect light. Avoid direct sunlight, as it can fade the plant’s vibrant colors. They are best positioned away from windows with strong sun exposure, such as south or west-facing windows.
Growth: Calatheas typically grow to a height of 1-2 feet, but some species can grow larger. They are recognized for their beautiful, patterned leaves which can display various shades of green, purple, and even pink.
Complementing with Furniture: With their ornate foliage, Calatheas act as natural artwork, drawing attention and adding color to living spaces. They work well on side tables, plant stands, or as a centerpiece on a coffee table, especially in modern or eclectic decor.
Maintenance and Care: Keep the soil consistently moist, but avoid letting the plant sit in water. They thrive in higher humidity, so consider placing them on a tray with moist pebbles, using a humidifier, or misting them occasionally. Bright, indirect light is crucial to maintain their vibrant colors.
Other Aspects: Calatheas are known for their “dancing” leaves — they move up and down with the day-night cycle. This movement is a part of their circadian rhythm. They’re also pet-friendly, as they are non-toxic to cats and dogs. Brown leaf edges can indicate a lack of humidity or inconsistent watering. Regularly wiping the leaves can keep them dust-free and shiny.
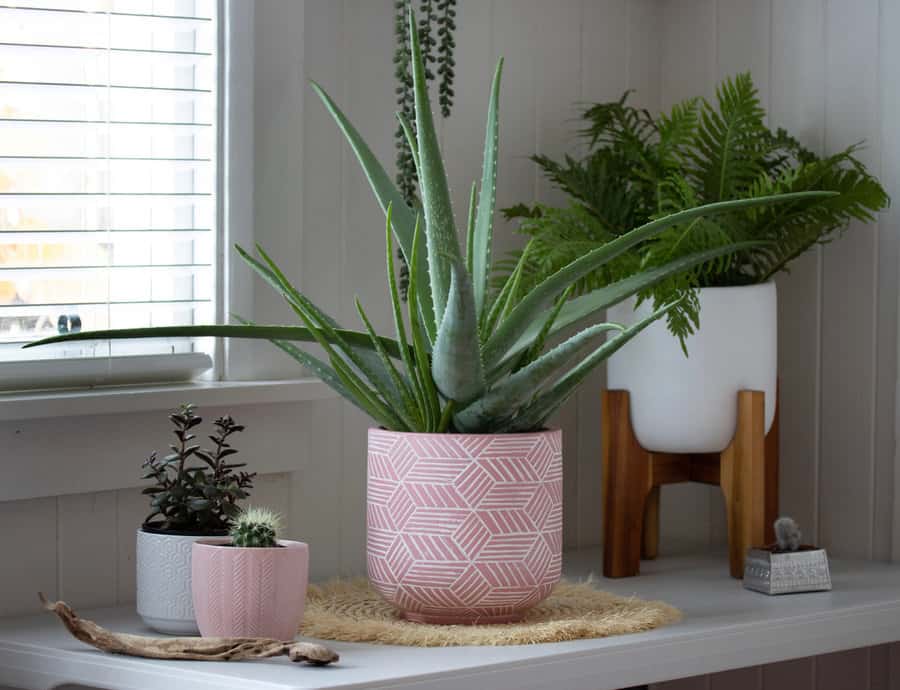
13. Aloe Vera
Position: Aloe Vera loves bright light, making it best suited for south or west-facing windows. While it can handle some direct sunlight, prolonged exposure, especially during the hottest parts of the day, can cause the leaves to turn brown or yellow.
Growth: A mature Aloe Vera plant typically stands between 1-2 feet tall, characterized by its thick, fleshy, green leaves that can grow up to 10 inches long. The leaves are filled with a clear gel that has numerous health and skin benefits.
Complementing with Furniture: Its sleek, modern look makes Aloe Vera a perfect fit for contemporary spaces, minimalist designs, or on work desks. Its green hue can provide a pop of color against white or neutral backgrounds.
Maintenance and Care: Aloe Vera is a succulent, which means it stores water in its leaves. It requires infrequent watering; let the soil dry out completely between waterings. Overwatering is a common issue, so ensure its pot has good drainage. Bright light ensures healthy growth, but shield it from intense direct sun.
Other Aspects: Aloe Vera has been used for centuries for its healing properties. The gel inside its leaves can be applied to burns, cuts, and other skin irritations for relief. It’s essential to be cautious, though, as the yellow sap (aloe latex) found just below the skin of the leaf can be an irritant. The plant is also toxic if ingested, so it’s best to keep it away from pets and children.
Did you know that the average person spends about 4 years of their life sitting on a sofa? That’s a significant chunk of time, making your sofa choice more important than you might think. Ever settled into what you thought was a plush sofa at a friend’s house, only to find yourself squirming uncomfortably moments later? Picking the right sofa isn’t just about aesthetics; it’s about crafting the perfect environment for relaxation and connection.
In this guide, we delve deep into the world of sofas, exploring the intricacies of design, materials, and ergonomics. From understanding the basics of frame durability to the secrets of cushion plushness, we’re going to ensure your next sofa isn’t just good—it’s perfect. Read on to unlock the secrets to sofa satisfaction.
[view_toc]
1. Measuring for Your Sofa
Before diving into sofa shopping, it’s essential to have a clear understanding of your room’s size. A sofa, while a significant piece, should harmoniously fit within its environment and not overpower the space.
Use a measuring tape to obtain precise room dimensions, taking into account windows, doors, and other significant elements. It’s not just about ensuring the sofa fits, but also about preserving the flow and functionality of the room.
The primary purpose of a sofa is seating, but remember that not all seating is created equal. You want to ensure ample space for every potential sitter. A common mistake is picking a sofa that’s too large, making the room feel cramped, or too small, rendering it inadequate for family gatherings or entertaining guests.
Visualize the space and consider other furniture items you might have or plan to acquire. A good tip is to use masking tape to outline the potential sofa space on your floor. This physical representation can give a clearer idea of how the sofa will interact with its surroundings.
2. Pick Your Sofa Style
Your sofa can be a statement piece, reflecting your personal style and the essence of your home. Classic sofas often boast elegant curves, plush backrests, and ornate wooden legs, resonating with a timeless appeal that complements a variety of decors.
On the other hand, modern sofas tend to favor cleaner lines, minimalist features, and are often seen in neutral palettes with occasional vibrant color splashes. These can be perfect for contemporary homes or those seeking a more streamlined look. When deciding, consider the existing décor elements in your room and what kind of ambiance you wish to establish.
The mid-century sofa design, popularized in the 1950s and ’60s, bridges the gap between classic and modern. With its vintage flair, tapered wooden legs, and functional form, it’s a versatile choice for both retro enthusiasts and those seeking a trendy, yet timeless appeal.
However, the sofa universe is vast, and other styles range from rustic, bohemian, industrial, to eclectic. It’s beneficial to explore various design catalogs or visit furniture showrooms to familiarize yourself with the plethora of styles available.
Remember, the key is to find a sofa that resonates with your aesthetic preferences and enhances your living space’s overall vibe.
3. Material Selection
Selecting the right material is as much about functionality as it is about aesthetics. Leather, a luxurious and durable choice, offers a sleek finish and is relatively easy to clean, making it a favorite for households with children or pets. Over time, it can develop a unique patina that adds character.
However, leather might not be ideal in extreme climates, as it can feel cold in winter and sticky in summer. Fabric sofas, conversely, come in a myriad of textures, patterns, and colors, allowing for more design flexibility. They can be cozier and more breathable than leather, but may require more maintenance, especially if they’re light-colored or delicate.
If you’re seeking a sofa for an outdoor setting, material selection takes on a new dimension. Outdoor sofas demand materials that can withstand varying weather conditions, from blazing sun to pouring rain. Think of solutions like synthetic resin, teak, or treated metal frames, paired with water-resistant and UV-protected cushions.
It’s also a good idea to invest in protective covers for off-season storage or unexpected weather changes. Remember, while outdoor sofas are built to be robust, periodic maintenance – such as cleaning and checking for wear – will significantly extend their lifespan and keep them looking fresh.
4. Cushion Comfort
When it comes to delivering consistent support and contouring to the body, memory foam stands out. Originally developed for astronauts, this material has found its way into our homes, offering a firm yet plush seating experience.
Memory foam cushions adapt to the sitter’s body shape, providing tailored comfort. They’re especially beneficial for those with back issues or who spend extended periods on the sofa. However, they can retain heat, so they might not be ideal for hotter climates or those who tend to run warm.
For those seeking the epitome of luxury and softness, down-filled cushions are a top choice. Filled with the fluffy undercoating of ducks or geese, these cushions offer a plush, sink-in feel that’s unparalleled. They’re incredibly comfortable and can give your sofa a relaxed, inviting look. However, they do require more maintenance, including regular fluffing to maintain their shape.
Additionally, for those with allergies, it’s essential to ensure that the down is hypoallergenic and encased in a tightly woven fabric to prevent feather escape.
5. The In-Store Test Drive
While online shopping offers convenience, there’s an irreplaceable value in physically testing a sofa in-store. The sit test goes beyond just a quick perch; it’s about truly experiencing the sofa. Sit down, lean back, and even lie down if that’s how you’d use it at home. Consider the depth of the seat, the angle of the backrest, and the height from the floor. Remember, what looks good might not always feel good, and the goal is to find a sofa that you can comfortably lounge on for extended periods.
A close inspection is crucial to ensure you’re investing in a durable piece. Examine the sofa’s stitching, looking for uniformity and tightness. Check the legs and frame for any signs of wobbling or instability. Feel the armrests and back for any lumps, sags, or irregularities. If it’s a recliner or has other moving parts, test those mechanisms to ensure smooth operation. Taking a few extra minutes to scrutinize the details can save you from potential hassles and added costs down the road.
6. Buying Smart: Questions to Ask
Purchasing a sofa comes with its set of logistics. Clarify delivery details in advance, including costs, timelines, and setup services. Consider challenges like tight spaces or stairways in your home. Some stores provide comprehensive ‘white glove’ services, while others might leave it at your door. Being prepared can stave off delivery day surprises.
When investing in a sofa, a clear understanding of its warranty is essential. Dive deep to know what’s covered, from frame to potential accidents. Some shops offer extended protections at an extra fee. Always weigh the costs and benefits and scrutinize the fine print.
Durability is paramount when choosing a sofa. Inquire about frame construction, cushion quality, and gather customer feedback. Such insights can give a clearer picture of the sofa’s longevity and overall performance.
7. Maintenance and Care
Prompt action can salvage a sofa from unexpected spills. For fabric sofas, understanding their cleaning codes is crucial; for instance, “W” suits water-based cleaners and “S” demands solvents. Leather requires immediate blotting of spills. Before using any cleaner, always test on an inconspicuous spot; for tough stains, consider professional cleaning solutions.
Proper maintenance prolongs a sofa’s lifespan. Regular vacuuming for fabric and periodic wiping for leather, complemented with annual conditioning, keeps them fresh. Protect your sofa from direct sunlight and, if possible, rotate its cushions to maintain even wear, ensuring it remains your living space’s focal point.
Have you ever walked into a living room and felt an inexplicable sense of calm, warmth, or even energy? Much of that reaction is influenced by the room’s color scheme. Believe it or not, 93% of consumers place visual appearance above other factors when making a purchase for their homes.
Choosing the right color palette for your living room isn’t just about aesthetics; it’s about creating an environment that resonates with your personal energy and comfort.
In this article, we’ll guide you through the process of selecting the perfect color scheme, helping to transform your living space into a true reflection of your personality. Dive in to discover expert tips, common mistakes to avoid, and the psychology behind your favorite hues.
[view_toc]
1. The Power of Color: How psychology shapes our reactions
Colors have a profound impact on our emotions and behavior. It’s not just a visual experience; it’s psychological.
Red exudes energy and passion. It can be invigorating, but in a living room setting, consider using it sparingly or in muted tones to avoid overwhelming the space.
Blue is calming and serene, often linked to tranquility and relaxation. It’s a top choice for creating a peaceful environment.
Green resonates with nature and renewal. It’s balanced, calming, and can rejuvenate a space. Think of soft mossy greens or deep forest tones.
Yellow brings warmth and cheerfulness. A splash of yellow can uplift a room, but a strong shade might be too intense. Pastel or mustard tones can be more soothing.
Remember, while these general associations exist, personal experiences also play a part. Your childhood home’s color or a memorable vacation spot might influence your reactions. It’s essential to choose colors that resonate with you personally. Before diving in, reflect on what you want your living room to represent emotionally.
2. Room Size & Light: Picking colors based on space and illumination
The size of your living room and the amount of natural light it receives can drastically influence how a color appears and feels.
Small Rooms: Lighter shades can make a living room feel larger and more open. If you’re dealing with a smaller space, consider soft neutrals or pastels to create an airy vibe.
Large Rooms: Darker colors can add warmth and make vast spaces feel cozier. Deep blues, greens, or even rich purples can bring a luxurious touch to expansive rooms.
Natural Light: Living rooms with abundant sunlight can handle darker shades without feeling closed in. The natural brightness will soften the hue and prevent it from being too overwhelming.
Limited Light: In spaces with less natural light, avoid overly dark colors, which can make the room feel dim and smaller. Instead, opt for mid-tones or lighter shades that reflect ambient light.
Angles matter too. If you’re unsure, paint swatches on different walls to see how the color changes throughout the day. It’s also worthwhile considering the type of artificial lighting you use. Warm bulbs can add a yellow tint, while cooler bulbs can lean towards blue, subtly shifting the paint’s appearance. Remember, it’s all about creating a harmonious balance that complements both the room’s dimensions and its lighting conditions.
3. Anchoring with a Base: Selecting your primary shade
Your primary color is the foundation of your living room’s aesthetic. It will cover the largest surface areas, so it’s vital to make this selection count.
Inspiration Sources: Begin by seeking inspiration. This could be a piece of artwork, a favorite rug, or even nature. Draw your primary color from something that resonates with you.
Neutral Foundations: Neutrals like beige, gray, or off-white are timeless and offer flexibility. They allow for easy changes in accent colors and decor in the future.
Bold Statements: If you lean towards bolder hues, ensure the color isn’t too overpowering. Remember, it’ll dominate the space. Consider muted versions of your favorite bold color for a balanced approach.
Mood Setting: Reflect on the ambiance you want. Cooler colors like blues or greens often create a calm atmosphere, while warmer tones like reds and oranges exude energy and coziness.
Consistency: If your living room is open to other areas of your home, consider the color flow. The primary shade should harmonize with adjacent spaces for a cohesive feel.
Lastly, take your time. Don’t rush the selection process. Once you have a few options in mind, invest in sample pots. Paint patches on your walls, observe them at various times of the day, and under different lighting to ensure you’re making a choice you’ll love long-term.
4. Accentuating with Flair: Two or three hues to elevate the look
Accent colors are the exclamation points of your living room, adding depth, contrast, and personality.
Rule of Three: A popular approach is the 60-30-10 rule. Your primary color covers 60% of the room, the secondary color 30%, and the accent color 10%. This creates a balanced and harmonious look.
Contrast and Complement: Choose accent colors that contrast with your base shade but are still complementary. If you have a cool primary color, a warm accent can add a touch of vibrancy, and vice versa.
Subtle or Bold: Depending on your preference, accents can be subtle additions or bold statements. Soft pastels can be soothing, while vibrant shades can inject energy.
Natural Inspiration: Nature is a fantastic source of complementary color schemes. Think of sunsets, forests, or seascapes for inspiration.
Functional Accents: Remember, accent colors aren’t limited to walls. They can be introduced through furniture, throw pillows, art, and other decor elements.
Always test before fully committing. Small swatches or incorporating temporary items like throw blankets in your chosen accent color can provide a glimpse of the final look. Adjust as needed, ensuring the accents harmonize with your primary color and the overall mood you aim to create.
5. Depth through Texture: Pillows, rugs, curtains, and beyond
While color is crucial, texture plays an equally significant role in defining and elevating a room’s ambiance.
Layering: Layer different textures to create depth. For instance, a silky-smooth curtain paired with a textured jute rug introduces a tactile dimension that’s visually appealing.
Material Matters: Fabrics like velvet, linen, or faux fur can provide luxurious softness, while materials like wood, metal, or glass can add sleekness and structure.
Pillows: Mix and match pillow textures. A suede pillow beside one with sequins or embroidery can make your sofa an inviting centerpiece.
Rugs: Don’t limit yourself to one type. A soft, plush rug can be layered over a flat-weave or a jute rug for a unique touch.
Curtains: Beyond color, consider the fabric’s weight and drape. Light, breezy sheers can bring in softness, while heavier drapes like brocade or chenille add gravitas.
Decorative Details: Even small decor elements, like a knitted throw, a beaded table runner, or a metal decorative bowl, can introduce varied textures.
Remember, texture not only enhances visual appeal but also invites interaction. It beckons one to sit down, touch, and truly immerse in the room’s environment. Balance is key: aim for a mix that feels cohesive, not cluttered, and always aligned with the mood you’re striving for.
6. Shades of Subtlety: Exploring variations within a hue
Utilizing subtle variations of a single hue can add sophistication and depth to a room without overwhelming it with contrasting colors.
Monochromatic Magic: Embrace a monochromatic palette. This doesn’t mean one flat color, but rather exploring the gradient: from the palest tint to the deepest shade of a particular hue.
Wall Variations: Consider painting one wall a slightly darker or lighter shade than the others. This can create a focal point and added interest without a stark contrast.
Furniture Hues: Choose furniture pieces in varying shades of your chosen color. A navy sofa, for instance, can pop against a backdrop of soft sky-blue walls.
Accent Details: Incorporate accessories like throw pillows, vases, or lamps in different shades of the base color. These details can tie the room together and add dimension.
Artistic Elements: Artwork can be a subtle way to introduce various shades. An abstract painting with varying tones of green, for example, can be both a centerpiece and a harmonizing element.
Watch the Undertones: Every color has undertones. For example, a gray might lean towards blue, green, or even purple. When playing with shades, ensure the undertones are consistent to maintain cohesiveness.
Subtle variations require a keen eye and a bit of experimentation. The beauty lies in the nuances, allowing you to craft a space that feels harmonious, layered, and uniquely reflective of your taste.
7. Simplicity is Key: Streamlining for a cohesive palette
In design, sometimes less truly is more. A refined and streamlined color palette can evoke elegance, clarity, and calm.
Limit Your Palette: While it’s tempting to incorporate many colors, narrowing down to a few that work harmoniously can create a more impactful design.
Neutral Grounding: Using neutrals as a foundation can simplify the palette. Colors like beige, gray, or taupe can provide a quiet backdrop, allowing other colors to shine without competition.
One Bold Statement: If you have a penchant for bold colors, consider using just one as a statement. A single vibrant hue, when set against neutrals, can become a room’s standout feature without overwhelming the senses.
Consistent Accents: Consistency in accent colors, whether through throw pillows, rugs, or decorative items, can tie the room together seamlessly.
Declutter: Beyond color, ensure your space isn’t overcrowded with decor. A clean, uncluttered space allows the chosen colors to take center stage.
Transition Smoothly: If your living room connects to other rooms, ensure a smooth color transition. A jarring change can disrupt the flow, so aim for complementary or analogous colors in adjacent spaces.
Remember, a simplified palette doesn’t mean a lack of character or style. It’s about creating a clear vision, reducing visual noise, and letting each chosen color play its part to the fullest. A cohesive and streamlined palette invites relaxation and appreciation for the nuances in your design choices.
8. Mistakes to Avoid: Ensuring your color choices stand the test of time
Color choices can deeply influence the ambiance of a space, but mistakes can lead to a room feeling off-balance or outdated quickly.
Trend Traps: While it’s tempting to adopt the latest color trends, remember that trends come and go. Opt for colors you genuinely love and resonate with, rather than what’s momentarily popular.
Forgetting Undertones: Colors, especially neutrals, often have undertones that can clash if not carefully coordinated. A beige with pink undertones might not work well with one that leans green.
Neglecting Lighting: As mentioned earlier, lighting can dramatically alter a color’s appearance. Testing colors under different lights, both natural and artificial, is essential.
Overwhelming Accents: While accent colors can elevate a space, too many can make a room feel chaotic. Stick to a select few that work well together.
Skimping on Samples: Investing in small paint samples before committing to gallons can save you from costly mistakes. Always swatch and observe for a few days.
Uniform Sheen: Different paint finishes (matte, satin, glossy) affect the final look. A high-gloss finish, for example, might not be suitable for large walls as it can highlight imperfections.
Not Considering the Whole Home: Your living room doesn’t exist in isolation. Ensure the colors flow seamlessly from one room to another for a cohesive home aesthetic.
The key takeaway is to be deliberate and thoughtful in your choices. With careful consideration, you can create a timeless space that remains fresh and inviting for years to come.
Welcome to the beautiful intersection of past and present, where old-world charm meets modern aesthetics. It’s a place where vintage pieces do not just survive, but thrive in contemporary design settings.
Whether it’s a rustic mirror frame from the 1930s or a mid-century modern lamp, these pieces hold the power to imbue your living space with a unique charisma that’s hard to replicate.
This article will guide you on the art of seamlessly blending vintage items with your modern home design, creating a timeless aesthetic that exudes warmth, personality, and style.
So, let’s step into the beautiful labyrinth of vintage and contemporary design fusion, and discover how you can bring this magic into your own home.
[view_toc]
1. Balance with Modern Elements
Integrating vintage pieces into your contemporary design is all about achieving a balance. Too many antiques can overpower your space and make it feel outdated.
Instead, aim for a stylishly eclectic look by blending vintage pieces with modern elements. This creates a harmonious contrast that keeps your space feeling fresh and visually interesting.
Pair a sleek, modern sofa with a vintage coffee table or place a retro armchair alongside a contemporary bookshelf.
The key is to strike the right balance between old and new, creating a cohesive and dynamic design aesthetic.
2. Restore Thoughtfully
Vintage pieces often come with signs of wear and tear, but a thoughtful restoration can breathe new life into them while preserving their charm.
When restoring vintage items, strive to maintain their original elements and unique character whenever possible. Refinish wood surfaces to bring out their natural beauty or repair minor damages while preserving the patina that tells the piece’s story.
However, don’t hesitate to update upholstery or finishes if it aligns with your overall aesthetic vision. Reupholstering a vintage chair with a contemporary fabric or refinishing metal hardware can modernize the piece while still honoring its vintage roots.
By restoring vintage pieces thoughtfully, you can enhance their charm and seamlessly integrate them into your contemporary home design.
3. Incorporate Vintage Lighting
Illuminate your contemporary space with the timeless charm of vintage lighting fixtures. Vintage sconces, chandeliers, or pendant lights can bring an elegant and warm glow to your home, creating a cozy and inviting atmosphere.
Opt for fixtures with unique details, such as intricate metalwork or delicate glass shades, to add visual interest and a touch of nostalgia.
Whether you place a vintage chandelier as a statement piece in your dining area or adorn your hallway with vintage sconces, these lighting elements can become focal points that blend seamlessly with your modern decor.
The warm ambiance they create adds depth and character to your space, making it feel even more welcoming and enchanting.
4. Use Vintage Textiles
Elevate your modern space with the rich textures and vibrant colors of vintage textiles. Incorporating vintage rugs, curtains, or throw pillows can add a layer of depth and visual interest to your decor.
Look for rugs with intricate patterns or unique weaving techniques that tell a story of craftsmanship and tradition. Vintage curtains can bring a touch of elegance and personality to your windows, whether it’s delicate lace panels or bold, retro prints.
Additionally, vintage throw pillows with embroidered details or unique fabric textures can serve as eye-catching accents on your sofas or chairs.
These vintage textiles not only add warmth and coziness but also infuse your contemporary space with a sense of history and character.
5. Use the 80/20 Rule of Decorating
Embrace the 80/20 rule of decorating: let approximately 80% of your design consist of contemporary elements, while reserving around 20% for vintage pieces.
This approach ensures a balanced and cohesive look, where the modern backdrop allows your carefully selected vintage treasures to shine as focal points without overwhelming the overall aesthetic. By predominantly featuring contemporary furnishings, colors, and finishes, you create a fresh canvas for your space.
The remaining 20% of vintage items add depth, character, and a touch of history. Strive for high-quality vintage pieces that complement your design and provide contrast and visual interest, resulting in a curated, stylish, and timeless space.
6. Mix and Match
Embrace the art of mixing styles and eras in your contemporary home design. Don’t be afraid to pair a modern couch with a vintage coffee table or mix different furniture styles to create a dynamic visual interest.
Combining elements from different time periods adds a layer of uniqueness and personality to your space. Look for opportunities to juxtapose sleek contemporary pieces with the character and charm of vintage items. This blending of styles creates a captivating contrast that sparks intrigue and creates a visually engaging environment.
Be adventurous with your choices, and let the mix and match approach unleash your creativity in designing a truly one-of-a-kind living room or any other space in your home.
7. Accessorize Smartly
Add a touch of vintage charm to your contemporary space through smart accessorizing. Vintage accessories such as mirrors, clocks, or vases can act as statement pieces that infuse your home with character without overwhelming the overall design.
Opt for unique and eye-catching vintage items that reflect your personal style and complement your contemporary decor. A beautifully ornate vintage mirror can serve as a captivating focal point on a feature wall, while a vintage clock adds a nostalgic touch and functionality to your space.
Vintage vases with intricate details or retro designs can bring a pop of color and artistic flair to your shelves or tabletops.
The key is to choose accessories that strike a balance between vintage charm and contemporary aesthetics, enhancing the visual appeal and personality of your home.
8. Play with Color
Harness the power of color to harmonize vintage and modern elements seamlessly. Whether you decide to preserve the original color of your vintage piece or give it a modern makeover, it’s essential to ensure that it complements the overall color scheme of your space.
Consider the existing palette and select colors that create a cohesive and balanced look. If your vintage piece boasts a vibrant or unique hue, let it take center stage by keeping the surrounding elements more neutral.
On the other hand, if you choose to update the color of a vintage item, opt for shades that align with your contemporary design while still honoring its timeless appeal.
By playing with color, you can create a visual connection between vintage and modern elements, establishing a harmonious and captivating aesthetic throughout your home.
9. Respect the Originality
In the pursuit of blending vintage and contemporary elements, it’s crucial to honor and respect the originality of vintage pieces. Each vintage item carries its own history, character, and unique story.
Allow these pieces to shine in their inherent uniqueness. Avoid altering or modifying them excessively to fit a particular aesthetic. Instead, embrace the authenticity and charm they bring to your space.
Highlight the original features and craftsmanship that make them special, whether it’s the intricate woodwork of a vintage cabinet or the patina of an antique brass fixture.
By appreciating and preserving the originality of vintage pieces, you not only maintain their value but also celebrate their timeless appeal in a contemporary context.
10. Experiment
When it comes to incorporating vintage pieces into your contemporary home design, don’t be afraid to experiment. Design has no set rules, and if a vintage piece feels right in your space, even if it’s unconventional, go for it. Your home should be a reflection of your personal taste and style.
Trust your instincts and explore creative possibilities. Mix unexpected combinations, embrace eclectic pairings, and let your imagination run wild. Incorporating a unique vintage find can bring a sense of individuality and personal expression to your space. Whether it’s an unconventional piece of furniture, an intriguing vintage artwork, or a whimsical accessory, let your intuition guide you.
Ultimately, it’s about creating a home that resonates with you, tells your story, and sparks joy every time you walk through the door. So, dare to be different, take risks, and let your creativity flourish as you experiment with vintage pieces in your contemporary home design.