Blog

  • 14 Cheap Ways to Cover Walls

    14 Cheap Ways to Cover Walls

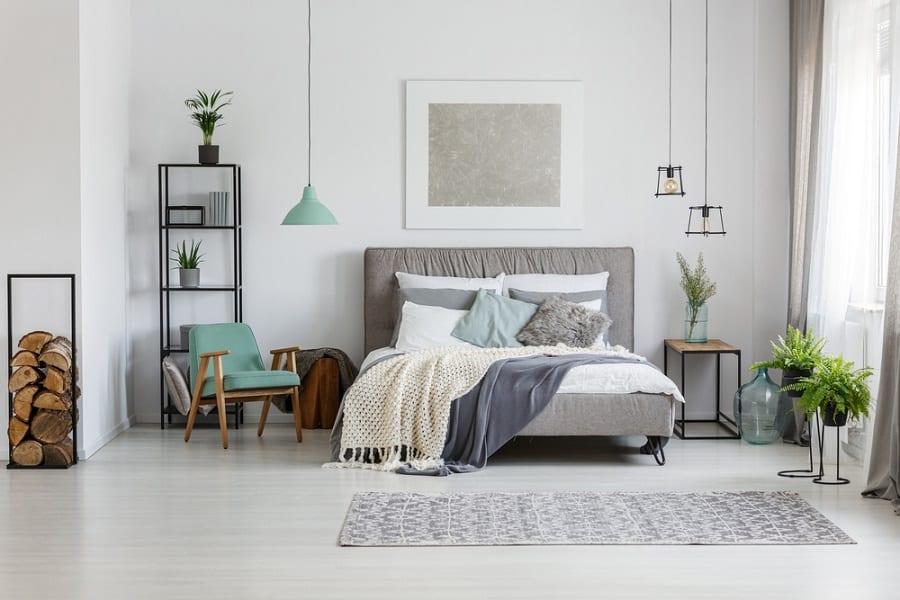
    Plain white walls are boring. So stop staring at those large blank walls in your home and finally do something with them. Turn some of them into accent walls or choose a wall treatment that you can do on all of the walls in a single room.

    Whatever you decide, it’s time to bring some life and color into your home. You don’t have to break the bank with a large budget, either. All you need is some creativity and DIY enthusiasm.

    Check out these cheap ways to cover walls and get inspired to upgrade the walls in your home.

    1. Traditional Wallpaper

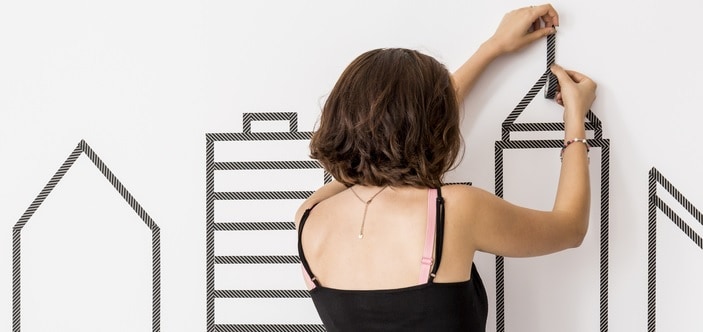
    Let’s start with a traditional wall treatment, wallpaper. Skip your grandmother’s style of wallpaper and that awful wallpaper paste. It’s messy and clumsy.

    Choose a more affordable modern option called peel and stick wallpaper. You remove the back and press it onto the wall. Then when you are ready for a change or move, you can unpeel it, and the wall goes back to being boring and white.

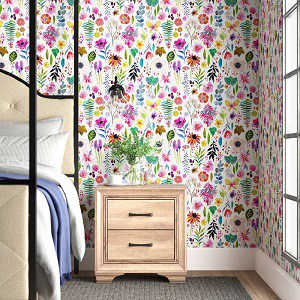
    This temporary wallpaper doesn’t disappoint when it comes to style. You’ll find all of the colors and patterns that traditional wallpaper comes in.

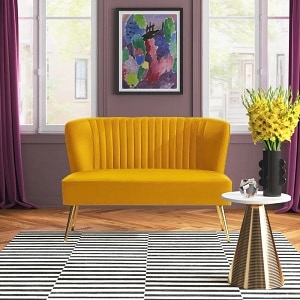
    A classic repeating floral pattern like this would look perfect in a grand millennial or French country interior design aesthetic. You could go bolder with a modern large-scale design that takes up the entire wall without any repeating.


    2. Fabric Wall

    Another classic wall treatment for plain walls is to use fabric. It’s similar to wallpaper, but the covering is made of fabric instead of paper. This used to be popular because it added an extra layer of texture and depth to the walls.

    These days, textured wallpaper can achieve a similar effect. However, using actual fabric adds warmth and sound dampening qualities that wallpaper can’t mimic.

    You can use almost any type of fabric, which lets you tailor your wall treatment to your budget. Quilting cotton is going to be the most affordable but velvet or upholstery fabric will give you the most luxurious look. You can also buy a specially made fabric wall with a particular effect such as brick, wood or a landscape.

    Leather will have a sophisticated and slightly moody feel. Avoid fabrics with stretch, such as jersey, because it will be a nightmare to work with.

    Keep in mind that you’ll need to glue the fabric to the wall, making this idea less apartment-friendly than peel and stick wallpaper.


    3. Wood Paneling

    Cover your large wall with wood paneling to add texture and a touch of nature. This isn’t the dark wood paneling from the 70s, though.

    These days, you can buy wood paneling in light, medium, or dark wood tones. This lets you find the perfect shade of wood for the design aesthetic you’re trying to achieve.

    There are also a variety of patterns, from simple planks to a board and batten design. You could create your own design with wood trim strips arranged to create geometric shapes on the wall. You could cut your own diamonds or triangles from varying wood thicknesses to create depth.
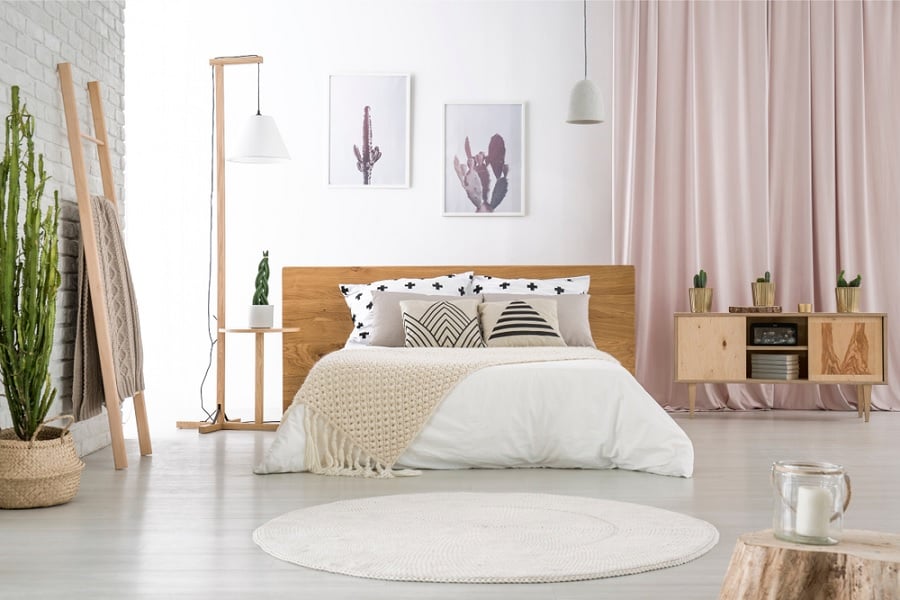
     

    4. DIY Wall Art

    Gallery wall in home

    Are you artistic or creative? Then why not make your own wall decor for a one-of-a-kind design? You could frame or hang your artwork on the wall to create a gallery wall design. The more you hang on the wall, the more wall you cover.

    Some DIY wall decor ideas skip the frames completely and plaster the art directly onto the wall like your own custom wallpaper. The trick to making this look work is to cover the entire wall from top to bottom and left to right.

    You don’t even have to use your own art for this approach. You could use your favorite magazine pictures, posters, or album art. Just be sure to fully adhere each piece to the wall and line everything up so that there are no gaps where the wall can peak through.


    5. Textured Wall

    Adding texture to your bad walls will hide imperfections and create depth in the room. The easiest textures to achieve on your own are orange peel and knockdown.

    You can buy the supplies at your local hardware store and do the application yourself. Plan to paint the wall as the texturizing material will be a different color from your wall, even if they are both white.

    You can also add texture with vinyl wall panels that have a texture to them. They typically have a geometric-inspired pattern like this that gives your wall a 3D effect.


    6. Tile

    Tile isn’t just for your bathroom walls anymore. Use it on the other walls in your home and have a durable wall treatment that will transform the look of your home. You could use it in your breakfast nook, on the wall around your fireplace, mudroom, or even your front entryway.

    Choose a large-scale tile to keep the design looking modern. Small scale tiles will create too much pattern, which can quickly look overwhelming on an entire wall.

    In some rooms, only use the tile on the bottom half of the wall. This gives you the benefit of the tile without making the room too cold or increasing echo.

    Use a bullnose or border tile along the top edge to give your tiled wall a professional finish. If traditional tile is still out of your budget, you can use peel and stick tile. It comes in sheets and is easy to cut to size.


    7. Wall Decals

    Woman applying wall decals

    You don’t have to cover all of your interior walls to give them an update. Vinyl wall decals are incredibly easy to peel and stick. These wall coverings could be a large sheet, text, or many small pieces.

    A single large sheet is typically a large-scale image. This will cover the most area on your wall. Text can look a bit cliche, but if it’s a saying that’s meaningful to you, go ahead and add it.

    Small pieces are typically meant to create a pattern on the wall, so scatter them throughout the wall. Be sure to fully press out the air bubbles so that your decals sit flush with the wall.


    8. Paint

    You don’t have to go crazy with an overly complicated wall covering. Paint is affordable, and you can easily buy as little as you need to paint the wall. You can paint almost any surface, from drywall to plaster walls.

    Choose one color or multiple colors. If you’re trying to hide imperfections in the wall, paint a pattern that will distract the eye. For example, you could do simple stripes, a modern geometric design, or even an ombre effect.


    9. Cork Panels

    Cork is affordable and environmentally friendly. This makes it ideal for use in your interior design. While you’re more likely to see it on a garage wall, you can also use it on your interior walls.

    Choose thick cork sheeting, and you can then hang wall art from the cork. This protects your walls from holes and creates warmth in the room. Cork is also a great option if you are trying to dampen sound.


    10. Foam Boards

    Foam boards are predesigned wall coverings that you mount on the wall. You can transform the look of your ugly walls and elevate the look of your home. High-end and luxury homes have custom trim work. You can mimic this look with these boards.

    Cover the entire wall with the boards for an elegant version of an accent wall. This more formal wall treatment idea if perfect for your dining room or home office.

    There are also modern versions that come in geometric shapes. They mount at varying depths. Add your own LED strip lighting to the back of them, and you have an innovative design at a fraction of the cost.
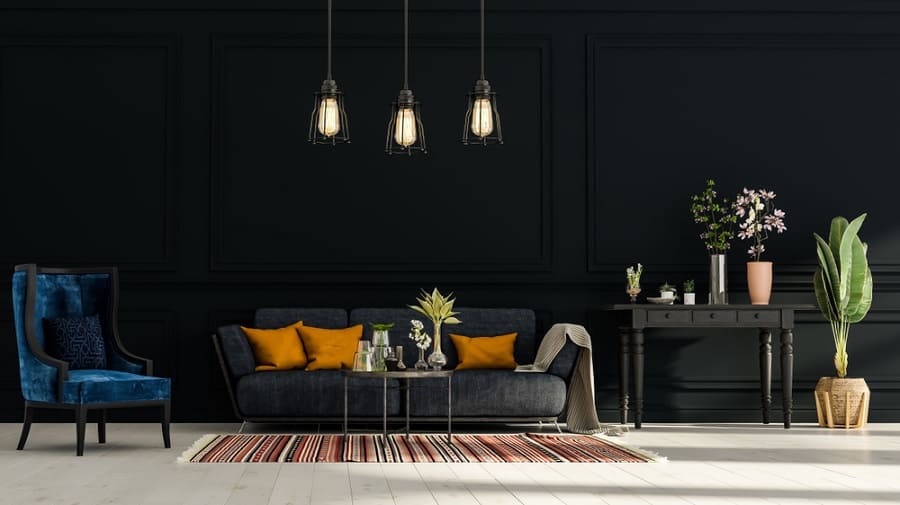
     

    11. Mirrors

    If the room you’re working in lacks natural light or is very small, then using mirrors can provide multiple benefits. Turn one wall into a feature wall that you cover in mirrors. This wall decoration will reflect what little natural light you have to work with.

    It also reflects the rest of the room, creating the illusion that the room is much larger than it really is. Single-piece large mirrors can be extremely expensive, so fake it with multiple small mirrors.

    You can copy DIY wall covering ideas and use peel and stick mirrors. Start by painting the wall black where you plan to place the mirrors. When the wall is dry, peel and stick the mirrors to the wall in a grid pattern, leaving a uniform amount of space between each one.

    Leave the same amount of space around the outside of the mirror to create a black border. The result is a finished framed mirror look that looks nicer than simply placing the mirrors right up next to each other.


    12. TapestryTapestry hanging in bedroom

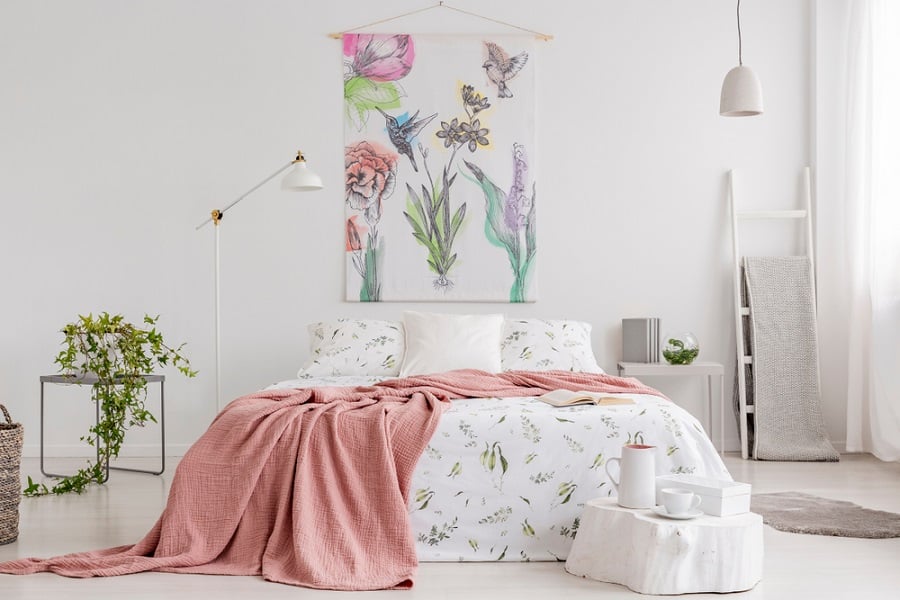
    Give your walls an artistic touch that’s perfect for a bohemian room by hanging a tapestry on the wall. Buy a curtain rod and add decorative finials. Hang your tapestry from the rod and let it be the focal point in the room.

    Tapestries don’t typically cover the entire wall, so try to center it on the wall. This solution is perfect for covering a damaged wall.

    Your tapestry could be a handwoven macrame piece that’s strung from a piece of driftwood. Or it could be a painted piece of fabric. Then there are traditional tapestries that have an authentic vintage appeal with delicate weaving.


    13. Curtains

    Similar to a tapestry, you can hang curtains to cover your walls. Unlike a tapestry, the fabric is standard curtain fabric that you’ll hang from a rod.

    Mount the rod at the top of the wall or even on the ceiling. Then hang curtains that are long enough to reach the floor. This is one of the easiest and most affordable cheap wall covering ideas, yet it will significantly elevate the look of your home.

    This wall decoration idea is nice because you can easily change out the curtains and transform the room’s look. Try layering a heavyweight curtain with a lighter-weight one for a layered look that brings more texture into the room.


    14. Shelving

    Give yourself more storage and elevate the look of your room by building faux built-in shelving. You could buy a shelving unit kit or build one from scratch. Then place the floor to ceiling unit in front of the wall. Paint it the same color as the walls so that everything blends together.

    You now have additional storage and a place to display decor. This is a great option if your walls have suffered a lot of damage and there are plenty of visible patches.

    To really sell the look, try adding crown molding to the top and baseboards around the bottom and top of the shelving unit, and then carry that trim around the rest of the room.

  • How to Waterproof Wood Furniture for Outdoors

    How to Waterproof Wood Furniture for Outdoors

    Do you have outdoor wooden furniture? If you have not waterproofed it, you wasted your money. Without the proper protection, your wood furniture is susceptible to water that will cause it to rot, splinter, and crack. This will ruin the wood’s look and shorten its useful life.

    Follow this guide and learn how to waterproof wood furniture for the outdoors.

    Rely on a Hand-Rubbed Oil Finish

    There are two types of wood oil that you can use to waterproof your wood furniture, linseed and tung oil. These oils are the least toxic method and do not have VOCs. The oil soaks into the wood to prevent moisture from getting into the wood.

    Their downfall is that they are not as protective as synthetic sealants. This makes it a good option for sheltered wood surfaces, such as covered patio furniture or indoor furniture.


    If you have light wood furniture like white oak, stick with tung oil that will not yellow over time like linseed oil. Some hardwoods, like teak wood, have an abundance of oils naturally, making it unnecessary to oil them.

    Darker woods like mahogany and walnut benefit greatly from an oil treatment because they can bring out the deep luster and color of the wood.

    Tools Required

    To oil your wood, you will need 80-grit sandpaper, a stiff-bristled scrub brush, a natural bristle paintbrush, mineral spirits, cleaning rugs, and your chosen oil.

    Process

    If your wood already has a finish or is visibly weathered, you will need to start by sandpapering the surface to remove the top layer. Then thoroughly wash the wood to remove the dust and allow it to dry.

    Once the wood is dry or if the wood is unfinished, you are ready to apply the oil. Use your paintbrush to apply a thin coat of oil over the entire surface of the wood.

    Try to saturate the wood without overapplying. Use your rag to wipe off excess oil. Place your oily rags in a bucket of water to prevent them from spontaneously combusting.

    Use the mineral spirits to clean the paintbrush. Leave the furniture to dry overnight. If your furniture needs more than one coat, wait at least 30 minutes between each layer. `


    How Often Should You Oil Wood Furniture?

    How often you need to apply oil to your wood furniture will depend on the level of abuse the wood experiences. Wood furniture out in the elements needs oiling about twice a year.

    Wood that is indoors can go longer with an oil application once a year. However, neither of these are hard-set rules. If you see that your wood furniture looks dry and weathered, then it is time for a coat of oil.


    Apply a Sealant

    There are three types of wood sealant, varnish, lacquer, and polyurethane. These products create a shiny hard shell on the surface of the wood that protects it from the outdoor elements.

    It is great at creating a solid seal for waterproofing wood and can prevent scratches in the wood. If you have Adirondack chairs, the smooth surface that sealants create is good because they prevent your clothes from snagging on the wood.

    The downside of sealant is that it will eventually peel up from the wood’s surface. You will also need to completely sand it off before applying a fresh coat. Oil-based varnishes will make wood look darker than it really is. Be aware of this if you do not want to change the look of your teak or eucalyptus patio furniture.

    Lacquer


    Wood lacquer will give you a stunning high gloss shine and will protect your wood from scratches. Unfortunately, it eventually discolors, and you will have to remove it and reapply to restore its beauty. The consistency is thinner than varnish and polyurethane, making it easier to apply with a sprayer than a paintbrush. However, lacquer does contain high levels of VOCs.

    Varnish


    You cannot beat the protective qualities of varnish. Marine-grade varnish is even more protective because it is specifically meant for high moisture environments and has UV blockers. In addition, the cured varnish is flexible and will not crack when put under stress.

    However, its biggest drawback is the incredibly time-consuming application process. It also only lasts two to three years before you will need to lightly sand the surface and reapply a topcoat.

    Polyurethane


    A polyurethane wood coating is a type of plastic and is not the same as varnish. It comes in both oil and water-based formulas. However, only the oil-based formulas are effective at protecting outdoor furniture. If you are trying to protect light-hued woods, this is a good option.

    Once applied, oil-based polyurethanes look similar to varnish. Their big advantage is that you only need two coats, making for a faster application process. However, they will expose you to higher levels of VOCs.

    Tools Required

    Because sealants contain VOCs, you will need a respirator or N-95 mask. You will also need an orbital sander and 80-grit sandpaper to remove the old sealant. Other required materials include deck cleaner, stiff-bristled brush, oil-based varnish, polyurethane, or lacquer, paintbrush, and mineral spirits.

    Process

    Start by putting on your mask before you start any work. Use the orbital sander to clean off the old sealant, and then wash and scrub the wood with your cleaner and a stiff-bristled brush.

    Let the wood dry completely before trying to apply sealant. While wearing your mask, use the paintbrush to apply thin coats of sealant.

    Do not aggressively shake or stir the sealant, or you will create air bubbles that will stick around and ruin the surface of your sealant when applied to the wood. Clean your brush with mineral spirits and let it dry overnight.

    You can apply a second coat the following day. You will need two to three coats of lacquer or polyurethane and eight coats of varnish. This makes for a lengthy and time-consuming application process.

    Wet wood furniture in backyard

    How To Prevent Yellowing and Darkening Sealant

    If you want to prevent yellowing or darkening, you will want to use water-based sealants. It will give you the same shiny shell but will not change colors the way oil-based formulas will. Oil-based formulas also tend to bring out the natural colors in the wood. Such light woods like pine tend to look more yellow.


    Use a Stain-Sealant Combo

    Valspar Pre-tinted Canyon Brown Transparent Exterior Wood and Sealer

    If you want to enhance the color of your wood while protecting it, then a stain and sealant combo is perfect. It is a single liquid that combines wood stain with a polyurethane wood sealer. This gives you a beautiful wood finish that will last.

    What is nice about this product is that it comes in a wide variety of color tints and finishes. It could be a rainbow of colors, have a matte, satin, or high gloss finish, or be opaque to transparent or somewhere in between. This lets you customize the look of your garden furniture.

    They also have an advantage over sealants because they will not yellow or otherwise discolor over time. In addition, they do not create a hard shell on the surface of the wood like other sealants, so you don’t have to worry about it eventually pealing. Unfortunately, they are high in VOCs because the formula contains polyurethane.

    Tools Required

    To apply your stain and sealant combo, you will need a respirator or N-95 mask, orbital sander, 80–grit sandpaper, cleaner, stiff-bristled brush, paintbrush, all-in-one stain and sealer, and mineral spirits.

    Process

    As with the other products, you will need to sand off the previous treatment before applying a new coat. Then, when your wood furniture is ready for a new application, put on your mask and get to work painting the furniture with your brush.

    Give it 24 hours to dry, and then you can apply another coat. You will need at least two coats to achieve the full desired color and protection level.


    How to Waterproof Painted Wood Furniture for Outdoors

    If you want to waterproof painted wood furniture, you need to remove the paint first. While latex paint creates a seal, exterior paint can’t protect your wood as well as sealants. Use a scraper, sandpaper, or steel wool to remove the paint so that you have bare wood. Then, use one of the above methods to seal the untreated wood.


    Can Paint Protect Your Wood?

    Some paint can protect your outdoor wood furniture. Paint specifically designed for exterior use protects the wood from moisture. For the best protection, always apply a primer first. Then you can apply two to three layers of exterior paint. You can use latex or oil-based paint for this.

    As long as you are using the correct paint, you will not need to treat the wood with another waterproofing product before painting the outdoor wood furniture. However, you should completely cover the wood so that there are no exposed wood areas that moisture could get into.

    Wood furniture in backyard

    How to Naturally Protect Wood

    If you do not want to use chemicals or potentially hazardous formulas, there are some natural options. However, keep in mind that these options will not protect as well as the solutions mentioned above and will not last as long.

    For the best protection, create a reapplication schedule so that your wood has routine care. Do not wait until your wood is struggling and desperate for some maintenance.

    You could use a damp rag to work coconut oil into the wood. The coconut oil will moisturize and protect the wood. Plus, it will smell wonderfully tropical with the subtle scent of coconut.

    Another natural protectant is a mixture of oil and vinegar. Mix three parts canola oil to one part vinegar. Wipe it onto the wood and protect it from water, insects, and wear.


    Importance of Waterproofing Your Outdoor Wood Furniture

    It is crucial that you weatherproof wood if you plan to leave your outdoor furniture outside throughout the year. Wood is ideal for outdoor use because it looks great and is durable.

    However, you need to help protect it from the elements so that it does not swell, warp, discolor, or rot. For example, teak or eucalyptus furniture is extremely durable but will patina over time from a rich wood color to a weathered grey.

  • How to Brighten a Dark Room

    How to Brighten a Dark Room

    Not every room has plenty of natural light. This can leave you with rooms that feel like a dark cave. However, if you know how to brighten a dark room, you can overcome the lack of windows and natural light.

    With the right changes to the architecture, artificial lighting, furniture, and decor, you can make even the darkest of rooms feel bright and welcoming.

    Give these ideas a try and bring more light to your home.

    1. Make Architectural Changes

    If you want to make major changes to a room, then look to architectural changes that you can permanently improve the amount of natural light. These are the most costly, but can have the biggest impact.

    Take Down the Blinds

    If you can, consider removing the blinds from the windows. This increases the amount of light that’s coming in through the windows. However, keep in mind that this can reduce your level of privacy and security, so be careful about which windows you do this with.

    Use a Door With a Window

    If your room has an exterior door, you can replace it with one that has a window. This gives you another place where natural light can come in beside the windows. For the maximum amount of light, you can use a full-length glass door.

    Paint the Window Trim

    If the trim around your window is any color other than white, then consider painting it. This will brighten up the window and create a reflective surface around the window. This will increase the amount of perceived light coming in the window.

    Paint the Walls

    Painting your walls a crisp white will reflect the most amount of light. However, it can also look harsh and cold. You can choose light colors like pastels and light greys. This is perfect for a small room or those with low light.

    Paint the Ceiling Bright White

    What is the color of your ceiling? Paint it bright white to help reflect light down into the room. Even if you think your ceiling is already white, if it has been a few years, it has probably yellowed and could use a refresh. A fresh coat of white paint can brighten the room.

    Paint the Dark Wood

    This piece of advice can be taboo, but there’s no denying that painting the dark wood in your home can instantly brighten the room. If you can’t bring yourself to paint over the beautiful wood in your home, then consider refinishing or replacing it. Lightwoods are brighter and can keep a room feeling light.

    Clean Your Windows

    This simple cleaning task can increase the amount of light coming in your window. It’s amazing how much more light can come in your windows when you clean the dirt and mildew off them. Use soapy water and a stiff-bristled brush to scrub the outside of the windows and rinse them clean. Then clean the inside of the windows with Windex.

    Trim Your Trees

    If you have large trees growing outside of your house, they could block valuable sunlight. Have your trees trimmed back, so they block less light coming into your home. This is also smart because it can reduce the risk of damage to your home by falling branches.


    2. Making Changes to Your Lighting

    Pendant lights in dark room

    Sometimes, there’s only so much natural light you can get into a room. If you struggle with a room with very little natural light, you’ll need to supplement it with artificial lighting. This could be adding a lamp to a dark corner or revamping the lighting in the entire room.

    Install Recessed Lighting

    If you don’t have room for floor lamps, consider installing recessed lighting. These pot lights get mounted into the ceiling so that they are flush. That way, they won’t block light or close the ceiling in. They are typically installed in multiples across the ceiling to provide a large wash of light over the entire room.

    Add Lower Level Light

    If the only light source in the room is overhead lighting, you need to add more artificial light. In addition to the overhead light, add a lower light source, like a floor or table lamp. Direct the light upward to reflect off the wall and brighten the walls, making the room feel brighter.

    Embrace Minimalist Light Fixtures

    You don’t want big statement fixtures taking the attention away from the artificial light. Stick with minimalist fixtures that are slim and streamlined to blend into the room. Flush-mounted lights are also good because they reduce the bulk and maximize the ambient light.

    Change Your Lampshades

    Adding table lamps isn’t enough. Replace the dark or thick shades with a lighter shade or one made of thinner material. There’s no point in adding artificial light if you are going to block it with a shade. Don’t eliminate the shade, though. A large white shade can give the illusion that the lamp produces more light than it really is.

    Use Diffused Lighting

    Focus on adding ambient light to the room. This generalized light creates a wash of light over the entire room. Avoid accent lighting that doesn’t create useful light; think LED strip lights under shelving or fairy lights. Task lighting is also not helpful because it is focused light directed at a workspace.

    Use Brighter Lightbulbs

    Choosing the right bulbs for your artificial light can maximize their effectiveness. Whether you choose incandescent bulbs or LED light bulbs, choose a bright white daylight light. Look for bulbs that produce light in a temperature range of 5,000-6,000 Kelvins. This is a crisp, bright light that’s invigorating.

    Aim Your Lights

    Don’t just randomly place floor lamps in the room. Think about where you want to direct the light. Aiming it at a wall or the ceiling helps brighten the wall and reflect the light back into the room. This visual effect makes the room feel brighter than if you directed the light into the middle of the room.


    3. Make Your Furniture Work For You

    Choosing the right furniture in the room can reduce the amount of light it blocks. The fabrics can also reflect light and help the room feel brighter. You could also reflect more light with shiny metal surfaces.

    Choose Light Colored Furniture

    Light-colored furniture reflects more light, so replace your dark-colored furniture with pieces that are white, light grey, or another pastel color. You can also go bold with brightly colored furniture, such as a sunny yellow. These light and bright colors help to reflect more light and make the space feel brighter.

    Angle Your Furniture

    Position the furniture in the room to allow the light to flow. Don’t place anything in front of the window that could block the light. Instead, try placing furniture on the opposite side of the room facing the window. Then the furniture can reflect the light into the space. This works especially well if the furniture is light-colored.

    Choose to Use Slimline Furniture

    Heavy furniture is solid and takes up a lot of visual space, which means it blocks and absorbs light. Replace it with slimline furniture like pieces on legs or a metal frame. This will reduce the visual space it takes up in the room and the amount of light it blocks.

    Make Shiny Surfaces Work For You

    Shiny surfaces reflect light. No, this doesn’t mean you need to have a mirror surface on everything in the room. A lacquered, polished, or metal surface will achieve the same effect. These are smooth, reflective surfaces that will bounce and direct the light to other areas in the room. If you are skilled, you can reflect the light from a window by bouncing it off a reflective coffee table to a mirror on the wall to somewhere else in the room.


    4. Brighten the Room With Decor

    If you don’t have the budget for the architectural changes, you’ve added all of the lamps that you can, and you have made the necessary furniture changes; your final step is to address the decor.

    These are the decorative pieces in the room that complete the design aesthetic you are going for. These pieces can help brighten a dark room or work against your room brightening efforts.

    Keep the decor to a minimum and strategically choose pieces that will reflect the light or make the room feel more energetic.

    Hang a Mirror

    Hang a large mirror in the room to reflect the light. Think about the direction the light comes into the room and where the darkest place in the room is. You can then use the mirror to reflect the light where you need it the most. The larger the mirror is, the more light you can reflect.

    Lighten Up With a Rug


    If you have a dark floor, you can lighten it up with a light-colored area rug like this white rug from SAFAVIEH. Choose a large area rug that can cover most of the dark floor. This helps to brighten the entire room from the ground up.

    Make the Window the Focal Point

    If there is a large window in the room, make it the room’s focal point. Arrange the furniture and decor in the room to draw attention to the window. By making the window the focal point, you make the room feel brighter by focusing on the brightest point in the room.

    Choose the Right Accent Colors

    Sure, an all-white color palette will make the room feel its brightest, but this isn’t your only option. When all-white isn’t functional for your tastes or lifestyle, choose lighter colors instead. You can achieve the same effect with pale greys and light-colored browns like beige. Avoid a color palette that’s full of dark colors.

    Pretend You Have a Window

    Just pretending you have a window can make a room feel brighter. If you have a small window, mount the curtains to extend higher and wider than the actual window. This creates the illusion that the window is bigger than it really is. It will trick the brain into thinking there is more light because the window is supposedly larger.

    Use White Curtains

    Having curtains on your windows gives them a finished look and completes your interior design. However, curtains can also block the natural sunlight you are trying to increase. Compromise with sheer curtains. The fabric should be very lightweight, almost like translucent shades. This creates a barely filtered effect that will create privacy while minimizing the amount of light that gets blocked.

    Reduce the Decor

    Reducing the amount of decor in the room can allow more light to flow throughout. There are fewer physical objects blocking and absorbing the light, helping the room to feel brighter. If you wish to display decor, try to have it on a bookshelf perpendicular to the window. This will minimize the light-blocking effects.

    Choose Brightly Colored Decor

    If you wish to display decor, avoid dark-colored pieces that will absorb the light. Instead, opt for brightly colored pieces. The bright pops of color will help the room feel more cheery and brighter.

    Say Yes to Maximalism

    Lisette Velvet Armless Loveseat

    So far, the vast majority of advice on this list is to go bright white and minimalist. However, you can also take another approach. Instead of turning a dark space bright with white walls, try a bright color like an orange, magenta, emerald green, or peacock teal sofa. Check out the Lisette 47” Velvet Armless Loveseat which comes in a range of vibrant colors.

    Then add shiny metal accents and large-scale patterns. This idea is to fill the space with bright and bold colors. This brings energy and life to the room, making it feel brighter.

  • What Color Cabinets Go With Black Stainless Steel Appliances?

    What Color Cabinets Go With Black Stainless Steel Appliances?

    Remember when white appliances were popular?  Times were simpler then because everything looked good with white. If all else failed, you could simply leave your kitchen cabinets white and have a kitchen design that would look beautiful for decades. White cabinets never seem to go out of style, though the white appliances did.

    Then there was the regular stainless-steel trend. This was nice until people realized that stainless steel showed every fingerprint and was a nightmare to keep clean.

    This led to the most recent trend in kitchen appliances, black stainless steel. It’s sleek and modern with a more matte finish that is easier to maintain. Which leads us to the next dilemma; what color cabinets go with black stainless-steel appliances?

    1. Natural Light Wood

    Natural wood cabinets look fresh and beautiful because they feature the natural beauty of the wood’s grain while helping to keep your kitchen looking bright.

    While wood isn’t technically a color, it’s one of the most popular choices, making it necessary to include it on a list of kitchen cabinet colors. The light hue of the wood balances beautifully with the ultra-dark coloring of the slate appliances.

    The light ash or honey hues of the wood brightens up the GE appliances. This helps the black kitchen appliances from looking too dark and closing in your kitchen.

    Try to space out your black appliances so that isn’t a wall of black from the dishwasher to the stove and the refrigerator. Spreading them out in your kitchen makes it easier to move about and balances the light and dark in the room.


    2. Dark Oak

    Dark oak cabinets have a rich brown color with deep chocolate hues. They look stunning with bright white or light grey granite countertops. Because these cabinets can be quite dark, the black appliances tend to bland right in, creating a uniform look to the appliances and cabinets. It’s a perfect example of when black and brown pair beautifully. However, because the counters and appliances can look quite dark, you’ll need to balance them out with lighter colors.

    You can do this with the walls, floor, and countertop. It’s also helpful to have plenty of natural light coming in or artificial light to supplement with artificial light.

    Many people think of traditional cabinet designs when you start talking about dark oak cabinets. They have raised panels with artful details. However, you can also have a modern kitchen with dark oak. Transform your cabinets with slab fronts where the dark oak wood grain continues from one cabinet door to the next. This creates a smooth and continuous front that extends the entire length of the cabinets.


    3. Cherry

    Elegant and high-end homes often have cherry wood cabinets. The wood has a rich color with a deep red undertone. They bring plenty of warmth and light into your kitchen. The rich luster of this wood can be hearty enough to stand up to black stainless steel appliances.

    Balance this deep color combination with lighter colors for the floor, walls, and countertops. This creates a nice contrast that keeps the space feeling welcoming and not overly heavy. If you decide to have cherry cabinets, choose a more traditional design for your cabinets. Skip the slab front and shaker door and opt for more elegant doors with a raised panel design.


    4. Red

    Using the color red in the kitchen is common because it’s the color of life and energy. It also influences the way we feel because it makes people hungry. Using red for your kitchen cabinets incorporates this bold color in a unique way. Red is also a versatile color that you can use with various interior design themes. Use beadboard cabinet fronts and distress them a bit, and you have the perfect red rustic farmhouse cabinets. Use perfectly smooth and shiny red cabinets for a sleek and modern look.

    Use simple red shaker cabinets for a contemporary take on your red cabinets. When pairing your red cabinets with black appliances, keep the decor simple to prevent your kitchen from getting overwhelming.


    5. Pink

    If red is too harsh and bold for your taste, consider something softer, like pink. A soft pink can look feminine and delicate. To keep the design more mature, limit the amount of pastel pink by taking a two-tone approach to the cabinets. Paint half of them pink and the other half either white or black. Then, accent it with black tiles for the backsplash.

    Swap out the pastel pink for a deep magenta for an ultra-glamorous look. This bright and vibrant pink pairs beautifully with black and creates a feminine and glam design. You can use as little or as much pink as you want to suit your tastes.


    6. White


    White cabinets are clean and classic, explaining why they never go out of style. So it’s only natural that your white kitchen cabinets would look beautiful with your matte black appliances. It’s a simple color scheme that will make your kitchen look fresh and clean.

    The black appliances help your kitchen from looking too blinding and bright with all white. The black breaks up the white and helps to define the space. To tie the look together, use black accents throughout the kitchen. This brings the appliances into a cohesive kitchen design. Use a crisp white like this paint from Nuvo with this approach. If it’s off-white or cream, the slight yellow tints will make your kitchen look aged and dull.


    7. Yellow

    Yellow can add a bright and cheery contrast to your kitchen. Be careful, though; the wrong yellow can make your kitchen look a bit like a bumblebee. A strong sunny yellow looks best in a farmhouse or modern kitchen.

    For a more appealing kitchen design, choose a softer yellow. It will complement the appliance finish better and create a less bold contrast. Add touches of soft grey to the color palette, and you have a bright and friendly but not juvenile kitchen color palette that is perfect for a kitchen. You can then add more black elements to tie the black appliances in with the rest of the design.


    8. Blue


    The right shade of blue can look stunning with your black appliances. The key is choosing a shade of blue that contrasts with the black enough for there to be a clear definition between the black appliance color and the blue cabinet shade. This means not choosing a shade of blue that is too dark.

    A soft pale blue, a deep royal blue or a dark navy blue like this are all good options. Finish out your kitchen’s color palette by adding white, cream, or grey. These colors will create a clean interior design and help prevent your kitchen from looking too depressing or dark.

    For a bit of extra glamour, choose gold or silver hardware for the cabinets. Depending on your final goal, this can add to the warm or cool effect. If you decide on a soft or pale shade of blue, be careful with the strong contrast the black appliances will create. Add natural wood elements like this countertop to soften this look.


    9. Black

    It may seem counterintuitive, but black cabinets pair beautifully with black stainless steel appliances. The result is a monochromatic look that has built-in texture and variation. The dark cabinets have a different finish from the metal finish on the appliances to create subtle changes in texture and light. This uniform approach to interior design can make a space feel larger.

    You could paint your traditional wood cabinets, but this won’t give you a modern look that this design really needs. The best cabinets for this look are smooth slab with low-profile hardware. This creates the smooth and uniform look necessary to make the appliances stand out. This means that the finish of your cabinets becomes more important.

    Consider the finish on your appliances and choose one that is different for your cabinets. If your appliances have a satin finish, then perhaps use a flat finish on your cabinets. These two surfaces will reflect the light differently and create variations that will catch the eye. You can then complete the look with black slate flooring and sleek metal light fixtures.


    10. Grey

    Grey is the modern neutral, and it is a popular color choice for kitchens. You can change the energy by the shade of grey that you choose. A pale, barely-there grey is delicate and soft. It’s bright enough to reflect light. This makes it a perfect choice for your grey cabinets. You can then accent it with other varying shades of grey. Perhaps one with a slightly green undertone to turn it into a greige. Or a slightly blue undertone for a bluish-grey feel.

    Try adding a more dramatic dark grey on the wall behind the light cabinets. It will give the illusion that your kitchen is bigger than it really is. Then the dark appliances add a nice contrast to the light cabinets, creating visual interest and preventing the space from becoming a bland wall of grey. This is a big advantage over traditional stainless steel that has a silver-grey look, which is too similar to the color grey.


    11. Two-Tone

    Modern kitchen design trends embrace color. You no longer have to choose just one. You could paint your kitchen island one color and your wall cabinets another. Or you can paint your lower cabinets a dark color and your upper cabinets a lighter color. This two-tone approach works well for your black stainless appliances because you can commit to a color that will make them stand out without having to paint your entire kitchen that color.

    Perhaps you paint your kitchen island black to match your appliances, but then you keep your kitchen feeling light by painting the wall cabinets white. Or you paint the lower cabinets a bold blue and the upper cabinets white.


    Colors to Avoid

    While we have listed several colors that are quite beautiful, there are some colors that you should avoid. While black stainless steel seems like a neutral, and neutrals should go with anything, that isn’t the case. Avoid choosing muted and earthy colors. These don’t bring out the beauty of the black stainless steel, and tend to make everything look muddy and bland.

    Mid-range colors are also not a great choice. They lack the necessary depth and vibrancy to bring out the luster and beauty of the appliances. It’s better to choose colors that are closer to the end of the spectrum, so either pale and pastel shades or deeply saturated and vibrant shades.

  • 14 Cool Things to Put in Your Bedroom

    14 Cool Things to Put in Your Bedroom

    Your bedroom is your private space to relax and escape the stress of the world. It should be filled with your favorite things and decor that makes you happy.

    This isn’t like decorating your dorm room with cool stuff in college. You have a master bedroom that needs to fit who you are today.

    This could be creating a relaxing and peaceful space, or perhaps it’s a shine to your passions. There are plenty of bedroom decor ideas to help you get started.

    Check out these cool things to put in your room and get inspired to revamp the decor in your bedroom.

    1. Elements From Nature

    The easiest way to add warmth and comfort to your bedroom is by adding touches of nature to your home decor. One way to do this is by adding real living plants to your bedroom. This brings in color and life.

    Don’t worry, if you don’t have a green thumb there are plants that look beautiful and require very little care. A snake plant, purple passion plant, Chinese evergreen, spider plant, and pothos are all great options.

    Skip the succulent and air plant, these are deceptively harder to grow than you think. Air plants are great for your bathroom, though. The natural moisture is high and this is the perfect environment for them.

    If you refuse to have living plants in your bedroom, you can still bring nature into your bedroom. Add wood elements or decor made out of natural materials. You could have wood furniture. Or you could have wall decor that’s made from driftwood, dried palms, pampas stems, or baskets woven from dried grasses.

    2. Mini Library


    If you have a collection of your favorite books, then adding a mini library is a perfect addition to your bedroom and a natural place to keep your book collection. With your mini library in your bedroom, you’re more likely to grab a book to read than you would if your library were in the living room or home office.

    Depending on how large your book collection is, you could have a single floating shelf or a large freestanding bookcase like this six-tier bookcase.

    Even if your book collection is small, consider buying a storage solution that is bigger than you need. Then you can break up the book collection into smaller groups and scatter decorative pieces among them.

    If your bedroom is small, consider using multiple shelves mounted on the wall. Doing this keeps your floor space open by utilizing the vertical space in the room.

    3. Accent Wall

    Eveie Corfee Garden Baby Peel and Stick Wallpaper Panel

    Adding an accent wall is an easy addition to a bedroom. The wall behind the headboard is the perfect bedroom wall to turn into the accent wall. This idea works in both large and small rooms.

    To create your accent wall, you could simply paint the wall a different color, but this is a bit boring. Instead, try using removable wallpapers. It comes in sheets with a backing that you will peel off and then adhere the paper to the wall.

    Unlike traditional wallpaper, modern versions come in small and large-scale patterns and designs. Some designs look like paintings and photographs. Some have mural designs that create a large-scale scene. You’ll even find textured wallpaper that mimics the look of real bricks.

    If wallpaper doesn’t appeal to you, another option is to use wood trim pieces. These are long, thin wood strips that you can easily cut to size and create a geometric pattern.

    You could build squares, chevrons, or a freeform design. Paint your trim pieces to match the color of the wall for a subtle textured effect, or paint it another color for a contrasting design.

    4. Decorative Lighting

    Treat Yo Self LED Neon Light

    If your bedroom only has one light source, it’s time for an upgrade. You need more than a single light in your ceiling fan. Layering light sources is an interior design trick that immediately elevates the look of your bedroom.

    Ambient light illuminates your entire bedroom. Your overhead light does this, but you can add a floor lamp to add to it. Task lighting is directed light that’s meant to illuminate your workspace. This is the best type of light for your reading chair, desk, vanity, or nightstands.

    The third type of light is accent lighting. This is the type of light where you can have the most fun. Fairy lights are popular in teen rooms.

    There are more options than just fairy lights, though. Paper lanterns come in various shapes, sizes, and colors. Arrange a couple of these hanging lights in a corner for a decorative element that also adds light.

    A custom neon light like this one is also a funky and cool option. You can buy LED strip lights and mount them almost anywhere in the room. Try placing them under your bed frame, under the shelving, behind the headboard, on the crown molding to illuminate the ceiling, or anywhere else in the room you want to add an accent.

    5. Hang a Mirror


    It doesn’t matter if you have a large or small space; a mirror can do wonders for your bedroom.

    Hanging a large mirror on the wall or having a floor-length mirror is a great bedroom idea because not only does it make your bedroom seem brighter and larger, but it also gives you a place to get ready.

    If you have a large bedroom, embrace the space and purchase a floor-length mirror like this one from NeuType. For the best look, choose a mirror based on height.

    Take the tallest person’s height that will be using the mirror and subtract six inches. This is the minimum length that your mirror should be to minimize distortion.

    However, a mirror needs to be at least half of the tallest person’s height to be able to show their entire body. It also needs to be wide enough to see your entire body easily.

    When choosing your mirror, there are wall-mounted, leaning, and freestanding mirrors. The one you choose will depend on your budget, taste, and space available. Freestanding mirrors take up the most room, then leaning, and wall-mounted takes up the least.

    Pay attention to the frame. A slimline frame will look modern, while a thick wood frame can look more rustic or farmhouse. A metal frame with decoration can look vintage-inspired.

    6. Gallery Wall


    While most people think about putting a gallery wall in their living room or main hallway, there’s no rule that says you can’t put one in your bedroom. A gallery wall is a perfect solution for when you have a lot of wall decor.

    You could have all photography shots or have a mix of photos, paintings, and other wall art. If you have small figurines, you can even include a shelf for them. This mix of items will create an eclectic mix of items for a lot of variety and visual interest.

    If you prefer a more uniform look, aim for a minimalist approach. Frame each piece with the same mat and frame. Then hang the art in a grid pattern where each frame is evenly distanced from the other frames around it.

    You don’t have to frame your pictures. If you have a large collection of images or like to change them out regularly, then a more mobile display solution is going to work better.

    Use a photo clip string light kit like this one from Dopheuor to string wire up in horizontal lines and then space clips out on the wire. You can then use the clips to hold pictures. This makes it easy to switch the pictures out as often as you want.

    7. Area Rug

    Hide your ugly carpet with a large area rug. If you have tile or wood floors, a rug is a must for making your bedroom feel warm and cozy. No one wants to get out of bed and immediately put their feet on a cold, hard floor.

    Area rugs around or under the bed cushion your feet and eliminate the chill. The cool thing about rugs in your bedroom is that you have a lot more freedom in sizing. If you have a decent budget to work with, you can buy a large area rug that starts under the bedside tables and extends down the entire length of the bed.

    A smaller and more affordable rug can look just as nice if it starts in front of the nightstands. If your budget is tight, stick with two smaller rugs on either side of the bed.

    If your rug is going under the bed, don’t worry about the pattern and color too much since the majority of it will be hidden under the rug. If your rug is going to be visible, then look for one that has a pattern that ties all of the room’s colors together.

    8. Soft Elements

    Adding soft textiles is a must for your bedroom. These are the fabrics that create a plush and cozy atmosphere. This is what takes your nice-looking bedroom and turns it into a place that has an inviting interior design.

    Choose accent textiles that feel nice. Fabrics like jersey, velvet, silk, some cotton, flannel, faux fur, sateen, and fleece all look and feel soft.  Add a couple of throw pillows to your bed and accent chair.

    Don’t add too many; your furniture shouldn’t be drowning in pillows. Next, add a throw blanket to the foot of your bed. Leave it folded, and you never have to actually use it for warmth. It can be there just for visual effect.

    Accent the rest of the room with soft fabrics. For example, add an area rug to the floor, hang curtains on the window, and mount a small tapestry on the wall.

    Add curtains to the bed if you want to create a whimsical or bohemian feel. You can hang them from a four-poster bed frame. If you don’t have this bed style, you can fake it by hanging them from the ceiling and draping them to either side of the bed.

    9. Expressive Art

    Don’t leave your bedroom walls boring and blank unless you are going for the minimalist look. However, even minimalist designs have at least one decor piece. The trick is choosing one and making it the focal piece. For other interior designs, you can easily have more than one decorative item on the walls.

    While you could hang a generic piece of art that’s massed produced, this is a bit boring and will have no meaning for you. Instead, look for pieces that are handmade and speak to you. This will increase your enjoyment of the room and help your bedroom reflect who you are.

    Wall hangings are popular right now. There are even videos showing you how to accomplish this DIY project.

    Mount a small curtain rod on the wall and display your handiwork. If you aren’t crafty, you can leave the artistry to other people and just buy art that speaks to you. It can be anything from ink prints to paintings or photography. Perhaps you see a weaving that.

    10. Extra Seating

    Most people have their bed, and that’s the only seating that is available in their bedroom. It’s time to elevate your bedroom with additional seating. This gives you or someone else somewhere else to sit while in your bedroom.

    A bench at the foot of your bed or a small stool are perfect furniture pieces for getting dressed. They are also easy to scale down and fit into a small bedroom. Add a comfy armchair if you have a larger bedroom and more room to work with.

    This gives you a place to relax, read a book, or drink a morning cup of coffee. For a more relaxed bohemian or eclectic feel, try more casual extra seating like a large pouf.

    11. Bold Color Scheme

    Your bedroom is your private space. This is your room to become the interior designer you’ve always wanted to be. You can freely choose the color scheme and decoration that you love.

    Choose a bold color scheme that features your favorite color. You could go for a monochromatic look with several shades of your chosen color. Or you could pair your favorite color with neutrals like white, grey, or black. This creates a beautiful contrast and keeps the focus on your favorite color.

    You also don’t have to paint just the walls. Instead, you could paint the ceiling. Doing this creates a unique and bold design that showcases your chosen color. Don’t be afraid to paint just part of the wall. Try painting just the area on the wall that’s behind your headboard.

    The best colors for a bedroom are soft neutrals, grey, blue, and green. These are calming and soothing colors that will help your brain and body to release stress and energy. This will help you fall asleep better and wake up well-rested.

    Colors that are not ideal for your bedroom are bright red, orange, and intense sunny yellow. These colors are energizing and intense, making them better for the kitchen or living room.

    12. Smart Home Technology

    It doesn’t take a lot to upgrade your bedroom with smart home technology. There are plenty of modern bedroom ideas that will help you upgrade your bedroom. Look for ways you can add technology to make your life easier.

    Replace the light switches with ones that are compatible with Amazon Alexa or Google Home. Add smart plugs to the lights that plug into sockets. Now you can control the lights in your bedroom by voice, which is really nice when you don’t feel like getting out of bed to turn the lights on or off.

    You can also create schedules to have the lights turn on and off on their own. Add a streaming device to your TV or upgrade your TV to a smart TV. Then you have more options for how you watch your favorite shows and movies.

    You can also sync your TV to your smart home device for voice control and other convenient features. Add Bluetooth speakers around your room for a surround sound experience.

    13. Signature Scent

    Take a lesson from some of the best high-end resorts around the world. They have a signature scent that subtly wafts throughout the hotel. You can do this in your bedroom by choosing a signature scent that will evoke the feelings or energy that you want to create.

    For a bedroom, you’ll want to choose scents that are calming and relaxing. Try rosemary, lavender, vanilla, jasmine, sage, or peppermint. There are all smells that help to relax the body and mind, which will help you fall asleep faster, sleep deeper, and wake up more refreshed.

    To add your scent to your bedroom, you can buy a candle and burn it. Or you could have incense, or essential oil diffusers arranged. Turn these items into the decor by choosing beautiful candles or diffusers. Now you have something that delights multiple senses.

    14. Wall Decals

    Skip the cheesy wall decals that are a cliche quote or are a large image. Instead, look for a kit that has sheets of small decals. You can then individually place them on the wall to create a custom pattern. Try placing them evenly spaced throughout the entire wall.

    Or you could place them densely close together at the top and then gradually spread and fade them out as you work your way down the wall. Or you could randomly scatter them.

    You could place them on all of the walls or on a single wall to create an accent. There are no rules with decals, so you could mix multiple sets of decals together and make your own pattern or design.

  • How to Place a Rug in a Living Room

    How to Place a Rug in a Living Room

    It is one of the most commonly faced dilemmas in home decorating; how to place a rug in a living room. Getting it right enhances your living room while getting it wrong can make the space feel awkward, cramped, and uncomfortable.

    So, whether you are starting from scratch or doing a little redecorating, this guide will help you perfectly place your rug.

    Choose the Right Size

    rugs-pillows-and-blankets-farmhouse-living-room-ideas-tatertotsandjello-4800143
    Source: @tatertotsandjello via Instagram

    Before you start figuring out living room arrangements, you need to take a step back and make sure you have the right rug size.

    The perfect rug will enhance the room, making it feel more spacious, welcoming, and tied together. Unfortunately, people often underestimate the size of the area rug they need. So, when in doubt, always go with the bigger rug.

    Unless your rug is curling up the walls, no one walks into a room and thinks, “gee, they bought a really big rug!”. However, even those not well versed in design will notice the awkwardness of a too small rug, even if they can’t articulate that the small rug is what makes the room feel awkward.

    Buying a rug that is too small makes the living room feel smaller than it really is because it creates an unnatural visual line that breaks up the space. This also makes the room feel choppy, which makes it awkward to be in.

    Finally, it brings down the quality, making the room feel cheap. The lack of design and forethought is a dead giveaway that someone other than a professional designed the room.

    Rugs Size Guide


    As a general rule, the majority of American homes have a living room that is large enough to support an 8 x 10 foot rug like this nuLOOM Ren Machine Washable Vintage Floral Area Rug. Unless your living room is unusually tiny, do not buy a rug under 6 x 9 feet. A 4 x 6 rug is simply too small for any living room in a home. Instead, save these smaller rugs for your bedroom, bathroom, or home office.

    You Bought Small

    If it is too late and you have already bought a small rug, there are a few things you do with it. This will save you from having to buy a new rug right away. Large rugs can be expensive. Try centering the small rug under the coffee table or a small table.

    Consider layering the rug with another one underneath it. For example, your first rug is a lovely handwoven 4 x 6 that you picked up while traveling or is a family heirloom.

    Place a jute or seagrass rug like the nuLOOM Elijah 9 x 12 Beige Solid Area Rug underneath for textural and color contrast. They are more affordable than other large rugs, and the two rugs create a purposeful feel to the smaller one.


    Center the Rug

    You shouldn’t position your rug so it is in the center of the entire room. Your rug placement needs to make sense with the positioning of the furniture.

    As mentioned earlier, you can center a small rug under the coffee table. A larger rug should be positioned to coordinate with the largest furniture piece in the room. This is typically the sofa.

    If you have two sofas, you should center the rug between the two. This may or may not be the center of the room. For example, if you have a sectional sofa that creates an L or U shape, the rug should be centered so that it is not longer on one side.


    All Legs Off

    Taking an all legs off approach works well in a small living room because it helps a small space to feel more open. The trick is placing the rug so that the edge of the rug just meets the front legs of the sofa.

    This showcases the beauty of a patterned rug and makes it the focal point in the room. A smaller rug that does not meet the front of the furniture will not have the same effect and can lead to the choppy effect mentioned earlier.


    All Legs On

    For a living room that looks professionally designed, buy a larger rug that you can place all four legs of your furniture on. The rug needs to be large enough that it extends several inches or up to a foot beyond the outside legs.

    The only exception is if your sofa is against the wall, then you would line both the rug’s edge and the sofa up with the wall. The all legs on approach works best in large living rooms or ones with an open floor plan.

    This approach creates a visual zone, helping to define the living room space from the rest of the home.

    If you have more than a sofa in your living room, this is an all or nothing approach. The rug should be large enough to position all of the furniture fully on it.

    This includes multiple sofas or a sofa and accent chair combination. If the rug is not large enough for this, then scale back and position only the front legs of all of the furniture on the rug.


    Front Legs On

    Rug in living room

    If you do not have the budget or living space for the all legs on approach, then you can cheat by only putting the front furniture legs on the rug. The rug needs to be big enough that you won’t see the edge when it is tucked under. It also needs to extend beyond the sides of the sofa. This defines the seating area without overwhelming a smaller room.


    Rounded

    SAFAVIEH Chelsea Ivory Round Floral Border Solid Area Rug

    The traditional rule of vintage rugs is to choose a rug shape that matches the shape of the room. This helps create visual flow by creating parallel lines. The long lines of the walls match the long lines of the rectangular rug.

    However, modern rules tend to put this aside for differently shaped rugs. Instead of using a square rug in a square room, try using a circular rug like this SAFAVIEH Chelsea Ivory Round Floral Border Solid Area Rug.

    The curves of the round rug will create a unique visual effect that can soften the harsh corners of the room. It can also work well in a room that does not have a clearly defined shape.


    Fully Cover High Traffic Areas

    When choosing your living room rug size and placement, think about where people will walk through your living room.

    The rug should either cover the entire walking path or leave it completely bare. You shouldn’t walk through with one foot on the rug and the other on the bare floor. This will feel awkward underfoot.


    Leave Equal Space

    Interior designers will tell you that the rules state that you should have about 8-12 inches of space on either side of the rug from the wall. However, this can vary greatly when you buy a larger rug.

    Traditional rugs on hardwood floors can leave as little as 4-6 inches of space from the wall. The amount of space is not as important as it is equal.

    The goal is to create a balanced look. If the rug covers the entire floor, look at the space between the edge of the rug and the wall.

    If your rug is smaller, look at the amount of rug that extends beyond each end of the rug. If your rug is between multiple pieces of furniture, it should be equally positioned between them.


    Use Multiple Rugs

    The idea of layering rugs is relatively new in mainstream interior design. There are a couple of ways you can go about it. The first is simple, have two rugs that are the same shape, with one larger than the other.

    Place the smaller rug centered on top of the larger one. Then arrange them as we described above. Typically, people choose a plain rug for the larger one because the majority of it will be covered. Then the top smaller one is more creative.

    For example, it could be a patterned or colorful rug. You can skip the rug pads with this approach. The multiple rugs will feel thick like carpet, especially if you use wool rugs.

    The other approach requires a bit more finesse and is harder to pull off. Buy several rugs that would be too small on their own, and then position them together.

    This works well for Moroccan rugs like this Bungalow Rose Heba Moroccan Area Rug. You could position them with front legs on for each piece of seated furniture.

    Or you could angle them haphazardly at 45-degree angles to cover the entire floor. This placement looks beautiful with bohemian decor or a nontraditional seating arrangement.

  • How to Hang Pictures Without Nails

    How to Hang Pictures Without Nails

    Knowing how to hang pictures without nails will save you from unnecessarily damaging walls. It also makes your life significantly easier.

    No more trying to find a wall stud. No more getting a special bit to drill a hole in a concrete or brick wall. No more watching your plaster walls flake and powderize in front of your eyes.

    With this list of nail-free picture hanging ideas, your walls will remain blemish-free and beautiful, no matter how many pictures you display.

    1. Command Hooks

    The easiest and fastest solution that is also similar to using a traditional picture hook or nail is command hooks. These are plastic and adhesive hooks (check out these available at Home Depot) that you adhere to the wall and hang the picture on.

    They work best on smooth surfaces so that the sticky tape can make full contact with the wall. You’ll also need to check their maximum weight limit. These hooks come in different sizes and strengths, so get one that’s strong enough to hold well above your picture’s weight.

    Also, pay attention to the size of the hook. Some are bulky, making it difficult to hook a small picture frame to look over it.


    2. Command Strips

    The second most popular solution for hanging pictures without nails is to use command picture hanging strips. Each strip comes with a paper cover on each side of the strip. You’ll peel one side off and adhere the strip to your picture frame. Then peel off the other paper backing and press the frame to the wall.

    The adhesive strip will grip the wall and the picture frame, holding the picture on the wall. Using these special mounting strips is better than using painter’s tape or another type of adhesive tape because they help prevent damage to the wall.

    Use Binder Clips

    If you like the idea of using command strips but don’t want the strips to adhere to your picture frames, then use binder clips. Place the command strip on the binder clip and then adhere it to the wall.

    Use the binder clip to grab onto the loop or hanging wire on the back of the picture frame. This is a nice solution if you want to create a gallery wall. You can easily move the pictures around on the binder clips without having to unstick and restick the command strips.


    3. Velcro Strips

    Velcro strips

    While command hooks and strips are great for lighter-weight pictures, they have their limits. If you have a heavy picture that you want to hang, you will want to up the holding power to hook and loop strips.

    Velcro brand is known for making high-quality Velcro strips that are perfect for hanging pictures. To use, peel off the backing and here the strip to your picture frame. Then peel off the other backing and press the frame to the wall so that the other side adheres.

    The Velcro will hold the picture in place to the wall. If you decide to move your pictures around, you can easily pull the picture frame off the wall and move it to another set of strips located elsewhere.

    Should you decide to remove the picture completely, you can easily and cleanly pull the strip off the wall.


    4. Suction Cup Hooks


    If you don’t trust adhesive or are afraid it will leave behind a residue, then you have an alternative. Suction cup hooks like these available at Amazon are great for hanging lightweight pictures. You press them against the wall, removing the air underneath. The suction cup grips the wall, and you can hang a picture from the attached hook.

    This method works best on smooth walls. Textured walls can create gaps in the suction cup’s contact with the wall. This lets micro amounts of air back under the suction cup. Eventually, too much air enters, and the suction cup fails.


    5. Use a Shelf and Lean

    You can place your frames on the shelf if you already have shelves instead of hanging pictures. You could stick with just one or two as a focal point with other decor. You could also try layering them.

    Choose several pictures of different sizes and shapes. Start by placing the largest of frames on the shelf first. Then place the next largest and work your way through them as they get progressively smaller. The goal is to layer the pictures without completely blocking the ones in the back.


    6. Set Up an Easel


    If you have a picture worth a significant amount of money or is in a particularly heavy frame, you may want to avoid hanging it completely.

    Set up a picture display easel like this REALlWAY 63″ Folding Easel Stand that you can place the picture on. This is ideal for giving use to a dead corner. It also makes it easy to move the picture around as you rearrange your furniture and decor.

    The easel provides extra support, and there’s no risk of the picture falling when your nail-less hanging method fails. Try to match the style of the easel to the style of the picture frame and the rest of your decor.

    A simple black modern frame looks best on an equally simple black or wood easel. An ornate gold gilded frame with a lot of detailing will look best on an easel that’s equally detailed and ornate.


    7. Hang From the Mantle

    If your home has a fireplace, it likely also has a mantle. This is like a built-in shelf that’s just waiting for picture displays. Of course, you can place pictures on the mantel. However, you can also hang pictures from it.

    Use stocking hooks that are weighted to stay in place and are strong enough to hold a significant amount of weight. Then use picture hanging wire or ribbon to suspend multiple pictures from the hook in front of the fireplace.

    Keep in mind that this approach is best for unused fireplaces. You’ll want to remove the pictures if you plan to have a fire.


    8. Picture Rail Molding

    Modern homes aren’t typically built with picture rails. However, if you are lucky enough to live in a home that has them, then you have a built-in solution for hanging pictures without the use of nails. All you need are some hooks and picture wire.

    You’ll need two equal lengths of wire with a hook attached at each end. One set of hooks will hook over the picture rail, and the other will hook on the picture frame’s hanging loops.

    You can hang as many pictures as you like from the rail. Adjust their height on the wall by changing the wire length.


    9. Shower Curtain Rod

    If your wall has an alcove or place where it’s indented, then you have the perfect place for adding your own picture rail. Use a shower curtain rod as a picture hanger. Adjust the tension rod to have a secure hold. Then use picture wire, twine, or ribbon to hang your wall art.


    10. Use Nail Alternatives

    If you are ok with making one or two holes, there are a few nail alternatives. These methods can minimize holes while maximizing the number of pictures you can hang. They can also be a simpler display method if you frequently move around or change out your pictures.

    Hang a Display Board

    Instead of hanging art and pictures directly on the wall, you can hang a single board. Then hang art from the board. This makes it easier to move the pictures around on the board. You only make two holes in the wall, but you can hang several pictures on it. This method works best when you have several small frames that you want to hang.

    Press-In Hooks

    Press in hooks will create a hole for every picture you hang. They work like a wall anchor that you hand push into the wall and hang your picture from the attached hook. They are different from nails because you don’t need a hammer to push them in. In addition, the hole they make is much smaller than a nail. Because of their small size, these hooks are best for small or lightweight frames.

    Hang a Cork Wall

    If you want to create a gallery wall, mounting a board may not be feasible. Instead, try covering your wall with cork. It comes in sheets that are varying thicknesses. Use removable adhesive to adhere the cork to the wall. Then hang your artwork from the cork. The cork gets full of holes, but you can easily remove it when needed to reveal the damage-free wall underneath.

  • What Size Rug Is Best for a Queen Bed?

    What Size Rug Is Best for a Queen Bed?

    Adding an area rug to your bedroom can give it a finished look. If you have hardwood, laminate, or tile floors, then a rug can add warmth and a sense of coziness to the room.

    Buying a rug for your bedroom isn’t like buying a rug for the other rooms in your house. Fail to get the wrong size, and your rug could completely disappear underneath the bed.

    Buy a rug that’s too big, and it’ll take over the bedroom, making it feel small and cramped. So, what size of a rug is right for a queen bed? This guide will help you buy the perfect rug for your bedroom.

    Know Your Bedroom Size

    Choosing the right rug size is about more than just the size of your bed. It’s also about making sure the rug looks good in your bedroom. You need to know your room size too. This is similar to finding out the size of your living room when buying area rugs.

    To find out the size of your bedroom, measure the length and width of the room. Then multiply these two measurements together. Now you know the shape of your room and its square footage.

    What Is a Standard Bedroom Size?

    The average American apartment bedroom is quite small at about 132 square feet, which is large enough to accommodate a queen-sized bed. This would be an 11 x 12-foot room.

    The International Residential Building Code states that a bedroom should be a minimum of 70 square feet. This would be a 7 x 10-foot room.

    Bedrooms in single-family homes average 219 square feet. That’s about 14 x 15 square feet, which is considered a standard size. If your bedroom is close to or over 300 square feet, you have a large bedroom.


    Know Your Bed Dimensions

    You know you have a queen-size bed, but this isn’t the full story. There is a standard size for queen mattresses that is 60 x 80 inches. However, there are also nonstandard bed sizes, such as an Olympic queen, that measures wider than average at 66 x 80 inches. Or there is the California Queen, which is longer than the average.

    Obviously, the right size you choose could change when you have a queen mattress that is bigger than the average.

    Additionally, you need to measure your entire bed. Your queen mattress sits on the bed frame, so by measuring the outside dimensions of the frame, you’ll have a better idea of how large the rug needs to be to extend beyond the bed.

    Circular rug in bedroom

    Common Rug Placements

    Once you know the size of your bed and the size of the room, you need to decide on rug placement. This will help you compare different rugs. Your bedroom rug could go under all of the furniture, none of the furniture, or only some of it.

    Anchored by the Nightstands and Bed

    If you have a large bedroom, you have enough room for the bed and two bedside tables. Take advantage of all this space and buy a large area rug that can go under all four legs of both nightstands and the bed.

    The rug will start at the wall behind the bed and nightstands but not extend out beyond the foot of the bed and to the left and right of the nightstands. This works well if you don’t have furniture or decor at the foot of your bed that would need anchoring.

    It also works well for smaller spaces that may not have the space available at the foot of the bed for an area rug to extend far beyond the foot of the bed.

    In Front of the Nightstands

    If you buy a smaller rug that’s not big enough to go completely under the nightstands, then try placing it in front of the tables. This placement works well with an area rug size that’s slightly smaller.

    Just be sure that the rug extends under the foot of the bed. Otherwise, it will look like it’s awkwardly floating in the middle of the bed.  If you have a large room, you can buy a larger rug that extends several feet beyond the foot of the bed.

    Middle of the Bed

    A third common rug placement is to have the rug start at the middle point of the bed. This is ideal when you have additional furniture at the foot of the bed. That way, the rug extends beyond the bed far enough so that the furniture is also on the rug.

    This placement is also ideal when you have a larger room with a long rectangle shape where the head of the bed is against the short wall. With this placement, you can use a vintage rug.

    Having only half of the rug hidden under the bed means you will still see the majority of the gorgeous rug’s design.


    Standard Rug Sizes

    Area rugs come in standard sizes. Understanding how each size will look and when it is best to use each size will help you choose the right size for your bedroom and bed size.

    4 x 6 Feet

    A rug that is 4 x 6 feet is too small to place under the bed. These are small rugs and not large enough to visually balance the size of a queen bed. However, you can still use rugs this small if you use multiple rugs. Place one on either side of the bed where you would put your feet when getting in and out of bed.

    5 x 8 Feet

    If you plan to only use one rug, the narrowest it should be is five feet. This is a perfect rug for smaller bedrooms. Place it under the bed and in front of the nightstands. It isn’t wide enough to place it under the nightstands.

    6 x 9 Feet

    This slightly bigger rug fits better into an average-sized bedroom. It gives a bit more rug space on either side of the bed, making it the right size for most people. Despite it being a large rug, it’s still not big enough to extend all of the way under the nightstands. However, you could shift it to be just in front of the front legs of the nightstands. Additionally, if you have a nonstandard Olympic queen bed, the extra length will work well with your larger bed.

    8 x 10 Feet

    If your bedroom is slightly larger than the average, consider purchasing a bigger rug that measures 8 x10 feet, like this turquoise Luxe Ombre rug from nuLOOM. While you won’t get the entire bed and nightstands on the rug, you do have two placement options with this larger rug.

    First, try laying the rug under the nightstands and head of the bed. This keeps the rug up at the head of the bed and works best if there isn’t a lot of space at the foot of the bed. The other option is to shift the rug down.

    Start the rug a quarter of the way or halfway down the length of the bed. This leaves several feet of rug extending out from the foot of the bed. If you have a California queen, this is a good option because it accounts for the additional bed length. This is also a good placement option if you have a chest or bench at the foot of the bed.

    9 x 12 Feet

    A 9 x 12 foot or larger rug like this 9 x 12 Navy Indoor Geometric Southwestern Area Rug provides the greatest coverage. It will completely cover the entire carpet or bare floor in some bedrooms. It’s actually too large for small bedrooms.

    If you have plenty of floor space, then this size of rug will be large enough to go under the nightstands and queen bed with plenty of space on either side and extending out from the end of the bed.

    Round Rugs

    Everyone automatically thinks of a square or rectangular rug when buying an area rug for their queen bed. However, they aren’t your only options. You could also place a round or oval rug.

    This approach will create a custom rug look. You don’t want to place a round rug centered directly under the bed. Then it will barely peak out of the sides. Instead, the edge of the rug should start at the middle of the bed and extend out of the bottom of the bed.

    This approach works well for a narrow bedroom because the round shape will complement the limited space. The round shape of a rug like this Imaria Southwestern Red Area Rug can give your bedroom a creative or eclectic look.

    Runner

    Runner area rugs are long and skinny, making them perfect for use in a hallway or placed in front of a long kitchen countertop. You can also use them in the bedroom. They are perfect for small spaces or if you have a limited budget.

    If the long side of your bed is against the wall, you can place the runner along the side of your bed. If you have space on both sides of your bed, then you could place one runner on either side of the bed.

    A third option is to place one at the foot of the bed. Never place a runner under the bed as they are not wide enough to ground the bed.

    Animal Skins


    An animal fur can make a plush and luxurious addition to your queen bed. Whether you decide to buy real or faux, furs come in a unique shape that is hard to measure. A single sheep’s skin rug or faux sheep’s skin rug like this BAYKA Small Faux Fur Rug works well as a small rug placed next to the bed.

    Position it in front of the bedside table so that it’s the last thing your toes touch when getting in bed at night and first thing in the morning when getting out of bed.

  • What Colors Go With a Gray Sofa?

    What Colors Go With a Gray Sofa?

    What colors go with a gray sofa? Well, the short answer is that almost any color can coordinate beautifully with your gray sofa. This gives you complete freedom to decorate your living room with your chosen color palette.

    Unlike other colors, like blue or brown sofas, your creativity is not limited. When selecting your colors, think about more than just the colors. Consider the shades for a balance of light and dark and the interior design style you’re going for.

    This guide will help you choose the perfect color palette for your room with a gray sofa.

    1. White

    White is bright, clean, and fresh feeling. It reflects the maximum amount of light, making it perfect for rooms that lack natural light. It’s also a top choice for those who like simple and modern designs. It doesn’t clutter up the space with unnecessary color.

    However, the all-white aesthetic isn’t for everyone. This is where gray becomes an important addition. Adding gray upholstery to your white room softens the white and makes the room feel more comfortable and welcoming.

    White works well with both light and dark shades of gray, so you can make your design work no matter what shade of gray your couch is. To really soften your white and gray room, add wood elements. Doing this gives you room a Scandinavian feel.

    Try adding a light wood floor and furniture. This adds more warmth to the space and softens the white color’s brightness.


    2. Black


    On the opposite end of the color spectrum, there is black. It creates a moody and sophisticated feel. It also works well for a sleek and modern design.

    You could commit to the black look and use it as the wall color on all four walls. However, this can be too much black for some people. Instead, try painting one wall black as an accent wall using a black wall paint like this one from Microblend, and leave the others white or a pale gray.

    You could coordinate the light gray walls with a matching light gray sofa. The dark colors offset the light gray furniture. Be careful that the room doesn’t become too dark. Don’t block the windows with heavy curtains. Add light fixtures that can increase the amount of light.


    3. Gray


    Of course, gray decorative elements will coordinate with your gray sofa. Gray living room ideas are popular right now because gray is considered the trending neutral. It comes in a wide range of shades for versatile interior design options.

    Don’t choose elements that match too closely. When you have gray walls, flooring, and furniture, everything blends to become one large bland blob of gray. It can look boring and dull. Instead, vary the gray tones to balance light and dark.

    If you have a dark gray sofa, then choose light gray paint like this one from Prestige Paints for the wall, or vice versa. This creates depth in the room by making it clear that the sofa is separate from the wall and other furniture.

    Choose textiles that have other colors in addition to gray. The pattern on the fabric and the weave of the material add texture to the room. This helps it to feel more cozy and welcoming.


    4. Neutrals

    Neutral may seem counterintuitive, but they can complement your gray sofa nicely. Choose neutral colors that are in the same shade family as your gray. For example, if you have a light gray sofa, then choose neutral shades that are also light.

    If your gray sofa is darker, then choose shades that are also darker. This keeps the colors in the same family. It’s also good to choose either the gray or the neutrals to be the dominant feature in the room, and then the other color is a pop of color accent.


    5. Earth Tones

    Using earth tones with gray can bring some subtle and gentle warmth into the room. gray tends to be a cool color, so earth tones can make the gray feel less cold.

    Colors that qualify as earth tones are ones that you would find in nature. For example, mustard, marigold, terra cotta, rust, burnt sienna, deep navy, and turmeric are all earth tones. These warm colors are a step up from the traditional neutrals.

    Try using these colors with your gray sofa in the decor. This could be wall art, decorative pieces on a coffee table, pots for plants, or small items on a shelf.


    6. Red

    Red and gray don’t seem like they would go together, but this bold color can create a unique aesthetic in your home. The design choice tends to be hit or miss with people, so you’ll either love it or hate it.

    Most people use a combination of bold, bright red with black and light gray. Balance the three colors in the room to create a balance of light, dark, and bright. Gray sofas are good for this because it provides a neutral furniture piece. Then you can add red accents.

    If you decide you’re tired of this design, you can easily switch out the red decor for another color.


    7. Pink


    Pink and gray are a classic color combination that creates a design that’s the perfect balance between masculine and feminine design. Both colors work well together in light and dark shades, so you have a lot of freedom in choosing any color of pink that appeals to you most.

    Darker shades of pink have a more sophisticated feel, while pastels work best in a rustic, farmhouse, or contemporary design. Mauve is a muted version of pink that works well for vintage-inspired designs like grand millennial decor.

    To elevate your interior design, use more than one shade of pink. Choose one dominant shade for the room but then accent it with lighter and darker shades in the textiles with a multi-dimensional pattern. Florals like these decorative cushion covers work well for this because they naturally use varying shades of a single color.


    8. Yellow

    Using yellow in your interior design can help brighten your living space. It’s the color associated with the sun, so even if your room lacks light, this bright color gives the impression of more light. It’s a naturally bright and light color, so it will help reflect the light that is present in the room.

    Pairing it with your gray sofa is a smart choice because the gray balances the yellow and gives it some softness. Pale yellow is perfect for farmhouse and contemporary designs. The light color adds some life to what would otherwise be a bland, neutral color palette.

    If you like bold colors, choose a vibrant yellow that can balance nicely with a darker shade of gray. The contrast between light and dark makes for a bold interior design. Try to use equal amounts of each color so that your design is balanced.


    9. Green

    Bring a lush touch of nature into your living room by pairing your light gray sofa with rich green shades. Try adding a tropical leaf wallpaper to one wall and an accent. This will have multiple shades of green that will add depth to the room. You can then pick up those green colors throughout the rest of the room.

    Add solid green curtains to frame the window. Dress the sofa with pillows and a blanket. Add an area rug that has a bold pattern that features green.

    Finally, commit to the green nature aesthetic by adding actual live plants. Mount them on the wall opposite the feature wall or place one in a large plant in a dead corner.


    10. Blue

    Using blue with your gray couch is a smart choice if you want to create a calm and soothing aesthetic. Pale blue can brighten up a dark couch with a light throw pillow or a blanket.

    Using light blue for the rug color is also good because it adds some lightness to the bottom half of the room, which keeps a dark gray sofa from absorbing too much light.

    A charcoal gray color can also look beautiful with a deep blue paint color. The two dark shades will have a sophisticated and understated glamorous feel, especially if you accent it with gold fixtures and hardware.

    Using blue, white, and gray can be a perfect color palette for a nautical interior design. It can also work well for a simple contemporary or Scandinavian design.


    11. Jewel Tones

    Choosing a jewel tone for your wall paint and color scheme will give your room richness and regality. These colors are highly saturated, and complement gray beautifully. Think deep peacock sapphire blue with hints of teal, deep ruby red that isn’t too bright but not dark burgundy either, and earthy emerald green that mimics the lush color of healthy tropical plants.

    Inspired by the deep colors of gemstones, these jewel tones add life and vibrancy to your gray sofa. They work with both light and dark gray. Add metallic accents, and your plain gray sofa gets elevated into something that looks elegant or even luxurious.

    Try pairing more than one jewel tone together for a coordinated look. For example, blue, green, and gray would look beautiful together and be a soothing design. Or red, orange, and gray can have an energizing but not overwhelming design.


    12. Wood

    Wood isn’t necessarily a color, but it’s an important element to discuss when styling your gray sofa. Adding natural elements to your living room helps bring warmth into your living space.

    A common method for doing this is with wood flooring. However, having wood flooring typically means you’ll want to lay an area rug down. You’ll then need to consider the color carpet combination and how it coordinates with your gray sofa.

    You can add more warmth to the room with wood end tables, a coffee table, or shelving. Choose woods that have cool undertones. This means avoiding woods like cherry with red undertones or oak.

    Woods like ash, maple, pine, and popular all have cool undertones. These will pair better with the cool nature of gray. You could even further bring out these undertones by giving it a whitewash or graying treatment.

  • What Color Goes With a Brown Leather Sofa?

    What Color Goes With a Brown Leather Sofa?

    A brown leather sofa is a classic piece of furniture that looks beautiful in any home. The luxurious leather adds a sense of elegance and class that a fabric sofa simply can’t achieve. This is especially the case when you choose a classic upholstery design, like a Chesterfield sofa or a mid-century modern sofa.

    Once you have your beautiful leather sofa, you now have to design the rest of your living room around it. So, what colors go with a brown leather sofa? This guide will help you find the perfect color scheme for your leather sofa.

    1. Earth Tones


    Pair your brown couch with a color scheme that features earth tones. These are colors that you would find existing in nature. Think rusty reds, burnt oranges, mustard yellow, sage, moss grey, and sandy beige. These colors pair well with your brown leather sofa because the sofa is also an earth tone shade naturally occurring in nature.

    This KILZ TRIBUTE Interior Matte Paint comes in a range of earth tones including “Baked terra cotta”, “Haute red” and “Pottery beige”.

    Choose a paint color that balances the shade of your sofa. For example, if your sofa is dark brown, choose a lighter earth tone for the walls. If your sofa is a lighter color, then skip the light beige for the walls and choose another color. This will create dimensions and depth in the room.

    Classic earth tone color combinations are found in Southwestern design, the country cabin aesthetic, or even some mid-century modern designs. Do not try to use all of these earth tones in a single room as this is too much color. Stick with the 60/30/10 rule of three. You’ll choose three colors and use them 60%, 30%, and 10% in the room.


    2. Warm Colors

    Pair your dark brown sofa with warm colors like red, orange, and yellow. These warm-hued colors bring out the warm undertones in the leather. These colors can be overwhelming when painted on the wall, so be sure you are ready to make a bold statement before painting the walls red in your living room.

    Instead, try using these warm colors in the accents and textiles. For example, keep the walls a soft neutral and hang red curtains, use a patterned area rug with red in it, and have red throw pillow combinations.

    Also, try using different shades of red, orange, and yellow.  Bright yellow can provide light and dark balance to a dark brown leather sofa. A soft mauve can add a delicate feminine touch to your brown leather sofa that has a masculine feel.


    3. Cool Colors

    Cool colors are greens, blues, purples, and greys. Certain shades of these colors compliment brown leather sofas beautifully by balancing the warmth of the leather. For example, deep navy blue or forest green color walls will look sophisticated and elegant when paired with crisp white trim and a dark brown leather sofa.

    In contrast, a bright coastal shade of blue with a light brown leather sofa will look fresh and inviting. Be careful when using purple, though. Purples can be hit or miss with brown. Stick with purples that are pale or have grey undertones for a more sophisticated look.

    Blues and greens look good together, so you can have a color palette that features blue, green, and brown. Or you can balance blue and brown with a soft cream color for accents. Finally, tie the room together with an area rug that uses all three colors.


    4. Grey

    Grey is the modern neutral, and you will see it in various interior design themes. This makes it perfect for pairing with your brown leather furniture. Dark charcoal or pepper grey will look slightly moody and sophisticated, making it perfect for a distinguished Chesterfield sofa.

    In contrast, a soft pale or pearl grey will look right at home with a modern brown leather sofa. Choose honey or chestnut leather for this look. To keep the room from falling flat, use more than one shade of grey.

    Balancing light and dark grey shades creates depth and definition in the space. You also need other brown accents in the room to ground the sofa in the space. This approach would look good in a farmhouse or rustic sofa.

    Then you could have brown cowhides on the floor instead of a traditional area rug. Or you could bring out the brown hues of the leather with wooden furniture. Add matching brown leather hardware for the drawer pulls.


    5. White

    White is the ultimate neutral and the go-to wall color. It will act as a blank slate for your brown leather couch. You can then choose bold colors for the accents. This could be with throw pillows, a blanket, area rug, window treatments, or artwork on the walls.

    White is bright and reflects light well, balancing darker brown leather shades. You are also free to choose brown leather sofas with more unique undertones, like reds and oranges.

    Next, accent your white room and brown leather sofa with black hardware and fixtures. Finally, place wood furniture with your sofa, and you will have a rustic farmhouse feel that won’t feel old or outdated.


    6. Cream

    White can look crisp, but it can also look stark and cold. It can also reflect a high amount of light, which isn’t necessary for rooms with a lot of natural light.

    A perfect alternative is to use a soft cream color instead. This lighter shade is perfect to pair with a dark brown couch because there are warm undertones in the white shade.

    Pay attention to the undertones in your chosen shade, as some are pink and others are more yellow.

    Don’t pick a shade where the undertones are too strong, or you will lose the cream look and instead have pale pink or yellow walls. It’s also best to pair your brown leather sofa and chosen shades of cream with a third color that matches the undertones of the cream.


    7. Black

    An outdated fashion rule states black and brown should never go together. This rule is out and one that you can ignore. A black wall and chocolate brown leather sofa can look beautiful together.

    Keep the decor to a minimum for a clean design and pair your black and brown with white and light woods. Accent the sofa with a soft cream-colored blanket like this one to soften the look. This is a minimalist approach to Scandinavian design.

    Your living room will have an understated feel that is spacious and cozy. This design works best when your leather sofa looks slightly worn in and has an overstuffed feel to the cushions.


    8. Jewel Tones

    Chanille 29'' Wide Tufted Velvet Barrel Chair

    Jewel tones are colors that are derived from gemstones, hence the name. These are stones like sapphire, ruby, and emerald. The colors are highly saturated and eye-catching – check out this gorgeous velvet barrel chair.

    Historically, these gemstones were associated with the ultra-rich nobility and royalty. This association has carried over today, and when used in interior design, they give a sense of regal-ness and distinction. This makes them perfect for use with leather furniture, which is also associated with someone who is upscale and has wealth.

    The richness of the brown leather provides a complementary color that won’t compete with the bold jewel-tone colors. This color combination looks complete when you accent it with metal fixtures.

    While painting your walls, a jewel tone makes a bold statement; not everyone is ready to commit to this. Instead, you could choose a jewel tone rug color. It will pop even more with brown furniture placed on it.


    9. Metallics

    Brown colors can look a bit dull, even if they are in the form of a luxurious leather sofa. You can play up the elegant feel of your leather by pairing it with other high-end materials.

    Try adding metallic accents to the room that will elevate the interior design. Change out the legs on the sofa for copper, gold, or brass, or rose gold legs. Then carry your chosen metal hue throughout the rest of the room.

    You could hang wall decor, add metallic picture frames, use table lamps with metal accents, or side tables that have metal frames. Don’t forget about the curtain rod over the window. Avoid cool metals like silver and nickel; they make brown leather sofas look cheaper.

    Black metals have their place, such as in a vintage-inspired, farmhouse-themed, or industrial design. Look for black metal accents and fixtures that match your chosen aesthetic.


    10. Neutral Colors

    You can’t go wrong with a neutral palette when decorating with a brown leather sofa. Whether you have a honey, caramel, saddle, chocolate, or darker shade, all of these are considered neutrals.

    Take the color of your leather sofa and build the rest of your neutral palette around it. If your sofa is dark, add medium and light shades. If your sofa is a medium shade, add dark and light shades. If your sofa is light, add medium and dark shades.

    You want a good balance of light and dark because it will add depth and dimension to your room. Everything will blend and look incredibly bland if you have beige walls, textiles, furniture, and flooring. Don’t be afraid to add white, cream, or even black to your neutrals.


    11. Vibrant and Bright Colors


    No, we are not talking about neon colors. Brown couches and neon colors do not mix. However, a dark brown shade is a perfect color to ground more conventional bright colors, like a bright sunny yellow, southwest turquoise, or vibrant magenta. These colors are highly saturated and need a dark color to balance them out.

    Dark brown furniture is perfect because it has a softness that pure white or black lacks. If you have a light brown leather sofa, pair it with bright kelly green elements like these throw pillows. Try using bright colors in a maximalist design that embraces vibrant colors, shiny metals, and bold patterns.