Blog

  • 16 Unique Window Valance Ideas

    16 Unique Window Valance Ideas

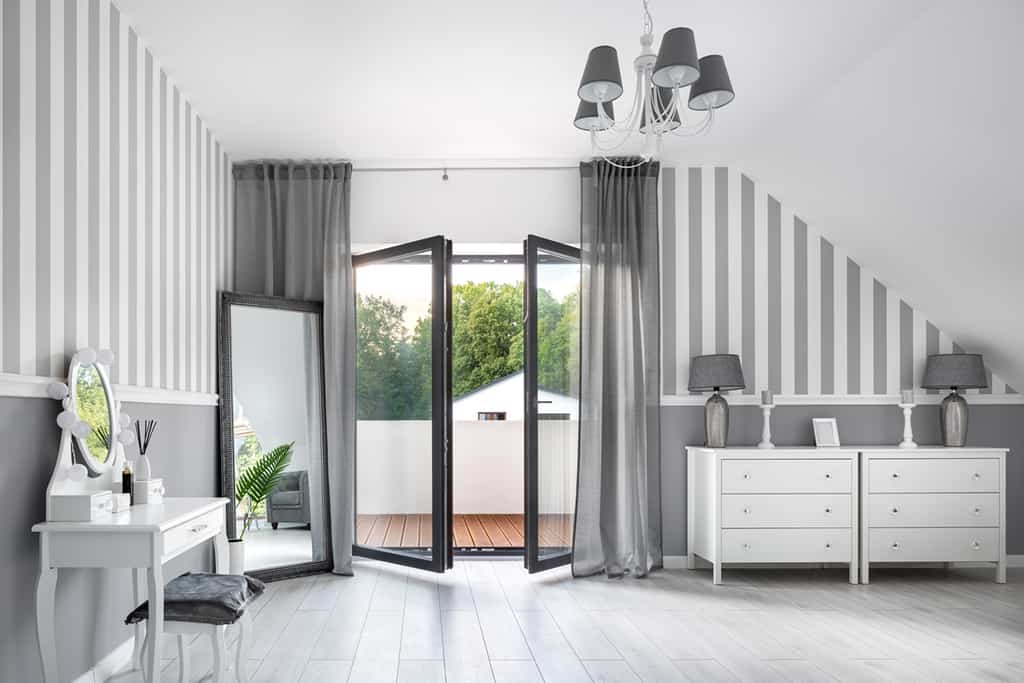
    Take a look around your home. What is on your windows? It’s probably a set of curtains, right? But have you thought about adding a valance? This is the piece of fabric that goes across the top of the window to frame the window and complete the look of the curtains. Before you do a hard pass, there are plenty of options that don’t look like the dust-covered lace valances in your grandma’s house. 

    Give the windows in your home a fresh look by adding one of these window valance ideas.

    [view_toc]

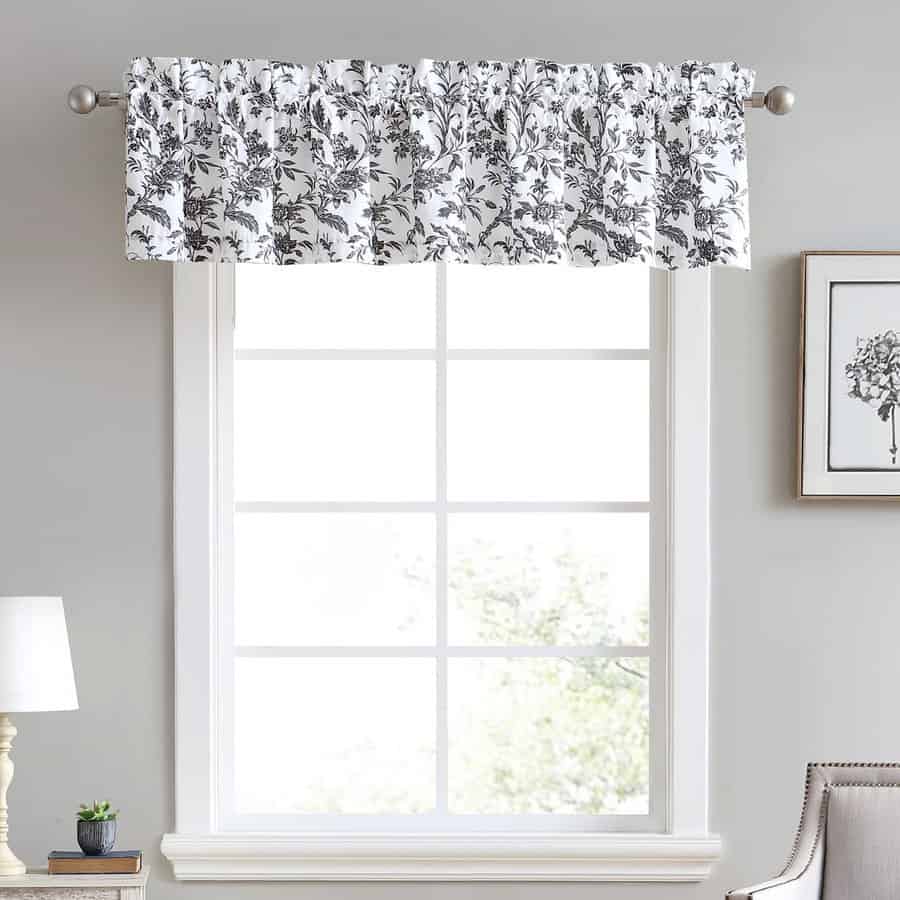
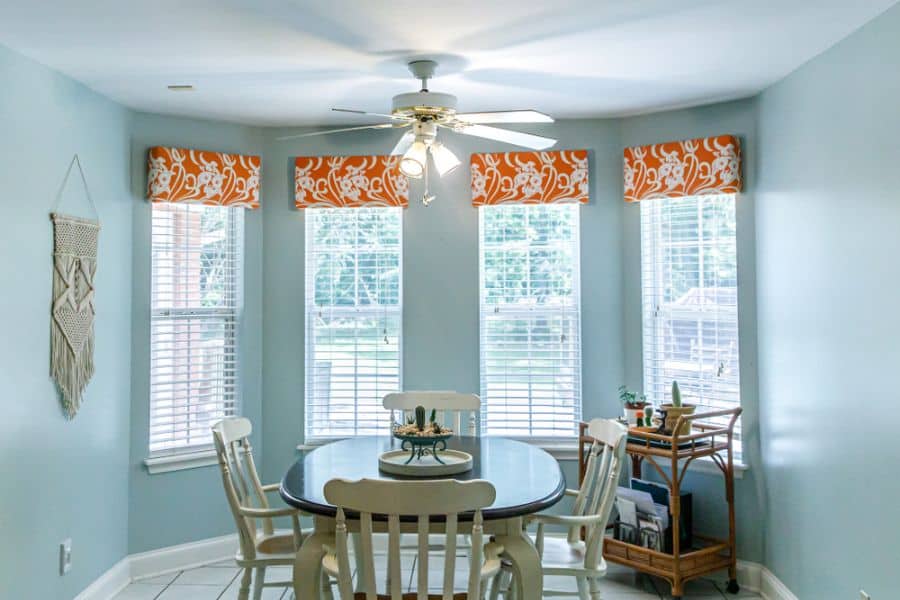
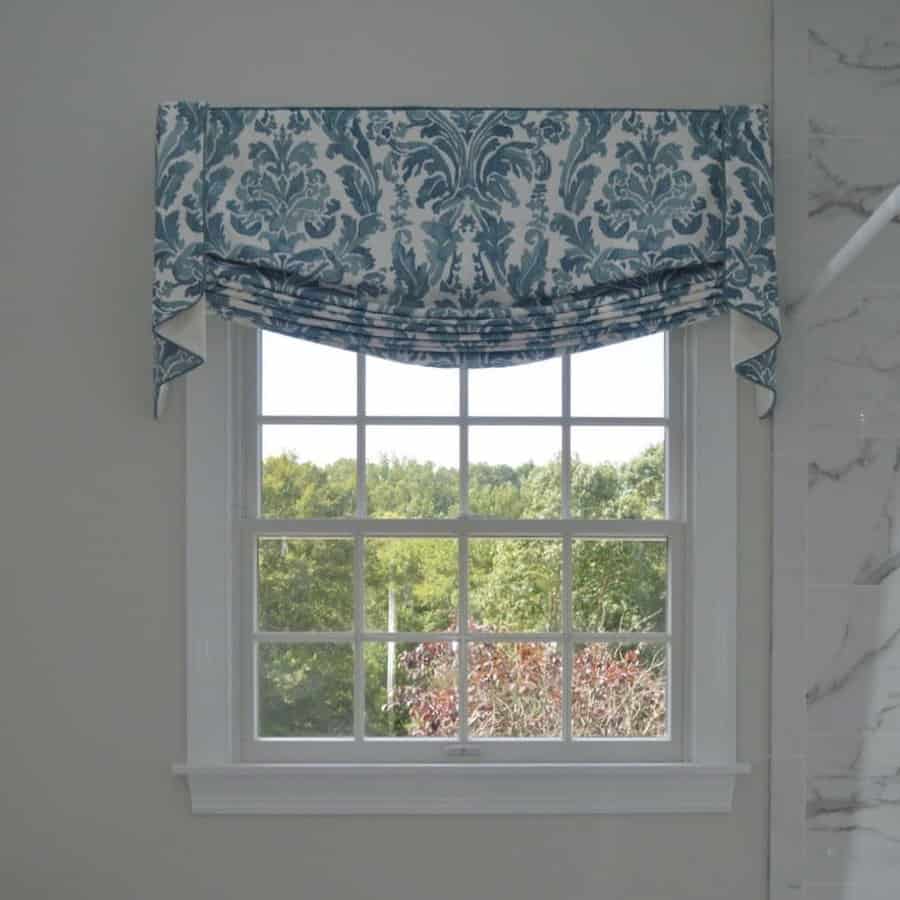
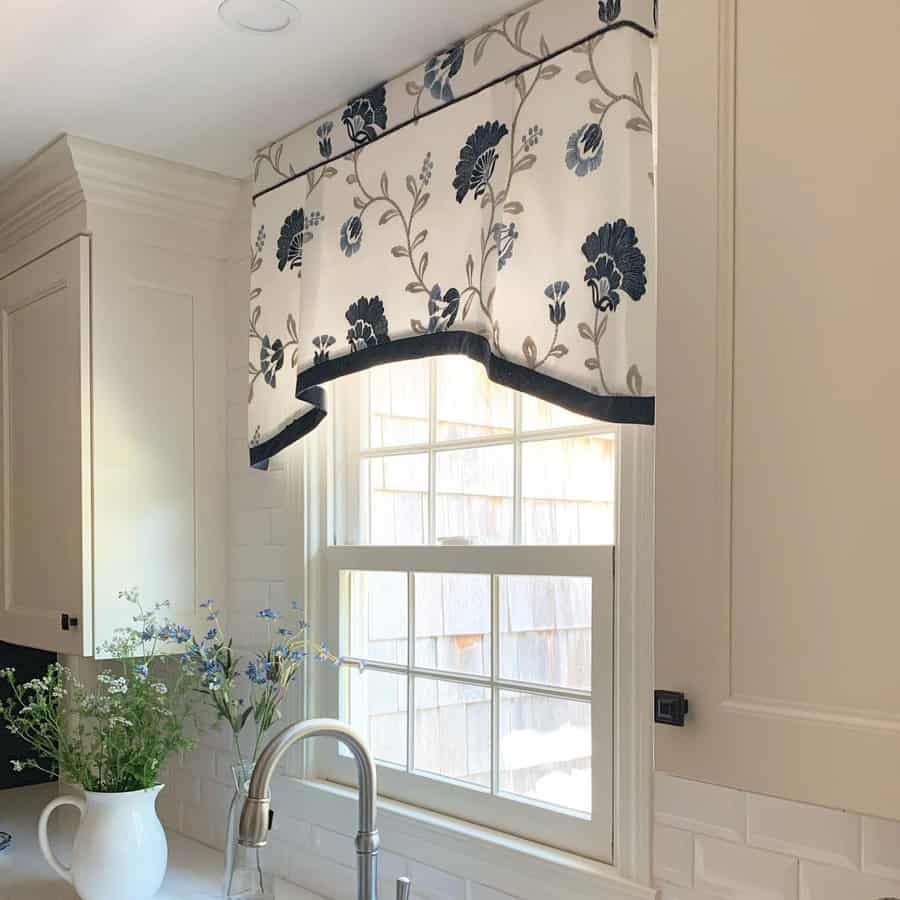
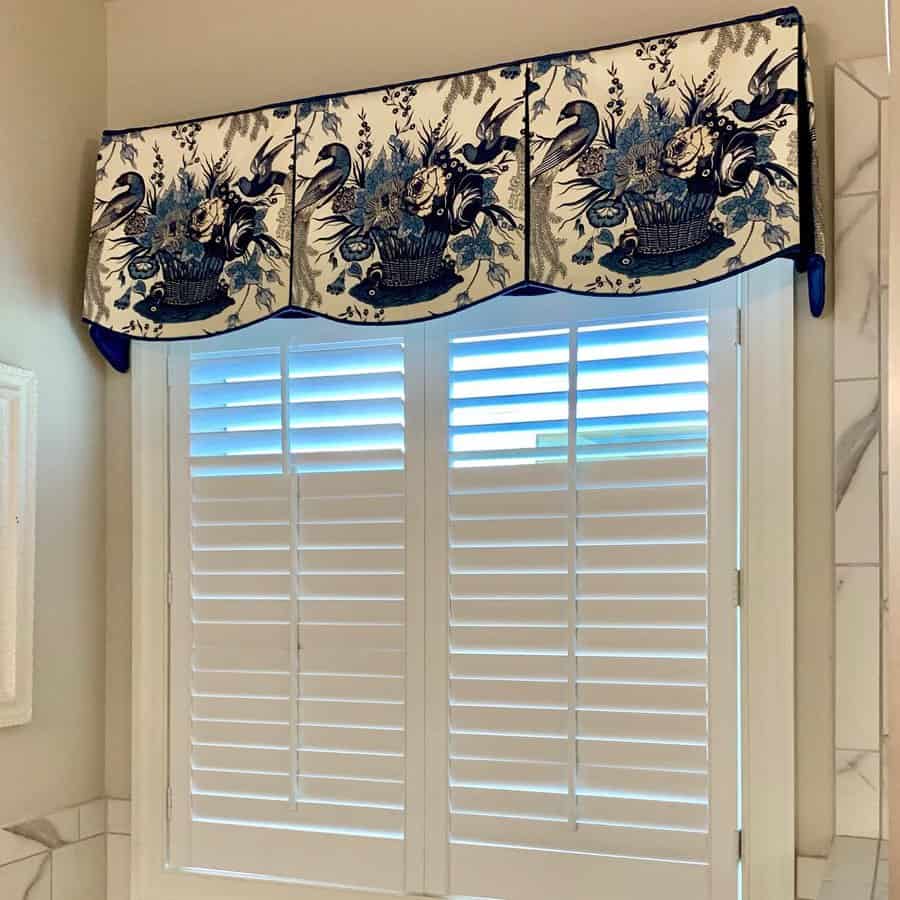
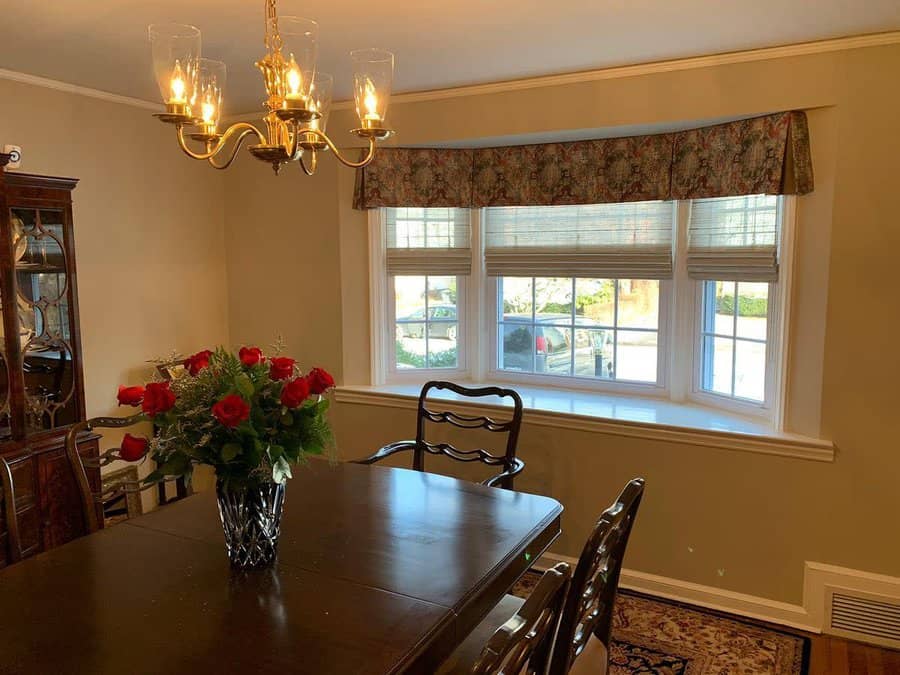
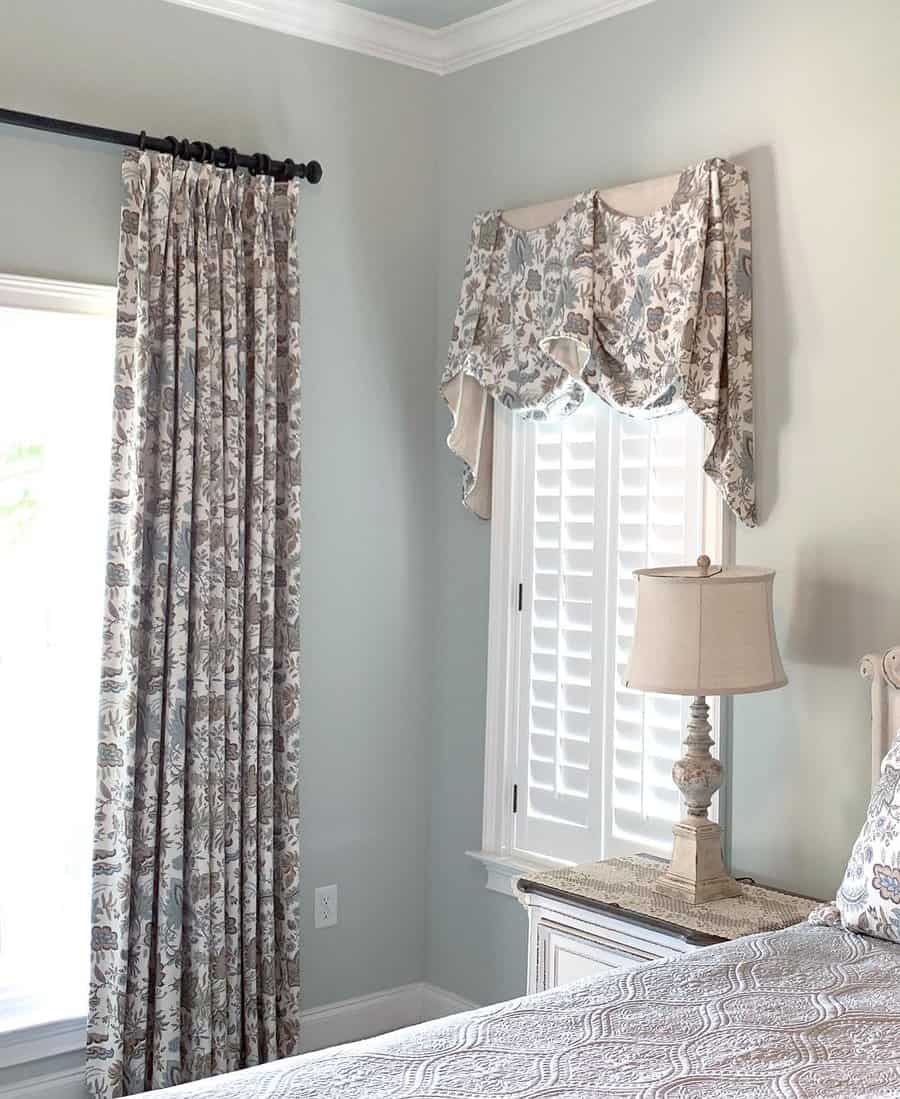
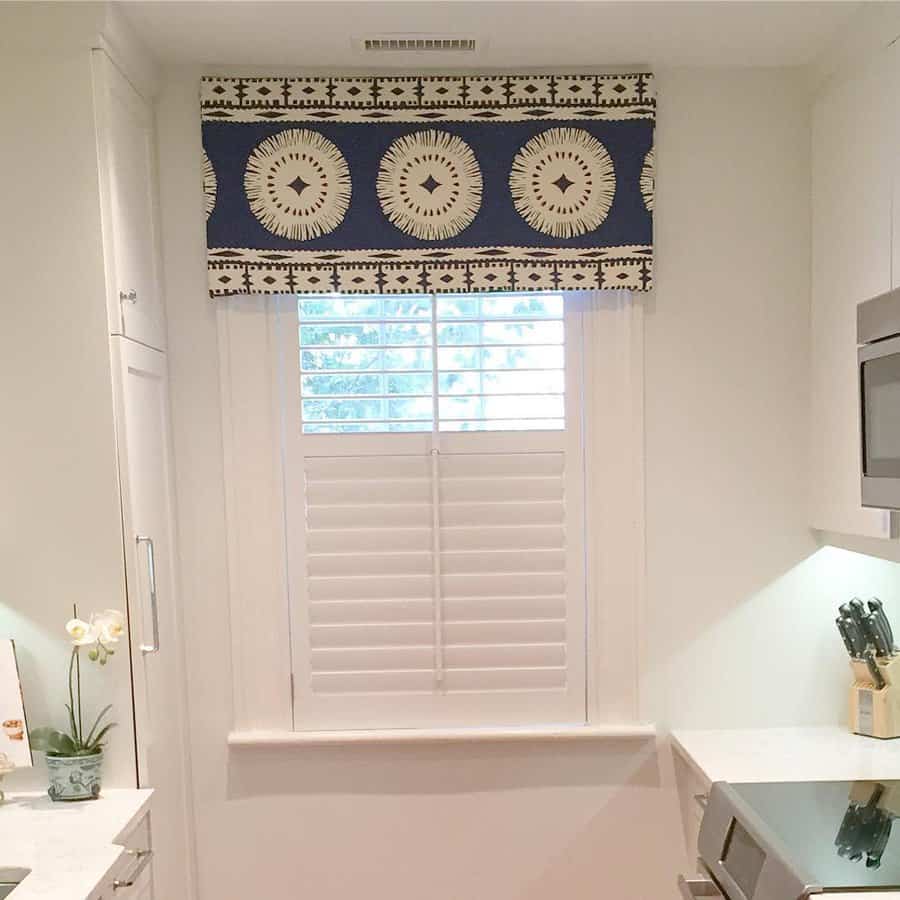
    1. Dress Up A White Window With Prints

    A printed valance curtain can transform a plain white window into an eye-catching spectacle. With its vibrant color, bold patterns, and delicate embellishments, it instantly revives a stagnant room and adds a delightful touch of style to the decor.

    It instantly transforms an otherwise dull white window into a bold statement with its vibrant colors, patterns, and textures. This dress-up is sure to impress any guest who steps foot in your house, as it adds a depth of texture and elevates the entire room from ordinary to extraordinary.

    Valance curtain with prints
    Source: @dianadnolan via Instagram
    Valance curtain with prints
    Source: @cynthiaclarkinteriors via Instagram
    Valance curtain with prints
    Source: @marciekm via Instagram
    Valance curtain with prints
    Source: @whitneywhitedraperydesign via Instagram

    2. Decorate & Embellish

    Looking for that special touch to add a personalized touch to your home? Why not try embroidering a sheer valance curtain with your family name? This stunning decorative piece is sure to pull any room together and also bring a spark of joy as you remember what it stands for.

    By taking the time to embroider this delicate, elegant valance with your initials or family name, you’ll be able to create unique memories in each and every space that the embroidered curtain will grace.

    Don’t hesitate – an embroidered sheer valance is the perfect way to tie any room together and show off your creative side!

    Embroidered valance curtain
    Source: @ellensdecor via Instagram

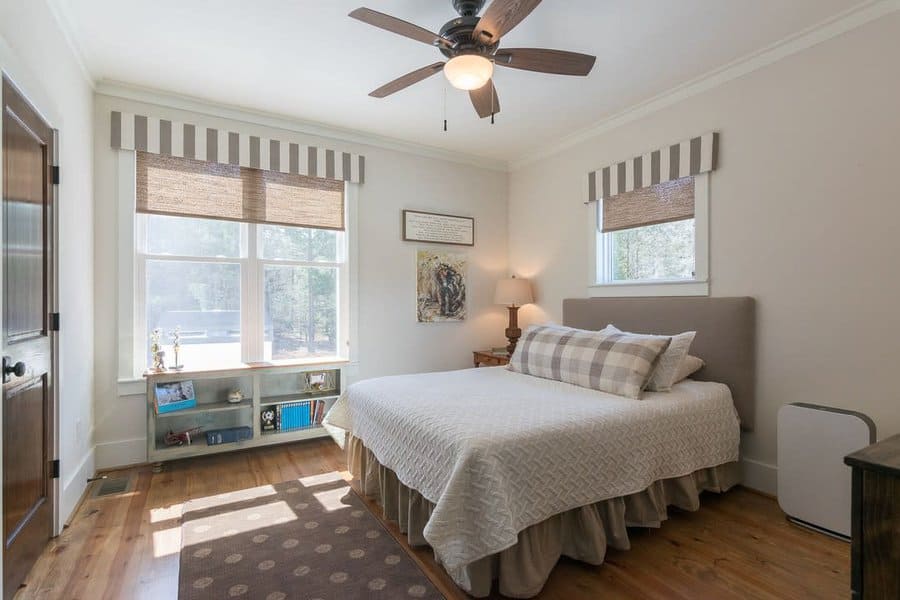
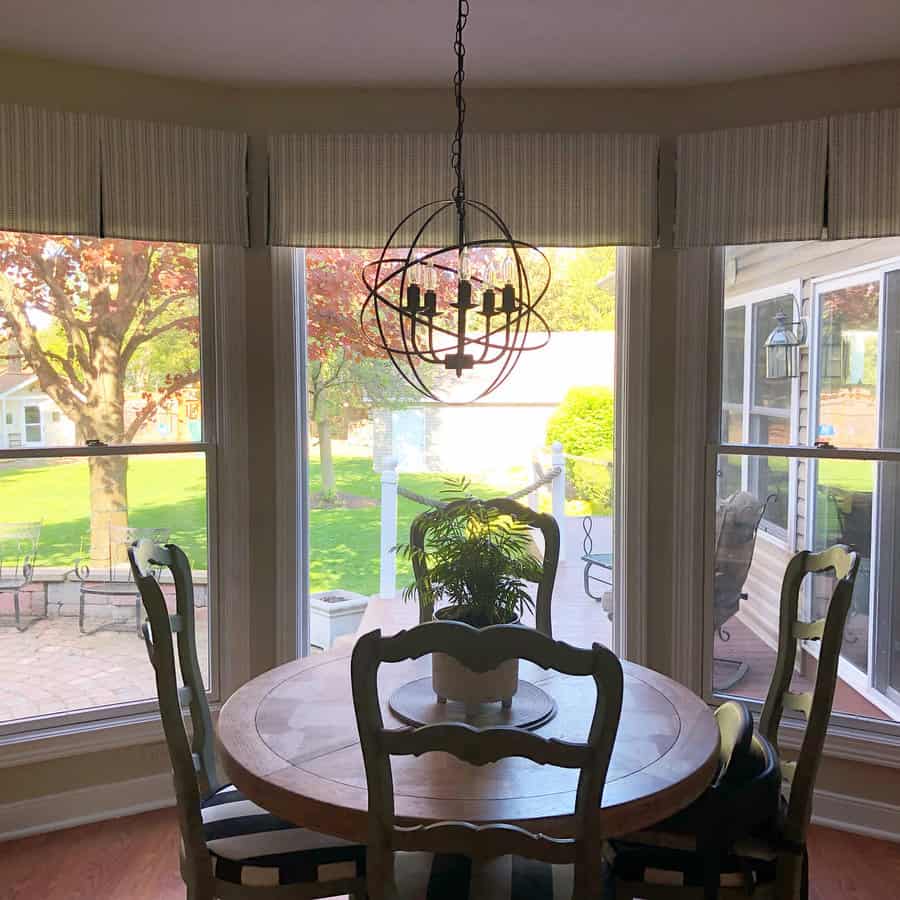
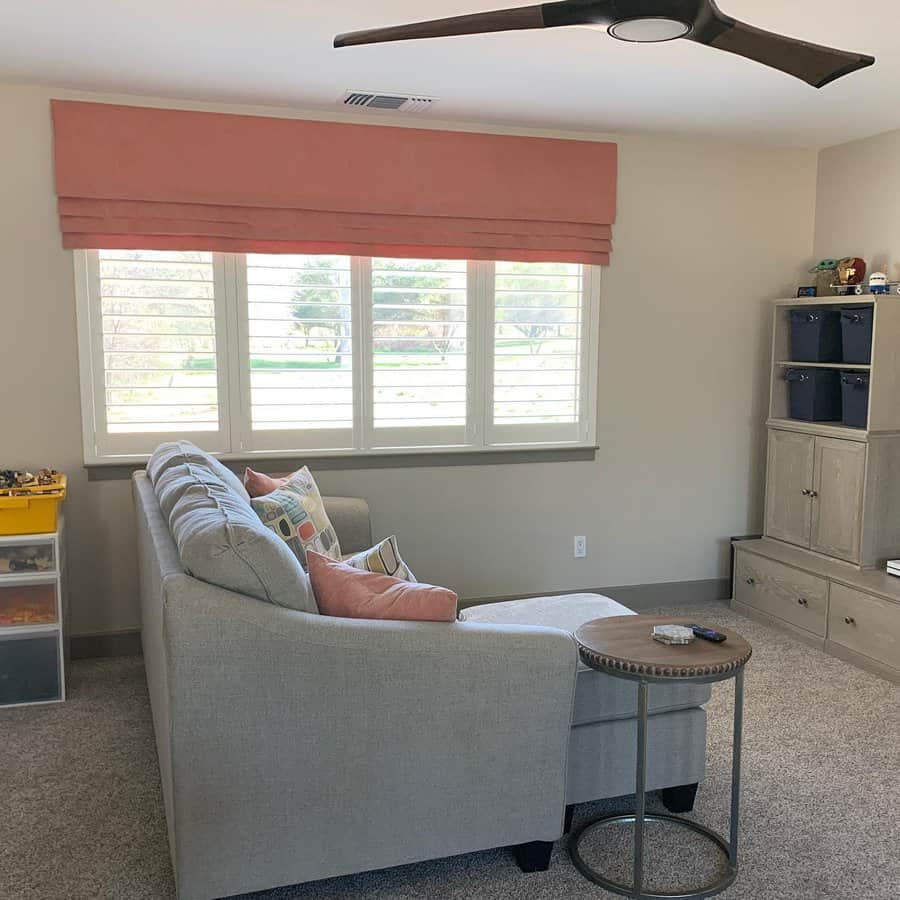
    3. Keep It Flat For A Modern Look

    A flat valance curtain is a perfect addition to any modern interior. Whether you are outfitting a minimalist home or searching for the perfect accent piece, flat valance curtains can bring a touch of style and sophistication to any room.

    These flat panels add a hint of texture and interest while maintaining an understated aesthetic – perfect to liven up a modern, minimalist space. With flat valance curtains, you can keep your home looking both chic and comfortable.

    Flat valance curtain
    Source: @budgetblindsathens via Instagram
    Flat valance curtain
    Source: @pinklady2267 via Instagram
    Flat valance curtain
    Source: @jermar_designs via Instagram

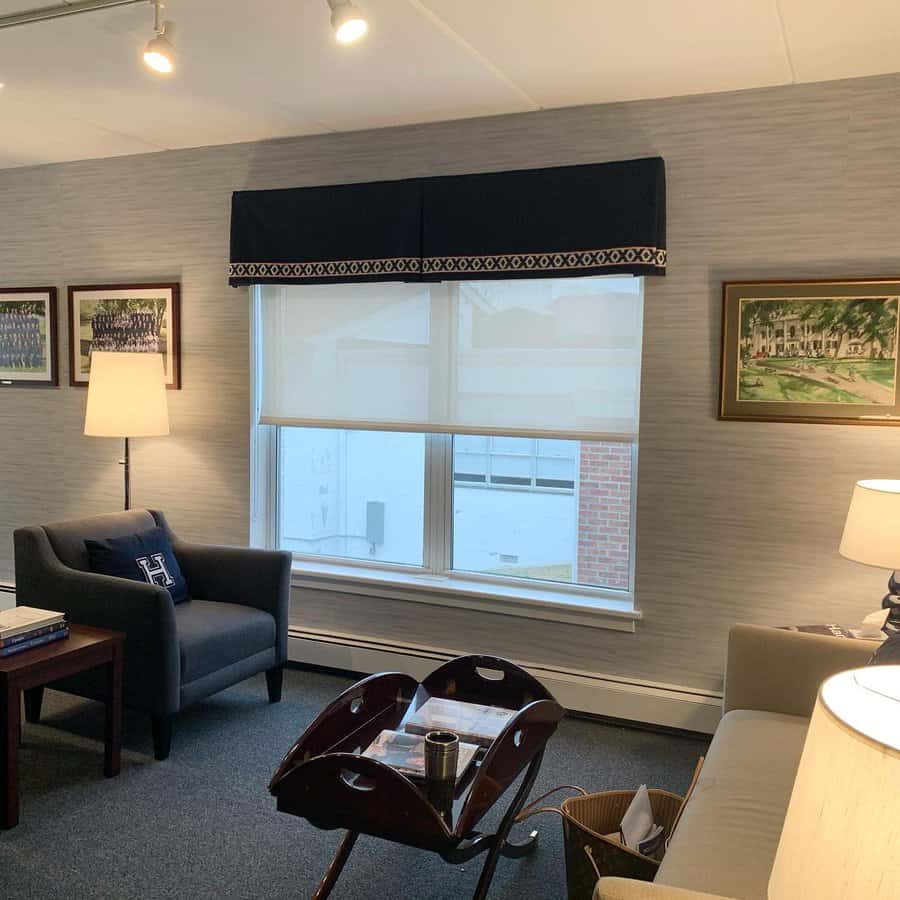
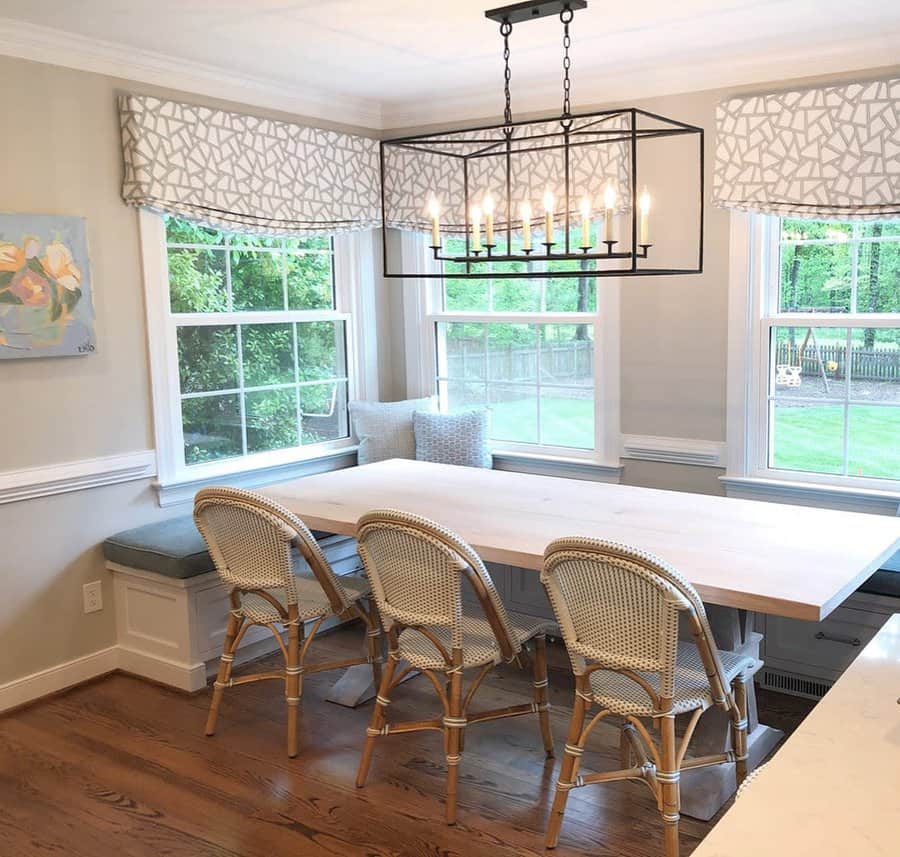
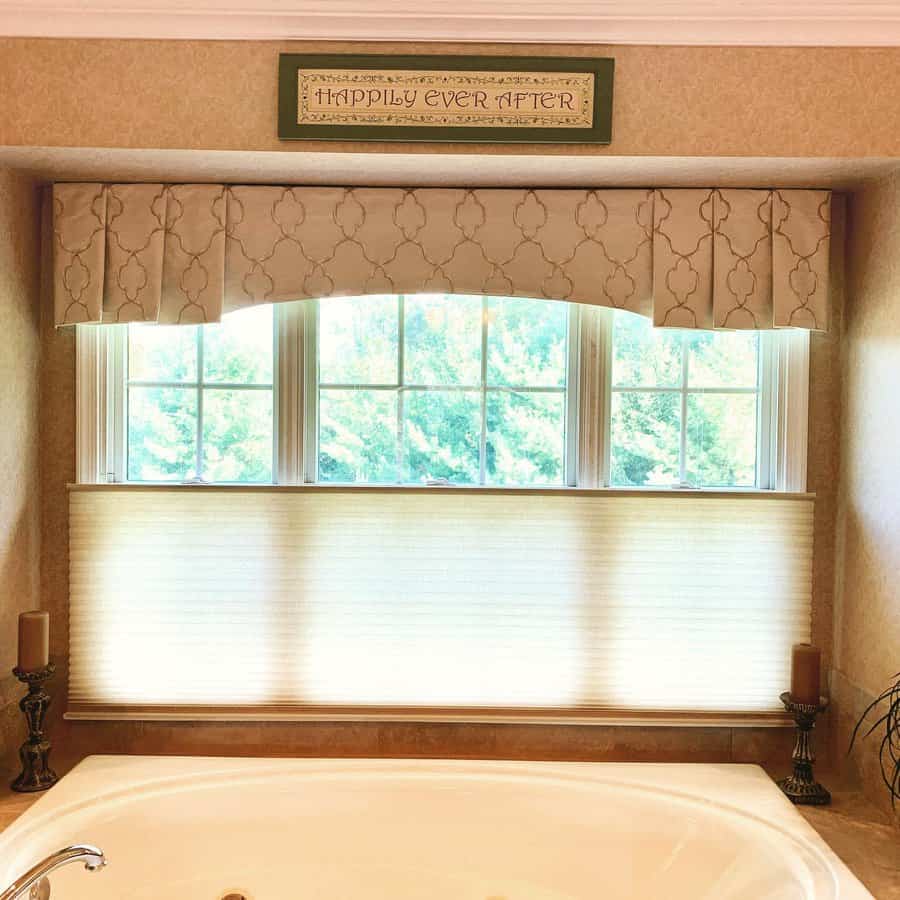
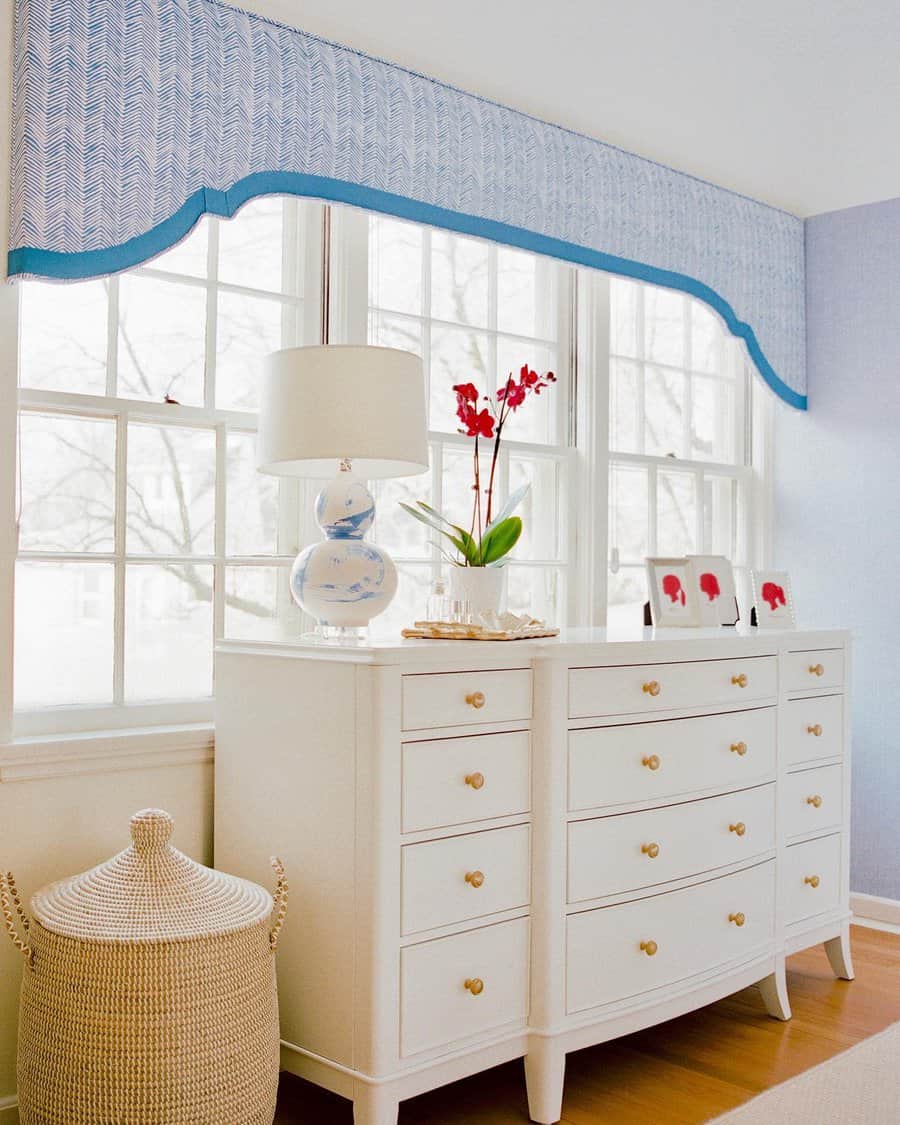
    4. Pleat It For A Clean Look

    The pleated valance curtain is the perfect way to bridge both traditional and modern decor in a transitional interior. Its sleek and elegant silhouette can add dimension to a room while providing added window coverage for privacy.

    Whether draping grandly from a tall window or cascading down more petite frames, its pleats provide just the right amount of visual texture to draw attention without overwhelming the other elements in your space.

    Pleated valance curtain
    Source: @seamssewright via Instagram
    Pleated valance curtain
    Source: @robinsoninteriors via Instagram
    Pleated valance curtain
    Source: @dianesteindesign via Instagram
    Pleated valance curtain
    Source: @meticulous_designs_ via Instagram
    Pleated valance curtain
    Source: @jillianamber via Instagram
    Pleated valance curtain
    Source: @tom_knine via Instagram

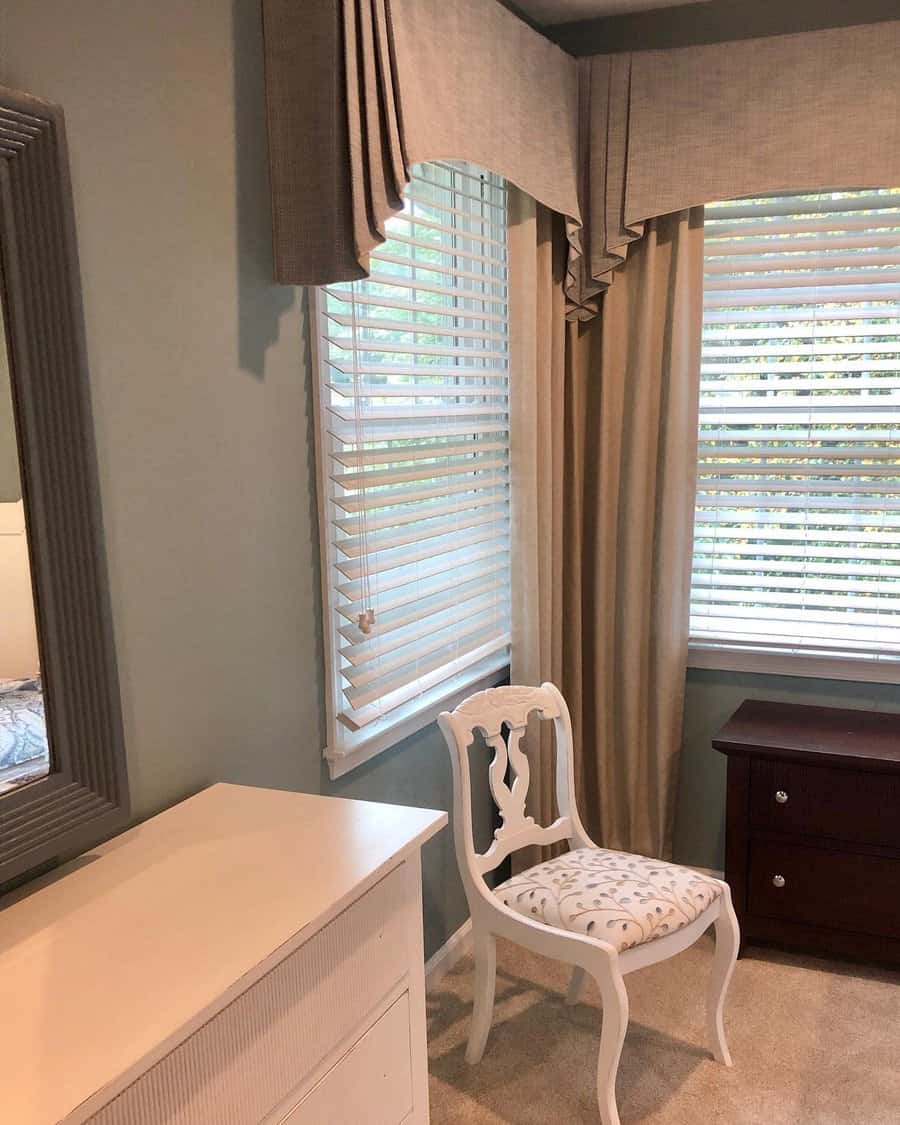
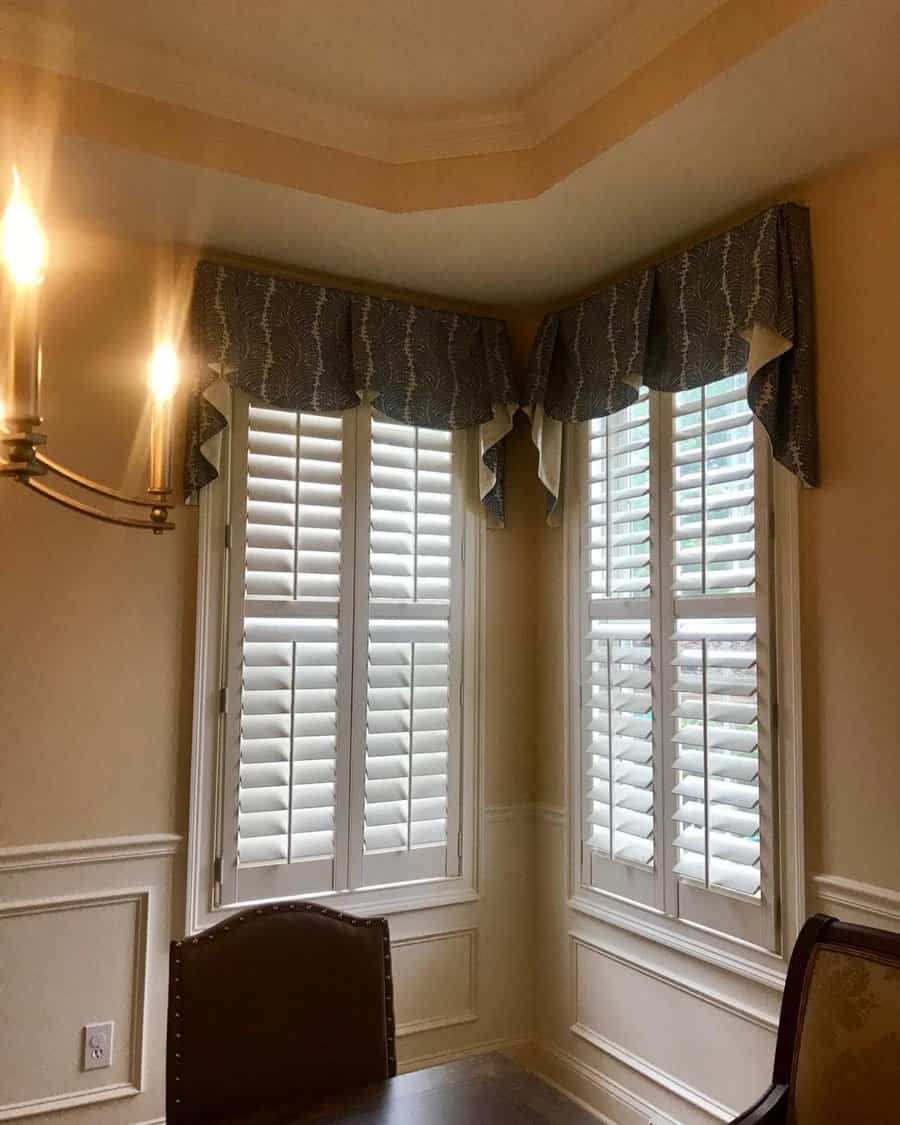
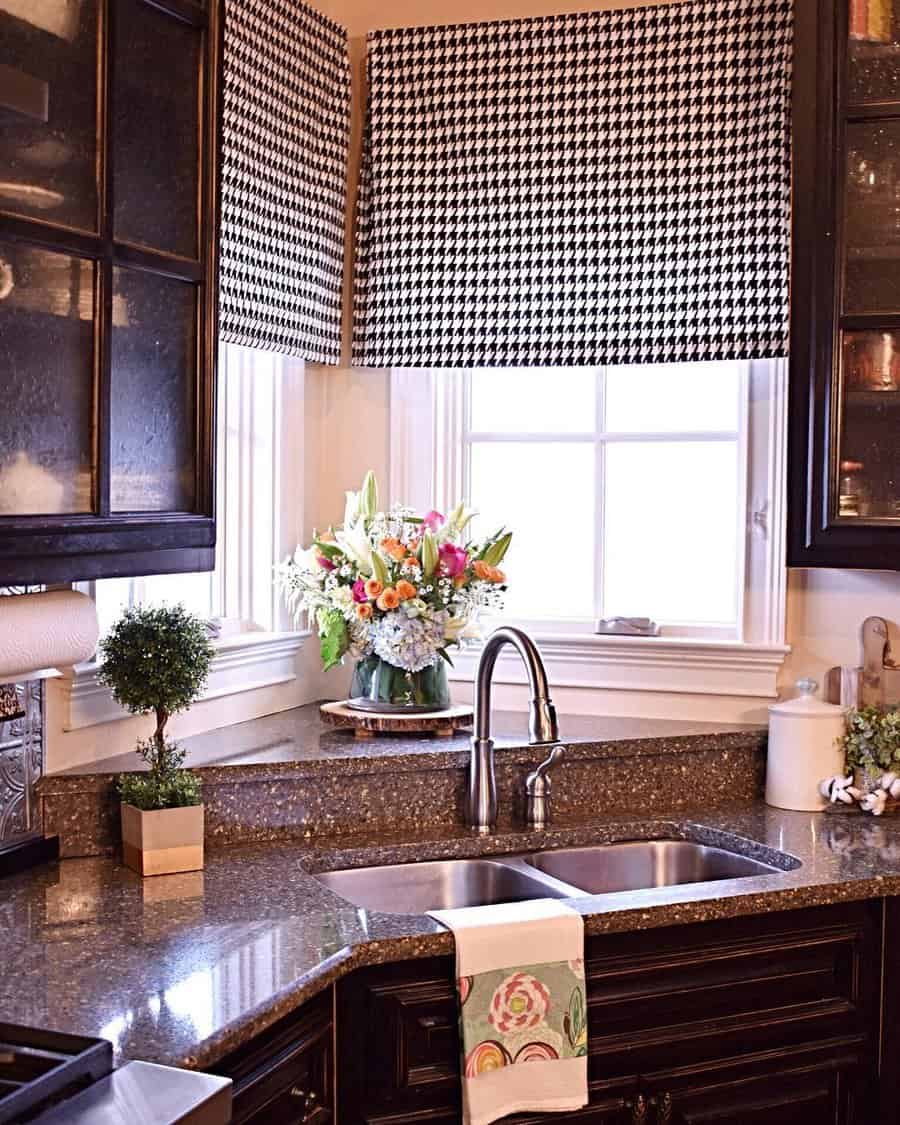
    5. Stand Out With A Protruding Valance

    Valances are a great way to amplify the aesthetics of your room. With protruding valances and curtains, any bedroom or living room can become more dynamic with an eye-catching look. The luxurious drape of the protruded valance will bring the presence of the room together and create a modern yet cozy environment.

    Whether you’re aiming for a classic style or something more eclectic, adding a protruding valance with curtains will instantly add dimension to the room and serve as an accent that ties in all the other elements of your design.

    Protruding valance curtain
    Source: @keep_me_in_stitches via Instagram
    Protruding valance curtain
    Protruding valance curtain
    Source: @ellasdesigns via Instagram

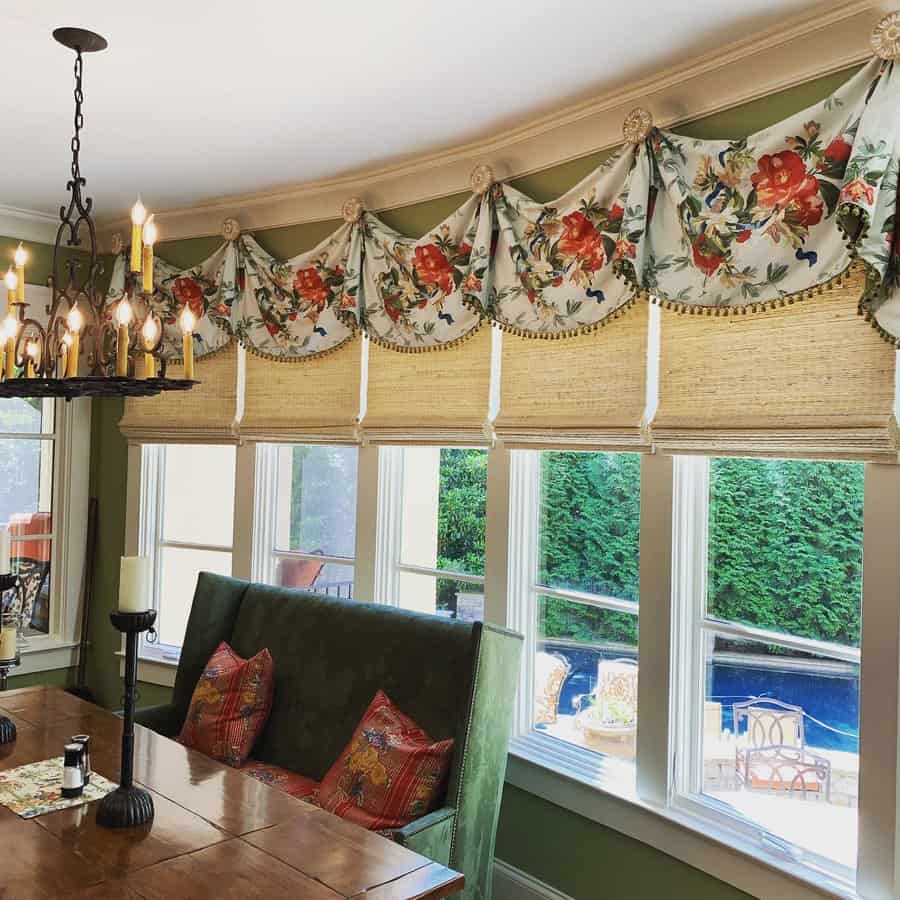
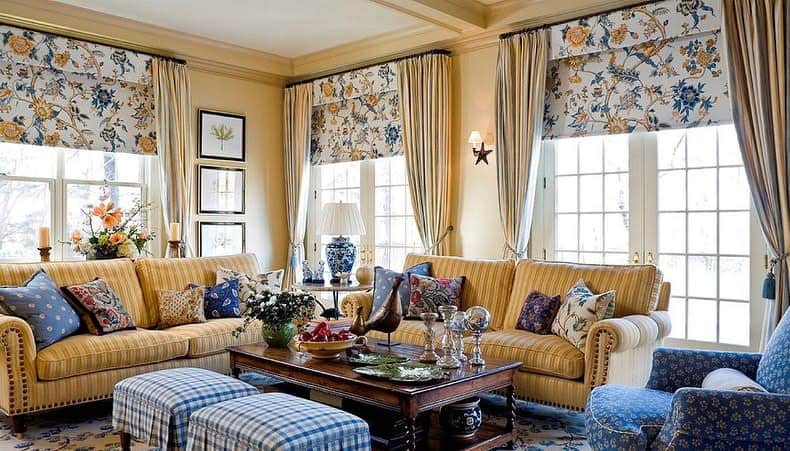
    6. Go Traditional With Swag Valances

    The simple act of layering a swag valance or swathing it in different colors can inject new life into any room without changing much else. For those looking for something more traditional, adding a plain or patterned valance in layers over drapery gives windows a timeless aesthetic.

    Not only do swag valance curtains highlight your window frames, but they also give off an instantly cozy atmosphere that sets the perfect tone for any room.

    Swag valance curtain
    Source: @mj_bdesigns via Instagram
    Printed swag valance curtain
    Source: @whitneywhitedraperydesign via Instagram
    Lace swag valance curtain
    Source: @smdesignco via Instagram
    Green swag valance curtain
    Source: @vikrtreat via Instagram

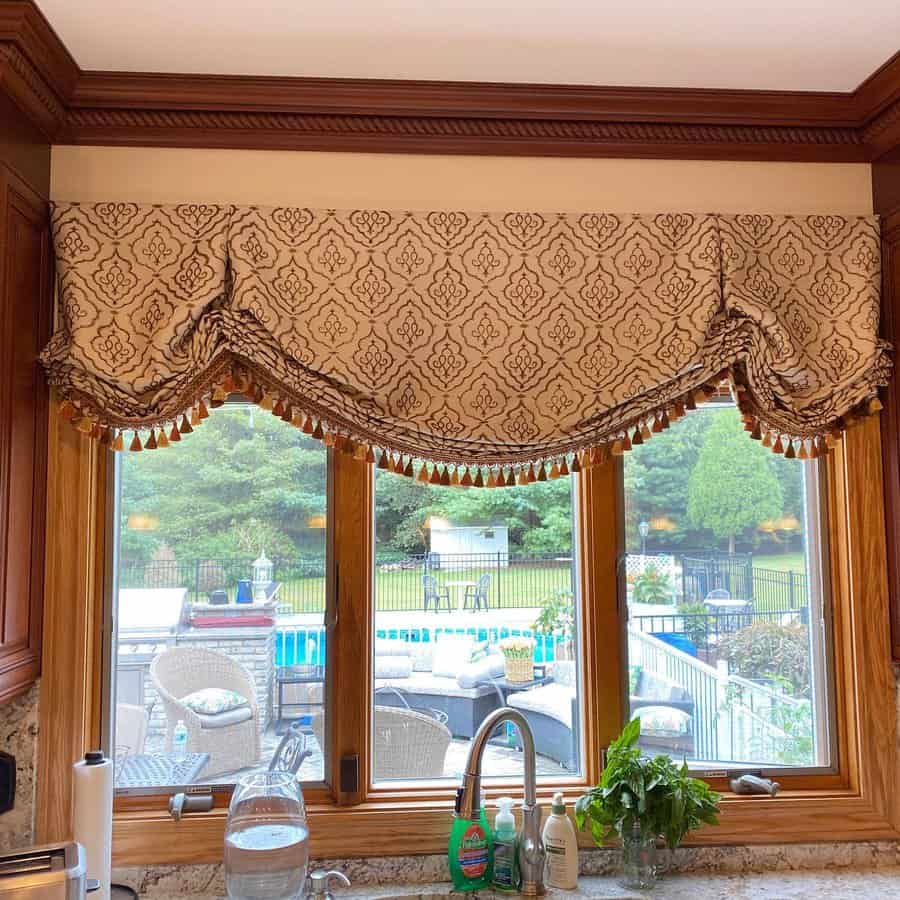
    7. Style With Some Fringe

    Transform your bare window into a beautiful valance masterpiece! All you need is a valance curtain with a charming fringe that is sure to add a stunning touch of modern elegance to the room.

    The valance’s soft textures and intricate design will tie the entire space together for an impressive look without being overly flashy. Your valance curtain will spark conversations and envy among anyone who steps foot in the room.

    Valance with fringe
    Source: @rosendecorators via Instagram
    Valance with fringe
    Source: @letkidsbecreative via Instagram
    Valance with fringe
    Source: @poshpetitesboutique via Instagram
    Valance with fringe
    Source: @foodfarmlive via Instagram

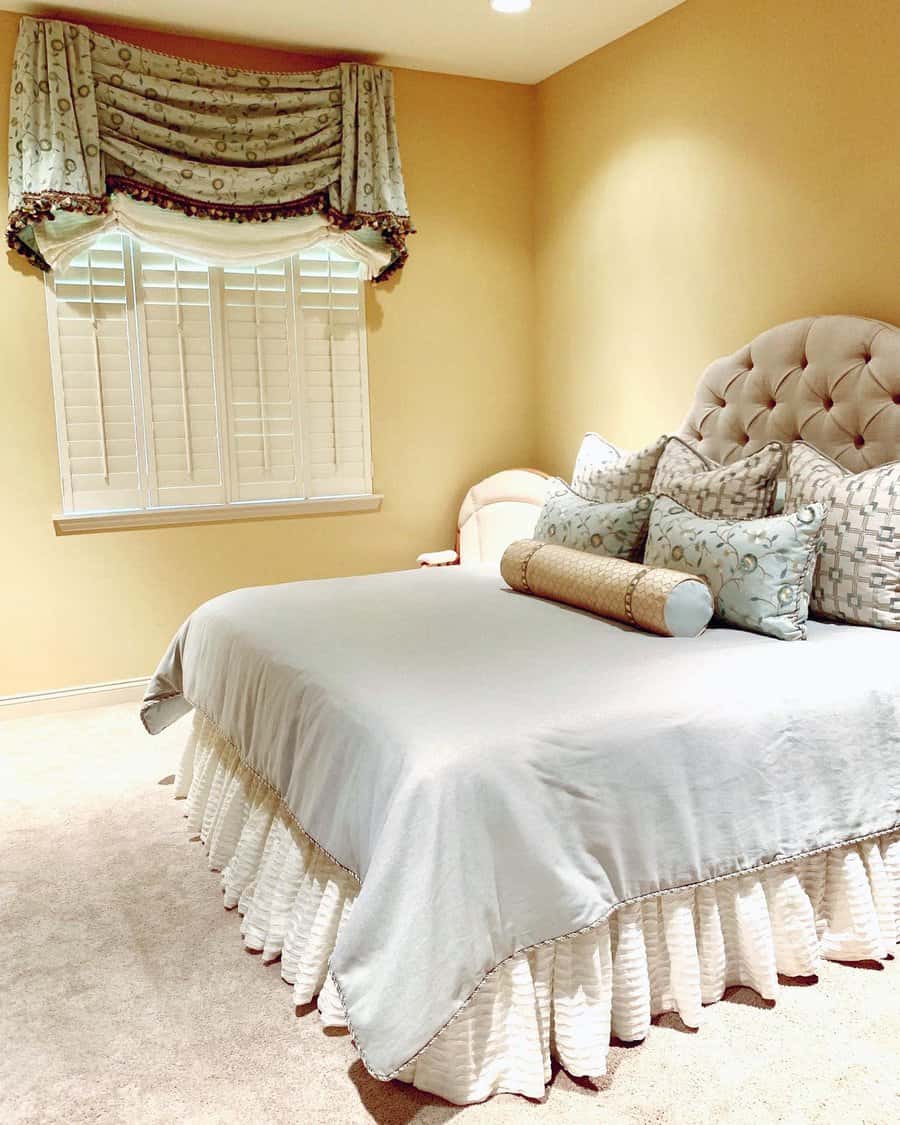
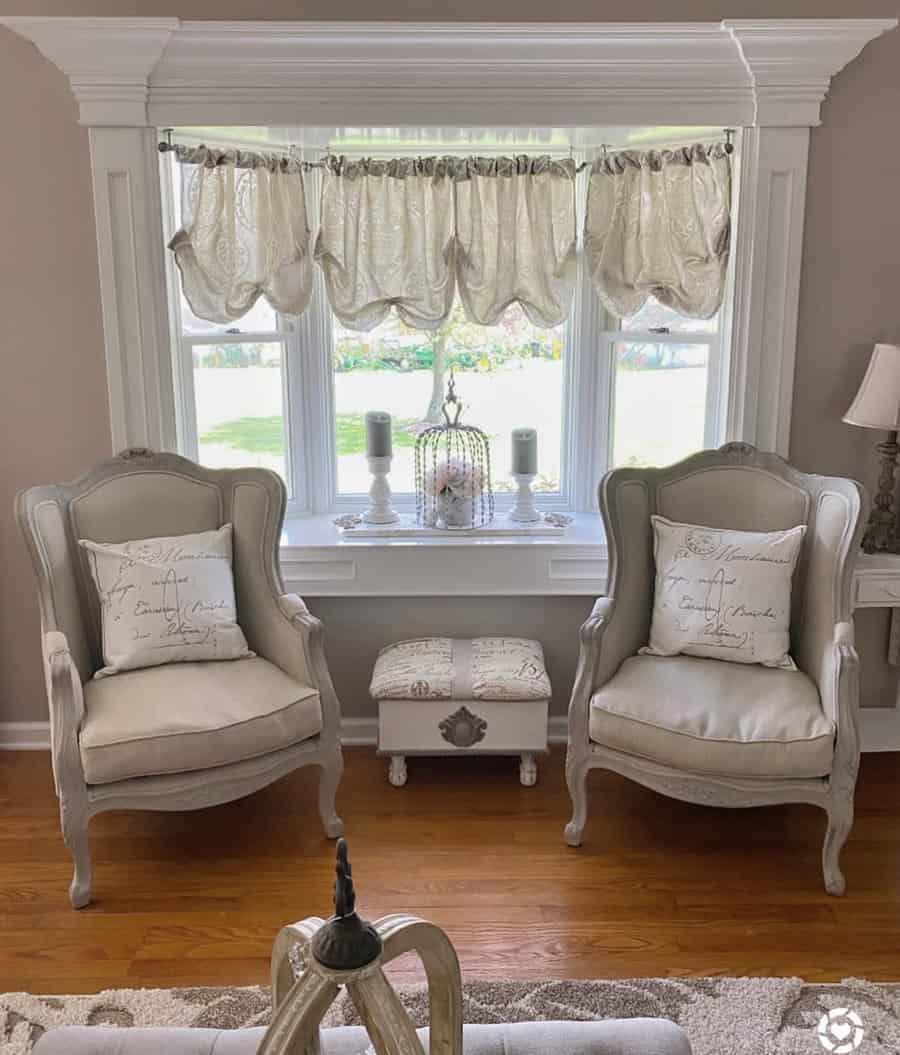
    8. Be Extravagant With Balloon Valances

    Adding valance to a room can give it a sophisticated and extravagant feel. One creative way to do just that is by using valance curtains with balloon draping, which gives the room a more traditional look. It’s the perfect way to bring some life into an ordinary space by accentuating its style.

    The valance creates a sense of depth with its fullness while also providing privacy and sun blockage control. With valance, any setting can be transformed into an exquisite interior façade that is as unique as it is opulent.

    Balloon drape valance curtain
    Source: @lovely.feathers via Instagram
    Balloon drape valance curtain
    Source: @oldjoyvintage via Instagram

    9. Layer Valance Curtains For Dimension

    Diversifying the layers with prints, fabrics, and colors is an easy task that can amplify the entire atmosphere of any living space. Whether you’re looking for curtains that make a statement or just want to create simple yet commanding layered valances, there is a design for everyone’s taste and style.

    Not only do layered valances provide a sophisticated and regal look, but they also give anyone who enters your home an air of sophistication and high-end finery.

    Layered valance curtain
    Source: @definedbydarla via Instagram
    Layered valance curtain
    Source: @xo.lauren_ashley.91.xo via Instagram
    Layered valance curtain
    Source: @debrawilliamsdesigns via Instagram

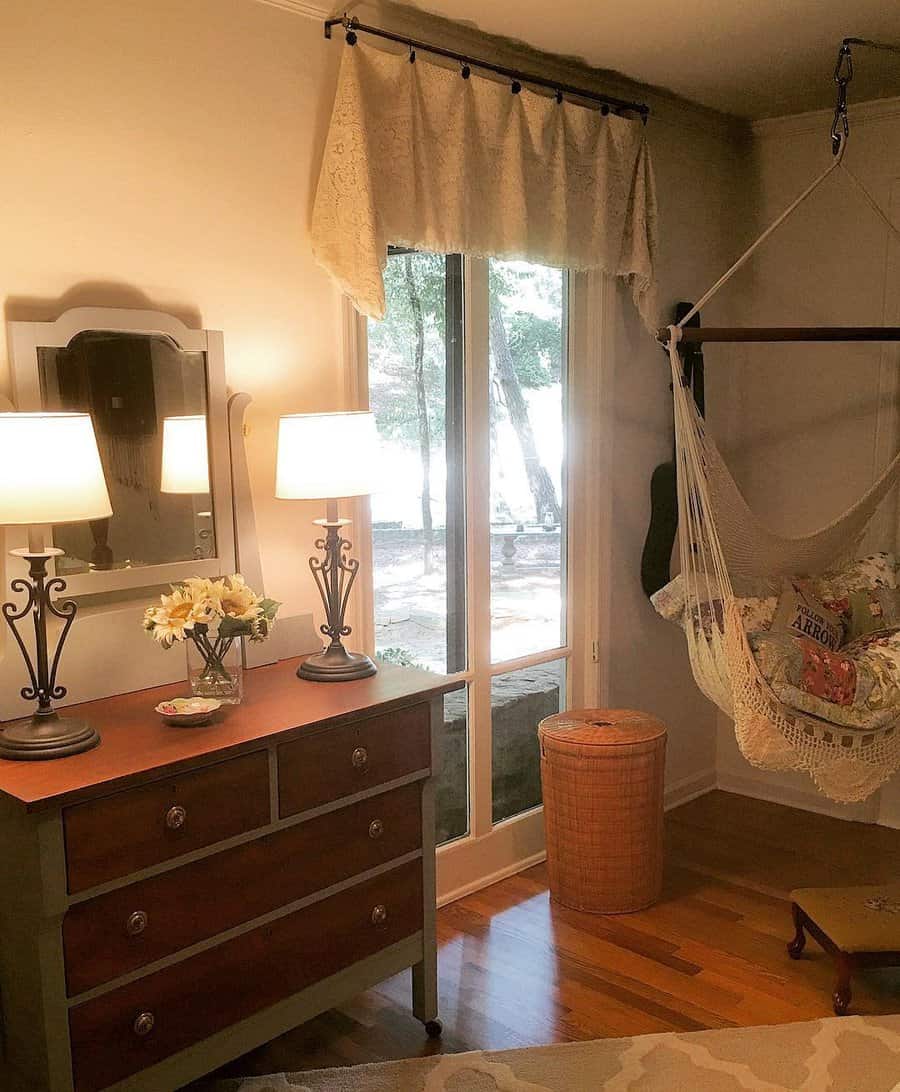
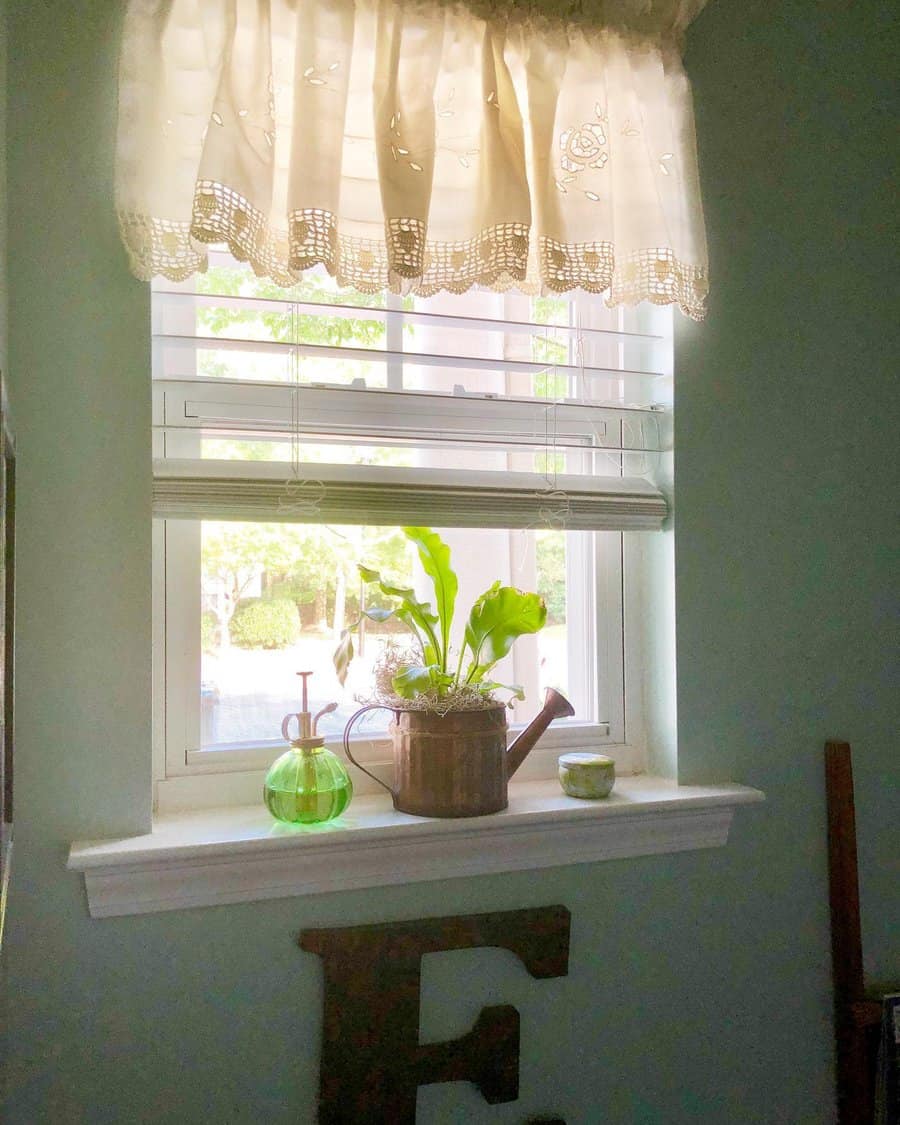
    10. Lace Crochet Inspired

    A lace crochet-inspired valance curtain is the perfect way to give any room a touch of daintiness. With its subtle detailing, it’s sure to make any space look incredibly charming and inviting. From bedrooms with its sweet lace edging to living rooms with a lace crocheted accent, this breathtaking window treatment will create an idyllic atmosphere in no time.

    Not just decorative, the lace crochet-inspired valance is highly practical as well – the delicate overlapping lace panels diffuse sunlight while still allowing natural light from outside to come in. It’s definitely an accessory that’ll stylishly elevate any surroundings and complete your cozy home decor.

    Lace crochet valance
    Source: @kelly_ann625 via Instagram

    11. Create More Coverage With Venetian Blinds

    Valances are the perfect addition to any home to not only enhance the aesthetic of a room but also provide more coverage from the sun. Venetian blinds can be used as valance curtain that combines with bright colors and textures, making any ordinary window look luxurious.

    The best part is they come at an incredible price compared to some other window treatments! With so many options, you are guaranteed to find something that perfectly suits your style and gives you that extra layer of sun protection.

    Venetian style valance
    Source: @sassafrashome via Instagram
    Venetian style valance
    Source: @aggieray105 via Instagram

    12. Coastal With Blue Valance Curtains

    Giving any room an instant dose of coastal charm, blue valance curtains bring the feeling of the seaside to you as soon as you walk in. Hang a blue valance with a repeating pattern on a window and transform your interior into an oasis with turquoise blue tones that bring paradise-like vibes to your home.

    Use gorgeous ocean blue fabrics to add a beautiful touch to any living room or bedroom, letting dreamy blues and foamy whites evoke memories of walking barefoot along the shoreline between crashing waves. Bring some of this serenity indoors and make your own seaside paradise at home – it’s just a blue valance curtain away!

    Coastal blue valance curtain
    Source: @summit_drive_design via Instagram
    Coastal blue valance curtain
    Source: @domaininteriors via Instagram

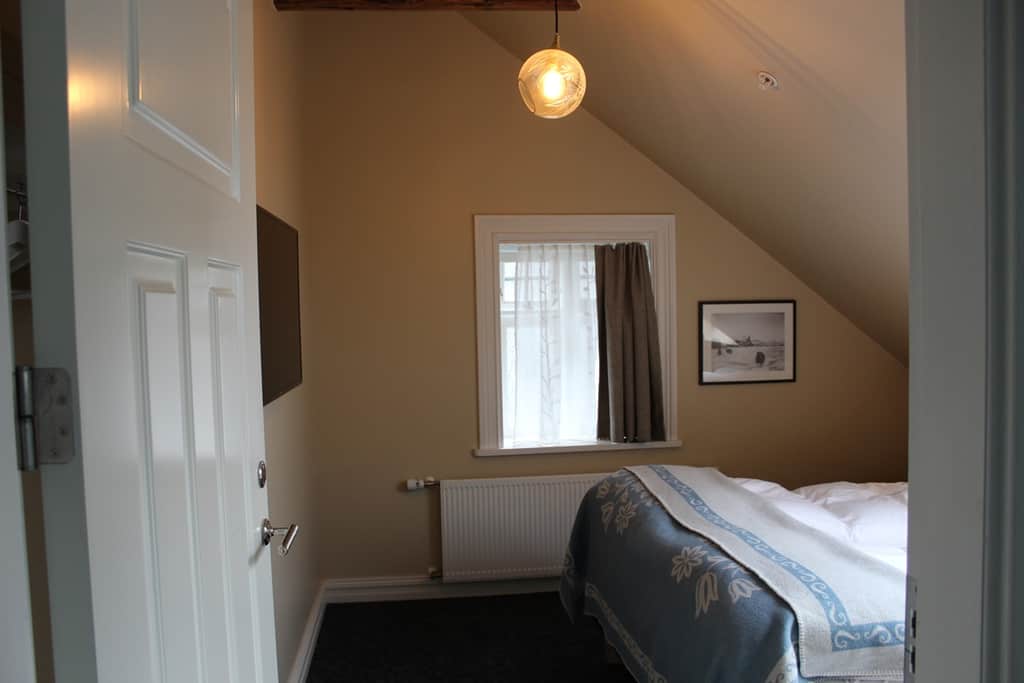
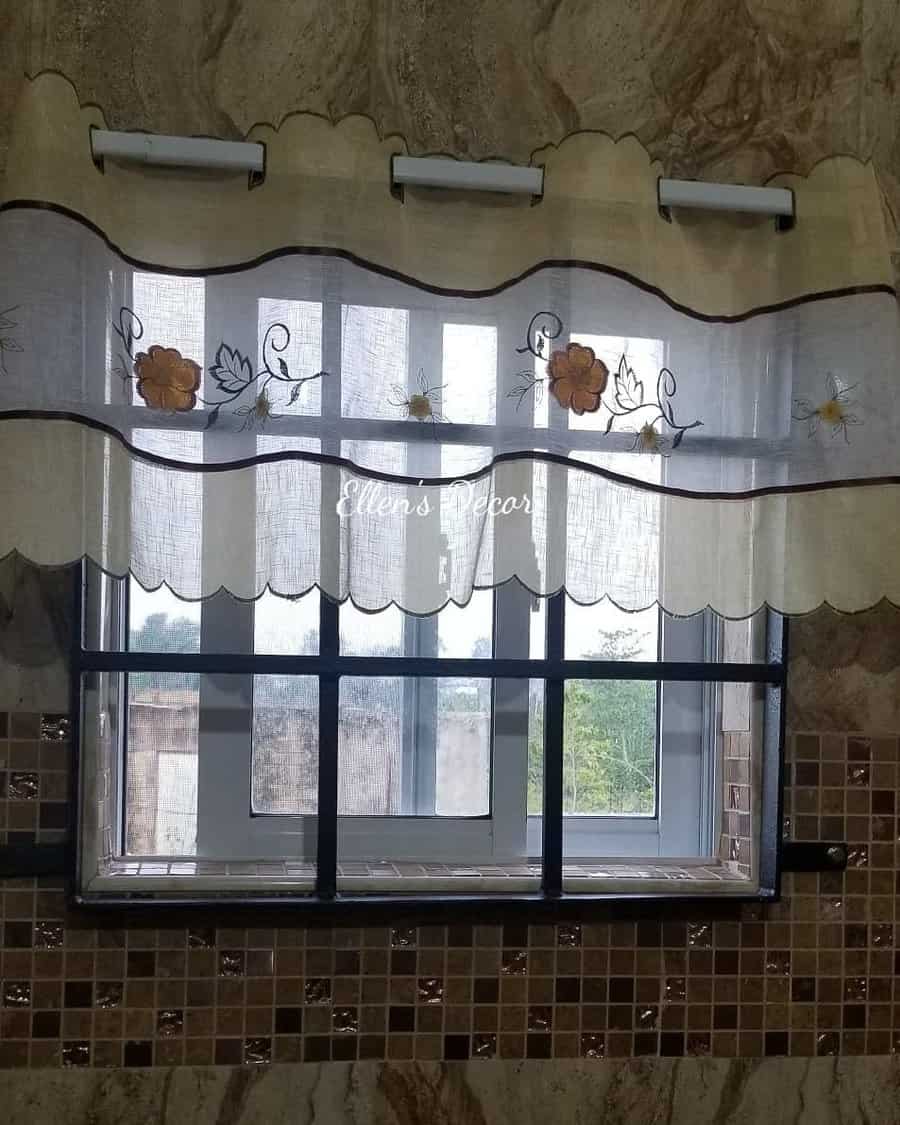
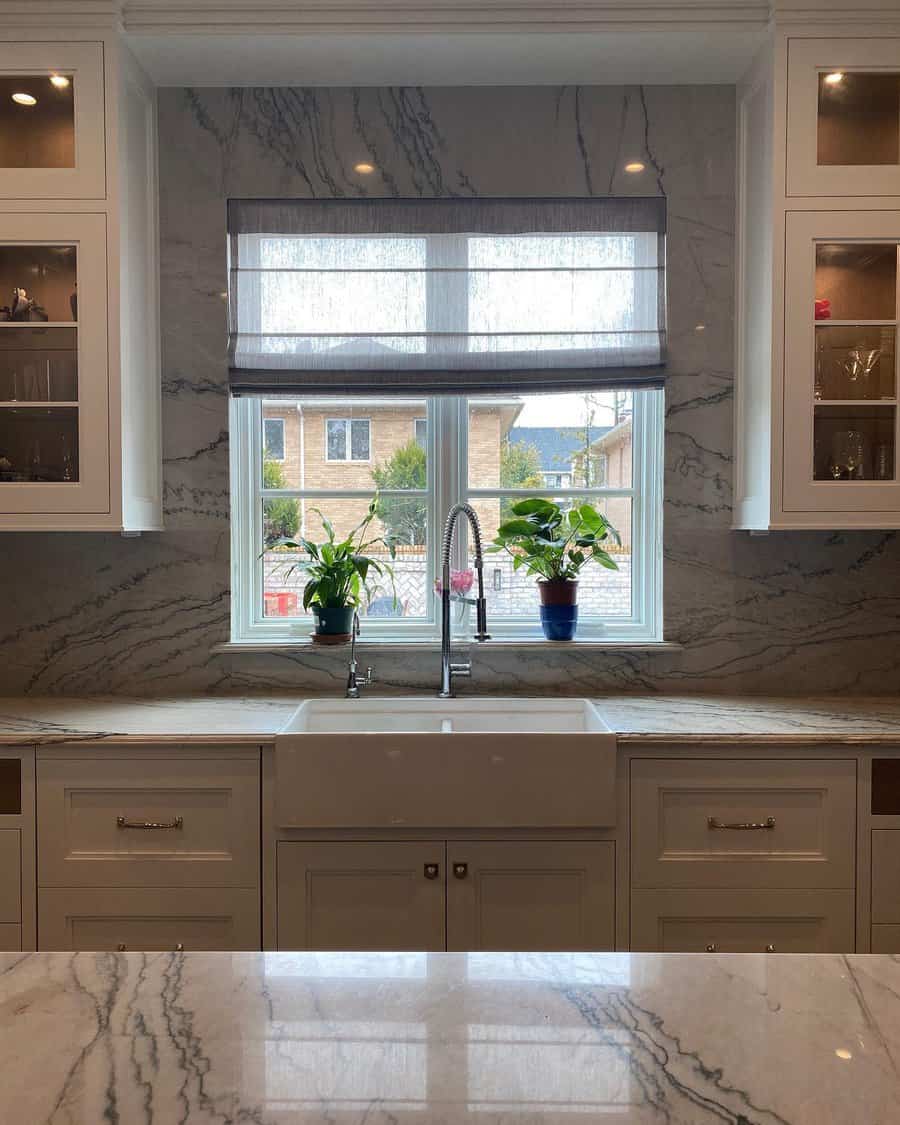
    13. Diffuse Soft Light With Sheer

    When sheer valance curtains are hung in the window, they lend an airy, graceful tone to the room. The sheer fabric diffuses and softens the light that shines through, creating a subtle warmth and comfort.

    Whether used alone or as part of a layered window treatment, sheer valance curtains can bring harmony and balance to any room.

    They offer a simple sophistication—creating a sense of understated luxury and elegance in even the plainest of spaces.

    Sheer valance curtain
    Source: @blendedfarmhouse via Instagram
    Sheer Venetian valance curtain
    Source: @lnlinteriordesigns via Instagram

    14. Enliven The Living Room With Valance & Floor Curtain

    Valance curtains offer a perfect balance of aesthetic and practicality, blending beauty and structure while enhancing the overall atmosphere of any home. In addition to providing light control and privacy, valance curtains add visual depth with their layered look when combined with floor curtains.

    Installing valance curtains as part of interior design will help create an ambiance that is welcoming yet classic – one that every guest can appreciate. From airy materials to luxe fabrics with striking shades, valances provide your space with unique style and charm.

    Valance with floor curtain
    Source: @hackrea_en via Instagram

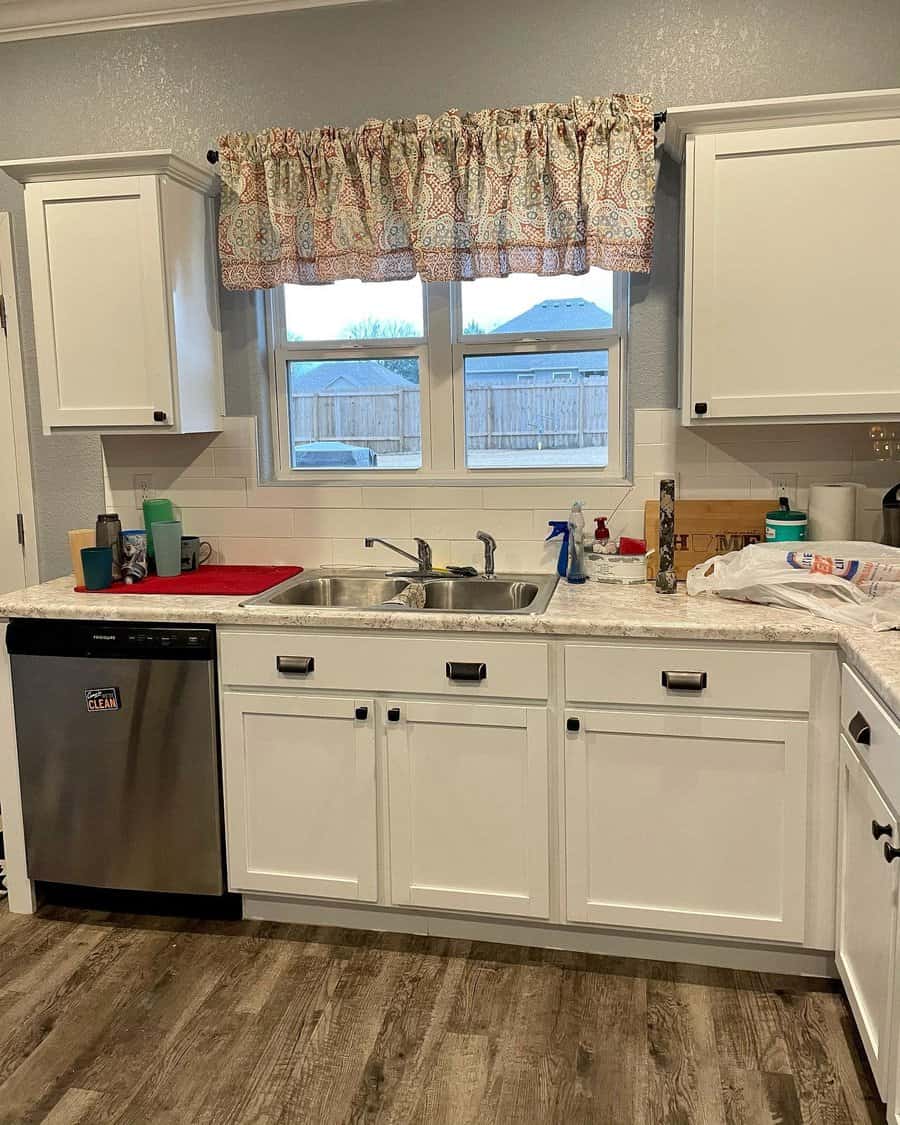
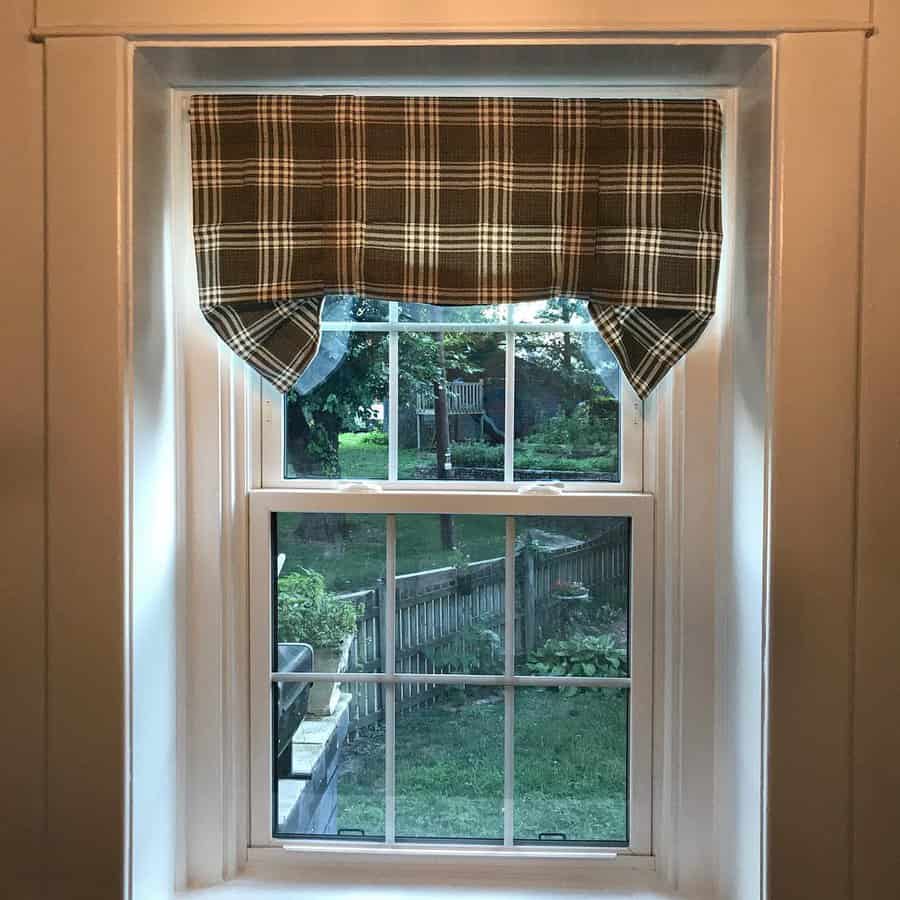
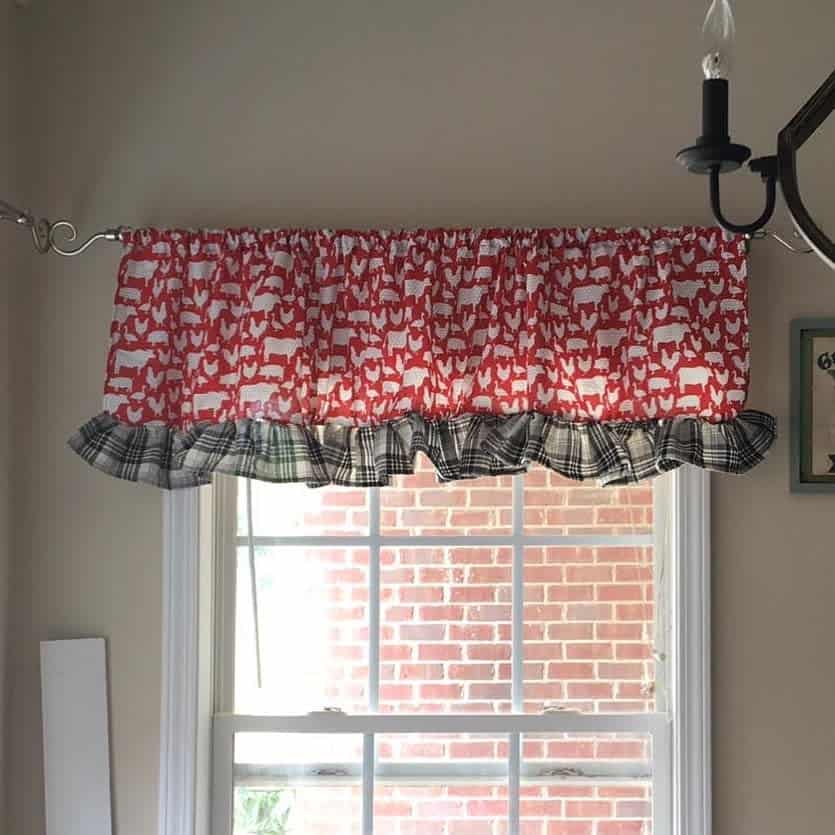
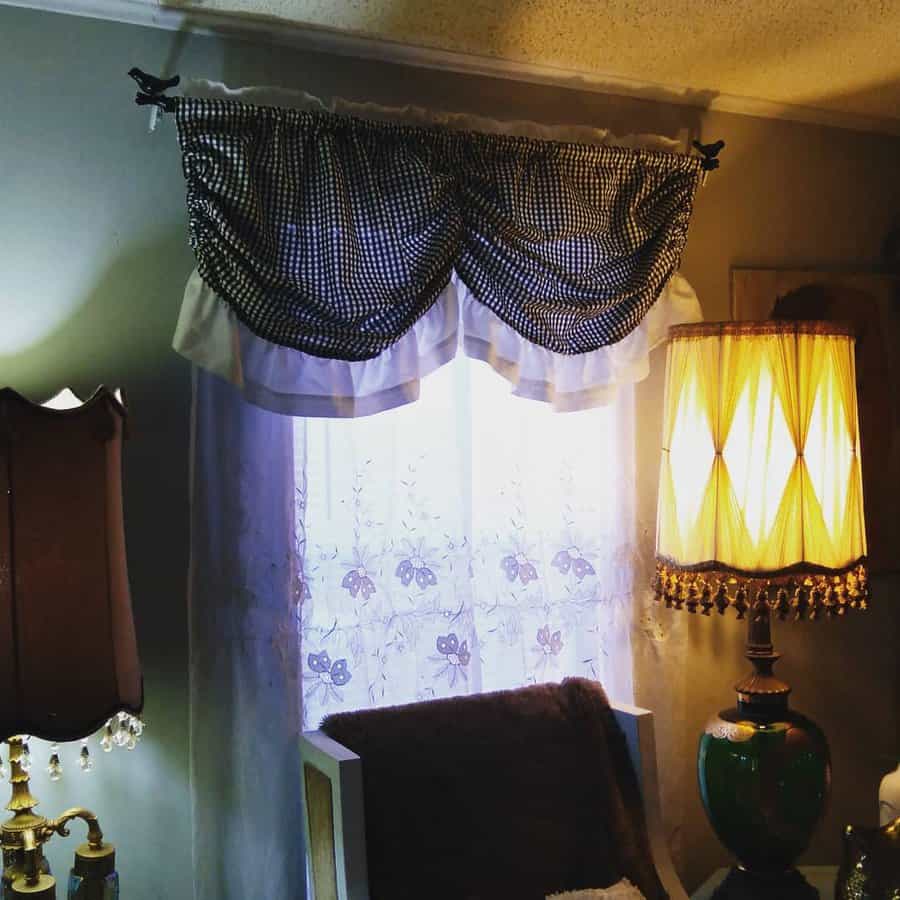
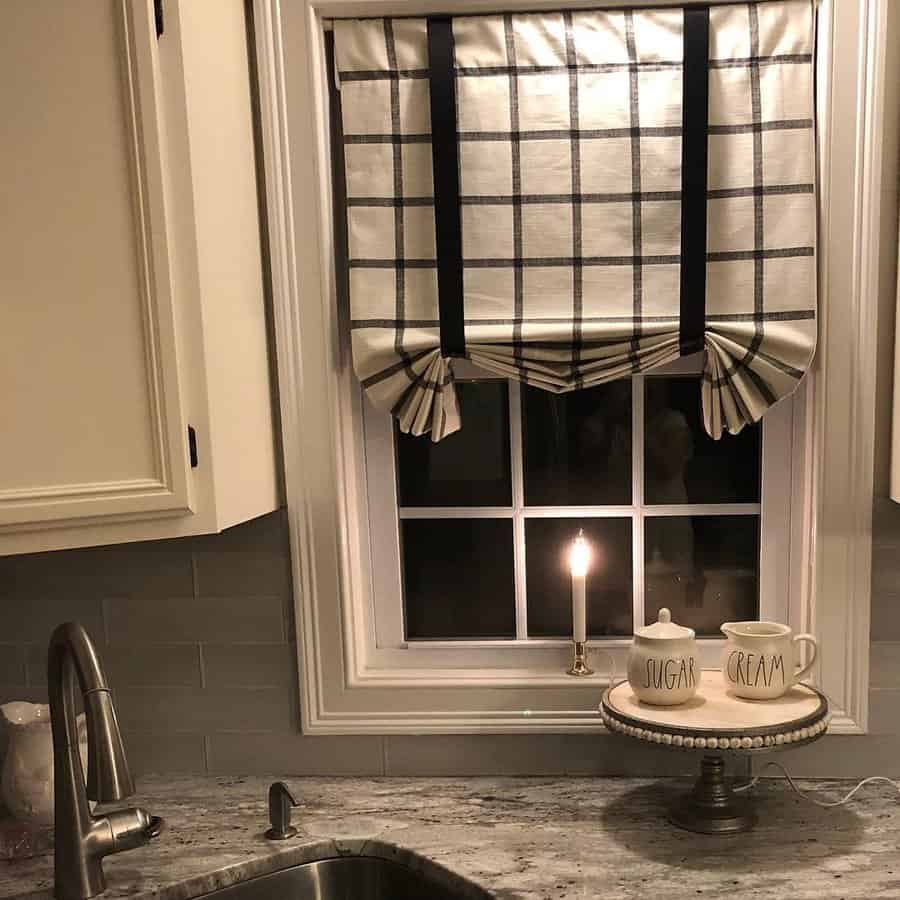
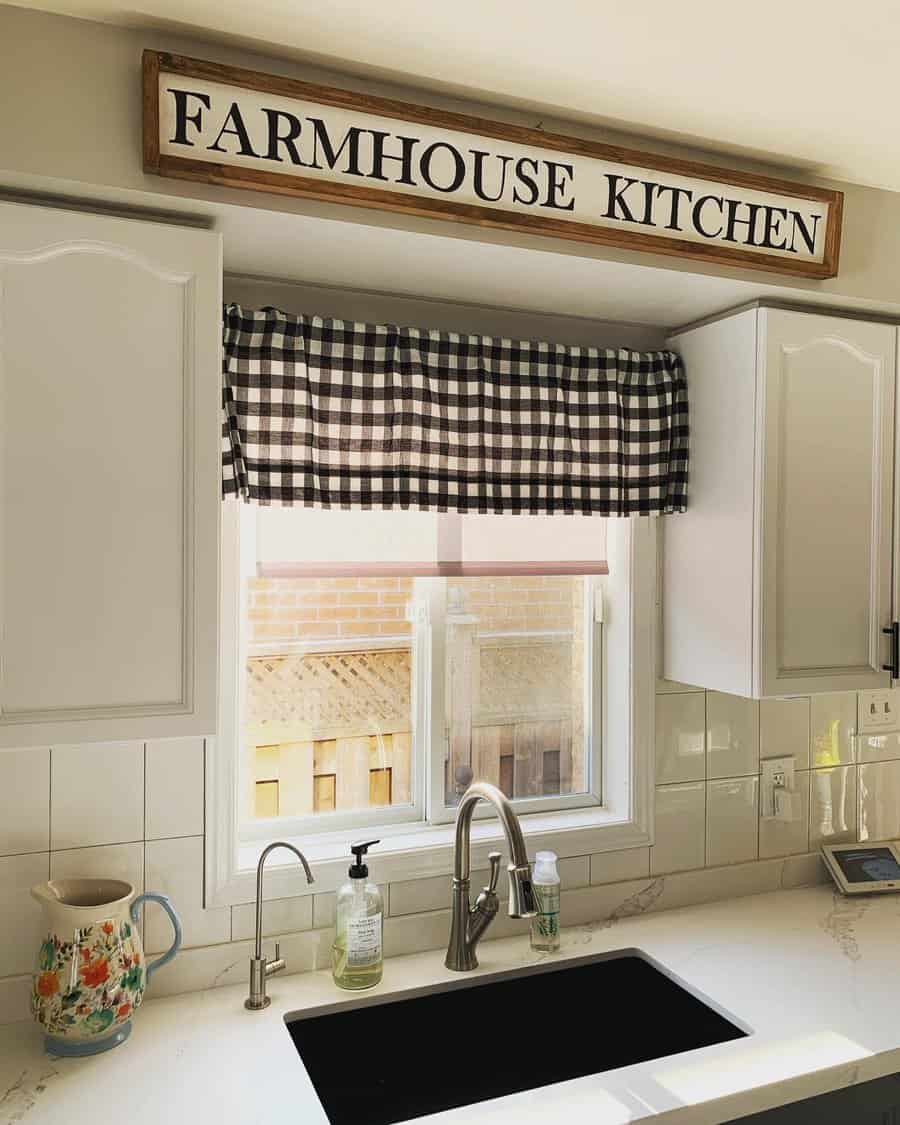
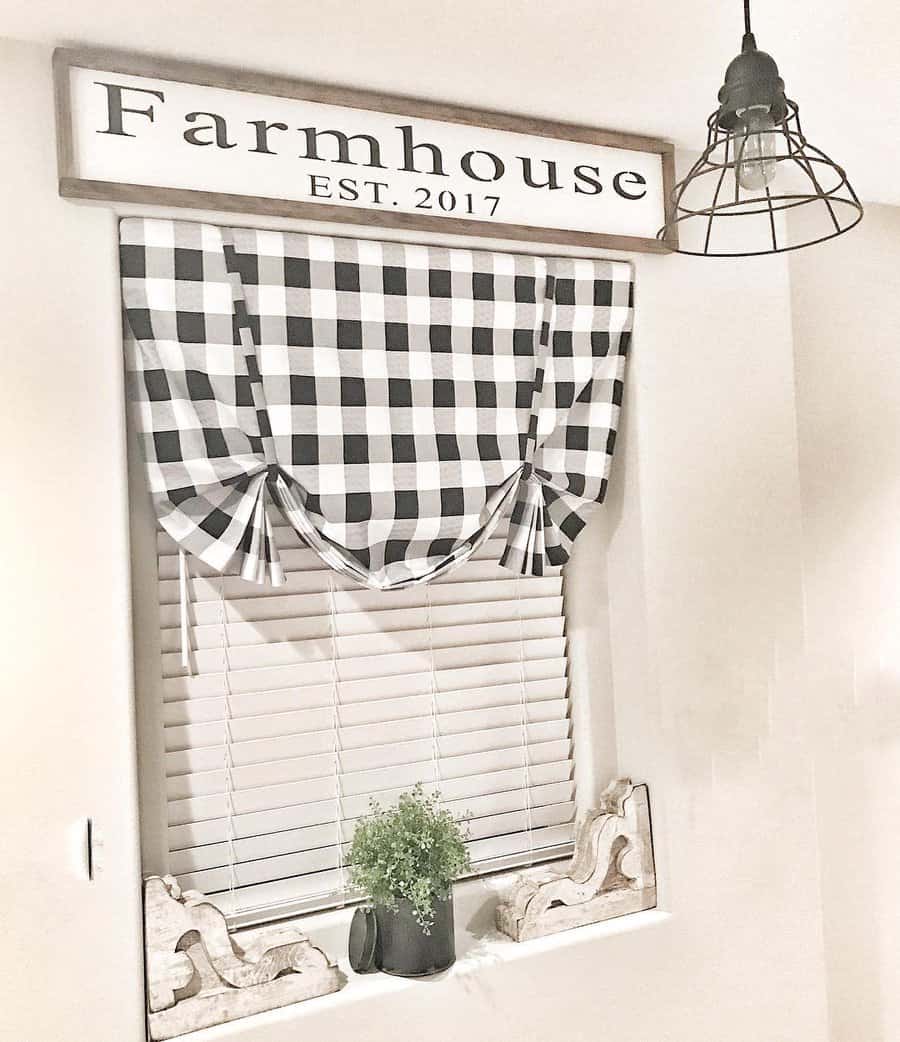
    15. Jazz Up A Farmhouse Kitchen With Gingham

    Picture a gingham valance curtain draped artfully in a farmhouse kitchen as the perfect finishing touch for a classic country-style look. Its delicate pattern and rich earthy colors bring an aura of rustic nostalgia to any home, transporting you back to simpler times with unmatched charm and whimsy.

    Whether your style is traditional or modern, gingham valance curtains are sure to be a great addition that adds timeless appeal and style to any room.

    Farmhouse gingham valance curtain
    Source: @nishalov3ly via Instagram
    Farmhouse gingham valance curtain
    Source: @notafarmhousentexas via Instagram

    16. Make It Versatile With Monochrome

    If you’re looking to enhance the look of any room in your home, monochrome valance curtains are a great choice! Not only do they look stylish and modern, but they are also incredibly versatile. You can mix and match colors to create subtle high contrasts or an ombre effect.

    The monochrome offers endless possibilities as accent items, making them perfect for tying together any type of themed decor. Valance curtains come in a range of designs and styles, so no matter how intricate or plain you’d like the look to be, there’s something for everyone.

    Monochrome valance curtain
    Source: @myhometheory via Instagram
    Monochrome valance curtain
    Source: @leah.walder via Instagram
    Monochrome valance curtain
    Source: @homesteadwindows via Instagram
    Monochrome valance curtain
  • 10 Practical Kayak Storage Ideas

    10 Practical Kayak Storage Ideas

    Kayaking is a great physical pastime for getting some exercise while enjoying nature. While you could rent your kayak, this gets tedious and means you are dependent on someone else. Instead, owning your kayaks means you can head out on the water for free any time you want. You just need to figure out where to put your kayak when you’re not using it. What you need is a kayak storage rack. 

    These kayak storage ideas will help you figure out what to do with your kayak while you’re not out on the water.

    [view_toc]

    1. Beachside Kayak Storage

    If you’re lucky enough to live near the beach, then you could skip the hassle of transport and keep your kayak directly on the beach. You’ll see this commonly done with hard shell kayaks. A freestanding rack is ideal because it gets the kayak off the ground.

    Row of yellow kayaks by mountain lake
    Colourful kayaks stored on a dock
    Inverted kayaks lined up side by side on a dock
    Racks of colorful sea kayaks
    Orange plastic canoe put in a metal rack
    Kayak rack by the marina on sunny day
    Colorful kayaks stacked lakeside
    Kayak rack by cloudy seaside
    Riverside kayak storage in sunlight
    Beach kayak storage ideas
    Source: @boatinginboston via Instagram

    Make sure to always turn them upside down while on the rack. It should also have a cover overhead. This will protect the kayaks from the sun’s harmful UV rays. You don’t want the molded plastic growing brittle and cracking from exposure.

    2. Simple DIY Kayak Rack Construction

    While there are many fancy kayak storage racks and kits that are available, you don’t have to go this route. Instead, you can easily create a DIY kayak rack plan. Use a tape measure to plan out the size and shape of your rack. Then use wood to build the rack.

    DIY kayak storage ideas
    Source: @diesel_sprague via Instagram
    DIY kayak storage ideas
    Source: @windroseranch via Instagram

    Be sure to reinforce it will plenty of support. You also want to make sure that it stays stable once the kayak’s weight is on the rack. To protect your kayak, add foam padding to the support rails.

    3. Waterside Dock Storage for Kayaks

    When you live on the water, the smartest storage option is a dock. This puts your storage location right on the water. Then you have easy access to your recreational kayaks whenever you want them. You could even put your inflatable kayak or canoe on the dock. While they may be more expensive, invest in a floating dock. They are made of durable PVC material and float on the water right at the edge.

    Kayaks and pedal boats on dock
    Dock kayak storage ideas
    Source: @boatinginboston via Instagram
    Rack of colorful kayaks on dock
    Covered kayak storage on pier
    Dock kayak storage ideas
    Source: @boatinginboston via Instagram
    Dock kayak storage ideas
    Source: @chesapeake_dock_outfitters via Instagram

    On the water side, it slants down towards the water. That way, you can easily slide the kayak off into the water or paddle up on it.

    4. Freestanding Storage Racks

    The easiest kayak storage idea is a freestanding storage rack. You buy it, set it up, and put your kayak on it. If you only have one kayak, there are simple two-stand sets that you can fold up and tuck out of the way when not needed. Or you can move them around as needed.

    Kayaks under rustic shelter at dawn
    Yellow kayaks on wooden rack
    Kayaks on wooden rack
    Source: @boldcitybuilders via Instagram

    If you can’t afford to buy the specialty kayak stand, an even easier alternative is to set up two sawhorses. Just be sure to turn the kayak upside down when placing it on the supports.

    5. Indoor Garage Kayak Storage Ideas

    If you have a large garage, then it makes sense to bring your kayak indoors for garage storage. An indoor kayak storage rack will help keep your kayak looking and performing to the best of its ability for longer. With indoor storage, your kayak is protected from the elements, such as UV rays and fluctuating temperatures.

    Kayak storage at forest cabin
    Outdoor kayak storage shed with racks
    Modern kayaks stored on metal racks
    Kayaks stored on metal racks
    Urban kayak storage at marina
    Garage kayak storage ideas
    Source: @cwp_woodworks via Instagram
    Garage kayak storage ideas
    Source: @fliesbyfletch via Instagram
    Garage kayak storage ideas
    Source: @henkes_officiella via Instagram

    You can stand them up vertically with a rope securing them to the wall if you have a tall garage ceiling. For small spaces, it can make more sense to suspend them from the ceiling.

    6. Ceiling Kayak Storage: Maximizing Vertical Space

    If you lack the necessary floor space for storing your kayaks, it’s time to look up for your storage solution. Start by looking for a ceiling joist to mount your ceiling rack from. This will give it the necessary support and strength needed to hold the kayak’s weight.

    Hanging kayak storage ideas
    Source: @a_hayes_ via Instagram

    You can buy a mounting hardware kit like Rad Sportz. Once installed, a long cable will release the loops, lowering them to make it easy to put your kayak through the holding loops. Then pull the cable through the pulley system to raise your kayak out of the way. Underneath, you have your storage space back.

    7. Outdoor Kayak Storage Options for All Needs

    Kayaks can be quite large, making them cumbersome to keep in your garage. What you need is an outdoor kayak storage solution. It could be a wall-mounted option, freestanding rack, or even a kayak trailer on wheels.

    Outdoor storage of colorful kayaks
    Outdoor storage of colorful kayaks
    Kayaks on trailer storage in rural area
    Autumn backdrop with outdoor kayak racks
    Wooden racks with colorful kayaks
    Outdoor kayak storage ideas
    Source: @aframeonfindley via Instagram
    Outdoor kayak storage ideas
    Source: @boatinginboston via Instagram
    Outdoor kayak storage ideas
    Source: @lindsaymarie1783 via Instagram
    Outdoor kayak storage ideas
    Source: @ttspecialtyproducts via Instagram

    The type of outdoor storage that you decide to use will depend on your budget, available space, and the number of kayaks you need storage for. Simple wall-mounted hooks are affordable but limit the number of kayaks you can hang. A large freestanding unit can be more expensive but ideal for storing many kayaks.

    8. Vertical Kayak Storage for Space Efficiency

    When you head to an outdoor sporting goods store, you’ll likely see the kayak on display standing upright. This is done because you can easily store multiple kayaks in a smaller space. You can take the same approach with your at-home kayak storage. It could be a freestanding rack or individual blocks for each kayak stand.

    Vertical kayak storage by water's edge.
    Vertical kayak storage by water's edge.
    Vertical kayak storage by water's edge.
    Source: @markj29a via Instagram

    You should also have an adjustable strap that wraps around the middle of the kayak or a second loop mounted higher on the wall for safety purposes. This secures the kayak to the wall while in a vertical storage position.

    9. Versatile Wall-Mounted Kayak Racks

    Wall mounted racks are one of the most common storage methods because you can mount them on any wall at any height. They typically come as individual hooks that are bolted to the wall. You place the kayak in the hooks and then use the straps to secure the kayak in the hooks.

    Wall kayak storage ideas
    Source: @sherri_marie_b via Instagram
    Wall kayak storage ideas
    Source: @Ideas via Instagram

    The Suspenz EZ Kayak Rack is a popular option. You can essentially build your own wall rack because the individual hooks are mounted separately. This lets you mount them where you have the available wall space.

    10. DIY Freestanding Wood Kayak Rack

    If you have a lot of kayaks that you need storage space for, then building a wood rack is an ideal option. You can easily build a freestanding rack from available kits. Most kits can hold three to six kayaks. They will feature two arms for each kayak. You’ll place the kayak in from the side so that it rests on the two supports.

    Blue kayaks on wooden storage rack
    Source: @a2oproperties via Instagram
    Orange kayaks on wooden storage rack
    Source: @just_jack_d via Instagram
    Wood kayak storage ideas
    Source: @labradorkid via Instagram
    Wood kayak storage ideas
    Source: @stephencaugheyjoinery via Instagram
    Colorful kayaks on wooden storage rack
    Source: @Ideas via Instagram

    This is the most user-friendly method because it’s easy to take the kayaks on and off. An alternative option is where the kayaks get placed on the stand from the end. This style of rack is best when you don’t have enough room to load them from the side, such as when the rack is on a dock.

  • How to Cover a Closet Without Doors

    How to Cover a Closet Without Doors

    If you live in a small apartment or home, you know the frustration created when you try to open your closet doors. Whether they are swing open or bi-fold, opening closet doors takes up additional floor space that you just don’t have. In addition, you have to be careful about furniture placement so that the doors don’t bang into the furniture. The easiest solution is to take the doors off the closet. But now you have a new problem, how do you cover the open closet with doors? 

    Try one of these ideas to cover your closet that will take up less space while still looking stylish. 

    [view_toc]

    Curtains 

    bedroom interior with curtain for closet

    One of the easiest solutions is to add curtains. This is a doable DIY project that anyone can accomplish. It’s also possible to add curtains in an apartment or rental home where you don’t want to create holes. Start by choosing your installation method. A temporary and removable solution is to use a tension rod. You could mount a curtain rod with screw-in rod supports for a more permanent option. For a traditional look, choose a rod that mounts into the wall. For a modern feel, choose a set of ceiling curtain tracks. 

    Once you’ve chosen the rod, you can choose your curtains. The fabric should have a thick, dense weave that will block your ability to see into the closet. Choose a color or pattern that complements the rest of your bedroom design

    Elevate the Look 

    Try mounting the curtain rod on the inside of the closet. This creates a clean design on the outside. The curtains should be long enough to just skim above the floor. Too short, and they will look awkward. Too long, and they’ll pool in a pile on the floor and look sloppy. Additionally, add tiebacks or hooks that will hold the curtains out of the way when you want to access the closet. 

    Beads

    closet with bohemian style
    Apartment Therapy

    Give your closet a vintage or bohemian feel with a beaded curtain. There are curtains made from brightly colored beads, wood, or bamboo. Some have a random pattern, while others will have a decorative design. If you’re looking for more of a visual block, choose a curtain that has beaded strings placed close together and maintain the same width as the entire length of the curtain.

    Curtains with more space between the strings or varying widths allow you to see through the strings more easily. As someone who has had a beaded curtain in a doorway, there are some drawbacks to using a beaded curtain. They can get annoying as you move the beaded strings out of the way every time you want to walk through the door. They can get caught on your hair or clothing as you move through the curtain. Depending on the material they are made out of, the beads can make noise when they move, which can be annoying. 

    Give It a Unique Look 

    You can use a beaded curtain in your glam bedroom. Choose a beaded curtain that’s made from glittery beads or crystals. This style of beaded curtain will sparkle and catch the light. Another option is to choose one made of metallic beads. These curtains will add an extra touch of glam to your bedroom. The individual strings of beads will swing and move, catching the light, adding movement and shine. 

    Roman Shades 

    closet without doors romanian shades
    iStock

    The primary function of Roman shades is to be a window covering, but that doesn’t mean they can’t serve another purpose. Using them to cover your closet door opening is a smart solution because it’s a classic decor piece that adds a touch of sophistication to any room. Additionally, because they are traditionally a window treatment, you can create a faux window look in your bedroom. Turn the light on in the closet behind them and create the illusion of your bedroom being brighter. 

    Roman shades are made of a single piece of fabric that’s gently folded over itself as it cascades down the length of the window. When you pull the string the raise them, the folds sit on top of each other to compact down as they rise to the top of the window. The same function would happen in your closet doorway. If you have tall ceilings, mount the shade above the door frame so that when you raise the curtain, it neatly tucks up and out of the way.

    The drawback of this option is that you’ll likely have to purchase a custom shade. However, doors are typically a standard width, so once you have your shades made, you can take them down and move with them easily. There are also several DIY options that make it an affordable home improvement option. 

    Folding Screen 

    closet with folding screen

    Traditionally, folding screens are used as room dividers. They typically have three or more panels that are connected with hinges. You can angle each panel so that the screen stands on its own. For your bedroom, you can use your folding screen to block the view of your open closet. What’s nice about folding screens is that you can purchase them in a wide range of lengths and heights. This lets you create the perfect look for your bedroom. If you have a wide opening for your closet, you may want to use two screens. They will be lighter weight and easier to move. 

    Choose a screen that suits your bedroom’s decor style. A bohemian screen could be made from hand-carved wood with an intricate design. An art decor screen will look sophisticated and elegant with elaborate decoration and touches of gold. If you love the farmhouse look, try a folding screen made from slatted panels or panels that are styled like barn doors. 

    For maximum effect, choose a folding screen that’s taller. You shouldn’t be able to see over it when standing in your bedroom. This means choosing a screen that’s close to six feet tall.  

    Saloon Panels 

    closet with saloon panel

    While saloon panels are technically doors, they don’t function as a traditional door. This makes them ideal for taking up less space while also adding a unique style to your bedroom. While you could go traditional with western style saloon doors, there are other options. Traditional saloon doors tend to lack vertical height. They don’t reach the floor, and they are easily seen over the top. Instead, look for a modern version of saloon doors that are the full height of your closet door space, with a small opening at the top and bottom.  

    Modernize Your Saloon Panels 

    Instead of sticking with the traditional wood doors, try glass panels instead. The frosted glass gives your closet and bedroom a modern feel while also blocking the view into the closet. For a sleek look, stick with unadorned large glass panels. For a vintage-inspired look that still feels modern, choose glass doors with a solid black frame that creates the look of multiple panels. 

    Accordion Screen 

    closet with accordion screen

    An accordion screen is perfect for small spaces. They are similar to bifold doors, but the folding panels are much smaller. This helps the screen to take up less space. Accordion screens are made from vinyl material. There’s a track that the screen will hang from, and you’ll slide the screen open and close on the track. To help keep the door closed, small magnets will hold the door in place. 

    These screens are perfect for small spaces or rental properties. They are affordable and lightweight. However, they aren’t the best option if you’re looking for a permanent option. They tend to look lower quality than other options on this list. They also come in a limited set of color options. However, there are faux wood options that can give your bedroom an earthy look. 

    Large Mirror

    closet without doors in a large mirror

    Placing a large mirror in your bedroom helps it feel bigger and brighter. However, it can be challenging to find a large empty wall to hang your mirror or enough floor space for a freestanding mirror. Instead, use a mirror to cover the opening to your closet. One option is to mount the mirror on wheels. Then you can easily move the mirror out of the way and then back in front of the closet. Choose a full-length mirror that lets you see your entire outfit. 

    Another option is to cover a barn-style door with a mirror. While this is technically a door, it’s a new take on a popular space-saving door option. Rolling barn doors sit flush against the wall and hang from a track mounted on the wall above it. There are wheels on the door that allow the door to roll back and forth. This door style doesn’t take up a lot of floor space in the room but does require you to have a blank wall next to the closet that’s large enough for the door to roll in front of when the door opens. Instead of leaving this door plain, mount a large mirror on it. Now it looks like the mirror is mounted on the track. A large mirror of this size will help your bedroom feel significantly larger and brighter. To give the mirror a bit more style, add a frame around the mirror in metal or wood. 

  • How to Organize Under the Bathroom Sink

    How to Organize Under the Bathroom Sink

    Keeping a tidy and organized bathroom helps you start your day on the right foot. Nobody likes to spend precious minutes in the morning rush, looking for stuff that has been misplaced. A good organizing system helps you be more effective getting ready in the morning – everything you need must be at easy reach, following the organization’s golden rule: “a place for everything and everything in its place”.

    We are here to help! In this post, we will give you some practical ideas that will make your bathroom more functional and beautiful. After all, beauty is essential…

    [view_toc]

    FIRST THINGS FIRST

    Start by decluttering the bathroom. I know, it’s hard work that nobody likes, but take some time to separate your items into categories, so you will be able to define what goes where. Let’s start with the basics:

    1. Check the expiration date of all beauty and hygiene products and discard all those that have expired.
    2. Create your categories, so that you know how many baskets and organizers you will need:  skincare, hygiene items, hair products, etc. Store them in different baskets for easier access. 
    3. Choose the material and size of the baskets and organizers you will need. Opt preferably for the same material and color. This creates uniformity, which is another golden rule of organization.
    4. The most suitable material for bathrooms is plastic and clear acrylic since they are washable. Cardboard boxes or wicker baskets covered in fabrics will not last in a humid space.
    5. Check for mold in the cabinet under the sink. Do not store your items in case you find mildew. It is safer to treat the wood first. In the e-book A Homeowner’s Guide to Mold Remediation, author and mold remediation expert Brian Turner recommends cleaning mold from non-porous furniture using first a HEPA vacuum, then a damp wipe with a low-toxicity cleaning product.
    6. You can then sand and refinish the wood. If the mold damage is too deep, this process won’t be enough, and you may need to consider disposing of the item.
    7. Once you have taken care of the basics, it’s time to start filling your bathroom cabinet in a neat, organized way. Shall we start?

    LABEL BINS AND ORGANIZERS

    bathroom with sink in a modern style

    Once you have sorted out your items, label the bins or organizers and start placing them in the cabinet. If your cabinet is small, consider using stackable plastic boxes to optimize space.

    KEEP CLUTTER OFF THE COUNTERS

    bathroom counter with sink and compartments

    Avoid leaving your items over the counter. With an organizing system, you will be able to store your stuff in compartments that are labeled and easy to find. Organizers with suction cups can be attached to the tile, which frees up counter space. 

    WHERE TO STORE MEDICINE, MAKEUP, AND PERFUMES

    bathroom with sink in a wooden counter

    Because of temperature fluctuation, bathrooms may not be an ideal place to store makeup and perfumes. If there is no other place, keep them on a floating shelf, away from the sink. 

    Plastic or clear acrylic containers are champions when it comes to bathroom organization. You can store all your toiletries and cosmetics in them. Use drawer dividers or organizers to store your stock of soap, tampons, and other smaller items.

    Ideally, place the bins side by side in the cabinet, leaving the items you use more in the front, and the bigger stuff, like baskets for toilet paper and shampoos and conditioners in the back. Store medicine in a medicine cabinet or in airtight jars under the sink.

    STORE SWABS AND COTTON IN MASON JARS

    cotton balls and cotton swabs in a mason jars on bathroom with sink

    Use glass jars to store cotton and cotton swabs, to keep them well preserved and easy to access. Mason jars work as décor pieces and can be placed on a shelf. Place a scented candle in a glass jar, and you will have a great décor piece for the bathroom. 

    WICKER OR NATURAL FIBER BASKETS FOR TOWELS

    bathroom with sink and towels in a basket

    If you want to add a rustic vibe to your bathroom, use wicker or natural fiber baskets. They are excellent organizers for toilet paper. Roll the towers in tubes and arrange them side by side in the basket and they will work as décor pieces.

    Read also: 67 Towel Storage Ideas

    USE TRAYS AND ORGANIZE WITH STYLE

    stylish bathroom with sink and round mirror

    Use trays to organize the items you would normally leave on top of the counter. You can gather the everyday use items on a tray near the sink, for easy access. You can have a tray for skincare products and face masks, placed under the sink. Use a mirror tray for your perfumes, it is a charming way to store them, preferably on a shelf. 

    EVERY INCH COUNTS

    bathroom with sink in a toiletries and stylish vessel sink on light countertop

    For that awkward space right under the sink in bathroom cabinets, use bins with items that won’t fit in a drawer, like shampoos and conditioners, moisturizers, and lotions. The important thing is to measure the space and then buy organizers that will fit perfectly, leaving no gaps. If your under-sink cabinet is loaded with stuff without any dividers or properly sorted out in bins, it will soon become a cluttered space where things will get easily lost. 

    USE ORGANIZERS AND MASH DRAWERS

    classical white bathroom with sink interior with blue cabinet

    Whether on shelves or inside cabinets or drawers, it is important to organize the small items, so they don’t get lost in the clutter. Use organizers for this purpose.

    Another solution is to place mash drawers in the cabinet under the sink. Mash drawers are great not only because of the effective use of height but also because you can easily slide the drawers in and out, making it very practical to store and find your stuff. 

    DRAWER DIVIDERS ARE ESSENTIAL

    woman organizing an open drawer in a bathroom with sink

    Keep your drawers tidy and organized with dividers, or they will quickly turn into junk drawers. Things inevitably get lost in the clutter. In the rush of everyday life, we end up throwing any bathroom-related item in the drawers, and the result is that we never seem to find them again.

    Buying dividers that fit perfectly inside the drawers is like a puzzle. Measure the size and the depth of your drawers, leaving no gaps. After taking your measurements right, look for dividers that will fit and accommodate the items you plan for each one. 

    Related read: 96 Over The Toilet Storage

    USE THE INSIDE OF CABINET DOORS

    banthroom with sink in a white paint and marble countertop

    Don’t let any space go wasted! You can gain extra storage space by using the inside of your cabinet doors. Over the door organizers and command hooks are very practical solutions, that can be easily removed, if needed.

    Clutter makes living difficult. It is frustrating to spend time looking for stuff, especially if you are in a rush. Keeping your bathroom tidy will give you a sense of accomplishment and will help you start your day in the best mood. 

    Transform your bathroom into your personal spa retreat, no matter the size. What really matters is that you have everything you need, nicely placed for easy access. No more looking for lost items.

    No more stressful mornings amidst the mess. An organized bathroom feels like a brand-new space, it’s a whole new world!

    So, relax and enjoy. You deserve it!

  • How to Decorate a Bedroom With Slanted Walls

    How to Decorate a Bedroom With Slanted Walls

    If you are searching for a house and see an ad that says “bedroom with vaulted cozy ceilings” this generally means that the room can be quite cramped and difficult to decorate!

    Slanted walls are a challenge for interior design. But spaces with vaulted ceilings can turn out to be the most charming places in a home, it all depends on good planning. 

    In old and traditional homes, you will find rooms with this incredible charm and potential, waiting to be filled with creative design solutions. In this post, we will bring you some of these solutions:

    [view_toc]

    1. LOWER FURNITURE

    lower furniture in the bedroom with slanted walls

    You have to avoid the sensation of being swallowed by the slanted walls closing up above you in a bedroom, and there is only one way to do it: right color paint and low furniture. This is the perfect combo for a slanted walls bedroom.

    You cannot place tall cabinets or bulky furniture in slanted wall spaces. They will make the room feel oppressive and crowded. You want harmony and a sense of amplitude, so go for lower furniture. 

    Have custom cabinetry made, if you can afford it. Otherwise, there are several options in the market for sleek, straight furniture that will fit perfectly in a space like this. 

    2. A-FRAME BEDROOM

    A-frame decorated in the bedroom with slanted walls

    The classic décor for this type of ceiling is to place the bed in the middle of the vaulted walls so that the whole room will look more spacious. But there are some creative ways to place beds perpendicular to the walls. This may be an option for the kids’ room.

    Choosing the right colors for the space is key, so you don’t feel closed in by the slanted roofline. Go for light tones everywhere. Light walls, floors, and wood, so that the space does not feel overwhelmed by the heavy tones and furniture. Bedding and décor pieces should follow the same light pattern, to make the space feel larger and brighter.

    3. COLOR IS WHAT WILL DEFINE THE SPACE

    light color painted in the bedroom with slanted walls
    Hendrickson Photography / Shutterstock.com

    Choose the right colors for the walls. Some people do not care for white walls – some even call it a “psychiatric ward” style… but in a slanted-wall bedroom, the light colors will work in your favor. You can be a little (just a little) bold and use a slightly darker tone on the straight part of the wall, but paint the slanted part white.

    This will make the room visually larger, without adding a claustrophobic feel that dark colors would certainly bring. On the contrary, it will create an interesting and eye-catching detail, especially if the walls are not too steep. You can also choose to cover the straight part of the walls with light wooden panels or beadboard. 

    Wallpapers with bold patterns are the least suitable option for this type of room. Dark colors on slanted walls make the room feel like a dungeon and do not contribute to setting the mood you want in a bedroom, which is a relaxing, comforting space. 

    Should you like to add some texture to the ceiling, you can install a mural with light colors, such as stars or clouds over a light blue sky. This will bring an interesting and peaceful touch to the space over your bed.

    4. LIGHT FURNITURE IS A MUST

    light furniture in the bedroom with slanted walls

    The easiest way to make a slanted wall bedroom feel bigger is with light furniture. Choose off-whites, beiges, and soft yellows for bedding and furnishes, along with white furniture or light wood furniture. If the space has dark floors, decorate it with a light rug.

    5. WALLPAPER

    wallpaper in the bedroom with slanted walls

    Wallpapers are risky, but worth it, depending on your décor style. For a kid’s room, vibrant wallpaper with a fun design like clouds or robots may be an option. You can leave the colors to the wallpaper and keep white or light furniture in the rest of the room. Create a more classic and subtle look by using striped wallpaper in shades similar to the rest of the walls.

    6. VINYL STICKERS

    vinyl sticker in the bedroom with slanted walls

    You can add your personal touch to the walls with vinyl stickers if you do not want to commit to painting and wallpapers. This works very well for teenagers’ and kids’ bedrooms. They can apply their own style to the décor, and it is not a huge compromise, since these stickers are not permanent. 

    Just wipe the wall with a damp cloth, let it dry, remove the adhesive film and press it against the wall. If you get air bubbles, smooth it out with a thin, flat object like a credit card.

    7. GLAMOUR AND DRAMA

    classic style bedroom with slanted walls

    If your style is classic, install a dramatic chandelier in the center of the room. This will catch the eye of anyone who enters the space and will be the feature piece of the décor. Just think about the proportions as it will stand in the middle of slanted walls. 

    8. LOW SHELVING

    low shelving in the bedroom with slanted walls

    Installing shelving can be tricky in a slanted wall bedroom. They can make the space feel cramped if the square footage is not too big. So, it’s all a matter of how high your straight walls go. Opt for floating shelves if the straight walls are high enough or go for low bookshelves instead. 

    9. LESS IS MORE

    minimalist bedroom with slanted walls

    The minimalist style may be the perfect style for a slanted walls bedroom. The less furniture you have, the less cramped the space looks.  Opt for functional, sleek lines furniture. Choose an ottoman or a chaise longue, instead of bulky armchairs.

    Avoid tall headboards and use light colors for the bedding and pillows. Tall armoires are incredibly charming but may not be a perfect fit for this kind of space.

    10. YOUR ROOM, YOUR SANCTUARY

    bedroom with slanted walls
    Lauren Piasecki / Shutterstock.com

    No matter the size or the challenges the space presents, your room must carry your signature and reflect who you are. Use these tips to choose décor options that speak to your heart, but avoid common mistakes like overwhelming the space with excessive décor and bold colors. Bring your personal touch with artwork here and there and those very special framed memories one can’t live without.

    Soften the space with some flowers, even a small vase makes a difference. And make it a comfy, soothing place you are happy to go back to at the end of every day.

  • Best Outdoor String Lights

    Best Outdoor String Lights

    Without outdoor lighting, your backyard living space is only usable during daylight hours. This significantly reduces the amount of time you can spend on your patio, enjoying your backyard. You could add an outdoor light to the side of your house, but this won’t give you the ambient light you’re looking for. Instead, you can hang patio string lights overhead to create a gentle wash of light across the entire patio.

    To help you make the most of your outdoor living space, we’ve found the best outdoor string lights that will look great and last for years to come. 

    [view_toc]

    Top Picks

    Best Overall: Blairsden Bulb Globe String Light

    Courtesy of wayfair

    Specs: 

    Overall Length: 100 feet

    Number of Lights: 100

    Bulb Type: Incandescent

    This globe string light is the perfect addition to your outdoor living room, dining table, or patio bar. The globe lights are large with sizeable filaments to create plenty of light for a large space. Each string is 100 feet in length and has 100 bulbs. This is long enough to extend the entire length of a long patio or criss-cross several times over a smaller patio. While the traditional look is the black cable, there are also green and white cable color options. The light produced is a warm light at 2600K and 35 lumens. You’ll need to have an outlet within reach for the plug. 

    One potential drawback for these lights is that the bulbs are incandescent and made of glass. This makes them fragile. Thankfully, they come in a box separate from the cable, so be sure to hang the string where you want it before you attach the bulbs. 

    [buy_now title=”Check Price” link=”https://www.wayfair.com/lighting/pdp/arlmont-co-blairsden-100-outdoor-100-bulb-globe-string-light-w006427604.html”]

    Best Budget Pick: Brightown Outdoor String Lights

    Specs: 

    Overall Length: 25, 50, 100 feet

    Number of Lights: 25, 50, 100

    Bulb Type: Incandescent

    If you’re working with a limited budget, then this string light option with incandescent bulbs is a great option. It comes in three lengths, 25, 50, and 100 feet, with a matching number of light bulbs of 25, 50, and 100 glass bulbs. This set of lights has impressive durability and is rated IP44 waterproof. You’ll like the warm light the bulbs produce at 23 lumens. Your set also comes with two spare bulbs, which is nice in case one gets broken or burns out. What’s nice about these lights is that you can connect them together. Buy multiple strings of different lengths for a customized set up in your backyard. 

    The drawback of these lights is that they are incandescent, which makes them less durable than LEDs. However, this string is UL certified for use outside. This means they are weatherproofed to be safe for exposure to extreme temperature changes, water, rain, snow, and wind. 

    [buy_now title=”Check Price” link=”https://www.amazon.com/dp/B00RQHBZVS/?tag=trendey-20
    “]

    Best Solar: Brightown Outdoor String Lights Solar

    Specs: 

    Overall Length: 34 feet

    Number of Lights: 34

    Bulb Type: LED 

    Unlike many other strands on this list, these lights are solar-powered. In addition to the 34-foot long string of lights, you will get a small solar panel that acts as the power source. Just four hours of charging are required to have these lights illuminate at night. You can even remove the solar panel to charge it in the ideal spot and then return it to the lights for use. The light bulbs are impressive, with a shatterproof construction and IP 65 waterproof rating. There are four lighting modes to choose from, steady on, slow flash, fast flash, and pulsating. This style o string lights are perfect for your campsite or RV where you don’t have access to electricity. They are also useful on a garden pergola or other sitting area away from your home. The Edison design of the bulbs gives them a retro look but the LED shatterproof bulbs ensure their longevity and durability. 

    One drawback of these lights is that they aren’t very bright. If you plan on using them as the primary or only light source, you may want to replace the bulbs with brighter ones. The set also doesn’t come with extra bulbs, so if one is defective or damaged, you will have to replace it on your own. 

    [buy_now title=”Check Price” link=”https://www.amazon.com/dp/B09S9LB9LB/?tag=trendey-20″]

    Best Premium Pick: Solar String Light – Rectangular

    Courtesy of west elm

    Specs: 

    Overall Length: 6 feet

    Number of Lights: 10

    Bulb Type: LED 

    Don’t just hang the same outdoor lights that everyone else has on their patio. Elevate the look of your backyard with this string of caged lights. This string from West Elm is six feet long and features ten lights. This LED string light produces a soft warm glow that is perfect for creating ambiance on your deck. They won’t be your main light source, but they make a nice accent. The fact that they are solar makes them affordable to run since you don’t need to use electricity or batteries. 

    Unfortunately, this string is really short at six feet. However, the lights are closer together, so you have more lights in a shorter space. However, you’ll need to buy several strings if you want to have them extend across an entire patio space. The fact that they are solar can also be an issue because how bright they depend on the amount of sun exposure they get. 

    [buy_now title=”Check Price” link=”https://www.westelm.com/products/solar-10l-string-light-rectangular-d13668/?cm_src=WsiSearch&recstrat=Search-Page-3%7CMETA-GRP-TAG-AFF”]

    Best Globe Bulbs: Renfroe Bulb Globe String Light

    Courtesy of wayfair

    Specs: 

    Overall Length: 100 feet

    Number of Lights: 100

    Bulb Type: Incandescent

    This string of incandescent globe lights is an impressive 100 feet long with 100 bulbs. This makes it ideal for large decks or patios. You could also string it back and forth over a gazebo or pergola. You can choose from black, green, or white for the cable color. This set of lights is rated for outdoor use, and durable enough to withstand bad weather. However, the string comes with a spare bulb and fuse. The light produced is a soft, warm white light at 45 lumens and 2600K. If you want something brighter, you can replace the bulbs thanks to the standard-sized base. While the lights use a plug for the power source, they are dimmable if you connect them to a dimmer controller. 

    Unfortunately, the size of the globes is smaller on this string than others. This isn’t necessarily a bad thing but can result in a different effect than what some buyers are going for. The bulbs are also made of glass, which makes them more delicate than shatterproof plastic options. 

    [buy_now title=”Check Price” link=”https://www.wayfair.com/lighting/pdp/arlmont-co-renfroe-100-outdoor-100-bulb-globe-string-light-w000509926.html”]

    Best Curtain Pick: Caln Bulb Curtain String Light

    Courtesy of wayfair

    Specs: 

    Overall Length: 6 feet

    Number of Lights: 150

    Bulb Type: Incandescent

    Instead of having a string of lights over your outdoor space hang this curtain of mini string lights instead. They look like a combination of fairy lights and icicle lights. You have the option of choosing between non-twinkle and twinkle lights. There are 150 bulbs on each set of lights, making them perfect for adding plenty of decorative accent lighting to your outdoor space. If you plan to hang them on a wall, a single set will cover 72 inches wide and 60 inches high. The bulbs are incandescent. 

    The drawback of these lights is that it’s only six feet long. You may need more than one string to cover an entire wall. You can connect up to three strings together. The construction could be more durable, with plastic being the primary material used for the housing. 

    [buy_now title=”Check Price” link=”https://www.wayfair.com/lighting/pdp/arlmont-co-caln-6-outdoor-150-bulb-curtain-string-light-mcrw2923.html”]

    Best Lanterns: Bulb Paper Lantern String Light

    Courtesy of wayfair

    Specs: 

    Overall Length: 12 feet

    Number of Lights: 10

    Bulb Type: Incandescent

    Give your patio or deck a party or festive atmosphere with this string of paper lanterns. While the string of lights is UL rated for indoor or outdoor use, you won’t want to leave the paper lanterns on the lights all of the time. They are not durable enough to be exposed to the elements. The lights are mini size and produce a bright white light. The lanterns that go over them are yellow, white, pink, red, and blue. While a single string may only be 12 feet in length, you can easily connect more than one string together. You will need to have the plug end near an electrical outlet so that you can power them. 

    The drawback of this light set is that you can’t install them and leave them up. If you wanted to do this, you would have to remove the paper lanterns and then put them back up when you are planning to use your backyard. 

    [buy_now title=”Check Price” link=”https://www.wayfair.com/lighting/pdp/penn-distributing-12-10-light-paper-lantern-string-light-pend1120.html”]

    Best LED Pick: Portfolio White Outdoor LED String Lights

    Courtesy of Lowe’s

    Specs: 

    Overall Length: 45 feet 

    Number of Lights: 18

    Bulb Type: LED

    These vintage string lights have the look of incandescent bulbs but are actually LED lights. However, what makes this string stand out is the commercial-grade construction. They are UL rated for wet locations, making them safe for use anywhere outside. The bulbs may look like traditional bulbs but are actually shatter-resistant plastic. The string also comes with two replacement bulbs and one replacement fuse, just in case. The light produced by the bulbs is warm white light and bright enough to use as your primary light source in your backyard. 

    The downside of these lights is that you cannot connect more than two strings of light together. Any more than this and it overloads the fuse. The bulbs can also develop condensation, which causes the bulbs to have water in them. 

    [buy_now title=”Check Price” link=”https://www.lowes.com/pd/Portfolio-48-ft-18-Light-Shade-Plug-in-Vintage-Bulbs-String-Lights/1001774538″]

    Best Multi-Colored: Solar Powered LED Outdoor String Lights

    Courtesy of overstock

    Specs: 

    Overall Length: 10 feet

    Number of Lights: 110

    Bulb Type: LED

    If you love the look of Christmas lights, then these are the perfect lights for your outdoor area. They are solar lights, so you can use them almost anywhere on your property. Wrap them around a tree trunk, weave them through a fence, or drape them in the branches overhead. There are three color options to choose from, multi-colored, cool white, and warm white light. Each strand is 10 feet in length and has 110 individual LED bulbs. The bulbs are incredibly durable, making them perfect for use during the Christmas season or all year long. 

    The drawback of these lights is that they look like Christmas lights. This may or may not be a good thing. The short ten-foot length also makes them limited in where you place them. If you want a more elaborate display, you’ll need to buy multiple sets. As with anything that is solar-powered, if your solar panels don’t get enough sun exposure, your lights will be dim or not illuminate at all. 

    [buy_now title=”Check Price” link=”https://www.overstock.com/Lighting-Ceiling-Fans/Solar-Powered-110-LED-Outdoor-String-Lights-White-or-Multicolor/12737281/product.html”]

     Best Commercial Grade: Addlon Outdoor String Lights

    Specs: 

    Overall Length: 24 or 48 feet

    Number of Lights: 8 or 15

    Bulb Type: Incandescent

    This set of white, orange, or black string lights will give your backyard a vintage feel with large Edison bulbs. There are two lengths to choose from 24 or 48 feet. They have 8 and 15 bulbs, respectively. You can connect multiple strings together to cover your entire space. What makes this strand better than similar options is that it has a sturdy construction. It has high-grade copper with individual insulation and a PVC cable jacket. This helps the lights to be UL listed weatherproof. Because these lights are so durable, they are perfect for a permanent installation over an outdoor living space. Each sock has a loop that you can use to secure the lights along a support wire for coverage of a large square footage. 

    Unfortunately, the bulbs on this light string are not as durable as the string itself. This can lead to several bulbs breaking in inclement weather. Additionally, the hanging loops are perpendicular to the cable, making the lights hang crooked. 

    [buy_now title=”Check Price” link=”https://www.amazon.com/dp/B07CLG95NK/?tag=trendey-20″]

    Read also: 26 Landscape Lighting Ideas

    How to Choose the Perfect Outdoor String Lights

    Length

    The length of the outdoor string lights is how long the cable is from one end to the other. The more area you need to cover the longer the lights need to be. Longer string lights also have more individual lights, which can create more illumination on your patio. Longer string lights also weigh more, which means they need more support. Consider the square footage of the area and structure you plan to mount the lights on when choosing the right length of lights. 

    Number of Lights 

    Look at the number of lights a string has to ensure you get plenty of light from a single string. The average distance between each bulb is about 8-12 inches. However, some can have them as far as three feet apart. When choosing how many bulbs your string should have, consider how much light you want on your patio. More lights mean more illumination. However, fewer lights can create a dimmer atmosphere that creates a different type of ambiance. 

    Power Source

    The majority of outdoor string lights have an electrical plug that you connect to an outdoor electrical outlet on the facade of your home. This is the simplest installation method. However, you can also find commercial-grade string lights that hardwire into your home’s electrical system. These lights tend to be more expensive, but are worth the investment for a clean install. Consider how many lights you plan to use on your patio. Some string lights can easily connect to each other for the easy installation of multiple lights. 

    Bulb Style

    The bulb style of your outdoor string lights will help to create a particular atmosphere and aesthetic. A traditional bulb will look a bit commercial but can provide plenty of light. Edison bulbs can give your patio a funky vintage or retro feel. However, these bulbs also tend to have a warmer light that looks yellow. Globe lights are round and can come in a range of color temperatures from yellow to white. Consider the size of the bulbs in addition to the shape, too large and they will be heavy and cumbersome to hang. 

    Durability

    You don’t want to have to take the lights up and down constantly. This will become tedious and time-consuming. Instead, buy a durable set of lights that can withstand the weather elements to be left up throughout the year. Generally, even the most basic of outdoor string lights are rated for outdoor use. However, higher-quality lights have additional qualities that make them more durable. This could include insulated cables, reinforced connections, waterproof ratings, and UV protection. Pay attention to both the cable and the bulbs. You don’t want delicate bulbs cracking or breaking. 

    Conclusion

    Our top pick for the best outdoor string lights is the Blairsden Bulb Globe String Light because it’s an incredibly long string of lights with plenty of bulbs. They are perfect for adding a traditional look to your backyard. For a more budget-friendly option, the Brightown Outdoor String Lights are a great alternative because they come in several lengths. They are incredibly durable and produce plenty of light for your backyard.

  • Best Ceiling Fans for Bedroom

    Best Ceiling Fans for Bedroom

    For many homeowners, they simply cannot get to sleep without the ceiling fan running. If you are one of those people, then you need a fan that will create just the right amount of airflow to help you feel cool and comfortable. The best ceiling fans for bedrooms have nicely sized blades, a light feature, durability, and plenty of innovative features. We’ve found the most attractive fans that will not only look beautiful in your bedroom but will reliably run. 

    [view_toc]

    Top Picks

    Best Overall: Home Decorators Collection Ashby Park LED Brushed Nickel Ceiling Fan

    Courtesy of Home Depot

    Specs: 

    Fan Blade Span: 52 inches

    Mounting Type: Flush mount

    Number of Lights:  1

    Number of Blades: 5

    This brushed nickel, bronze, or black ceiling fan is a top choice because it’s a size that’s universally compatible with a wide range of bedroom sizes. The housing and fan blades have a contemporary design that isn’t too sleek and modern but isn’t too traditional either. It’s a nice balance that helps the fan to look timeless. The large light included with the fan creates plenty of ambient light in your bedroom. A unique feature is that you can choose from warm white, soft white, or daylight light. The integrated LED bulb is long-lasting, so you’ll never have to worry about replacing it. 

    One potential issue with this fan is that the fan’s light can have a delayed reaction to illuminate. Then once on, it can occasionally flicker. You can help prevent this by ensuring the wiring is secure. Additionally, you can only use the remote to control the fan’s operation. 

    [buy_now title=”Check Price” link=”https://www.homedepot.com/p/Home-Decorators-Collection-Ashby-Park-52-in-White-Color-Changing-Integrated-LED-Brushed-Nickel-Ceiling-Fan-with-Light-Kit-and-Remote-Control-59252/308039187″]

    Best Budget Pick: Prominence Home Saybrook Ceiling Fan

    Specs: 

    Fan Blade Span: 52 inches

    Mounting Type: Downrod

    Number of Lights:  3

    Number of Blades: 5

    If you have a limited budget, you don’t have to sacrifice functionality or style with this quiet ceiling fan. Its reversible blades circulate the warm air, helping you to feel cooler. You essentially get two fans in one with the reversible fan blades. One side is a rustic rough pine that’s perfect for a farmhouse, country, vintage, or rustic look. The other is a smooth chocolate maple that will look beautiful in a traditional, contemporary, or vintage look. A unique feature of this fan is that you can mount it on the downrod on a flat or angled ceiling. Included with the fan is a light kit that has three arms with glass shades. The 52-inch diameter of the fan blades makes it perfect for a 12 x 12 or 18 x 18 square foot room. 

    Unfortunately, this fan doesn’t come with a remote and is not dimmable. The blades aren’t real wood but have a wood laminate finish. 

    [buy_now title=”Check Price” link=”https://www.amazon.com/dp/B085W7KKLV/?tag=trendey-20″]

    Best for Small Bedrooms: Harbor Breeze Mazon Brushed Nickel Flush Mount Ceiling Fan

    Specs: 

    Fan Blade Span: 44 inches

    Mounting Type: Flush mount

    Number of Lights:  1

    Number of Blades: 3

    If you have a small bedroom, then you need a fan that’s scaled down to fit the size of the space. Similarly, if you have a low ceiling, you need a fan that doesn’t hang down too long, creating a safety risk.  This flush mount ceiling fan is perfect for small rooms with a 44-inch diameter. The three small fan blades are effective at circulating air in up to 100 square feet. It also has an 18-watt LED bulb that’s diffused by a matte opal glass light. You can use the included remote to control the three fan speeds, light, and reverse. The simple design of this fan makes it perfect for a variety of design styles. 

    Unfortunately, the light on this fan isn’t very bright. You also can’t replace the LED bulb with a brighter one. Additionally, the remote isn’t crisp white, more of a beige, making it less attractive. 

    [buy_now title=”Check Price” link=”https://www.amazon.com/dp/B071GCWSHJ/?tag=trendey-20
    “]

    Best for Large Bedrooms: Monte Carlo Maverick Energy Star Ceiling Fan

    Specs: 

    Fan Blade Span: 60 inches

    Mounting Type: 6-inch Downrod

    Number of Lights:  0

    Number of Blades: 3

    This oversized fan is perfect for extra-large rooms that need a powerful fan for effective air circulation throughout the room. While this fan would be suitable for most living rooms, it can also work well in an extra-large bedroom. It comes in four sizes, 52, 60, 70, and 88 inches. Despite its large size, it is energy efficient, making it affordable to run. It’s powered by an 85 x 28 millimeter DC motor. There are eight different wood color options to choose from, making this fan versatile for a wide variety of interior design styles. It has an impressive six speeds to choose from and a reverse function that are all controllable from an included remote. 

    The downside of this fan is that it does not come with a light. However, it does have a plate in the center, so you could install your own light kit during installation. 

    [buy_now title=”Check Price” link=”https://www.amazon.com/dp/B01HN1WLFK/?tag=trendey-20″]

    Best Glam: House of Hampton Bay Etting Ceiling Fan 

    Courtesy of wayfair

    Specs: 

    Fan Blade Span: 52 inches

    Mounting Type: Downrod

    Number of Lights:  4

    Number of Blades: 5

    Make a statement with your master bedroom fan with this fan that is all high glamour. The body housing of the fan has a high gloss silver finish and the fan blades are a more muted matte silver. Then around the included light fixture is a reign of crystals that reflect and refract the light. This light isn’t all looks, though. It has a three-speed motor, reverse function, and a high-performance motor. It also comes with a downrod for easier and more flexible installation. This 52-inch span of the fan blades makes this fan ideal for medium to large bedrooms that are 12 x 14 to 18 x 20 square feet. 

    Unfortunately, this fan doesn’t have a silent operation. While it isn’t loud, it also isn’t totally silent. This can be a drawback for some people who need complete silence when they sleep. Additionally, light bulbs don’t come with this fan, so you’ll need to purchase them separately. 

    [buy_now title=”Check Price” link=”https://www.wayfair.com/lighting/pdp/hunter-fan-44-pacer-6-blade-ceiling-fan-w003556501.html?categoryid=230&placement=16&slot=1&sponsoredid=381080e641a13608edcb4b9dbe0de87c20ac1598410dc5eecf1b80abaa2c998e&_txid=I%2FWEwmIt9kdULRO4hFPqAg%3D%3D&isB2b=0&auctionId=f9a6a117-6721-47d2-8071-bd3f814742fc”]

    Best Premium: Spitfire Ceiling Fan

    Courtesy of west elm

    Specs: 

    Fan Blade Span: 48

    Mounting Type: Downrod

    Number of Lights:  1

    Number of Blades: 3

    Add a touch of sophisticated elegance to your bedroom with this wood and polished brass fan. The solid wood blades have a gentle curve that adds some style without being over the top. While the shiny brass adds a touch of shine to the room. If you prefer a different color scheme, this fan also comes in antique bronze and dark walnut, brushed nickel and black, polished brass and black, and matte white and light wood combinations. The included center light is a long-lasting LED light that is both bright and energy-efficient. 

    One drawback of this fan is that the light in it is quite small compared to other bedroom fan lights. This can create a lack of ambient light in your bedroom. The blades are also made from solid wood. While this can signal the fan’s quality build, it also means it is quite heavy and more challenging to install. 

    [buy_now title=”Check Price” link=”https://www.westelm.com/products/spitfire-ceiling-fan-48-h5191/?pkey=s~ceiling%20fan~28″]

    Best Modern: Minka Aire Light Wave Distressed Koa Ceiling Fan 

    Courtesy of Home Depot

    Specs: 

    Fan Blade Span: 52 inches

    Mounting Type:  6-inch Downrod

    Number of Lights:  1

    Number of Blades: 3

    This all-wood three-blade fan from Home Depot has a modern feel that will also bring a sense of visual warmth to a room. You want your bedroom to feel temperature cool, not look sterile and cold. If the richly colored distressed koa isn’t your taste, it also comes in black, driftwood, sliver, and white. The integrated LED light produces a bright white light at 896 lumens that’s perfect for illuminating your entire bedroom.  It can also be dimmed for a softer glow if desired. The included remote makes it easy to control your fan from anywhere in your bedroom. What makes this fan stand out is the propeller design and the dramatic twist in each of the fan blades. 

    Unfortunately, you cannot use the remote to reverse the spin of the fan blades. With how large the fan is, it will typically be in a large room with a high ceiling, making the directional switch a tedious task. The fan can also make noise when running on high. 

    [buy_now title=”Check Price” link=”https://www.homedepot.com/p/MINKA-AIRE-Light-Wave-52-in-Integrated-LED-Indoor-Distressed-Koa-Ceiling-Fan-with-Light-with-Remote-Control-F844-DK/205376744?”]

    Best Industrial: Divisadero Ceiling Fan

    Courtesy of wayfair

    Specs: 

    Fan Blade Span: 52 inches

    Mounting Type: Downrod

    Number of Lights:  3

    Number of Blades: 5

    Give your bedroom an industrial or rustic feel with this ceiling fan that features a mesh guard around the included LED light fixture. The mixture of rough pine wood blades and black metal hardware gives this fan a softened commercial feel that is further accentuated by the mesh ring around the lights. With a blade span of 52 inches, this fan is ideal for larger bedrooms, up to 18 x 20 feet. It’s also best for bedrooms with taller ceilings, as the entire fan’s height including the downrod is 14.1 inches. Additional nice features of this fan are that you can connect it to a dimmer switch or use the included remote control to operate the fan. There are three speeds to choose from and a reverse spin option. 

    While you could mount the fan without the downrod to give you more overhead clearance, it will put the fan blades too close to the ceiling. This could have a negative impact on the fan’s ability to circulate air throughout the bedroom. 

    [buy_now title=”Check Price” link=”https://www.wayfair.com/lighting/pdp/gracie-oaks-52-divisadero-5-blade-standard-ceiling-fan-with-remote-control-and-light-kit-included-w005269839.html”]

    Best Scandinavian: Hunter Fan Company Anslee Flush Mount Ceiling Fan

    Courtesy of wayfair

    Specs: 

    Fan Blade Span: 46 inches

    Mounting Type: Flush mount

    Number of Lights:  1

    Number of Blades: 5

    The clean design of this ceiling fan makes it perfect for a modern, mid-century modern, or Scandinavian inspired bedroom. It comes in four color schemes, white, brushed nickel, bronze, and matte silver. Each of these will blend perfectly with a neutral color palette. The integrated light kit features a painted case white glass dome that adds to the contemporary design of the fan. An impressive feature of the fan is the whisper-quiet three fan speeds. Even though it’s a flush mount and on the smaller side, it produces an ultra-powerful airflow. If you have low ceilings, the flush-mount design will keep it safely tucked up and out of the way. 

    One drawback of this light is that the fan blade directional switch is located inside of the light dome. This forces you to remove the light dome if you want to switch the spin direction. The installation is also more complicated than similar ceiling fans.

    [buy_now title=”Check Price” link=”https://www.wayfair.com/lighting/pdp/hunter-fan-46-anslee-5-blade-led-flush-mount-ceiling-fan-with-pull-chain-and-light-kit-included-htf2207.html?piid=17799249″]

    Best Bohemian: The Curated Nomad Carillon Woven Rope Ceiling Fan

    Courtesy of overstock

    Specs: 

    Fan Blade Span: 52 inches

    Mounting Type: 6-inch Downrod

    Number of Lights:  2

    Number of Blades: 5

    This beautiful ceiling fan is perfect for a coastal or bohemian bedroom. The rich wood blades give your bedroom an organic feel while the woven rope shade adds texture and movement. Paired with the wood blades is an oiled bronze housing to give the fan an old-world feel. With a diameter of 52 inches, it’s perfect for larger bedrooms to give you plenty of air circulation. What makes this fan stand out is the ability to change its looks. The five wood blades are rich barnwood on one side and light driftwood on the other. Use the chain control to choose from three speeds. Additionally, a light kit is included that has two dimmable LED bulbs to illuminate your entire bedroom. 

    Unfortunately, while you can install the fan with a downrod, it doesn’t come with the fan, so you’ll need to purchase one separately. The rope shade also blocks some of the light, which can make this fan light seem dimmer than other lights

    [buy_now title=”Check Price” link=”https://www.overstock.com/Lighting-Ceiling-Fans/The-Curated-Nomad-Carillon-52-inch-Woven-Rope-5-blade-LED-Ceiling-Fan/31321203/product.html?refccid=KGOI5NPQA7JJROCC2LEA2E7AHU&searchidx=10&kwds=bedroom+ceiling+fan&rfmt=style%3ABohemian+%26amp%3B+Eclectic&option=57373160″]

    How to Choose a Perfect Ceiling Fan for the Bedroom?

    Size

    The ceiling fan size that you buy will depend on the ceiling height and room size. Bigger isn’t always better. It needs to be the right size and distance from the ceiling to have optimum air movement. If you have a high ceiling, then you may need to purchase a down rod to adjust the ceiling fan height. If you have an eight-foot ceiling, you will need a flush mount ceiling fan. For every foot taller your ceiling is, add six inches in length to your downrod. So I nine-foot ceiling would need a six-inch downrod, a ten-foot ceiling would need a twelve-inch downrod, and so on. To know the size, measure the diameter of the ceiling fan blades. A 100-150 square foot room should have a 44-50 inch diameter fan. A 150-300 square foot room should have a 52 to 60-inch fan. 

    Finish

    The next step in choosing the right ceiling fan is the finish. Consider the rest of the home decor in your master bedroom. It should coordinate with your chosen design style. There is the finish of the housing and the fan blades. The housing could be antique bronze, oil-rubbed bronze, brushed nickel, matte black, or polished pewter. For the blades, they could be bronze, solid wood, plastic, wicker, or bronze. There are even some with wood finishes. 

    Light

    While other rooms may not need a light in the ceiling fan, your bedroom is a room that could benefit from the additional light. A ceiling fan that includes a light kit makes installation simple. Otherwise, you’ll have to buy a separate compatible light kit. Look for a fan that generates a large wash of ambient light. It could be a single dome or several individual lights. There are three bulb options. However, LED bulbs are the best choice because of their energy efficiency, durability, and light color flexibility. 

    Accessories

    To get the most out of your fan, look for one that comes with accessories. It could have wall control compatibility, a remote, or be a smart ceiling fan that integrates into your smart home system. Generally, more expensive fans have more advanced features. For example, a basic fan may not have a remote, while a mid-grade fan has a simple push-button remote, and an advanced fan has an integrated app. 

    Conclusion

    Our top pick for the best bedroom ceiling fans is Home Decorators Collection Ashby Park LED Brushed Nickel Ceiling Fan. It has a beautiful finish and a large integrated light. The contemporary design helps this fan to look timeless. For a more budget-friendly option, the Prominence Home Saybrook Ceiling Fan with its reversible fan blades, attractive color options, and multiple individual lights.

  • 13 Grey Bathroom Design Ideas

    13 Grey Bathroom Design Ideas

    Grey has enjoyed a resurgence in popularity over the past few years. Once considered a boring, drab color for home decor, grey is now seen as a new neutral. It’s on bathroom tile, flooring, the wall—everywhere!

    Grey bathroom decor can be elevated into an elegant, sophisticated space, or tweaked into a quirky little hideaway. Whatever your preference, we have 57 amazing grey bathroom ideas to inspire your next bathroom makeover.

    [view_toc]

    1. Explore Concrete Features in Grey Bathroom Design

    The natural grey tones in concrete make it an ideal material to incorporate into your bathroom design. Concrete floors are durable and provide the same water impermeability as floor tile. Concrete can be etched or stained for a unique finish and also used for grey walls and vanity countertops.

    Modern bathroom with rainfall shower and candles
    Source: @inspospira via Instagram
    Chic bathroom with mirror and walk-in shower
    Source: @seemaandmiasfirsthome via Instagram
    Sleek bathroom with wood accents and basin
    Modern grey bathroom with glass shower
    Stylish bathroom with plant and purple lamp
    Elegant bathroom with mirror and view into bedroom

    Because of its weight, it’s best to save concrete for single-story homes that are built on a concrete slab, or in steel-structured apartments. Standard floor joists aren’t strong enough to support its weight.

    2. Upgrade to a Contemporary Grey Bathroom

    It would be hard to find a more perfect contemporary bathroom color than grey. Each shade of grey works well in contemporary and transitional decor, enabling the room’s architectural details to stand out.

    Light grey bathroom with floral accents
    Source: @amandaryanhome via Instagram
    Neutral bathroom with bath and frosted window
    Source: @bellwaycutler10 via Instagram
    Bathroom with patterned tile shower and plant
    Source: @our.1930s.semi via Instagram
    Modern gray tiled bathroom with radiator
    Source: @til3duk via Instagram

    For an elegant updated grey bathroom, replace silver fixtures with black ones. You will enjoy the visual contrast between black fixtures, white tile, and grey walls and paint.

    3. Embrace Dark Grey for a Bold Bathroom Look

    On the darker end of the grey tones scale, we find graphite, gunmetal, and charcoal grey color options. These almost-black tile and paint color options are ideal if you enjoy the moodiness of black but don’t want a shade quite as dark.

    Spacious gray bathroom with freestanding tub
    Source: @inspospira via Instagram
    
Cozy bathroom with vanity and greenery
    Source: @ourfirsthome_38 via Instagram
    Graphic tiled bathroom with walk in shower
    Source: @rousebathrooms via Instagram
    Industrial chic bathroom with stone basin
    Dark gray bathroom with under lighting and mirror

    Dark grey bathroom ideas are perfect in modern or rustic homes where a masculine vibe is desired. White-veined black or dark grey marble tile is a beautiful way to merge charcoal walls with a white shower, vanity, sink, and toilet. Chrome or brushed nickel fittings are a classic pairing with this bathroom idea.

    4. Learn to Differentiate Fixtures and Fittings in Grey Bathrooms

    When building or remodeling a home, it can be easy to confuse bathroom terminology. Bathroom fixtures are the permanent bathroom features, including the shower, tub, toilet, and sink. Bathroom fittings can be moved more easily and include mirrors, wall cabinets, toilet seats, and accessories.

    Subway tiled bathroom with gray vanity
    Source: @athomewiththelloyds via Instagram
    Gray bathroom with clawfoot tub and cat
    Source: @bricksandshutters_at_number1 via Instagram
    Elegant marble bathroom with gray vanity
    Source: @livingmybesthome via Instagram
    Vintage gray bathroom with patterned floor
    Source: @myhomeatno9 via Instagram

    Fixtures and fittings are available in many color choices, most of which coordinate well with grey bathroom ideas. To save money, apply grey paint to the bathroom vanity, wall cabinet, mirror frames, or any other fittings that can be painted.

    5. Discover Luxury Grey Tile Options for Master Baths

    Grey is a fantastic foundation color if a luxurious master bathroom renovation is in your near future. Carrara marble, granite, basalt, and slate are excellent natural stone grey tile options when the budget is generous. Look for unique tile shapes and materials, such as light grey fish scale tile, or liquified glass dark grey tile in an arabesque shape.

    Luxury bathroom with marble and freestanding tub
    Source: @zephyr_constructions via Instagram
    Classic bathroom with marble details and tub
    Contemporary bathroom with double vanity and shower

    Splurge on a mosaic tile border or panel inside the shower—which of course should be fitted with multiple shower heads. Install glass shower walls instead of a shower curtain, so you can fully showcase your high-end grey tile bathroom selections.

    See more luxury bathroom ideas here.

    6. Streamline Your Bathroom with Pewter and Modern Fixtures

    A modern bathroom has streamlined fixtures and fittings, paired with a simple color scheme. For example, a floating vanity and glass bowl basin takes the place of a traditional vanity and sink. Shower stalls are impressive displays of grey bathroom tile, and not hidden behind a shower curtain.

    Modern dark gray bathroom with niche and walk in shower
    Source: @architectormendisabal via Instagram
    Stylish bathroom with marble shower and basin
    Source: @egueyseta via Instagram
    Contemporary shower with terrazzo tiles and plants
    Source: @villa.almhult via Instagram
    Contemporary bathroom with gray tiles
    Source: @wetwallsceilings via Instagram
    Gray bathroom with modern fixtures
    Gray bathroom with modern fixtures

    Pewter is an excellent grey paint color for a modern bathroom wall finish. A beautiful cross between grey and silver, pewter’s neither light nor dark—a perfect middle tone to support grey color ranges at each end of the spectrum.

    See more modern bathroom ideas here.

    7. Create a Unique Monochrome Grey Bathroom

    A monochrome photo is one that’s printed in black and white or varying shades of a single color. Monochromatic room ideas are the same, with one color appearing in different shade options. Speaking of photos, framed black and white photographs make excellent grey bathroom wall decor.

    Monochrome grey bathroom
    Source: @a_tattooist_home via Instagram
    Monochrome grey bathroom
    Source: @brand_new_home_ via Instagram

    Because grey is on such a spectrum, from pale grey to nearly black, a grey monochrome bathroom doesn’t have to be boring. Look for grey bathroom tile that includes multiple hues of grey, then select those individual shades when choosing your grey paint color palette.

    8. Maximizing Style in Small Powder Rooms with Light Grey Tones

    A powder room is a small bathroom, minus a shower or tub. Vanity space and even wall space may be limited, but you can still create a beautiful small bathroom within its confines. Look for a narrow profile vanity and toilet to free up as much floor space as possible.

    Powder rooms with light grey tones
    Source: @appleyardselfbuild via Instagram
    Powder rooms with light grey tones
    Source: @home_edition.atno1 via Instagram
    Powder rooms with light grey tones
    Source: @homeoncherrytree via Instagram
    Powder rooms with light grey tones
    Source: @queen_of_the_clean via Instagram

    Since a white bathroom tends to look bigger than one with a darker color scheme, try to keep your greys on the lighter end of the grey spectrum. A light grey bathroom can feel just as spacious as a white bathroom, but it won’t seem as sterile. If you prefer darker grey colors, choose one for an accent wall, or install dark grey floor tile.

    9. Rustic Bathroom Ideas with Grey Wood Accents

    Wood tends to turn grey as it weathers, and a weathered grey wood vanity is an excellent addition to a rustic themed bathroom. Install a faux brick wall for an accent feature, and replace ordinary tile with floor tile planks that resemble grey driftwood.

    Grey bathroom with wood accents
    Source: @abackens_lantliv via Instagram
    Grey bathroom with wood accents
    Source: @loveyourroom via Instagram
    Grey bathroom with wood accents
    Source: @our_journey_at_81 via Instagram

    Be sure to add other unrefined textures to your grey rustic bath, such as a hammered metal sink basin and rough-cut floating shelves. Black is always a great addition to rustic spaces, so shop for black iron towel racks for the wall, and iron drawer pulls for the vanity and wall cabinet.

    See more rustic bathroom ideas here.

    10. Design a Scandinavian Bathroom with Grey Tones

    A grey Scandinavian bathroom needs touches of real wood to make it true Scandinavian-inspired design. It’s good that grey looks great next to any type of wood stain, so feel free to use your grey colors beside the pale wood finishes that are popular in Nordic homes.

    Scandinavian grey bathroom
    Source: @bijamberthuis via Instagram
    Scandinavian grey bathroom
    Source: @did_it_ourselves via Instagram
    Scandinavian grey bathroom
    Source: @home_at_rivermead.x via Instagram
    Scandinavian grey bathroom
    Source: @ourpadonthemews via Instagram
    Scandinavian grey bathroom
    Scandinavian grey bathroom

    White is also a common bathroom color in Scandinavia, so either add touches of white or choose a very pale dove grey for your walls. Be sure to keep the space uncluttered and choose furniture and fittings that reflect this design style’s simplicity.

    11. Enhance Small Bathrooms with Colors and Lines

    A small bathroom is a great space to add creative decorating ideas to a basic grey bathroom. Splashes of color keep the room cheerful and interesting, but try not to overdo it. Green plants will add life to the room as well as a welcome dash of color.

    Grey bathroom with colors and lines accent
    Source: @bellwaypinehurst via Instagram
    Grey bathroom with colors and lines accent
    Source: @holly.lily.archie_x via Instagram
    Grey bathroom with colors and lines accent
    Source: @homewiththehiltons via Instagram
    Grey bathroom with colors and lines accent
    Source: @housetohomebeverley via Instagram
    Grey bathroom with colors and lines accent
    Source: @newhometogether via Instagram
    Grey bathroom with colors and lines accent
    Source: @ourlittlebeigepad via Instagram
    Grey bathroom with colors and lines accent
    Source: @prof.reno via Instagram

    Keep in mind that any kind of horizontal lines will make the room feel wider. Arrange subway tile in a horizontal pattern, or buy textured shower tile that has horizontal lines. Cover a feature wall in shiplap and paint it dove grey, or hang a large-scale wallpaper pattern that includes wide lines.

    12. Find the Perfect Grey Tile for Any Budget

    Virtually any type of bathroom tile you can imagine comes in several shades of grey. From natural marble to recycled glass tile, there’s a grey tile option for every budget and design preference.

    Grey tile bathroom
    Source: @our_first_home_at_number1 via Instagram
    Grey tile bathroom
    Source: @ourclermont via Instagram

    Look for ways to add expensive tile accents that add richness to a bargain-tiled bathroom. A marble tile inset is a good way to incorporate this elegant material into your grey bathroom without breaking the bank.

    13. Choose the Right Paint or Wallpaper for Grey Bathrooms

    While some bathrooms are covered in tile from floor to ceiling, most have half-tiled walls. Others only have tile on the floor and leave the walls bare. Whichever type of bathroom wall you have, choosing the right paint or wallpaper is a foundational part of the room’s design.

    Grey wallpaper bathroom
    Source: @inspospira via Instagram
    Grey wall bathroom
    Source: @loveyourroom via Instagram
    Grey wall bathroom
    Source: @mycosyvictorianhome via Instagram
    Grey wall bathroom
    Source: @nomadic_home via Instagram
    Grey wall bathroom
    Source: @scottoncottage via Instagram

    Consider painting each wall a slightly different shade of grey, or choose a light and dark grey to paint on opposite walls. Tape off stripes or another pattern for an inexpensive wallpaper substitute. Or search online for various painting techniques that are easy to DIY, such as the modern bathroom wall ideas in this video:

    Read also: 46 Blue Bathroom Ideas

  • 15 Smart Tool Storage Ideas for Better Organization

    15 Smart Tool Storage Ideas for Better Organization

    If you enjoy DIY projects, you will surely have a lot of tools. And maybe your first DIY job is to store them properly. That may be a bit easier if you have a spacious garage, but tends to be a little more complicated if you live in a small apartment and like to spend time with home improvements that need tools.

    So, we have selected some awesome tool storage ideas that will inspire you to create a functional solution. And when it comes to storage, creativity and organization are far more important than square footage.

    [view_toc]

    1. Transform Your Closet Into Storage Space

    If you want to upgrade your tool storage while maximizing closet space, then you should look beyond what’s on the shelves and start thinking about how to transform unused closet corners.

    Utilizing closet corner storage can be an easy, economical way to store your tools. Place closet corners equipped with hooks and baskets, so that power drills, hammers, saws, and any other accessories can all find their place in the closet with style and efficiency.

    Rather than having your gear scattered around the room or taking up valuable closet shelf space, why not try something new and let closet corner storage work its magic? You’ll be surprised at how much extra closet storage space you can create for yourself!

    Closet tool storage
    Source: @casa_de_nix via Instagram
    Closet tool storage
    Source: @just4youwoodcraft via Instagram
    Closet tool storage
    Source: @ktkompel via Instagram
    Closet tool storage
    Source: @orangedreamr via Instagram
    Closet tool storage
    Source: @phoebeeverill via Instagram
    Closet tool storage
    Source: @spatialdesignsolutions via Instagram

    2. DIY A Storage Station With Wood Pallets

    If you’re looking for a creative storage solution for tools around your home or workplace, consider making your own storage station out of wood pallets! This is an easy and inexpensive DIY project that can add a rustic touch to any room.

    By upcycling wood pallets and adding some basic storage components, you can easily organize tools of all shapes and sizes in one handy storage station. With minimal effort and cost, this storage solution looks great and can last for years to come.

    Wood pallet tool storage
    Source: @7g_woodworks via Instagram
    Wood pallet tool storage
    Source: @theaskewaesthetic via Instagram
    Wood pallet tool storage
    Source: @stoutsawdust via Instagram
    Wood pallet tool storage
    Source: @eumo_furniture via Instagram
    Wood pallet tool storage
    Source: @macys_workshop via Instagram
    Wood pallet tool storage
    Source: @t_daddy1970 via Instagram
    Wood pallet tool storage
    Source: @thenexthoudini via Instagram

    3. Build Overhead Storage With A Ceiling Storage System

    Ceiling tool storage systems are a great way to free up garage space and make your tools more accessible. Installing overhead storage racks takes advantage of unused overhead space, which helps keep the floor area clear. With a wide variety of shapes, sizes, and materials, you can easily customize overhead tool storage to fit your needs and lifestyle.

    Additionally, adding overhead storage not only makes it easier to keep track of tools but also will boost the look and feel of your workspace. Investing in an overhead storage system is a great way to utilize all available overhead space without taking away from the aesthetic of your garage.

    Ceiling storage system
    Source: @evanswoodshopanddesign via Instagram

    4. Install Rollout Shelves & Sliding Bypass Units

    Tool storage can be a critical decision for any household workshop. In most cases, roll-out shelves and sliding units are the two best options for streamlining the workspace and efficiently organizing your tools.

    Whether you’re a craftsman or a DIY enthusiast, roll-out shelves provide easy access to all of your equipment, so there’s no need to dig around for what you need; just roll it out and get to work. Sliding units keep things neat and tidy, giving you maximum vertical storage in minimal space.

    By selecting roll-out shelves or a sliding unit, your tool storage problems will be a thing of the past!

    Workbench with roll out shelves
    Source: @thandle1978 via Instagram

    5. Get A Standalone Rolling Metal Toolbox

    When it comes to tool storage, standalone rolling toolboxes quickly come to mind. They’re perfect for easy transport and handling of your tools when you’re in a tight space or just need quick access on the go. Even if you have a limited workshop area, adding one of these mobile units can save you from unnecessary frustration anytime you need to move your armory around.

    You can also choose from different types of standalone storage like a metal toolbox that lets you securely organize not only often-used tools but those only used seasonally, too. Either way, portable storage keeps the tools you need most close at hand and ready when you are!

    Rolling metal tool box
    Source: @angelvip2474 via Instagram
    Rolling metal tool box
    Source: @bgold_garage via Instagram
    Rolling metal tool box
    Source: @nary_metal via Instagram
    Rolling metal tool box
    Source: @indiana_lang via Instagram
    Rolling metal tool box
    Source: @namor.rm via Instagram
    Rolling metal tool box
    Source: @4rungunclimb via Instagram

    6. Opt For Floating Shelves

    Having floating tool storage will help to organize and tidy up your workspace. Floating shelves make excellent tool storage because they are versatile, sturdy, and easy to mount. You can choose from a variety of floating shelving options when selecting the perfect floating shelf for your needs – wood, metal, plastic, or even suspended cabinets with plenty of storage space.

    With floating shelves, you’re also able to tailor each shelf to fit tools and supplies exactly as needed. Finally, floating shelves are an inexpensive way to store a wide range of items while saving precious floor or counter space. If you’re looking for the perfect solution to keep your workspace neat and tidy, floating tool storage is the way to go!

    Wood floating shelves
    Source: @b_gierl via Instagram
    Garage with tools and storage cabinets
    Source: @james_renfrow657 via Instagram
    Wood floating shelves
    Source: @st_arvans via Instagram
    Wood floating shelves
    Source: @dennis.s2018 via Instagram
    Metal floating shelves
    Source: @builditthrifty via Instagram

    7. Be Creative With Repurposed Items

    If you’re looking for creative ways to store old tools, repurposing old items may be the perfect solution. An old filing cabinet is a great place to start; it can easily hold an array of drill bits, wrenches, and other metal tools. And don’t forget that old multi-purpose holder – it could easily serve as the ideal spot for hammers, screwdrivers, and other small items.

    Furthermore, when it comes to repurposed tool storage, creativity is key! With a little bit of imagination and resourcefulness, anything old can become a useful storage container.

    Repurposed old green file cabinet
    Source: @east_coast_vintage_tools via Instagram
    Repurposed hammer holder
    Source: @kjellmanchapinblacksmiths via Instagram

    8. Stack Your Toolboxes

    Tiered tool storage is an oft-overlooked but highly effective way to keep your tools secure, orderly, and easily accessible. Instead of leaving them scattered or stacked on top of one another, an efficient alternative is stacked toolboxes. This allows you to effectively utilize the vertical space around you while organizing your tools according to use.

    You can also categorize them by size, regularly used during a certain project, or set aside a special box for sharp power tools that should be handled with extra care. Plus, stacked toolboxes are easy to customize and move around in your workspace as needed.

    Stacked tool boxes
    Source: @morksnekkerservice via Instagram

    9. Get A Peg Board

    Whenever you undertake a DIY project, peg board tool storage can be a lifesaver. This simple solution is great for getting tools off the ground and making them accessible in an organized fashion. Setting up peg board tool storage is fairly easy and low-cost.

    Start by deciding where to position your peg board: ideally above a workbench or in an area where you can access your tools frequently. Once in place, decide how to decorate it – pegboard tool organizers usually come with plastic holders that can be painted in different colors for added variety.

    Finally, put each of your tools on its own peg or pegboard accessory and enjoy an organized workspace with all your pieces within reach!

    Pegboard tool storage
    Source: @nickwoodweld via Instagram
    Pegboard tool storage
    Source: @fultonfinewoodworks via Instagram
    Pegboard tool storage
    Source: @trinityinternational via Instagram
    Pegboard tool storage
    Source: @dave_foss_ via Instagram
    Pegboard tool storage
    Source: @dnt_u_wish via Instagram
    Pegboard tool storage
    Source: @unclutterit via Instagram
    Pegboard tool storage
    Source: @wisemimarlik via Instagram
    Pegboard tool storage
    Source: @lazyguydiy via Instagram

    10. Install A Portable Trunk Pull Out System

    Who says portable tool storage has to be clumsy and hard to handle? With portable trunk pull-out systems, you can transport your tools quickly and simply. Imagine being able to take your portable tool storage wherever you need it, without the hassle – that’s exactly what portable trunk pull-out systems deliver.

    This innovative design makes your portable tool storage easy to organize and transport, so you can enjoy quick and convenient access to the tools you need whenever you need them!

    Trunk pull out system
    Source: @andyglassimpressions via Instagram
    Trunk pull out system
    Source: @tossycarpenterjapan via Instagram
    Trunk pull out system
    Source: @builtbyevan via Instagram

    11. Compartmentalize Your Tools For Easy Access

    An organized tool storage shelf is an essential part of any workshop or home improvement station. Keeping everything in order allows for more efficiency, letting you get to the tools you need quickly and with minimum fuss. Investing in a shelf with compartments is a must, allowing you to sort the various tools into sections – hammers in one spot, screwdrivers in another, and so on – ensuring that everything can be quickly located when needed.

    There’s nothing worse than starting a job only to find yourself delayed as you scramble around looking for the right tool; taking control of your storage situation will save loads of time and hassle!

    Organized compartment tool storage
    Source: @jhampton_1 via Instagram
    Organized compartment tool storage
    Source: @sdgarageyyc via Instagram
    Organized compartment tool storage
    Source: @rise.cabinetry via Instagram
    Organized compartment tool storage
    Source: @dallas_hayes via Instagram

    12. Small Pegboard For Small Tools

    When it comes to small tool storage, many of us are faced with the same dilemma: where to keep all those tiny tools?! Storing small hardware can be a pain — small parts belong in small places. That’s why having an organized small tool storage system is essential!

    From small pegboards for tiny tools to magnetic metal pegboards, there’s literally no limit to how creative you can get when it comes to keeping your small tools safe and sound. No matter what small tool storage solution you choose, one thing is for sure — you won’t have to worry about frantically searching for that missing screw ever again!

    Pegboard tool storage
    Source: @craftbude via Instagram
    Pegboard tool storage
    Source: @mattyschnarr via Instagram

    13. Customized Storage For A Perfect Fit

    When it comes to finding efficient storage solutions for your tools, customized tool storage is the way to go. Whether you are an avid DIYer or a professional in a workshop, customized tool storage is necessary to make sure your tools are orderly and easy to reach.

    Customizing your tool storage gives you the freedom to choose the types of compartments and drawers that suit your individual needs. You can also ensure that the size of each compartment fits all the tools you plan on storing, so you know everything has its designated spot. With customized tool storage, organizing your workspace becomes easier than ever!

    Custom tool storage
    Source: @ktjimbogarage via Instagram
    Custom tool storage
    Source: @rynos_woodshop via Instagram

    14. Secure Items With A Wall-Hanging Tool Chest

    The wall-hanging tool chest storage system is an amazing invention that can save you space and keep your tools organized. Not only does it allow for a wall-mountable storage solution, but the enclosed chests provide a secure place to store all of your tools – no more sifting through piles!

    The wall-hanging design also makes it easier to access what you need quickly because you’ll know where to find it. Whether you’re tackling home improvement projects or undertaking small renovations, wall-hanging tool chest storage is a great choice when looking for a smart and creative solution.

    Wall hanging tool chest
    Source: @manyoftheobjects via Instagram
    Wall hanging tool chest
    Source: @ravaughanfurniture via Instagram
    Wall hanging tool chest
    Source: @sealsonparade via Instagram

    15. Set Up A Workbench With Storage Space

    Having a workbench with storage space makes work much easier and more satisfying. The workbench is great for any workspace – home, garage, or workshop – as it provides easy access to your tools when you need them. Forget about having to constantly search for the tool you need; just reach down and pick it out of the workbench with storage!

    Not only that, but having all that extra space on hand ensures you can take on a variety of projects with the supplies you keep close at hand in a workbench with storage. Get ready to become a pro DIYer in no time!

    Workbench with storage
    Source: @fullcirclewoodworker via Instagram
    Workbench with storage
    Source: @p_a_rustik via Instagram
    Workbench with storage
    Source: @thatcarpenterdude via Instagram
  • 16 Ways to Decorate an Unused Fireplace

    16 Ways to Decorate an Unused Fireplace

    A fireplace in a home is a place that holds fond memories. Whether working or not, it will always be the place to hand socks at Christmas time. The Christmas tree normally stands next to it, and that’s where our little ones gather to find their presents on Christmas mornings.

    A fireplace mantel will always hold pumpkins and candy for Halloween decorations. Even if a fireplace is not operational, it is a centerpiece in any home and should not be wasted space. There are creative ways to make the fireplace stand out and claim back the spotlight it deserves.

    See also: 77 Fireplace Décor Ideas 

    Here are 16 awesome ideas for you to give your unused fireplace a total facelift. One of them will surely match your décor style, so we hope you will feel inspired to let your fireplace take center stage and shine, as it should!

    PAINTING

    First things first. Start your fireplace remodel by giving it a fresh coat of paint. You may choose one single color for both fireplace and wall or contrasting colors.

    If you decide on a single color for both fireplace and wall, then the mantel should stand out. Give the wood mantel a refresh by sanding it and applying a varnish coating, or paint it in a different color, contrasting with the wall and the fireplace. 

    Once this is done, you can start decorating the empty space inside the fireplace. Check out these decorating ideas:

    [view_toc]

    1. CANDLE LIGHTS

    unused fireplace with candle lights

    Not an out-of-the-box solution. But the reason why many people do it is because it looks good! Candles are an accessory that can match the color palette of your home and complement the décor. It’s a great way to add style to a fireplace that would otherwise be dead space in the room.

    Place various scented candles of different sizes in the fireplace, and you will see the amazing visual effect when you light them all. For an elegant look, choose one single color that matches your furniture. Same color, same shape, but different sizes.

    If you prefer a vibrant and informal look, however, choose various colors and shapes. The effect is great, just the same. The only thing missing after you light the candles? A good glass of wine…

    2. AN INDOOR GARDEN

    fireplace with indoor garden

    If you’re thinking of placing potted plants in the interior of the fireplace, do it with style! Choose vases and greenery of different sizes and shades, so you’ll have different layers of green.

    Add string LED lights in between the pots, so that there is a diffused light that comes from behind the vases. The effect is awesome, and the light won’t hurt the leaves if you don’t place it directly over them.

    3. SHELVES AND DÉCOR PIECES

    unused fireplace shelves and decor pieces

    Why not transform your fireplace into your little art gallery? Again, we need to start with the basics: a facelift on the fireplace. Start by painting the fireplace and mantel in one single color, and add a shelf inside the fireplace, in the same color, so that everything looks like one single piece of furniture. An all-white or all-black fireplace is an elegant choice!

    Now, what will make this space stand out is the inside part of the fireplace. Paint it in an accent color (i.e., an all-white fireplace with a black background). By doing so, you will set the stage for the star of the show: the décor pieces. Add a few books, a small statue some framed pictures and this fireplace will be a feature wall with style!

    If you have a brick fireplace and do not want to paint over it, keep it as it is, and add a wooden shelf. The décor will then have to match the style: go for a few books, wicker baskets with dry flowers, some ceramic pots, and there you have it. A farmhouse décor for a rustic fireplace. 

    4. MIRROR

    unused fireplace with mirror

    If you don’t want to fill the fireplace space, cover it with style. Mirrors are a great solution for that. Mirrors bring light and an amplitude feel and can be an interesting piece to add to a fireplace.

    There are two ways you can use mirrors in a fireplace: either by covering the fireplace completely or by adding mirrors to the interior walls. If you choose to do so, decorate with one single vase right in the middle, with a beautiful flower arrangement (it can be faux flowers) or potted plants instead (as long as they have volume and can stand out in that space). You will see that one single décor piece will create an awesome visual effect against the mirrors behind it.  

    5. TEXTURE AND COLOR 

    unused firplace with texture and color

    You can cover the internal walls of the fireplace with wallpaper, to bring out texture and color that complements your décor. Decorate it with pieces that match the design style of your home: wicker baskets and natural materials for a farmhouse, rustic style; silver pieces and statues for a classic style; natural stones for a Boho chic look.

    6. BOTTLES

    unused fireplace with bottles

    You can have a monochromatic fireplace and bring in light and style by filling the inside space with several bottles of different colors, sizes, and shapes. This is an interesting option for modern spaces, that also harmonizes with minimalist décor.

    7. STYLE AND SOPHISTICATION IN BLACK AND WHITE 

    unused fireplace with style

    White and black are the perfect combo for stylish, sophisticated spaces, either for modern and minimalist designs as well as for traditional homes. If you want the fireplace to stand out and be the centerpiece of the room, paint it all-white, and add a black background to the interior walls, that will highlight one single piece of white décor, which you can place right at the center of the fireplace.

    Keep the space clean by adding all-white décor pieces on the mantel, which will complement this style choice perfectly. The pièce de resistance of the whole ensemble will be a vintage crystal mirror over the fireplace. This will bring elegance and a unique touch of style and sophistication. 

    8. BOHO CHIC

    unused fireplace boho chic

    Cover the interior of the fireplace with a beadboard panel and decorate it with vintage suitcases and framed paintings. Add some dry flowers for a soft, feminine touch. Decorate the interior of the fireplace mantel with candles, a couple of books, and a stylish, delicate lamp. Place a vintage mirror above the fireplace, for the final touch. 

    9. BLACK

    fireplace with candle lights

    Have you ever thought of having a black fireplace, on a black wall? For an ultra-sophisticated space, paint the entire structure black: fireplace, mantel, and the surrounding wall. Decorate the interior of the fireplace with white candles of various sizes, that will stand out and break the dark tone.

    Adorn the mantel with a bronze centerpiece and place crystal vases at both ends of the mantel, with tall, ornamental flowers or foliage. This will bring a unique touch of sophistication to the entire ambiance.

    10. WINE BOTTLE RACK

    fireplace with wine bottle rack
    Jan S. / Shutterstock.com

    Why not store your favorite wine inside the fireplace? There are so many beautiful wine racks you can choose from, that will match your design style. Add some big, soft cushions on the floor in front of the fireplace, to complement the décor.

    11. FAKE LOGS WITH STRING LIGHTS

    unused fireplace with fake logs and string lights

    Do you want your fireplace to look like it works? Then place some fake logs in it, and decorate with string lights, for a fun, cozy touch. If you want a real fireplace effect, there is the option of electric log heaters with flame projection.

    12. FAKE IT WITH STYLE!

    unused fireplace style design

    If you want your unused fireplace to look like it works, simply cover it with a fireplace screen. There are some very fancy vintage covers, made of cast iron, that are absolutely gorgeous!

    They will cover the entire space and make a huge visual impact in your living room, that’s for sure!

    13. YOUR OWN LITTLE ART GALLERY

    unused fireplace with little art gallery

    Transform the little space inside an unused fireplace into your own art gallery. Think of the space as your blank canvas, and use your imagination to display artwork, which you can change from time to time. 

    14. GO BARE

    unused fireplace accent piece

    Don’t want to be reminded that there used to be a fireplace in that space? You don’t need to go to the extreme of drywalling it. Simply remove the mantel and paint the interior of the fireplace and the surrounding wall in the same color. 

    Use the empty fireplace space to place an accent piece such as a vase of flowers or a décor piece that takes over the space, like a large coral décor.

    15. RUSTIC LANTERNS

    unused fireplace with rustic lanterns

    They are so warm and inviting, and great pieces to fill an empty fireplace. You can place several lamps of different sizes, and when you light them, you will have a gorgeous visual effect. A simple and affordable solution that is full of charm!

    16. NATURAL STONES AND CRYSTALS

    fireplace with natural designs

    If you want that natural vibe in your space, place some natural stones and crystals in the fireplace. If you add some string lighting, the crystal stones will be translucid by the light and this is an awesome effect!