Category: Décor Ideas

  • How to Use Vintage Pieces for Contemporary Home Design

    How to Use Vintage Pieces for Contemporary Home Design

    Welcome to the beautiful intersection of past and present, where old-world charm meets modern aesthetics. It’s a place where vintage pieces do not just survive, but thrive in contemporary design settings.

    Whether it’s a rustic mirror frame from the 1930s or a mid-century modern lamp, these pieces hold the power to imbue your living space with a unique charisma that’s hard to replicate.

    This article will guide you on the art of seamlessly blending vintage items with your modern home design, creating a timeless aesthetic that exudes warmth, personality, and style.

    So, let’s step into the beautiful labyrinth of vintage and contemporary design fusion, and discover how you can bring this magic into your own home.

    [view_toc]

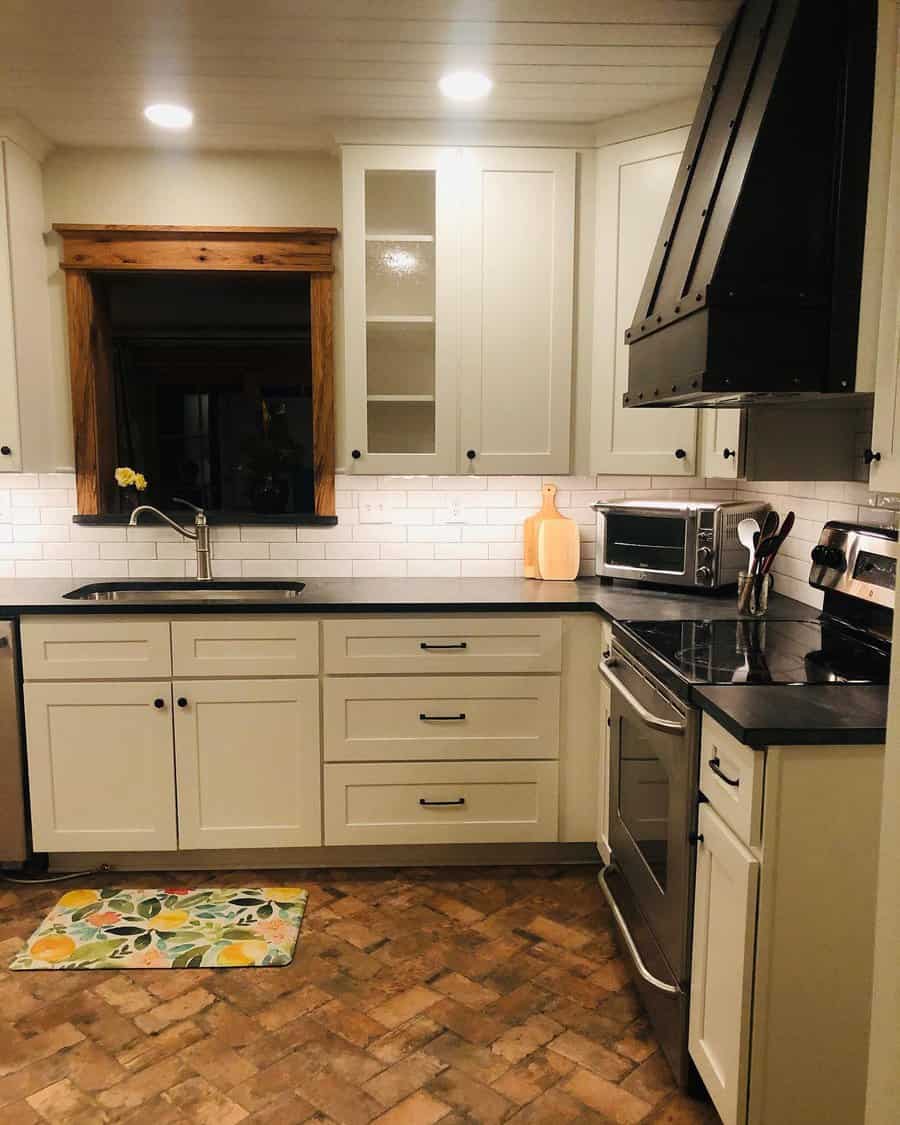
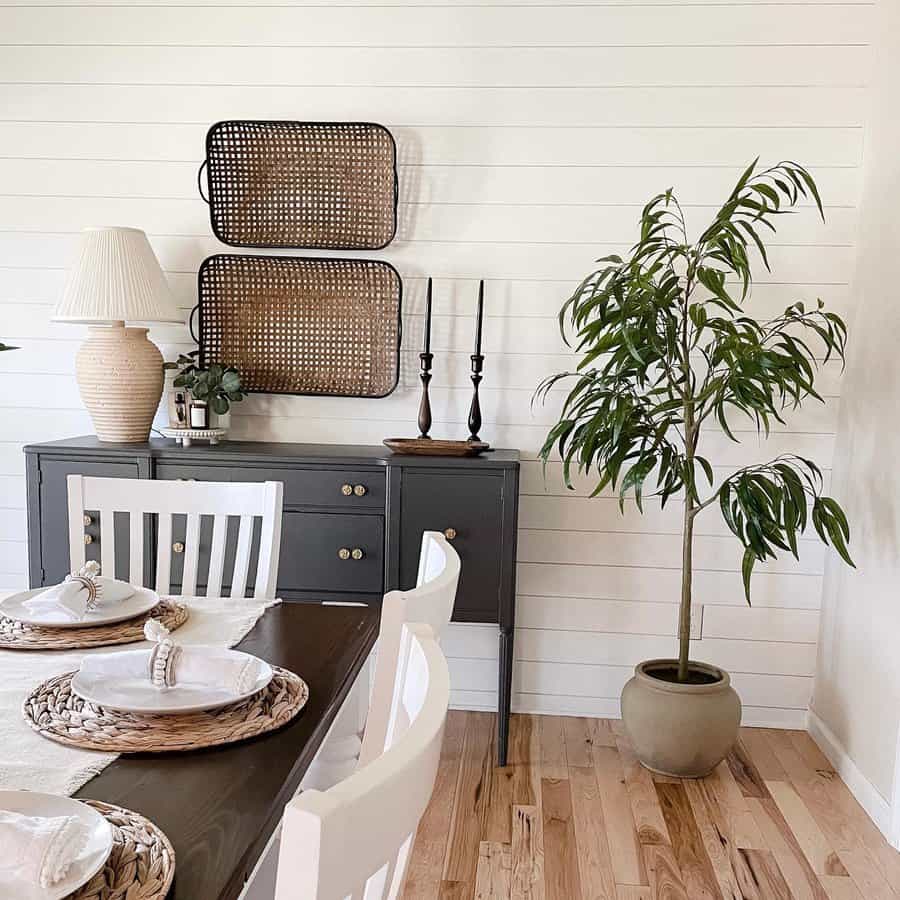
    1. Balance with Modern Elements

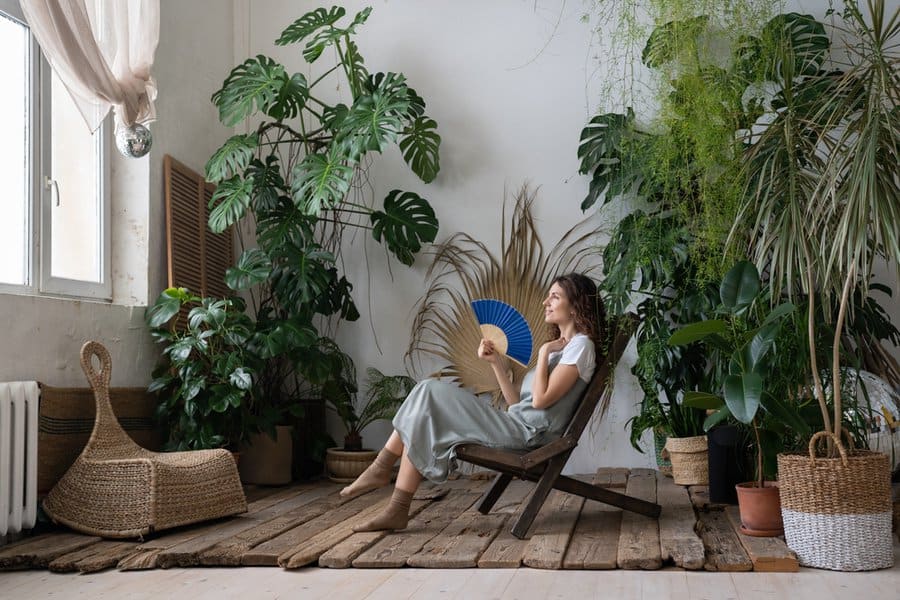
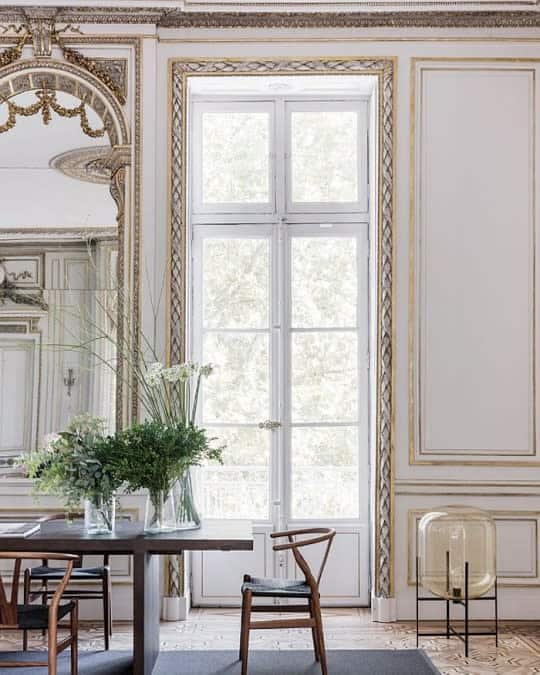
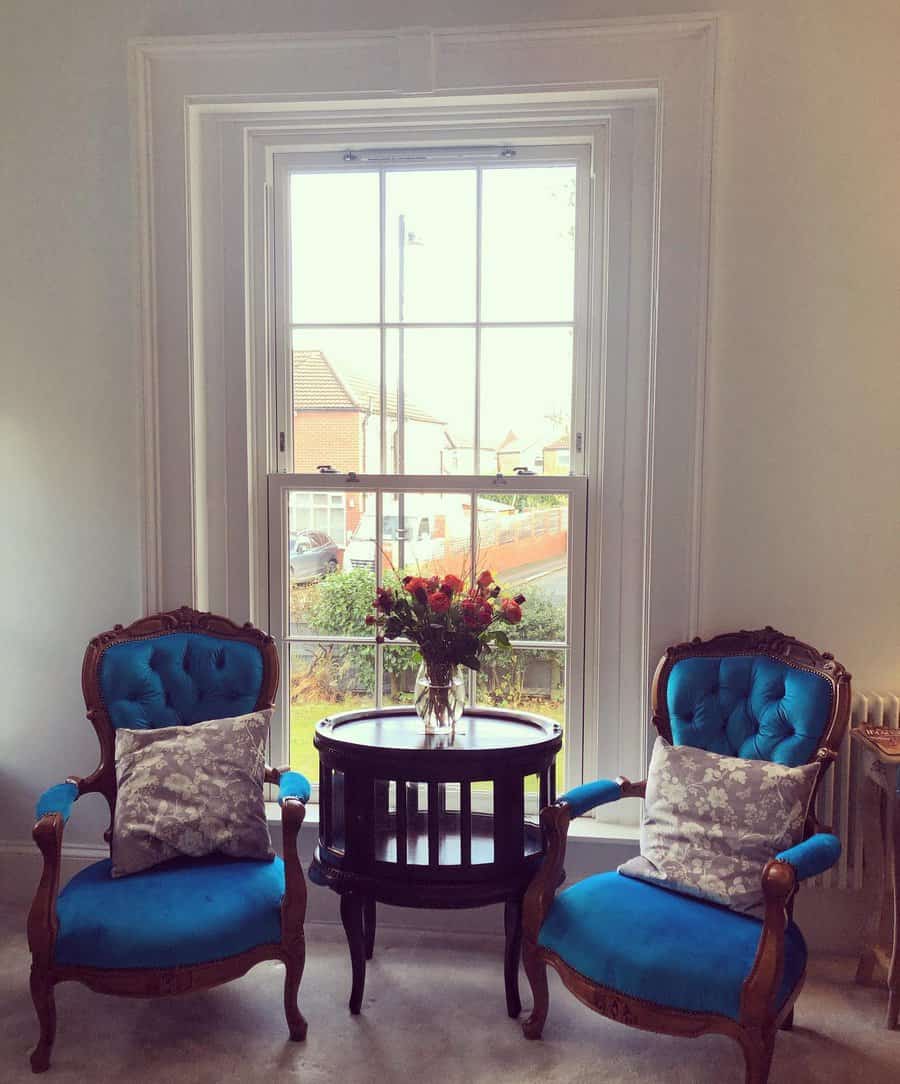
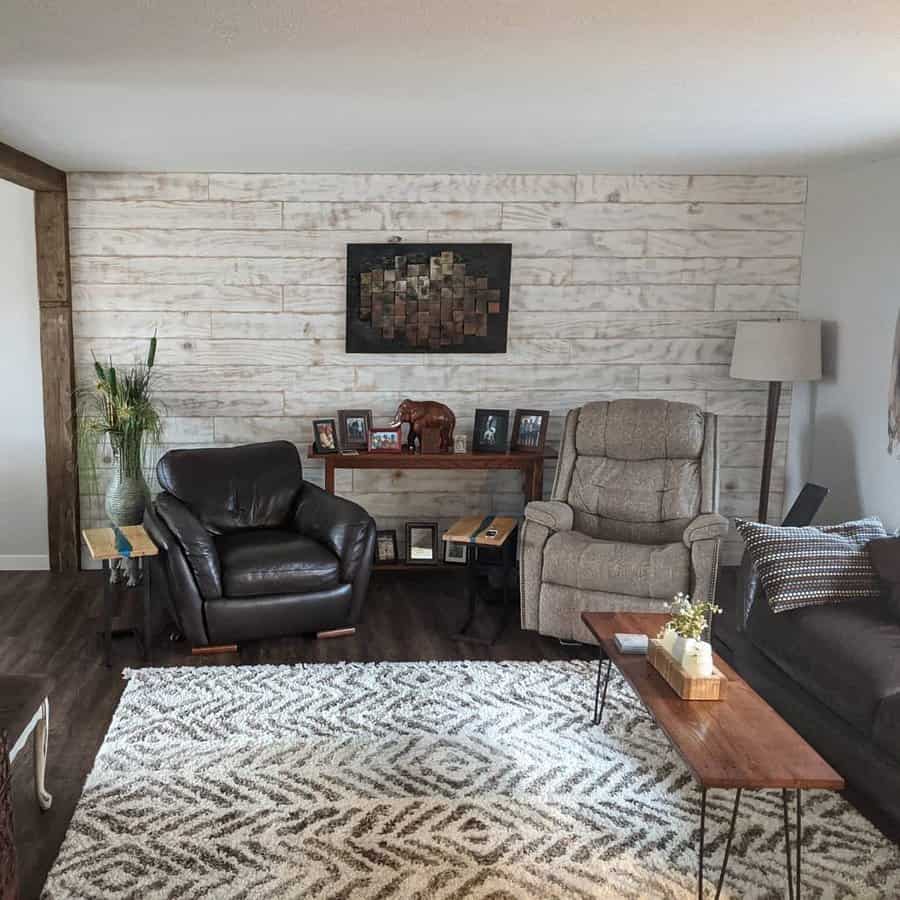
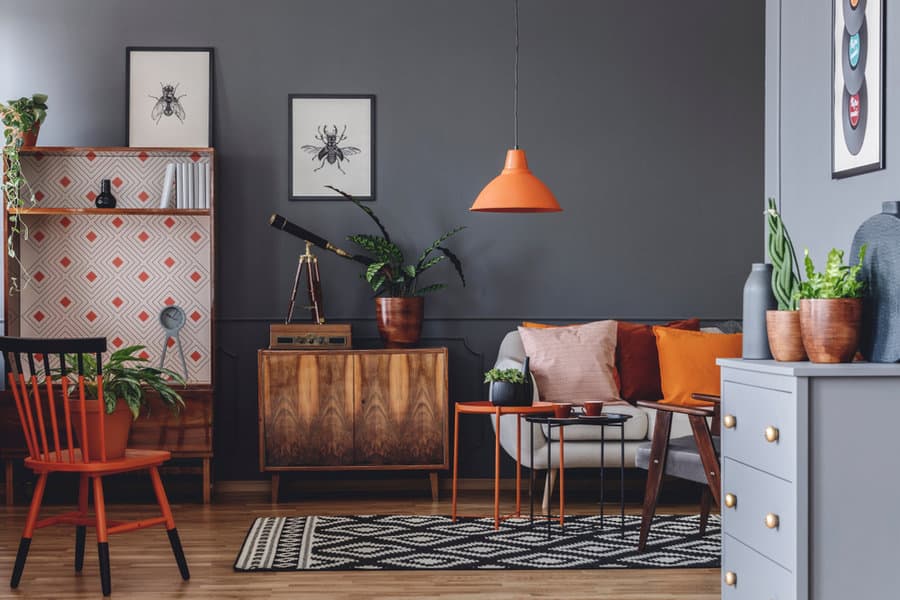
    Integrating vintage pieces into your contemporary design is all about achieving a balance. Too many antiques can overpower your space and make it feel outdated.

    Instead, aim for a stylishly eclectic look by blending vintage pieces with modern elements. This creates a harmonious contrast that keeps your space feeling fresh and visually interesting.

    Pair a sleek, modern sofa with a vintage coffee table or place a retro armchair alongside a contemporary bookshelf.

    The key is to strike the right balance between old and new, creating a cohesive and dynamic design aesthetic.

    2. Restore Thoughtfully

    Vintage pieces often come with signs of wear and tear, but a thoughtful restoration can breathe new life into them while preserving their charm.

    When restoring vintage items, strive to maintain their original elements and unique character whenever possible. Refinish wood surfaces to bring out their natural beauty or repair minor damages while preserving the patina that tells the piece’s story.

    However, don’t hesitate to update upholstery or finishes if it aligns with your overall aesthetic vision. Reupholstering a vintage chair with a contemporary fabric or refinishing metal hardware can modernize the piece while still honoring its vintage roots.

    By restoring vintage pieces thoughtfully, you can enhance their charm and seamlessly integrate them into your contemporary home design.

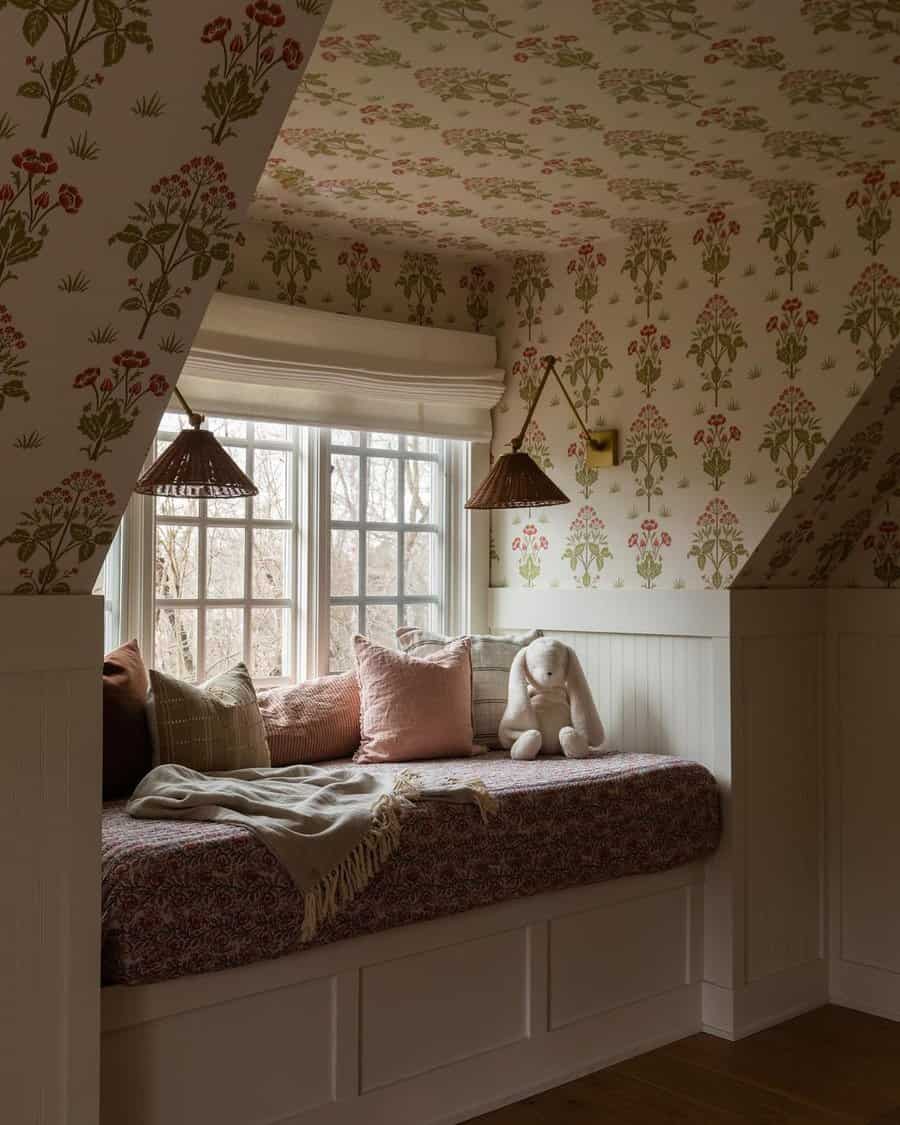
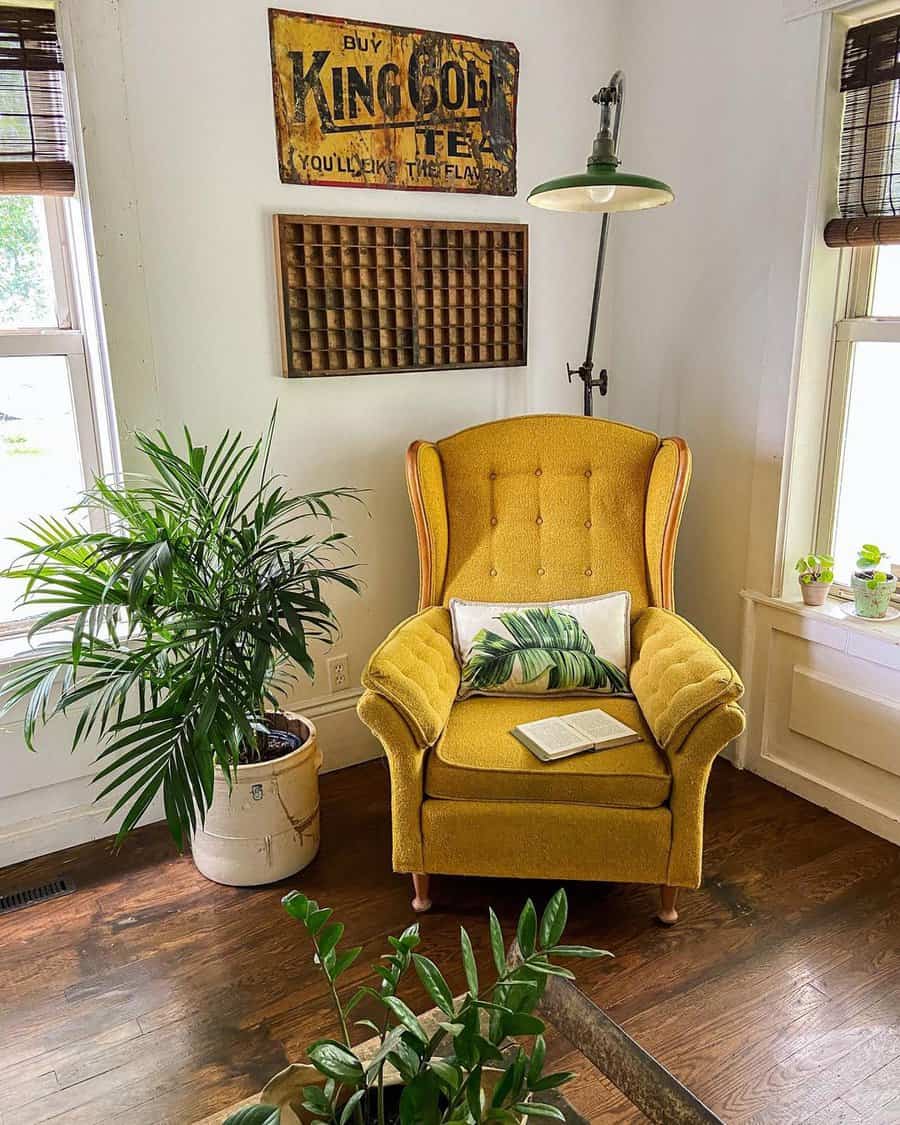
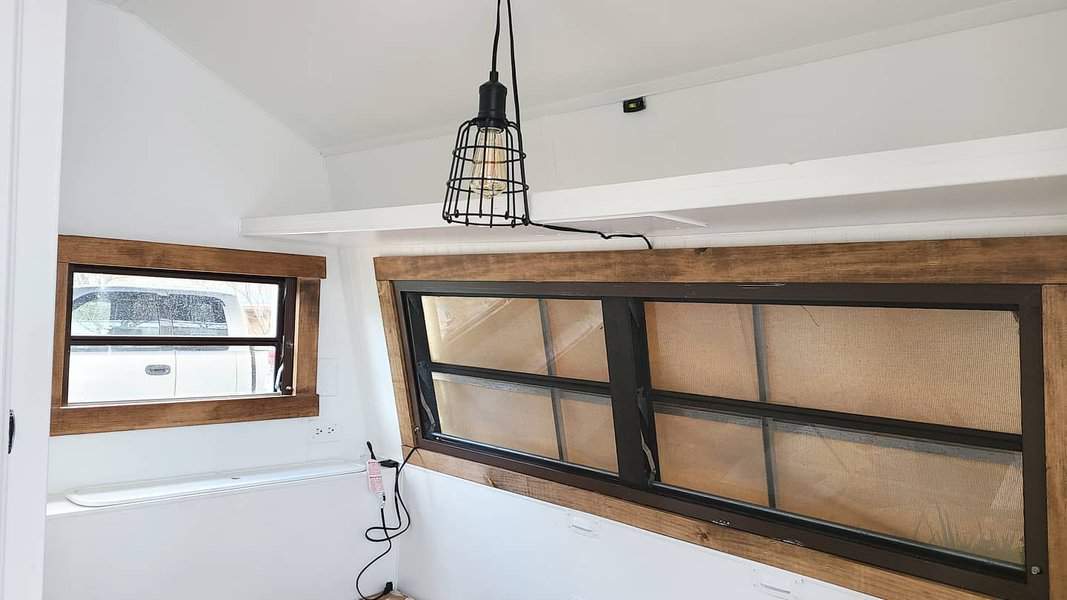
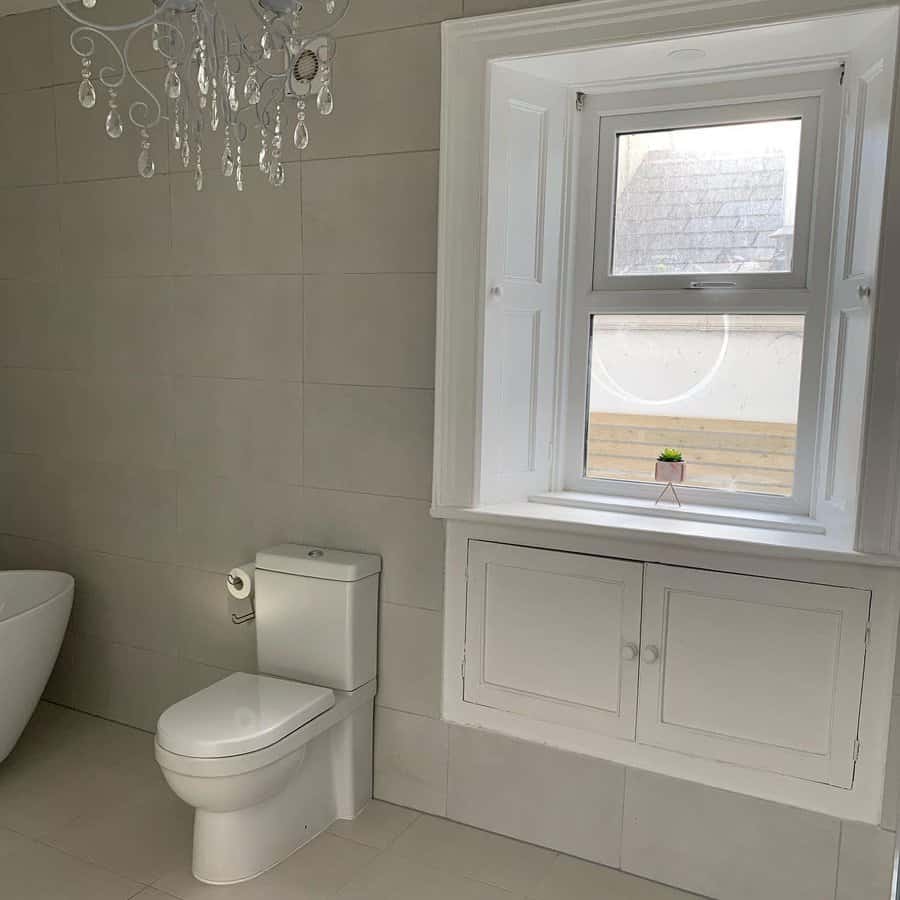
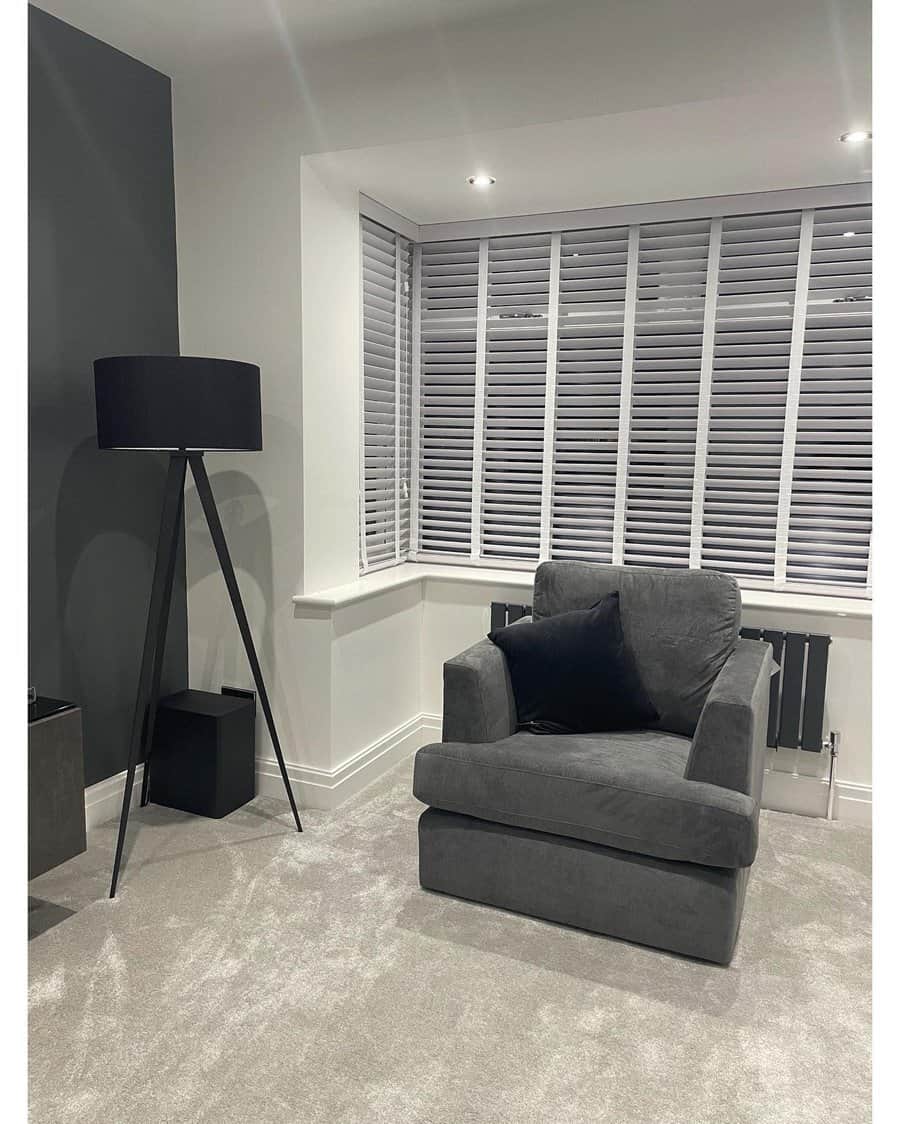
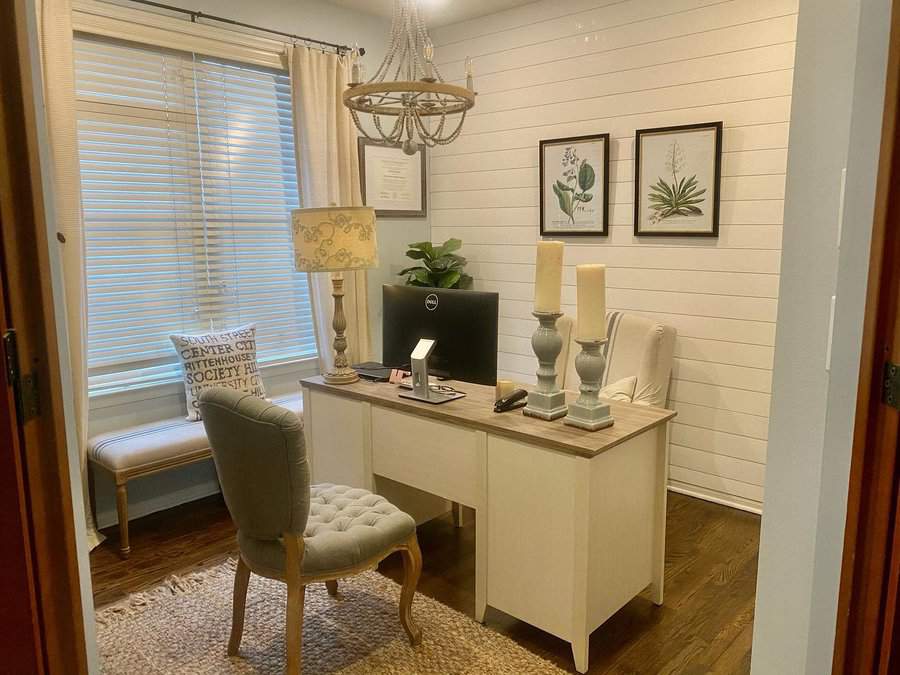
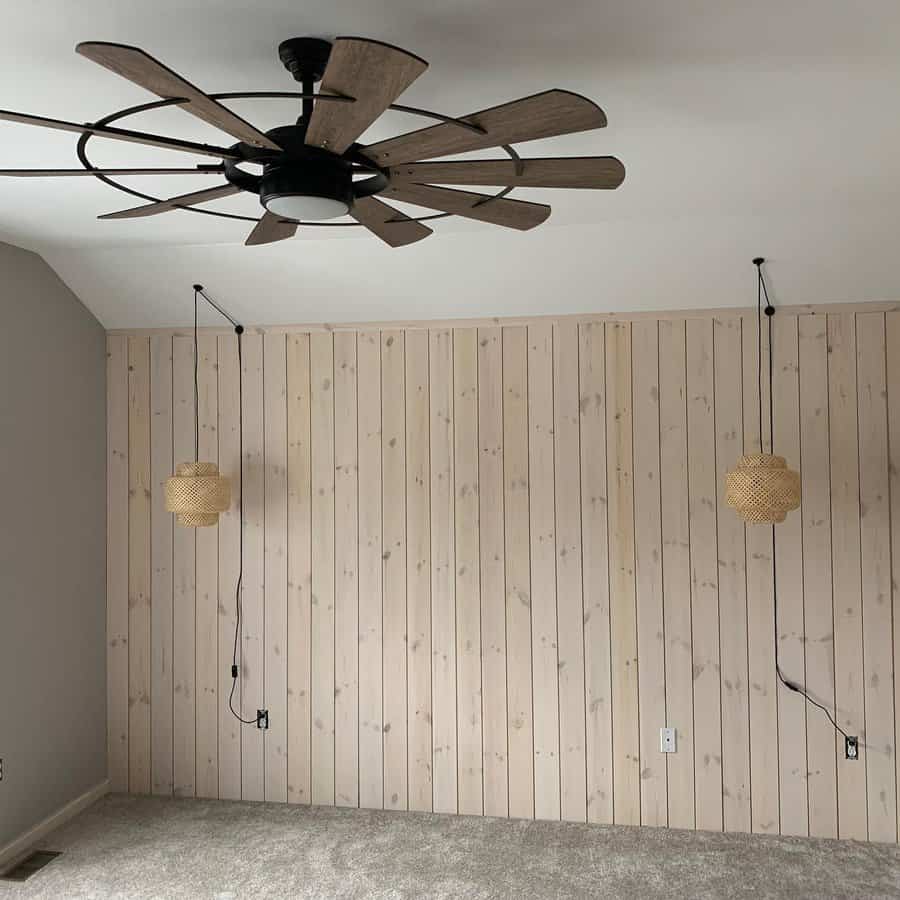
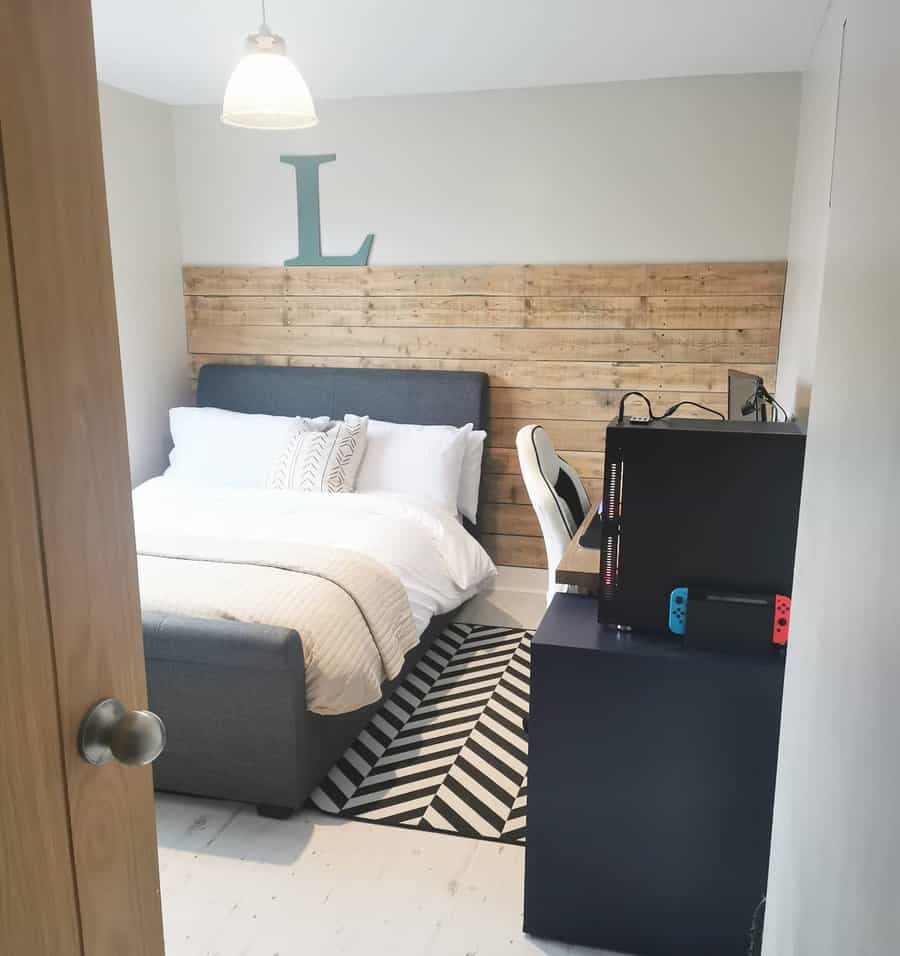
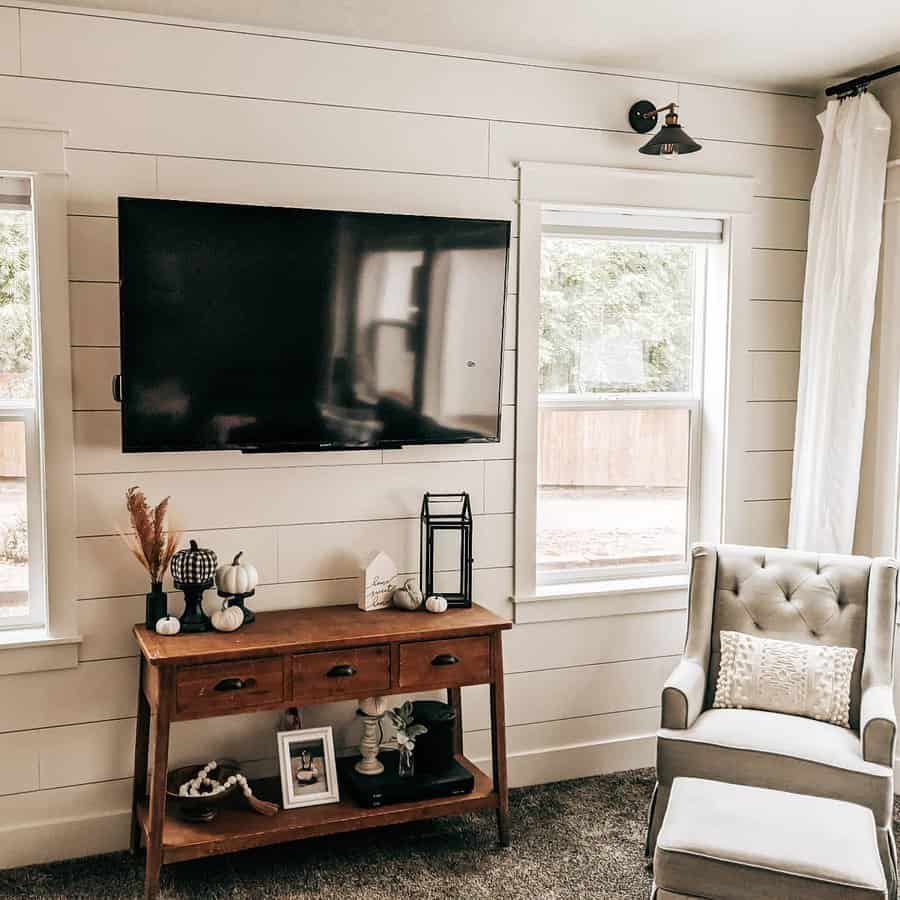
    3. Incorporate Vintage Lighting

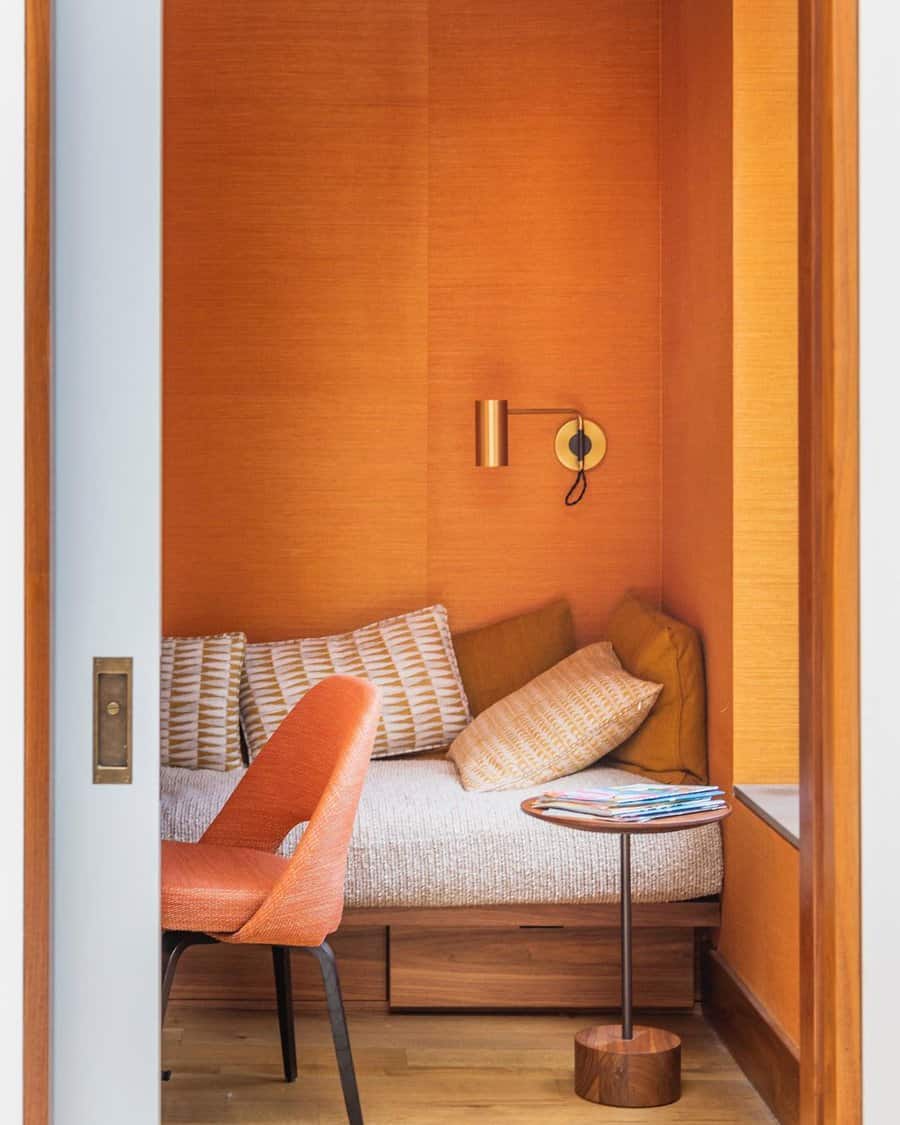
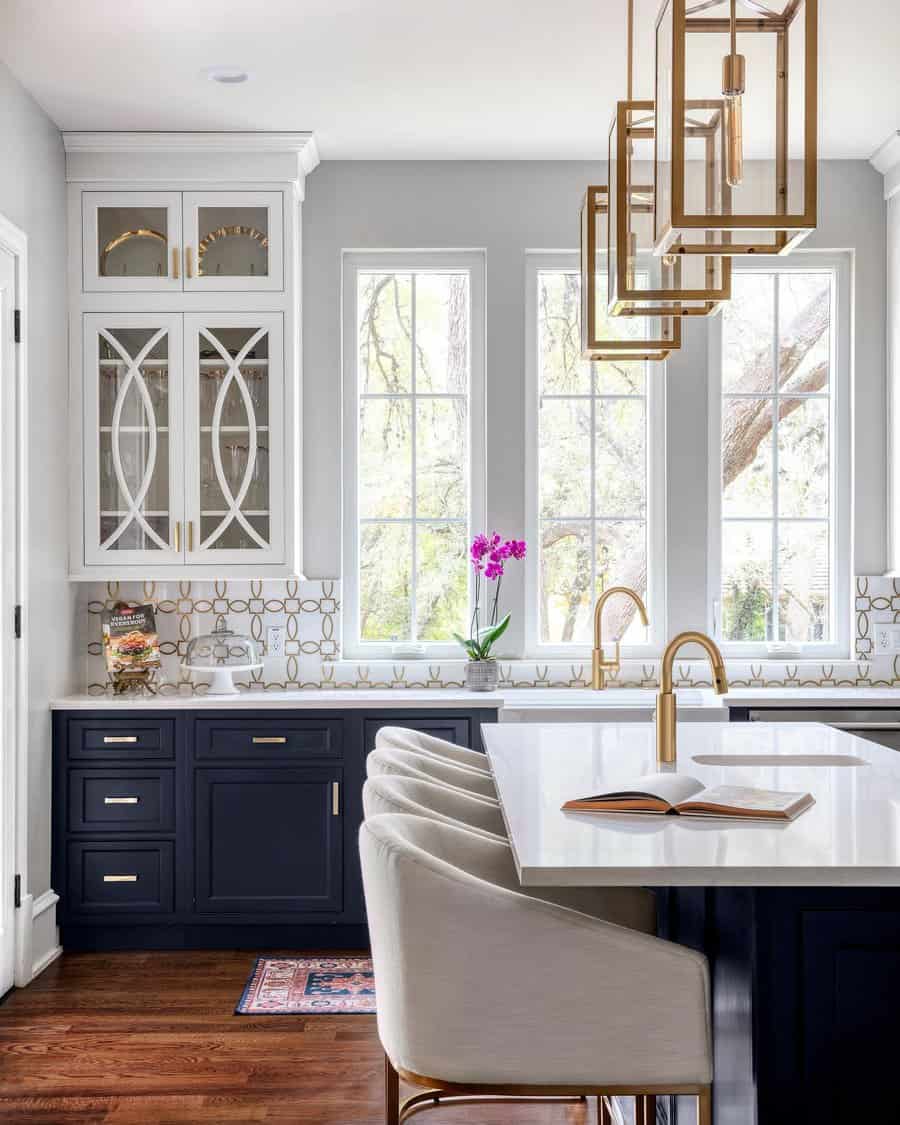
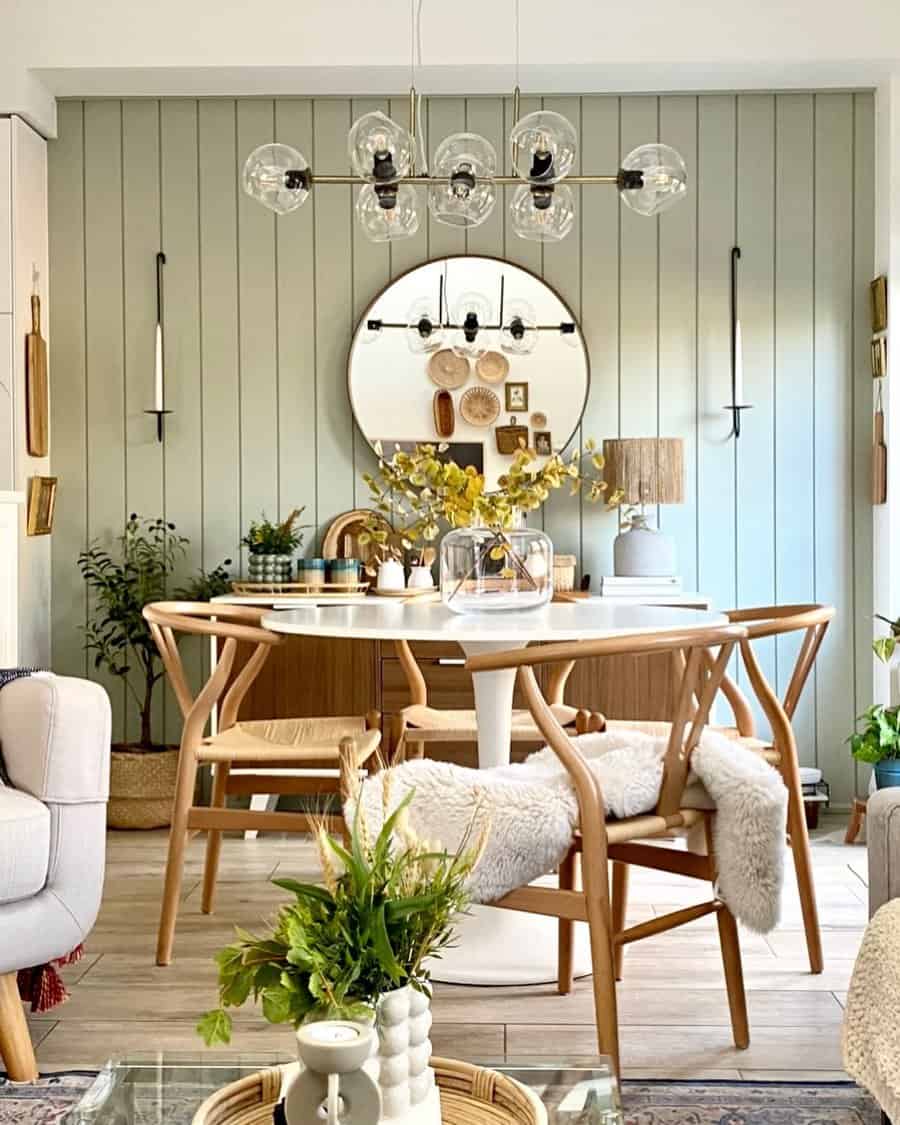
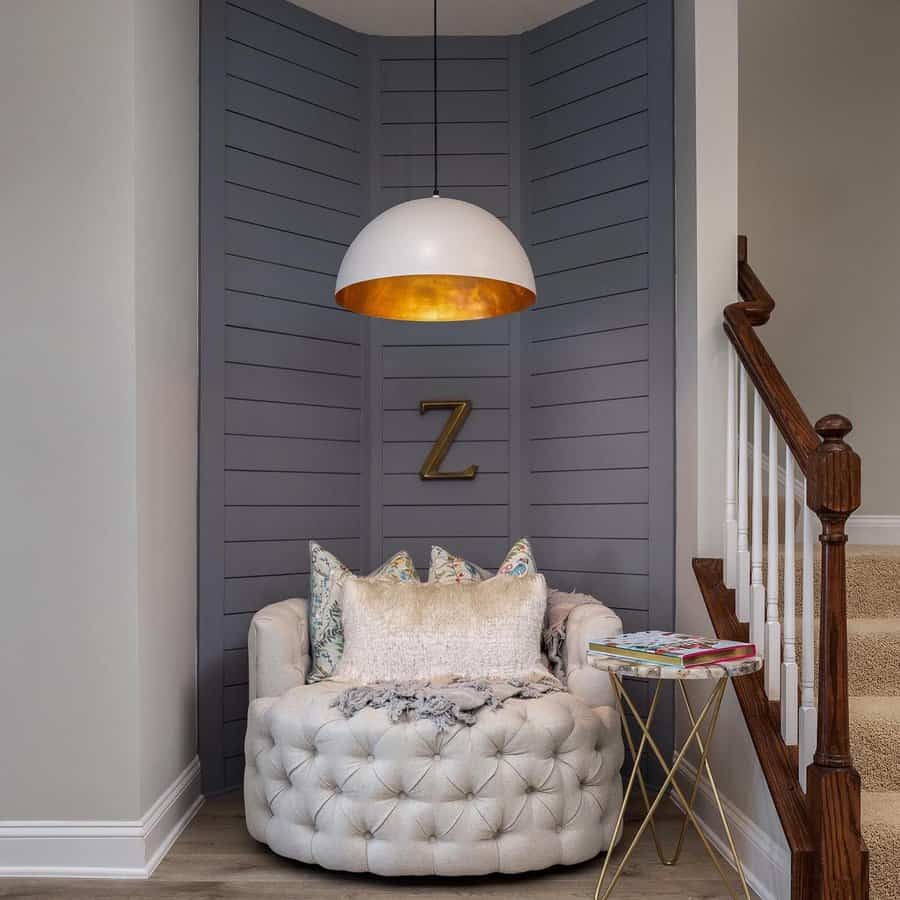
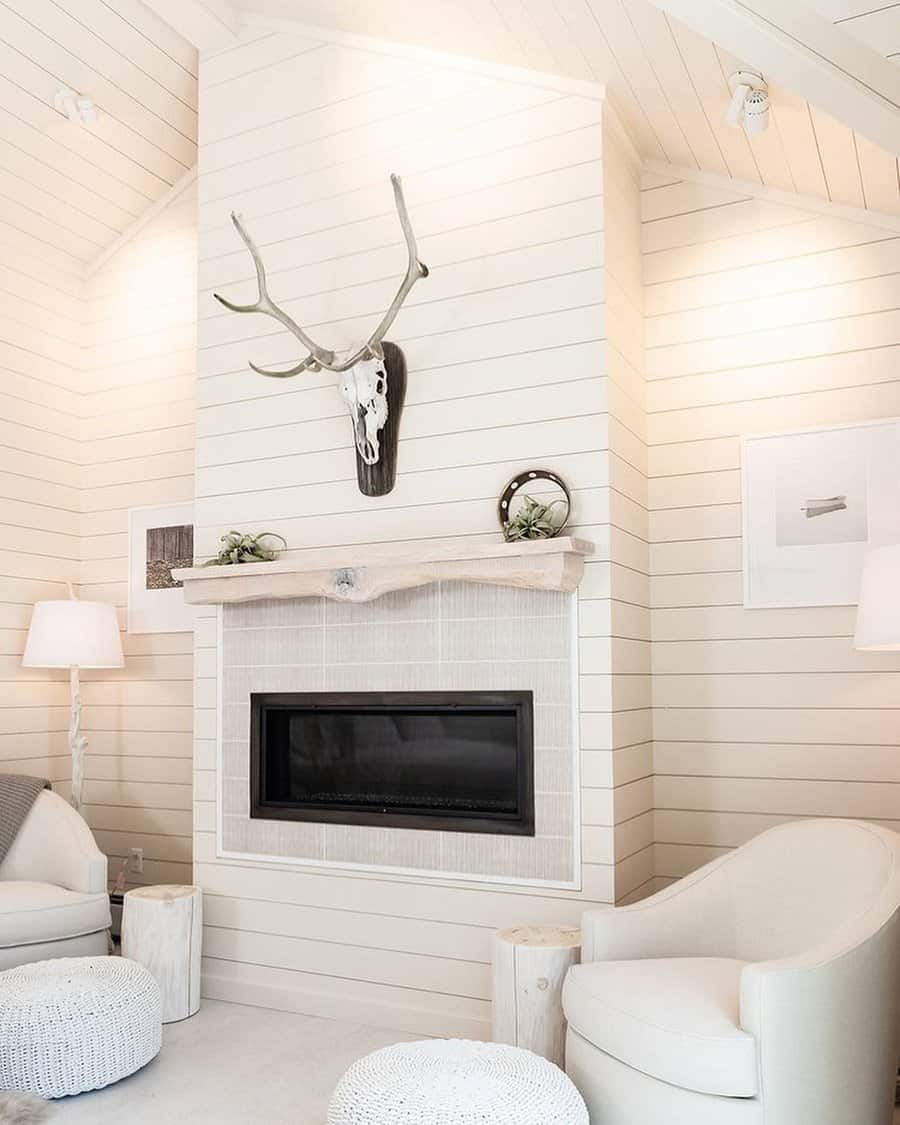
    Illuminate your contemporary space with the timeless charm of vintage lighting fixtures. Vintage sconces, chandeliers, or pendant lights can bring an elegant and warm glow to your home, creating a cozy and inviting atmosphere.

    Opt for fixtures with unique details, such as intricate metalwork or delicate glass shades, to add visual interest and a touch of nostalgia.

    Whether you place a vintage chandelier as a statement piece in your dining area or adorn your hallway with vintage sconces, these lighting elements can become focal points that blend seamlessly with your modern decor.

    The warm ambiance they create adds depth and character to your space, making it feel even more welcoming and enchanting.

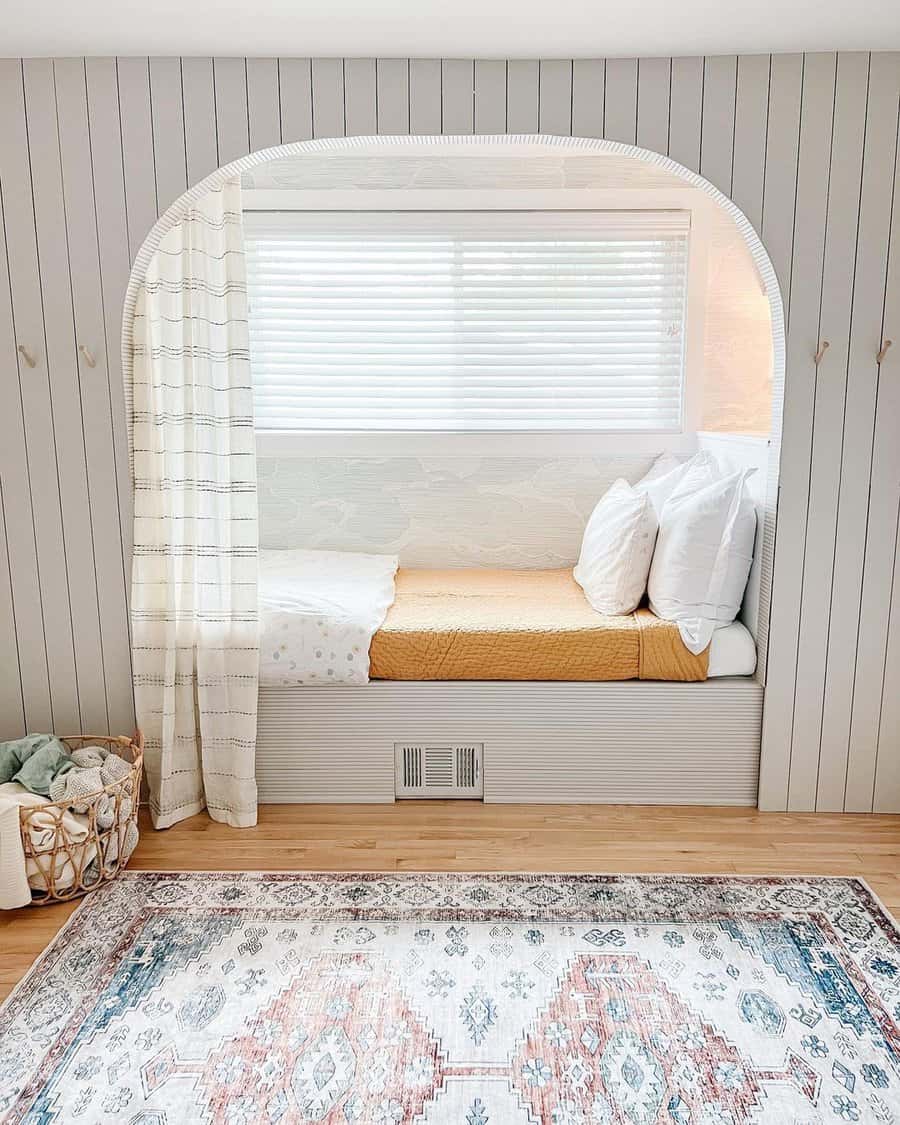
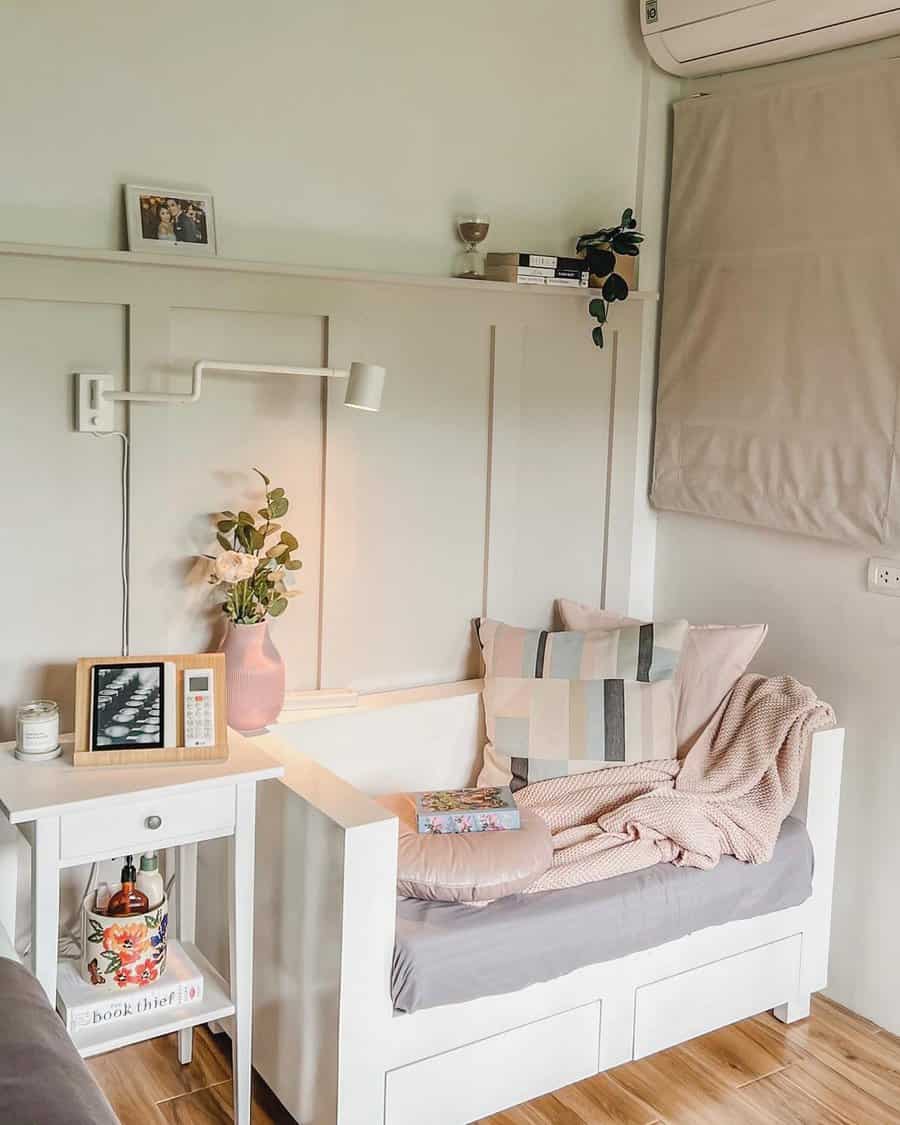
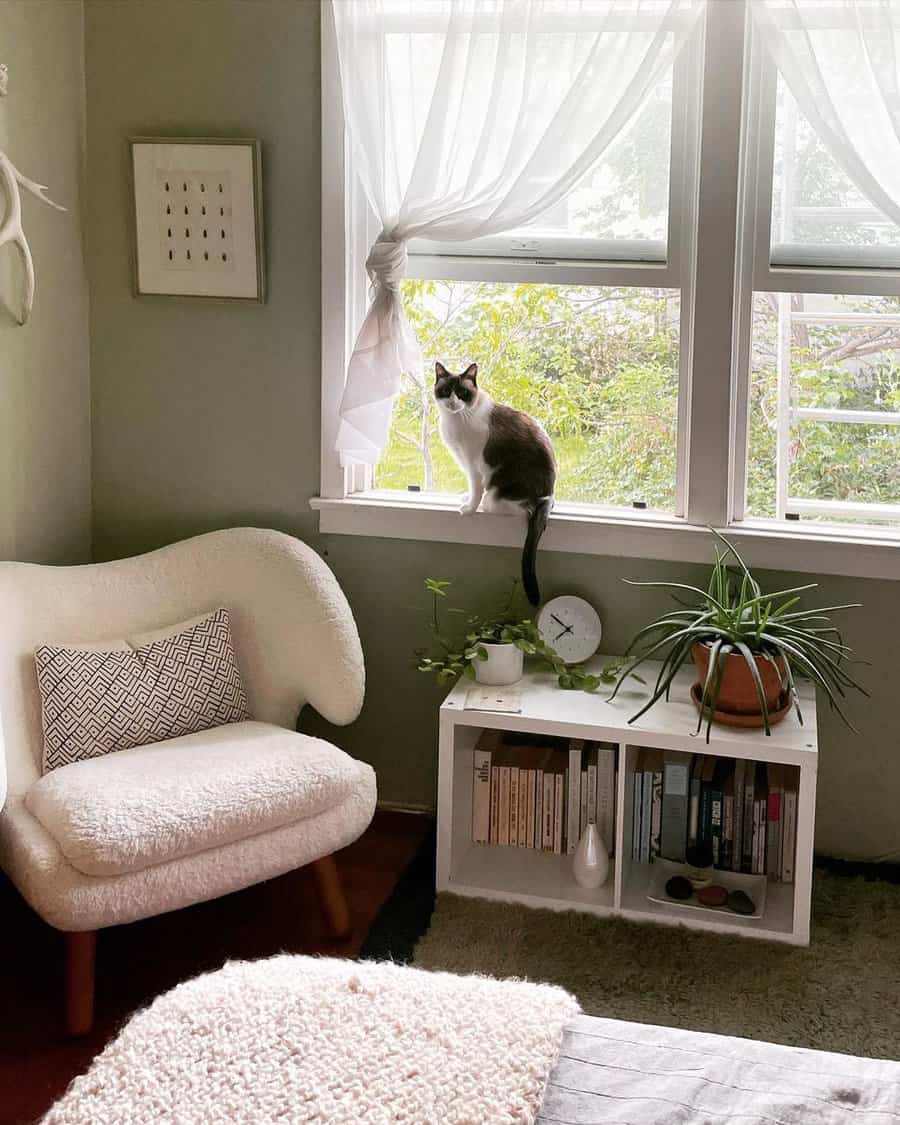
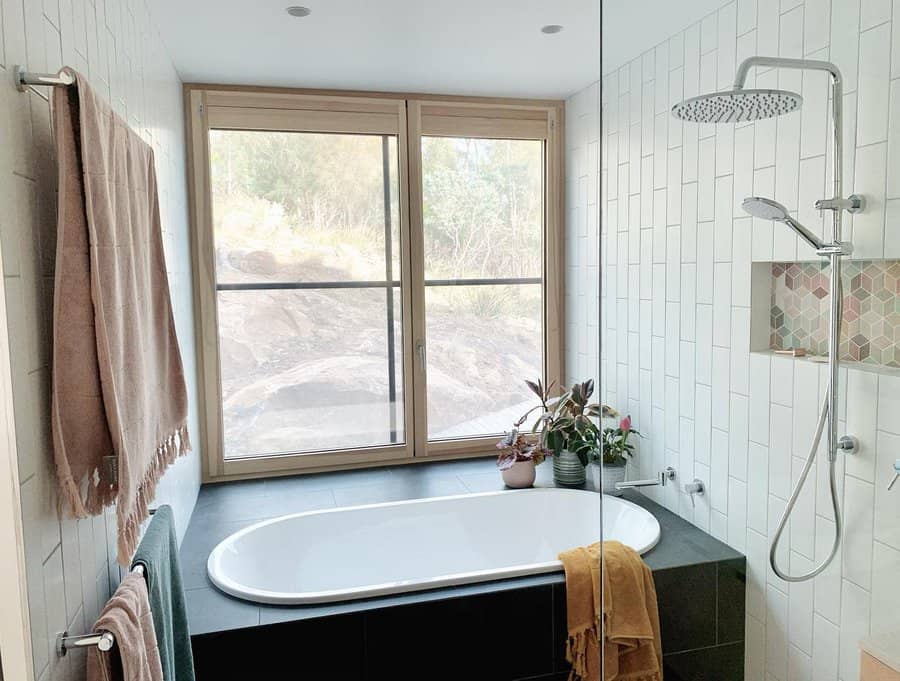
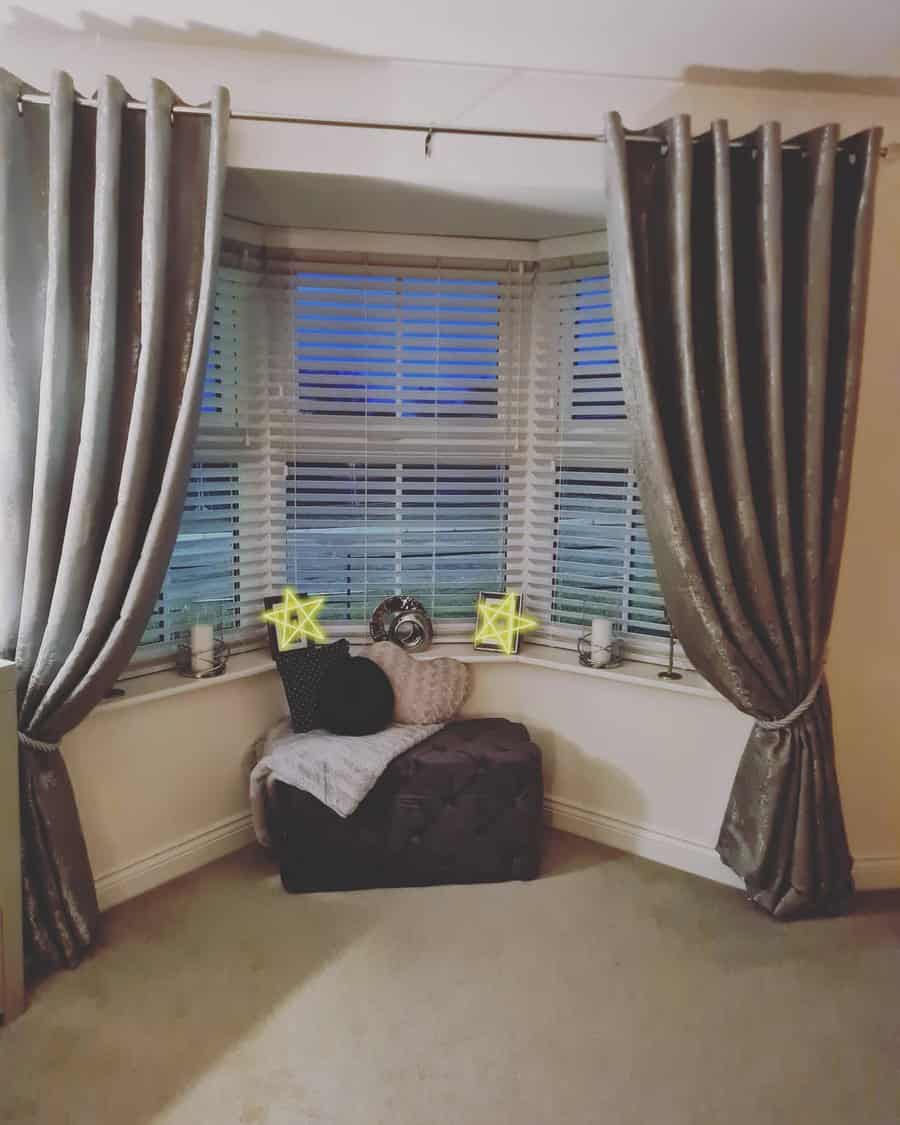
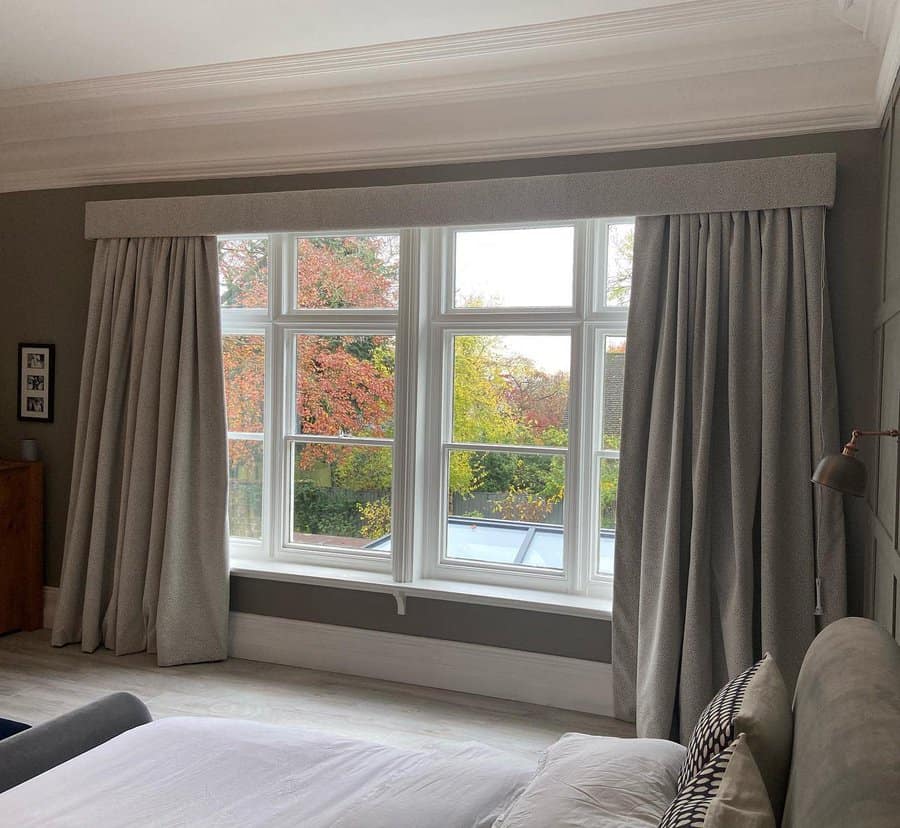
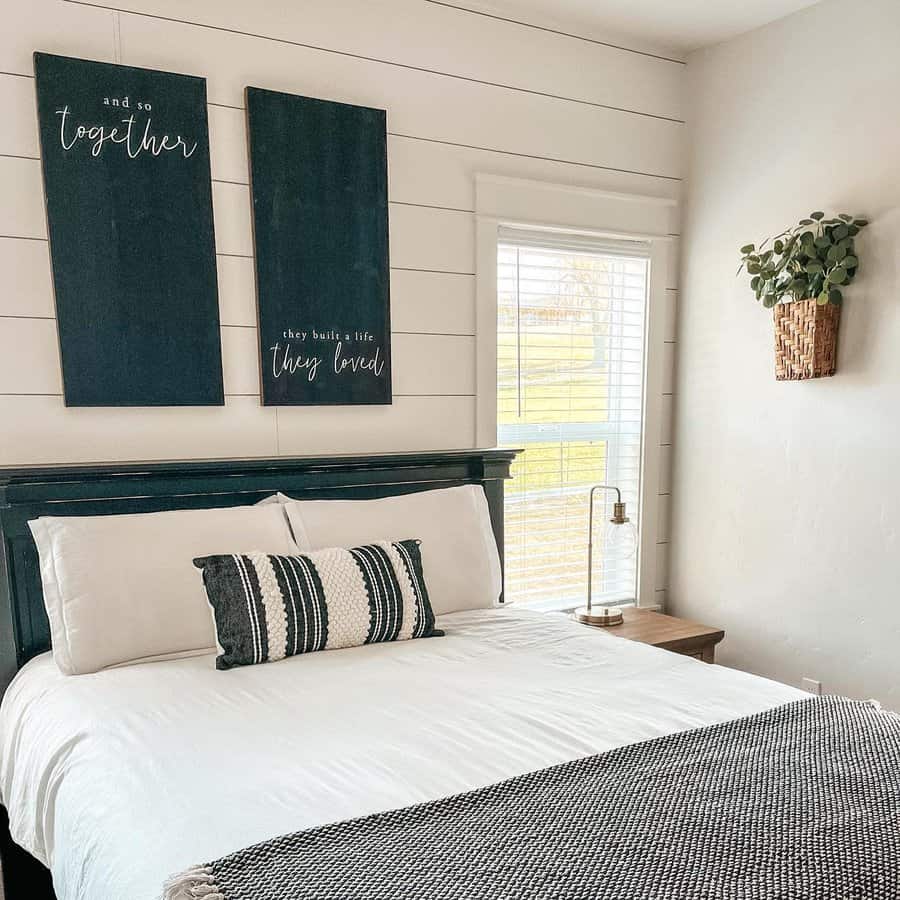
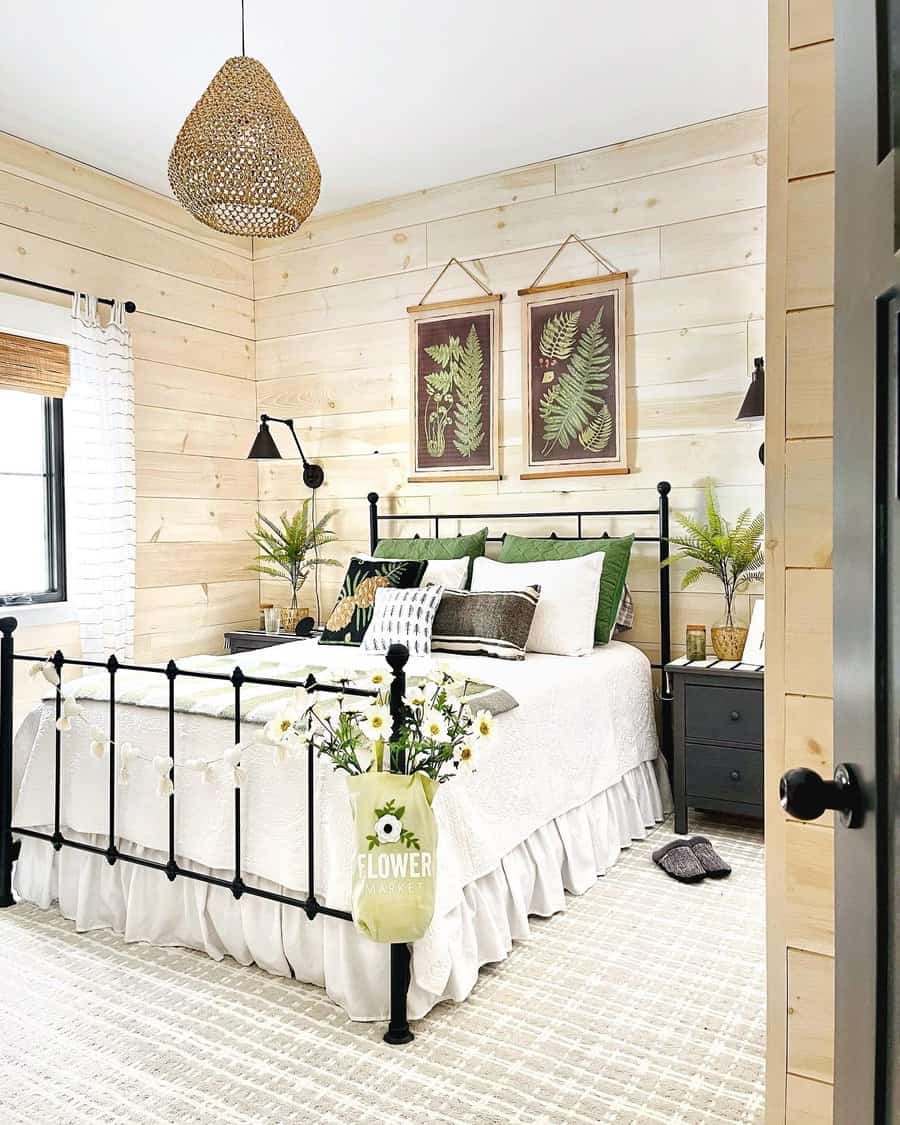
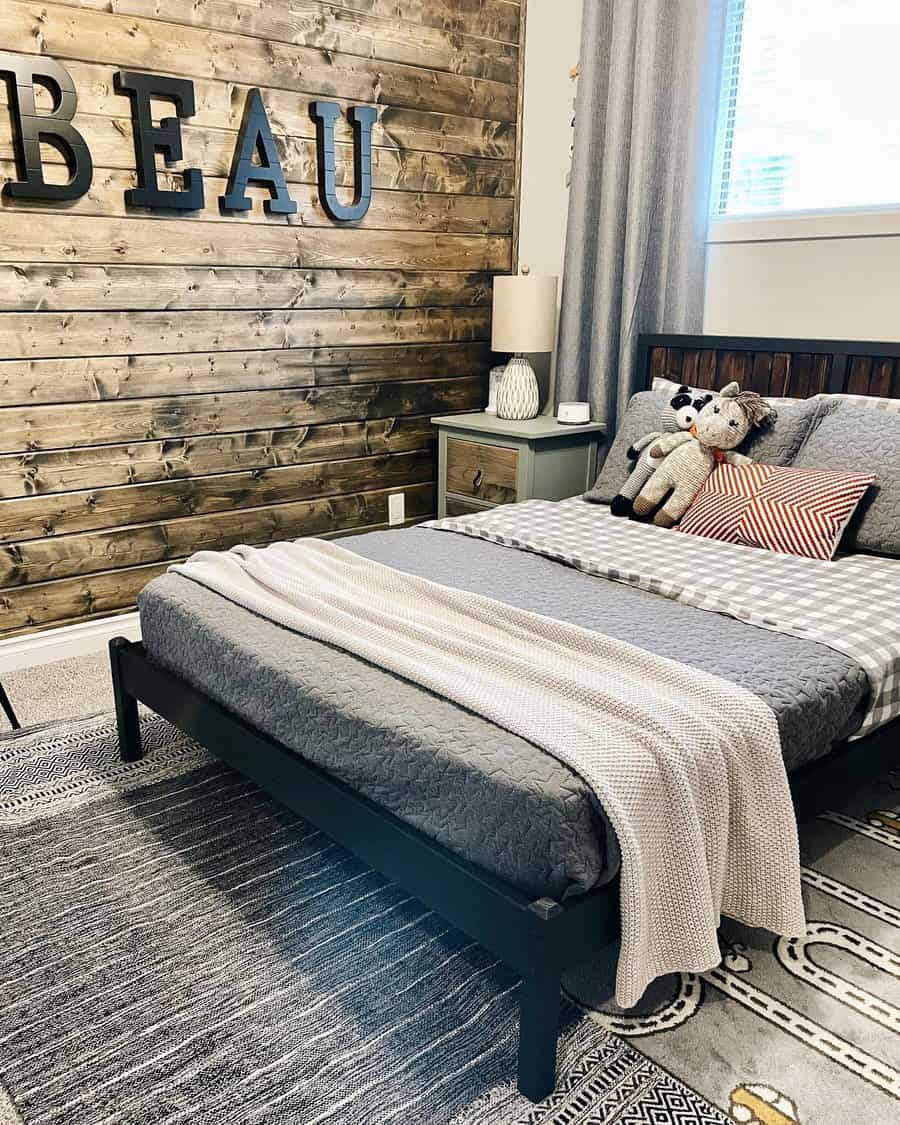
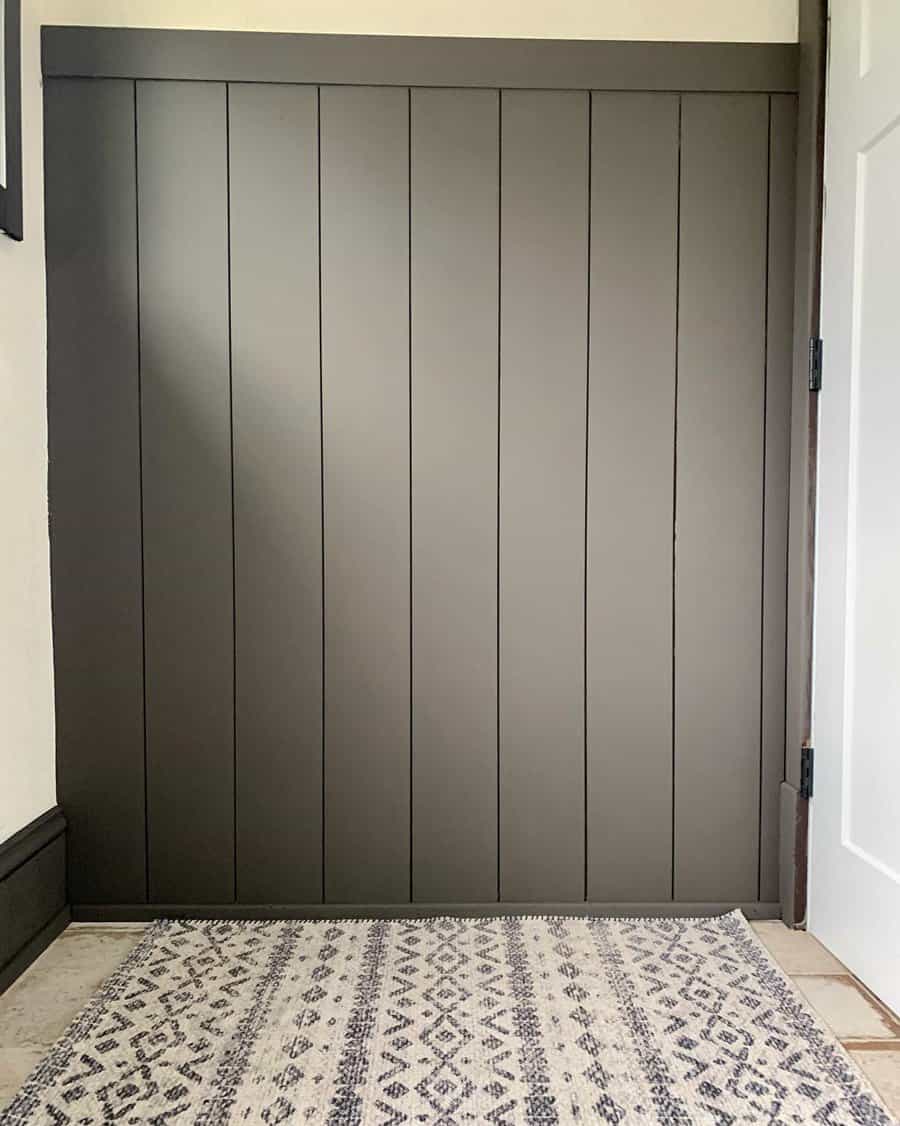
    4. Use Vintage Textiles

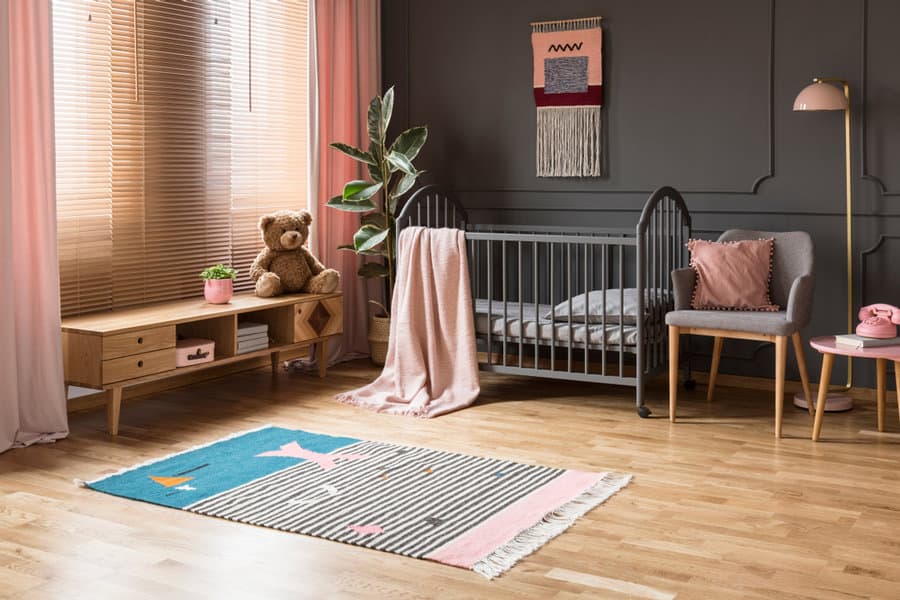
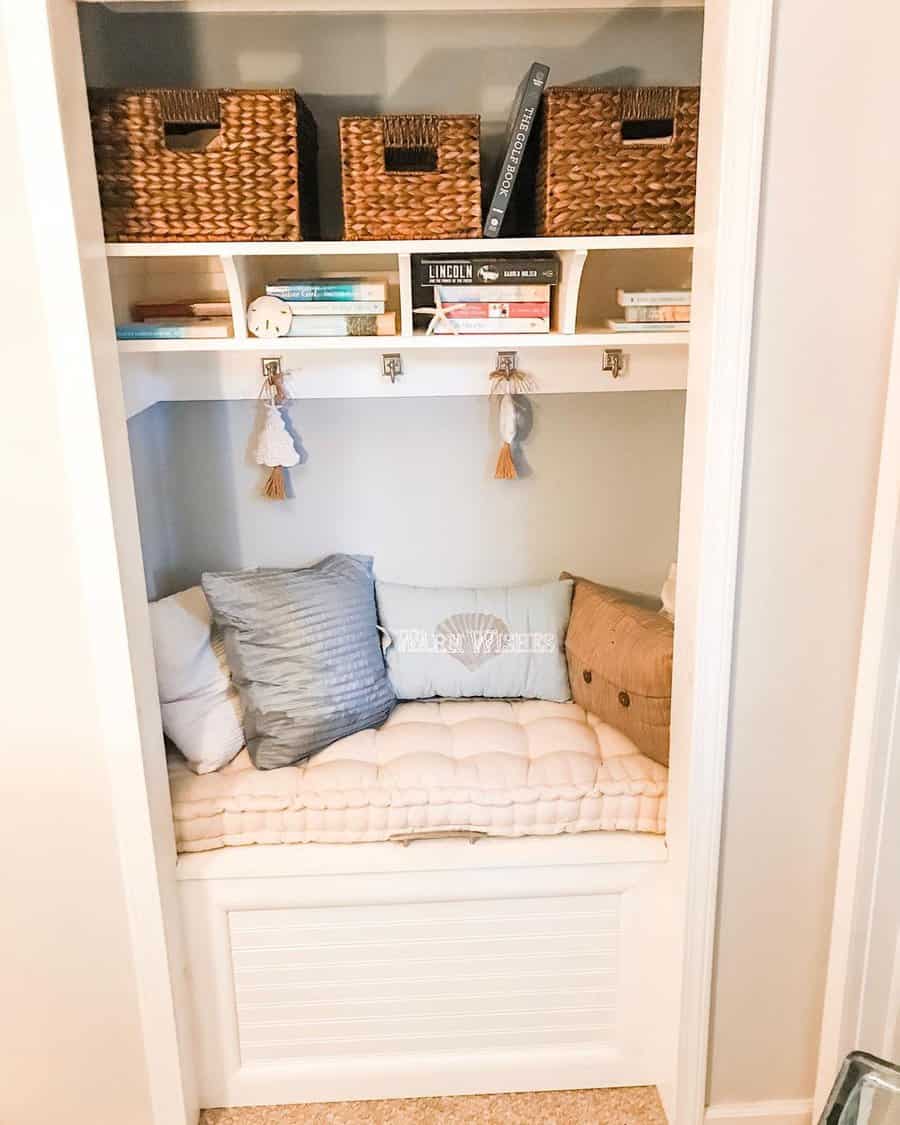
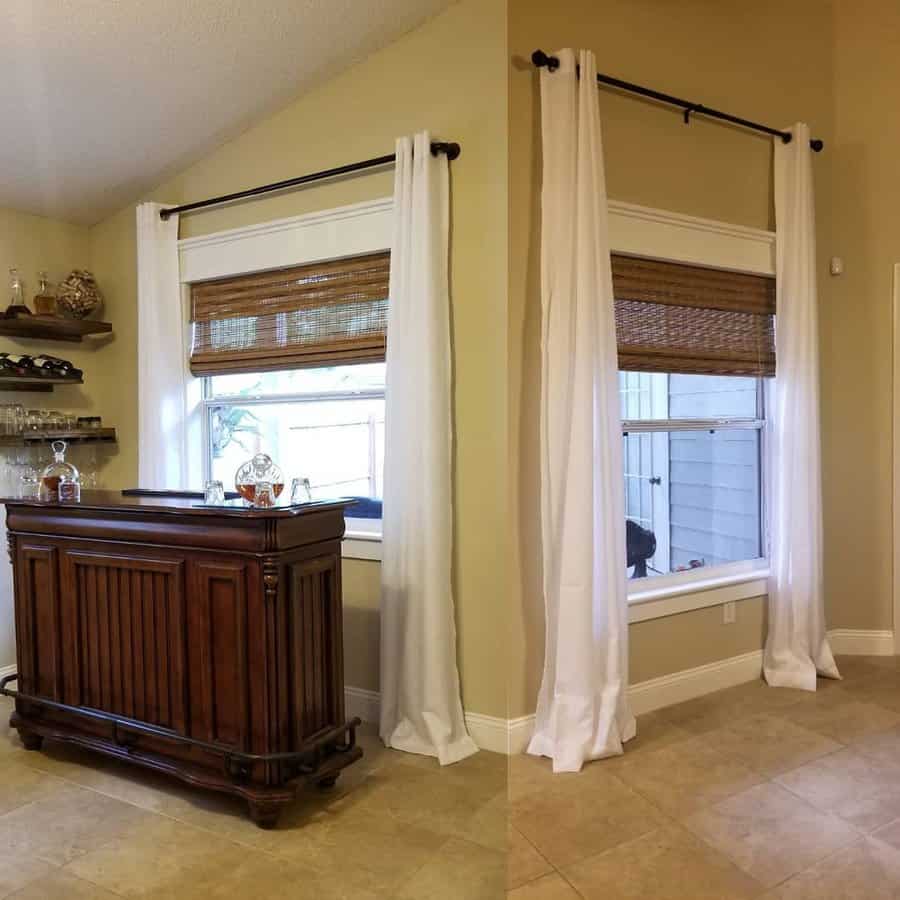
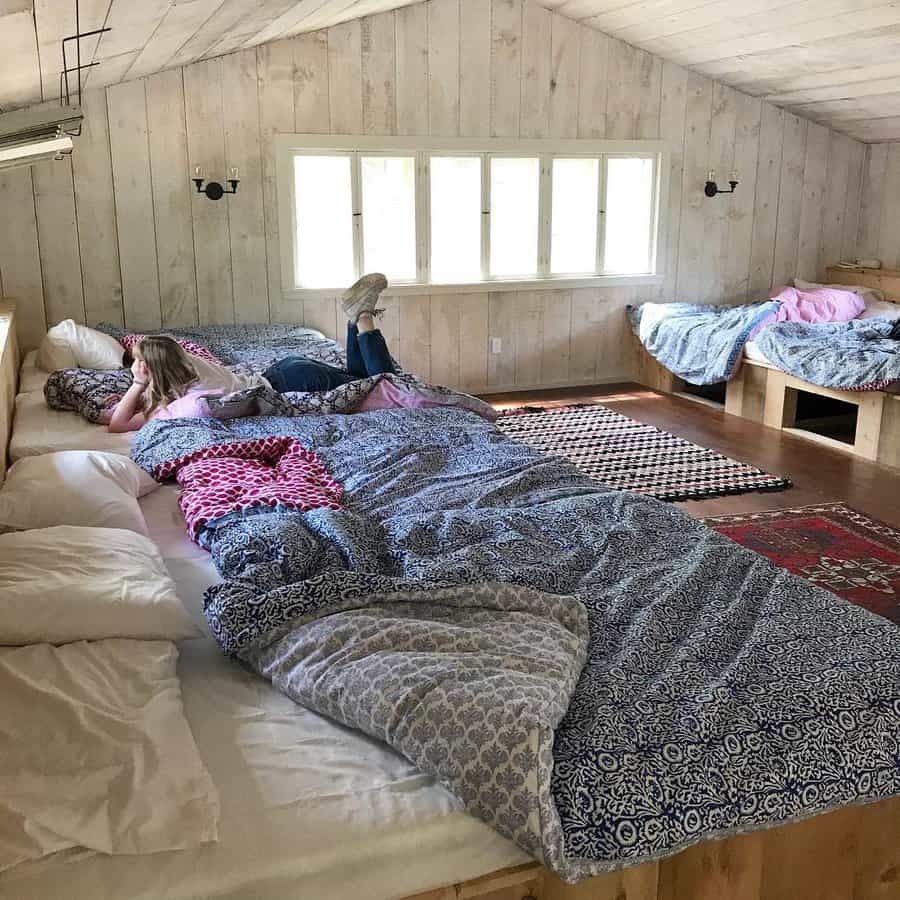
    Elevate your modern space with the rich textures and vibrant colors of vintage textiles. Incorporating vintage rugs, curtains, or throw pillows can add a layer of depth and visual interest to your decor.

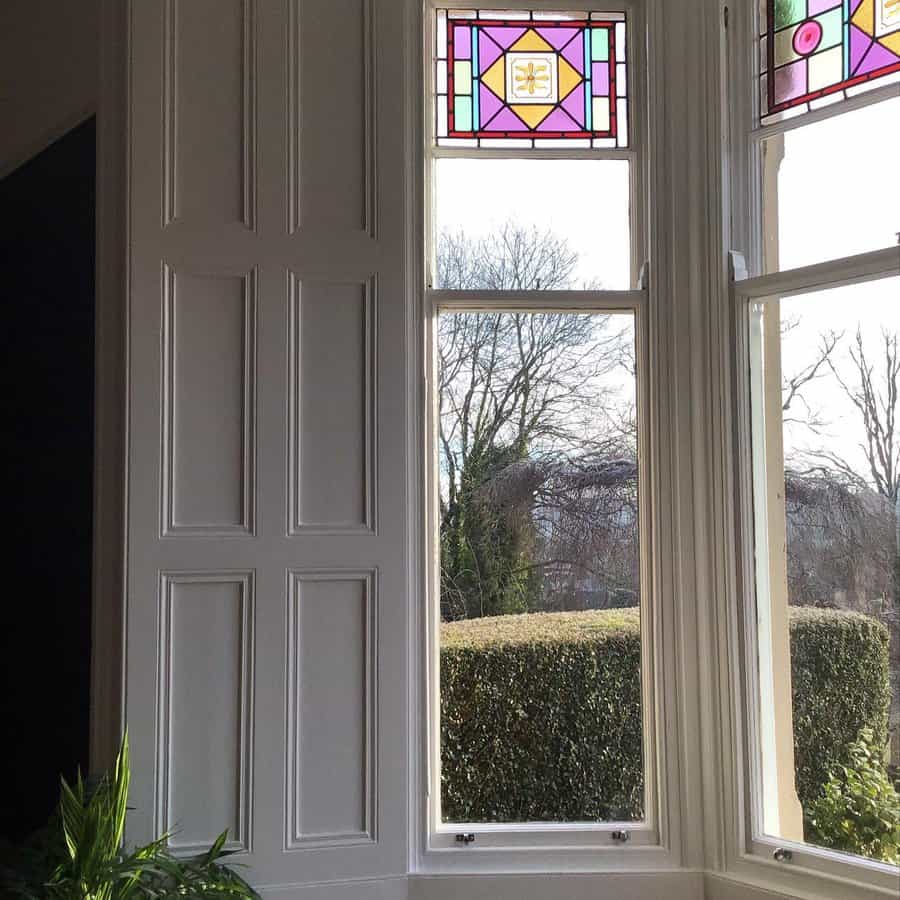
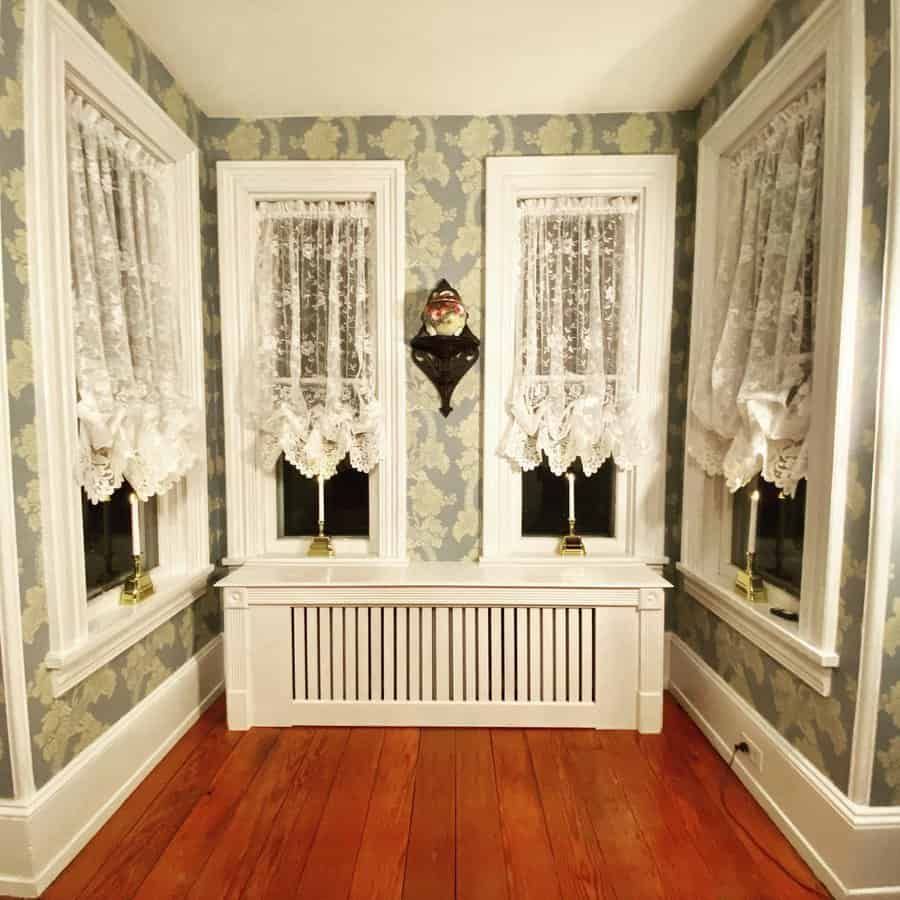
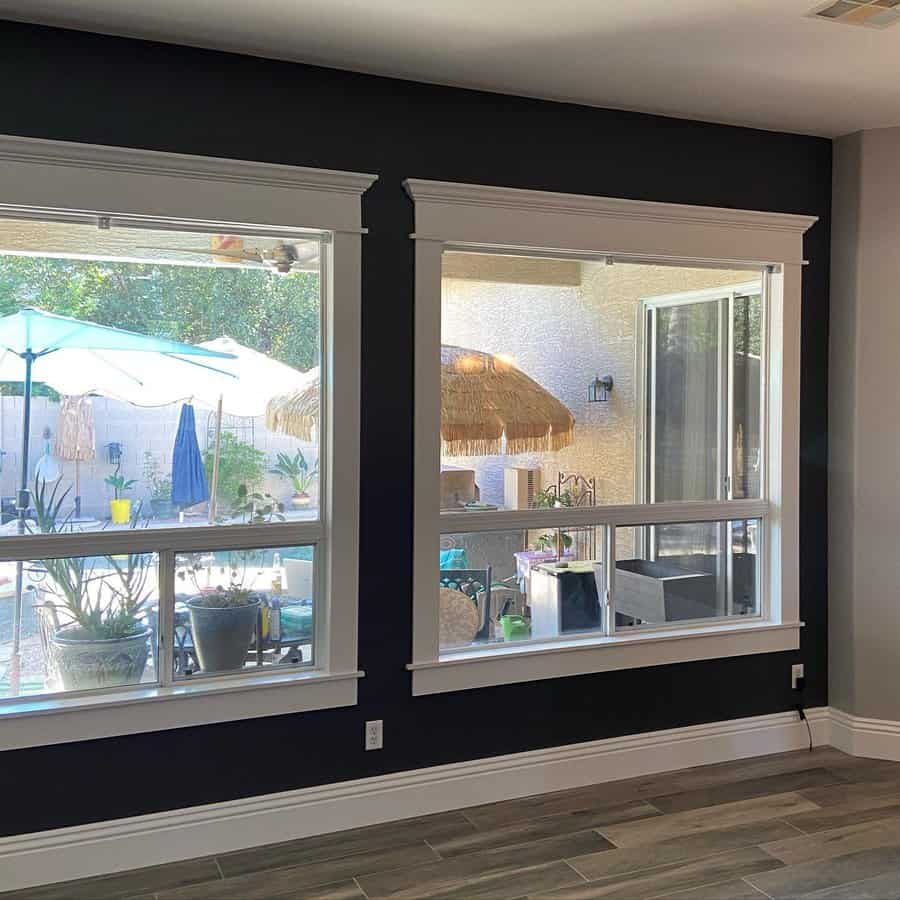
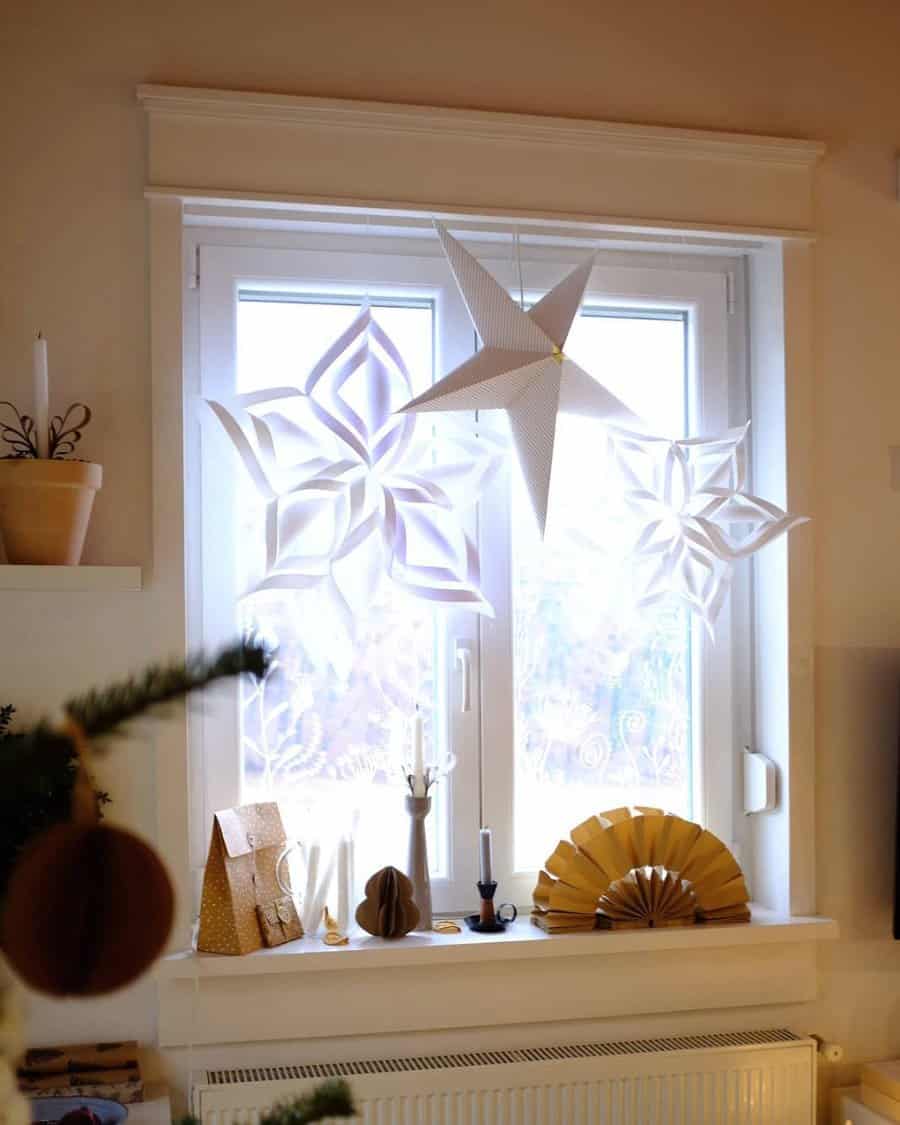
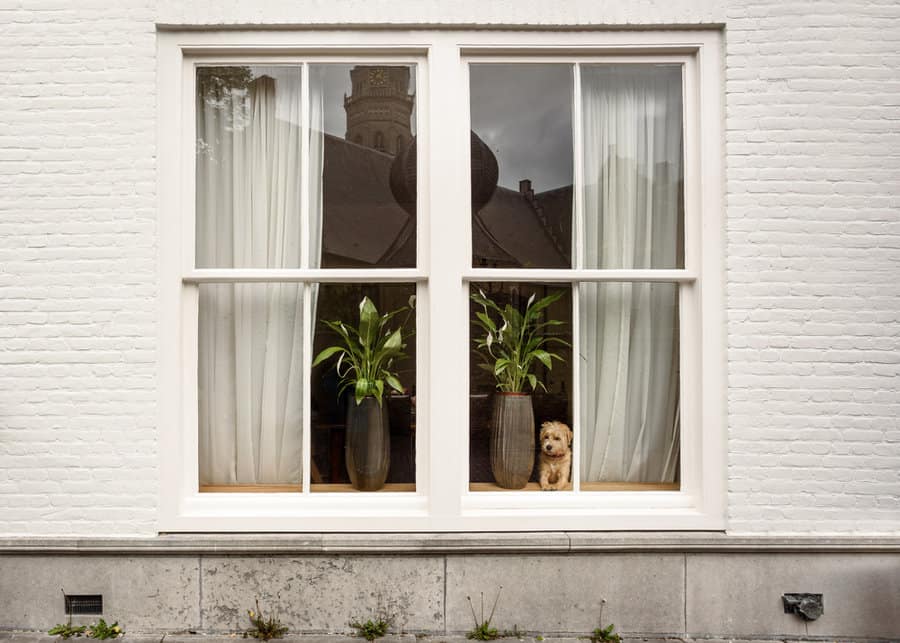
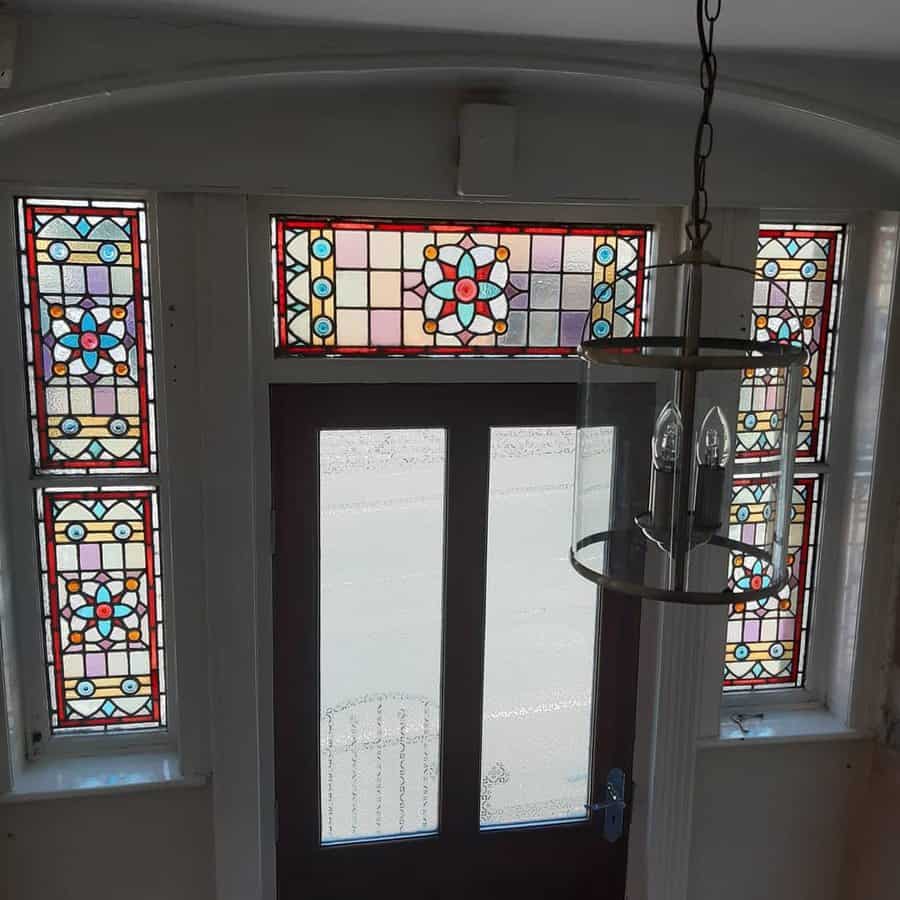
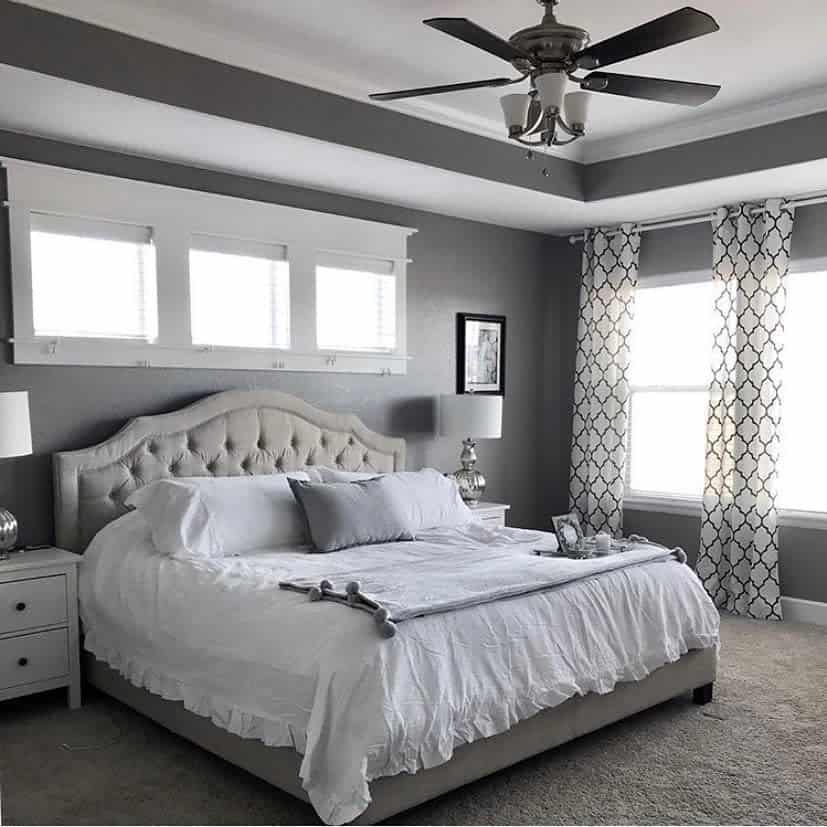
    Look for rugs with intricate patterns or unique weaving techniques that tell a story of craftsmanship and tradition. Vintage curtains can bring a touch of elegance and personality to your windows, whether it’s delicate lace panels or bold, retro prints.

    Additionally, vintage throw pillows with embroidered details or unique fabric textures can serve as eye-catching accents on your sofas or chairs.

    These vintage textiles not only add warmth and coziness but also infuse your contemporary space with a sense of history and character.

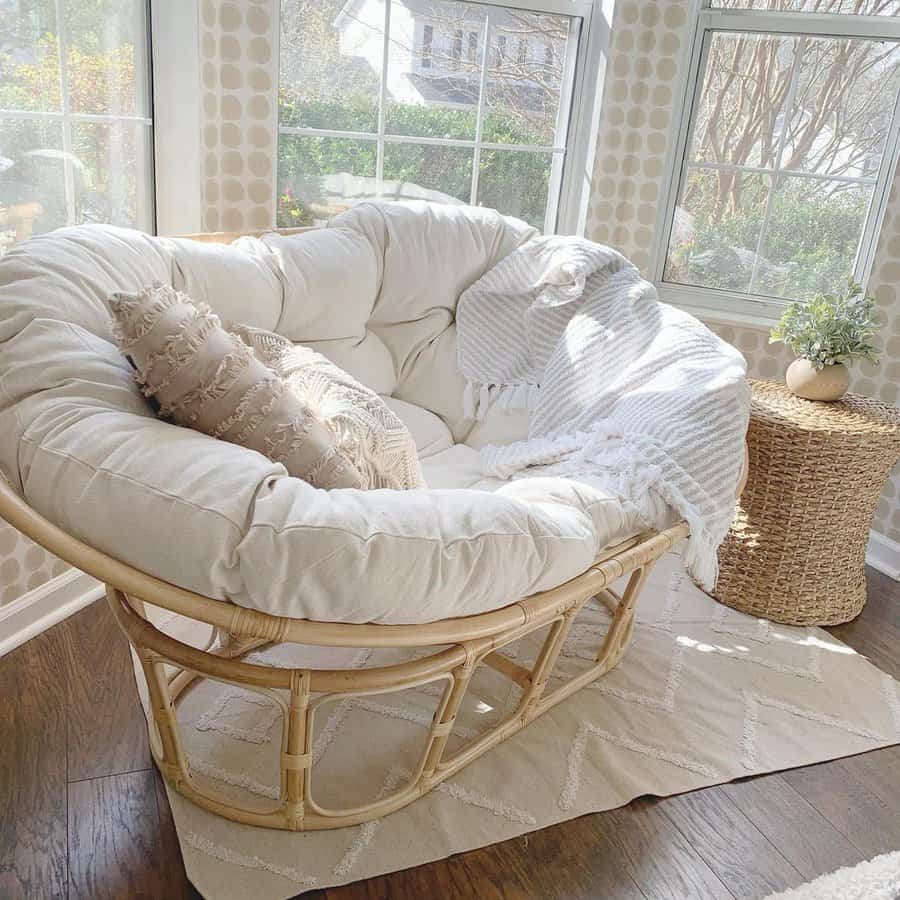
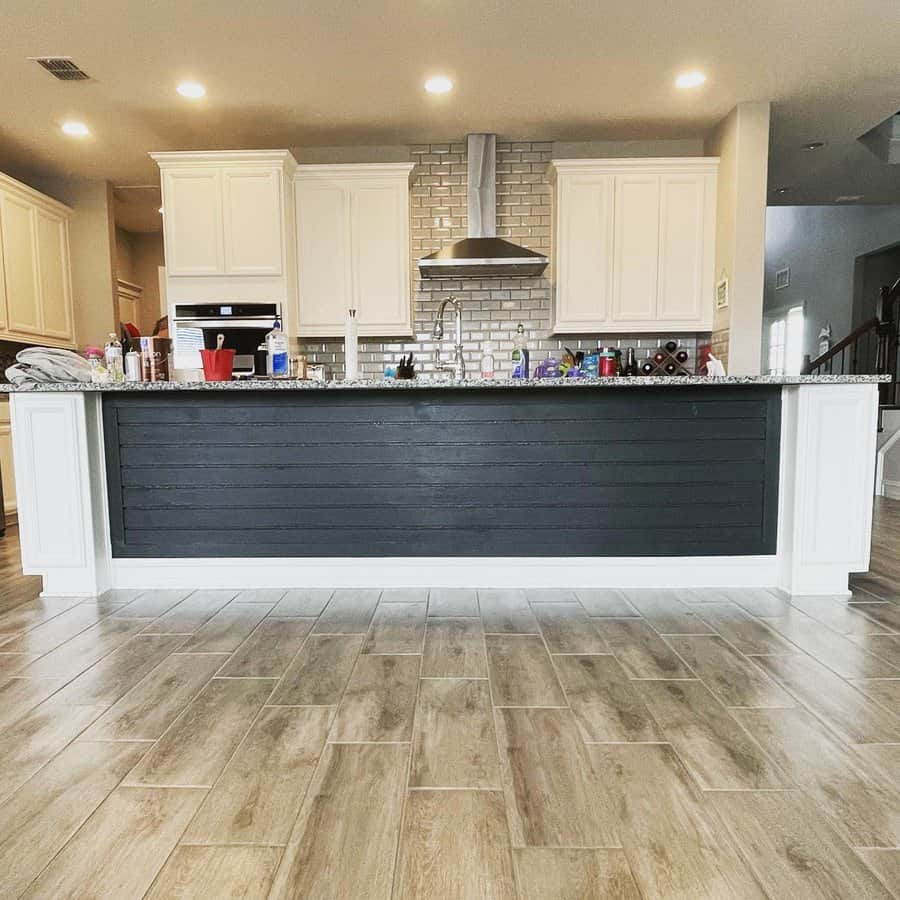
    5. Use the 80/20 Rule of Decorating

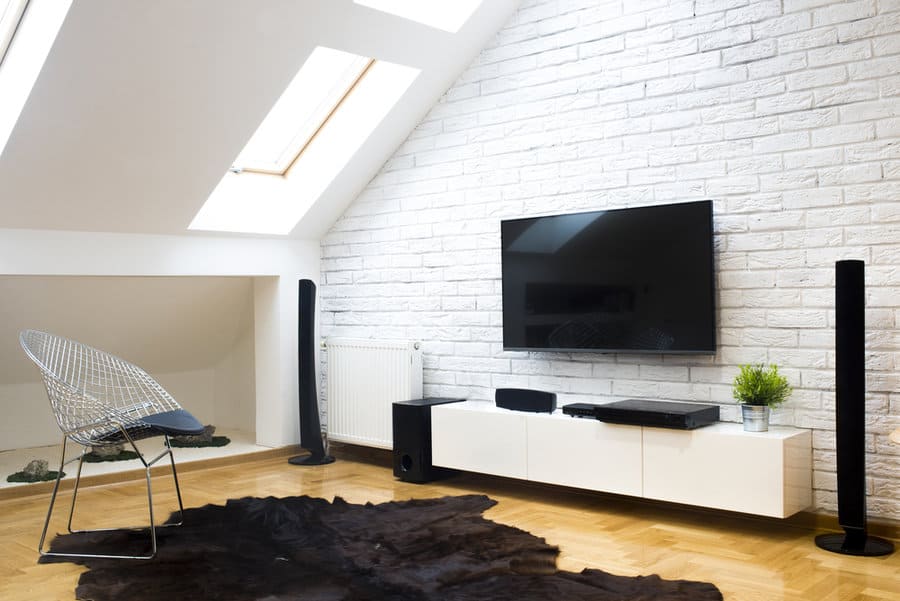
    Embrace the 80/20 rule of decorating: let approximately 80% of your design consist of contemporary elements, while reserving around 20% for vintage pieces.

    This approach ensures a balanced and cohesive look, where the modern backdrop allows your carefully selected vintage treasures to shine as focal points without overwhelming the overall aesthetic. By predominantly featuring contemporary furnishings, colors, and finishes, you create a fresh canvas for your space.

    The remaining 20% of vintage items add depth, character, and a touch of history. Strive for high-quality vintage pieces that complement your design and provide contrast and visual interest, resulting in a curated, stylish, and timeless space.
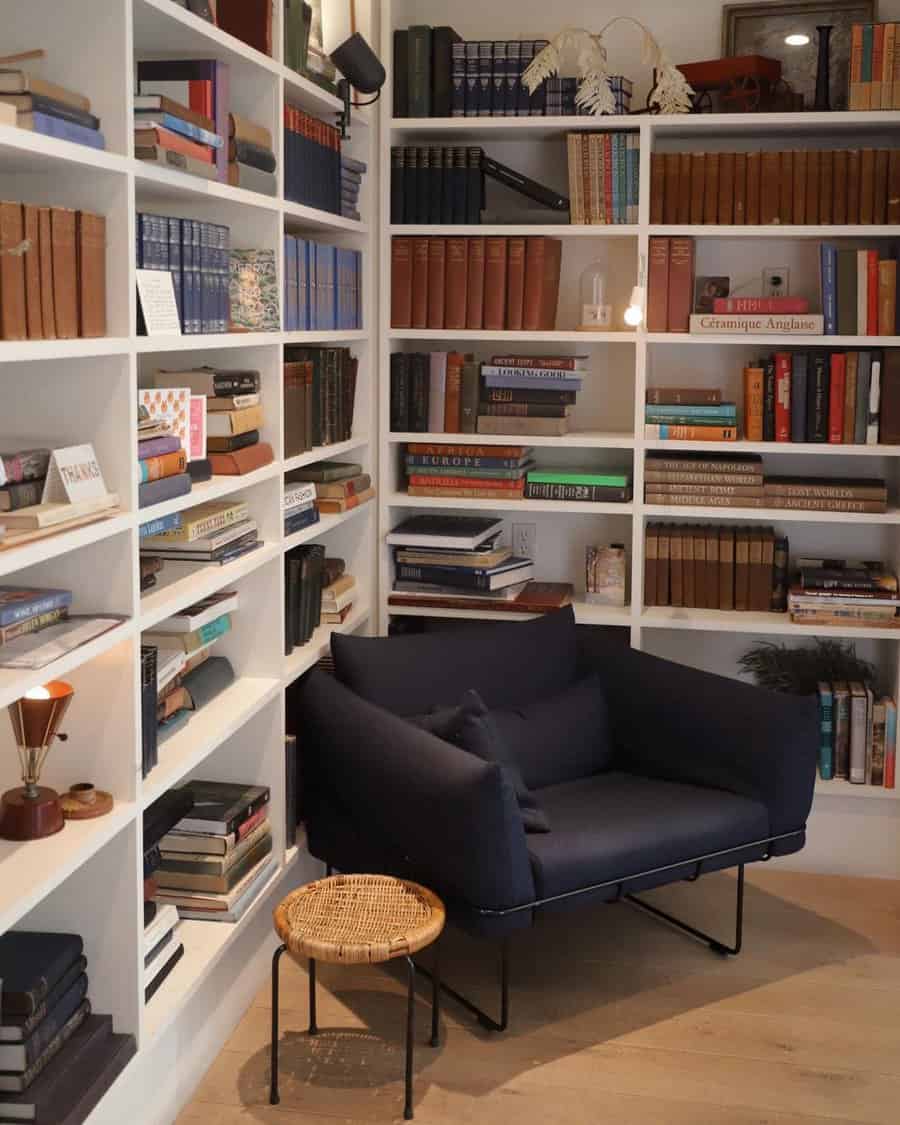
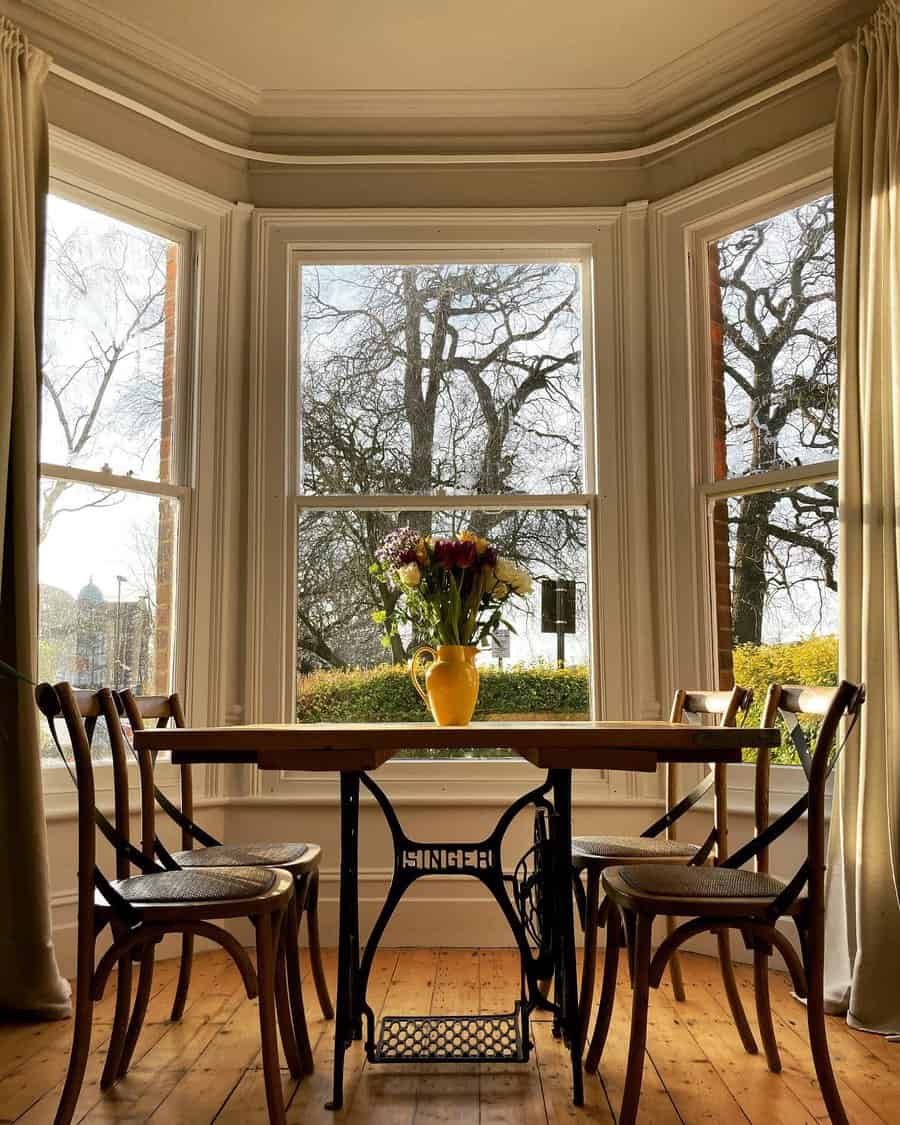
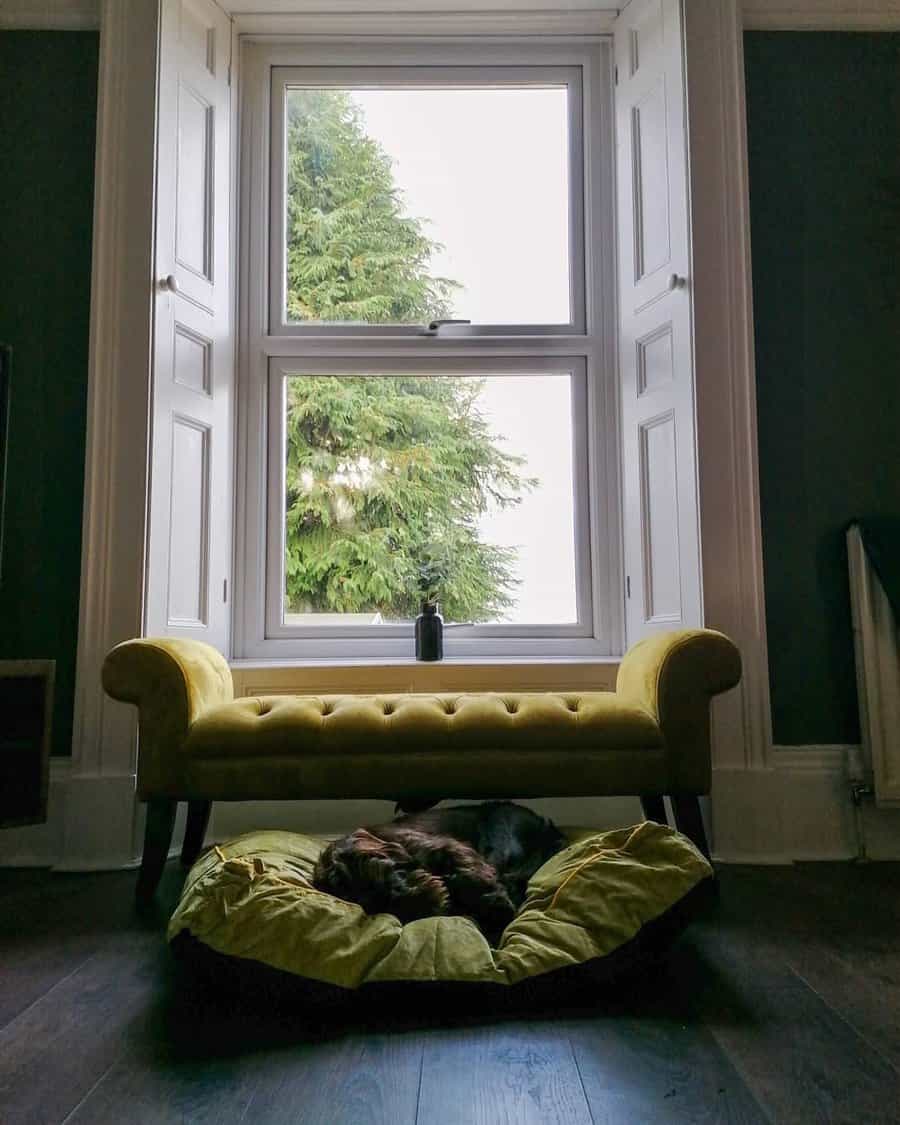
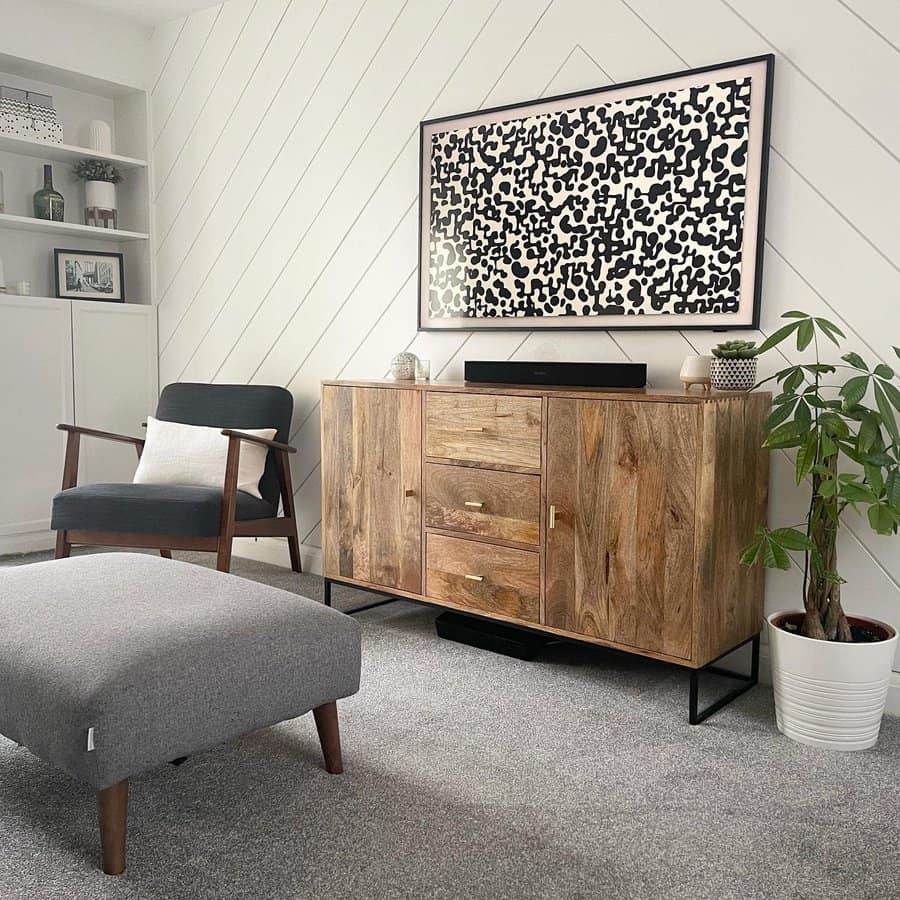
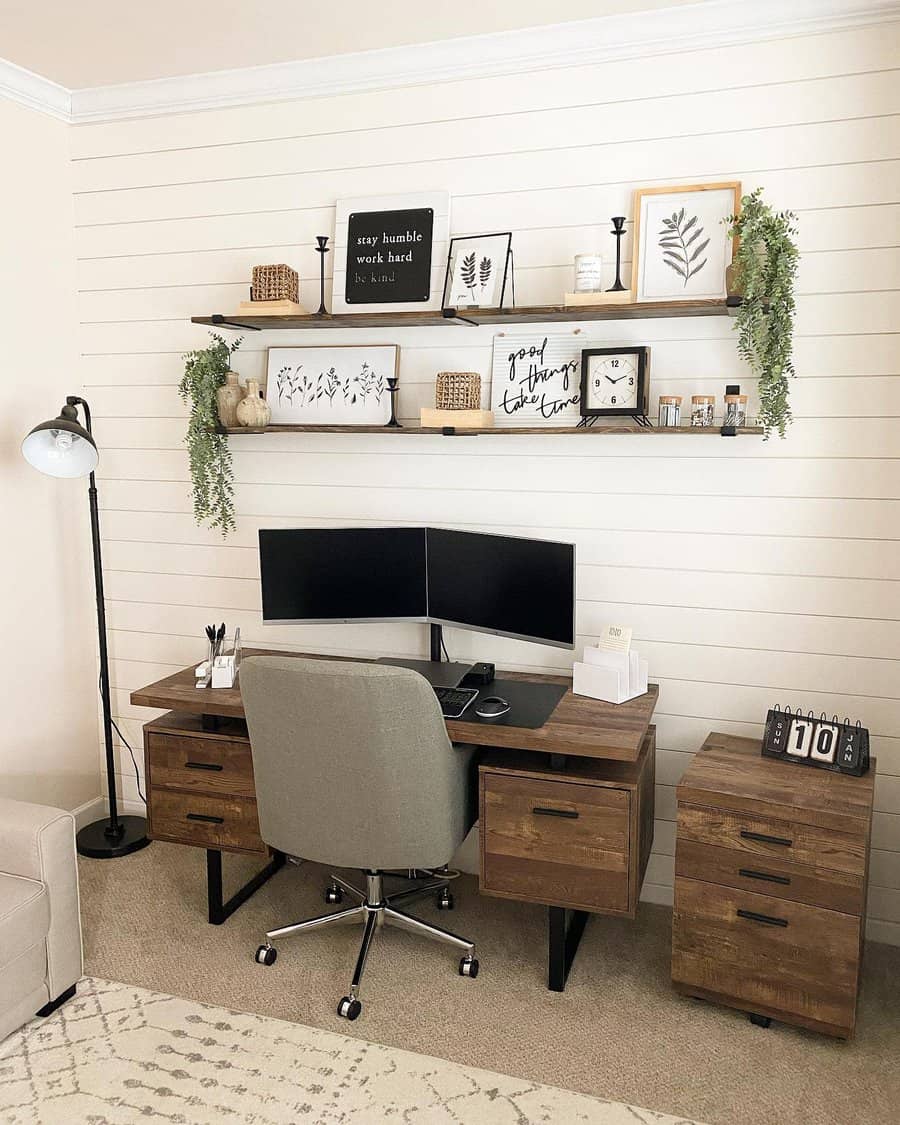
    6. Mix and Match

    Embrace the art of mixing styles and eras in your contemporary home design. Don’t be afraid to pair a modern couch with a vintage coffee table or mix different furniture styles to create a dynamic visual interest.

    Combining elements from different time periods adds a layer of uniqueness and personality to your space. Look for opportunities to juxtapose sleek contemporary pieces with the character and charm of vintage items. This blending of styles creates a captivating contrast that sparks intrigue and creates a visually engaging environment.

    Be adventurous with your choices, and let the mix and match approach unleash your creativity in designing a truly one-of-a-kind living room or any other space in your home.

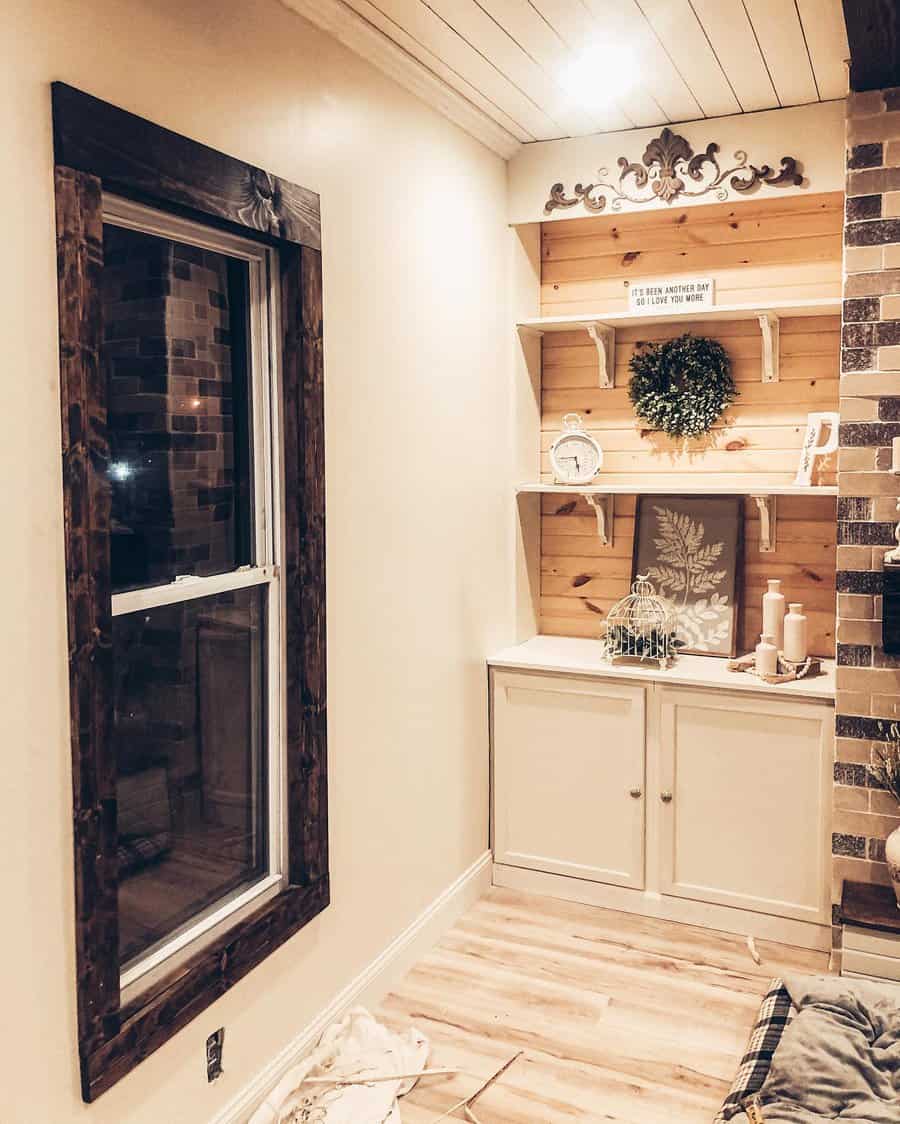
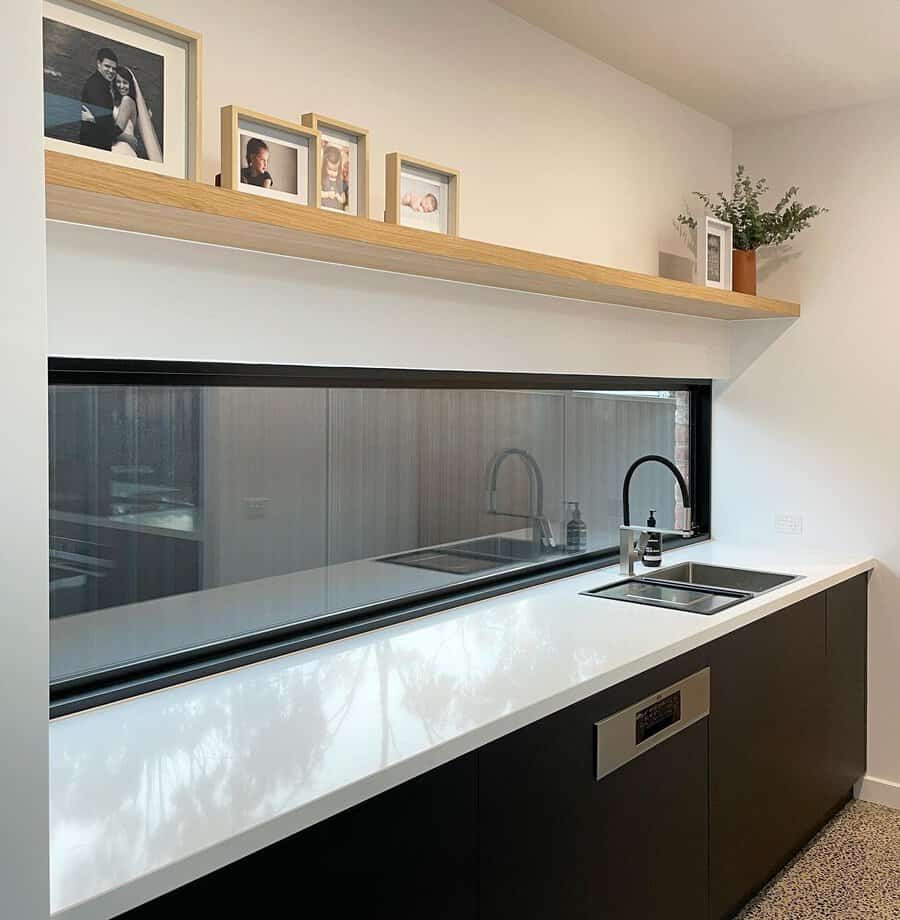
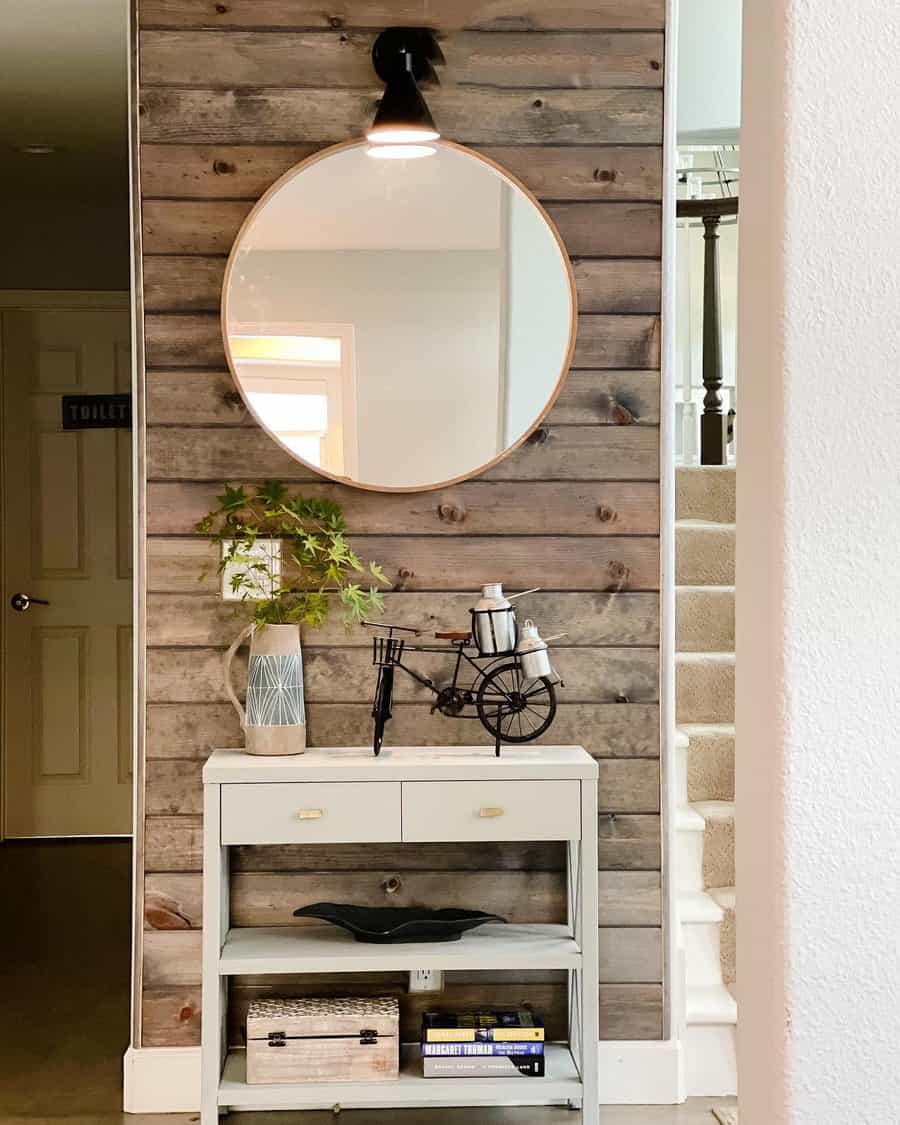
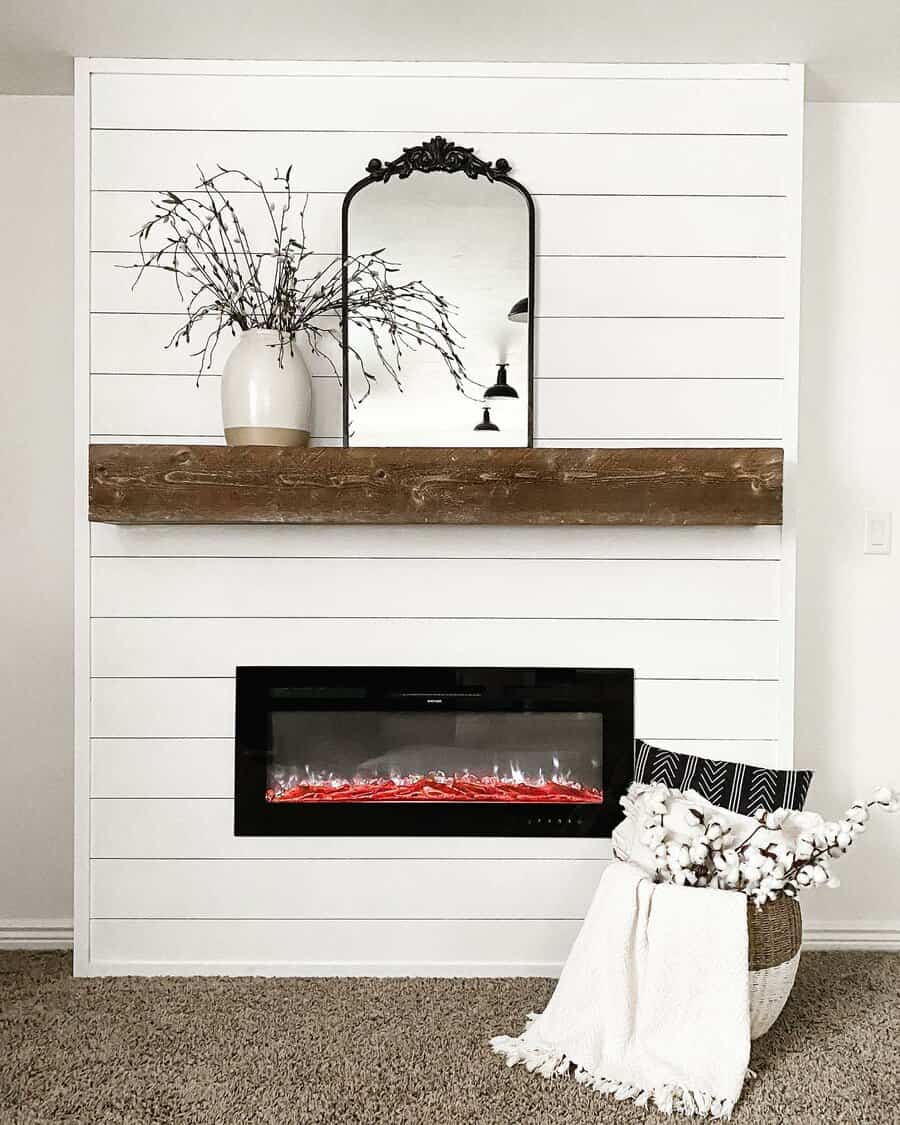
    7. Accessorize Smartly

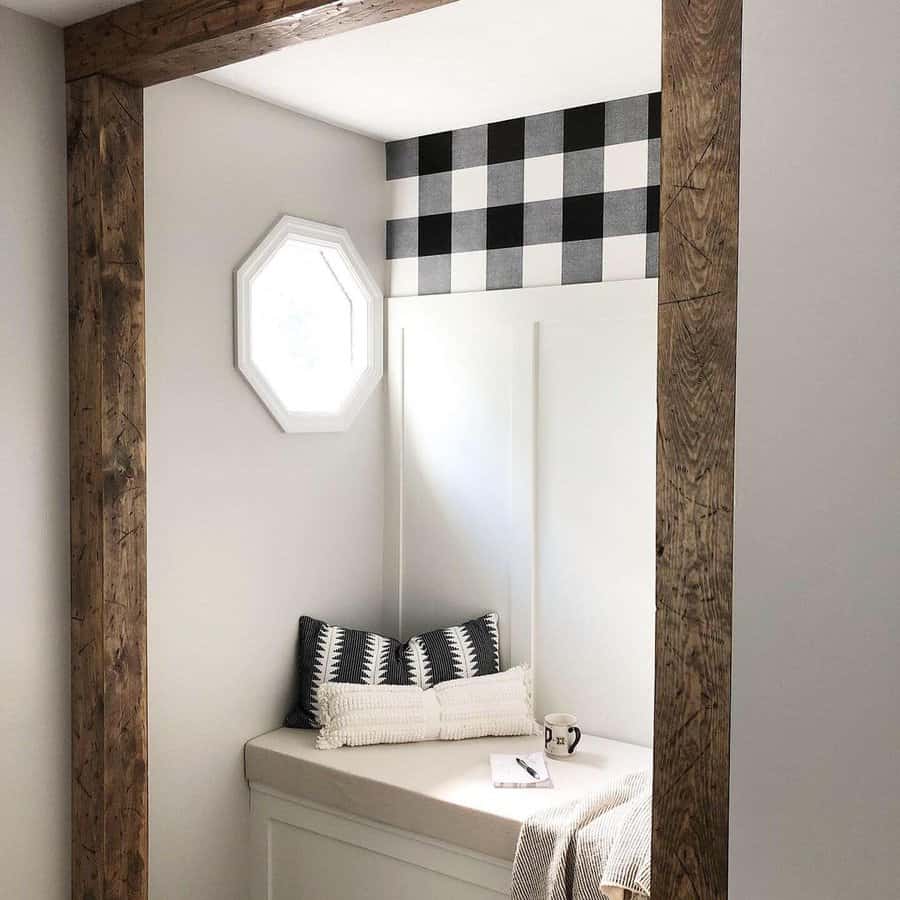
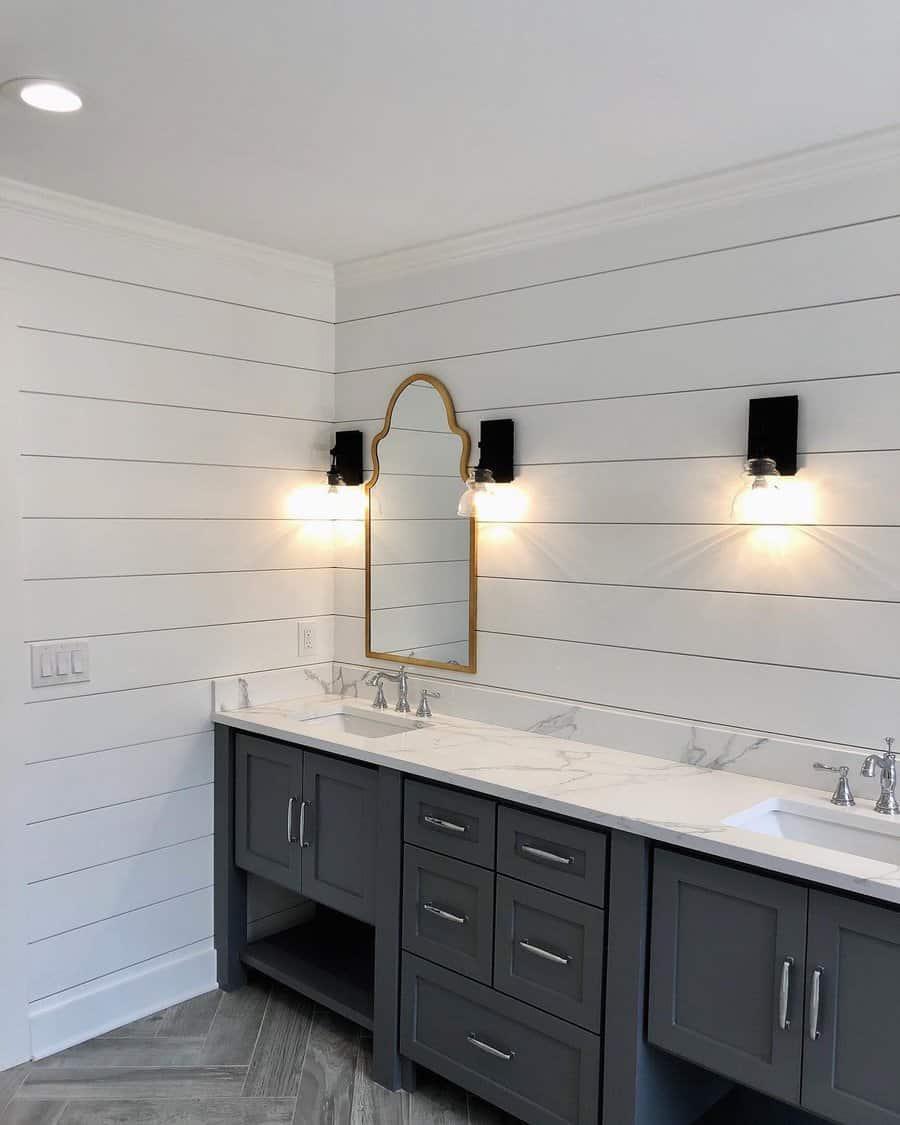
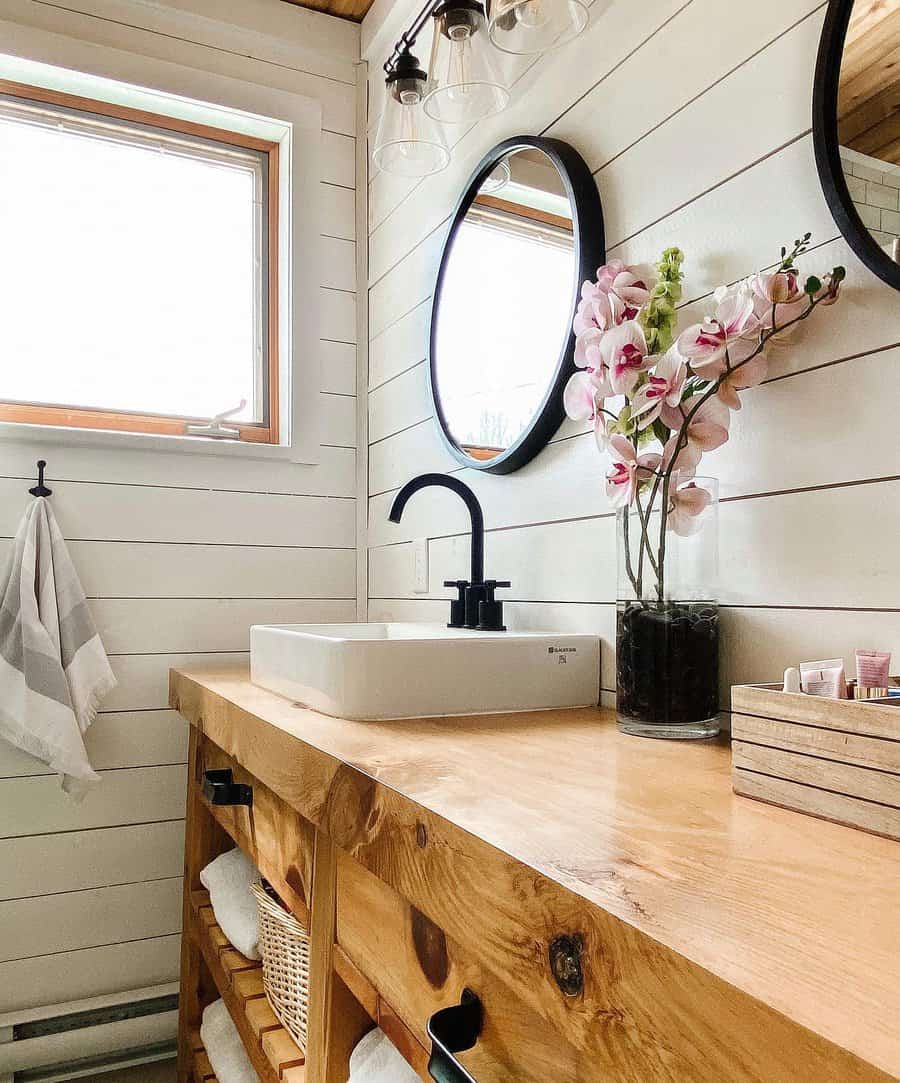
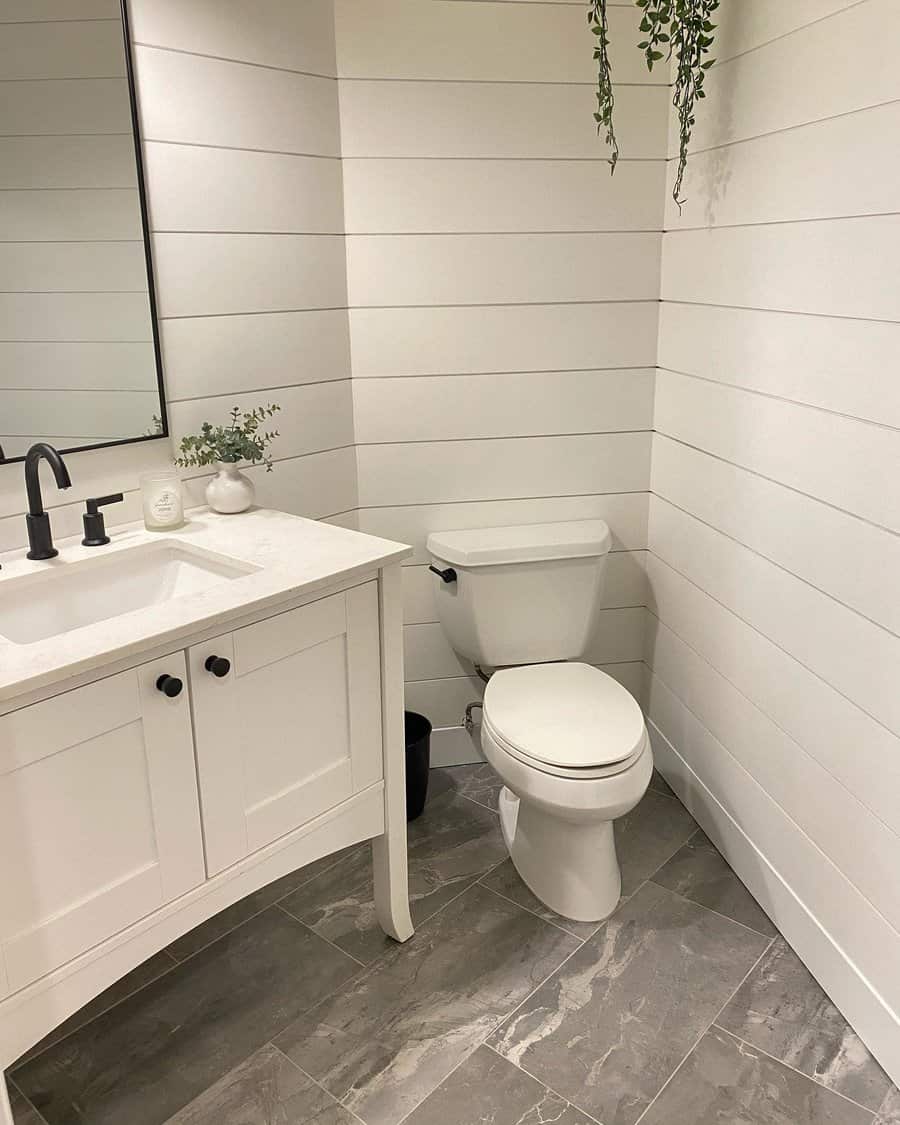
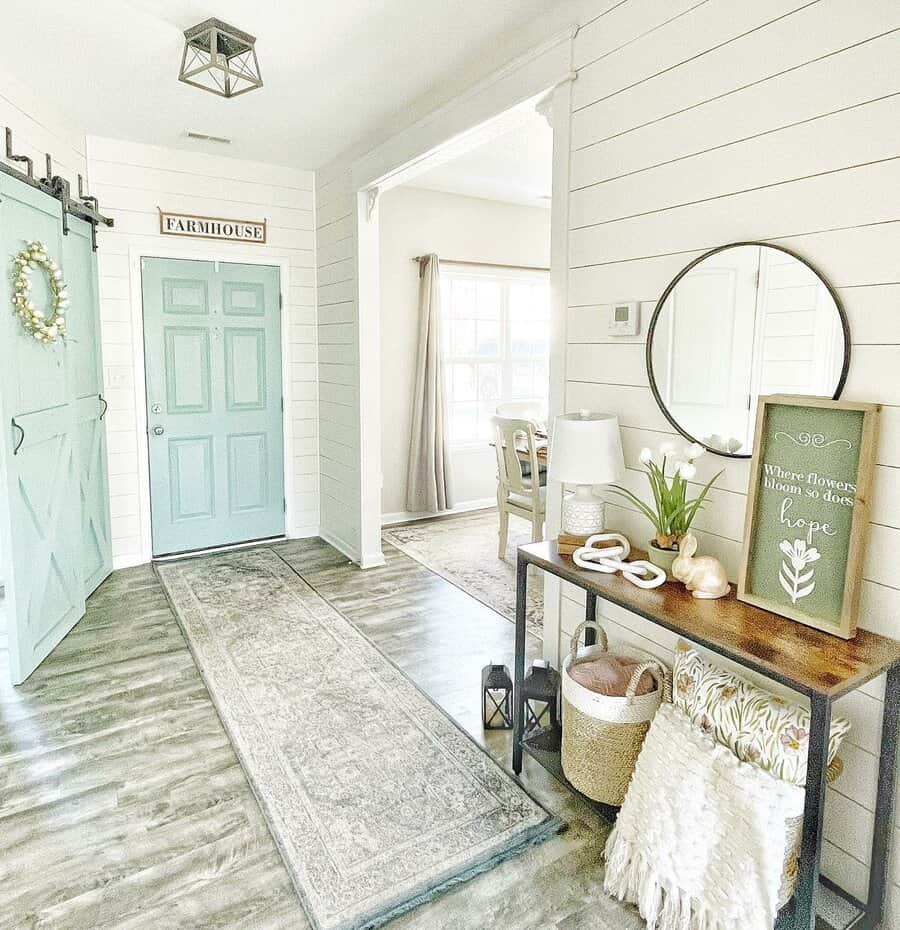
    Add a touch of vintage charm to your contemporary space through smart accessorizing. Vintage accessories such as mirrors, clocks, or vases can act as statement pieces that infuse your home with character without overwhelming the overall design.

    Opt for unique and eye-catching vintage items that reflect your personal style and complement your contemporary decor. A beautifully ornate vintage mirror can serve as a captivating focal point on a feature wall, while a vintage clock adds a nostalgic touch and functionality to your space.

    Vintage vases with intricate details or retro designs can bring a pop of color and artistic flair to your shelves or tabletops.

    The key is to choose accessories that strike a balance between vintage charm and contemporary aesthetics, enhancing the visual appeal and personality of your home.
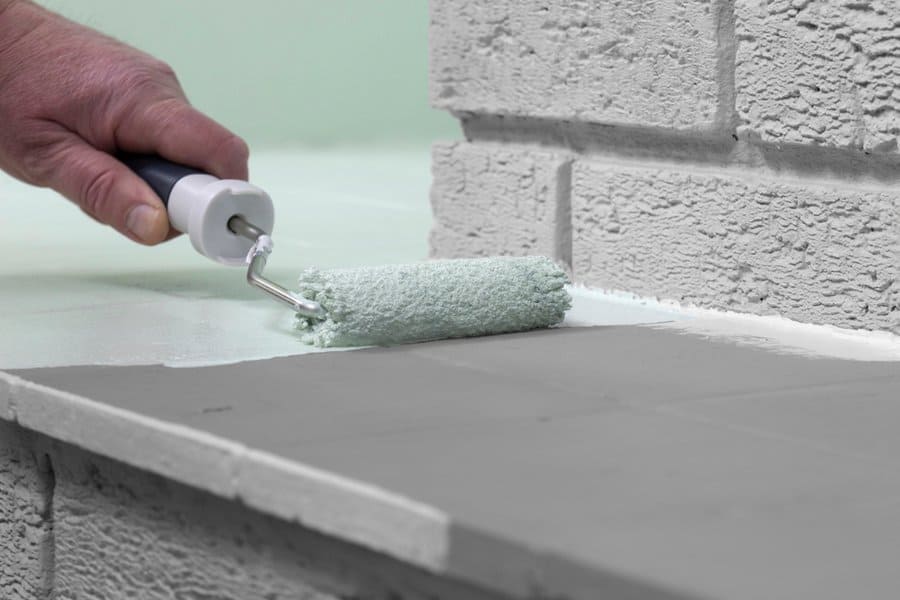
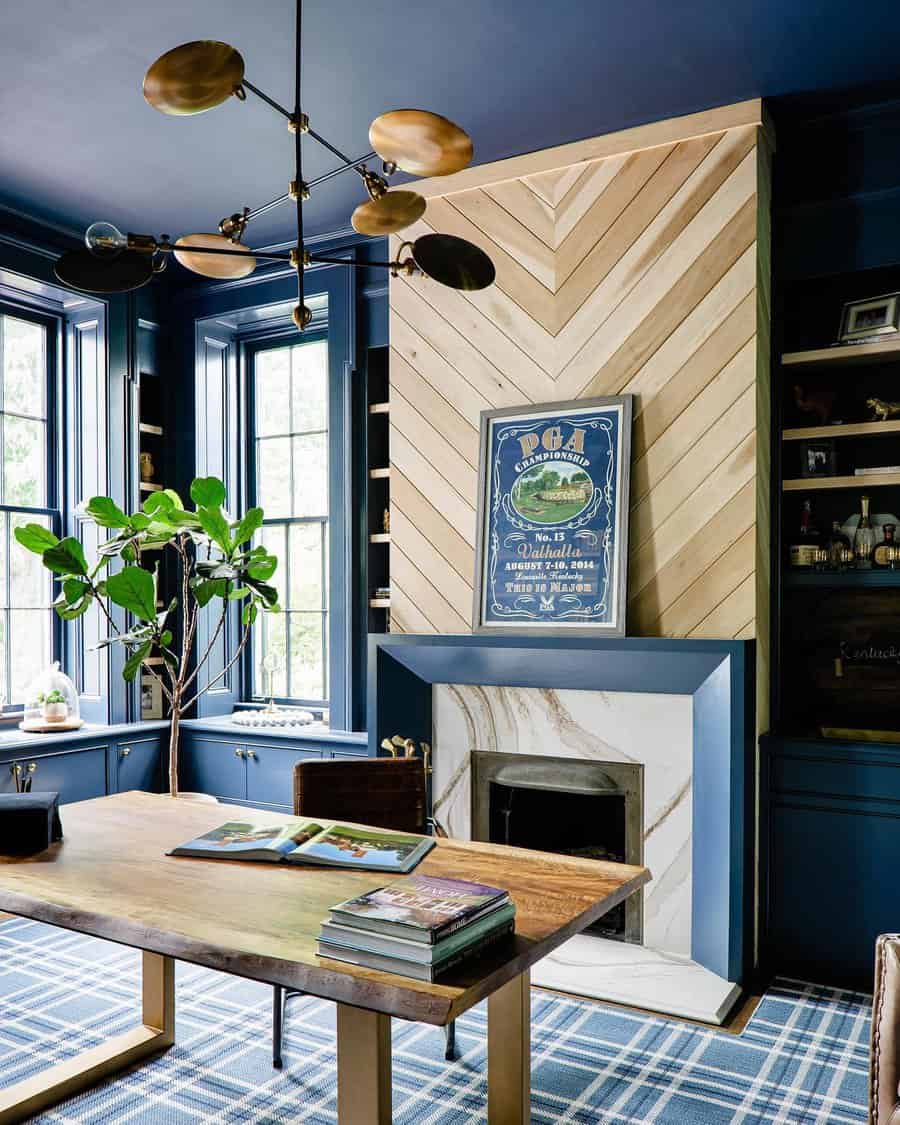
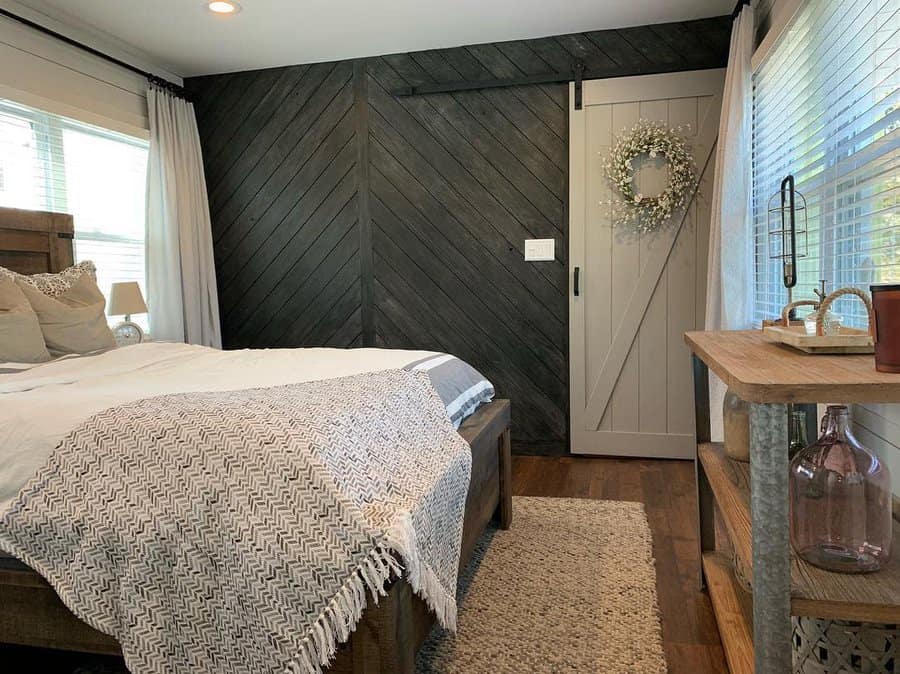
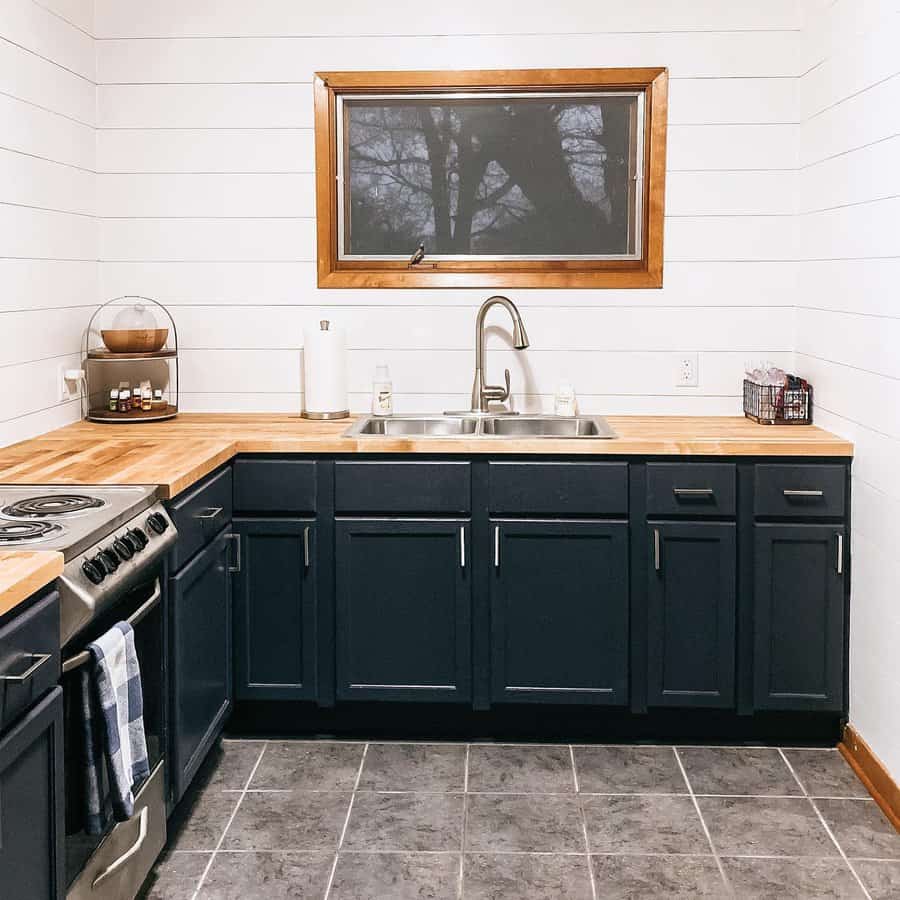
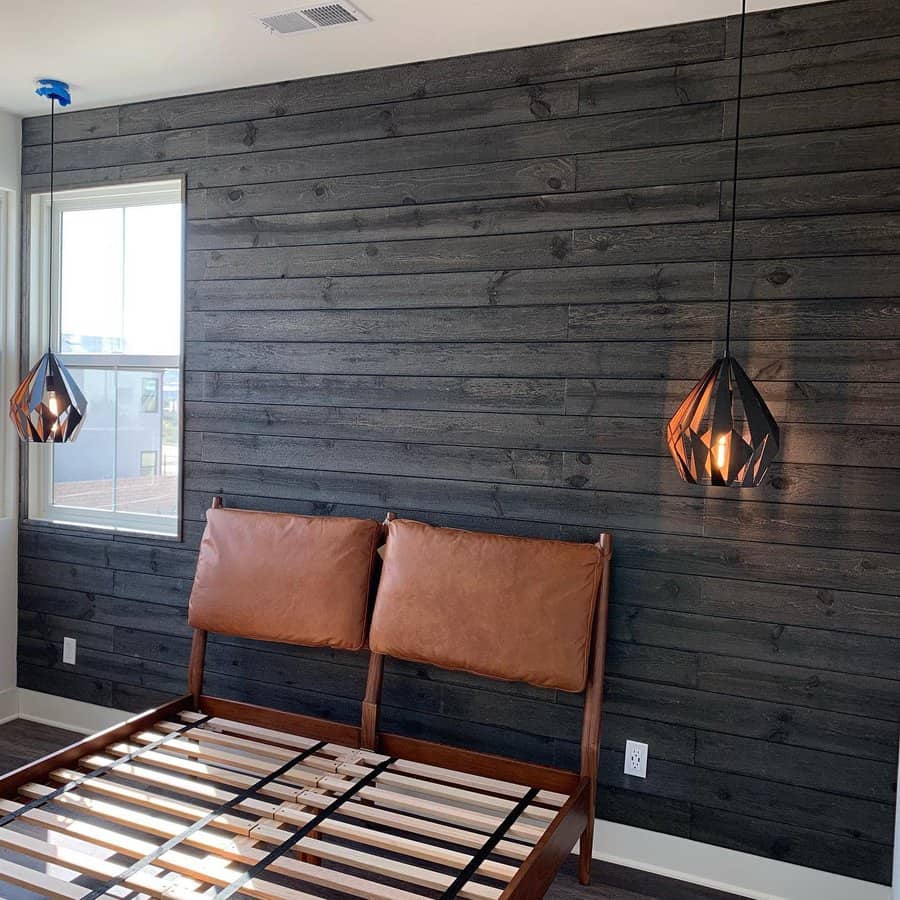
    8. Play with Color

    Harness the power of color to harmonize vintage and modern elements seamlessly. Whether you decide to preserve the original color of your vintage piece or give it a modern makeover, it’s essential to ensure that it complements the overall color scheme of your space.

    Consider the existing palette and select colors that create a cohesive and balanced look. If your vintage piece boasts a vibrant or unique hue, let it take center stage by keeping the surrounding elements more neutral.

    On the other hand, if you choose to update the color of a vintage item, opt for shades that align with your contemporary design while still honoring its timeless appeal.

    By playing with color, you can create a visual connection between vintage and modern elements, establishing a harmonious and captivating aesthetic throughout your home.

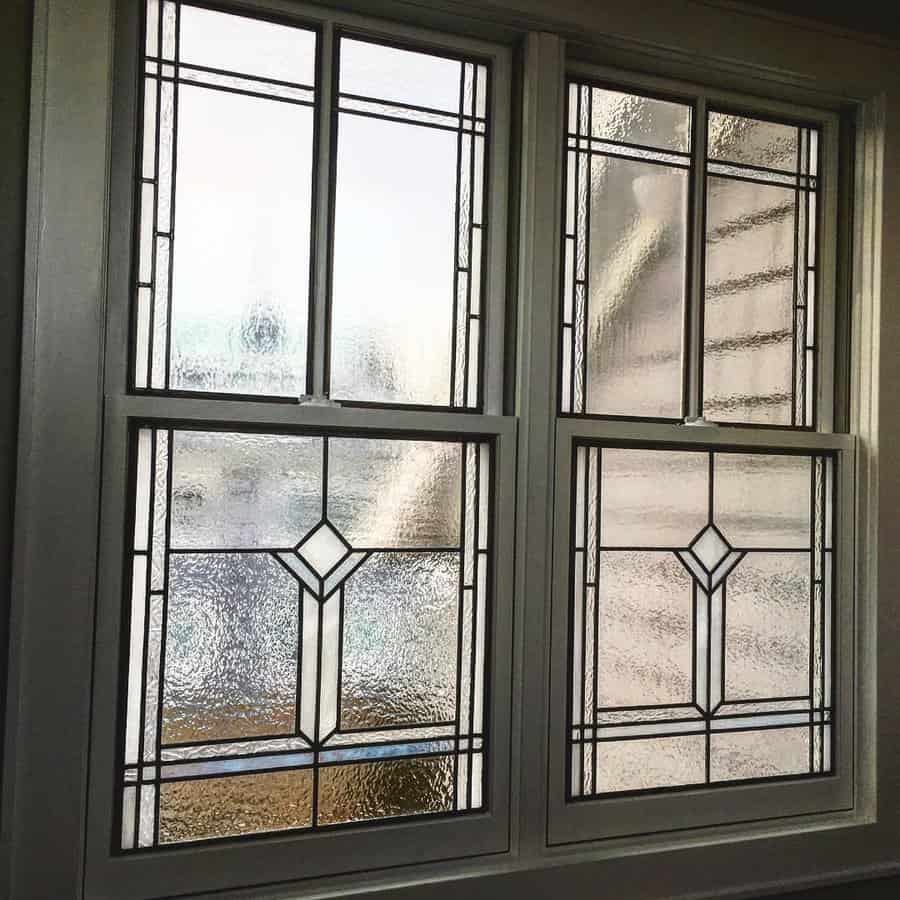
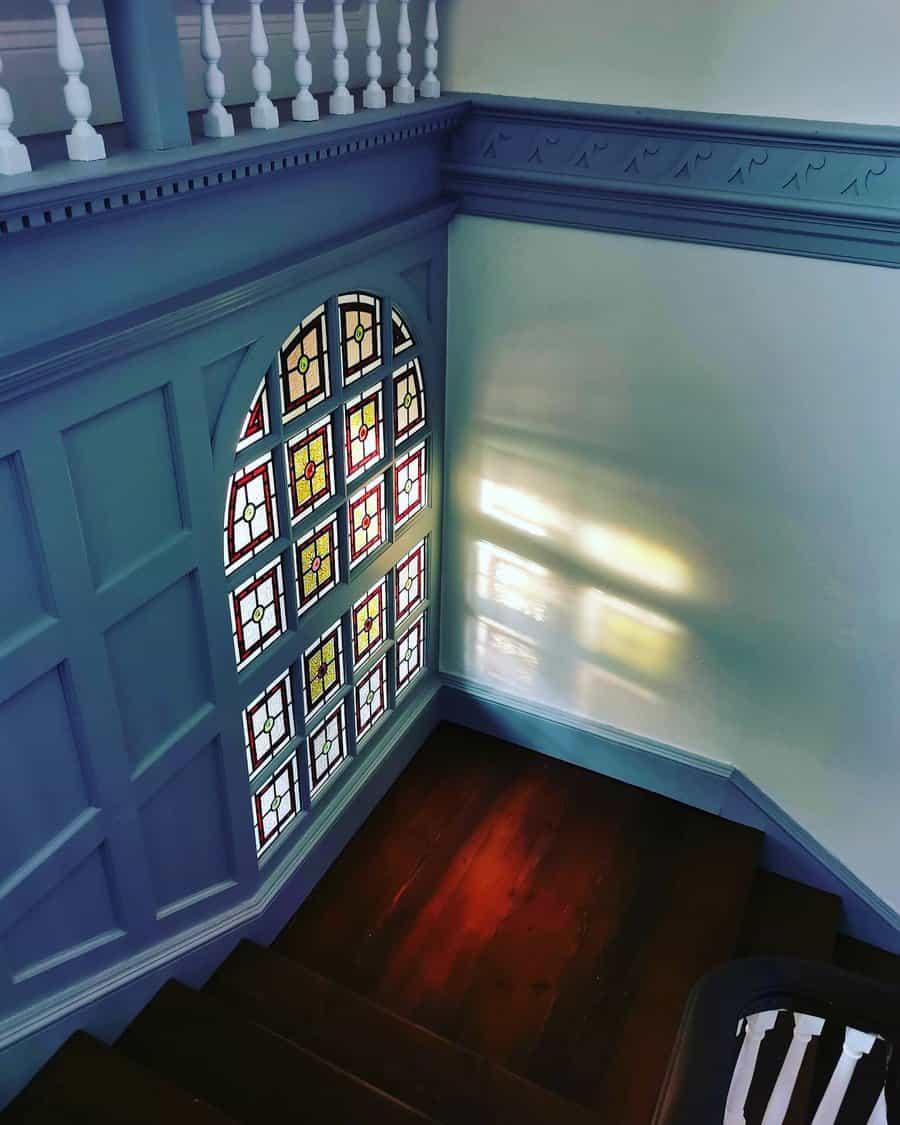
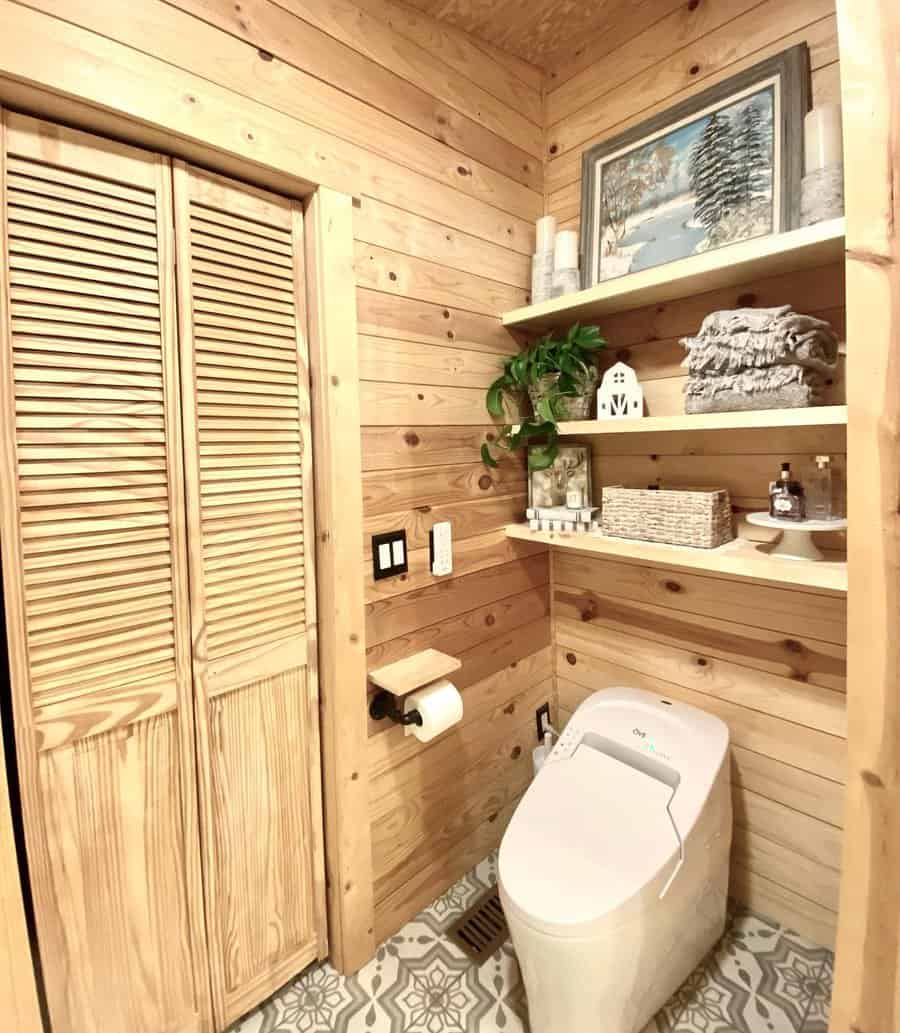
    9. Respect the Originality

    In the pursuit of blending vintage and contemporary elements, it’s crucial to honor and respect the originality of vintage pieces. Each vintage item carries its own history, character, and unique story.

    Allow these pieces to shine in their inherent uniqueness. Avoid altering or modifying them excessively to fit a particular aesthetic. Instead, embrace the authenticity and charm they bring to your space.

    Highlight the original features and craftsmanship that make them special, whether it’s the intricate woodwork of a vintage cabinet or the patina of an antique brass fixture.

    By appreciating and preserving the originality of vintage pieces, you not only maintain their value but also celebrate their timeless appeal in a contemporary context.

    10. Experiment

    When it comes to incorporating vintage pieces into your contemporary home design, don’t be afraid to experiment. Design has no set rules, and if a vintage piece feels right in your space, even if it’s unconventional, go for it. Your home should be a reflection of your personal taste and style.

    Trust your instincts and explore creative possibilities. Mix unexpected combinations, embrace eclectic pairings, and let your imagination run wild. Incorporating a unique vintage find can bring a sense of individuality and personal expression to your space. Whether it’s an unconventional piece of furniture, an intriguing vintage artwork, or a whimsical accessory, let your intuition guide you.

    Ultimately, it’s about creating a home that resonates with you, tells your story, and sparks joy every time you walk through the door. So, dare to be different, take risks, and let your creativity flourish as you experiment with vintage pieces in your contemporary home design.

  • Transforming Your Home into a Wellness Oasis

    Transforming Your Home into a Wellness Oasis

    In an ever-evolving world where stress and anxiety have become our constant companions, it is more important than ever to cultivate a space of tranquility and wellness in our lives. Your home should not just be a dwelling place; it should be a sanctuary that promotes holistic wellbeing, a refuge that rejuvenates your mind, body, and soul. With the right tools and mindset, you can transform your home into a wellness oasis that radiates positivity and encourages healthy living.

    This article serves as your comprehensive, step-by-step guide to achieving this transformation. Whether you’re starting from scratch or seeking to enhance your existing environment, this guide will empower you to create a haven of comfort, balance, and vitality. Through a blend of mindfulness, sustainable design, and wellness-oriented practices, let’s embark on this journey towards nurturing a home that reflects your health goals and supports your wellbeing.”

    Let’s dive in, and start your home’s transformation today!

    [view_toc]

    1. Understanding the Importance of a Wellness-oriented Home

    The Impact of Environment on Wellbeing

    Our environment plays a crucial role in determining our physical and emotional wellbeing. Each aspect, from the air we breathe to the sounds we hear and the colors we see, can significantly influence our mood, stress levels, productivity, and overall health.

    Living in a cluttered, disorganized, or chaotic environment can lead to feelings of distress and anxiety. On the other hand, a serene, well-organized, and calming environment can enhance our sense of peace, comfort, and happiness. By understanding the intricate relationship between our environment and wellbeing, we can make conscious choices that uplift our physical and mental health.

    The Value of Home in Holistic Health

    Our home holds a unique value in the pursuit of holistic health. It is where we start and end our day, find solace from the world’s stresses, and cultivate deep connections with our loved ones. It serves as the backdrop of our lives, making its role in our wellness journey irreplaceable.

    A wellness-oriented home doesn’t just facilitate better physical health; it also promotes emotional balance, spiritual growth, and mental resilience. By providing a restorative environment, it nurtures us, helps us rejuvenate, and builds a strong foundation for a healthy and fulfilling lifestyle. The importance of aligning our home with our health and wellness goals cannot be overstated.

    2. Assessing Your Current Space

    Identifying Stress Triggers

    Before starting your transformation, it’s essential to identify the potential stress triggers within your current space. These could include clutter, insufficient natural light, noise pollution, or color schemes that lack calming effects.

    Take time to observe how different areas of your home affect your mood and wellbeing. Do certain spaces make you feel tense or uneasy? Are there rooms where you feel notably calm and relaxed? Recognizing these stress triggers will guide your journey to a serene and harmonious living environment.

    Evaluating the Flow of Your Home

    Assessing the flow of your home is another pivotal aspect of creating a wellness oasis. The flow refers to the ease and comfort with which you move through and interact with your space.

    Consider whether your current layout allows for adequate movement and activities promoting wellness, such as yoga or meditation. Does your furniture arrangement facilitate smooth navigation? Is there a natural progression from one area of your home to another, or does it feel disjointed?

    The flow of your home significantly impacts your comfort and relaxation. By evaluating and enhancing it, you can boost your space’s functionality and overall sense of harmony.

    3. Creating a Mindful Floor Plan

    Making Room for Movement

    Movement plays a vital role in our overall wellbeing. A wellness-focused home should accommodate this by offering enough space for exercises, stretches, or activities like yoga or dance.

    Think about how you can reconfigure your floor plan to promote movement. Could you create a dedicated workout area, or clear some space in your living room for morning stretches? Perhaps there’s room for an open area where you can engage in mindful activities such as tai chi. The aim is to make physical activity an inviting and accessible part of your daily routine.

    Designing Spaces for Relaxation

    A wellness-oriented home also needs spaces explicitly designed for relaxation. This could be a quiet reading nook, a cozy meditation corner, or a peaceful outdoor space for unwinding and connecting with nature.

    These relaxation spaces should be inviting and calming, radiating peace and tranquility. Keep in mind factors like natural light, views, noise levels, and comfort when designing these areas. By creating these dedicated spots for downtime, you encourage regular rejuvenation breaks, fostering a healthier balance between activity and rest.

    4. Incorporating Natural Elements

    The Power of Plants for Indoor Air Quality

    Incorporating indoor plants into your home goes beyond aesthetics; it’s a proactive step towards wellness. Plants can significantly improve indoor air quality by absorbing toxins, increasing humidity, and producing oxygen.

    The natural greenery of plants can also create a calming atmosphere, reduce stress, and boost mood. Consider air-purifying plants like spider plants, snake plants, or peace lilies to enhance these benefits. A home adorned with vibrant, lush plants is not just visually appealing, but also fosters a healthier, more relaxing environment.

    Leveraging Natural Light and Views

    Natural light is an essential component in transforming your home into a wellness sanctuary. Regular exposure to natural light can regulate our body’s circadian rhythm, leading to improved sleep quality and mood.

    Try to maximize the inflow of natural light by using light curtains, installing mirrors to reflect sunlight, or simply keeping your windows clean. If you have the luxury of a pleasant view, make the most of it. A window overlooking a garden, a tree, or the sky can offer calming visual stimulation, further amplifying your home’s wellness quotient.

    5. Choosing the Right Color Palette

    Colors that Promote Calm and Serenity

    The psychology of color significantly impacts our emotional and mental wellbeing. Choosing the right colors can foster calm and serenity, making them perfect for relaxation or sleep spaces.

    Blue shades, often linked with calmness, can help alleviate anxiety. Greens, reminiscent of nature, can cultivate peace and tranquility. Neutral hues like whites, beiges, and grays can create a serene, restful atmosphere. Incorporate these colors when selecting paints, furniture, or decor items.

    Colors that Stimulate Energy and Creativity

    Certain colors can also energize and stimulate creativity, suitable for workspaces, exercise areas, or places for creative pursuits. Warm colors such as reds, oranges, and yellows can invigorate and stimulate activity.

    Brighter tones can spur creativity and are excellent choices for home offices or art studios. Balance is the cornerstone of a wellness-oriented home, so ensure to mix calming shades with vibrant ones based on each room’s purpose.

    6. Harnessing the Power of Aromatherapy

    Selecting Essential Oils for Your Home

    Aromatherapy can significantly influence our wellbeing by reducing stress, promoting sleep, and uplifting mood. At the heart of aromatherapy are essential oils, and selecting the right ones can transform your home into a wellness sanctuary.

    For a relaxing atmosphere, consider calming scents like lavender, chamomile, or ylang-ylang. To stimulate focus and energy, opt for invigorating oils such as lemon, peppermint, or rosemary. Always ensure to use these oils safely, ideally in a diffuser, following the recommended dilution rates.

    Creating Your Own Signature Home Scent

    Creating a signature home scent is a personal and creative journey that enhances your home’s ambiance. By mixing and matching different essential oils, you can find a unique combination that resonates with you and reflects the atmosphere you wish to create.

    You might prefer a refreshing blend of citrus scents, a soothing mix of floral notes, or an earthy combination of woody aromas. By crafting a signature scent, you add a unique, personal touch to your wellness oasis, making it truly your own.

    7. Curating a Sound Environment

    The Effect of Noise on Wellbeing

    Noise, or the lack thereof, can have a profound impact on our wellbeing. Consistent exposure to high noise levels can lead to increased stress, hindered concentration, poor sleep quality, and even long-term health issues.

    On the other hand, a peaceful, quiet environment can promote relaxation, improve focus, and contribute to better sleep. Understanding the impact of noise on your wellbeing is the first step towards curating a sound environment that fosters wellness.

    Utilizing Soundscapes and White Noise

    Soundscapes and white noise are potent tools for creating a calming auditory environment. Soundscapes, like the soothing melodies of birds, waves, or forest ambiances, can establish a peaceful atmosphere and mask distracting external sounds, particularly useful in urban settings.

    White noise, a consistent sound containing equal intensities of all frequencies, is excellent for drowning out intermittent background noise. It can enhance sleep quality or encourage focused work sessions. Devices or apps producing white noise make it easy to incorporate this soothing backdrop into your home environment.

    8. Creating Wellness Focused Zones

    Designing a Zen Meditation Room

    A Zen meditation room is a space within your home dedicated to quiet, mindful reflection. This room should be free from distractions and decorated with elements that promote serenity and peace.

    A simple color palette, comfortable seating like floor cushions or a meditation bench, and calming elements such as a small water feature, soft lighting, or a candle could be included.

    Setting Up a Home Fitness Corner

    A home fitness corner is an area dedicated to physical activity. Depending on your fitness preferences, this might include workout equipment like weights, a yoga mat, resistance bands, or even more substantial equipment like a treadmill or exercise bike.

    A wall mirror can also be useful for checking your form during exercises. Remember to also consider factors like ventilation and natural light. The goal is to make this space inviting, encouraging you to maintain regular physical activity as part of your wellness journey.

    Crafting a Serene Sleep Environment

    Your sleeping environment significantly impacts your sleep quality, a key component of overall wellness. This space should be designed to promote deep, restful sleep. Consider a comfortable, supportive mattress and pillows, blackout curtains or shades to keep the room dark, and soothing colors like blues or neutrals.

    Reduce clutter and remove any stress-inducing items. You might also consider a white noise machine or fan to provide consistent, soothing background noise. Creating a serene sleep environment supports healthy sleep habits and contributes to your overall sense of wellbeing.

    9. Sustainable and Healthy Home Materials

    Understanding the Impact of Toxic Home Materials

    Many common materials used in homes can contain substances that are harmful to both our health and the environment. These may include volatile organic compounds (VOCs) in paint, formaldehyde in pressed-wood furniture, or phthalates in vinyl flooring.

    Over time, these substances can off-gas into our homes, impacting indoor air quality and potentially causing a range of health issues from headaches and allergies to more serious long-term effects. It’s essential to understand the impact of these toxic home materials as part of creating a wellness-focused home environment.

    Choosing Eco-Friendly and Non-Toxic Options

    Fortunately, there are an increasing number of eco-friendly and non-toxic alternatives available for home use. When selecting paints, look for those labeled low-VOC or zero-VOC. For furniture, consider options made from solid wood, certified sustainable sources, or recycled materials. Flooring can be made from natural materials like hardwood, cork, or bamboo, or from recycled or sustainable sources.

    Always check for any certifications that indicate the product is free from harmful chemicals.

    10. Maintaining Your Wellness Oasis

    Daily Wellness Practices

    Creating a wellness oasis is just the start; maintaining it involves incorporating daily wellness practices. This could include a regular meditation or yoga session in your Zen room, a workout routine in your fitness corner, or a calming bedtime ritual to enhance your sleep.

    Remember to also utilize your essential oils for aromatherapy, update your soundscapes to reflect your mood or needs, and care for your indoor plants to keep them thriving.

    Engaging in these daily practices can help to reinforce your commitment to wellness and ensure that your home continues to serve as a supportive wellness oasis.

    Regular Home Care and Maintenance

    Just like any home, a wellness-focused home requires regular care and maintenance. This might involve replacing air filters to maintain good air quality, regular cleaning to keep spaces tidy and inviting, or periodically refreshing your decor to maintain the desired ambiance.

    In a wellness-focused home, consider using natural cleaning products to reduce exposure to harsh chemicals. Regular maintenance not only keeps your home looking its best, but it also contributes to a healthier, more enjoyable living environment.

    Read also: 42 Backyard Oasis Ideas

  • How to Infuse Minimalism into Your Home Design

    How to Infuse Minimalism into Your Home Design

    Welcome to the world of minimalism in home design, where less truly is more. In this article, we will explore the principles and techniques of infusing minimalism into your living space.

    From decluttering to selecting furniture with clean lines, get ready to create a harmonious environment that promotes calmness and mindfulness.

    Let’s embark on a journey of simplicity and discover how to transform your home into a minimalist sanctuary.

    [view_toc]

    1. Decluttering: Streamline your space by removing unnecessary items

    Decluttering is the essential first step to infusing minimalism into your home design. Begin by assessing each room and identifying items that serve no purpose or hold no sentimental value. Donate or discard these belongings to create a sense of spaciousness and order.

    Start with smaller areas like countertops, shelves, and tabletops. Clear away excess knick-knacks, old magazines, or unused decorative items. Store items that are rarely used or out of season, reducing visual distractions.

    In closets and drawers, take a systematic approach. Sort through clothes, accessories, and shoes, keeping only what you genuinely wear and love. Consider adopting a capsule wardrobe or rotating seasonal items to maintain simplicity.

    In the kitchen, eliminate duplicate utensils, gadgets, and mismatched dishware. Keep only the essential tools and appliances that you frequently use. Create a designated space for each item, promoting efficiency and ease of access.

    Apply the same principles to your living room, bedrooms, and home office. Simplify your furniture arrangement, removing any unnecessary pieces that clutter the space. Embrace open areas and create functional zones that cater to your specific needs.

    2. Simplify Color Palette: Opt for neutral tones and limited color schemes

    When infusing minimalism into your home design, simplifying the color palette plays a pivotal role in creating a cohesive and serene atmosphere. Opting for neutral tones and limited color schemes brings a sense of calmness and visual harmony to your space.

    Choose neutral colors such as whites, grays, beiges, or soft pastels as the foundation of your design. These shades provide a versatile backdrop that allows other elements to shine while exuding an understated elegance.

    Consider using variations of a single color or complementary hues to create depth and interest within the space. Limiting the color palette to a few key shades ensures a visually uncluttered and cohesive aesthetic.

    To add pops of color, select one or two accent shades to incorporate sparingly through artwork, pillows, or small decor items. These accents should be carefully chosen to complement the neutral tones and provide a focal point without overwhelming the overall simplicity.

    Maintain consistency in color throughout different areas of your home, creating a seamless flow and a sense of unity. This approach promotes a soothing and uncluttered visual experience.

    3. Clear Surfaces: Keep countertops and tables free from excessive objects

    Clearing surfaces is a key aspect of infusing minimalism into your home design. By keeping countertops and tables free from excessive objects, you can create a clean and uncluttered visual appeal.

    Start by assessing each surface in your home, from kitchen countertops to coffee tables and desks. Remove items that are not essential or do not serve a specific purpose in that space.

    In the kitchen, store small appliances, cutting boards, and cooking utensils in cabinets or drawers when not in use. Keep only the essentials, such as a coffee maker or toaster, visible on the counter.

    In living areas, minimize decorative items and keep only a few carefully chosen pieces that enhance the space. Avoid overcrowding coffee tables with books, remote controls, or excessive decor. Instead, opt for a minimalist centerpiece or a single decorative element that adds character.

    Maintain a clutter-free workspace by clearing off unnecessary items from your desk. Keep only essential supplies within reach, and organize them in designated storage containers or drawers. A clean workspace promotes focus and productivity.

    Adopt a “one-in, one-out” policy for surfaces to prevent clutter from accumulating. Whenever you introduce a new item, remove or reposition something else to maintain balance.

    4. Functional Furniture: Choose pieces that serve a purpose and have clean lines

    Functional furniture is a fundamental aspect of incorporating minimalism into your home design. Opting for pieces that serve a purpose while boasting clean lines helps create a streamlined and uncluttered aesthetic.

    Consider furniture that offers practical storage solutions, such as ottomans with hidden compartments or beds with built-in drawers. These multifunctional pieces help eliminate the need for additional storage furniture, reducing visual clutter.

    Choose furniture with clean and simple lines, avoiding ornate details or excessive embellishments. Minimalist design focuses on simplicity and functionality, so opt for sleek and unadorned forms.

    Invest in versatile furniture that can adapt to different needs or spaces. Modular or convertible furniture allows you to optimize your living area while maintaining a minimalistic vibe.

    When selecting seating options, choose pieces that offer comfort without excessive bulkiness. Opt for streamlined sofas or chairs with minimalistic silhouettes, allowing for an open and airy feel.

    Consider furniture with built-in functionality, such as desks with integrated cable management or dining tables that can extend to accommodate guests. These features enhance practicality while maintaining a clean and cohesive look.

    Ensure that each piece of furniture serves a purpose and contributes to the overall functionality of the space. Avoid accumulating unnecessary furniture that clutters the room and hinders movement.

    5. Effective Storage Solutions: Utilize smart storage options to minimize visual clutter

    When incorporating minimalism into your home design, effective storage solutions are essential to minimize visual clutter and maintain an organized space.

    Consider utilizing vertical storage options, such as tall shelving units or wall-mounted cabinets, to maximize floor space and keep belongings neatly stored. These solutions prevent items from accumulating on surfaces and create a sense of openness.

    Opt for furniture pieces with built-in storage compartments, like ottomans or coffee tables with hidden storage. These multi-functional pieces help keep everyday items within reach while concealing them from view.

    Utilize storage baskets or bins to organize and contain smaller items, reducing visual clutter. Labeling them can further enhance organization and accessibility.

    Closets can be optimized with space-saving solutions like hanging organizers, shoe racks, and stackable storage containers. Group items by category and keep only what you truly need, donating or discarding the rest.

    In the kitchen, install pull-out pantry systems or use drawer dividers to maximize storage capacity and keep items easily accessible. Clear containers can help create uniformity and make it easier to see the contents.

    Take advantage of underutilized areas such as under the bed or staircases by incorporating storage solutions like sliding drawers or built-in cabinets.

    6. Embrace Open Space: Allow room to breathe by avoiding overcrowding

    Embracing open space is a key principle of minimalist home design. By avoiding overcrowding and allowing room to breathe, you can create an atmosphere of spaciousness and serenity.

    Arrange furniture in a way that creates a sense of openness. Avoid blocking pathways or cramming furniture against walls. Instead, leave ample space between pieces to promote easy movement and an airy feel.

    Consider using fewer, well-chosen furniture items rather than filling every corner of a room. Opt for functional pieces that serve multiple purposes, such as a sofa bed or a dining table that can extend when needed. This approach prevents the space from feeling overwhelmed.

    Maximize floor space by keeping the center of rooms clear. Avoid placing furniture directly in the middle, allowing for a sense of flow and openness.

    Choose lightweight and visually unobtrusive furniture that doesn’t dominate the room. Select pieces with slender legs or transparent materials to create an illusion of openness.

    Limit the number of decorative accessories and keep surfaces uncluttered. Embrace minimalism in artwork and wall decor, opting for a few carefully selected pieces that create visual interest without overwhelming the space.

    Avoid overcrowding shelves and bookcases. Leave empty spaces to create breathing room and to showcase a few well-curated items.

    7. Mindful Decor: Select minimalistic accents that enhance the overall aesthetic

    Mindful decor is a crucial aspect of infusing minimalism into your home design. By selecting minimalistic accents, you can enhance the overall aesthetic of your space while maintaining a sense of simplicity and harmony.

    Choose decor items that have clean lines and a minimalist aesthetic. Opt for simplicity in design, avoiding excessive ornamentation or intricate details.

    Embrace the concept of “less is more” when it comes to decor. Select a few well-curated pieces that have a significant visual impact rather than filling every available surface with decorations. This approach allows each item to stand out and create a focal point.

    Incorporate natural elements like potted plants or small succulents to bring a sense of tranquility and freshness to your space. Minimalistic planters or simple vases can complement the overall aesthetic without overwhelming it.

    Consider incorporating functional decor, such as wall-mounted hooks or stylish storage baskets, that serve both a practical purpose and add a touch of minimalistic elegance.

    Choose artwork that aligns with the minimalist style, featuring simple and abstract designs or monochromatic pieces. Large, statement art can make a bold impact, while a small gallery wall can add visual interest without overpowering the space.

    Pay attention to the color palette of your decor items, ensuring they harmonize with the overall design scheme. Neutral tones or limited color schemes often work well in minimalist spaces, creating a cohesive and serene ambiance.

    Keep surfaces uncluttered by displaying only a few select decor items that have personal meaning or contribute to the overall aesthetic. Avoid excessive knick-knacks or decorative objects that can clutter the space.

    8. Quality over Quantity: Invest in well-made, timeless items rather than accumulating many

    When it comes to incorporating minimalism into your home design, prioritizing quality over quantity is key. Instead of accumulating numerous items, focus on investing in well-made, timeless pieces that will stand the test of time.

    Choose furniture and decor items that are crafted with high-quality materials and demonstrate excellent craftsmanship. Opt for durable materials like solid wood, genuine leather, or sturdy metals that can withstand the test of time.

    Consider the functionality and versatility of each item before making a purchase. Select pieces that serve multiple purposes or can adapt to different styles or room layouts. This approach allows you to maximize the utility of each item while minimizing the need for excessive belongings.

    Opt for classic designs that transcend passing trends. Timeless pieces with clean lines and minimalistic aesthetics ensure that your home design remains relevant and cohesive for years to come.

    Prioritize long-term value over short-lived trends. Investing in quality items may require a higher upfront cost, but they are likely to last longer and require fewer replacements, ultimately saving you money in the long run.

    Be selective in your choices and avoid impulsive buying. Take your time to research and compare options, ensuring that each purchase aligns with your overall vision for a minimalist and well-curated space.

    Consider second-hand or vintage items as they often possess unique character and can add a touch of history to your home. However, ensure that they are in good condition and complement your overall design scheme.

    9. Organizational Systems: Implement efficient systems to maintain order

    Implementing efficient organizational systems is vital for maintaining order and embracing minimalism in your home design.

    Start by decluttering and sorting items into categories. Utilize storage containers, bins, or drawer dividers to keep similar items together and easily accessible.

    Create designated spaces for specific items to reduce visual clutter. Assign a home for everything, from clothing and accessories to kitchen utensils and office supplies.

    Consider using labels or tags to identify the contents of containers or shelves, promoting easy retrieval and ensuring everything has its place.

    Maximize vertical space by utilizing shelves, hanging organizers, or wall-mounted racks. These solutions optimize storage capacity while keeping the floor area free and uncluttered.

    Implement a regular decluttering routine to prevent accumulation of unnecessary items. Set aside time to reassess belongings and let go of things that no longer serve a purpose or bring joy.

    Digital organization is also important. Organize files on your computer or cloud storage in a systematic manner, utilizing folders and naming conventions for easy retrieval.

    Streamline paperwork by implementing a filing system with labeled folders or using digital document management tools to reduce physical clutter.

    Maintain a minimalist approach to storage furniture. Choose furniture pieces that offer hidden storage options, such as ottomans or bed frames with built-in drawers, to keep belongings out of sight and maintain a clean aesthetic.

    Regularly review and adjust your organizational systems as needed. As your needs change over time, adapt the systems to accommodate new items or lifestyle changes.

    10. Natural Light: Maximize natural light to create an airy and spacious atmosphere

    Maximizing natural light is a crucial element in creating an airy and spacious atmosphere within your home.

    Keep window treatments minimal and opt for light, sheer fabrics that allow ample sunlight to filter through while still providing privacy when needed.

    Avoid heavy drapes or dark curtains that block natural light. Instead, choose blinds or shades that can be easily adjusted to control the amount of light entering the room.

    Arrange furniture in a way that doesn’t obstruct the flow of natural light. Position pieces away from windows to prevent blocking the light source and maintain an open feel.

    Keep windows clean and unobstructed to allow for maximum light penetration. Regularly remove any objects or furniture that may be blocking the windowsill or impeding light from entering the space.

    Use reflective surfaces strategically to amplify natural light. Mirrors, glass tabletops, or shiny finishes can help bounce light around the room, creating a brighter and more spacious ambiance.

    Consider adding skylights or light tubes to areas with limited access to natural light, such as windowless bathrooms or interior rooms. These installations bring in additional sunlight, enhancing the overall brightness and openness.

    Choose light-colored paint or wall coverings that reflect natural light, making the space appear brighter and more expansive. Light shades of white, beige, or pastels can contribute to a fresh and open feel.

    Trim trees or bushes outside windows that may be obstructing sunlight from entering your home. This allows for a clearer path for light to flow into the space.

    Avoid cluttering windowsills with excessive objects or decorations. Keep them clean and free from distractions to maximize the impact of natural light.

  • How to Incorporate Biophilic Interior Design in Your Home

    How to Incorporate Biophilic Interior Design in Your Home

    Welcome to the world of biophilic interior design, where the harmony between nature and living spaces creates a transformative ambiance. In this article, we will delve into the enchanting realm of incorporating biophilia into your home.

    Uncover the secrets of bringing the outdoors inside, and learn how to infuse your living spaces with the restorative beauty of nature. From soothing greenery to natural materials, let us guide you on a journey towards creating a harmonious sanctuary that reconnects you with the natural world.

    [view_toc]

    1. Harness the Power of Natural Light

    Embracing the power of natural light is a fundamental aspect of biophilic interior design. By maximizing windows and skylights in your home, you can invite an abundance of sunlight to flood your living spaces, creating a warm and inviting atmosphere.

    Sunlight brings with it a myriad of benefits. It boosts our mood, enhances productivity, and regulates our circadian rhythm, promoting better sleep patterns. By incorporating ample windows and skylights, you can effectively blur the boundaries between indoors and outdoors, allowing you to bask in the beauty of natural light throughout the day.

    To optimize the effects of natural light, consider the orientation of your windows. South-facing windows tend to receive the most sunlight throughout the day, while east-facing windows welcome the morning sun, infusing your space with a fresh energy. Complement large windows with sheer or light-colored curtains to allow soft, diffused light to filter through while maintaining privacy.

    Skylights are another fantastic option, particularly in areas with limited wall space, as they bring an overhead wash of sunlight into your home.

    2. Infuse Living Greenery into Your Spaces

    Integrating living greenery is a key element of biophilic interior design, allowing you to bring the vibrancy and calming effects of nature into your home. Potted plants, hanging gardens, and living walls offer versatile options to infuse your interior spaces with the beauty of greenery.

    Potted plants bring life and freshness to any room, improving air quality and adding aesthetic appeal. From small succulents in the kitchen to large leafy plants in the living room, they create a soothing atmosphere and enhance well-being.

    Hanging gardens utilize vertical space, suspending planters or baskets to create visually captivating displays. They are ideal for maximizing greenery in areas with limited floor space.

    Another striking option is the installation of living walls, which transform entire walls into breathtaking vertical gardens. These walls offer not only a visual focal point but also provide benefits such as improved air quality and insulation.

    3. Embrace Natural Materials for Authenticity

    Incorporating natural materials like wood, stone, and bamboo in your home’s furniture, flooring, and decor adds a sense of authenticity and grounding. These materials bring forth a connection to nature, elevating the biophilic experience within your living spaces.

    Wood, with its warm and timeless beauty, can be used for hardwood floors and furniture pieces, infusing your home with a natural and inviting atmosphere. Similarly, integrating stone elements such as granite countertops or marble accents enhances the solidity and earthiness of your interior design, harmonizing the indoors with the outdoors.

    Additionally, choosing bamboo, a sustainable and rapidly renewable resource, provides a lighter and contemporary alternative. From bamboo flooring to furniture, it imparts a serene and eco-conscious touch to your home.

    4. Create a Tranquil Soundscape with Water Features

    Enhance the tranquil ambiance of your home by incorporating soothing water features, such as indoor fountains or cascading water walls. These elements not only create a visually captivating focal point but also contribute to a serene soundscape that can mask urban noise and provide a calming atmosphere.

    The gentle sound of flowing water can have a profoundly relaxing effect on our minds and bodies. Indoor fountains, whether small tabletop versions or larger freestanding structures, introduce the soothing sound of trickling water into your living spaces. The rhythmic flow can help drown out disruptive noises, promoting a peaceful environment.

    Cascading water walls, with their elegant and continuous streams of water, add a touch of elegance and provide a more immersive experience. They can be integrated into your interior design as stunning statement pieces, creating a serene and harmonious atmosphere in any room.

    5. Incorporate Organic Patterns and Textures

    Elevate the visual appeal of your living spaces by incorporating organic patterns and textures inspired by nature. Nature-inspired wallpapers, fabrics, and artwork bring depth and visual interest while establishing a strong connection to the outdoors.

    Choose wallpapers featuring botanical motifs, floral patterns, or natural landscapes to create an enchanting backdrop that evokes the tranquility of nature. These designs can be applied to a feature wall or an entire room, infusing your space with organic elegance.

    Complementing wallpapers, select fabrics with patterns reminiscent of leaves, branches, or waves to bring tactile elements inspired by nature to your upholstery, curtains, or pillows. Natural fibers like linen, cotton, or jute enhance the organic feel, contributing to a cozy and inviting atmosphere.

    Complete the transformation of your living spaces by incorporating artwork that depicts landscapes, wildlife, or abstract interpretations of natural elements.

    6. Design Outdoor-Inspired Nooks and Retreats

    Transform your home into a haven of tranquility by crafting outdoor-inspired nooks and retreats. Create a cozy reading corner by placing a comfortable chair or daybed near a window with a view, surrounded by shelves filled with books, potted plants, and soft lighting.

    For an even deeper connection to nature, dedicate a space to an indoor garden with an array of plants, flowers, and herbs, incorporating shelves, hanging planters, or a vertical garden. Add cozy seating to create a serene oasis where you can immerse yourself in the beauty of nature’s embrace.

    These carefully curated spaces provide a sanctuary within your home, allowing you to escape the stresses of everyday life and find solace in the serenity of nature.

    7. Engage the Senses with Natural Scents

    Elevate your home’s ambiance by engaging your senses with natural scents. Use aromatherapy diffusers, scented candles, or fresh herbs to create a multisensory experience that evokes the essence of the outdoors.

    Aromatherapy diffusers disperse invigorating or calming scents throughout your space, offering a soothing and refreshing ambiance. Choose essential oils like lavender for relaxation, eucalyptus for freshness, or citrus for an uplifting atmosphere.

    Scented candles, made from soy or beeswax, infuse your home with natural fragrances, such as pine, sandalwood, or floral notes, enveloping your senses in the tranquility of forests, gardens, or meadows.

    Additionally, incorporating fresh herbs like basil, rosemary, or mint adds an earthy and refreshing aroma, creating a delightful connection to nature in your kitchen or living area.

    8. Frame Your Spaces with Natural Views

    Enhance the beauty of your home by incorporating natural views and vistas. Strategically position your furniture and arrange rooms to capture glimpses of surrounding greenery or scenic landscapes, seamlessly integrating the outdoors into your living spaces.

    Take advantage of windows and doors to frame picturesque views. Orient seating areas, like sofas or chairs, to face these views and allow you to appreciate the natural surroundings while relaxing or entertaining. Place dining tables near windows for captivating backdrops during meals. By optimizing furniture placement, you can create a seamless connection between your indoor spaces and the outside world.

    Consider the layout and flow of your rooms to maximize visibility. Arrange furniture to avoid obstructing views and create open pathways. Place taller pieces along walls or in corners to maintain unobstructed sightlines. This way, you can enjoy the visual splendor of nature as you move throughout your home.

    9. Extend Biophilic Design Principles to Every Room

    Create a seamless connection with nature throughout your home by emphasizing biophilic design principles in every room. From the bedroom to the bathroom, incorporate natural elements to foster a sense of harmony and well-being.

    In the bedroom, use natural materials like wooden bed frames and organic cotton bedding. Introduce greenery with potted plants or floral arrangements, and choose soothing earthy colors for a tranquil atmosphere. In the bathroom, incorporate stone or wood accents, large mirrors, and live plants to create a spa-like experience. Enhance the sensory aspect with natural scents through soaps, bath oils, or candles.

    Extend biophilic design principles to the rest of your home by maximizing natural light, incorporating living greenery, and utilizing organic textures. Fill your living spaces with sunlight and views of the outdoors, bring in potted plants or living walls, and integrate materials like wood, stone, or bamboo. By doing so, you create a cohesive and nurturing environment that promotes a deep connection with nature in every room.

    10. Reap the Health Benefits of Biophilic Design

    Experience the numerous physical and mental health advantages of biophilic design in your home. By incorporating elements such as plants, natural light, and outdoor views, you can reduce stress, improve air quality, and enhance overall well-being.

    Biophilic design has a calming effect on the mind and body, reducing stress levels and promoting relaxation. Natural elements create a sanctuary where you can unwind and find peace amidst the demands of everyday life. Additionally, incorporating living greenery improves air quality by acting as natural air purifiers, providing a healthier living environment.

    Furthermore, biophilic design positively impacts overall well-being, enhancing productivity, cognitive function, and mood. The connection to nature through natural materials, organic textures, and living elements stimulates creativity, concentration, and mental clarity.

  • How to Hang Rugs on the Wall

    How to Hang Rugs on the Wall

    Rugs are not just for floors. In fact, hanging rugs on the wall is a popular trend in interior design that provides a unique way to showcase these pieces of art.

    Wall-mounted rugs can instantly transform your living spaces, lending them a touch of warmth, texture, and character. Plus, it’s a great way to protect precious or antique rugs from wear and tear.

    If you’re considering this approach, but are unsure how to hang a rug on the wall, don’t worry. We have compiled several methods, each with their own step-by-step guides, to help you securely display your rugs with style and grace.

    [view_toc]

    1. Using a Curtain Rod

    This method provides a sturdy base for your rug while making it easy to remove or replace the rug whenever you want.

    Steps:

    • Measure the width of the rug and buy a curtain rod that is slightly longer than this measurement. This allows the rod to stick out slightly on both sides of the rug.
    • Sew a casing, or a tube of fabric, along the top back edge of the rug. The casing should be large enough for the curtain rod to slide through easily. If you’re not comfortable sewing, a professional tailor can do this for you.
    • Attach the curtain rod brackets to the wall at the desired height, ensuring they are level and securely mounted into the wall studs.
    • Slide the curtain rod through the casing on the rug and rest the rod on the brackets.

    2. Using Velcro

    This method works well for lighter rugs. It provides a secure grip and makes it easy to remove the rug when needed.

    Steps:

    • Measure the width of your rug and purchase a strip of Velcro (hook and loop fastener) that is the same length.
    • Sew the loop side of the Velcro along the top back edge of the rug. Again, if you’re not comfortable sewing, a tailor can assist.
    • Attach the hook side of the Velcro to a strong piece of wood cut to the width of the rug. Use a strong adhesive or small nails to secure it.
    • Mount the wood strip to the wall, making sure it’s level and attached to wall studs. The Velcro attached to the rug will adhere to the Velcro on the wood strip, holding the rug in place.

    3. Using Carpet Tack Strips

    Carpet tack strips are a sturdy and inexpensive way to hang heavier rugs.

    Steps:

    • Purchase a carpet tack strip that matches the width of your rug.
    • Attach the strip to your wall where you want the top edge of your rug to be, ensuring it’s level and securely fastened into wall studs.
    • Place your rug on the tack strip, pushing it into the tacks. Be careful as the tacks are sharp. You might want to use a rubber mallet to help secure the rug onto the tacks.

    4. Using a Rug Hanging Kit

    These kits are readily available online or in craft stores and are designed specifically for hanging rugs.

    Steps:

    • Purchase a rug hanging kit that suits the size and weight of your rug. The kit will typically include a flat bar and clips.
    • Attach the bar to the wall at the desired height, ensuring it’s level and secured to wall studs.
    • Attach the rug to the bar using the clips provided in the kit. Space the clips evenly for the best support and visual appeal.

    Conclusion

    With these methods in your toolkit, you are ready to transform any rug into a stunning wall hanging. Not only is this a great way to change up your decor, but it’s also a brilliant way to preserve and display your favorite rugs.

  • How to Paint a Brick Fireplace

    How to Paint a Brick Fireplace

    There’s something undeniably charming about a brick fireplace. However, as time passes, it can start to feel outdated or mismatched with the rest of your home’s aesthetic.

    Luckily, there’s a simple solution that doesn’t involve a total renovation—paint. With a bit of time, the right tools, and a touch of creativity, you can transform your old brick fireplace into a stunning focal point that can dramatically elevate your living space.

    Whether you’re a seasoned DIY expert or this is your first home improvement project, we’ll walk you through the process, step-by-step, to help you achieve a professional-looking finish. So, let’s roll up our sleeves and breathe new life into that old fireplace!

    Read also: How to Update a 1970s Stone Fireplace

    [view_toc]

    Step 1: Gather Necessary Materials and Tools

    Here’s a list of the materials, tools, and equipment you’ll need for painting a brick fireplace:

    Materials:

    1. Primer: Preferably a stain-blocking, oil-based primer to help cover any soot stains and prevent them from seeping through the paint.
    2. Paint: Latex paint or a paint specifically designed for masonry is best. Choose your desired color.
    3. Trisodium Phosphate (TSP): This is a heavy-duty cleaner you’ll use to clean the fireplace before painting.

    Tools & Equipment:

    1. Paintbrushes: A combination of angled and straight brushes will help you cover all areas.
    2. Paint roller: A roller designed for rough surfaces will help you get even coverage on the brick.
    3. Painter’s tape: You’ll use this to protect areas around the fireplace that you don’t want to get paint on.
    4. Drop cloth or plastic sheeting: To protect your flooring and any nearby furniture.
    5. Cleaning brushes: Stiff-bristle brushes will help you clean the brick before painting.
    6. Safety gear: This includes gloves, goggles, and a mask to protect you while you’re cleaning and painting.

    Remember, investing in high-quality tools and materials will pay off in the long run, as it will help you achieve a professional-looking finish. Before you begin the project, gather all your tools and materials so everything is at hand, making the process smoother and more efficient.

    Step 2: Preparation

    Begin by prepping the area around your fireplace. Use a drop cloth or plastic sheeting to cover your floors and any furniture nearby. Then, use painter’s tape to protect the walls around the fireplace and any metal or glass elements you don’t want to get paint on.

    Step 3: Safety First

    Put on your safety gear—gloves, goggles, and a mask. This will protect your skin, eyes, and respiratory system from dust and chemical exposure.

    Step 4: Clean the Fireplace

    Use a stiff-bristle brush to remove any loose debris or dust from the bricks. After that, prepare a cleaning solution with trisodium phosphate (TSP) according to the manufacturer’s instructions. Apply this solution to the bricks and scrub thoroughly. This will help the primer and paint adhere better to the surface. After cleaning, let the fireplace dry completely.

    Step 5: Apply the Primer

    Using your paintbrushes, apply a coat of your stain-blocking, oil-based primer to the entire surface of the brick fireplace. The angled brush can help you get into the deep crevices of the brick and mortar. This step might take time, but patience will pay off with a more professional-looking result. Allow the primer to dry as per the manufacturer’s instructions.

    Step 6: Paint the Fireplace

    Once the primer is completely dry, you can start painting. Use the paint roller for the larger areas and the paintbrushes for the corners and crevices. It’s best to start from the top and work your way down to prevent dripping on completed areas. You might need multiple coats to get even coverage and achieve your desired color. Make sure to let each coat dry before applying the next.

    white fireplace paint

    Step 7: Clean Up and Enjoy

    After the paint is dry, remove the painter’s tape carefully. Clean your brushes and rollers, and remove the drop cloths or plastic sheeting. Step back and enjoy your newly transformed, painted brick fireplace!

    This project might take a weekend or a few days to complete, depending on the size of your fireplace and the drying time between coats. But the result—a beautiful, updated fireplace that enhances your home’s aesthetic—is well worth the effort.

    Read also: What Color to Paint Fireplace Surround?

  • 7 Must-Have Accessories for Your Man Cave

    7 Must-Have Accessories for Your Man Cave

    Your man cave should be a place where you and your closest friends can get together, kick back, and relax. This means you need more than an empty room with a couch and mini-fridge.

    The right mix of man cave accessories is what takes your boring, run-of-the-mill man cave and turns it into a cool place to hang out. There should be plenty of comfortable seating, a place for making drinks, entertainment, and themed decor.

    Outfit your man cave with things that interest you and your friends most. Perhaps you are sports fans and need large TVs for watching the big game.

    Or maybe you are hardcore gamers and need just the right lighting and comfortable seating. Then there are the classic man caves that look like your favorite local hole-in-the-wall bar.

    Check out these man cave accessories and trick out your man cave.

    1. Entertainment Center

    An entertainment center is a must for your garage or basement man cave. It creates a natural focal point in the room and gives you a place for housing your TV.

    Choosing the right entertainment center also gives you additional storage, which is nice you have gaming equipment, movies, or sports memorabilia that you need to store somewhere.

    You could choose a basic entertainment center, like a mid-century modern design. These are low profile and minimalist in design. These are good for small man caves because they won’t take up a lot of visual space.

    Larger entertainment centers are better for larger man caves. They can give your man cave a traditional feel with dark wood and decorative carvings.

    Rustic entertainment units will have wood that looks weathered and worn. They can give your man cave a farmhouse and relaxed feel.

    ClassicFlame Old Wood White TV Stand

    [buy_now title=”Check Price” link=”https://sovrn.co/1c1i2oo”]

    This slightly rustic look entertainment center comes with an added bonus of a built-in electric fireplace. The entire unit measures 17.50 x 63 x 34.50 inches and can support up to 70 pounds, making it compatible with TVs that are up to 70 inches in size.

    The electric fireplace is a 5,200 BTU infrared quartz that can warm a space that is up 1,000 square feet.

    The unit’s body is white with a dark wood top and classic barn door style hardware on the front. You can move the doors from in front of the four shelves on each side to the center to cover the fireplace. This gives you hidden storage for books, movies, games, or entertainment equipment.

    2. Comfortable Seating

    You need enough comfortable seating for everyone that you plan to invite over. Nothing is worse than inviting people over, and only half of them can actually sit down. You will notice that people quickly leave if this happens.

    The more comfortable the furniture is, the longer people will sit back, relax, and hang out. One approach is to have a sizeable plus couch and a love seat. Then place a coffee table in the middle and have a living room or lounge feel.

    You could take a traditional approach or look for one that has cave man specific features like built-in cup holders. If you want more of a bar feel to your man cave, then skip the sofas and use bar stools and high tops instead.

    Kirwan Genuine Leather Flared Arm Reclining Sofa

    [buy_now title=”Check Price” link=”https://sovrn.co/1gcua97″]

    This beautiful brown leather sofa will invite people to sit down with its plush cushions. It is upholstered with genuine leather for a high-quality look and feel. It has a standard seat depth, making it comfortable for the majority of people.

    A nice extra feature is the power reclining seats, making these seats incredibly comfortable for long-term sitting.  It also has an impressive maximum weight capacity of 750 pounds, making it suitable for bigger men.

    Keep in mind that this sofa is quite large at 41 H x 92 W x 40 D inches, making it too large for some smaller man caves.

    3. Technology

    Add technology to your man cave and bring it into modern times. It does not have to be anything over the top of fancy. There are plenty of small gadgets and devices that would make perfect man cave ideas.

    Even if the guys are not tech-savvy, there are plenty of devices that anyone can use. Adding smart plugs to the electrical equipment can make it simple to use voice control or program their operation.

    Cameras can ensure no one uses the man cave when you are not home. Bluetooth speakers can create the ultimate surround sound experience. Smart home devices can sync the man cave with other rooms in the house for easy communication with those who are not in the man cave.

    Smart lights can create custom lighting that gives your bar a party theme or your sports den a wash of your team’s colors. There are even sofas with USB plugs so that you can charge your phone.

    Kasa Smart Home Plug

    [buy_now title=”Check Price” link=”https://www.amazon.com/TP-Link-Alexa-Smart-Wifi-Plug/dp/B07S57PQSM?&linkCode=ll1&tag=mancaveaccesories-20&linkId=0888dcaf9b79653c718f03965ec5c770&language=en_US&ref_=as_li_ss_tl”]

    These smart home plugs are convenient and useful because they work with any electrical plug. This lets you turn anything that plugs into a smart device. It is Wi-Fi compatible and does not require a special hub to operate. Once set up, you can integrate it into your Amazon Alexa, Echo, or Google Home.

    It comes with several features, including scenes, away mode, smart actions, grouping, remote control, and scheduling. These plugs are incredibly easy to set up with an app that walks you through the process.

    The only drawback is that these plugs can randomly go offline. This requires you to reconnect them by going through the setup process again. This can become annoying.

    4. Bar Station

    What will you serve your guests to eat and drink while they are hanging out? Sure, you could head to your kitchen, but that will get old fast after the fourth or fifth trip. It is much easier to have food and drinks readily available in your man cave. Then you never have to leave.

    You could build a full bar, but for most people, this is more than necessary. Instead, you just need a station where you can store your beer mugs, bottles opener, shot glasses, decanters, liquor dispensers, kegerator, or bar accessories.

    A fridge is also nice for keeping drinks cold and at the ready. You could go with the classic stainless-steel appliances or make them blend in with cabinet fronts. When designing your bar, think about the type of alcohol you typically drink. Your bar should be tailored to making those types of drinks.

    Jamison Black Bar with Expandable Storage

    [buy_now title=”Check Price” link=”https://sovrn.co/recdxsv”]

    This all-in-one bar unit is a perfect addition to your man cave. It is a freestanding unit, so you can place your bar anywhere you want. Then if you decide to move it in the future, you can. The dark wood finish gives it a masculine and sophisticated feel.

    When closed, it looks like a regular cabinet. However, when you open it, you will see that it can hold up to 20 bottles and 24 wine glasses. There are also several shelves to hold small bottles and cans.

    A conveniently placed drawer is perfect for organizing tools. The entire unit measures 37.25 in. H x 40 in. W x 19 in. D and is made of pressed pine. You will need to assemble it upon delivery. You will also need additional space around the unit to fully open the doors.

    5. Games

    You need something for you and your friends to do while hanging out in your man cave. If you and your friends enjoy playing video games, this is one option. However, it doesn’t get you truly engaging with each other.

    For a bar-like feel, you can add traditional games. For example, you can set up darts, foosball, or a pool table. These are all great additions because they get people up and interacting with each other.

    Plan out your man cave before you start buying games, though. Some of these can take up quite a bit of room. Try to create zones in your man cave. That way, some people can play games and others can sit and relax without interrupting each other.

    Kirkwood Seven-Foot Pool Table

    [buy_now title=”Check Price” link=”https://sovrn.co/k37q6pr”]

    This modern-looking pool table features bright blue felt and comes with drop pockets, balls, cues, and chalk. This seven-foot table may take up a lot of room in your man cave, but it will make an impressive stance.

    The finish is a light rustic blonde wood that sits on black angular resin legs. The play surface is solid wood, and the table is CSA certified.

    Because this table comes with everything you need, you can start playing as soon as you get it set up. However, it is a heavy pool table. It will take quite a bit of effort to set it up and get it level.

    6. Display Unit or Shelves

    Let’s face it, your basement man cave may start out bare and empty, but it will not stay that way for long. As people learn about your new hang-out spot, they will begin to buy you gifts and decor. Before you know it, you will have more decorations and knickknacks that you can handle.

    Embrace these gift ideas and invest in a shelf or shelving unit to display them all. If you have the floor space, a freestanding unit will work. If you don’t have enough room, then stick with a floating shelf.

    Mounting shelves on the wall lets you utilize the vertical space while keeping the space feeling open. Finally, choose a shelving solution that matches the rest of the decor and furniture.

    If your other furniture is rustic, then choose shelves that are also rustic. If your sofa looks sleek and modern, then your shelves should also. If you have already bought dark or light wood furniture, then stick with the shade when buying wood shelves.

    Danya B. Brown Laminate Shelf Kit

    [buy_now title=”Check Price” link=”https://sovrn.co/17kg1pw”]

    This industrial-looking shelving unit has a unique design with a pipe and wooden board. The wood is finished with a distressed look, helping it to blend with farmhouse and rustics interior designs. The black metal pipe gives the shelves an edgy and industrial feel.

    Measuring 31.5-in x 10-in x 67-in, these shelves won’t take up too much space in your man cave. While it mounts on the wall, it does extend to the floor, giving it a more solid feel than a typical floating shelf.

    One drawback of this unit is that the pipes go through the shelves, limiting your full use of each shelf.

    7. Custom Man Cave Decor

    Every old-school man cave has a neon sign. They make great man cave gifts, brighten up any wall, and look right at home among sports memorabilia. While traditional neon signs are typically beer logos or branding, modern signs can be anything.

    There are plenty of man cave decor ideas that show you how you can order one of these personalized bar signs. This makes it one of the most unique decor items.

    Choose the color, size, font style, and design that you want your wall art to be. Then you can use your neon sign as decoration and additional accent lighting in your man cave.

    Jadetoad Custom Neon Sign

    [buy_now title=”Check Price” link=”https://www.amazon.com/JadeToad-Individual-Personalized-Bedroom-Customization/dp/B08CT2K4VT?&linkCode=ll1&tag=mancaveaccesories-20&linkId=bf1bc5040cbbb8e86dcaa76d4c053f3a&language=en_US&ref_=as_li_ss_tl”]

    It is incredibly easy to order a customized neon sign. This particular one makes it simple by breaking down the process into steps. Start by deciding how many lines of text you want.

    You can choose from one, two, three, or four. Then choose your desired size, which can be anywhere from ten to sixty inches. You will then decide what color and type of font you want.

    Your sign will be safe to touch because it uses LED technology and comes on a board ready for hanging. It won’t get hot like traditional neon, so you can hang it anywhere that is within reach of a plug.

    People often make the mistake of ordering a sign that is too small, so measure out your desired sign before ordering so that you choose a large enough size.

  • 16 Best Reading Nook Design Ideas

    16 Best Reading Nook Design Ideas

    A reading nook is a special space where you can escape from the world, dive into an enchanting novel, or simply relax with your favorite magazine.

    Creating the perfect reading nook involves more than just a comfy chair and good lighting – it’s about designing a space that inspires peace, comfort, and a deep love for literature.

    In this article, we’ll explore an array of reading nook design ideas, ranging from cozy corners to window-side retreats, to help you create the ultimate sanctuary for your reading passion.

    [view_toc]

    1. Create a Bay Window Book Haven

    Transform a bay window into a serene reading retreat by adding a built-in bench. Adorn the space with plush pillows and a soft throw for comfort. Install adjustable reading lights for tailored illumination. This design maximizes natural light and offers a charming view, creating an ideal reading environment.

    Bay window reading nook
    Bay window reading nook
    Bay window reading nook

    2. Transform Your Hallway into a Reading Retreat

    Utilize a hallway by setting up a slender bench or a comfortable chair with a small side table. Place a floor lamp for targeted lighting. This creates a practical, inviting reading space in an otherwise underused area. Consider a neutral color palette to maintain an open, airy feel in the hallway.

    Reading nook in a hallway

    3. Design a Vibrant Recessed Reading Space

    A recessed nook with an orange wall can become a vibrant reading space. Install a daybed and an array of cushions for a relaxing atmosphere. The orange color adds warmth and energy, perfect for stimulating the mind while reading. Wall-mounted shelves nearby can store books and accessories.

    Recessed reading nook

    4. Craft a Cozy Sofa Reading Alcove

    Position a small, cozy sofa in a recessed area, draped with a textured blanket. Introduce a stylish floor lamp for a warm glow. This setup offers a snug, private space for long reading sessions, and the recessed area provides a sense of seclusion.

    recessed reading nook with sofa

    5. Turn a Closet into a Personal Reading Sanctuary

    Transform a closet into a charming reading nook by installing white shelves and a built-in seat with plush pillows. The shelves provide ample storage for books, creating a personal library feel. Soft, warm lighting and a few decorative items make this nook inviting and personal.

    Closet reading nook

    6. Build a Rustic Wood Pallet Book Nook

    Craft a unique reading nook using wood pallets for seating, adding a rustic touch. Cushion the pallets with comfortable padding and pillows.

    Wood pallet reading nook
    Wood pallet reading nook

    7. Define Your Reading Area with a Rug

    Lay a textured rug in front of a bookcase to define a reading area. This adds warmth and comfort underfoot, inviting one to sit or lie down with a book. Pair with a low ottoman or a floor cushion for a relaxed reading posture.

    Traditional bookcase

    8. Set Up a Rustic Reading Chair by Your Bookcase

    Place a rustic-style chair in front of a bookcase to create a classic reading spot. The chair’s design can complement the room’s overall aesthetic, while its placement provides easy access to books. Adding a small side table can hold a cup of tea or reading glasses.

    Traditional bookcase

    9. Style a Corner Banquette Reading Nook

    A corner nook with floating shelves and a cushioned corner banquette offers a stylish, space-saving solution. The shelves keep books within arm’s reach, while the banquette provides comfortable seating. Accentuate with soft lighting and a few pieces of art to personalize the space.

    Reading corner nook

    10. Choose the Perfect Chair for a Quiet Corner Read

    Select a plush chair and position it in a quiet corner. Add a floor lamp and a small side table to keep essentials handy. This setup offers a secluded, comfortable spot for immersing in books.

    Yellow reading nook chair in a corner of house
    White reading nook chair in a corner of house

    11. Fashion a Light and Airy Rattan Reading Chair Nook

    A rattan chair paired with plush cushions creates a light, airy reading nook. The natural texture of the rattan adds an organic feel, while the cushions ensure comfort. Place near a window to enjoy natural light, and add a small side table for convenience.

    Rattan reading nook

    12. Utilize a Corner with End-To-End Bookcases

    In a corner flanked by end-to-end bookcases, a well-chosen chair serves as a perfect reading spot. Select a chair that complements the bookcases’ style. Add a soft throw and a floor lamp to complete this classic reading nook.

    End to end bookcase

    13. Relax in a Lazy Bag with Bookshelf Overhead

    A lazy bag in a reading area, with floating shelves above filled with books, creates a laid-back, modern vibe. It’s ideal for relaxed, informal reading sessions. Position near a window to enjoy natural light and add a small side table for a cup of coffee or tea.

    Lazy bag with floating shelves

    14. Create a Magical Wooden Teepee Book Nook

    Create a whimsical reading space with a wooden teepee, ideal for children or as a playful adult retreat. Furnish the inside with cushions and soft lighting. This unique structure becomes a magical spot for reading and daydreaming.

    Teepee reading nook

    15. Experience Outdoor Reading in a Bubble Nook

    An outdoor bubble reading nook offers a unique escape into nature. Fill it with comfortable seating and weather-resistant cushions. This setup is perfect for enjoying a book surrounded by the beauty of the outdoors while being protected from the elements.

    Outdoor bubble reading nook

    16. Innovate with an Under-The-Stairs Book Corner

    The space under the stairs can be transformed into a cozy reading nook. Install built-in seating or sofa, and shelving to store books. Soft, warm lighting and comfortable cushions make this a charming, hidden gem for reading enthusiasts.

    Under the stairs reading nook
    Under the stairs reading nook
  • 14 Window Trim Ideas for Every Home

    14 Window Trim Ideas for Every Home

    Windows, the “eyes” of a home, not only allow in light and provide views but can also be transformed into striking architectural features with the right trims.

    This guide delves into the array of styles, materials, and colors available for window trims, offering ideas to complement any home decor, from traditional to modern, rustic to chic.

    More than just aesthetic, the right window trim reflects your taste, suits your home’s style, and can even boost your property’s value. Discover how to choose the perfect trim to enhance your windows and elevate your home’s overall design.

    [view_toc]

    1. Wooden Window Trim

    Wooden trims provide a warm, natural look to a room, effortlessly creating a rustic or traditional feel. Consider using dark-stained wood for a more formal setting or lighter shades for a breezy, Scandinavian touch. This style pairs well with earthy wall colors and hardwood floors.

    Wood window trim
    Wood window trim
    Wood window trim
    Wood window trim
    Wood window trim
    Wood window trim
    Wood window trim
    Wood window trim
    Wood window trim
    Wood window trim

    2. Board & Batten Window Trim

    This trim style lends a charming, cottage-like appeal to windows. Use wide boards flanked by narrow battens to give a structured yet simplistic look. It’s ideal for homes aiming for a farmhouse or country aesthetic and works well with pastel or neutral wall colors.

    Board and batten window trim

    3. Bay Window Recessed Window Trim

    For bay windows, a recessed trim can create a sense of depth and elegance. Paint the recess in a contrasting color to the wall to draw attention to the window area. This design suits modern and minimalist decors, emphasizing the architectural feature of the bay window.

    Recessed window trim
    Recessed window trim
    Recessed window trim
    Recessed window trim
    Recessed window trim
    Recessed window trim

    4. Colonial Window Trim

    A colonial trim, characterized by its clean lines and symmetrical form, suits both historical and contemporary homes. To achieve this look, use a combination of wide lower sills and narrow side casings. This trim complements traditional furnishings and classic color schemes.

    Colonial window trim
    Colonial window trim
    Colonial window trim
    Colonial window trim
    Colonial window trim

    5. Decorative Window Trim

    Use ornate trims to add character and detail to windows, ideal for period homes or spaces wanting a touch of sophistication. Select designs with intricate molding patterns and pair with elegant drapery. Works well in rooms with high ceilings and detailed architectural features.

    Decorative window trim

    6. Layered Window Trim

    Layered trims, combining different molding styles, create a rich, textured look. Start with a simple base trim and add additional layers with varying profiles. This approach suits eclectic interiors, allowing for a mix of modern and classic elements.

    Layered window trim
    Layered window trim
    Layered window trim
    Layered window trim

    7. Craftsman Window Trim

    Characterized by its sturdy and straightforward design, Craftsman trim is perfect for adding a touch of artisanal quality. Use natural wood or earth-toned paints, and pair with handcrafted furniture for a cohesive Craftsman style home.

    Craftsman window trim
    Craftsman window trim
    Craftsman window trim
    Craftsman window trim

    7. Crown Window Trim

    Crown molding at the top of window frames adds a luxurious touch. Painted in a contrasting color to the wall or the same color for a subtle effect, it works best in formal or traditional settings and complements high ceilings and grand decor.

    Crown window trim
    Crown window trim
    Crown window trim

    8. Recessed Exterior Trim

    This trim style gives depth and dimension to exterior windows. Paint in a bold color to contrast with the home’s exterior, adding visual interest. Ideal for modern and contemporary homes, this trim adds sophistication without overwhelming the facade.

    Recessed exterior trim
    Recessed exterior trim

    9. Round Window Trim

    Round windows are a unique architectural element. Frame them with a simple, streamlined trim to maintain focus on their shape. This trim style is particularly suited to nautical or whimsical-themed rooms.

    Round window trim

    10. Black Window Trim

    Black trim frames a window with striking contrast, particularly against light-colored walls. It’s a bold choice that suits industrial or modern decors, and pairs excellently with metallic accents and minimalist furniture.

    Black window trim
    Black window trim
    Black window trim

    11. Victorian-Style Window Trim

    This ornate trim style, with intricate designs and elaborate moldings, suits period homes or those seeking a vintage look. Paint in rich, deep colors to highlight the detailed craftsmanship.

    Victorian style window trim
    Victorian style window trim
    Victorian style window trim

    12. Stained Glass Window Trim

    Stained glass windows are a focal point in themselves. Frame them with a minimal trim to avoid competing with the glass design, letting the colors and patterns stand out. This style suits both traditional and contemporary homes.

    Stained glass window trim
    Stained glass window trim

    13. White Window Trim

    White trim offers a timeless, clean look that can brighten and open up a space. It’s versatile, working with any wall color and in any room, from kitchens to bedrooms. It’s particularly effective in coastal or Scandinavian-themed interiors.

    White window trim
    White window trim
    White window trim
    White window trim
    White window trim

    14. Minimal Window Trim

    For a sleek, modern look, use a minimal trim or even a flush finish with the wall. This style suits contemporary homes, emphasizing clean lines and uncluttered spaces. Pair with simple window treatments or bare windows for a minimalist aesthetic.

    Minimal window trim
  • 12 Shiplap Wall Design Ideas for Interior Walls

    12 Shiplap Wall Design Ideas for Interior Walls

    Shiplap is a traditional wall texture made from nailing wood planks in orderly rows. Originally designed to waterproof seacraft, shiplap paneling has grooves cut into its sides so that each piece connects tightly together.

    Before the invention of sheetrock, shiplap was used to provide an even surface for applying wallpaper. Though it wasn’t originally intended to be seen, interior design experts discovered that exposed shiplap made a beautiful and unique wall treatment.

    Made popular by “Fixer Upper” and other home decor shows, real and faux shiplap ideas are here to stay. Check out our favorite takes on this comfortable modern farmhouse accent wall idea.

    [view_toc]

    1. Versatile Shiplap Accent Walls for Vintage Charm and Texture

    Although older homes may have shiplap in an entire room, it’s most commonly used as an accent wall material today. You may also see shiplap panels as an accent on kitchen islands or cabinet fronts. It’s also found on fireplaces, built-in bookshelves, and hallways.

    Dual vanity bathroom with round mirrors and patterned floor
    Source: @jennseung via Instagram
    Cozy dining area with modern decor and green accent wall
    Source: @maryb_bohostyling via Instagram
    Nook with tufted sofa and shiplap walls
    Source: @thesuiteshoppe via Instagram

    Beloved for its ability to create definite shadow lines, a shiplap accent wall adds vintage charm to cottage, costal, and farmhouse dwellings. However, it’s a great way to add texture to any room, from the living room to the bathroom.

    2. Enhancing Bathroom Space with Stylish Shiplap Wall Ideas

    Shiplap is an excellent bathroom wall treatment. Not only does it add welcoming texture and style, its horizontal lines can make a small bathroom look bigger. Top a white shiplap wall with a round vanity mirror to soften the strong lines created by the wooden plank surface.

    Bathroom with shiplap walls and gold framed mirror
    Source: @bcmlondon via Instagram
    Rustic bathroom vanity with shiplap wall and oval mirror
    Source: @unicawallsnc via Instagram
    Modern bathroom with shiplap walls and grey floor tiles
    Source: @yonagohome via Instagram

    Subway tiles look great in a bathroom featuring shiplap wall ideas. Either enjoy the continuity of subway tile and horizontal shiplap lines, or mix it up by installing a vertical shiplap wall instead.

    3. Creative Shiplap Bedroom Design Ideas

    The logical place for a bedroom shiplap accent wall is behind the bed, but you can add this architectural detail anywhere in the room. Horizontal shiplap and vertical shiplap work equally well in the bedroom, and many love the effect so much, they install shiplap on the ceiling as well.

    Bedroom with shiplap wall and inspirational art
    Source: @quinnlayneliving via Instagram

    If an entire shiplap wall is too much for your personal aesthetic, shop for a shiplap headboard instead. It will provide just enough of that casual texture you love while freeing up your walls for other home decor accents.

    4. Exploring Diagonal Shiplap: A Modern Twist on Classic Wall Design

    Traditionally, a shiplap wall would be installed in a horizontal pattern. Now, it’s common to see vertical shiplap, chevron shiplap, and diagonal shiplap configurations. Diagonal wood shiplap is particularly attractive as an accent feature, such as on a kitchen island or a set of sliding barn doors.

    Office with blue walls and chevron shiplap fireplace
    Source: @artisansignaturehomes via Instagram
    Living room with diagonal shiplap wall and modern decor
    Source: @claytoncorner via Instagram
    Bedroom with black chevron shiplap wall and barn door
    Source: @irehabhomes via Instagram
    Corner nook with diagonal shiplap and plush bench
    Source: @vintagethreshold via Instagram

    Some designers install shiplap in two patterns on one wall. For example, one half will feature vertical planks, while the other half has them set on the diagonal. This adds a modern twist to classic shiplap wall ideas and is a particularly great backdrop for Scandinavian decor.

    5. Elevating Farmhouse Kitchen Vibes with White Shiplap Walls

    A white shiplap wall is a must if your kitchen is decorated in farmhouse style. No other wall ideas can beat it for creating that particular country vibe. It’s the perfect background for floating shelves, wire baskets, chalkboard art and other key farmhouse design components.

    Modern kitchen with white shiplap walls and black accents
    Source: @25thandbrick via Instagram
    Kitchen with white shiplap walls and dark cabinets
    Source: @potter.linda via Instagram
    Spacious kitchen with shiplap island and brick backsplash
    Source: @winchester_woodcrafts via Instagram

    If you don’t want to go full farmhouse in the kitchen, a smaller shiplap wall idea will do. Shiplap accent wall ideas are great behind a bench in a mudroom area, or to define the boundaries of your breakfast nook.

    6. Balancing Functionality and Style with Shiplap Office Wall Design

    People tend to focus more on functionality than style when designing an office space. But there’s no reason for you to stare at a blank white wall while working all day—especially in a home office where you have liberty to decorate as you please.

    Home office with white shiplap walls and elegant decor
    Source: @adorehousedecor via Instagram
    Cozy office with shiplap wall and inspirational shelf decor
    Source: @visionswithvic via Instagram

    Define your desk area with shiplap and paint it a color that contrasts with the rest of the walls. Extend your horizontal shiplap wall paneling onto the ceiling for a unique design accent that will make a small office appear more spacious.

    7. The Timeless Appeal of Southern Yellow Pine Shiplap

    Back when shiplap was used as an interior wall foundation, southern yellow pine was the most popular material in Texas and the southeastern United States. Now pine is one of the most common shiplap woods across America. 

    Bright bedroom with natural pine shiplap and botanical art
    Source: @plaids.and.poppies via Instagram
    Minimalist room with pine shiplap wall and hanging wicker lamps
    Source: @spundesign via Instagram
    Rustic bathroom with natural wood shiplap and patterned tile floor
    Source: @starryhollowranch via Instagram

    Unpainted pine shiplap adds a pale, rustic flavor to any room. Pine wood shiplap must be sealed if used in high-moisture areas like kitchens and bathrooms.

    8. Embracing the Beauty of Reclaimed Wood Shiplap

    Reclaimed wood makes an excellent type of shiplap. Its natural variations and textures are beautiful as a wall covering in rustic or contemporary homes.

    Small bedroom with reclaimed wood shiplap headboard and modern decor
    Source: @interior___addict via Instagram
    Compact bedroom with shiplap headboard and striped rug
    Source: @oldeworldhomestead via Instagram

    If you cannot get real shiplap from an old house, other types of reclaimed wood can be cut into shiplap planks. You can also achieve a faux reclaimed finish by staining planks different colors before installation.

    9. Elevating Home Decor with Stained Wood Shiplap Accents

    Staining is an excellent way to add various wood tones to your home decor. An accent wall with varied shiplap planks can help tie together your decor when you already have several wood tones in the same space.

    Bedroom for kids featuring a dark shiplap wall and oversized alphabet art
    Source: @fullhousetohome via Instagram
    Modern bedroom with black shiplap wall and geometric pendant lights
    Source: @innovativeconcepts_const via Instagram
    Hallway with rustic shiplap wall and round mirror
    Source: @mydiyhappyhour via Instagram
    Living room with dark shiplap accent wall and mounted TV
    Source: @tmhoriginal via Instagram
    Bedroom with balcony view and wooden shiplap walls
    Source: @ufpedge via Instagram

    Most ceiling surfaces are covered in some variation of white plaster. But covering your ceiling in stained wood shiplap is a great way to make a room feel warmer and cozier.

    10. Transform Your Interiors with Shiplap Wainscoting

    Sophisticated yet simple, wainscoting is decorative paneling installed along the lower half of a wall. Shiplap wainscoting is more casual than traditional types of wainscoting, but it’s still an excellent choice for a dining room, bathroom, or hallway.

    Twin beds in a cozy room with shiplap wainscoting and botanical prints
    Source: @house_of_7feathers via Instagram
    Fresh white bathroom with shiplap wainscoting and patterned window
    Source: @manymustardseeds via Instagram
    Chic bathroom with grey shiplap wainscoting and open shelving
    Source: @nextleveldesign_build via Instagram
    Dark grey shiplap accent wall with patterned floor rug
    Source: @twineindesign via Instagram

    Because wainscoting is meant to protect walls from scuffs and dings, choose a durable type of shiplap wood. Add a decorative strip of molding along the top.

    11. The Timeless Allure of White Shiplap in Interior Design

    White is the first color that comes to mind when most people hear the word “shiplap.” White shiplap has now transcended the boundaries of farmhouse and cottage style and can be found in just about any traditional or contemporary interior.

    Living space with white shiplap wall and rustic decor
    Source: @davenportfarmhouse_ via Instagram
    Dining area with white shiplap walls and natural wood accents
    Source: @deep.roots.home via Instagram
    Living room with mounted TV on white shiplap wall and cozy decor
    Source: @quinnlayneliving via Instagram
    Bright living space with white shiplap and antler decor
    Source: @sawteethcarpentry via Instagram
    Entryway with white shiplap walls and light blue door
    Source: @shiplapshanty via Instagram

    White paint is a classic finish for shiplap, but you don’t have to settle for a plain bright white. Cream, ivory, and barely-there grey are white-like paint choices that provide the same look but in a softer way.

    12. Whitewash Shiplap: Blending Elegance and Natural Texture

    Whitewash is an excellent choice for someone who loves the look of white shiplap but wants some of the natural wood grain to remain. It’s particularly lovely in a room that also has whitewashed exposed brick walls.

    Spacious attic bedroom with whitewashed shiplap walls and multiple beds
    Source: @emilygriffin_designer via Instagram
    Cozy living room with whitewashed shiplap wall and rustic accents
    Source: @papas_pallets via Instagram

    Traditional whitewash paint was made from a mixture of chalk and slaked lime, but now you can make an easier version by mixing one part white paint with three parts water. Whitewashed shiplap will need a sealer or glaze to protect the finish.