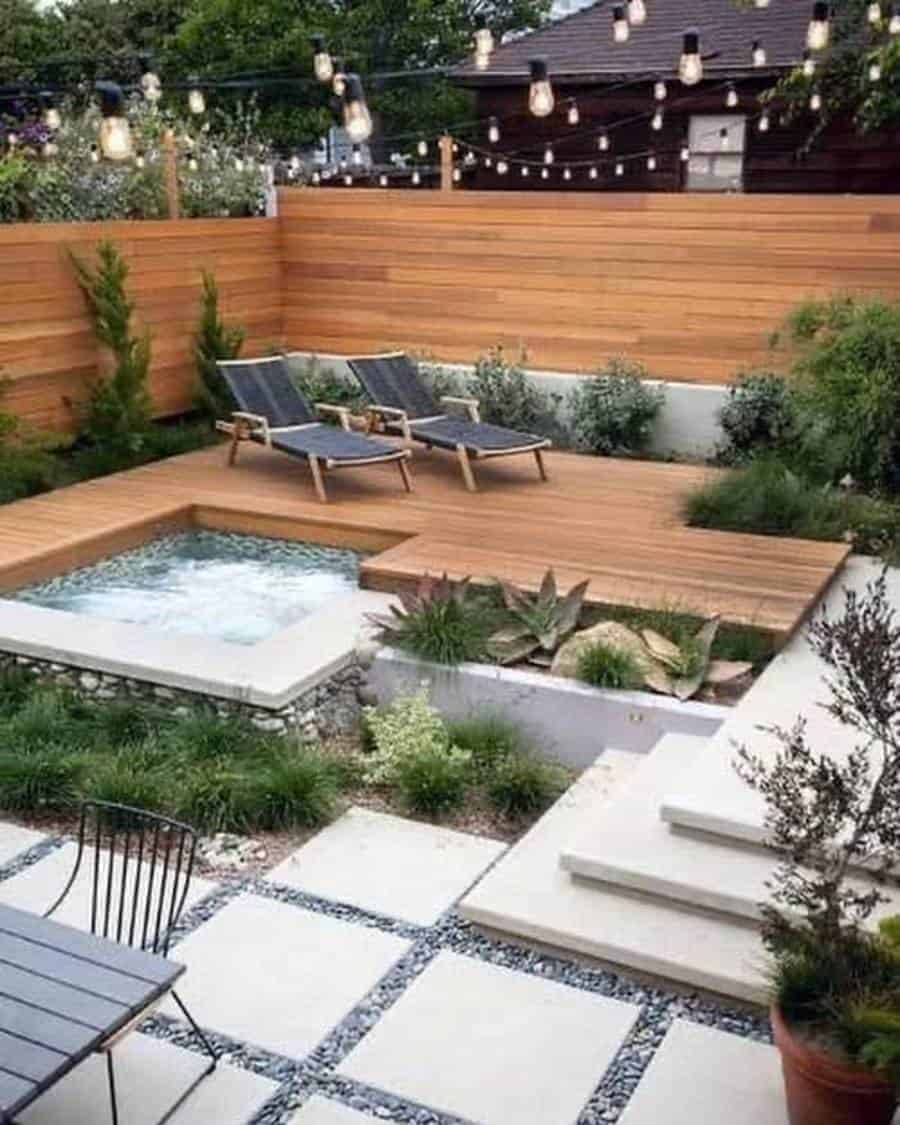
You look out of the window into your backyard and wish for something better. It’s small, but you want to make it into a livable space. Maybe you could turn the patio into an outdoor lounge. Or you could have an outdoor kitchen.
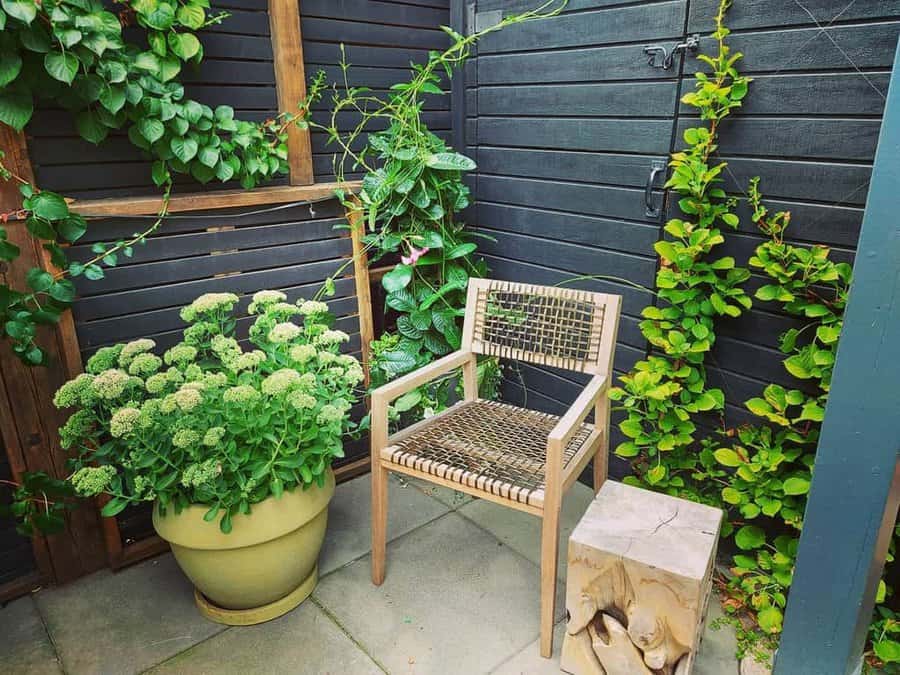
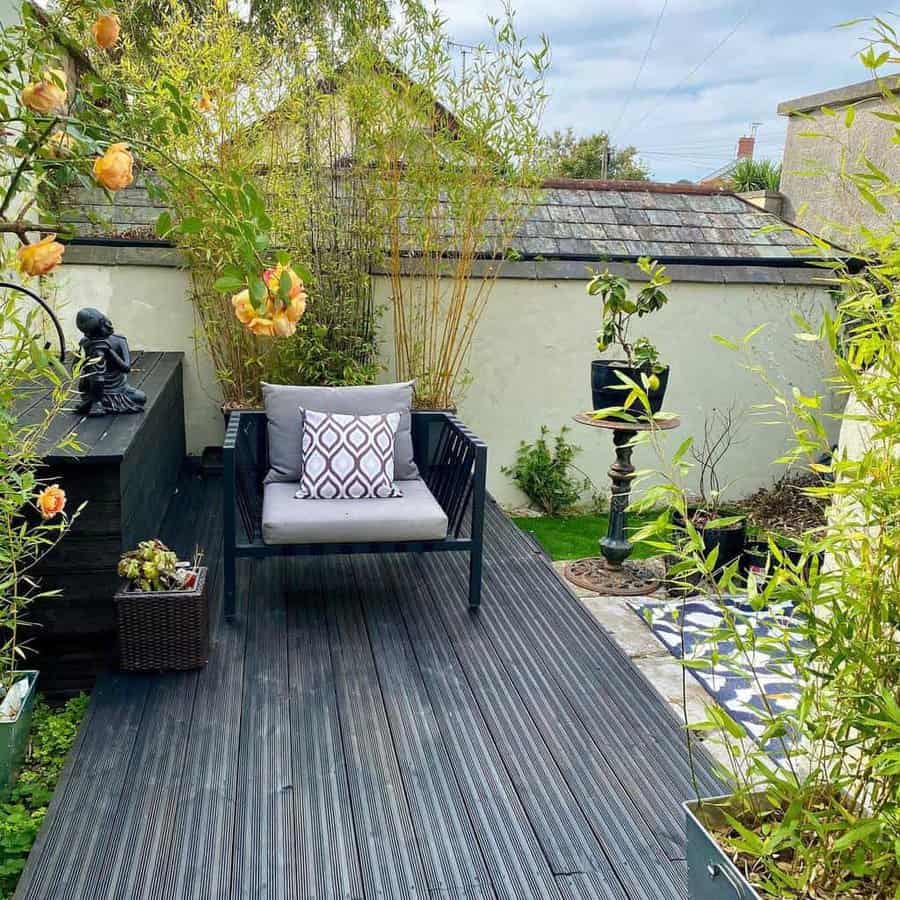
A small patio can still serve you well despite the lack of square footage. You just need to scale down your furniture and be strategic with your design. So why not check these small backyard patio ideas out and do something about your depressing backyard patio?
[view_toc]
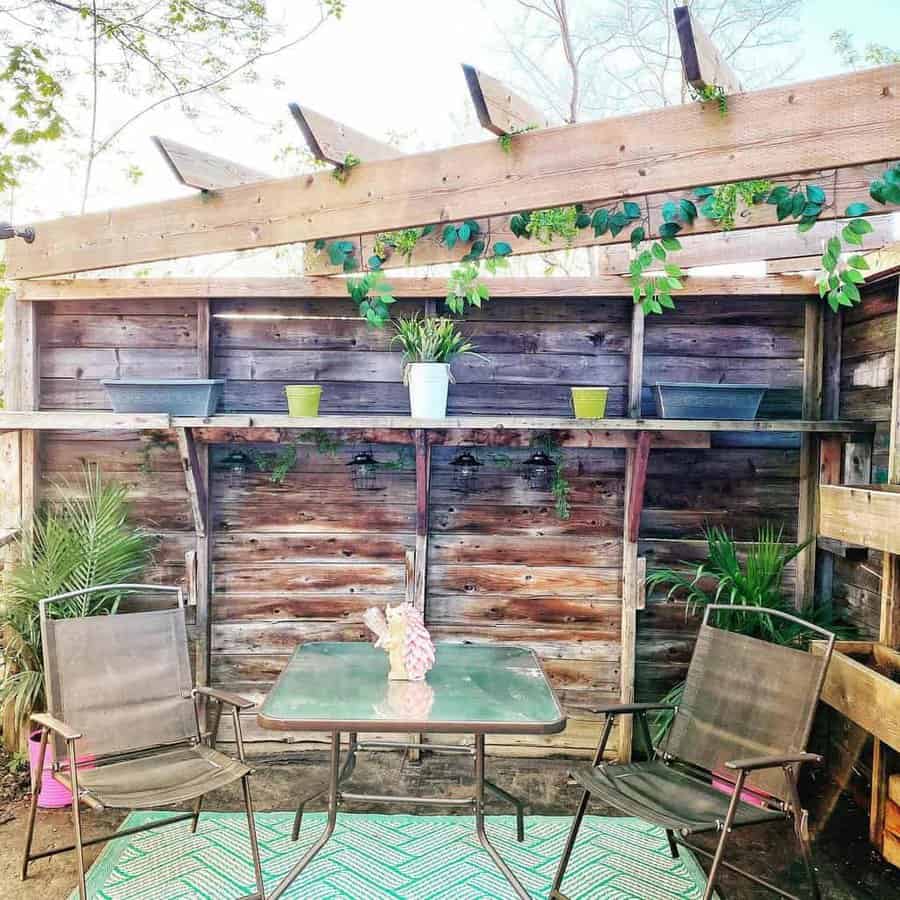
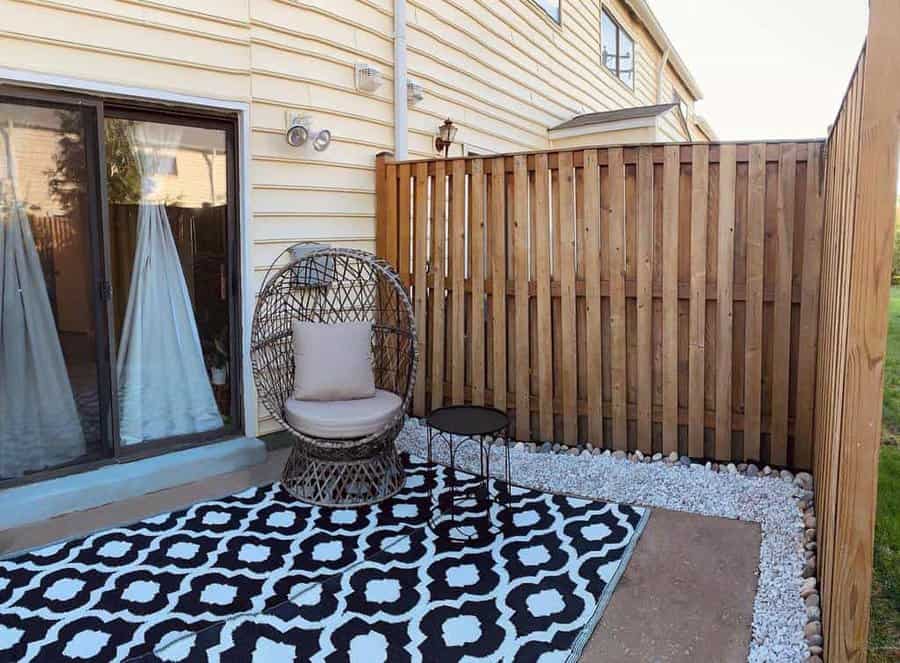
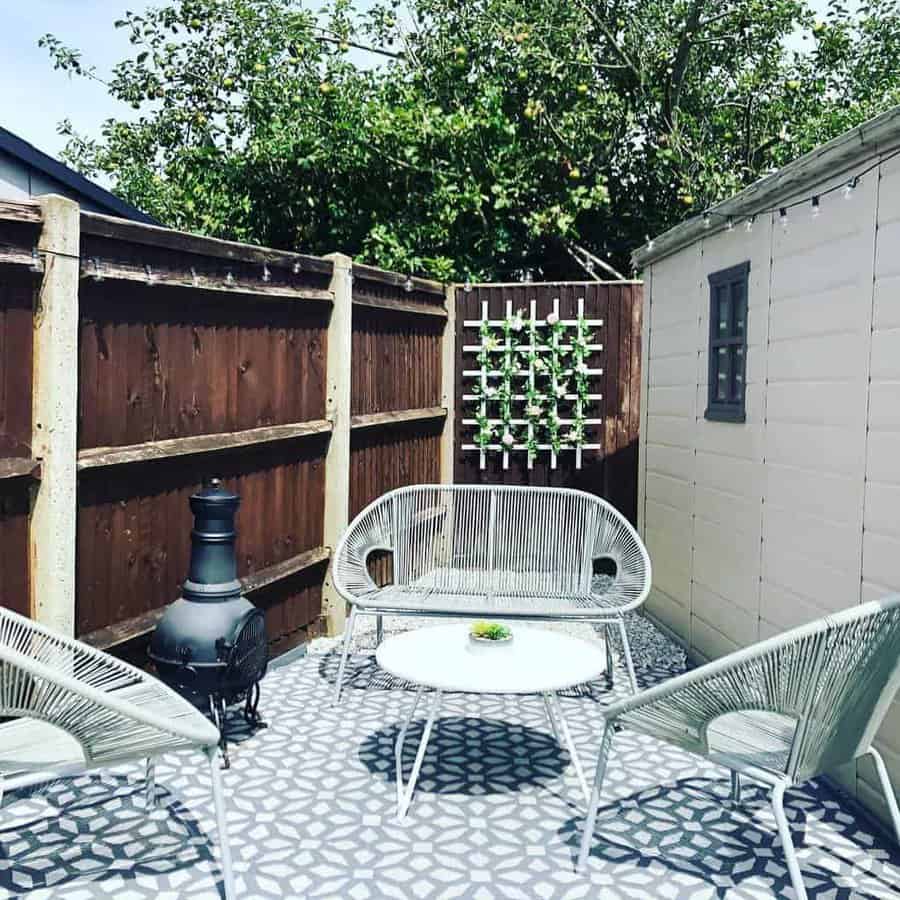
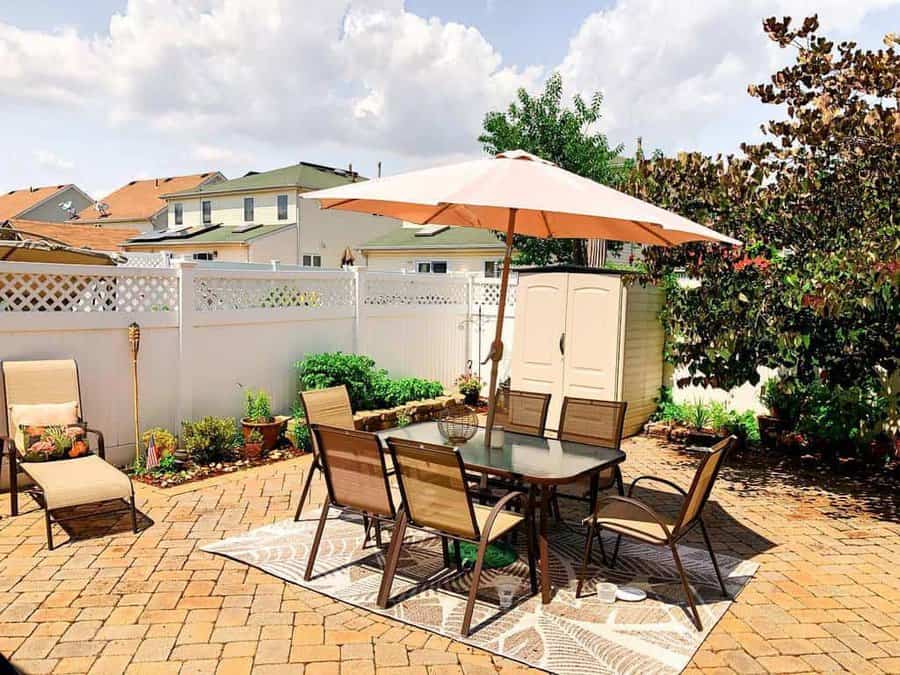
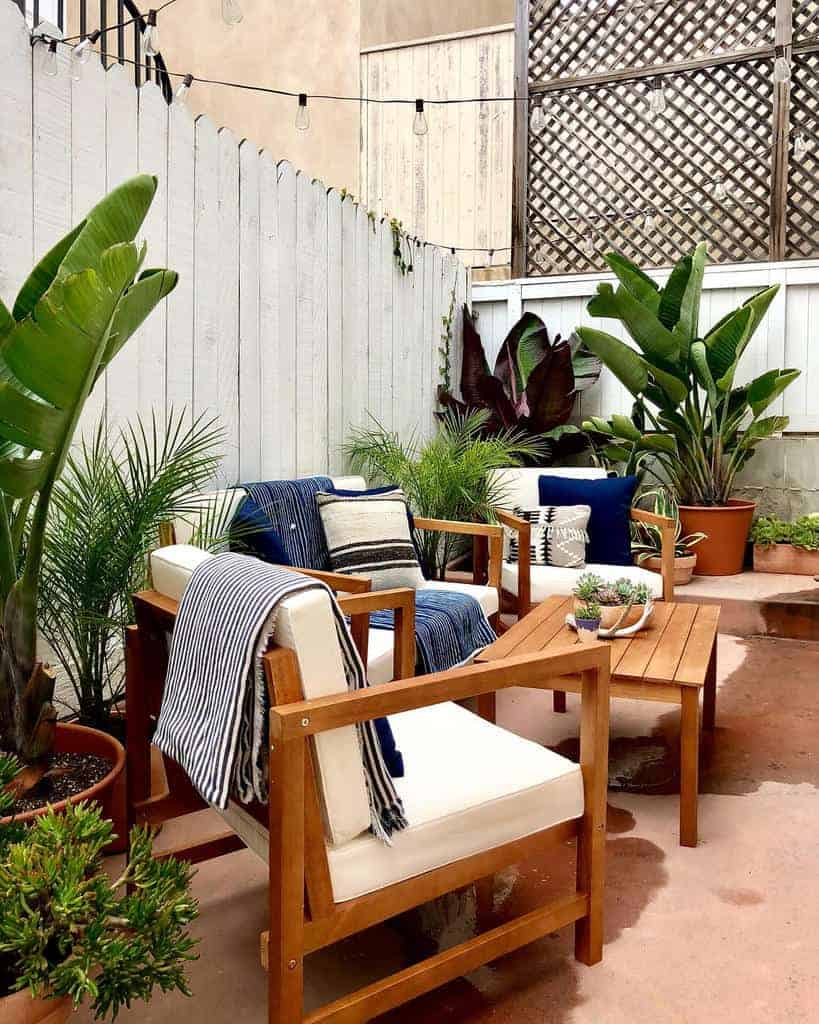
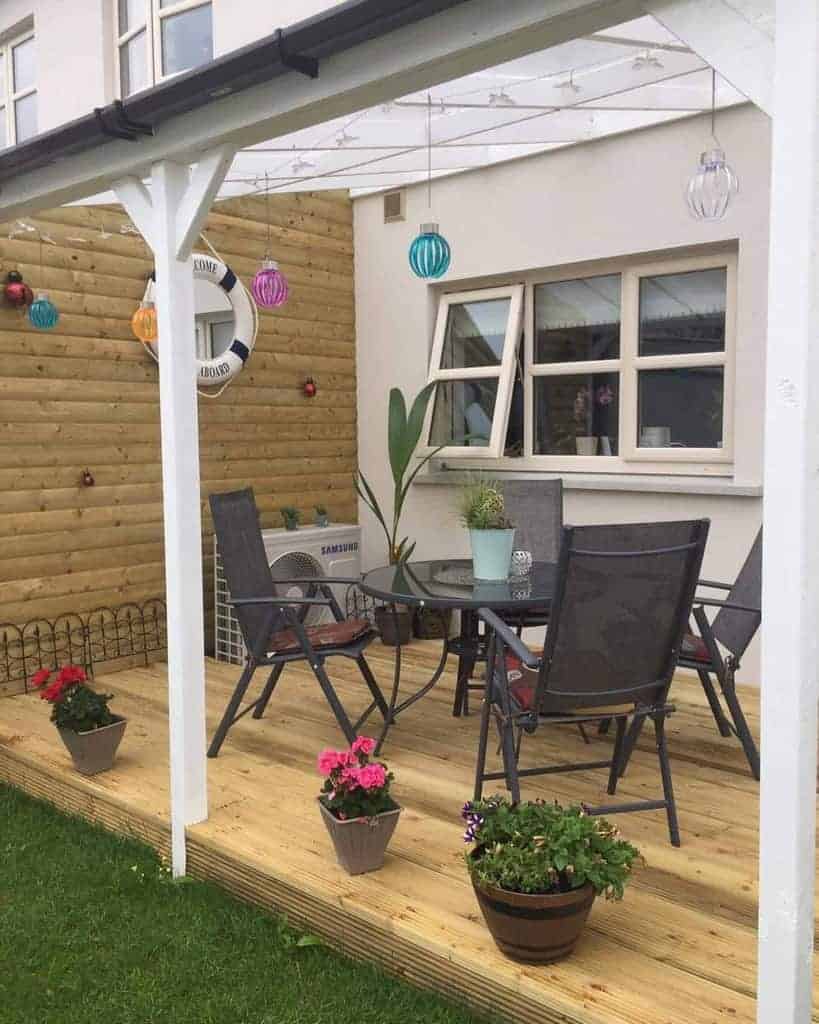
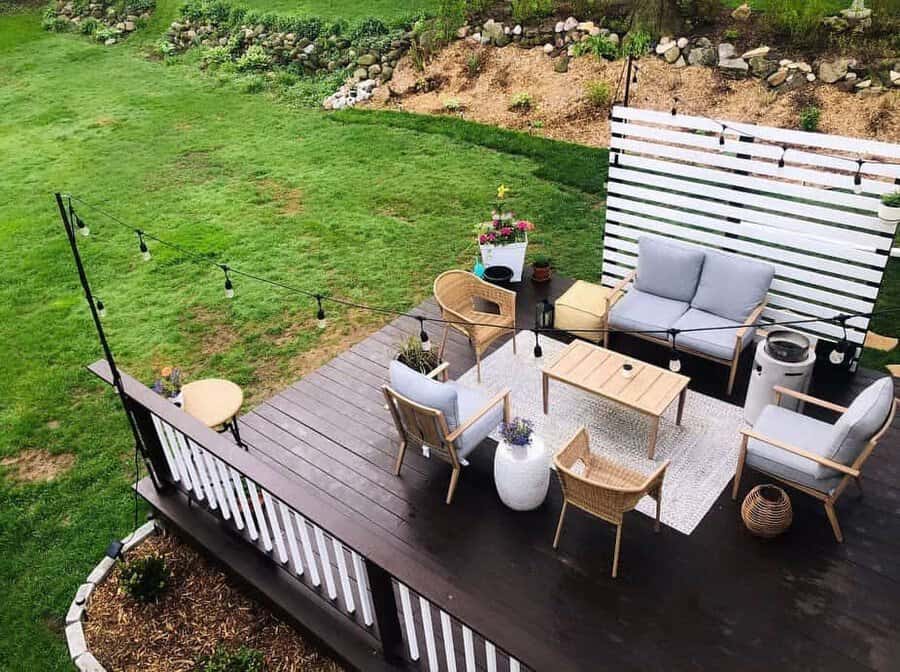
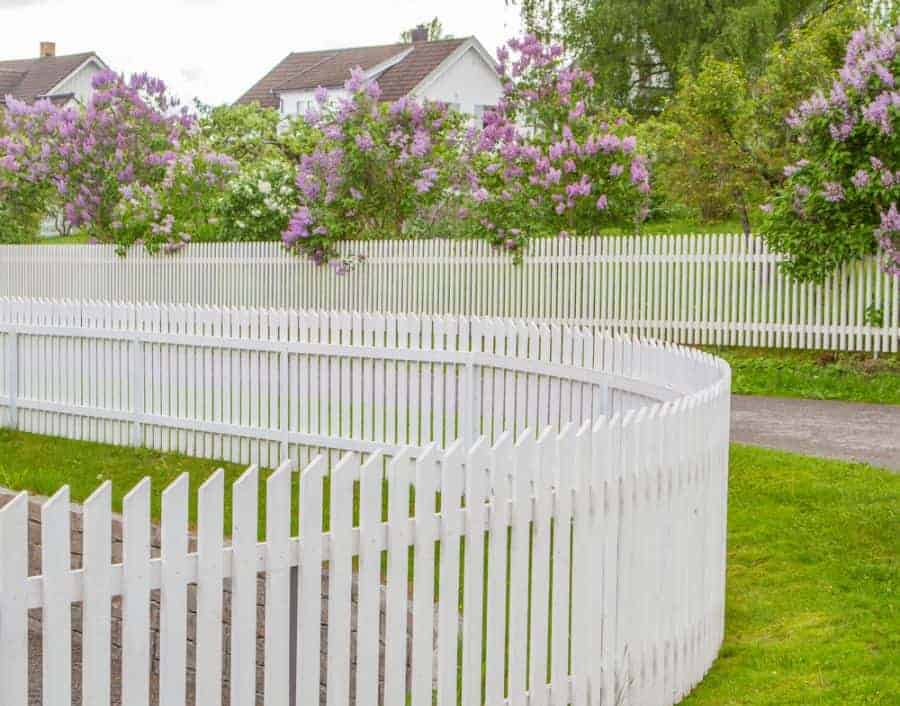
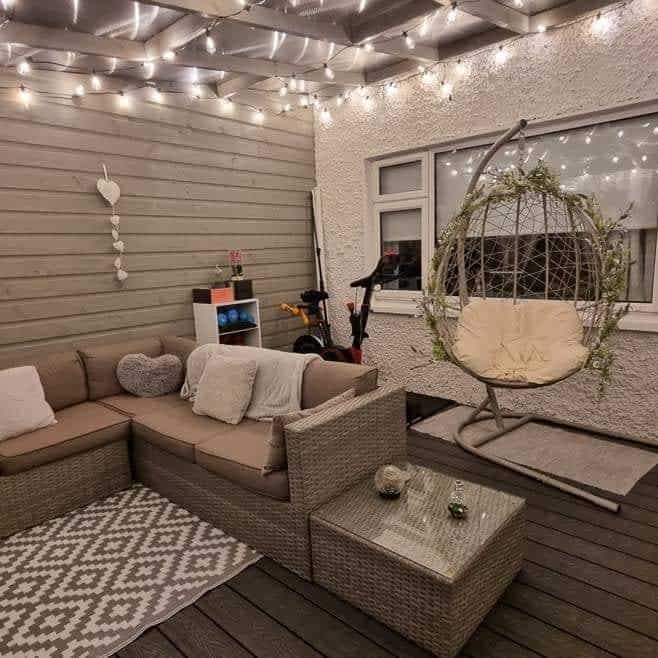
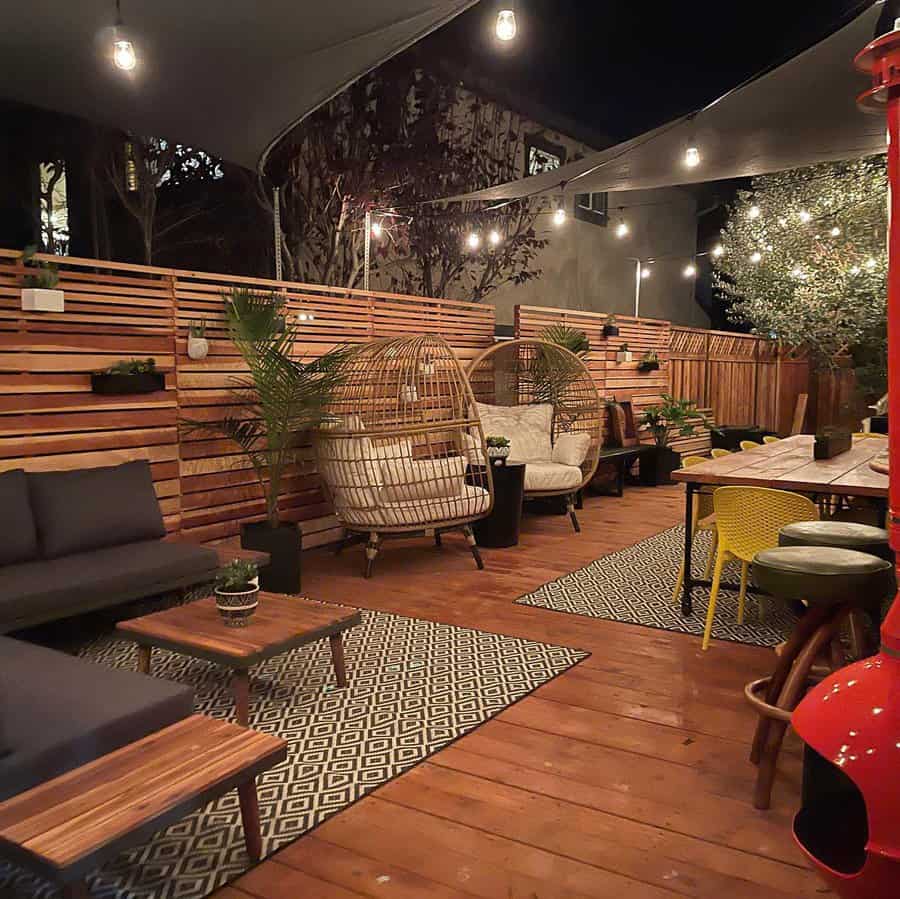
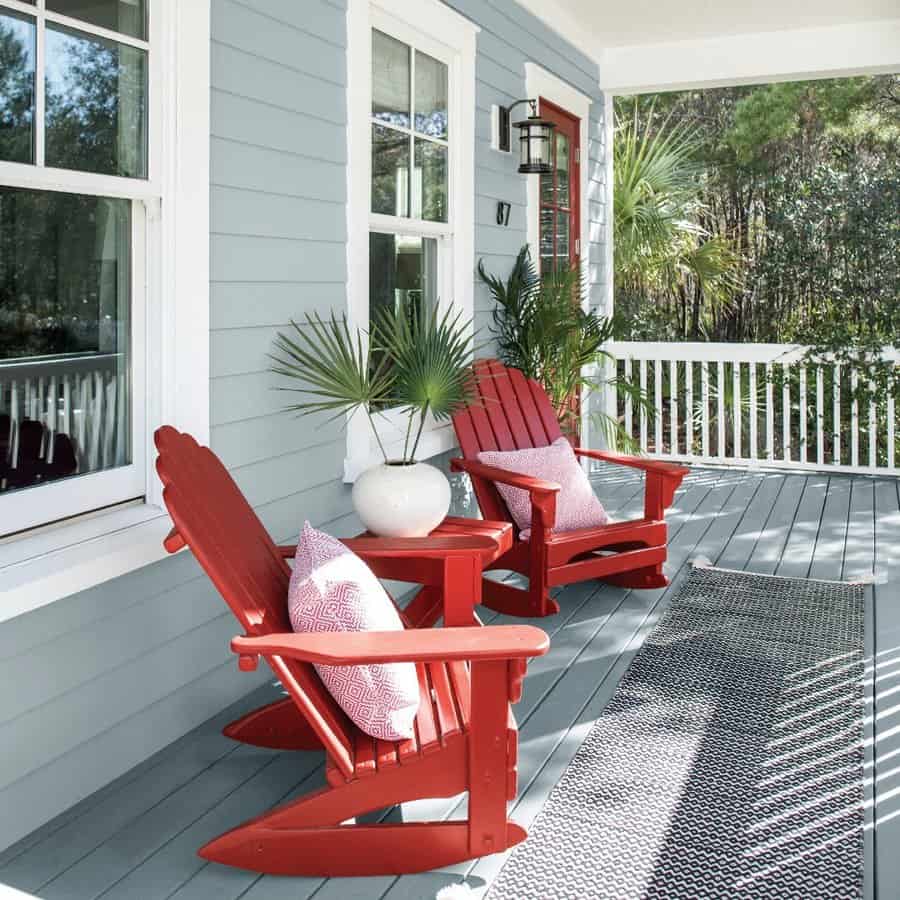
1. Create a Cozy Patio with an Area Rug
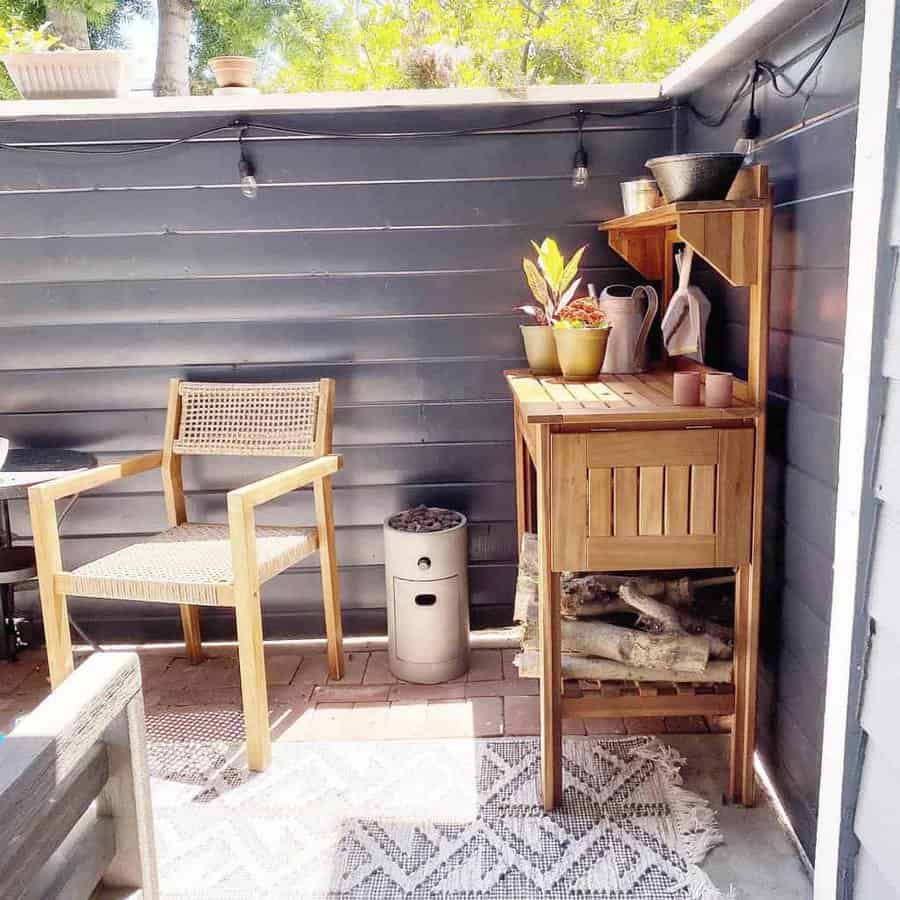
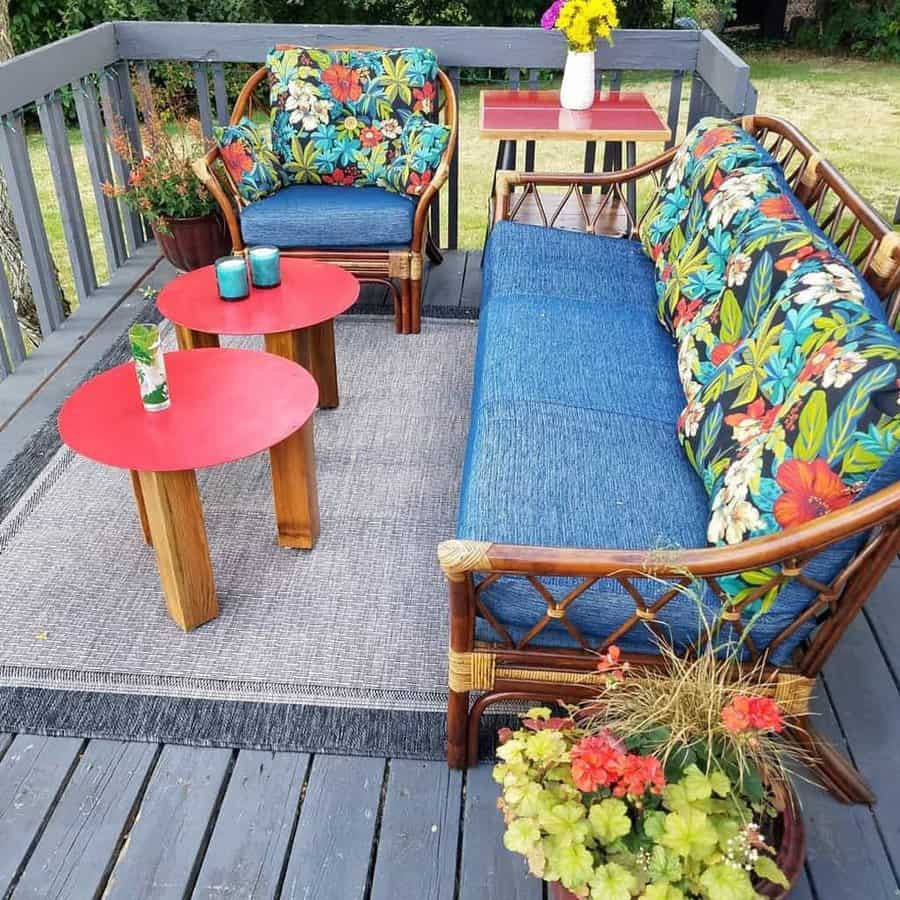
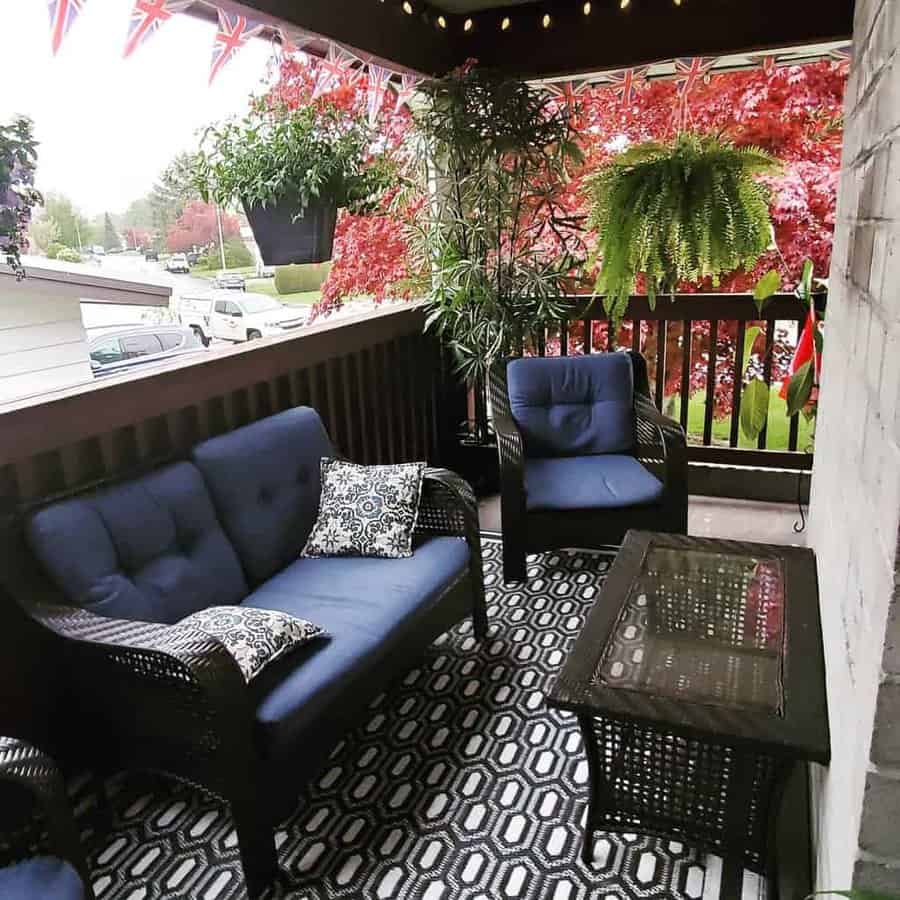
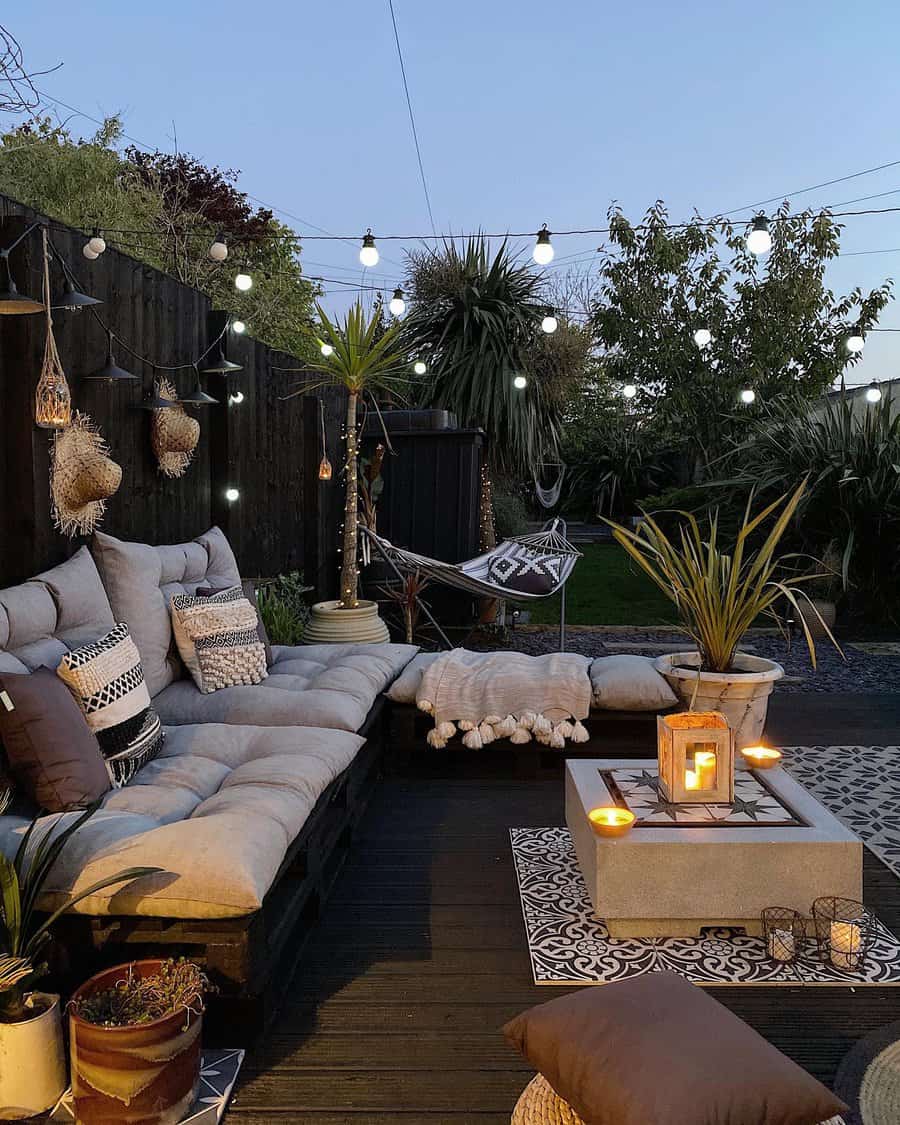
A well-chosen area rug can define your small patio space, bringing warmth and style. Select a rug that is weather-resistant and complements your outdoor furniture. This choice is not only visually appealing but also budget-friendly, transforming a simple patio into a cozy retreat.
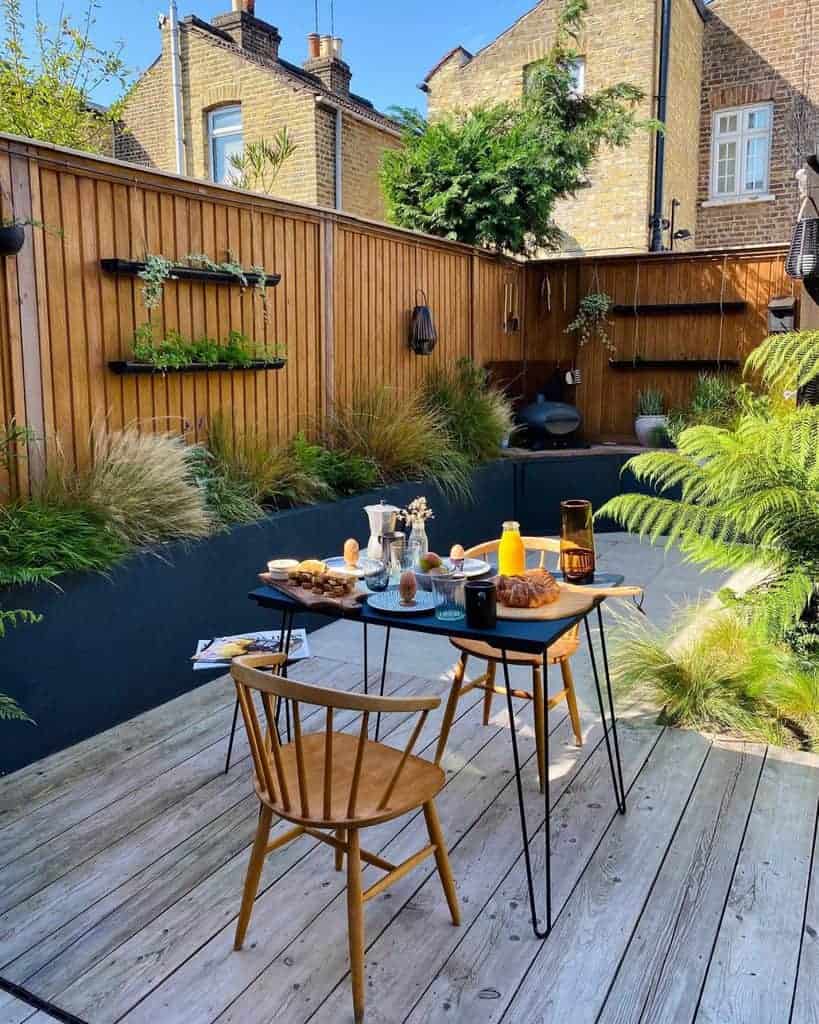
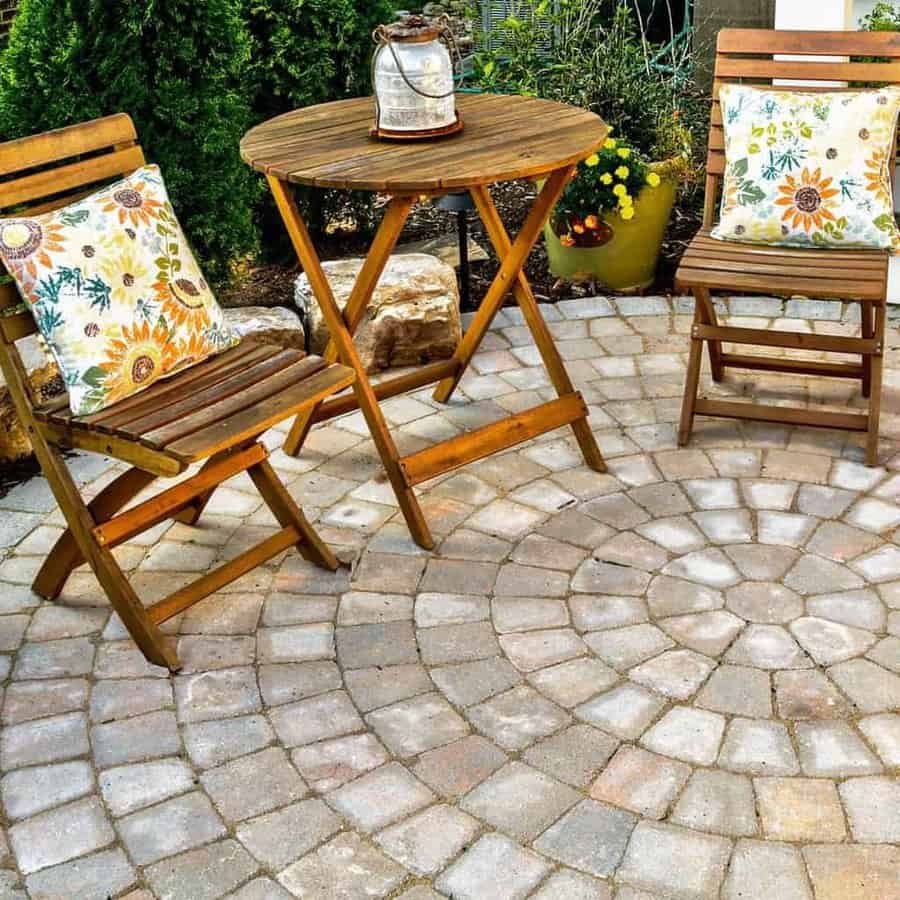
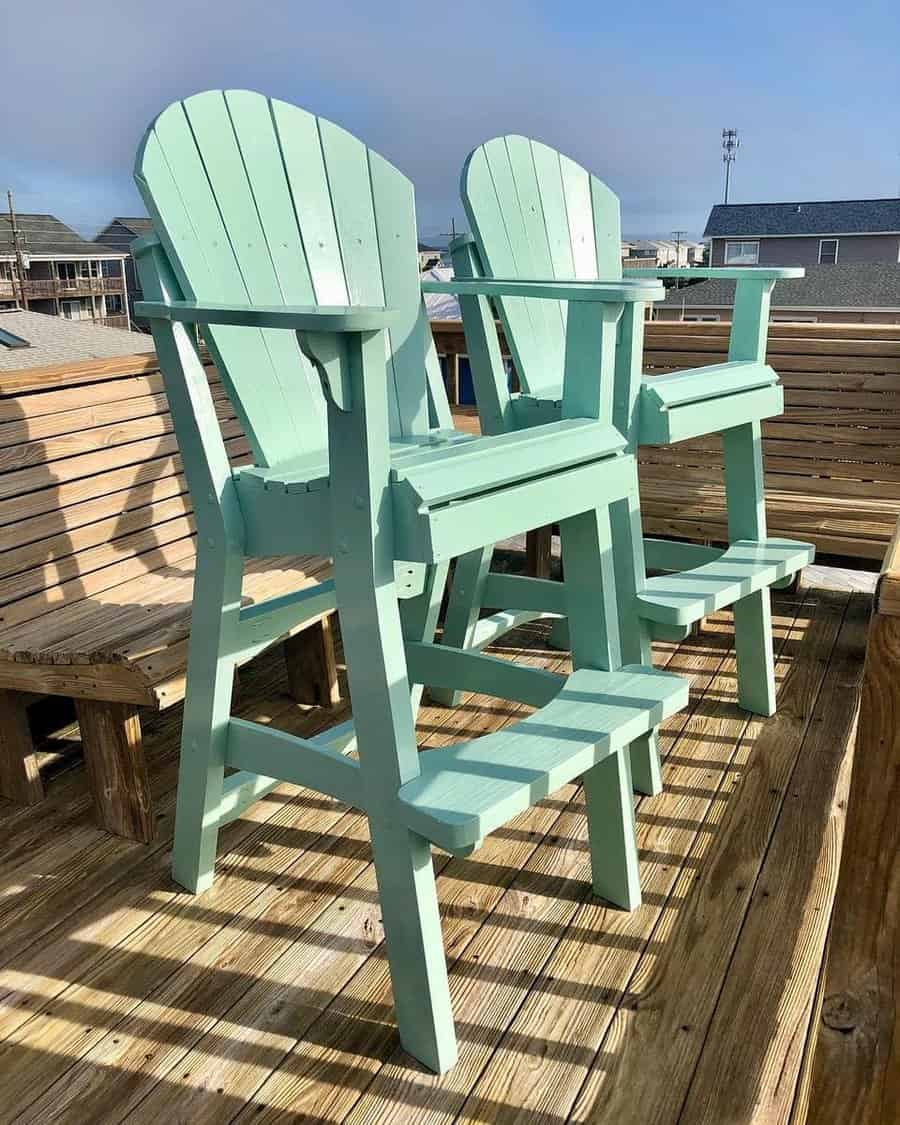
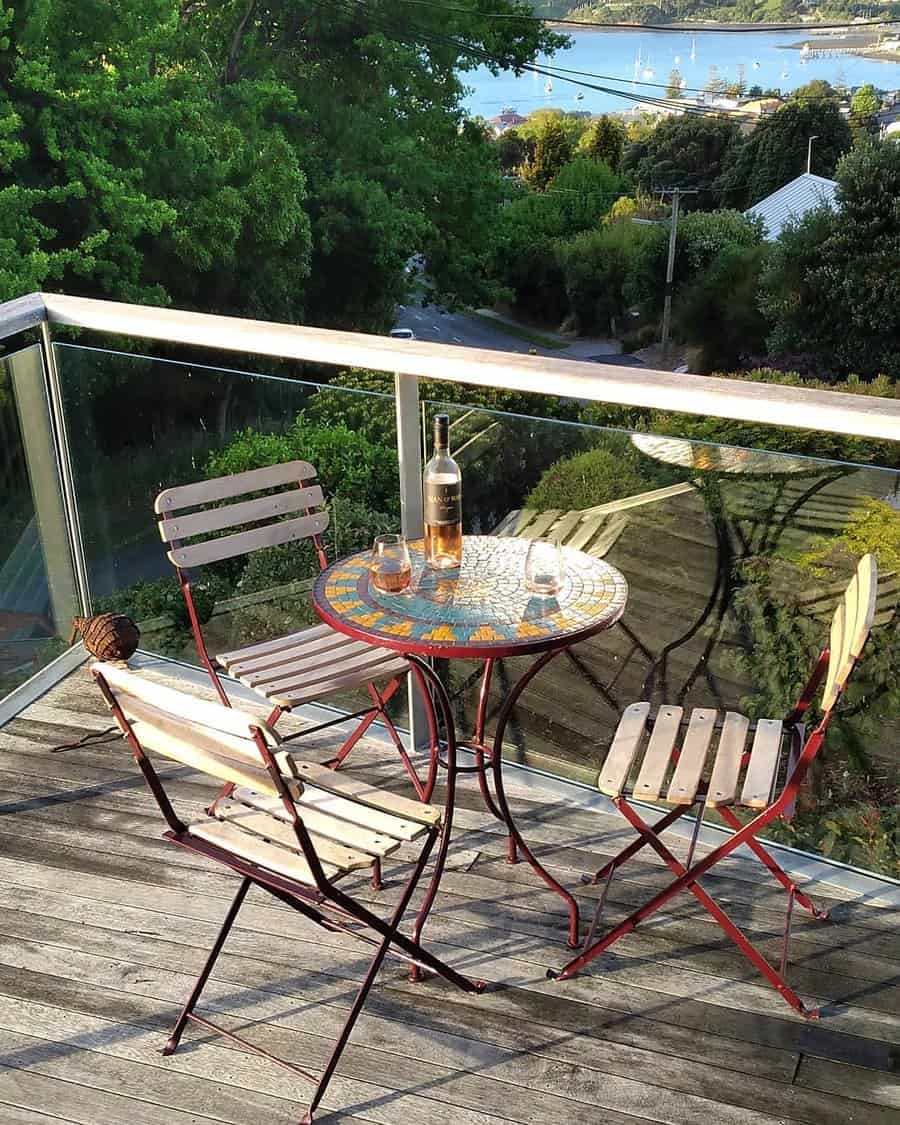
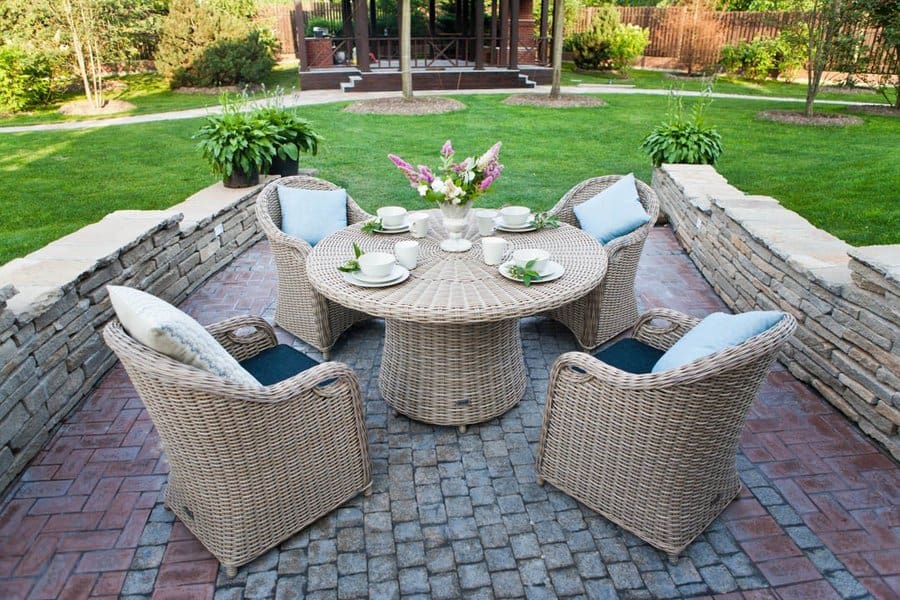
2. Set Up a Two-Person Minimalist Patio
A two-person patio set is ideal for small spaces, offering functionality without clutter. Choose a sleek, minimalist design that maximizes space. This setup is budget-conscious and creates an intimate setting for conversation.
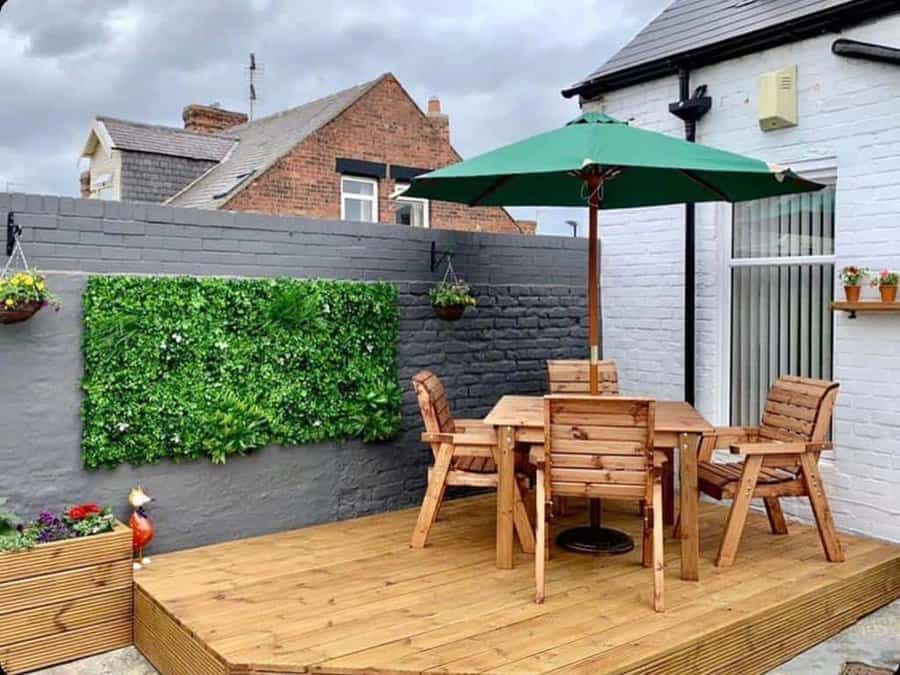
3. Transform Your Patio with Decorative Flooring
Utilize decorative flooring to add character to your patio. Options like interlocking deck tiles can dramatically change the look without permanent alterations, making it an excellent choice for renters. This upgrade is moderately priced but can significantly impact the aesthetic of a small patio.
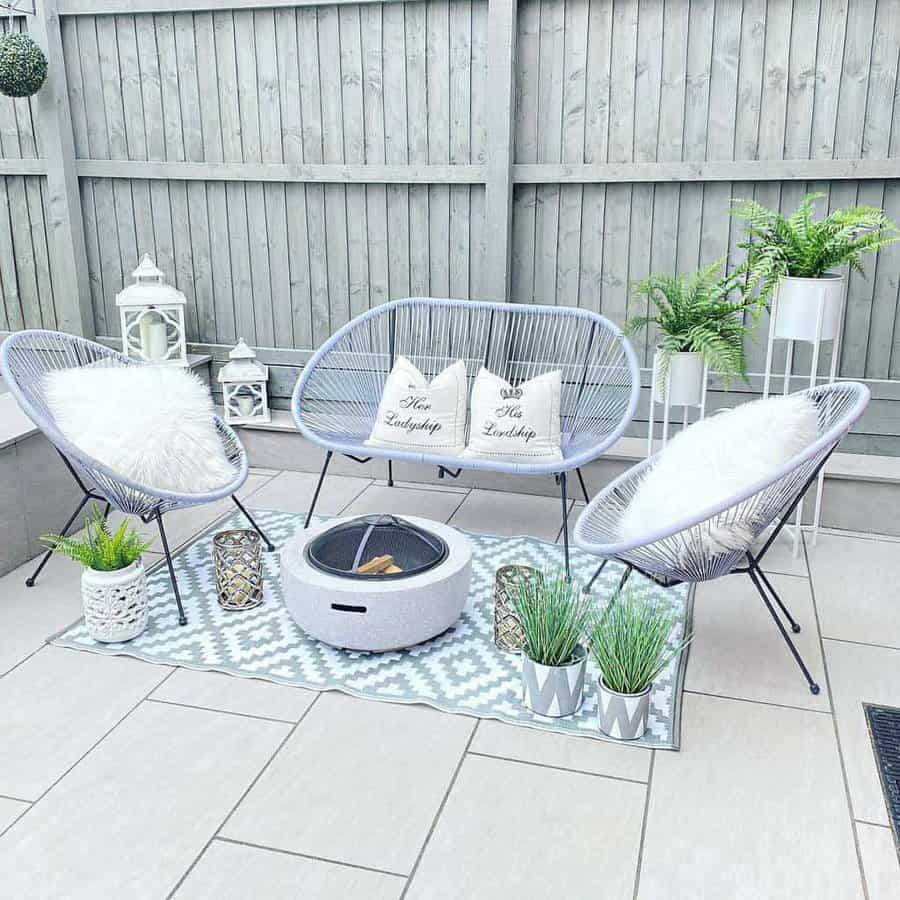
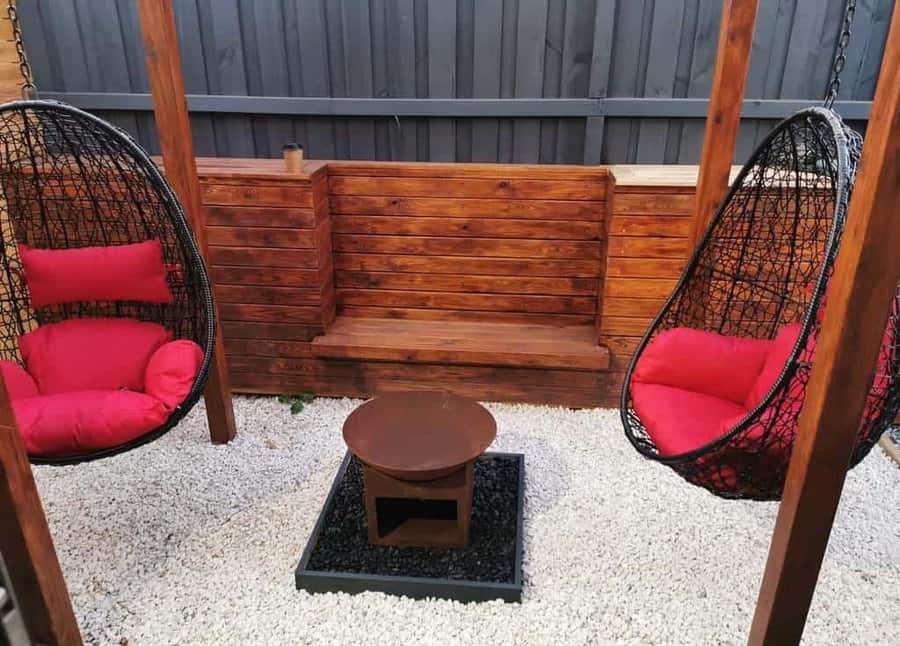
4. Add Comfort with an Egg Chair
An egg chair with a stand is a stylish and comfortable addition to a small patio. It serves as a focal point and offers a cozy nook for relaxation. While slightly higher in price, its unique design and comfort justify the cost.
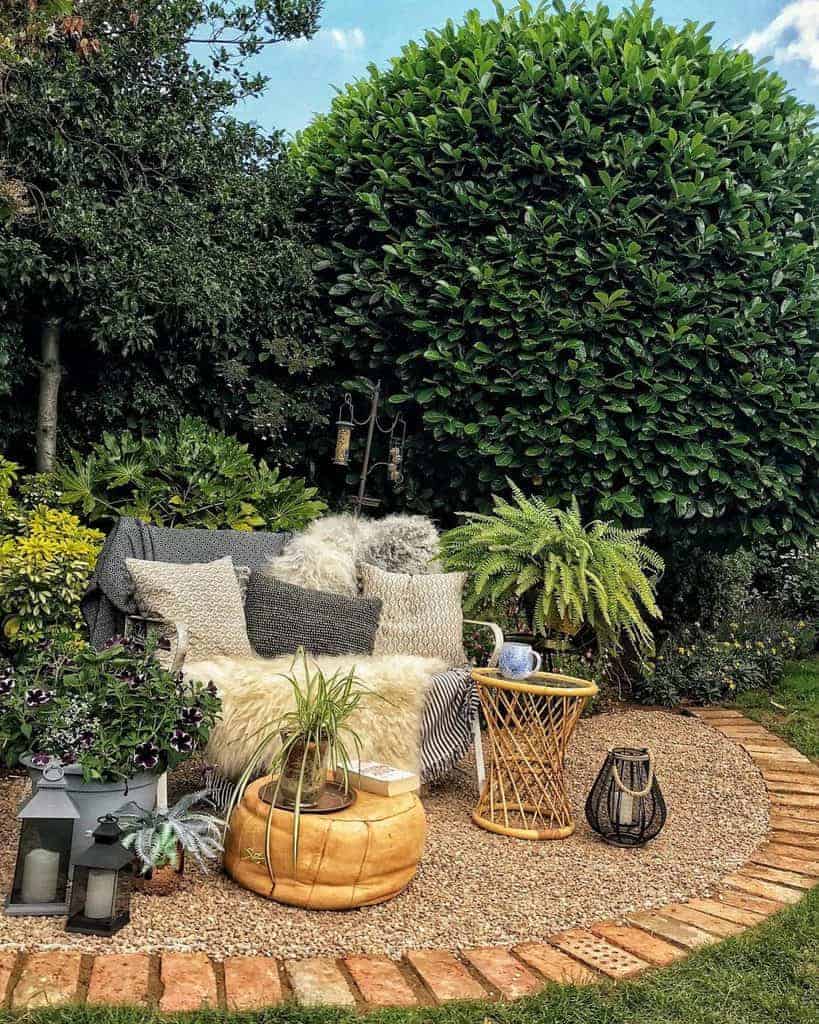
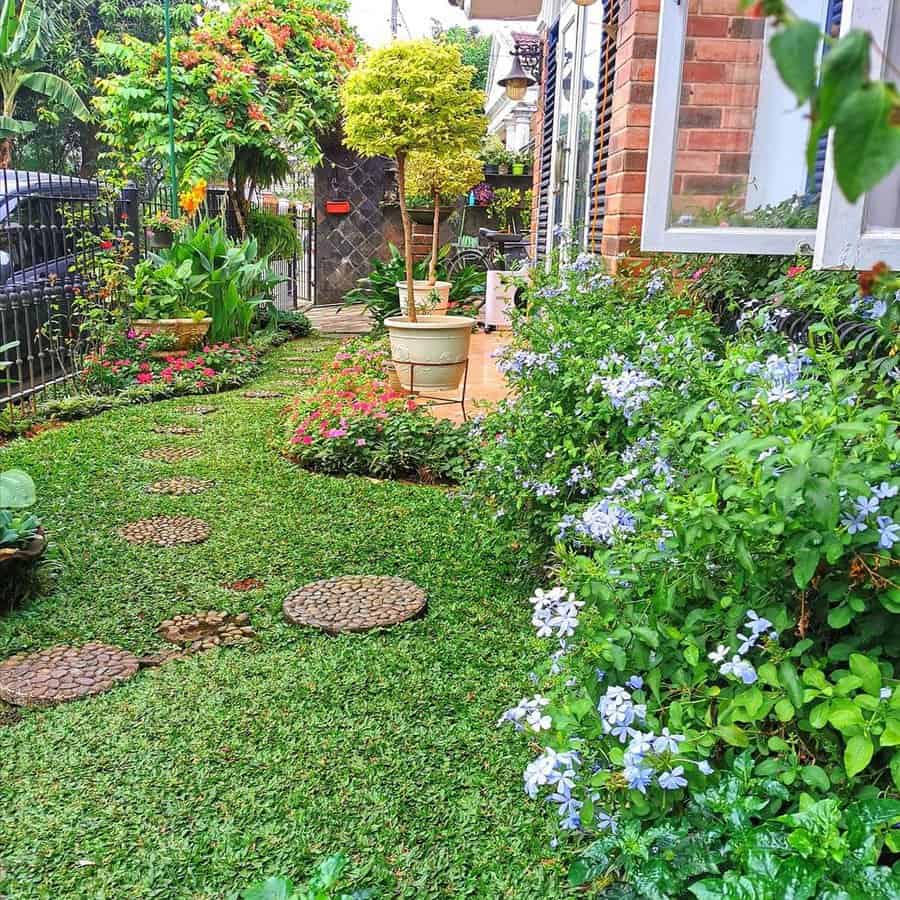
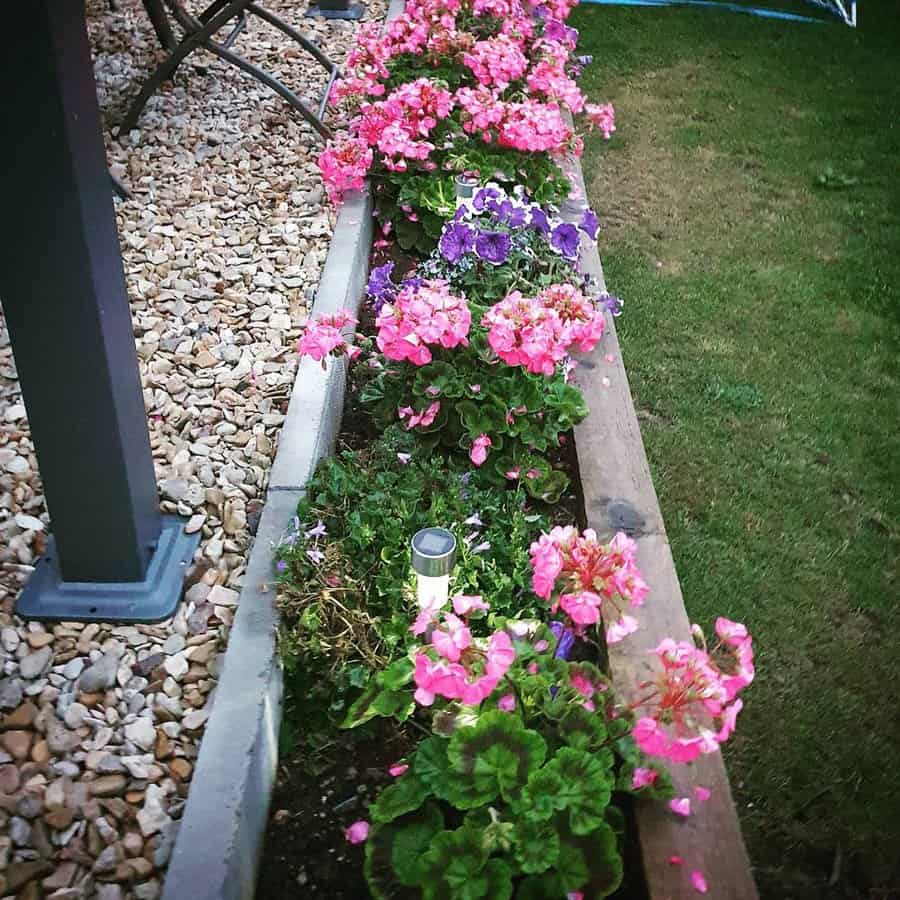
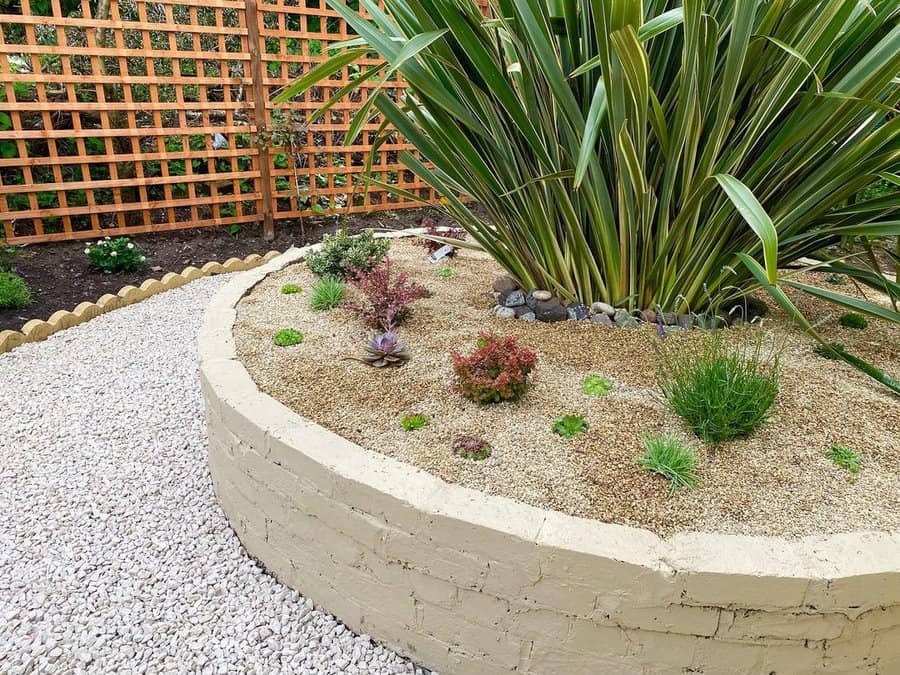
5. Design a Pebble Patio Oasis
Creating a pebble patio is a cost-effective way to add texture and natural elements to your outdoor space. It’s low maintenance and works well in small areas, offering a Zen-like feel that is both functional and aesthetically pleasing.
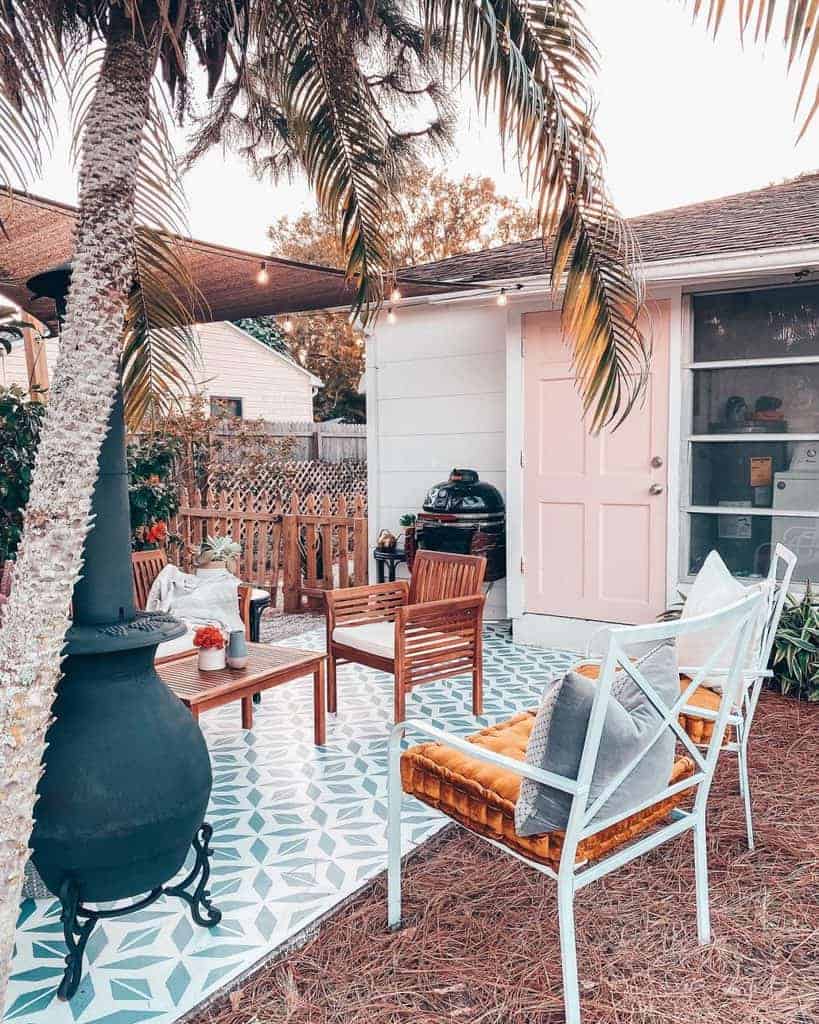
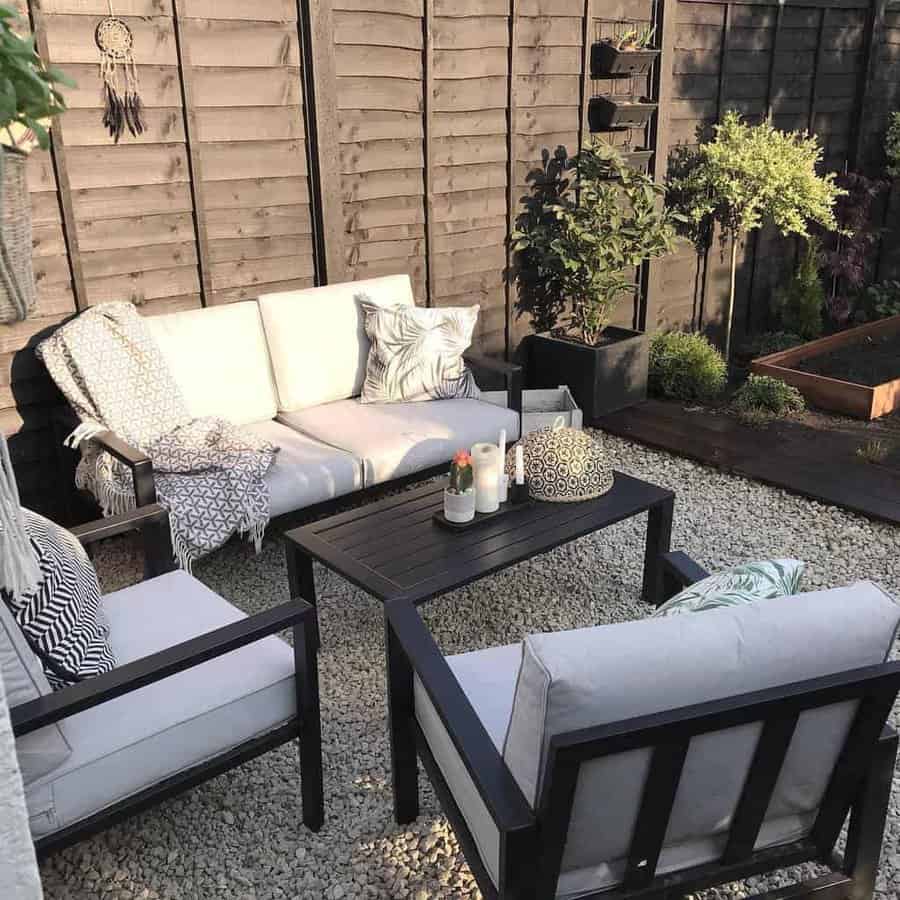
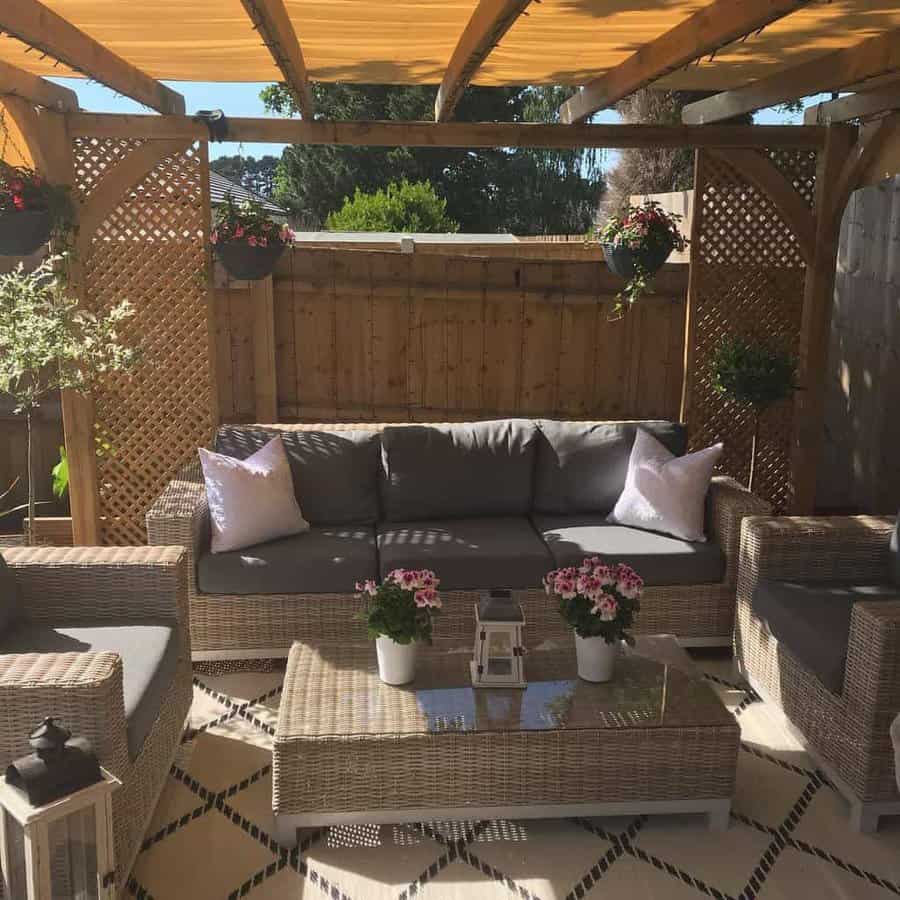
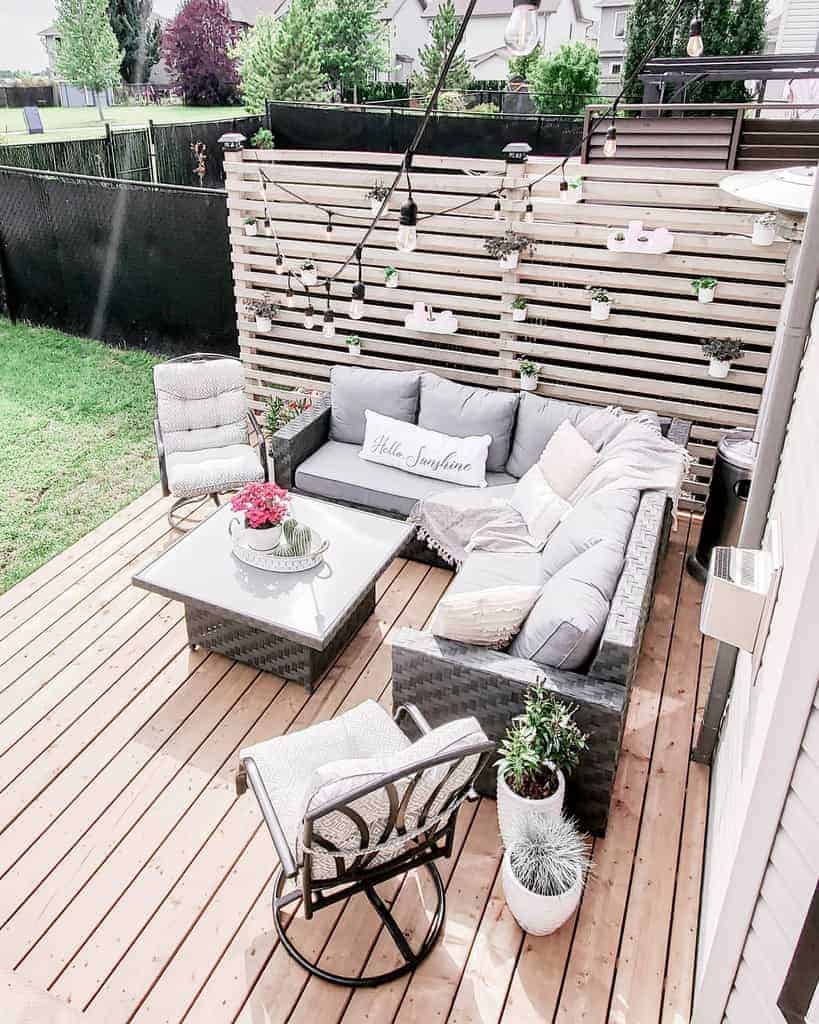
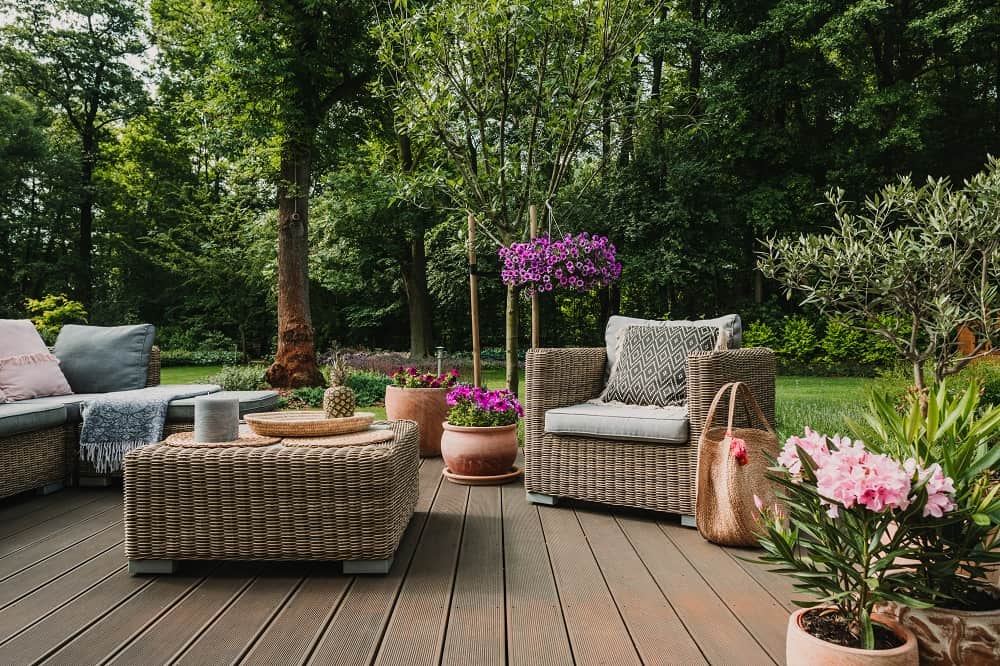
6. Maximize Space with a Small Lounge Set
A compact lounge set can make your small patio both functional and stylish. Look for sets with clean lines and low profiles to avoid overcrowding the space. This choice strikes a balance between cost and comfort, making it a practical option for small patios.
7. Go Green with Artificial Grass on Your Patio
Laying artificial grass is a creative way to add greenery to your patio without the need for maintenance. It’s especially suitable for urban spaces where natural grass is impractical. The initial cost may be higher, but it’s durable and long-lasting.
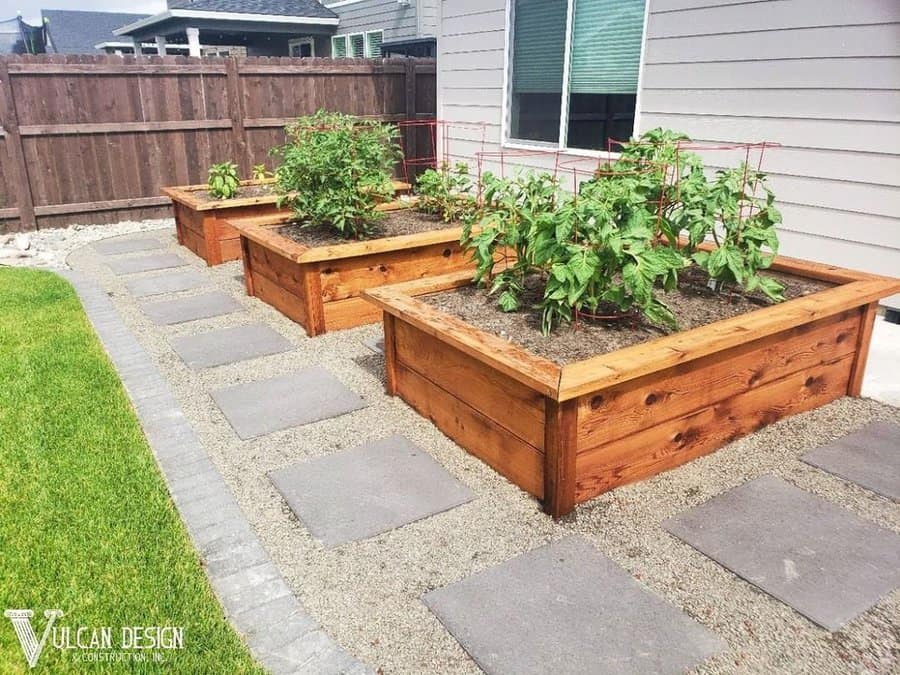
8. Modernize with a Concrete Paver Patio
Concrete pavers are an excellent option for a modern, sleek patio design. They are durable, low-maintenance, and can be laid in various patterns. The cost varies, but concrete pavers are a solid investment for a lasting and stylish patio.
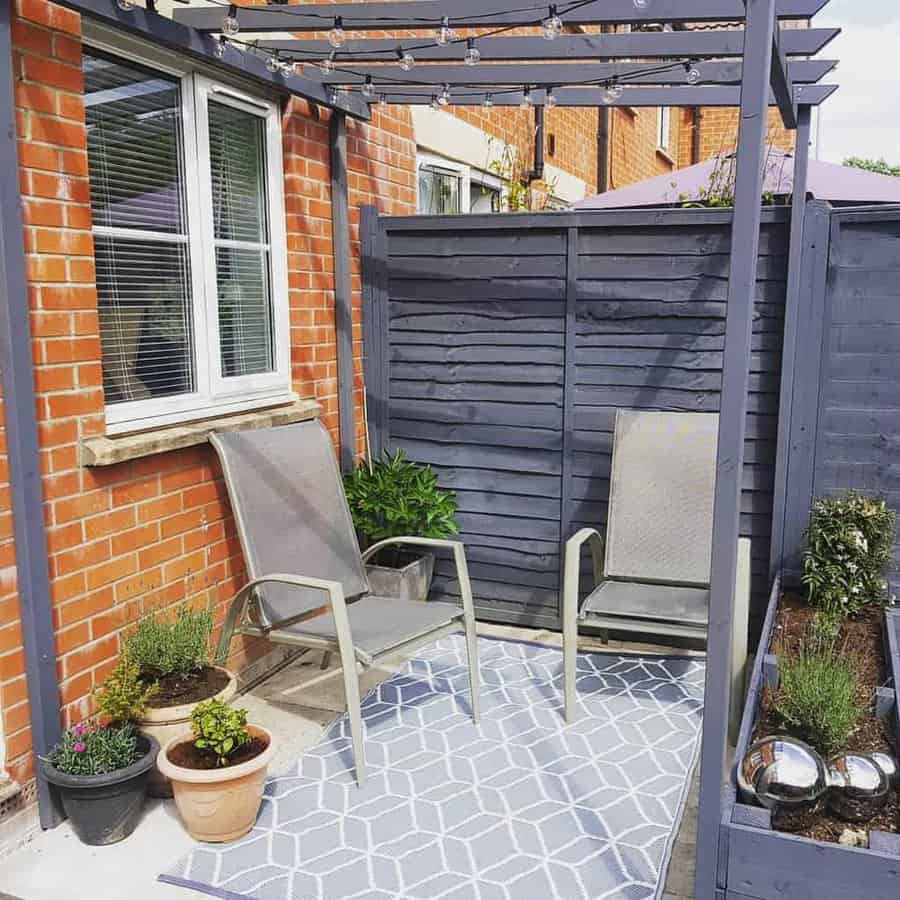
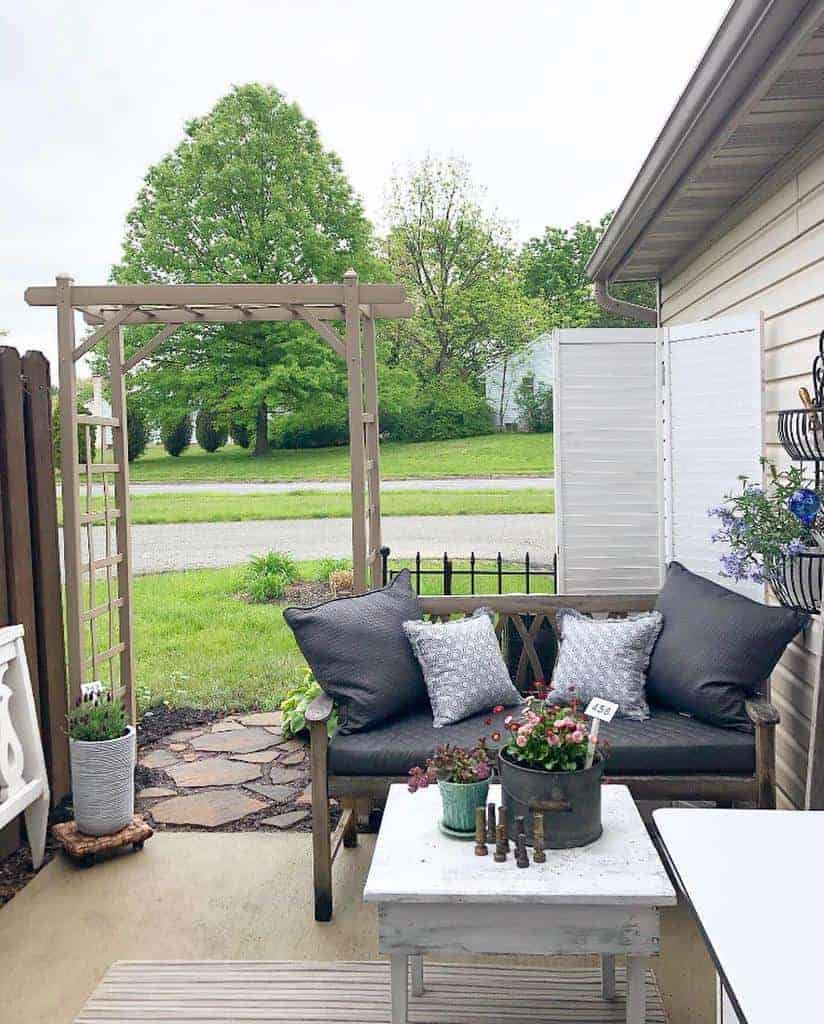
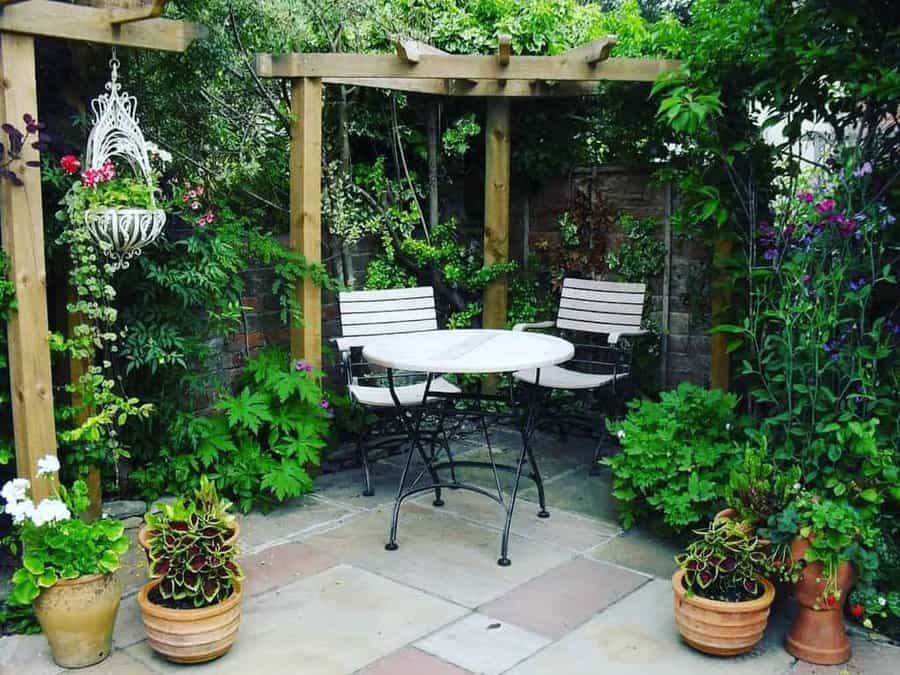
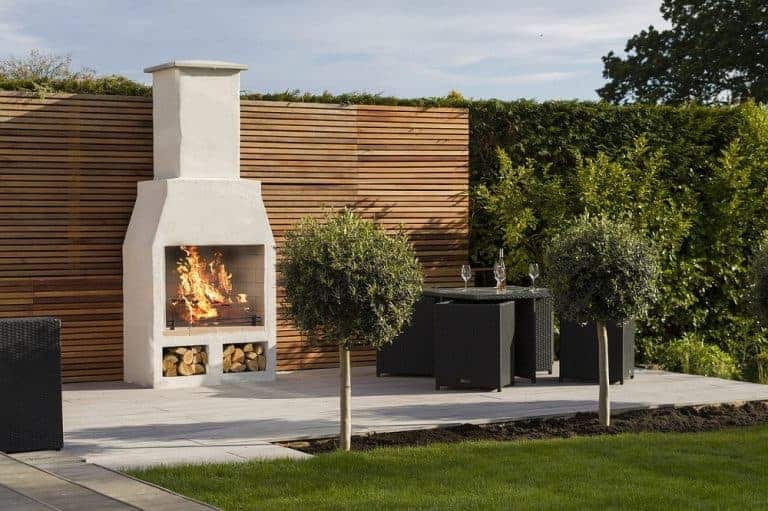
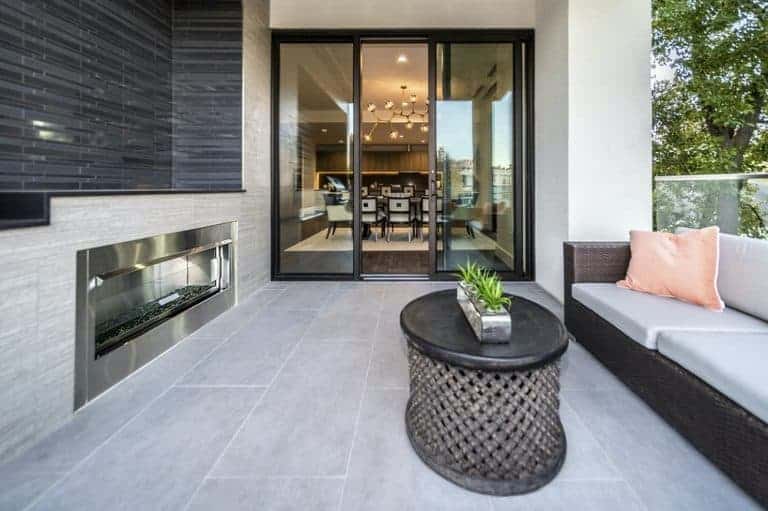
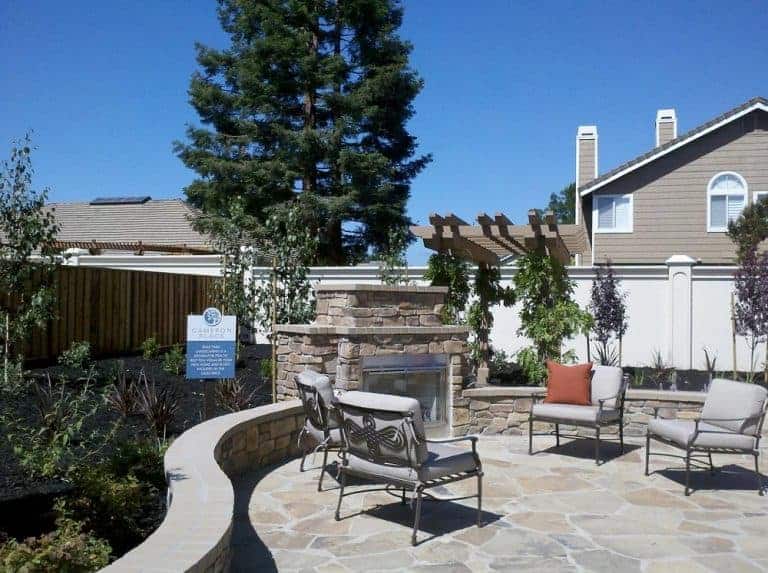
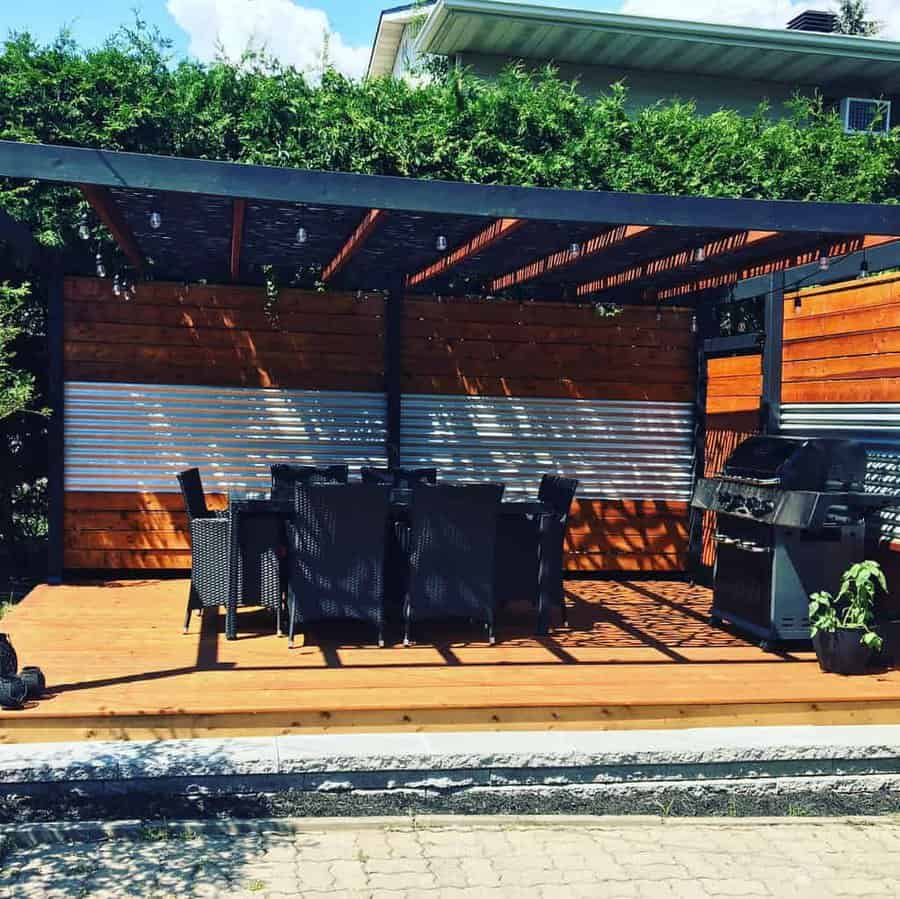
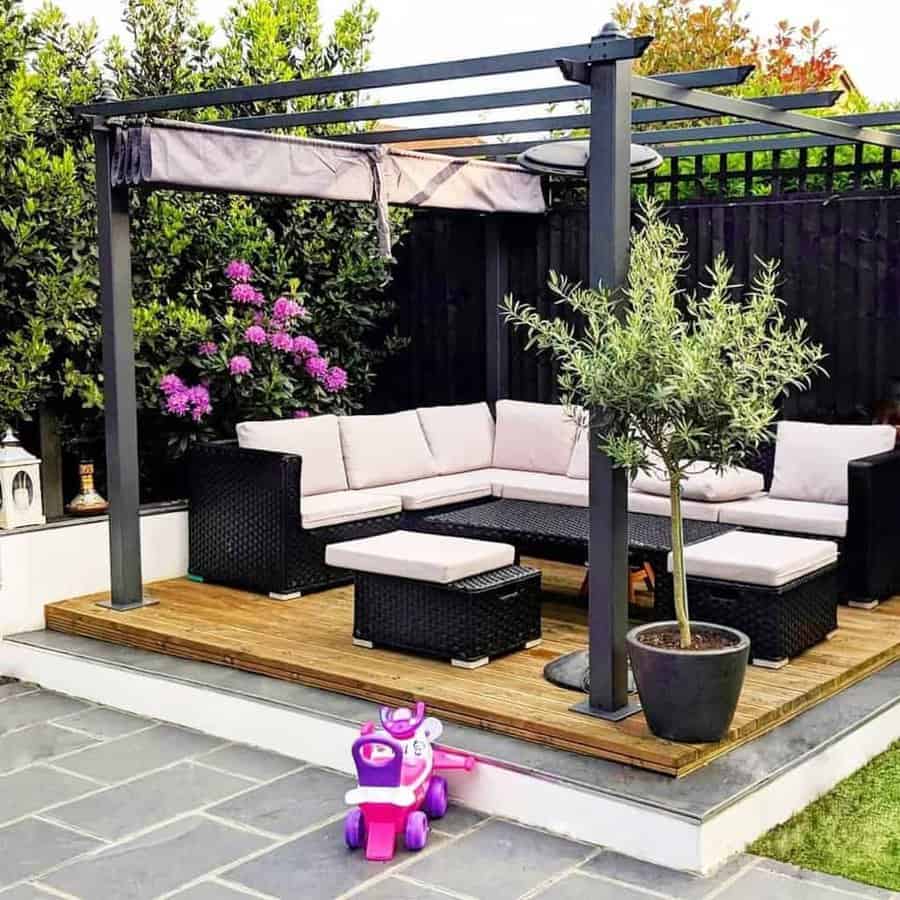
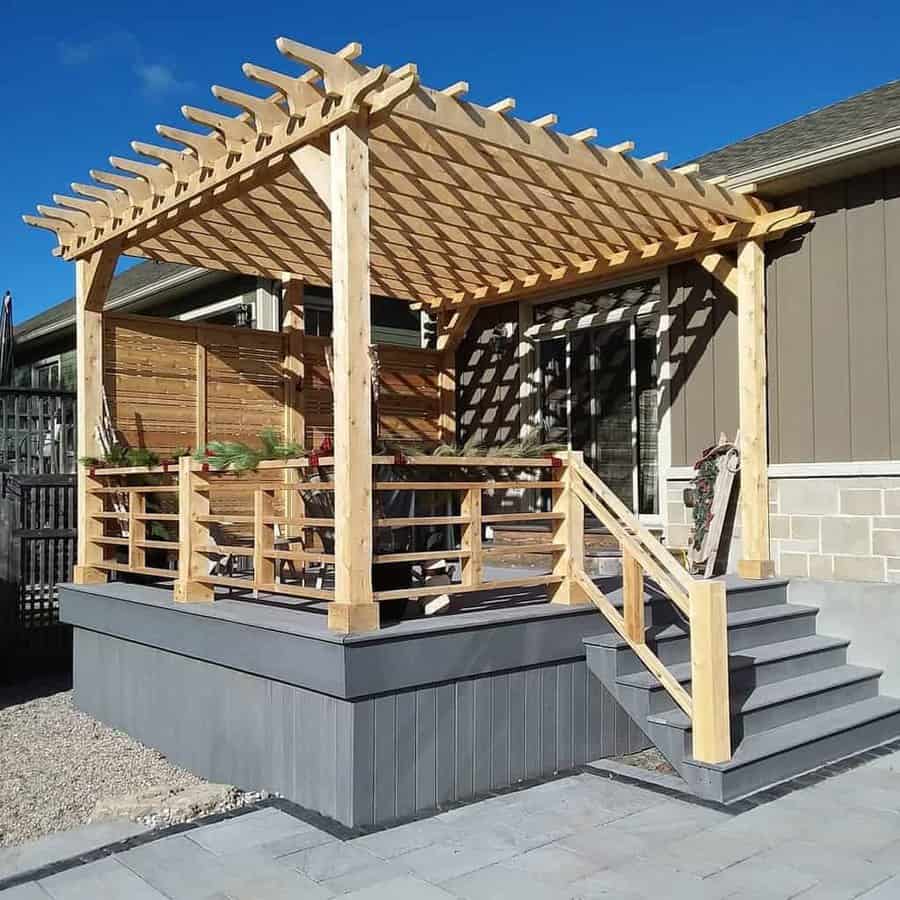
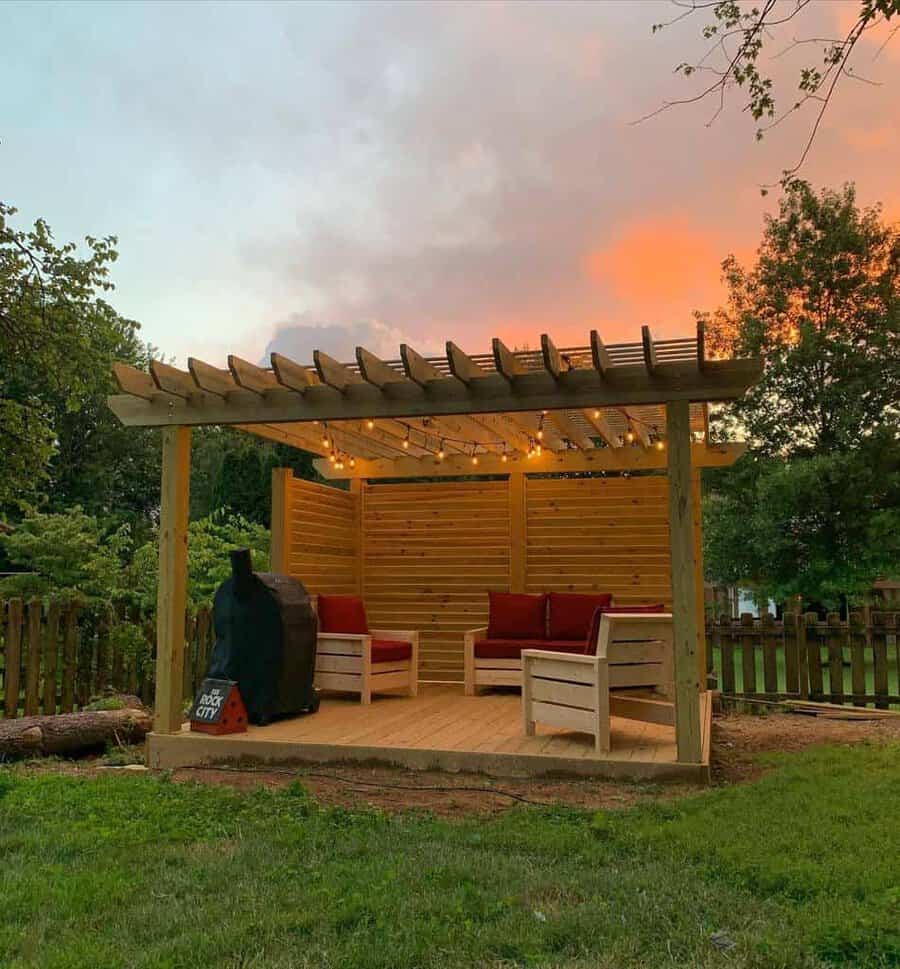
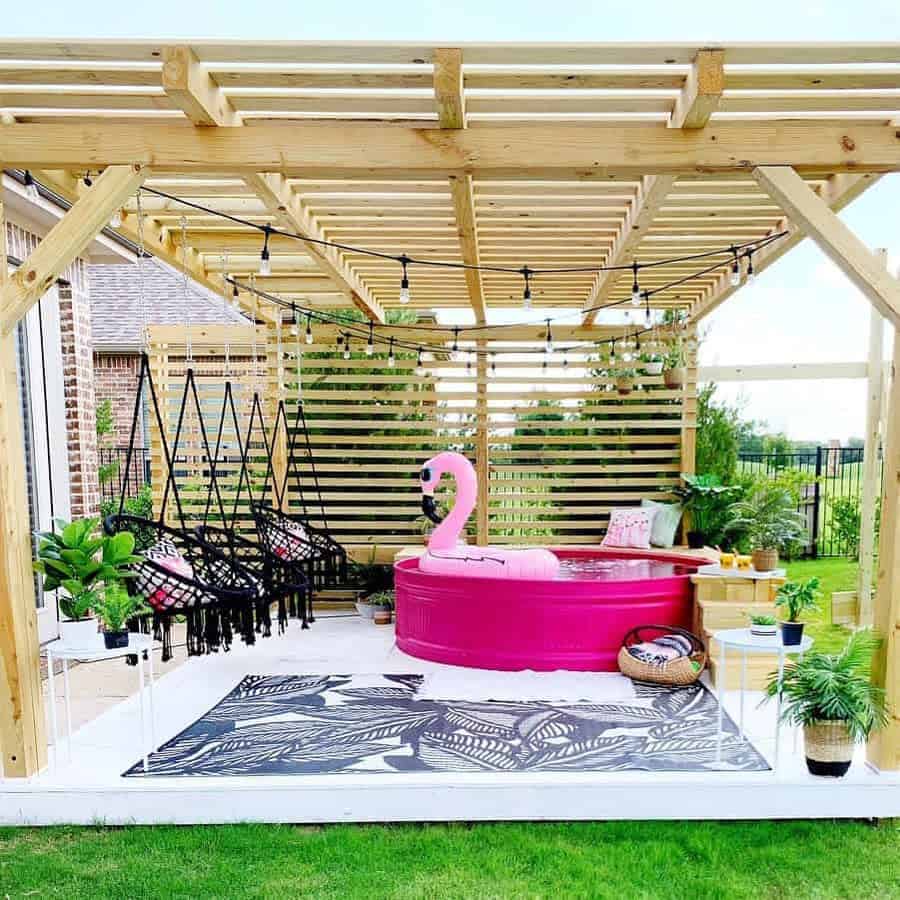
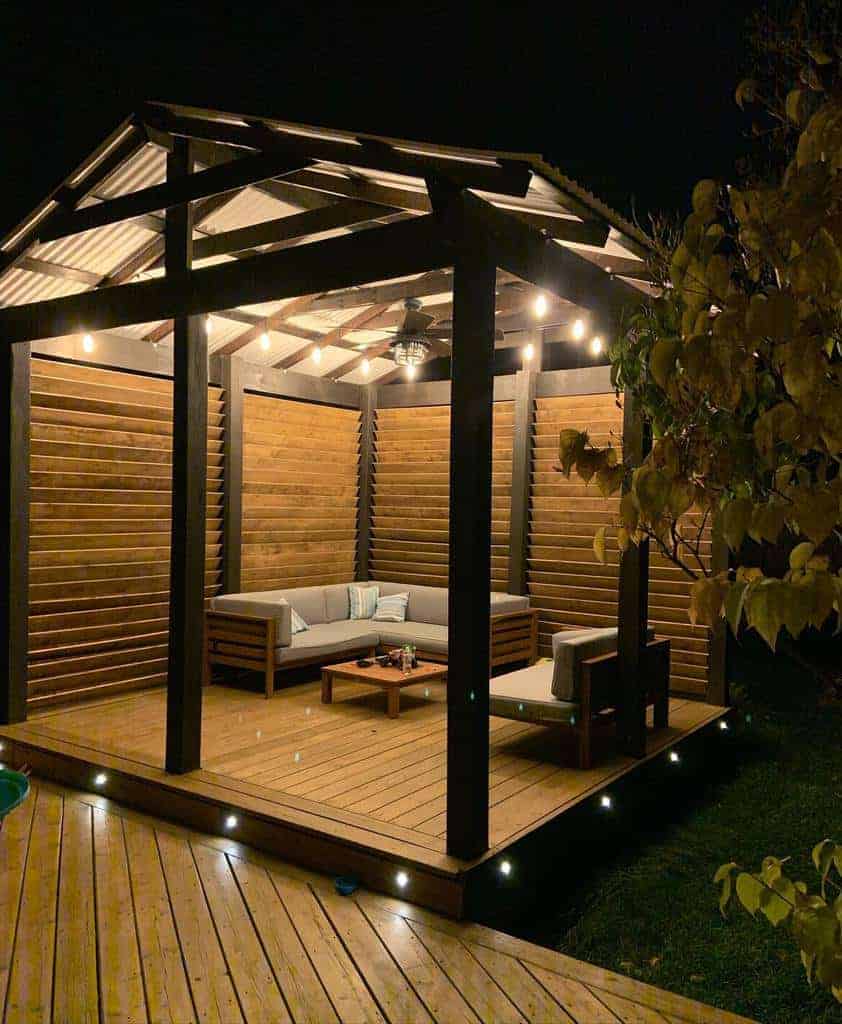
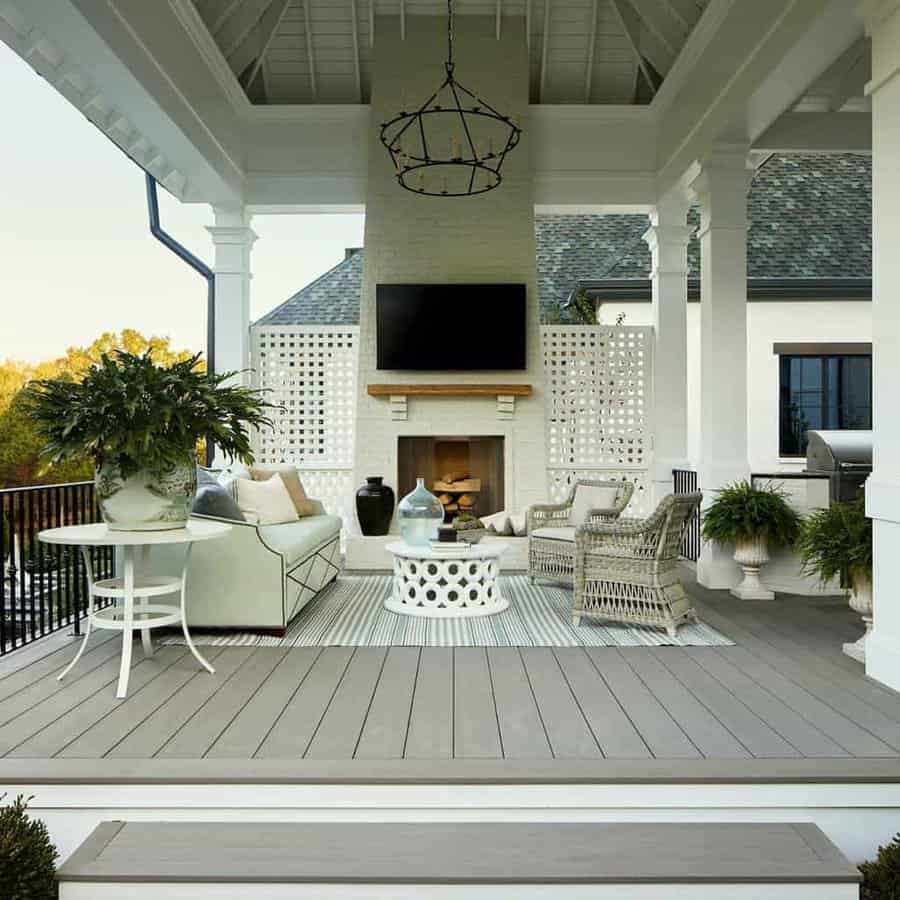
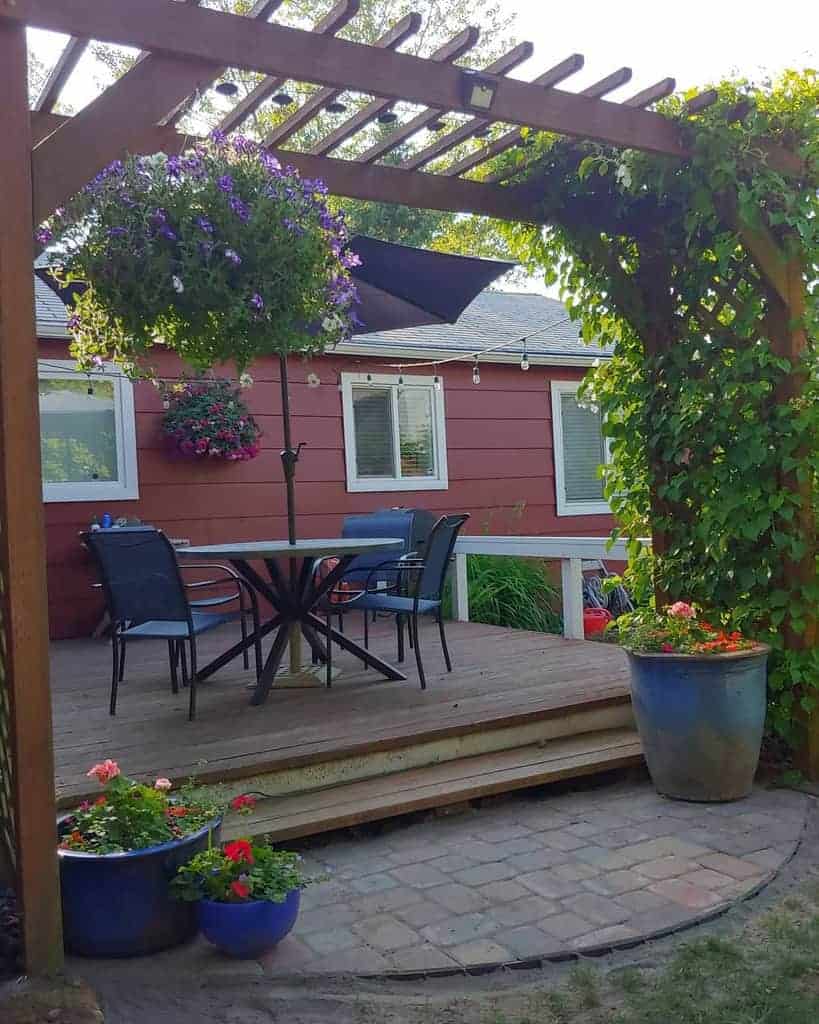
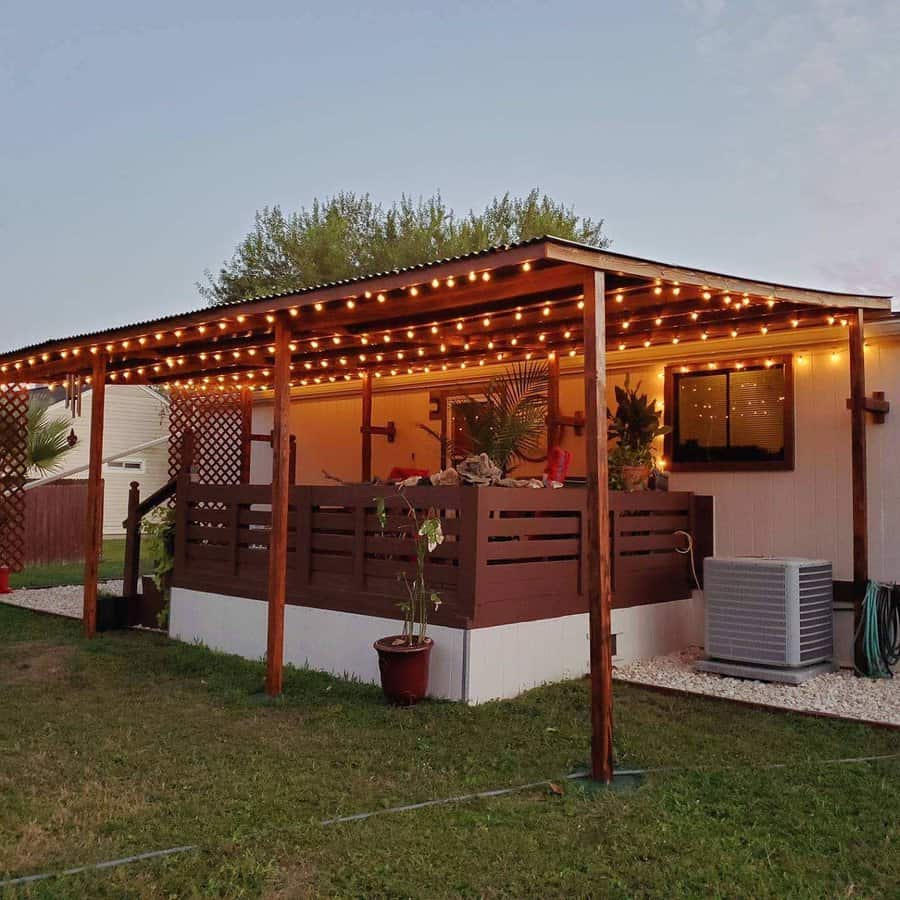
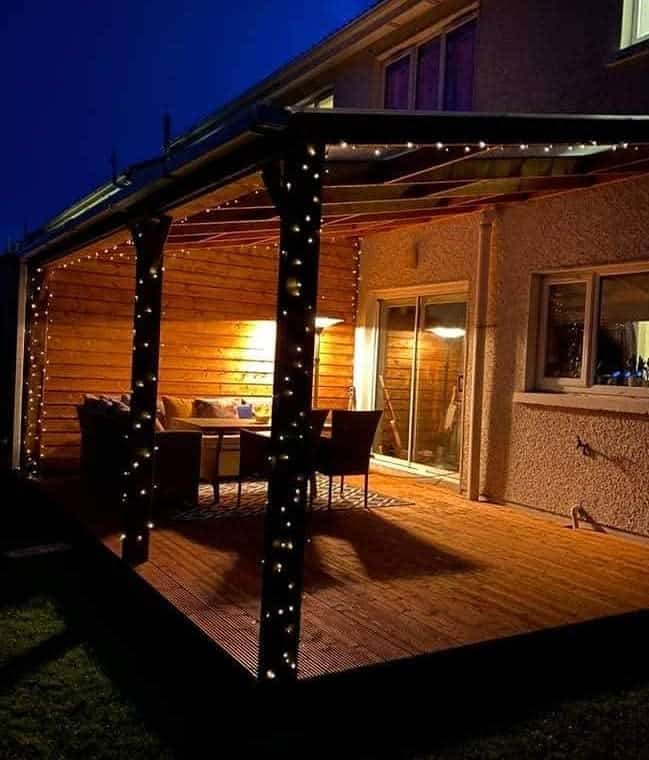
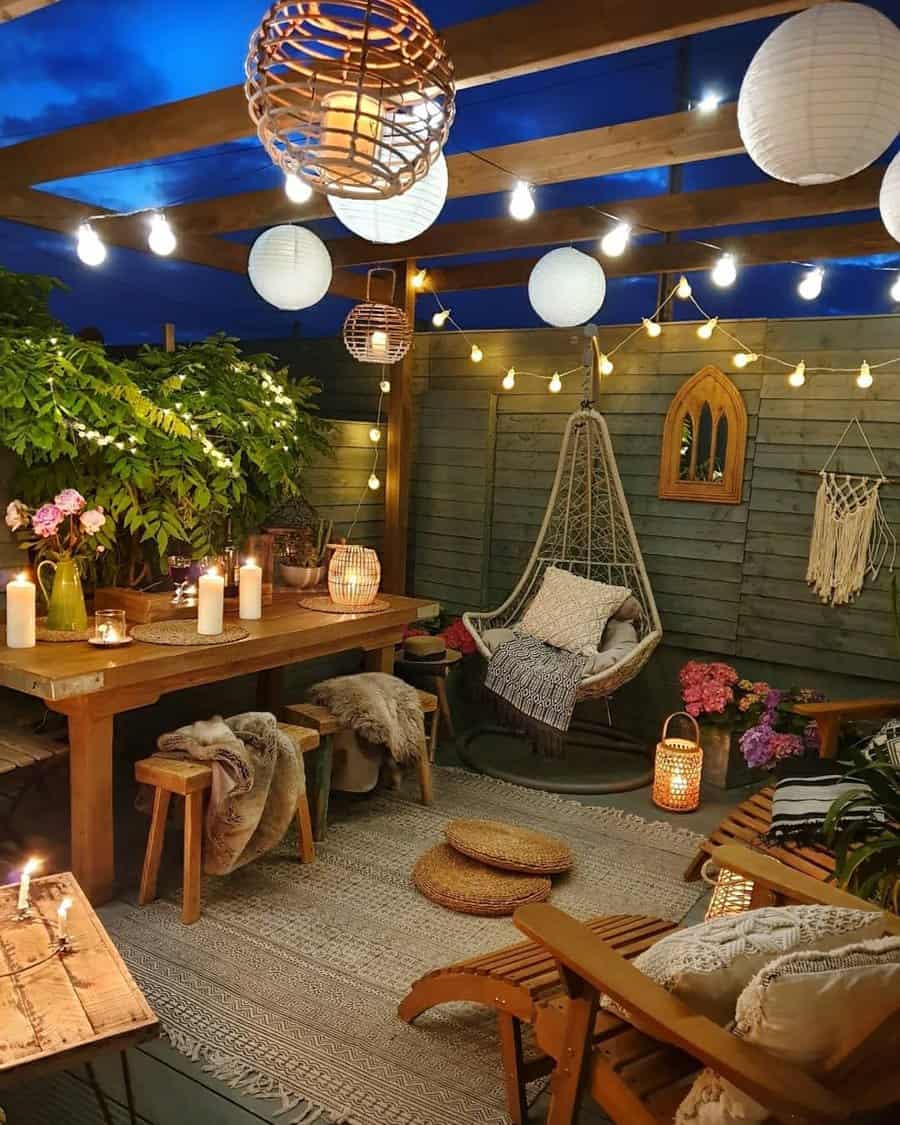
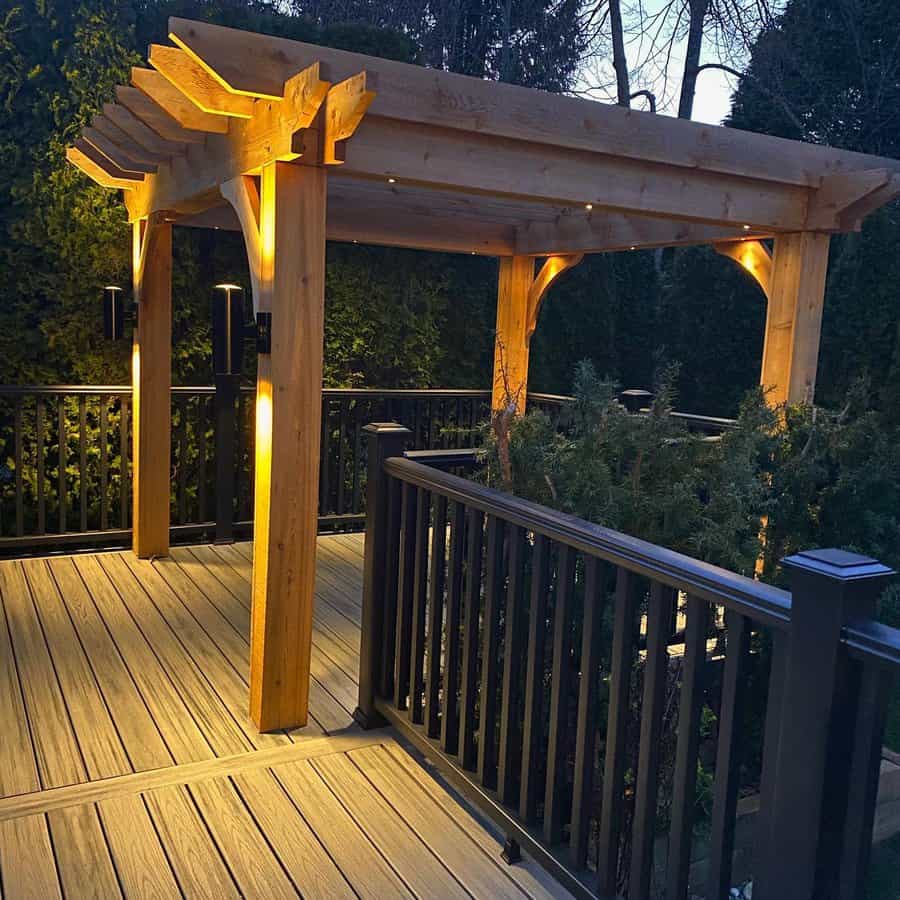
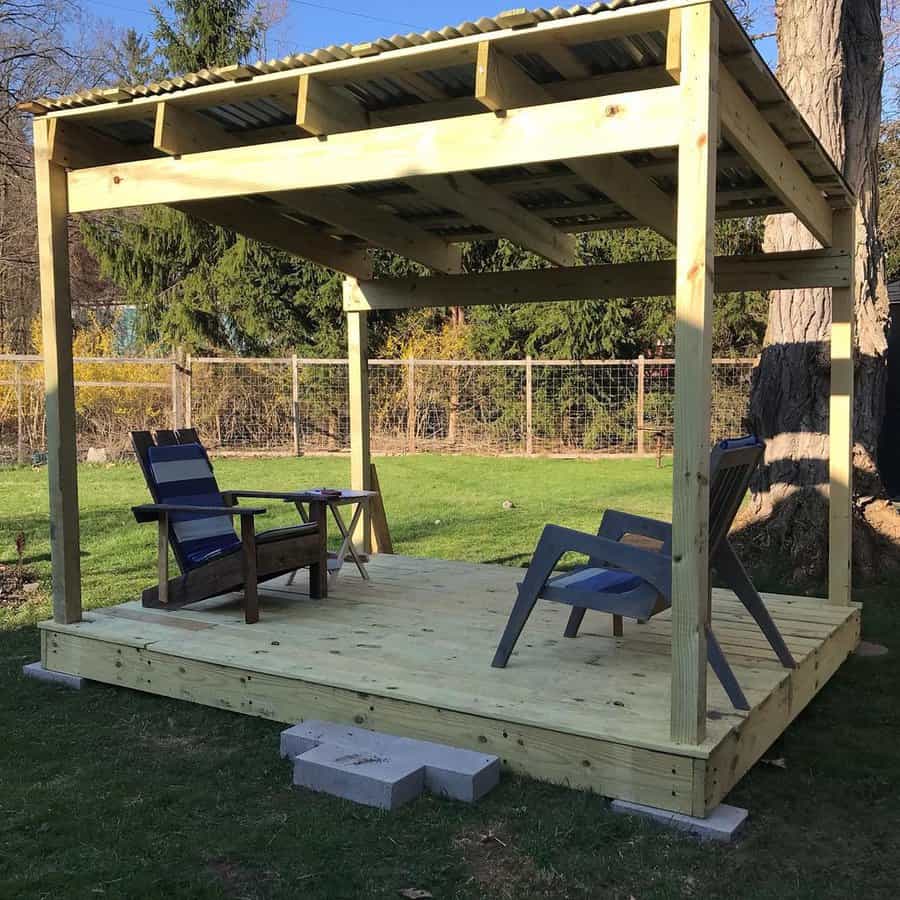
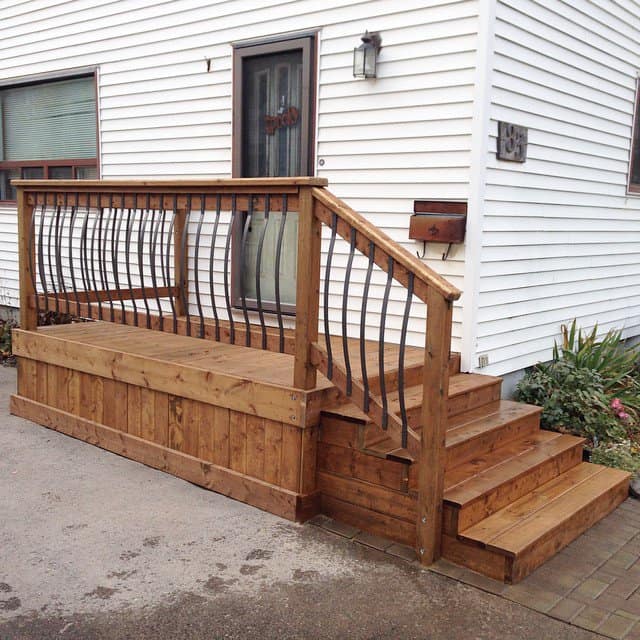
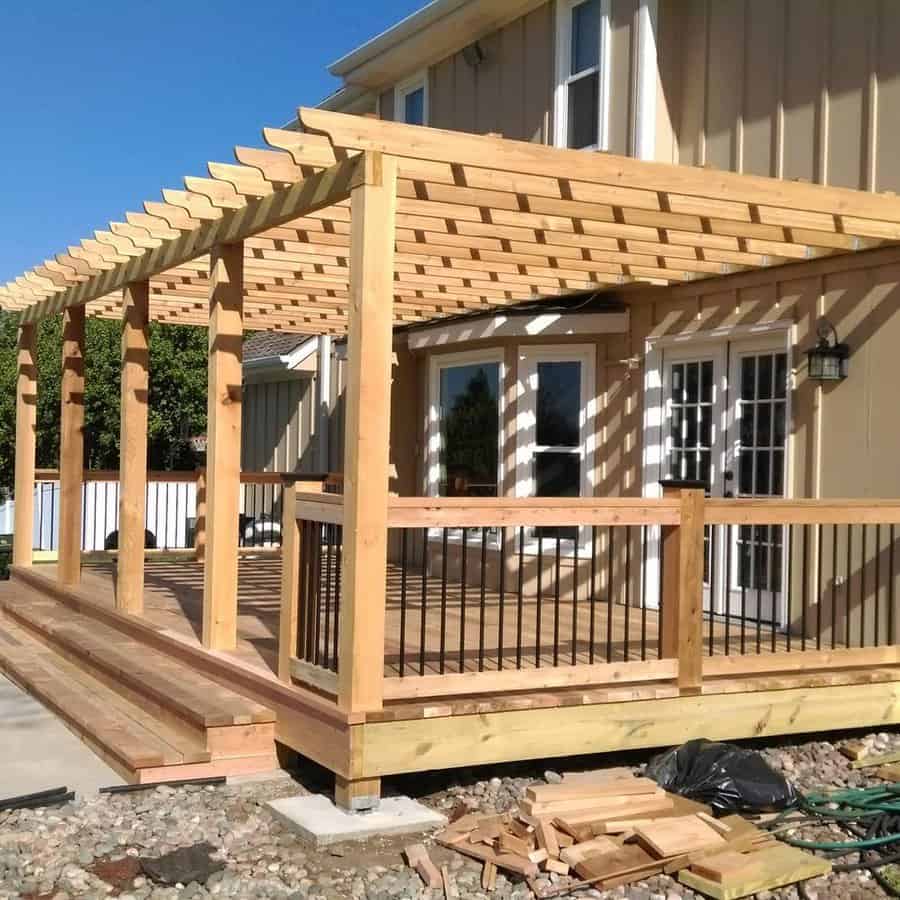
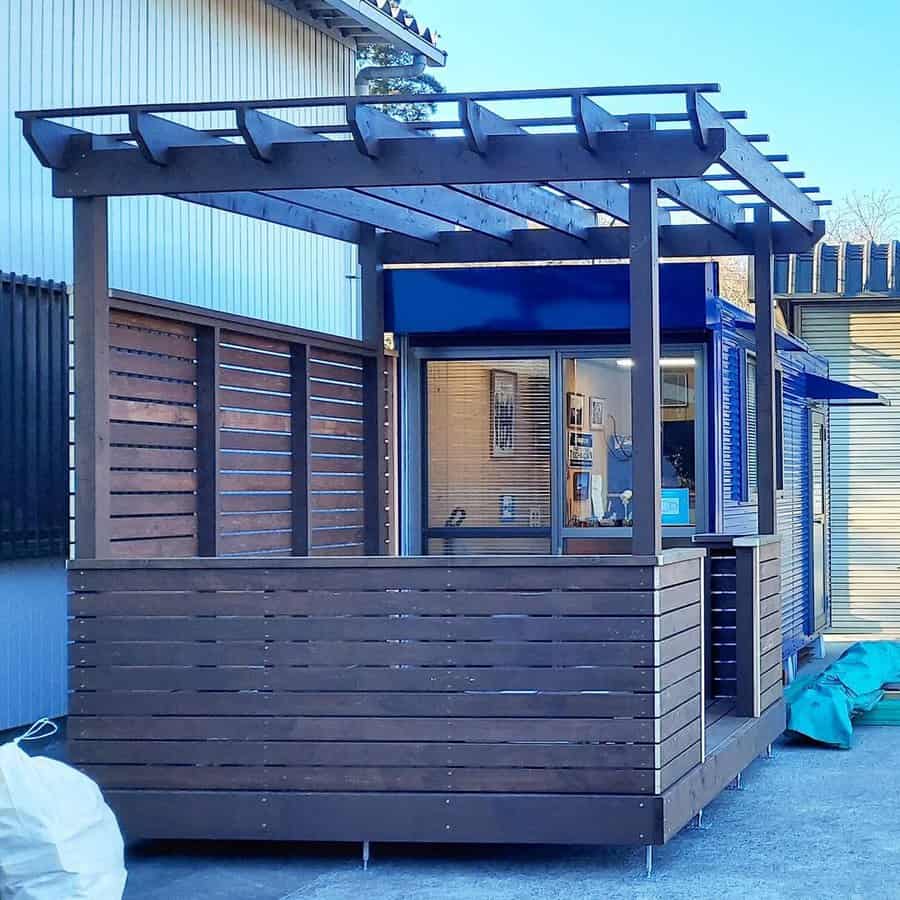
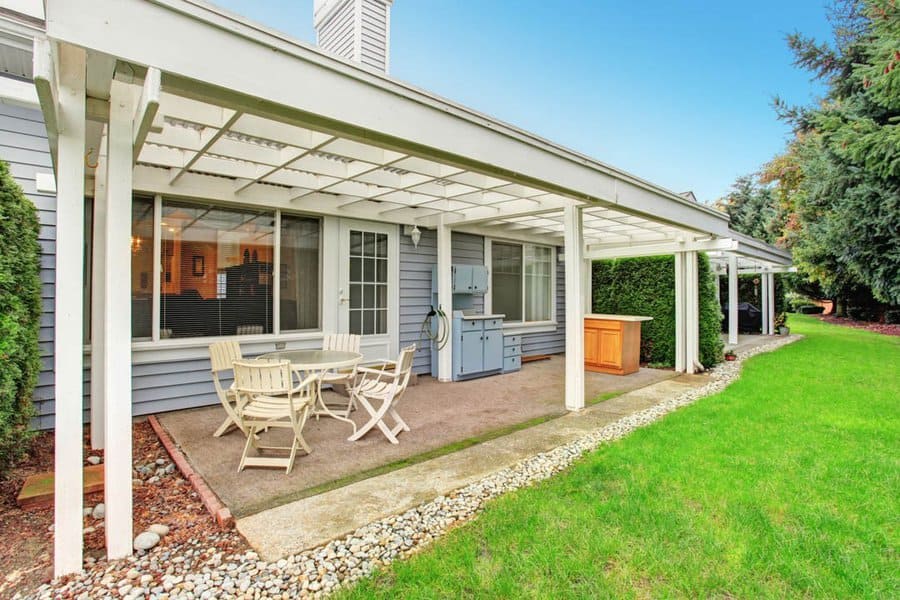
9. Enhance Outdoor Living with a Pergola
Adding a pergola to your patio creates a sense of enclosure and shade. While this can be a more significant investment, a pergola adds value to your property and transforms your patio into an elegant outdoor room.
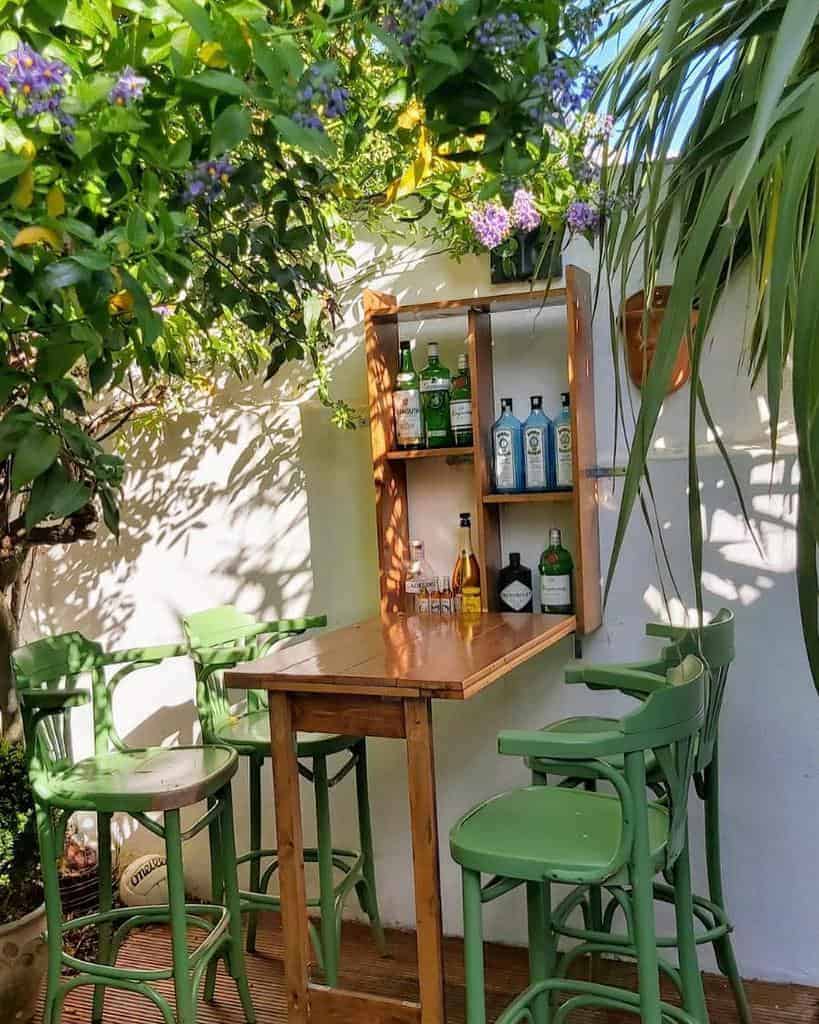
10. Space-Saving Wall-Mounted Patio Bar
A wall-mounted bar is a space-saving and functional addition to a small patio. It’s ideal for entertaining and adds a touch of sophistication. The cost is generally moderate, depending on the materials and design.
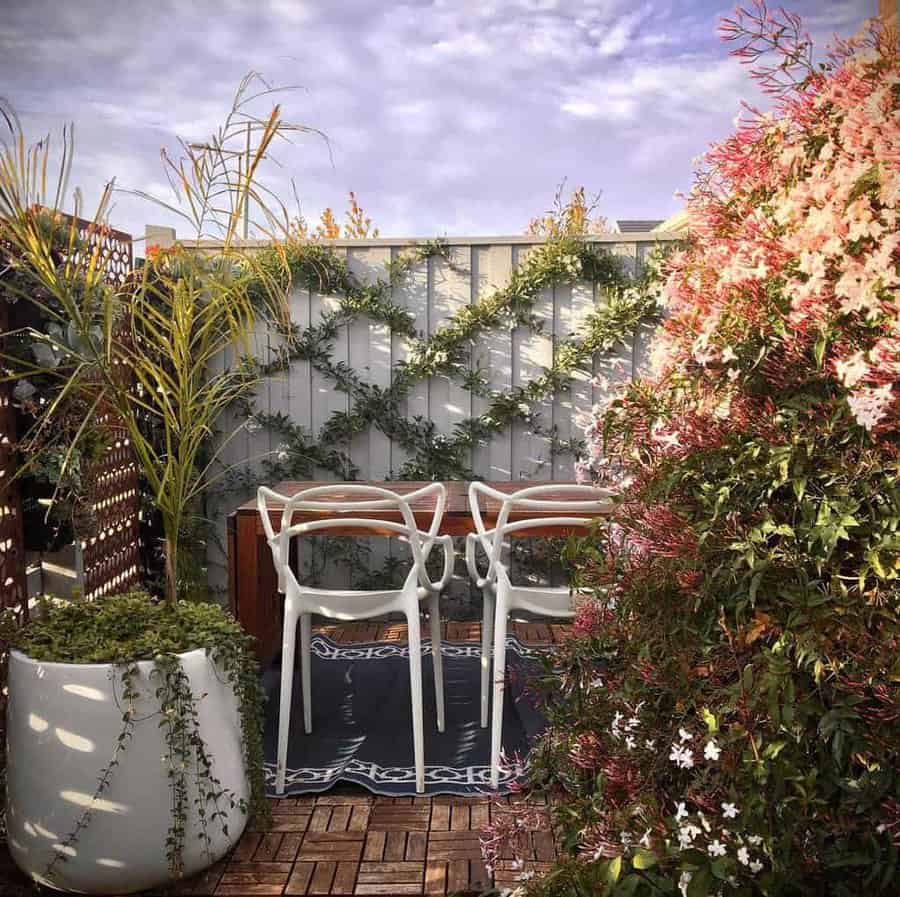
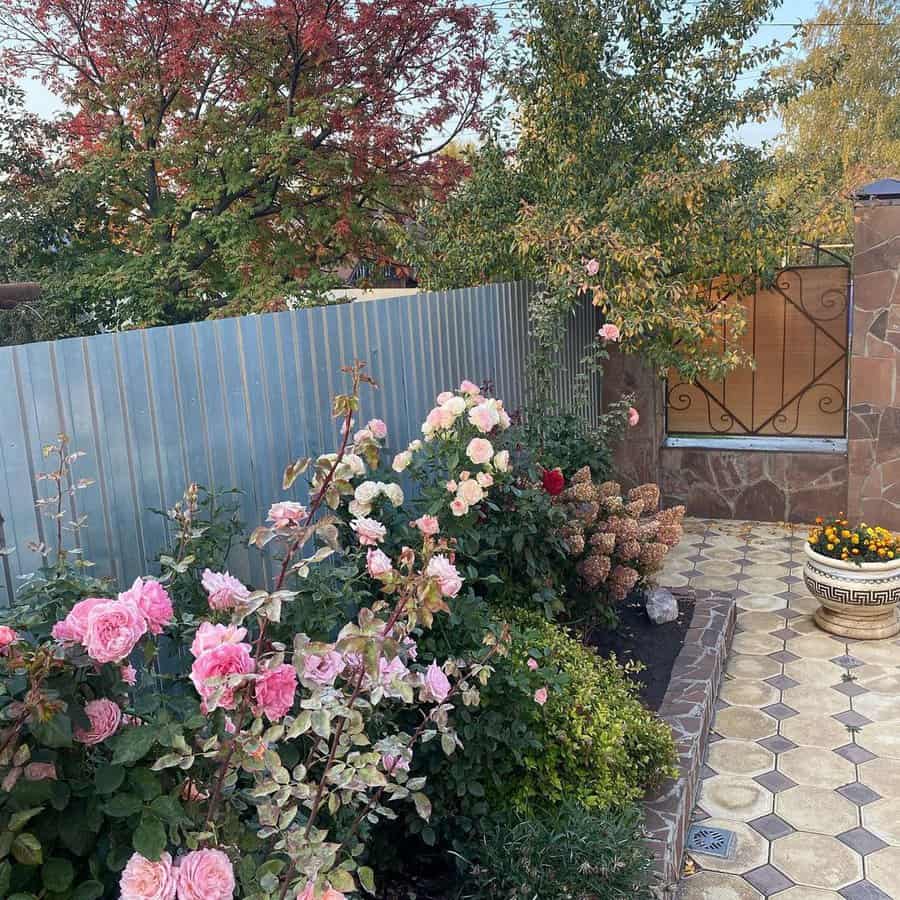
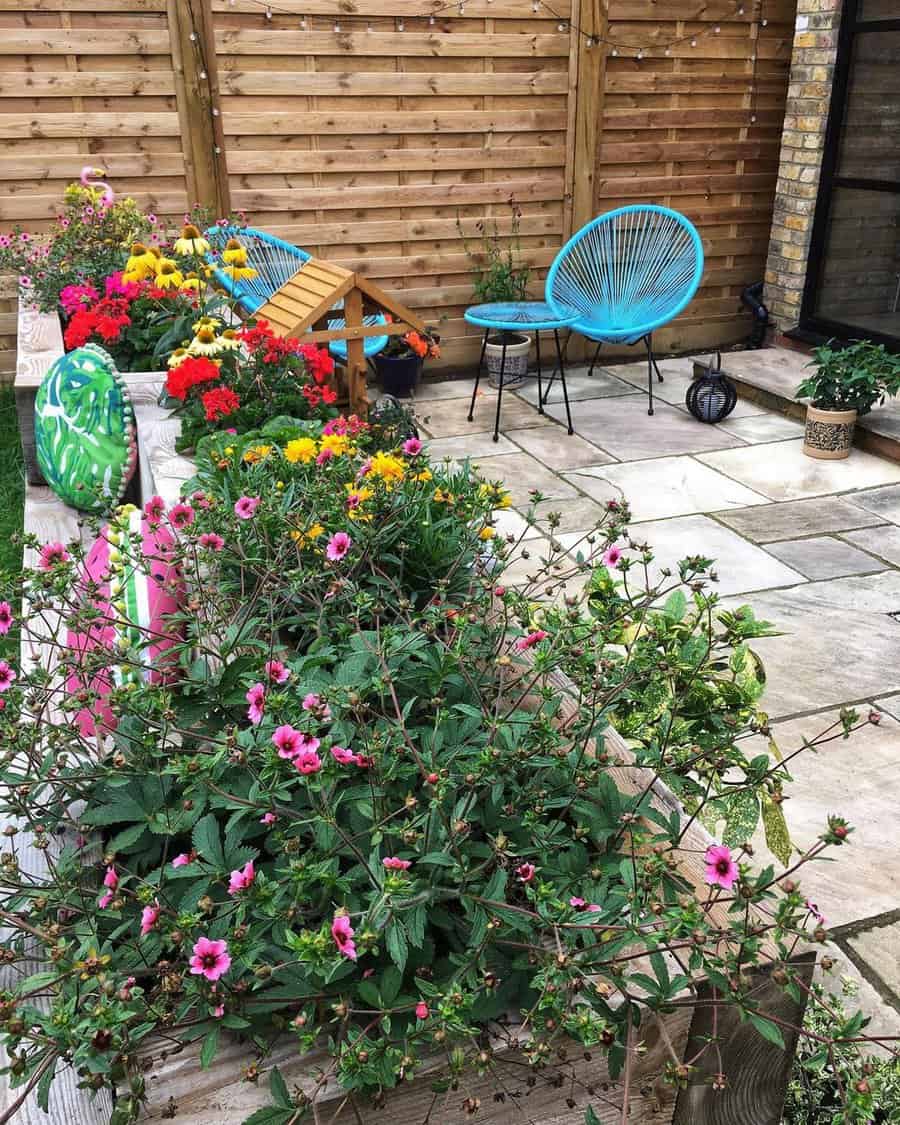
11. Cultivate a Tropical Patio Garden
Infuse your patio with lush, tropical plants to create a serene oasis. This idea is budget-friendly and can be customized to your taste and climate. Potted plants are easy to care for and instantly enliven a small space.
12. Breathe Life with a Green Wall Patio
A green wall brings life and color to a small patio, offering an eco-friendly design element. Though initial installation might be pricey, the visual impact and air-purifying benefits make it a worthwhile feature.
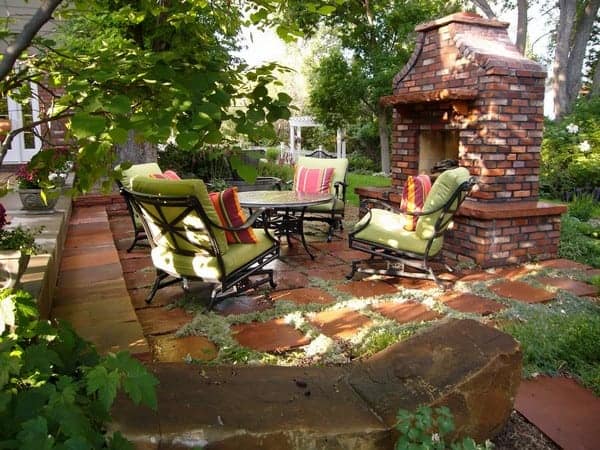
13. Classic Elegance with a Brickstone Patio
A brickstone patio exudes classic charm and is highly durable. While the cost of materials and installation can be higher, brickstone adds timeless elegance and can increase your home’s value.
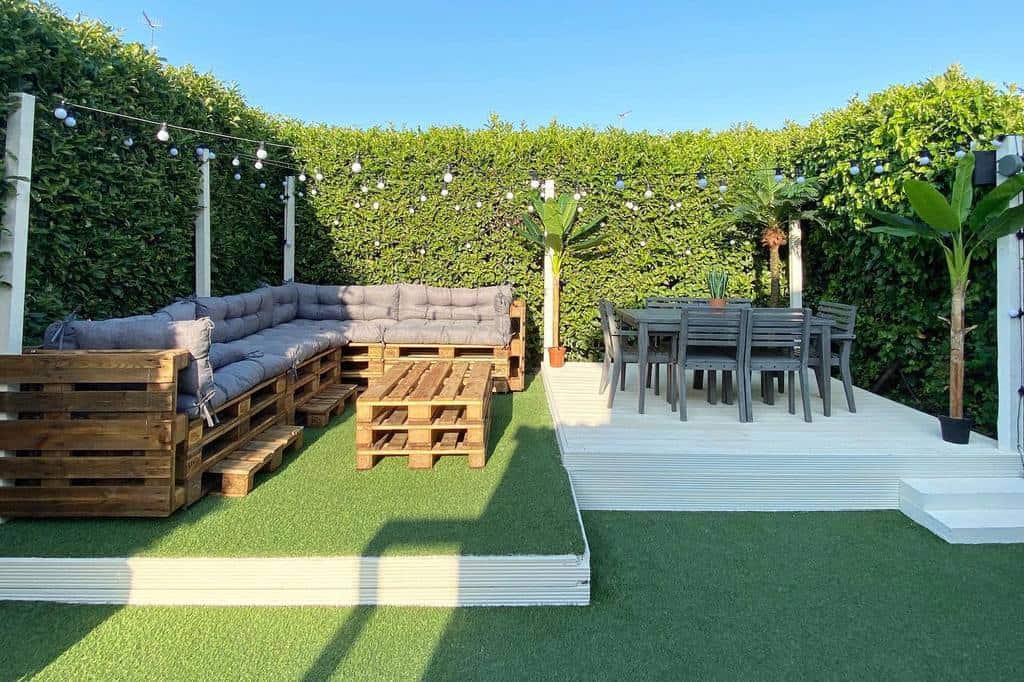
14. DIY Charm: Wood Pallet Patio Deck
Repurposing wood pallets for a patio deck is an eco-friendly and cost-effective solution. This approach adds a rustic charm and is ideal for DIY enthusiasts looking to personalize their patio space.
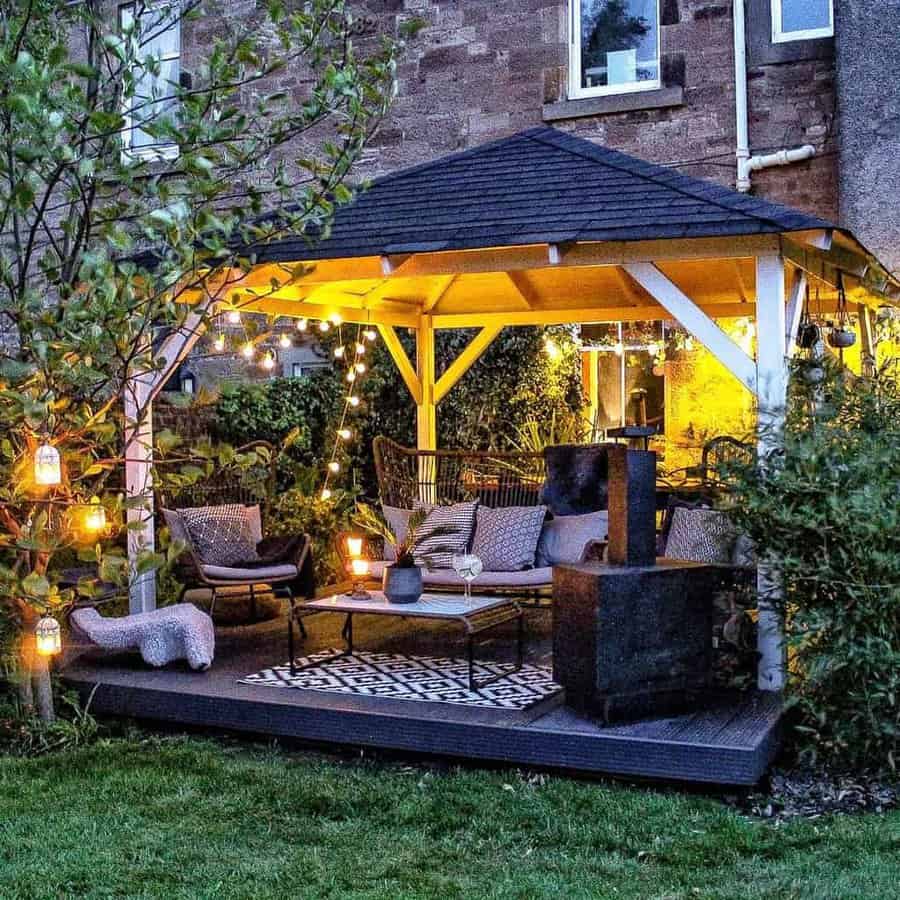
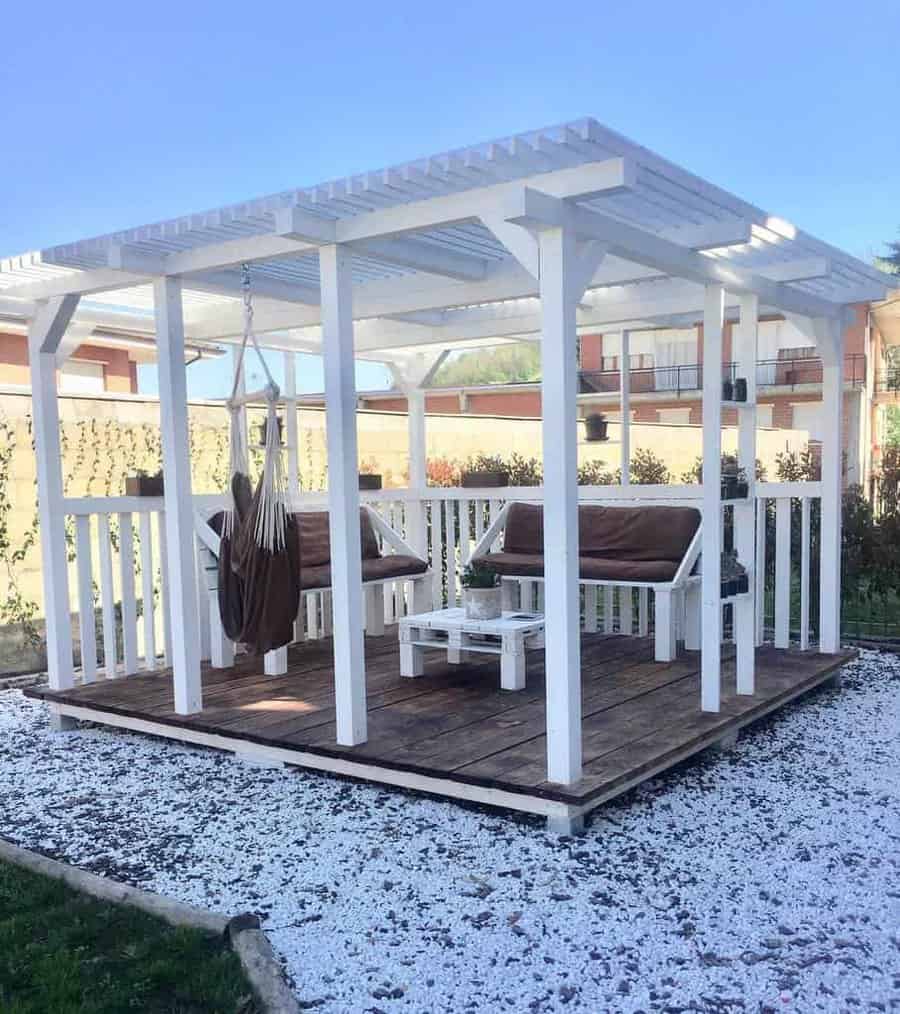
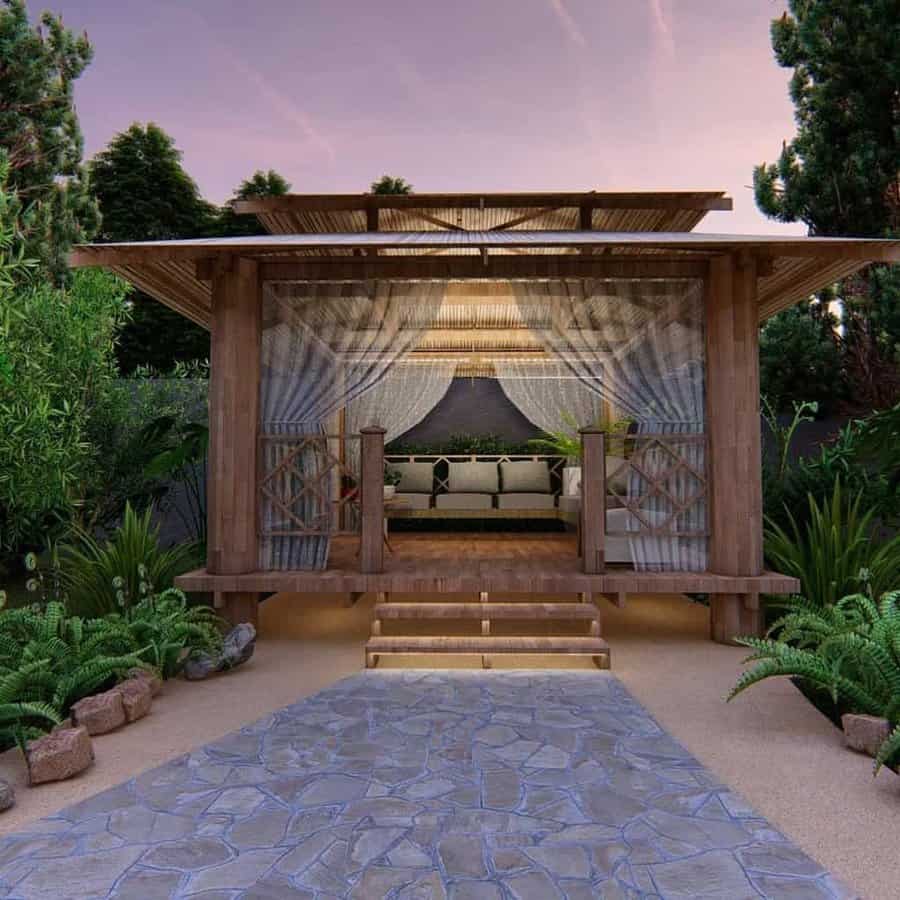
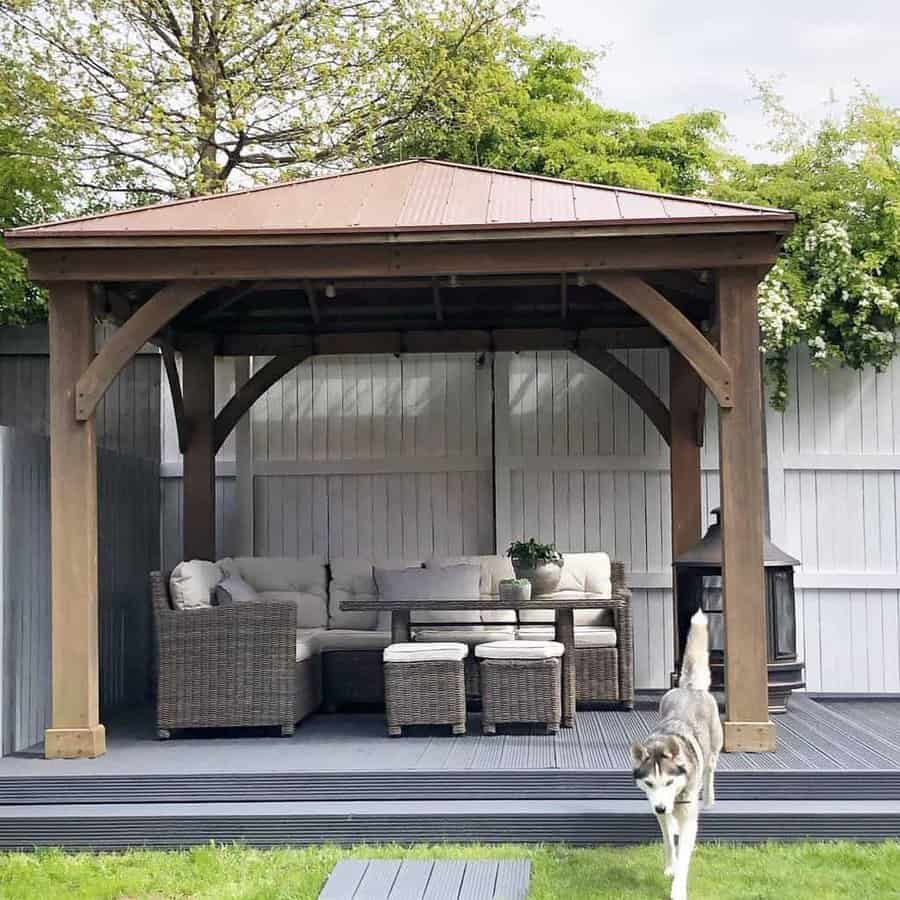
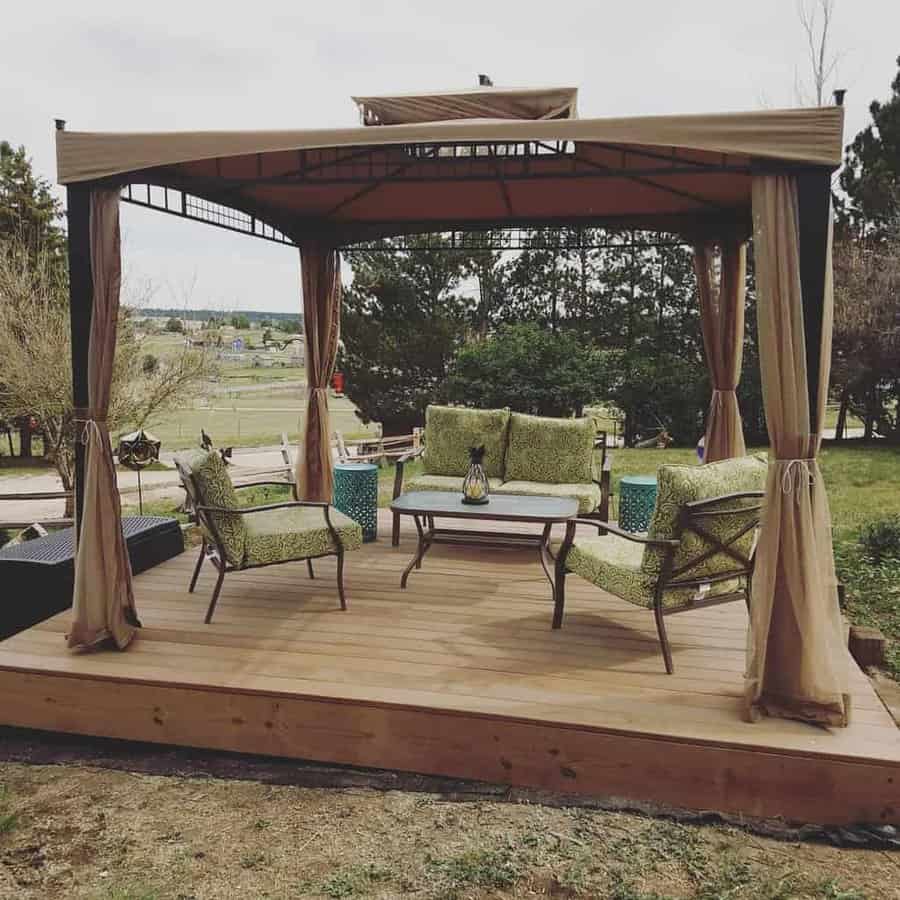
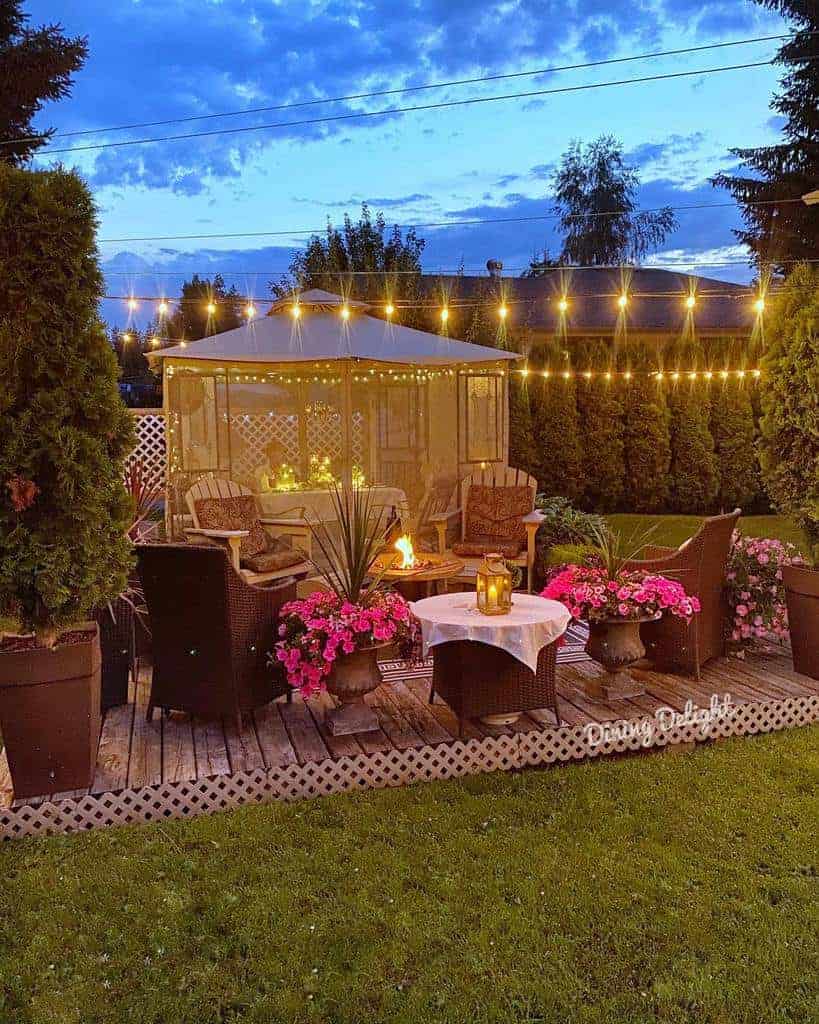
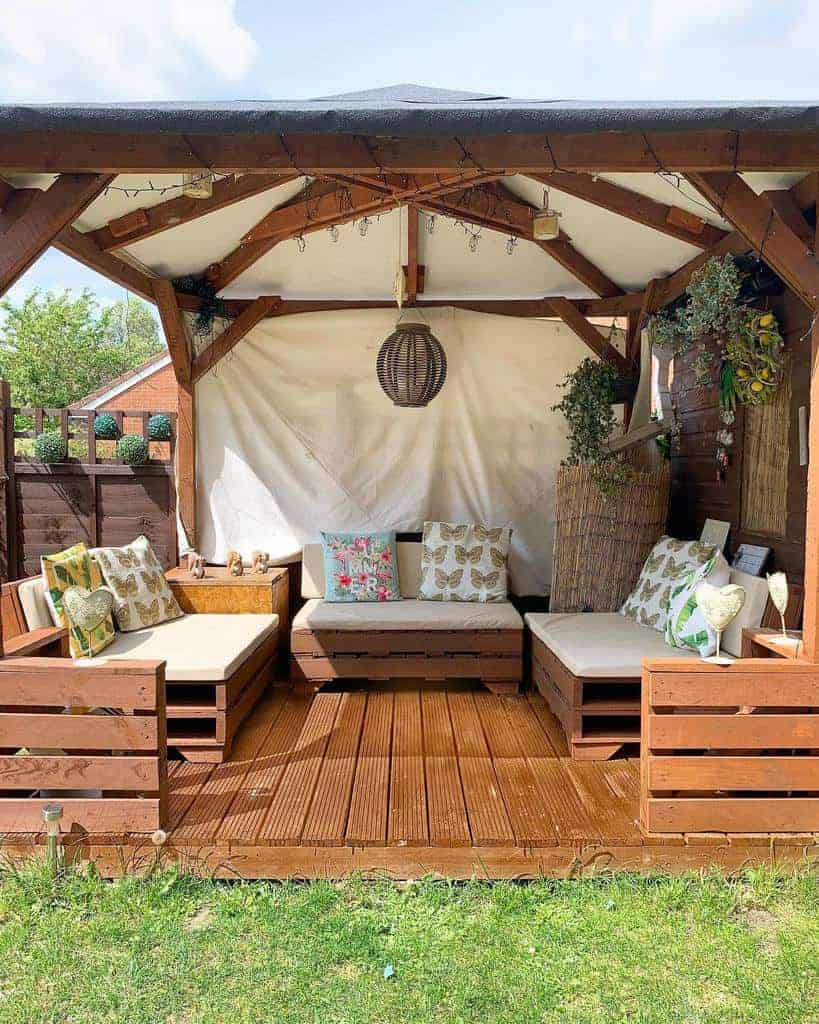
15. Create a Haven with a Patio Gazebo
A gazebo provides a shaded, private area for your patio. It’s a significant investment but creates a stunning focal point and an extra room for entertaining or relaxing outdoors.
16. Privacy Meets Style: Patio Screen Solutions
Privacy screens are an affordable way to create a secluded haven on your patio. They come in various styles and materials, offering both functionality and an aesthetic upgrade.
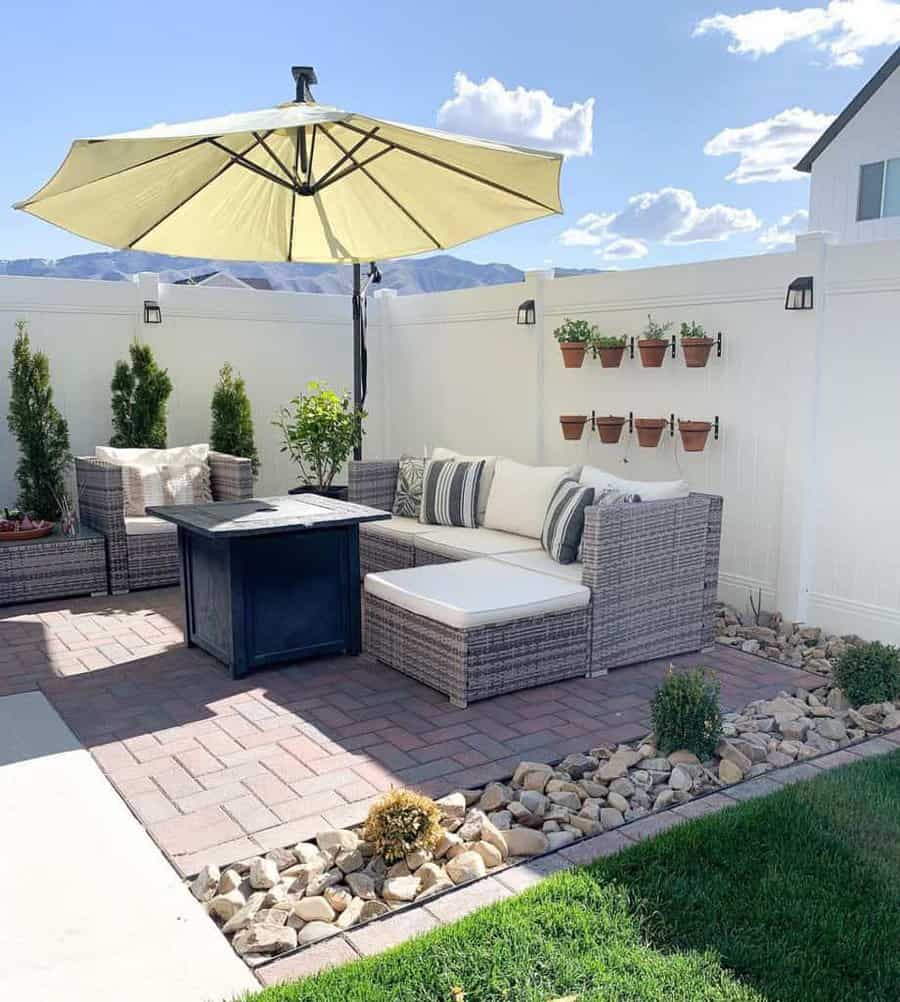
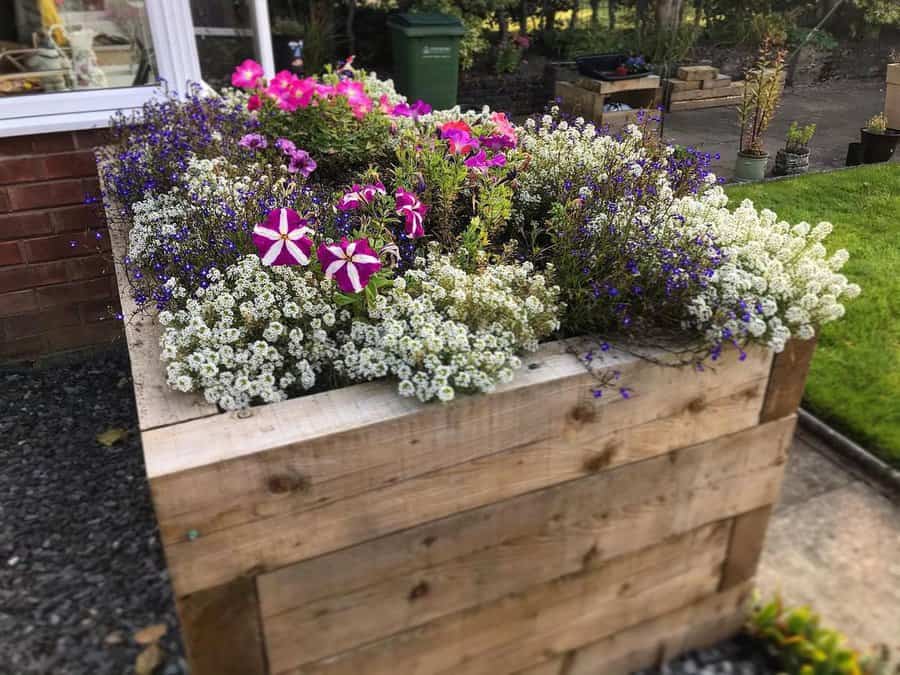
17. Green Up with Patio Plant Boxes
Incorporating plant boxes is a simple and effective way to add greenery and privacy. This is a budget-friendly option that also allows for gardening in a confined space.
18. Dual Function: Dining & Lounge Patio
Integrate a dining and lounge area to maximize your patio’s utility. Select furniture that is proportionate to your space and multi-functional. This design approach is cost-effective and enhances the usability of a small patio.
19. Enjoy a Patio Breakfast Nook
A petite table and chair set is perfect for a breakfast nook on your patio. Choose a minimalist design to prevent overcrowding. This setup is budget-friendly and adds a charming spot to start your day.
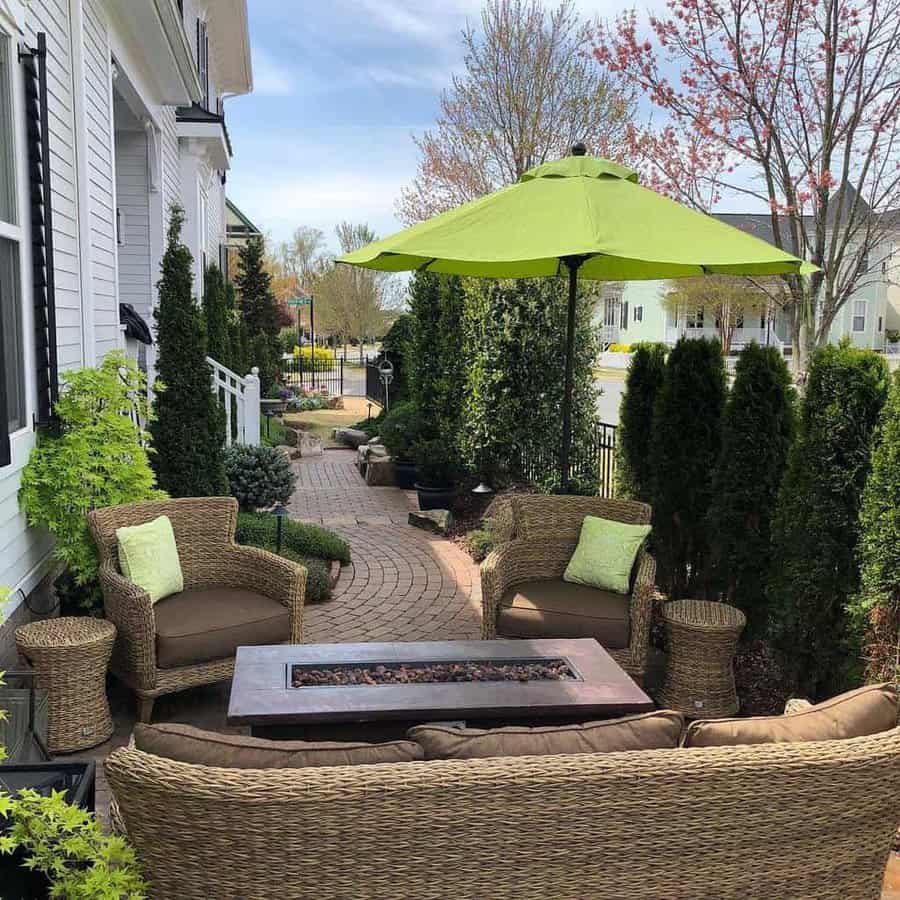
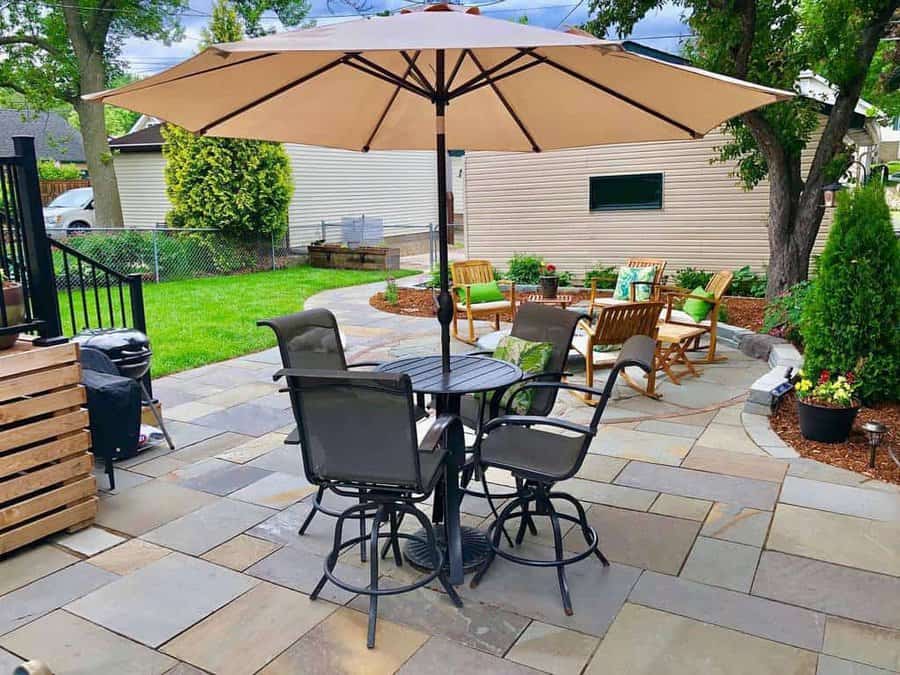
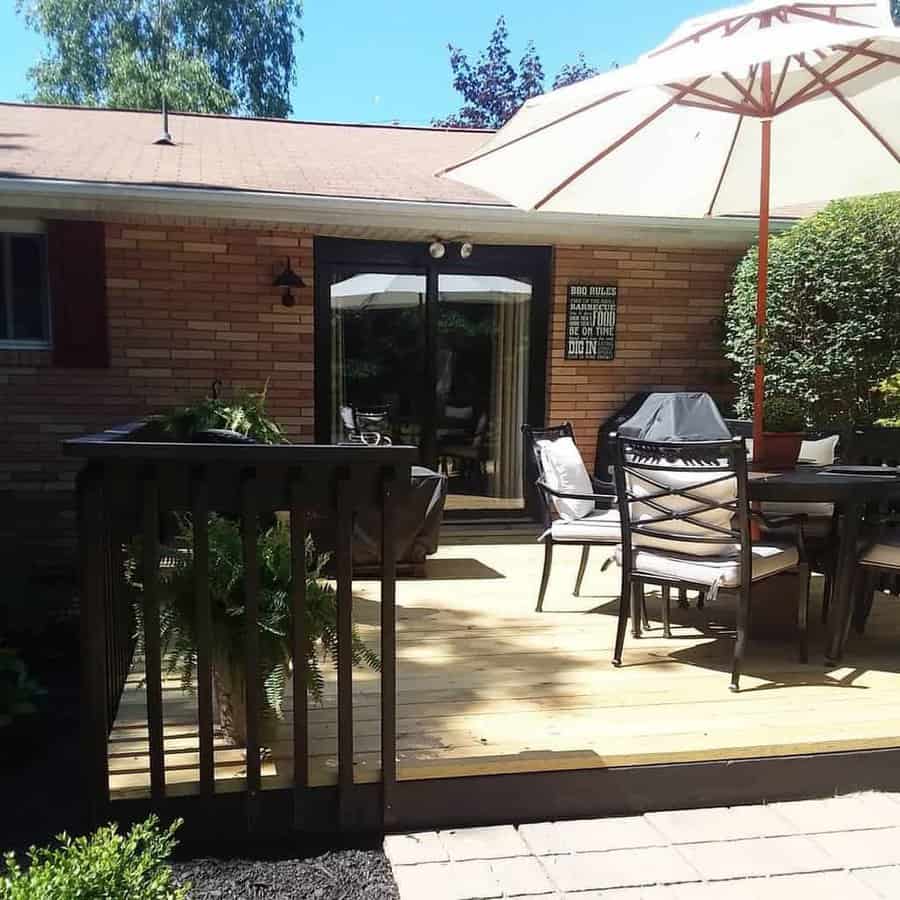
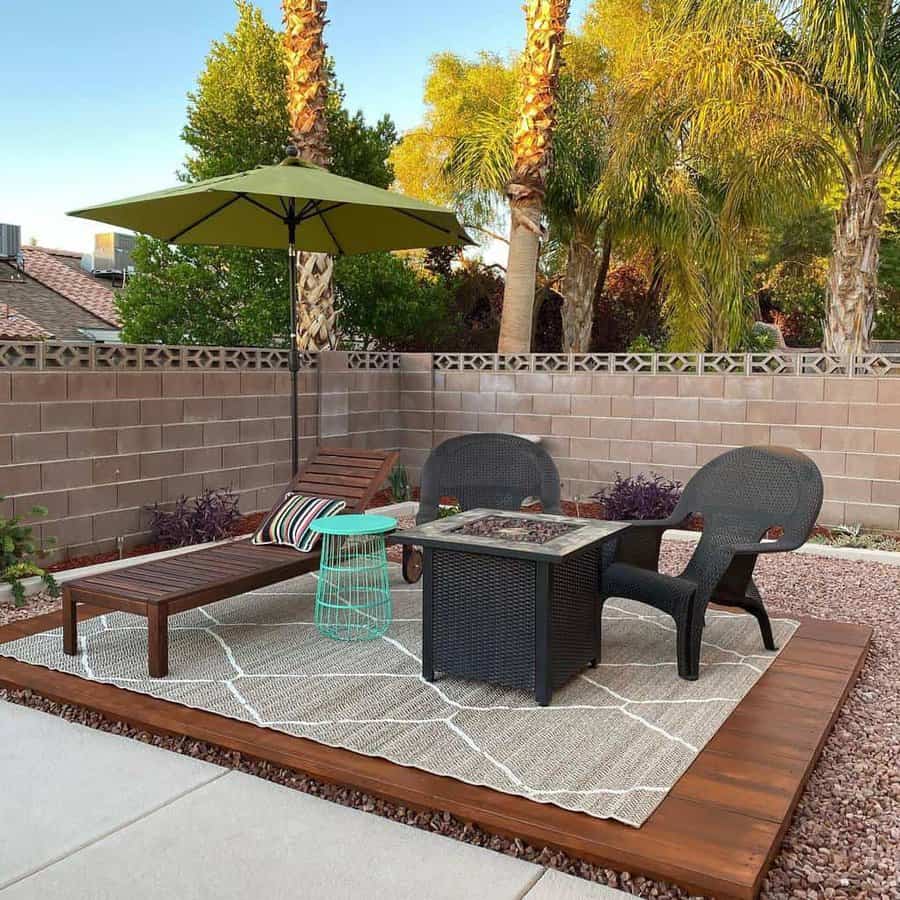
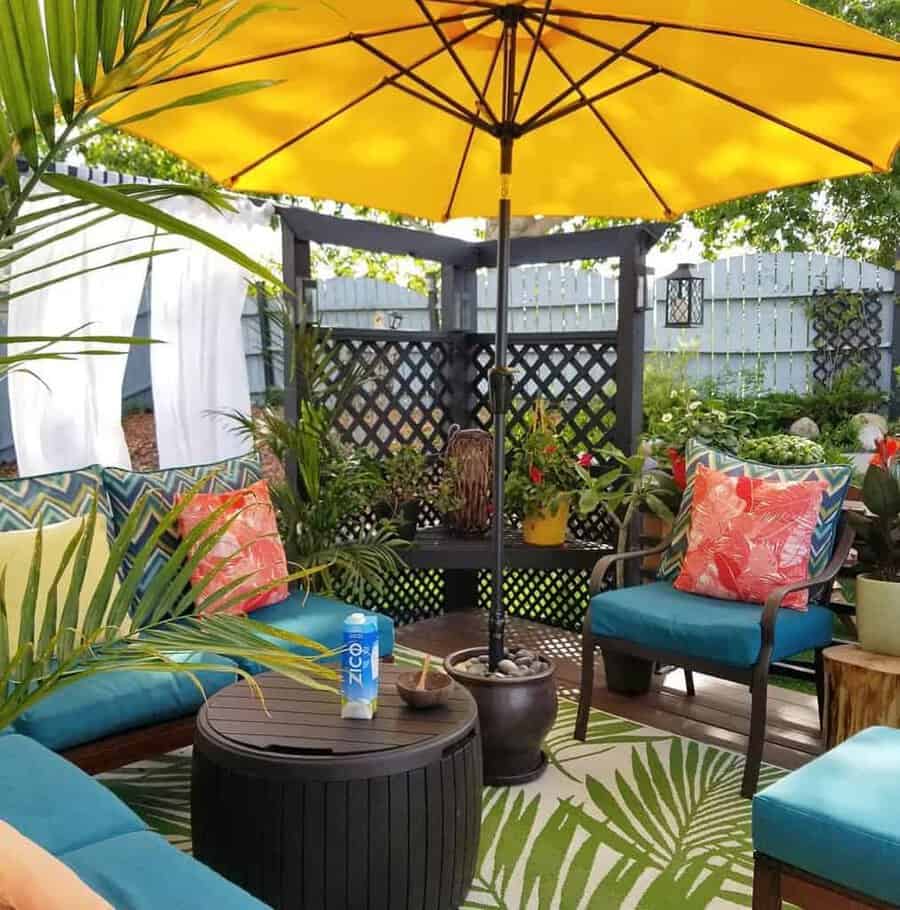
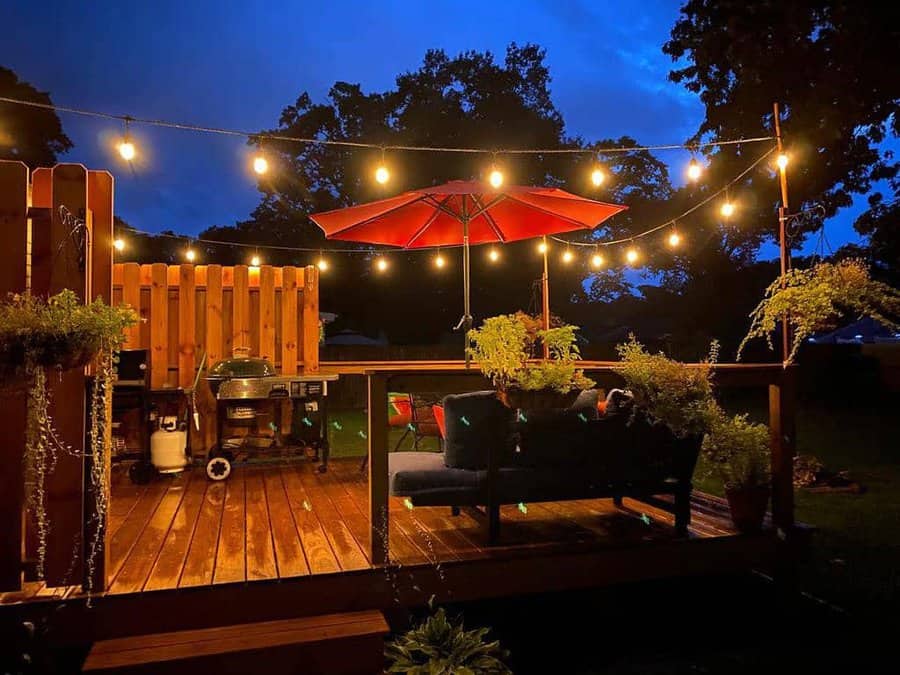
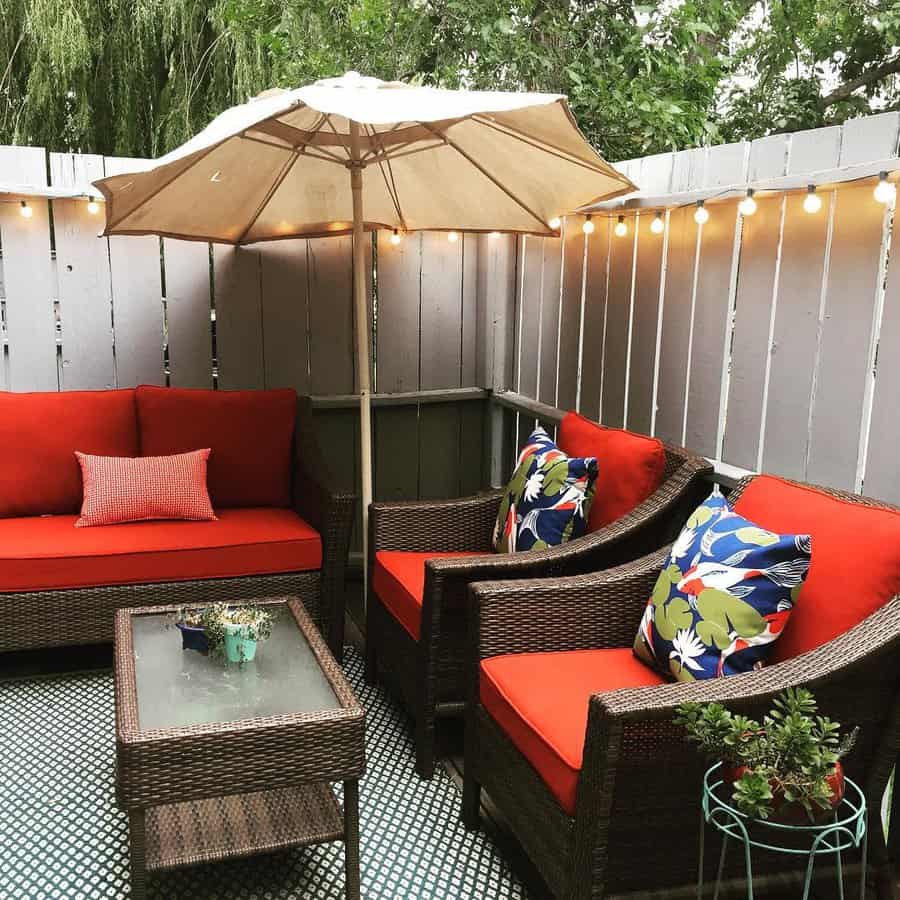
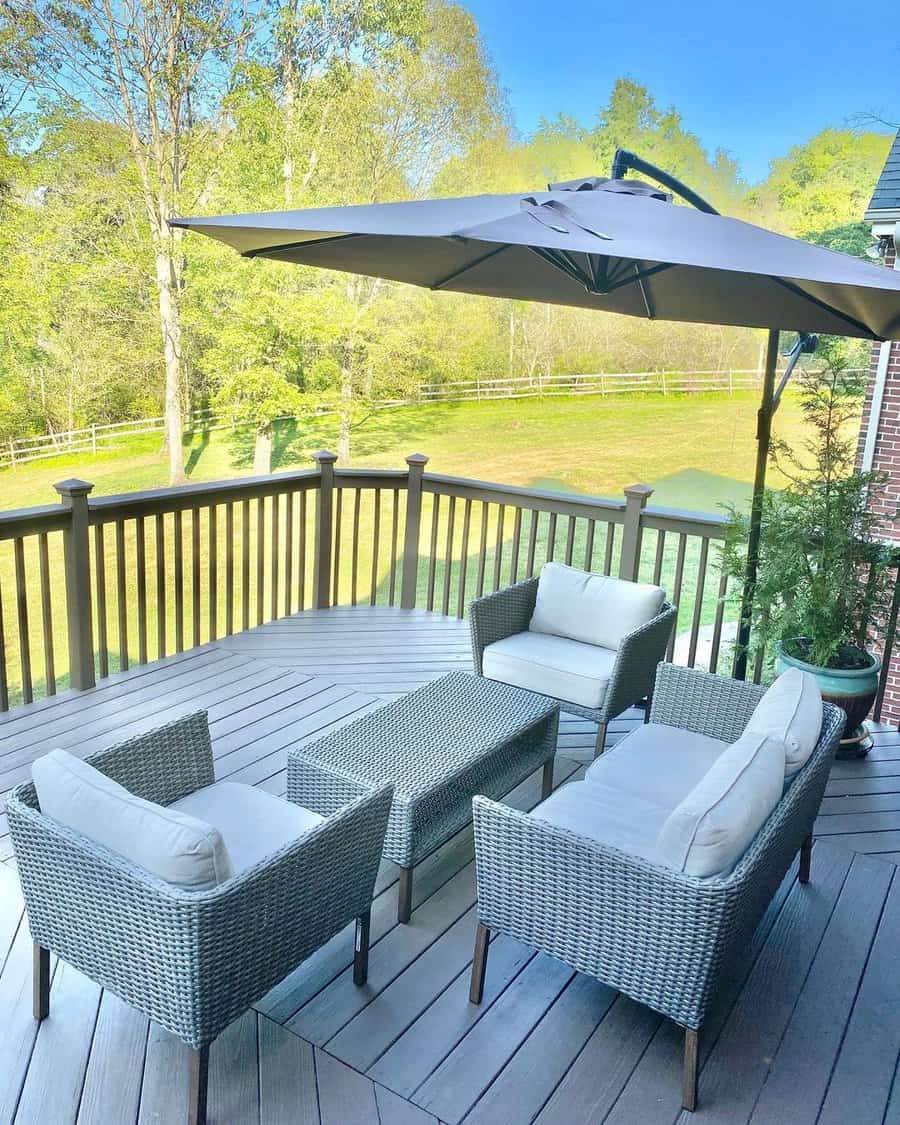
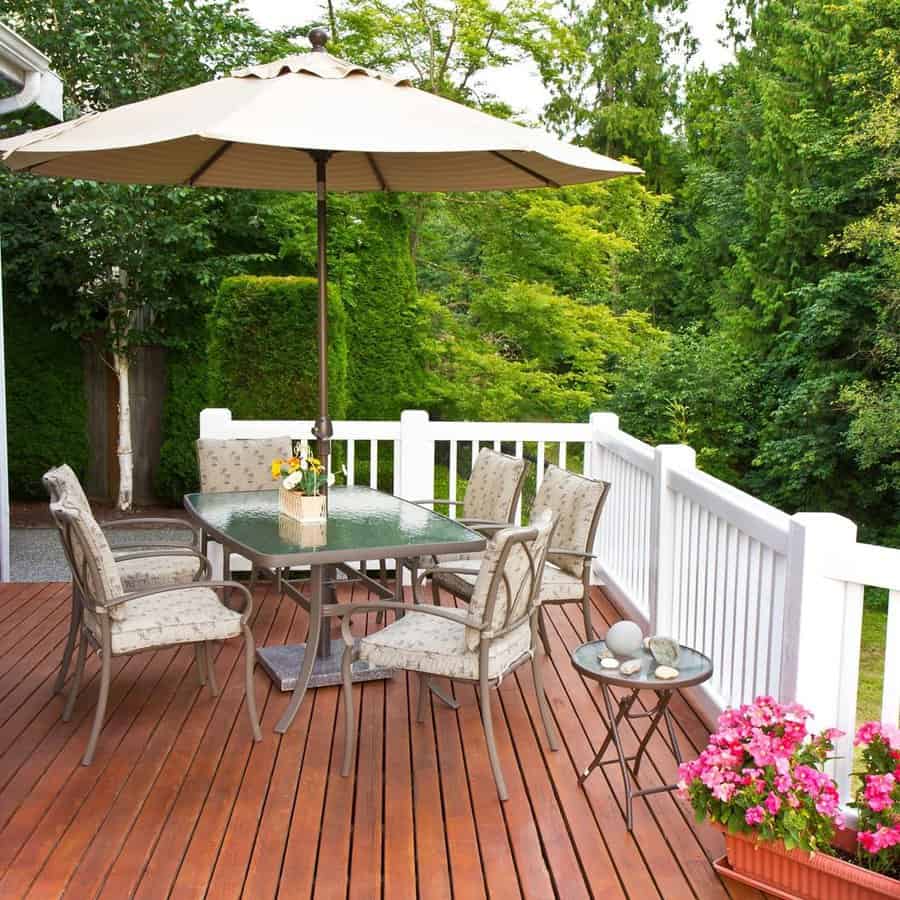
20. Shade and Style with a Patio Umbrella
A patio umbrella offers a movable shade solution, perfect for small areas. It’s an affordable way to protect against the sun while adding a pop of color and style to your patio.
21. Intimate Gatherings: Coffee Table and Chairs
Select a compact coffee table and chair set for a casual and intimate setting. This arrangement is budget-conscious and perfectly suits small patios for relaxation and casual gatherings.
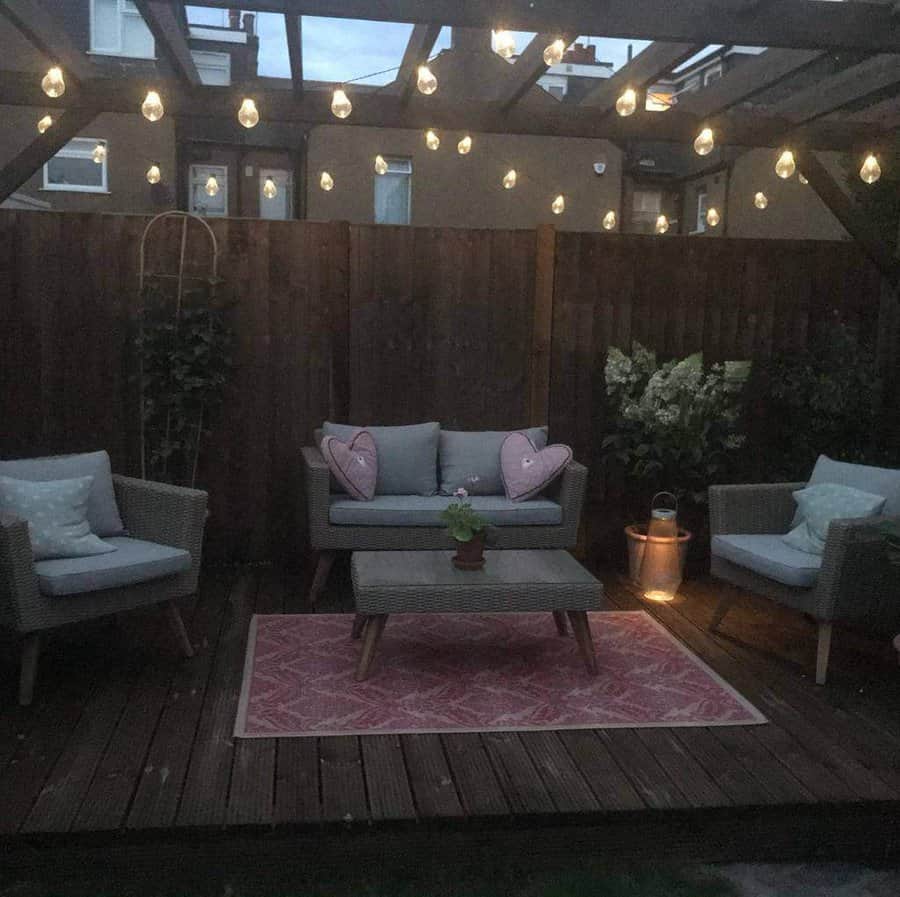
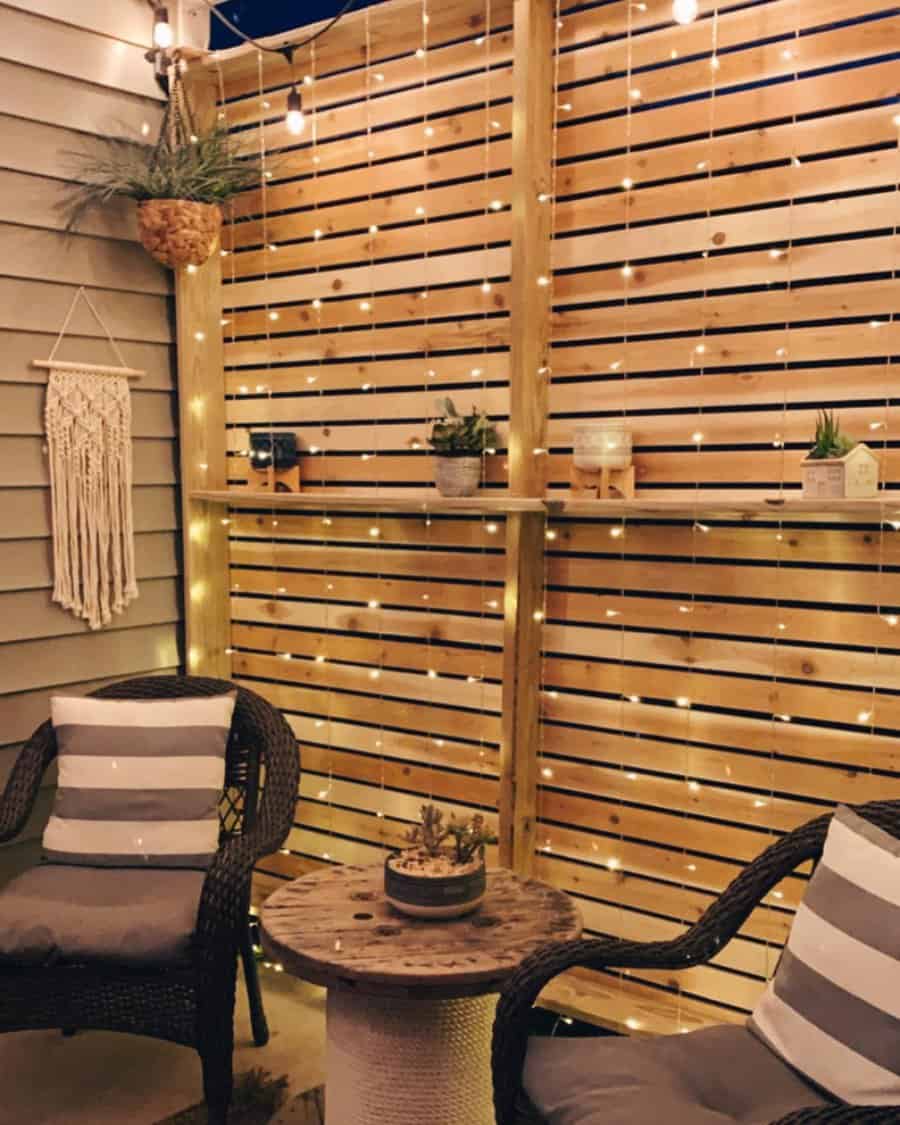
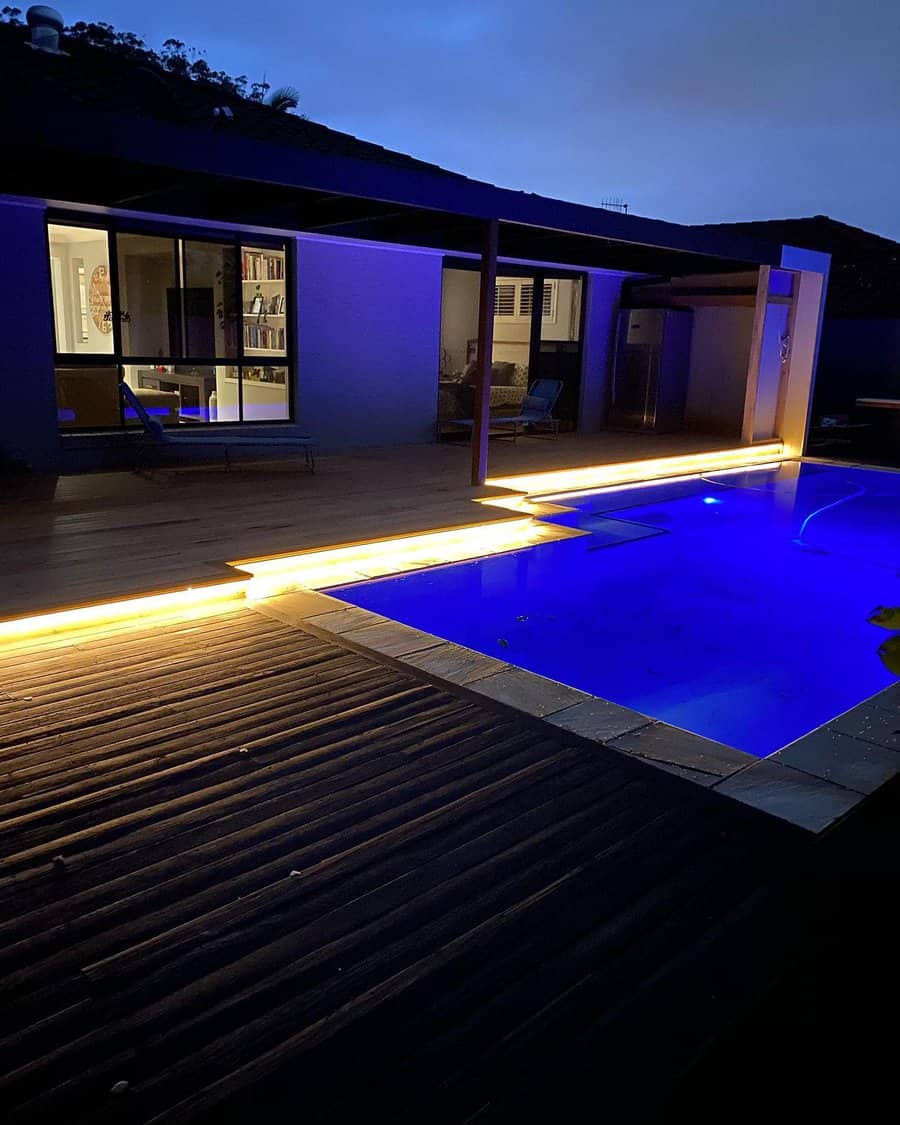
22. Illuminate with Patio String Lights
String lights are an inexpensive way to create a magical ambiance in the evening. They are easy to install and can transform your patio into an enchanting space.
23. Durable Elegance: Vinyl Patio Deck
Opt for a vinyl patio deck for a low-maintenance and durable surface. It’s a cost-effective alternative to wood and comes in various styles and colors to match your patio theme.
24. Luxurious Touch: Patio Plunge Pool
A plunge pool is a luxury feature for a small patio. While costly, it adds a unique element of relaxation and luxury, making it a stunning centerpiece for your outdoor space.
25. Wood Pallet Corner Seating
Create corner seating with wood pallets for a budget-friendly and cozy nook. This DIY project adds a personal touch and maximizes seating in a limited space.
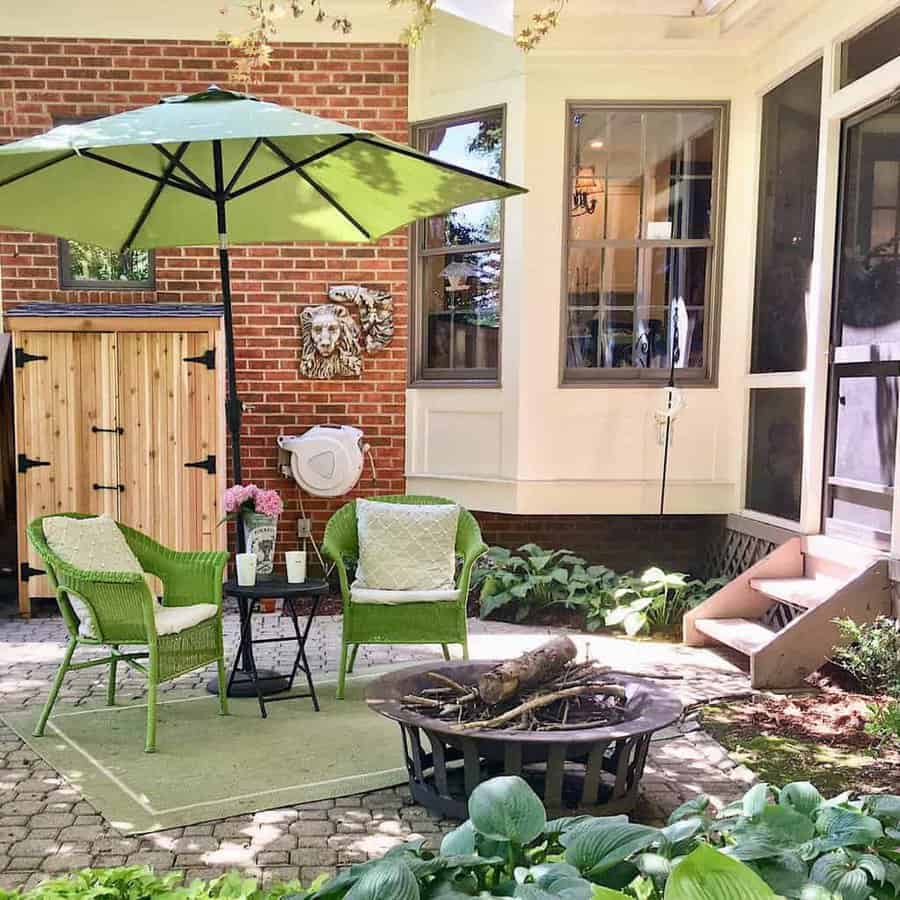
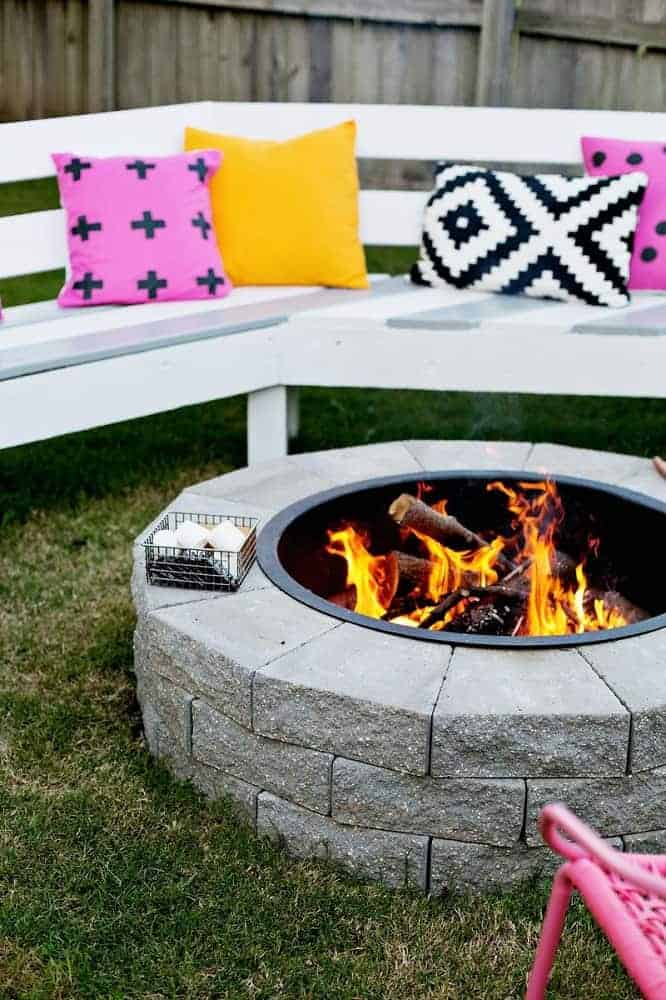
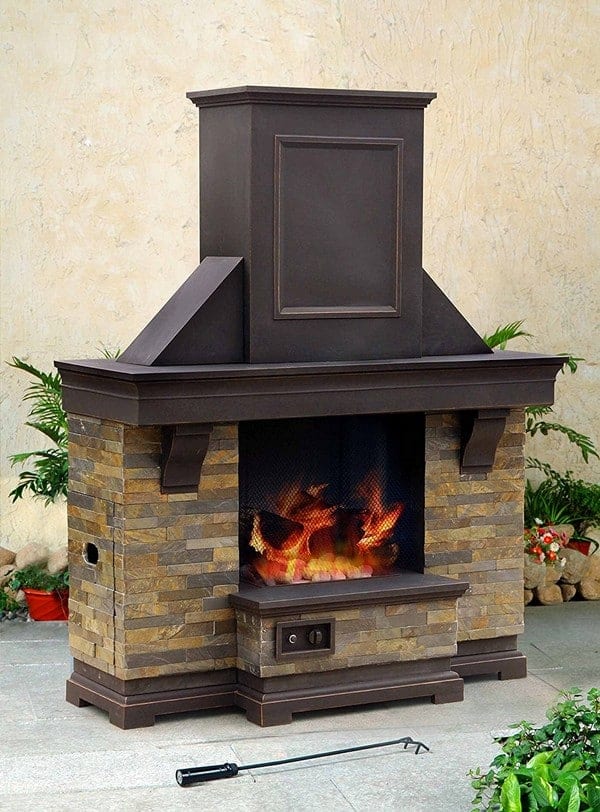
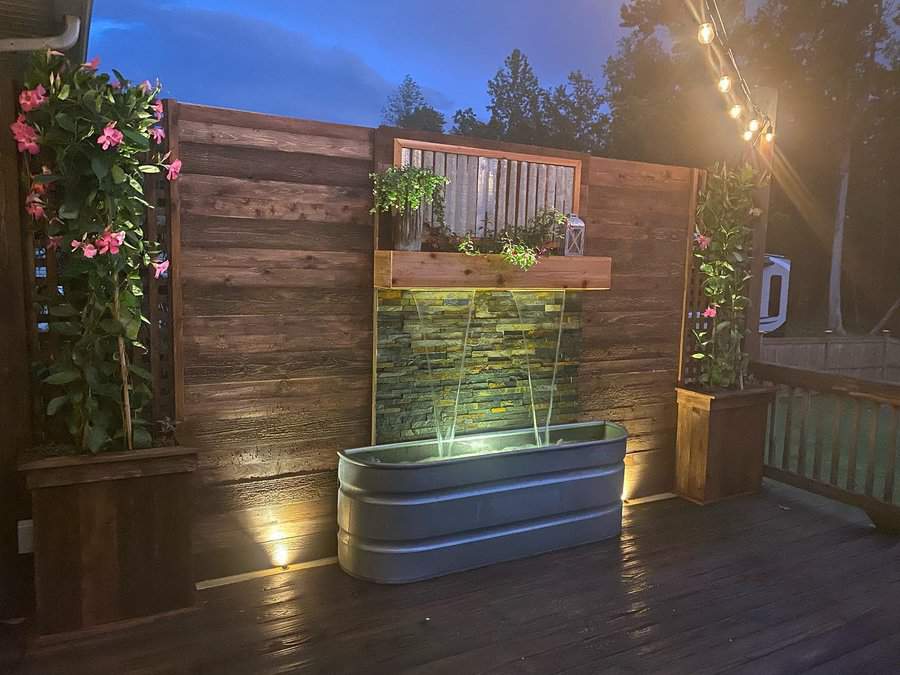
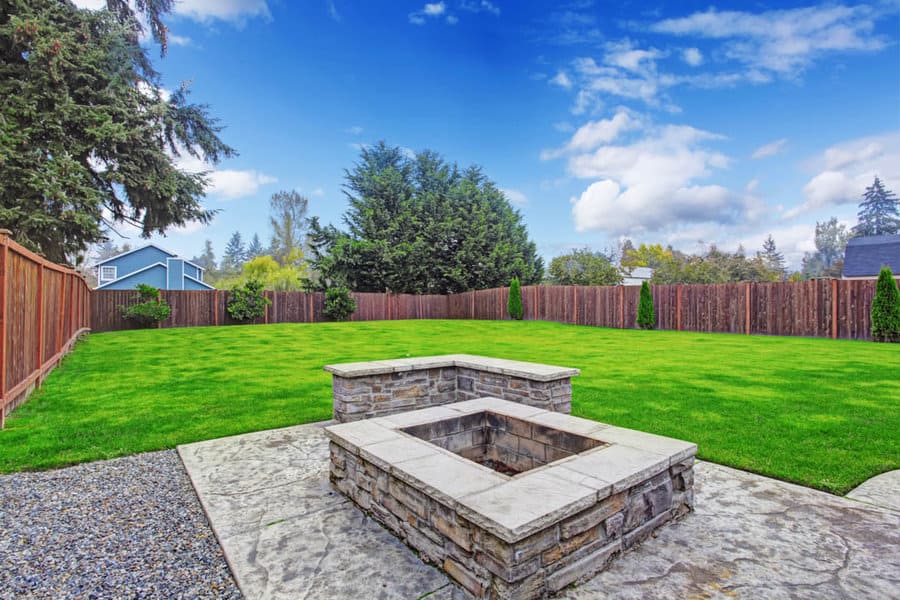
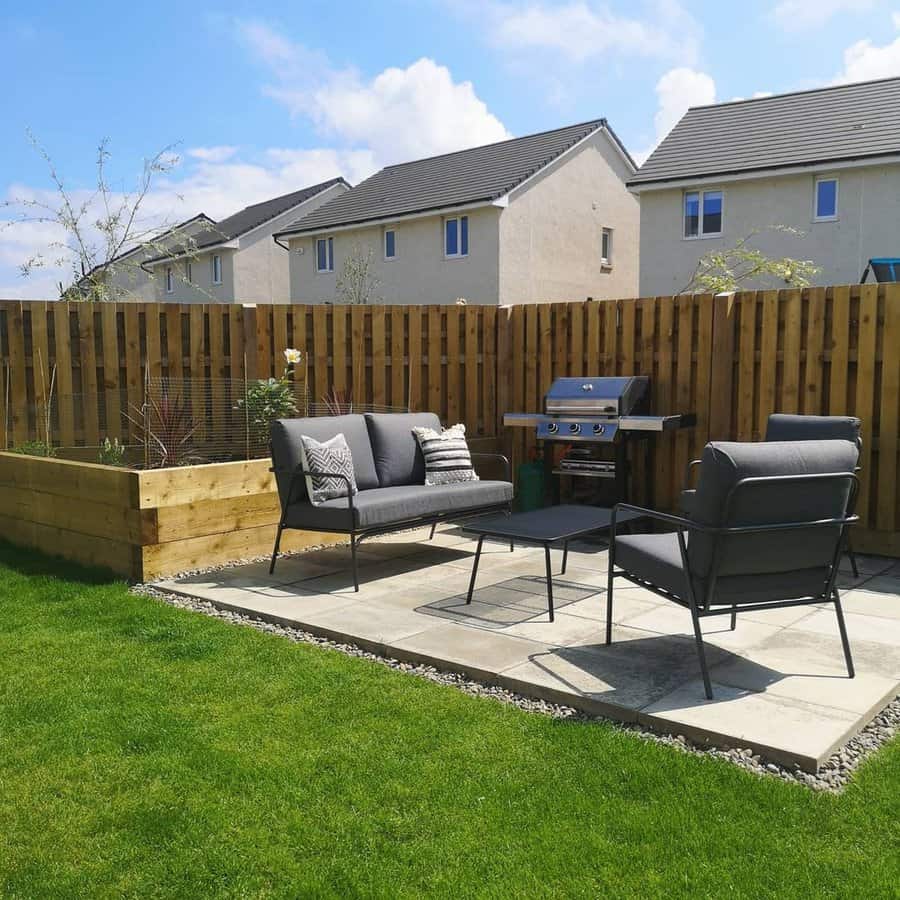
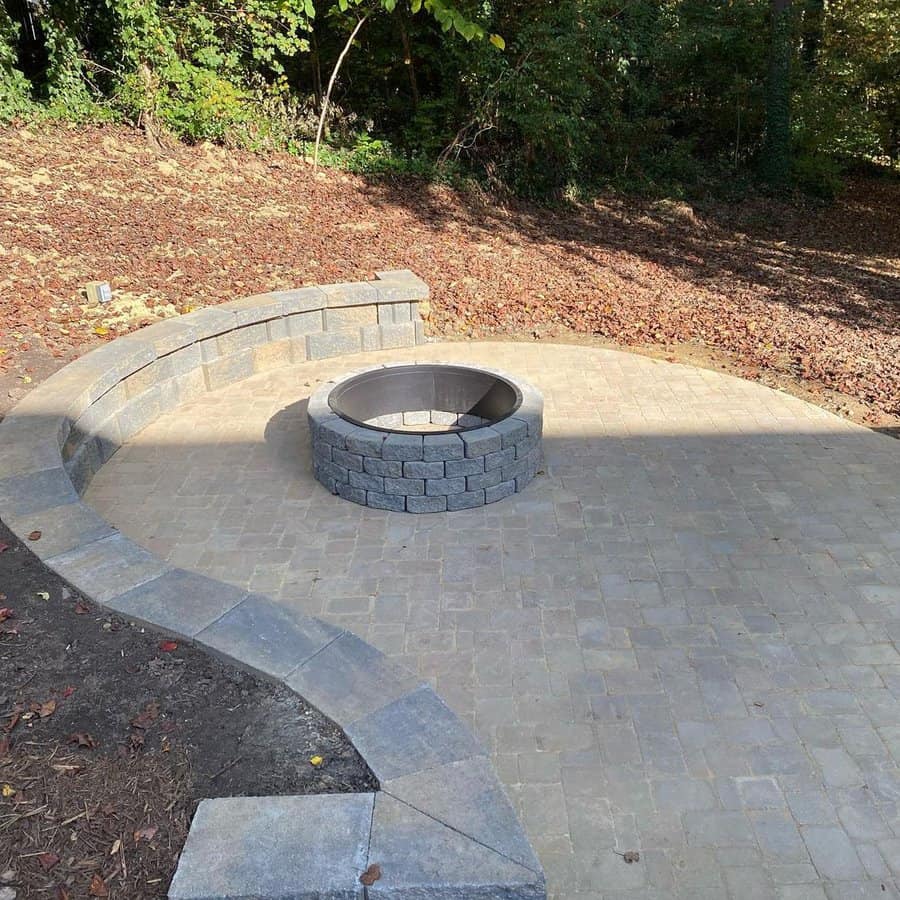
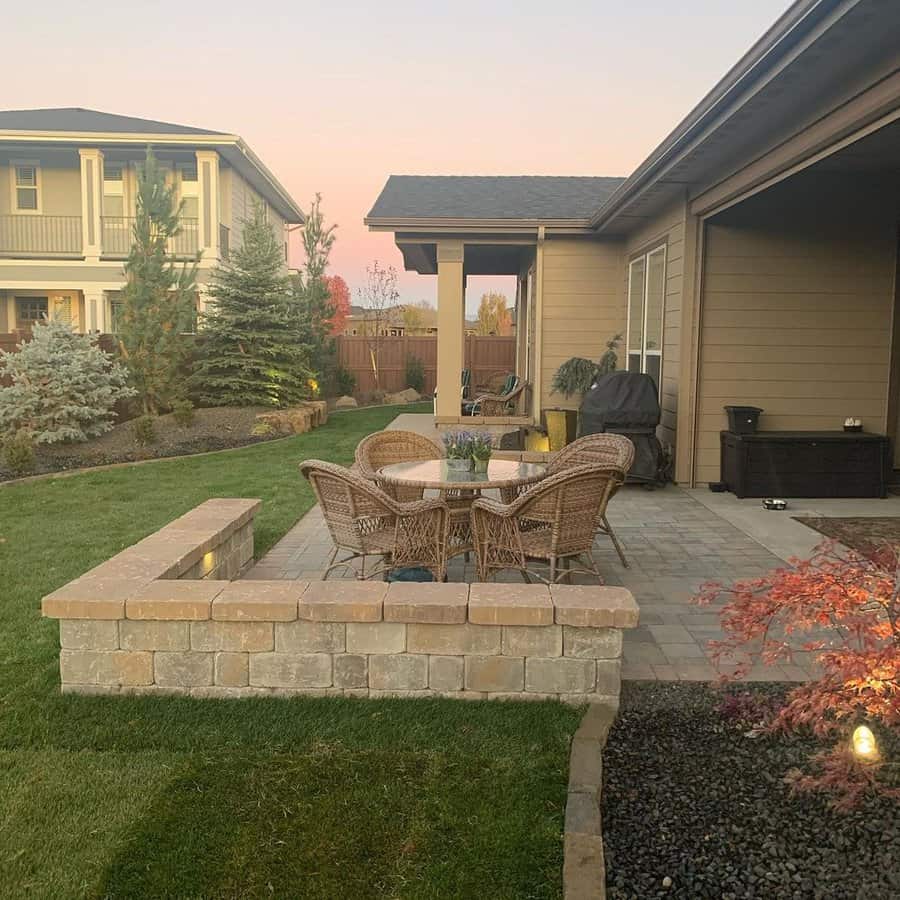
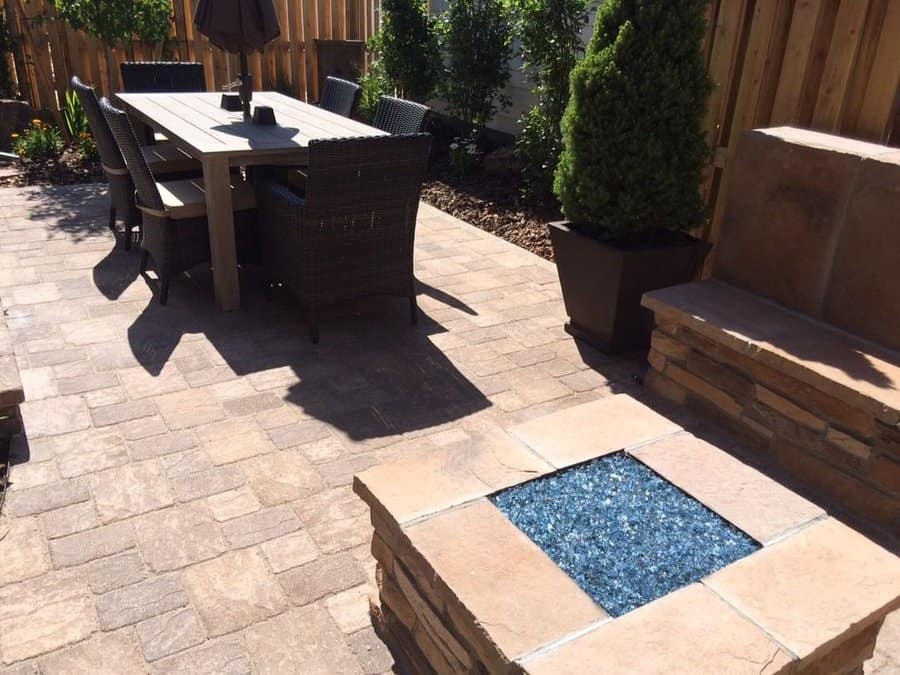
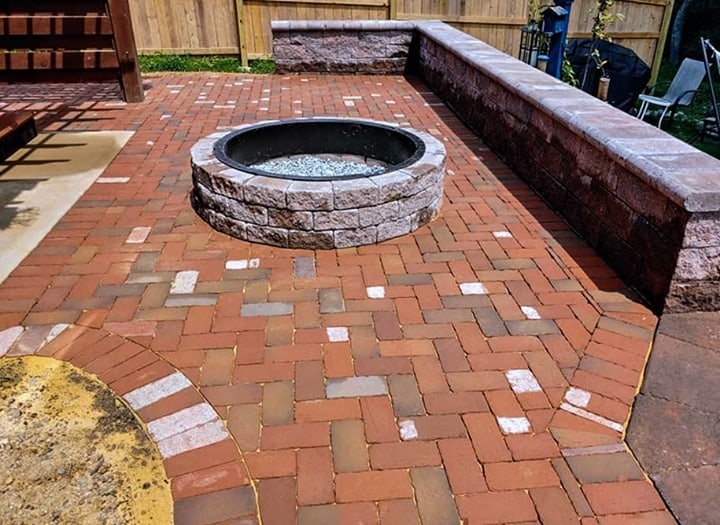
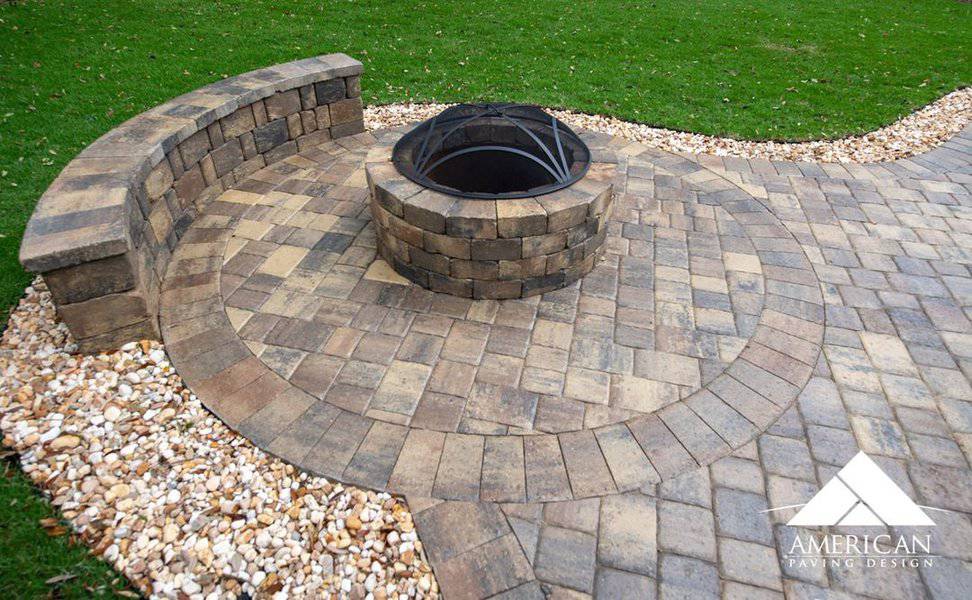
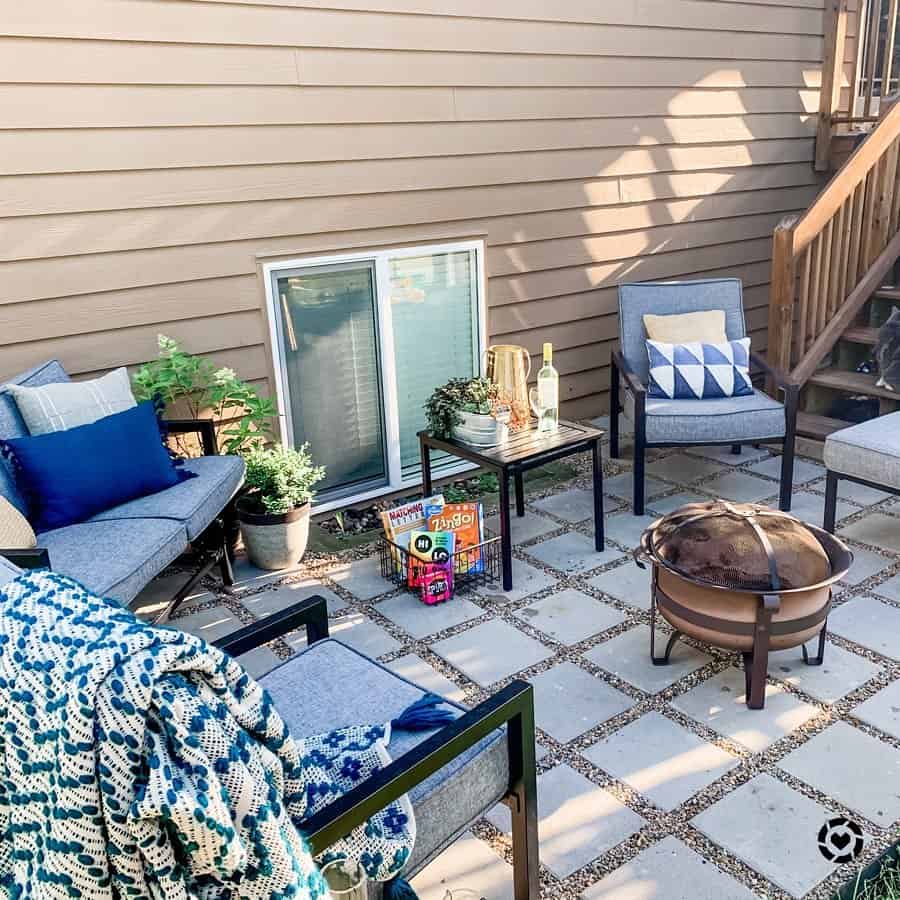
26. Warmth and Ambiance with a Firepit
A firepit can be a focal point for your patio, providing warmth and a gathering spot. Options range from portable metal firepits to built-in designs, accommodating various budgets and styles.
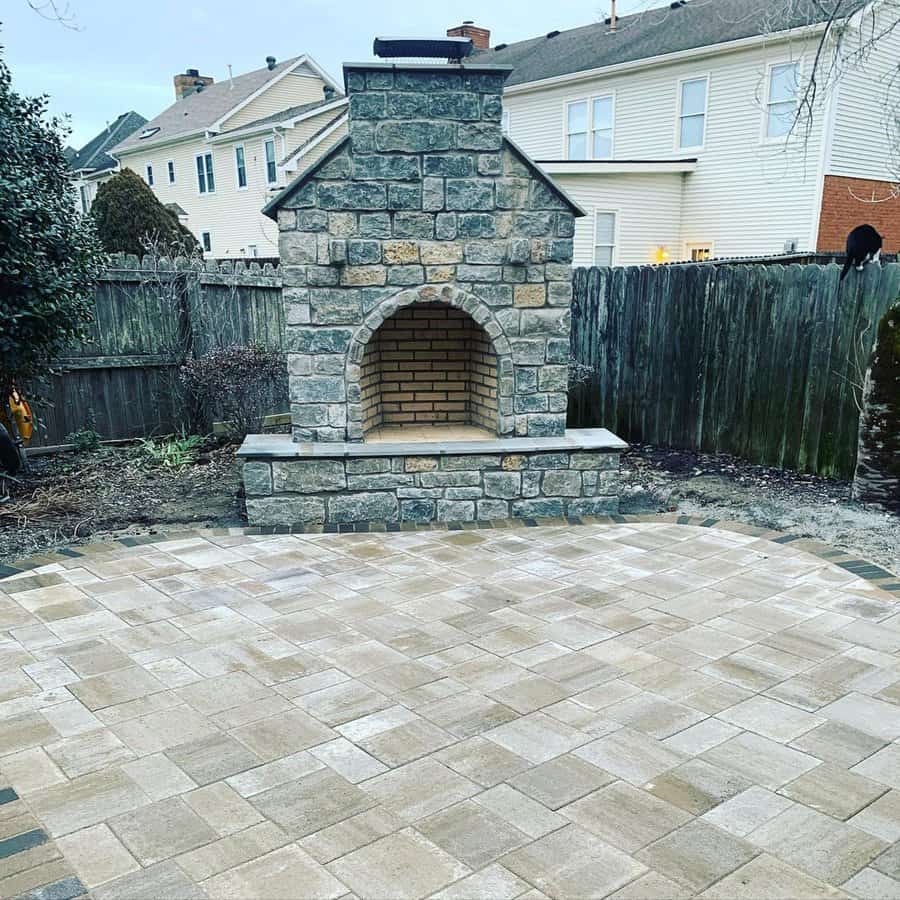
Having a DIY outdoor fireplace is the pinnacle of outdoor entertaining. While bonfires are fun, an outdoor fireplace takes hosting and outdoor cooking to a new level. It offers an ambiance to a nice evening while enjoying time with family and friends. Good times and good food!
Building an outdoor fireplace is no small task that will be quick or easy to complete. If you are a DIYer, then it’s important to understand what you are getting into if you take on this project.
It is a fairly heavy construction project that has multiple layers of the process, from the preliminary set up, to deciding on a style and figuring out the materials as well. There are lots of things to consider as this project gets underway.
Codes, Local Legislation and Restrictions
While legalities are not the first thing that comes to mind when you get inspired to do some outdoor additions such as a fireplace, they do need to be researched and followed.
Local rules and legislation are put in place not only for the safety of the users, but to make sure neighbors are safe as well. They are ensuring the structural integrity of an outdoor fireplace throughout the building process.
Every locality will have its own restrictions in place and will vary district to district. Some will require that there be specific licenses and permits needed, while other places may go farther and even demand that specific types of fuel be used once the fireplace is completed.
There will be restrictions on where a fireplace can be situated on the property, usually detailing the distance from current structures, trees and fences as well. They often state that the required distance is at least 10’ at a minimum, but this space can vary area to area.
While placement is often regulated in most areas, chimney height may be as well. This is done to maintain the fireplace’s structural integrity as well as making sure it works in a safe manner.
Any rules, regulations, bylaws, local legislation and restrictions should all be met because if they are not, then there is a good chance that construction will be halted, or the structure taken down if it does not meet the required standards. There will usually be a requirement to have a design presented before permits are issued and then an inspection after the construction is complete.
The other issue that can affect the construction of an outdoor fireplace is home insurance. It is important to check with your homeowner’s policy to make sure that they will cover any damage that may come from having an outdoor fireplace. It is not worth putting one in to find that insurance will no longer cover certain aspects of the home due to the presence of the fireplace.
Another place that you will need to go through is a local utility company. It is important to make sure you know where their lines are buried so they are not cut or disturbed by accident once construction begins. If you dig and something is cut, it can be an expensive issue to deal with if there were no calls to make sure it was safe to dig.
Once all the rules, regulations and restrictions are met, then you can get to work on your outdoor fireplace.
Choosing a Design
The design of an outdoor fireplace is more complicated than one would assume. Firstly, the fireplace design should focus on the reason it is being built. Is it for entertainment, food preparation, warmth, or all of the above?
There has to be a decision on whether it is to be a small, secluded, and romantic fireplace or a large, warm and inviting one for the enjoyment of a group of people. The reason for building the fireplace will help narrow down the design choices.
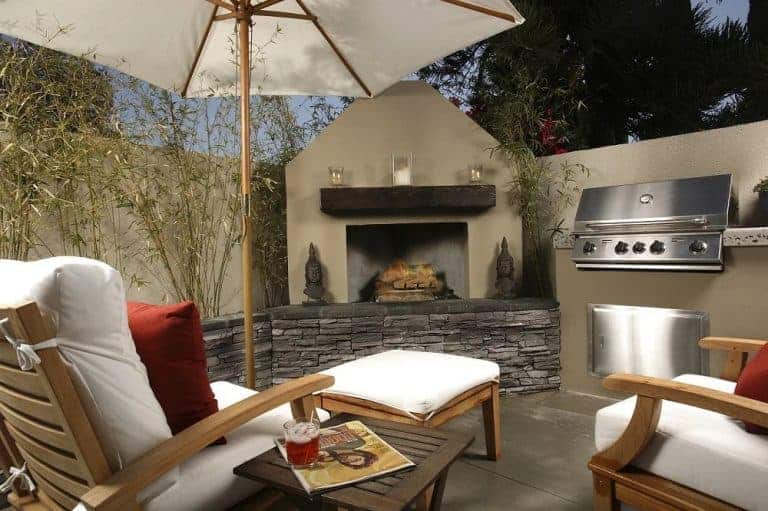
The second factor to think about when working on a design is where the outdoor fireplace is going to be installed. Determining how it will best enhance the landscape and compliment the architectural style of the home is important.
Creating a connection between architectural styles is important so the fireplace doesn’t stand out, looking out of place. A lovely red brick style will suit a colonial-looking home, whereas a fireplace that has an adobe-style will fit in with a southwestern style or maybe a ranch look.
Building an outdoor fireplace is not limited to one particular style but should suit your lifestyle. Its area of placement and matching the aesthetic of your home can bring architectural continuity, so it looks stylish while meeting the user’s needs as well.
Choosing a design means finding the general area where it will be built. Look at the area from different perspectives to make sure it can be seen from every perspective you would like. Building this fireplace is a hefty investment, so make sure you can see it from the proper vantage points.
If you want to be able to see it from the inside of your home, then make sure the placement does that. The placement should not just be about one viewpoint but multiple, so walk around the area to make sure it is positioned in the best way for the ultimate outdoor fireplace experience.
The other factor to consider is the space available for the fireplace to be built. It is important to have room to enjoy the fireplace and adjust people’s sitting area depending on the different levels of heat.
Generally, you should allow at least 5 feet of space in front of the fireplace for a seating area. This means 2 feet of free space between the fireplace and the front of the chairs.
If the chairs are closer, it may be too hot to be enjoyable and further away may leave people chilled. Some open space allows for adjustments as needed depending on the current weather. The size of this area should be big enough so chairs can be adjusted as needed.
Construction Materials
Once the outdoor fireplace design and building location are chosen, then the hunt for construction materials begins. Every outdoor fireplace has to be built with materials that are heat-safe.
This refers to brick, concrete, stone and other such material for the outside of it. The interior frame will often use cinder blocks as a significant part of the support as they are sturdy as well as heat safe.
The area where the fire will burn is called the firebox. This has to be made from steel or bricks that are fire-rated to withstand extreme heat. If the outdoor fireplace has a chimney similar to indoor traditional fireplaces, then the flue pipe will have to be fire-rated as well, going from the top of the firebox up to the end of the chimney.
Cost
DIY outdoor fireplaces are like any other construction project; their cost can fit into a wide range of budgets. They can start around $100, and it goes up from there depending on décor, size and complexity.
Inexpensive ones could be made of cinder bricks, a pit bowl, grate and then a special cover. But if you want to build one with a nice stone style, extended sides, and other features, you can do it with a kit or spend the time and money to do it yourself and create your own design. Using a contractor is a good choice as well, but it’s not a true DIY project for yourself and is going to cost you more.
DIY means attention to detail and planning for the desired outcome. While each outdoor fireplace will be different in style and building requirements, there are some general rules to follow:
Have the correct permits and allowances
Choose the placement
Check for pre-existing underground wires and cables
Choose a design that suits and fits the selected area. This includes checking weight tolerances if using a pre-built deck or other outdoor areas
Decide if it will be gas or wood fed. This is important as lines need to be professionally installed if gas is chosen
If the fireplace will be stone or brick then a solid base needs to be established to support the weight and avoid settling
Excavation of at least 9” should be done for any permanent fire pit
Fill 9” hole with 6” pea gravel and then top with 3” thick concrete pad – make sure it will fit the fireplace and any extra seating area to be built
If the fireplace is larger in size, then it may need structural footing, which means the concrete will need to go deeper past the front level. This will vary from area to area
Create a frame outlining the fireplace
Add cement board to the frame using concrete screws
Mix mortar and put it on the cement board. Do not do this all at once as it will dry out. Do it in sections
Add stones and ensure there are no gaps in between
Ensure firebox, flue and chimney cap are installed to code and as specs require
DIY Outdoor Fireplace Ideas
The list of ideas for DIY outdoor fireplaces is endless. Once you have your DIY steps in place then there are lots of designs to choose from. There are kits, engineered drawings, or you can use a design of your own. There is something to meet everyone’s construction ability and budget.
1. Simple DIY Fireplace
This fire pit is simple and can be completed in one afternoon. It doesn’t need a lot of prep or extensive materials. Once you have chosen the right spot, then you are ready to go. It simply takes some ground preparation, 3-4 layers of landscaping stone, a pit bowl, and a grate. You can be enjoying the fireplace by the time the sun goes down.
2. Large Outdoor Fireplace
Outdoor fireplaces come in all shapes and sizes. Design can extend beyond the fireplace itself to both the patio and accessories. Think big when choosing what you want to include so the fireplace is integrated into the full area of use. Larger designs can take extra planning but are well worth it when it comes to seeing a beautiful end project.
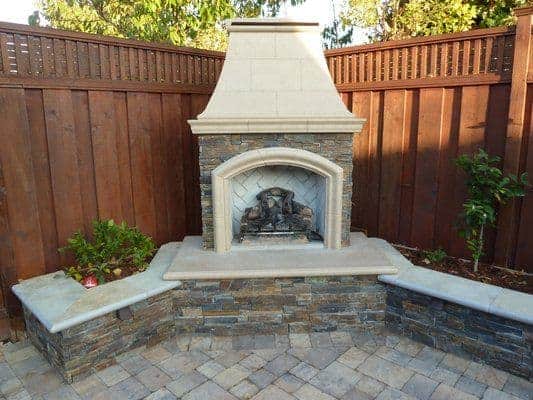
3. Rustic Outdoor Fireplace
DIY outdoor fireplaces do not have to be extreme engineering concepts. They can be stellar-looking, even with a basic red brick design that blends into the backyard area. You do not have to be a top-notch stonemason to build these. Either using a pre-fab design or creating one of your own is not complicated and can give you a great backyard getaway to enjoy. Matching the patio stone color can link the whole look together.
4. Fireplaces for Pool Areas
Simple yet elegant outdoor fireplace kits can change the atmosphere of any backyard that has a pool area. Designs do not have to be complex or overwhelming but can add a stunning nighttime look, especially when outdoor lighting is included as well. Some simple lights along with open flames look classic and warm with a water backdrop.
5. Prebuilt Fireplaces
An outdoor fireplace that is prebuilt is great for those who want to have one but aren’t feeling like they are up for the do-it-yourself task. That doesn’t mean that the early steps of regulations and sit prep isn’t necessary, it just means that the actual building of the fireplace has been done so it will only need placement, levelling and hook up for gas if that is the way you have chosen to have your fire.
6. Fireplace Area with Furniture
Building a backyard oasis can be simple or include a whole outdoor area for both cooking and relaxing. If you have a secluded corner that is already built or a big enough area, then building a fireplace along with other cooking prep areas and grills can be a great way to enjoy the outdoors. Adding some comfortable outdoor furniture can make the area a backyard getaway.
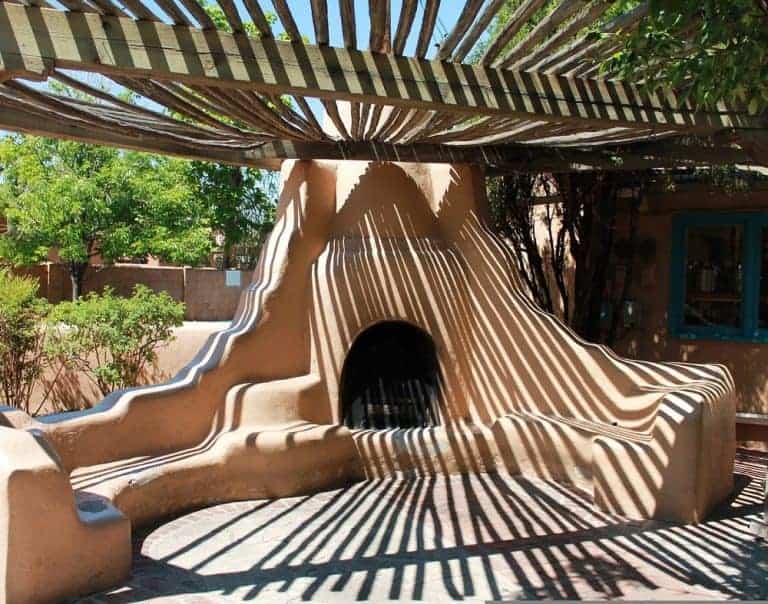
7. Desert Style Fireplace
For those who want a more south-western look rather than the more standard type of outdoor fireplace, a design like this can be great. It fits in with a relaxed atmosphere that offers the option of both enjoying a fireplace and somewhere to do some basic cooking. The design can set the tone for your whole outdoor atmosphere. This is good design, especially for those who get to enjoy the weather all year round.
8. Backyard Fireplace
Installing an outdoor fireplace does not mean you have to have a huge backyard or be out in a more rural setting. If the fireplace is installed according to local bylaws and regulations, you can have a beautiful one that is nestled in your urban backyard.
A nice fireplace along with an extended seating area can make evenings in the city or suburb just as nice as sitting around an outdoor fire in a rural setting. With some good design and solid install techniques, you can enjoy some great evenings under the stars.
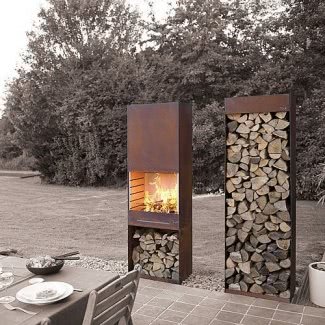
9. Steel Fireplace
So many of us tend to fall back into looking only at traditional designs when it comes to outdoor fireplaces. We look for the elegant stone that fits into a more classical outdoor décor.
This steel fireplace is not only different, it is simple to create while still giving off an ambiance of warmth and style. It is different and can fit with some modern outdoor décor that can give a stunning outdoor look. Having the wood stacked beside it enhances its style and makes feeding easy. Its slim design means it can fit into even the smallest backyard area.
10. Corner Fireplace
Not everyone has lots of space to build an outdoor fireplace. If you have a corner of your yard available, then you can still enjoy some flames outside.
Building a corner fireplace uses a small space to its advantage. It can look great while reducing the amount of lawn care and garden maintenance you need to worry about. Choosing a brick that complements the fence and your house can add to your outdoor comfort and style.
Final Thoughts
Whether you are looking to build a simple DIY outdoor fireplace or something large and complex, both styles are going to enhance your outdoor freedom and enjoyment.
Creating an outdoor space that has the fireplace as the focal point is not a complicated process if you go step by step. A small circular fireplace with a bowl situated like a campfire or one that is fully integrated into an outdoor dining area is all achievable with the right research, design and application process.
No matter what size of an area you are going to put your outdoor fireplace in, make sure it meets all codes and local legislation. Have a nice-looking outdoor fireplace is the goal, but a safety is a must as well.
Make sure the construction materials are up to code and that any gas install is done by a licenced person. Building your own outdoor fireplace is not only going to give you great satisfaction, but it is also going to bring endless evenings of warmth and enjoyment as well.
Are you ready to transform your ordinary backyard into a stunning outdoor oasis? Imagine stepping out into a personalized paradise, where every detail reflects your unique style and comfort. This isn’t just a dream – with the right deck ideas, it can be your everyday reality.
Here, we dive into the world of backyard decks, offering a myriad of ideas and inspirations to turn your space into the perfect retreat. Whether you’re looking to create a cozy corner for morning coffees or an expansive entertainment area for summer barbecues, we’ve got you covered.
[view_toc]
1. Install Waterproof Vinyl Deck Flooring
Ideal for a sleek, modern aesthetic, waterproof vinyl decking in PVC is a practical choice for any outdoor setting. Its durability against the elements makes it perfect for year-round use. For a touch of sophistication, select a finish mimicking natural wood or stone. Combine with minimalist furniture to create a chic, low-maintenance outdoor retreat.
2. Create a Luxury Deck
Transform your deck into a luxury oasis with a fusion of natural textures and contemporary lines. The key lies in the blend of organic materials like the rattan storage basket with sleek, modern furnishings such as the glass and metal tabletop accessories.
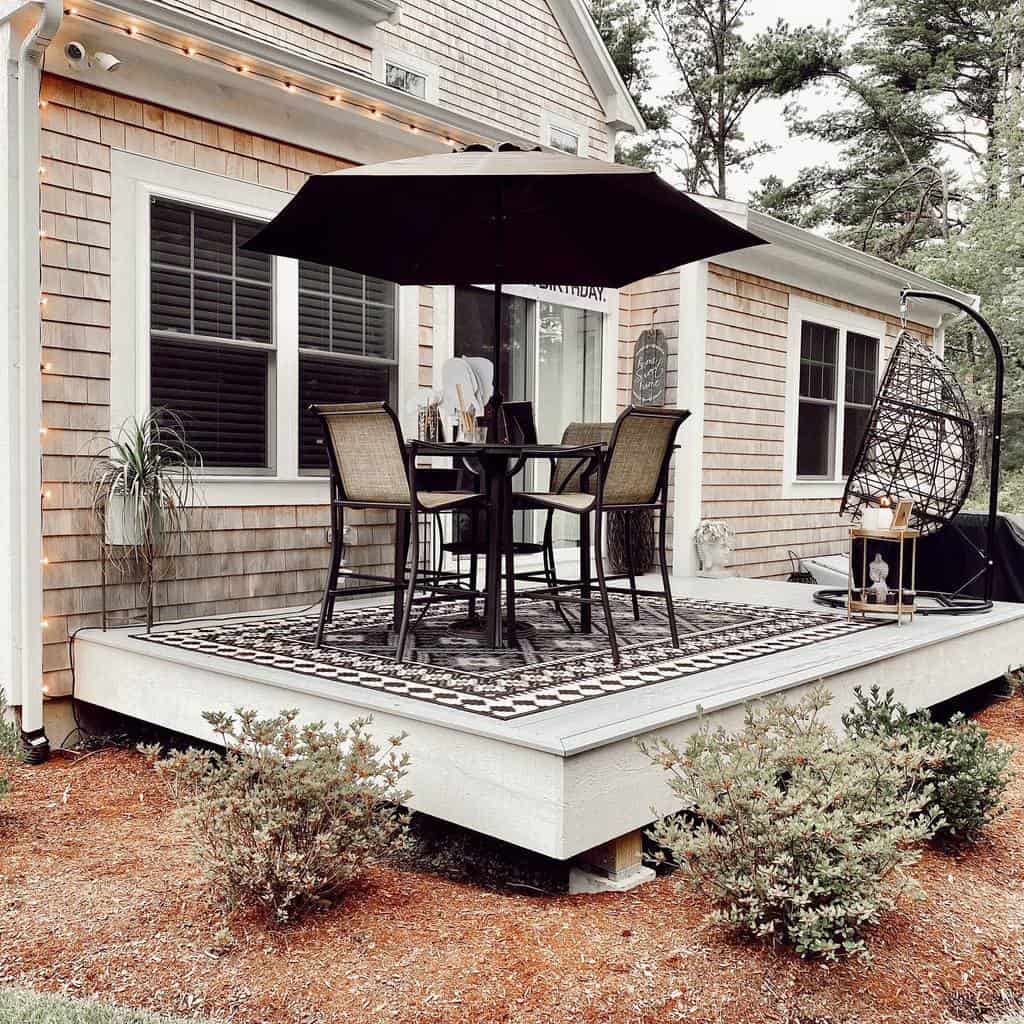
3. Design a Small, Covered Deck
A small, covered deck can be a charming and intimate space. Utilize light-colored woods and sheer draperies to give a sense of openness. Furnish with compact, multifunctional pieces like foldable chairs and extendable tables to maximize space without sacrificing style.
4. Upgrade Your Deck with Wood Railings
Wooden railings offer a classic, timeless look. Stain them in a hue that complements your home’s exterior for a cohesive feel. Accentuate the natural beauty of the wood with simple, elegant decor like potted greenery and soft, warm lighting.
5. Install Sleek Cable Railings on Your Deck
Cable railings are sleek and modern, and they create an unobstructed view. They pair well with a minimalist aesthetic. To soften the industrial feel, add touches of wood in furniture or decking and incorporate plush cushions in your seating areas.
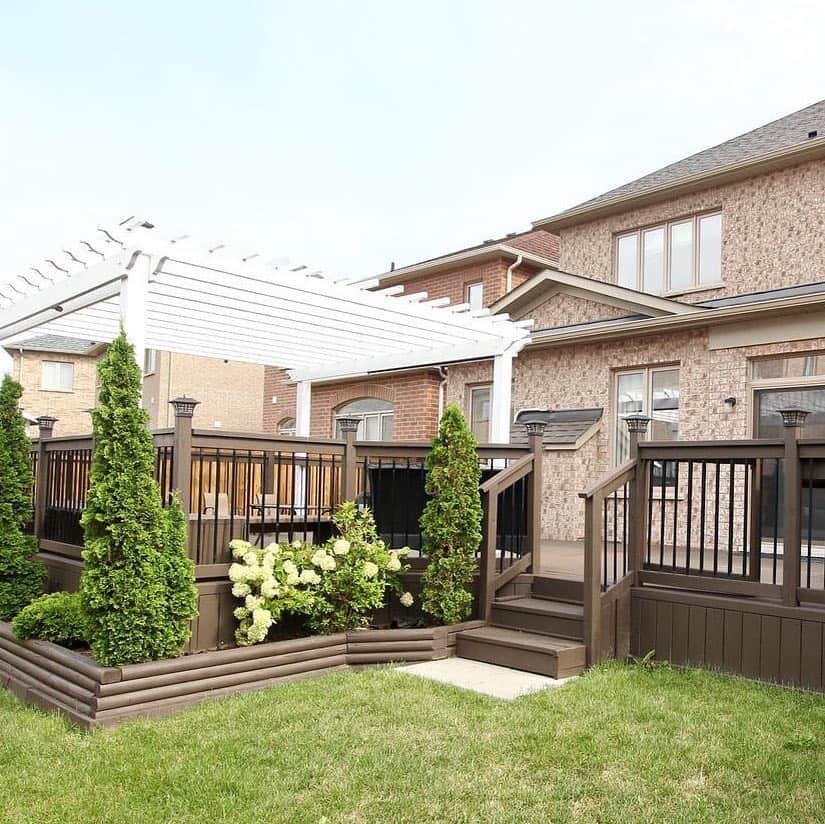
6. Add a Pergola to Your Deck for Style and Shade
A pergola adds architectural interest and a framework for natural shade. Train climbing plants over the structure for a living canopy. Use bold, geometric-patterned outdoor rugs and cushions to add color and texture under this natural arbor.
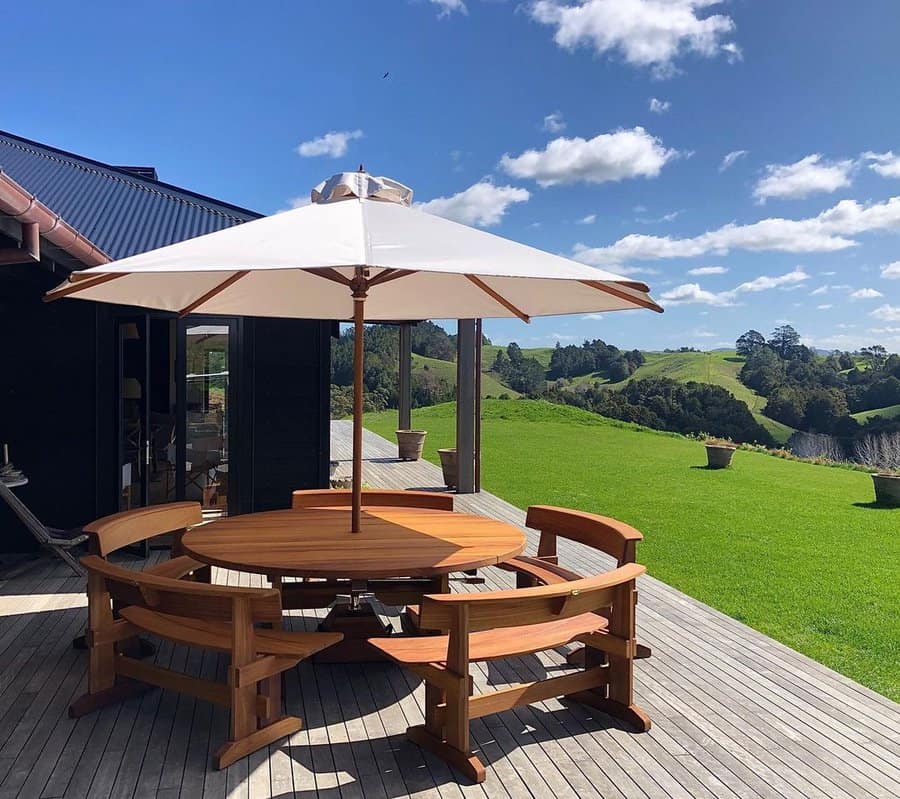
7. Choose the Perfect Deck Umbrella
Opt for a large, cantilevered umbrella for flexible shade. Choose a design in a bold color or pattern to make it a focal point. Arrange a dining set, a pair of swivel chairs, and a lounge set with a coffee table underneath to create distinct zones for dining, relaxing, and socializing.
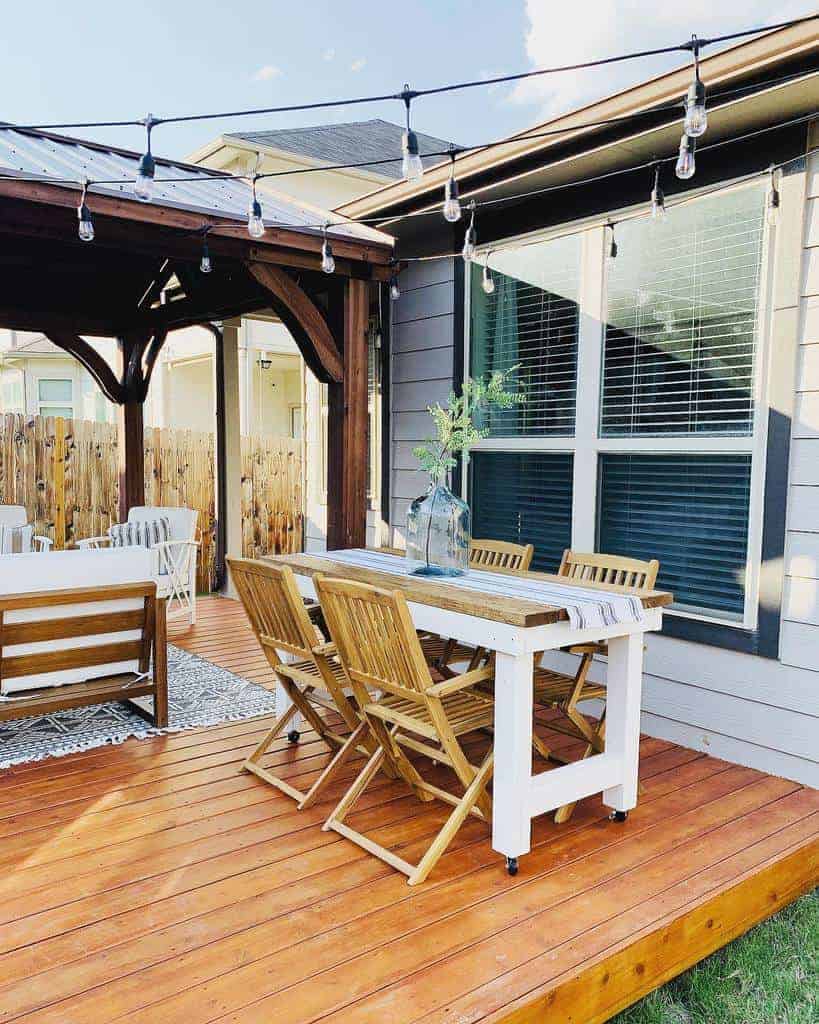
8. Selecting the Ideal Deck Dining Set
Select a dining set that echoes the architecture of your home and the texture of your decking. A robust, extendable table ensures versatility for gatherings, while stackable chairs offer space-saving solutions. Go for materials like powder-coated aluminum or treated hardwood to withstand the elements and maintain their allure throughout the seasons.
9. Find the Best Swivel Chairs for Your Deck
Introduce a pair of swivel chairs to your deck as a stylish yet functional feature. These chairs should offer comfort without compromising on design; think weatherproof fabric seats and rust-resistant bases. Their rotating feature allows for dynamic interaction with the space, providing both a view of your garden and engagement with guests.
10. Complete Your Deck with a Lounge Set and Coffee Table
A lounge set paired with a low-profile coffee table invites leisure and ease. Seek out modular pieces that can be reconfigured to suit the occasion, whether it’s a casual family gathering or an elegant outdoor soirée. Ensure the materials are resilient, like synthetic wicker, and pair with all-weather cushions in a color palette that complements your outdoor aesthetic.
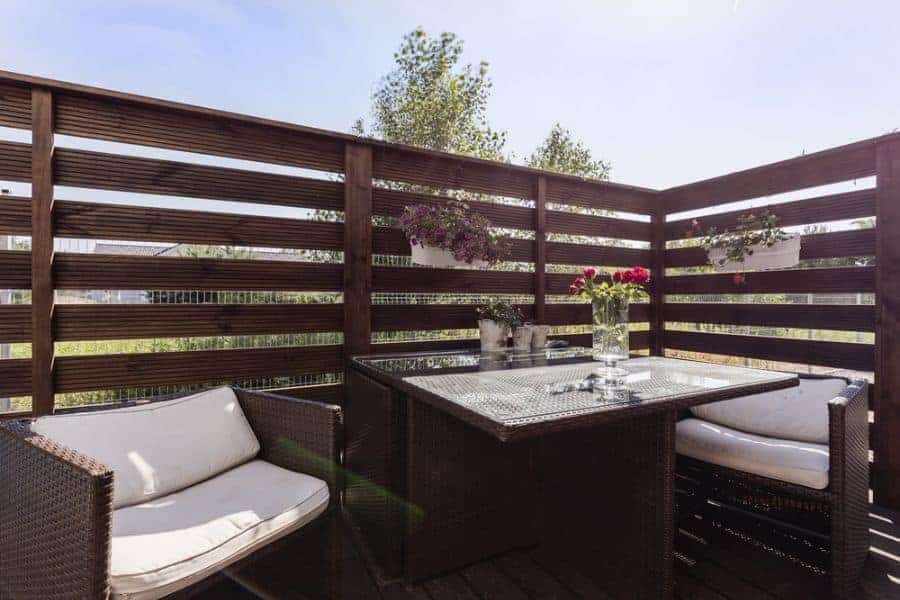
11. Enhance Deck Privacy with a Wooden Fence
A wooden fence ensures privacy while adding warmth to the space. Paint it in a soothing color to blend with the natural surroundings. For an inviting ambiance, add a round hot tub, surrounded by potted plants and soft, outdoor lighting.
12. Integrate a Round Hot Tub into Your Deck
Anchoring your deck with a round hot tub immediately turns it into a luxurious retreat. Position the tub for privacy, perhaps cornered by the privacy fence, and ensure there’s enough decking around it for safe, easy movement. Surround it with built-in benches or all-weather lounge chairs to fashion an inviting dip-and-lounge zone, complete with waterproof side tables for those cocktail evenings under the stars.
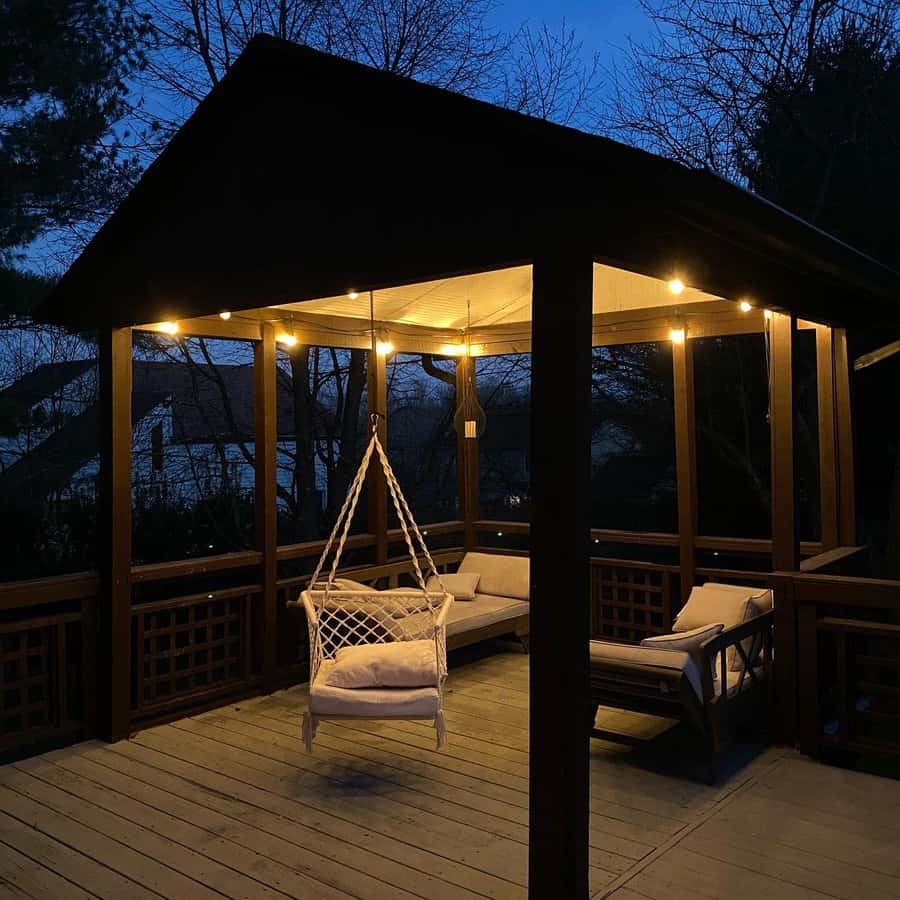
13. Build a Gazebo on Your Deck
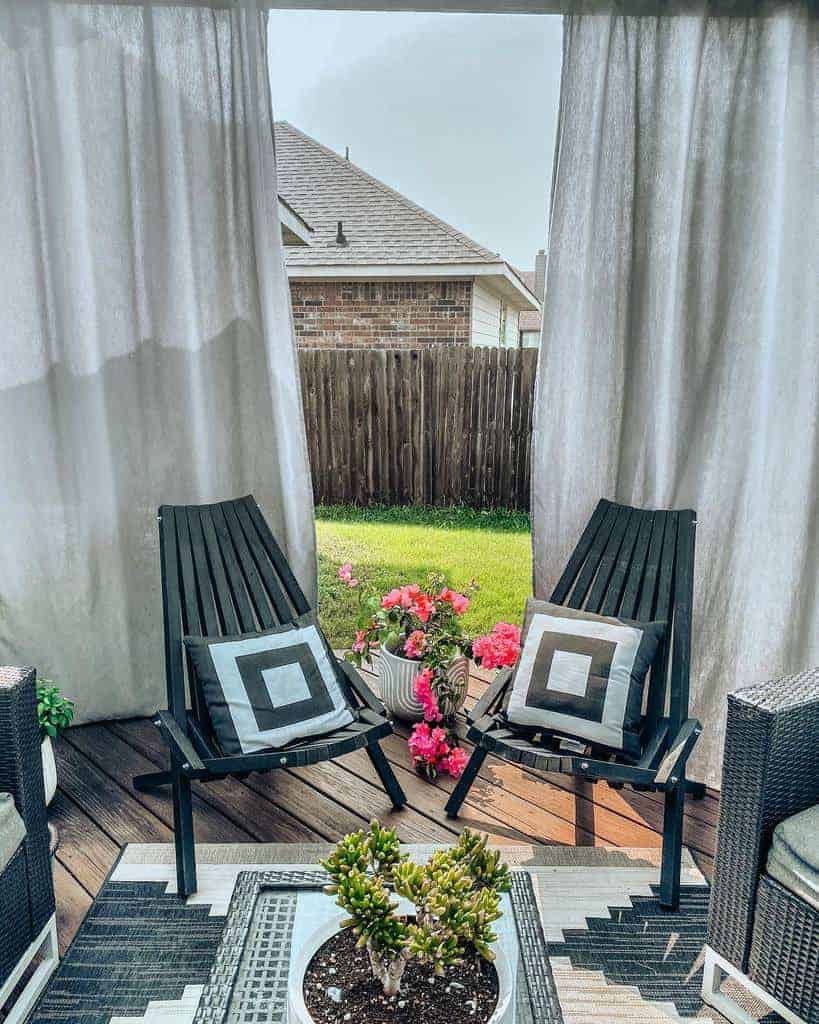
A gazebo on the deck provides a defined space for outdoor entertainment. Furnish it with comfortable seating and weather-resistant decor. To enhance the romance and charm, hang soft, billowy curtains around the edges.
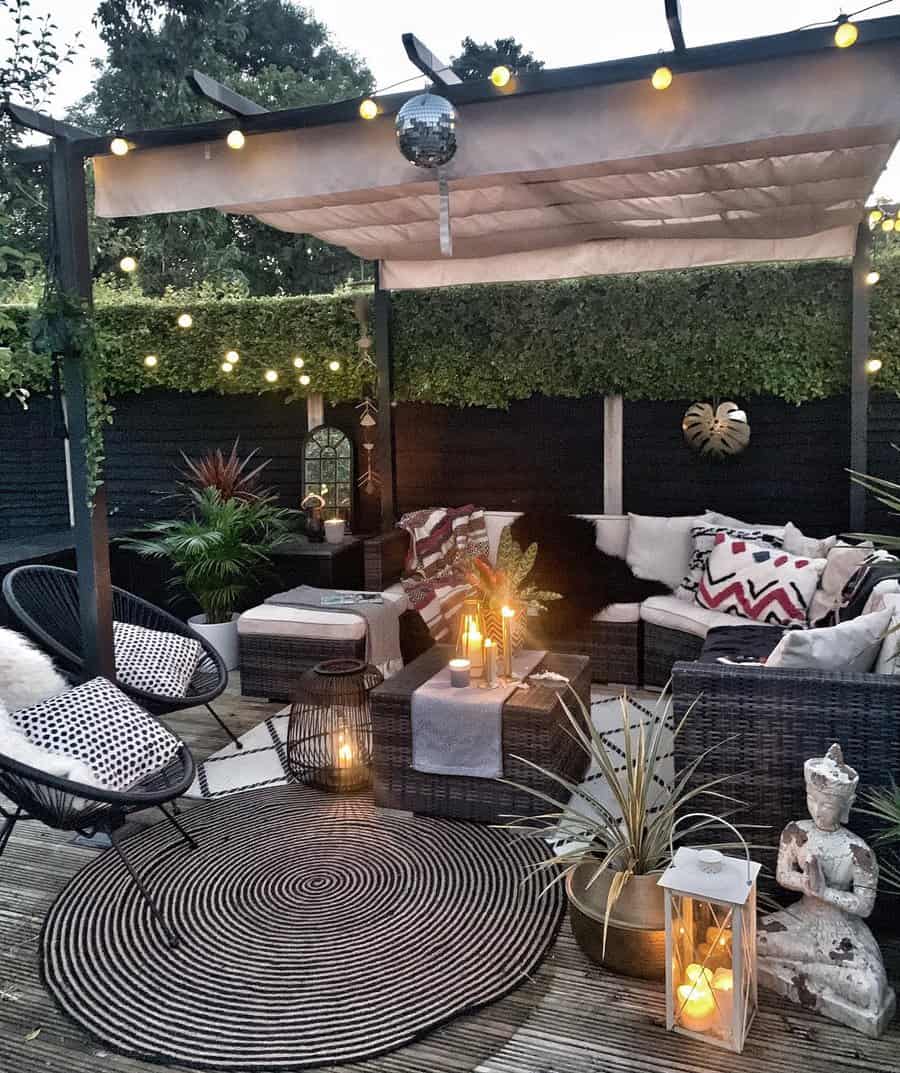
14. Add Elegance with Deck Curtains
Flowing curtains around your deck create a luxurious, secluded feel. Combine with plush seating and rich textiles to design a cozy nook. Ambient lighting like lanterns or string lights adds to the enchantment.
15. Construct a Stylish Deck Pavilion
A pavilion gives structure and sophistication. Use it to shelter a dining area or lounge space. Match the pavilion’s style with your home for a seamless transition from indoors to outdoors.
16. Elevate Your Outdoor Space with a Raised Deck
This deck acts as an extension of your living space. Use consistent flooring and complementary materials to blur the lines between inside and outside. Furnish with comfortable, stylish pieces for seamless entertaining or relaxation.
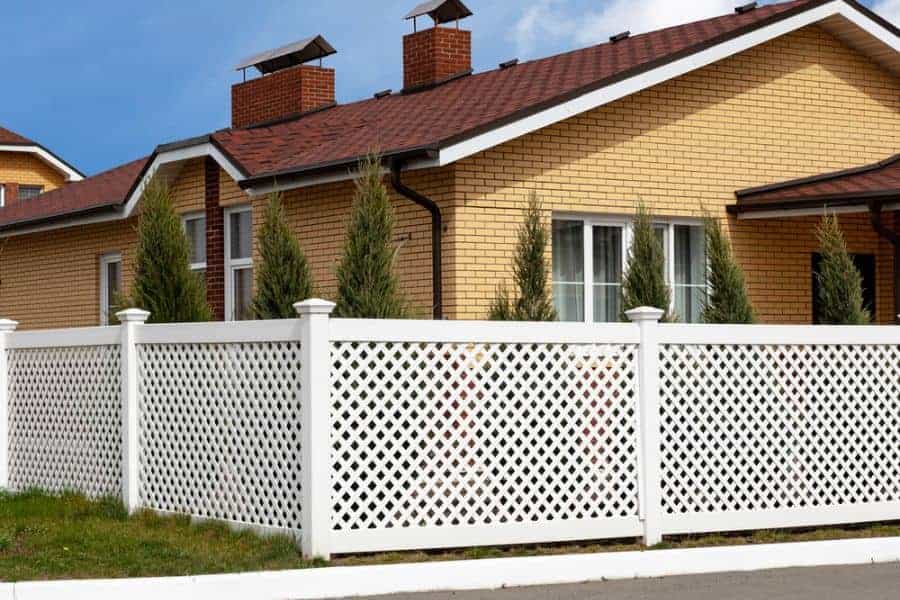
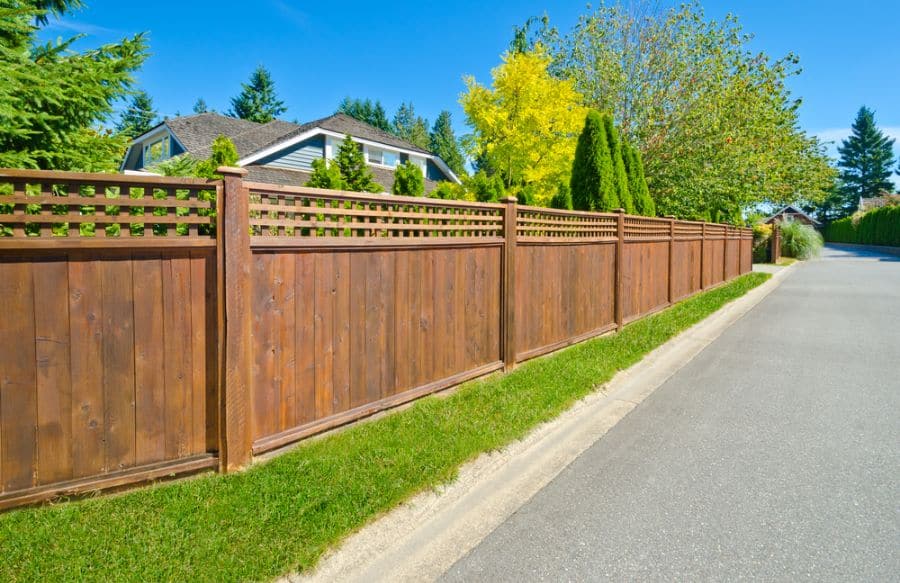
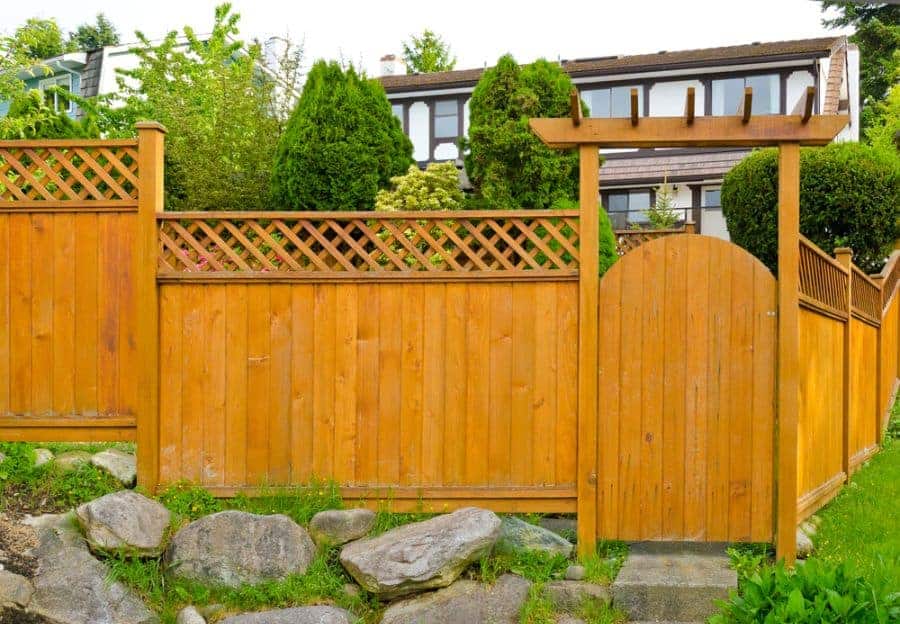
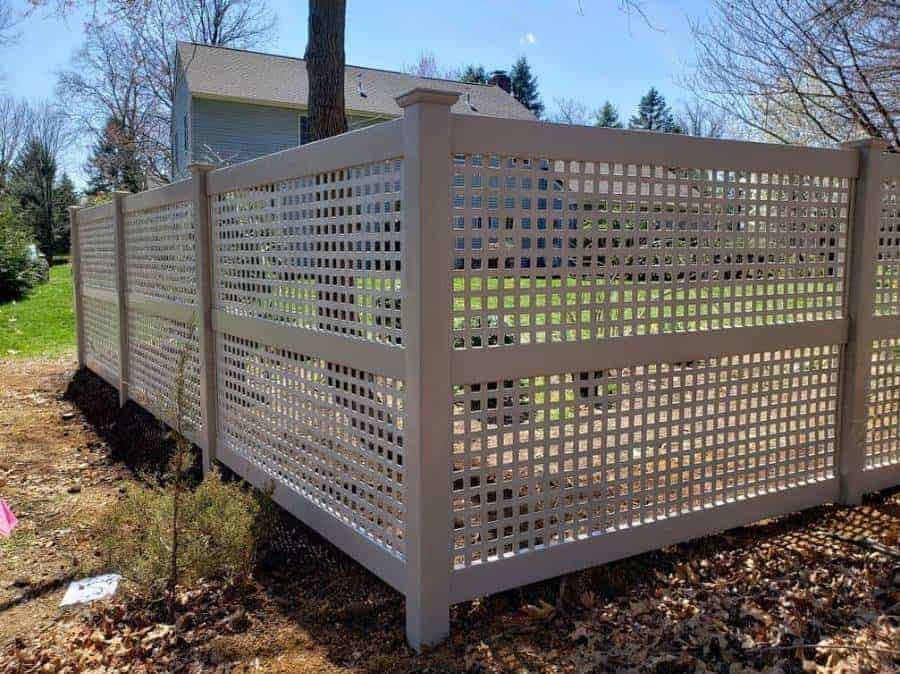
17. Beautify Your Deck with a Lattice Fence
Lattice fences are ideal for supporting climbing plants, creating a living wall. Consider fragrant or flowering climbers to add sensory appeal. The fence can act as a backdrop for a focal point, like a statement sculpture or water feature.
18. Best Climbing Plants for Deck Pergolas
Choose climbers like wisteria for a fragrant, floral canopy over your pergola, or go with the vibrant hues of clematis for a pop of color. Ivy will provide a lush, year-round green backdrop, but needs trimming to stay tidy. Bougainvillea brings a tropical flair with its vivid blossoms, and climbing roses add timeless elegance with their blooms and scent. Select these for an enchanting vertical garden effect on your deck.
19. Maximize Space with a Corner Deck
Maximize this cozy nook with built-in seating and custom cushions. Add a fire pit or a small table for a quaint conversation area. Overhead string lights can cast a warm, inviting glow during the evenings.
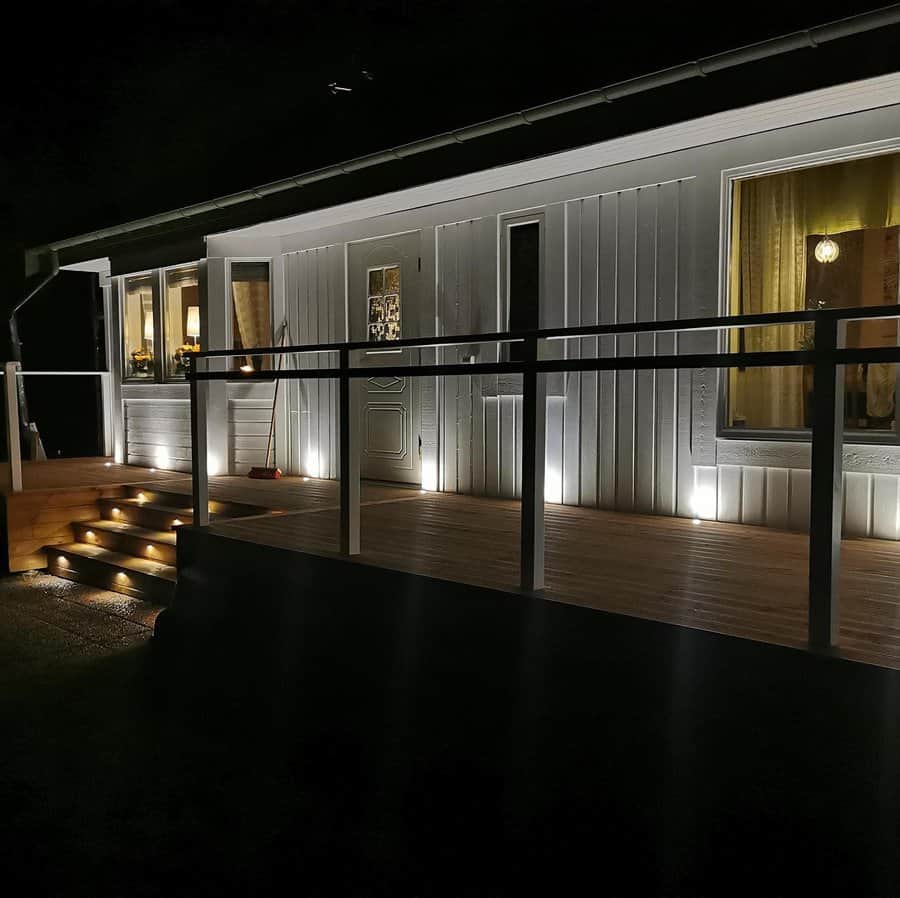
20. Illuminate Your Deck with String Lights
String lights bring a magical touch to any deck setting. Drape them overhead or around railing to create a warm, inviting atmosphere. Combine with comfortable seating and soft throw pillows for a dreamy escape right in your backyard.
Did you know that about half of U.S. pet owners say their pets are as much a part of their family as a human member? So why should our furry companions settle for less when it comes to their homes?
Welcome to the world of innovative dog house ideas, where comfort meets style for your four-legged friends.
Here, we’re diving into the realm of canine architecture, exploring creative and practical solutions to ensure your dog’s house is not just a shelter, but a true home.
Get ready to discover dog house designs that cater to your pet’s comfort while adding a dash of flair to your backyard.
[view_toc]
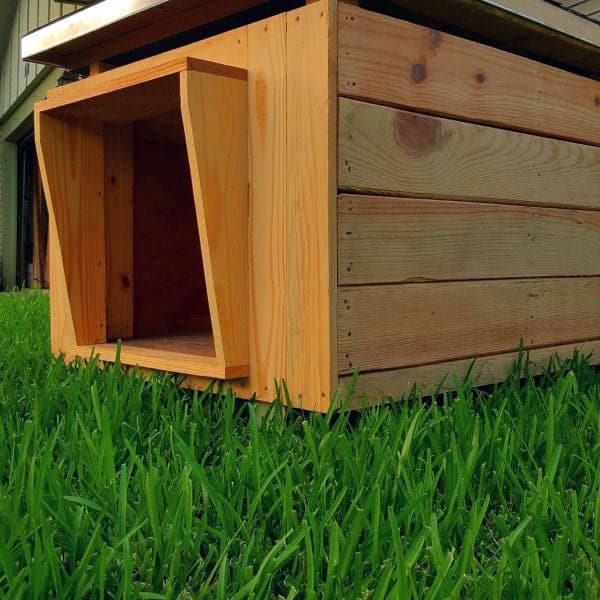
1. Build a Simple Wood Dog House
Embrace the charm of minimalism with a natural grain wood dog house. Its box-like design, featuring an open front, provides comfort and ease of access for your pet. A slanted roof not only adds to the visual appeal but also ensures efficient water runoff.
2. Create a Durable Insulated Dog House
See below a robust frame crafted from dark-stained wood, exuding a rustic yet durable aesthetic. The insulation on the sides, possibly a light-colored thermal material, ensures a cozy and warm interior, safeguarding your pet from chilly weather.
3. Design a Shiplap Style Dog Kennel
Utilize shiplap boarding for a stylish and weather-resistant dog kennel. This design lends a textured look that’s both contemporary and classic, perfect for a chic outdoor setting.
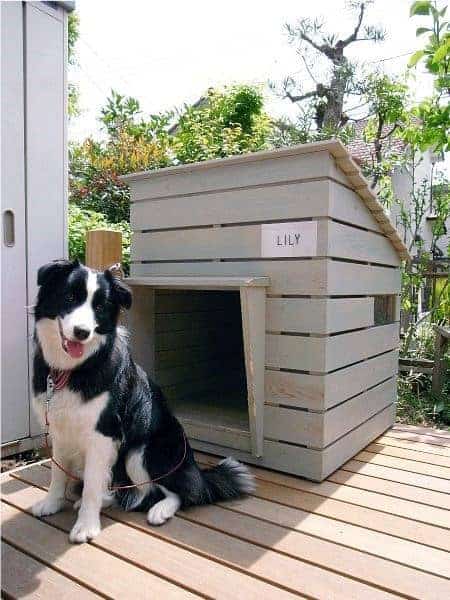
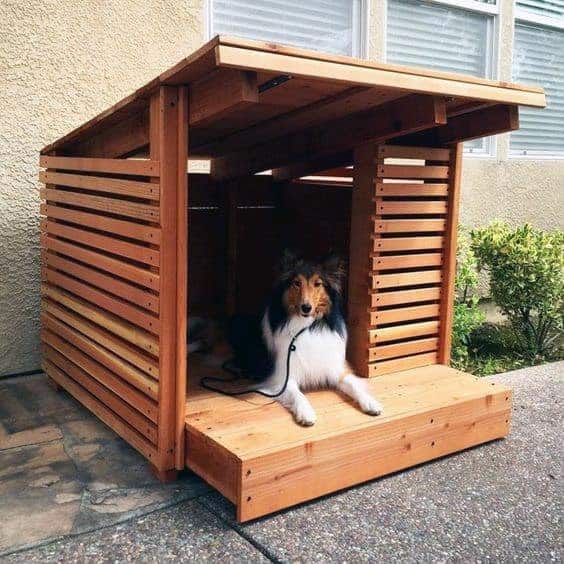
4. Construct a Sleek Flat Roof Dog House
A flat-roof design can be both practical and modern. It allows for additional space atop the kennel, where pets can lounge or you can place decorative elements. The flat roof lines contribute to a sleek, streamlined appearance.
5. Make a Bold Red Dog House
Introduce a bold statement with a red roof and red borders. This vibrant choice brings life and character to the dog house, making it a standout piece in any garden or backyard.
6. Craft a Rustic Shingled Dog House for Winter
Design a winter sanctuary with a rustic dog house adorned with roof shingles. This feature not only adds to the aesthetic appeal but also provides extra protection against harsh weather, ensuring a warm and dry space for your pet.
7. Design a Colorful Rainbow Dog House
Celebrate color with a rainbow-themed dog house. This joyful design can brighten up any space, infusing it with fun and positivity, making it a delightful haven for your furry friend.
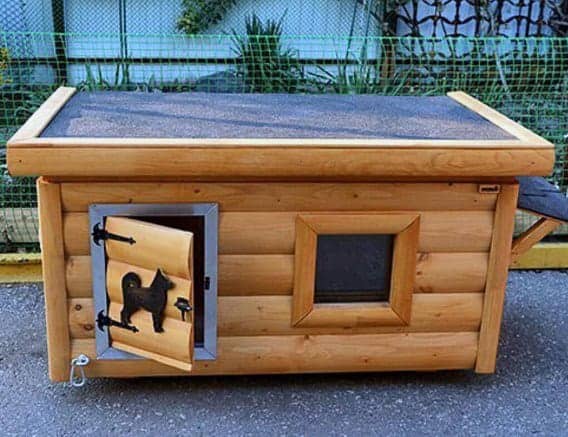
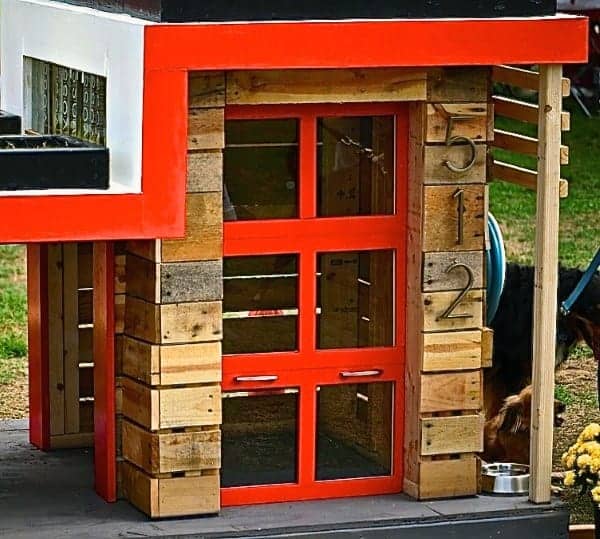
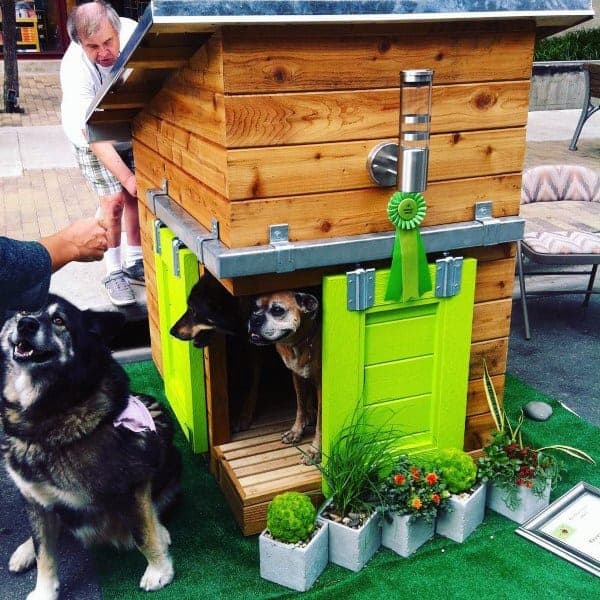
8. Modernize Your Dog House with a Number Sign
Combine functionality with fashion in a modern dog house, complete with a stylish number sign. This addition personalizes the space, giving it a unique touch while maintaining a contemporary look.
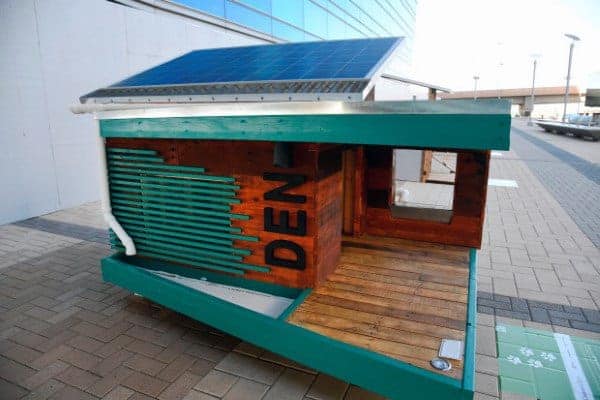
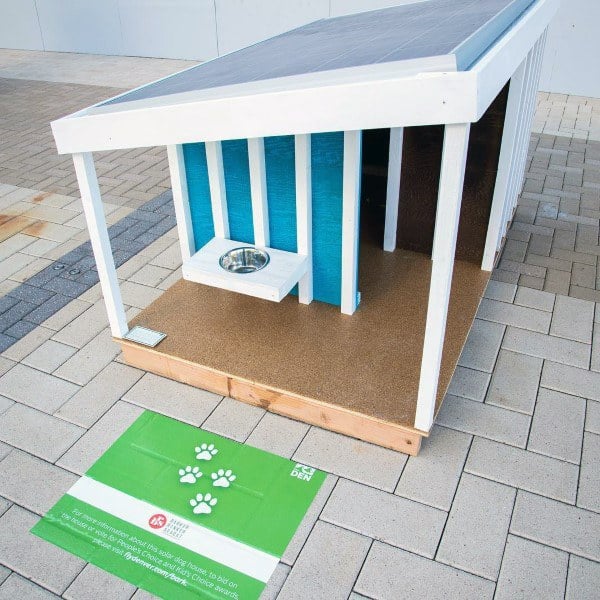
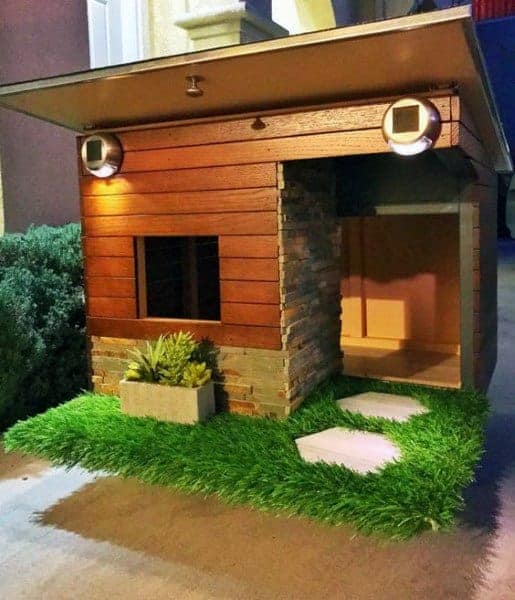
9. Implement Solar Panels
Embrace sustainability by adding a solar panel to your dog house. This eco-friendly addition is not only a responsible choice but also adds a modern edge to the design.
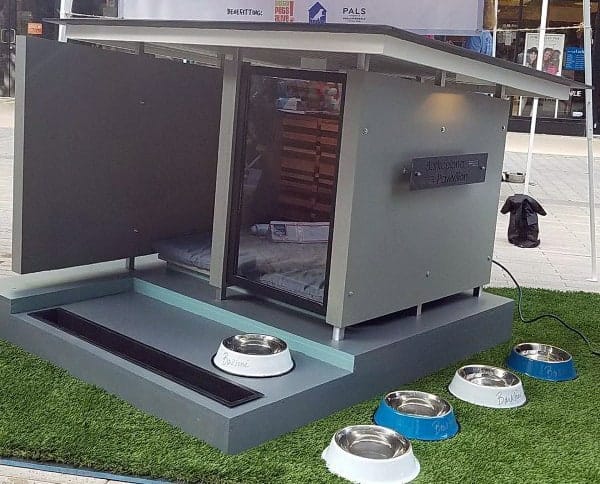
10. Modern Dog House with Stylish Glass Windows
Integrate glass windows for a chic and sophisticated dog house. The transparency offers a view while keeping the design airy and light, merging modern aesthetics with functionality.
11. Create a Tranquil White and Blue Dog House
Opt for a classic and serene color combination with a white and blue dog house. This timeless palette exudes tranquility and elegance, creating a calming shelter for your pet.
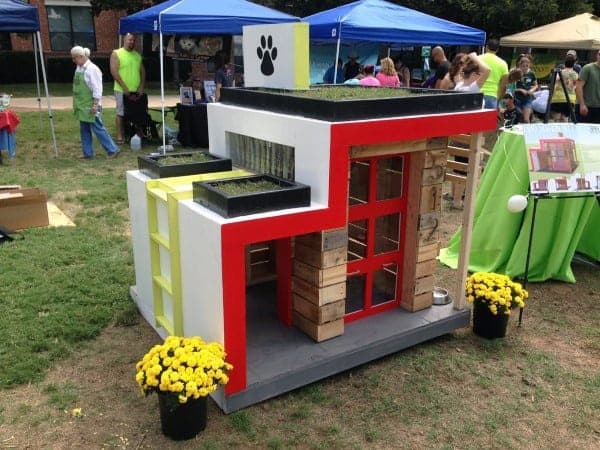
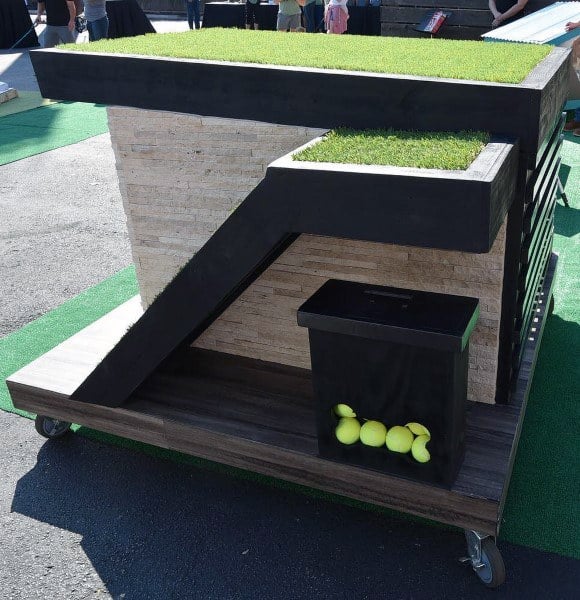
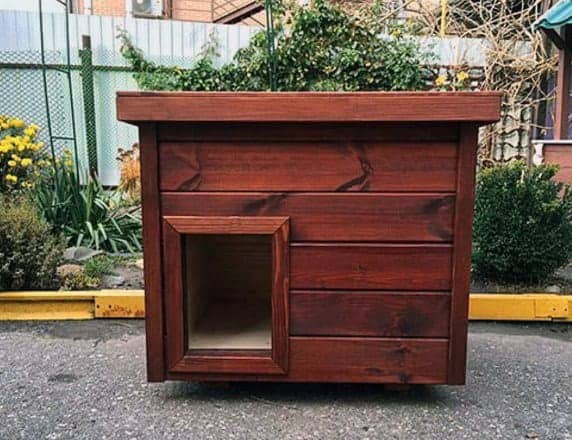
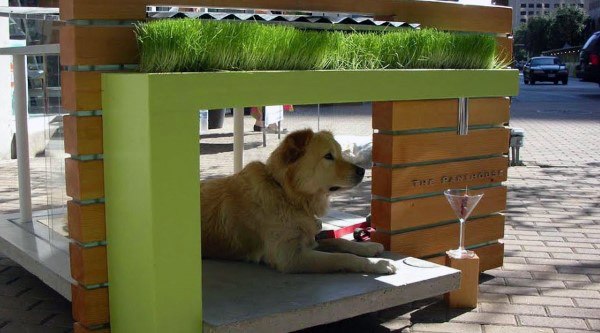
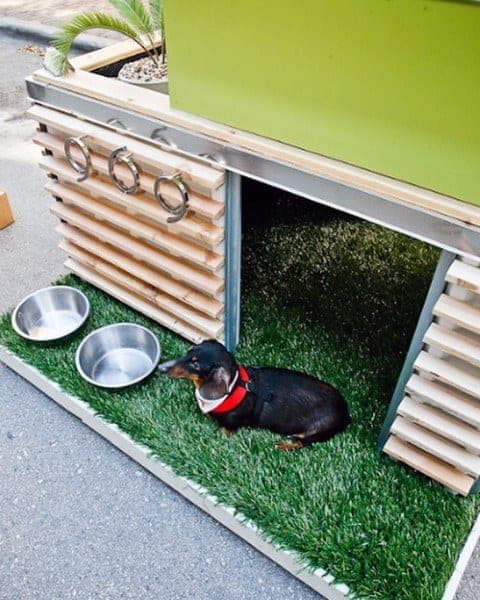
12. Build a Chic Two-Level Dog House
Venture into a dynamic design with a two-level dog house. The contrasting red, white, and grey colors add vibrancy, while the planter box on the roof introduces a touch of nature and sophistication.
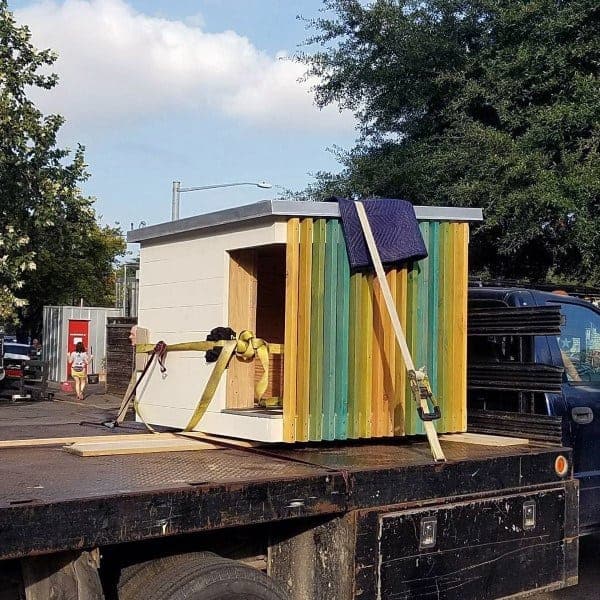
13. Design a Dog House with Vibrant Vertical Slats
Craft a visually intriguing shelter with vertical slats painted in shades of yellow, green, and blue. The white backdrop and flat roof design enhance the playful yet clean aesthetic.
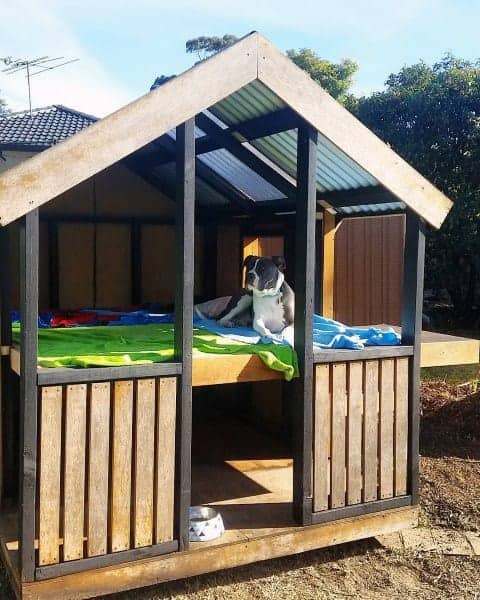
14. Set Up an Indoor Open Dog House
Design an inviting and accessible space with an indoor open dog house. This design is perfect for keeping your pet close, while seamlessly blending with your home’s interior.
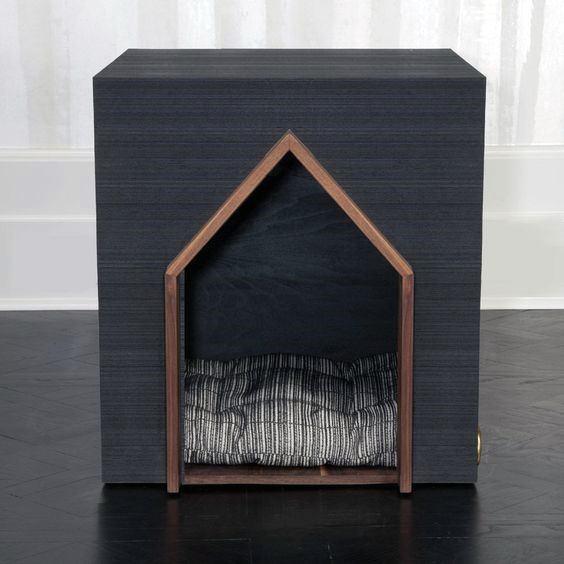
15. Develop a Sleek, Minimalist Indoor Dog House
Create a modern haven with a cube-shaped, minimalist dog house. The darker fabric or textured material contrasts beautifully with the wooden framed entrance, offering a contemporary twist on the classic house silhouette.
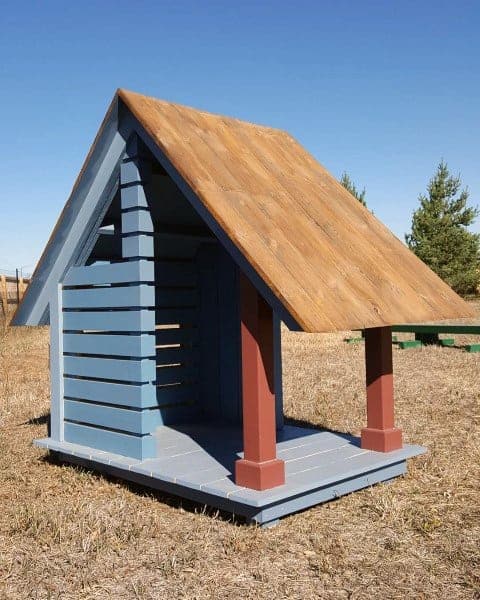
16. Construct a Shelter-Style Rustic Dog House
Construct a rustic shelter featuring a sloped wooden shingle roof, painted in light blue with dark pillars. Its raised design ensures protection from elements and insulation, while the open front maintains ventilation.
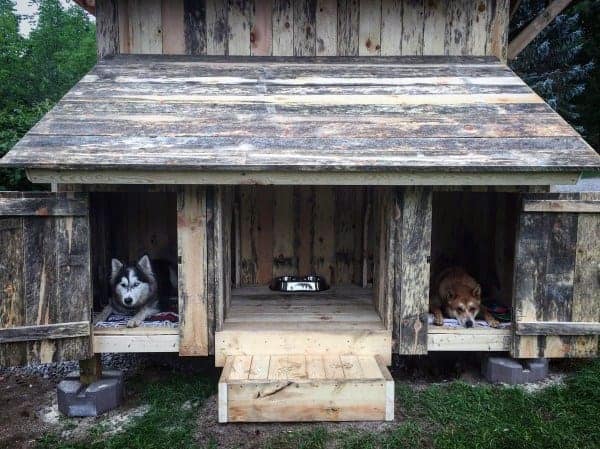
17. Create a Spacious Double Dog House
A tall, white structure with a blue roof makes for a striking double dog house. This design accommodates multiple pets while maintaining an elegant and harmonious look.
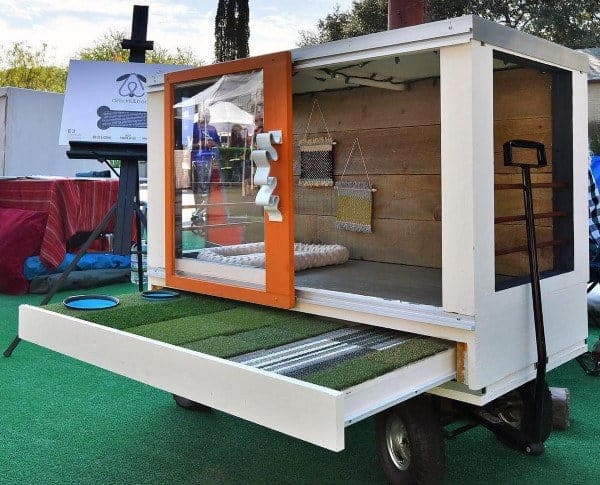
18. Develop a Mobile Rolling Dog House
Introduce mobility and convenience with a rolling dog house. This design allows for easy relocation, ensuring your pet’s comfort is always at the forefront, no matter the setting.
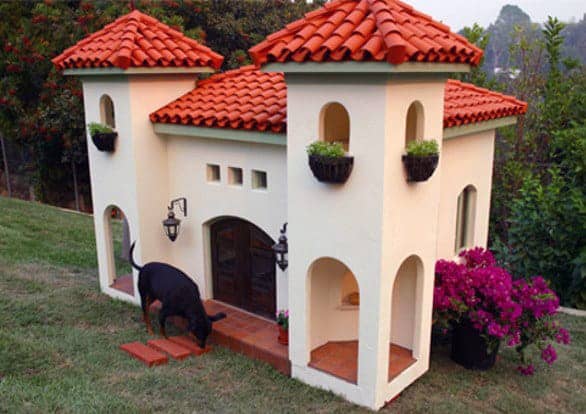
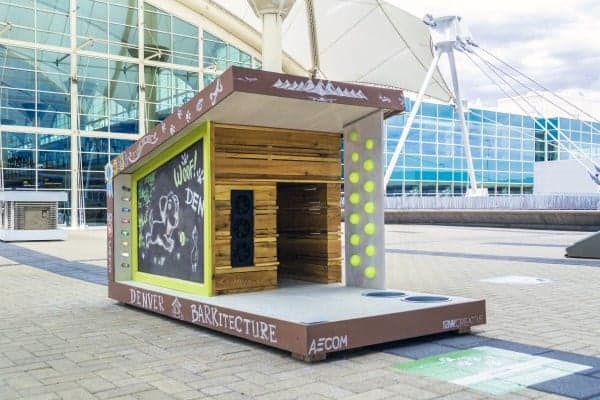
19. Build a Luxury Dog Mansion
Envision a palatial residence for your pet with a luxury dog mansion. This extravagant design can include multiple rooms, luxurious finishes, and bespoke detailing, setting a new standard in pet living.
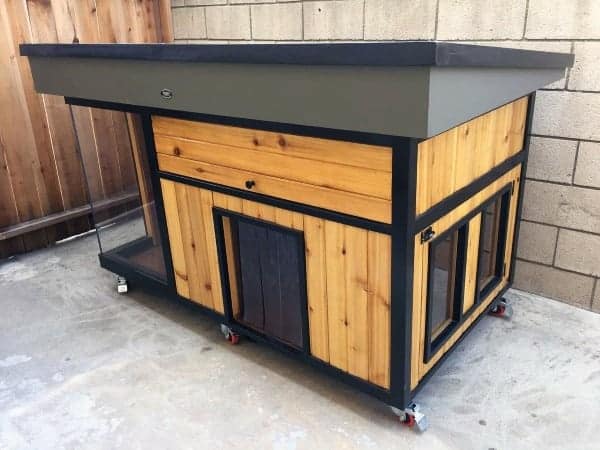
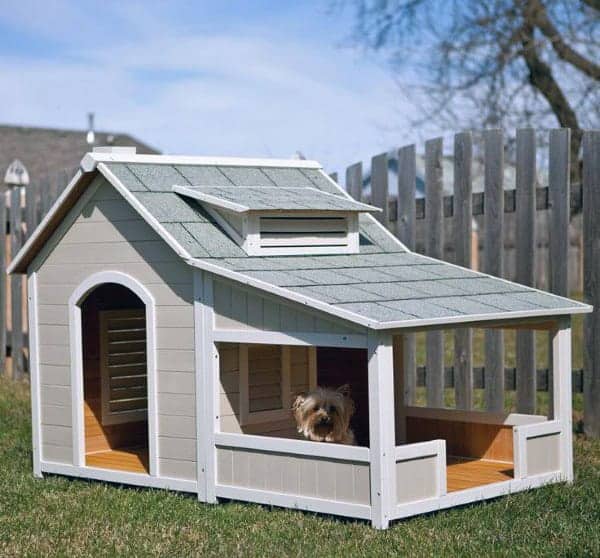
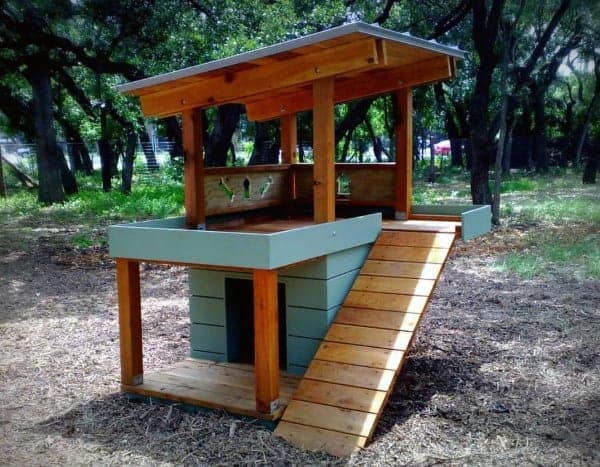
20. Craft a Two-Level Dog House with a Deck
Construct a wooden two-level dog house featuring a comfortable ground shelter and an upper deck. The protective overhang and ramp add to its practicality and charm.
21. Enhance Your Dog House with Front Planters
Enhance your dog’s house by adding planters in front. This not only beautifies the space but also brings a touch of nature, creating a more inviting and lively environment.
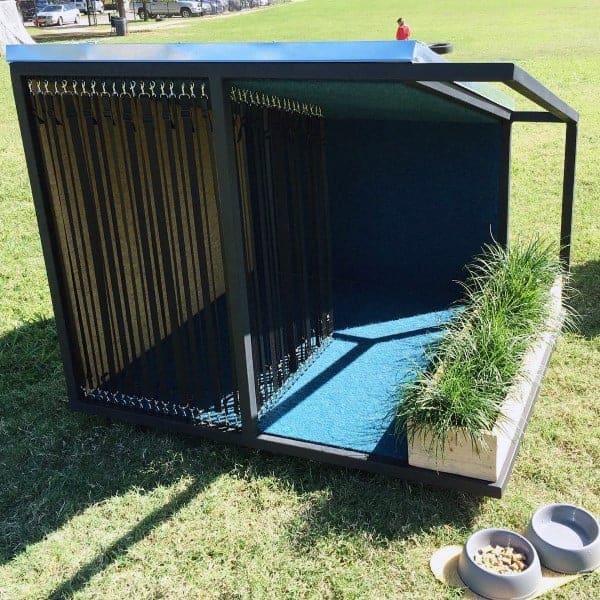
22. Design an Industrial-Style Dog Crate
Imagine a cage-like structure with an industrial flair. This sturdy and raw design is ideal for those seeking a minimalist yet functional approach to a dog’s resting space.
23. Repurpose Wood Pallets into a Dog House
Utilize wood pallets for an eco-friendly and rustic dog house. This resourceful design speaks of creativity and sustainability, providing a comfortable shelter with a unique aesthetic.
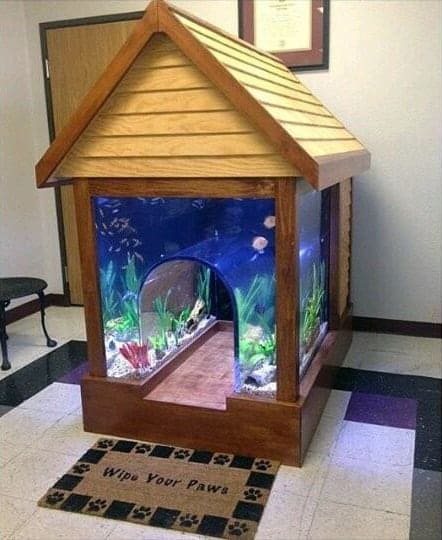
24. Create an Aquarium-Themed Dog House
Dive into a whimsical underwater theme with an aquarium-inspired dog house. Incorporate elements that mimic a fish tank, creating a captivating and imaginative space for your pet.
25. Beautify Your Dog House with Artificial Grass
Adorn the dog house with artificial grass for a touch of greenery. This not only adds to the visual appeal but also provides a soft and comfortable surface for your pet to relax on.
26. Convert a Cabinet into a Cozy Dog House
Transform a cabinet into a cozy dog house. This space-saving design cleverly integrates your pet’s shelter into your home decor, offering a snug and stylish spot for your furry friend.
27. Design a Quaint Barn-Style Dog House
Design a quaint barn-style dog house. This charming approach gives a nod to traditional farm aesthetics while providing a sturdy and picturesque shelter for your pet.
28. Establish an Open Air Dog Kennel
An open dog kennel allows for maximum air flow and social interaction. It’s ideal for warmer climates or as a daytime outdoor space, offering a secure yet open environment for your pet.
29. Personalize with Dog House Mural Art
Personalize your dog house with mural art. This artistic touch can depict anything from nature scenes to abstract designs, making your pet’s house a unique and eye-catching piece.
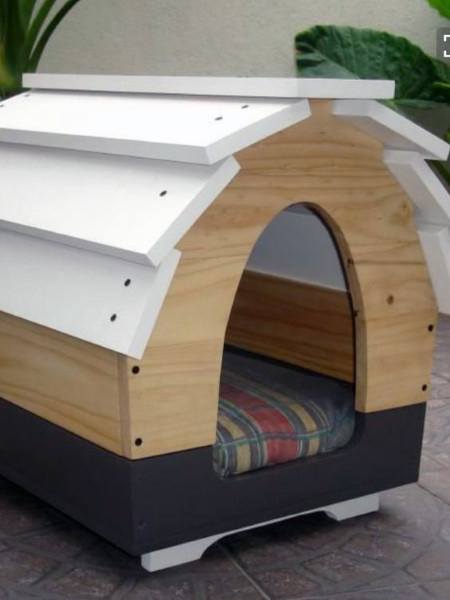
30. Build an Arched Dog House
Introduce an architectural element with an arched dog house. This elegant design not only stands out visually but also provides a spacious and comfortable shelter.
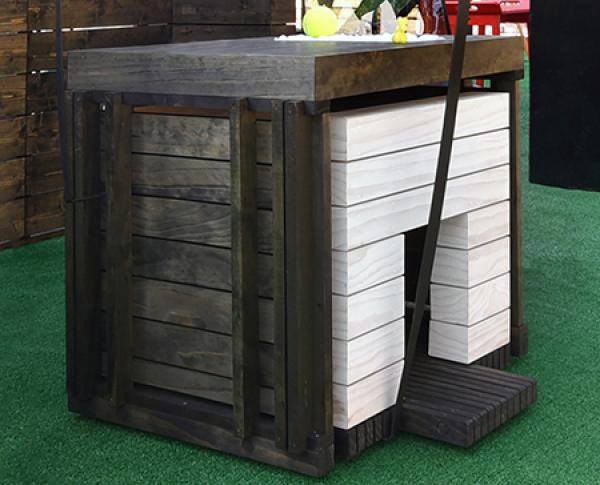
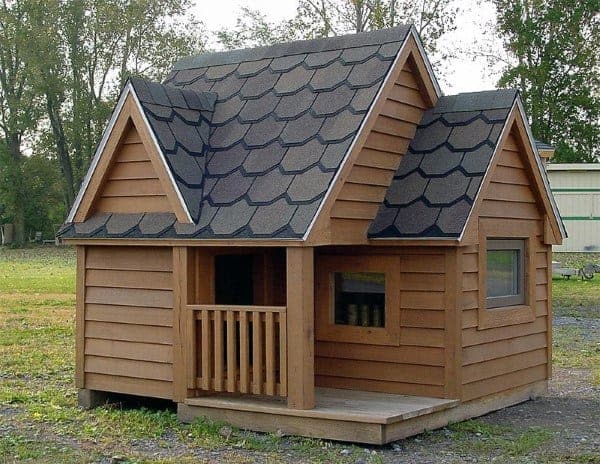
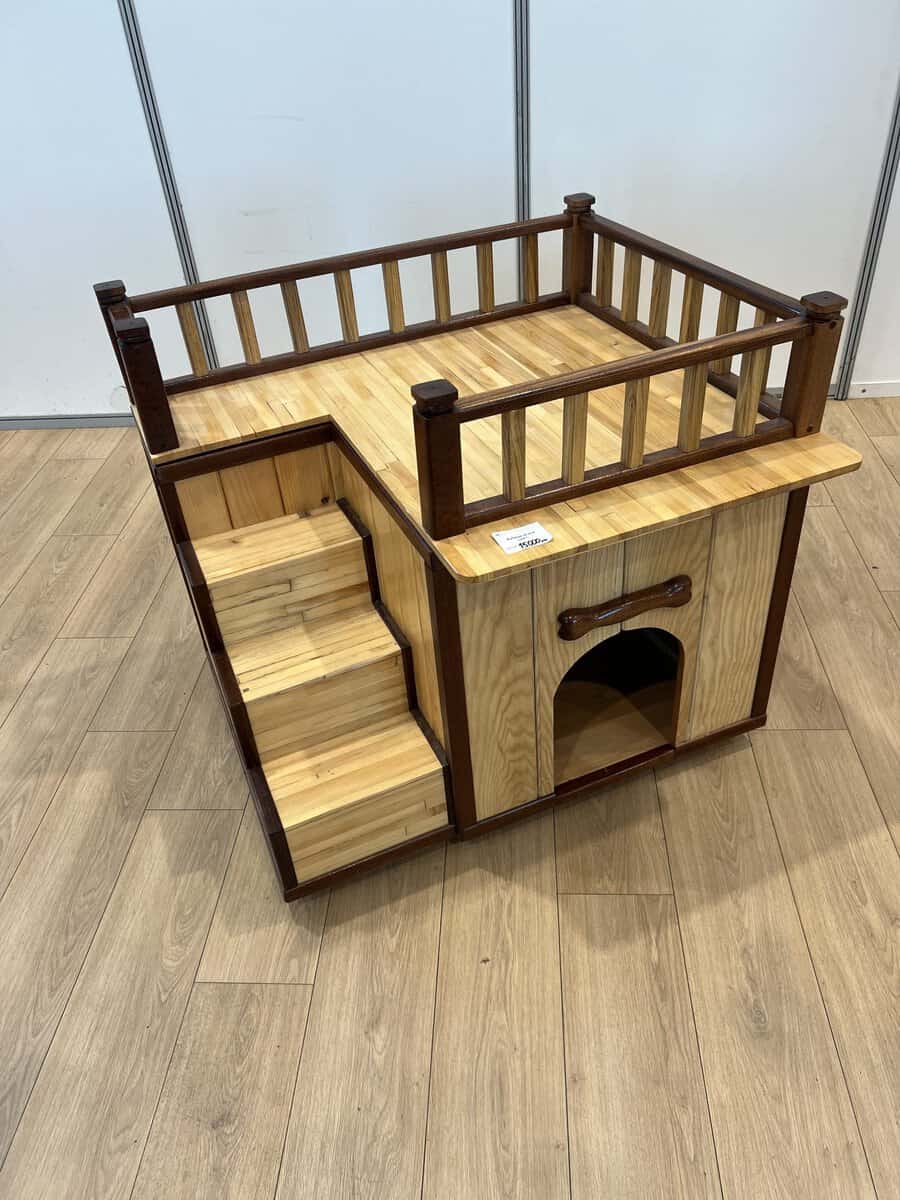
31. Elevate Style with a Wooden Dog Room and Stairs
See below a multi-functional shelter with a raised roof and a balcony bed, accessible via stairs. This design offers a luxurious and elevated resting place, suitable for both indoor and outdoor use.
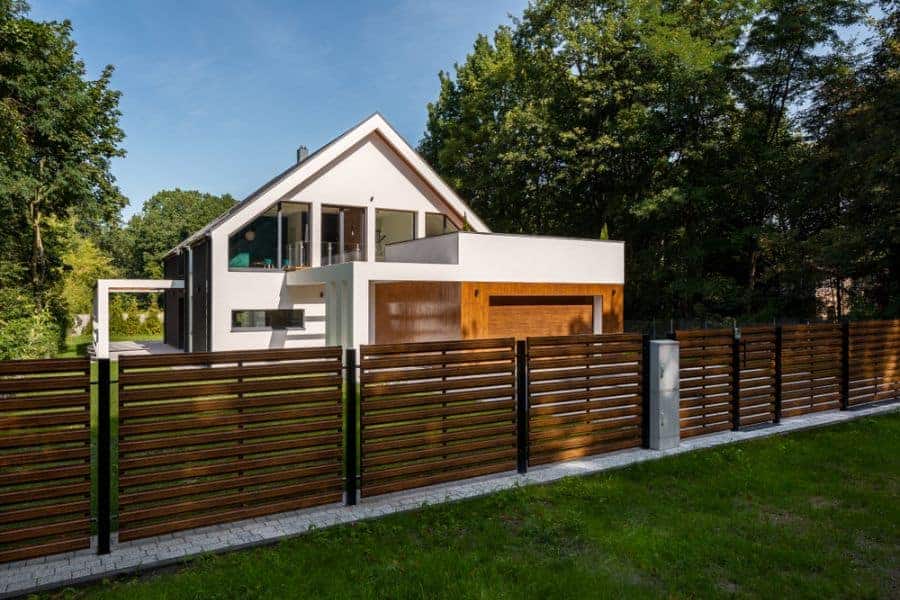
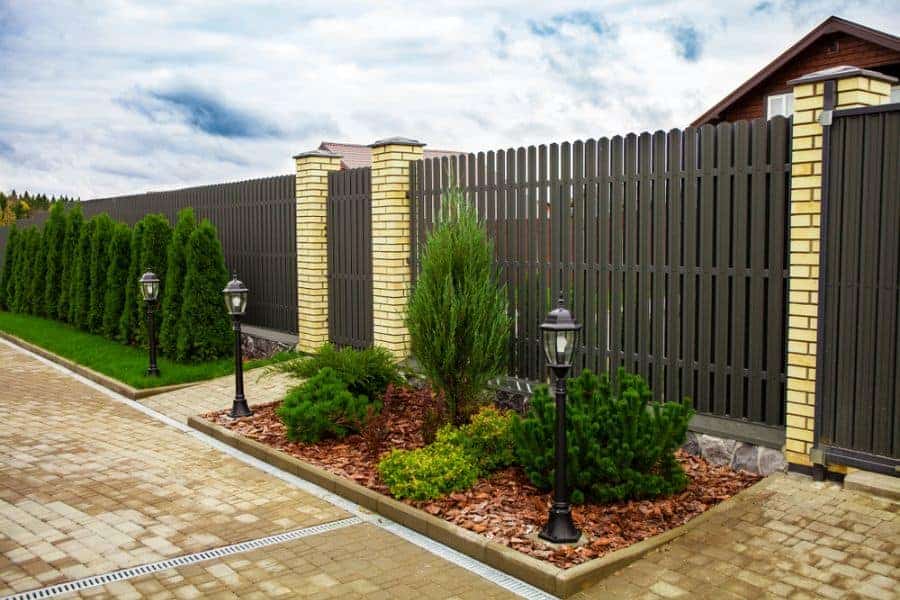
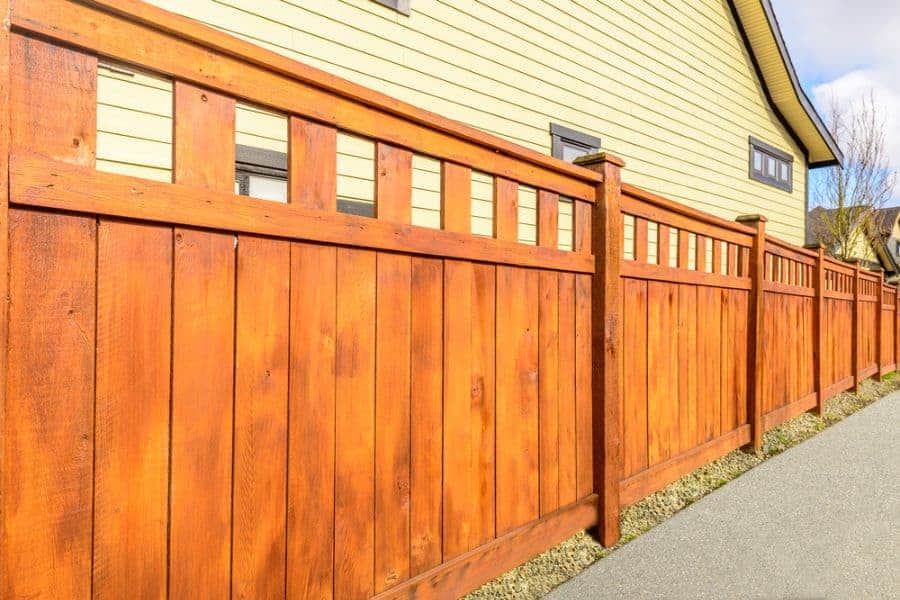
There’s truth in the saying, “Good fences make good neighbors.”
So why not build a wooden fence around your yard and give your home and property privacy? The right wood fence will do more than just create a physical barrier. It can also improve the look and value of your property.
When it comes to building a fence, you could choose a chain link or a vinyl fence, but these lack the natural beauty of wood. With wood, you have plenty of options for the construction and style of your fence. Get inspired by these wood fence ideas and find the perfect fence that will complement your property and be functional for your needs.
[view_toc]
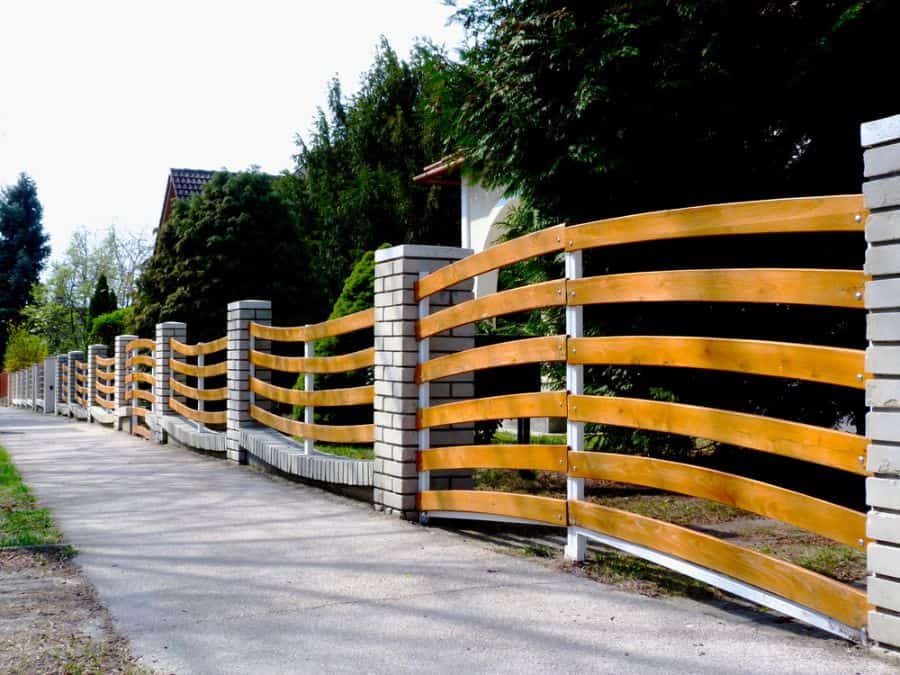
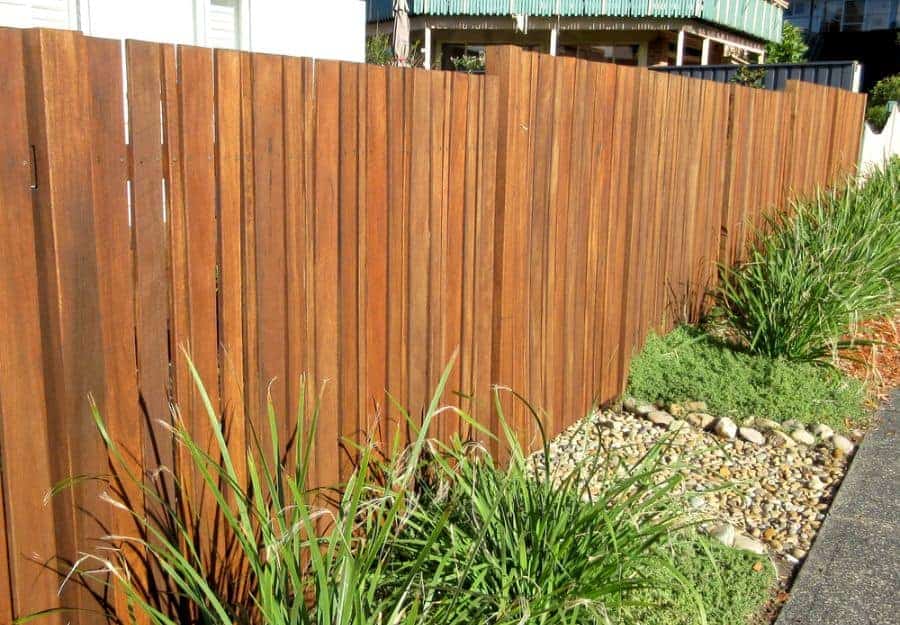
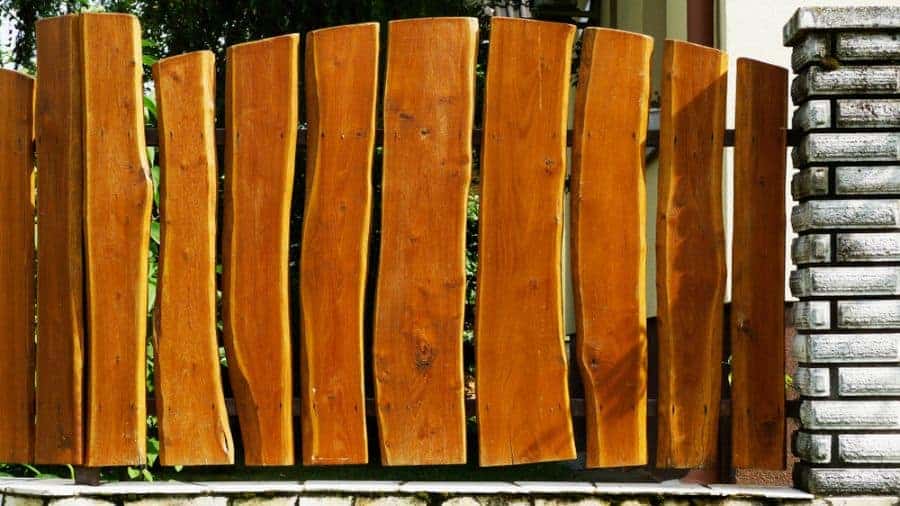
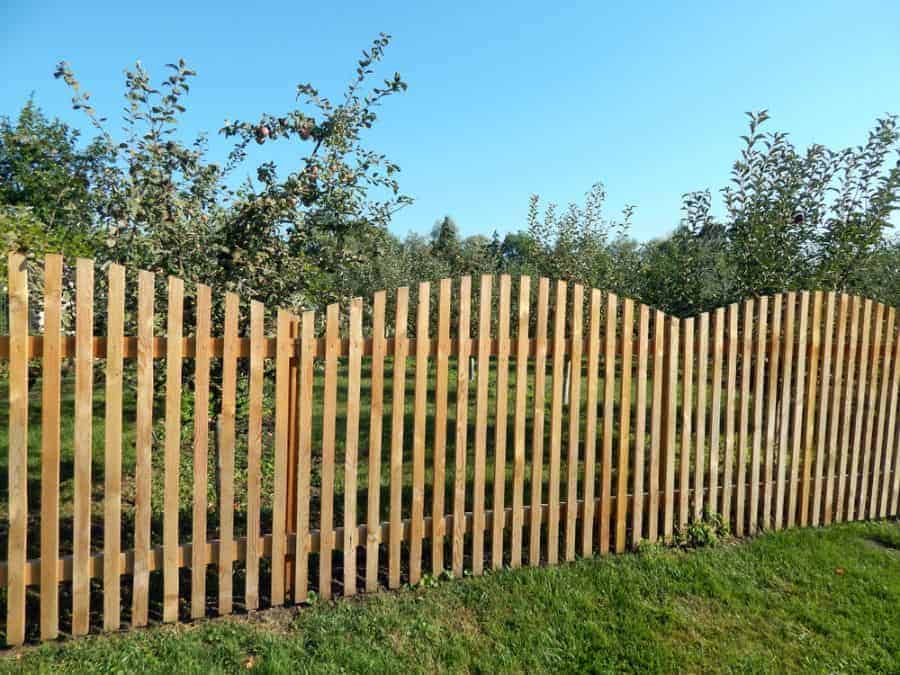
1. Natural Charm with Rustic Wood
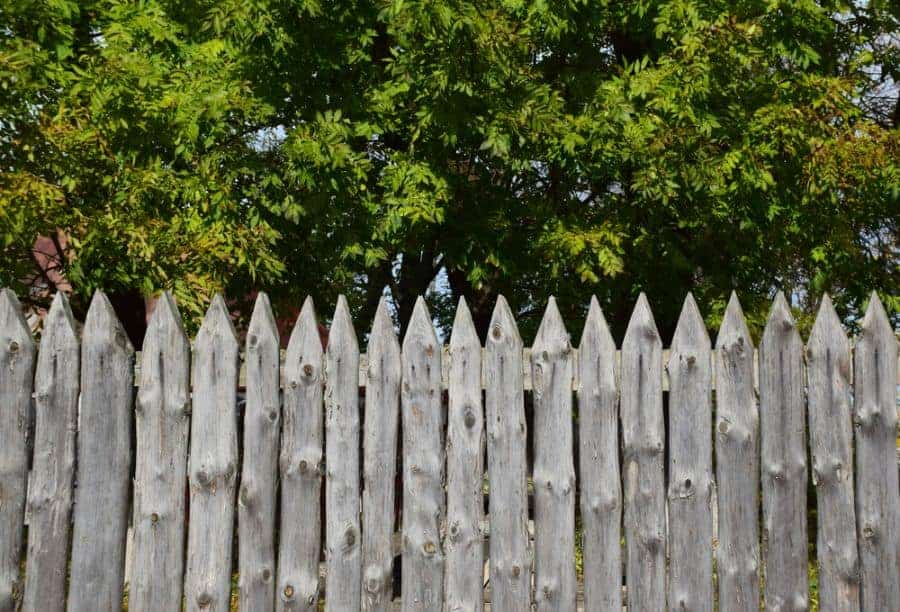
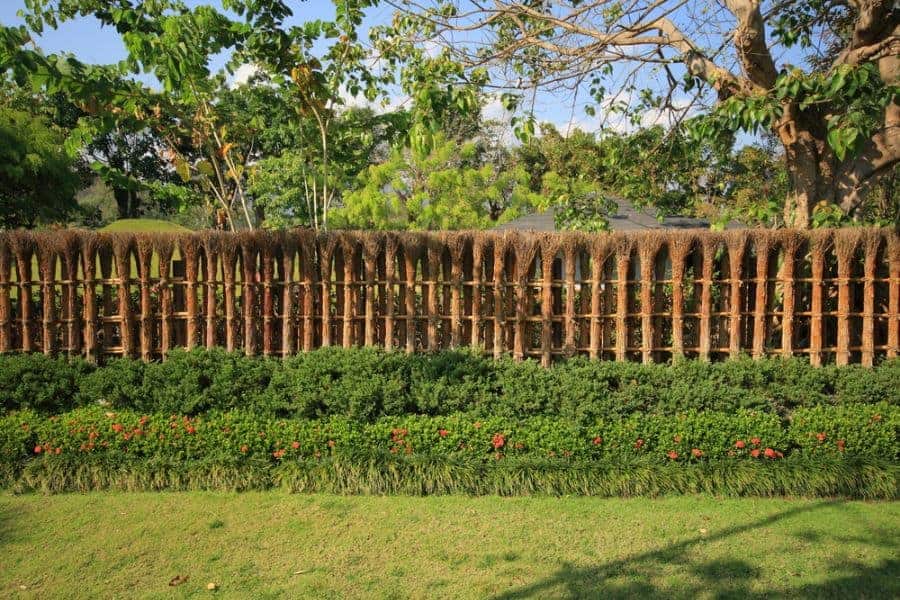
Properties outside of the city limits and in a more rural area can benefit from a rustic wood fence. The main characteristic of a rustic fence is that it embraces the natural characteristics of the wood. The planks aren’t perfectly smooth and straight. The beams could be rough-hewn and not completely uniform in size. It’s also common to see the bark left on the wood.
A common style of rustic fence is a zig-zag split rail fence. To build this DIY fence, you’ll take rails and create a zig-zag patterned fenceline. Then alternate the rails as you stack them to create the desired height of your fence.
Another standard rustic fence is a stacked horizontal wood fence built from split rails. Create pairs of fence posts from straight branches or small tree trunks. Leave enough space between the pairs that you can slide horizontal rails down between them. You’ll alternate the rails to gradually build the fence panels to your desired height of the fence.
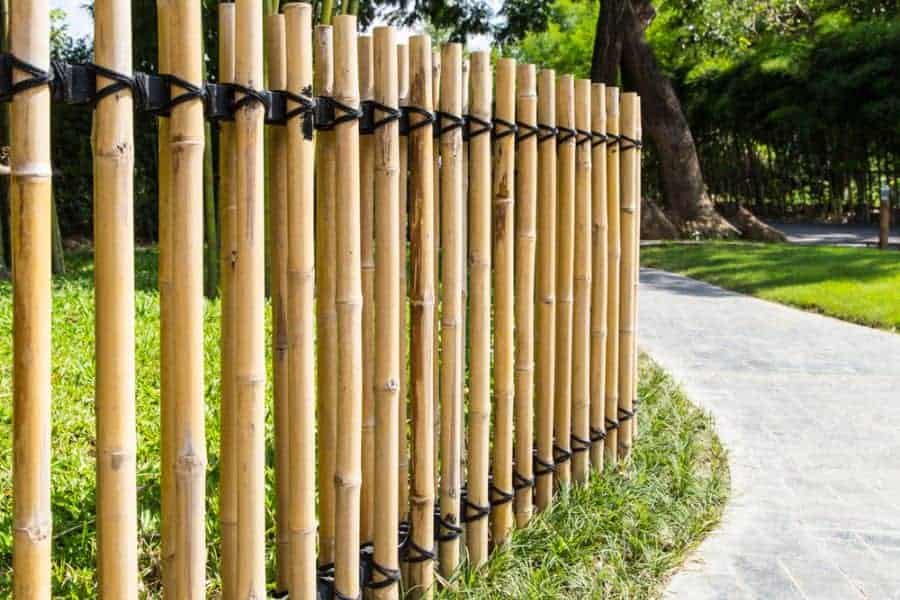
You can create an entirely vertical rustic fence by placing several posts in a line next to each other. This is a widespread technique when building a bamboo fence.
A third rustic fence idea is to build your fence out of brambles or branches. Building this style of fence embraces the natural curves and shapes of the branches to weave a fence. It will take equal parts construction and design skills to weave the branches together artfully to build a functional fence.
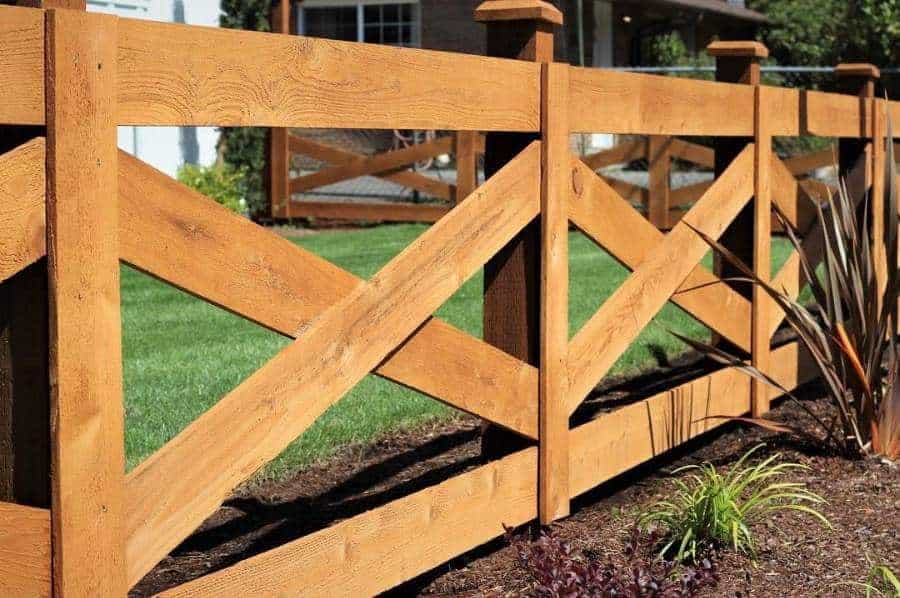
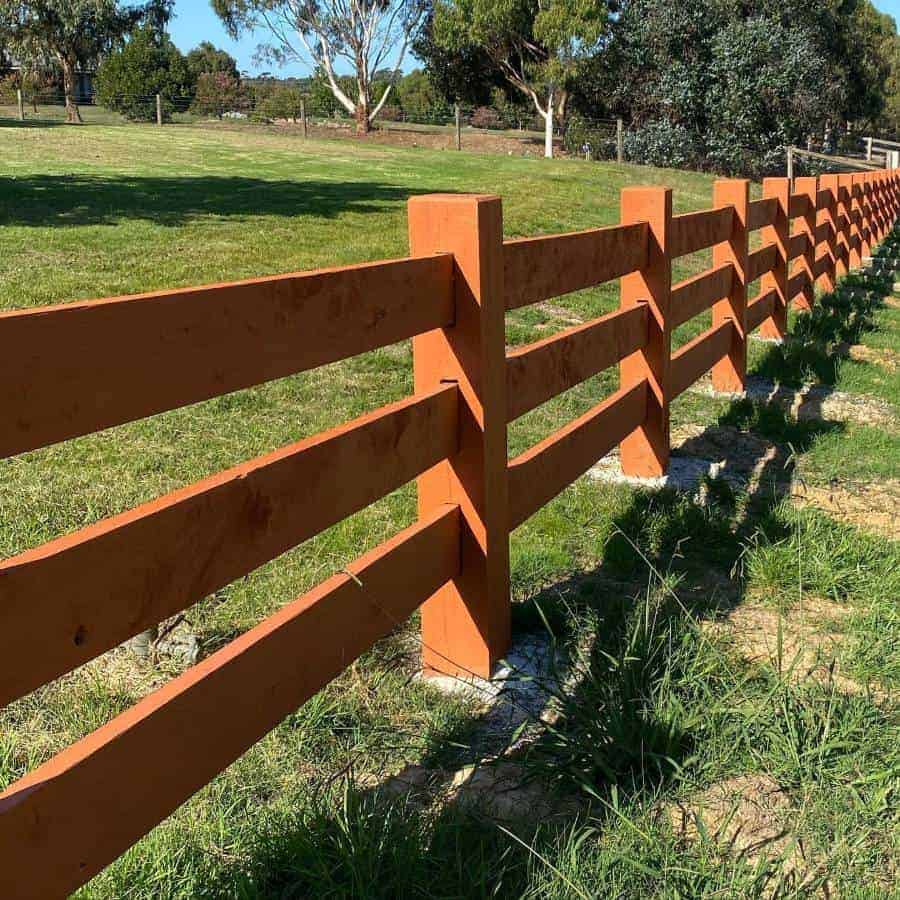
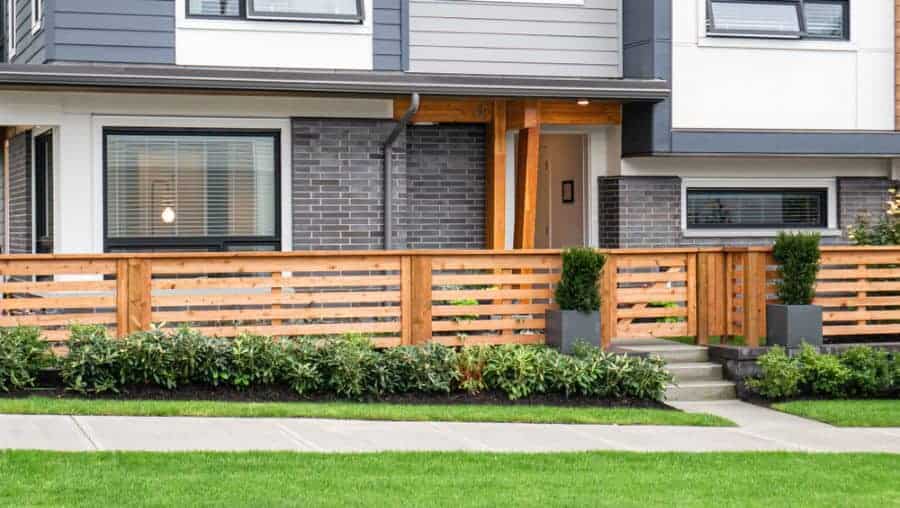
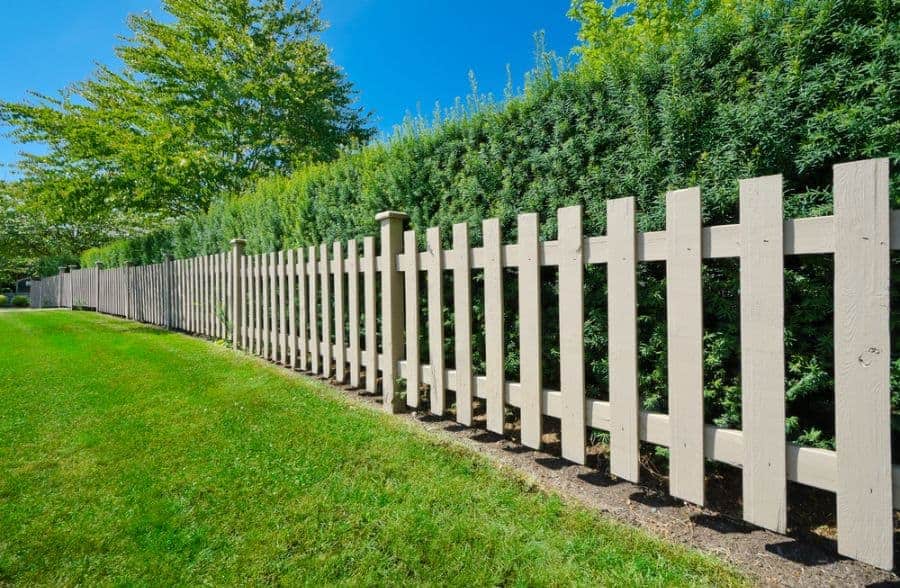
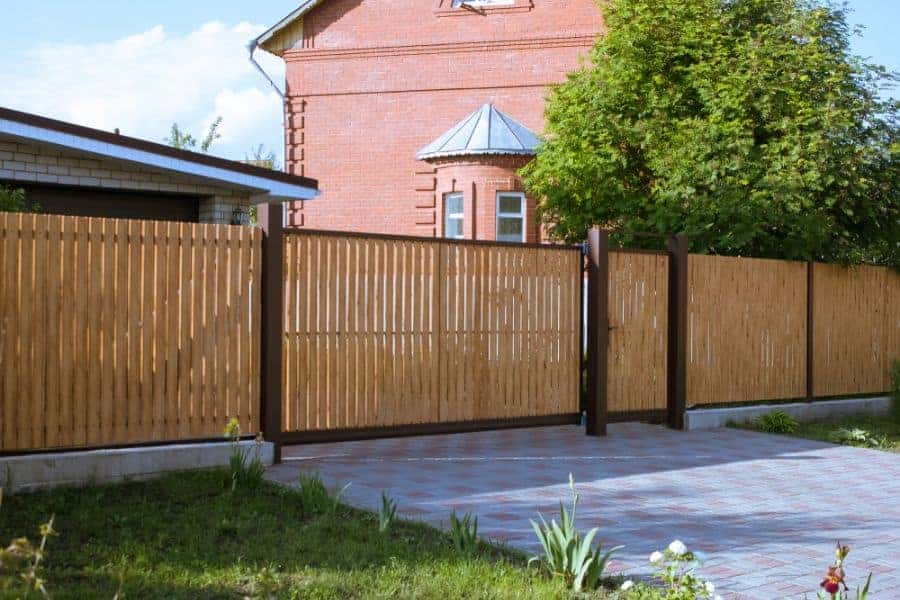
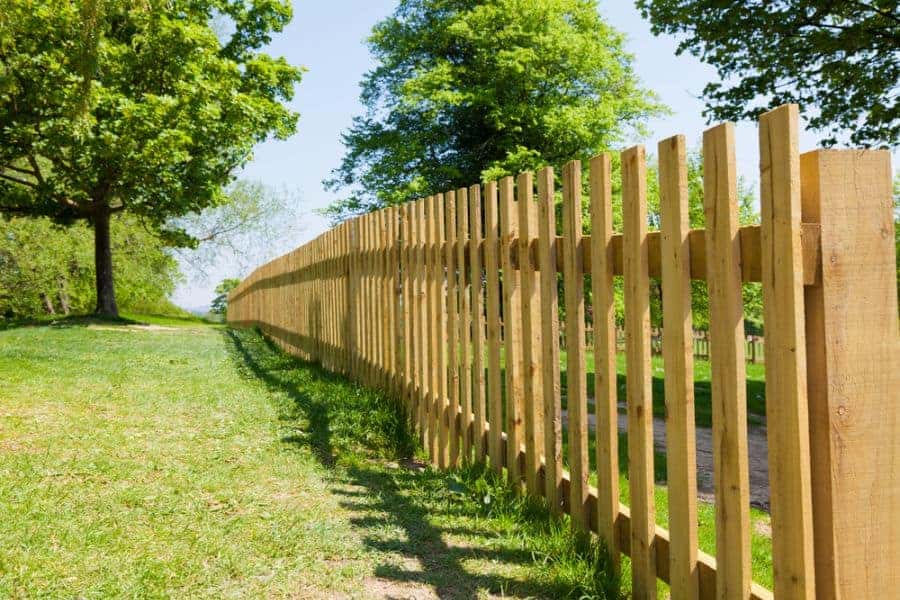
2. Elegance in Ranch-Style Fencing
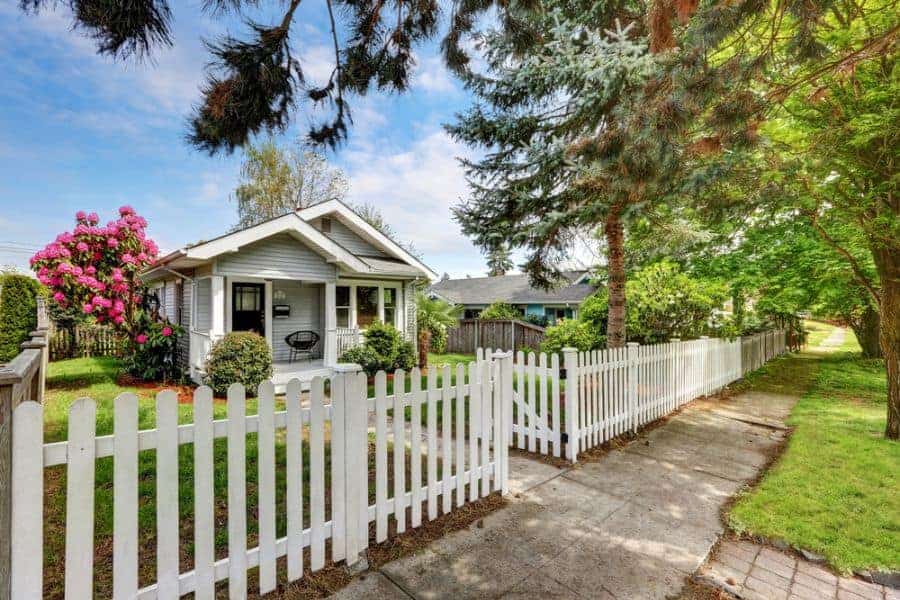
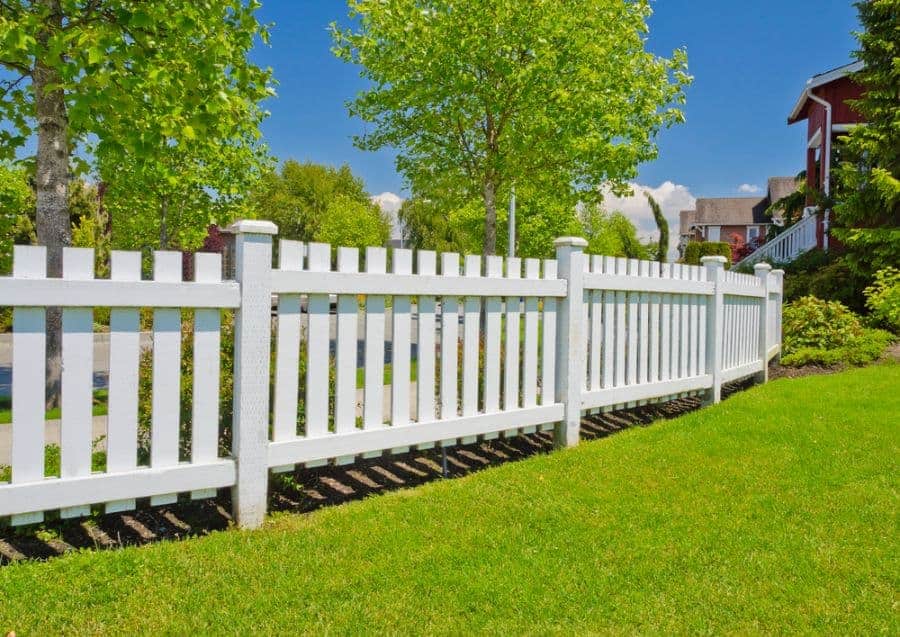
A country or ranch style fence is a great option when you want something simple but also refined. A rustic fence isn’t clean looking, and this is where a ranch style fence steps in. You could build a rail fence or a picket fence for the perfect country look.
Both fences feature vertical slats an equal distance apart. For a rail fence, there are flat horizontal wood planks with each end of the plank attached to two upright posts. This fence design will typically have three or four horizontal planks. If you want to use this style for your backyard or dog fence, but are afraid it’s not secure enough, consider adding metal. You could use a chain-link fence or chicken wire fence material in addition to the planks. What’s nice about this is that from afar, you still have a wood-look, country fence because the metal isn’t as noticeable.
The other popular country fence choice is a white picket fence. These fences will have two horizontal rails at the top and bottom. Then a series of vertical planks will get mounted on them with gaps in between each plank. You can scale your picket fence for the size of the land you’re fencing in. A low fence will make the perfect garden fence.
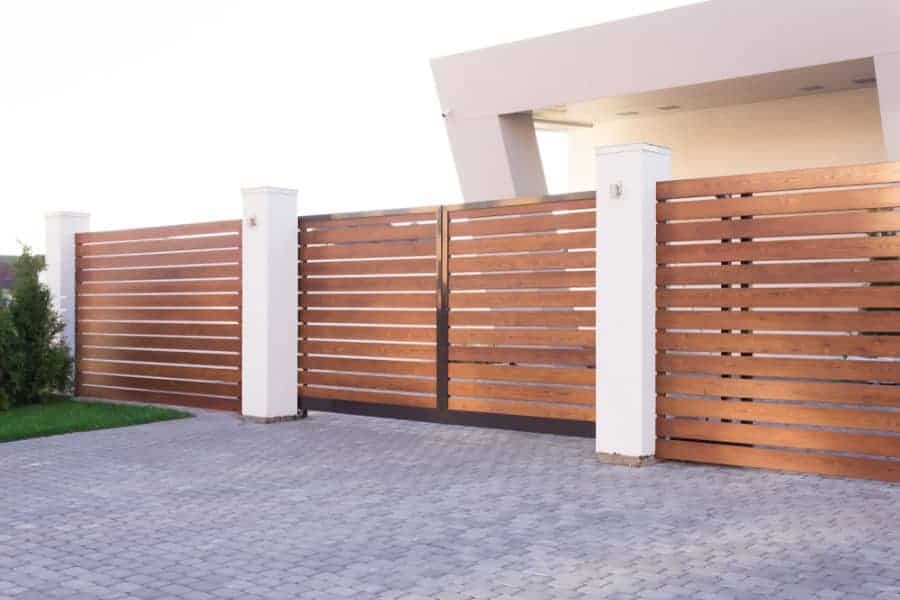
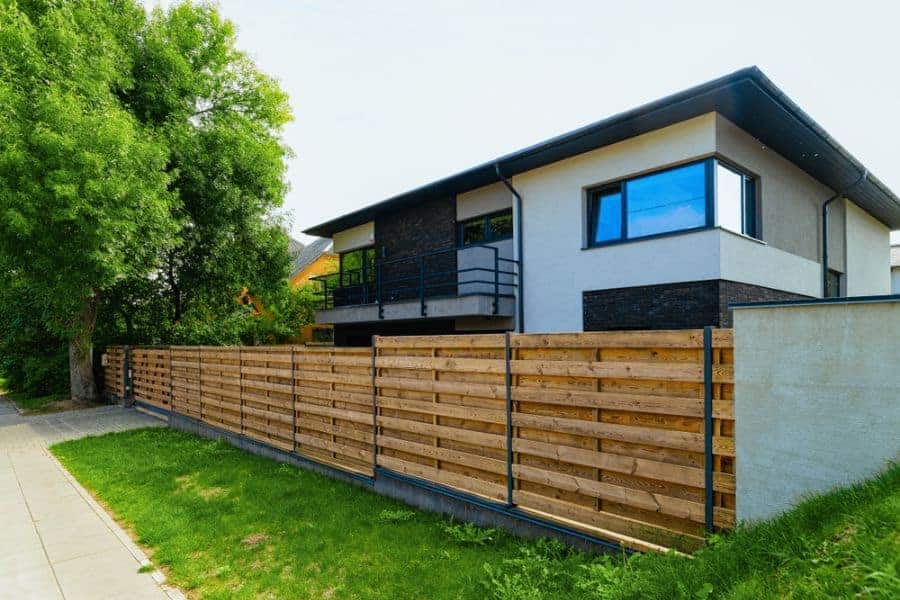
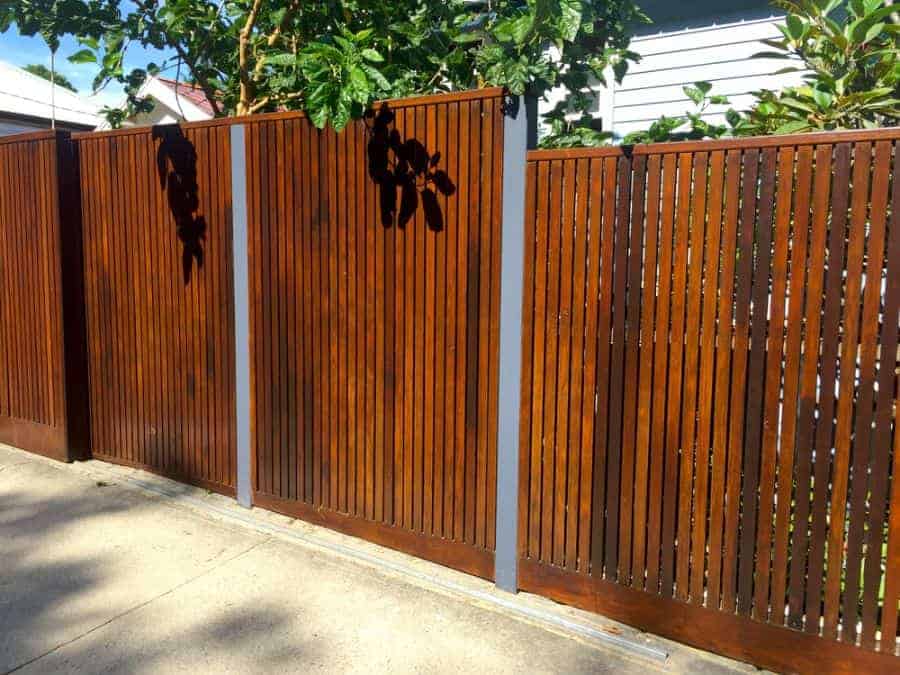
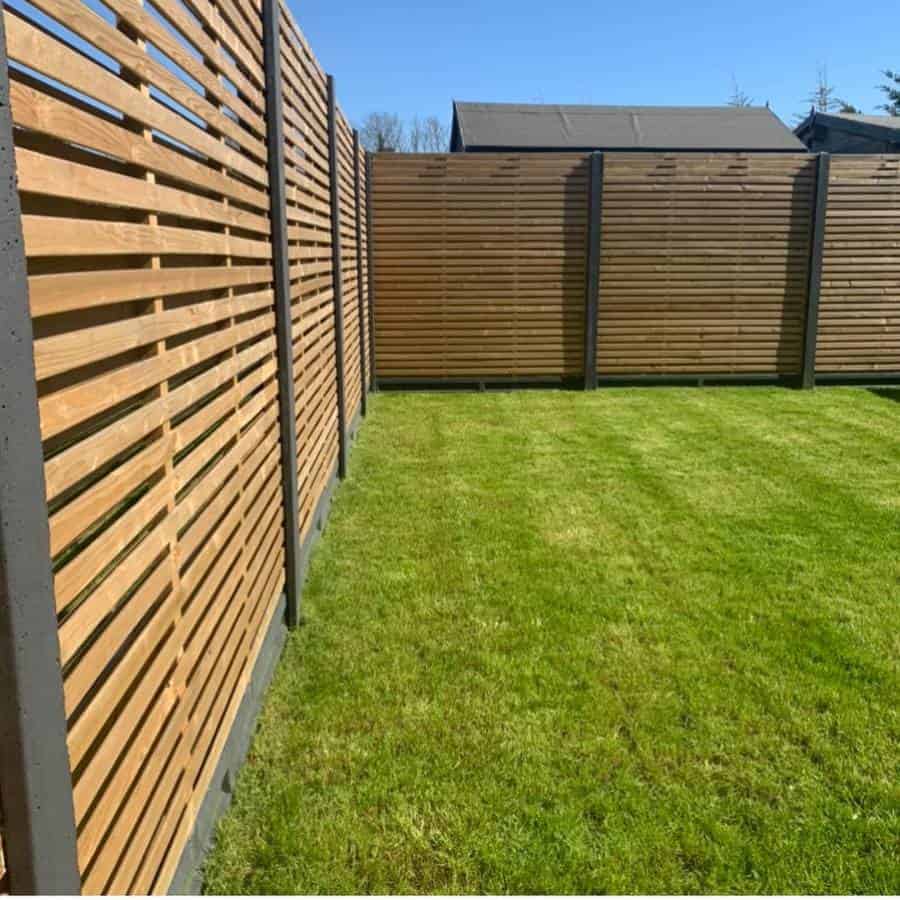
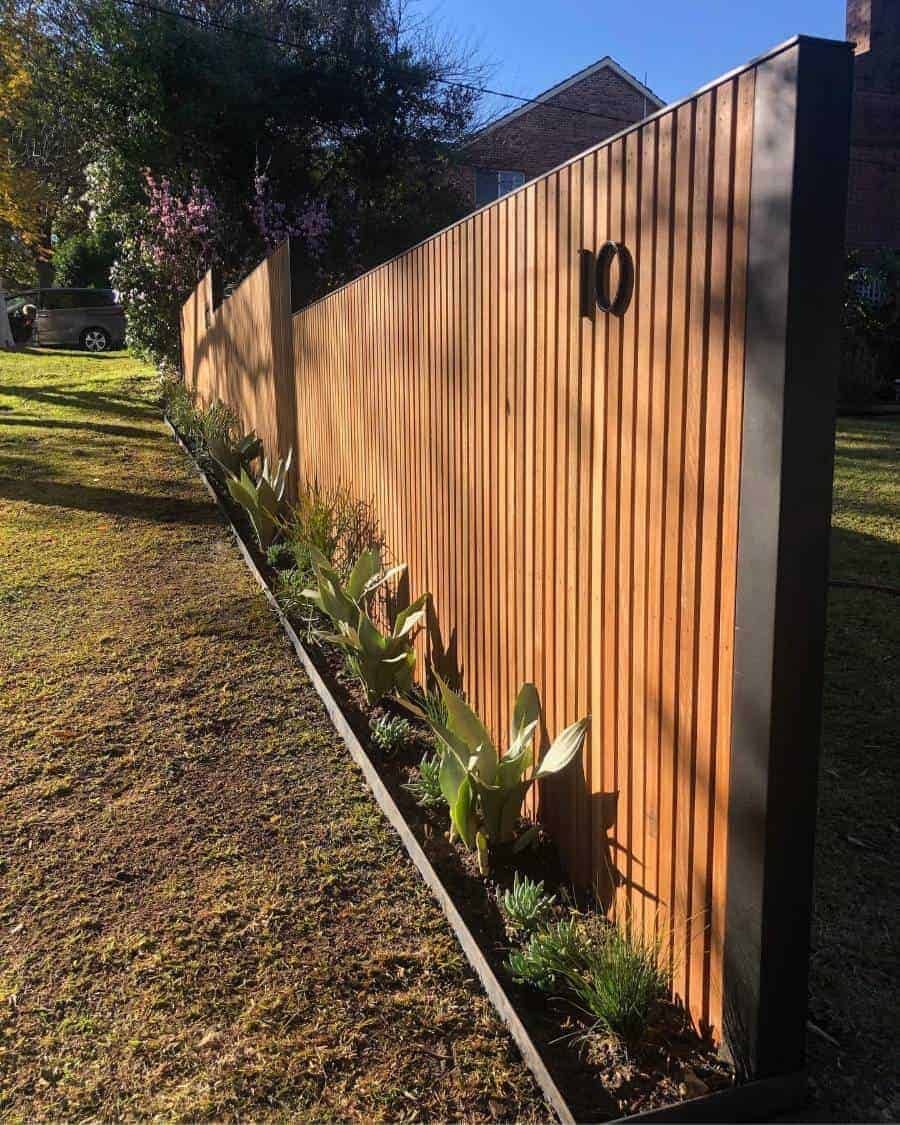
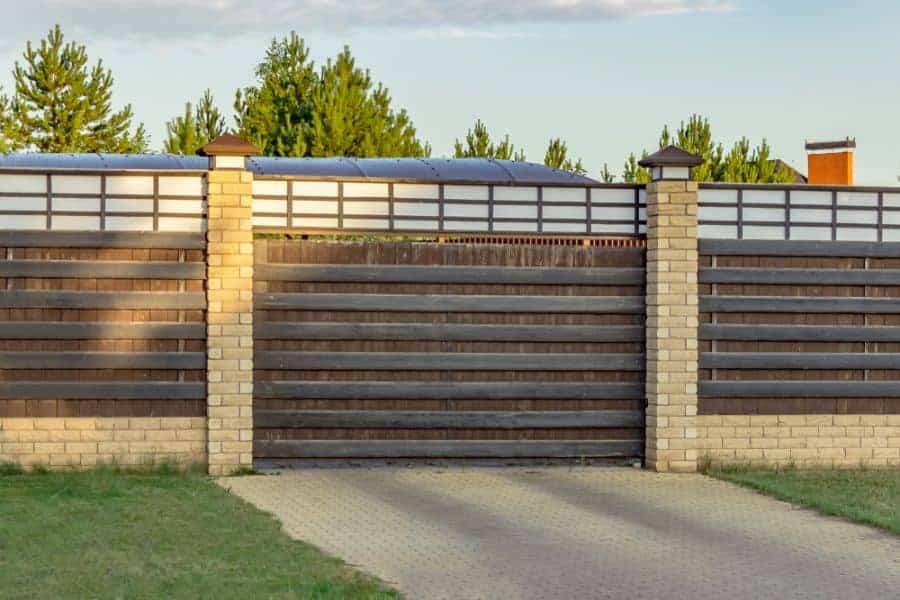
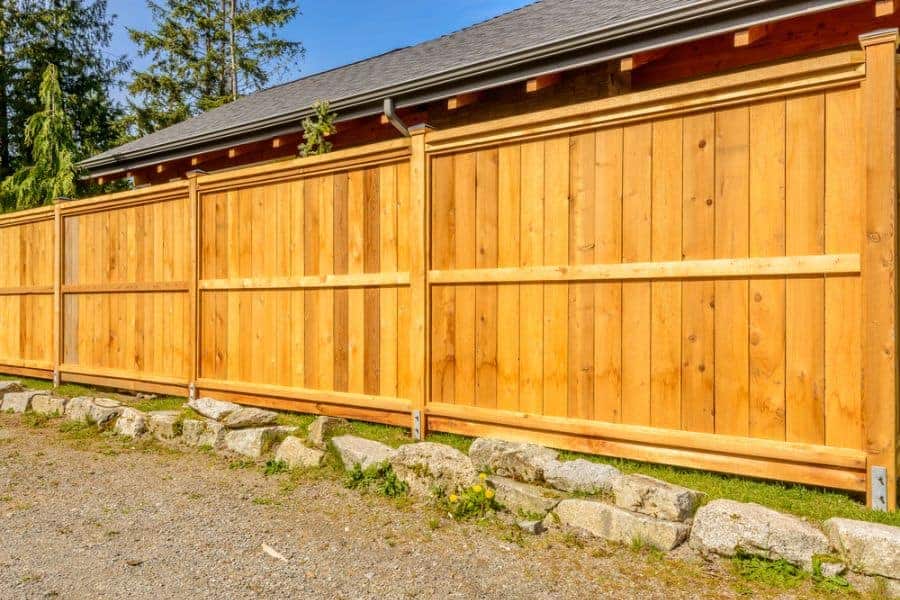
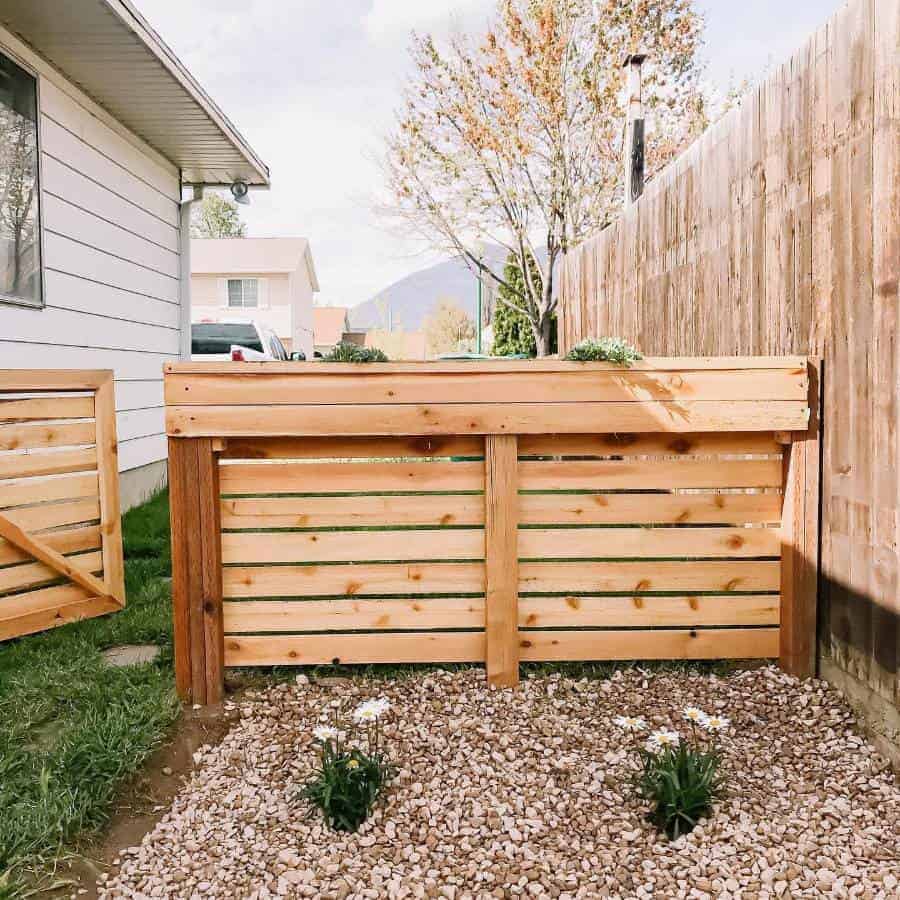
3. Sleek Modern Wood Fences
Modern fencing looks clean and streamlined. The most common modern fence you’ll see are ones that combine wood with a metal fence frame. The main support posts will be black with thin vertical or horizontal planks to create the fence. You may see black metal trim along the top of the fence to complete the frame around the wood planks.
Take note that the planks on modern fences tend to be thinner than the standard plank fence that uses 2×4 beams. You could get creative and use wood of different widths to create a pattern.
Another big difference you’ll see in modern fencing is the color of the wood. It’s typically richly colored and made of cherry or red cedar. You can buy pre-made panels that already have the planks mounted, and all you have to do is install them on your posts.
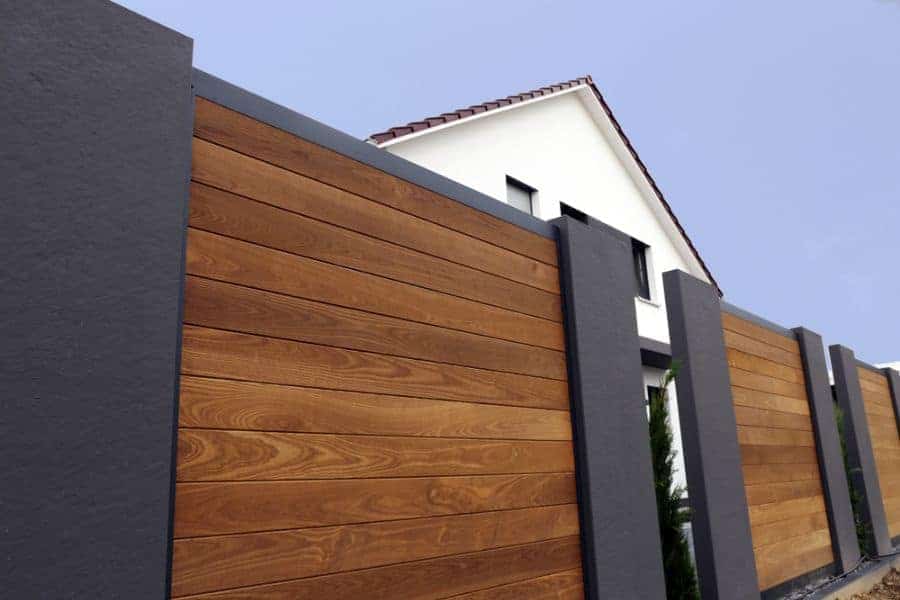
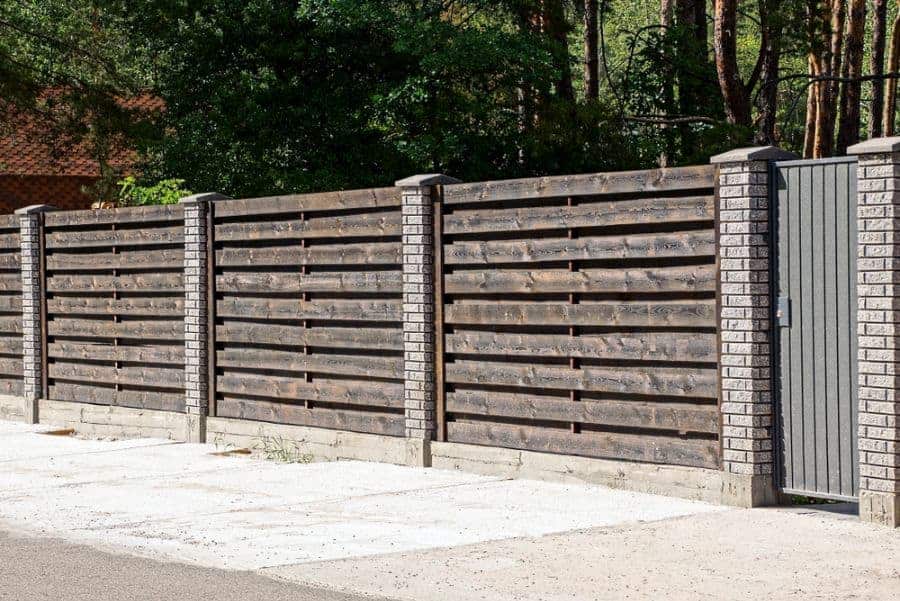
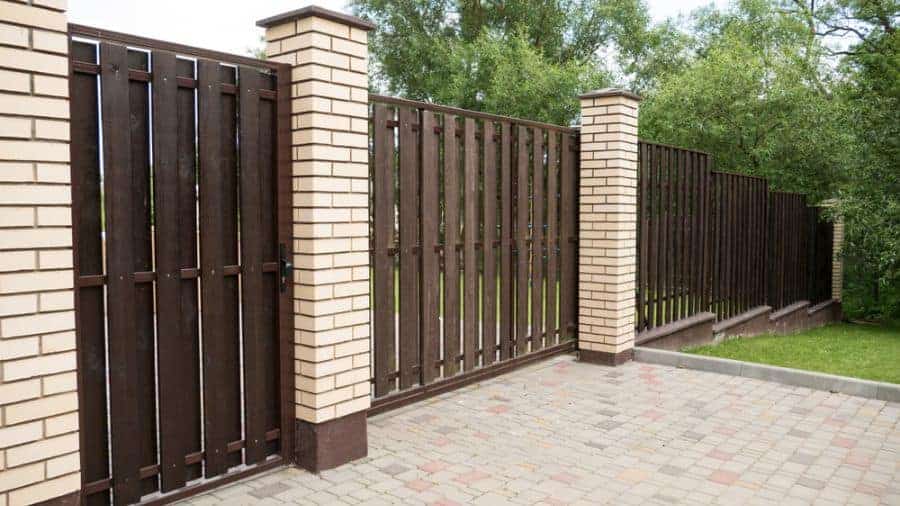
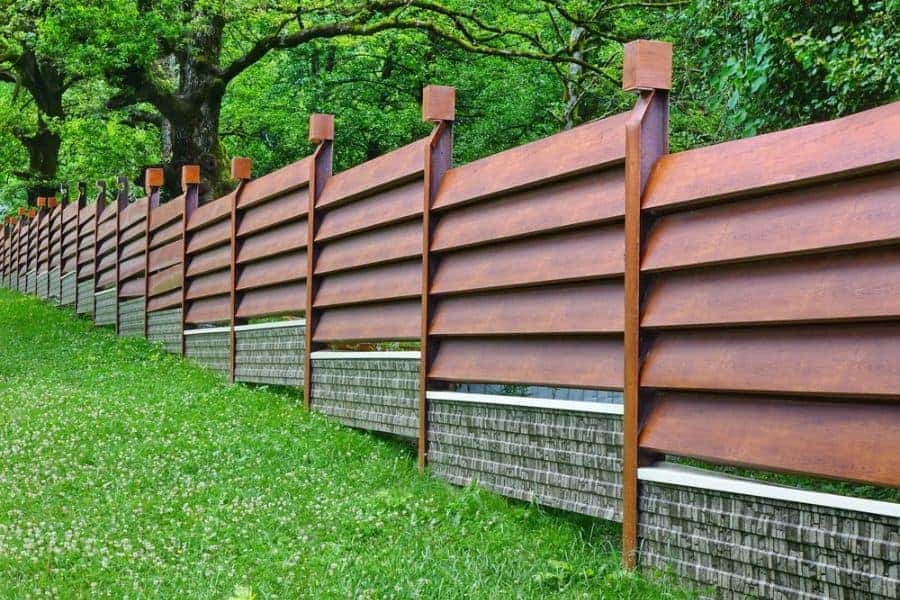
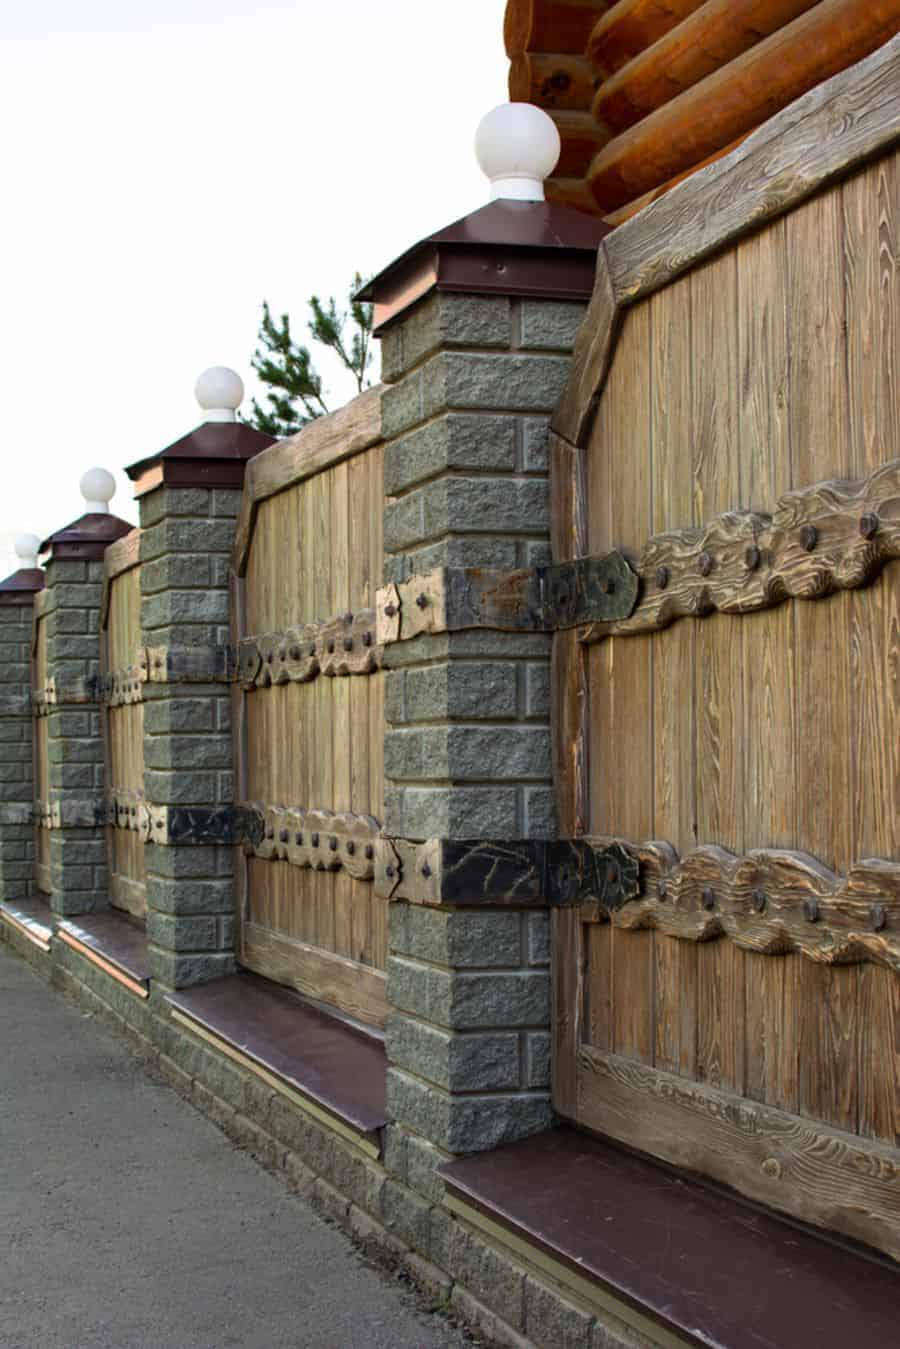
4. Brick & Wood: Strength Meets Beauty
When it comes to building a large perimeter fence, it can be smart to combine wood with a stone fence. This will elevate the look and feel of the fence. It’s a logical choice for more upscale areas and homes. Combining brick or stone with wood is also a good option when building a fence on uneven ground.
A common way of combining these two building materials is to use the stone for the support posts. This will create an alternating look of stone and wood throughout the length of the fence. Another option is to create a brick or stone base for the fence and then use wood on top.
When building your fence on a slope, the brick and stone allow you to build up the ground to create a flat step down base for the wood fence. This makes building the fence significantly easier.
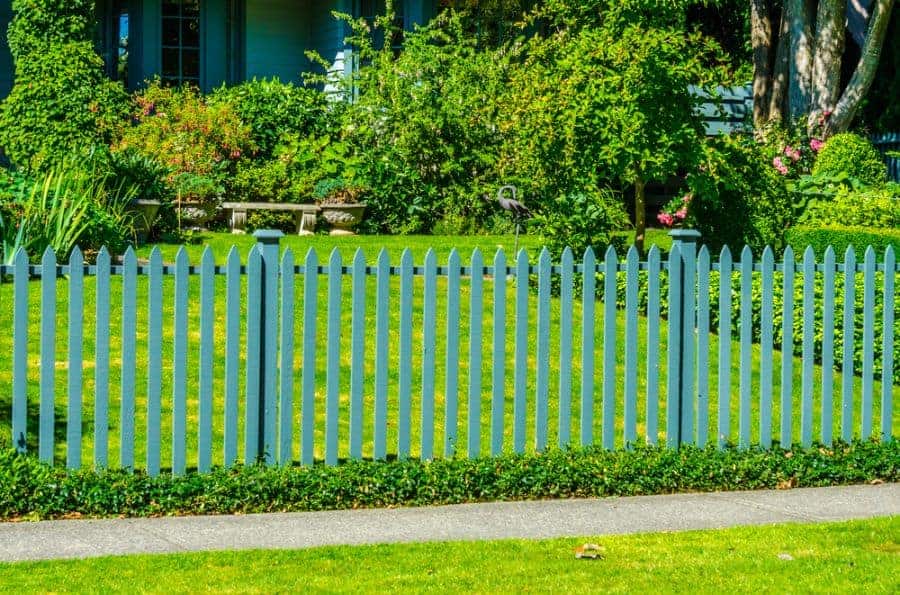
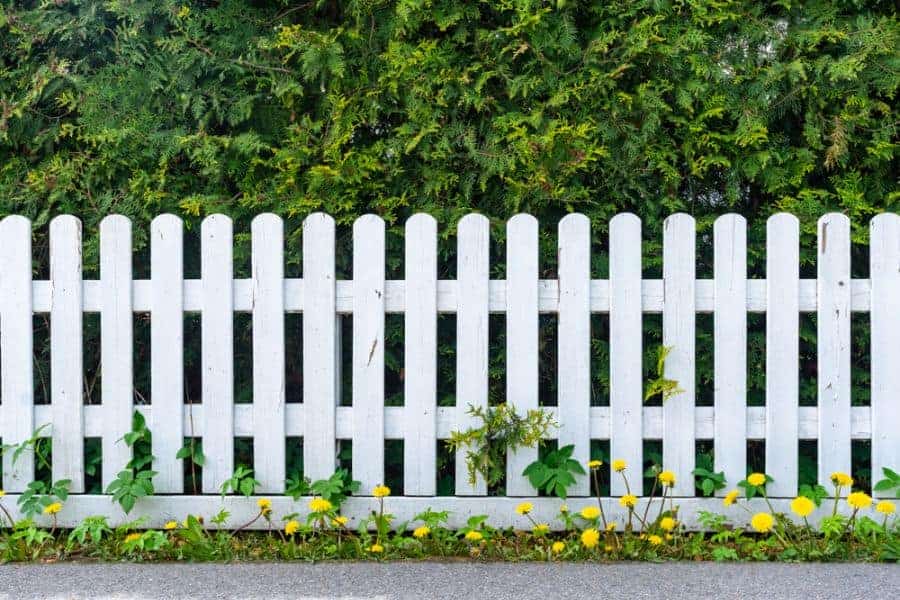
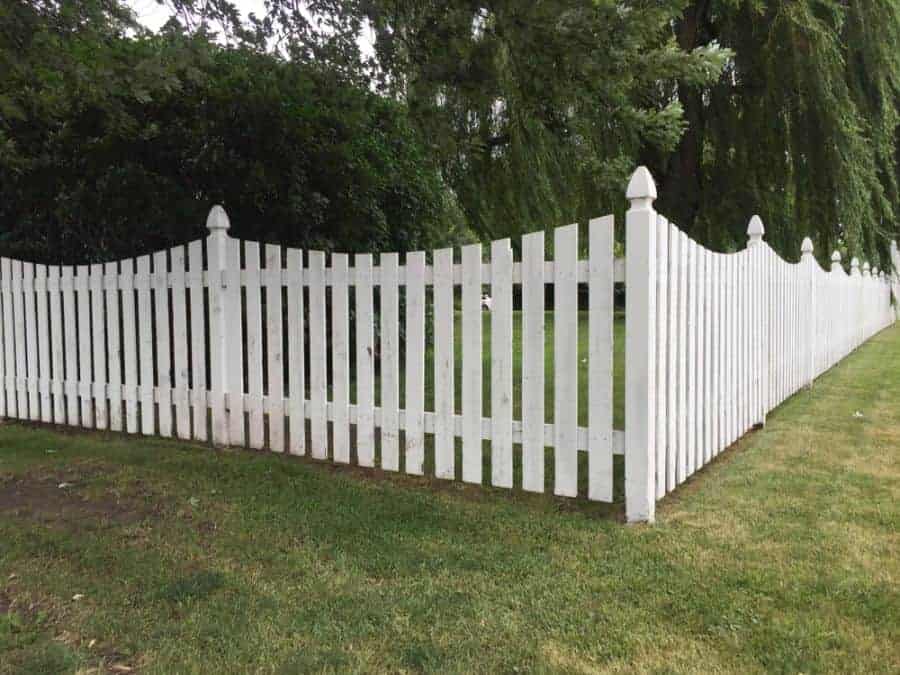
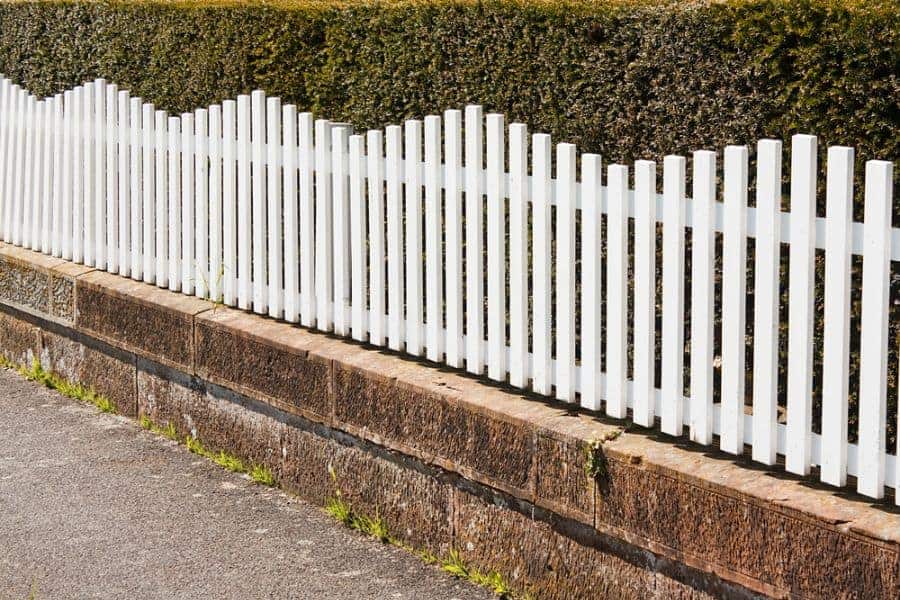
5. Classic Picket Fence Elegance
Don’t you just love the classic look of a white picket fence lining the front yard garden of a home? There’s a gate to walk through to go up the front walk to the door of the home. Picket fences add a bit of style and design to your fence. This makes it both functional and beautiful.
If you want to define your property line and keep your home friendly and welcoming, then a picket fence is a great choice. This style of fence keeps the planks far enough apart that you can easily see between them. The fence is also lower so that you can easily see over the fence.
If you don’t like the look of white, or don’t want to deal with the cleaning and upkeep, you could leave your picket fence unfinished. You could build your picket fence over a cement curb or block wall. This will soften the look of the wall and create a more welcoming look to your property.
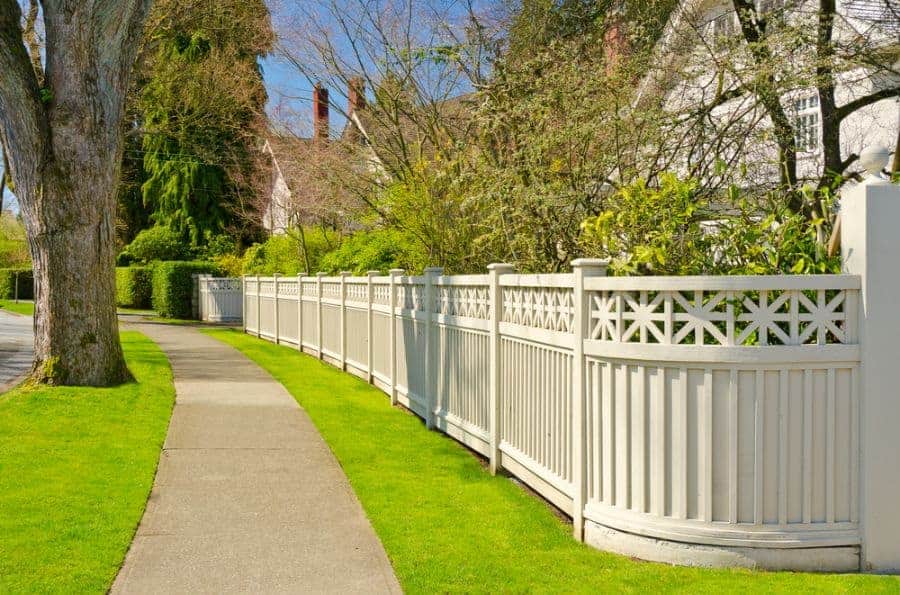
One signature characteristic of picket fences is their style and design. You’ll find some with a scallop design on the top of the fence. Others will have fancy finials on the top of the posts. It’s also common to see decorative cutouts on the planks.
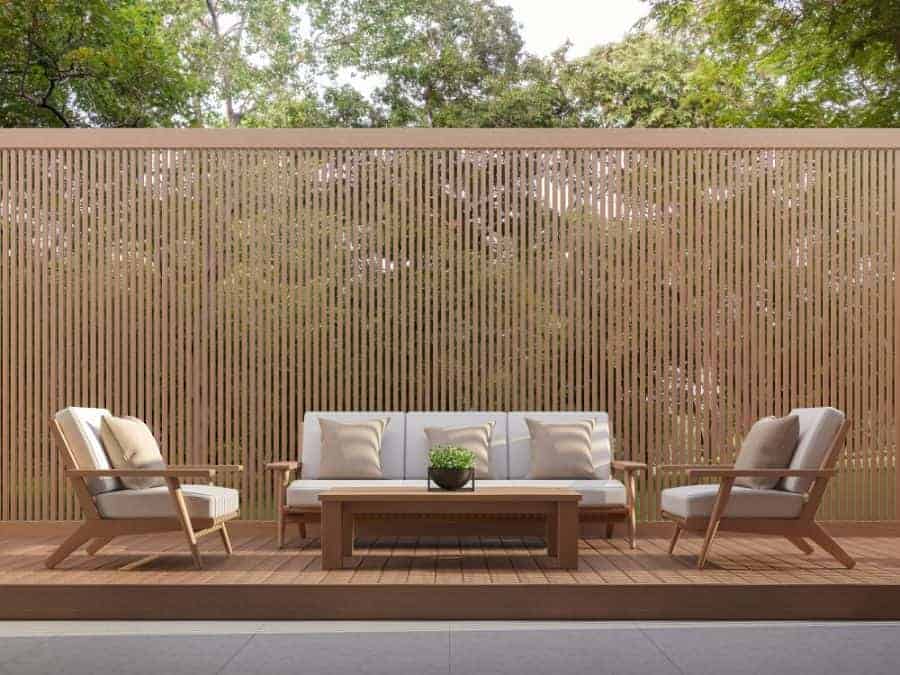
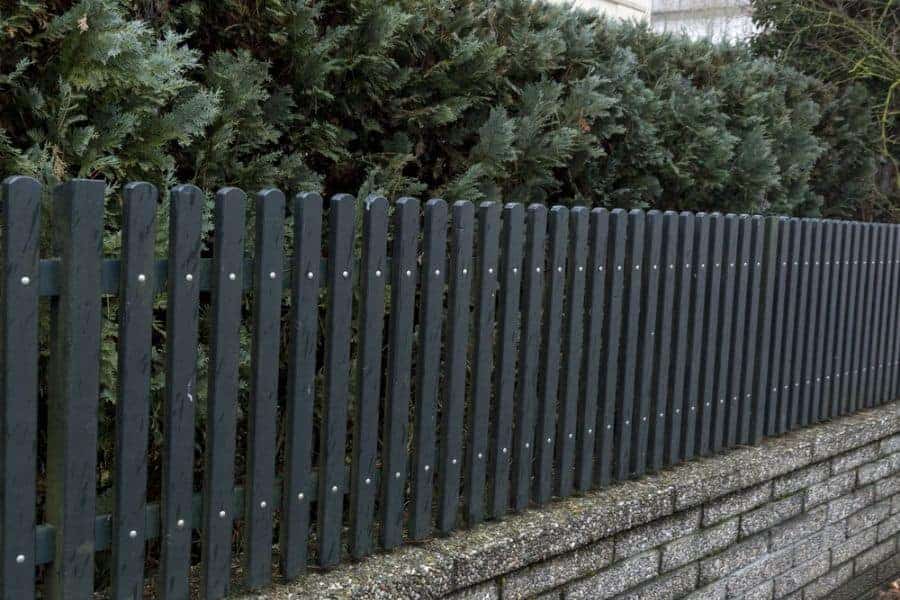
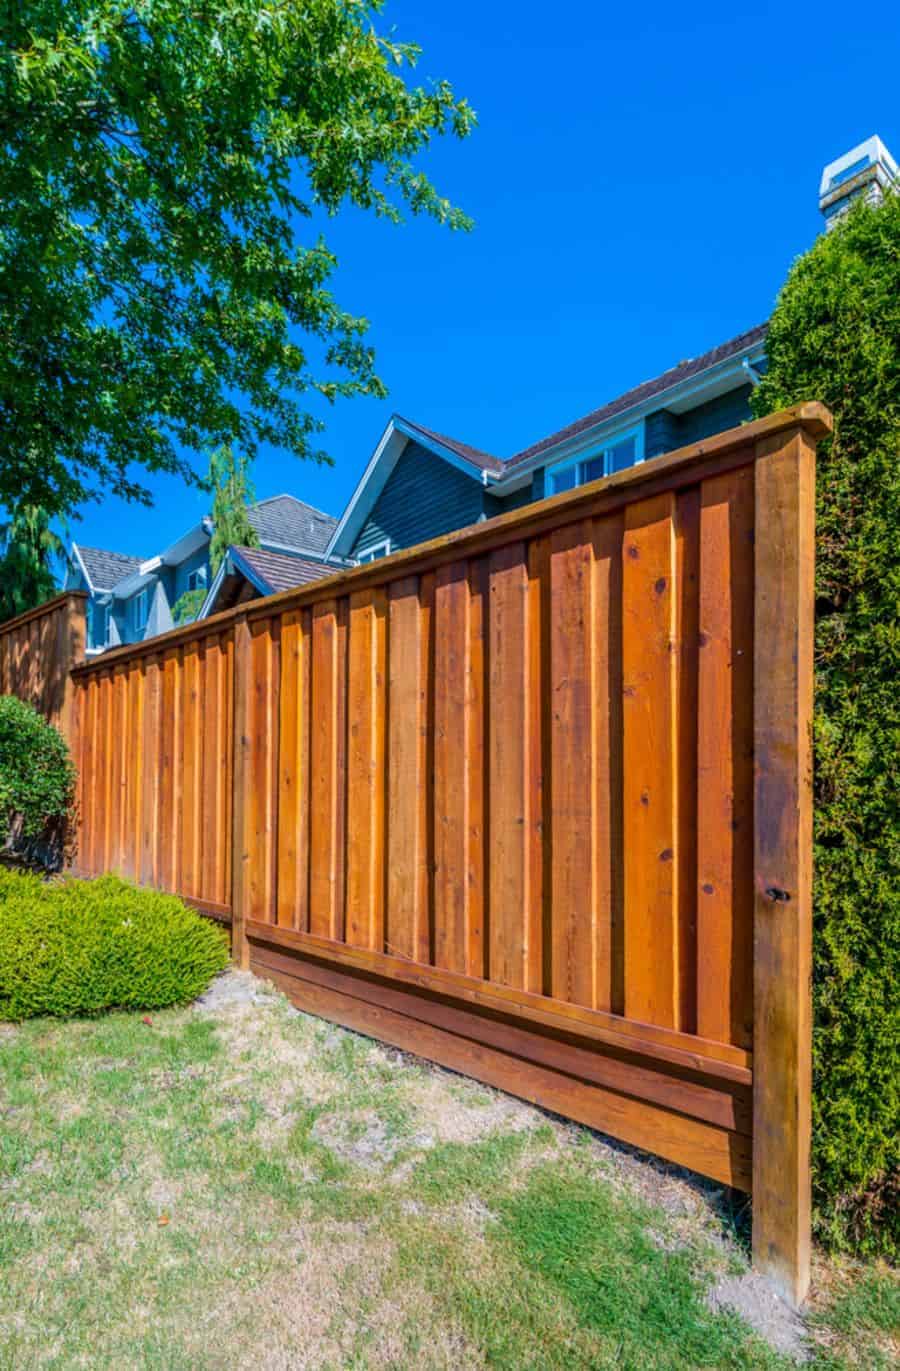
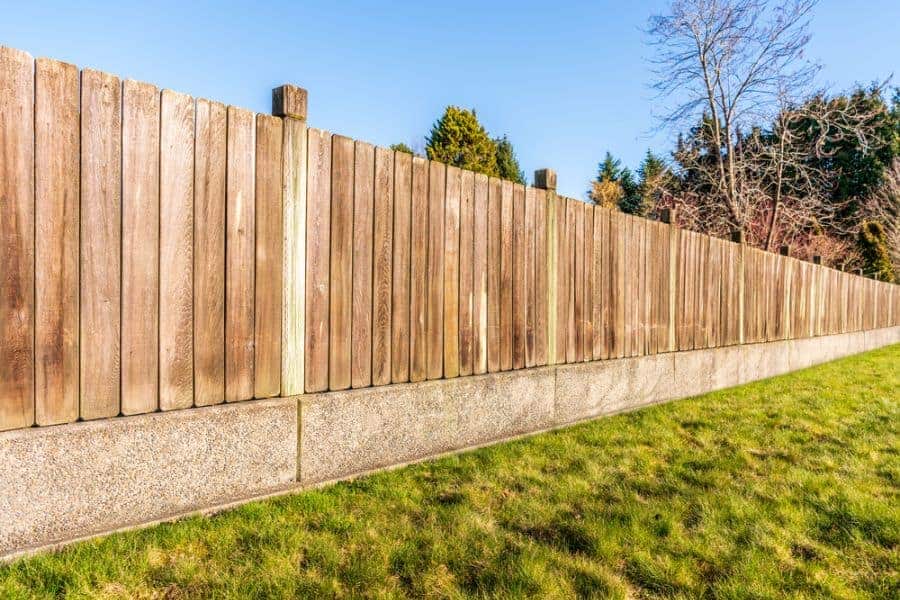
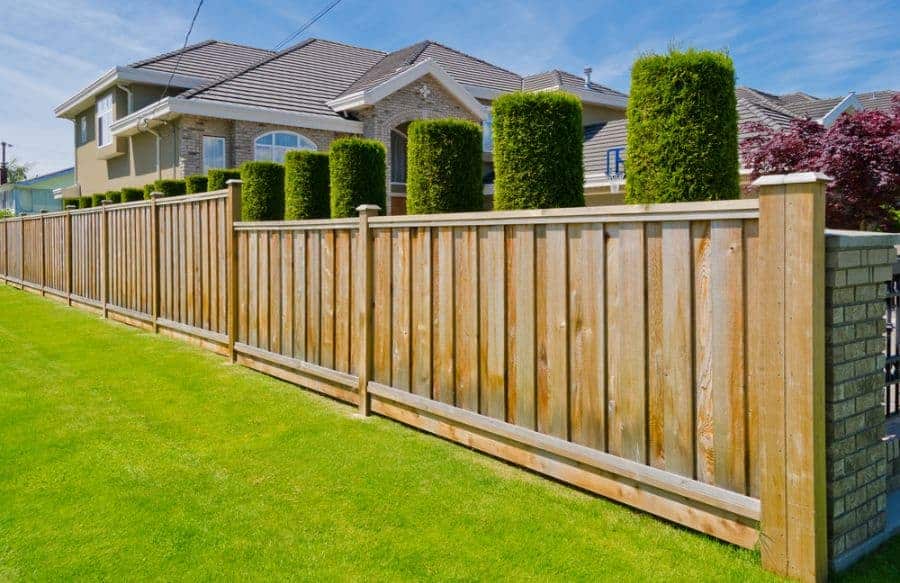
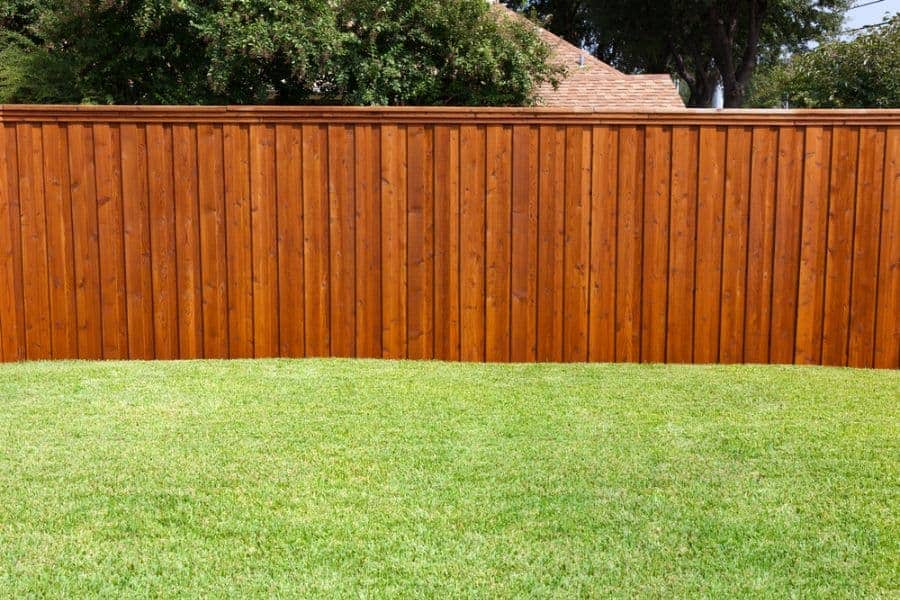
6. Solid Wood for Privacy Fence
Sometimes you want your fence to do more than provide a barrier; you want it to provide complete privacy. This means you’ll want a solid wood fence without any gaps in the fence board. When it comes to privacy fence ideas, they all have two things in common; they’re tall and you can’t see through them.
You can turn an existing fence into a privacy fence by increasing the number of planks to close the gaps in the fence. If you have a pool in your backyard, you can create a tropical getaway inspired fence by using bamboo. Bamboo fencing is tall, durable, and tightly woven together. You can purchase bamboo fencing in a roll, making installation relatively easy as it just installs on your posts.
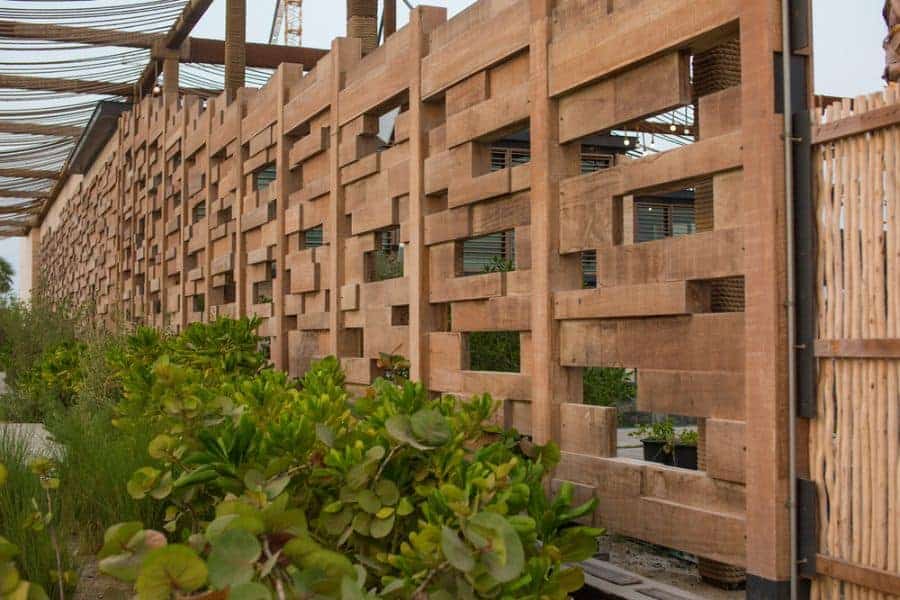
7. Aesthetic Touch with Decorative Fences
When building your fence, don’t let yourself get so focused on its placement and function that you forget to think about what it looks like. Wood gives you the ability to create a fence that’s beautiful to look at. This will enhance the look of your property and increase your property value.
Consider replacing one of your modern fence panels with a decorative panel. Or you could top your fence with a decorative line of lattice.
Consider choosing a wood that is both durable and beautiful. Red cedar has a rich color that, when treated, looks beautiful and will last for years to come.
Don’t be afraid to get creative with your fence. You could alternate the wood fence panels you use to create a design or pattern other than straight vertical or horizontal.
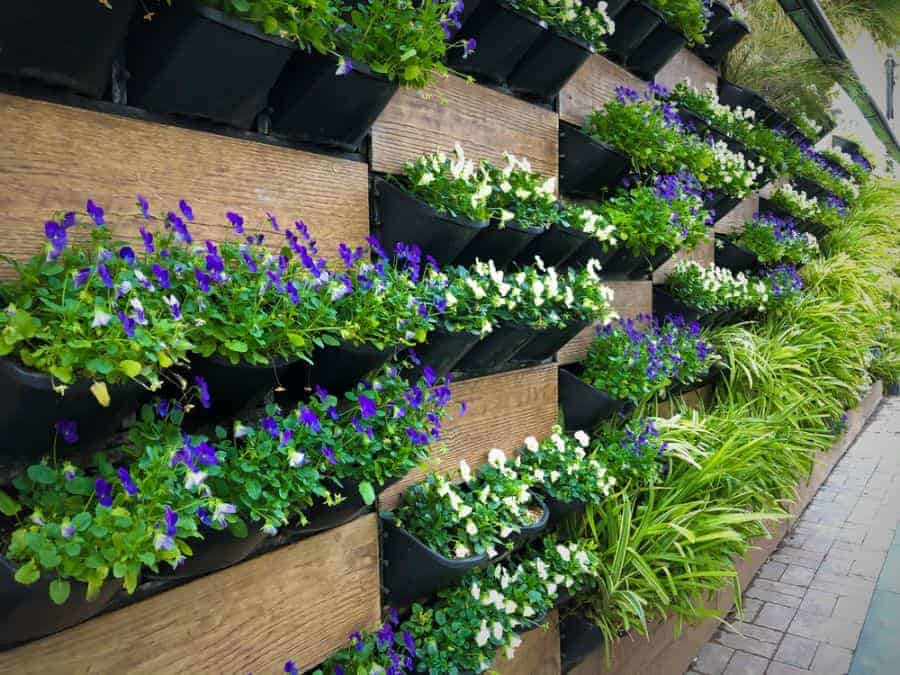
Use alternative materials with the wood when building your fence. Hang planters on your wall to turn your fence into a garden full of flowers and greenery. Place the metal cutout on top of your wood privacy fence to create dimension and design. Instead of bricks or stone, you could use tile that matches your patio as the base of your fence.
8. DIY Projects for Unique Fences
There are plenty of kits available to make the job easier if you would rather do the fence installation yourself. You’ll need posts. These are the main vertical supports. Then you’ll need to decide what type of wood fencing you’ll use between those posts.
One solution is to buy a pre-made fence panel. Then you can quickly build a fence by installing the panels between the posts. This works well when building a wood privacy fence. You can buy a tall fence panel that has alternating vertical planks to block people from being able to see through the fence.
You can also look for pre-made panels that have a decorative top. This could be a scalloped shape to the vertical planks, lattice trim, or wrought iron trim.
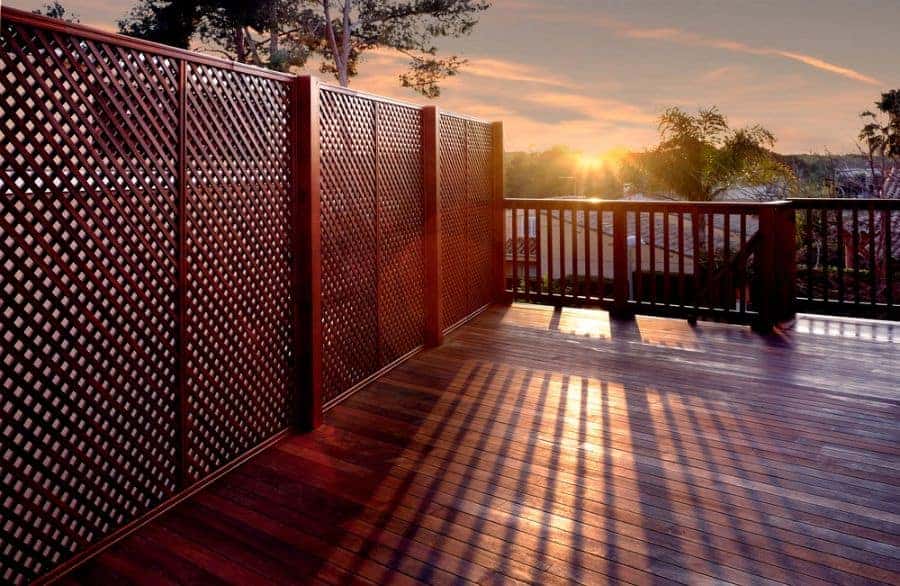
9. Lattice Fences: Function Meets Design
A lattice fence style uses several thin wood strips that are in a crossed pattern. They could be vertically and horizontally oriented, or they could be diagonal at 45-degree angles.
When it comes to garden fence ideas, you can’t beat the lattice. This is because not only does it provide protection and privacy, but it also gives you the perfect platform for plants that vine or like to climb. Now you have an elegant plant wall with a sturdy wood base.
If you don’t want to build an entire wall out of lattice, consider using it as the decoration. You can have a thin strip of lattice that extends the length of your fence along the top. This is a good solution for privacy fences where you’d like the height, but you still want to be able to see beyond your fence.
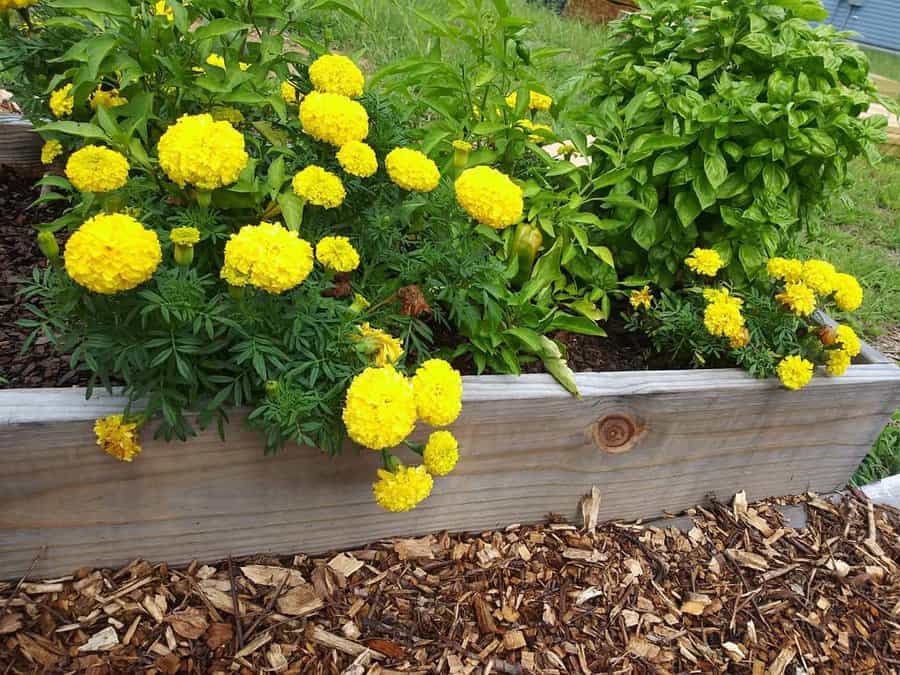
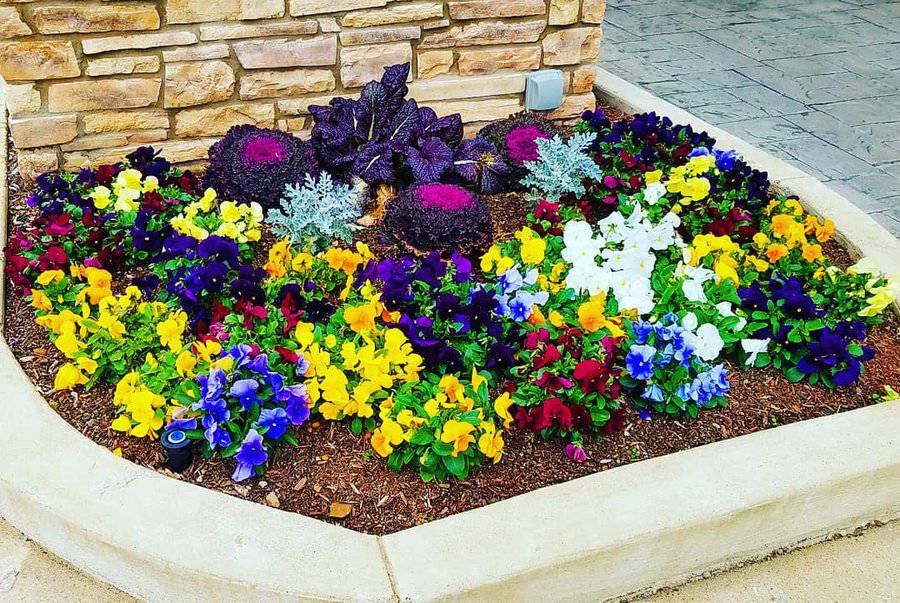
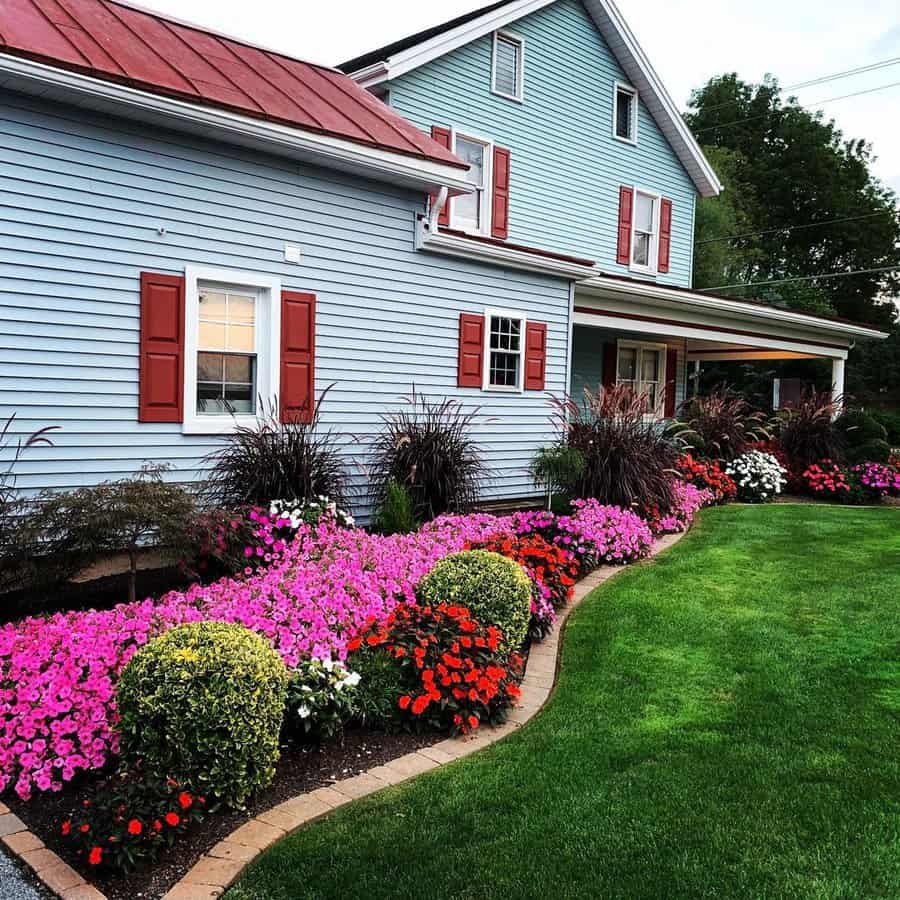
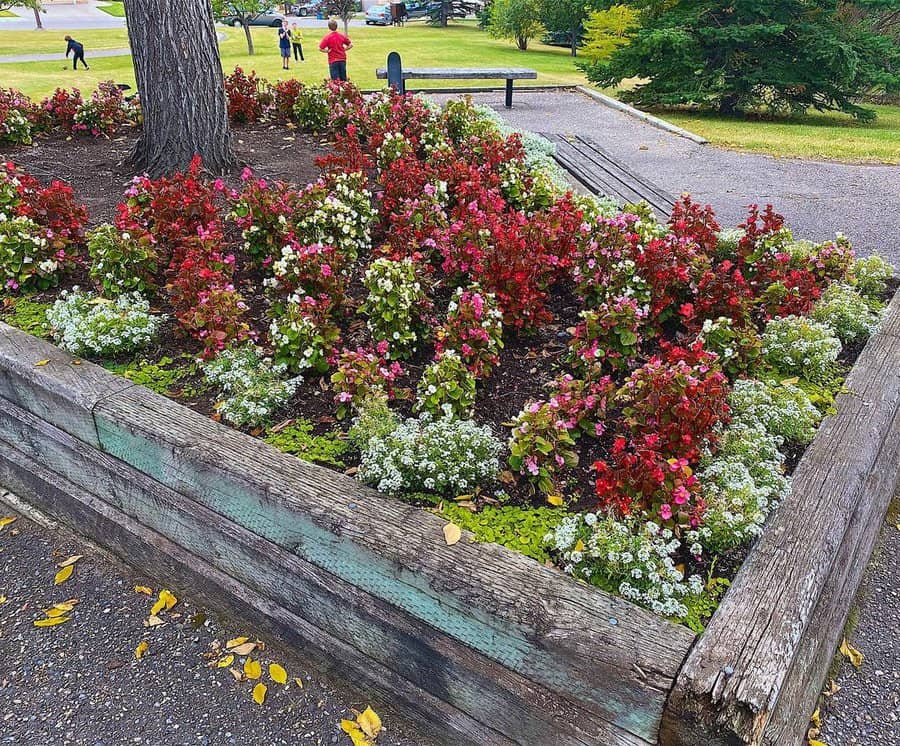
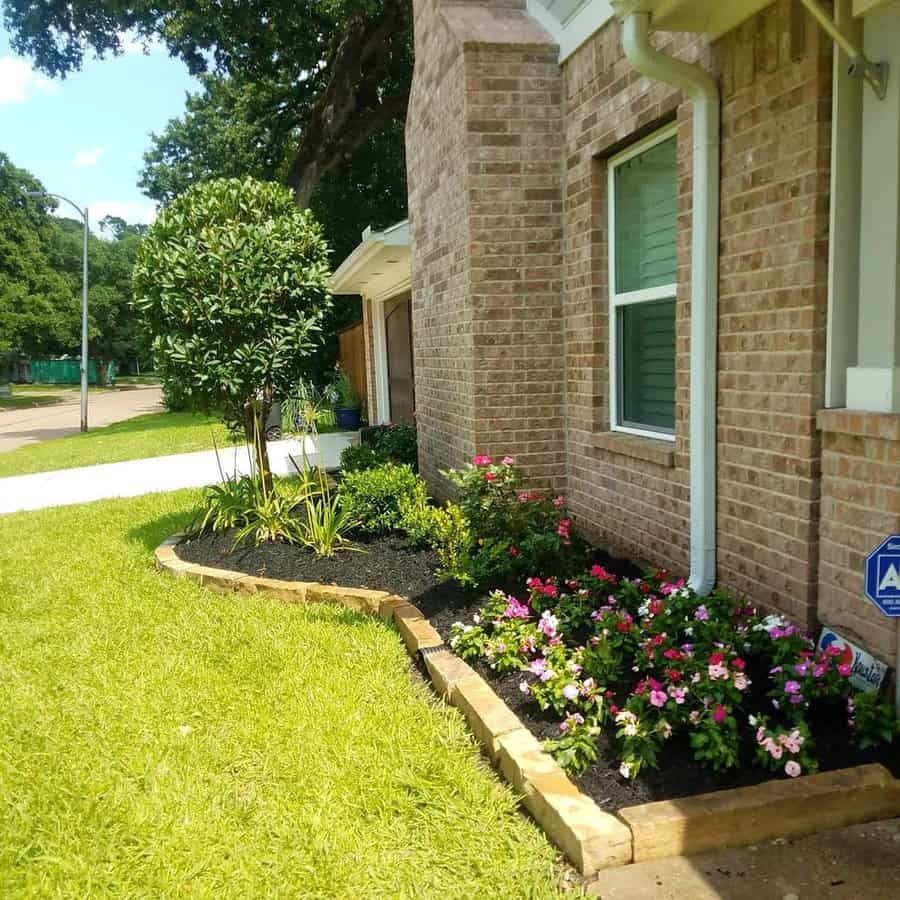
Nothing can quite match the charm and serenity of a beautifully designed flower bed. It adds vibrancy to your garden, transforms your outdoor space, and reflects your personal style. Whether you’re a seasoned gardener or a beginner, crafting the perfect flower bed can be both a fun and rewarding experience.
In this article, we’ll explore a multitude of flower bed ideas, from classic arrangements to modern designs, and tips on choosing the right flowers for your space. You’ll discover how to use color, shape, and texture to create stunning visual impact and make your garden truly sing.
[view_toc]
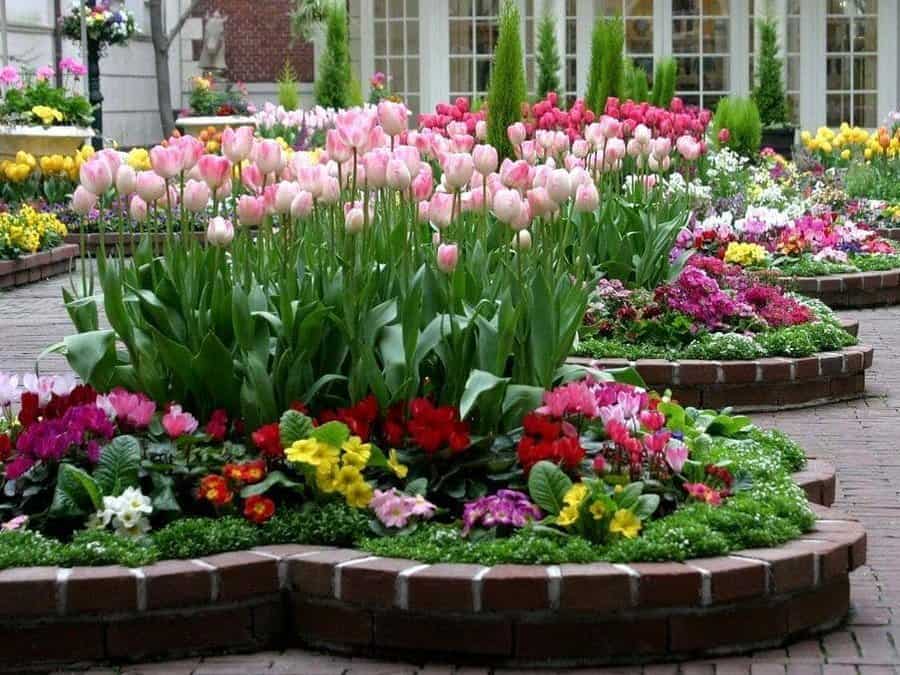
1. Build a Tulip Raised Bed
To establish a raised tulip bed, select a sunny spot and use quality soil mixed with compost for a nutrient-rich environment. Plant tulip bulbs in the fall, about 4-6 inches deep, with the pointed end up. Space bulbs at least 4 inches apart. Water them well after planting and provide occasional watering during dry spells in spring. Mulch lightly to maintain moisture and deter weeds.
2. Tiered Edibles & Blooms
For this tiered garden, use scalloped-edge concrete blocks to create a visually appealing stair-like structure. Plant strawberry plants in the first tier; their cascading growth is both aesthetic and functional, providing easy access for harvesting.
In the second tier, plant daffodils, choosing varieties with white and yellow blossoms to signal the arrival of spring. This combination of edibles and ornamentals creates a dynamic and productive garden space.
Ensure each tier has adequate soil depth and drainage to support the different plant needs, and consider adding organic matter to enrich the soil.
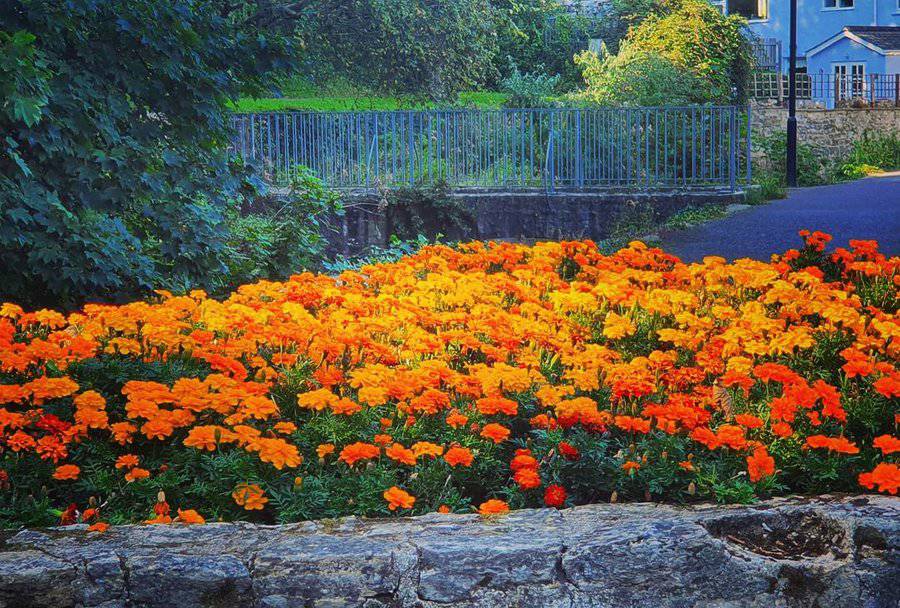
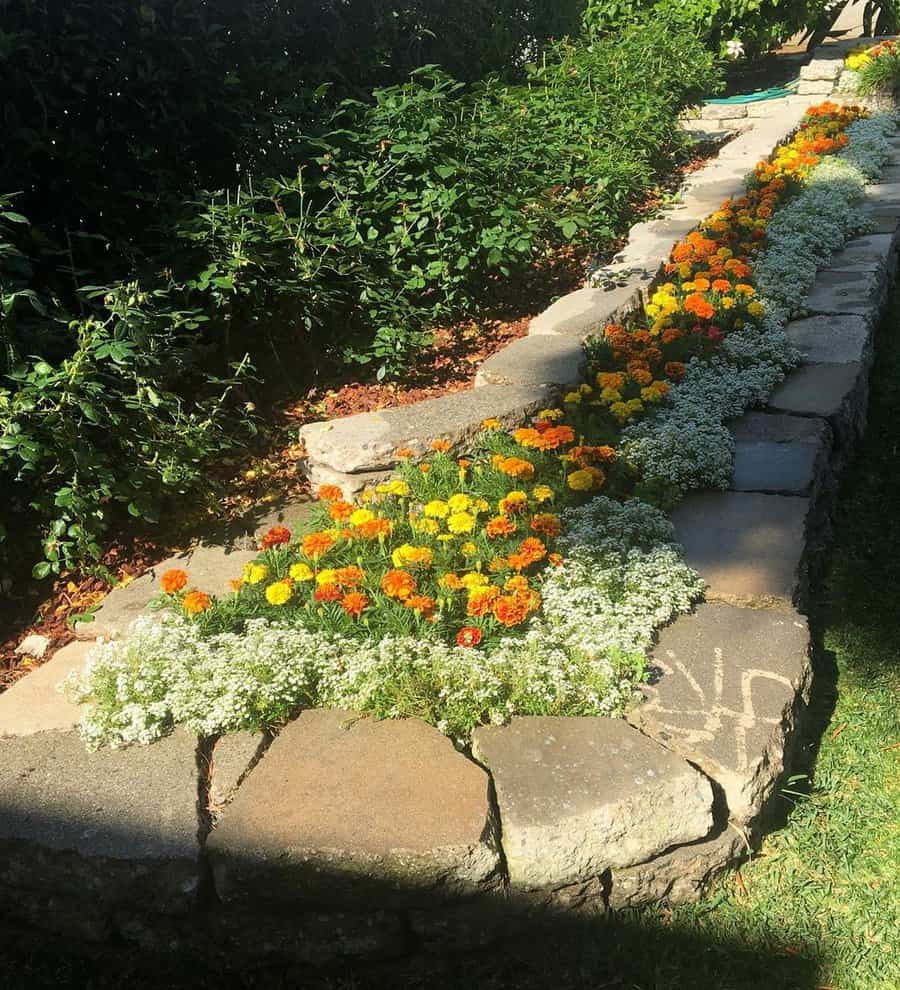
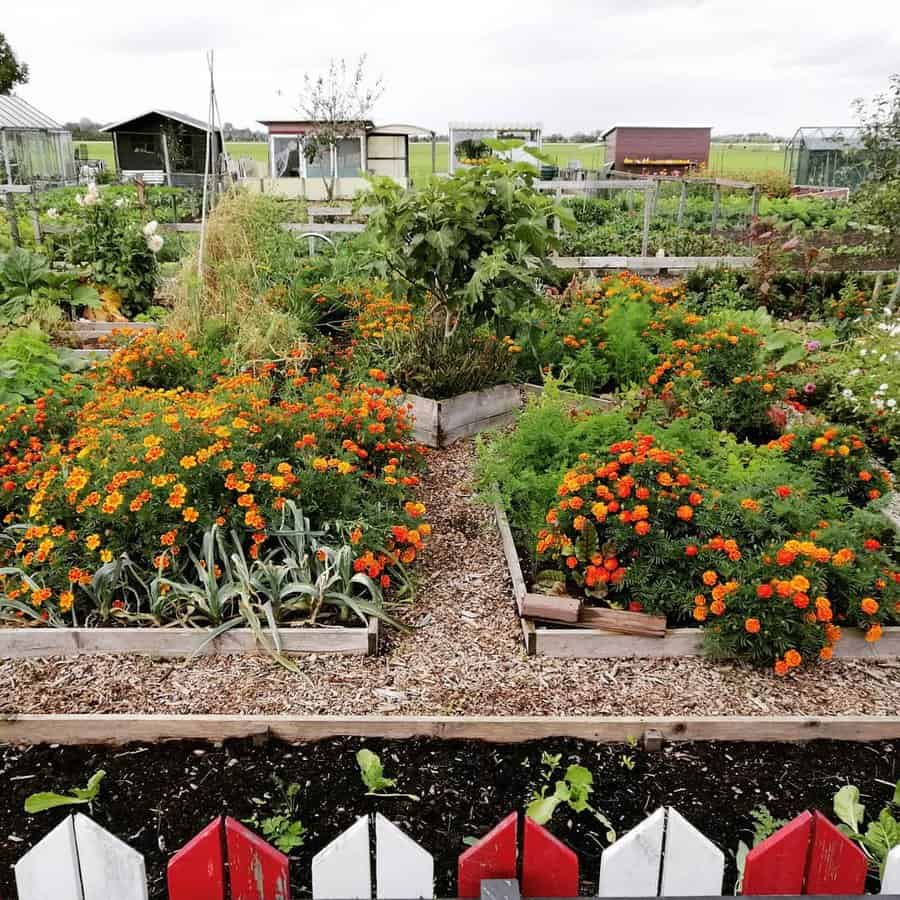
3. Vibrant Marigold Bed
For a vibrant marigold bed, choose a location with full sun and well-draining soil. Plant marigold seeds after the last frost, or start with nursery-grown seedlings for quicker blooms. Space plants about 8 inches apart to ensure good air circulation. Regularly deadhead spent blooms to encourage continuous flowering throughout the season. Marigolds are low-maintenance and often deter pests, making them great for beginner gardeners.
4. Craft a Cement Garden Bed
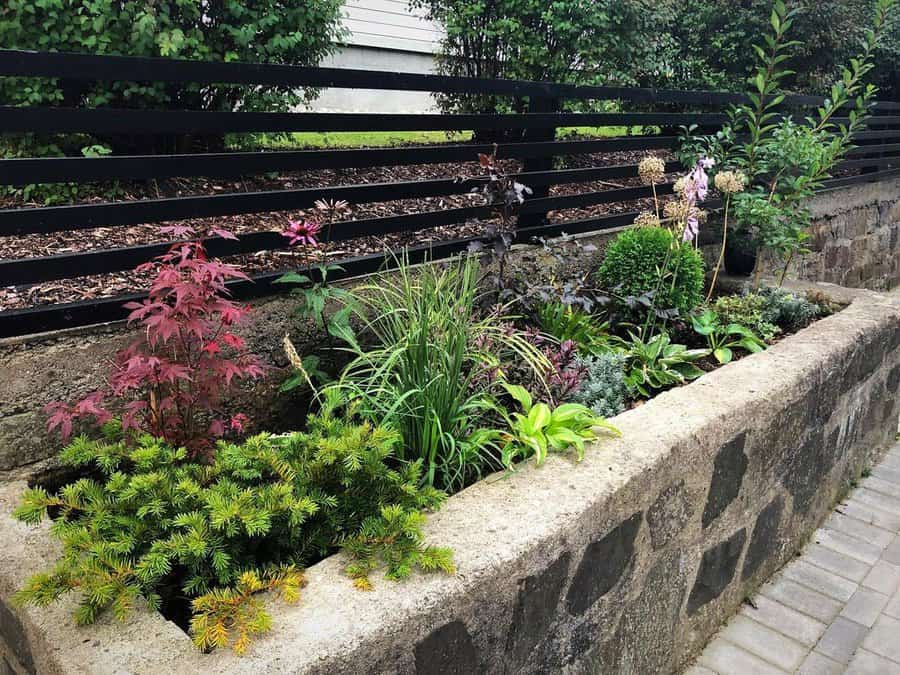
Construct a durable, weather-resistant bed using cement blocks. Measure and outline the desired area, then lay the blocks to form the perimeter. Ensure the bed is level and fill it with a mix of garden soil, compost, and if needed, sand for drainage. This type of bed works well for deep-rooted plants and can be customized to any size or shape.
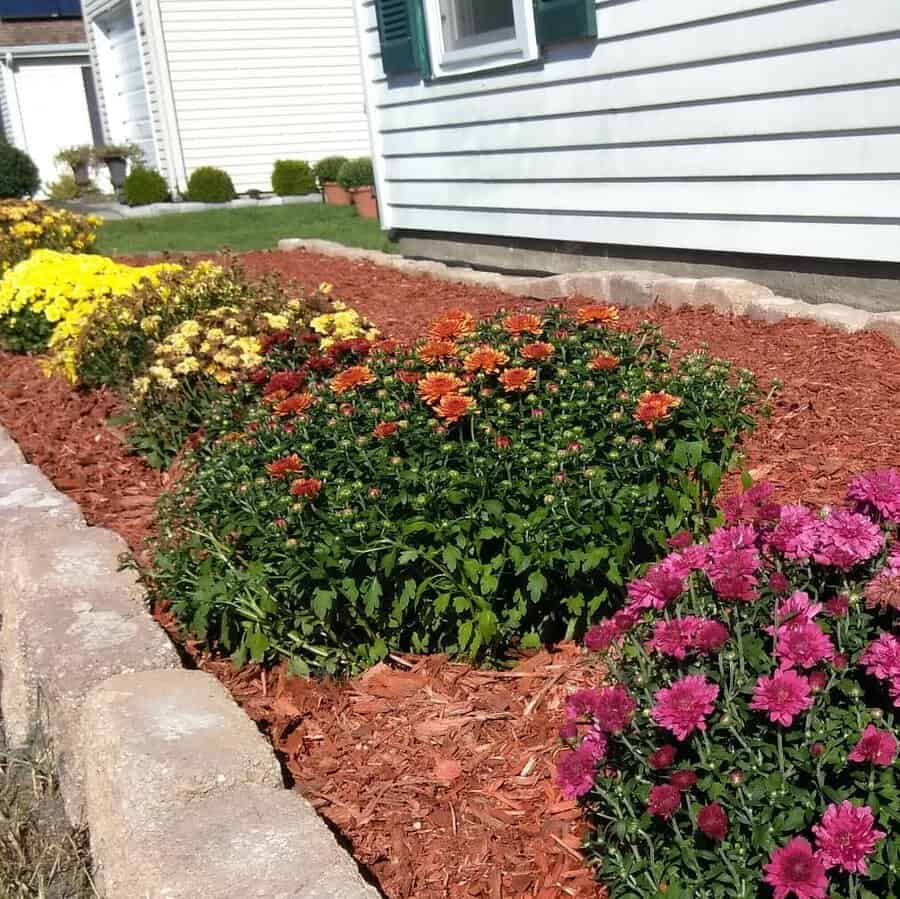
5. Effective Mulching Techniques
Apply a 2-3 inch layer of organic mulch like shredded bark or straw around plants in your flower bed. Mulch retains moisture, regulates soil temperature, and suppresses weed growth. Keep mulch a few inches away from plant stems to prevent rot. Replenish mulch as needed, usually annually, to maintain its benefits.
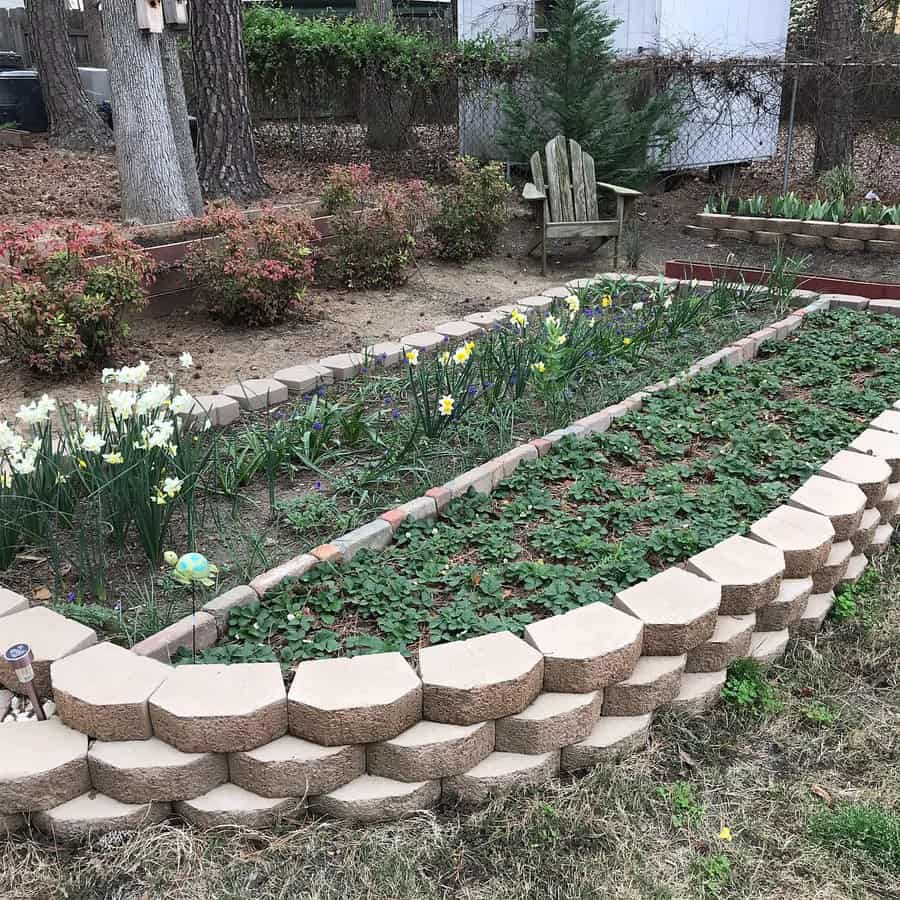
6. Raised Bed: House Border
Position this bed at least 2 feet away from your home’s foundation to prevent moisture problems. Use weather-resistant materials like cedar or stone for construction. Ensure good drainage by adding a mixture of garden soil and compost. Raised beds are ideal for controlling soil quality and can offer a visually appealing structure against the house backdrop.
7. Integrate Container Plants
Introduce containers in varying sizes and colors among your flower beds for added dimension and flexibility. They’re perfect for seasonal plants or those with different soil requirements. Ensure containers have drainage holes and are filled with a high-quality potting mix. This approach allows for easy rearrangement and updating of your garden’s look.
8. Wooden Bed Edging
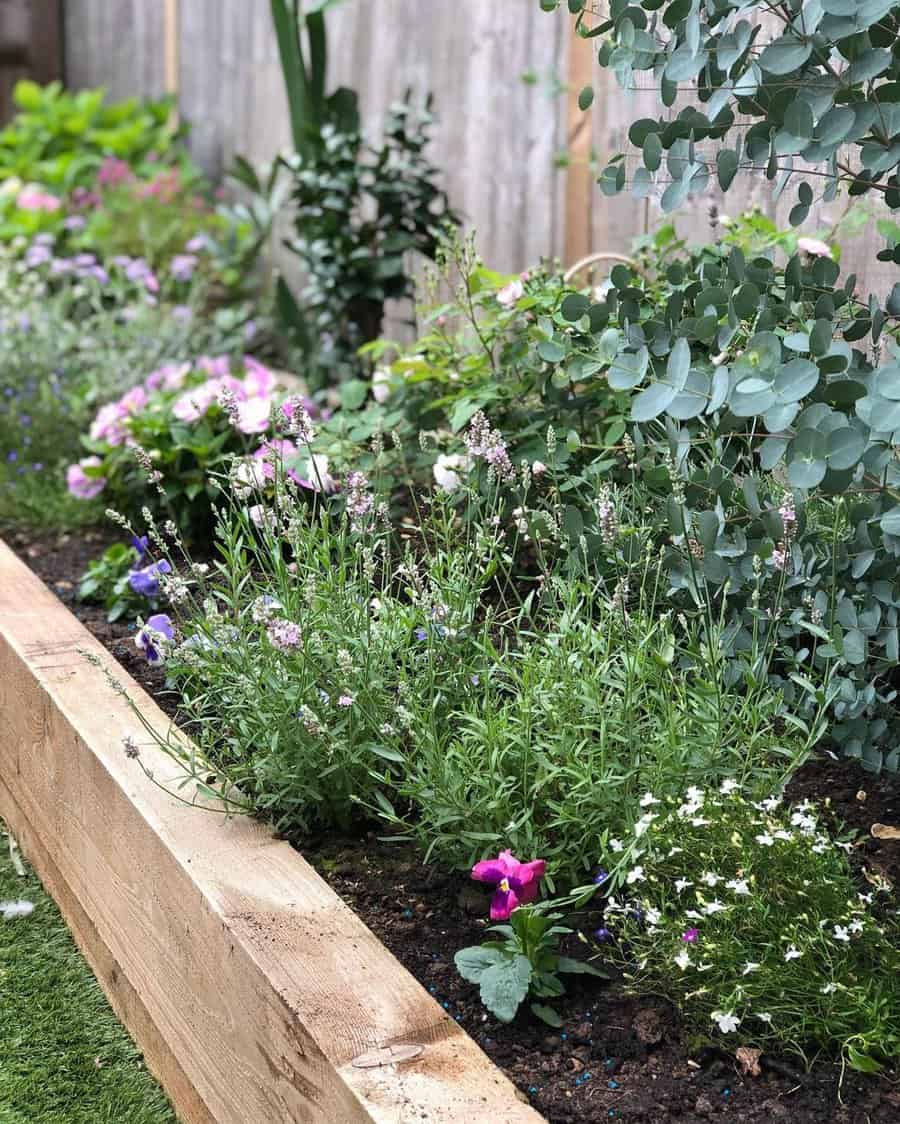
Install wood edging to define the garden bed and create a neat, organized appearance. Choose rot-resistant wood like cedar or redwood. Cut wood to the desired length and securely embed it in the ground, ensuring it’s level. This edging helps to contain soil and mulch, and simplifies mowing and trimming around the bed.
9. Design a Minimalist Garden
Design this garden with simplicity and elegance by planting few white petunias and carnations. Space plants evenly, keeping the design symmetrical and uncluttered. This approach emphasizes the beauty of each plant and is low-maintenance. Use a monochromatic color scheme and simple, clean lines for planters and decorations to maintain the minimalist vibe.
10. Central Garden Fountain
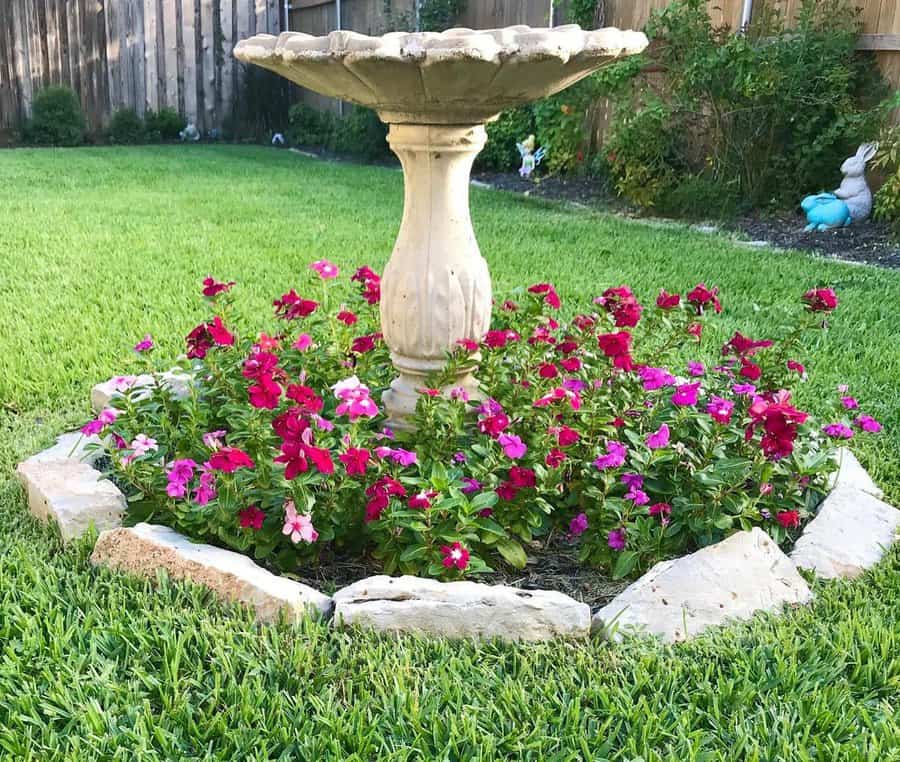
A fountain serves as a focal point and adds a serene element to your garden. Place it centrally in a flower bed, surrounded by low-growing, colorful flowers that don’t obstruct the view. Ensure the fountain’s style complements your garden’s theme. Regularly maintain the fountain to keep it functioning and clean.
11. Shape Geometric Beds
Create beds in shapes like circles, triangles, or hexagons for a modern look. Use bright marigolds, purple ageratum, red begonias, and structural grasses or shrubs. Geometric beds are visually striking and can be used to direct the eye or create divided spaces in the garden. Plant taller species in the center or at the back of the bed for depth.
12. Mix Perennials and Ornamentals
Combine Echinacea and salvia for a bed that offers both aesthetic appeal and longevity. These perennials provide color and texture throughout the growing season. Group plants in odd numbers for a natural look, and consider bloom times to ensure continuous color. Both plants attract pollinators, adding ecological value to your garden.
13. Cultivate a Rose Haven
Select a sunny, well-draining spot for your rose garden. Amend the soil with organic matter and ensure it’s rich and loamy. Space rose bushes to allow for air circulation, reducing the risk of fungal diseases. Regular pruning, deadheading, and proper watering are key to maintaining healthy roses. Consider companion plants like lavender or catmint to complement the roses.
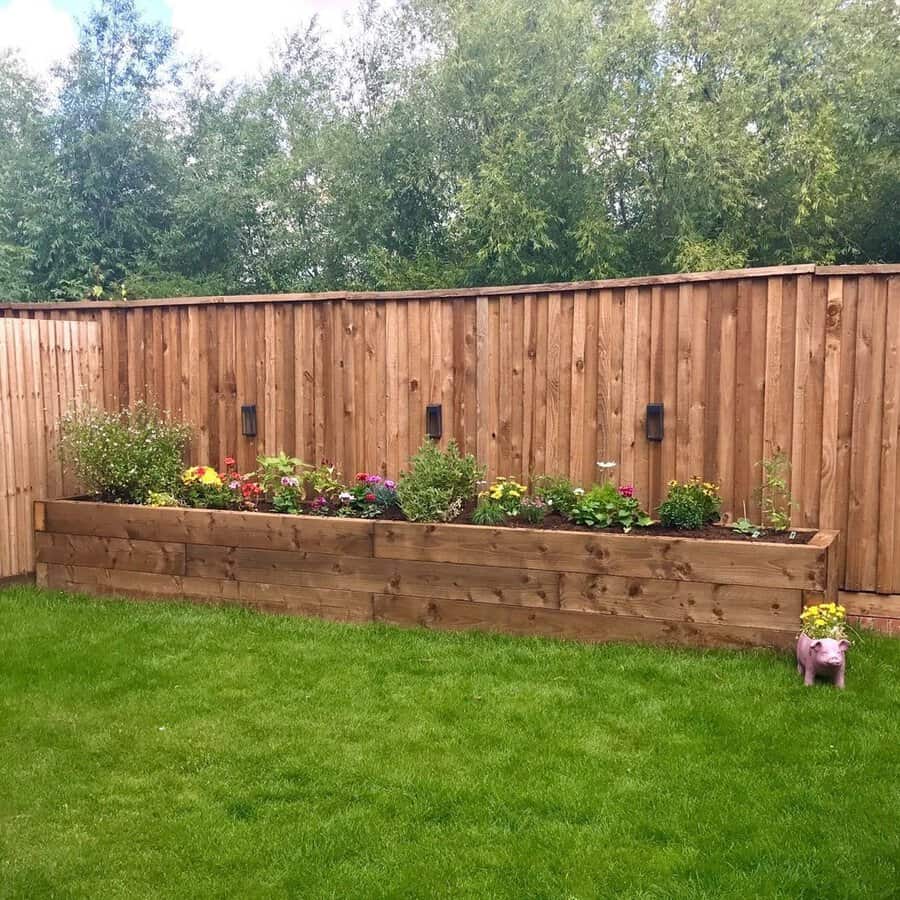
14. Fence-Line Raised Beds
Install raised beds along your fence line to create a border full of color and texture. Choose a mix of perennial and annual flowers for year-round interest. Ensure the bed receives adequate sunlight and is accessible for maintenance. This setup can also help to conceal less attractive sections of the fence.
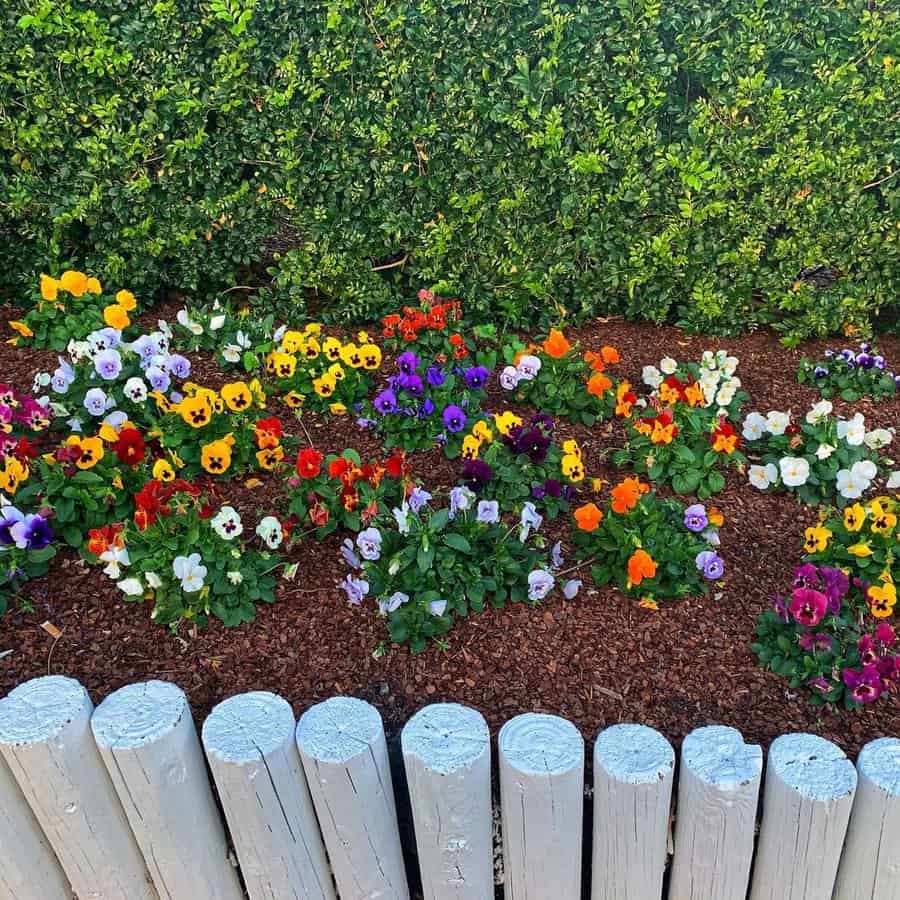
15. Pansy Color Explosion
Plant pansies in a spot with full sun to partial shade and well-drained soil. They thrive in cooler temperatures and can be planted in early spring or fall. Pansies come in a variety of colors and patterns, allowing for creative and vibrant bed designs. Regular deadheading will keep the bed looking fresh and encourage more blooms.
16. Lush Petunia Display
Create a stunning display with pink and rose petunias. They thrive in full sun and well-draining soil. Space plants about 12 inches apart to allow for growth and air circulation. Regular watering, especially during dry periods, and monthly fertilization will keep petunias blooming vigorously. Deadhead spent flowers to encourage new blooms.
17. Hydrangea Haven
Choose a location with morning sun and afternoon shade for hydrangeas. They prefer rich, moist soil that’s well-draining. Amend the soil with organic material for best growth. Hydrangeas’ color can be influenced by soil pH: acidic soil for blue flowers and alkaline for pink. Water them deeply once a week, more in extreme heat.
18. Daylily Delights
Daylilies are hardy and versatile, ideal for beginner gardeners. They prefer full sun but can tolerate some shade. Plant them in well-drained soil, and water regularly, especially during dry spells. Remove spent blooms and trim back foliage in late fall for tidiness. Daylilies are available in various colors and bloom times, offering flexibility in design.
19. Harmonious Flower Combinations
Select flowers with similar sun, soil, and water requirements. Good companions for mixed beds include coneflowers, black-eyed Susans, and Russian sage. These combinations create a diverse, robust display and can attract beneficial insects. Regular deadheading and trimming will keep the bed looking neat and encourage more blooms.
20. Salvia Spectacle
Salvias are excellent for adding height and color. They prefer full sun and well-drained soil. Space plants about 18 inches apart to allow for mature growth. They are drought-tolerant once established, requiring minimal watering. Deadheading spent blooms encourages more flowers and extends the blooming season.
21. Solar Lights Charm
Integrate solar lights for a charming effect. They’re energy-efficient and easy to install. Place lights strategically to highlight specific plants or paths. Solar lights come in various styles, from stakes to lanterns, allowing for personalization. They provide ambient lighting and can enhance garden safety.
22. Anemone Accents
Anemones thrive in partial shade and well-drained soil. They bloom in spring or fall, depending on the variety. Soak the tubers in water before planting to encourage growth. Plant them 2-3 inches deep and water regularly. Anemones are perfect for adding delicate, whimsical touches to your garden.
23. Tapestry Garden Magic
Combine tall orange blooms like dahlias or cannas with a white-flowering underplanting such as alyssum. This creates a visually striking contrast. The taller plants serve as a backdrop for the shorter, dense carpet of white blooms. This design approach creates layers of texture and color, adding depth to your garden.
24. Metal Bed Elegance
Use metal raised beds for a modern, sleek look. They’re durable, easy to assemble, and great for controlling soil conditions. Fill with a mix of topsoil, compost, and if needed, sand for drainage. Metal beds heat up faster in spring, giving a head start to your plants. They work well for vegetables, herbs, and flowers.
25. Xeriscape Beauty
Incorporate drought-tolerant plants like sedum, lavender, and Russian sage for a xeriscape bed. This approach reduces the need for irrigation, making it environmentally friendly and low maintenance. Use gravel or stone mulch to retain moisture and suppress weeds. Xeriscaping can be both beautiful and sustainable.
26. Brick Edge Definition
Brick edging offers a classic and versatile look. Lay bricks in your desired pattern along the garden bed’s perimeter. You can bury them halfway or lay them flat. Bricks help define the bed’s boundary, prevent grass from encroaching, and provide a clean transition between different areas of the garden.
27. Natural Stone Charm
Use natural stones for a rustic and organic edge. Varying sizes and shapes of stones add texture and natural beauty. Dig a trench along the bed’s border and place the stones securely. This type of edging blends seamlessly with the landscape and is particularly effective in rock gardens or with native plantings.
28. Tree Circle Petunias
Plant a circular bed around a tree with petunias for a splash of color. Ensure the bed doesn’t disturb the tree’s root system. Choose petunias that complement the tree’s foliage and the surrounding landscape. Maintain a balance between watering the flowers and the tree’s needs, avoiding overwatering.
29. Impatiens Impact
Impatiens are great for shaded areas and add vibrant color. Plant them in moist, well-draining soil. They require regular watering, especially in hot, dry conditions. Impatiens are available in a variety of colors, allowing for diverse and lively bed designs. They fill in quickly, creating a lush, full appearance.
Imagine stepping out onto your deck to find a mesmerizing blend of lights that transforms your outdoor space into an enchanting oasis. Did you know that the right lighting can not only elevate the aesthetic appeal of your deck but also significantly enhance its functionality and safety?
In this article, we delve into deck lighting ideas designed to illuminate and invigorate your outdoor haven. From subtle under-rail LEDs to dramatic spotlight features, we’re here to guide you through a variety of lighting options that promise to brighten your deck and create the perfect ambiance for any occasion.
Whether you’re looking to host memorable evening gatherings or simply enjoy tranquil nights under the stars, these ideas are tailored to inspire and solve your deck lighting conundrums.
[view_toc]
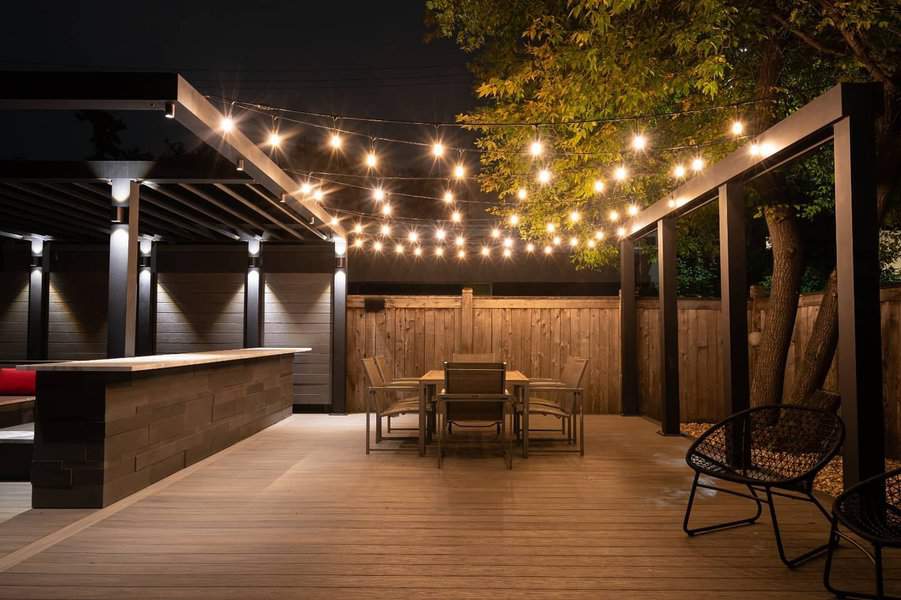
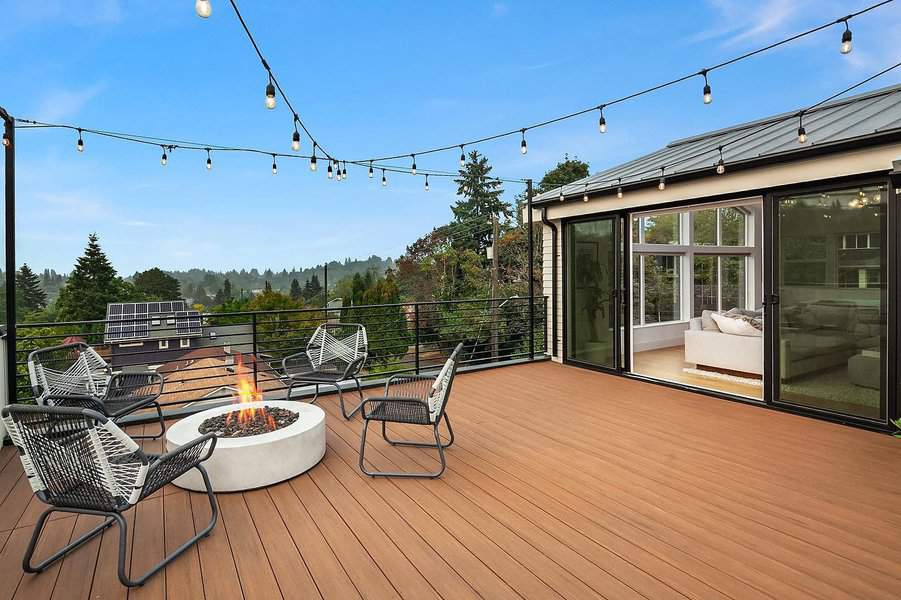
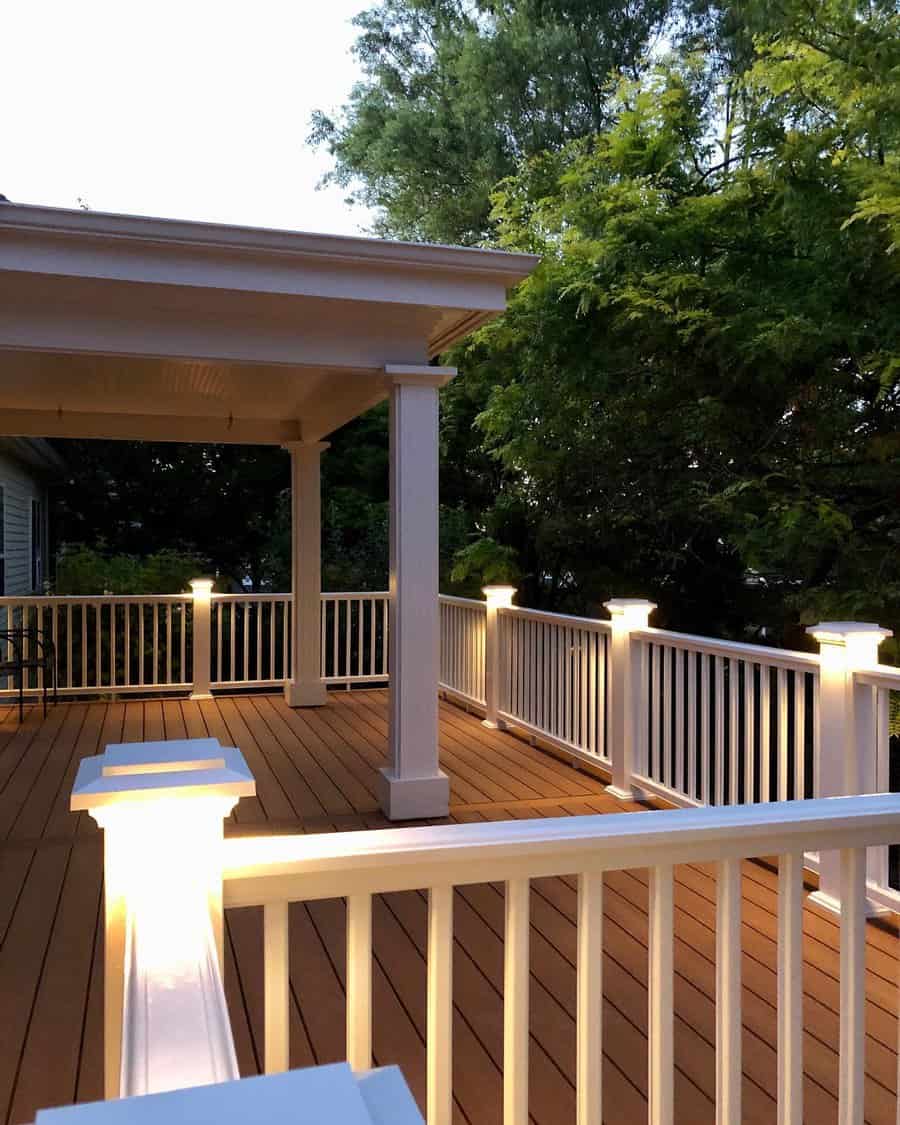
1. Ambient String Lights
Ambient string lights offer a versatile and cost-effective solution for outdoor deck lighting. They create a warm, inviting atmosphere, perfect for social gatherings. Installation is straightforward; you can drape them along railings or overhead frames.
Prices vary depending on length and bulb type, but generally, they’re an affordable option.
Consider LED bulbs for energy efficiency and longer life. String lights work well in both small and large spaces, offering flexibility in design and placement.
2. Festoon Lights
Festoon lights are similar to string lights but feature larger bulbs, which make a bold statement. They are ideal for creating a focal point in your outdoor space. These lights often use LED technology, balancing style with energy efficiency. Installation requires secure mounting points due to the weight of the bulbs.
Price-wise, they are a bit more expensive than standard string lights but offer a durable and long-lasting lighting solution.
They are perfect for an aesthetic that combines both classic charm and modern sensibility.
3. Fairy Lights
Fairy lights, with their tiny LED bulbs, bring a magical and delicate touch to deck areas. They are perfect for intimate settings or as complementary lighting. Being LED, they consume very little power and are cost-efficient in the long term.
Installation is simple; they can be wound around railings or branches, or hung in clusters.
Price points are generally low, making them an accessible option for adding a whimsical element to your outdoor design.
4. Japanese Paper Lanterns
Japanese paper lanterns infuse a cultural aesthetic into your deck lighting design. They emit a soft, diffused light, ideal for creating a serene atmosphere.
Installation is simple but requires careful handling due to the delicate material. Prices vary based on size and design complexity.
It’s important to use them in covered areas or in fair weather to protect from the elements. They pair well with minimalist or Asian-inspired décor themes.
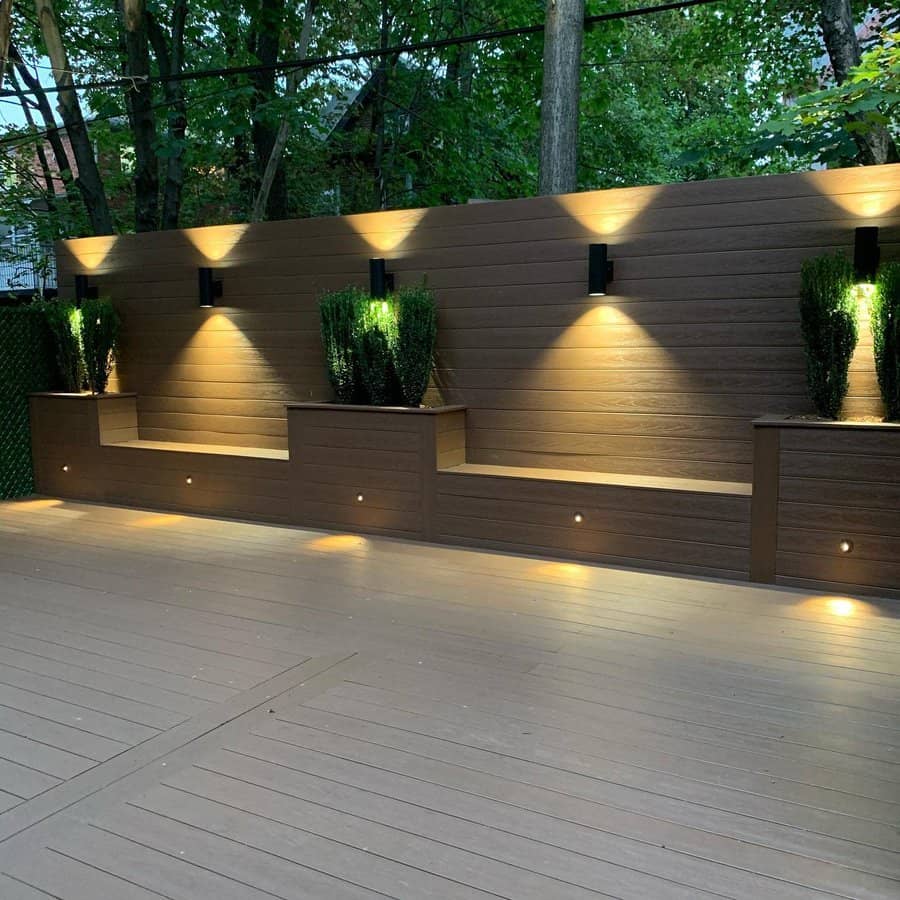
5. Industrial Wrap Lights
Industrial wrap lights are a robust option for deck lighting. They often come in metal finishes and are designed to withstand outdoor elements.
The installation might require professional help, especially for larger setups.
Price-wise, they’re a mid-range option but offer significant durability and longevity. These lights lend a modern, industrial look to the space, ideal for contemporary outdoor designs.
6. Pendant Lights
Industrial-style pendant lights are a statement piece for any outdoor deck. Their exposed filament bulbs provide a warm, inviting glow. Installation usually requires professional help, as they need to be securely hung from a ceiling or overhead structure.
Pricing can be on the higher side, reflecting their design and quality. These lights suit spaces that aim for a stylish, yet rustic ambiance.
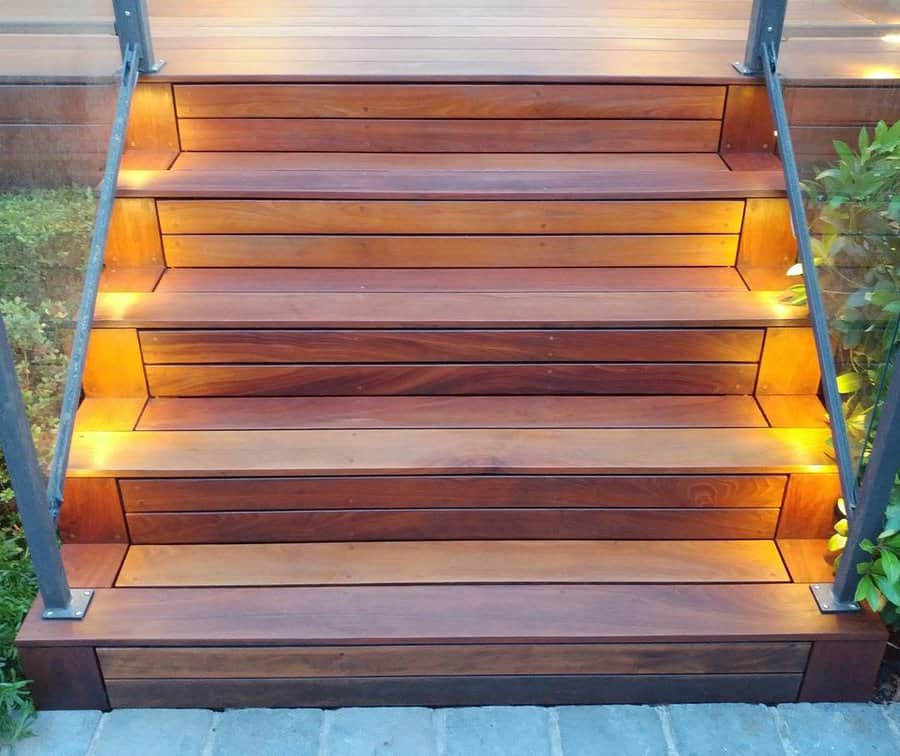
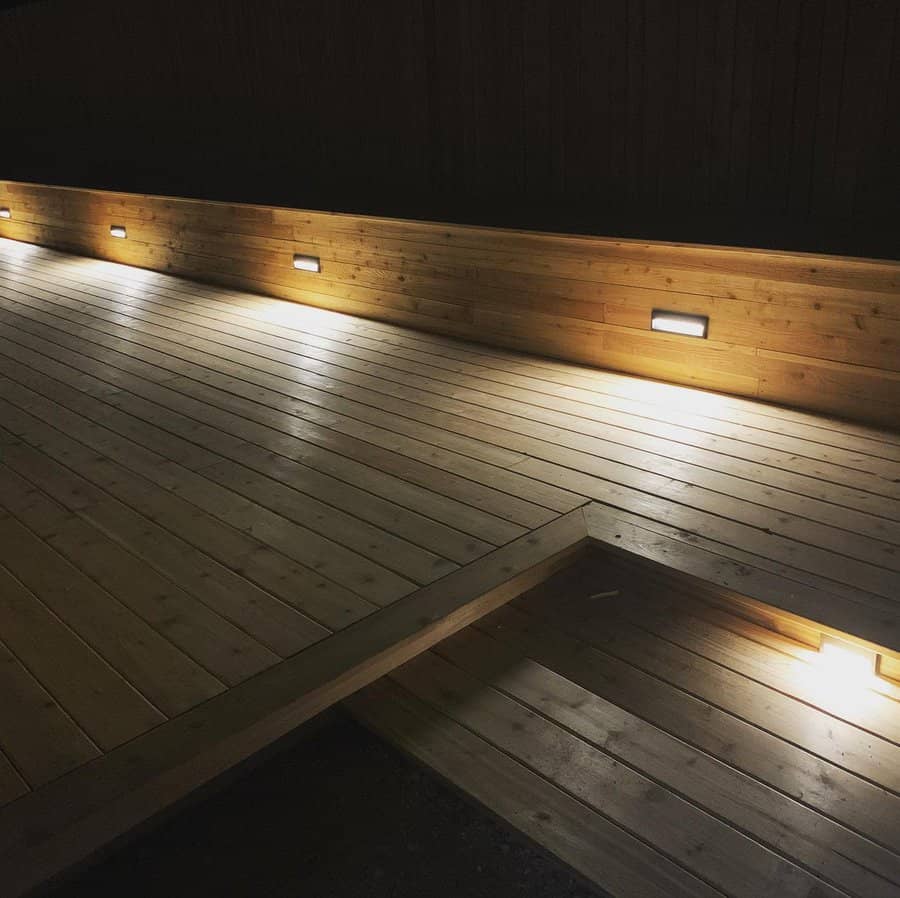
7. Recessed Deck Lights
Recessed deck lights are embedded into the floor, providing a sleek, modern look. They are particularly useful for marking pathways or defining the edges of your deck. Professional installation is recommended to ensure safety and proper integration with the deck’s structure.
In terms of cost, they are an investment, but they offer a high-end, polished finish to any outdoor space. LED options are available for energy efficiency.
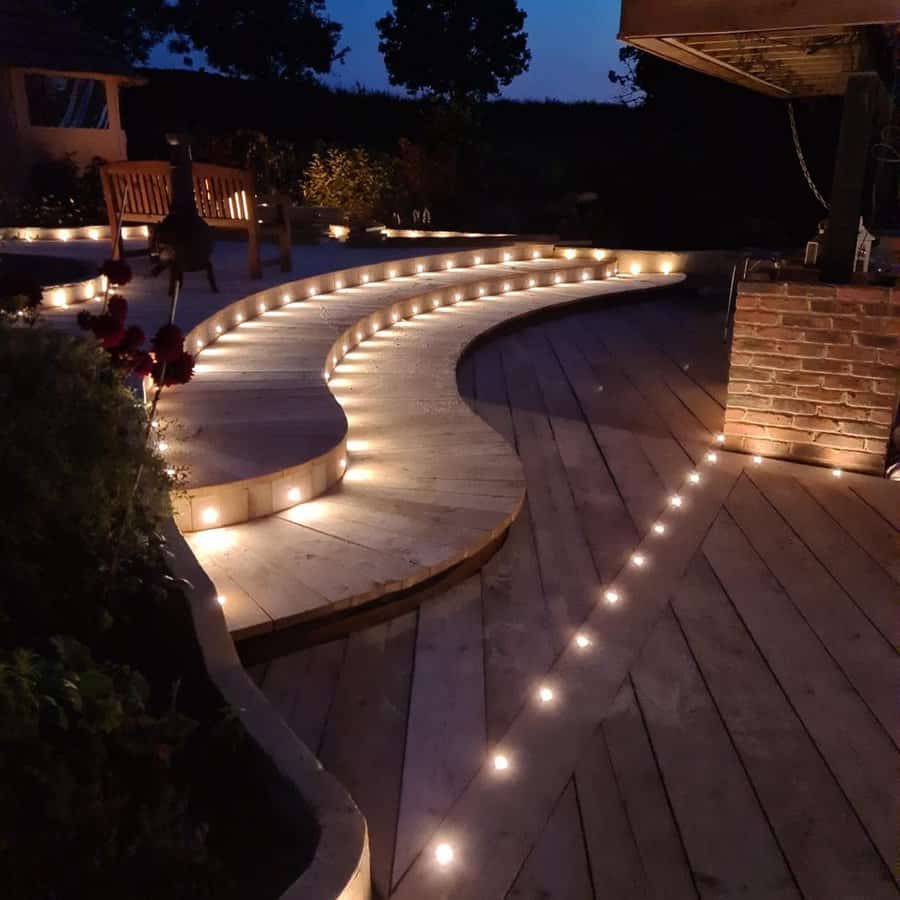
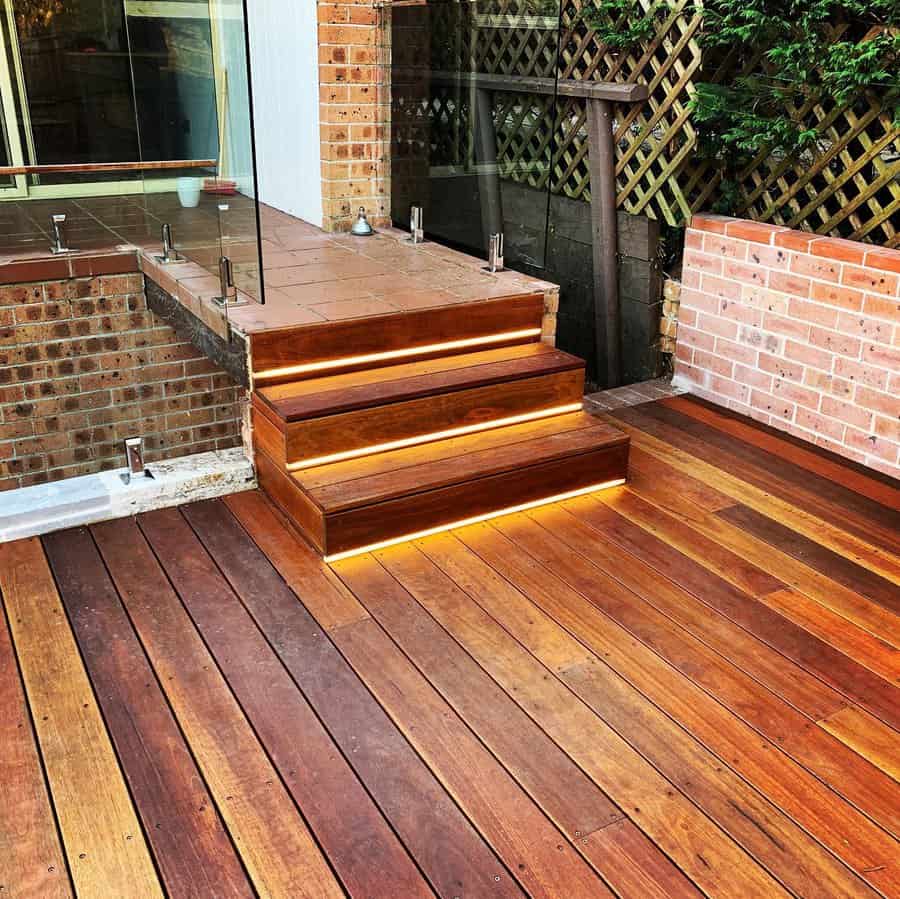
8. Strip LED Lighting
LED strip lighting offers a modern and discreet way to light up a deck. These strips can be placed along the edges, under railings, or in other strategic locations for a subtle yet effective glow. They are relatively easy to install and are available at various price points, depending on the length and quality.
LED technology ensures low energy consumption and long lifespan. Their versatility in placement makes them suitable for both accent lighting and functional illumination.
9. Wall Sconces
Wall sconces provide directed light and can be used to accent architectural features of your home or deck. They come in various styles, from traditional to modern, to match any design theme. Installation may require professional assistance, especially for hardwired models.
Prices vary widely based on design and material. Wall sconces are an excellent choice for creating an elegant, well-lit outdoor environment.
Have you ever gazed at your backyard and dreamed of a stunning deck, but felt constrained by a tight budget? You’re not alone. In fact, most homeowners believe that building a deck requires a hefty investment. However, this is a common misconception.
In this article, we’re going to debunk this myth by exploring creative and cost-effective backyard deck ideas. Whether you have a sprawling lawn or a cozy nook, these budget-friendly solutions will transform your outdoor space into a charming and functional extension of your home.
Get ready to learn how you can build the deck of your dreams without breaking the bank.
[view_toc]
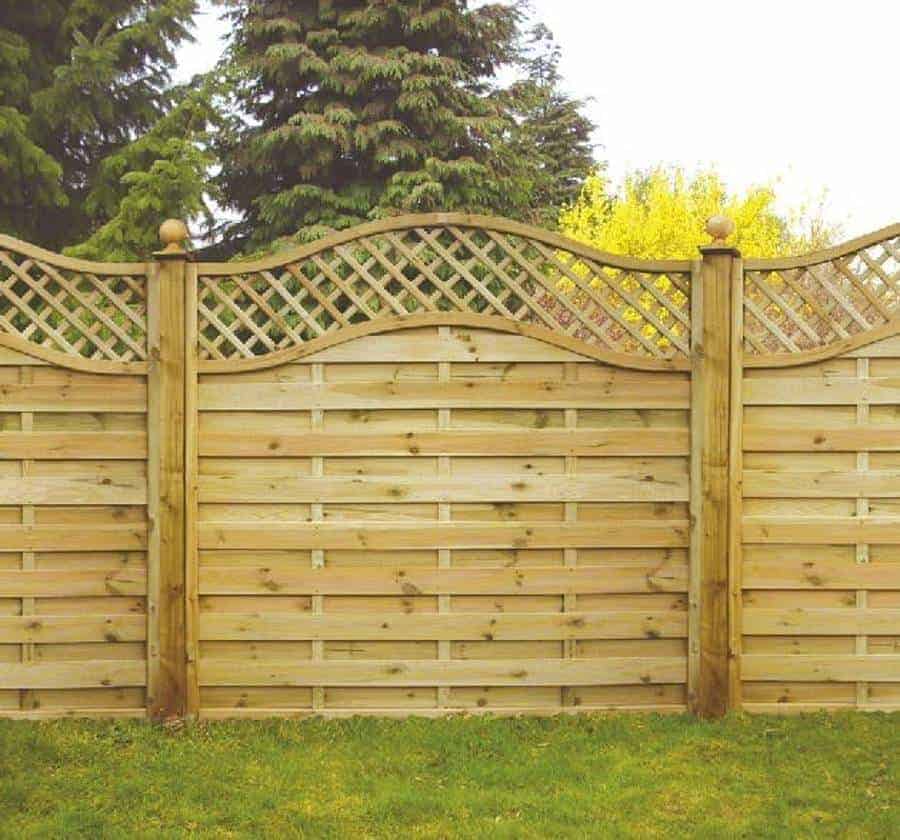
1. Small Backyard Deck With Lattice Fence
Transform a compact outdoor space with a small deck and a lattice fence, offering both charm and privacy. Use pre-assembled lattice panels for cost efficiency, and consider a natural wood finish to create a warm, inviting atmosphere. This setup is ideal for smaller budgets, typically costing between $15-$30 per square foot depending on materials.
2. Covered Deck With Umbrella Shade
Introduce a stylish umbrella to your deck for a chic, shaded retreat. Select a large, durable umbrella, preferably with UV protection, to provide ample shade. This option is budget-friendly, with quality umbrellas available from $100-$300, offering an affordable alternative to permanent roof structures.
3. Adirondack Chairs on a Deck
Adirondack chairs add a timeless and comfortable touch to any deck. Opt for chairs made of recycled plastics for an eco-friendly and low-maintenance choice. Depending on the quality and material, expect to spend around $100-$250 per chair.
4. Deck Benches
Custom-built deck benches create functional and aesthetic seating without consuming much space. Use the same decking material for a cohesive look. The cost varies, but building a simple bench can range from $15 to $50 per linear foot.
5. Glass Deck Fence
A glass fence provides an unobstructed view while ensuring safety. Tempered glass panels, though more costly than traditional materials, offer durability and sleek style. On average, a glass deck railing cost around $50 to $600 per linear foot. So if we talk about the cost-per-foot figures, they average around $10 to $80.
6. Backyard Deck Garden
Integrate greenery into your deck with a variety of potted plants. Choose pots of different sizes and materials to create visual interest. This is a highly affordable option, with typical costs for decorative pots ranging from $10-$50 each.
7. Wooden Bar Stools with a Table
A round wooden table with bar stools creates a cozy dining or socializing corner. Seek sustainably sourced wood for an eco-conscious choice. A basic wooden table and stools set can start around $200, depending on size and craftsmanship.
8. Wooden Privacy Horizontal Fence
Construct a modern, horizontal wooden fence for privacy and style. Cedar or redwood offers durability and a pleasing aesthetic. Expect to pay $15-$30 per square foot, depending on the wood type and design complexity.
9. DIY Small Wood Pallet Deck
Create an economical, rustic deck using repurposed wood pallets. Sand and seal the pallets for longevity. This can be an extremely low-cost project, often under $100, depending on the need for additional materials.
10. DIY Freestanding Covered Deck
Building a freestanding covered deck allows flexibility in design and placement. Use treated lumber and corrugated metal roofing for durability. Costs vary, but DIY enthusiasts can expect to spend around $1,200-$2,000 for materials.
11. Wood and Metal Deck Railings
Combine wood and metal for a contemporary railing design. This mix offers both sturdiness and aesthetic appeal. Cost depends on the complexity and materials, typically ranging from $50 to $120 per linear foot.
12. Multi Level Deck
A multi-level deck adds dimension and separates activity zones. This requires more materials and labor, with costs starting at $20 per square foot, increasing with complexity.
13. Small Deck with Stairs
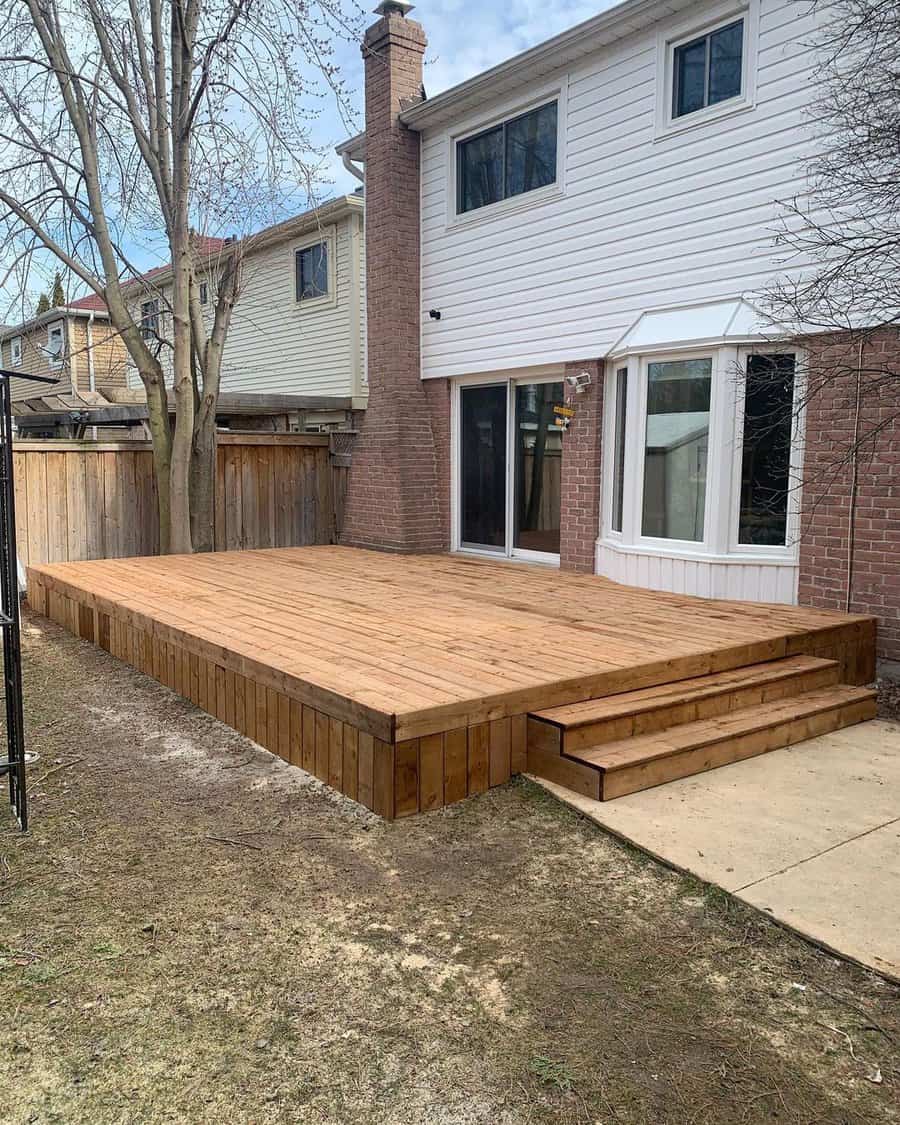
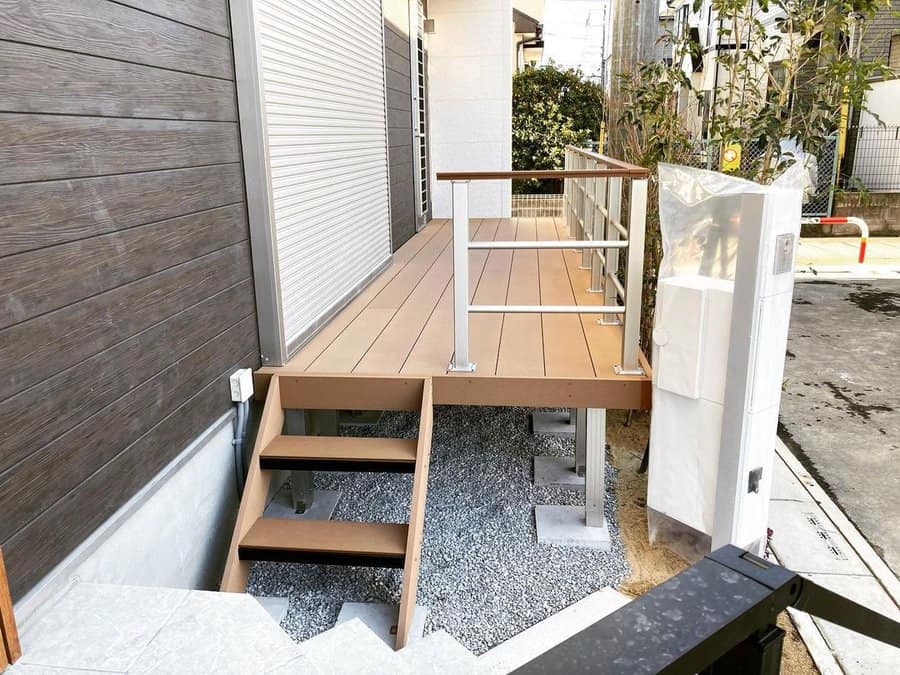
A small deck with stairs can make a backyard more accessible and usable. Use pressure-treated lumber for cost-effectiveness and durability. A simple stair addition can start from $15 per square foot.
14. DIY Ground Level Deck
This is a straightforward, cost-effective project suitable for DIY enthusiasts. Materials like pressure-treated lumber are recommended for durability and cost around $5-$10 per square foot.
15. Backyard Deck With Pergola
Add architectural interest with a pergola. Kits are available for around $1,800-$3,000, depending on size and material, offering a blend of shade and style.
16. Vinyl Backyard Deck
Opt for a vinyl deck for a low-maintenance and durable option. Vinyl decking starts around $10 per square foot and is available in various colors and textures.
Have you ever gazed at your backyard and dreamed of transforming it into a stunning outdoor space without breaking the bank? Surprisingly, creating a beautiful paver patio doesn’t have to cost a fortune.
In this article, we tackle the challenge many homeowners face: designing a captivating patio area on a budget. We’ll explore a variety of inexpensive yet stylish paver patio ideas that are not only cost-effective but also easy to implement.
Whether you’re a seasoned DIY enthusiast or a first-time patio planner, get ready to uncover affordable solutions that promise to transform your outdoor area into a charming and functional retreat.
[view_toc]
1. Stamped Tile Pavers
Stamped tile pavers offer an affordable way to achieve a high-end look. These pavers, imitating the appearance of natural stone or brick, can be a cost-effective alternative to actual stone tiles.
Prices typically range from $10-$20 per square foot, including installation.
Maintenance is relatively straightforward, requiring occasional sealing to maintain their color and prevent weather damage. Their versatility in design allows for a variety of unique patio layouts.
2. Concrete Pavers
Concrete pavers are a durable and economical choice, with costs as low as $6 per square foot, including installation. They come in a range of colors and shapes, providing flexibility in design.
Regular cleaning and periodic sealing are recommended to preserve their appearance. Due to their uniformity, they can be easily replaced if damaged, making them a practical option for high-traffic patio areas.
3. Leftover Tile Pavers
Utilizing leftover tile pavers is an eco-friendly and budget-conscious approach. It encourages creativity, as you can mix and match different tiles for a unique patio design. Costs can be significantly lower, depending on the source of the tiles.
However, be mindful of the varying thickness and durability of mixed tiles, which may affect the installation process and long-term maintenance.
4. Stone Pavers
Stone pavers exude a natural elegance and are incredibly durable. Prices vary widely, typically between $15-$30 per square foot, depending on the type of stone.
They require minimal maintenance, mostly just regular cleaning.
When laying stone pavers, ensure proper drainage to avoid water damage. Stone pavers work exceptionally well in garden settings, harmonizing with natural surroundings.
5. Brick Pavers
Brick pavers offer a classic look and are known for their longevity. Costs generally range from $10-$25 per square foot, including installation. They are low maintenance, needing only occasional cleaning and sealing to retain their color.
Brick pavers are ideal for creating a warm, inviting outdoor space, and their uniform size makes installation straightforward.
6. Round Patio Bricks
Perfect for areas surrounding a fire pit, round patio bricks add a distinct charm. They can be arranged in various patterns to complement your outdoor design. These bricks are typically in the mid-price range and offer good durability.
Regular cleaning and sealing are recommended to keep them looking fresh. The circular design can create a focal point in your patio, drawing guests in for a cozy gathering.
7. Patterned Pavers in Running Bond Design
Patterned pavers designed to mimic natural stone in a running bond pattern are a smart choice for contemporary patios. This layout, where each paver is offset from the next, adds visual interest and a sense of movement to the space. The color variation in these pavers enriches the patio’s texture and depth, contrasting sharply with single-color designs.
Pricing is usually mid-range, depending on the quality of the pavers, with costs including installation ranging from $12-$20 per square foot.
Maintenance is straightforward, necessitating regular cleaning and occasional sealing to preserve the color and prevent wear.
8. Gravels in-Between Concrete Pavers
Adding gravel between concrete pavers is an affordable way to add texture and contrast to your patio. This approach is cost-effective, with gravel being inexpensive and easy to spread.
Maintenance is low, requiring occasional raking to keep the gravel even. This design choice aids in drainage and prevents weed growth, making it both aesthetic and functional.
9. Herringbone Pattern Pavers
Herringbone pattern pavers provide a visually striking design. While installation might be more complex, resulting in higher labor costs, the end effect is sophisticated and timeless.
This pattern is particularly effective at distributing weight and handling traffic, making it a durable choice. Regular cleaning and sealing are recommended to preserve the intricate pattern.
10. Artificial Turf with Square Concrete Pavers
Combining artificial turf with square concrete pavers in a checkerboard pattern creates a modern, low-maintenance patio. The turf requires no watering or mowing, and the concrete pavers are easy to clean.
Installation costs vary but are generally moderate due to the simplicity of the materials. This design is especially suitable for areas where natural grass might struggle to grow, offering a green, lush look year-round.
What’s better, a patio or a porch? Is there really any difference between the two?
When it comes to architectural definitions, patios and porches share a lot of similarities. But they also have different features. Keep reading to learn the nuances between the two types of outdoor living space and answer the question of patio vs porch.
[view_toc]
Basic Differences Between Patios and Porches
The main difference between a porch and patio is its attachment to the house. A patio is usually detached from the home itself. It’s built at ground level behind the home and often is uncovered. A patio is almost always located behind the house.
A porch is attached to the home. It’s level with the home’s exterior doors and may be built up off the ground. It usually has a roof and railings that also connect to the home’s main structure. A porch is usually along the front of the house, but it can also be located behind it. Some farmhouses have a wraparound porch that goes around the entire home.
Different Types of Patios
Although many patios are uncovered, plenty of people build a covered patio so that at least part of the patio deck has a roof over it. This is a helpful source of shade in the summertime and it also shields your patio furniture from the elements. Others obtain shade with a temporary patio cover, such as a pop up tent, umbrella, or shade sail.
A patio can be made of concrete, bricks, pavers, tile, or even gravel. Because patios must be built at ground level, there may be steps between the patio door and deck surface. A wood deck—even if built at ground level—is not technically a patio, though it might be used as one.
A patio may be built several yards away from the main building, with a path connecting the home and concrete deck. This is often the case with patios that surround a swimming pool.
Different Types of Porches
Like a patio, a porch can be covered or open to the sky above. A covered porch is the most common type, and usually reflects a continuation of the home’s architectural style. The porch roof usually matches the home’s roof, and the porch deck may even have the same style of wood flooring used inside the home. Porches are often thought of as an outdoor living room and used as such.
A screened porch has screen panels over any open sides. These panels extend from the porch roof to the deck and help keep insects and other pests from invading your home. Instead of a screen porch enclosure, some people install windows, turning their backyard porch into a sunroom that can be used year-round.
A patio can be turned into a backyard porch with the addition of a roof and railings. An upstairs balcony may be called a porch if it is covered and blends into the home design.
Patio vs Porch: Factors to Consider
If you’re building a new home, or simply looking for an outdoor home improvement project, building a patio or porch is a good idea. Not only will you gain outdoor living space, this type of home addition will increase your property value. If you like both options, here are a few factors to take into consideration before deciding which outdoor structure to build.
First, consider how much living space you have for a porch or patio. If you have a spacious lot, building a large porch or patio should not be a problem. If you have a small backyard, you’ll need to keep your patio on the smaller side. If you have a small front yard, a front porch may make you feel too close to the street to enjoy relaxing there.
Second, take a realistic look at your budget. A simple concrete patio or one made from pavers costs less per square foot than a porch or veranda. This is largely due to the labor costs involved in building a wood porch, roof, deck, and railings. You will also need to pay someone to paint Many a homeowner has learned how to DIY concrete pavers to build their own simple patio.
Third, consider the type of climate you’re working with. An open patio or veranda will probably get year-round use in a warm climate. However, if you live where winters are long, your patio might not get much use beyond the summer months. In that case, an enclosed porch will be more useful, especially if it is a sun room with windows to close when it’s chilly.
Finally, think about how you plan to use your outdoor space. A front porch offers little privacy, but it’s great if you’re friends with your neighbors and enjoy socializing in your front yard. Since a patio is usually located in the backyard, it provides more privacy for intimate outdoor dinners or big parties. If your plan includes an outdoor kitchen, a concrete slab patio or veranda is an ideal foundation.
Other Names for Outdoor Living Spaces
With so many names for an outdoor living space, how do you know which one to use? Unless you’re writing a real estate listing, feel free to call your outdoor space whatever you like. But if you’re curious about the nuances between different names, here’s a guide.
Balcony: A platform that is built out from the side of a building, on a second floor or higher. A balcony is enclosed by a railing or half-wall.
Deck: A deck is a raised horizontal platform supported by beams or columns. It’s usually made of wood or a composite decking material. A deck doesn’t have a roof or walls, but must have a railing if it’s more than two feet above the ground.
Lanai: The word “lanai” is commonly used in Hawaii, South Florida, and other tropical areas to describe an enclosed porch. A lanai usually has a concrete or tile floor and sits at ground level beside or behind the home. It may feature screens or windows instead of open sides.
Portico: This type of covered outdoor area predates the modern porch or veranda. Popular in ancient Greece, a portico is usually positioned directly in front of the home’s entryway. Porticos are often supported by columns.
Sunroom: A sunroom or sun porch features large glass windows. It’s as visually open as a traditional porch, but it’s an enclosed space that can be used year-round.
Terrace: A terrace is similar to a patio in that it’s a paved or tiled outdoor area. It may be located on a rooftop instead of ground level.
Veranda: Also spelled “verandah” this term for an outdoor seating area is most commonly used in the southern United States. Unlike an elevated balcony or deck, a veranda is located at ground level. Sometimes southerners will use the word veranda to describe any type of porch or patio, even if it’s not at ground level. A veranda will usually be bigger than an average porch or patio. Historically in the south, the veranda was used as a gallery room or for entertaining guests.