Author: Andra DelMonico

  • How to Arrange Living Room Furniture With a TV

    How to Arrange Living Room Furniture With a TV

    Picture this: You’re settling in for a movie night, only to find your neck craning awkwardly, or the sun’s glare wreaking havoc on your screen. The living room is the heart of your home, and the placement of your furniture – especially the TV – can make or break your relaxation haven.

    This article will guide you on how to masterfully arrange your living room furniture to optimize your TV viewing experience. Dive in to discover practical steps, aesthetic considerations, and ergonomic principles that will transform your living room into a cinematic paradise.

    1. Establish the TV as the Focal Point

    TV as the Focal Point

    Ensure your TV is the central point of attention in your living room layout. This helps guide the rest of your furniture arrangement for optimal viewing and aesthetics.

    2. Seating Arrangement

    sofa opposite to TV

    Your primary sofa or couch should be directly opposite the TV for the best straight-on view. Side chairs or smaller seating should angle slightly towards the TV to keep everyone comfortably engaged.

    3. Mind the Distance

    distance between seating area and TV

    Ensure there’s a proper gap between your seating and the TV. A too-close sofa can distort the viewing experience, while a too-far one can make details hard to catch.

    4. Coffee Table Placement

    coffe table between TV and sofa

    Position your coffee table centrally between your sofa and TV. This not only supports snacks and drinks but also bridges the gap between the main seating and the screen.

    5. Side Tables for Convenience

    Place side tables next to armchairs or the ends of your sofa. They’re perfect for holding remotes, drinks, and decorative items without having to reach far.

    6. Shelving and Storage Units

    If you have bookshelves or cabinets, place them perpendicular to the TV wall to avoid distractions. This can also provide a place to store media or display decorative items.

    7. Use Rugs to Define the Area

    area rug in a living room with a TV

    A well-placed rug can delineate the TV watching area from the rest of the room, creating a cozy enclave for entertainment.

    8. Opt for Slimline Furniture

    small living room with a TV

    If space is tight, choose slender furniture pieces that don’t overpower the room or obstruct viewing angles.

    9. Multi-functional Pieces

    Living room with TV, sofa and ottoman

    Invest in furniture like ottomans or benches that provide storage. This keeps the room tidy, storing items like remotes, magazines, or blankets.

    10. Leave Space Behind Sofas

    Living room with TV and sofa in front of the TV

    Ensure there’s a bit of space behind your sofa, especially if it’s against a wall. This prevents the room from feeling cramped and allows for better air circulation.

    11. Allow for Walking Paths

    grey living room with a TV

    Arrange your furniture in a way that leaves clear paths for walking. This ensures the room remains functional and accessible.

    12. Create Zones

    large living room

    If you have a particularly large living room, create zones. For instance, have a TV watching zone, a reading corner, and perhaps a gaming area. Use furniture to subtly demarcate these spaces.

  • How to Decorate a Living Room with High Ceilings

    How to Decorate a Living Room with High Ceilings

    High ceilings, while breathtaking and luxurious, can present unique challenges in interior design. Most homeowners grapple with striking the right balance between warmth and grandeur in such spacious rooms.

    If you’ve ever wondered how to transform your cavernous space into a cozy haven without losing its architectural charm, you’re not alone.

    This article unveils insightful tips for designing a living room with high ceilings, ensuring that every inch, from floor to ceiling, resonates with style and purpose. Dive in to explore ways to maximize aesthetics, maintain functionality, and create an ambiance that harmonizes with your personal taste.

    [view_toc]

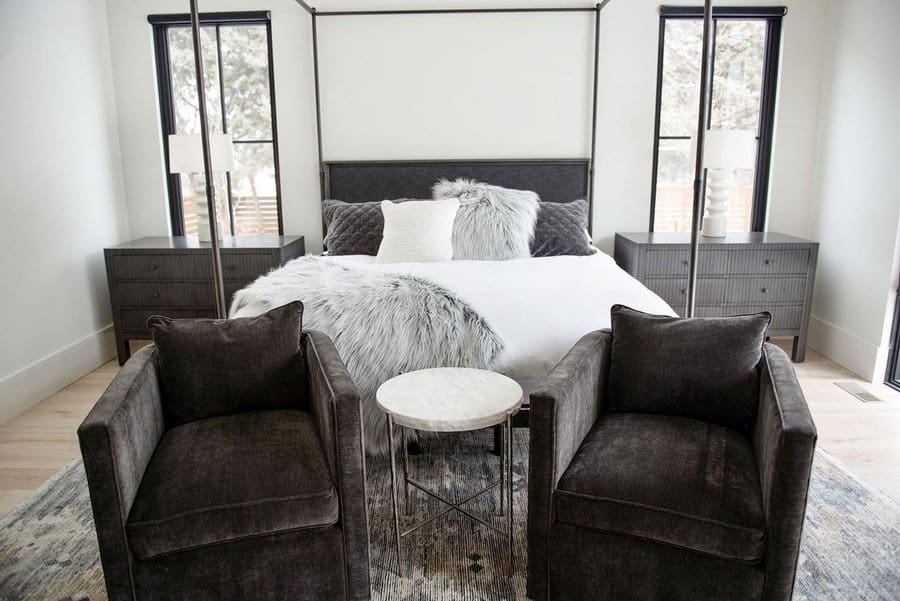
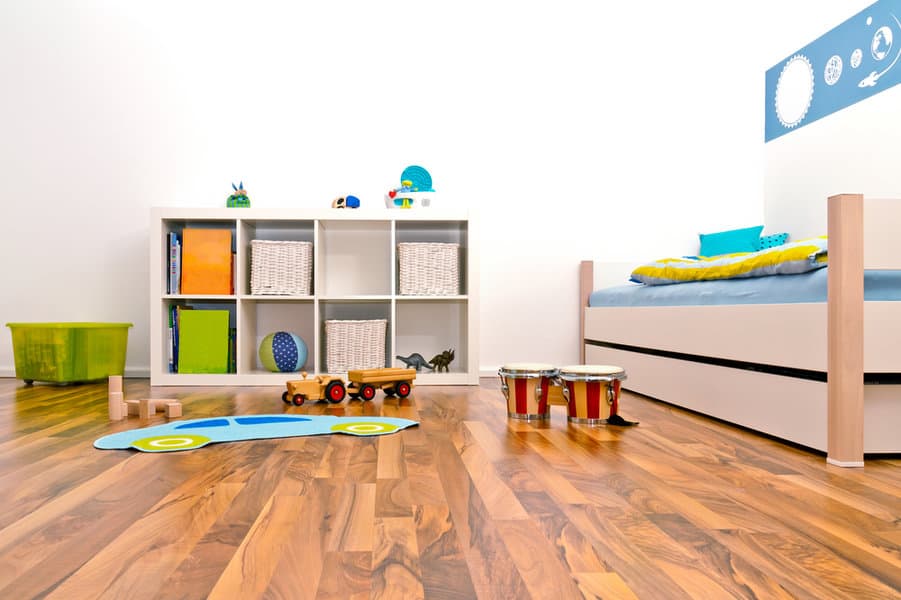
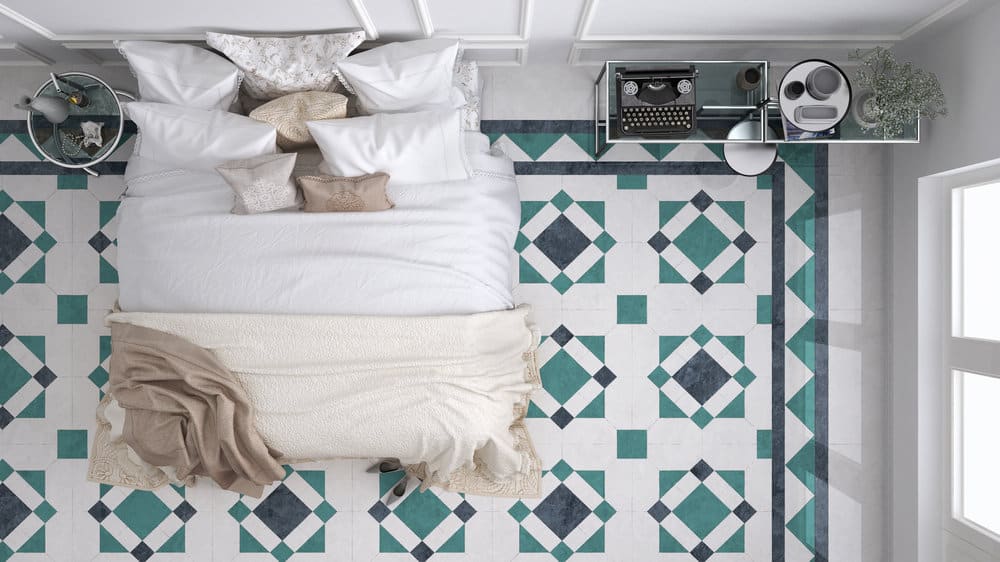
    1. Scaling Furniture to Match Ceiling Height

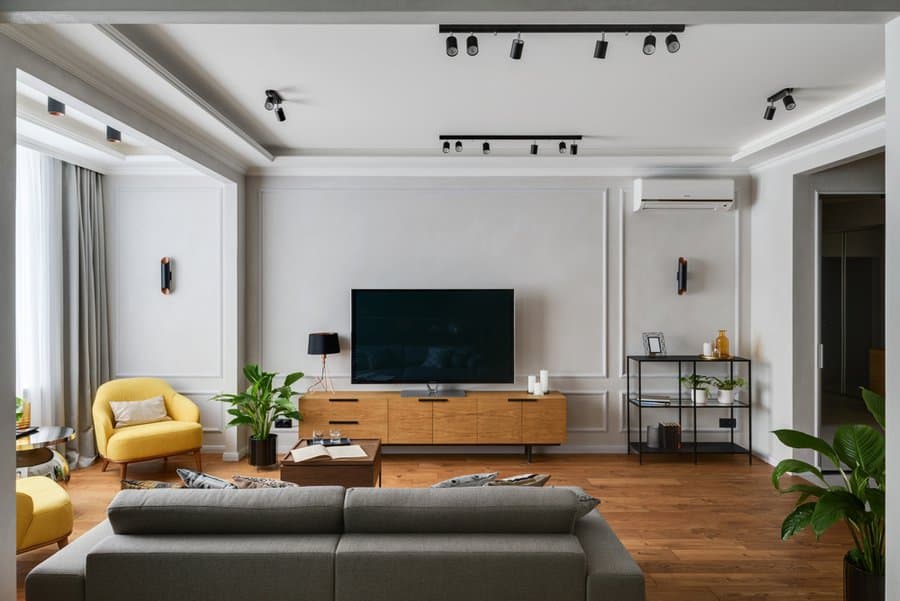
    In a living room with towering ceilings, dainty furniture can look out of place. Opt for larger, bulkier pieces that hold their own in such voluminous settings.

    Consider sofas with taller backrests, chunky armchairs, or even grand bookshelves that stretch upwards.

    However, while scaling up, ensure there’s a balance. Your aim should be furniture that complements the ceiling height without making the room feel congested.

    Lastly, remember that visual balance is key. If you have an oversized coffee table, for instance, pair it with substantial sofas or chairs to ensure harmony in the design landscape.

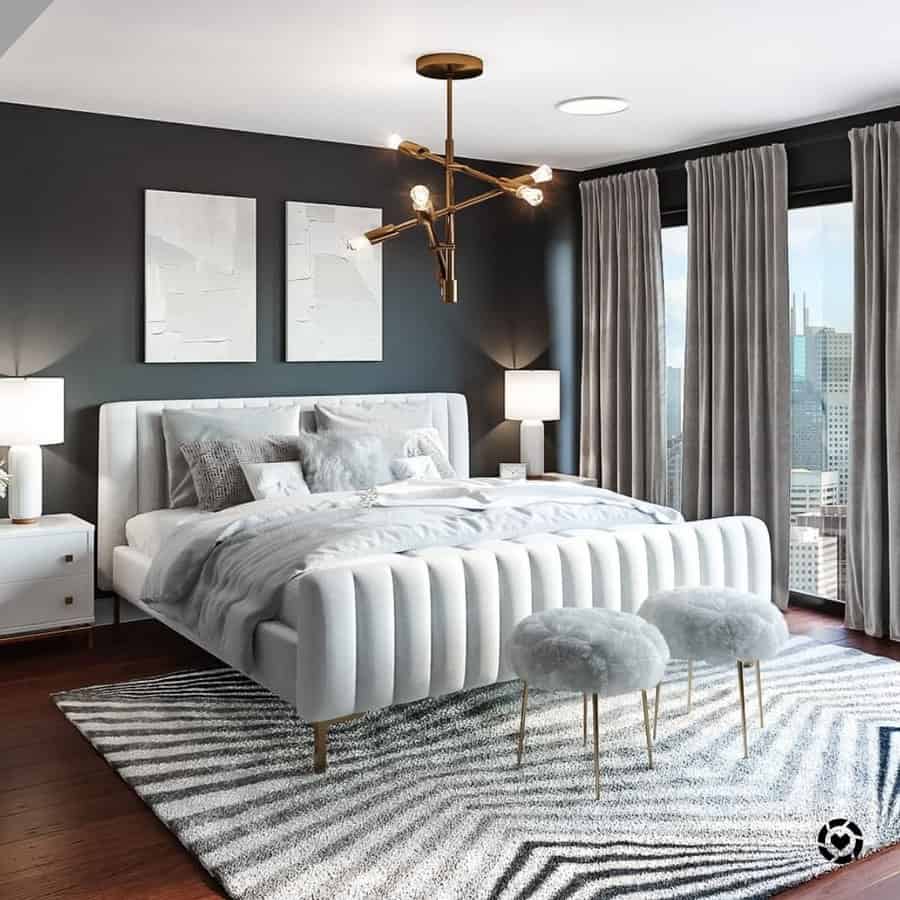
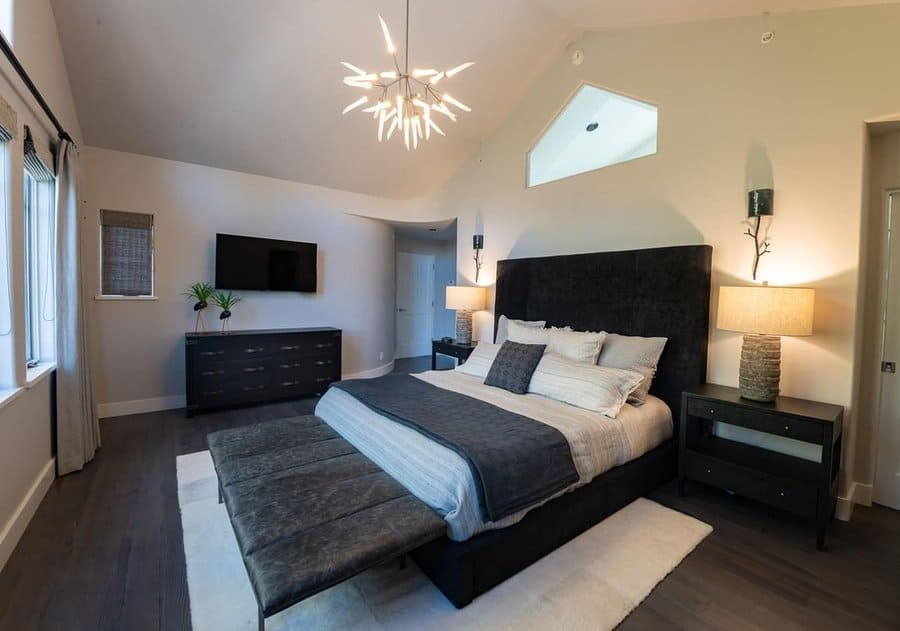
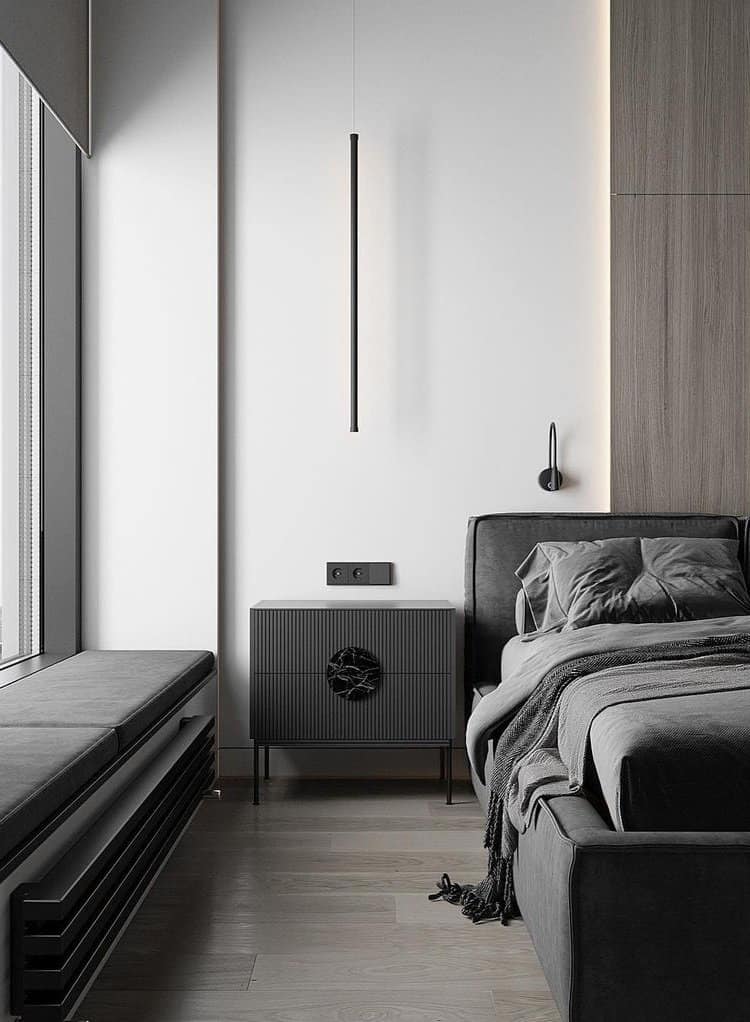
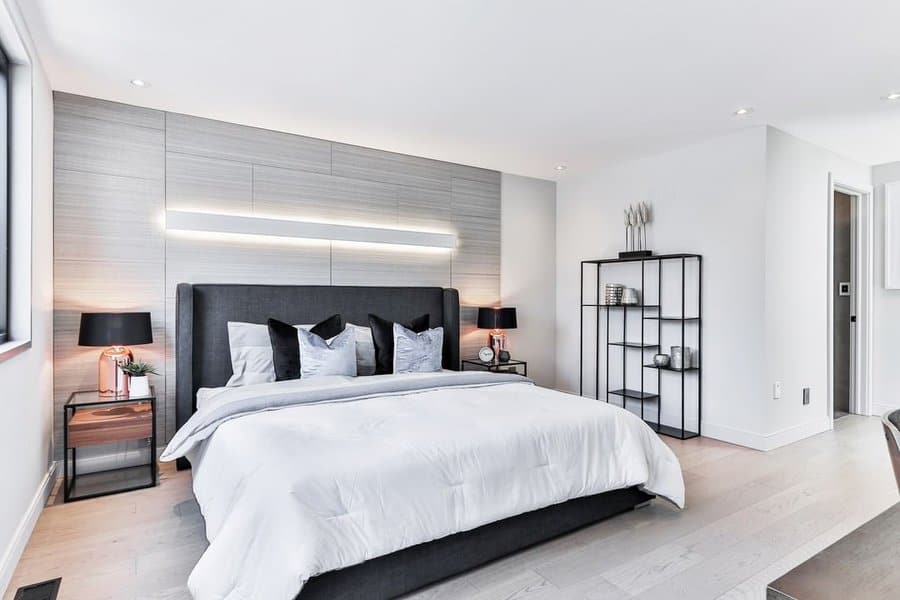
    2. Strategic Lighting: Layers and Vertical Dynamics

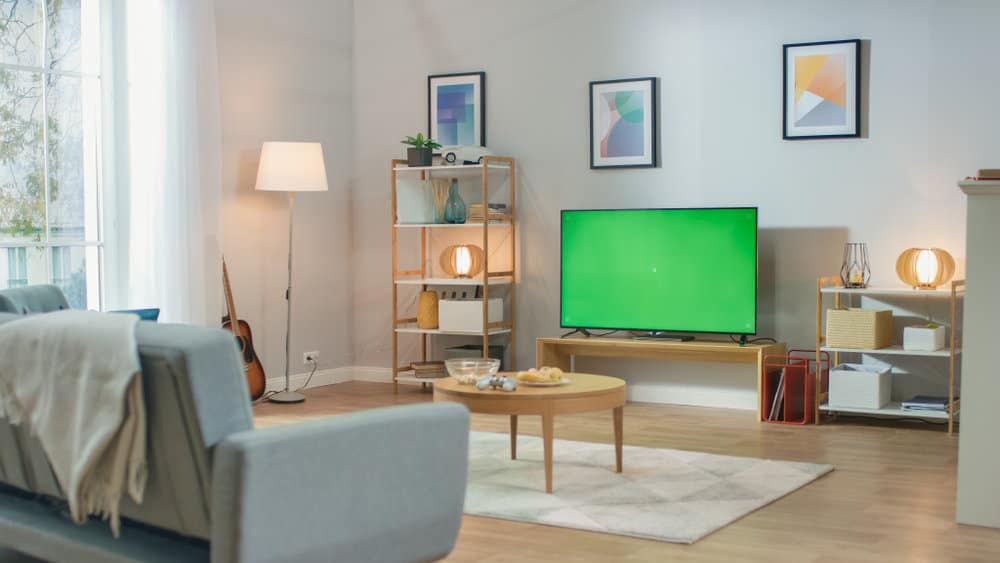
    High ceilings offer a splendid canvas for lighting experiments. Begin by layering light sources to cater to the room’s verticality.

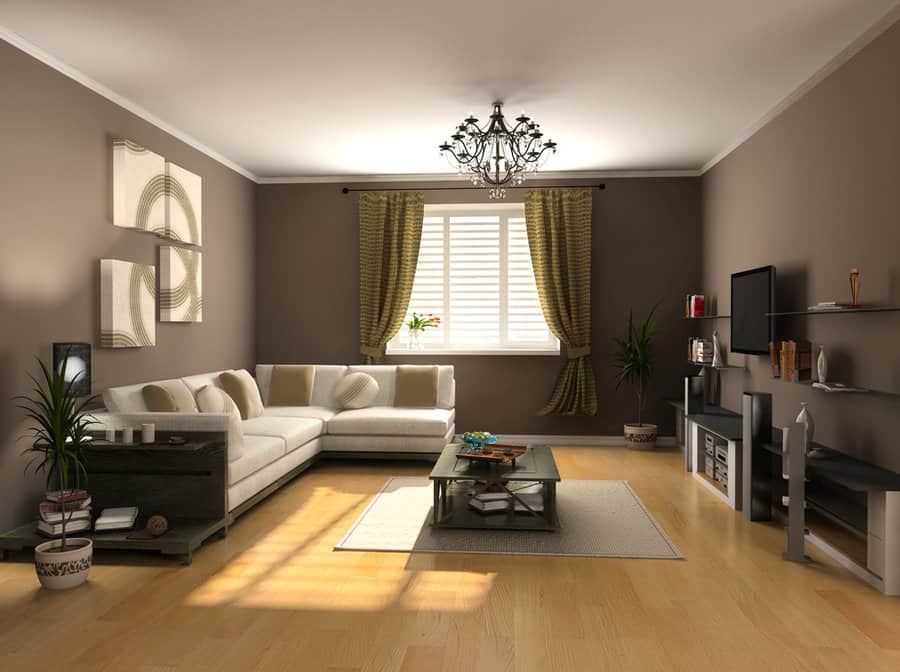
    Downlights, pendants, chandeliers, and uplights can all play a role. A cascading chandelier can bridge the gap between the ceiling and the primary living space, drawing the eye and filling the vertical expanse.

    Wall sconces or vertical light installations can accentuate the height while providing ambient light.
    Multiple light sources, controlled individually, also allow you to set the mood — bright and airy for the day, cozy and intimate for the night.

    Read also: 56 Living Room Lighting Ideas

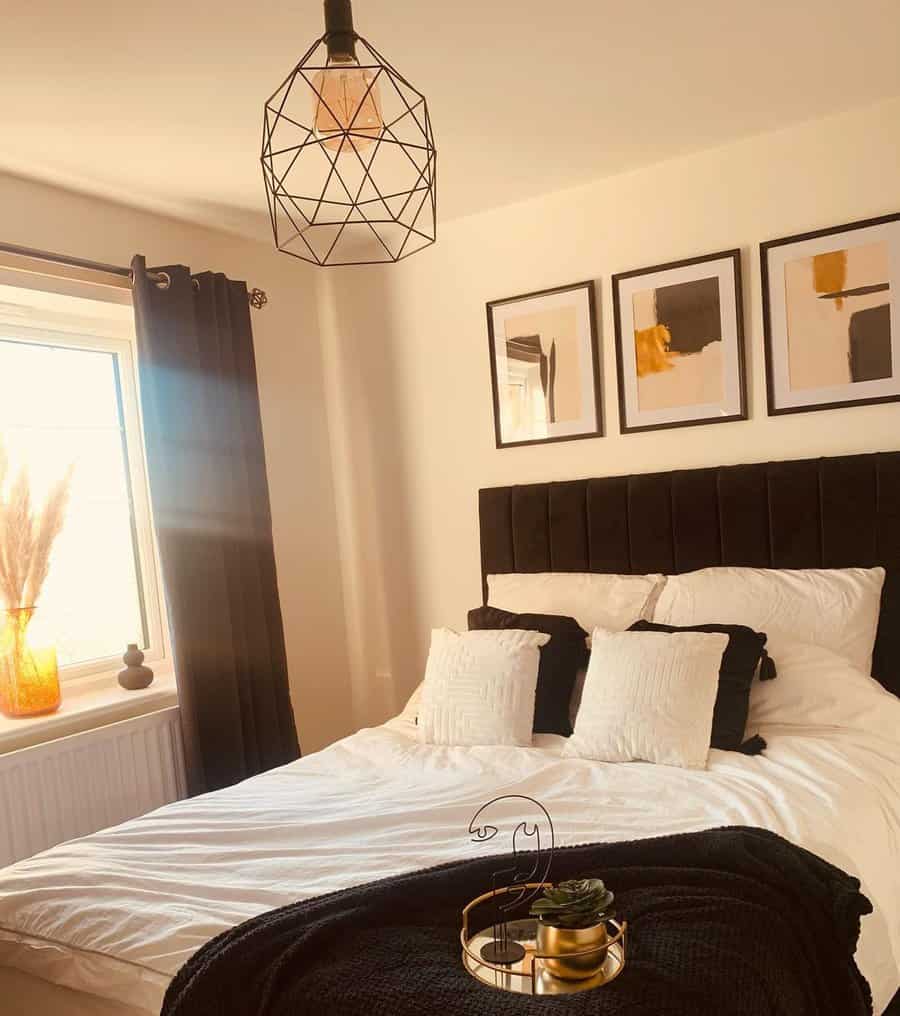
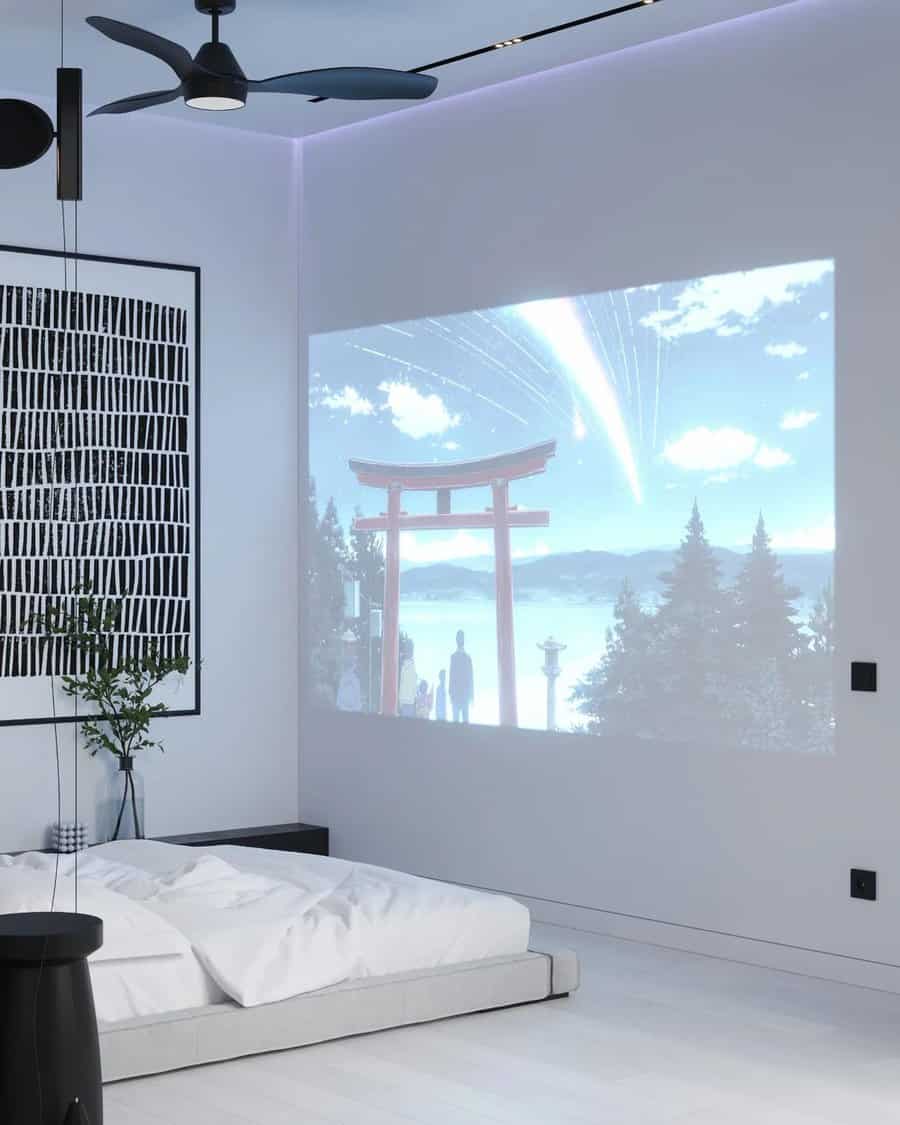
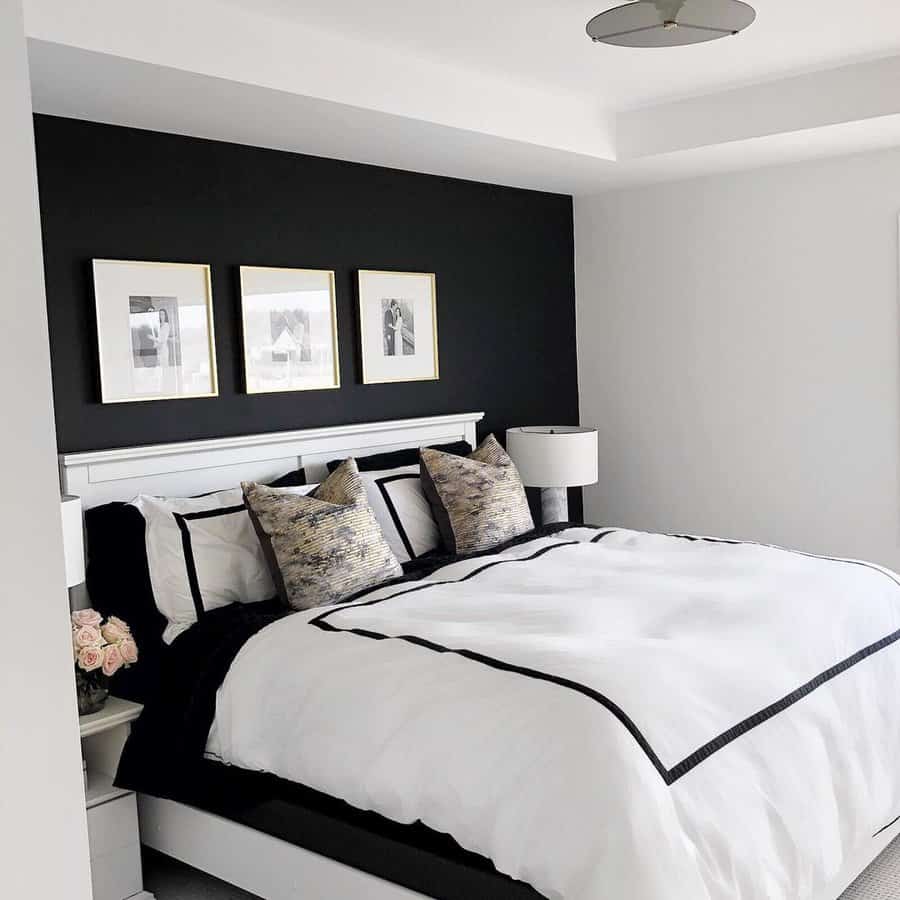
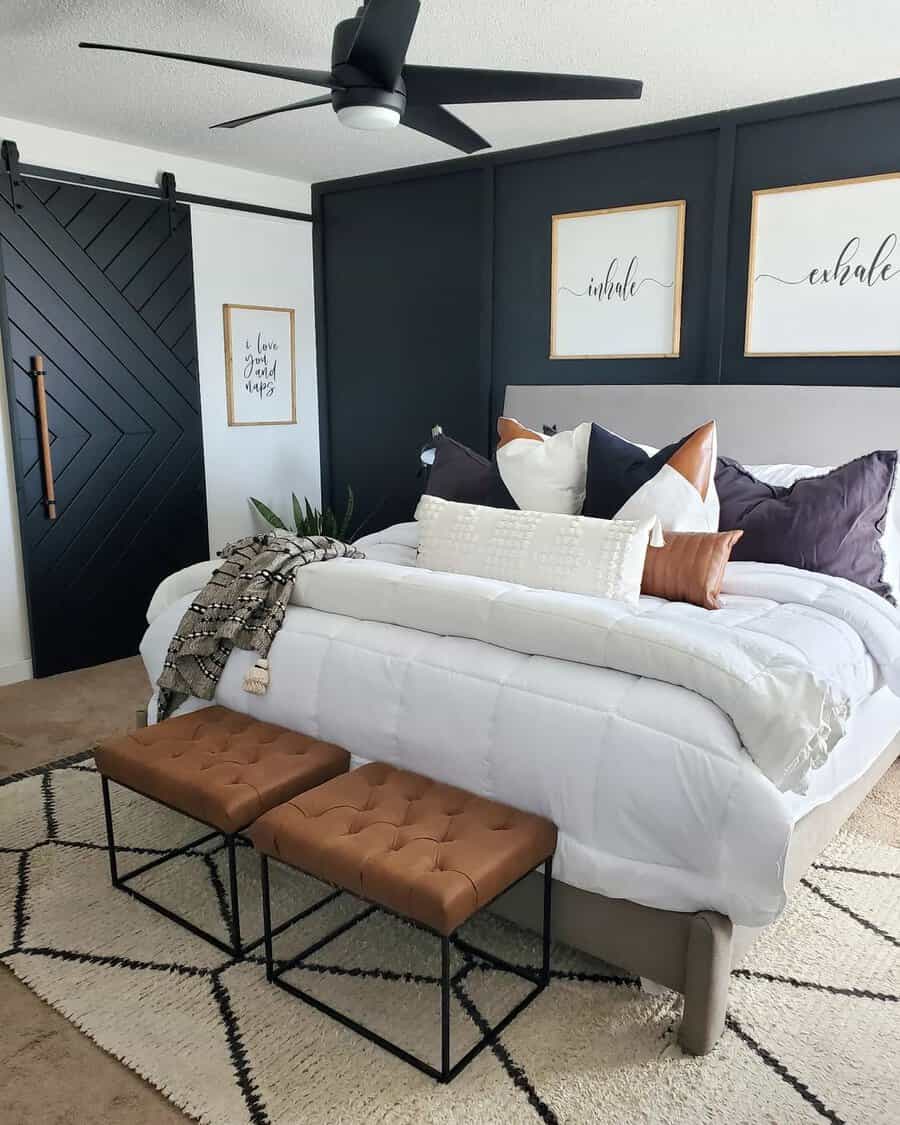
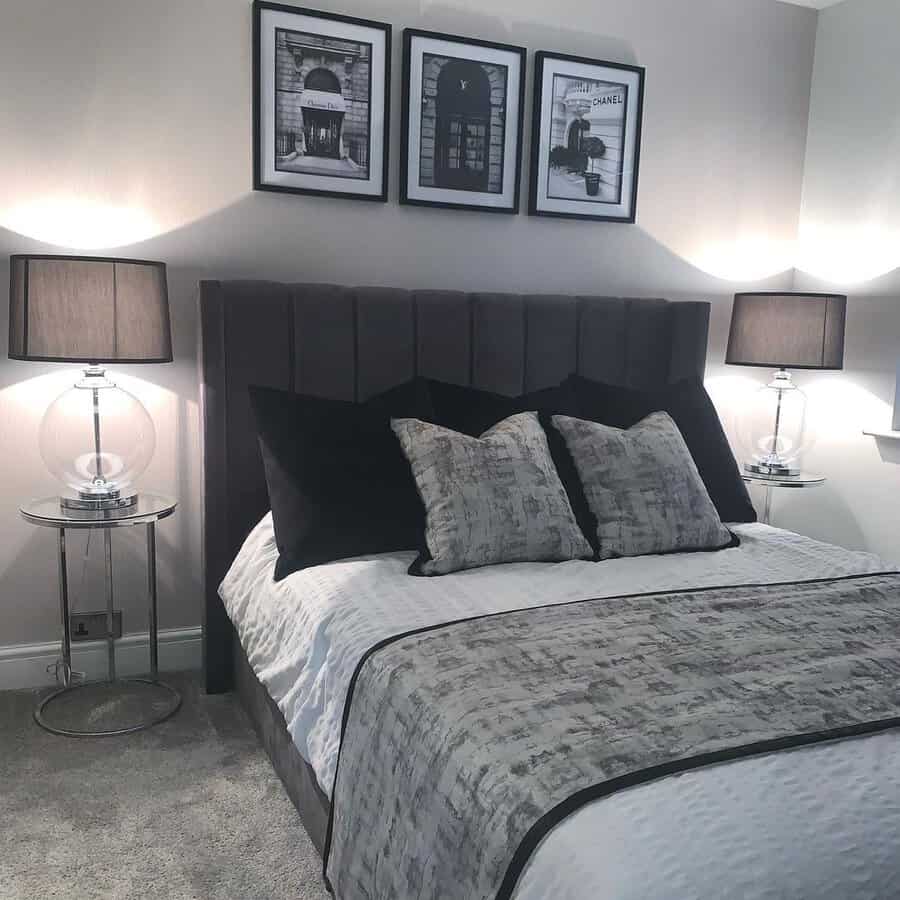
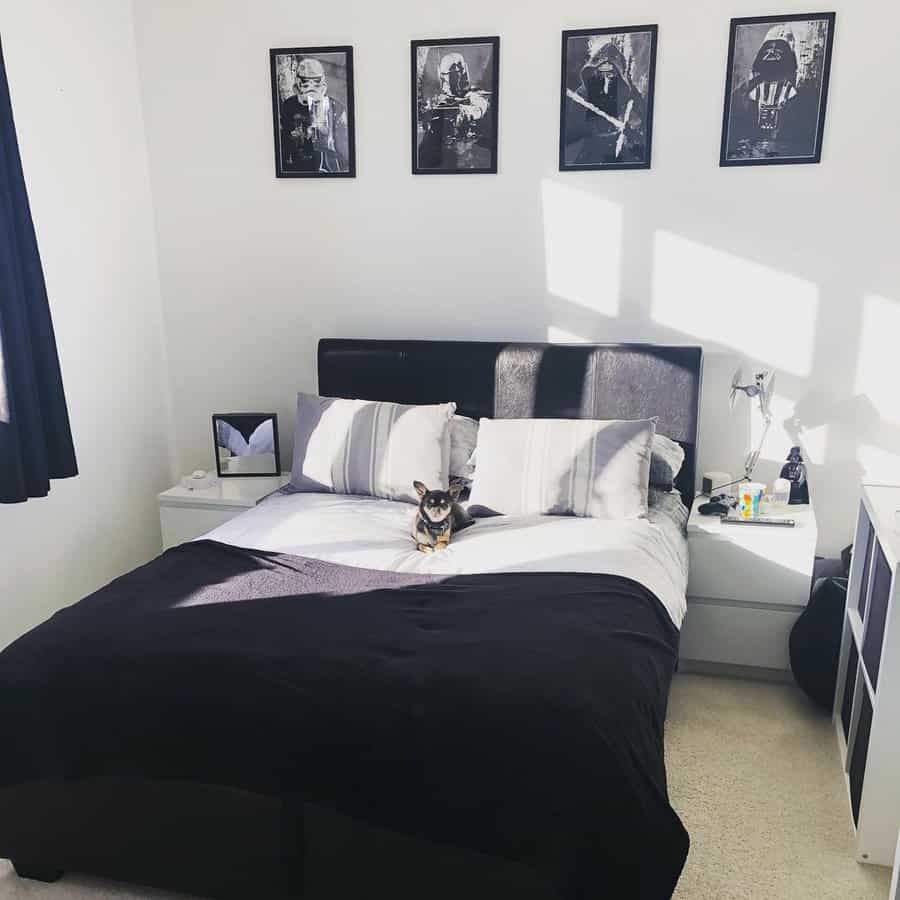
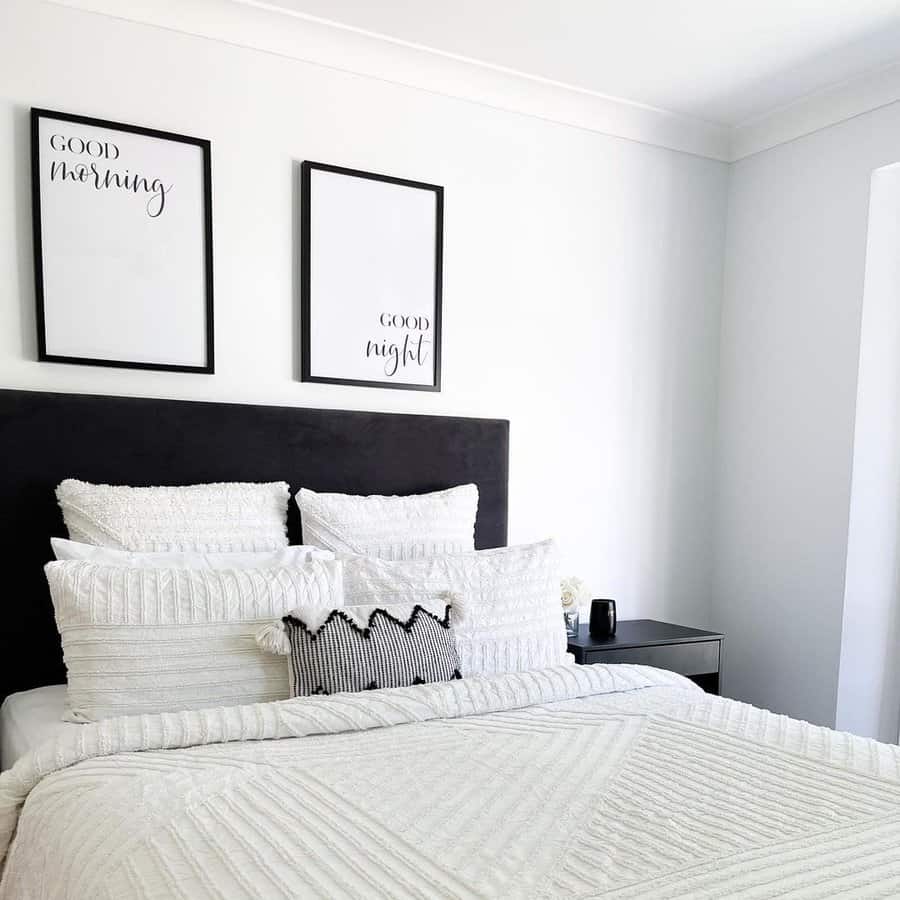
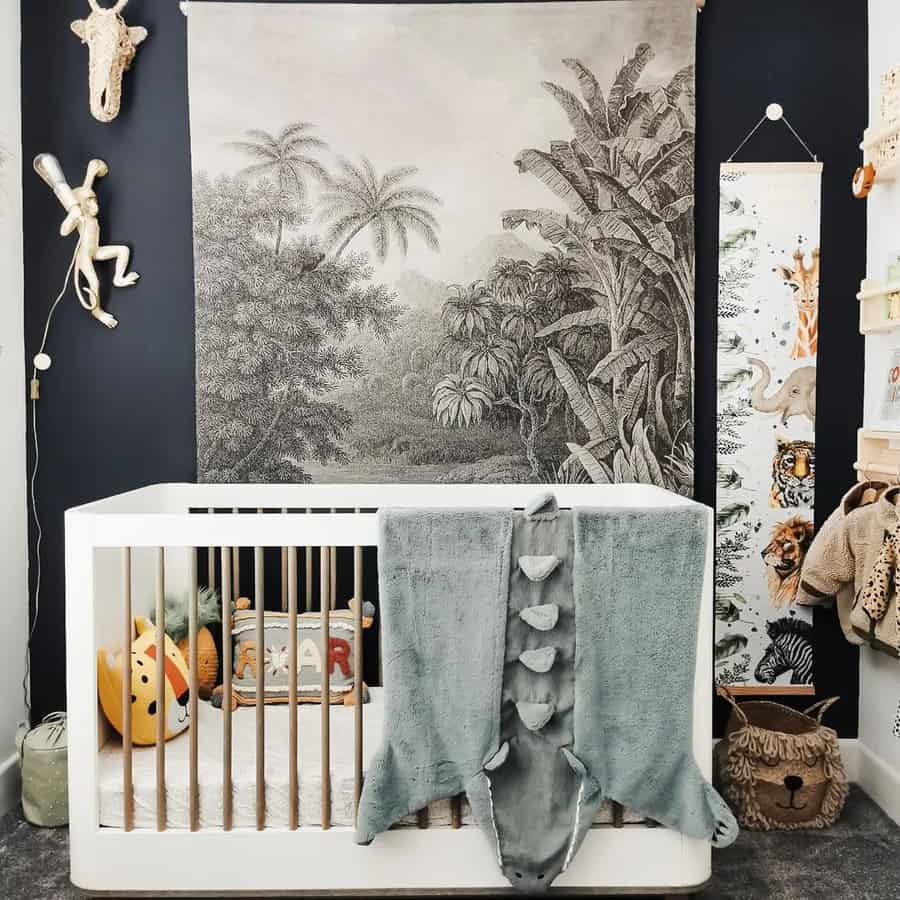
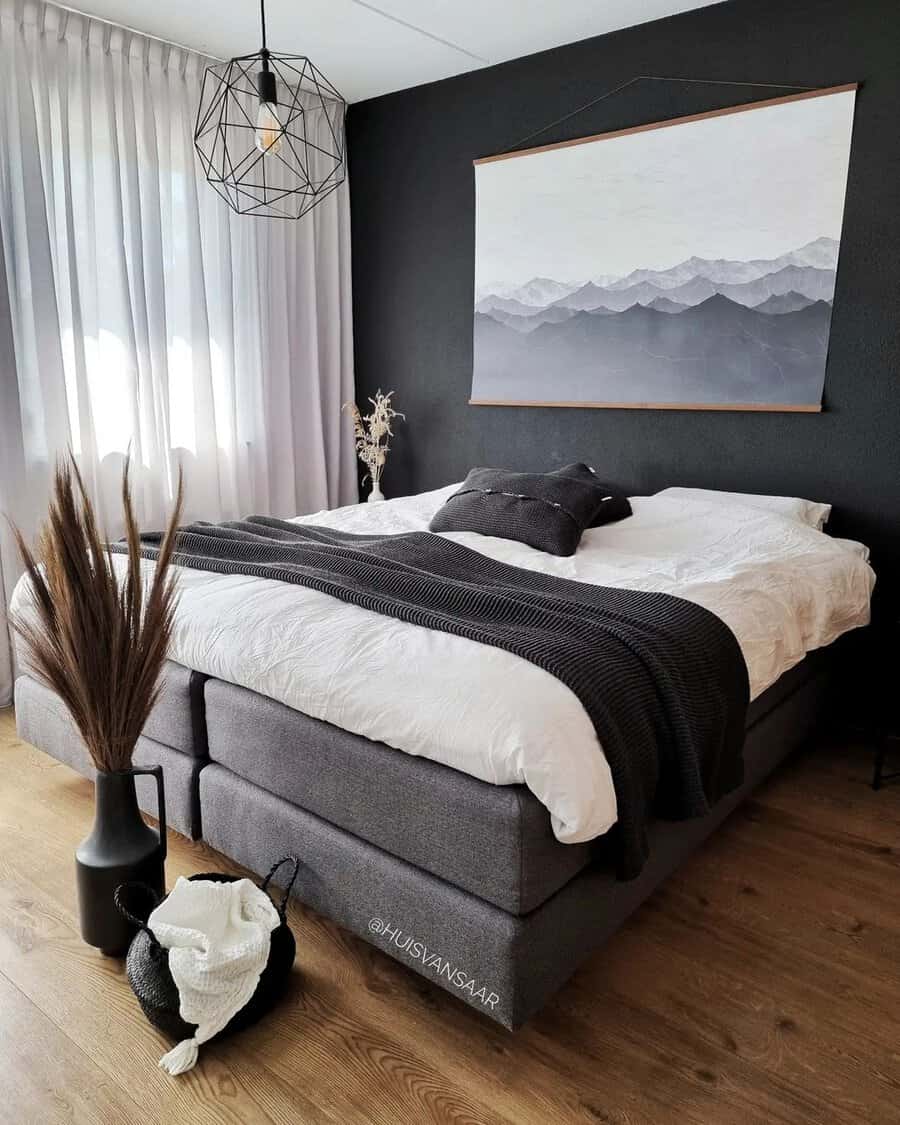
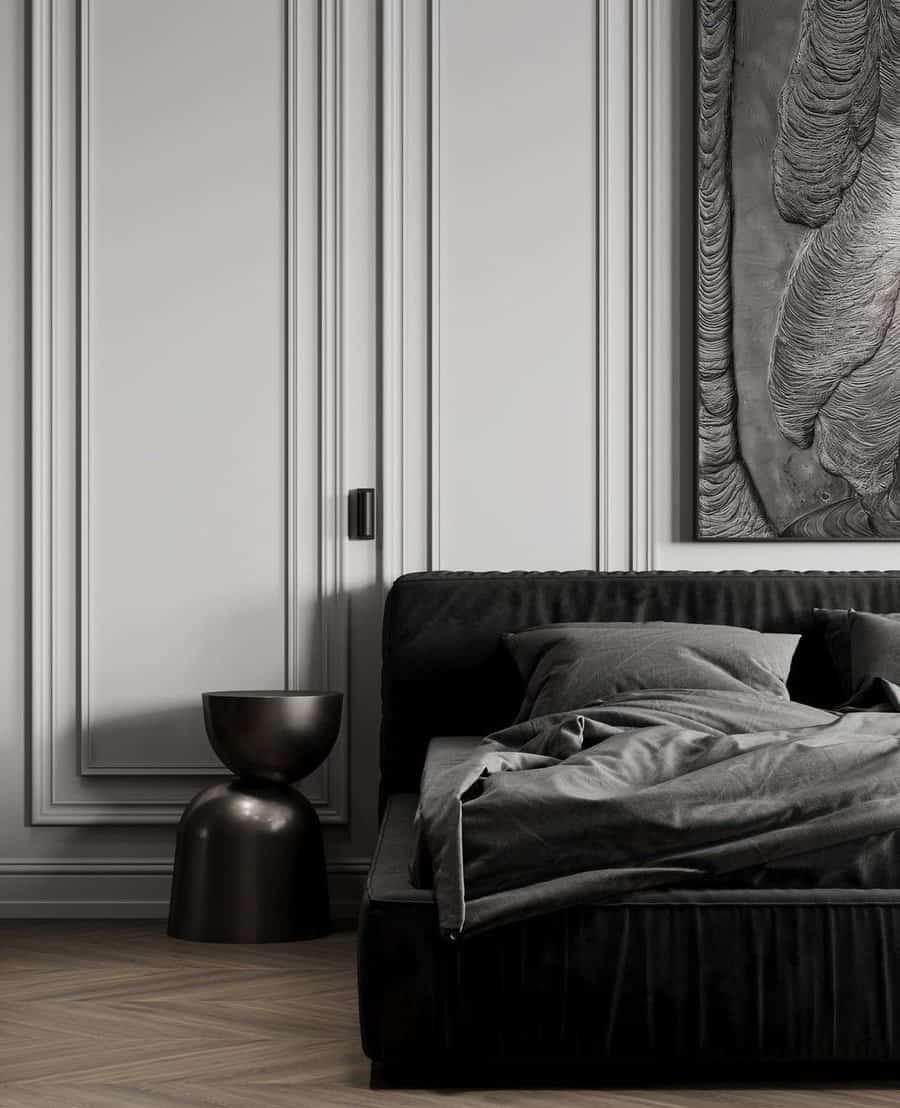
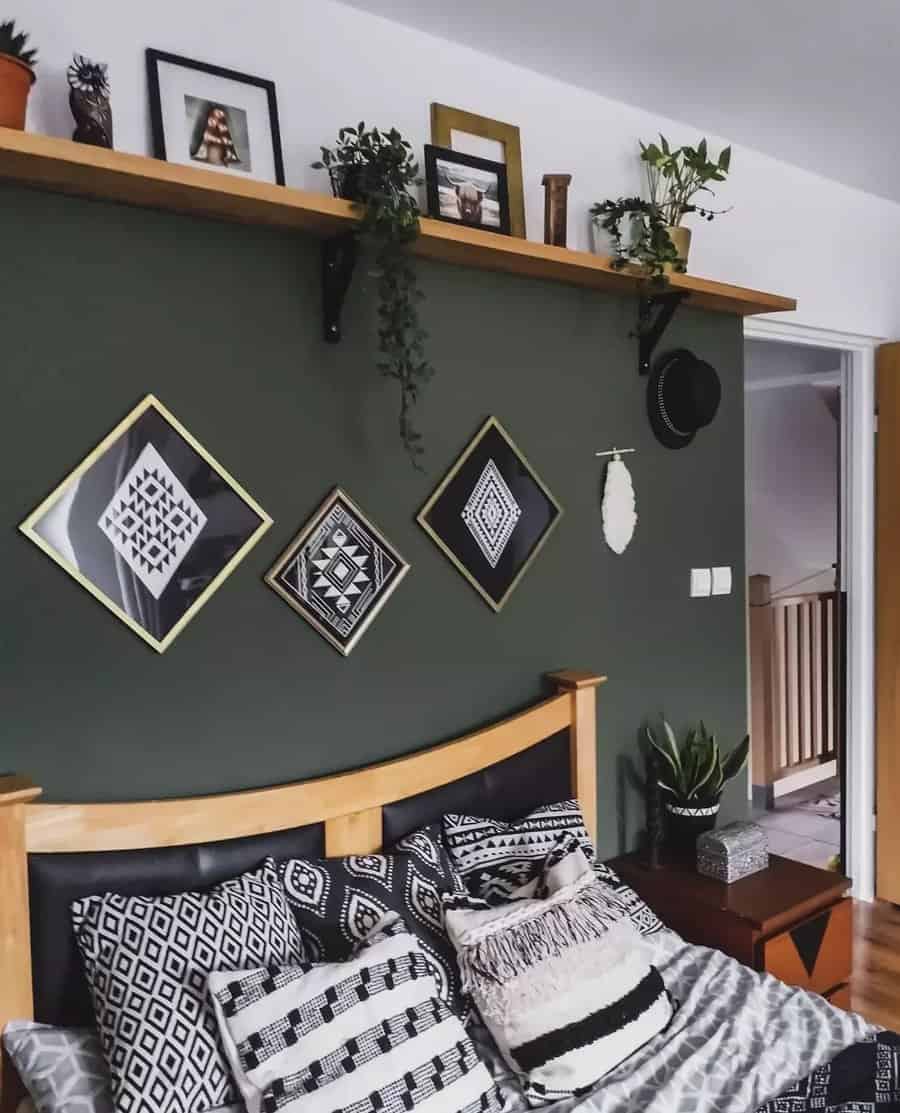
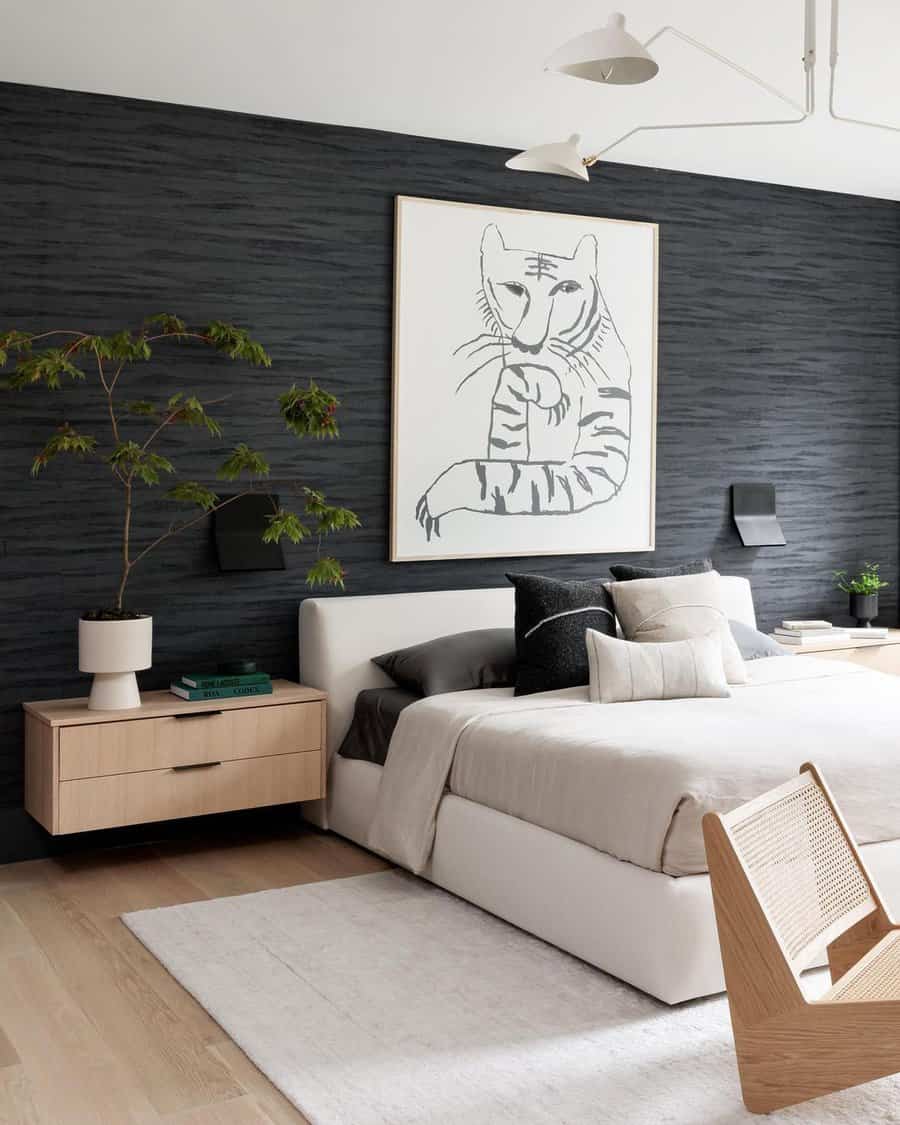
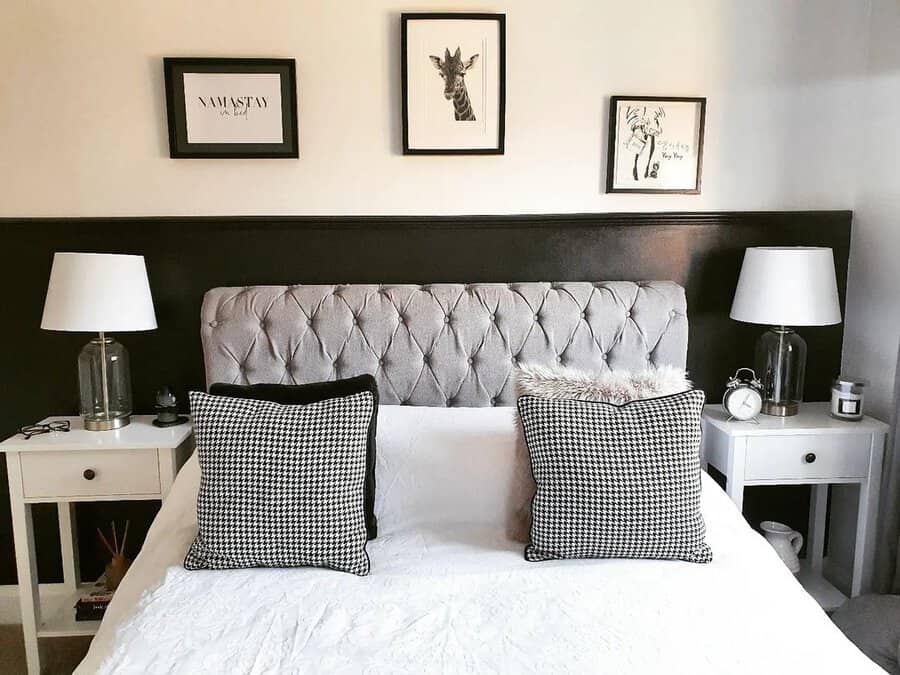
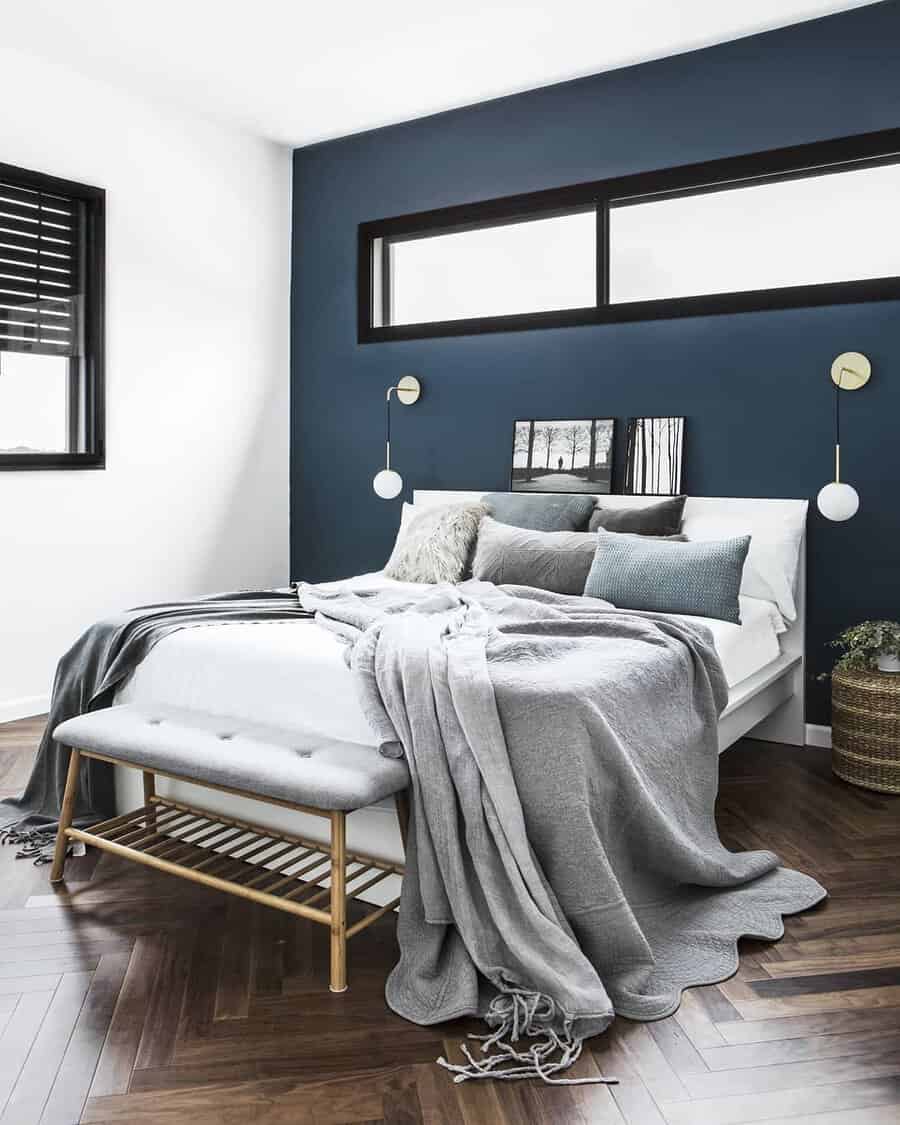
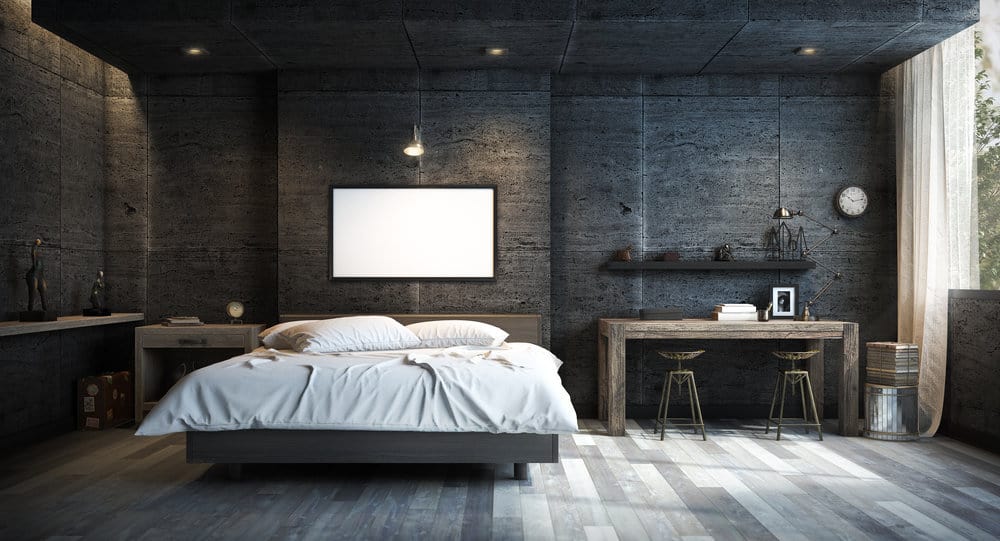
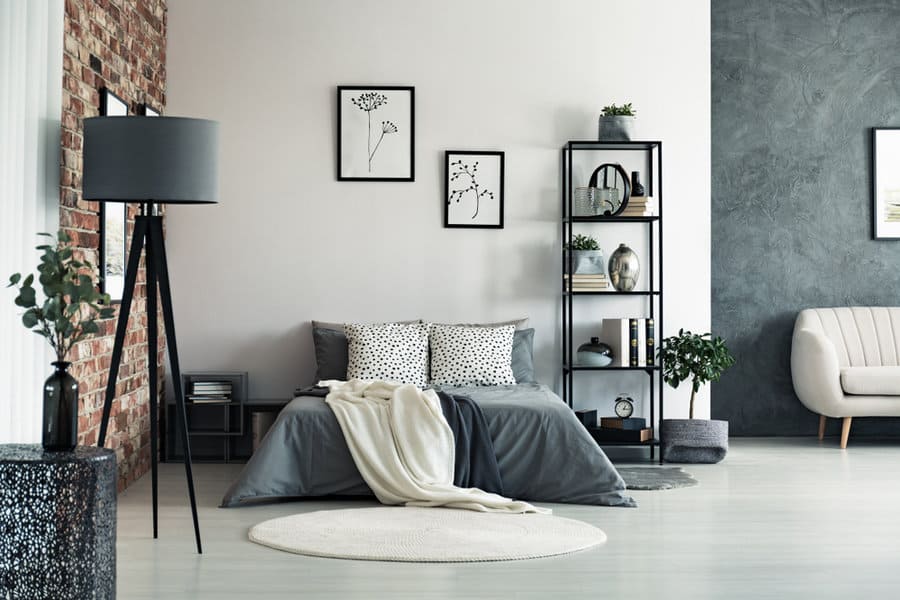
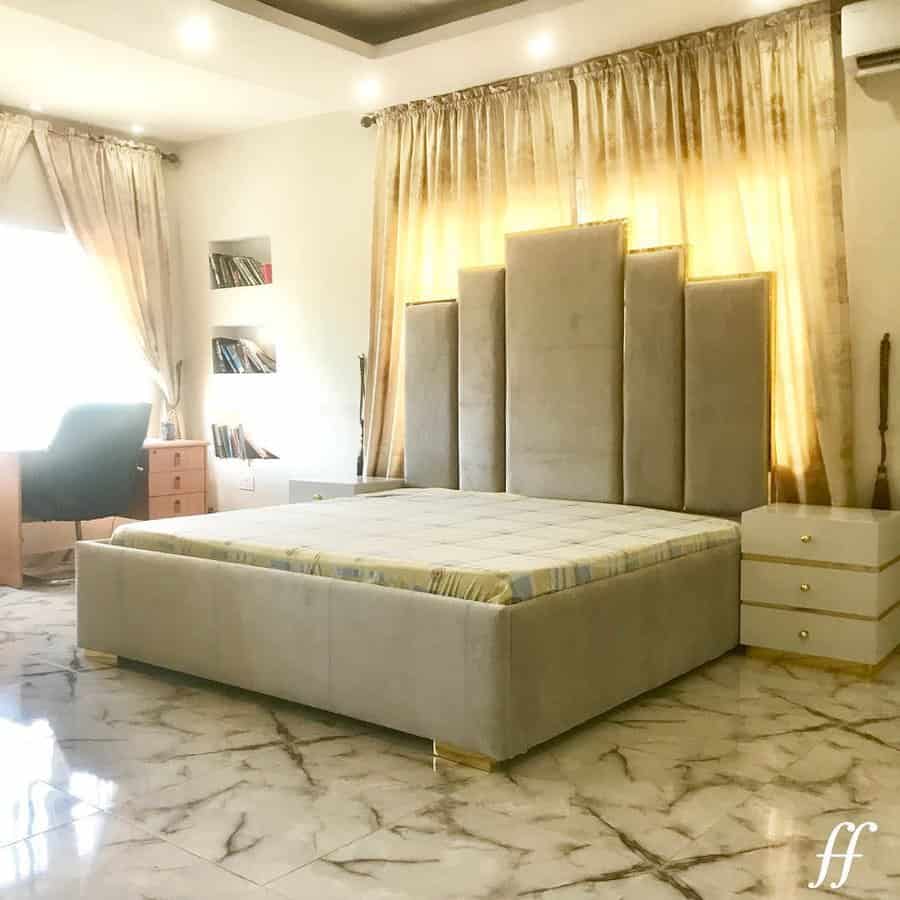
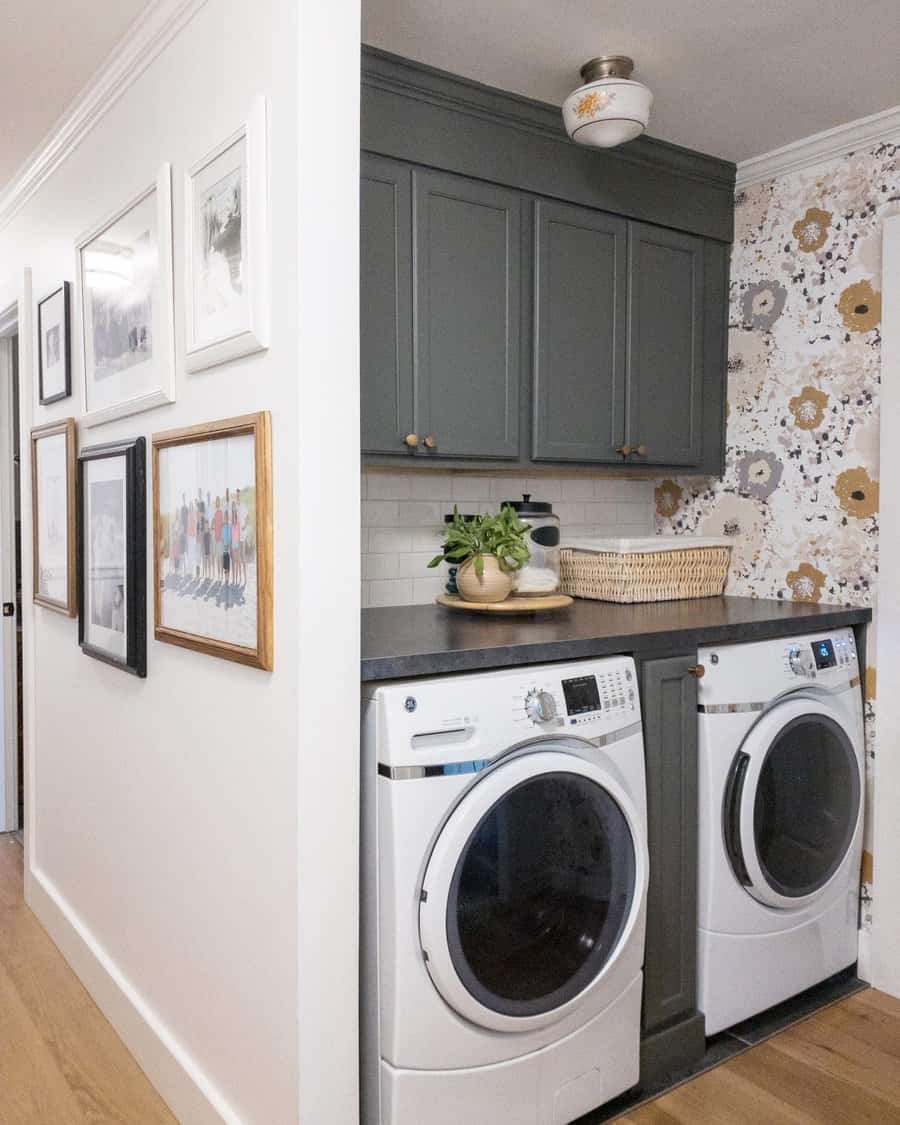
    3. Wall Art and Decor: Going Vertical

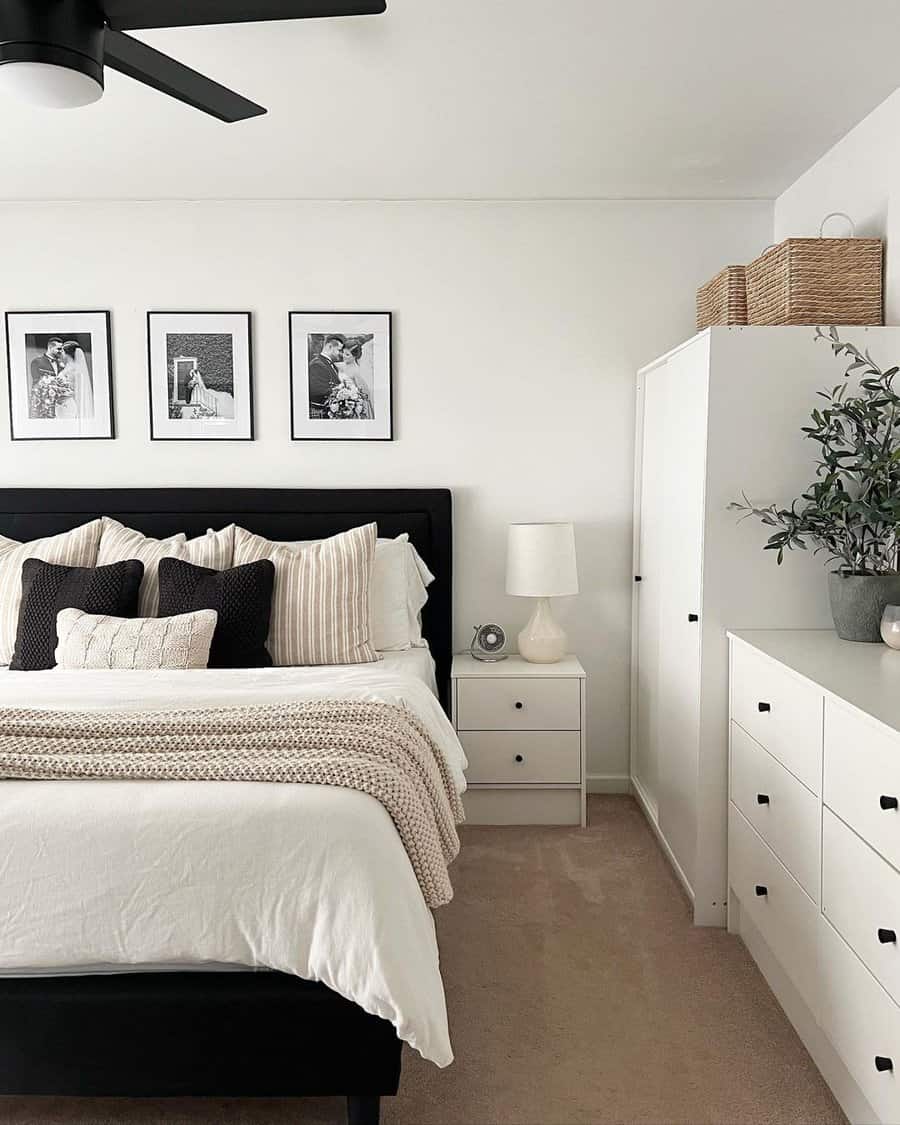
    In spaces graced with high ceilings, walls can seem expansive and intimidating. However, they’re also a golden opportunity to make a visual statement.

    Start by considering tall pieces of art or tapestries that can anchor the space. These pieces shouldn’t just be broad but elongated, guiding the viewer’s eyes upward.

    If one significant piece feels overpowering, consider a vertical gallery wall, stacking artworks or photographs from floor to ceiling. This arrangement can lend a dynamic, curated feel to the room.

    Moreover, when selecting frames, colors, and themes, ensure they align with the room’s overall design language. You want the art to feel integrated, not isolated. Mixing textures, such as metal wall sculptures with painted canvases, can also add depth and intrigue to your vertical space.

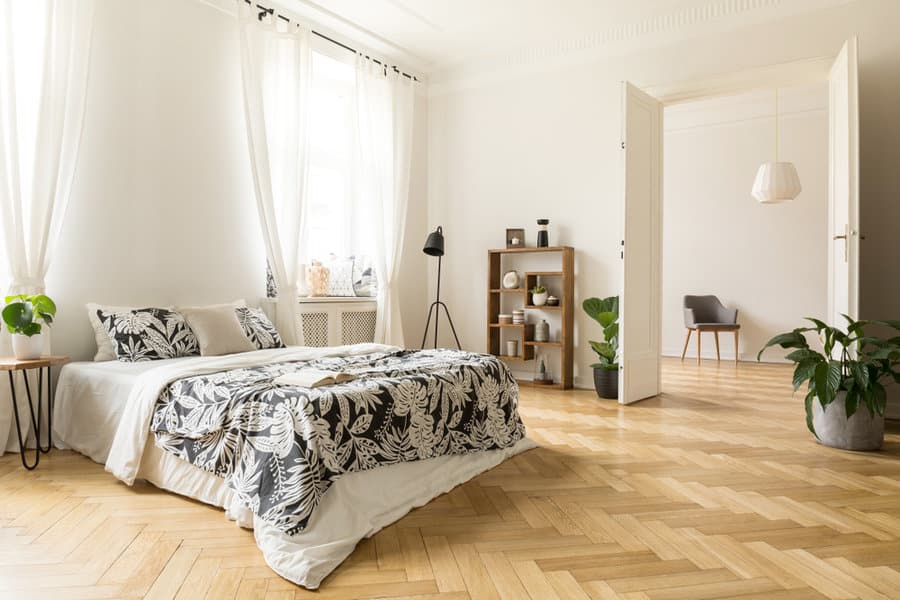
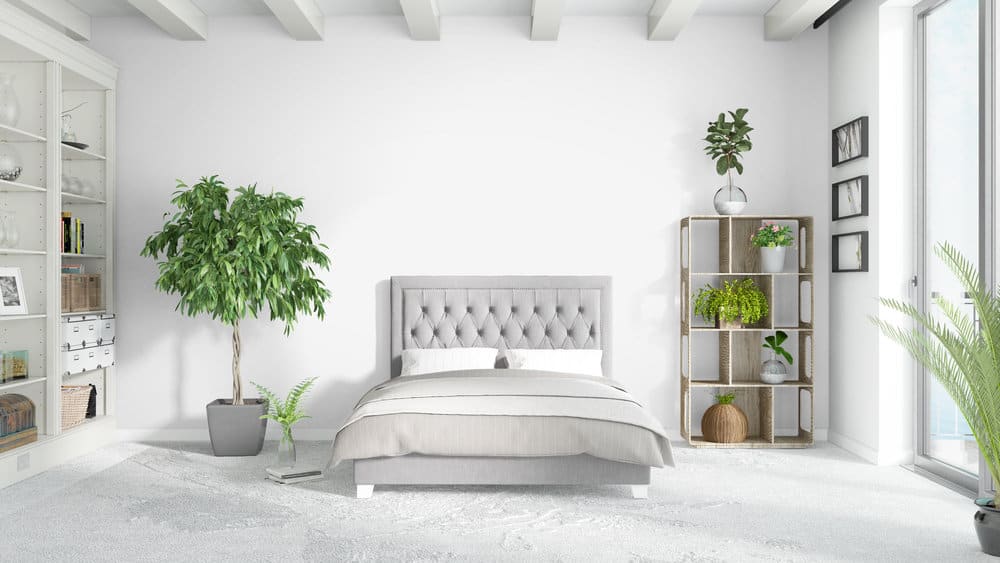
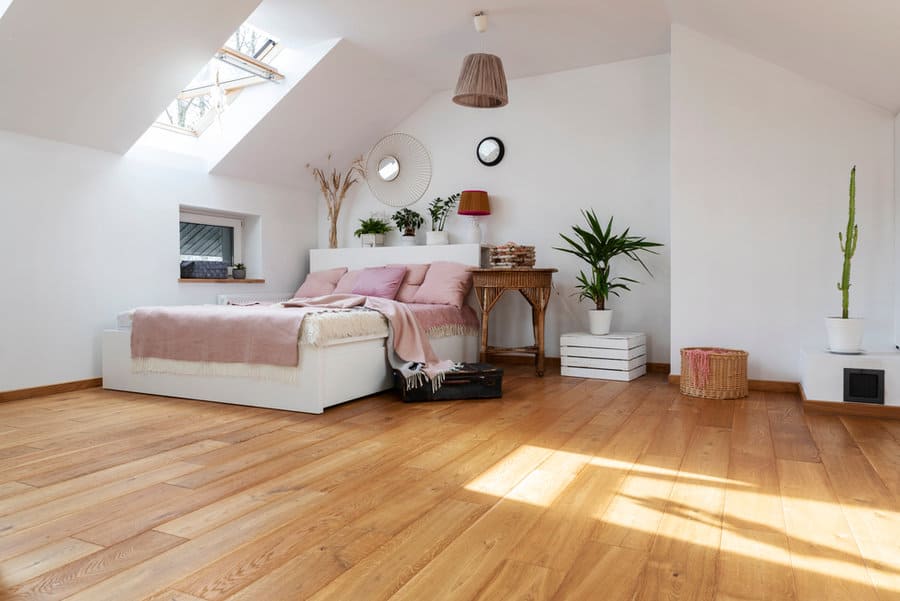
    4. Incorporating Tall Plants and Trees

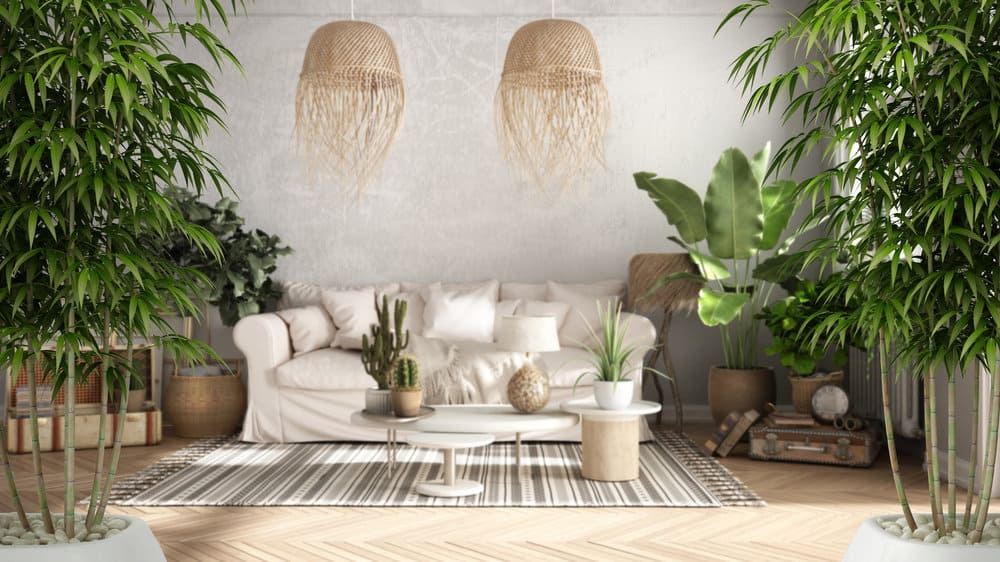
    High-ceilinged rooms provide an ideal setting for showcasing impressive indoor trees and plants. Embracing these natural elements can transform your space into an urban oasis.

    The Bird of Paradise stands tall with its sculptural leaves, making it a perfect choice for vertical appeal. The Dracaena, with its long, slender trunk and tufted top, is another option that can reach considerable heights.

    Palm trees, like the majestic Kentia Palm or the fan-like Lady Palm, introduce a touch of the tropics and can grow tall, filling in those vertical gaps nicely.

    Don’t forget about the Bamboo plant which can add a touch of Zen while embracing the room’s height. And, if you’re looking for something a tad unconventional, consider the Norfolk Island Pine, an indoor-friendly tree that brings a hint of the forest into your living room.

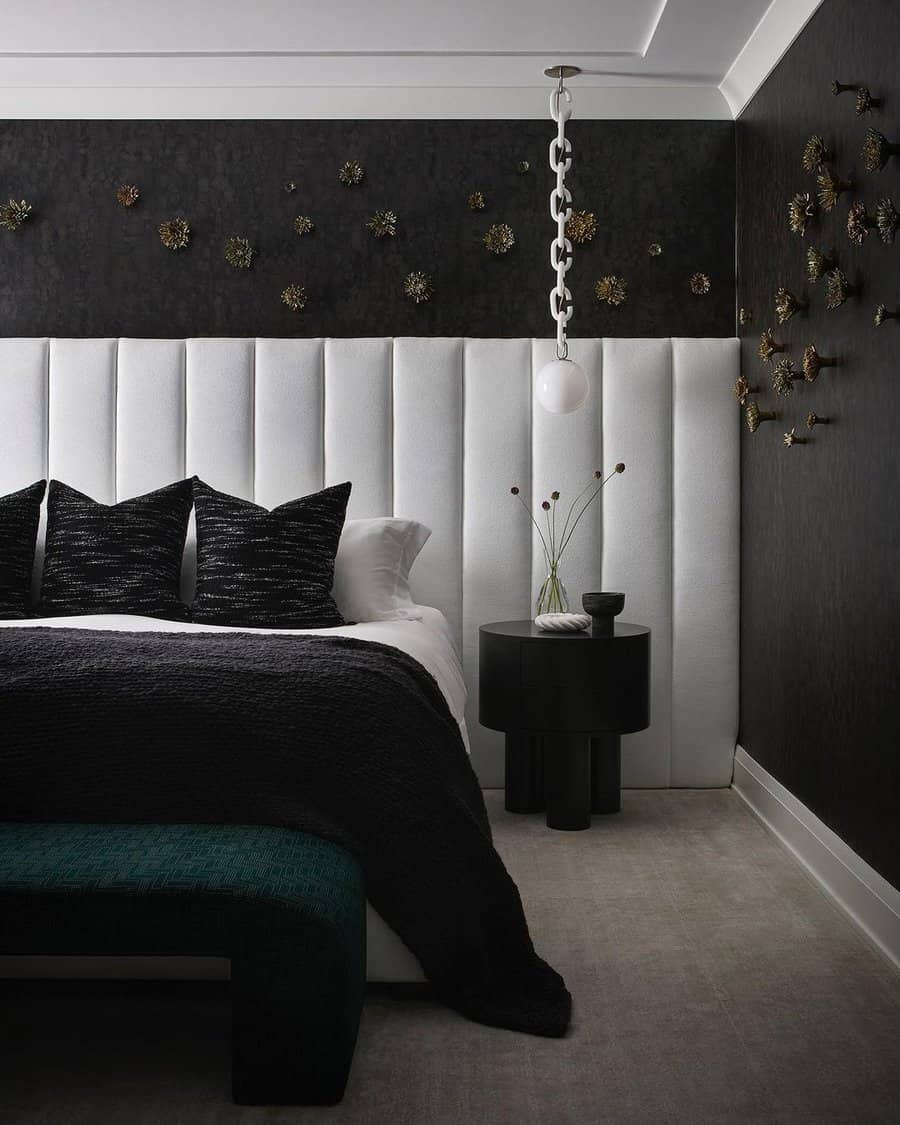
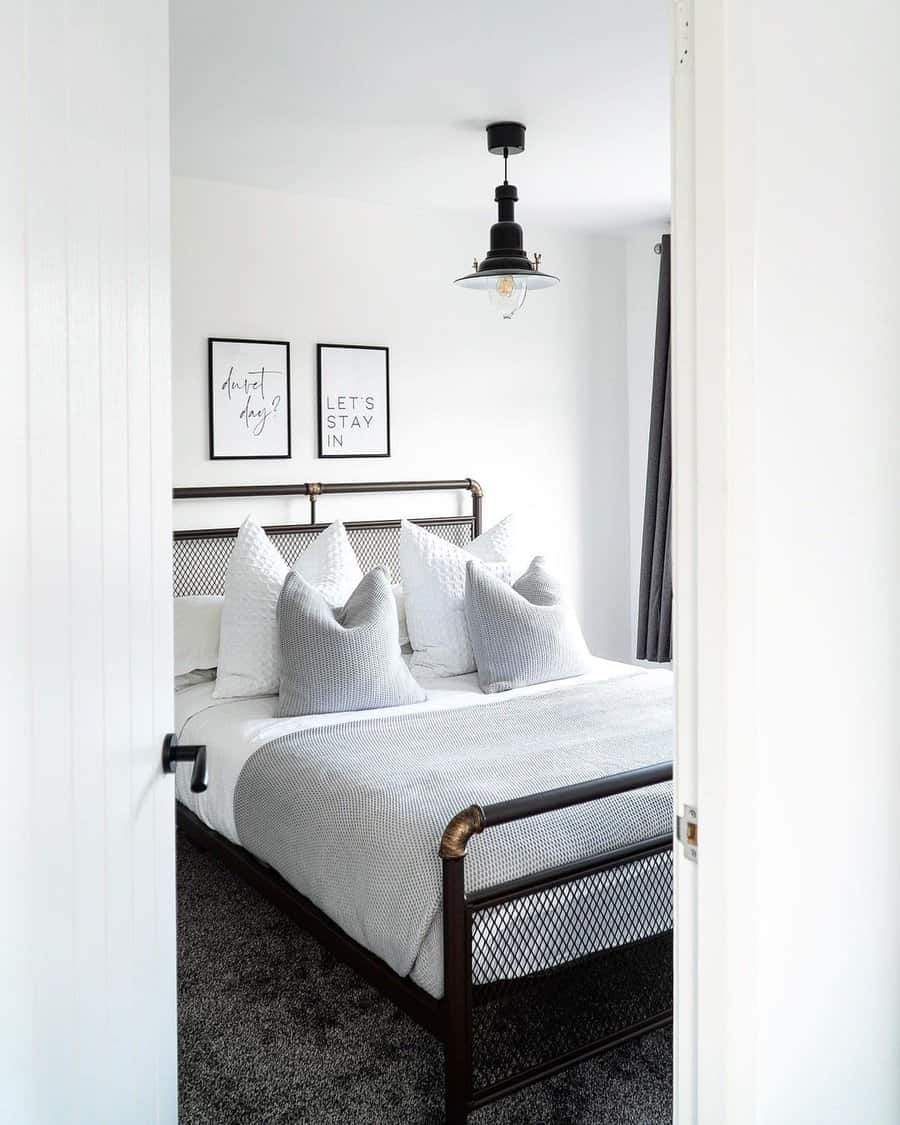
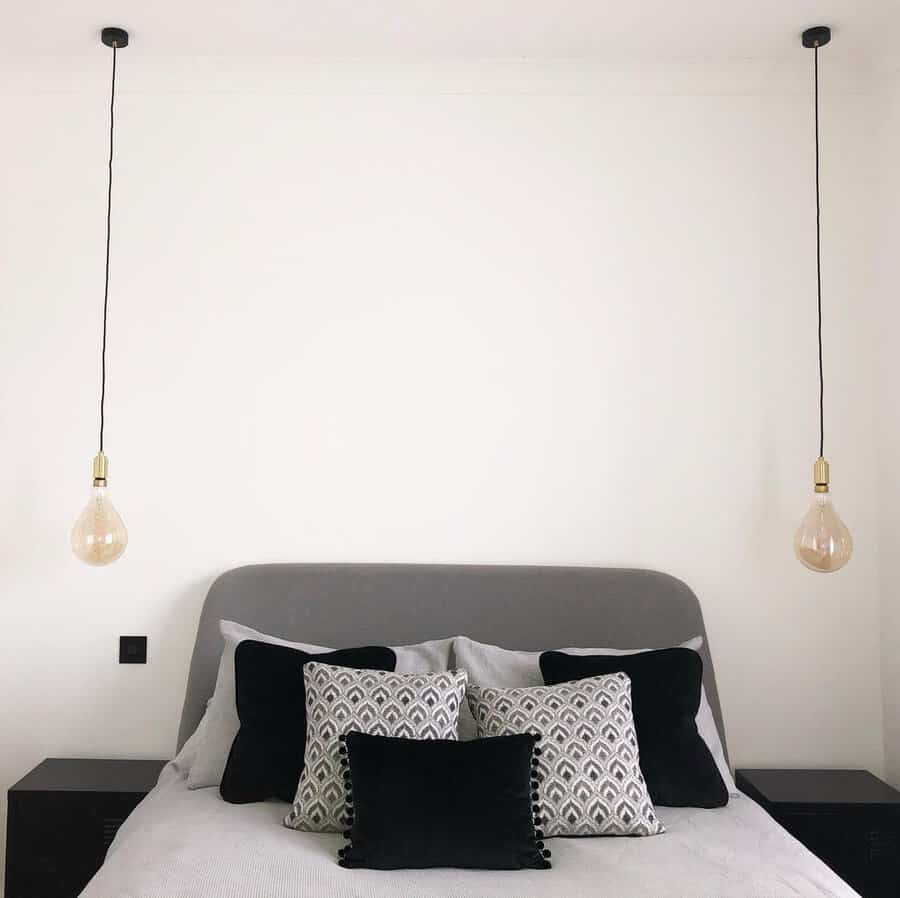
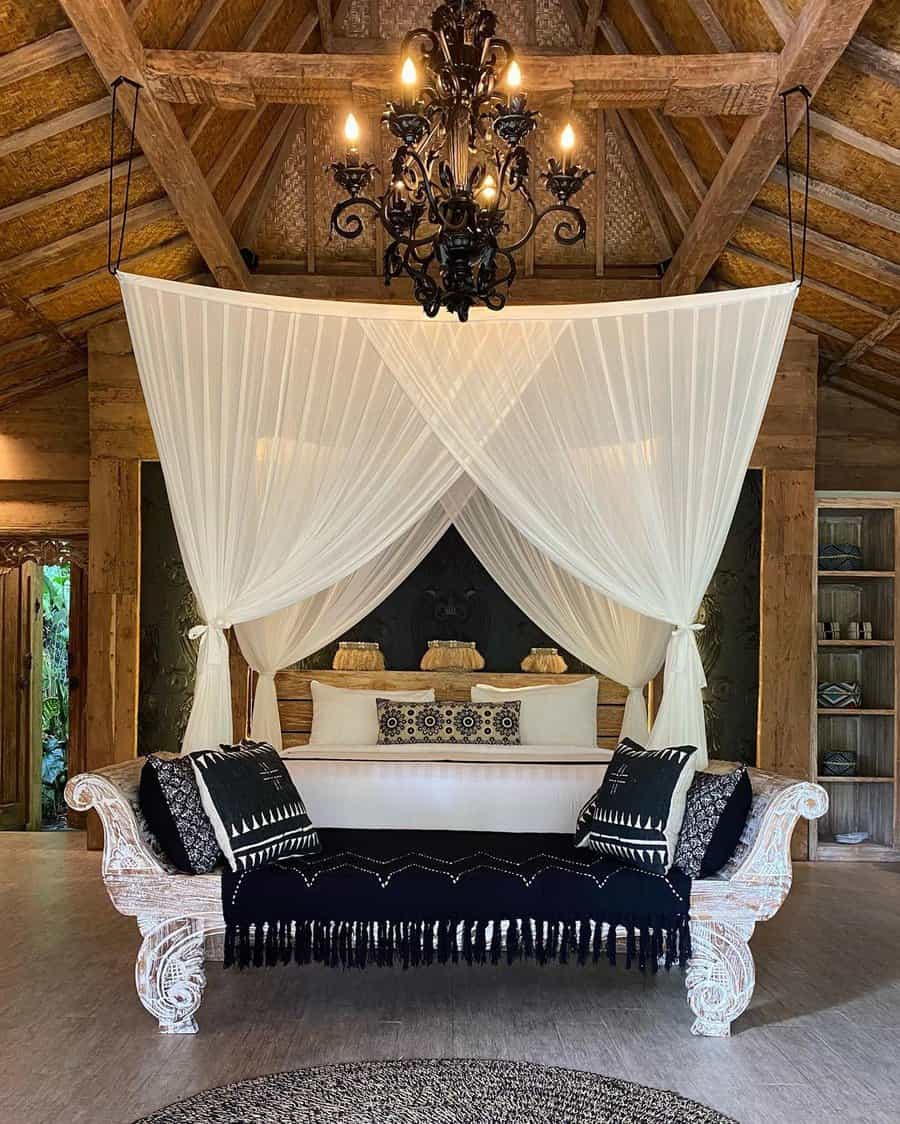
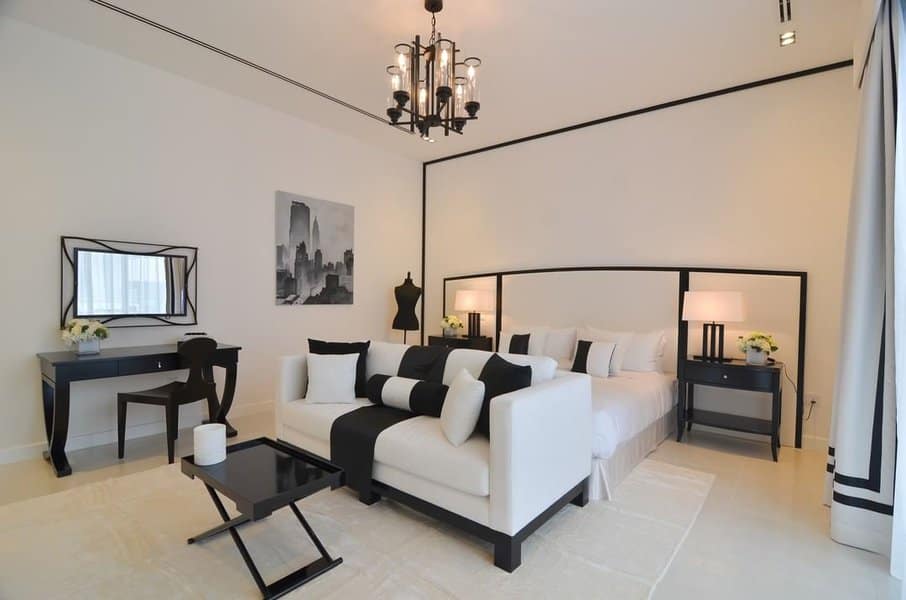
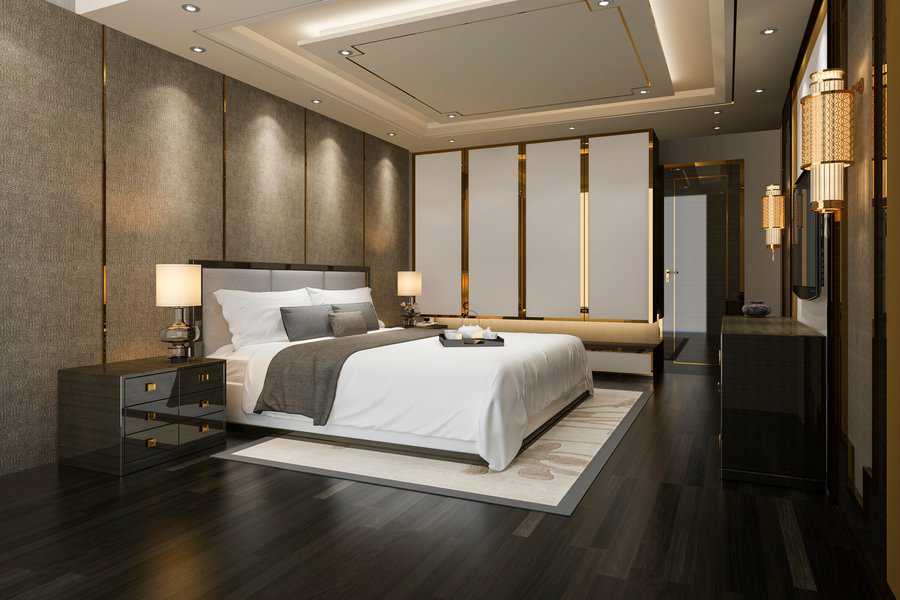
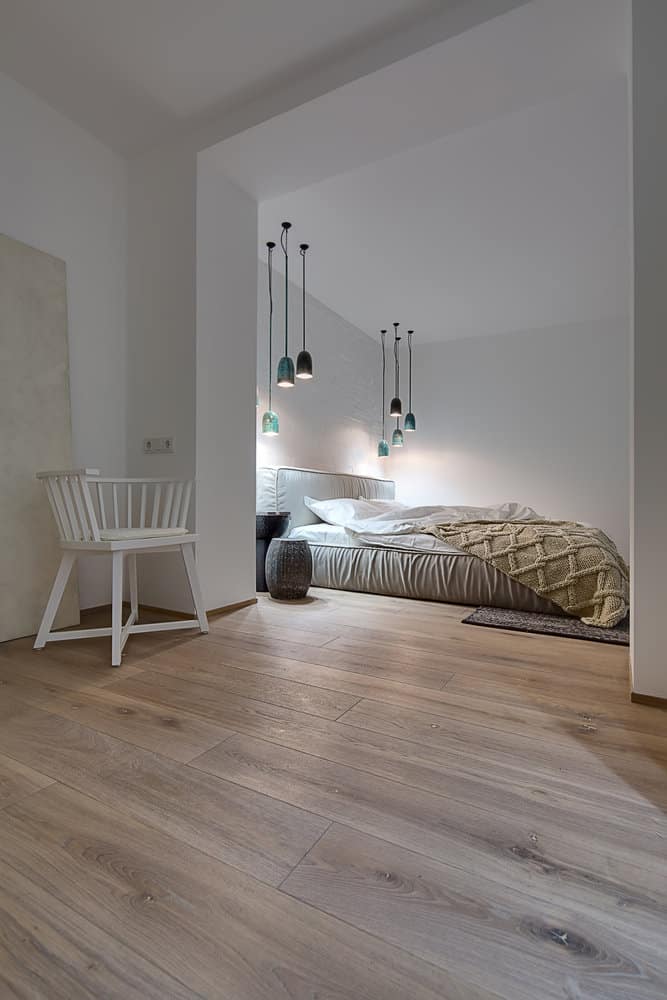
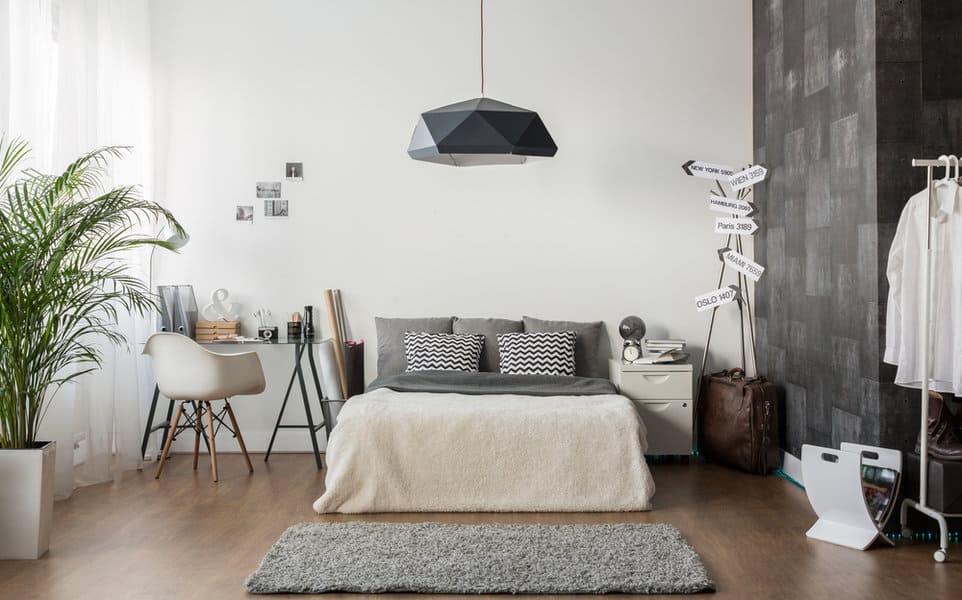
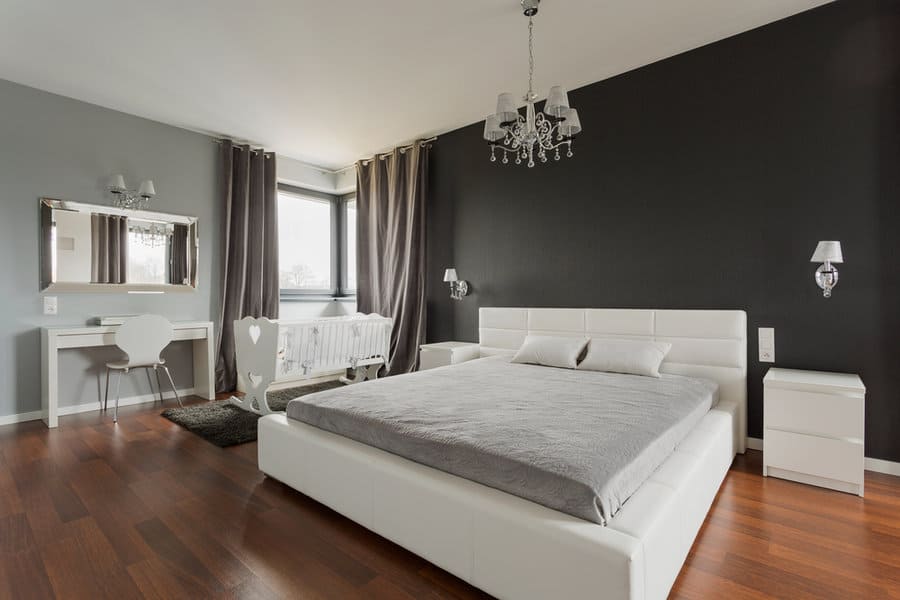
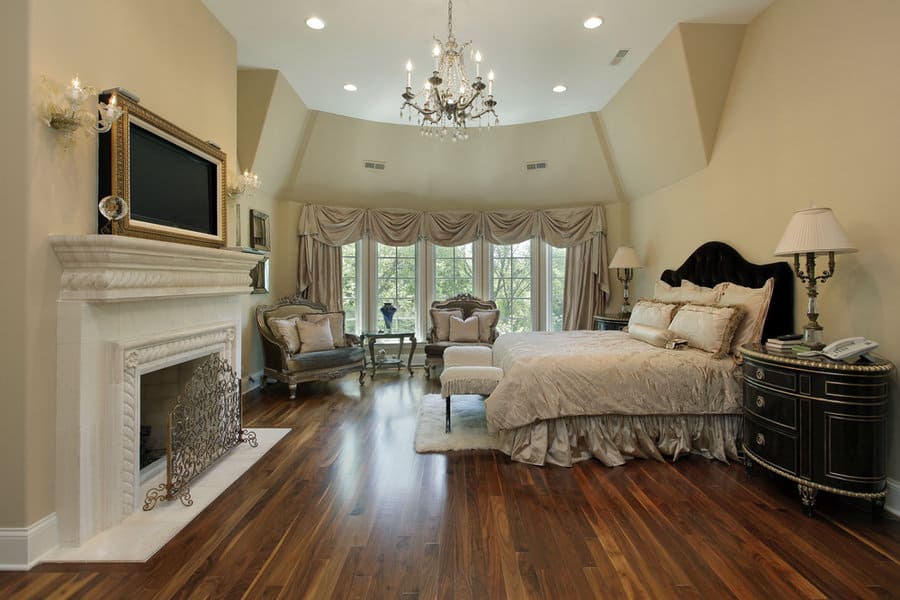
    5. Utilizing Statement Ceiling Fixtures

    The vast expanse of a high ceiling provides a unique opportunity to make a bold statement with ceiling fixtures. When chosen thoughtfully, these elements not only serve their functional purpose but become show-stopping centerpieces.

    First, think grand chandeliers. These aren’t just for classic or traditional spaces. From intricate crystal designs to sleek, modern geometric forms, there’s a chandelier to match every style.

    Next, consider pendant lights. Grouping them in clusters or arranging them at varying heights can create a visually captivating cascade effect. Opt for designs that complement the room’s aesthetics, whether that’s minimalist cone pendants or opulent, globe-shaped ones.

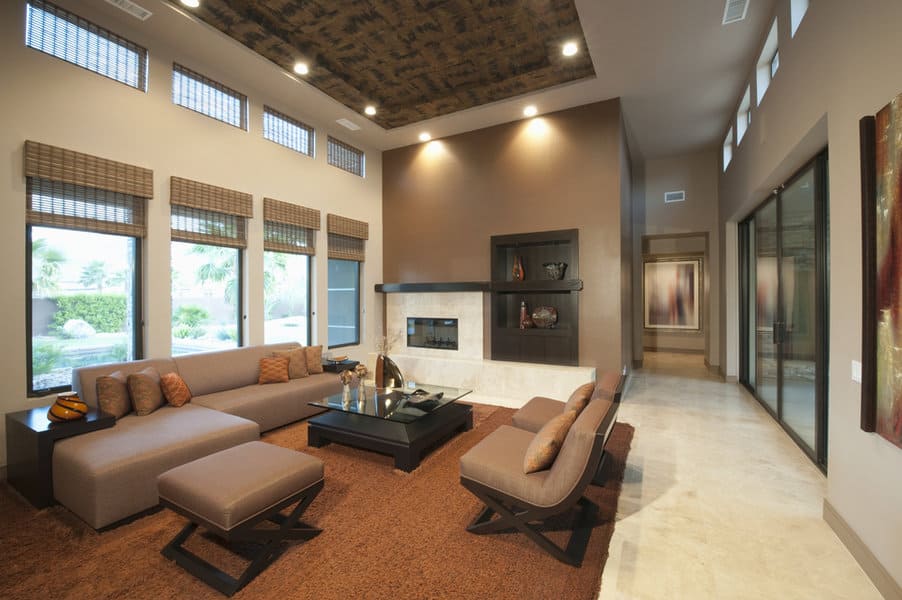
    Also, explore architectural fixtures like coffered ceilings or wooden beams. These not only add texture and depth but can also help visually segment and define the vast ceiling space.

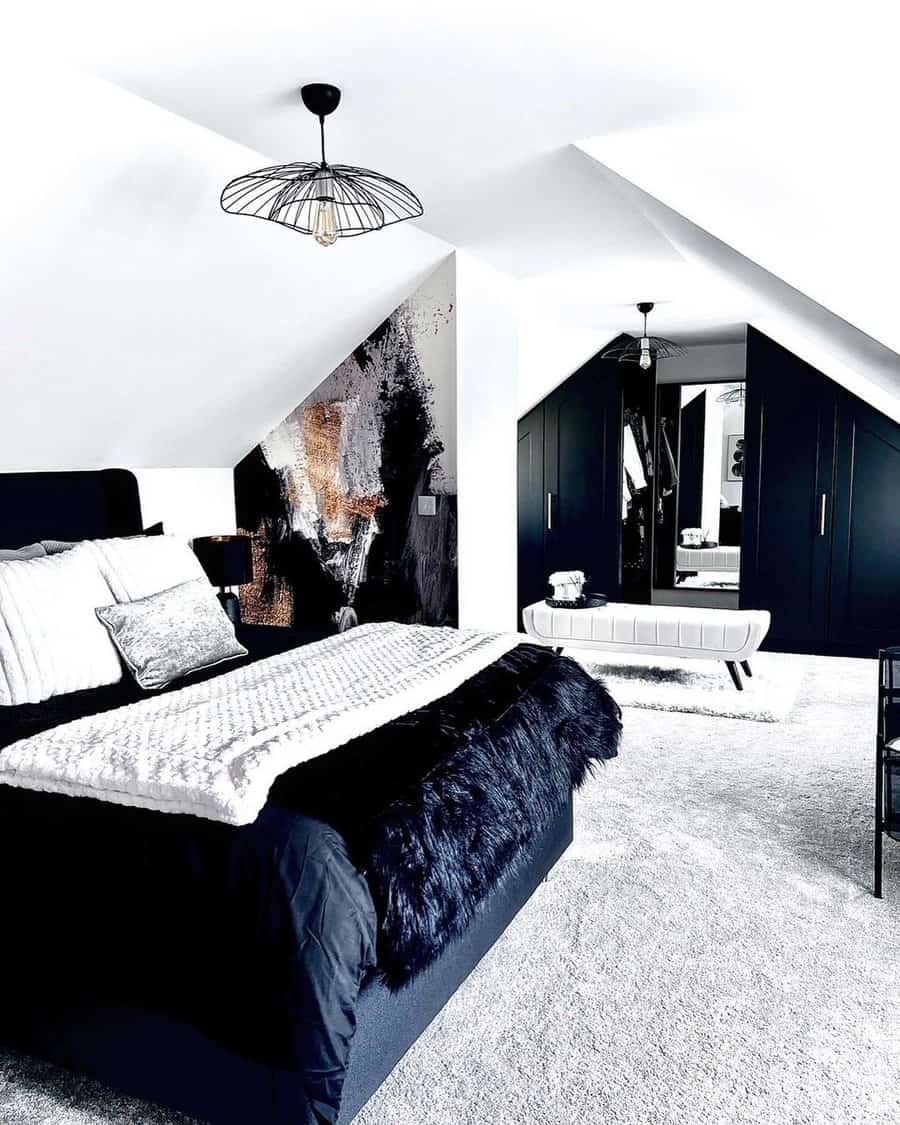
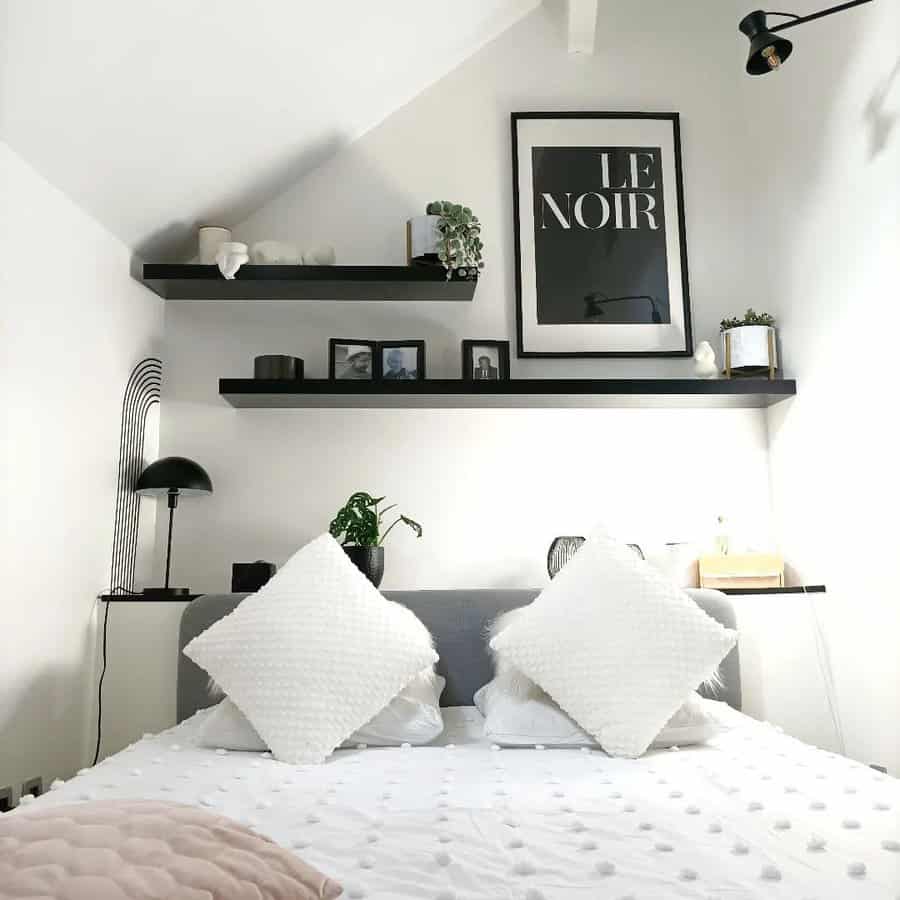
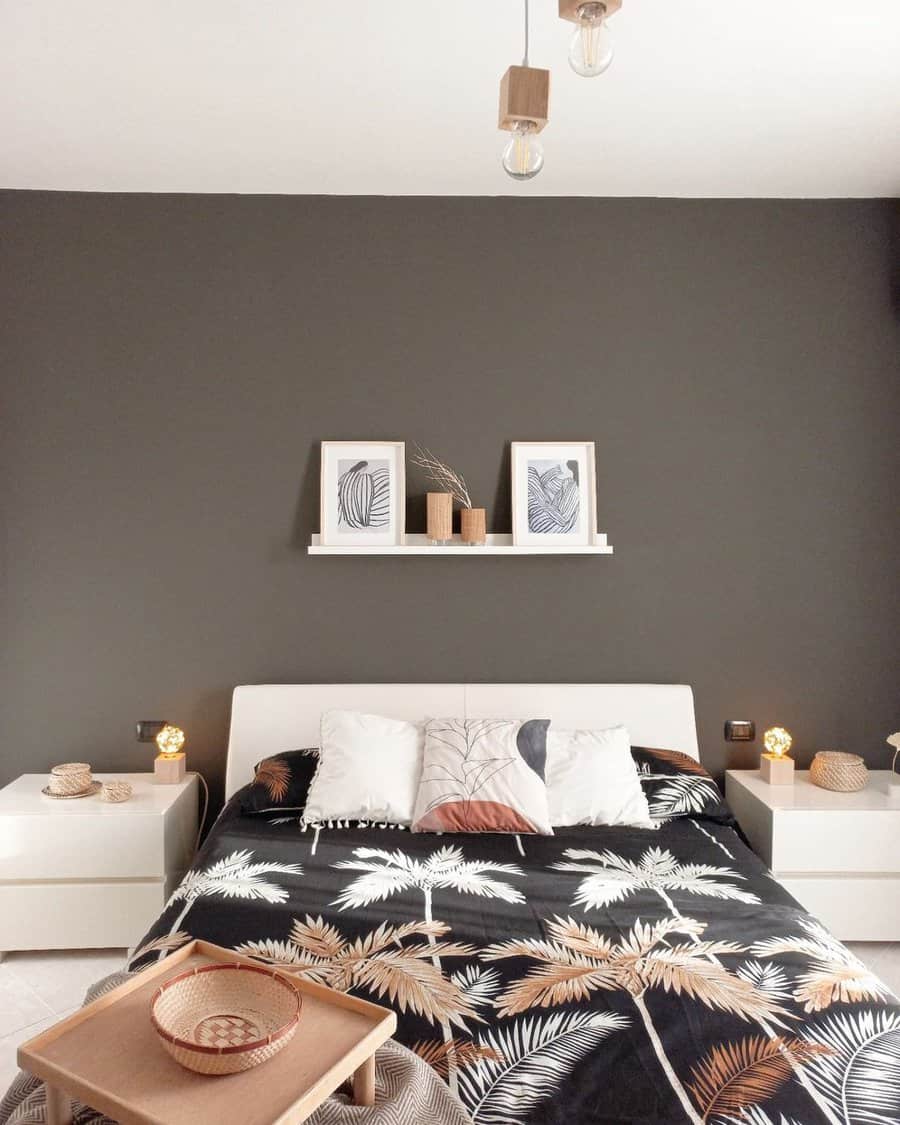
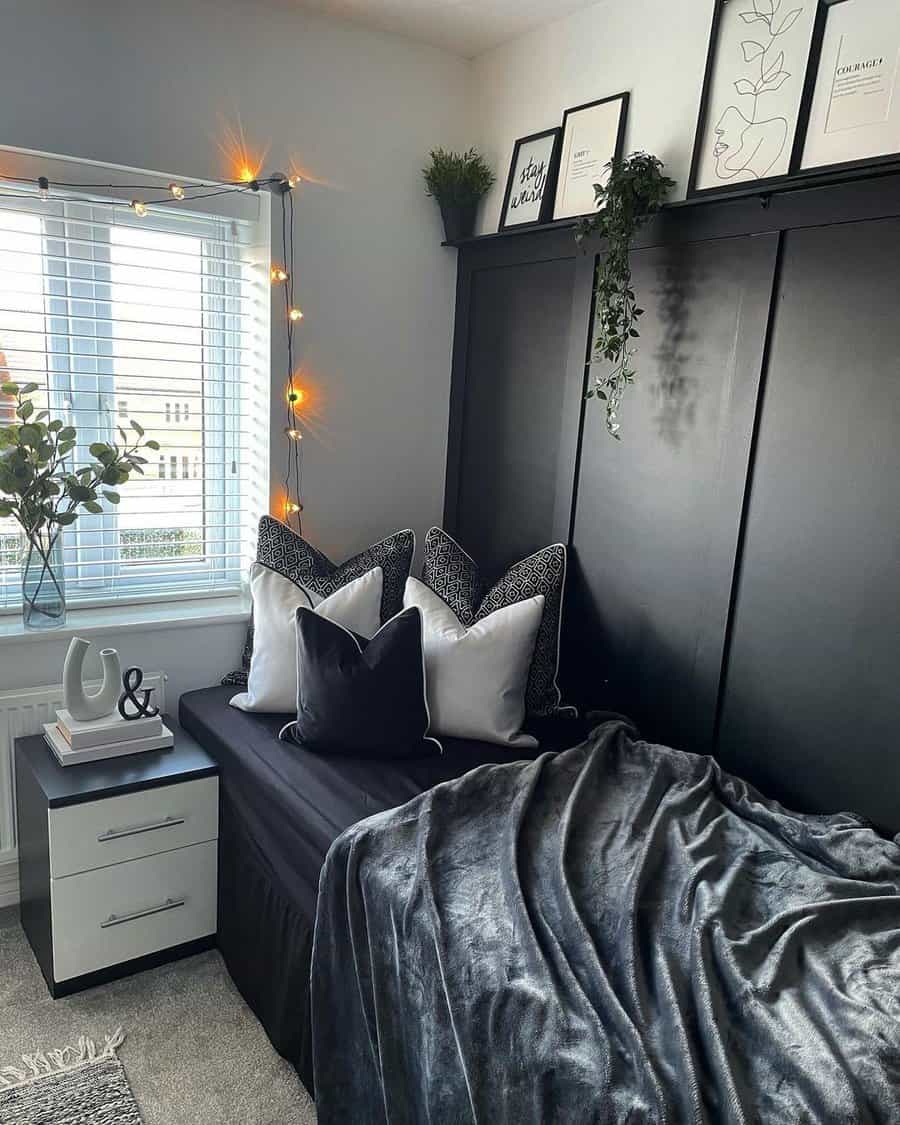
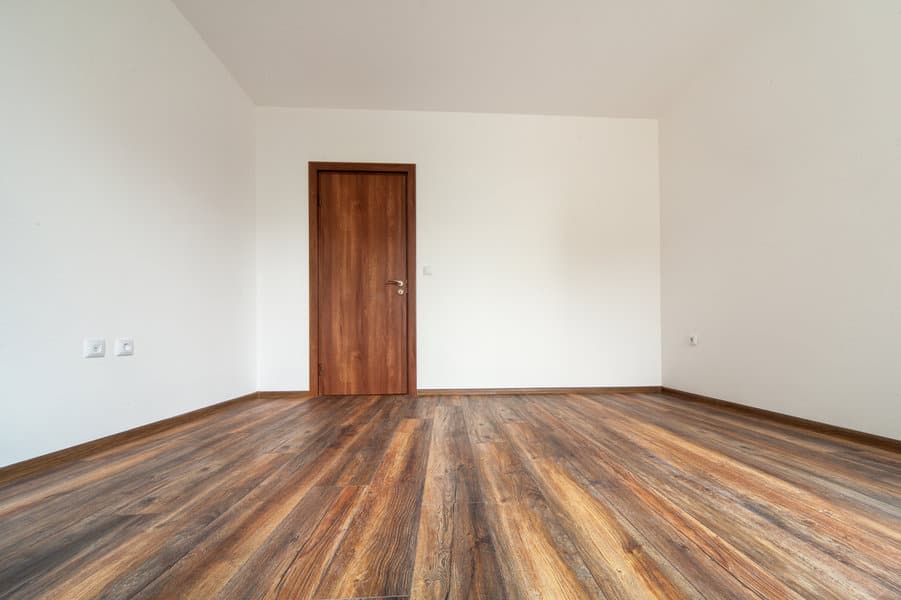
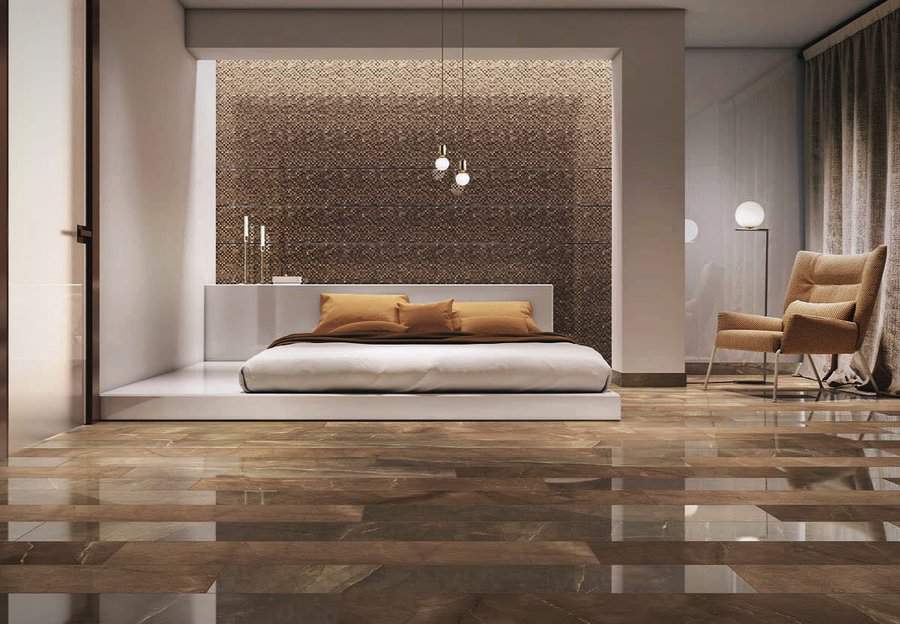
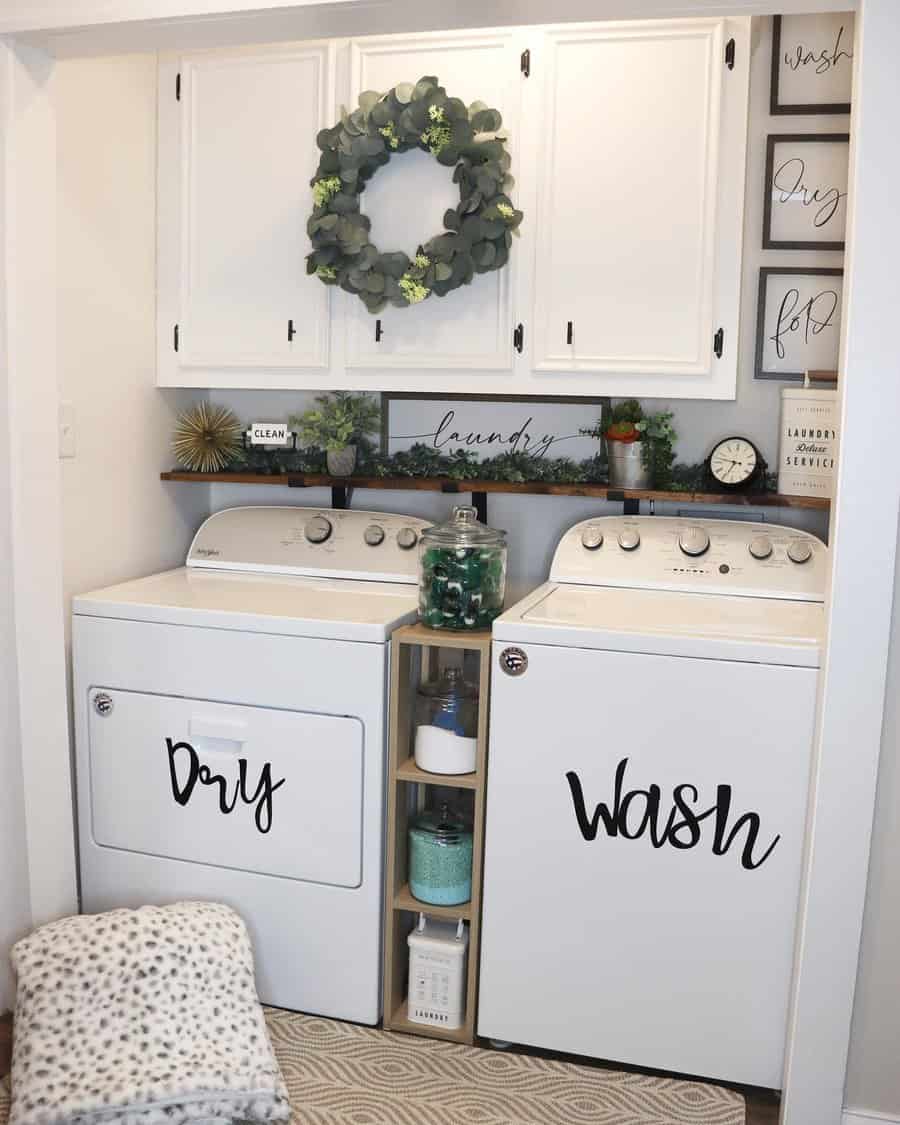
    6. Balancing Negative Space: Tips on Upper Wall Design

    The upper sections of walls in rooms with high ceilings can sometimes feel barren or disconnected. Addressing this negative space is crucial for creating a cohesive and inviting atmosphere.

    Floating shelves are a fantastic tool. When mounted higher up, they can house decorative elements, sculptures, or books, drawing the eye and providing visual interest in often-neglected areas.

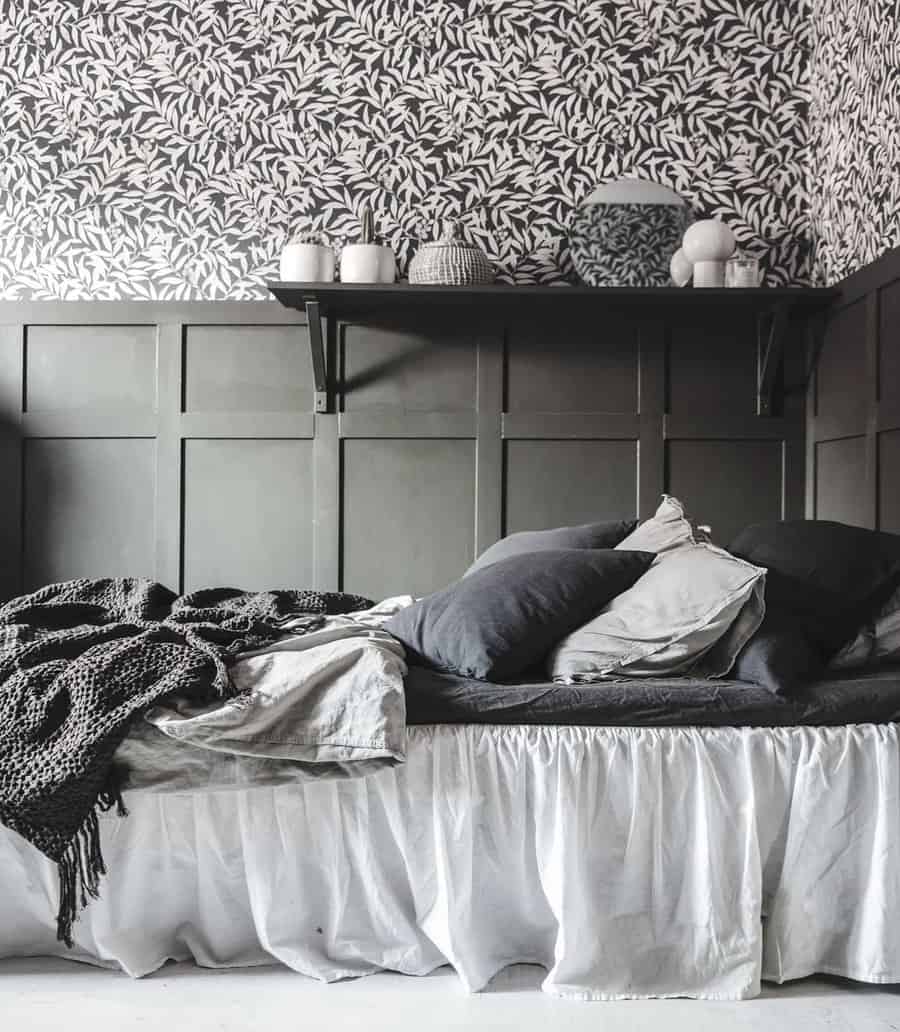
    Consider architectural moldings or trim work. These can segment vast wall expanses, creating zones or frames for art or other decorative elements. They also add layers of texture and sophistication to the room.

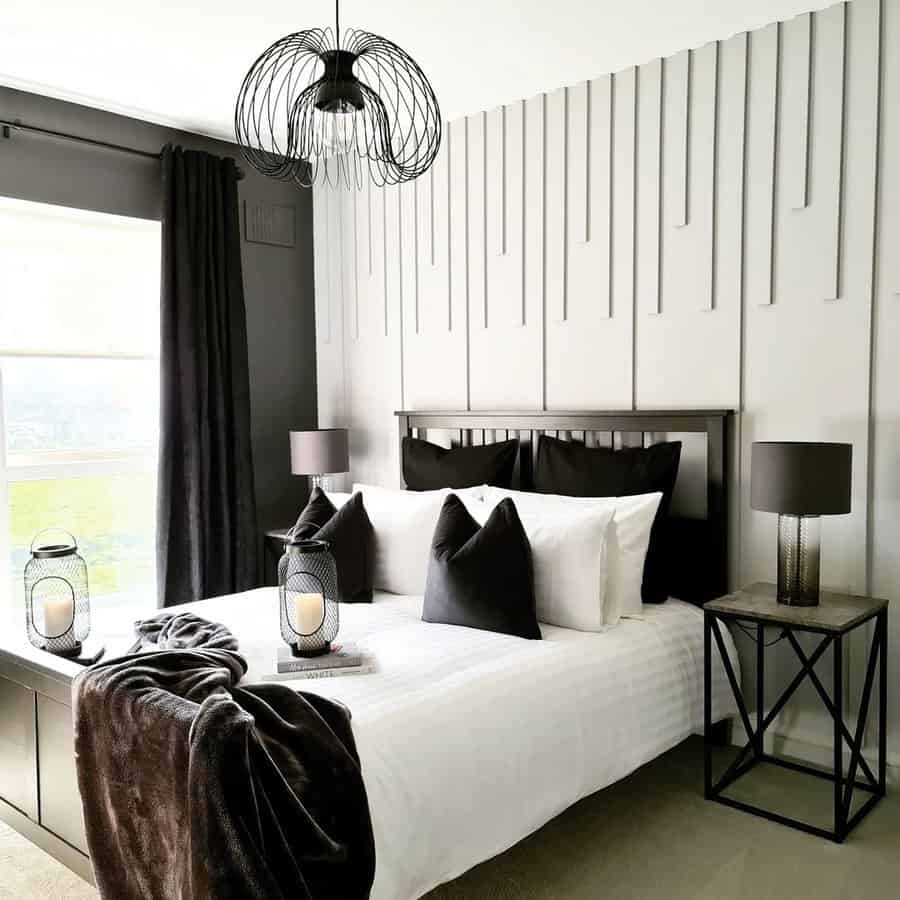
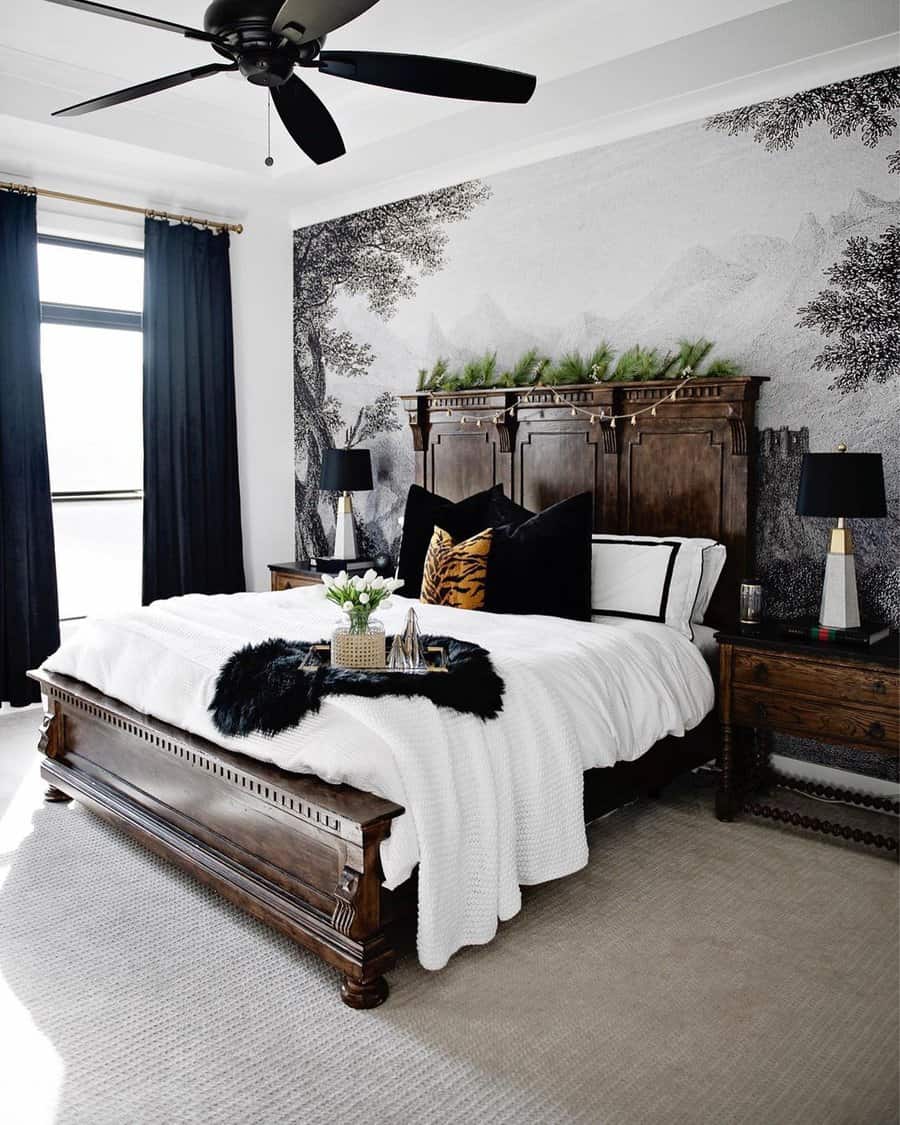
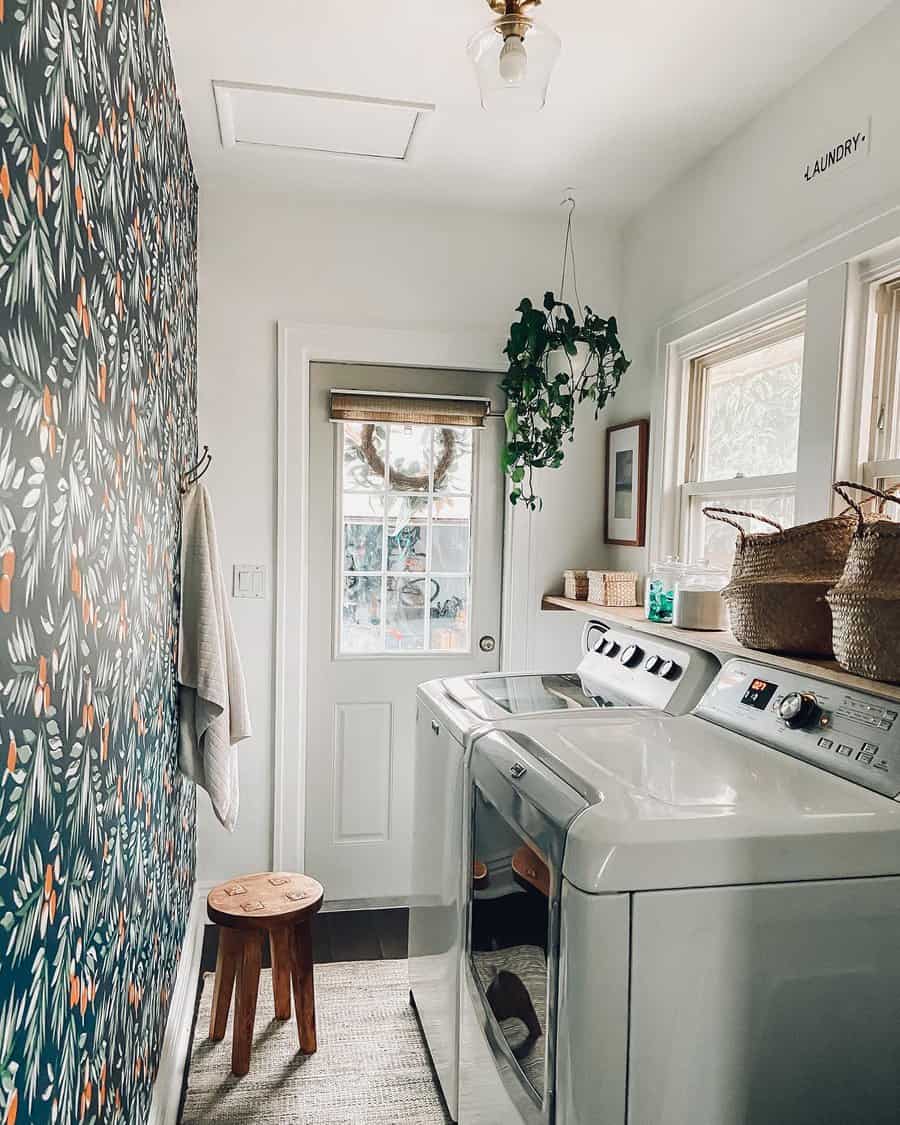
    Wallpaper or wall decals can be employed strategically. Using patterns or murals that play with verticality can elongate the space further while filling it with engaging visuals. Consider designs that have gradients or upward-reaching motifs.

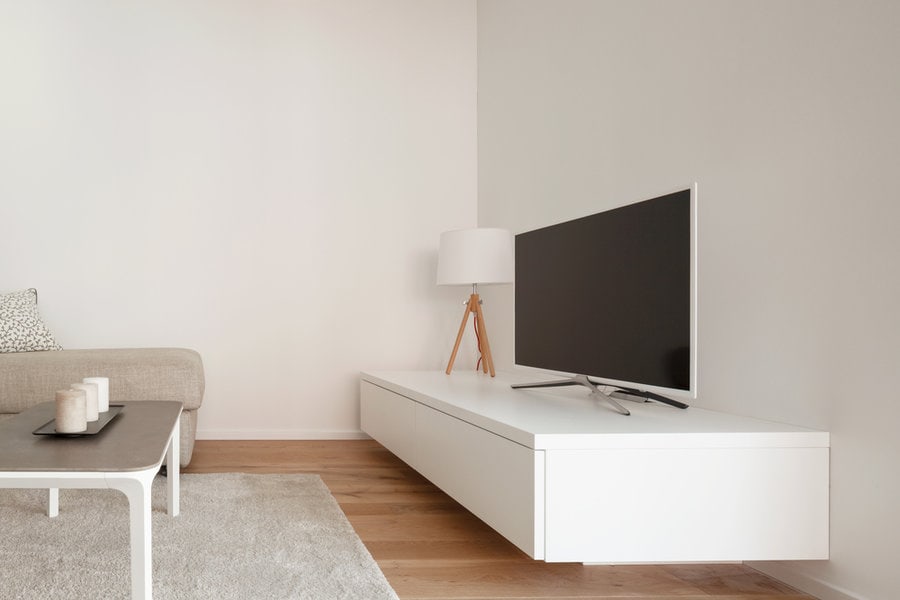
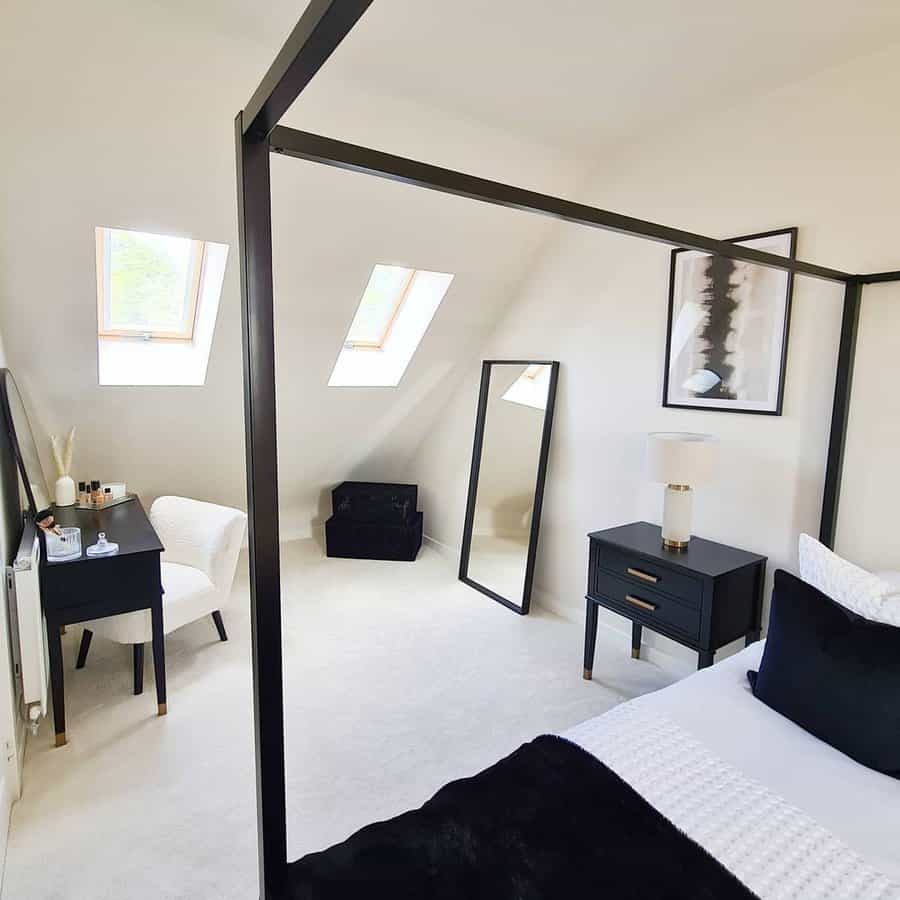
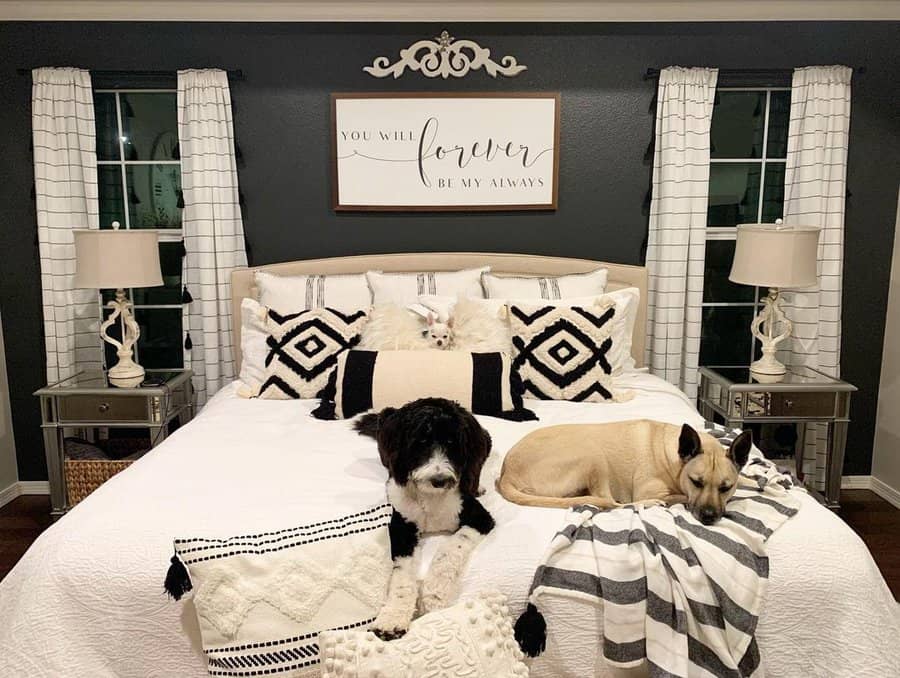
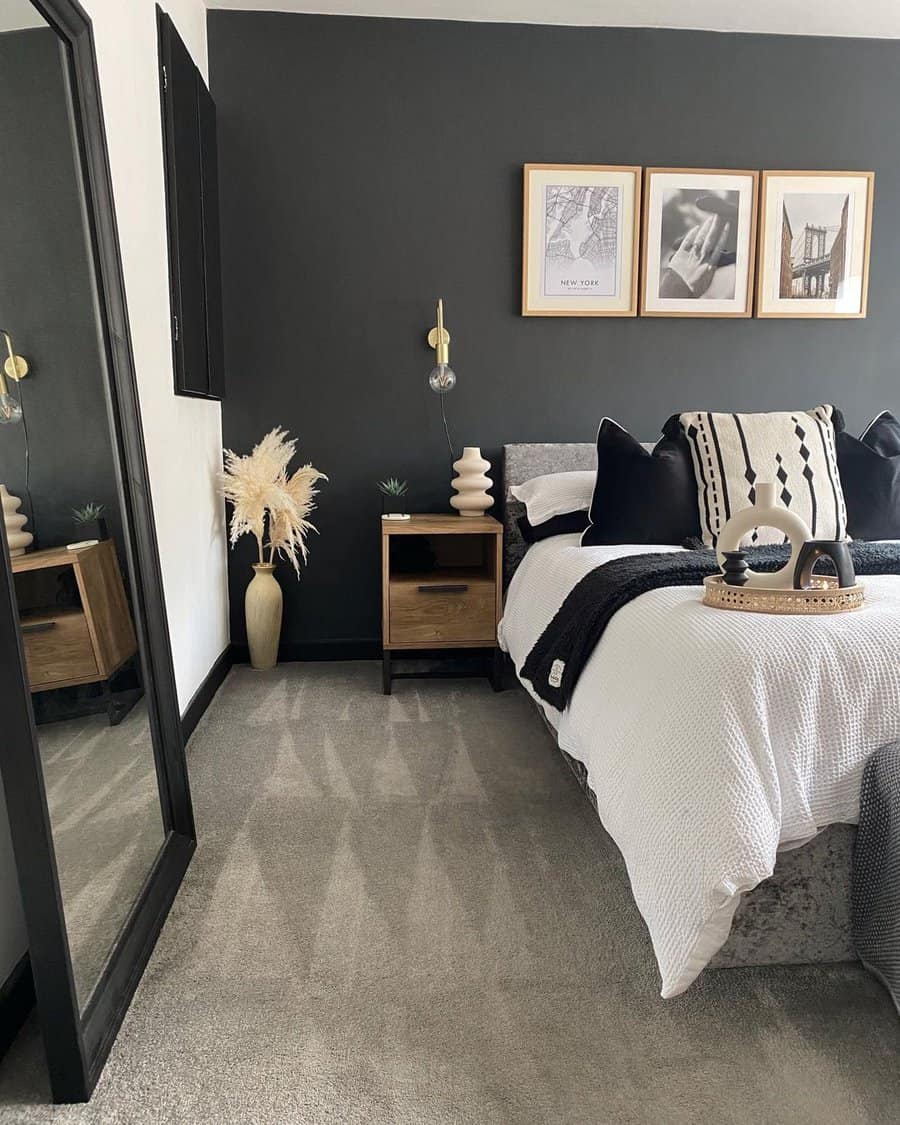
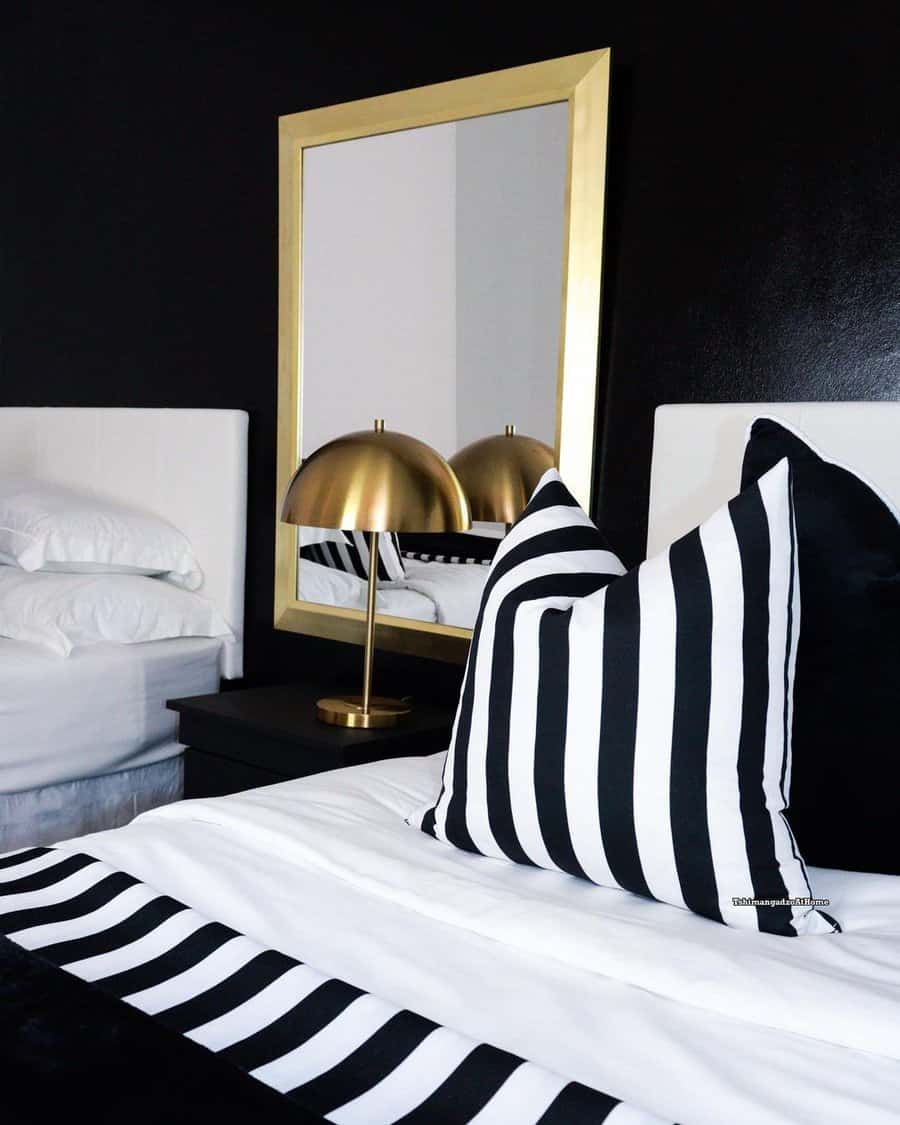
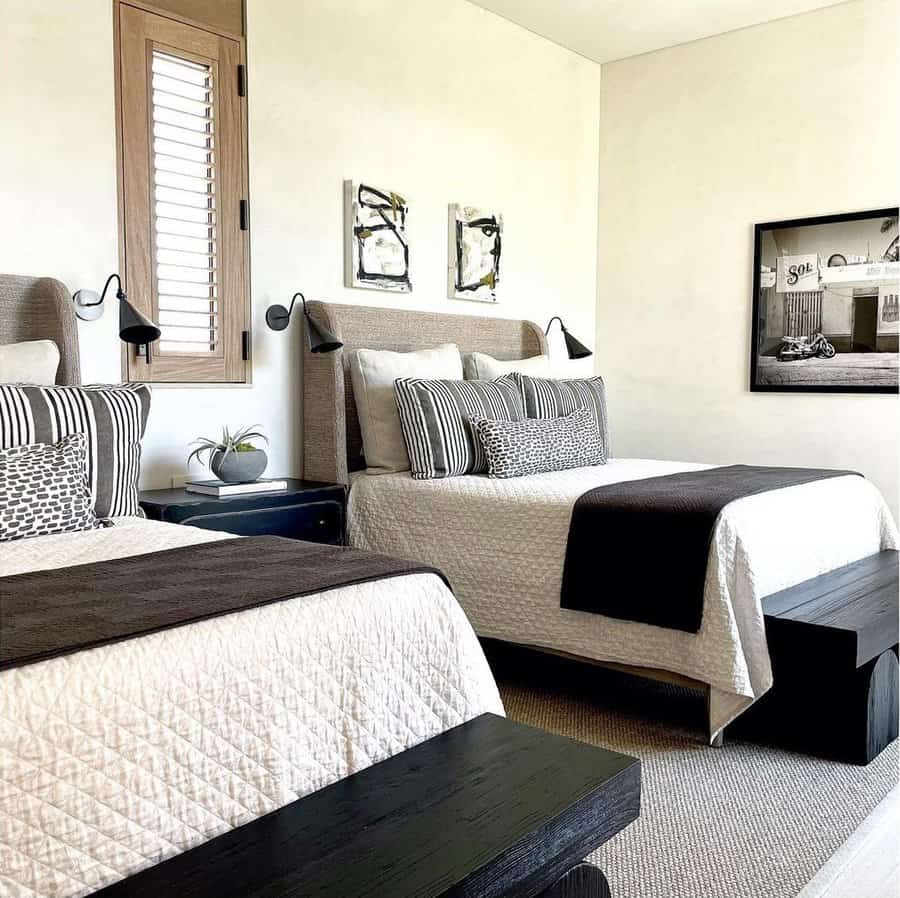
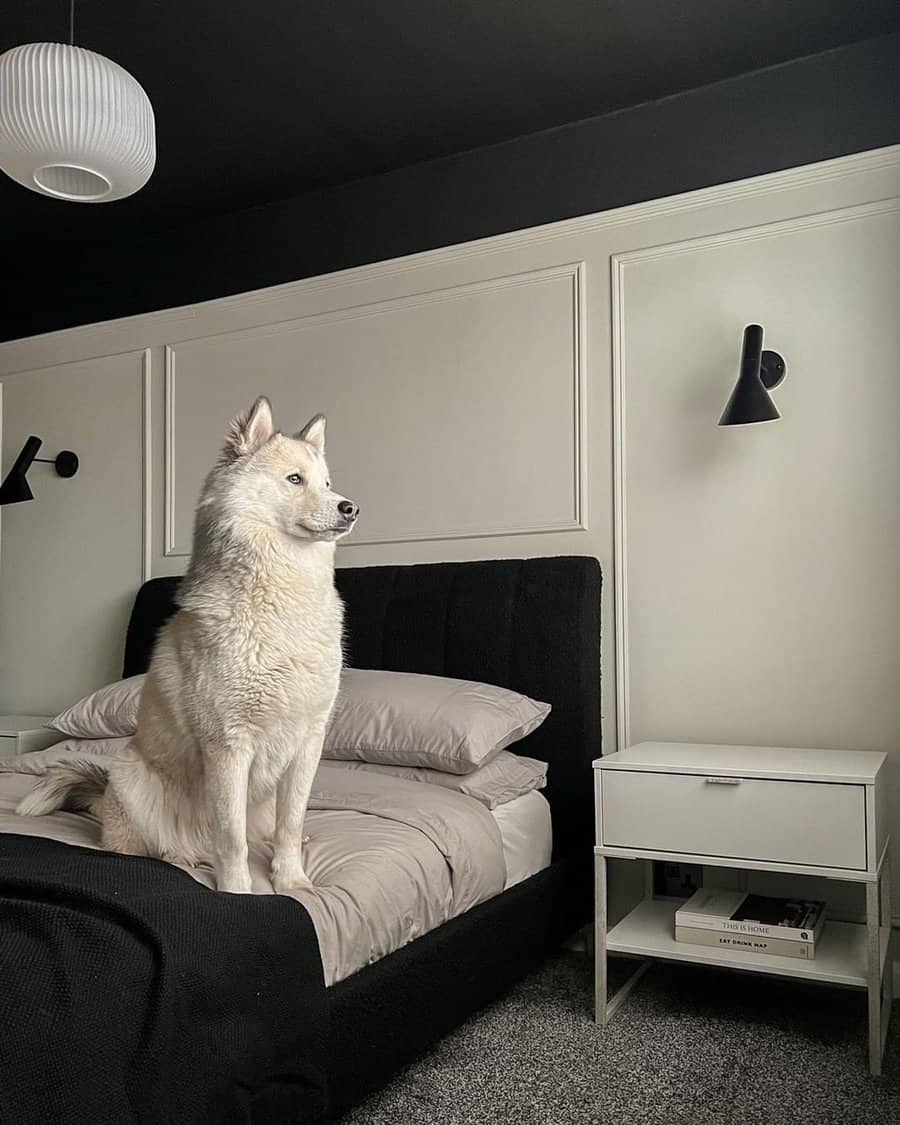
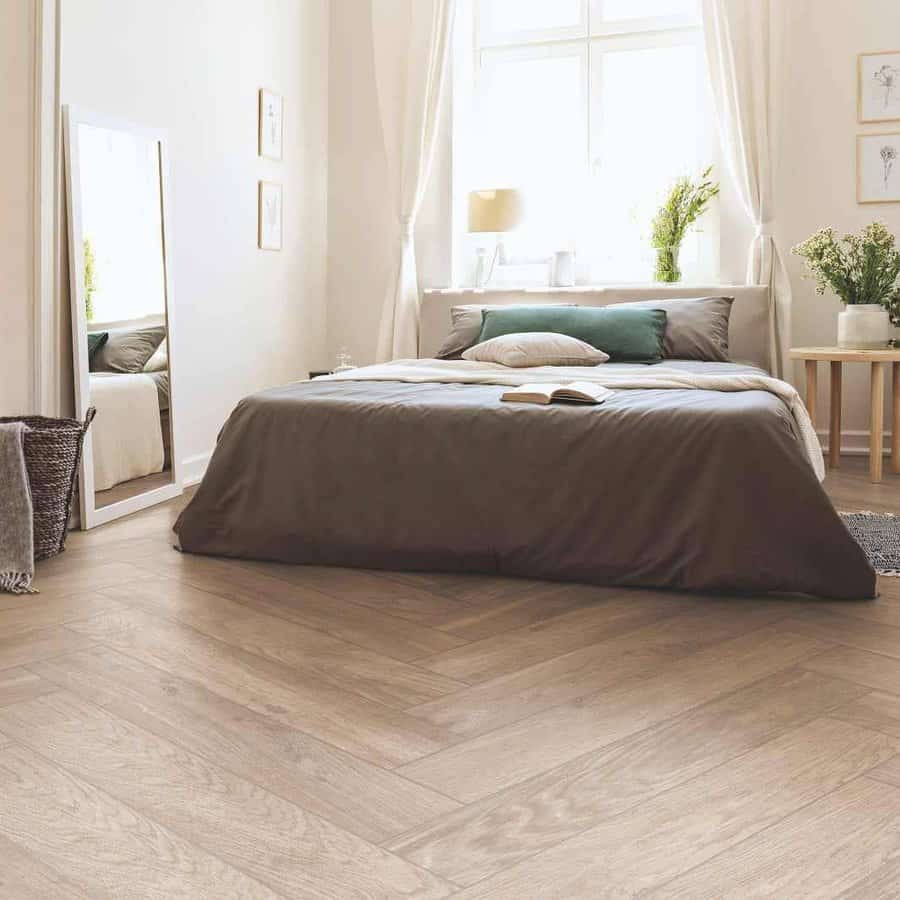
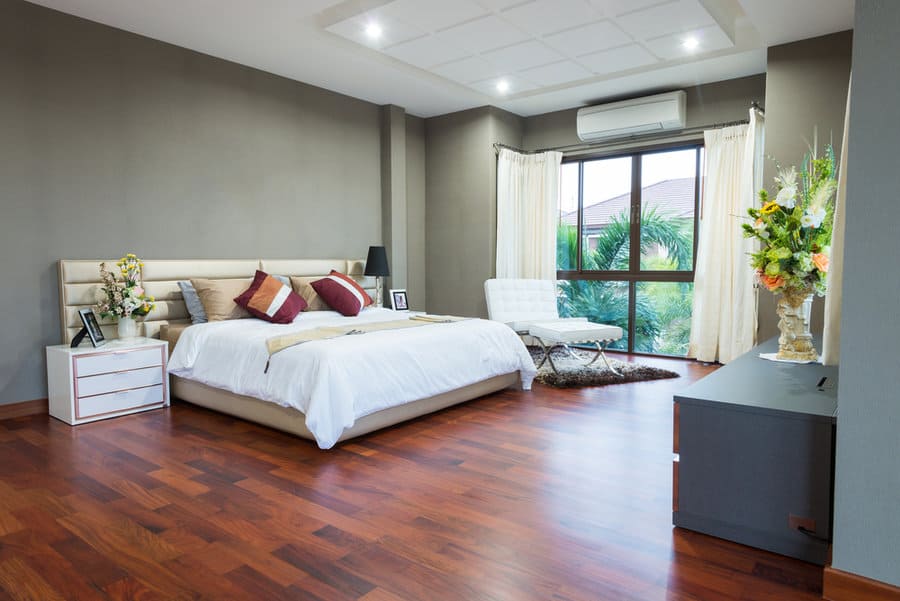
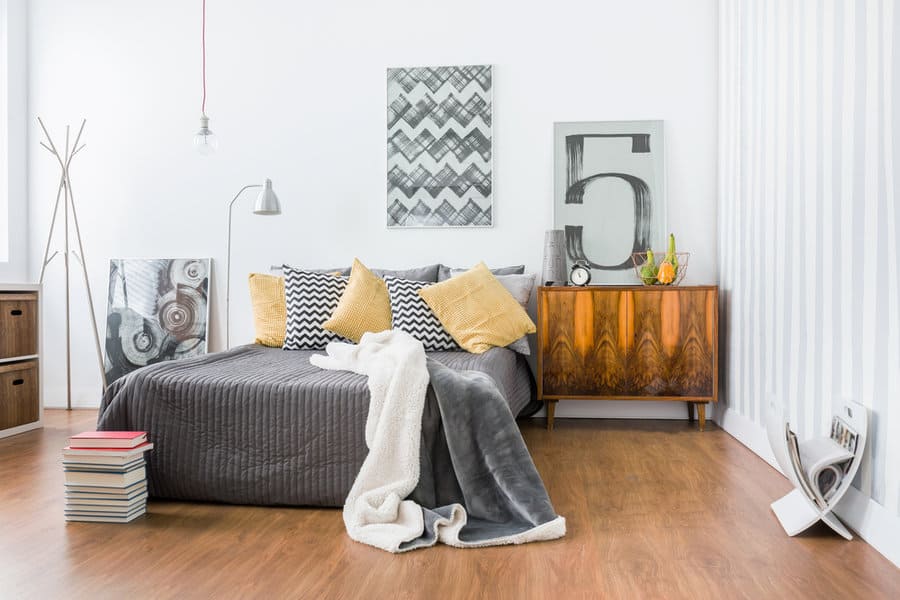
    7. Eye-Level Interest: Keeping Cohesiveness from Bottom to Top

    With high ceilings, there’s a risk of the design feeling disjointed, where the lofty heights steal the show and the immediate eye-level area feels overlooked. To maintain cohesiveness, it’s vital to bridge the gap between the floor and the ceiling.

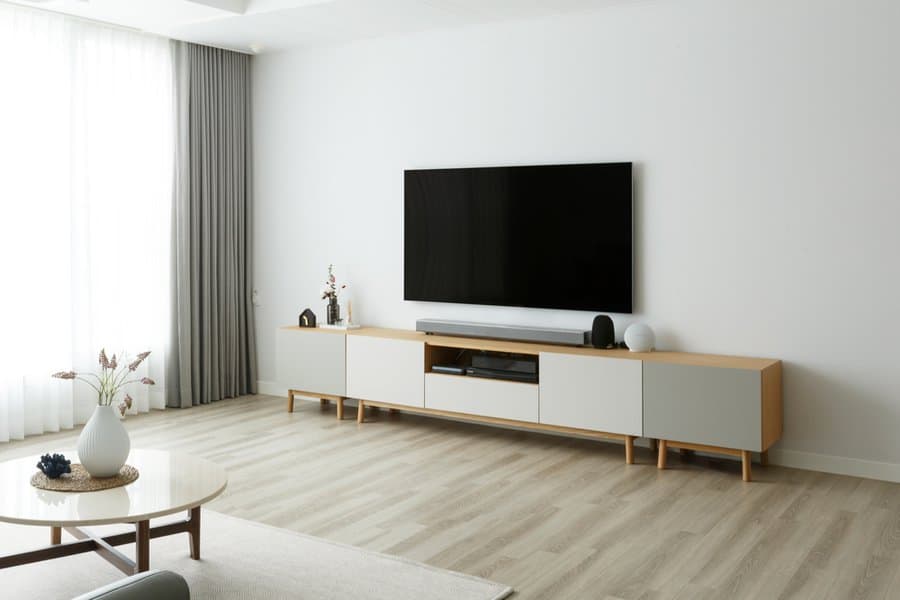
    Start with strategically placed mid-height furniture like credenzas, sideboards, or console tables. These pieces can anchor the room and offer surfaces for decorative elements like vases, sculptures, or photo frames.

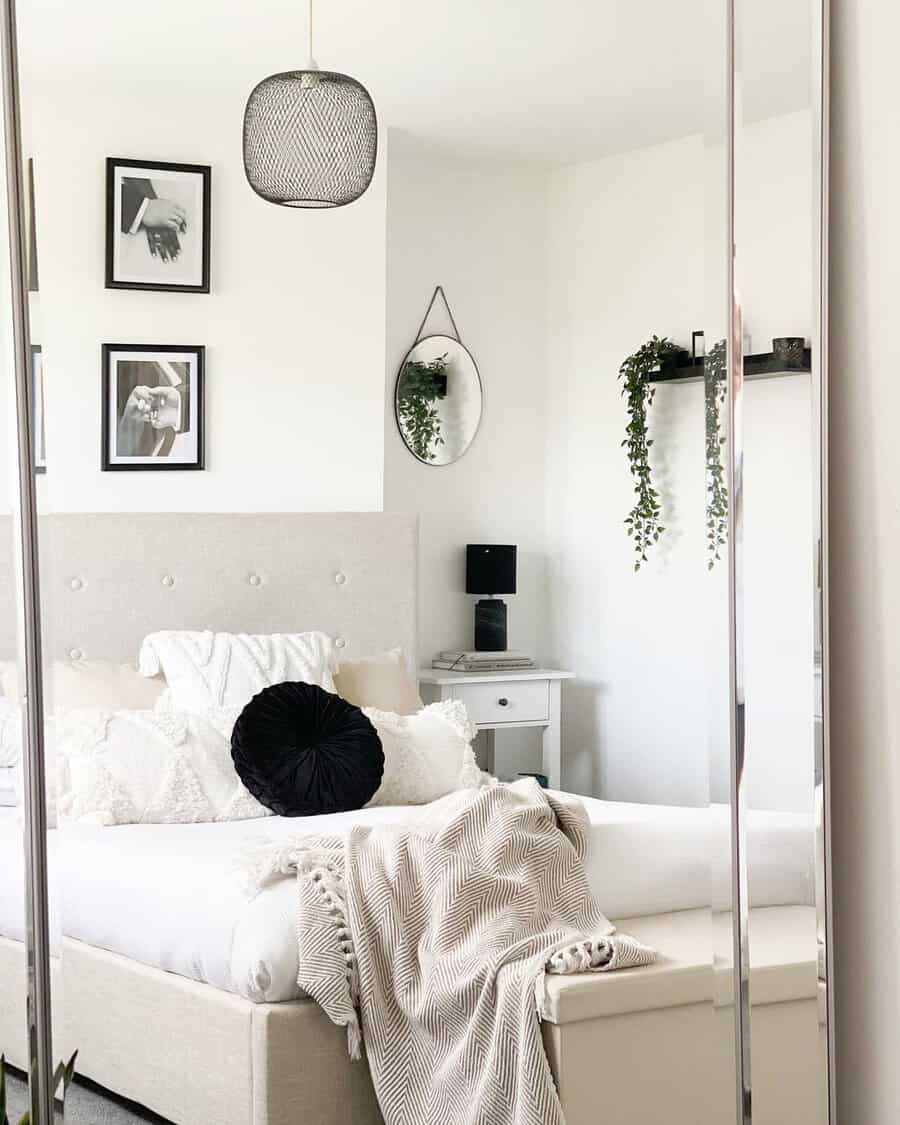
    Mirrors are invaluable tools in these spaces. Vertical or horizontally-oriented mirrors at eye level can reflect light, add depth, and tie together the room’s upper and lower regions.

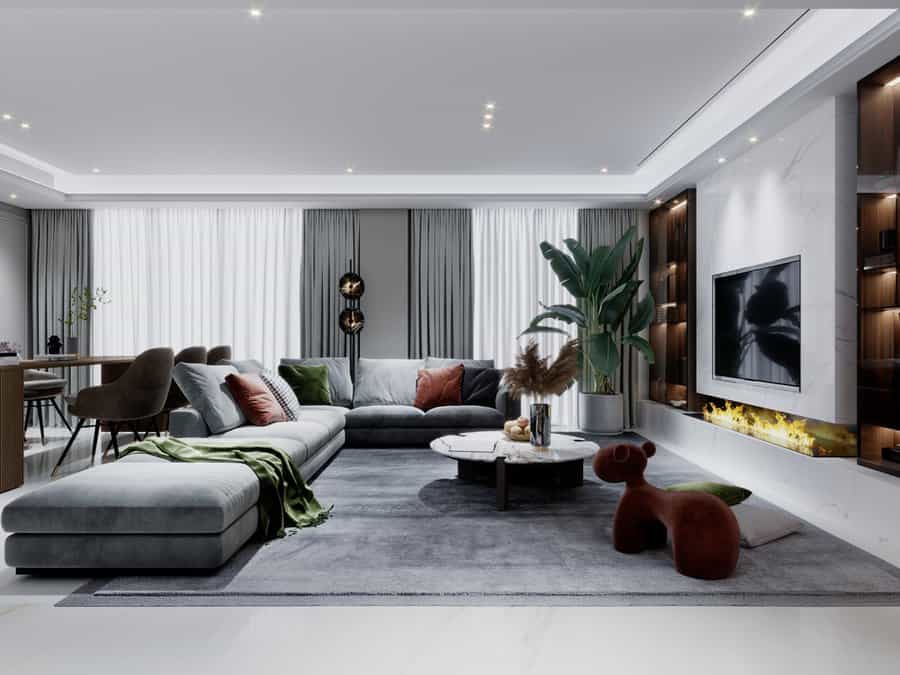
    Consider creating a focal wall, maybe with a fireplace, textured panels, or a large painting. This not only draws the eye but offers a grounding element in the midst of towering walls.

    Utilize plants of varying heights. While we’ve discussed taller trees, don’t neglect medium-height plants like monstera, pothos, or snake plants. Positioned on stands or tables, they can seamlessly bridge the vertical design gap.

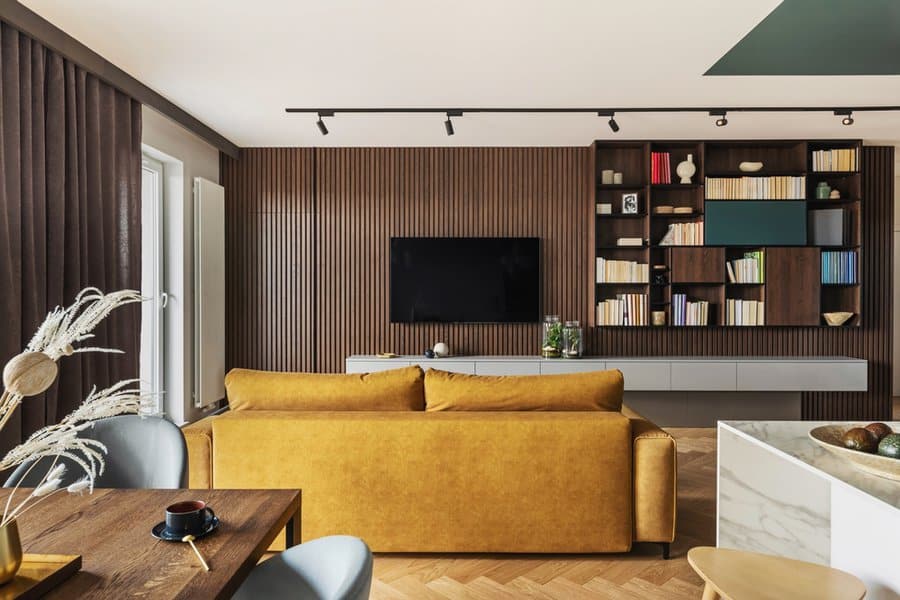
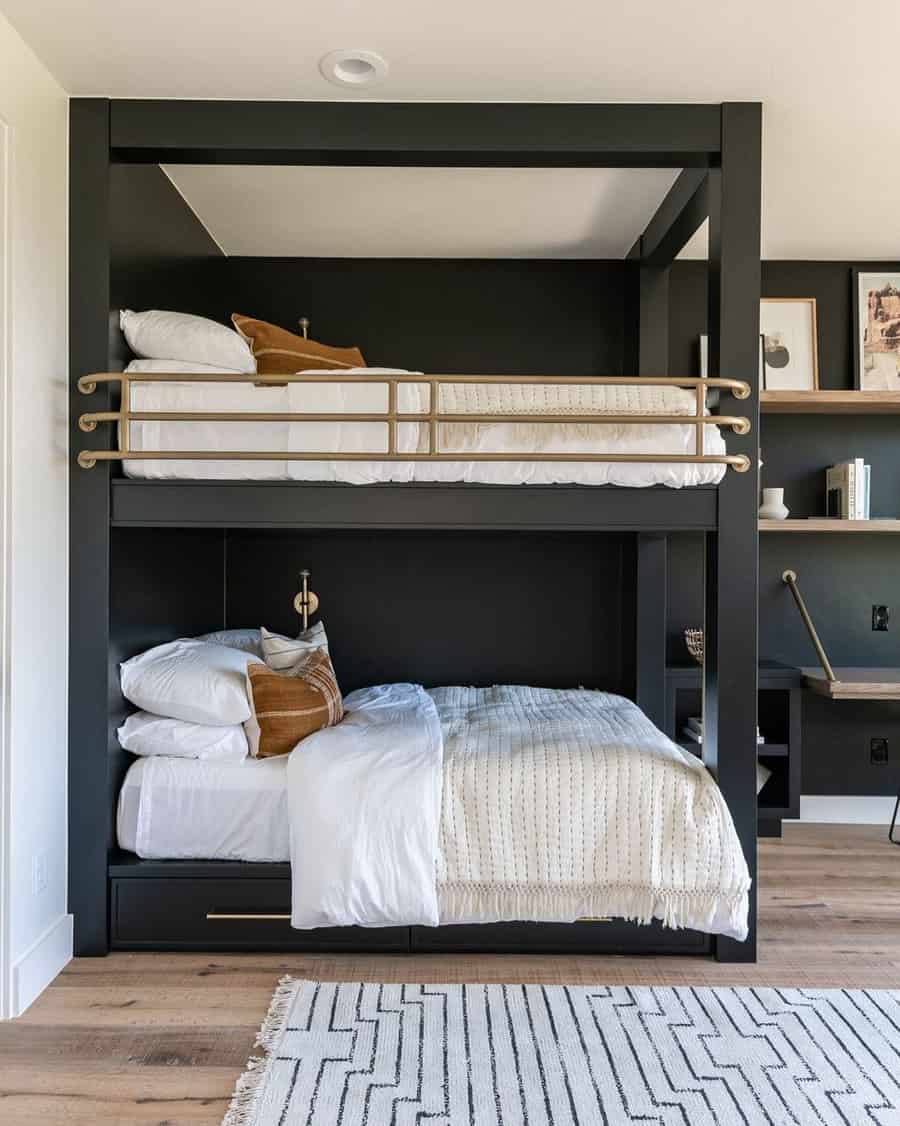
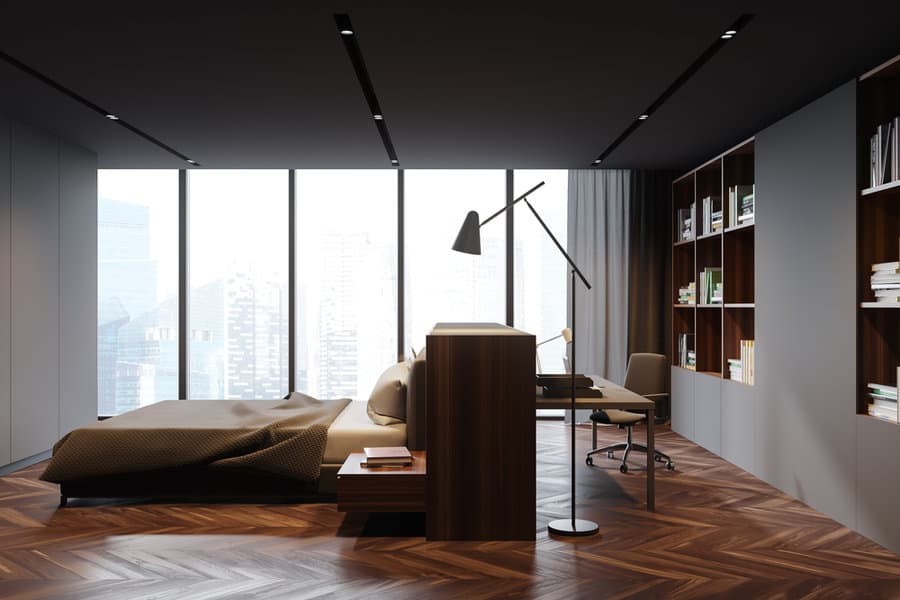
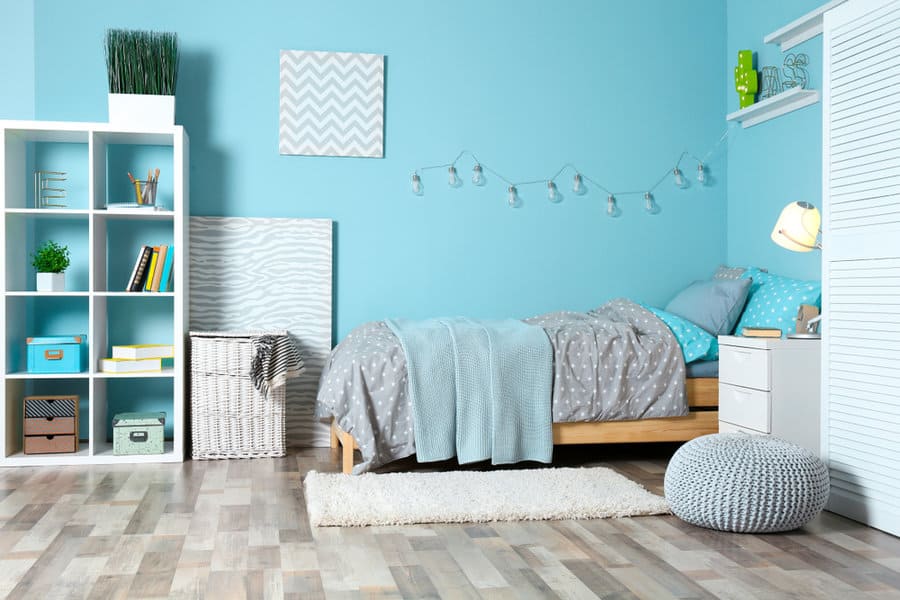
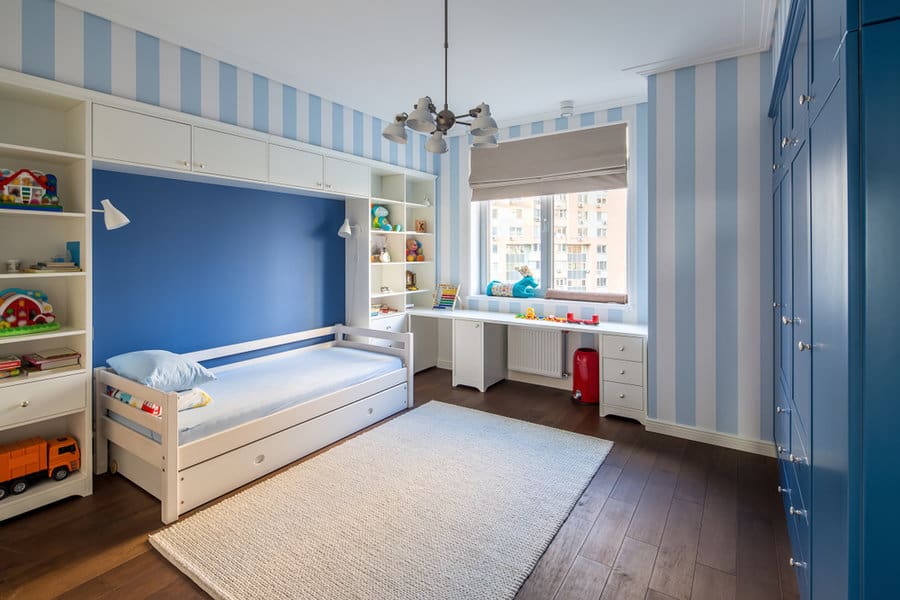
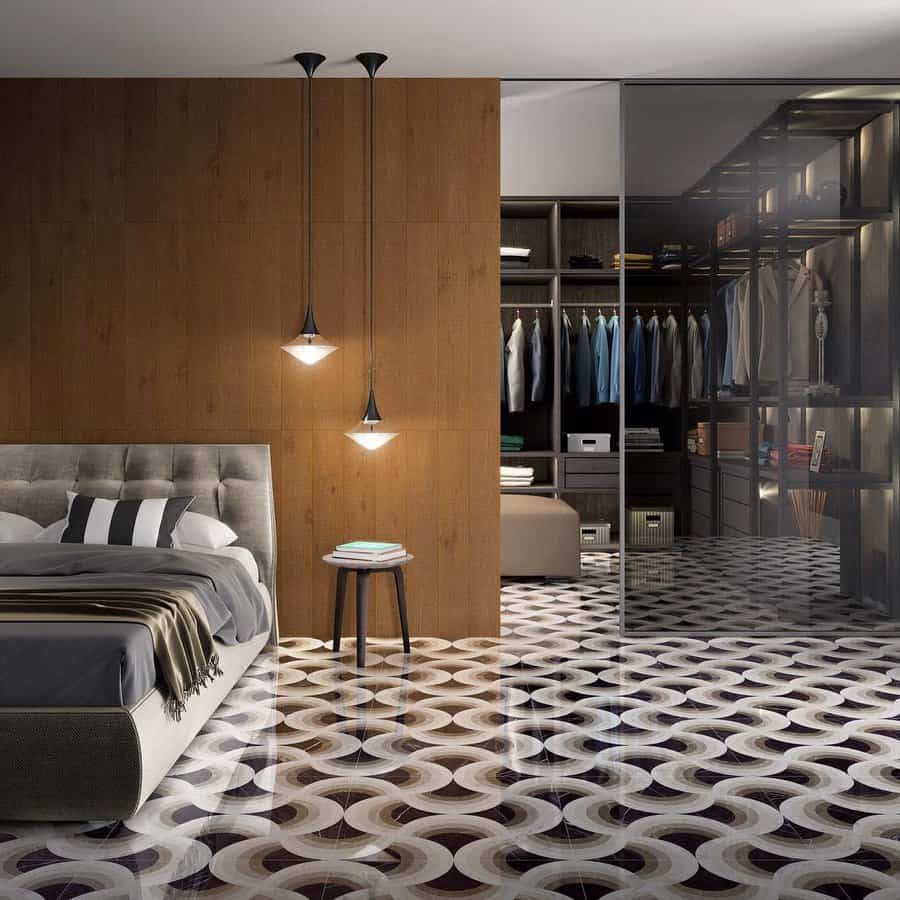
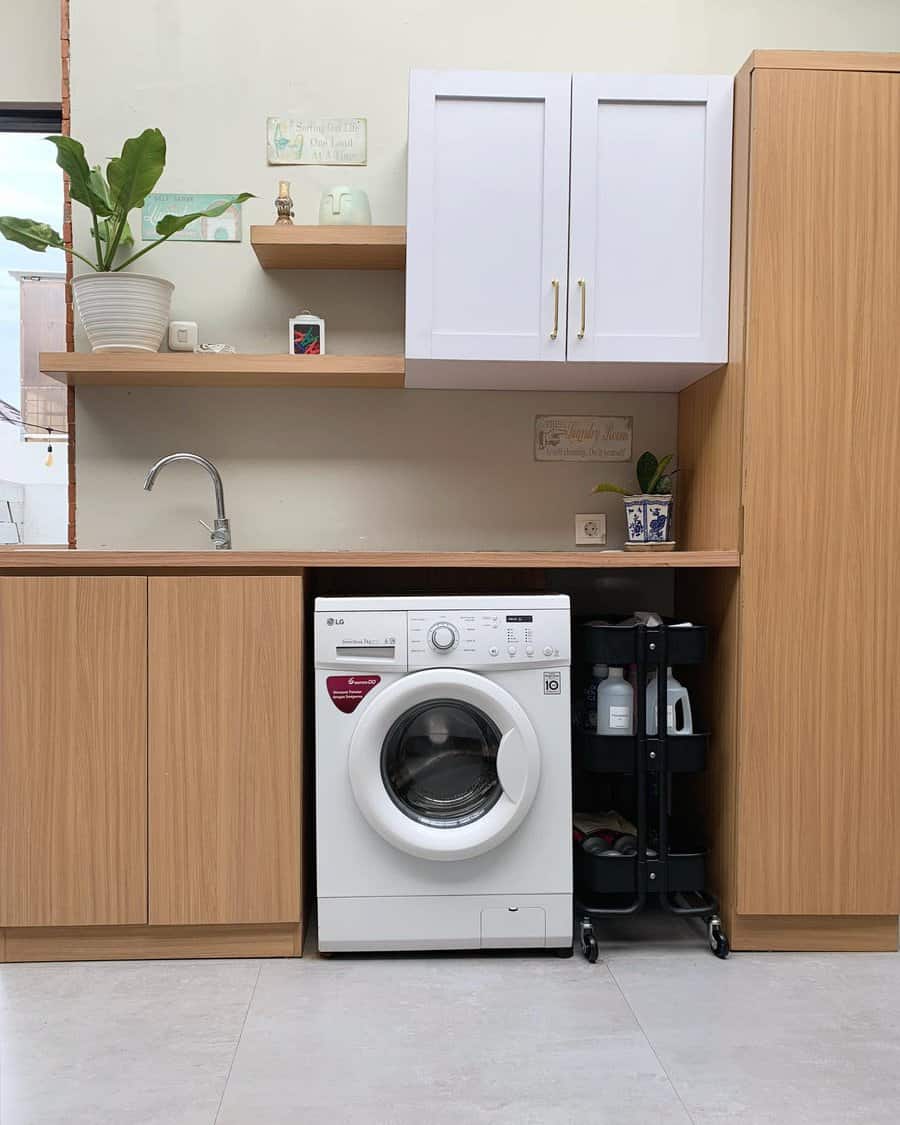
    8. Multi-Level Shelving and Display

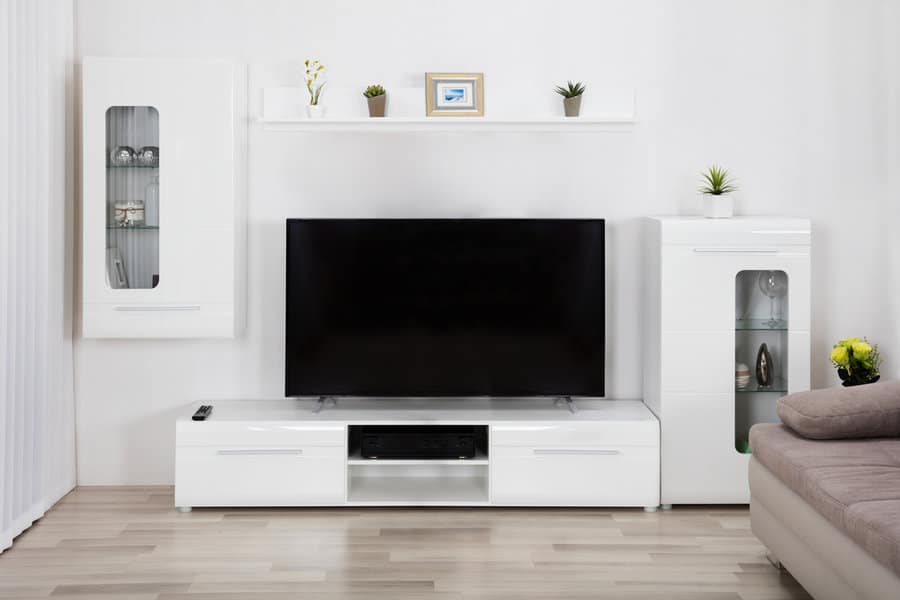
    When dealing with high ceilings, multi-level shelving becomes a powerful design asset, effectively using vertical space while offering functionality and aesthetic appeal.

    Start by considering floor-to-ceiling bookshelves. Not only can they house your literature collection, but they also provide niches for decorative items, framed photos, and potted plants. Varying the shelf heights or including cabinets can break the monotony and introduce rhythm.

    Modular shelving systems are adaptable and can be customized to fit the room’s dimensions and design ethos. Whether you prefer a minimalist metal frame or a rustic wooden look, these systems can be tailored to your needs.

    Display platforms or staggered shelving can create visual intrigue. By having some shelves protrude more than others or vary in width, you introduce depth and a dynamic quality to the space.

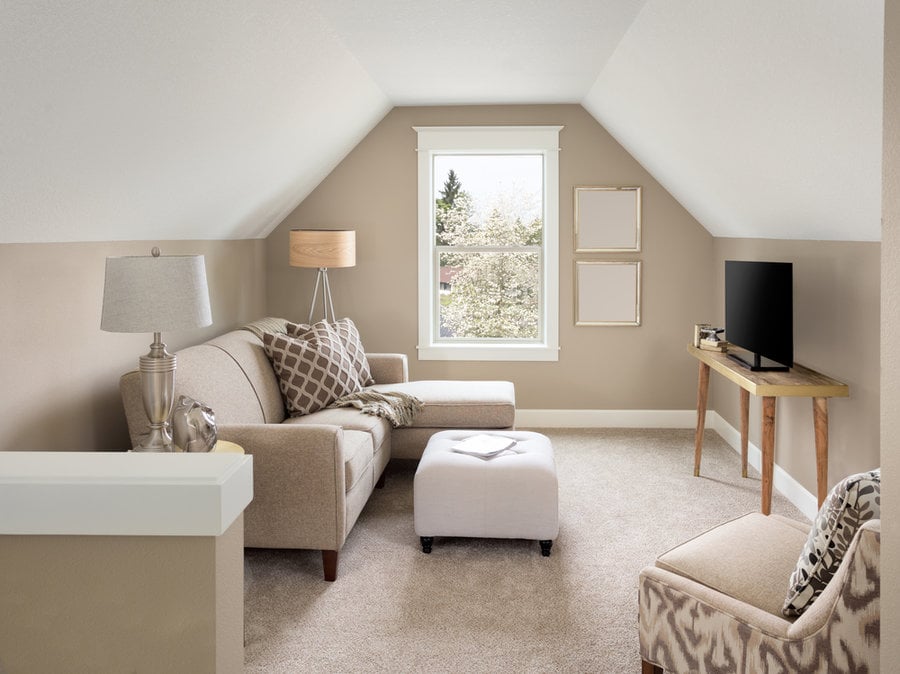
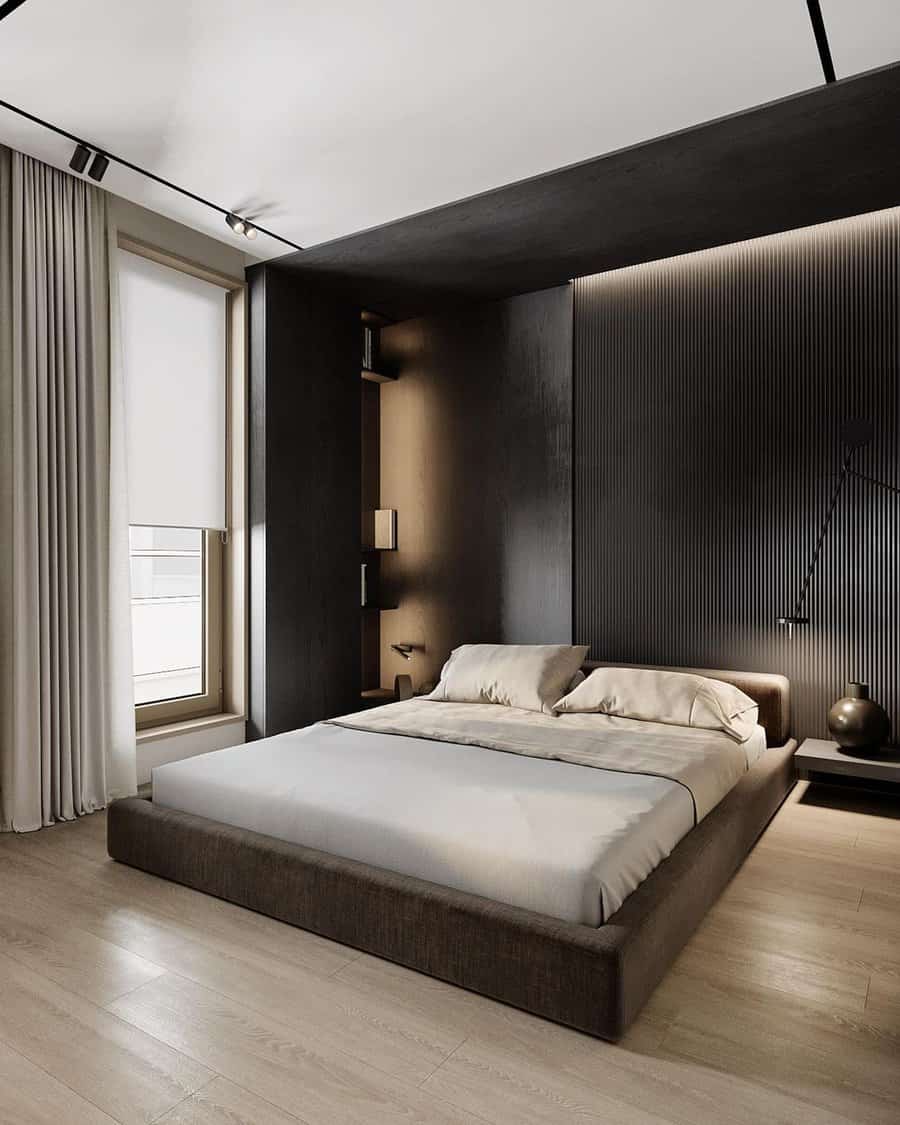
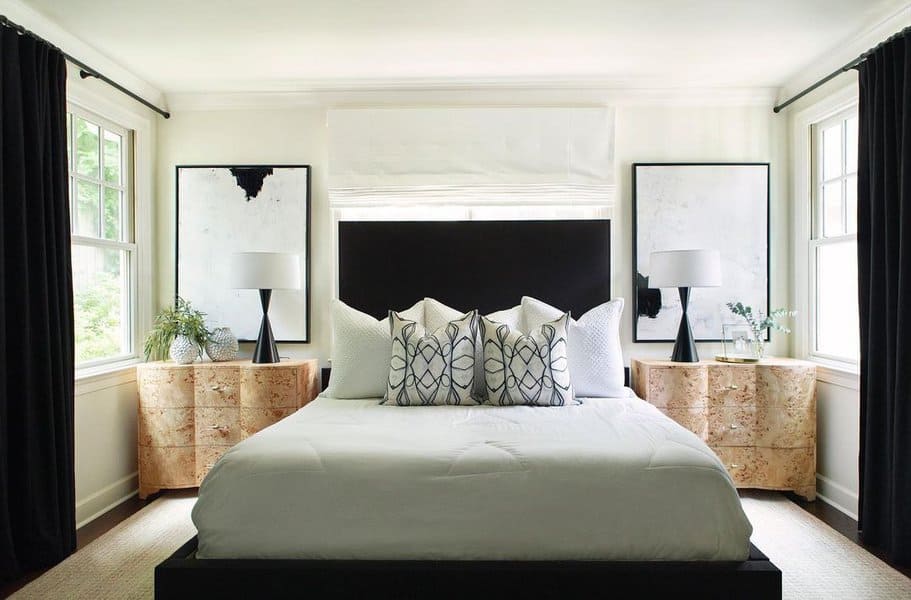
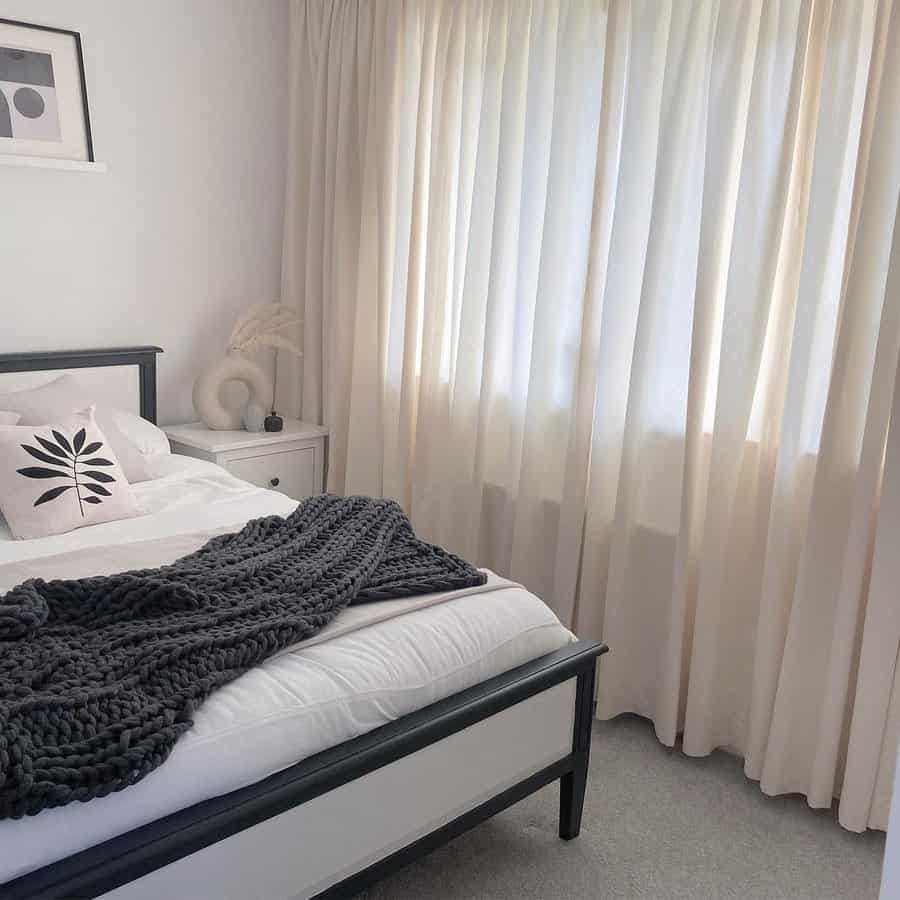
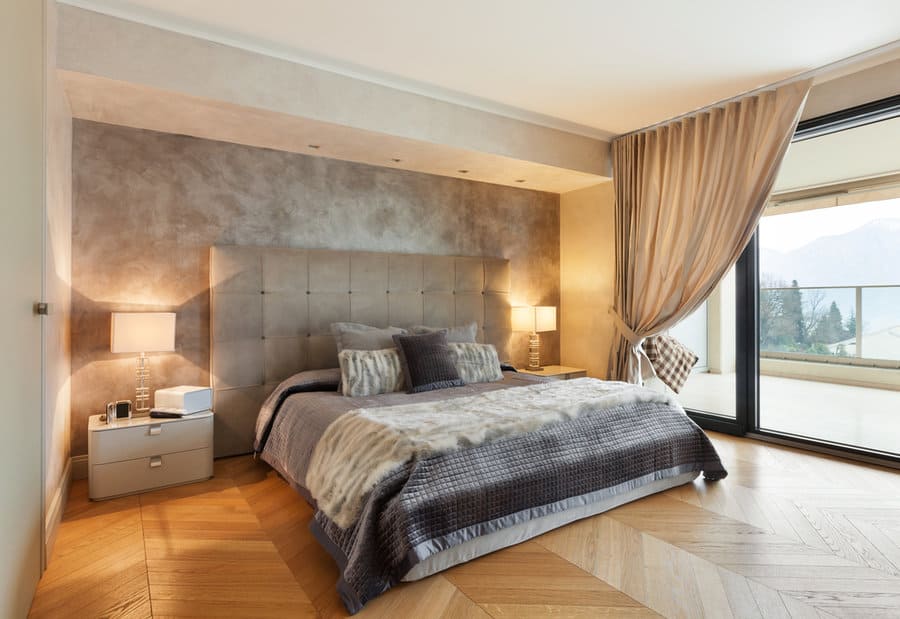
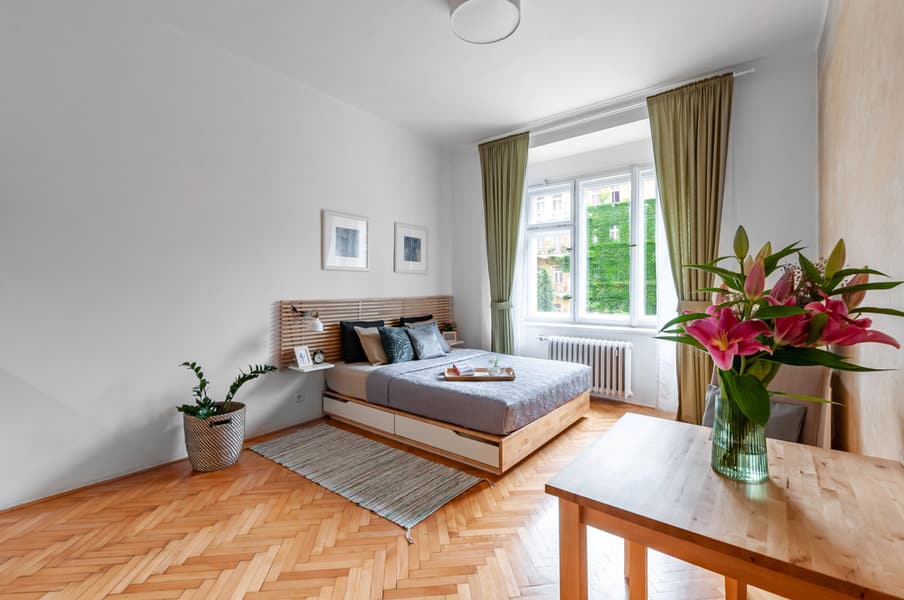
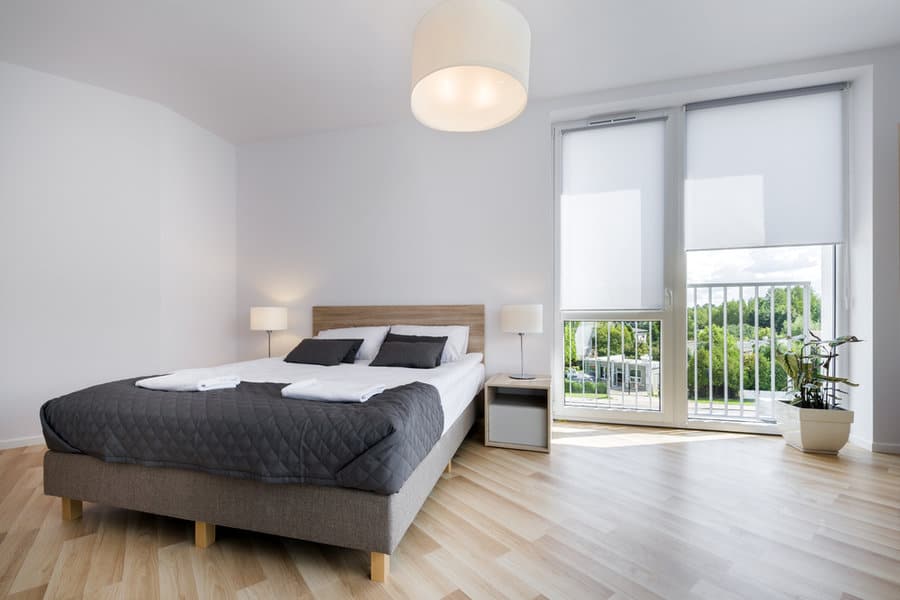
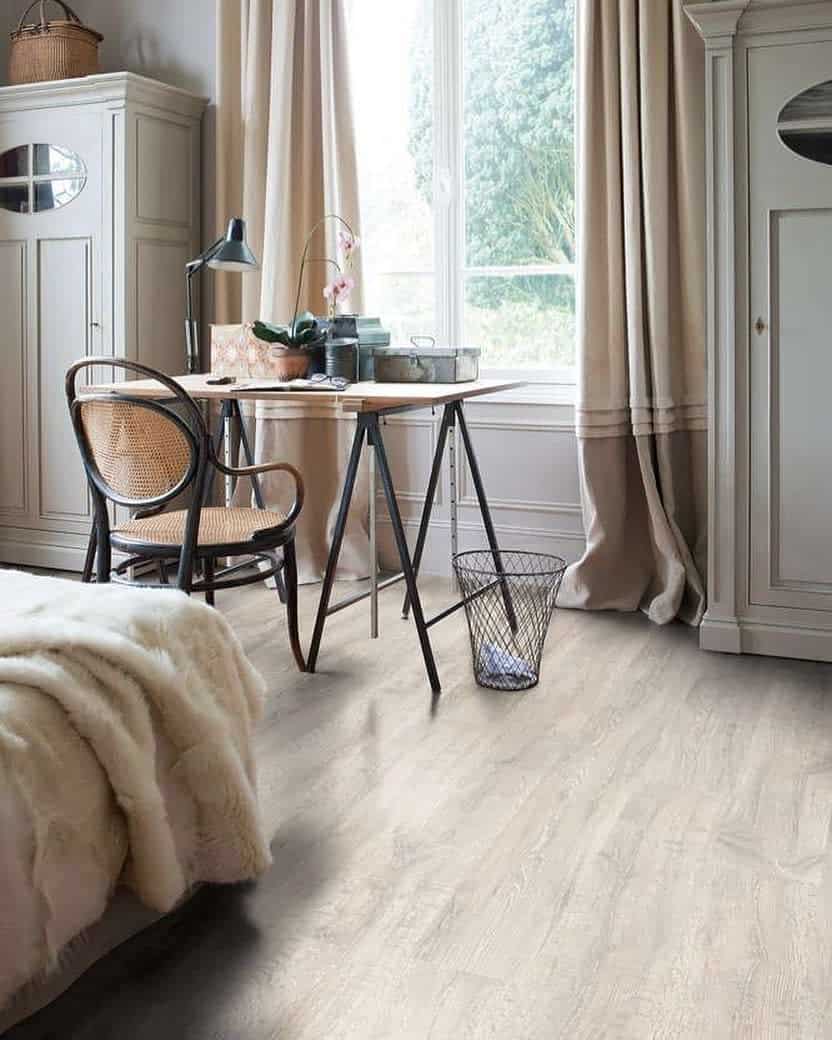
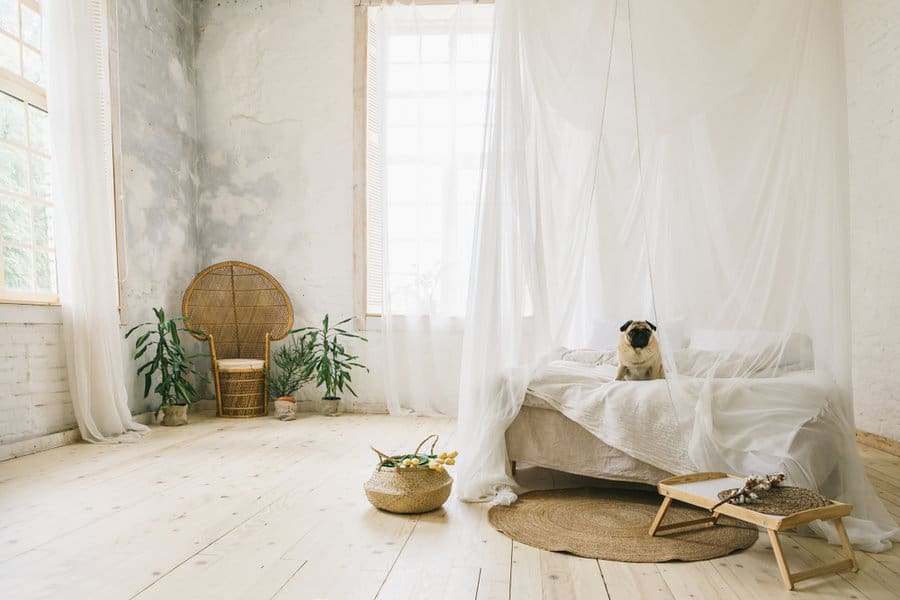
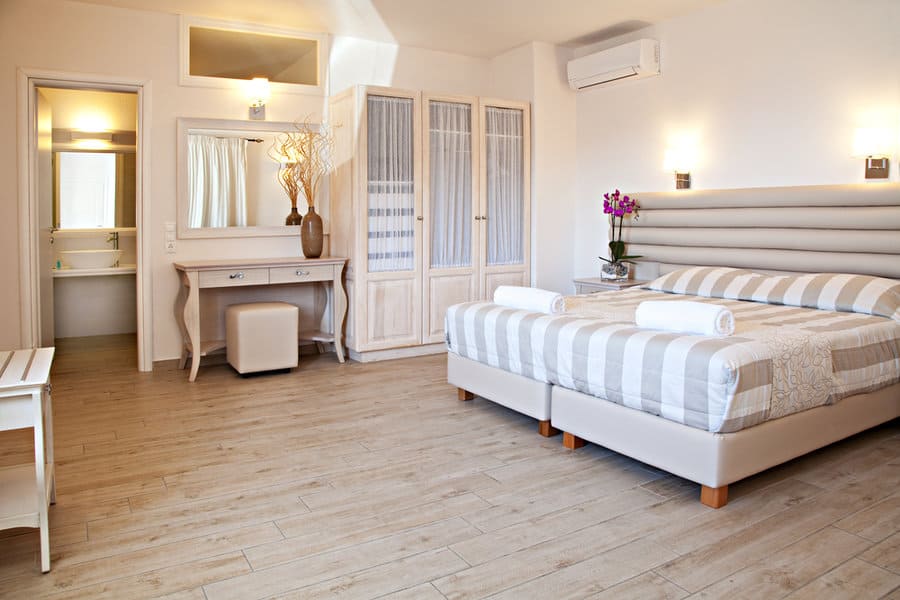
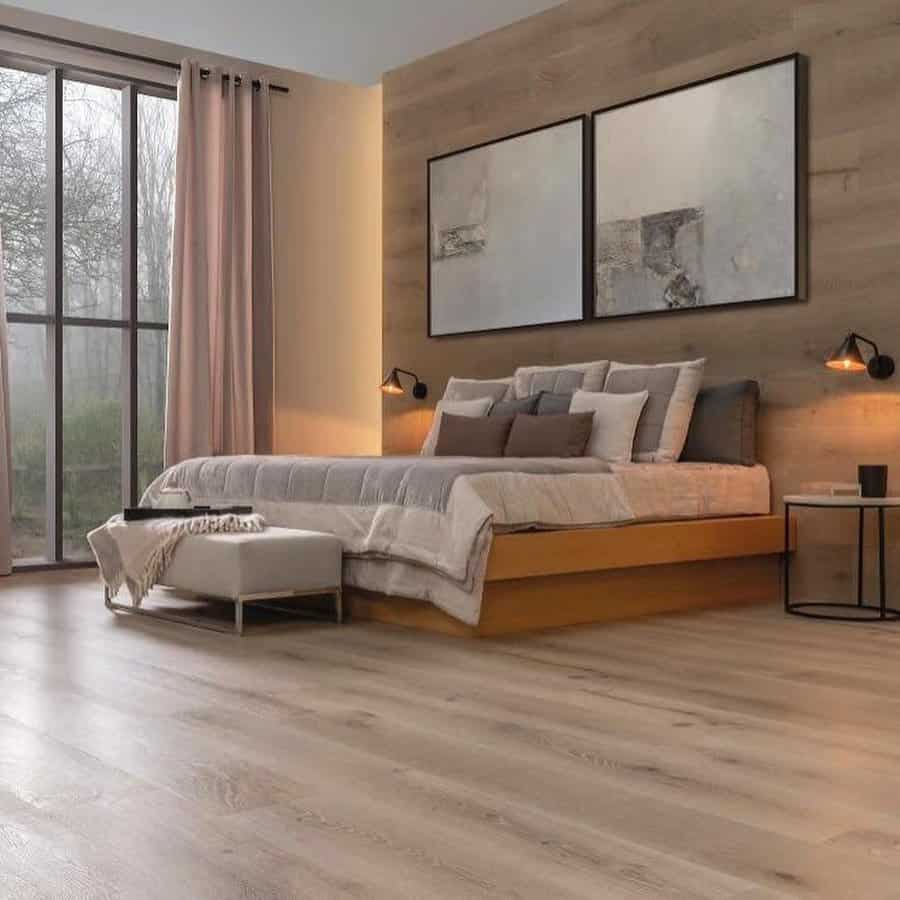
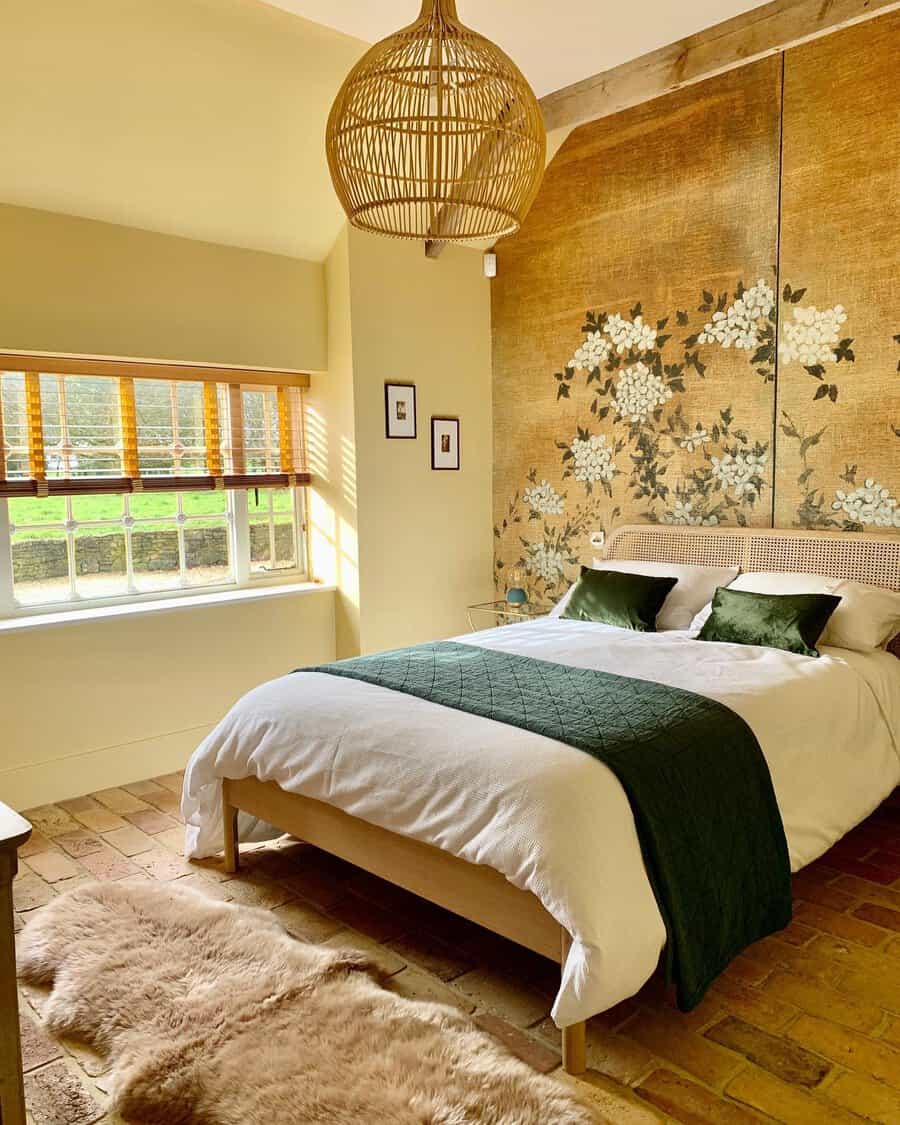
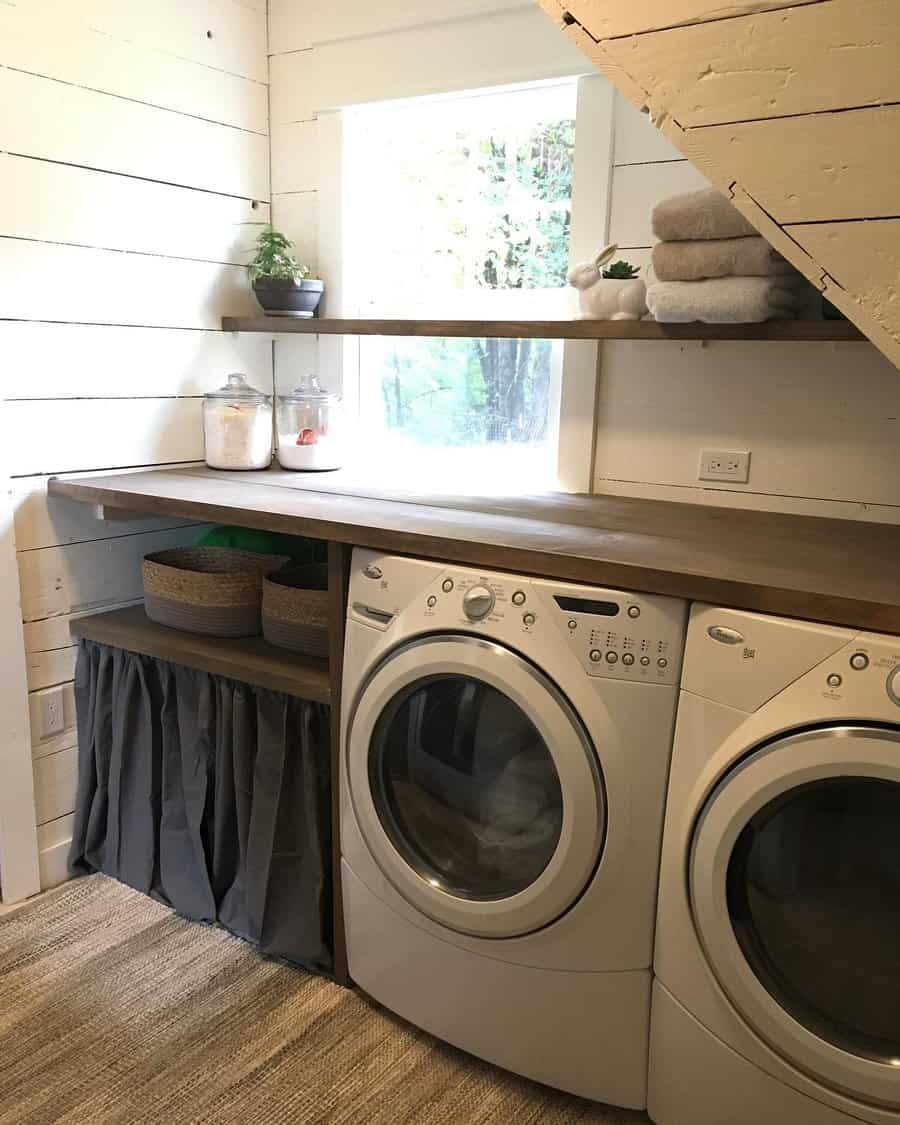
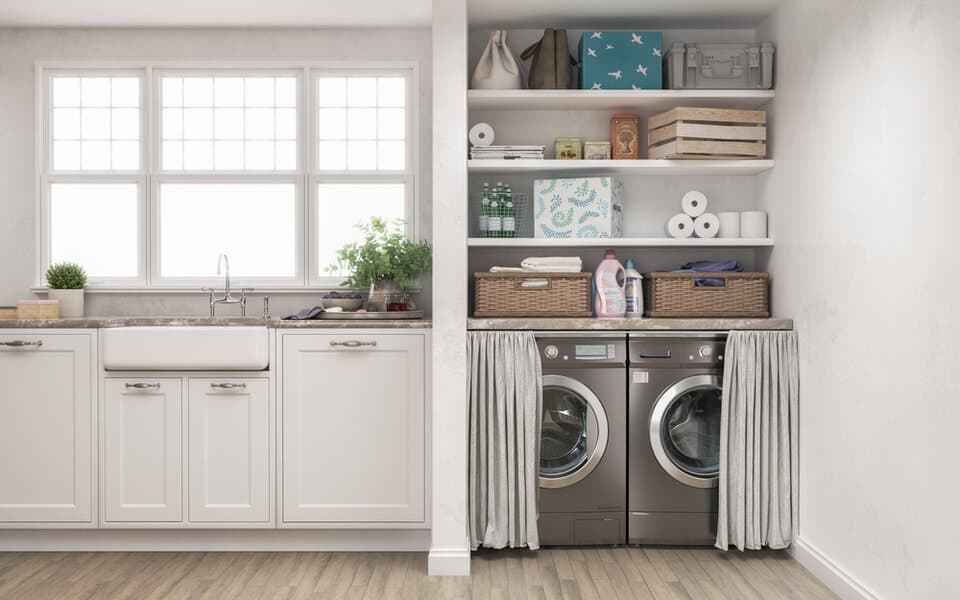
    9. Drapery Solutions for Tall Windows

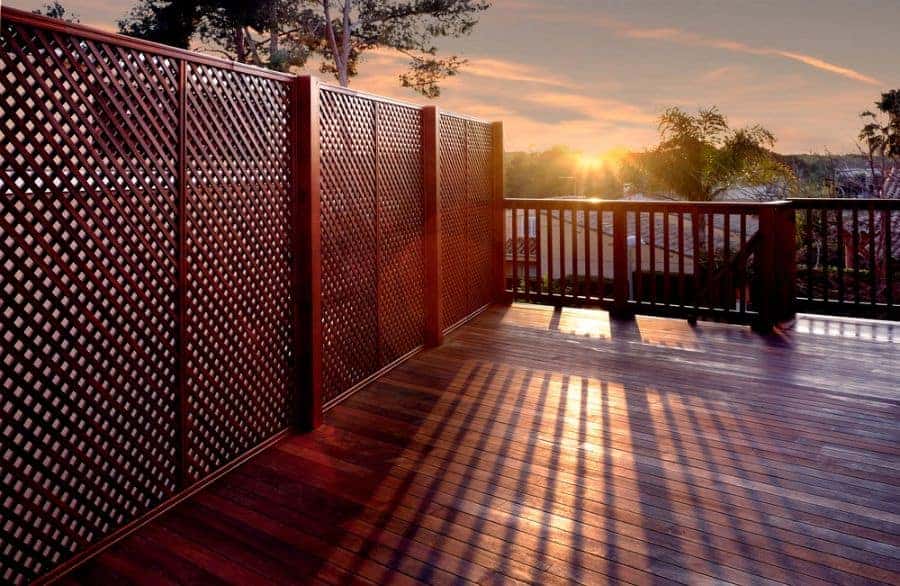
    Tall windows are a hallmark of rooms with high ceilings, offering abundant light and a sense of grandeur. However, they demand special attention when it comes to drapery, ensuring both aesthetics and functionality are in harmony.

    Selecting extended curtain rods that stretch wider than the window frame can create an illusion of even larger windows, further emphasizing the room’s verticality.

    Floor-to-ceiling drapes are a must. Not only do they underscore the room’s height, but they also provide an elegant and continuous visual flow. Materials like velvet or heavy linen can offer a luxurious feel, while sheer, breezy fabrics can maintain an airy ambiance.

    Layering is key. Using a combination of sheer drapes for daytime privacy and heavier, opaque curtains for night can ensure versatility. This dual approach also adds depth and texture to the window space.

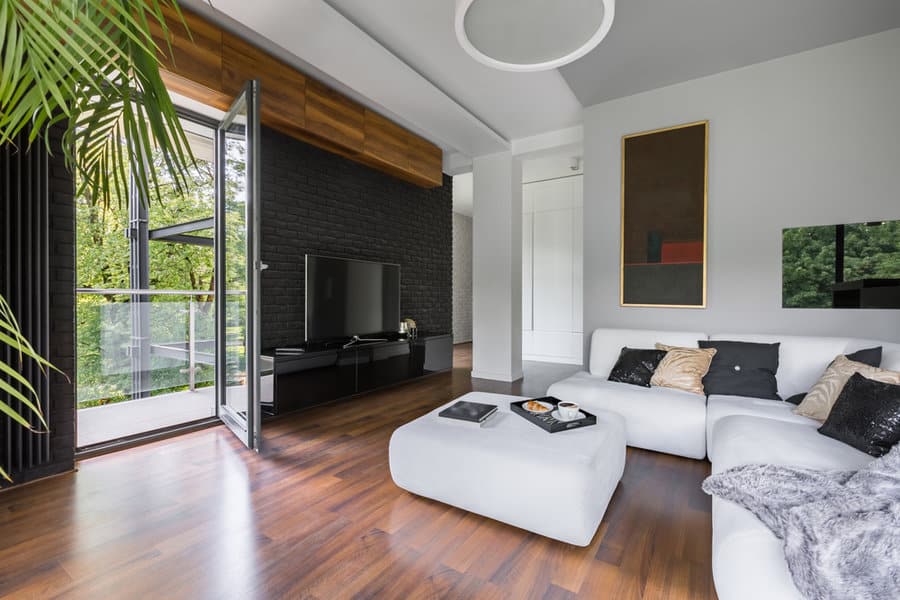
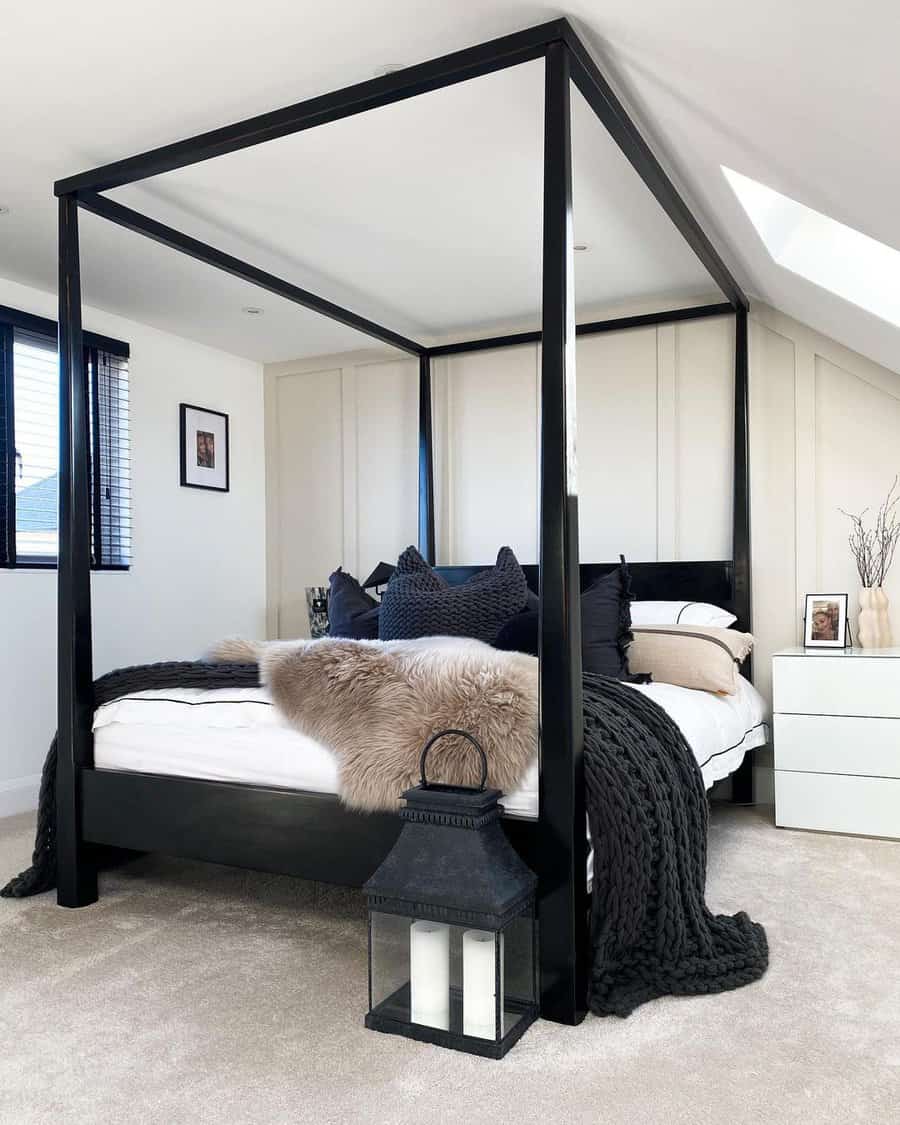
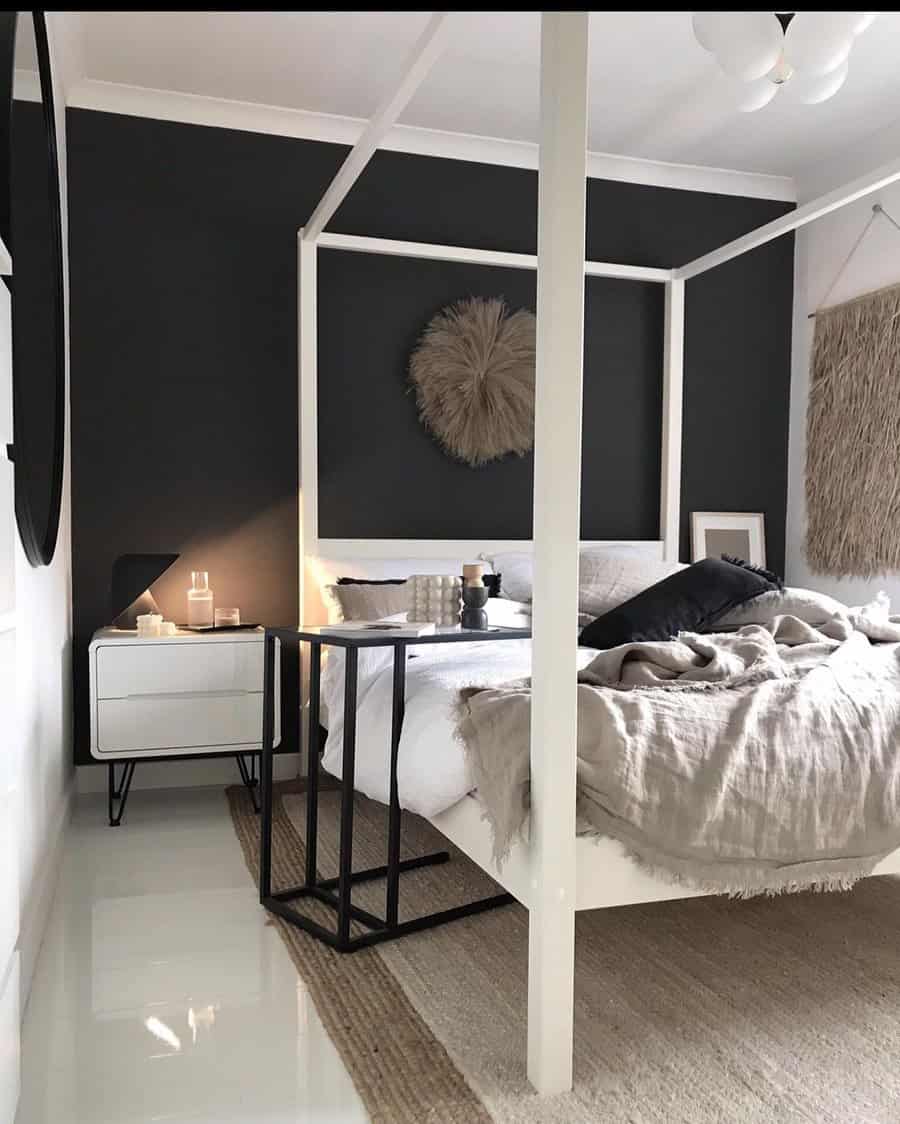
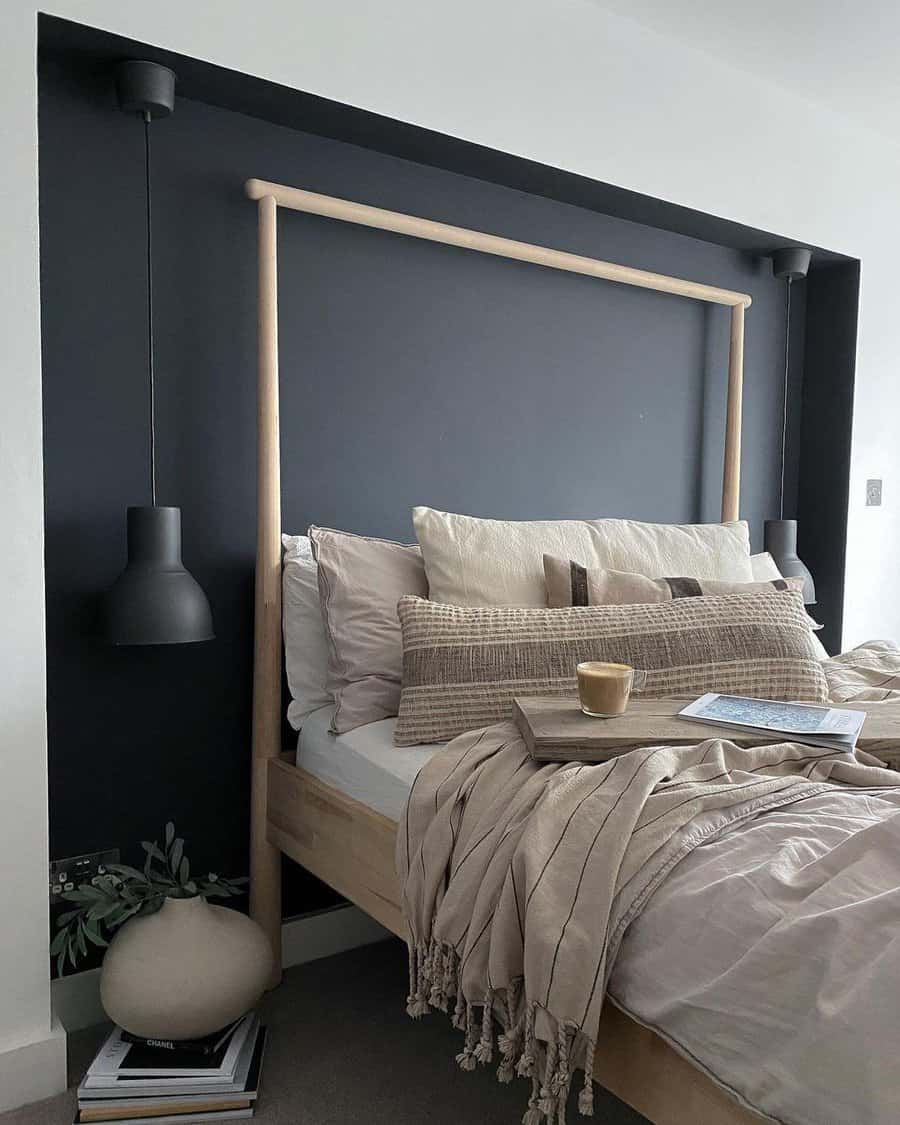
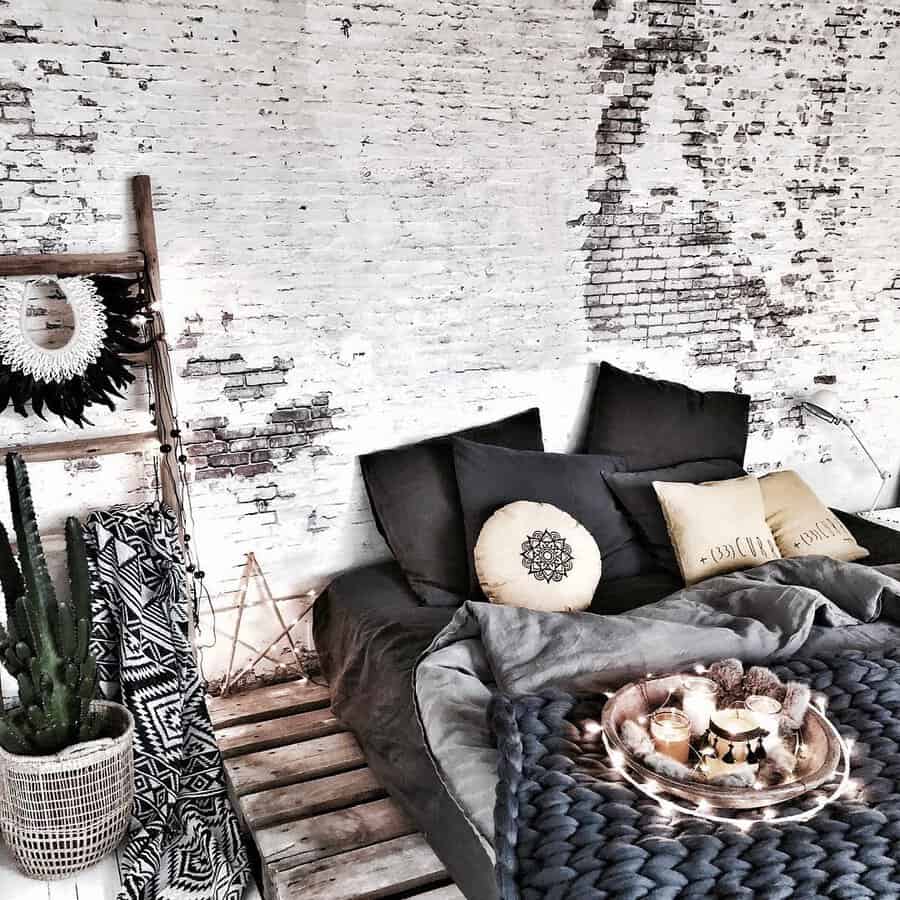
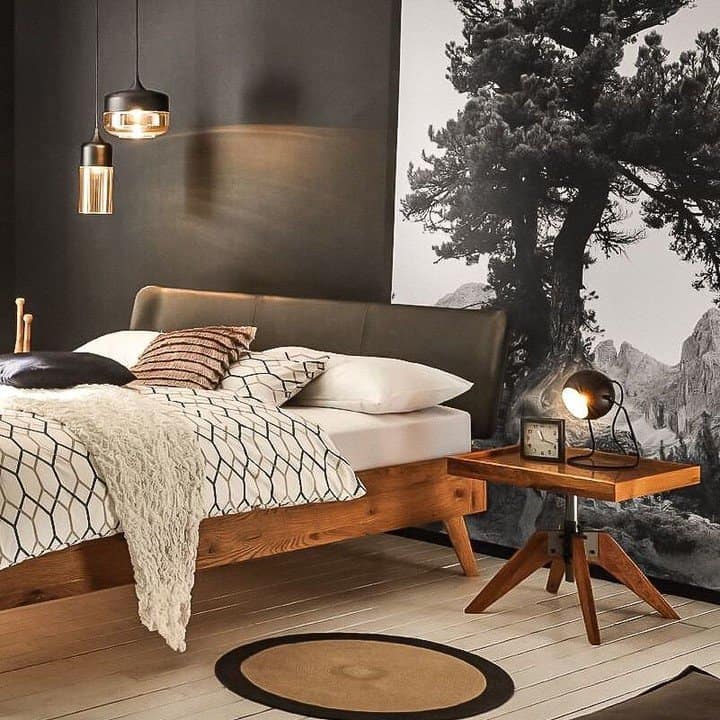
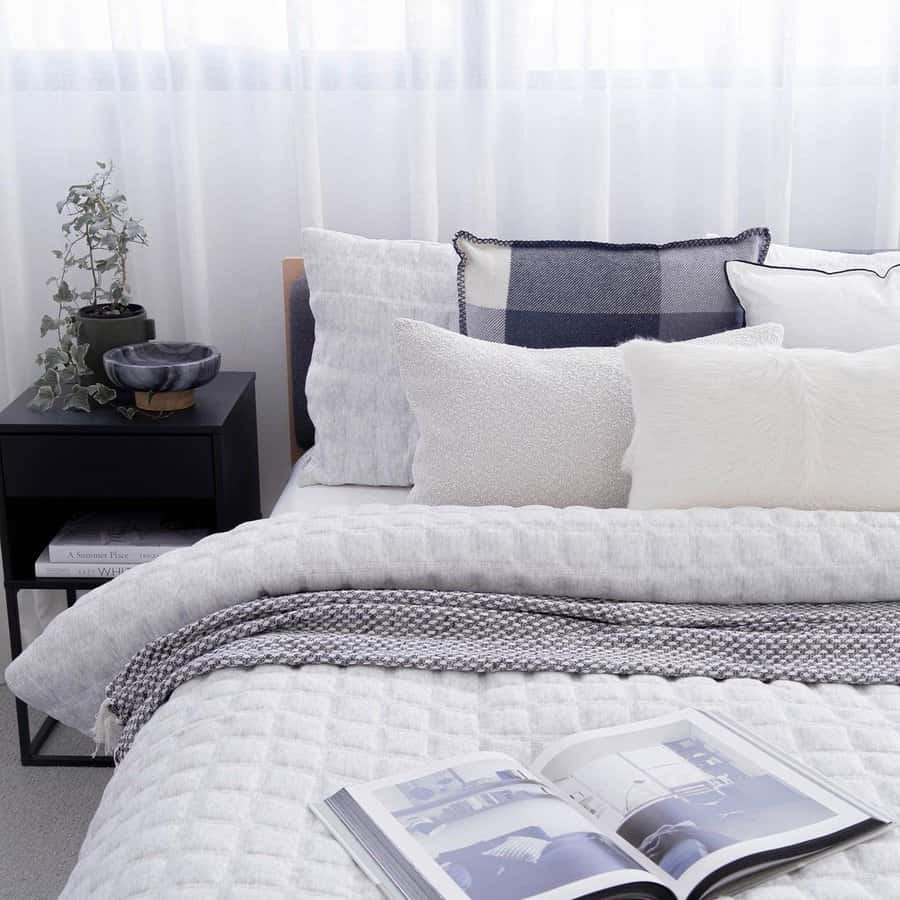
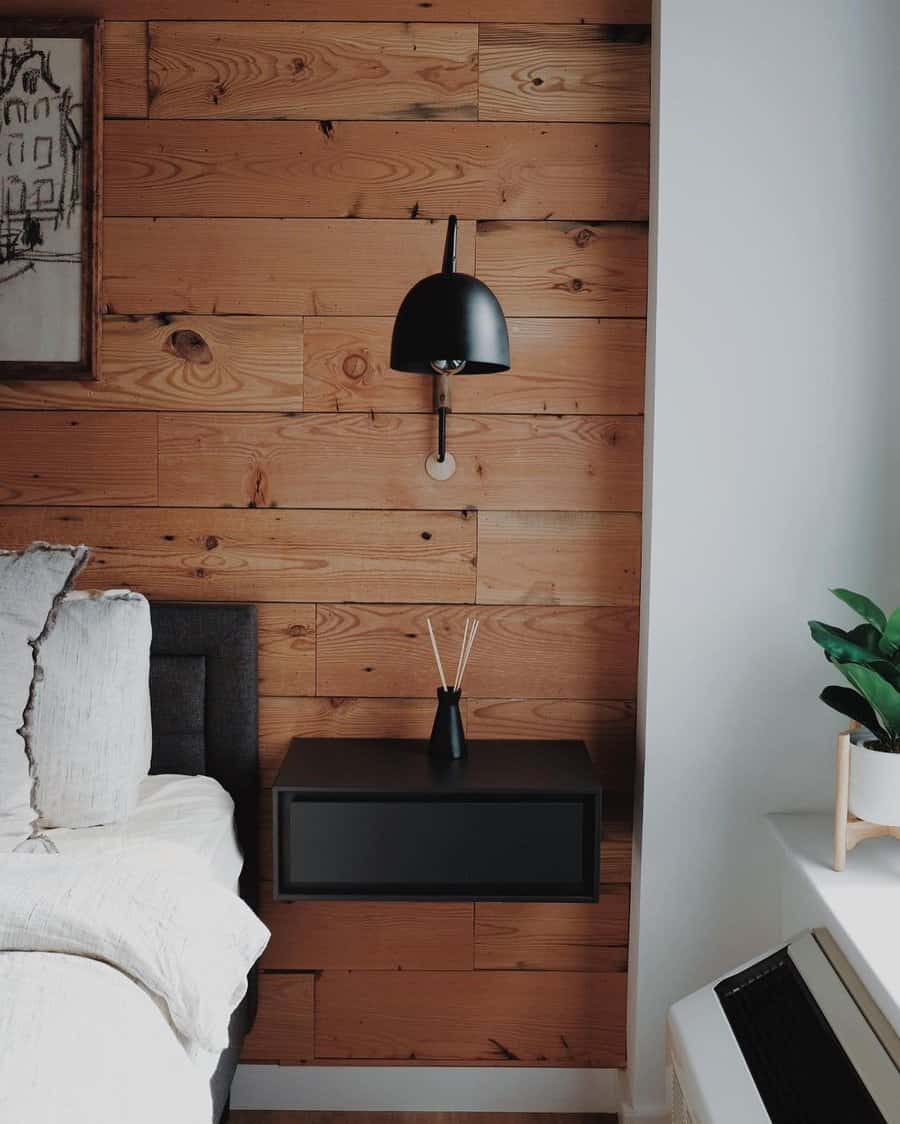
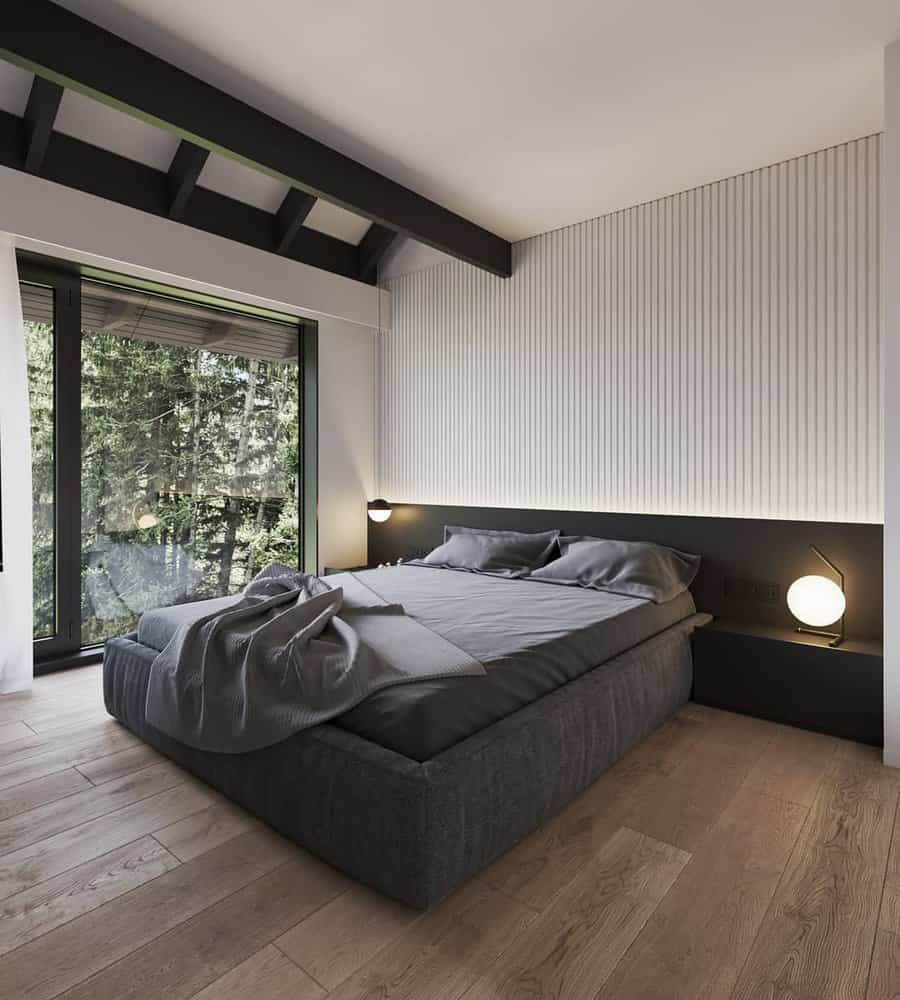
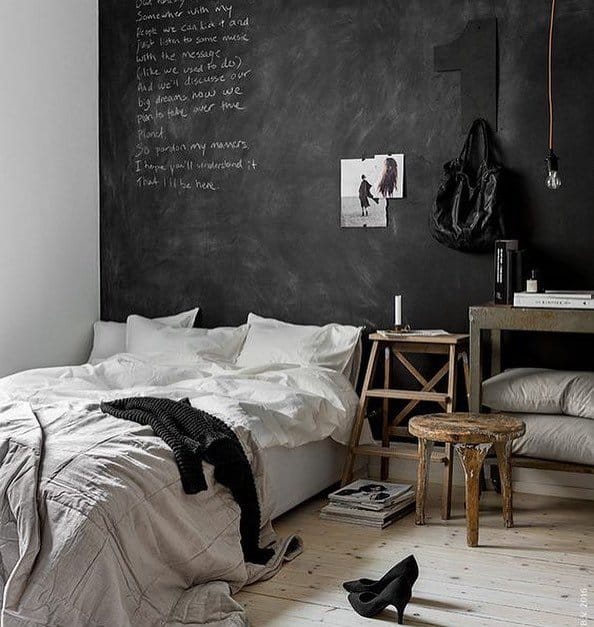
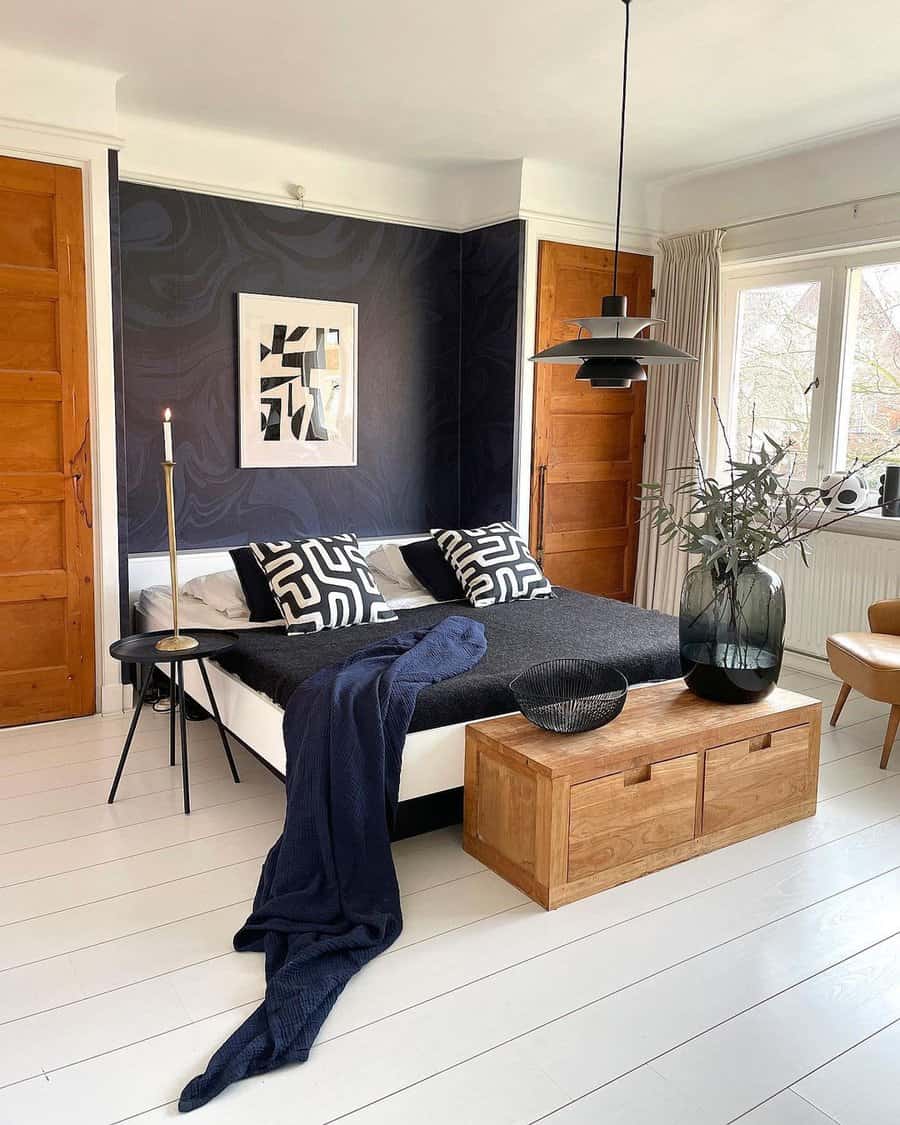
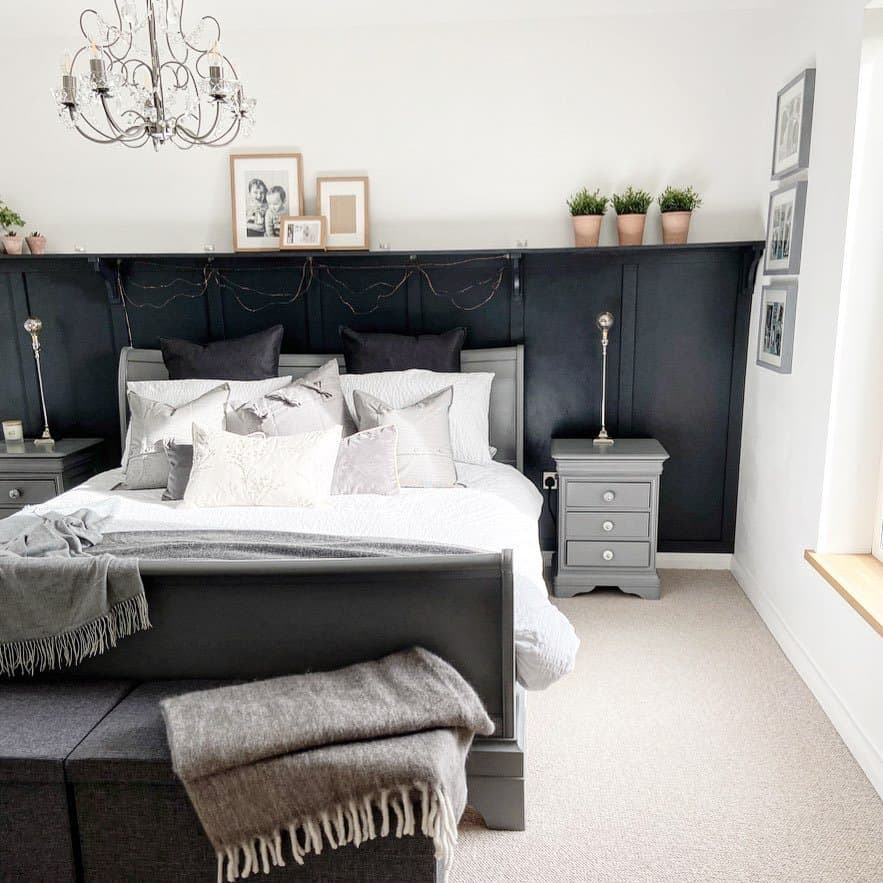
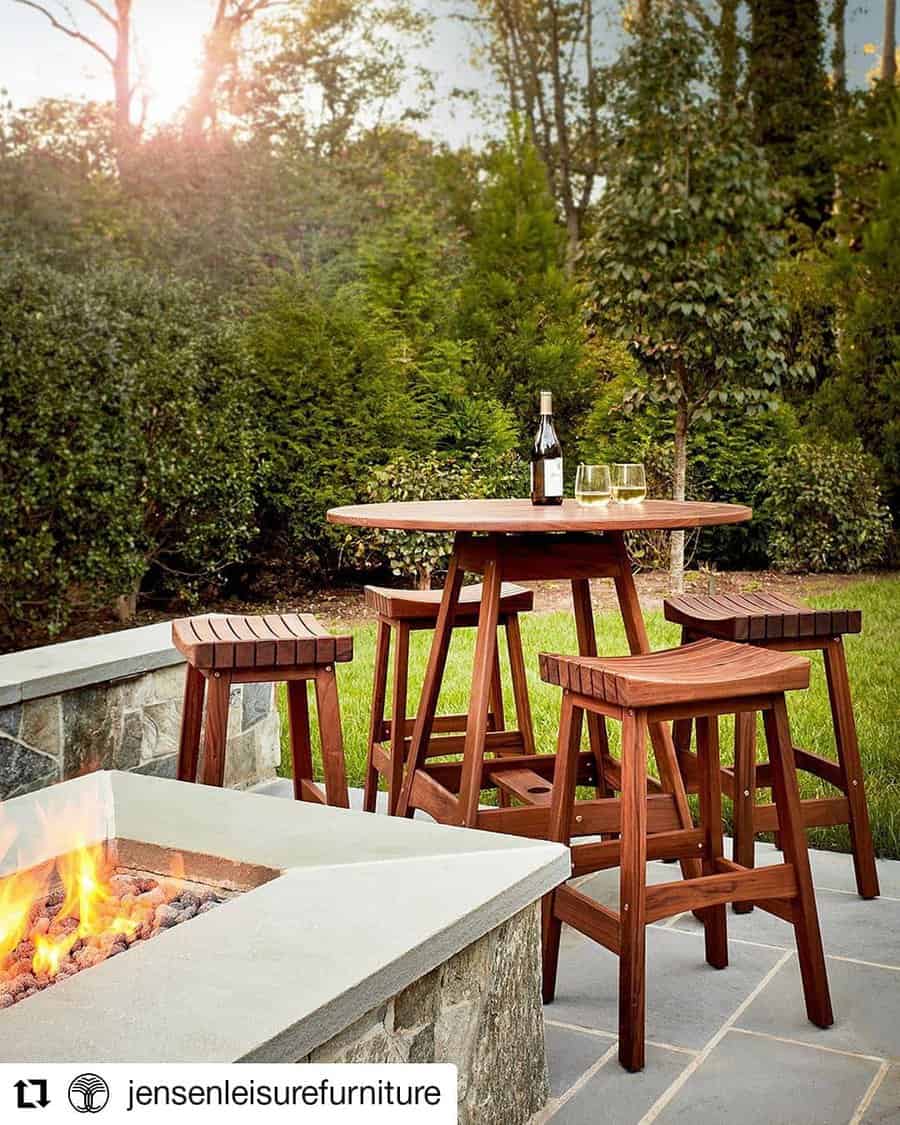
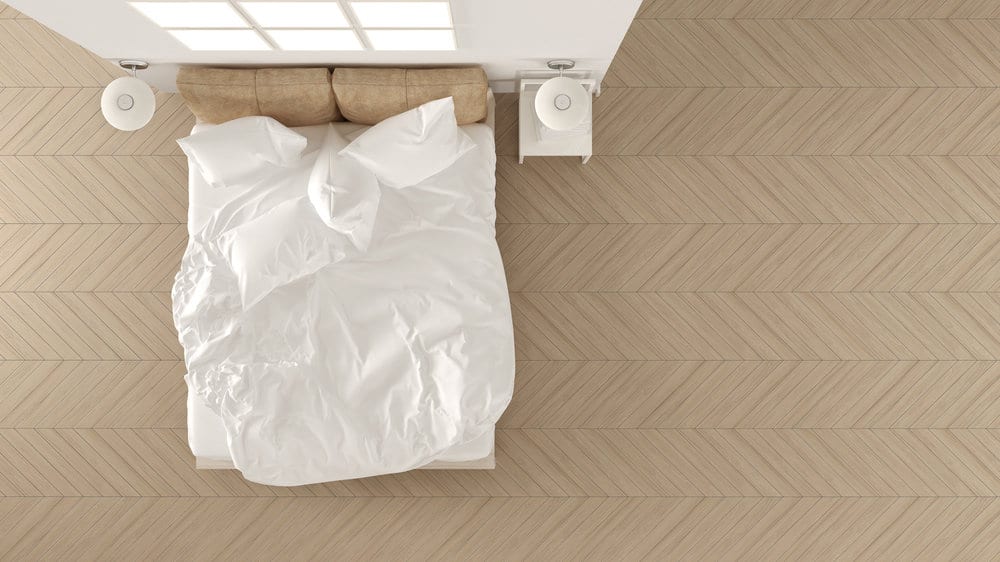
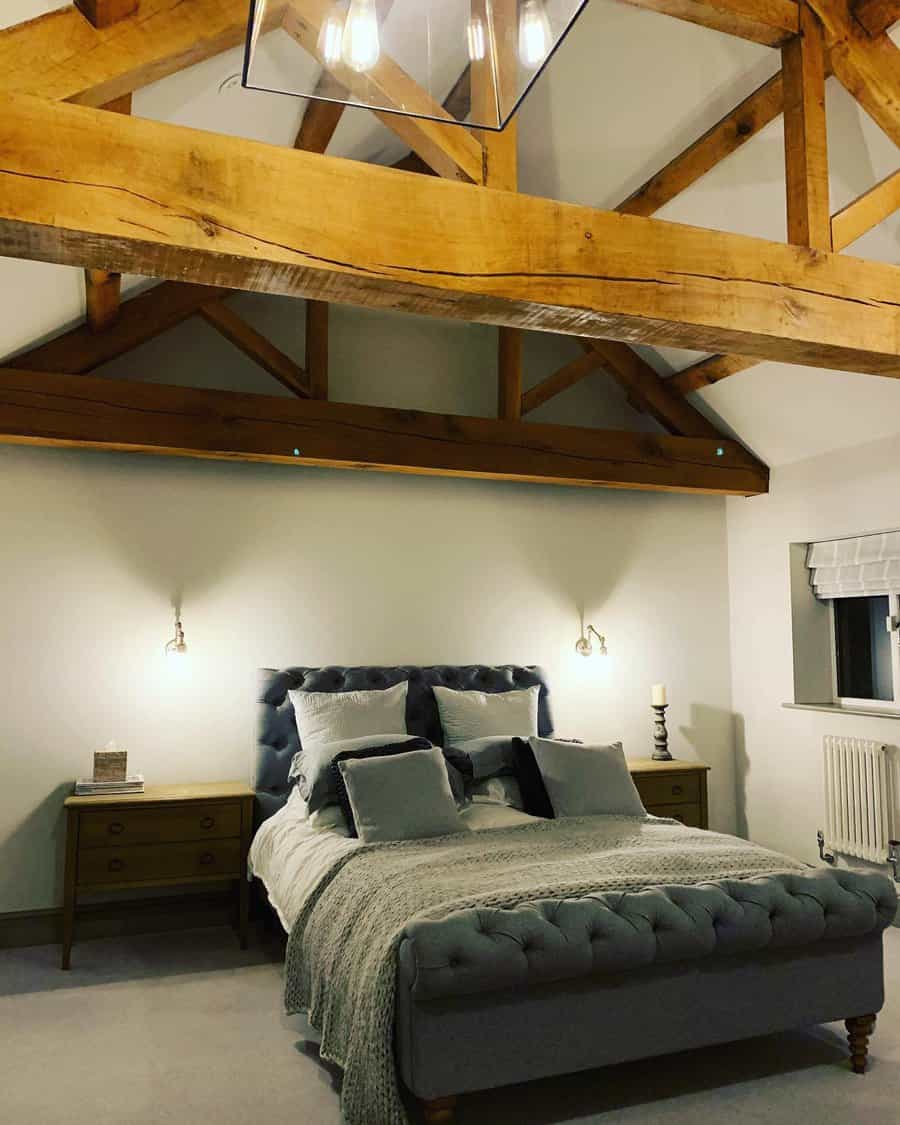
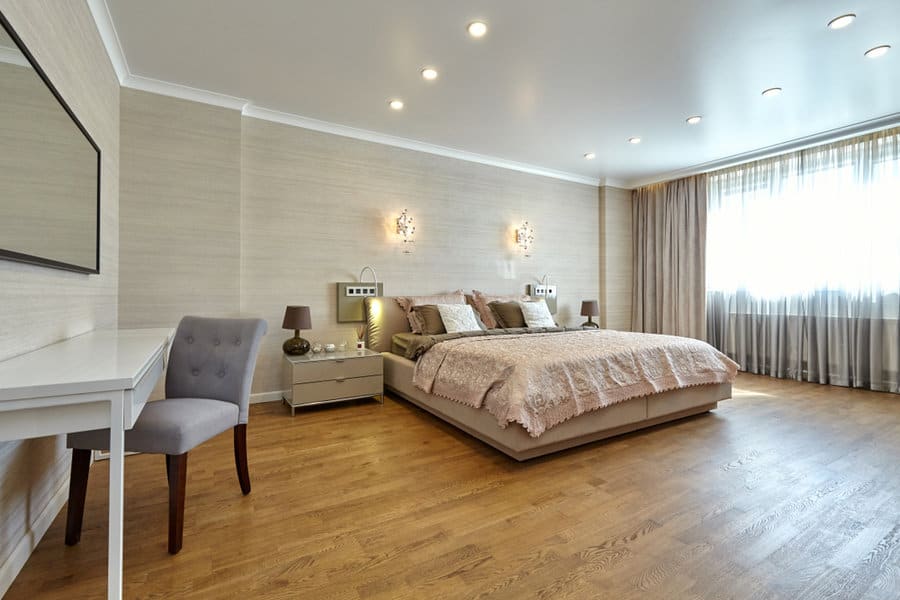
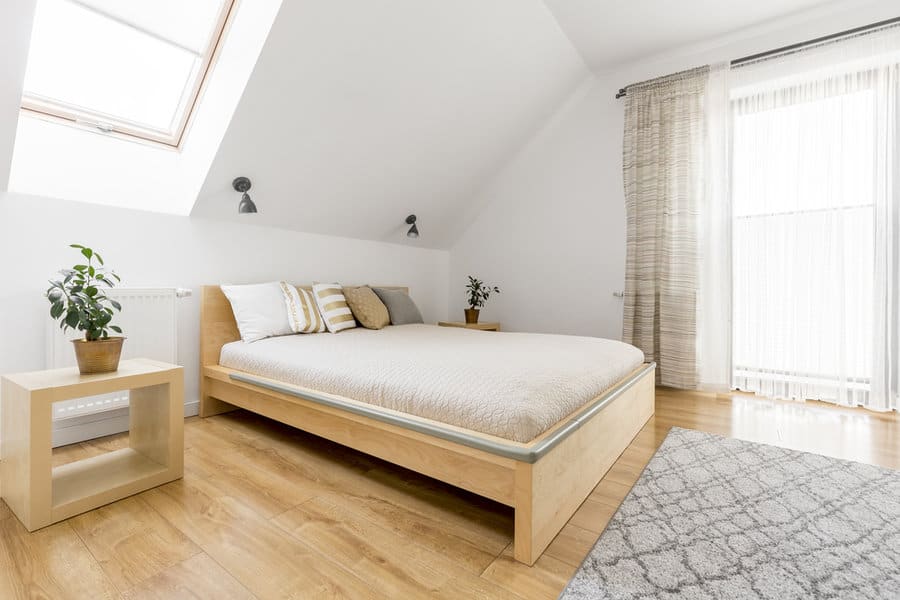
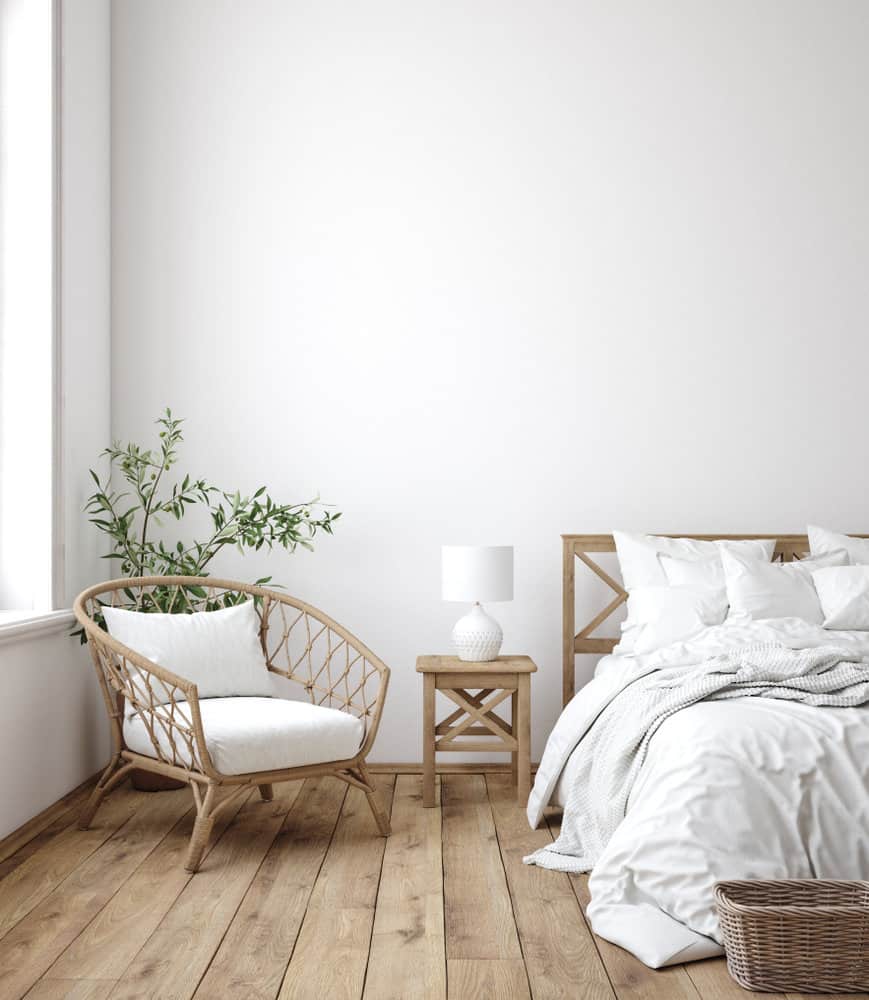
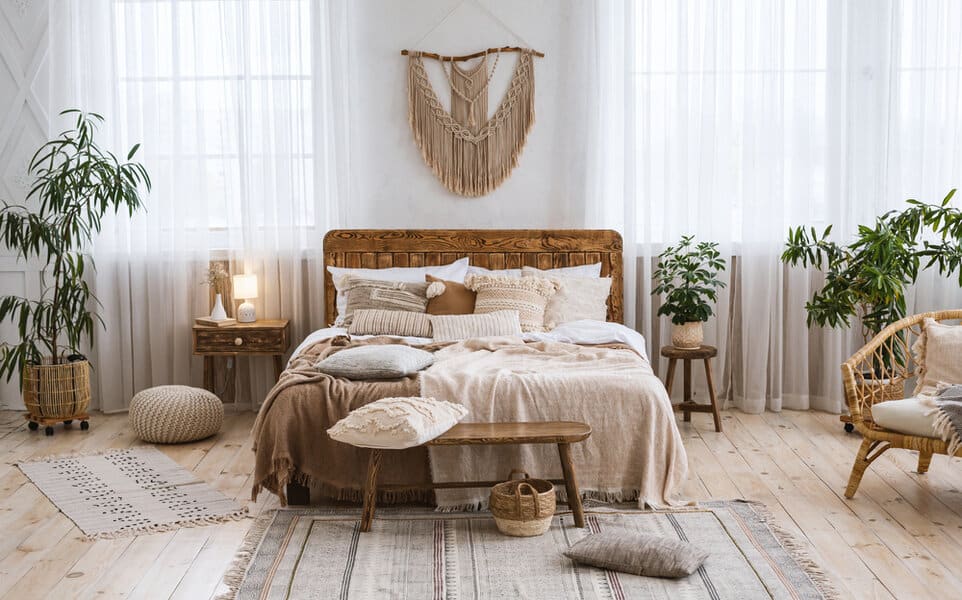
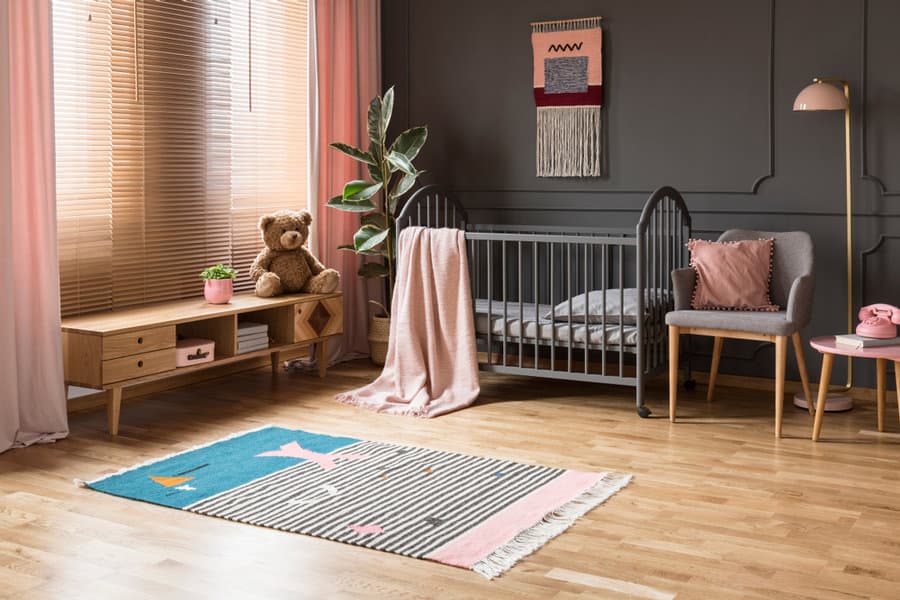
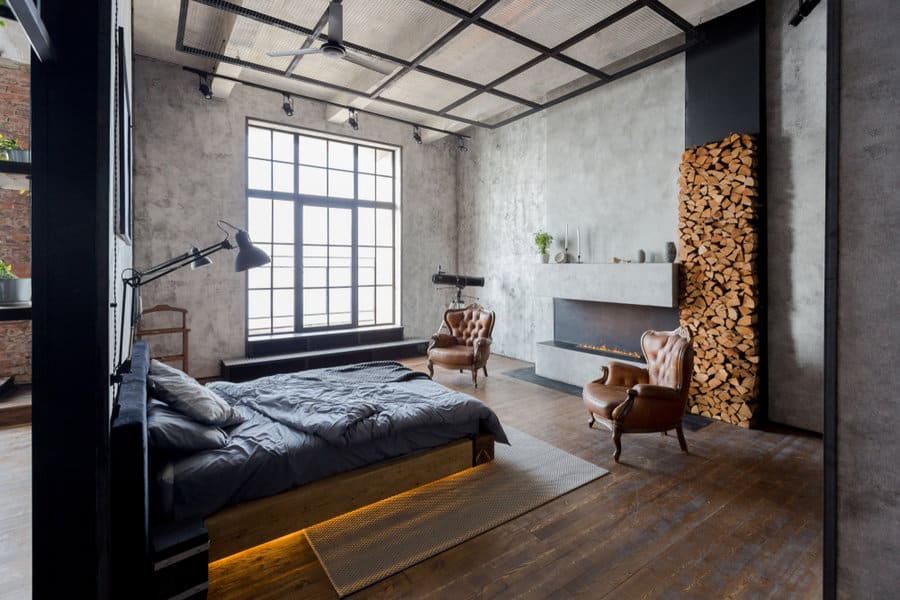
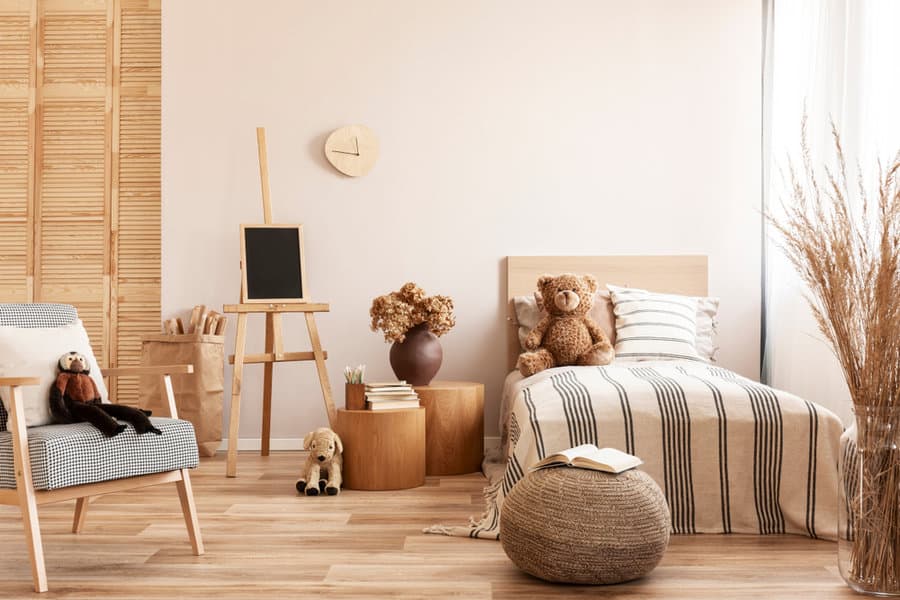
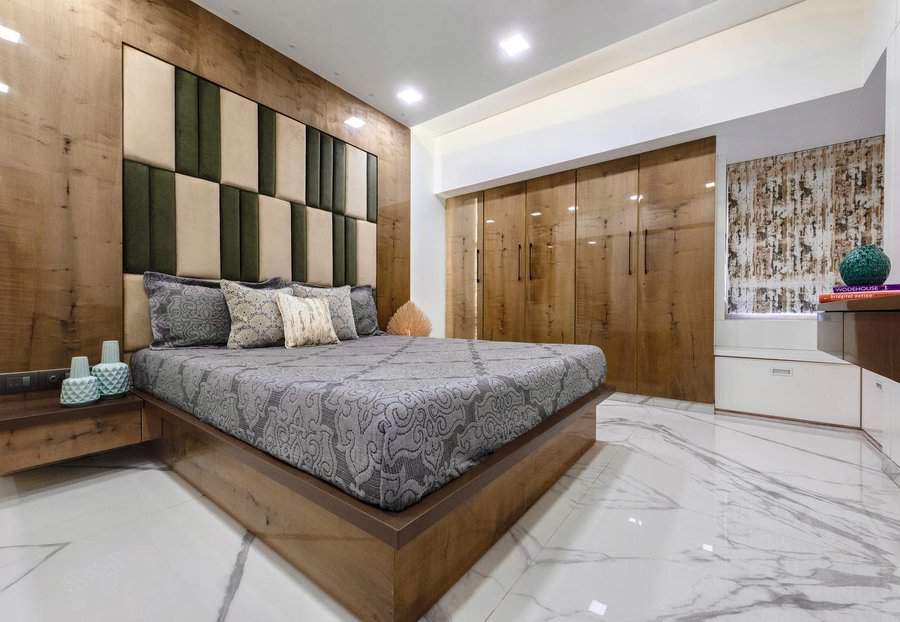
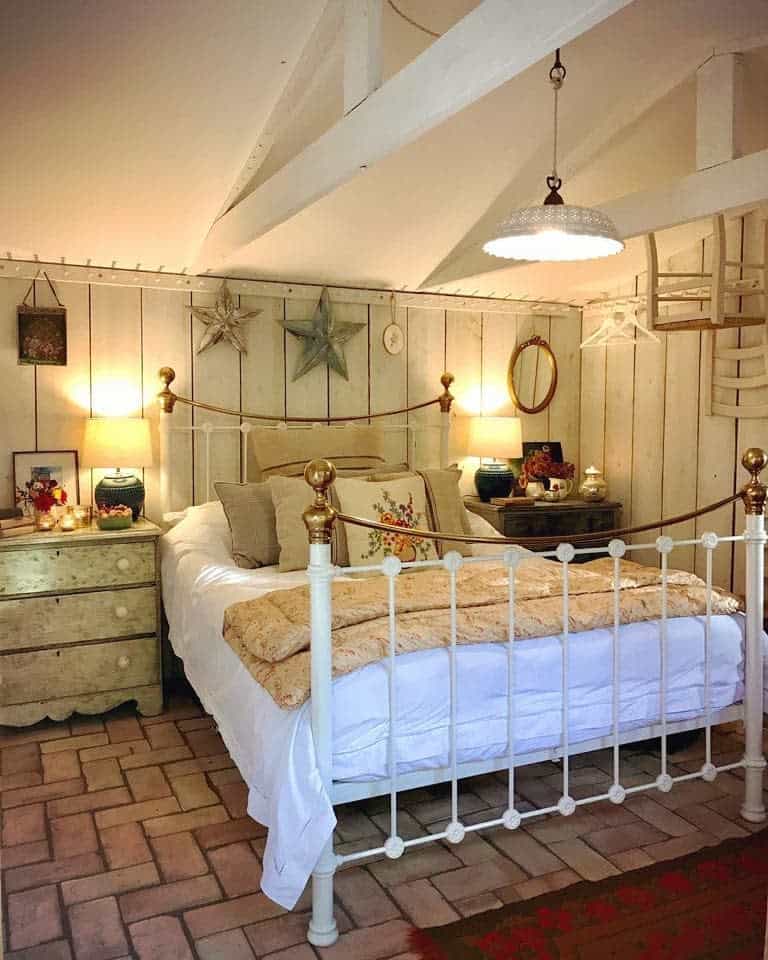
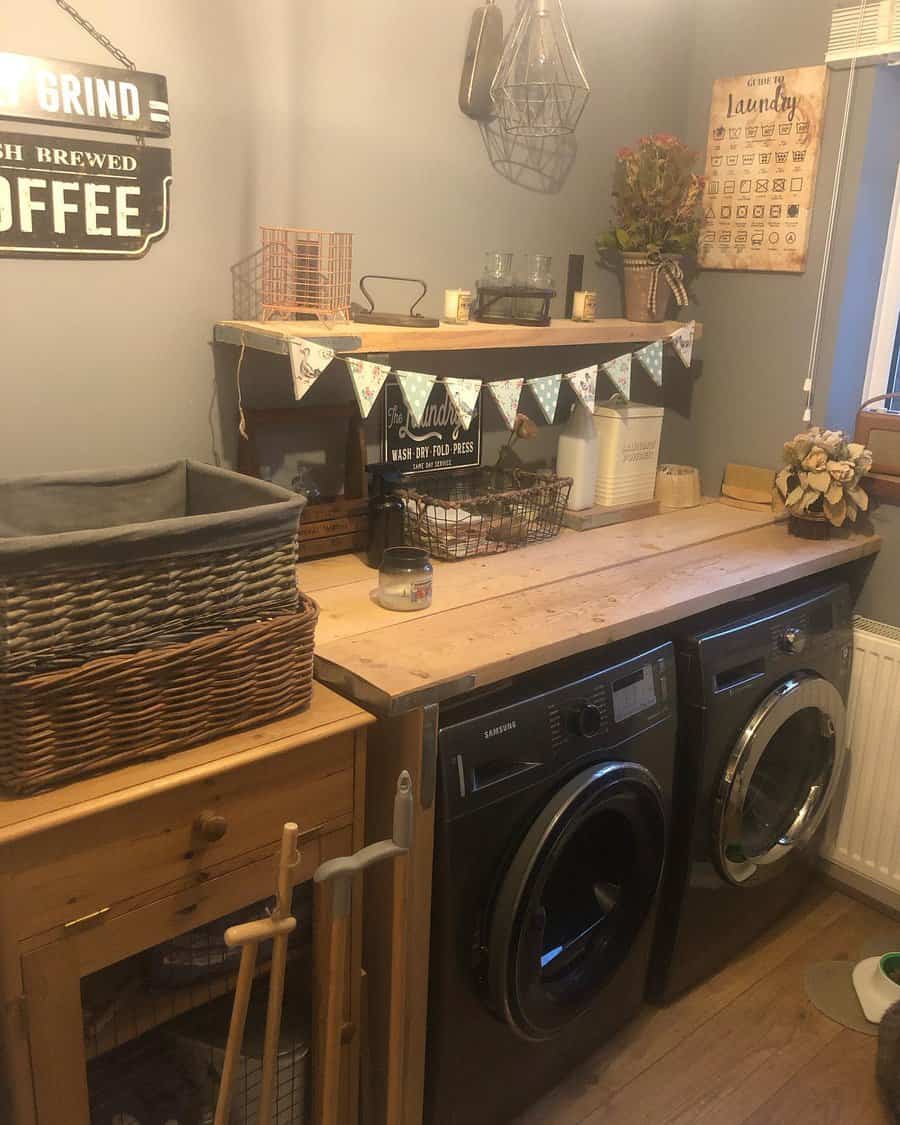
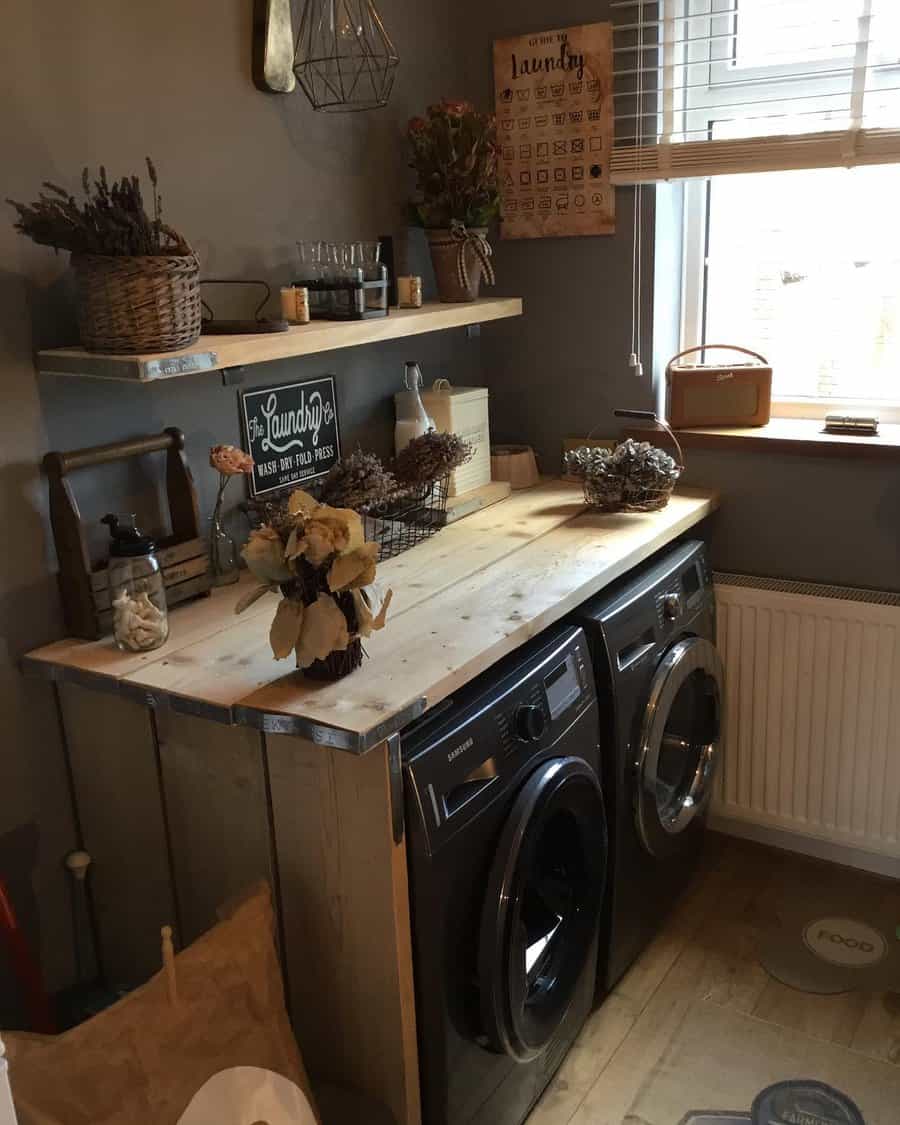
    10. Cozying Up: Textures and Materials for High Spaces

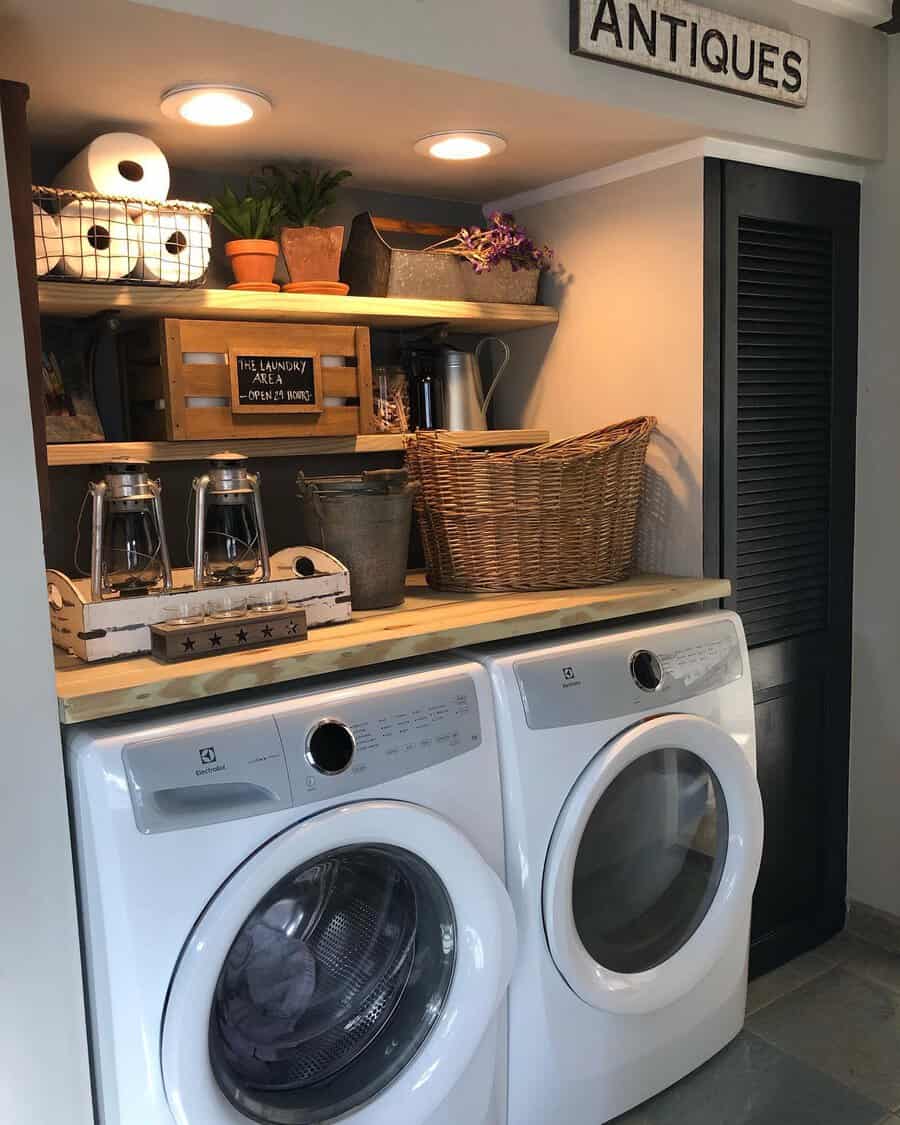
    High ceilings, while majestic, can sometimes impart a feeling of coldness or detachment. Introducing varied textures and materials is key to warming up the space, making it feel intimate and welcoming

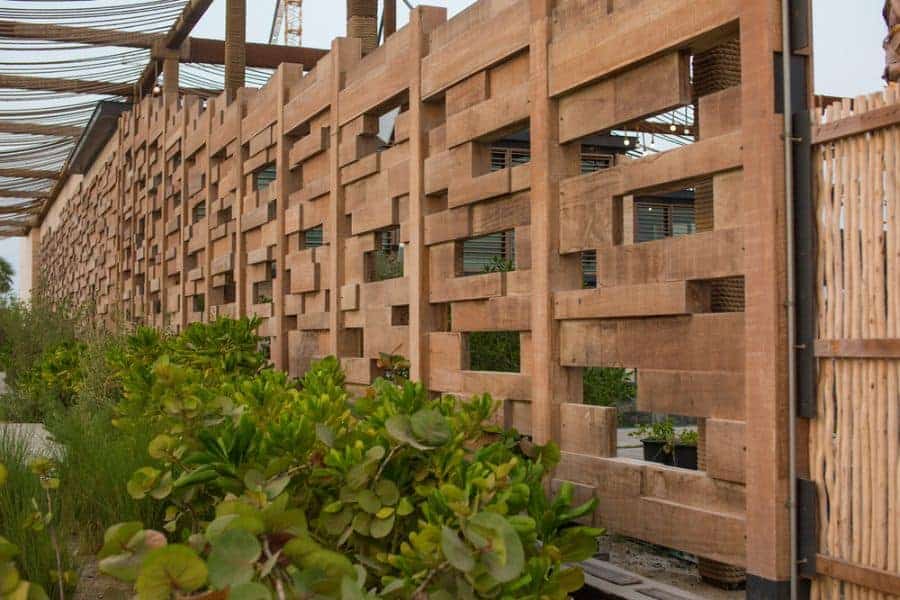
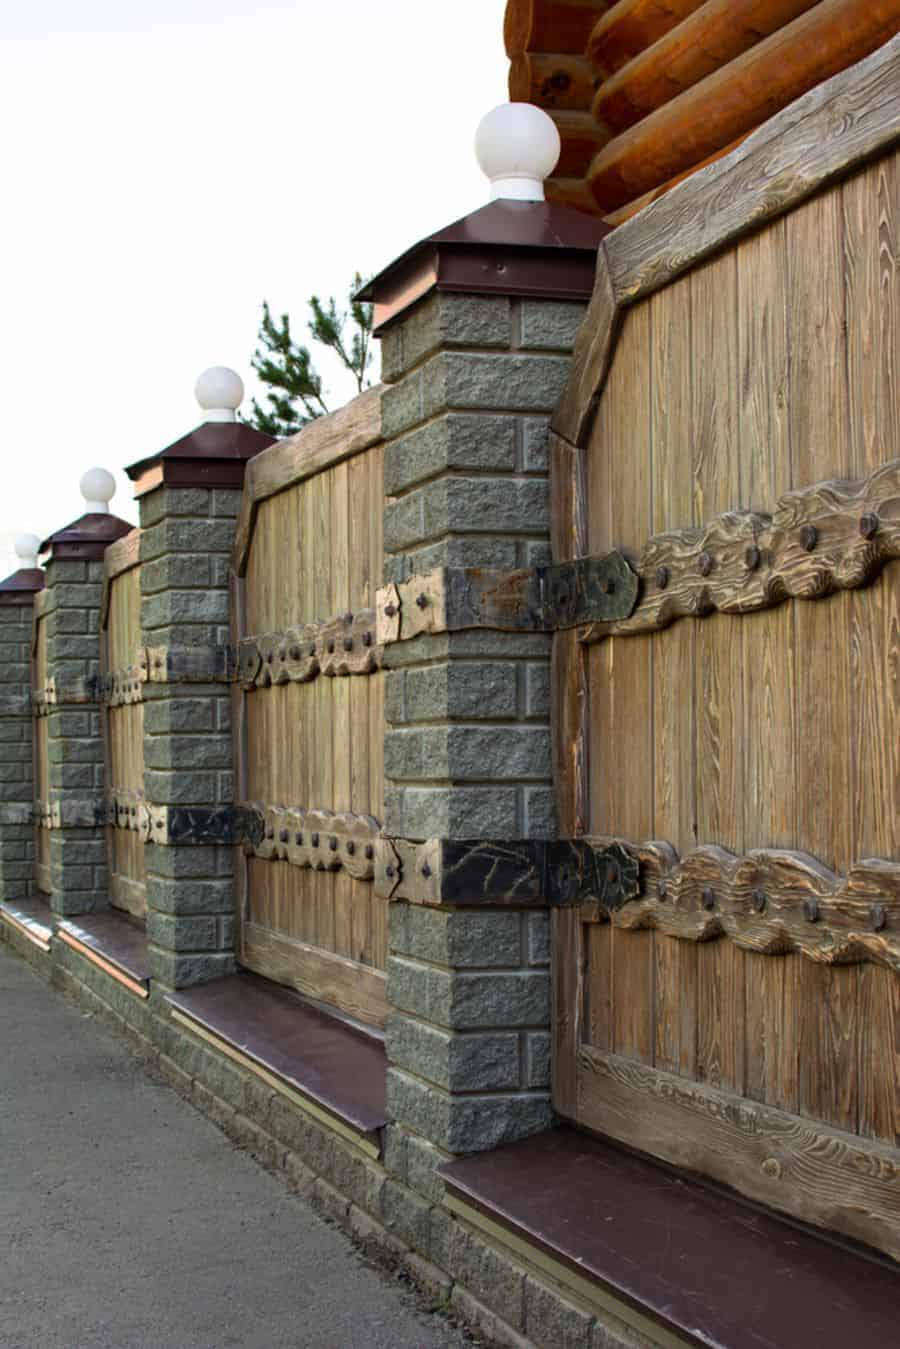
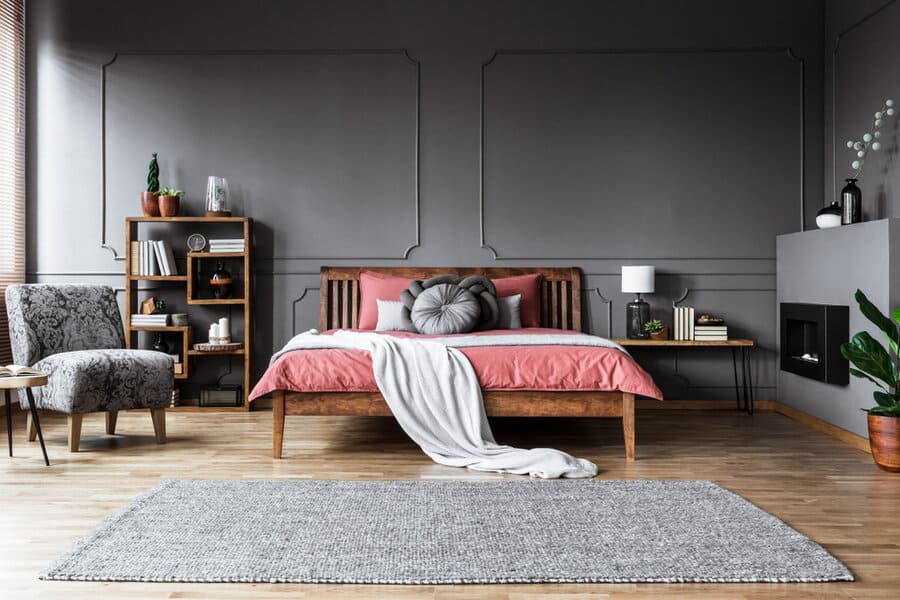
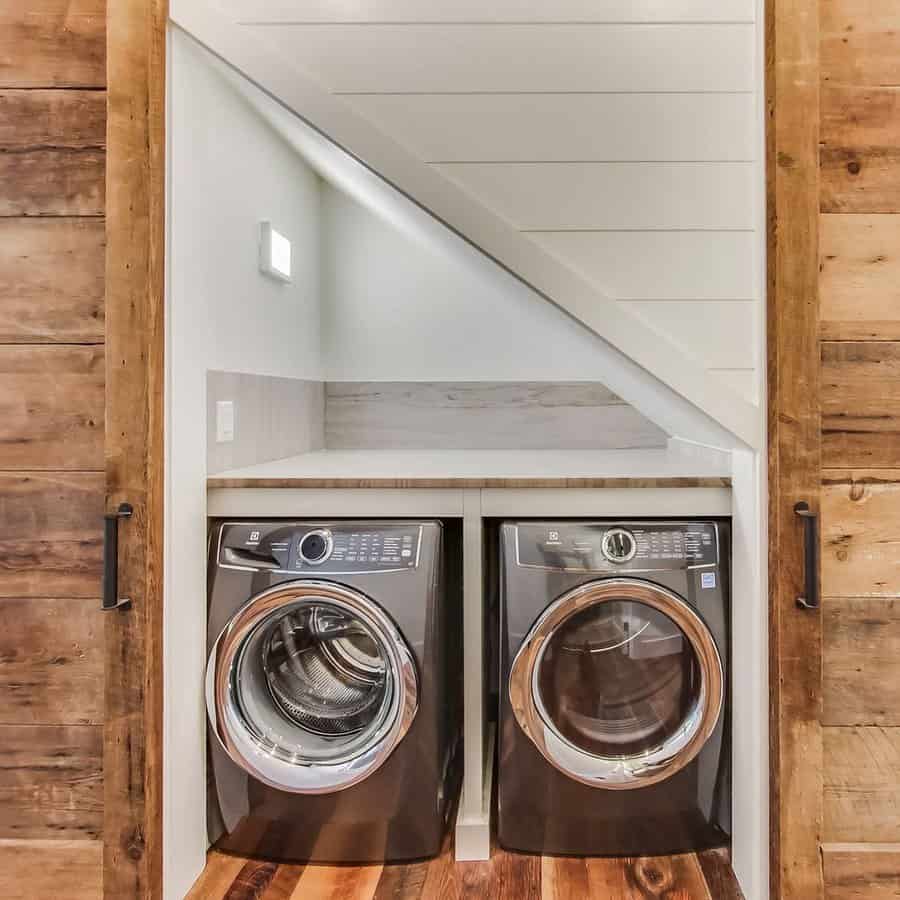
    Rustic wooden beams or paneled ceilings can instantly add warmth. The raw, earthy texture of wood contrasts beautifully with the openness of a high ceiling, offering both visual and tactile comfort.

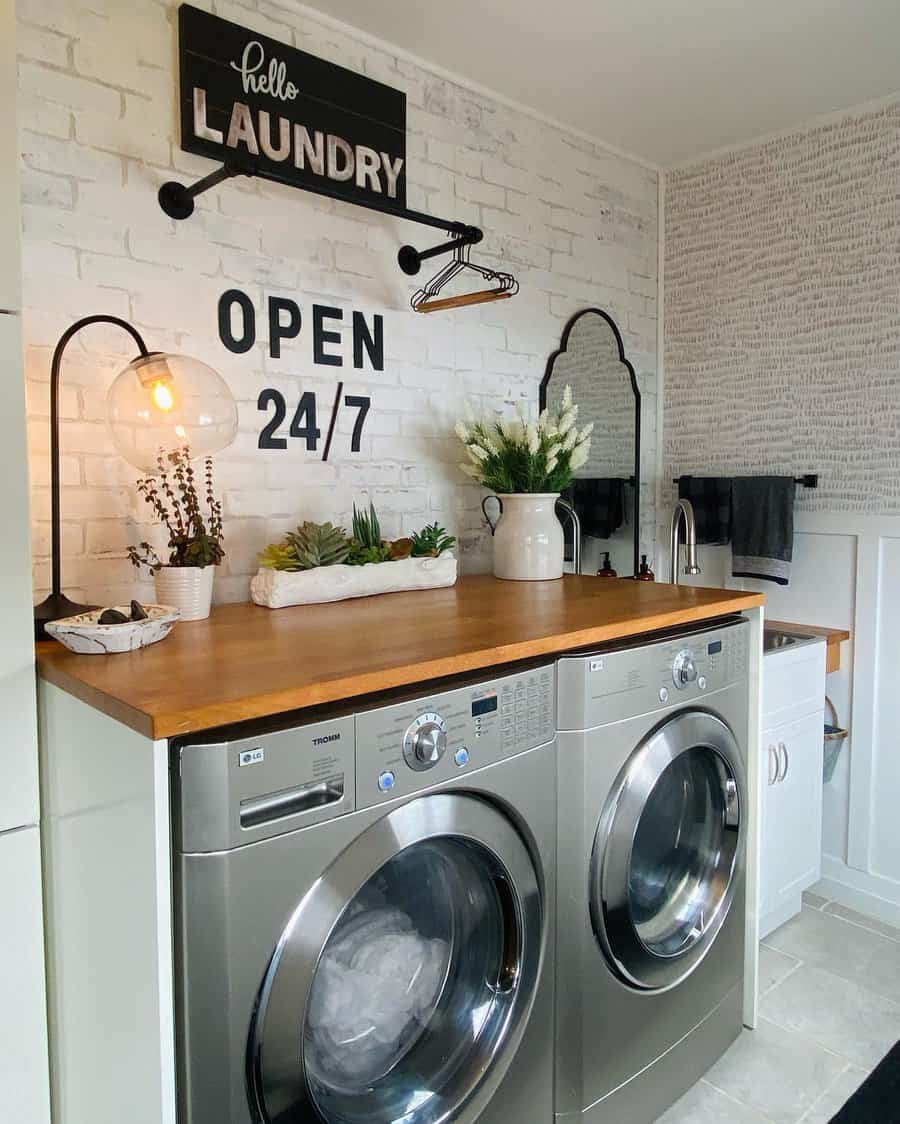
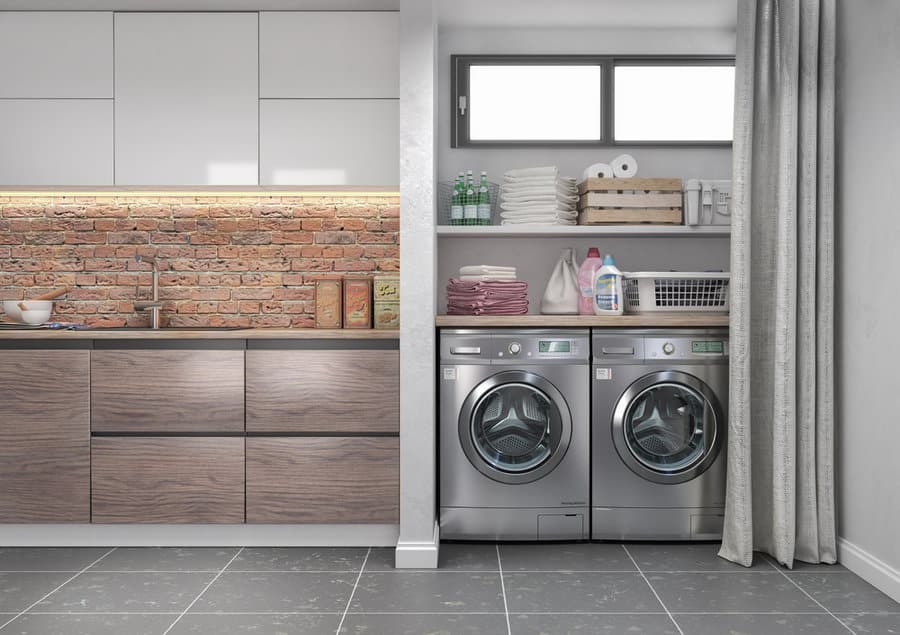
    Wall textures, like exposed brick or decorative plaster, can elevate the cozy quotient. These tactile surfaces can reduce the starkness often associated with towering walls.

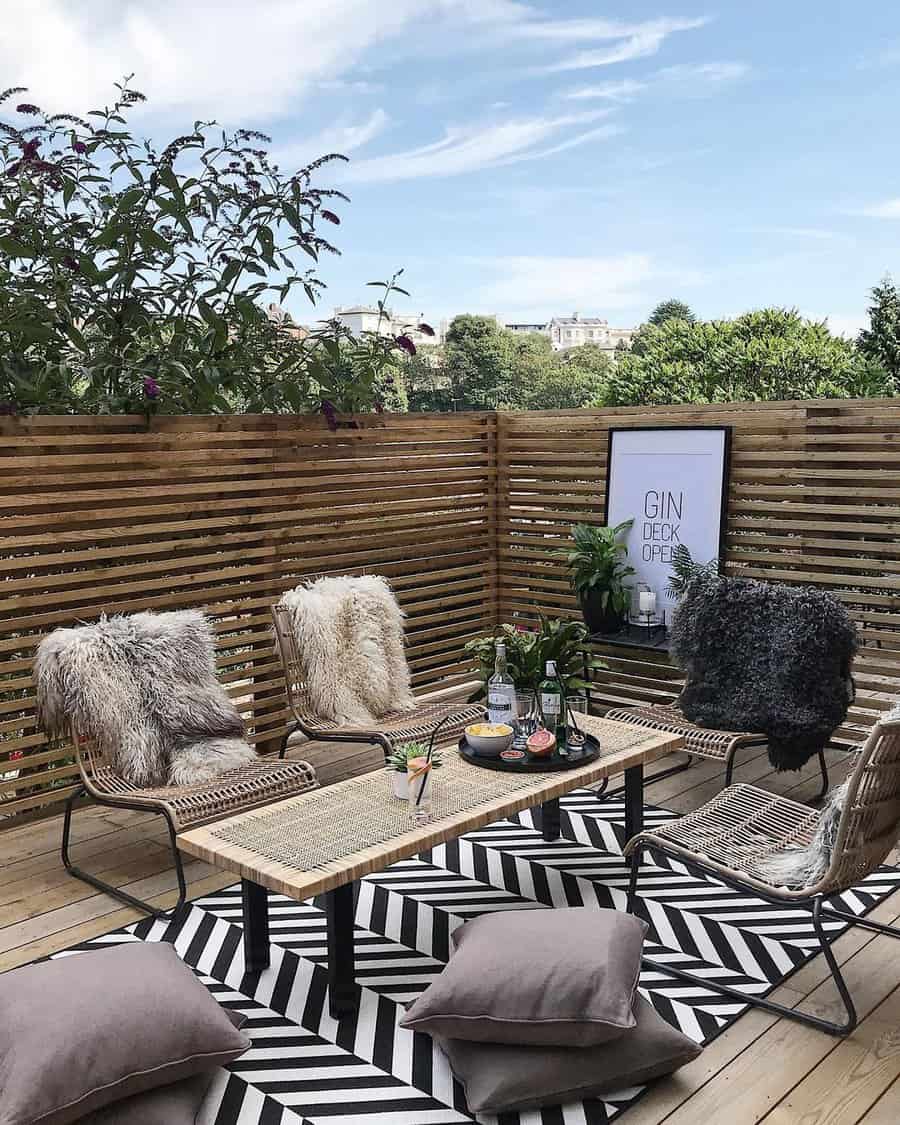
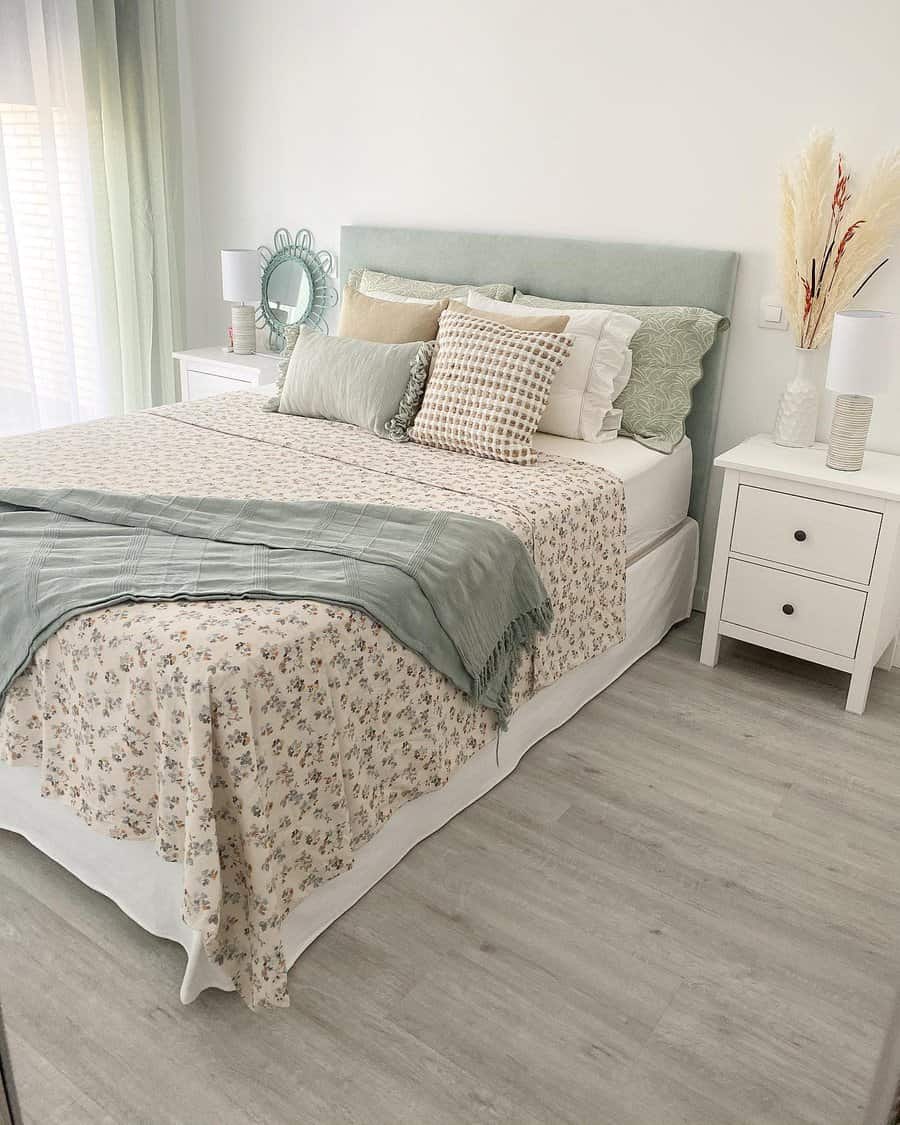
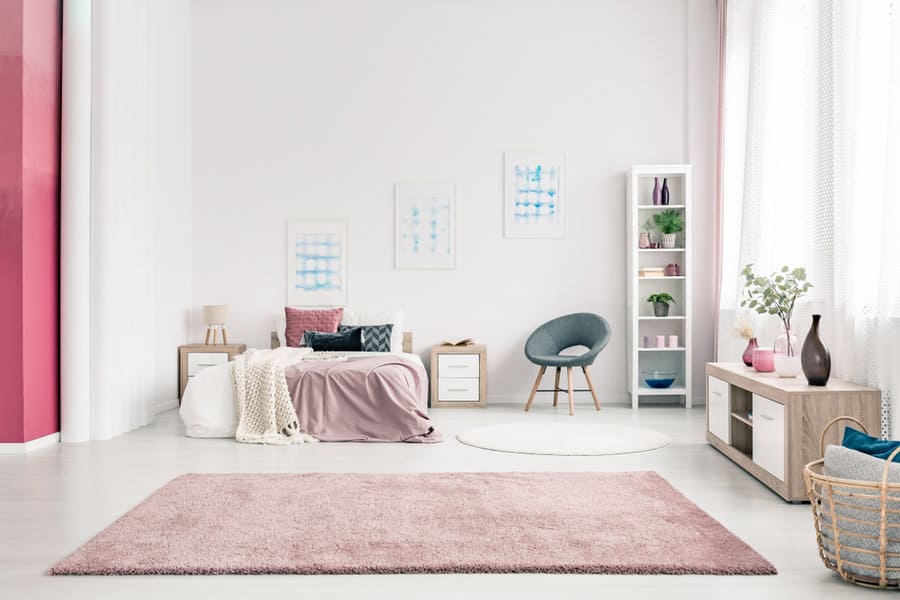
    Incorporate plush rugs or carpets. Soft underfoot, they not only delineate spaces within the room but also introduce a snug and comforting layer.

    Soft furnishings like velvet cushions, chunky knit throws, or tufted ottomans can break the room’s vastness, making it feel more approachable and cozy.

    Lastly, natural materials like stone, rattan, or jute can be integrated through decorative items, furniture, or wall accents. Their organic feel can counteract the room’s imposing size, bringing it down to a more human scale.

  • How to Feng Shui Your Living Room

    How to Feng Shui Your Living Room

    The ancient Chinese art of Feng Shui suggests that the arrangement of objects and spaces can deeply affect our well-being, mood, and even our prosperity. This age-old practice emphasizes harmony between humans and their environment, and the living room, where we spend a significant amount of our time, is no exception.

    In this article, we’ll delve into practical steps and insightful tips to Feng Shui your living room, ensuring it not only looks aesthetically pleasing but also resonates with positive energy and balance.

    [view_toc]

    1. Clear the Clutter

    In Feng Shui, stagnant energy is often associated with clutter. A cluttered living room can disrupt the flow of chi (energy), leading to feelings of stagnation, confusion, and stress. Maintaining a clear, organized space promotes positivity, clarity, and a refreshing ambiance, essential for harmonious living.

    To effectively declutter, start by systematically going through each item in your living room. Separate items into categories: keep, donate, recycle, or throw away. Once you’ve streamlined your belongings, invest in storage solutions that keep essentials accessible but out of sight. This could include decorative baskets, cabinets, or shelves. Committing to regular decluttering sessions—say, once every few months—ensures your living room remains an oasis of calm and balanced energy.

    2. Prioritize Natural Light

    In the realm of Feng Shui, natural light is a powerhouse. Sunlight not only revitalizes living spaces but also infuses them with positive energy. A well-lit room exudes warmth, optimism, and encourages an upbeat mood. It’s essential, then, to make the most of the daylight pouring into your living room.

    To harness the full potential of natural light, consider sheer curtains or blinds that filter rather than block the sunlight. They provide privacy without creating a barrier to the sun’s nurturing rays. Additionally, positioning mirrors directly across from windows can reflect and amplify light throughout the room, making spaces seem brighter and larger. Regularly clean windows and mirrors to ensure they’re letting in and reflecting as much light as possible.

    3. Position Your Furniture Thoughtfully

    The arrangement of furniture plays a pivotal role in Feng Shui. A well-thought-out layout ensures the seamless circulation of chi, promoting a feeling of balance and relaxation. Conversely, haphazardly placed furniture can create blockages, causing energy to stagnate, which can lead to feelings of unease or restlessness.

    The “command position” is a fundamental Feng Shui principle. In your living room, the main seating, like sofas, should ideally face the door but not be directly in line with it. This position offers a sense of security and control, allowing one to easily see the entrance. It’s also crucial to avoid creating barriers with furniture. For instance, don’t place a large sofa in the middle of the room, blocking the flow from the entrance. Instead, ensure there are clear pathways and open spaces, allowing energy to circulate freely and invitingly.

    4. Incorporate the Five Elements

    Feng Shui emphasizes the balance of five elements: Wood, Fire, Earth, Metal, and Water. Each brings unique energy, shaping the ambiance of a space.

    • Wood: Symbolized by wooden furniture or plants, it radiates growth. A simple wooden shelf or potted plant infuses vitality.
    • Fire: Exemplified by candles or red decor, it denotes warmth. A few red throw pillows or candles can evoke its essence.
    • Earth: Reflecting stability, it’s captured in earth-toned decor or ceramics. A beige rug or clay pot adds grounding energy.
    • Metal: Representing clarity, it’s highlighted with metallic items or white shades. Consider metallic frames or white vases.
    • Water: Mirrors or blue tones embody its emotional depth. A tabletop fountain or blue decor encapsulates its spirit.

    Incorporating these elements is about harmony, ensuring no element overshadows another, resulting in a unified, positive space.

    5. Choose Colors Wisely

    Colors in Feng Shui are more than mere aesthetic choices; they’re channels of energy that can influence mood, well-being, and the ambiance of a space. Each hue resonates with a particular vibration and energy, making it essential to select colors that align with your intentions for the room.

    1. Earth Tones (Beige, Light Yellow, Sandy Browns): These shades instill a sense of grounding, stability, and nurturing. They’re ideal for creating a calming environment, making them great choices for main wall colors or large furniture items.
    2. Wood Colors (Green, Teal): Representing growth and vitality, green hues rejuvenate and bring a sense of renewal. Incorporate them through plants, wall art, or cushions to promote healing energy.
    3. Fire Colors (Red, Bright Orange, Purple): Energetic and dynamic, these colors stimulate activity and passion. Use them sparingly, like in accent pieces, to invigorate the space without overwhelming it.
    4. Metal Colors (White, Metallics, Pastels): Signifying clarity and joy, metal-associated colors bring a sharp, clean energy. Think of white walls, metallic fixtures, or pastel decor.
    5. Water Colors (Blue, Black): These colors offer a deep, introspective energy, fostering wisdom and relaxation. Incorporate them in artwork, rugs, or throw blankets.

    Remember, balance is key. Your living room should reflect a harmonious blend of colors that not only appeal to your aesthetic sense but also promote the desired energy flow.

    6. Balance Yin and Yang

    Feng Shui’s essence lies in the balance of Yin and Yang—representing life’s dualities.

    Yin, characterized by softness and coolness, can be enhanced in a living room through plush rugs, muted colors, and ambient lighting. A cozy chair corner encapsulates this calming energy.

    On the other hand, Yang, signifying brightness and warmth, shines through in vibrant colors, sharp-edged decor, and materials like glass or polished wood. Bright wall art emphasizes its dynamic nature.

    When designing, gauge your room’s natural tone. If it’s brightly lit with hard surfaces, it may need Yin touches, and vice versa. The goal is a living room that’s both rejuvenating and serene.

    7. Use Mirrors Strategically

    In Feng Shui, mirrors are powerful tools for reflection and amplification. Properly placed, they can magnify positive energy, expand confined spaces, and redirect chi. However, when mispositioned, they might scatter good vibes or even magnify negatives.

    To harness their positive potential, mirrors should reflect scenic views or attractive decor, like an indoor plant, thereby enhancing the room’s energy. Yet, it’s vital they don’t capture sources of negativity, such as clutter or bathrooms. Mirrors placed directly opposite each other can cause energy whirlwinds, leading to unease. In compact living rooms, mirrors can open up the space, offering an airy feel.

    However, avoid mirrors reflecting the main door; they might push out positive energy. If light is limited, a strategically placed mirror can brighten the ambiance. Lastly, opt for round or oval mirrors, their gentle curves promote a smooth chi flow.

    8. Introduce Living Plants

    Living plants breathe life into indoor spaces, aligning with Feng Shui principles to radiate vibrant chi, health, and vitality. Beyond beautifying a room, they purify the air, absorbing toxins, and releasing oxygen. This natural filtration fosters tranquility, reduced stress, and a deeper connection to nature.

    Among the plants that resonate with Feng Shui, bamboo stands out, symbolizing luck and resilience. The elegant Peace Lily not only purifies the air but exudes serenity. Snake Plant acts as a guardian against negative vibes, while the Rubber Plant’s round leaves are associated with wealth. The sturdy Ficus represents growth and prosperity. While integrating these green companions, ensure they get proper light and aren’t cramped or obstructing pathways. A flourishing plant, when placed thoughtfully, becomes a beacon of positive energy and aesthetic charm.

    9. Avoid Sharp Corners and Edges

    In the realm of Feng Shui, sharp corners and edges, dubbed “poison arrows,” are seen as conduits of disruptive energy, or sha chi. They can inadvertently introduce unease or even discord in a space. Think of chi as water: when it encounters sharp objects, its flow becomes disturbed, much like a stream hitting jagged rocks.

    Addressing these “poison arrows” is about smoothing energy flow. Placing tall plants like bamboo near aggressive corners disperses sharp energy. If a furniture edge is problematic, a decorative screen or room divider can buffer its effect. Flowing drapes can cloak sharp architectural features, and furniture with gentler curves, such as a round coffee table, is preferable to its edgier counterparts. For dangerous corners, especially at head level, decorative or functional covers can be a stylish remedy. The goal isn’t an edge-free room but a space where energy flows undisturbed.

    10. Incorporate Feng Shui Symbols

    Traditional Feng Shui is rich with symbols that carry profound meanings and are believed to attract specific energies into a space. Icons like the laughing Buddha, dragon, or koi fish are not only decorative but also potent reminders of the values, aspirations, and energies they represent.

    1. Laughing Buddha: A symbol of happiness, contentment, and prosperity, the Laughing Buddha is often placed facing the entrance of a home to welcome positive energy. However, in the living room, he can be positioned on a prominent shelf or table, always off the floor, to invite joy and abundance. Rubbing his belly daily is believed to bring good luck!
    2. Dragon: Representing power, strength, and good fortune, the dragon is a powerful Feng Shui enhancer. It’s best to place the dragon in the east section of your living room for health or the southeast for wealth. Ensure it’s not positioned too high, and it should never face outwards directly from a door or window.
    3. Koi Fish: Symbolizing abundance, perseverance, and success, the koi fish is often depicted in paintings or sculptures. A painting of koi fish in the living room, especially near the entrance, is believed to bring in waves of good luck and prosperity.

    When integrating these symbols, it’s essential to place them with respect and intention. While they enhance the Feng Shui of a space, their placement should also resonate personally, ensuring that they harmoniously blend with the room’s aesthetics and your personal beliefs.

  • 31 Dog House Ideas for Your Pet Friend

    31 Dog House Ideas for Your Pet Friend

    Did you know that about half of U.S. pet owners say their pets are as much a part of their family as a human member? So why should our furry companions settle for less when it comes to their homes?

    Welcome to the world of innovative dog house ideas, where comfort meets style for your four-legged friends.

    Here, we’re diving into the realm of canine architecture, exploring creative and practical solutions to ensure your dog’s house is not just a shelter, but a true home.

    Get ready to discover dog house designs that cater to your pet’s comfort while adding a dash of flair to your backyard.

    [view_toc]

    1. Build a Simple Wood Dog House

    Embrace the charm of minimalism with a natural grain wood dog house. Its box-like design, featuring an open front, provides comfort and ease of access for your pet. A slanted roof not only adds to the visual appeal but also ensures efficient water runoff.

    Simple dog house made of natural grain wood

    2. Create a Durable Insulated Dog House

    See below a robust frame crafted from dark-stained wood, exuding a rustic yet durable aesthetic. The insulation on the sides, possibly a light-colored thermal material, ensures a cozy and warm interior, safeguarding your pet from chilly weather.

    Sturdy Insulated dog house

    3. Design a Shiplap Style Dog Kennel

    Utilize shiplap boarding for a stylish and weather-resistant dog kennel. This design lends a textured look that’s both contemporary and classic, perfect for a chic outdoor setting.

    Cabin shiplap dog house
    Cabin shiplap dog house
    Cabin shiplap dog house

    4. Construct a Sleek Flat Roof Dog House

    A flat-roof design can be both practical and modern. It allows for additional space atop the kennel, where pets can lounge or you can place decorative elements. The flat roof lines contribute to a sleek, streamlined appearance.

    Sleek flat roof dog house

    5. Make a Bold Red Dog House

    Introduce a bold statement with a red roof and red borders. This vibrant choice brings life and character to the dog house, making it a standout piece in any garden or backyard.

    Red dog house

    6. Craft a Rustic Shingled Dog House for Winter

    Design a winter sanctuary with a rustic dog house adorned with roof shingles. This feature not only adds to the aesthetic appeal but also provides extra protection against harsh weather, ensuring a warm and dry space for your pet.

    Rustic shingle dog house for winter

    7. Design a Colorful Rainbow Dog House

    Celebrate color with a rainbow-themed dog house. This joyful design can brighten up any space, infusing it with fun and positivity, making it a delightful haven for your furry friend.

    Rainbow dog house

    8. Modernize Your Dog House with a Number Sign

    Combine functionality with fashion in a modern dog house, complete with a stylish number sign. This addition personalizes the space, giving it a unique touch while maintaining a contemporary look.

    Modern dog house with a sign number
    Modern dog house with a sign number

    9. Implement Solar Panels

    Embrace sustainability by adding a solar panel to your dog house. This eco-friendly addition is not only a responsible choice but also adds a modern edge to the design.

    Modern green dog house with a solar panel

    10. Modern Dog House with Stylish Glass Windows

    Integrate glass windows for a chic and sophisticated dog house. The transparency offers a view while keeping the design airy and light, merging modern aesthetics with functionality.

    Modern dog house with windows
    Modern dog house with windows
    Modern blue and white dog house with windows

    11. Create a Tranquil White and Blue Dog House

    Opt for a classic and serene color combination with a white and blue dog house. This timeless palette exudes tranquility and elegance, creating a calming shelter for your pet.

    White and blue dog house

    12. Build a Chic Two-Level Dog House

    Venture into a dynamic design with a two-level dog house. The contrasting red, white, and grey colors add vibrancy, while the planter box on the roof introduces a touch of nature and sophistication.

    Two level dog house

    13. Design a Dog House with Vibrant Vertical Slats

    Craft a visually intriguing shelter with vertical slats painted in shades of yellow, green, and blue. The white backdrop and flat roof design enhance the playful yet clean aesthetic.

    Dog house with vibrant vertical slats

    14. Set Up an Indoor Open Dog House

    Design an inviting and accessible space with an indoor open dog house. This design is perfect for keeping your pet close, while seamlessly blending with your home’s interior.

    Minimalist indoor open dog house

    15. Develop a Sleek, Minimalist Indoor Dog House

    Create a modern haven with a cube-shaped, minimalist dog house. The darker fabric or textured material contrasts beautifully with the wooden framed entrance, offering a contemporary twist on the classic house silhouette.

    Minimalist indoor dog house

    16. Construct a Shelter-Style Rustic Dog House

    Construct a rustic shelter featuring a sloped wooden shingle roof, painted in light blue with dark pillars. Its raised design ensures protection from elements and insulation, while the open front maintains ventilation.

    Shelter style rustic dog house

    17. Create a Spacious Double Dog House

    A tall, white structure with a blue roof makes for a striking double dog house. This design accommodates multiple pets while maintaining an elegant and harmonious look.

    Double dog house

    18. Develop a Mobile Rolling Dog House

    Introduce mobility and convenience with a rolling dog house. This design allows for easy relocation, ensuring your pet’s comfort is always at the forefront, no matter the setting.

    Rolling dog house
    Rolling dog house
    Rolling dog house
    Rolling dog house

    19. Build a Luxury Dog Mansion

    Envision a palatial residence for your pet with a luxury dog mansion. This extravagant design can include multiple rooms, luxurious finishes, and bespoke detailing, setting a new standard in pet living.

    Dog mansion
    Dog mansion
    Dog mansion
    Dog mansion
    Dog mansion

    20. Craft a Two-Level Dog House with a Deck

    Construct a wooden two-level dog house featuring a comfortable ground shelter and an upper deck. The protective overhang and ramp add to its practicality and charm.

    Two level dog house with a deck

    21. Enhance Your Dog House with Front Planters

    Enhance your dog’s house by adding planters in front. This not only beautifies the space but also brings a touch of nature, creating a more inviting and lively environment.

    Dog house with plant boxes
    Dog house with plant boxes

    22. Design an Industrial-Style Dog Crate

    Imagine a cage-like structure with an industrial flair. This sturdy and raw design is ideal for those seeking a minimalist yet functional approach to a dog’s resting space.

    Industrial style dog cage crate

    23. Repurpose Wood Pallets into a Dog House

    Utilize wood pallets for an eco-friendly and rustic dog house. This resourceful design speaks of creativity and sustainability, providing a comfortable shelter with a unique aesthetic.

    Wood pallet dog house
    Wood pallet dog house

    24. Create an Aquarium-Themed Dog House

    Dive into a whimsical underwater theme with an aquarium-inspired dog house. Incorporate elements that mimic a fish tank, creating a captivating and imaginative space for your pet.

    Aquarium themed dog house

    25. Beautify Your Dog House with Artificial Grass

    Adorn the dog house with artificial grass for a touch of greenery. This not only adds to the visual appeal but also provides a soft and comfortable surface for your pet to relax on.

    Dog house with artificial grass
    Dog house with artificial grass
    Dog house with artificial grass

    26. Convert a Cabinet into a Cozy Dog House

    Transform a cabinet into a cozy dog house. This space-saving design cleverly integrates your pet’s shelter into your home decor, offering a snug and stylish spot for your furry friend.

    Cabinet dog house

    27. Design a Quaint Barn-Style Dog House

    Design a quaint barn-style dog house. This charming approach gives a nod to traditional farm aesthetics while providing a sturdy and picturesque shelter for your pet.

    Barn style dog house

    28. Establish an Open Air Dog Kennel

    An open dog kennel allows for maximum air flow and social interaction. It’s ideal for warmer climates or as a daytime outdoor space, offering a secure yet open environment for your pet.

    Open big dog kennel
    Open big dog kennel
    Open big dog kennel

    29. Personalize with Dog House Mural Art

    Personalize your dog house with mural art. This artistic touch can depict anything from nature scenes to abstract designs, making your pet’s house a unique and eye-catching piece.

    Dog mural art

    30. Build an Arched Dog House

    Introduce an architectural element with an arched dog house. This elegant design not only stands out visually but also provides a spacious and comfortable shelter.

    Arched dog house

    31. Elevate Style with a Wooden Dog Room and Stairs

    See below a multi-functional shelter with a raised roof and a balcony bed, accessible via stairs. This design offers a luxurious and elevated resting place, suitable for both indoor and outdoor use.

    Stylish Wooden Pet House with Balcony
    Multi functional dog shelter with a raised roof and a balcony bed
  • 9 Wood Fence Ideas for Your Home

    9 Wood Fence Ideas for Your Home

    There’s truth in the saying, “Good fences make good neighbors.”

    So why not build a wooden fence around your yard and give your home and property privacy? The right wood fence will do more than just create a physical barrier. It can also improve the look and value of your property.

    When it comes to building a fence, you could choose a chain link or a vinyl fence, but these lack the natural beauty of wood. With wood, you have plenty of options for the construction and style of your fence. Get inspired by these wood fence ideas and find the perfect fence that will complement your property and be functional for your needs.

    [view_toc]

    1. Natural Charm with Rustic Wood

    Properties outside of the city limits and in a more rural area can benefit from a rustic wood fence. The main characteristic of a rustic fence is that it embraces the natural characteristics of the wood. The planks aren’t perfectly smooth and straight. The beams could be rough-hewn and not completely uniform in size. It’s also common to see the bark left on the wood.

    Rustic-Wood-Fence-Ideas-1
    Rustic-Wood-Fence-Ideas-2

    A common style of rustic fence is a zig-zag split rail fence. To build this DIY fence, you’ll take rails and create a zig-zag patterned fenceline. Then alternate the rails as you stack them to create the desired height of your fence.

    Another standard rustic fence is a stacked horizontal wood fence built from split rails. Create pairs of fence posts from straight branches or small tree trunks. Leave enough space between the pairs that you can slide horizontal rails down between them. You’ll alternate the rails to gradually build the fence panels to your desired height of the fence.

    You can create an entirely vertical rustic fence by placing several posts in a line next to each other. This is a widespread technique when building a bamboo fence.

    A third rustic fence idea is to build your fence out of brambles or branches. Building this style of fence embraces the natural curves and shapes of the branches to weave a fence. It will take equal parts construction and design skills to weave the branches together artfully to build a functional fence.

    2. Elegance in Ranch-Style Fencing

    A country or ranch style fence is a great option when you want something simple but also refined. A rustic fence isn’t clean looking, and this is where a ranch style fence steps in. You could build a rail fence or a picket fence for the perfect country look.

    Both fences feature vertical slats an equal distance apart. For a rail fence, there are flat horizontal wood planks with each end of the plank attached to two upright posts. This fence design will typically have three or four horizontal planks. If you want to use this style for your backyard or dog fence, but are afraid it’s not secure enough, consider adding metal. You could use a chain-link fence or chicken wire fence material in addition to the planks. What’s nice about this is that from afar, you still have a wood-look, country fence because the metal isn’t as noticeable.

    The other popular country fence choice is a white picket fence. These fences will have two horizontal rails at the top and bottom. Then a series of vertical planks will get mounted on them with gaps in between each plank. You can scale your picket fence for the size of the land you’re fencing in. A low fence will make the perfect garden fence.

    3. Sleek Modern Wood Fences

    Modern fencing looks clean and streamlined. The most common modern fence you’ll see are ones that combine wood with a metal fence frame. The main support posts will be black with thin vertical or horizontal planks to create the fence. You may see black metal trim along the top of the fence to complete the frame around the wood planks.

    Take note that the planks on modern fences tend to be thinner than the standard plank fence that uses 2×4 beams. You could get creative and use wood of different widths to create a pattern.

    Another big difference you’ll see in modern fencing is the color of the wood. It’s typically richly colored and made of cherry or red cedar. You can buy pre-made panels that already have the planks mounted, and all you have to do is install them on your posts.

    4. Brick & Wood: Strength Meets Beauty

    When it comes to building a large perimeter fence, it can be smart to combine wood with a stone fence. This will elevate the look and feel of the fence. It’s a logical choice for more upscale areas and homes. Combining brick or stone with wood is also a good option when building a fence on uneven ground.

    A common way of combining these two building materials is to use the stone for the support posts. This will create an alternating look of stone and wood throughout the length of the fence. Another option is to create a brick or stone base for the fence and then use wood on top.

    When building your fence on a slope, the brick and stone allow you to build up the ground to create a flat step down base for the wood fence. This makes building the fence significantly easier.

    5. Classic Picket Fence Elegance

    Don’t you just love the classic look of a white picket fence lining the front yard garden of a home? There’s a gate to walk through to go up the front walk to the door of the home. Picket fences add a bit of style and design to your fence. This makes it both functional and beautiful.

    If you want to define your property line and keep your home friendly and welcoming, then a picket fence is a great choice. This style of fence keeps the planks far enough apart that you can easily see between them. The fence is also lower so that you can easily see over the fence.

    If you don’t like the look of white, or don’t want to deal with the cleaning and upkeep, you could leave your picket fence unfinished.
    You could build your picket fence over a cement curb or block wall. This will soften the look of the wall and create a more welcoming look to your property.

    One signature characteristic of picket fences is their style and design. You’ll find some with a scallop design on the top of the fence. Others will have fancy finials on the top of the posts. It’s also common to see decorative cutouts on the planks.

    6. Solid Wood for Privacy Fence

    Sometimes you want your fence to do more than provide a barrier; you want it to provide complete privacy. This means you’ll want a solid wood fence without any gaps in the fence board. When it comes to privacy fence ideas, they all have two things in common; they’re tall and you can’t see through them.

    You can turn an existing fence into a privacy fence by increasing the number of planks to close the gaps in the fence. If you have a pool in your backyard, you can create a tropical getaway inspired fence by using bamboo. Bamboo fencing is tall, durable, and tightly woven together. You can purchase bamboo fencing in a roll, making installation relatively easy as it just installs on your posts.

    7. Aesthetic Touch with Decorative Fences

    When building your fence, don’t let yourself get so focused on its placement and function that you forget to think about what it looks like. Wood gives you the ability to create a fence that’s beautiful to look at. This will enhance the look of your property and increase your property value.

    Consider replacing one of your modern fence panels with a decorative panel. Or you could top your fence with a decorative line of lattice.

    Consider choosing a wood that is both durable and beautiful. Red cedar has a rich color that, when treated, looks beautiful and will last for years to come.

    Don’t be afraid to get creative with your fence. You could alternate the wood fence panels you use to create a design or pattern other than straight vertical or horizontal.

    Use alternative materials with the wood when building your fence. Hang planters on your wall to turn your fence into a garden full of flowers and greenery. Place the metal cutout on top of your wood privacy fence to create dimension and design. Instead of bricks or stone, you could use tile that matches your patio as the base of your fence.

    8. DIY Projects for Unique Fences

    There are plenty of kits available to make the job easier if you would rather do the fence installation yourself. You’ll need posts. These are the main vertical supports. Then you’ll need to decide what type of wood fencing you’ll use between those posts.

    One solution is to buy a pre-made fence panel. Then you can quickly build a fence by installing the panels between the posts. This works well when building a wood privacy fence. You can buy a tall fence panel that has alternating vertical planks to block people from being able to see through the fence.

    You can also look for pre-made panels that have a decorative top. This could be a scalloped shape to the vertical planks, lattice trim, or wrought iron trim.

    9. Lattice Fences: Function Meets Design

    A lattice fence style uses several thin wood strips that are in a crossed pattern. They could be vertically and horizontally oriented, or they could be diagonal at 45-degree angles.

    When it comes to garden fence ideas, you can’t beat the lattice. This is because not only does it provide protection and privacy, but it also gives you the perfect platform for plants that vine or like to climb. Now you have an elegant plant wall with a sturdy wood base.

    If you don’t want to build an entire wall out of lattice, consider using it as the decoration. You can have a thin strip of lattice that extends the length of your fence along the top. This is a good solution for privacy fences where you’d like the height, but you still want to be able to see beyond your fence.

  • 19 Black and White Bedroom Ideas

    19 Black and White Bedroom Ideas

    The timeless duo of black and white offers a striking balance that can bring both elegance and contrast to a bedroom. This monochrome palette, with its endless possibilities, caters to minimalist, luxurious, modern, or vintage aesthetics alike.

    In this article, we will dive into an array of black and white bedroom ideas, showcasing how you can play with patterns, textures, and shades to create your personal sanctuary. Whether you are seeking a bold, dramatic effect or a calm, serene atmosphere, we’ve got the inspiration to help you craft the captivating black and white bedroom of your dreams.

    [view_toc]

    1. Black and White Bedding Set

    Choose a white bedding set to serve as a crisp, clean base in your bedroom, complemented by black pillows or a black blanket for contrast. This combination ensures a sophisticated and contemporary look. Black pillows or a throw blanket add visual interest without dominating the space, maintaining a balanced and inviting atmosphere. This approach allows for flexibility; you can switch between a dramatic black blanket for a bold statement or use black pillows for a subtler accent.

    Black and white bedding
    Black and white bedding

    2. Faux Fur Throw Blanket

    Add a luxurious element with a faux fur throw blanket. Choose a blanket in a shade of grey or beige to bridge the gap between black and white. You can even go with the black one. This adds texture and warmth, making the room more inviting.

    Faux fur blanket
    Faux fur blanket
    Faux fur blanket

    3. Black and White Wall Art

    Wall art in black and white can be striking and add personality to the room. Opt for abstract pieces for a modern look, or classic black and white photography for a timeless appeal. Consider the scale of the artwork in relation to the wall size for proper visual balance.

    Black and white wall art
    Black and white wall art
    Black and white wall art

    4. Black Accent Wall

    A black accent wall provides a dramatic backdrop, adding depth and focus to the bedroom. Balance this bold feature with lighter elements in the room, such as white bedding or light wood furniture.

    Black accent wall
    black accent wall
    Black accent wall
    Black accent wall
    Black accent wall
    Black accent wall
    Black accent wall
    Black accent wall
    Black accent wall
    Black accent wall
    Black accent wall

    5. White Subway Brick Wall

    Utilize a white subway brick wall to introduce texture while maintaining a clean and crisp look. This classic design element works well with both industrial and contemporary themes and serves as a neutral backdrop for decor.

    White subway brick wall

    6. Blackout Window Shades

    Blackout window shades are not only functional for ensuring a good night’s sleep but also contribute to the room’s aesthetic. In black, they create a sleek look, while in white, they maintain a bright and airy feel.

    Blackout window shades
    Blackout window shades

    7. Black & White Mural Art

    Large-scale black and white mural art can be a showstopper. Whether it’s a cityscape or a botanical print, it can serve as the room’s centerpiece, around which other elements are designed.

    Black and white mural art
    Black and white mural art
    Black and white mural art

    8. Black and White Framed Photos

    Display black and white photos in sleek frames to personalize the space. This choice adds a nostalgic and artistic touch, especially when they are personal photographs or curated art prints.

    Black and white photos
    Black and white photos
    Black and white photos
    Black and white photos
    Black and white photos

    9. Black & White Patterned Throw Pillows

    Add interest to your bedding or chairs with black and white patterned throw pillows. Mix patterns such as stripes, polka dots, and chevron for a dynamic look, but keep the color scheme consistent.

    Black and white patterned throw pillows
    Black and white patterned throw pillows
    Black and white patterned throw pillows
    Black and white patterned throw pillows
    Black and white patterned throw pillows
    Black and white patterned throw pillows
    Black and white patterned throw pillows
    Black and white patterned throw pillows
    Black and white patterned throw pillows

    10. Black Carpet Flooring

    A black carpet can ground the space and add a cozy feel. Pair it with lighter walls and furniture to prevent the room from feeling too dark. A plush, high-pile rug adds comfort and texture.

    Black carpet flooring

    11. Gold Accent Details

    Gold accents can break up the monochromatic scheme beautifully. Think gold picture frames, light fixtures, or decorative objects. This metallic tone adds warmth and a touch of luxury to the black and white palette.

    Black and white bedroom with gold details
    Black and white bedroom with gold details
    Black and white bedroom with gold details

    12. Black & White Wall Tapestry

    A black and white wall tapestry can add a bohemian touch to the bedroom. Choose a tapestry with an interesting pattern or textural detail to add depth to the room’s design.

    Black and white tapestry
    Black and white tapestry
    Black and white tapestry

    13. Velvet Upholstered Headboard

    A velvet upholstered headboard in black or white adds a touch of elegance and comfort. It’s a statement piece that brings in a rich texture, and when paired with complementary bedding, it creates a cohesive look.

    Velvet upholstered headboard
    Velvet upholstered headboard

    14. Black Chandelier

    Introduce a black chandelier for a dramatic lighting option. This not only serves as a focal point but also adds sophistication. Ensure the size of the chandelier is in proportion to the room and bed.

    Black chandelier
    Black chandelier
    Black chandelier

    15. Black Night Stand

    A black nightstand can anchor the bedside area. Choose a sleek design for a modern look or something with intricate details for a more classic feel. Balance it with lighter elements on or above it, such as a white lamp or artwork.

    Black nightstand
    Black nightstand
    Black nightstand
    Black nightstand
    Black nightstand

    16. Light Monochrome Bedroom

    Create a serene space with a light monochrome palette. Use varying shades of white and light grey, with black accents to add depth. This approach can make the room feel larger and more open.

    Light monochrome bedroom
    Light monochrome bedroom
    Light monochrome bedroom

    17. Black & White Bedroom With Plants

    Introduce greenery to add a natural element to the black and white theme. Plants bring life and color, softening the stark contrast and adding a fresh, organic touch.

    Black and white bedroom with plants
    Black and white bedroom with plants

    18. Farmhouse Chic Black & White Bedroom

    For a farmhouse chic look, mix rustic textures with black and white elements. Think barn wood headboards, woven baskets, and patterned textiles that align with the farmhouse aesthetic.

    Farmhouse black and white bedroom
    Farmhouse black and white bedroom
    Farmhouse black and white bedroom
    Farmhouse black and white bedroom
    Farmhouse black and white bedroom

    19. Black & White Bedroom With Wall Trimming

    Wall trimming, such as wainscoting or crown molding, painted in black or white, adds architectural interest. This feature can give the room a more finished and sophisticated appearance.

    Black and white bedroom with wall trimming
    Black and white bedroom with wall trimming
    Black and white bedroom with wall trimming
    Black and white bedroom with wall trimming
    Black and white bedroom with wall trimming
  • 16 Backyard Deck Ideas on a Budget

    16 Backyard Deck Ideas on a Budget

    Have you ever gazed at your backyard and dreamed of a stunning deck, but felt constrained by a tight budget? You’re not alone. In fact, most homeowners believe that building a deck requires a hefty investment. However, this is a common misconception.

    In this article, we’re going to debunk this myth by exploring creative and cost-effective backyard deck ideas. Whether you have a sprawling lawn or a cozy nook, these budget-friendly solutions will transform your outdoor space into a charming and functional extension of your home.

    Get ready to learn how you can build the deck of your dreams without breaking the bank.

    [view_toc]

    1. Small Backyard Deck With Lattice Fence

    Transform a compact outdoor space with a small deck and a lattice fence, offering both charm and privacy. Use pre-assembled lattice panels for cost efficiency, and consider a natural wood finish to create a warm, inviting atmosphere. This setup is ideal for smaller budgets, typically costing between $15-$30 per square foot depending on materials.

    Backyard deck with lattice fence

    2. Covered Deck With Umbrella Shade

    Introduce a stylish umbrella to your deck for a chic, shaded retreat. Select a large, durable umbrella, preferably with UV protection, to provide ample shade. This option is budget-friendly, with quality umbrellas available from $100-$300, offering an affordable alternative to permanent roof structures.

    Umbrella shade
    Umbrella shade
    Umbrella shade

    3. Adirondack Chairs on a Deck

    Adirondack chairs add a timeless and comfortable touch to any deck. Opt for chairs made of recycled plastics for an eco-friendly and low-maintenance choice. Depending on the quality and material, expect to spend around $100-$250 per chair.

    Adirondack chairs on a deck
    Adirondack chairs on a deck
    Adirondack chairs
    Adirondack chairs

    4. Deck Benches

    Custom-built deck benches create functional and aesthetic seating without consuming much space. Use the same decking material for a cohesive look. The cost varies, but building a simple bench can range from $15 to $50 per linear foot.

    Deck benches

    5. Glass Deck Fence

    A glass fence provides an unobstructed view while ensuring safety. Tempered glass panels, though more costly than traditional materials, offer durability and sleek style. On average, a glass deck railing cost around $50 to $600 per linear foot. So if we talk about the cost-per-foot figures, they average around $10 to $80.

    Backyard deck with glass fence

    6. Backyard Deck Garden

    Integrate greenery into your deck with a variety of potted plants. Choose pots of different sizes and materials to create visual interest. This is a highly affordable option, with typical costs for decorative pots ranging from $10-$50 each.

    Backyard deck garden with potted plants

    7. Wooden Bar Stools with a Table

    A round wooden table with bar stools creates a cozy dining or socializing corner. Seek sustainably sourced wood for an eco-conscious choice. A basic wooden table and stools set can start around $200, depending on size and craftsmanship.

    Round wooden table accompanied by wooden bar stools

    8. Wooden Privacy Horizontal Fence

    Construct a modern, horizontal wooden fence for privacy and style. Cedar or redwood offers durability and a pleasing aesthetic. Expect to pay $15-$30 per square foot, depending on the wood type and design complexity.

    Backyard deck with a privacy fence

    9. DIY Small Wood Pallet Deck

    Create an economical, rustic deck using repurposed wood pallets. Sand and seal the pallets for longevity. This can be an extremely low-cost project, often under $100, depending on the need for additional materials.

    DIY small freestanding wood pallet deck

    10. DIY Freestanding Covered Deck

    Building a freestanding covered deck allows flexibility in design and placement. Use treated lumber and corrugated metal roofing for durability. Costs vary, but DIY enthusiasts can expect to spend around $1,200-$2,000 for materials.

    DIY freestanding covered wood deck

    11. Wood and Metal Deck Railings

    Combine wood and metal for a contemporary railing design. This mix offers both sturdiness and aesthetic appeal. Cost depends on the complexity and materials, typically ranging from $50 to $120 per linear foot.

    Wood pallet deck with railings
    Wood and metal deck railings

    12. Multi Level Deck

    A multi-level deck adds dimension and separates activity zones. This requires more materials and labor, with costs starting at $20 per square foot, increasing with complexity.

    Multi level deck

    13. Small Deck with Stairs

    A small deck with stairs can make a backyard more accessible and usable. Use pressure-treated lumber for cost-effectiveness and durability. A simple stair addition can start from $15 per square foot.

    Small deck with stairs
    Small deck with stairs

    14. DIY Ground Level Deck

    This is a straightforward, cost-effective project suitable for DIY enthusiasts. Materials like pressure-treated lumber are recommended for durability and cost around $5-$10 per square foot.

    Ground level deck

    15. Backyard Deck With Pergola

    Add architectural interest with a pergola. Kits are available for around $1,800-$3,000, depending on size and material, offering a blend of shade and style.

    Backyard deck pergola
    Backyard deck pergola
    Backyard deck pergola
    Backyard deck pergola

    16. Vinyl Backyard Deck

    Opt for a vinyl deck for a low-maintenance and durable option. Vinyl decking starts around $10 per square foot and is available in various colors and textures.

    Vinyl deck
  • 10 Cheap Paver Patio Ideas

    10 Cheap Paver Patio Ideas

    Have you ever gazed at your backyard and dreamed of transforming it into a stunning outdoor space without breaking the bank? Surprisingly, creating a beautiful paver patio doesn’t have to cost a fortune.

    In this article, we tackle the challenge many homeowners face: designing a captivating patio area on a budget. We’ll explore a variety of inexpensive yet stylish paver patio ideas that are not only cost-effective but also easy to implement.

    Whether you’re a seasoned DIY enthusiast or a first-time patio planner, get ready to uncover affordable solutions that promise to transform your outdoor area into a charming and functional retreat.

    [view_toc]

    1. Stamped Tile Pavers

    Stamped tile pavers offer an affordable way to achieve a high-end look. These pavers, imitating the appearance of natural stone or brick, can be a cost-effective alternative to actual stone tiles.

    Prices typically range from $10-$20 per square foot, including installation.

    Maintenance is relatively straightforward, requiring occasional sealing to maintain their color and prevent weather damage. Their versatility in design allows for a variety of unique patio layouts.

    Stamped concrete tile pavers
    Stamped concrete tile pavers

    2. Concrete Pavers

    Concrete pavers are a durable and economical choice, with costs as low as $6 per square foot, including installation. They come in a range of colors and shapes, providing flexibility in design.

    Regular cleaning and periodic sealing are recommended to preserve their appearance. Due to their uniformity, they can be easily replaced if damaged, making them a practical option for high-traffic patio areas.

    Poured concrete pavers
    Poured concrete pavers
    Poured concrete pavers

    3. Leftover Tile Pavers

    Utilizing leftover tile pavers is an eco-friendly and budget-conscious approach. It encourages creativity, as you can mix and match different tiles for a unique patio design. Costs can be significantly lower, depending on the source of the tiles.

    However, be mindful of the varying thickness and durability of mixed tiles, which may affect the installation process and long-term maintenance.

    Leftover ceramic tile pavers

    4. Stone Pavers

    Stone pavers exude a natural elegance and are incredibly durable. Prices vary widely, typically between $15-$30 per square foot, depending on the type of stone.

    They require minimal maintenance, mostly just regular cleaning.

    When laying stone pavers, ensure proper drainage to avoid water damage. Stone pavers work exceptionally well in garden settings, harmonizing with natural surroundings.

    Stone pavers
    Stone pavers
    Stone pavers

    5. Brick Pavers

    Brick pavers offer a classic look and are known for their longevity. Costs generally range from $10-$25 per square foot, including installation. They are low maintenance, needing only occasional cleaning and sealing to retain their color.

    Brick pavers are ideal for creating a warm, inviting outdoor space, and their uniform size makes installation straightforward.

    Brick pavers
    Red brick pavers
    Red brick pavers
    Cobblestone brick pavers
    Brick pavers

    6. Round Patio Bricks

    Perfect for areas surrounding a fire pit, round patio bricks add a distinct charm. They can be arranged in various patterns to complement your outdoor design. These bricks are typically in the mid-price range and offer good durability.

    Regular cleaning and sealing are recommended to keep them looking fresh. The circular design can create a focal point in your patio, drawing guests in for a cozy gathering.

    Round patio bricks
    Round patio bricks

    7. Patterned Pavers in Running Bond Design

    Patterned pavers designed to mimic natural stone in a running bond pattern are a smart choice for contemporary patios. This layout, where each paver is offset from the next, adds visual interest and a sense of movement to the space. The color variation in these pavers enriches the patio’s texture and depth, contrasting sharply with single-color designs.

    Pricing is usually mid-range, depending on the quality of the pavers, with costs including installation ranging from $12-$20 per square foot.

    Maintenance is straightforward, necessitating regular cleaning and occasional sealing to preserve the color and prevent wear.

    Patterned pavers in running bond design
    Patterned pavers in running bond design

    8. Gravels in-Between Concrete Pavers

    Adding gravel between concrete pavers is an affordable way to add texture and contrast to your patio. This approach is cost-effective, with gravel being inexpensive and easy to spread.

    Maintenance is low, requiring occasional raking to keep the gravel even. This design choice aids in drainage and prevents weed growth, making it both aesthetic and functional.

    Gravels in between concrete pavers
    Gravels in between concrete pavers
    Gravels in between concrete pavers

    9. Herringbone Pattern Pavers

    Herringbone pattern pavers provide a visually striking design. While installation might be more complex, resulting in higher labor costs, the end effect is sophisticated and timeless.

    This pattern is particularly effective at distributing weight and handling traffic, making it a durable choice. Regular cleaning and sealing are recommended to preserve the intricate pattern.

    Herringbone patterned pavers

    10. Artificial Turf with Square Concrete Pavers

    Combining artificial turf with square concrete pavers in a checkerboard pattern creates a modern, low-maintenance patio. The turf requires no watering or mowing, and the concrete pavers are easy to clean.

    Installation costs vary but are generally moderate due to the simplicity of the materials. This design is especially suitable for areas where natural grass might struggle to grow, offering a green, lush look year-round.

    Artificial turf with square concrete pavers
  • 17 Bedroom Flooring Ideas for a Stylish Sanctuary

    17 Bedroom Flooring Ideas for a Stylish Sanctuary

    Did you know that the average person spends about a third of their life in the bedroom? Yet, when it comes to home renovations, the bedroom floor often takes a backseat to more public spaces. This oversight not only affects the aesthetic appeal of your personal sanctuary but can also influence your comfort and well-being.

    Addressing this gap, our article delves into the world of bedroom flooring, exploring options that promise to transform your bedroom from a mere sleeping area into a haven of style and comfort. Expect to discover a variety of flooring ideas that cater to different tastes, needs, and budgets.

    From the timeless elegance of hardwood to the cozy allure of carpet, we’ll guide you through each option, highlighting the benefits, drawbacks, and maintenance tips. Prepare to be inspired and informed as we lay down the groundwork for your perfect bedroom retreat.

    [view_toc]

    1. Choose Parquet Flooring

    Parquet flooring brings a geometric allure to bedroom spaces, creating an air of sophistication. Its distinct patterns, made from pieces of wood, can vary from simple arrangements to complex mosaics. Maintenance requires regular sweeping and occasional polishing, but beware, it can scratch and isn’t moisture-friendly. Decoratively, balance its busyness with minimalist furniture.

    Parquet flooring
    Parquet flooring
    Parquet flooring
    Parquet flooring
    Parquet flooring
    Parquet flooring
    Parquet flooring
    Parquet flooring
    Parquet flooring
    Parquet flooring
    Parquet flooring
    Parquet flooring

    2. Select Carpet for Comfort

    Carpeting offers a soft, cozy foundation, ideal for a bedroom’s comfort-centric design. It’s excellent for sound insulation and warmth underfoot, particularly in colder climates. However, it demands regular vacuuming and professional cleaning to manage allergens. Decoratively, choose a neutral shade to serve as a canvas for bolder bedroom colors.

    Carpet flooring
    Carpet flooring
    Carpet flooring

    3. Advantage of Vinyl Flooring

    Vinyl flooring, known for its resilience and versatility, is a practical choice for bedrooms. It’s water-resistant, easy to clean, and offers a plethora of design options. While less luxurious than natural materials, it can mimic their look quite effectively. Use area rugs to add warmth and texture.

    Luxury vinyl tiles
    Luxury vinyl tiles
    Luxury vinyl tiles
    Luxury vinyl tiles
    Luxury vinyl tiles
    Luxury vinyl tiles
    Luxury vinyl tiles
    Luxury vinyl tiles

    4. Brighten with White-Washed Wood

    White-washed wood flooring adds a fresh, airy feel to the bedroom, reflecting light to make spaces appear larger. This flooring shows dirt easily, necessitating regular cleaning, and may require re-finishing over time. To complement its breezy aesthetic, pair with pastel or earthy tones and natural fabrics.

    White washed wood flooring
    White washed wood flooring
    White washed wood flooring
    White washed wood flooring

    5. Invest in Hardwood Floors

    Hardwood flooring exudes timeless elegance and adds value to any home. Durable and long-lasting, it requires occasional refinishing and can be sensitive to moisture. For bedroom décor, hardwood pairs beautifully with both modern and traditional styles, serving as a rich backdrop for rugs and furnishings.

    Hardwood flooring
    Hardwood flooring
    Hardwood flooring
    Hardwood flooring
    Hardwood flooring
    Hardwood flooring
    Hardwood flooring

    6. Benefit of Laminate Flooring

    Laminate flooring offers the appearance of hardwood at a more affordable price and is less prone to scratches. Ideal for high-traffic bedrooms, it’s easy to clean but is not as long-lasting as true hardwood. Complement its look with contemporary or classic bedroom furnishings, depending on the chosen laminate style.

    Luxury wood flooring
    Luxury wood flooring
    Luxury wood flooring
    Luxury wood flooring
    Luxury wood flooring
    Luxury wood flooring
    Luxury wood flooring
    Luxury wood flooring
    Luxury wood flooring
    Luxury wood flooring
    Luxury wood flooring

    7. Luxuriate with Marble Floors

    Marble flooring brings luxury and uniqueness to bedrooms, each piece offering distinct veining. It’s durable but requires regular sealing and is cold to the touch, so consider underfloor heating. For décor, keep it simple and elegant to let the marble’s natural beauty shine.

    Marble flooring
    Marble flooring
    Marble flooring

    8. Rustic Appeal of Stone Bricks

    Decorative tiles add a creative and personal touch to bedrooms. Ideal for accent areas or statement floors, they come in various patterns and colors. Maintenance is straightforward but grout lines can collect dirt. Keep bedroom décor simple to avoid visual clutter, letting the tiles be the focal point.

    Cobblestone bricks
    Cobblestone bricks

    9. Creative Decorative Tiles

    Travertine, with its natural, earth-toned appearance, offers a sense of warmth and character. It’s porous, so sealing is a must, and it may chip or stain over time. Pair with natural materials and neutral colors in the bedroom to complement its organic beauty.

    Decorative flooring
    Decorative flooring

    10. Warmth from Travertine Floors

    Travertine, with its natural, earth-toned appearance, offers a sense of warmth and character. It’s porous, so sealing is a must, and it may chip or stain over time. Pair with natural materials and neutral colors in the bedroom to complement its organic beauty.

    Travertine flooring

    11. Refresh with White Wood Panels

    White wood panel flooring, breezy and light, contributes to a spacious feel. Regular cleaning is essential to maintain its bright appearance. Balance its simplicity with colorful textiles or bold bedroom features to create a harmonious design.

    White wood panels
    White wood panels
    White wood panels
    White wood panels

    12. Style Area Rugs on Hardwood

    An area rug on hardwood flooring marries comfort with elegance. It adds warmth, texture, and color, also protecting the floor in high-traffic zones. Choose a rug that complements the hardwood’s tone and the overall bedroom palette for a cohesive look.

    Area rug on hardwood flooring

    13. Boho Chic with Persian Carpets

    A Persian carpet in a boho-style bedroom with a floor bed introduces an element of opulence and history. Its intricate patterns and rich colors contrast beautifully against simple, bohemian décor. Ensure the carpet’s hues tie in with other room elements for a unified aesthetic.

    Boho style bedroom with persian carpet

    14. Accent with a White Round Rug

    A white round area rug in front of the bed acts as a soft, inviting island. It breaks the monotony of straight lines in the bedroom and should be chosen to contrast yet complement the existing flooring. Opt for easy-clean materials, as white can show dirt quickly.

    White round area rug

    15. Playfulness of a Plush Pink Rug

    A plush pink rug adds a touch of whimsy and softness to any bedroom. It’s particularly effective in monochrome or neutral settings, offering a pop of color. Regular vacuuming is necessary to maintain its texture and appearance.

    Plush pink rug

    16. Versatility of Classic Grey Rugs

    A classic grey area rug is versatile, effortlessly fitting into various bedroom styles. It’s practical, hiding dirt and wear while providing comfort underfoot. Match it with a range of color schemes, from vibrant to subdued, for a sophisticated look.

    Classic grey area rug

    17. Glamour with Faux Fur White Rugs

    Faux fur white rugs add a luxurious, soft element to bedroom décor. Ideal as decorative pieces, they’re best placed in low-traffic areas to maintain their appearance. Pair with sleek, modern furniture for a chic contrast, or with plush, comfortable pieces for a cozy feel.

    Faux fur white rugs on a hardwood floor
  • 18 Functional and Creative Laundry Room Ideas

    18 Functional and Creative Laundry Room Ideas

    Did you know that the average household will likely do about 12 hours and 40 minutes of laundry per month? This often overlooked space can actually be a hub of efficiency and design in your home. Imagine transforming this mundane chore into an experience you look forward to.

    This article addresses the common problem of underutilized laundry rooms by exploring creative and practical ideas to revitalize this space. In this post, you’ll learn how to maximize both function and style in your laundry room, regardless of its size.

    From clever storage solutions to aesthetic decor tips, we’re diving into innovative ways to turn your laundry room into one of the most efficient and pleasing areas of your home.

    [view_toc]

    1. Maximize Space with Stacked Washer-Dryer

    Stacking your washer and dryer is a smart solution for saving space in your laundry room. This layout opens up floor space for additional storage or movement. Use a stacking kit for safety and stability. Accessorizing the area with a pull-out shelf between the appliances provides a convenient spot for laundry prep. Light, neutral colors for the walls and shelving can make the space feel larger and more open.

    Tiered dryer and washer
    Tiered dryer and washer

    2. Add Comfort with a Stylish Runner Rug

    A runner rug adds a splash of color and comfort to your laundry room. Choose a durable, low-pile option that can withstand moisture and frequent foot traffic. A patterned rug not only hides stains but also introduces a decorative element to the space.

    Laundry with runner rug

    3. Efficient Bathroom-Laundry Combo

    Efficiently utilize space in a bathroom-laundry combo by selecting stackable washer and dryer units. Use cohesive cabinetry to unify the look and ensure continuity in design. Smart storage solutions, like pull-out hampers, keep the area functional and organized.

    Bathroom laundry
    Bathroom laundry
    Bathroom laundry
    Bathroom laundry
    Bathroom laundry

    4. Utilize Tension Rods for Added Functionality

    A tension rod is a versatile addition to any laundry room. Install it under shelving or in a nook to hang delicate items that need air-drying. Its adjustability and ease of installation make it a practical solution for small spaces.

    Laundry area with tension rod

    5. Washer & Dryer Storage With Countertop

    Installing a countertop over front-loading washers and dryers creates a convenient work surface for folding and sorting laundry. Choose a durable material like quartz or granite for longevity. Underneath, use pull-out drawers or baskets for organized storage of laundry supplies.

    Washer and dryer storage with countertop
    Washer and dryer storage with countertop
    Washer and dryer storage with countertop
    Washer and dryer storage with countertop

    6. Transform a Small Space into a Laundry Closet

    Transform a small closet into an efficient laundry station with compact appliances and custom shelving. Use bi-fold or sliding doors to keep the area concealed when not in use. Clever use of vertical space can make even the smallest closet a functional laundry area.

    Closet laundry
    Closet laundry
    Closet laundry
    Closet laundry
    Closet laundry

    7. Incorporate Space-Saving Floating Shelves

    Floating shelves in the laundry room provide accessible storage while maintaining a clean, minimal look. Arrange laundry essentials, baskets, and decorative items on these shelves for a balanced blend of function and style. Choose sturdy materials to support heavier items.

    Laundry floating shelves
    Laundry floating shelves
    Laundry floating shelves
    Laundry floating shelves

    8. Design a Charming Farmhouse-Style Laundry Area

    For a farmhouse-themed laundry room, focus on natural textures and soft color palettes. Use reclaimed wood for shelving and add a classic farmhouse sink for practicality and style. Vintage-inspired signage and galvanized metal accents can complete the look.

    Farmhouse themed laundry area
    Farmhouse themed laundry area
    Farmhouse themed laundry area

    9. Enhance with Eye-Catching Wall and Floor Decor

    Make a statement with bold wallpaper or a vibrant paint color on one accent wall in your laundry room. Pair it with durable, water-resistant flooring such as black and white artistic ceramic tiles or luxury vinyl planks that complement the wall’s design.

    Decorative tiles
    Decorative tiles
    Decorative tiles
    Decorative tiles

    10. Set Up a Functional Garage Laundry Room

    A garage laundry room should balance functionality with the challenges of a non-traditional space. Insulate and climate-control the area for comfort, and use sturdy, industrial-style shelving and cabinets for storage. Bright lighting and a utility sink add to the room’s practicality.

    Garage laundry room

    11. Brighten with a Crisp White Laundry Room Theme

    A white laundry room exudes cleanliness and brightness. Use different textures and materials, like matte cabinets and glossy tiles, to add depth to the monochromatic scheme. Accent with pops of color through artwork or plants for a lively touch.

    White laundry area
    White laundry area
    White laundry area
    White laundry area

    12. Seamlessly Blend Laundry Area into Your Kitchen

    Integrating a laundry area in the kitchen requires a seamless design. Match the washer and dryer with the kitchen cabinetry for a unified look. Concealed or pull-out laundry bins and a hidden ironing board maintain the kitchen’s primary function while adding convenience.

    Kitchen laundry room
    Kitchen laundry room
    Kitchen laundry room
    Kitchen laundry room
    Kitchen laundry room
    Kitchen laundry room
    Kitchen laundry room

    13. Organize with Sleek Laundry Storage Cabinets

    Custom cabinets in the laundry room provide ample storage and help conceal clutter. Tailor the cabinetry to your needs with designated spaces for detergents, cleaning supplies, and linens. Choosing a bright color or unique hardware can add a personal touch.

    Laundry with cabinetry
    Laundry with cabinetry
    Laundry with cabinetry
    Laundry with cabinetry

    15. Craft a Cozy Rustic-Themed Laundry Space

    Embrace a rustic theme with natural wood elements, from exposed beams to wooden countertops. Use wrought iron hardware for a touch of ruggedness, and consider a stone floor for durability and style. Soften the look with woven baskets and linens.

    Rustic laundry area
    Rustic laundry area
    Rustic laundry area
    Rustic laundry area

    16. Smartly Use Under-Stairs for Laundry Setup

    Utilize the space under the stairs for a compact laundry area. Custom-fit the washer and dryer and use sliding or folding doors to conceal the space when not in use. Built-in shelving or pull-out baskets can efficiently store laundry essentials.

    Under the stairs laundry
    Under the stairs laundry

    17. Create a Discreet Recessed Laundry Area

    A recessed laundry area, set back from the main room, offers an unobtrusive yet accessible location for laundry tasks. Optimize the space with stacked appliances and shallow cabinetry. A neutral color palette can help blend the area with surrounding decor.

    Recessed laundry area
    Recessed laundry area
    Recessed laundry area
    Recessed laundry area

    18. Organize with Baskets on Floating Shelves

    Organize your laundry supplies with stylish baskets and bins on floating shelves. Label each basket for easy identification, and choose colors and materials that match your room’s decor. This arrangement keeps supplies handy and contributes to a clutter-free space.

    Laundry organizers
    Laundry organizers